I finally got around to updating the costs page. I will try to keep it current from now on. We are starting to make a dent into that 80-100k budget. Hmmm need to start moving a little faster, the storage costs are ridiculous.
The Vancouver Boat Show is scheduled for January 20-24th. That is going to be an expensive trip for us as we are going to be shopping for the new engine plus installation, new mattresses and cushions and possibly a complete paintjob of the hull sides. I mean how can we have a beautiful new 1976 Whitby 42 with 40 year old gelcoat on the hull?
The Admiral wants something that looks like this kind of paint.
Nail Polish Coloured Paint?
I am not too sure yet how I feel about using Nail Polish Brands to describe the colour of paint on our boat…
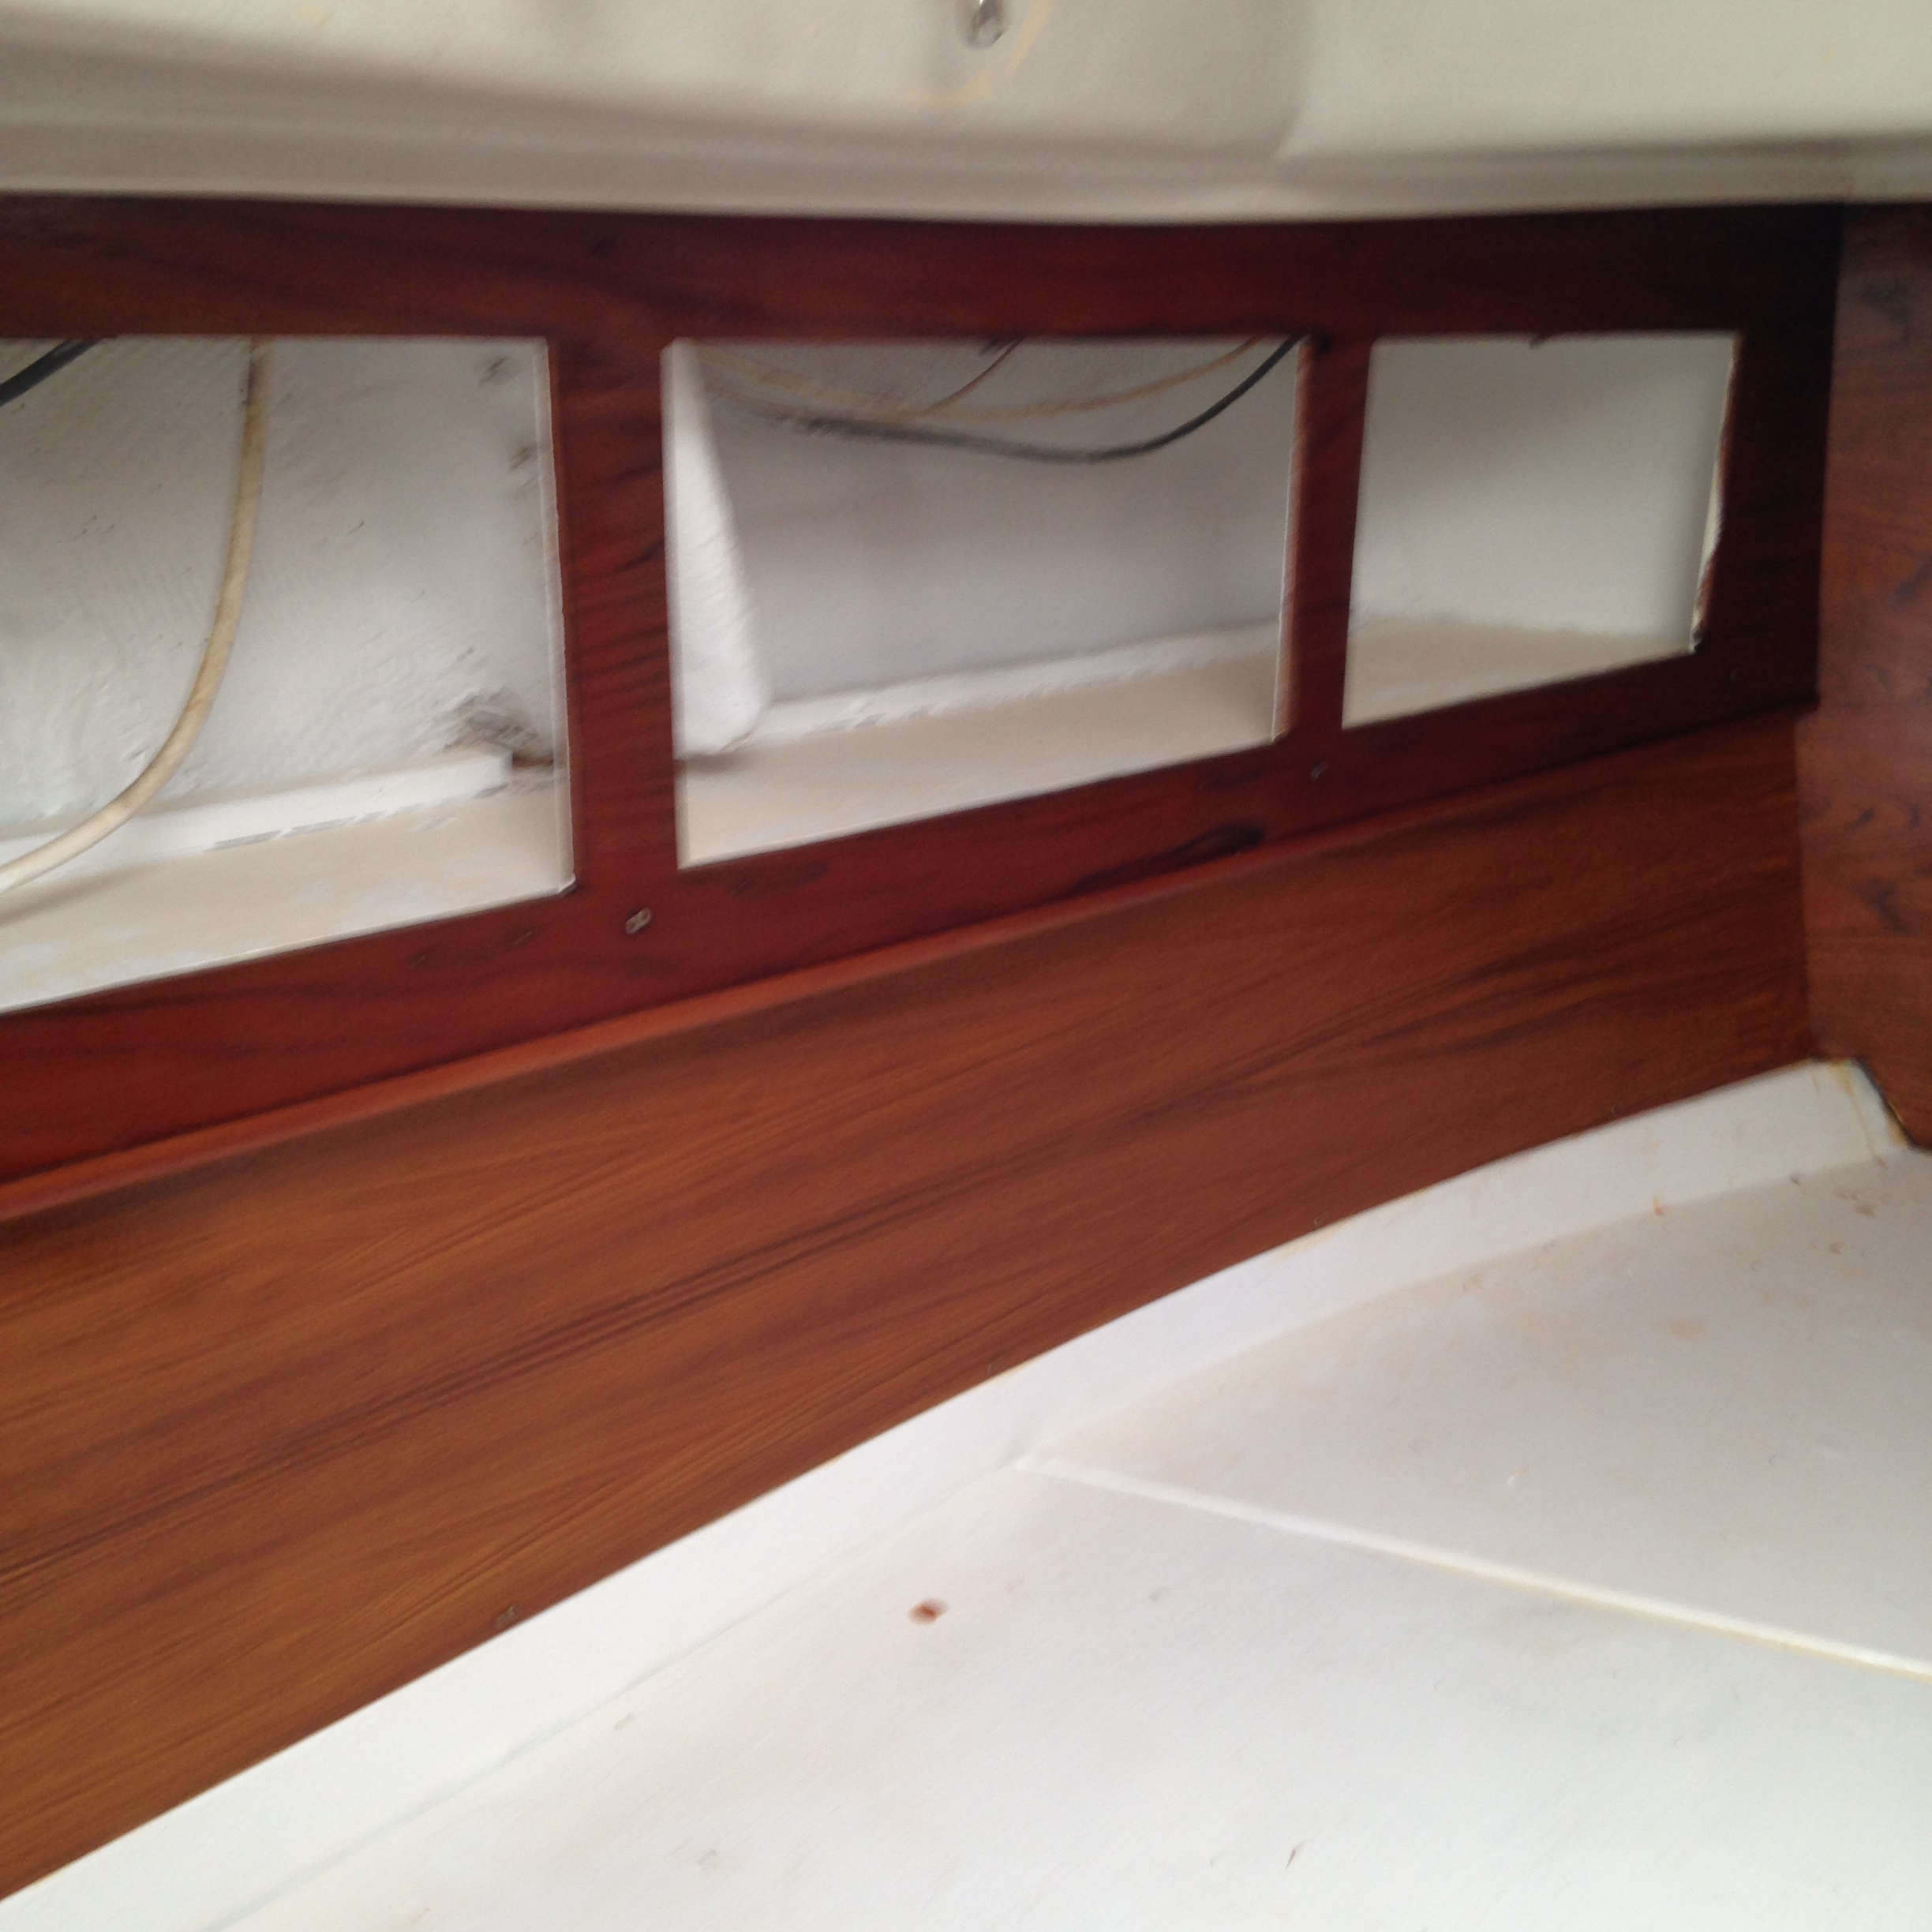
Several weeks ago we had a huge sense of accomplishment as the majority of the vberth interior was finally completed and we are nearing that point with the aft cabin as well. On Saturday we managed to sand install and stain the last cupboard face and the aft cabin door. We still have to complete the sanding, installing and staining of the cupboard doors and drawers but the major interior components are as complete as we are going to take them at this point.
The weather has begun to change and it is getting a bit cooler at night now which of course means not so hot during the day. Although we are sad to see it go we are also anxious to get started on some of the more labour intensive jobs. Okay anxious may not be the right word, but you get the point. 🙂
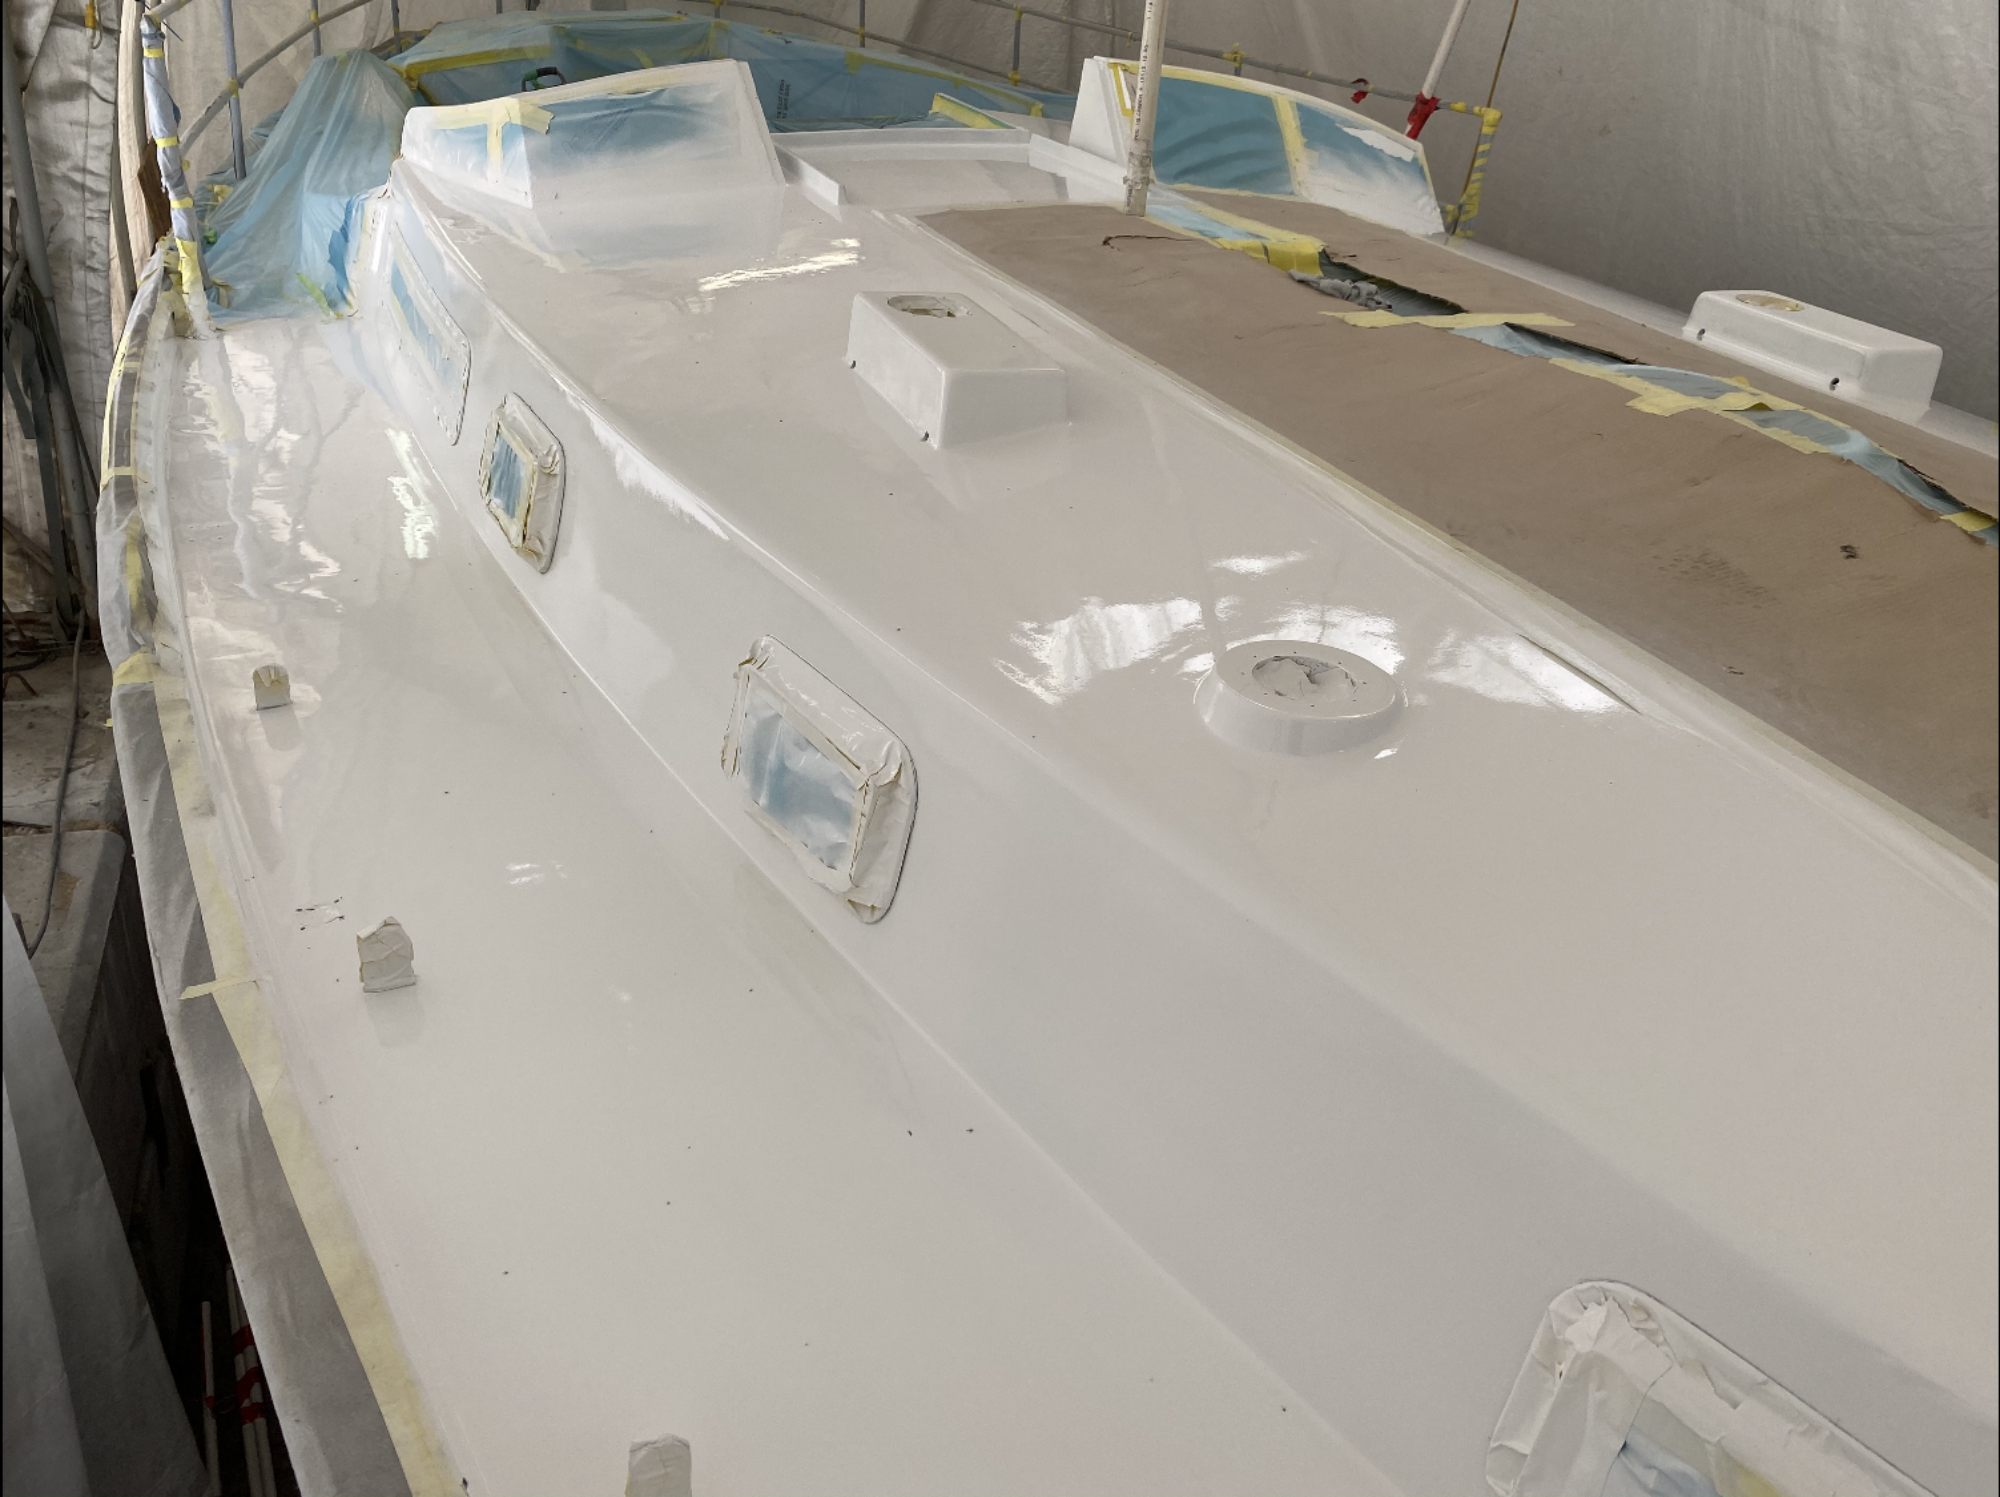
One of the big jobs that is coming in the very near future is the sanding and painting of all of the interior visible fiberglass. This is going to be a dirty, messy, dusty job and will require holding a sander or in some cases a grinder over our heads for extended periods. Oh well, once it is done and the new paint is applied, we will be able to reinstall the windows and the remainder of the interior trim.
We have decided to work on the heads, then the main cabin and finally the galley. I have obviously overlooked the engine room and nav station in this plan but it is for a reason. The nav station will probably happen last, after the engine install as we still have all of the wiring to plan, purchase and install, but a fair bit of it revolves around the engine and charging system.
We have chosen to attack the galley rebuild as the last, what I will call living space, rebuild for a couple of reasons. Firstly, in a lot of ways the galley is the most important space in Akupara. Well maybe after the wine cellar but at least as important. We have a fair bit of shopping to accomplish in order to get all of the items we want for the galley and only once that is completed can we really sit down and properly organize and layout the galley. In a lot of boats the galley always seems to be an afterthought and although we are not fundamentally changing the layout, we want to ensure we maximise it to the fullest. Secondly, once the galley is complete, I do not want to be grinding fiberglass and sanding wood, thereby covering the newly rebuilt galley in a forever coat of dust. Apparently eating fiberglass isn’t all that good for you.
And lastly I am sure you have noticed that I have glazed over a lot of work that has been mentioned previously or that you may have noticed in pictures or what have you, but we are fully aware that it needs to be completed and we will attack it when the time is right. Right now, the time is about gaining a sense of accomplishment and having a finished interior is giving us that sense at this time so that is the road we are going down.
Finally for today, I am way behind on the Costs page and will try to spend some time this week to bring it up to date. To be honest I have lost count of the man hours but I will make an educated guess in order to at least bring it semi current. The dollars spent should be fairly easy to track as I have the receipts and the history in the bank statements of course.
So a lot of people have the mindset that sailing is a lot like camping and a lot of those people would tell you that they take all of their old belongings and pots and pans and utensils along with them.
I am here to tell you the exact opposite. Do not take your old used dishes and pots and towels and whatever else you need, go out and buy new stuff. Yes spend the extra money and let me tell you why.
Sailing at times can be uncomfortable as it is without adding to the misery. If you surround yourself with nice new things you are actually more inclined to go. Save the old used stuff for home.
We have been down both sides of this road and I can promise you, that breaking out the fine china after a hard day is a lot more enjoyable than the mismatched plastic plates that you dug out of the bowels of your cupboards at home.
We have taken this to a new level, the last time we bought and outfitted a sailboat we went all out. Right down to brand new fluffy white towels and beautiful wine glasses. We brought our fine cutlery that was given to us as a wedding present and used it case and all in Kismet. And let me tell you, when you are a bit tired, a bit cranky, and a bit cold, there is nothing like sitting down to a nice hot meal that is presented on your best china, with a nice bottle of wine to pour into your crystal wine glasses, after taking a hot shower and drying off in a big white fluffy towel. We are out here to enjoy life, have great experiences, and wonderful memories. Why ruin that with old used dirty stuff that you wouldn’t use at home. And one last thing, the extra 5 minutes taken to present food properly will go miles in making yourself feel more comfortable and content and in creating those wonderful memories.
And guys. Speaking from experience, if you want your significant other to spend more time on the boat with you. Make it so special and comfortable that she wants to go.
Of course be forewarned. She may not want to leave or worse yet, you may find her taking mental health days from work and not telling you only to sit in the luxury that you have created.
In all honesty, life is too short. Do whatever you have to do to make it as enjoyable as ever. And when you come by for cocktail hour on our boat, expect to be served in glass not plastic.
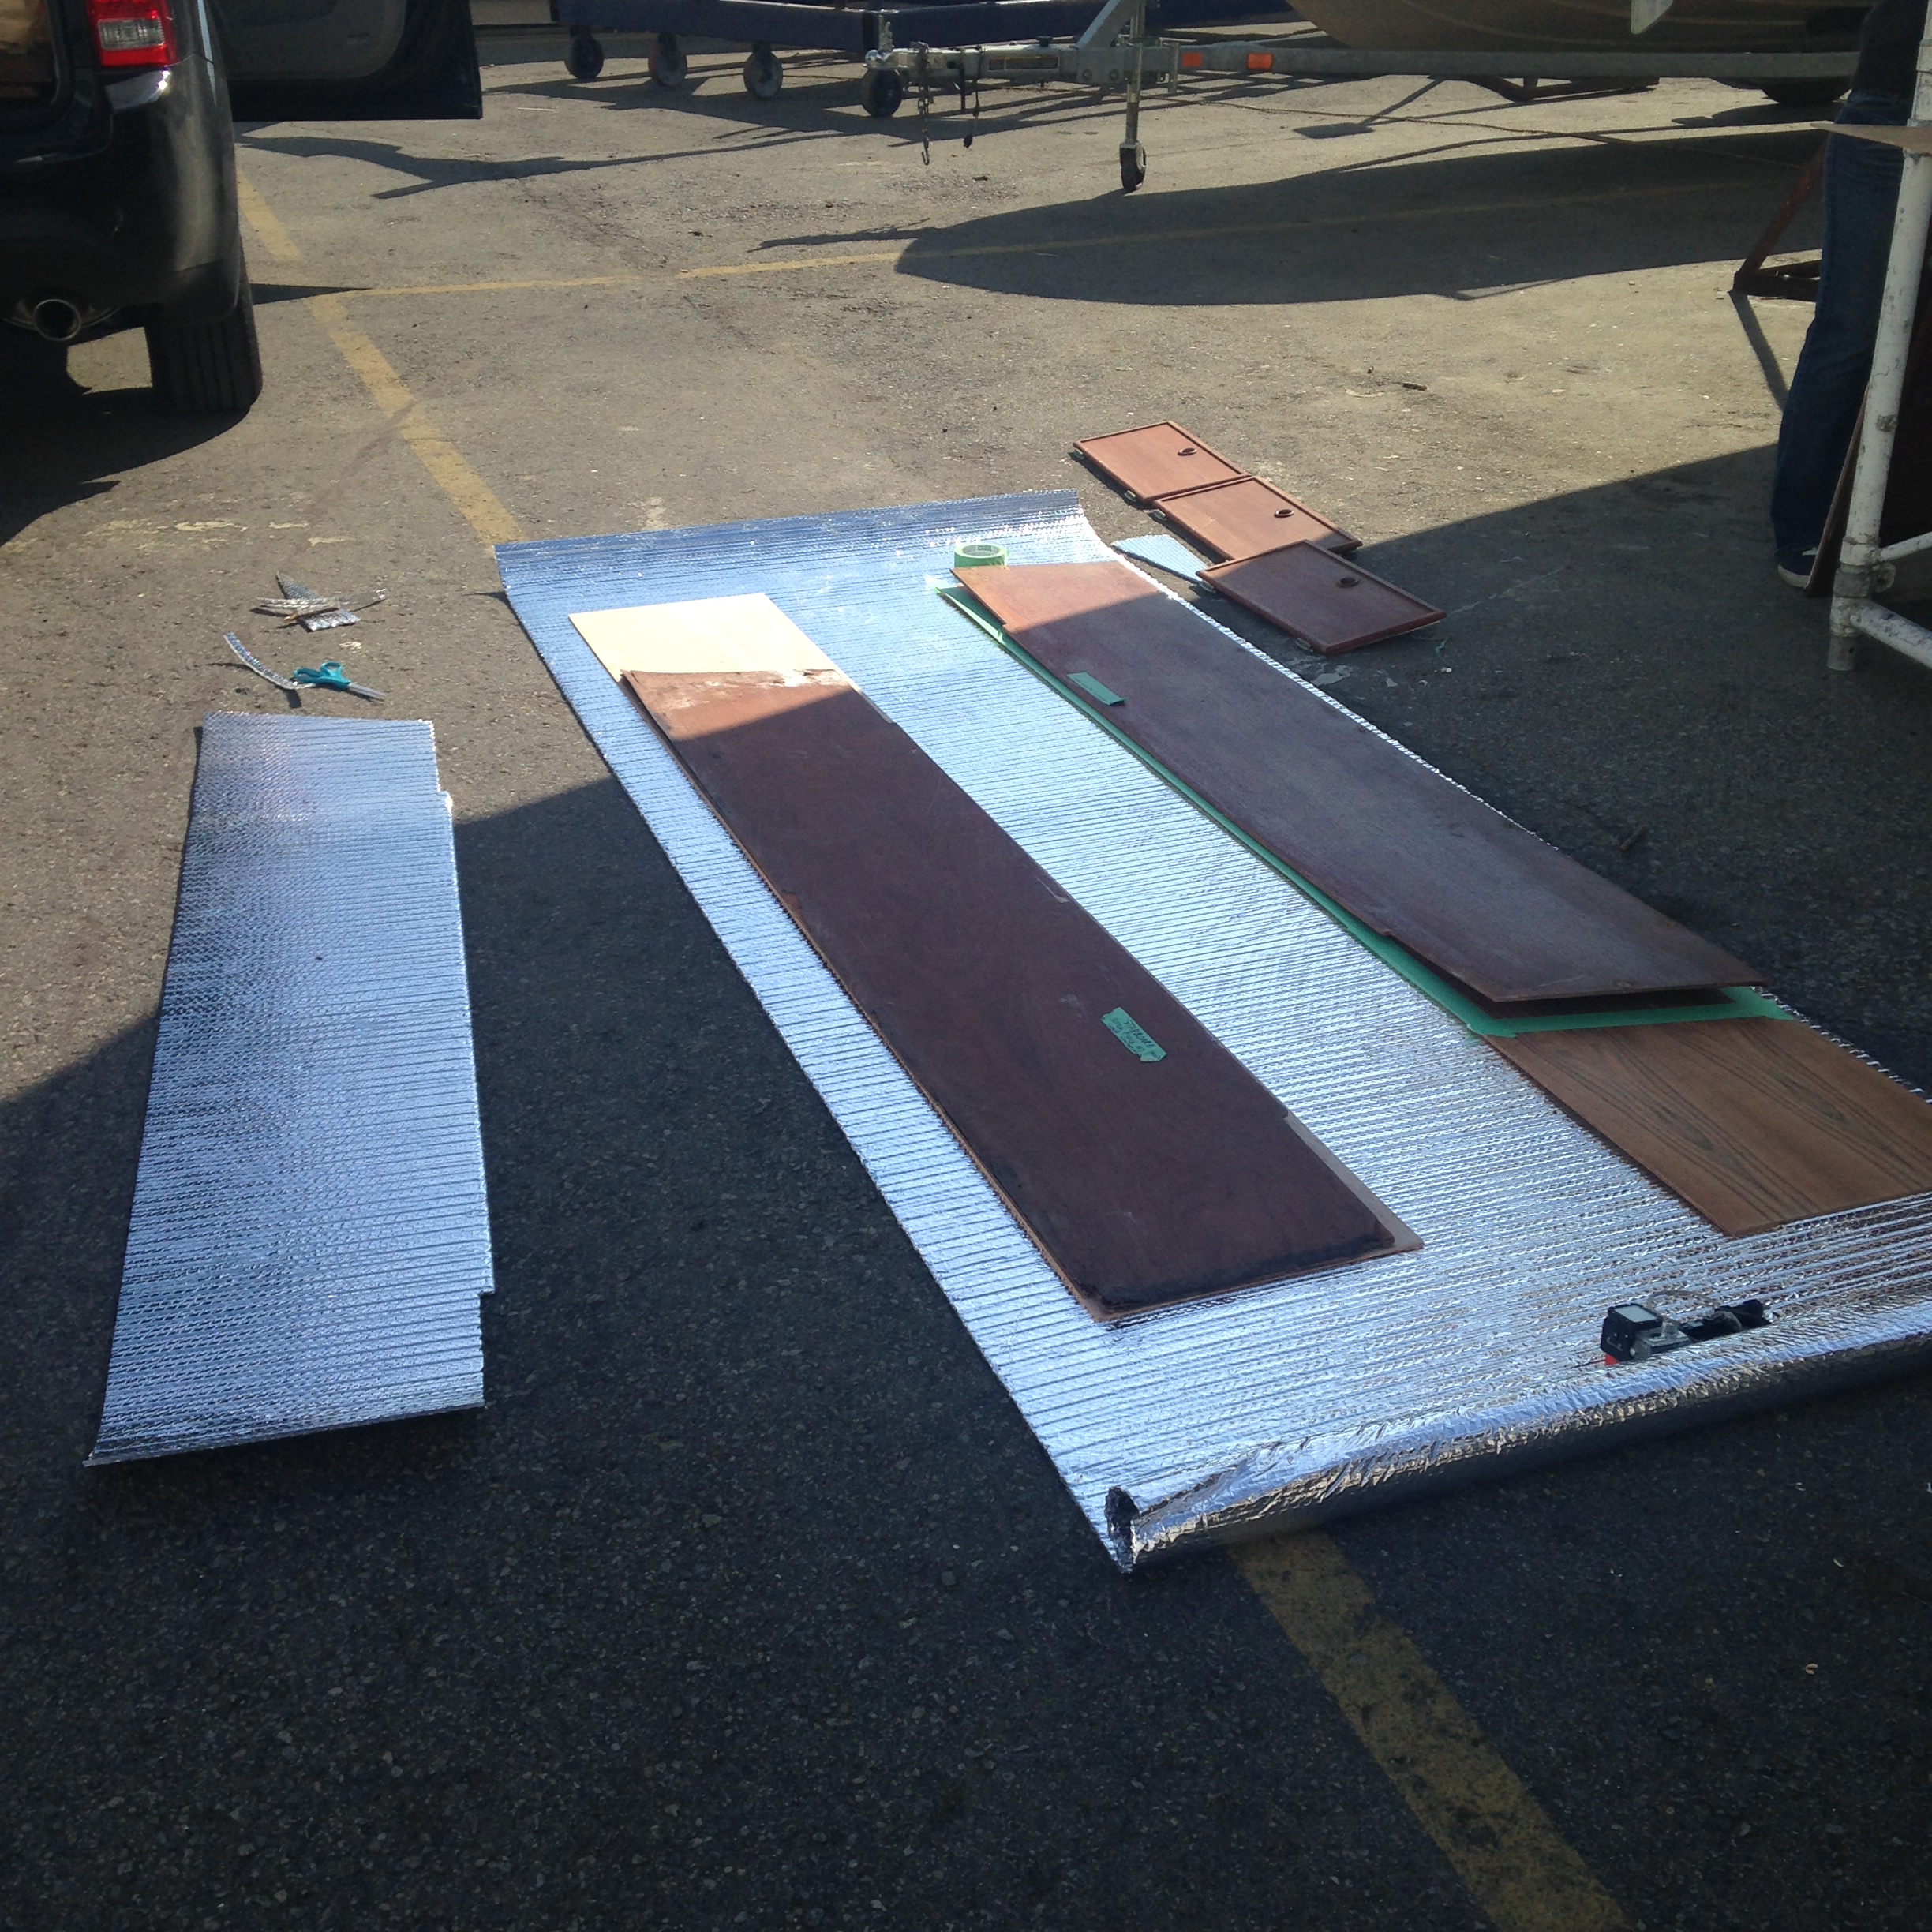
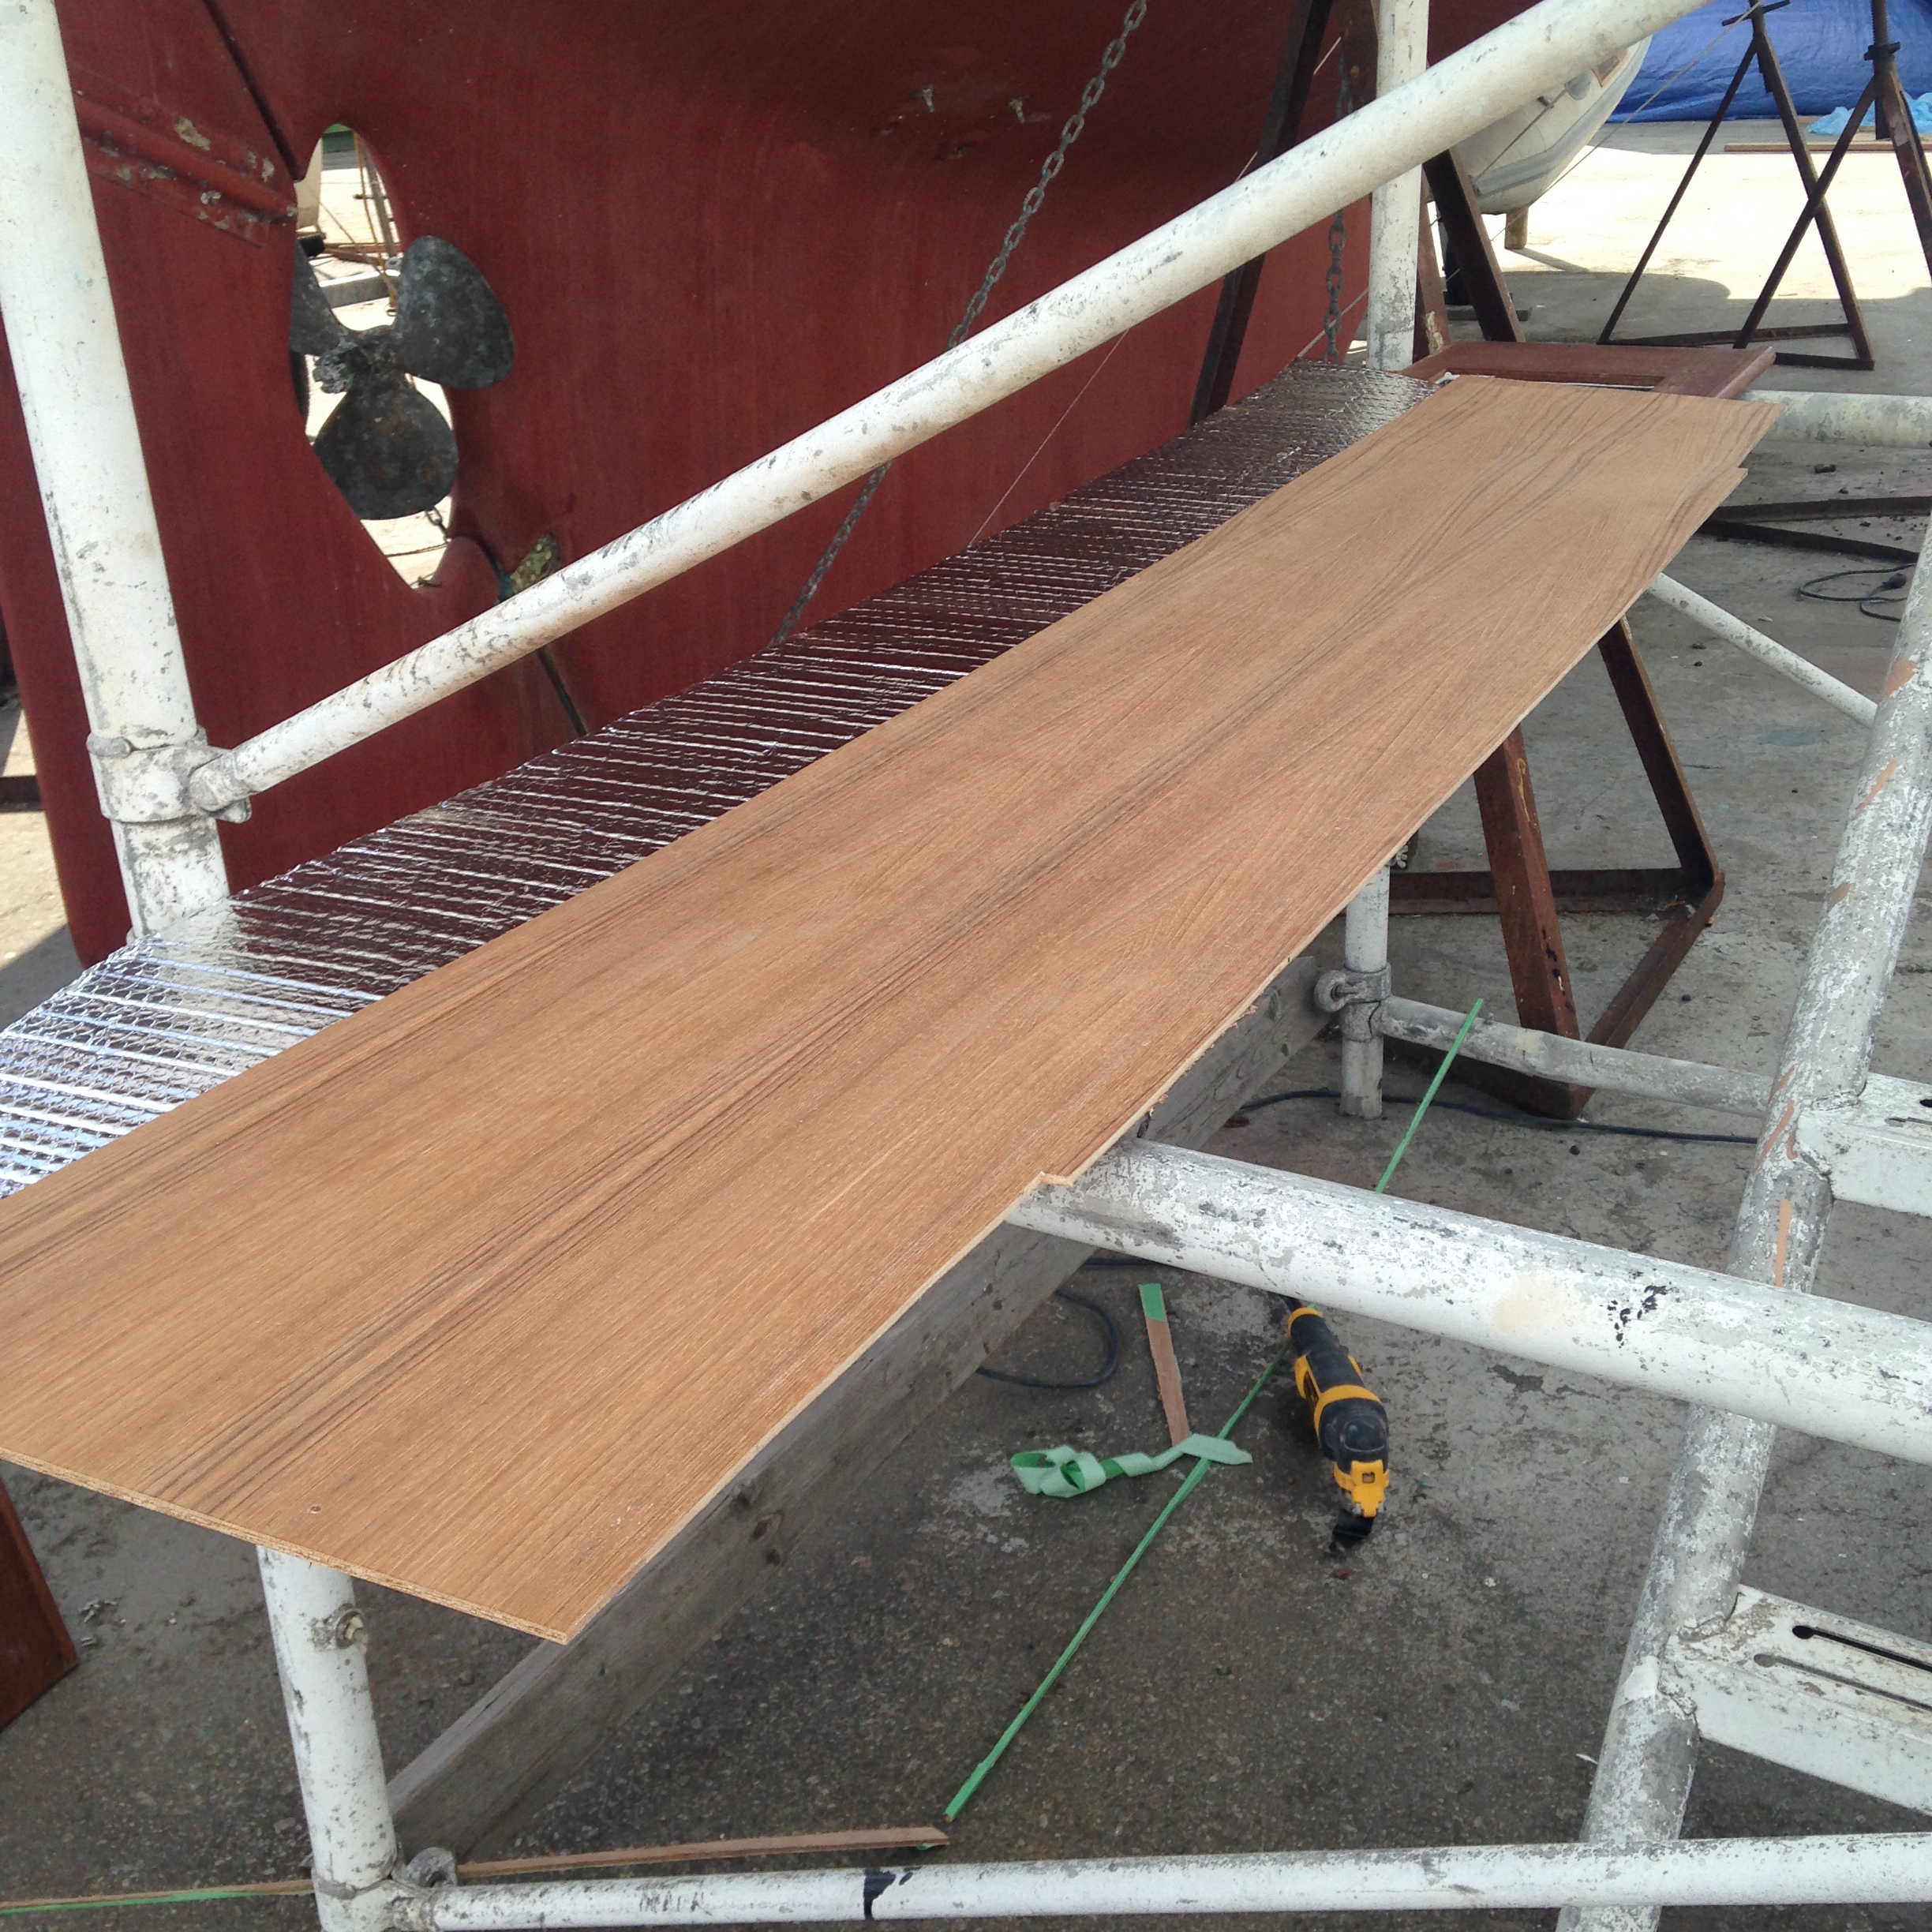
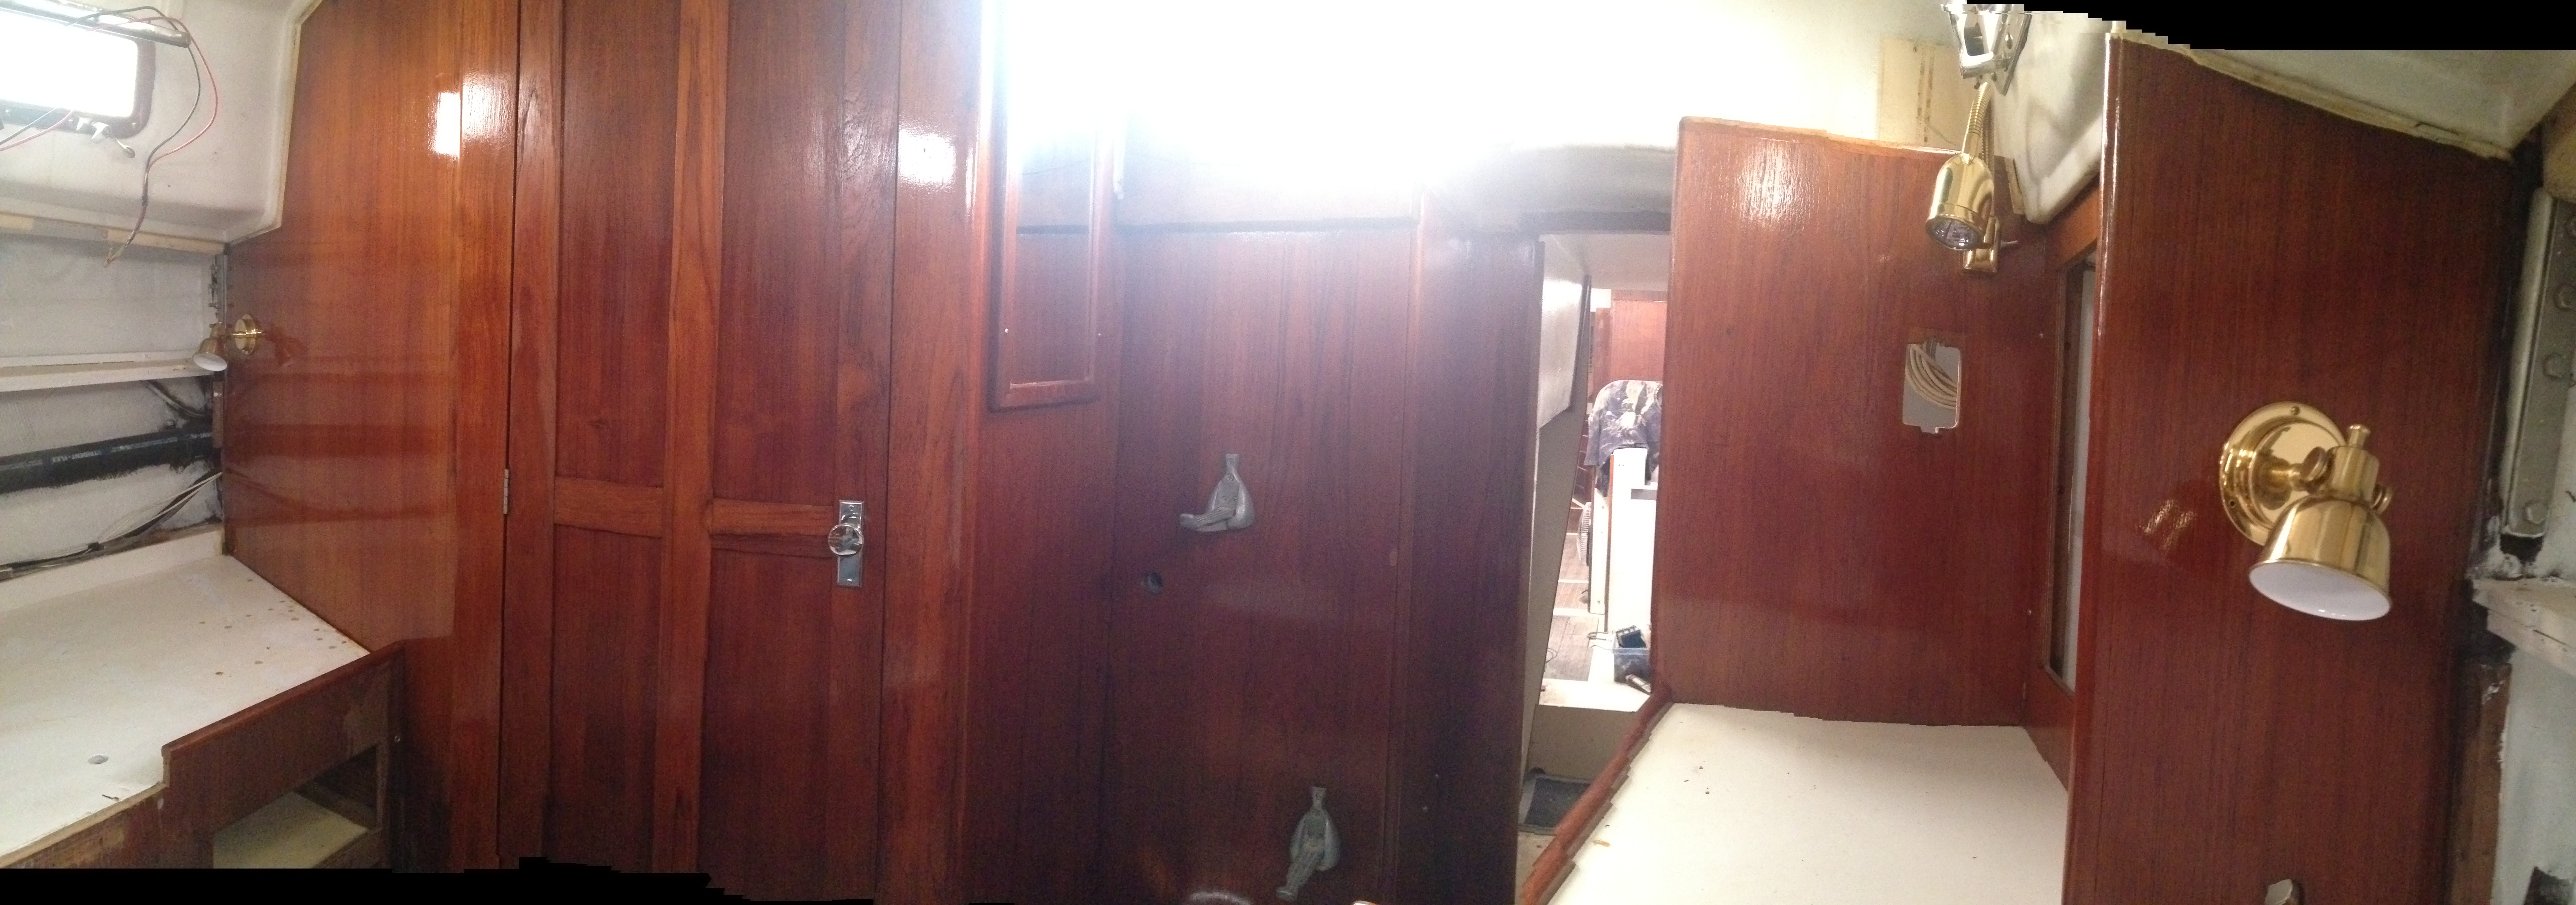
The two worst interior panels on all of Akupara were the two bottom ceilings in the aft cabin. They had suffered the most damage and unfortunately would not be salvageable so yesterday we set about replacing them.
In Vancouver it is pretty much impossible to find real Teak Marine plywood. Perhaps this is the case everywhere and I just do not realize it but either way it is fairly frustrating. So I broke down and purchased Teak plywood that is not marine grade and hopefully if we take the proper precautions it will last. Obviously we are planning on removing ALL ,which we have almost completely finished, and that will help to preserve this plywood, but I will take it a step further and once the visible side has completely dried and is therefore protected, I will remove the panels and paint the backs with epoxy. So why did I purchase the non marine teak ply? Simple, to make it look as close as possible like the originals.
The teak veneer is so thin that there is no way it can ever be sanded, but it turned out fairly close in looks to the aft bulkhead but not the cupboard face. In the previous picture you can see the silver foil bubblewrap that acts as both a moisture barrier and adds some insulation. It is cut to fit and installed behind the panels as well just like in the vberth.
We are getting closer. At least we feel like we are getting closer. Once we have all of the cupboard doors and the drawers sanded, stained and installed, we will have the woodwork for at least the vberth and the aft cabin complete. This is giving us a strong sense of accomplishment and although we still need to sand and paint all of the interior fiberglass on the ceiling which will be a big dirty job, we need to feel like we are getting somewhere and this is allowing for just that.
I am anxious to get started on the main cabin. It will be a slightly different approach as we are replacing the majority of the interior wood for the cabinets and shelving and hopefully it will go a bit faster. The original plywood that was used was 1/4 inch and over 40 years most of it has sagged and some of it has suffered water damage as well so it will simply be replaced. We kept all of the old pieces to use as templates so it is only a matter of tracing them on new plywood and cutting them out.
We still have a the giant job of sanding and painting the decks but we met a great young couple yesterday who just had the decks on their Bayfield 32′ sanded and painted. Wow what a nice job. It truly gave us inspiration to keep working. So I think the plan for now is to keep moving in the direction of completing the interior cabinetry, and making any repairs necessary on the inside as we go along. The electrical and plumbing can be added at any point so I am not all that concerned with that aspect. Once the interior is complete, and the weather cools off a bit, we will get back to re-finishing the decks. I do not want to have a beautiful new paintjob and then ruin it by dragging and moving all kinds of other parts all over it. This will also allow for the re-installation of deck fittings over the winter where we can take our time and make sure they are installed properly.
I knew the chainplates leaked. I also knew they leaked fairly badly. What I did not know was that the area of deck where the chainplates make their appearance is cored. I also did not know that the original way these holes were created did not include sealing the coring. Well, it did not take long to find all of this out.
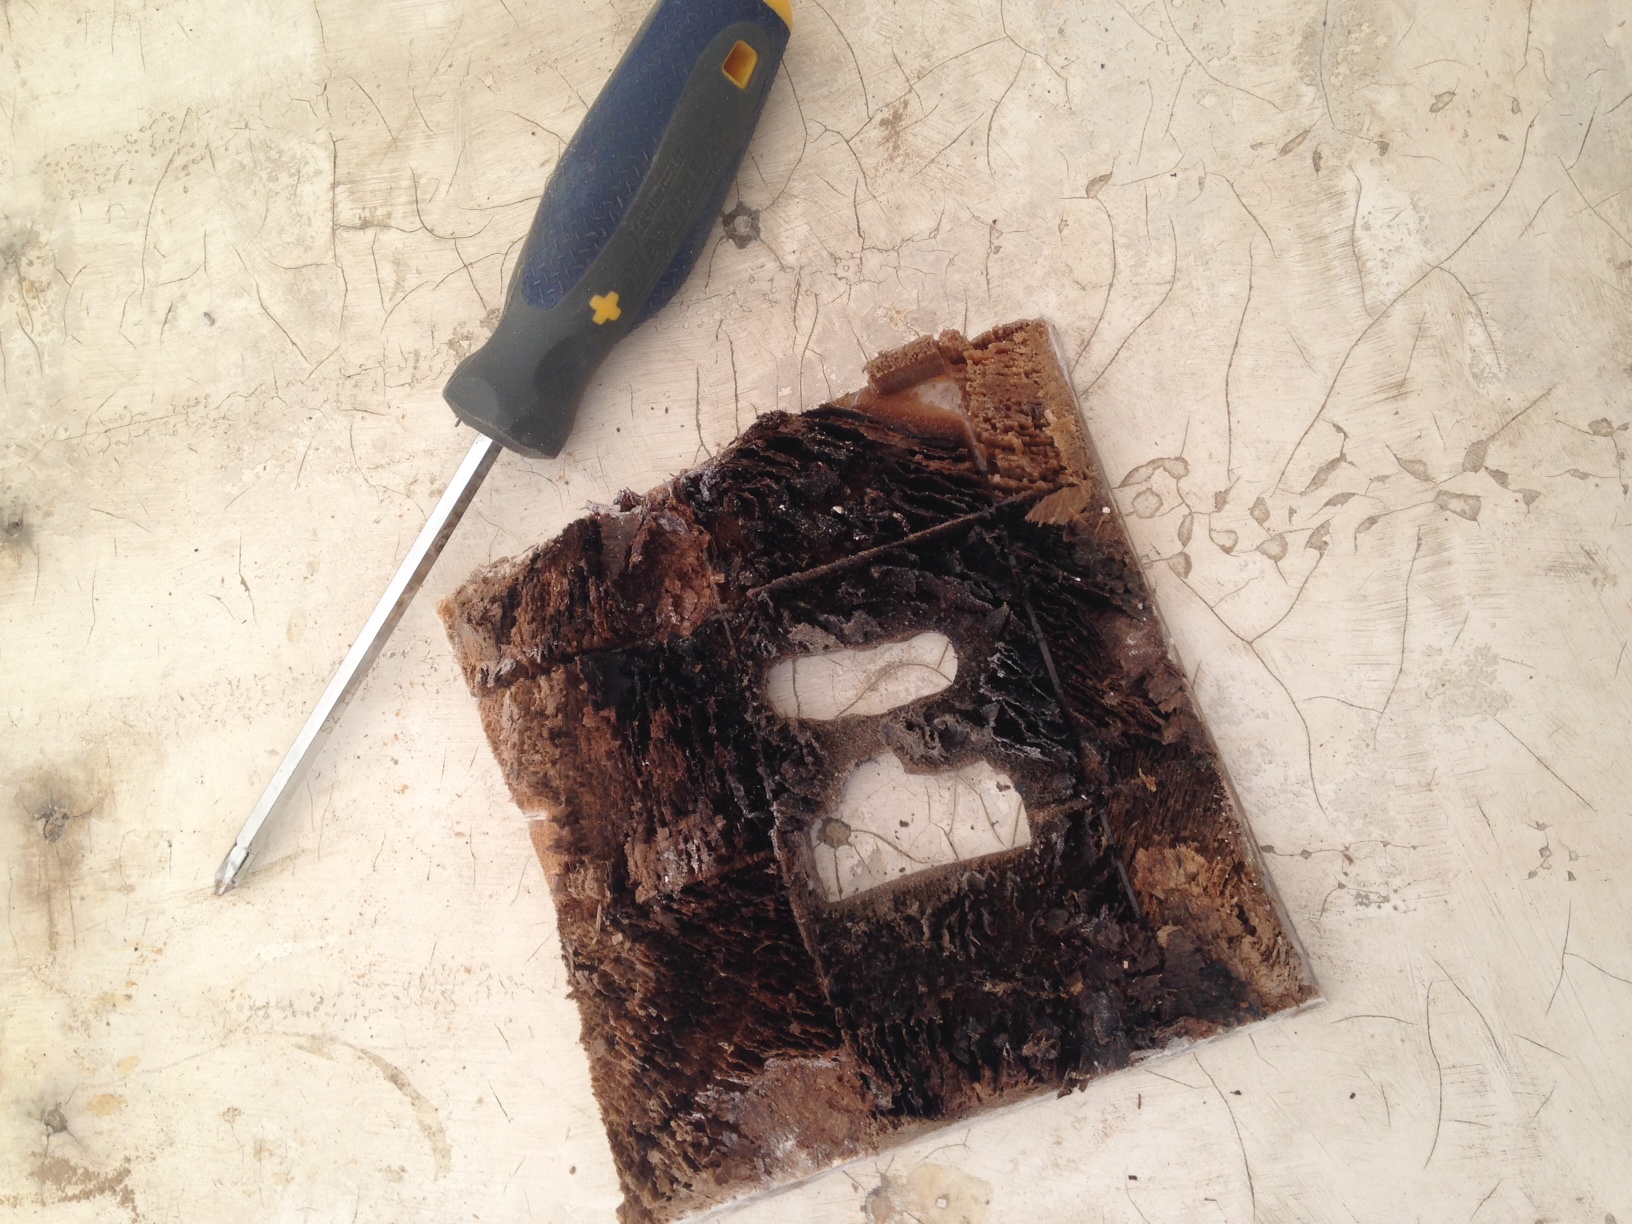
I decided yesterday to start pulling the chainplates in the aft cabin before we get too far ahead of ourselves and to fix the rot in the bulkheads. Fixing the rot in the bulkhead is not going to be that big of a job, but nevertheless I have been putting it off, however the decision was made to begin the fix which necessitates removal of the chainplates. First thing I noticed right off the bat was that the bolts holding the chainplate in place, were not even tight. Hmmmm. Second thing I noticed was that there was several layers of what I can only assume was 3m4200 or something very similar. Of course the 5 spare tubes we found in the cleanout also indicate a preference to this goop. Anyway, after cleaning out as much of the goop as possible, and removing all of the snug bolts, I pried from below decks and Andrea pulled from on deck and sure enough they popped out. This of course presented me the opportunity to discover the facts above. It became quickly obvious that an immediate repair was needed, and it became quickly obvious that I can be almost guaranteed that every other chainplate will require the same repair.
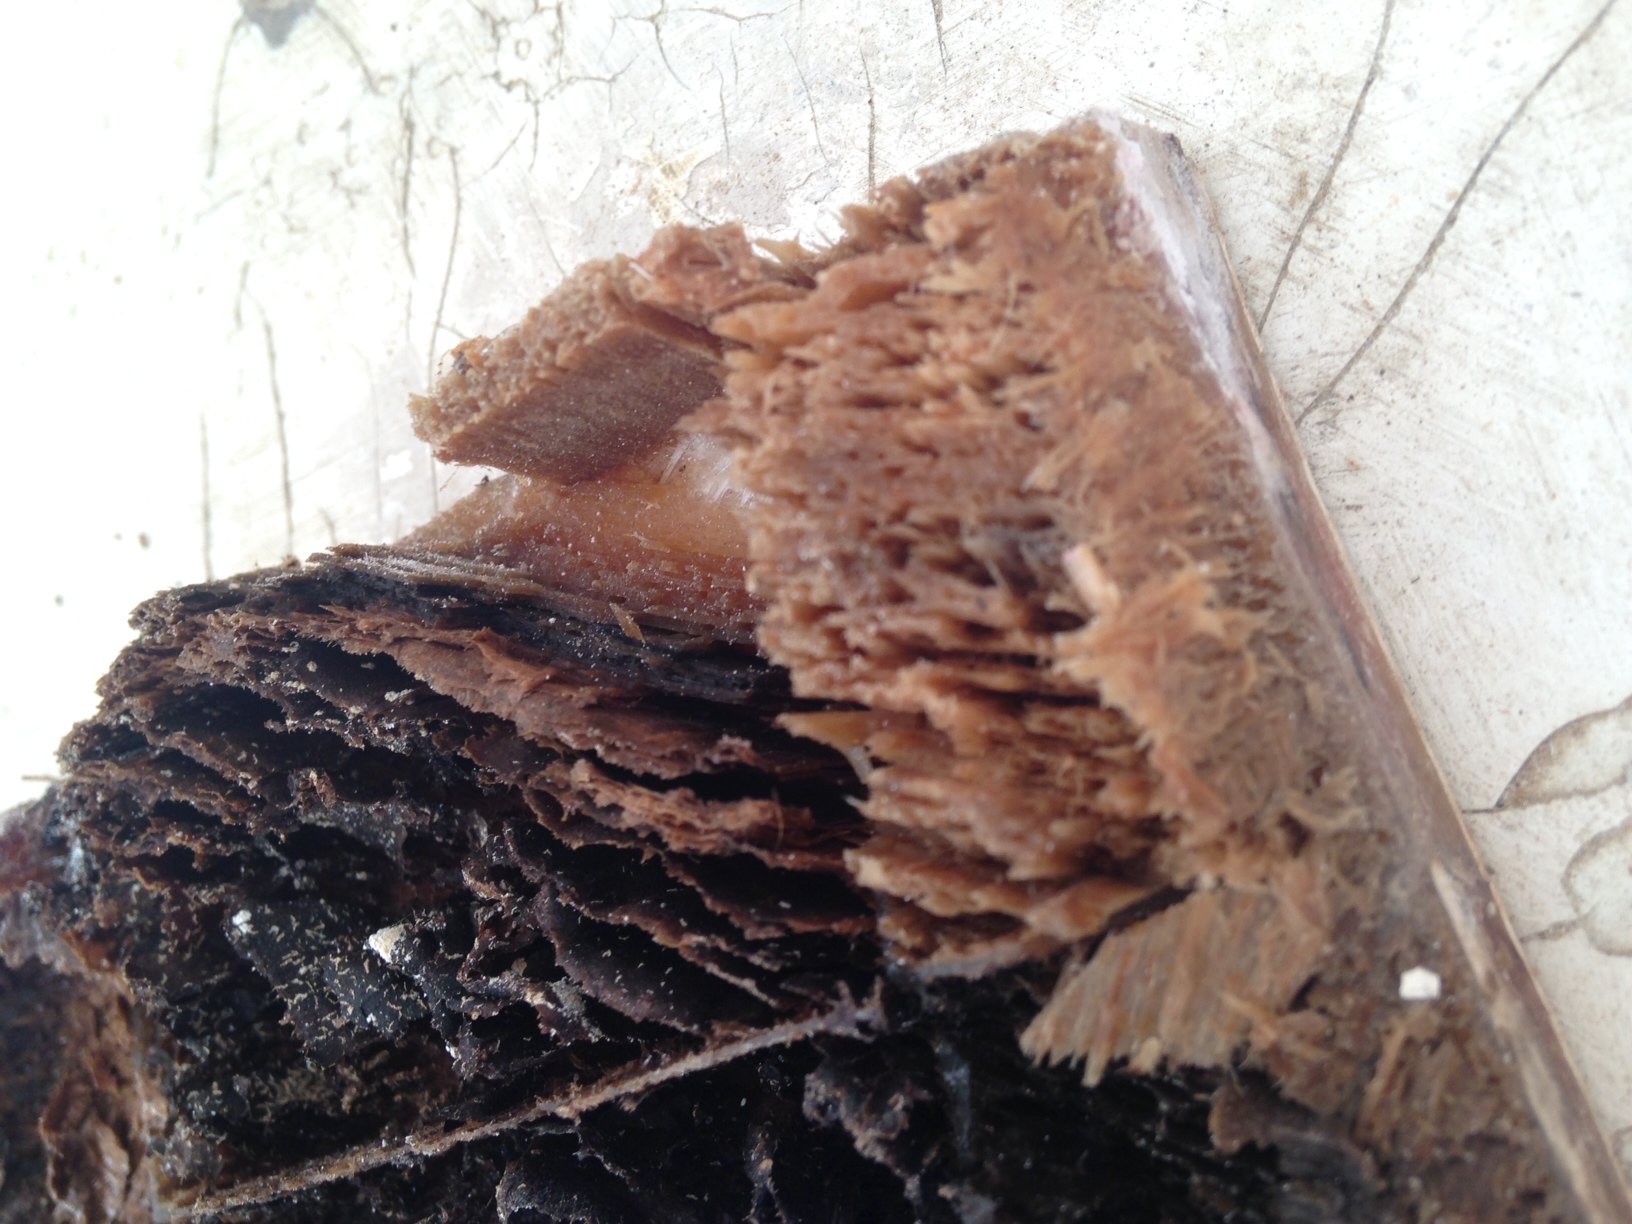
Rotten soaking wet end grain balsa
My repair process involved cutting out approximately 5″ square of the top skin around the existing holes. As soon as I began cutting the top skin it was painfully obvious that there was water damage. There is a smell that rotting wood has it and it was in the air. In the pictures you can see black core, which is already rotten and the somewhat light brown colour is wet. After removing this piece of top skin I scraped all of the remnants of coring out of the hole, ground it down with 60 grit sandpaper and cut a plug out of 3/4″ marine ply to fill in the section of now missing core. The original thickness of the coring here is closer to 1/2″ which means that my plug is almost flush with the top skin. This is by design so don’t panic. I placed a small piece of duct tape over the original holes on the bottom skin to prevent epoxy from running down inside of the boat, filled the areas that I had dug out underneath the remaining top skin, poured a bed of thickened epoxy into the hole, and placed the new coring in, completely covering it with epoxy. So now I have a solid area about 6″ square around the old holes.
The next step will be to grind the area concave including farther out than the 5″ piece I cut out in the top skin, drill a hole about 3″ in diameter where the chainplates will be through the plywood coring down to the bottom skin, fill the hole completely with thickened epoxy and add a layup of several layers of glass to the entire area until it is slightly proud of the surrounding deck. At this point I am going to take it one step farther. I am going to raise the 3″ diameter hole that has been filled with thickened epoxy, up past deck level by approximately a 1/2″. This will help eliminate any water intrusion as any water that finds its way on deck will run around the raised area. The purpose of the 3″ solid epoxy hole is that any water that might find its way down the chainplates will not be able to penetrate the coring as they will be surrounded by solid glass.
I only have to repeat this 9 more times for the rest of the chainplates and all will be good in the world again. But I will never have to repair these areas again.
A word of advice to all of the Whitby owners out there. Pull your chainplates, and make sure the coring around them is not wet. If it is not, at least seal the holes with epoxy and make sure it never does get wet.
While I was messing around with pulling chainplates and repairing core, I also replaced all of the temporary screws that were holding in any of the interior panels that we have put back. As I mentioned before in previous posts, every screw that is used on Akupara from here on in will be a Robertson screw. For those of you who do not know what a Robertson screw is, it is a square slot as opposed to just a slot, or a Philips which is a star shape, or any other type of screw for that matter. I have always found Robertson screws afford the best chance of NOT stripping them thereby making them removable for all time.
Andrea and Paige began the process of painting all of the bilges and lockers with Bilgekote paint. Andrea wanted white as opposed to the traditional grey, and after seeing the newly painted areas gleaming with fresh white paint, I think she made the right choice. Bilgekote is easy to apply and gives good coverage. It is also very hard once cured and is supposed to be very abrasion resistant. We actually started asking ourselves why we shouldn’t use white Bilgekote to paint the sole in Akupara as well. Abrasion resistant, tough, white, what more can we ask for? I will need to do a little research to see if there is any reason why we should not, but if I do not find anything, I think we have a solution to the 40 year old yellowish floors.
As I have been reviewing the pictures that I have taken over the last little while, I notice that not all of the finished parts of the interior wood are exactly the same and that there are some spots that are a little darker or lighter than others and I thought I should provide an explanation as to why.
Firstly I am not a professional furniture refinisher. Perhaps if I had contracted out the work, the wood would be a little more uniform in colour throughout. I am sure if I paid enough for it, it could be close to perfect. As close to perfect as the day it came out of the factory.
But secondly, Akupara is not brand new. Akupara has almost 40 years of experience under her belt. She has battle scars like any other 40 year old. She also has 40 years of stories to tell about those battle scars. A lot like me. I have a crooked middle finger on my left hand and there is an entire story I get to tell about crushing that finger in a compound sliding miter saw while attempting to cut one of the hardest pieces of wood I have ever seen.
In hindsight, I guess I could have had some kind of cosmetic surgery where they attempted to straighten out the bone, but was it necessary? I can use the finger perfectly fine, just ask many a driver in Vancouver who have cut me off in traffic, so no I do not feel it was necessary to make it perfect, and I have a pretty good story to tell when asked about it. Not to mention that in order to get the full visual, I have to stick my middle finger up at the audience, which is just a fringe benefit. 😉
So when it comes to the wood refinishing in Akupara. Yes we have filled as many holes as we need to, and yes we have sanded the old faded finish off, and yes we have re-stained it, but no it is not perfect. You can still see the lines and battle scars that Akupara has earned and each of which I am sure has a story to go along with it. Soon enough, we will undoubtedly add some of our own scars to her, and for those we will have a story to share, but for the others, Akupara will get to hold her past as her own and we will accept her for who she is now, along with all of her life experiences to which she should be proud of.
So I am sitting on Akupara surrounded by dust and bits and pieces of boat, under a white shrink wrap greenhouse. It is 9:10 in the morning and I am already sweating and I haven’t started working yet, and a question keeps going through my mind based on a comment I saw on TV last night.
The comment was from a famous movie star and she was being asked how she got her start in the industry and she went on to tell the interviewer about her start and summed it all up with a final comment to the effect of she never really had a backup plan.
I can relate. I don’t have a backup plan either. I guess the backup plan would be to sell Akupara, downsize to a small apartment when the kids leave and spend the rest of our days living the dream. What that dream means to me is perpetual punishment and I am unable to wrap my head around it which I guess also means I would spend the rest of my days depressed and angry for never having accomished MY dream.
The interviewer remarked to her that is the only way to go if you truly want to be successful at something and it obviously worked for her. Here is praying that it works for us as well.