The Refit of a 1976 Whitby 42 Ketch – Akupara
Well, hopefully work on the decks will resume shortly. The completion of the painting and non skid was delayed due to COVID 19 believe it or not. The painter has been stuck in the USA due to the border closure. He is on his way back and will need to self isolate for 14 days, so he will be isolating in the shed where Akupara is. Hopefully he can wrap up the decks and the clear coat on the hull so that we can get on with completing this gargantuan project.
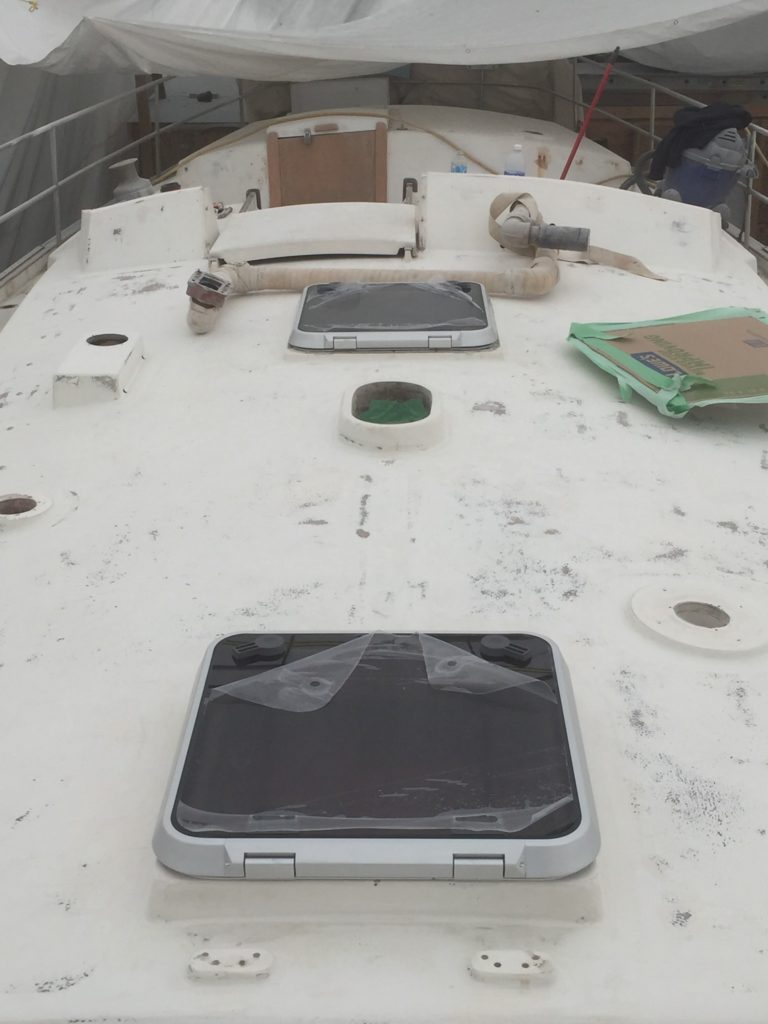
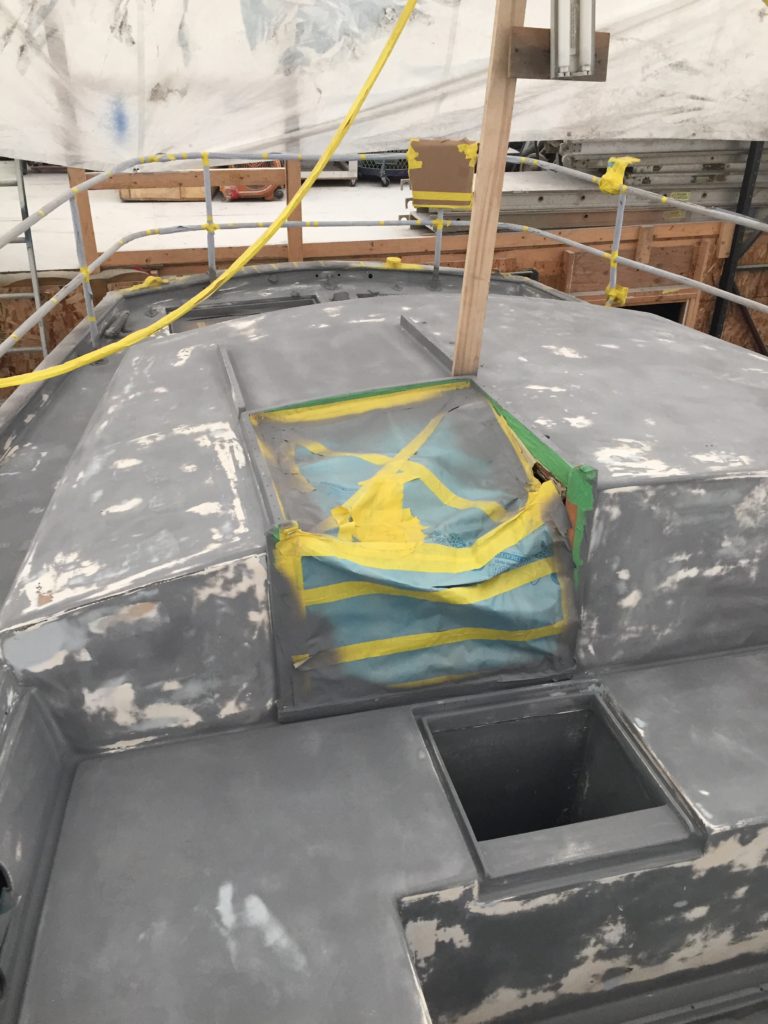
Sneak peak at the new hatches we have purchased for Akupara. These were taken while we were sanding the decks so they are not on the new paint of course!
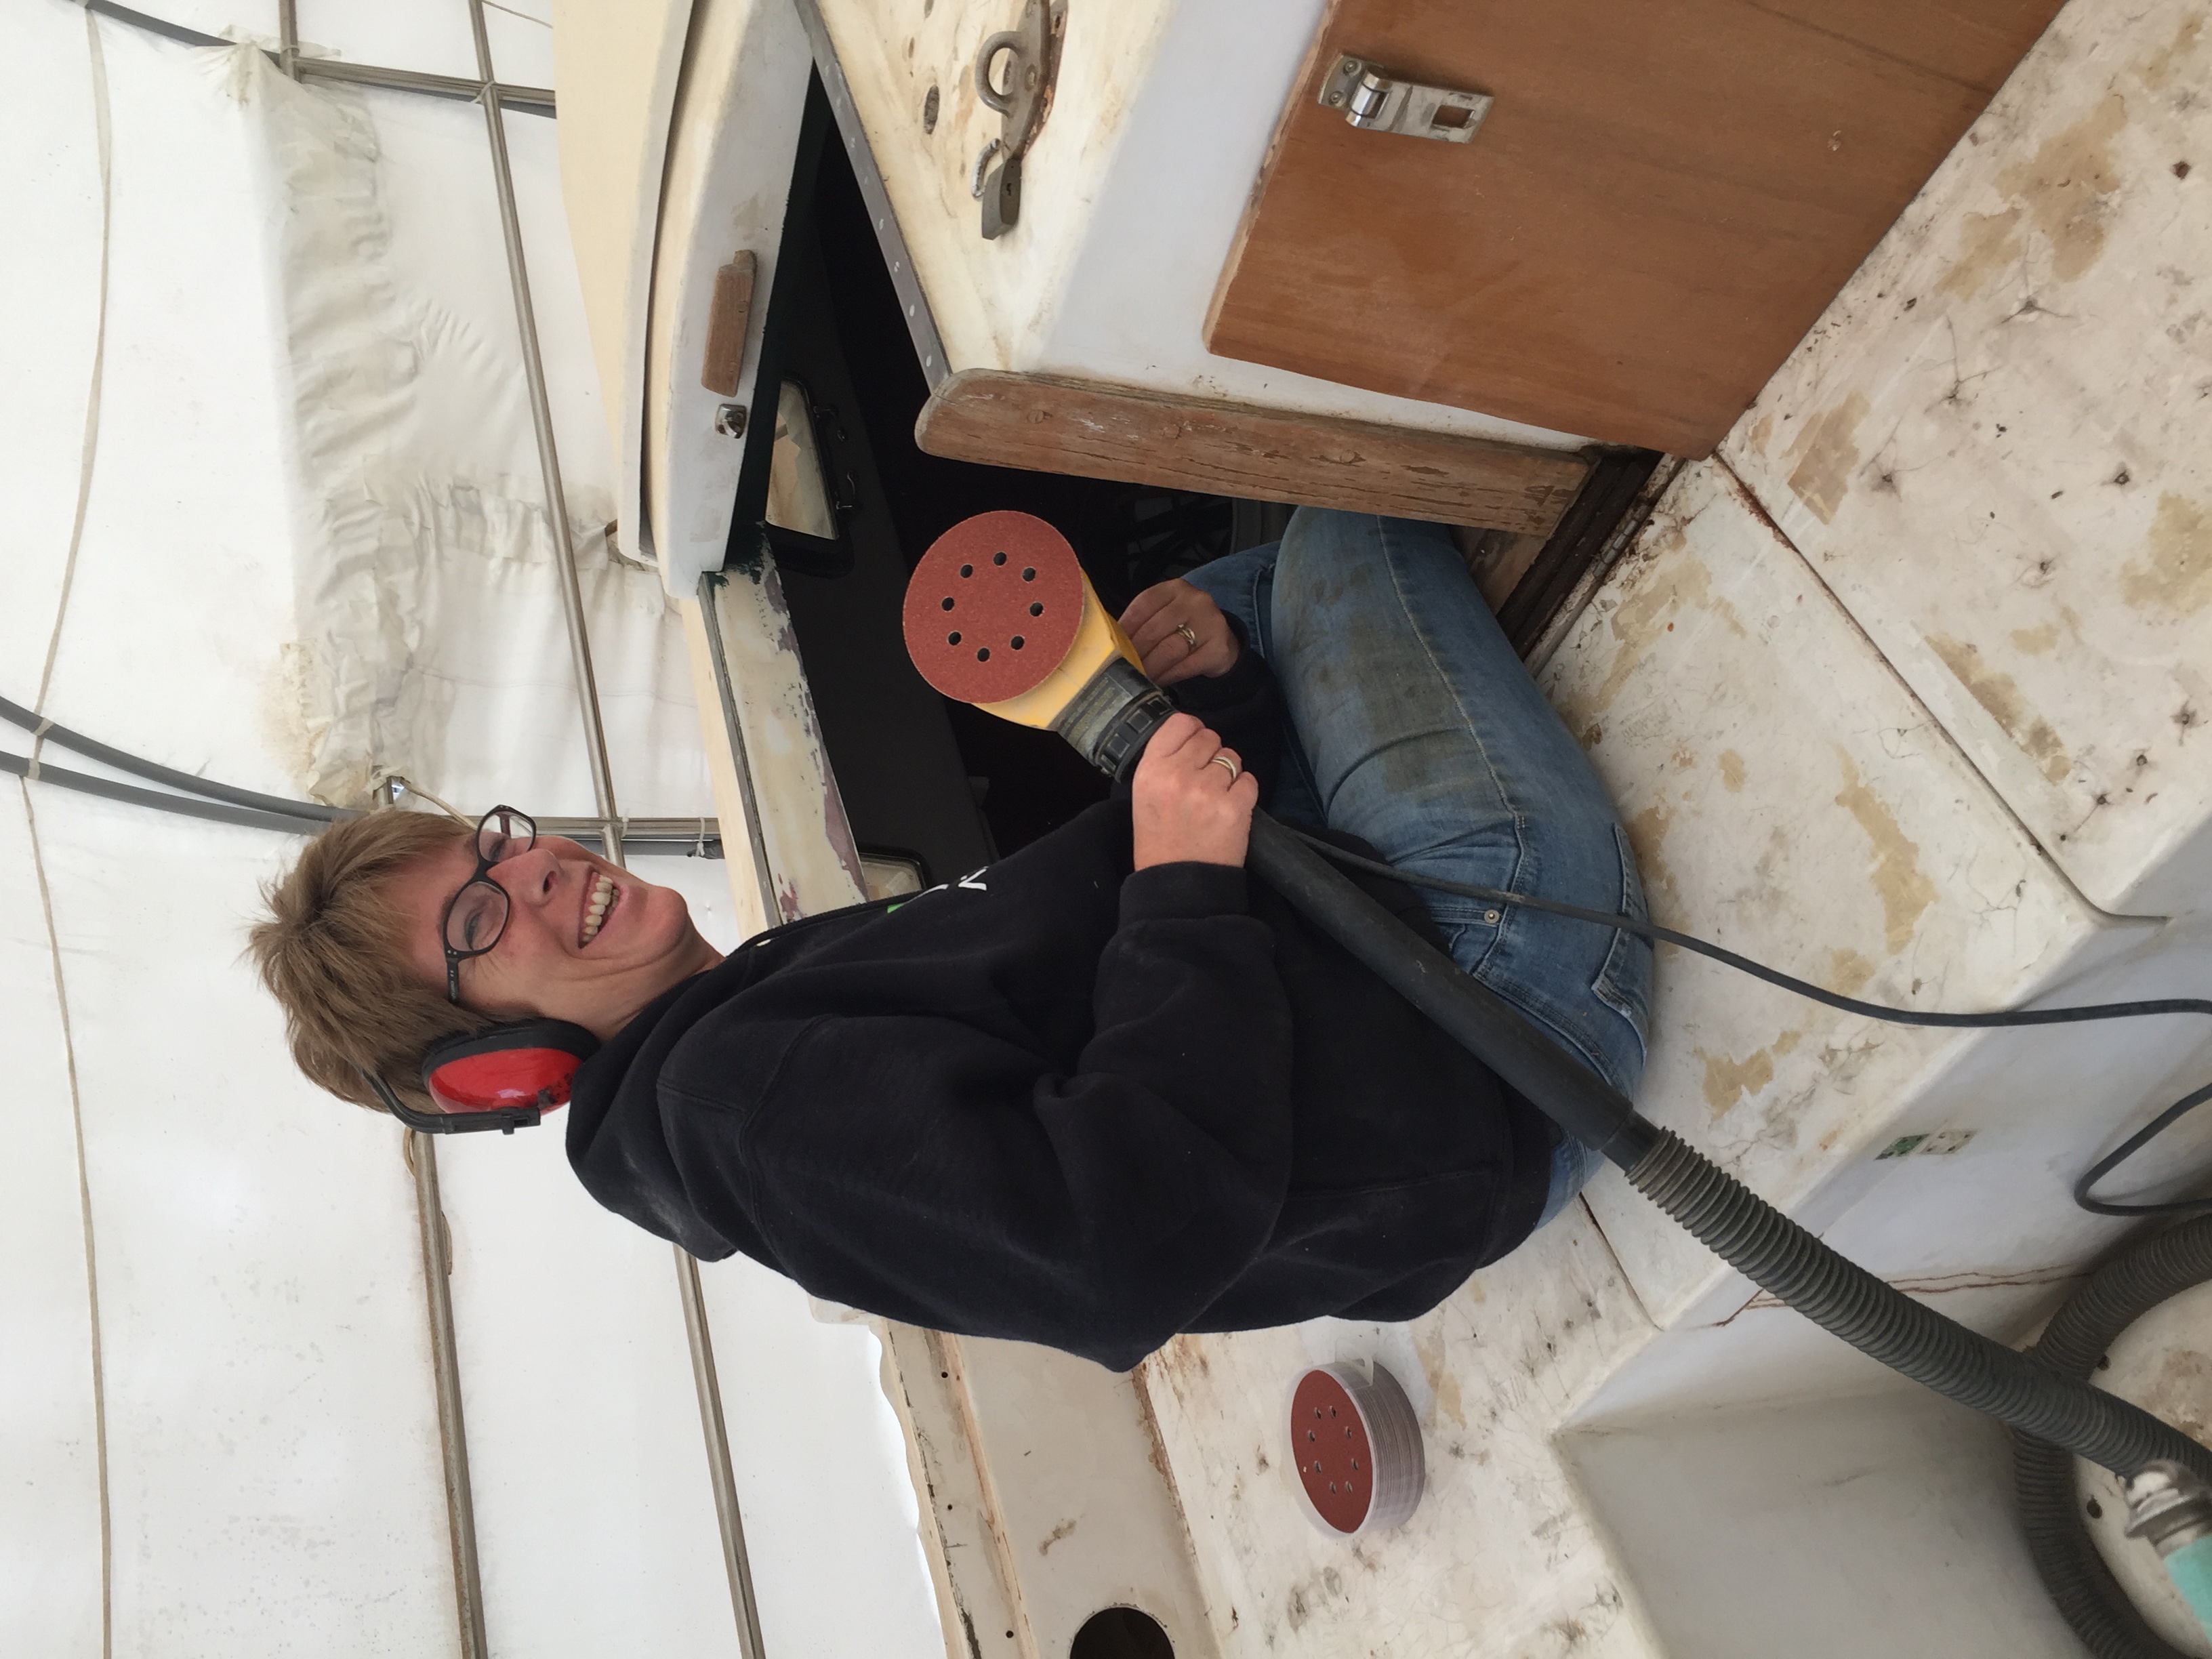
So after the Admiral and I spent a combined 18 hours of sanding the decks, Prodigy Marine took over the job! Thank heavens! My poor belt sander will never be the same!
They spent about a week sanding it and sprayed the first primer. Then went back and faired, sanded, sprayed and then faired, sanded and sprayed again.
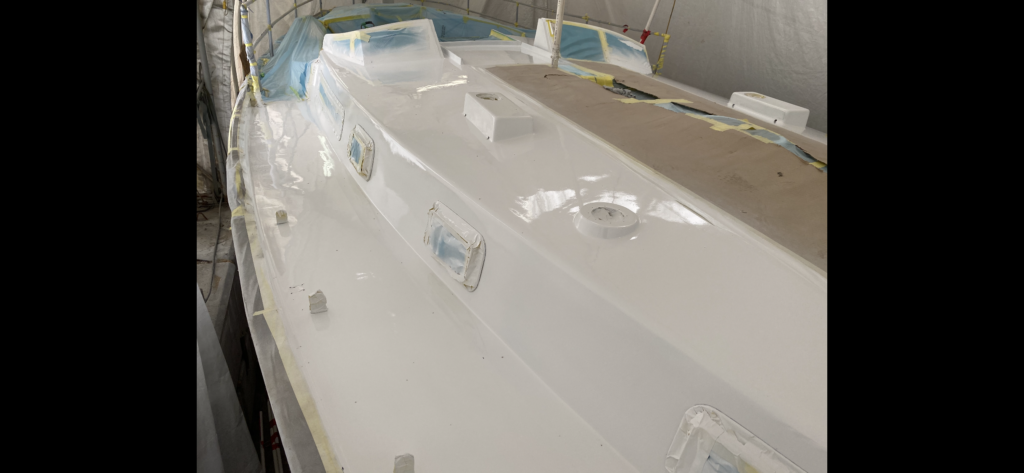
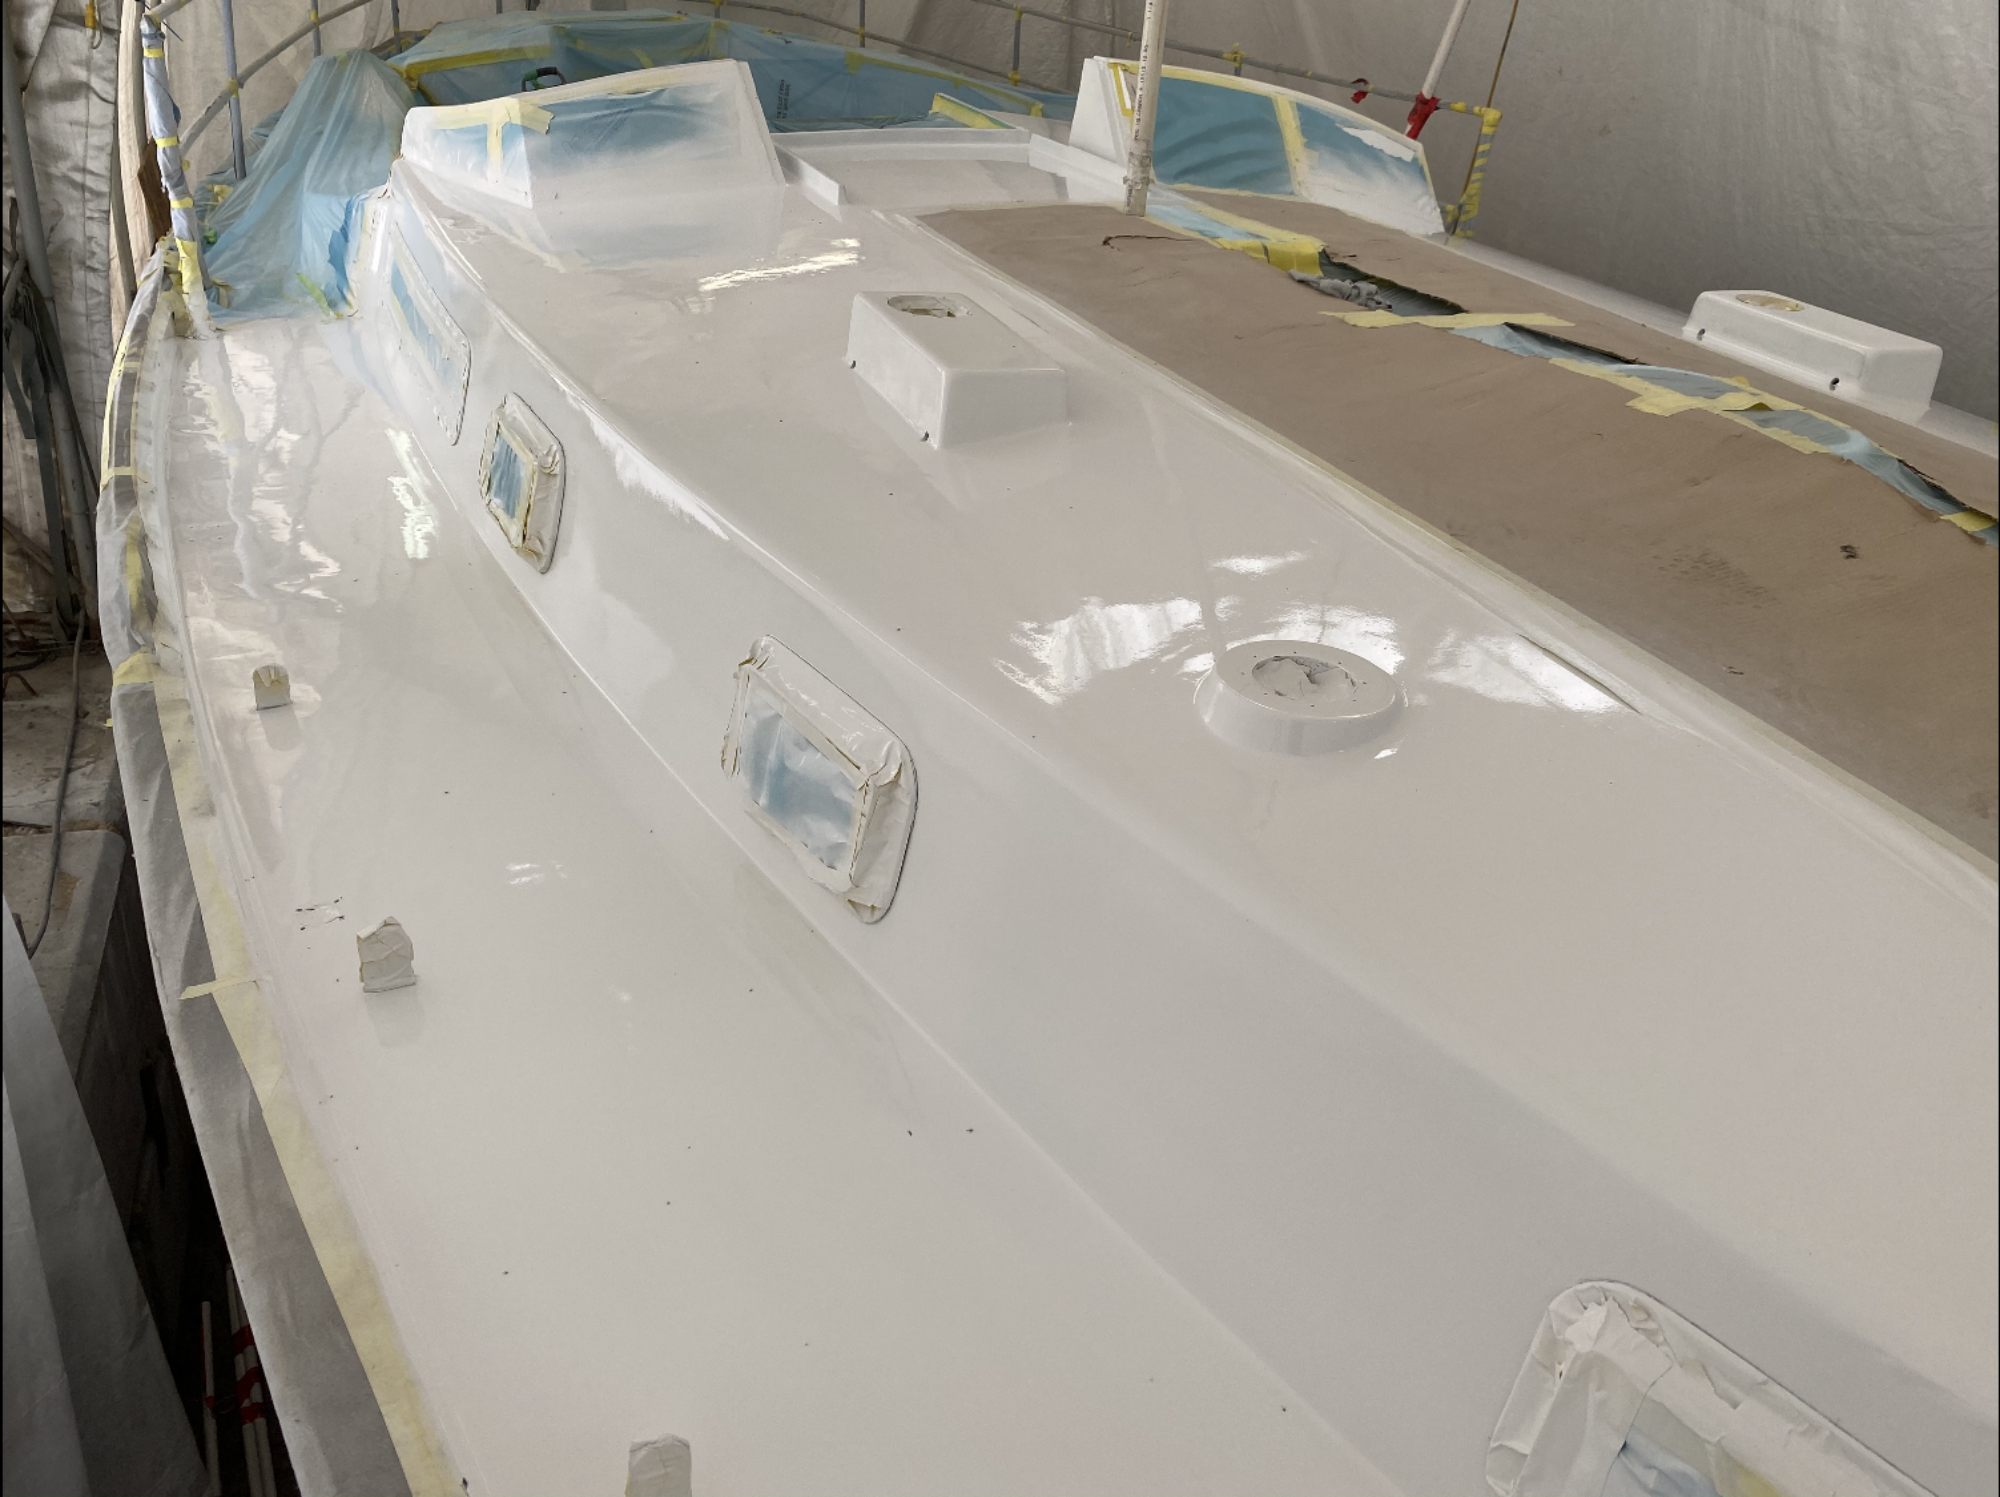
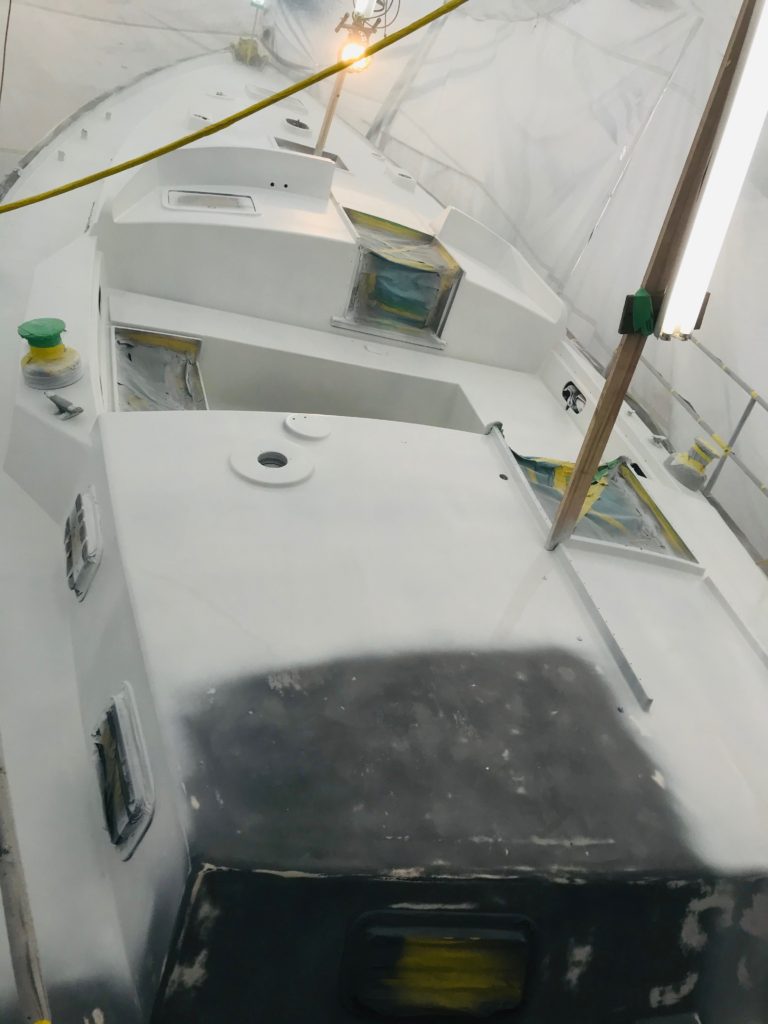
The primer they were using was battleship grey. Ugly as hell, but even seeing that was enough to get us excited! The decks are smooth as a baby’s arse, and cleaner than they have ever been!
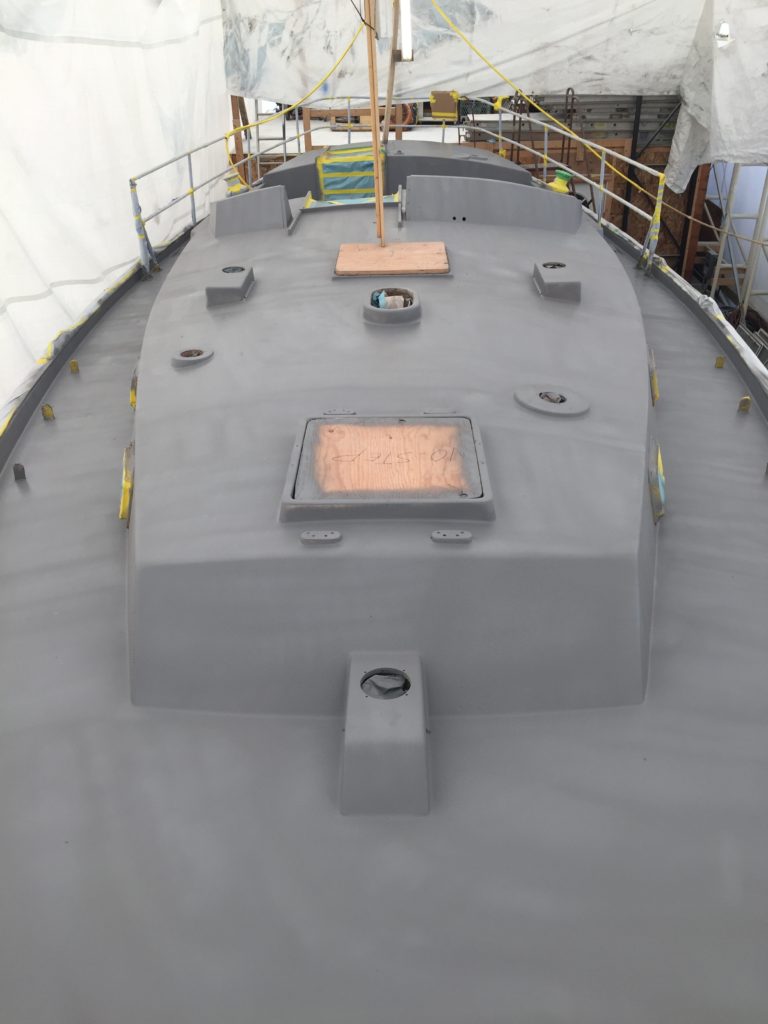
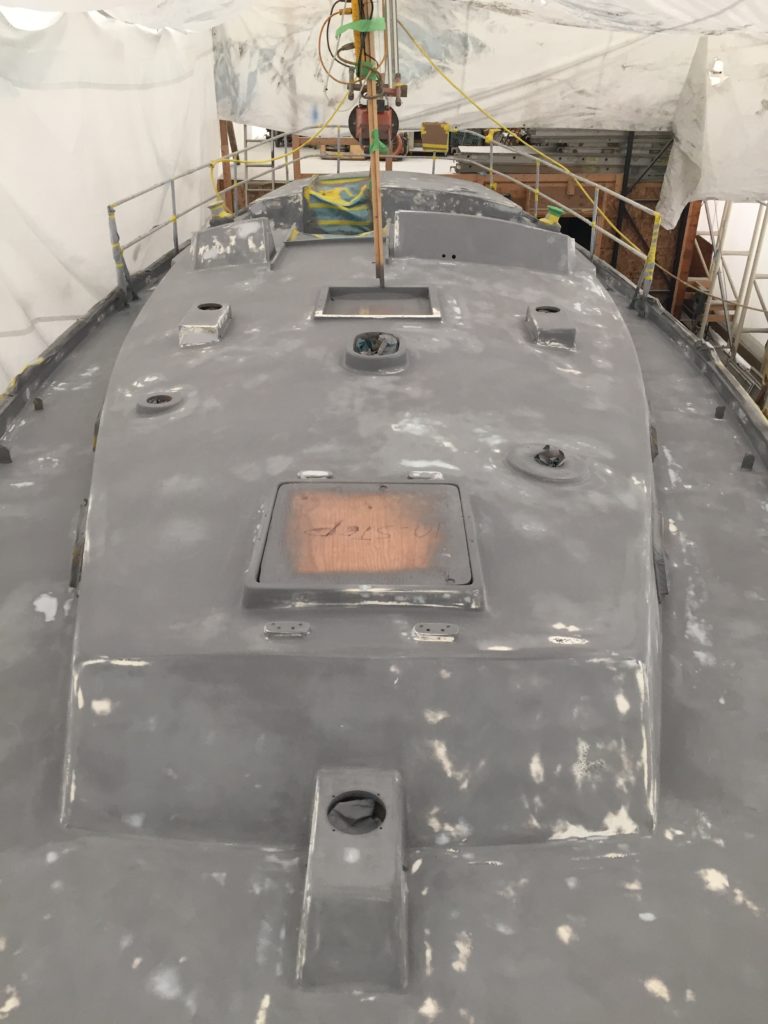
Last week they sprayed the final coat of primer, white.
My god seeing it in pictures was one thing but seeing it in person was another! It literally brought tears to my eyes!
We have been staring at the old gross crazed dirty decks for 5.5 years now. To see them clean and white was overwhelming!
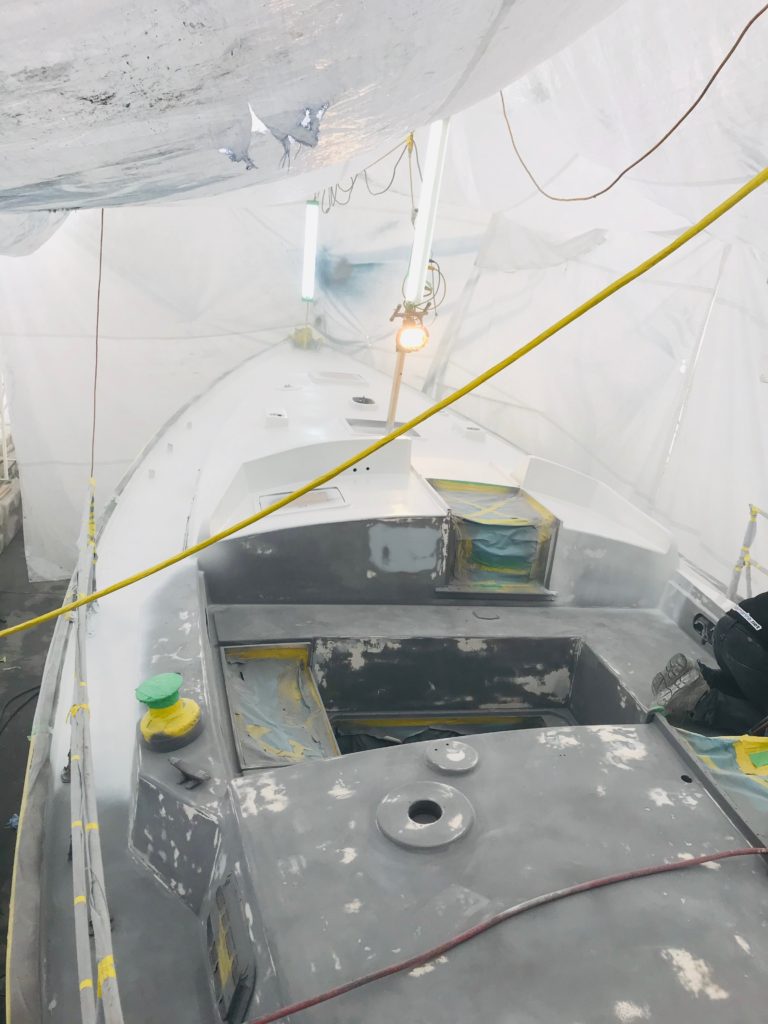
One more sanding with 320 this week, and they will spray topcoat next week. When that sets, they will mask and spray the nonskid. Can’t freakin wait!!!
We have been busy prepping the decks for sanding and eventually paint. 42 years of grime, dirt, old paint, rusted fittings etc all need to come off.
Sanding day is going to be nasty!

taken from: https://www.vocabulary.com/dictionary/pertinacious
pertinacious. If you won’t take no for an answer, you’re pertinacious. The same holds true if you stubbornly push on a door despite a sign that says “pull.” Pertinacious means unyielding or perversely persistent. We get pertinacious from the Latin pertinax, which combines per-, “thoroughly,” with tenax, “tenacious.”
This project has had many ups and downs. It has taken way longer than we ever anticipated. We expected to be sitting at anchor sipping drinks by now but we still have a lot of work to do before we are ready. To be completely honest there have been a couple of periods where we have simply lost interest. Akupara became more like an albatross than a dream. It has seemed like all we did for several years was work on her and write cheques, it has been downright depressing to say the least. We have had a few highs, the removal finally of those old stinking fuel tanks, even though the keel tank was the worst job an Akupara yet. When I finally installed the new electrical panel and had lights inside for the first time, when we installed the Cubic Mini Woodstove and had the first test fire! Those day were fun.
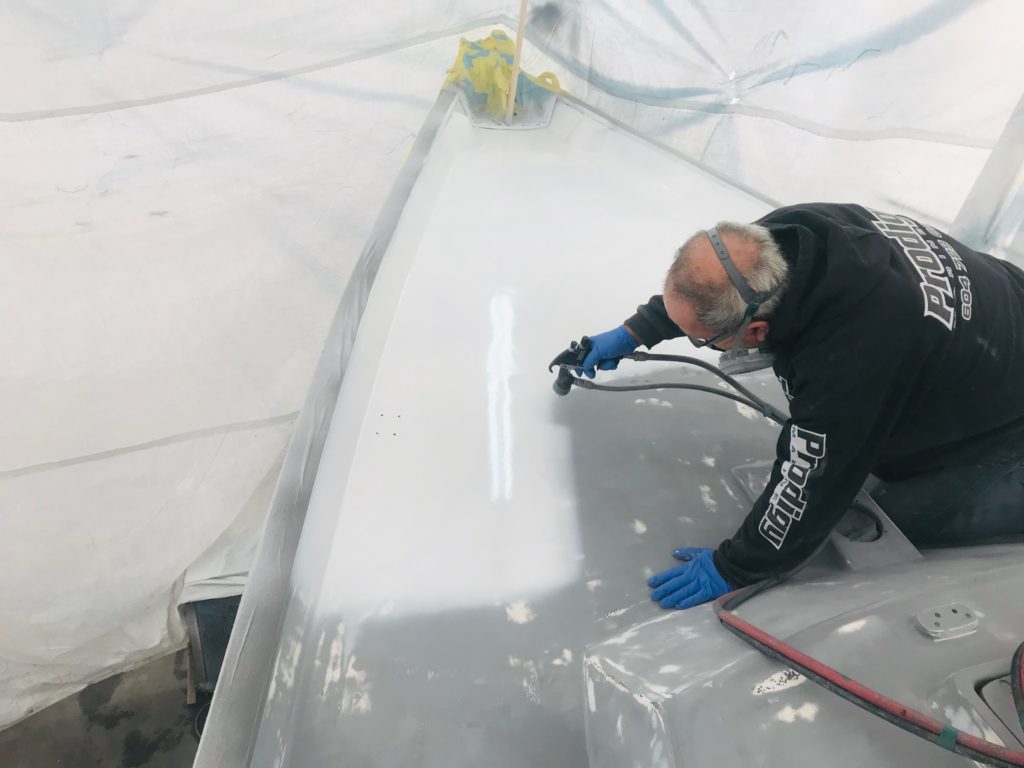
The biggest transformation and probably the most exciting has been the painting of Akupara’s hull! It took damn near 2 years but when it finally happened, my god, she is beautiful.
For the first time ever since owning Akupara, I had a small panic attack as we were removing the lifelines and a turnbuckle fell overboard dan near scratching the hull. That is a monumental step forward!!
So what has kept us going? Good question?
We have had many of these conversations over the last few days and we have now made it a priority to try to remember all of the reasons we started this project in an attempt to rekindle the fire! We have been talking about everything we enjoy, and everything we miss about sailing and generally being out on the water. With each new memory (things remembered) we can slowly feel the fire coming back.
It is of the utmost importance that now, especially now, we concentrate on all of the good things in order to make it through! If all goes well we have less than a year to finish her and get her in the water! It is just like running a marathon, you are tired, your feet hurt, your legs hurt, you are out of breath, you want to quit, but then you see that finish line and all of the negativity leaves and somehow you find the extra reserve of strength to push even harder!
Let’s hope we can find that last little bit! It’s time to get busy again!!
So are we pertinacious, or is there such a thing. Somehow I think that anyone who is described as such, consciously chooses to focus on the end results as opposed to the darkness and the hurdles that are immediately in front of them and I think they spend a lot of time forcing themselves to do so!

 As we approach the 2 year mark the Admiral is still smiling. Hmmm maybe we should buy a bigger boat?
Sometimes I wonder if we had just saved all of our dimes and nickels for all this time, we probably could have a bought a working version of Akupara by now. But then again, we would have an unknown boat with all kinds of yet to be discovered issues. At least with Akupara we will be 100% intimate with every nut bolt screw wire fixture fitting piece of wood rope material and know for sure that if and when there is an issue exactly how to fix it.

The realization has started to set in that we may need another year on the hard to complete Akupara’s refit. There is a battle raging in my head as to whether we launch without being 100% finished, or if we wait until we are 100% finished. The issue is several fold. On the one side, if we gave the old Lehman a tune up and completed enough jobs to at least look complete, we could spend the summer on Akupara while she is afloat, working on the jobs that still need completion. On the other hand, it would basically amount to 3 lost months of work as when we are at the dock, there at times can be a bit more socializing than working going on. On the other hand, if we wait to launch, we can complete more of the jobs we have scheduled, like replacing the Lehman etc.
Of course life has a way of getting in the way as usual. Braces, college tuition, school trips. All these things add up to subtract from the refit budget. Another year would help ease that financial pain.
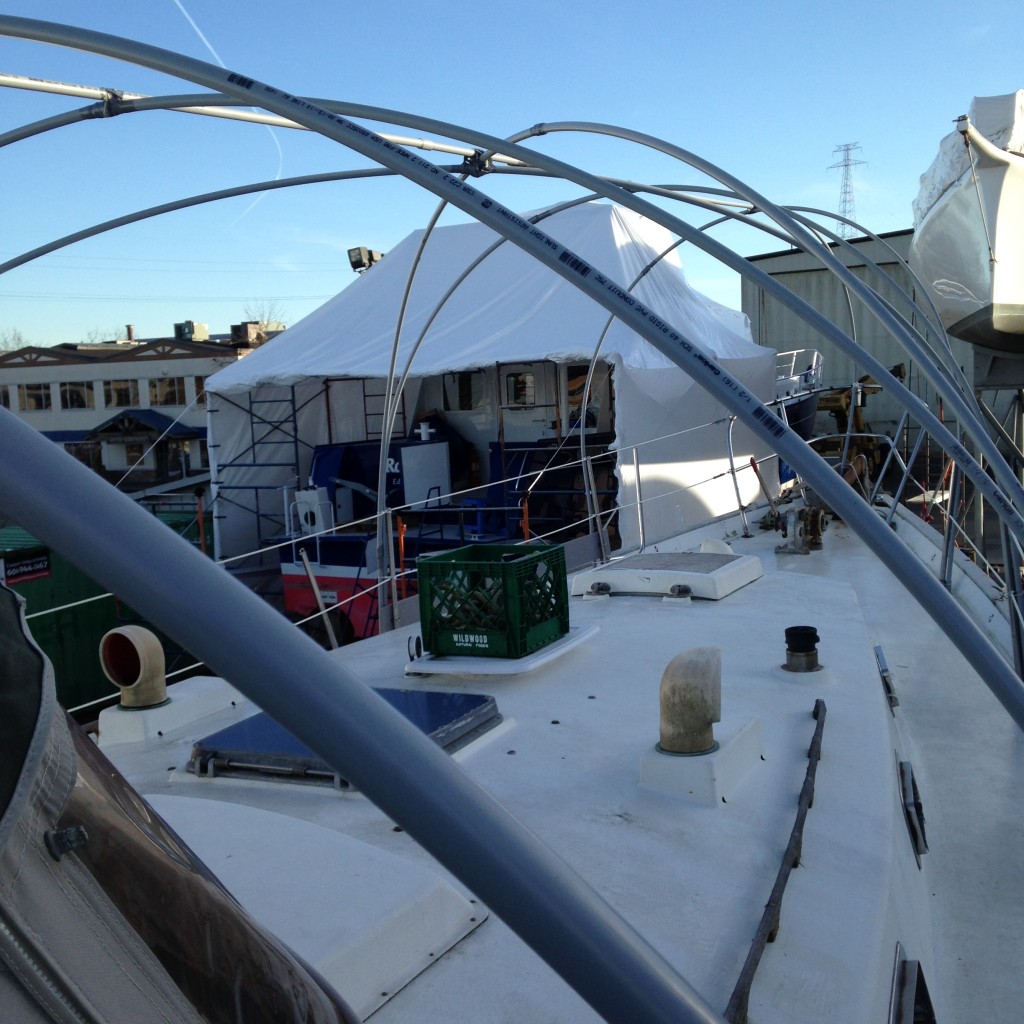
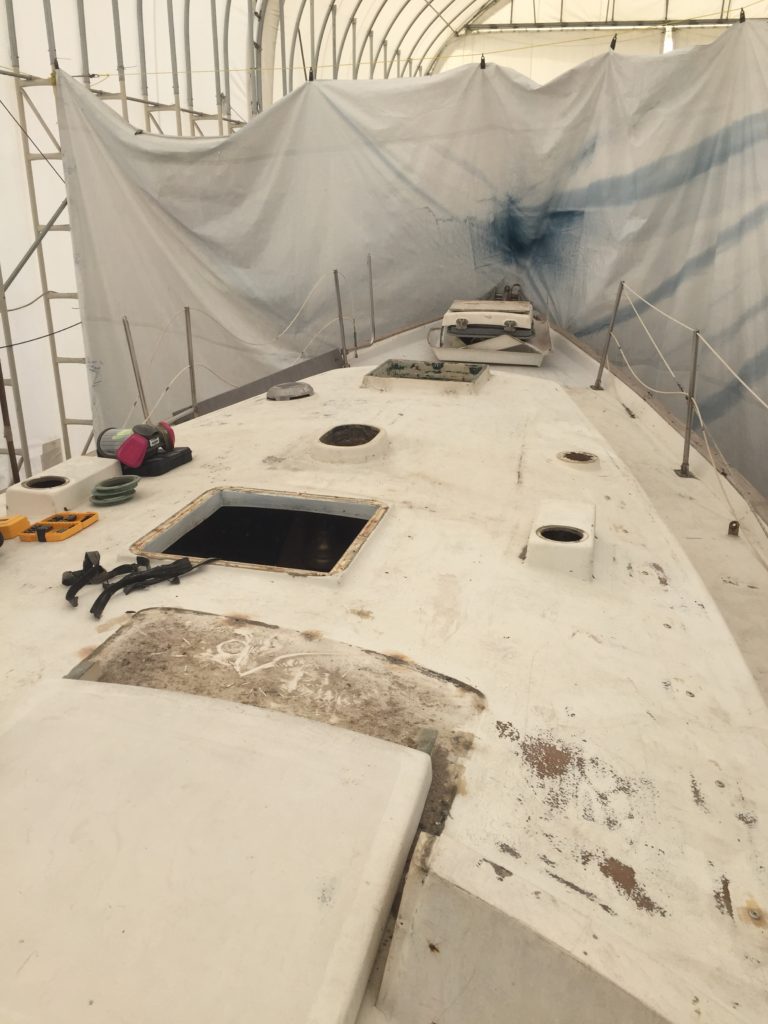
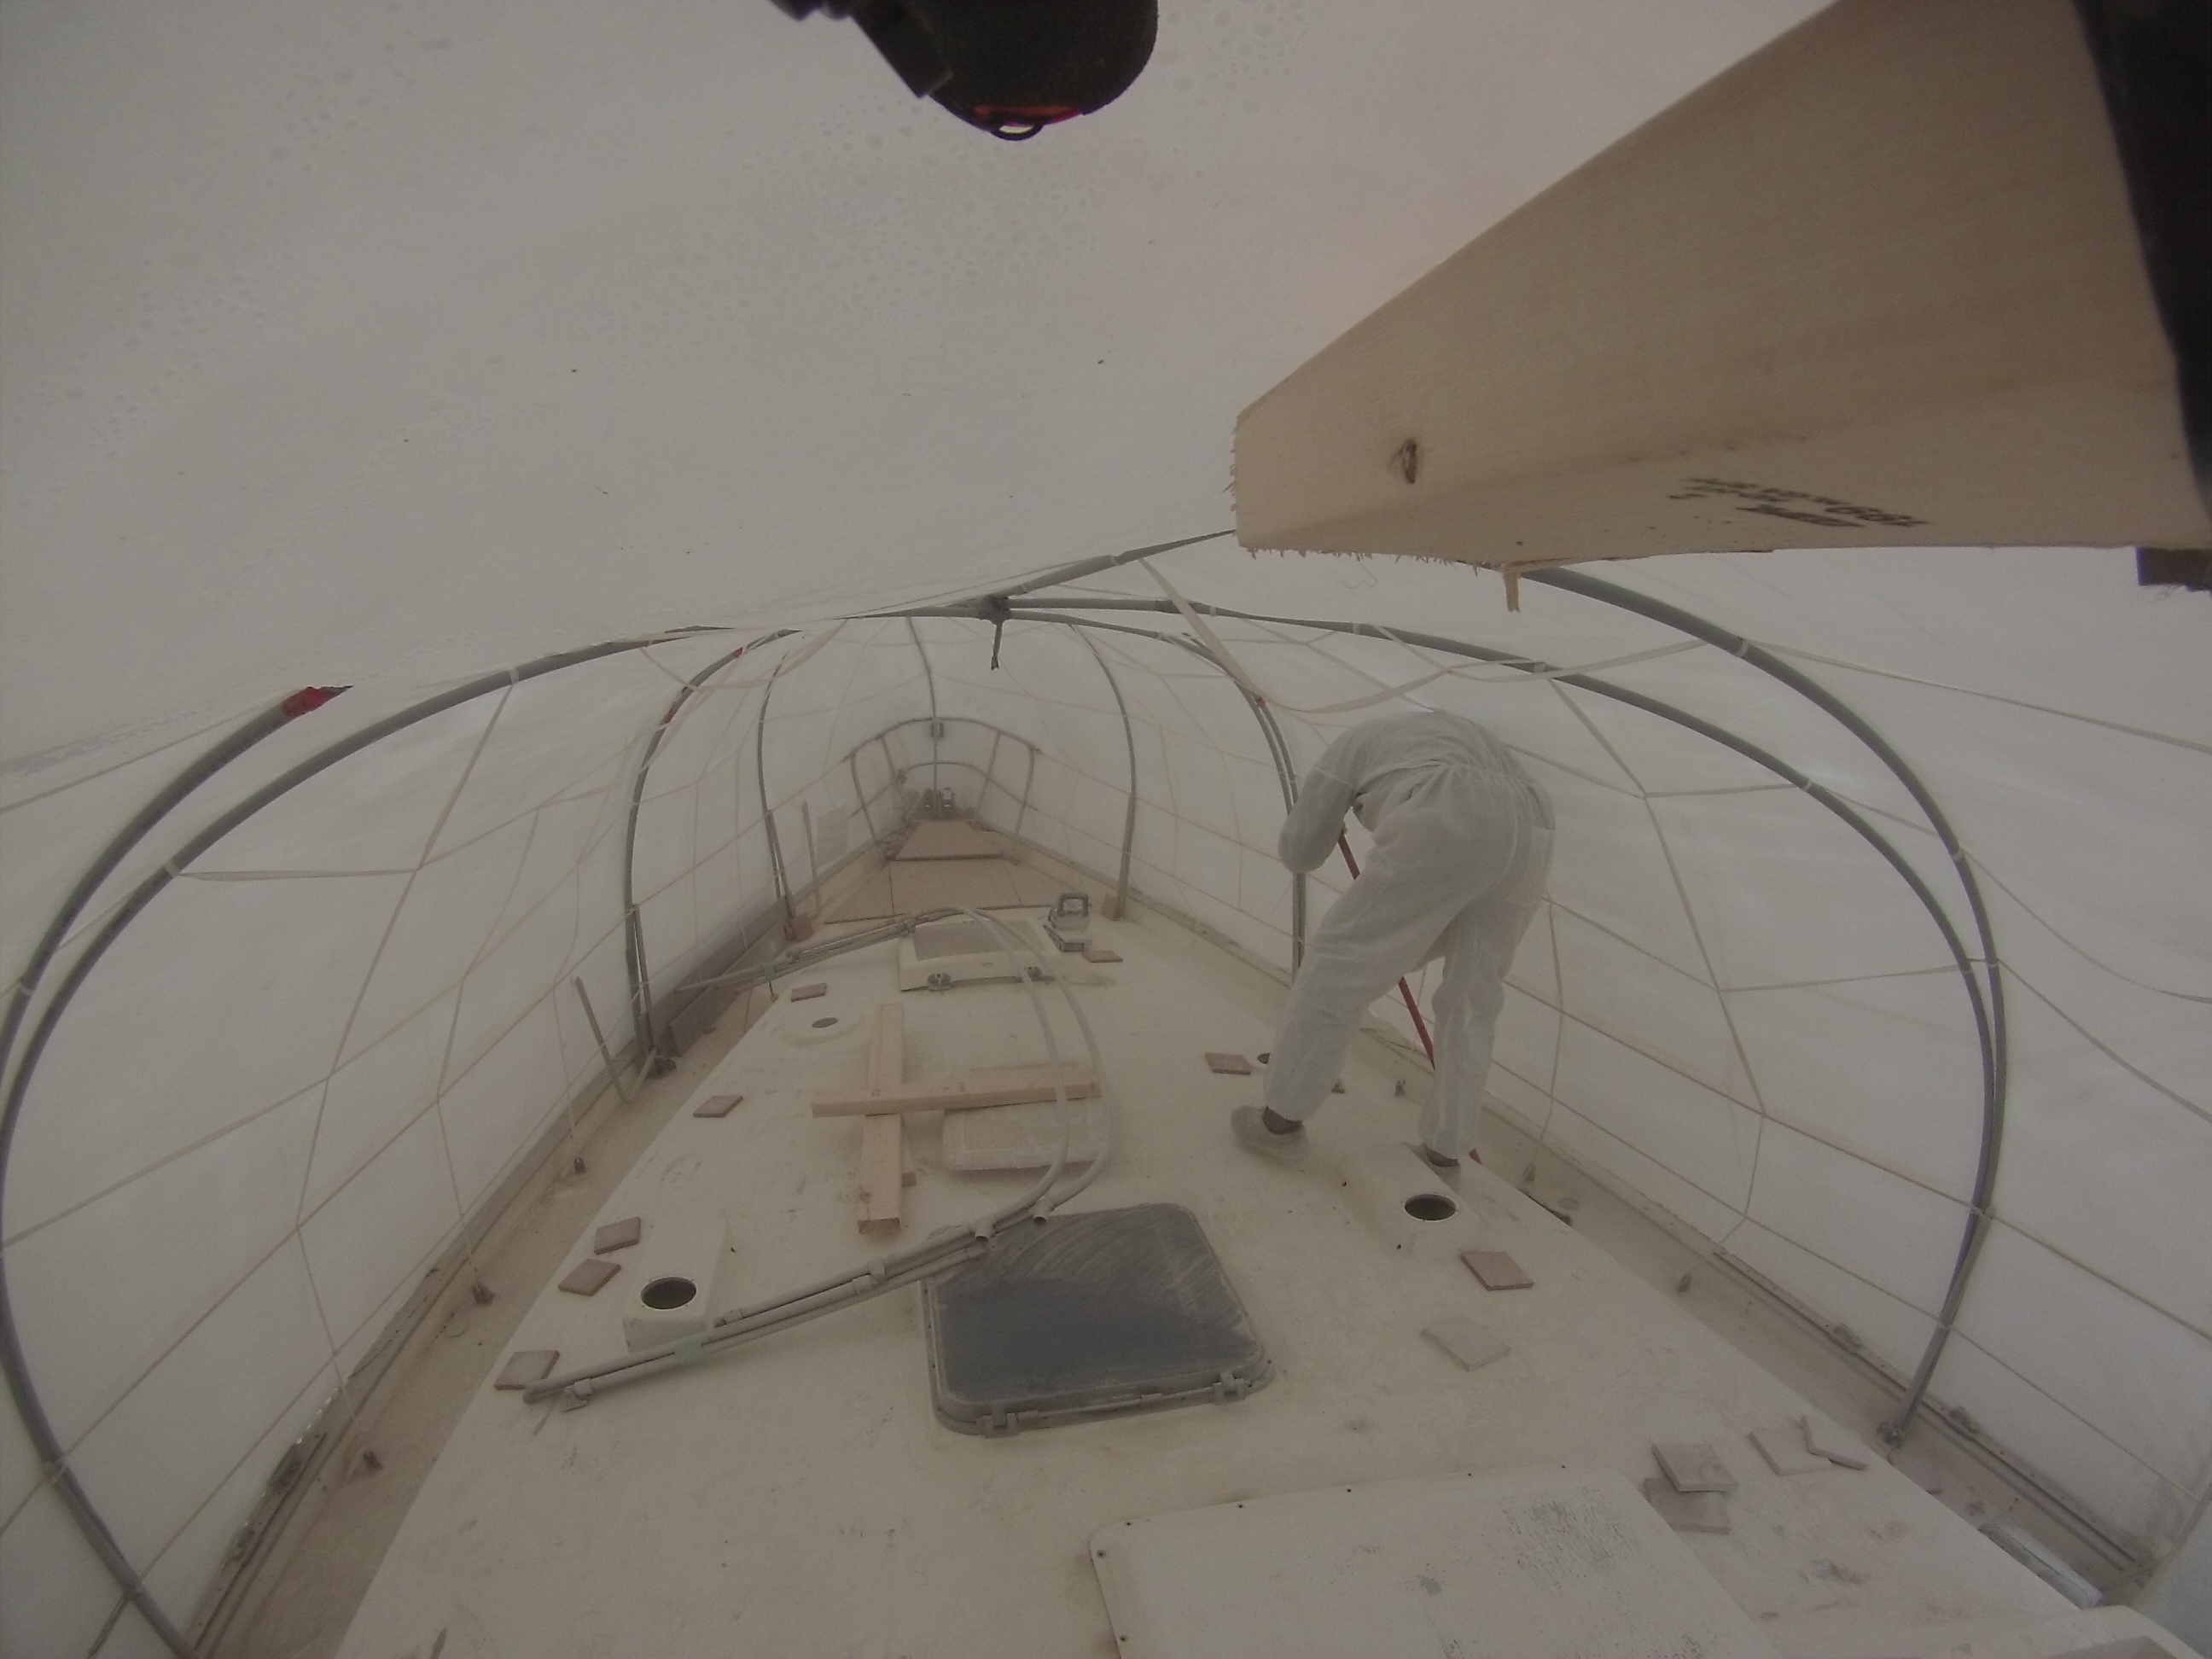
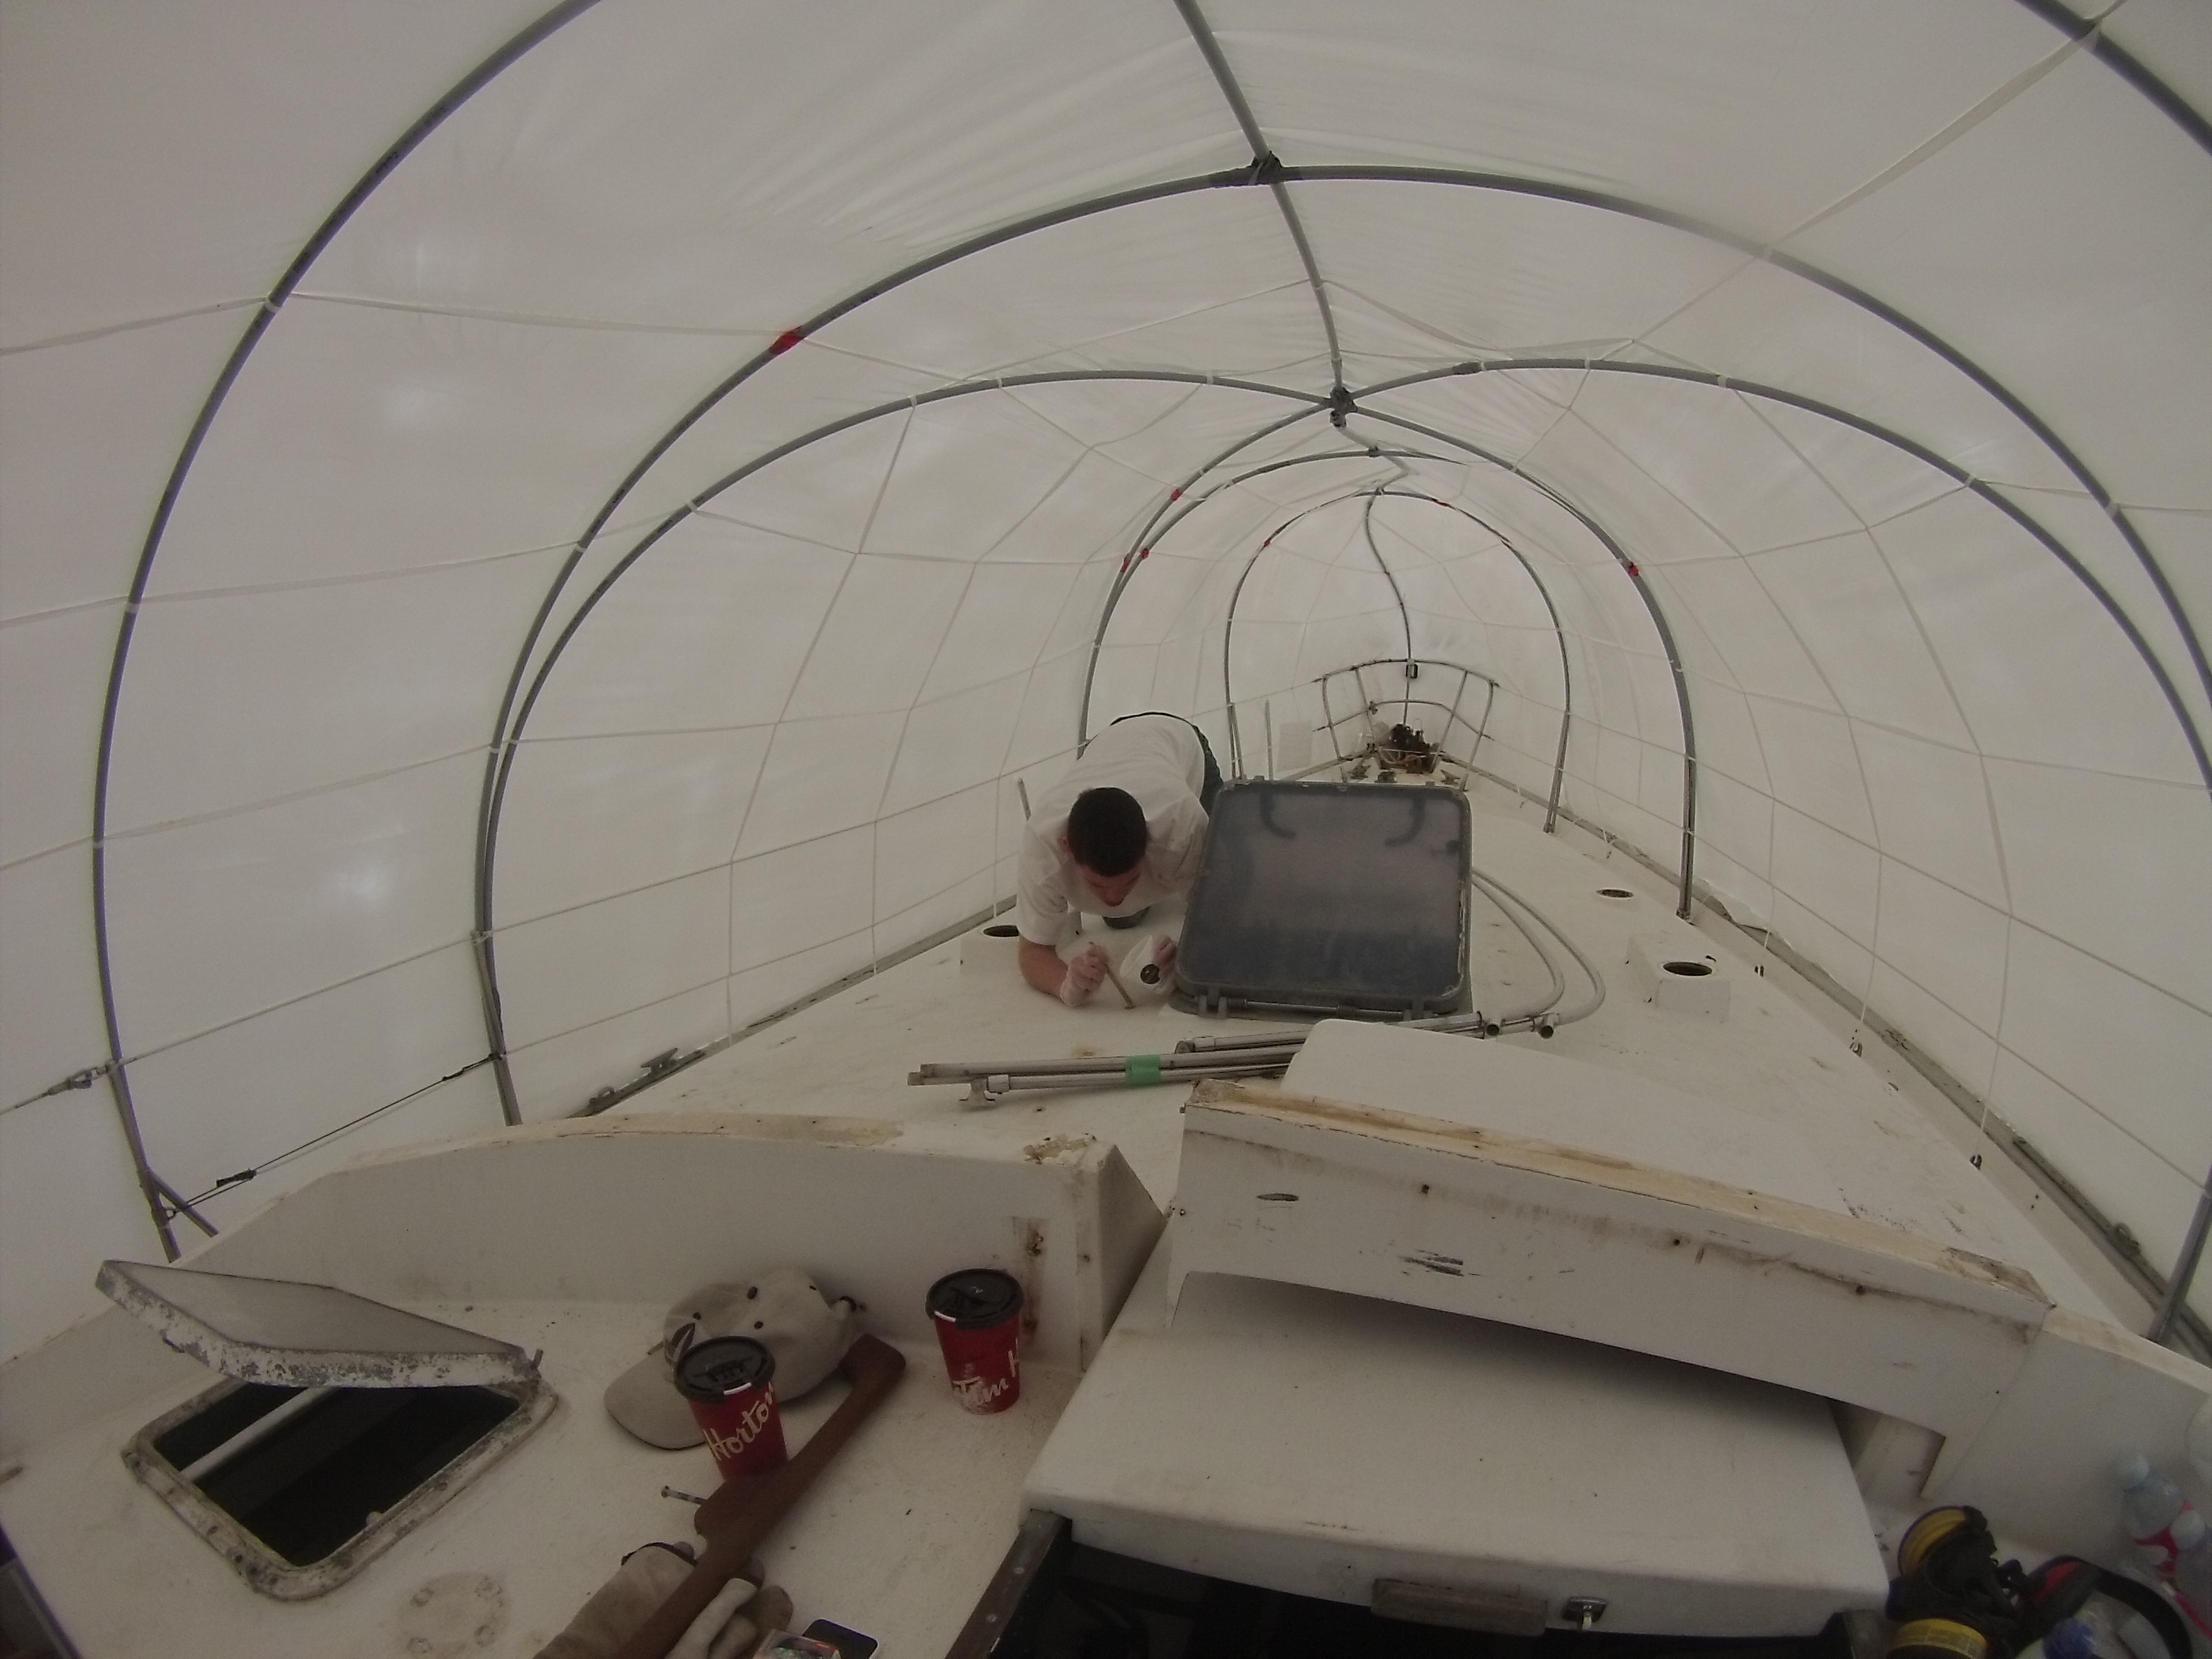
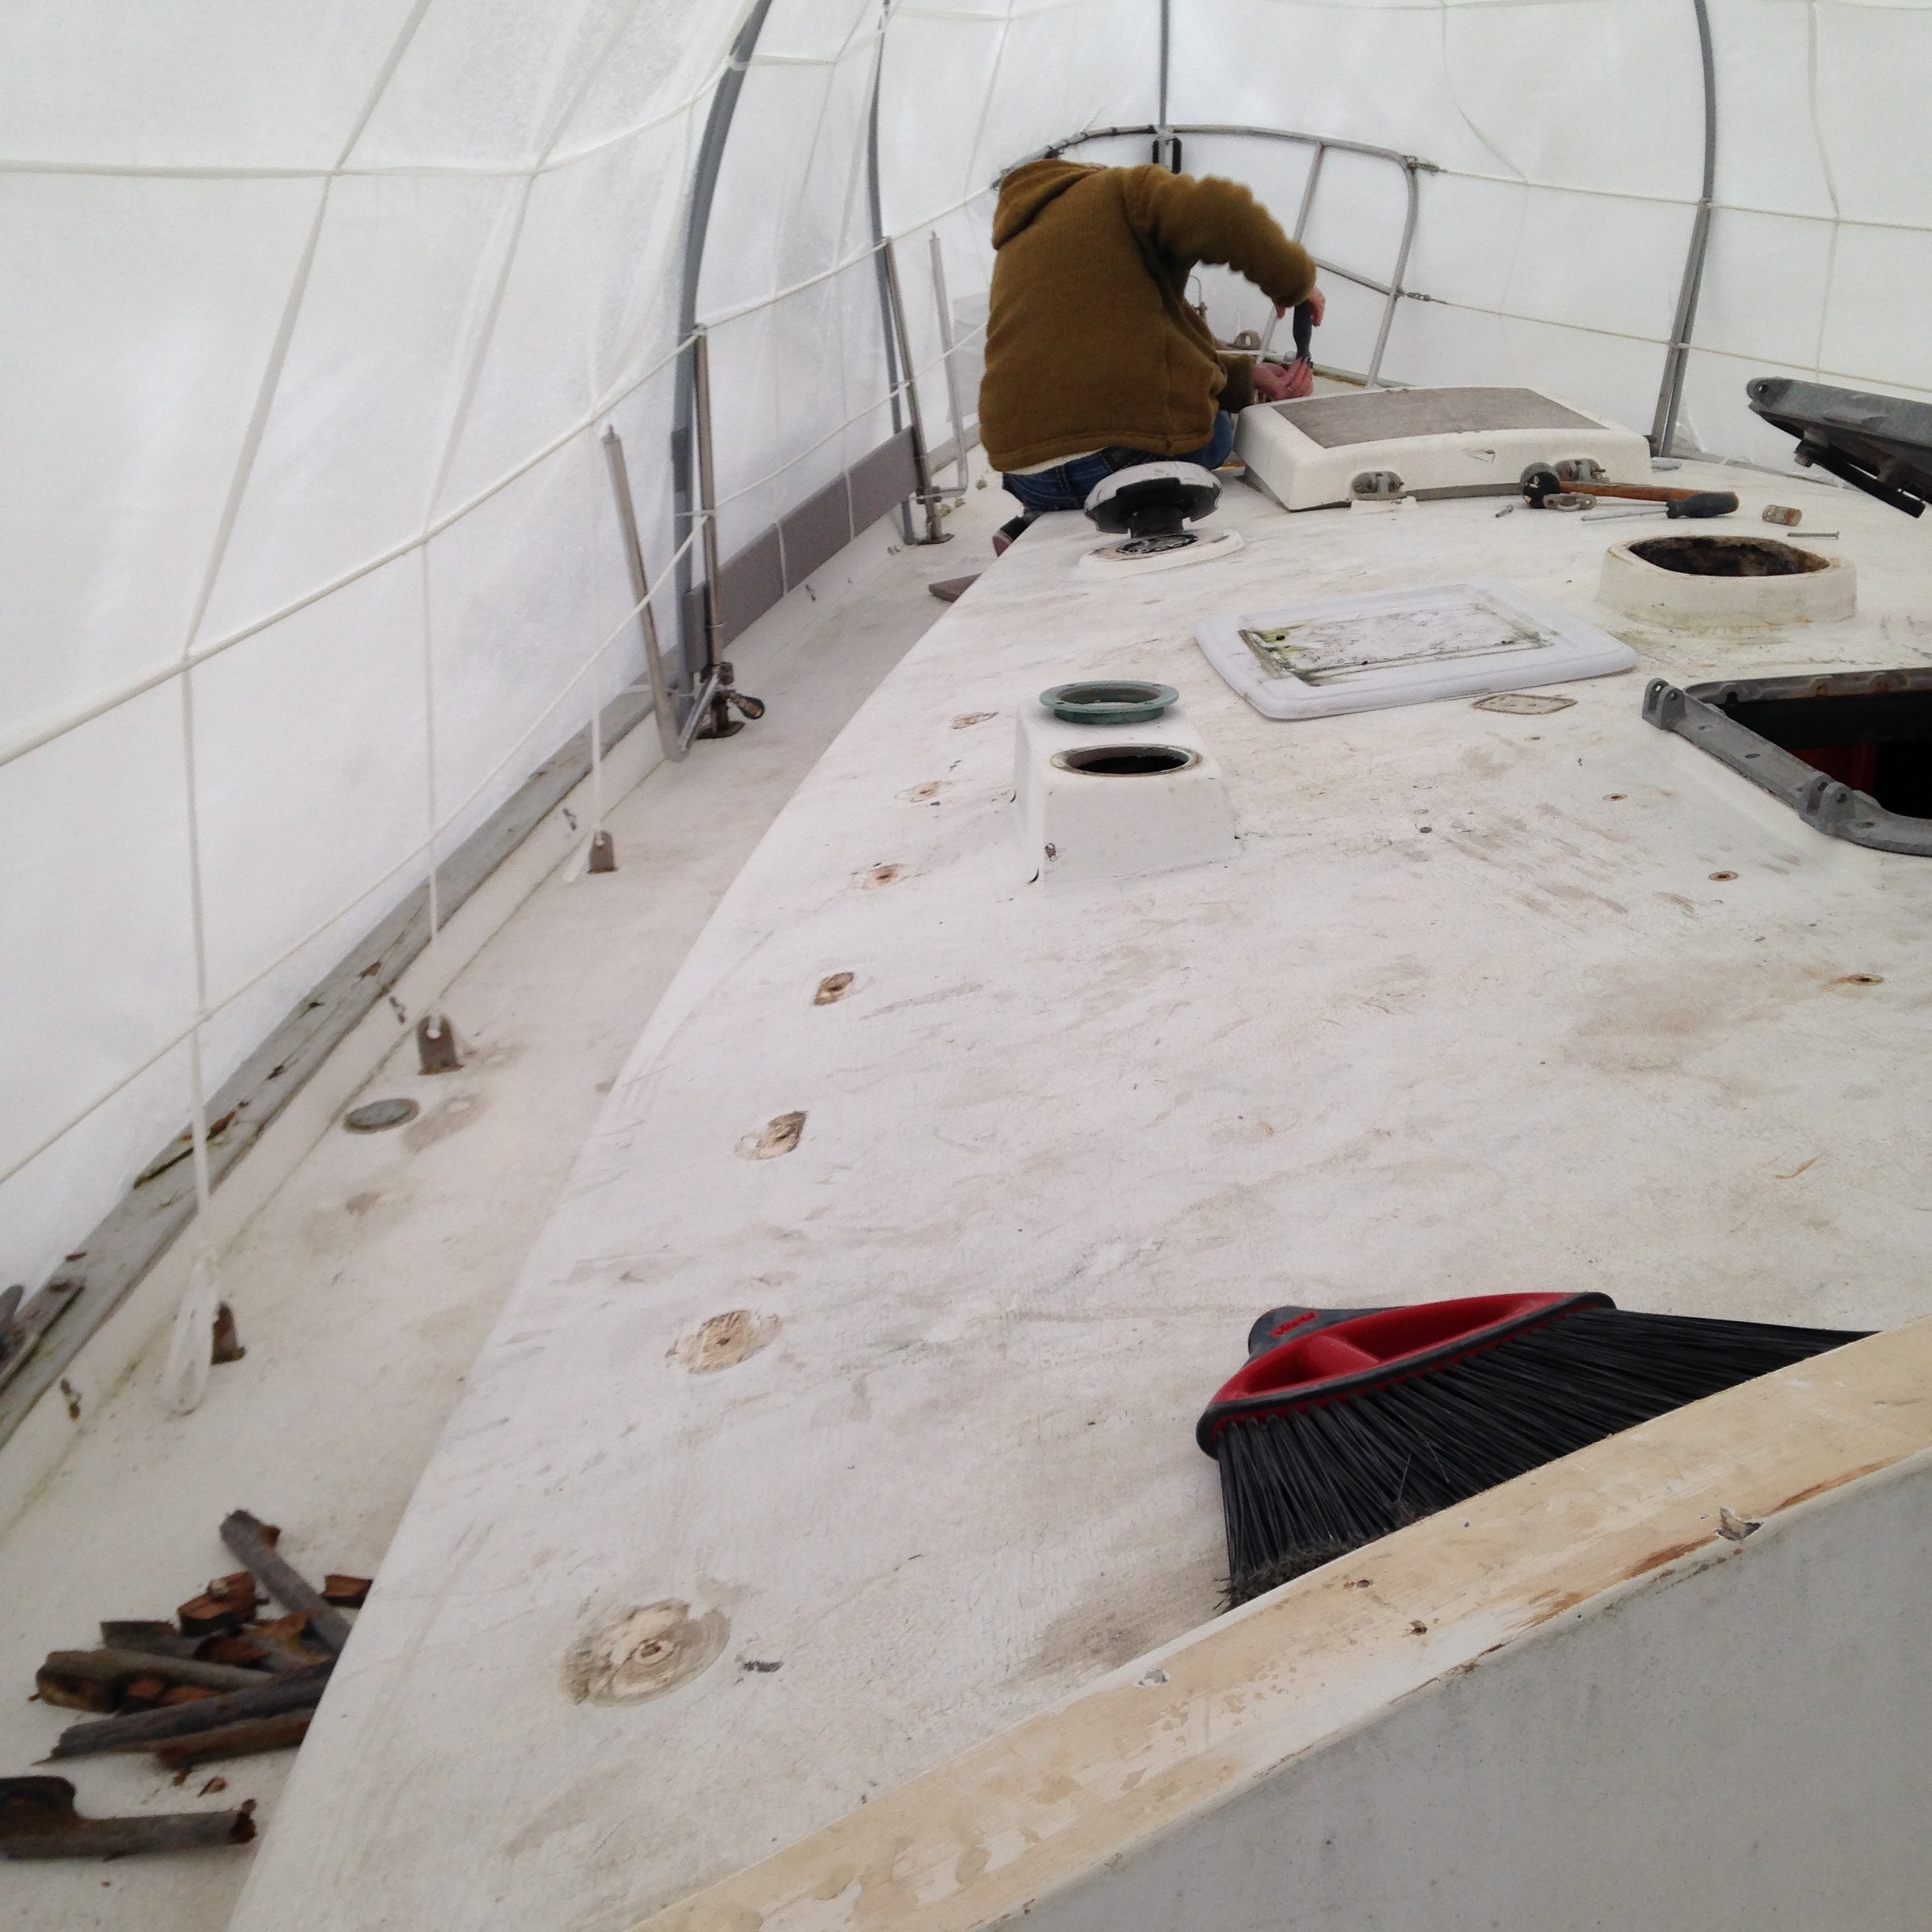
I am about half way complete sanding the decks. I still have the aft cabin area, and the cockpit to do. Not to mention all of the stanchions still need to come up. But, the majority of the decks have had a good rough sand with 80 grit. The shrinkwrap cover is a blessing and a curse at the same time. It allows us to be dry and get a lot completed but it makes it very difficult to work on deck as you can only stand up in the centre line and have to crouch somewhat on the sidedecks.
We will continue slogging it out for a while yet, but there may be a change of course coming up. It would be nice to feel Akupara move a little bit in the water.
We arrived at Akupara late yesterday and it was cold and raining of course. Andrea set about working on the last of the sanding and I was at a bit of a loss as to what I should do. We had stopped and picked up sandpaper including some 80 grit for the belt sander, and I thought what the hell, need to find out sooner or later if this is going to work. So, I started a test spot on the main cabin top and that quickly developed into rough sanding the entire top. It took me approximately 3 hours to complete the horizontal surface. Not bad. I will have to go back and get into some of the tighter places with a palm sander but for the most part it is sanded enough to apply an epoxy primer. I still have lots of work around all of the stanchions etc so the side decks will be a while yet. I calculate that one good day with the belt sander and I will be able to complete all of the large surfaces. It will probably be another complete day at least with a palm sander to knock down the harder to reach areas.
I spoke to a rep from Interlux paint at the boat show and he advised me to use a two part epoxy product and paint that is perfectly legal in Canada but for whatever reason is not sold here. Looks like I will have to head south to get some.
The plan is to use 80 grit in order to provide good adhesion for an epoxy primer. Then knock that down with a finer grit, and quite possibly a third time as well. Then it would be ready for paint.
Because this is such a giant pain in the ass job it is easy to want to take shortcut but any pro painter will tell you, the trick is in the preparation. Guess the sound of sanders is still in our future for a while yet.
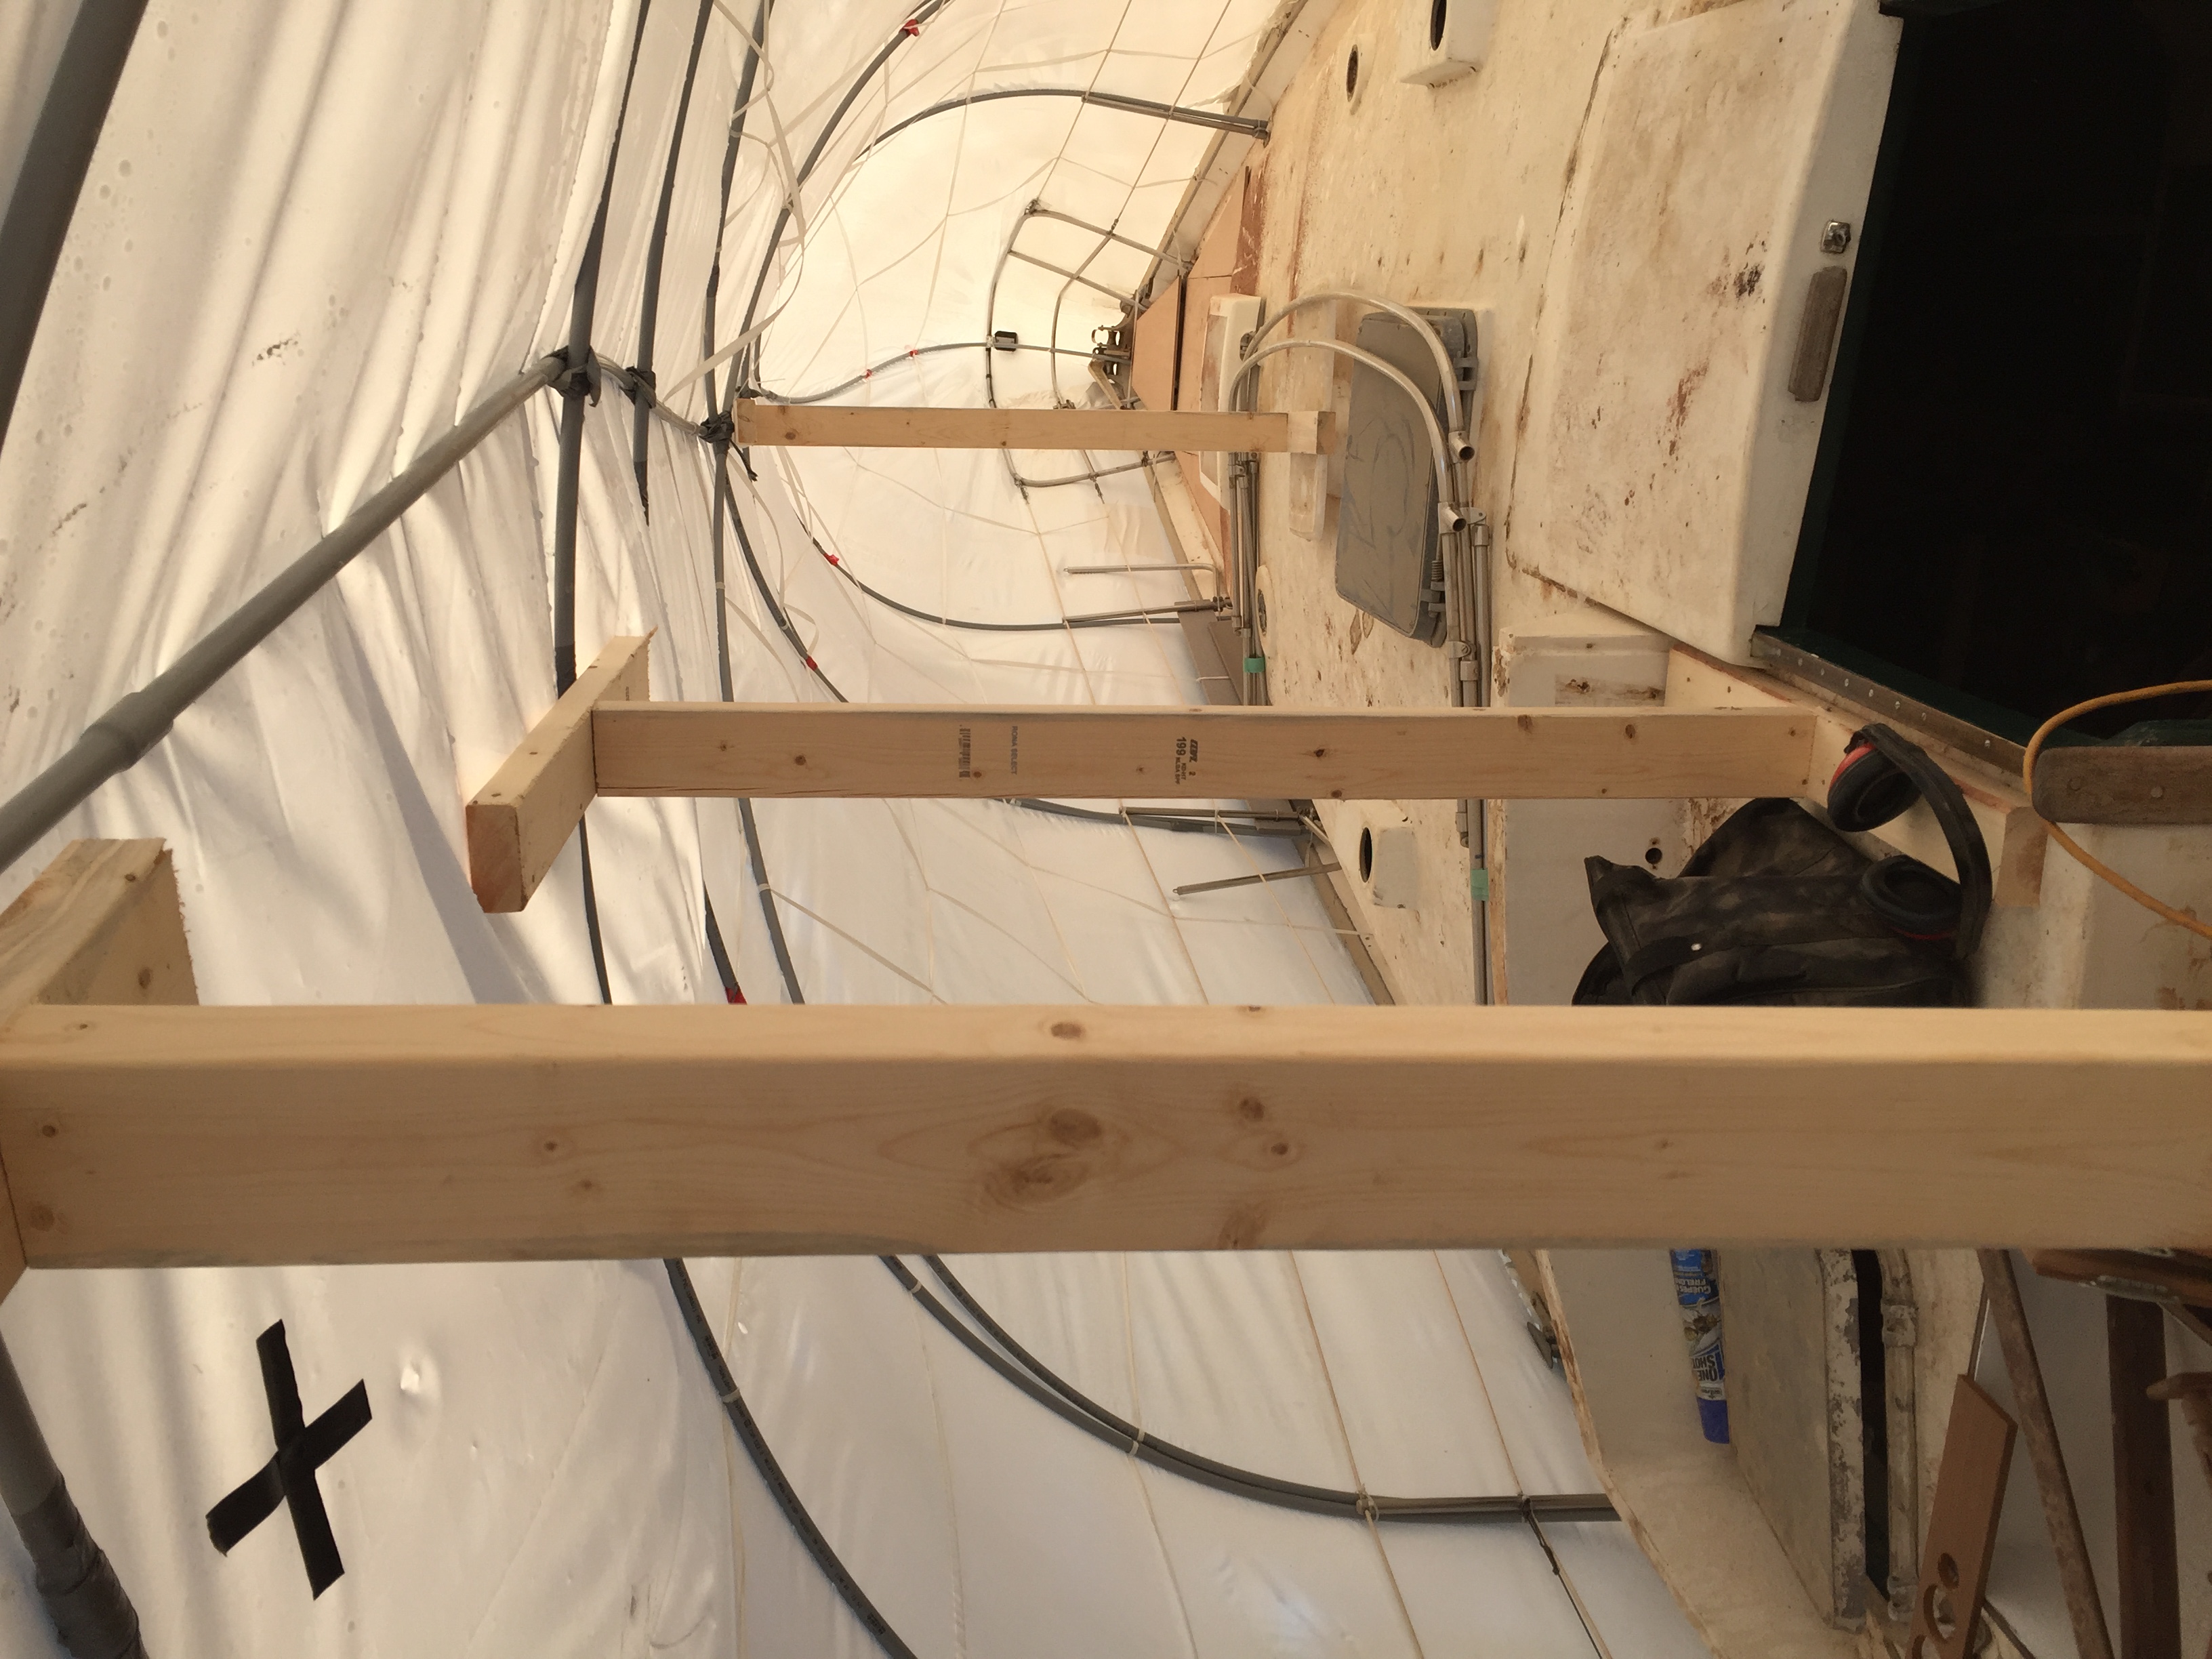 With a little help from my 2×4 friends we have managed to keep the sky up for now! It really did not need a lot of help but these 3 supports will at least keep the center up if nothing else. As you can see in the picture, Akupara’s poor old decks are covered in sawdust. Not long now and it won’t be sawdust it will be gel coat and Fiberglas dust as we transition to sanding the decks.
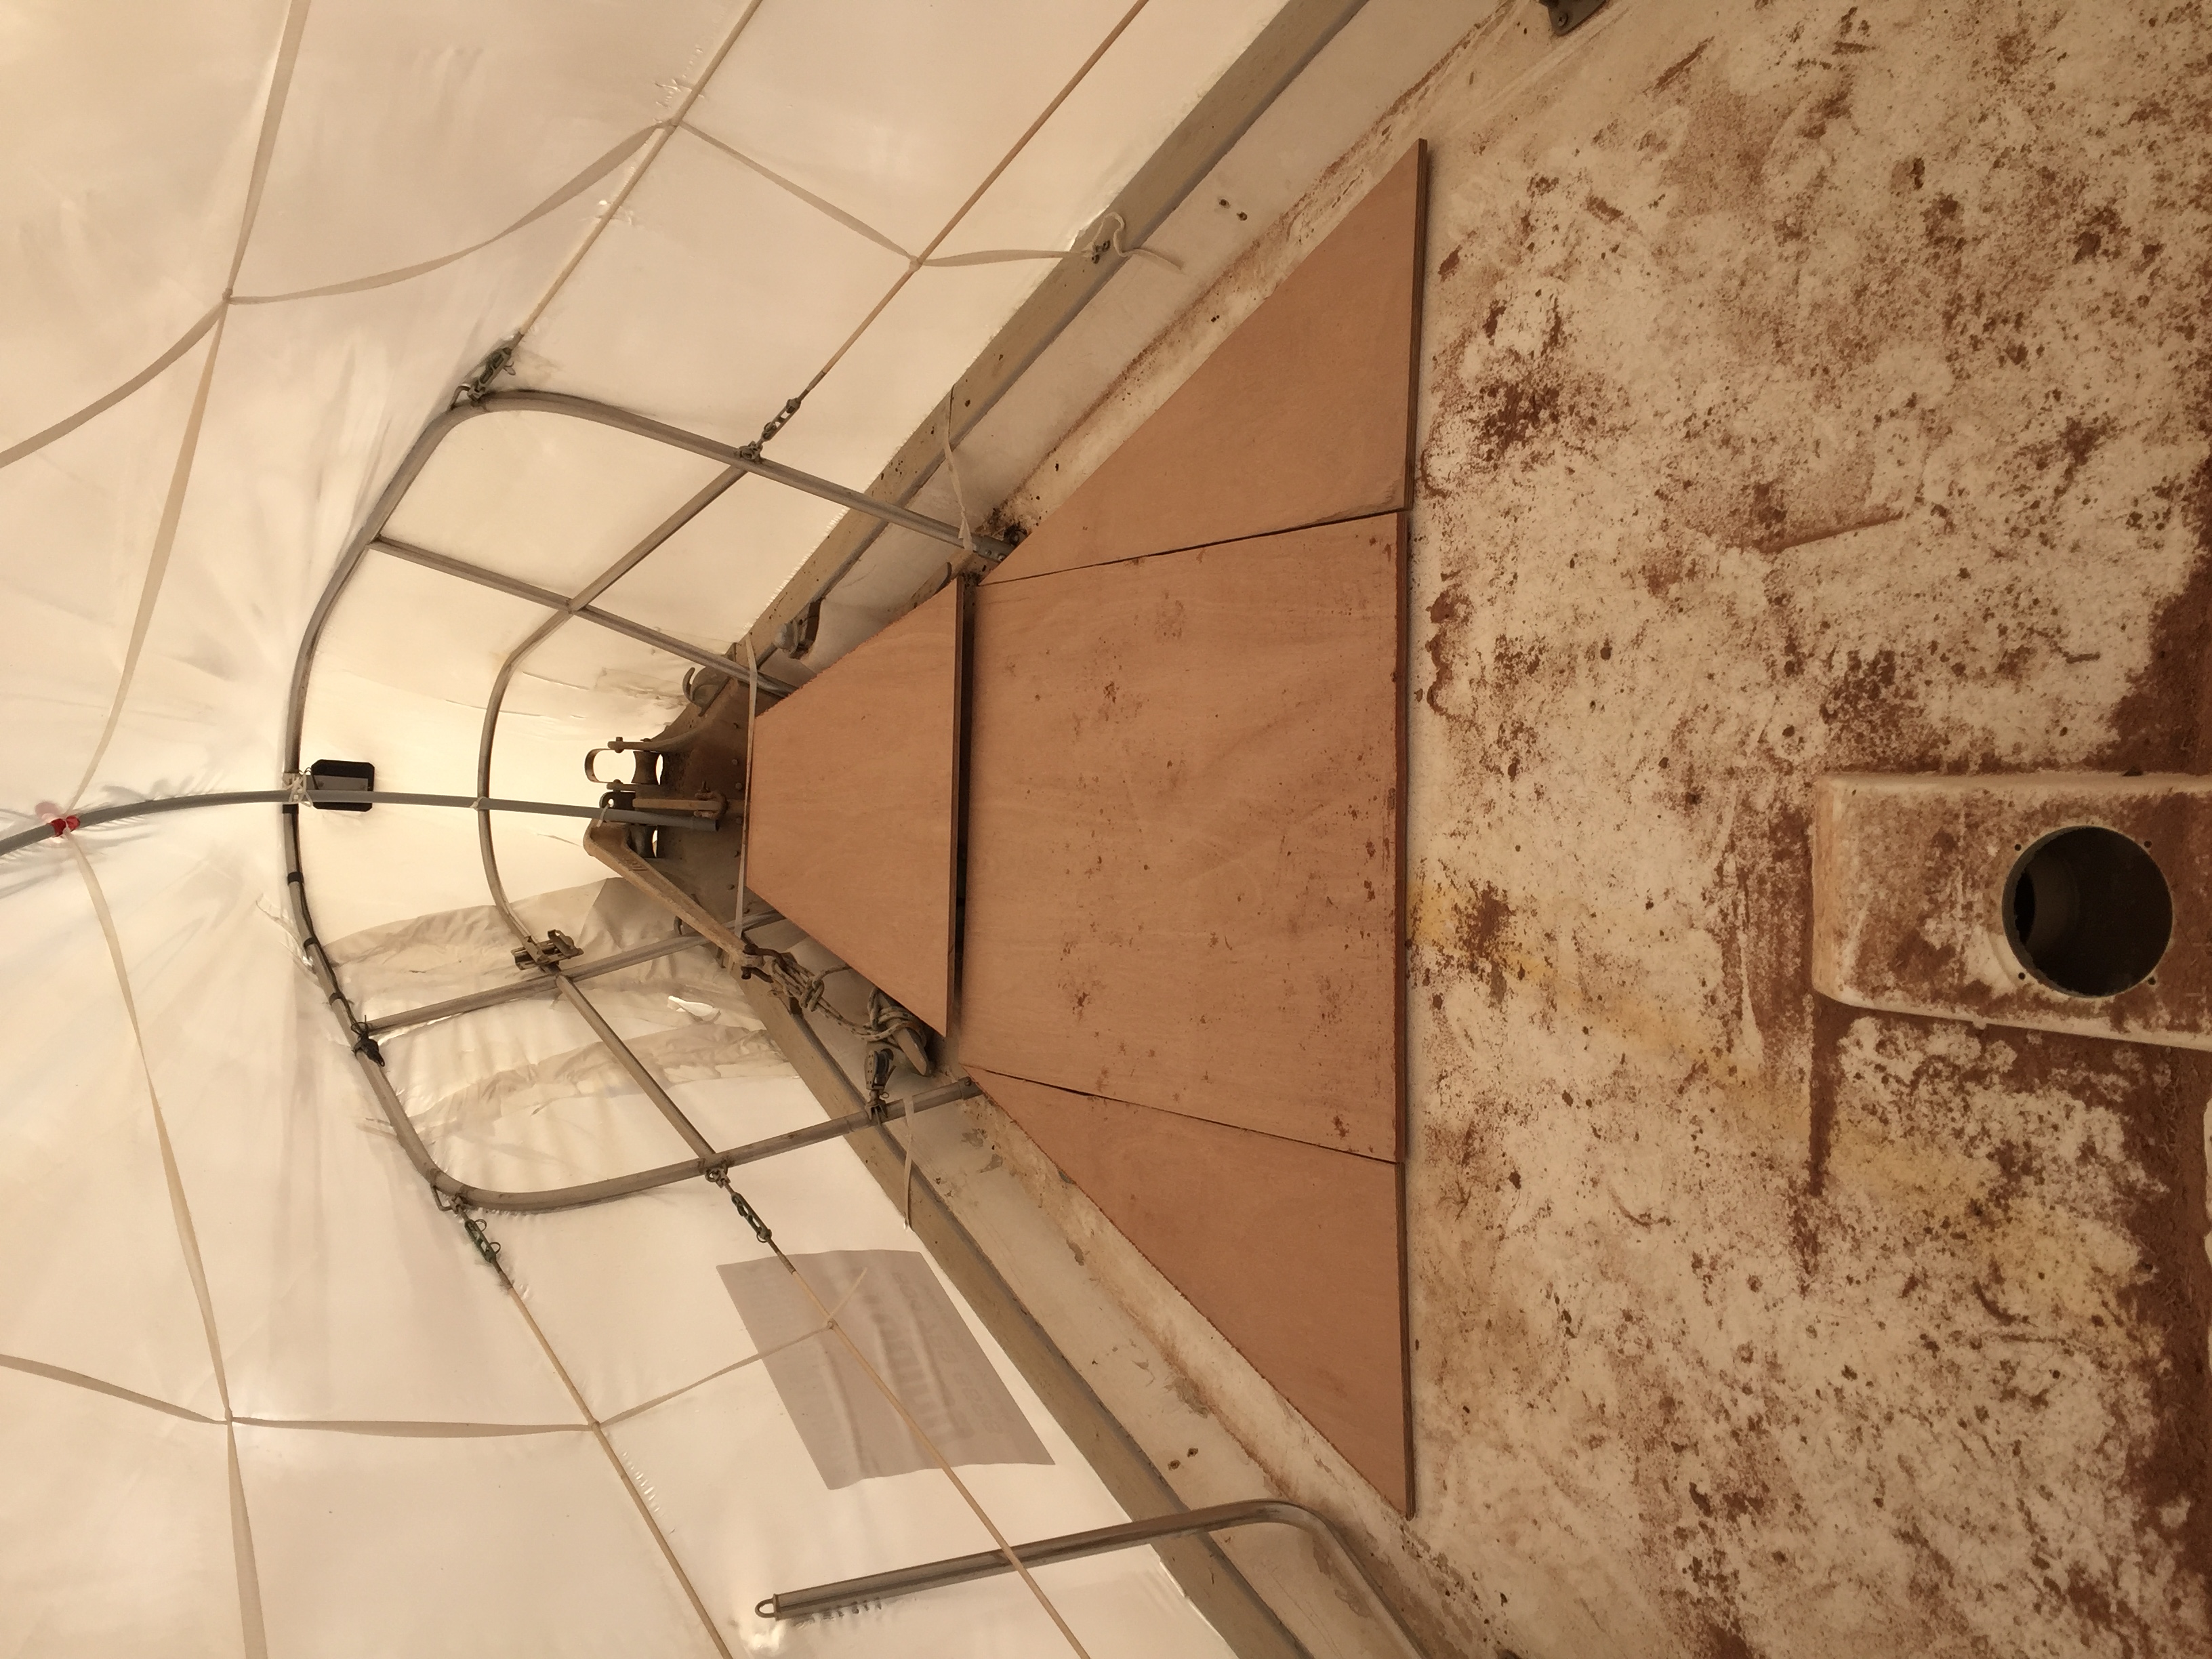
I have started to cut some of the known pieces to do the re core. We have had marine plywood start to accumulate from all of the other projects and the scraps I have been saving for all of the areas we will need to recore. I anticipate having to purchase a couple more sheets for the interior yet so we should have lots left.
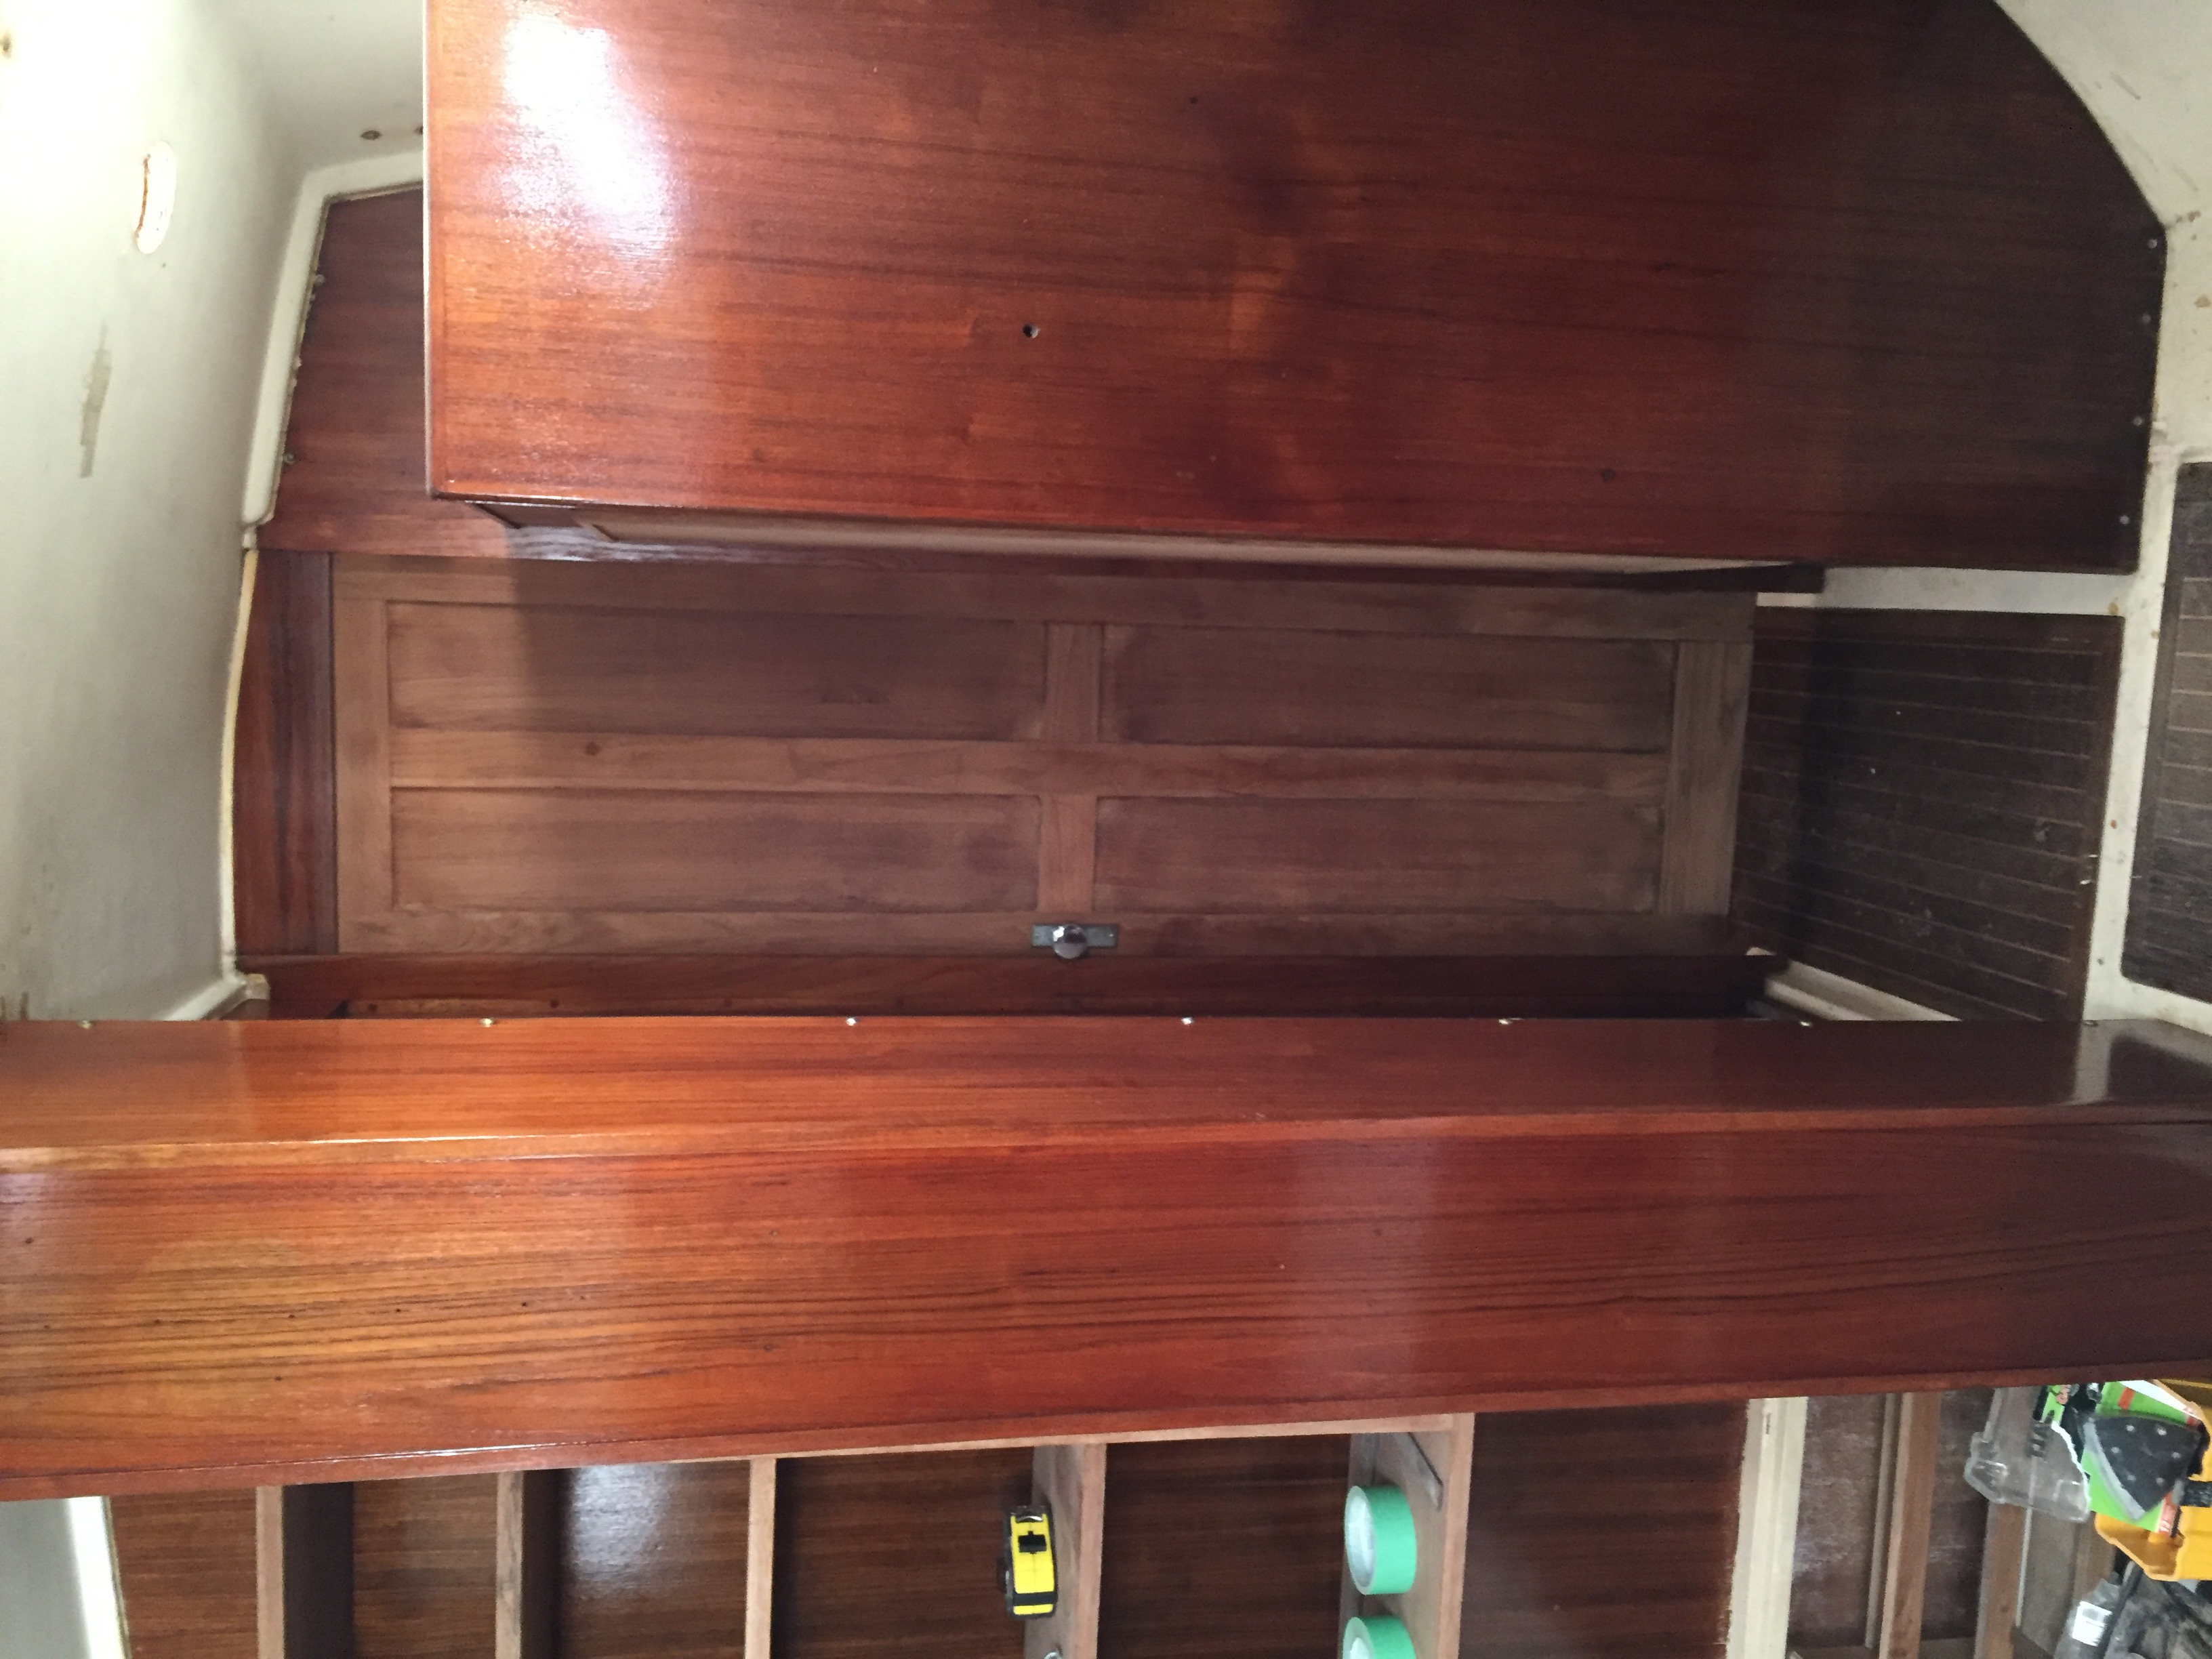
I also managed to get the vberth door sanded and hung, only 2 doors left now and we will have no more big pieces left to sand.
Of course we still have a lot of small pieces and trim etc but we are actually coming down to the end of sanding wood. It will be nice when it is finished. Paige has volunteered to come and help us this Saturday so we should make a little extra progress.
Next weekend is the Vancouver Boat Show so not a lot of work will get done. I will write a post about our findings when it is over.
As an aside you may have noticed that we have not been staining any of the pieces we have sanded lately. This is simply due to the temperature inside of Akupara, it is too low. Hopefully it will be a little warmer this weekend and we can get the wood stained.
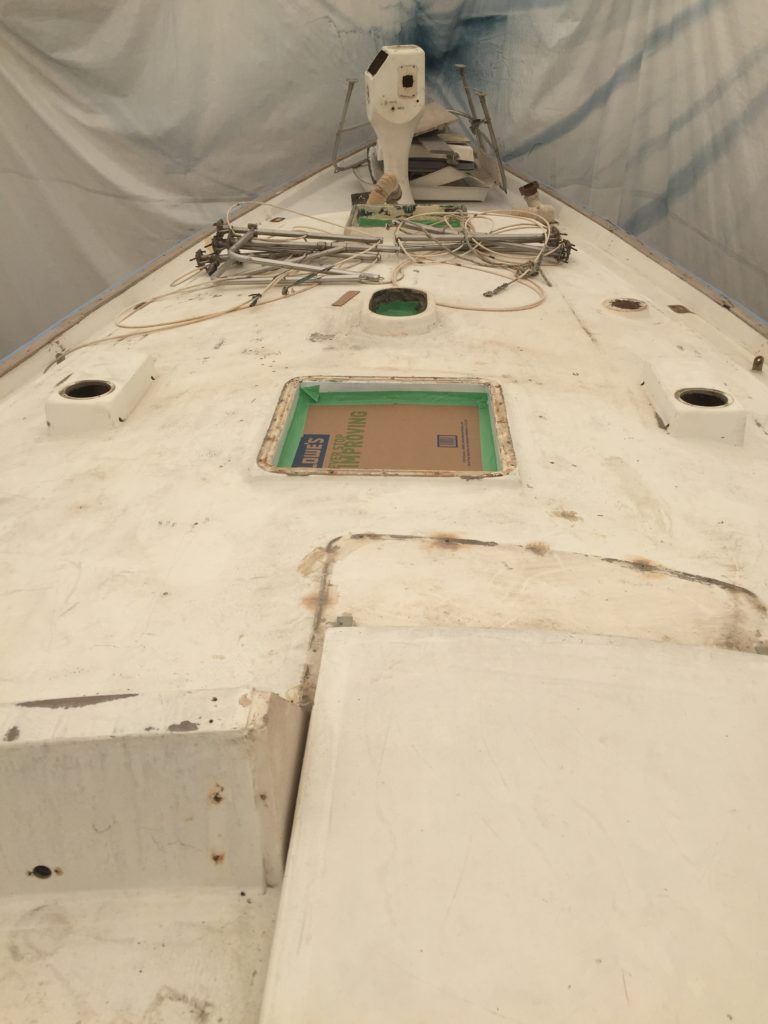
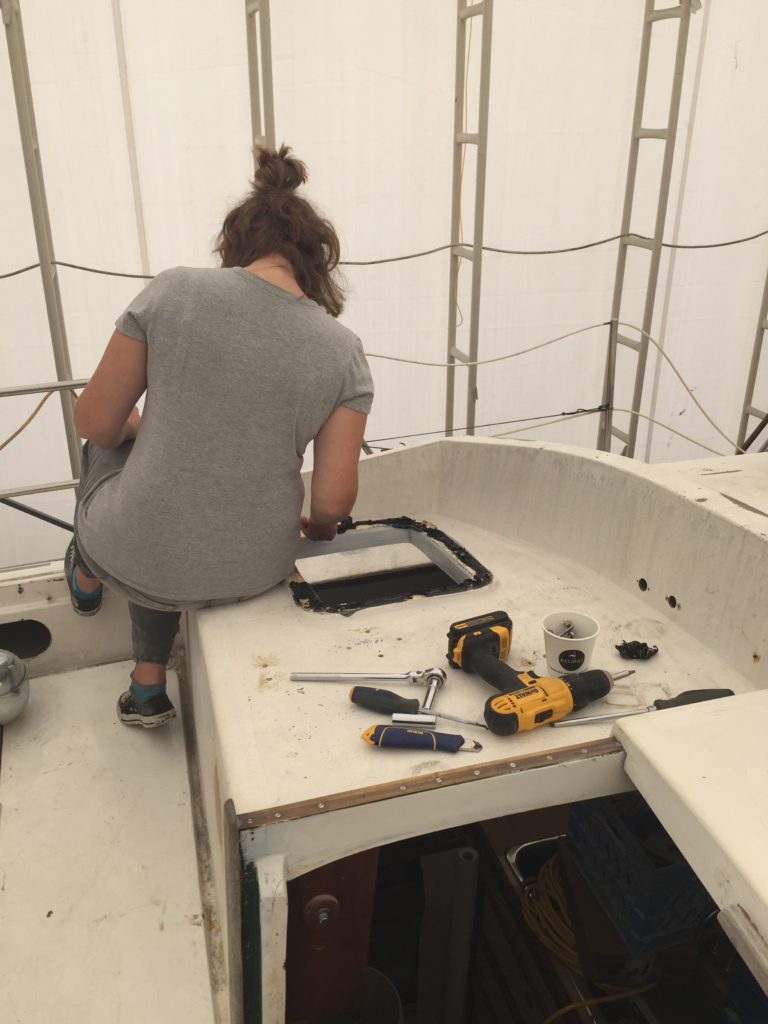
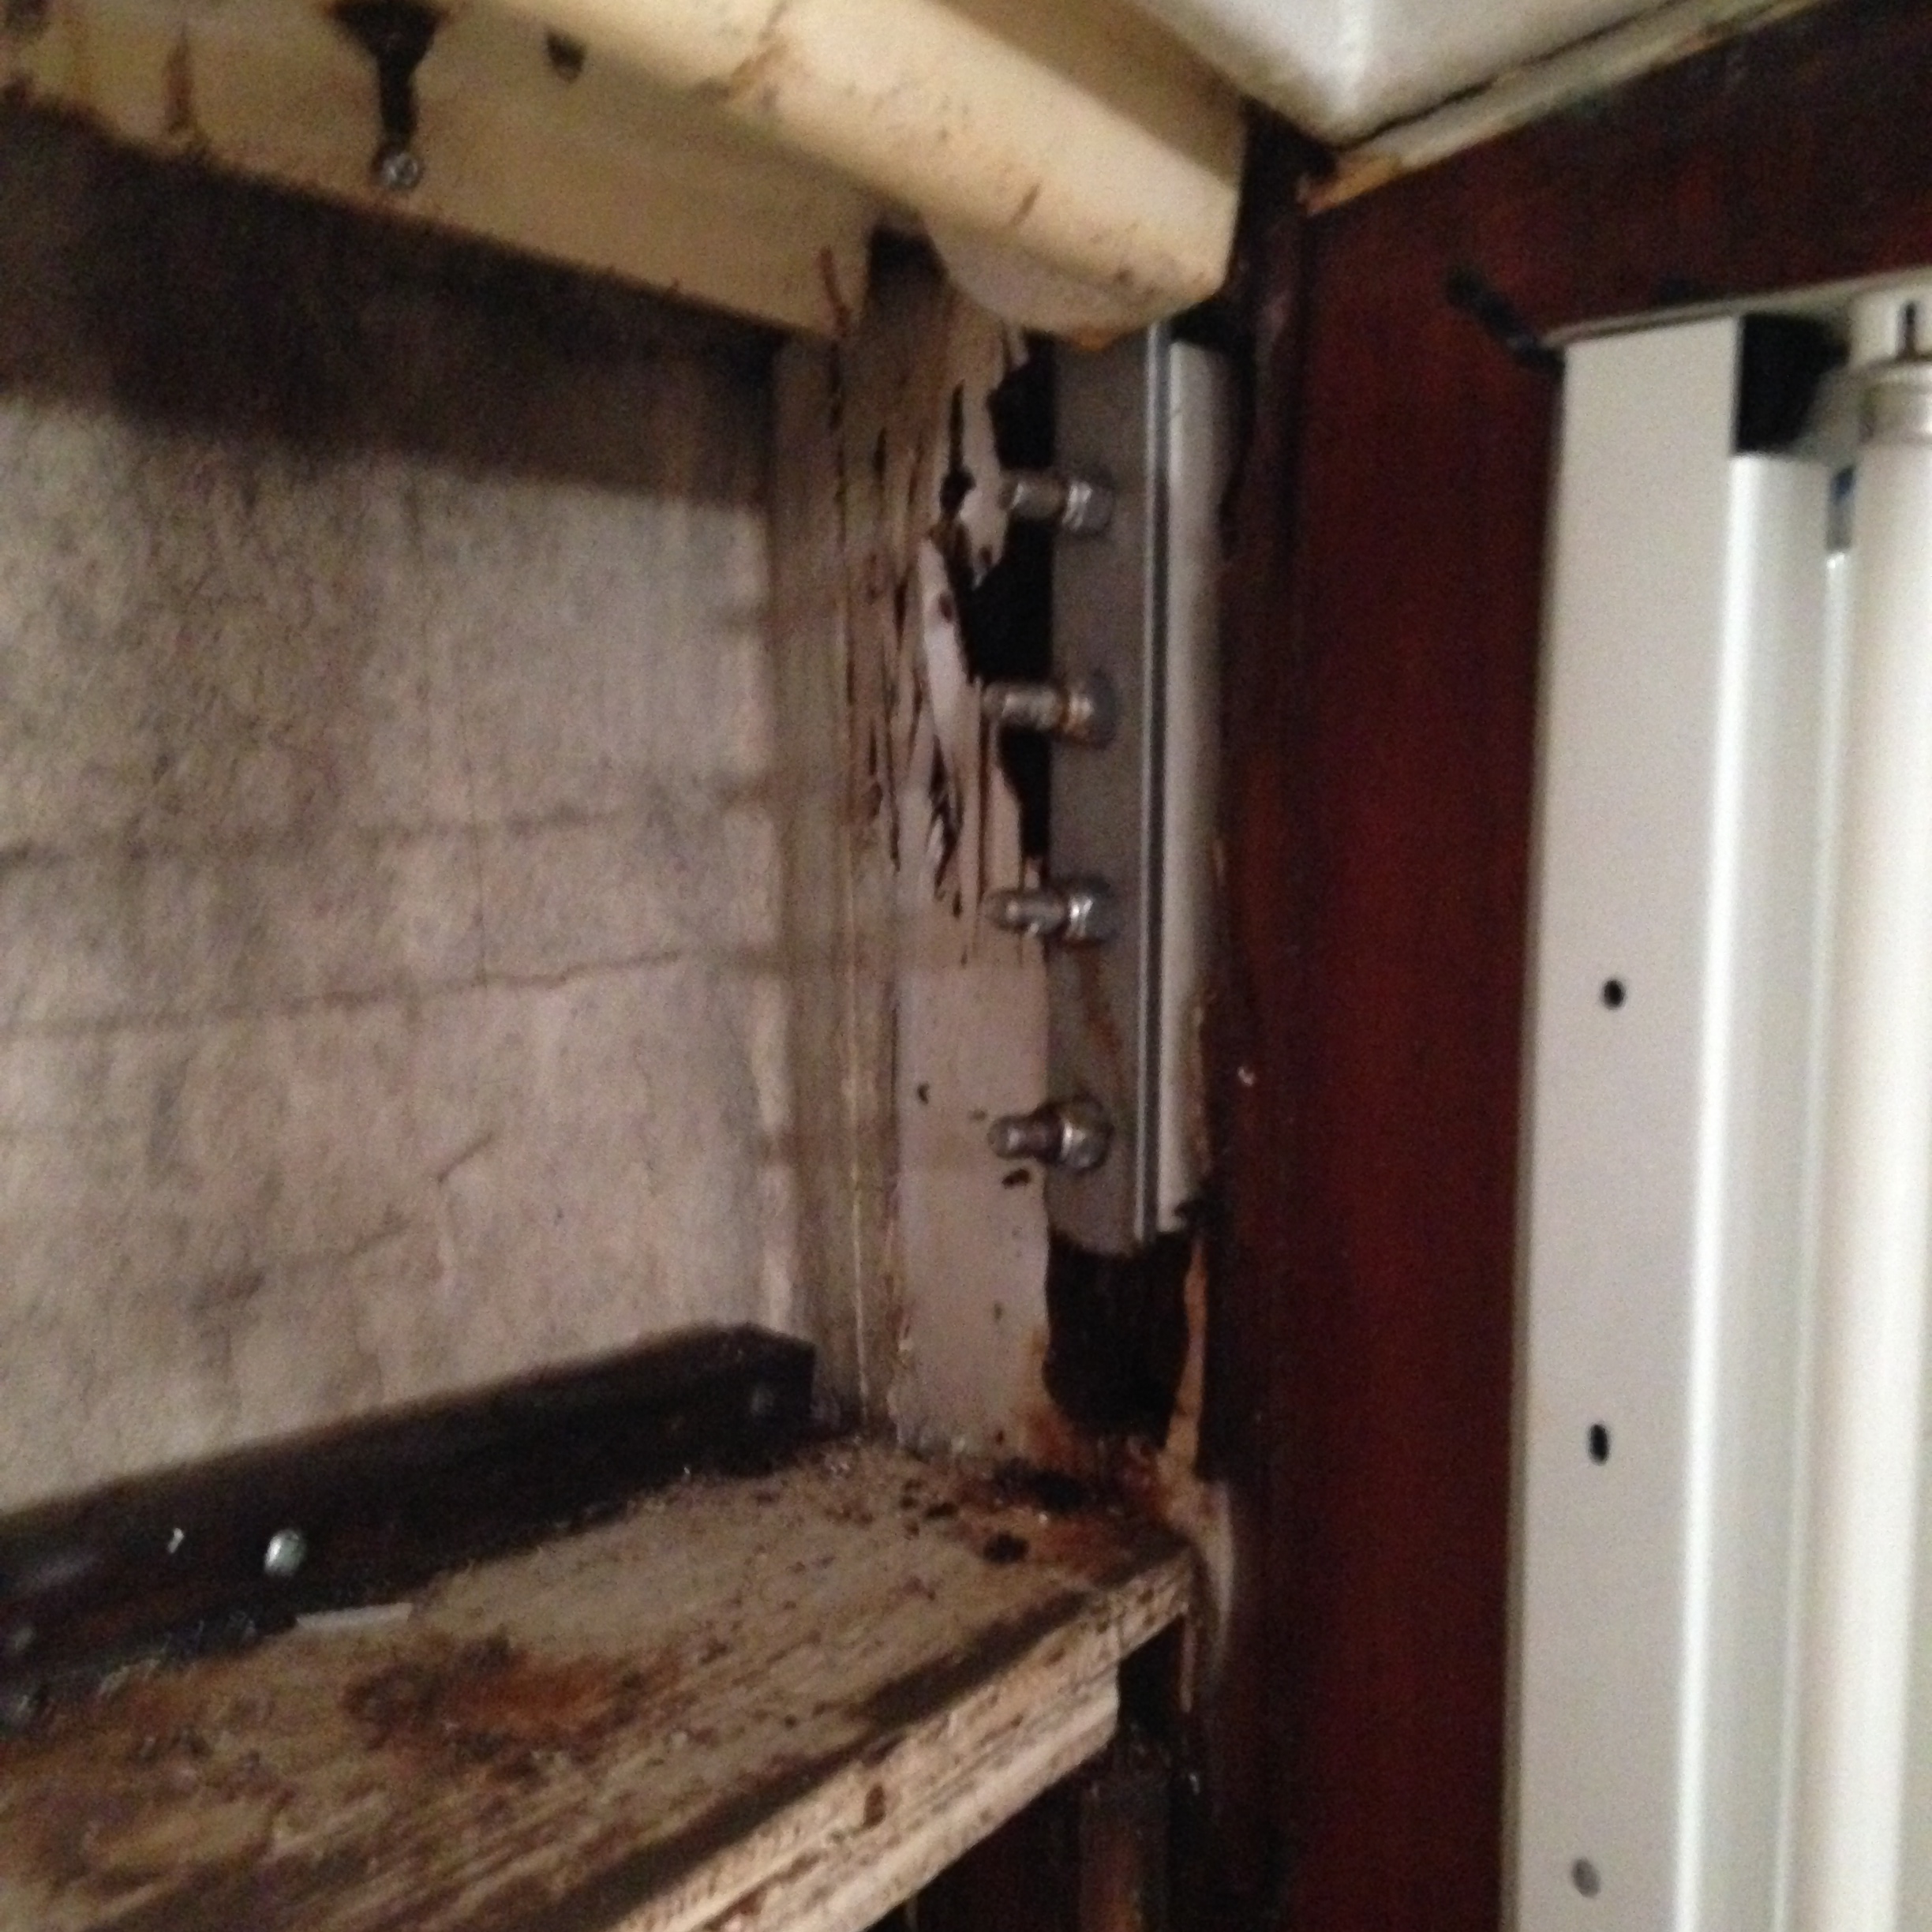
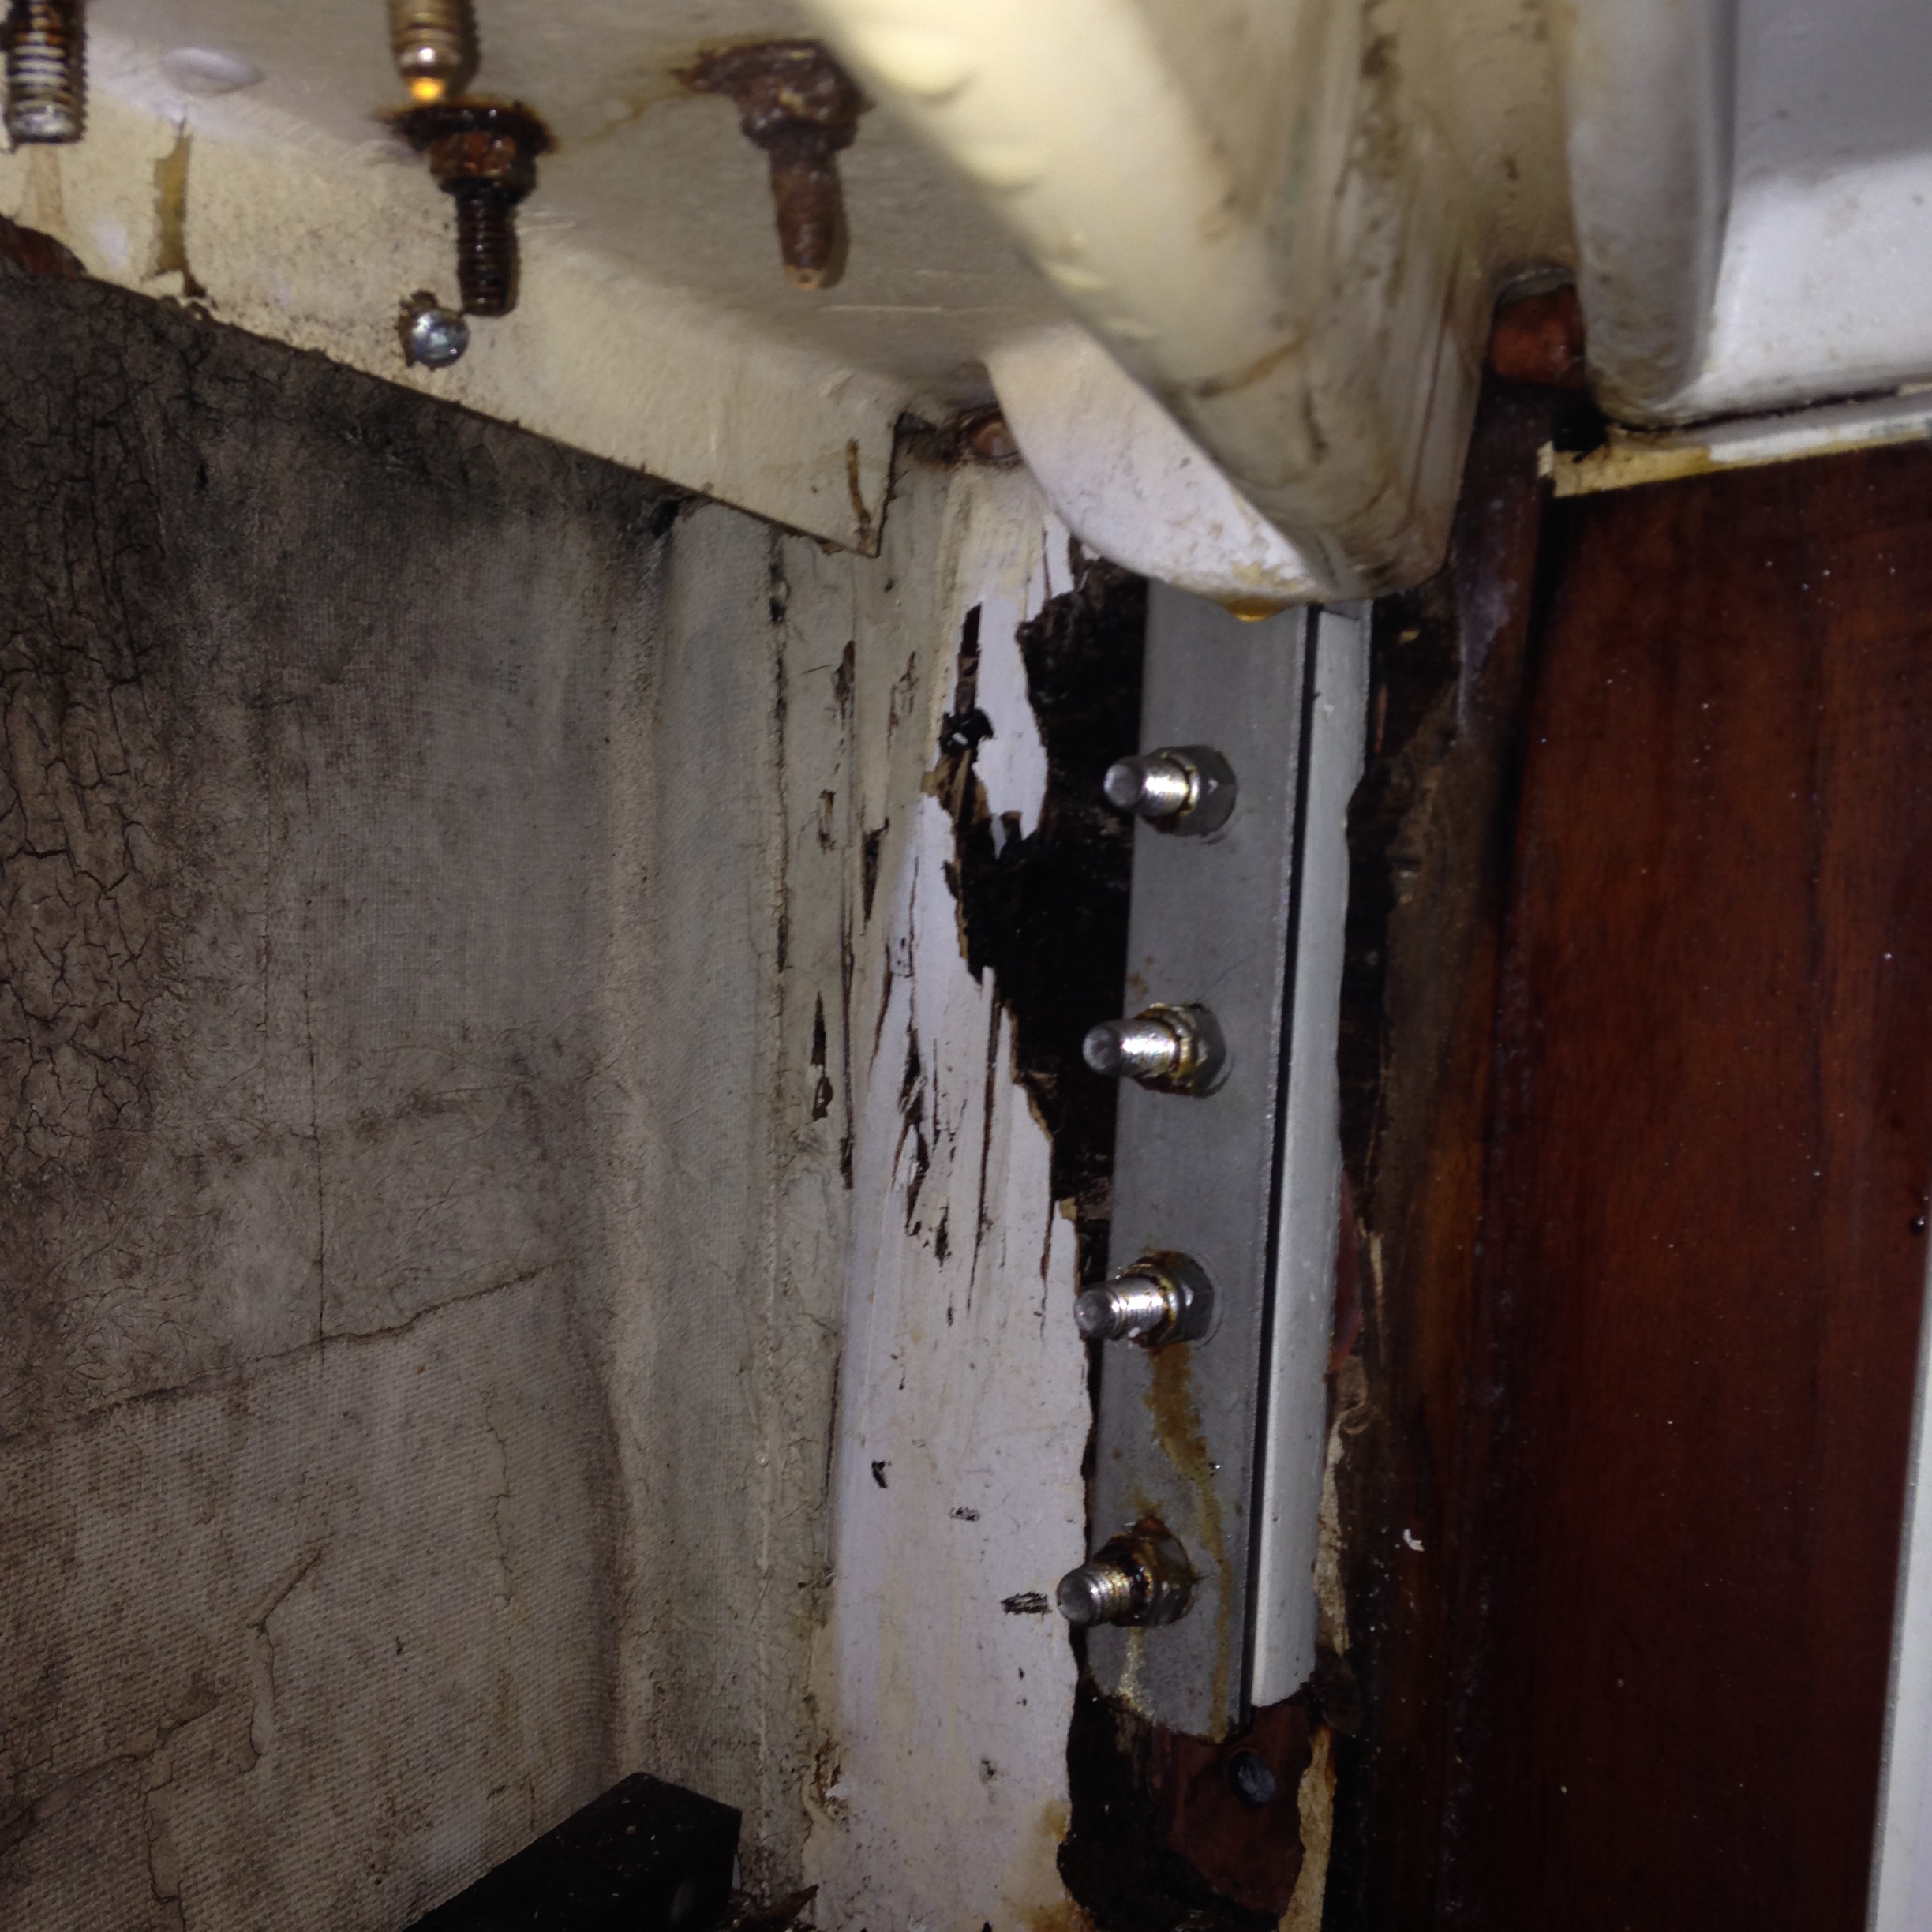
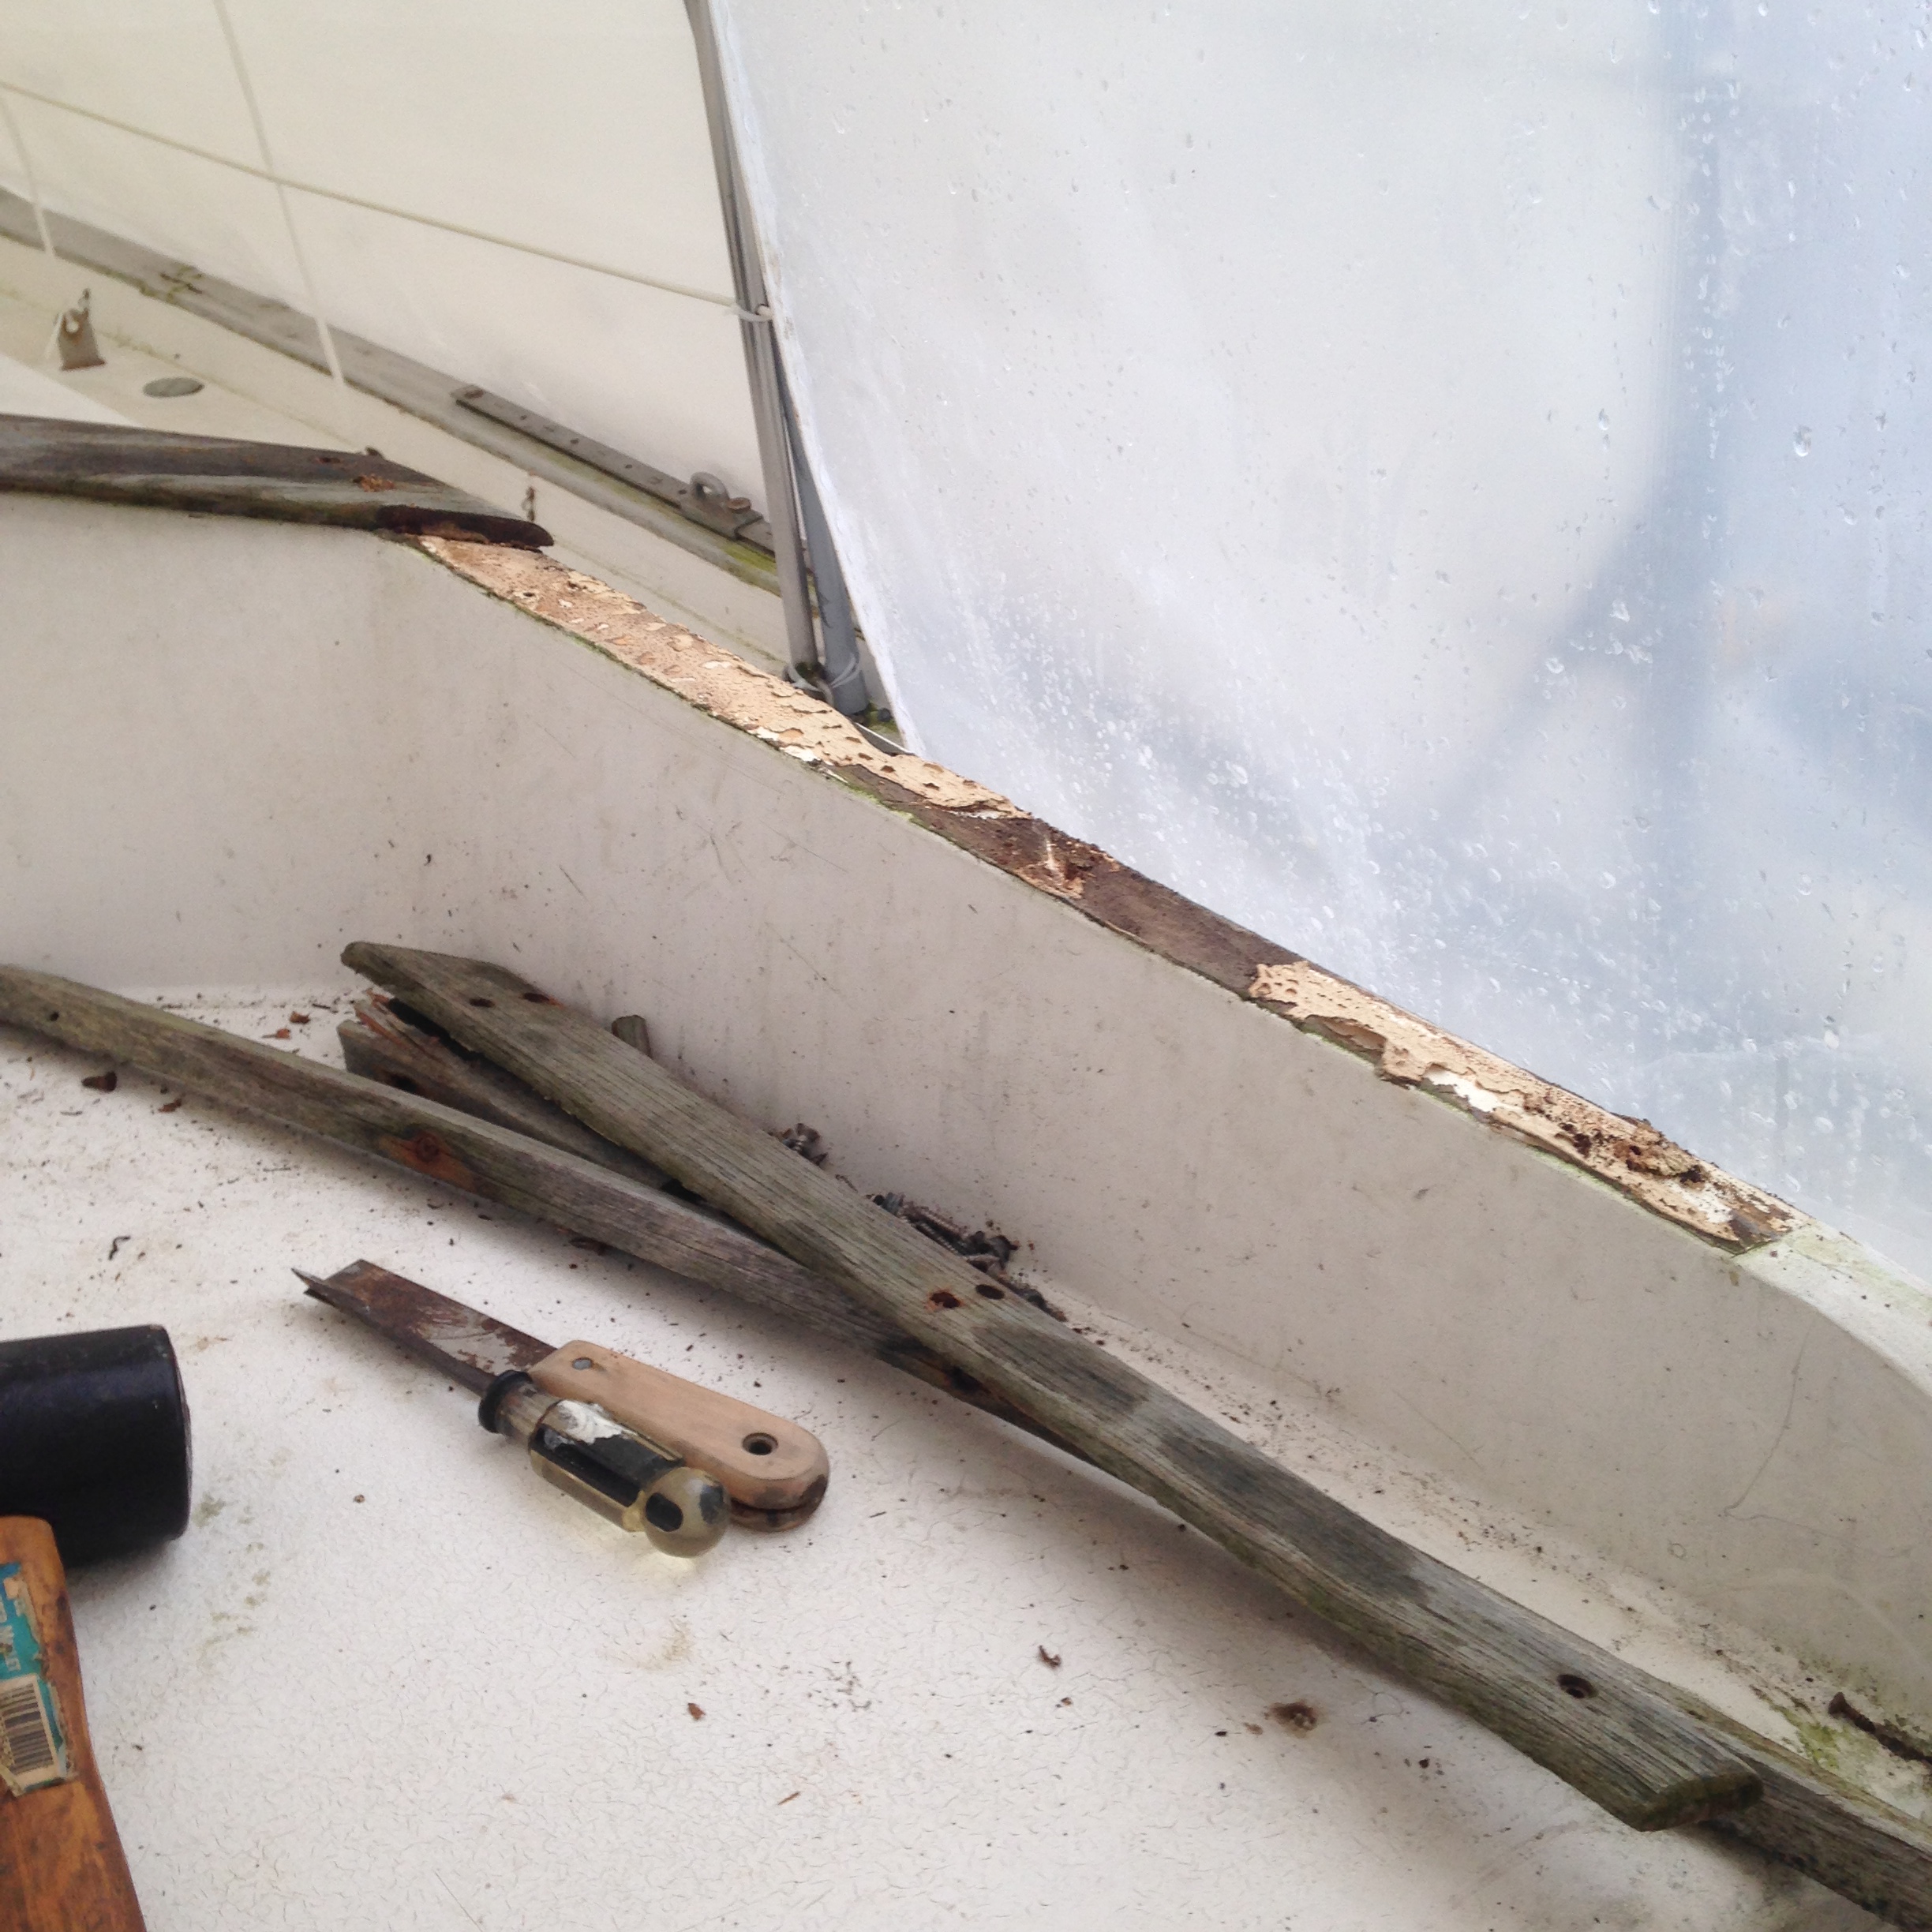
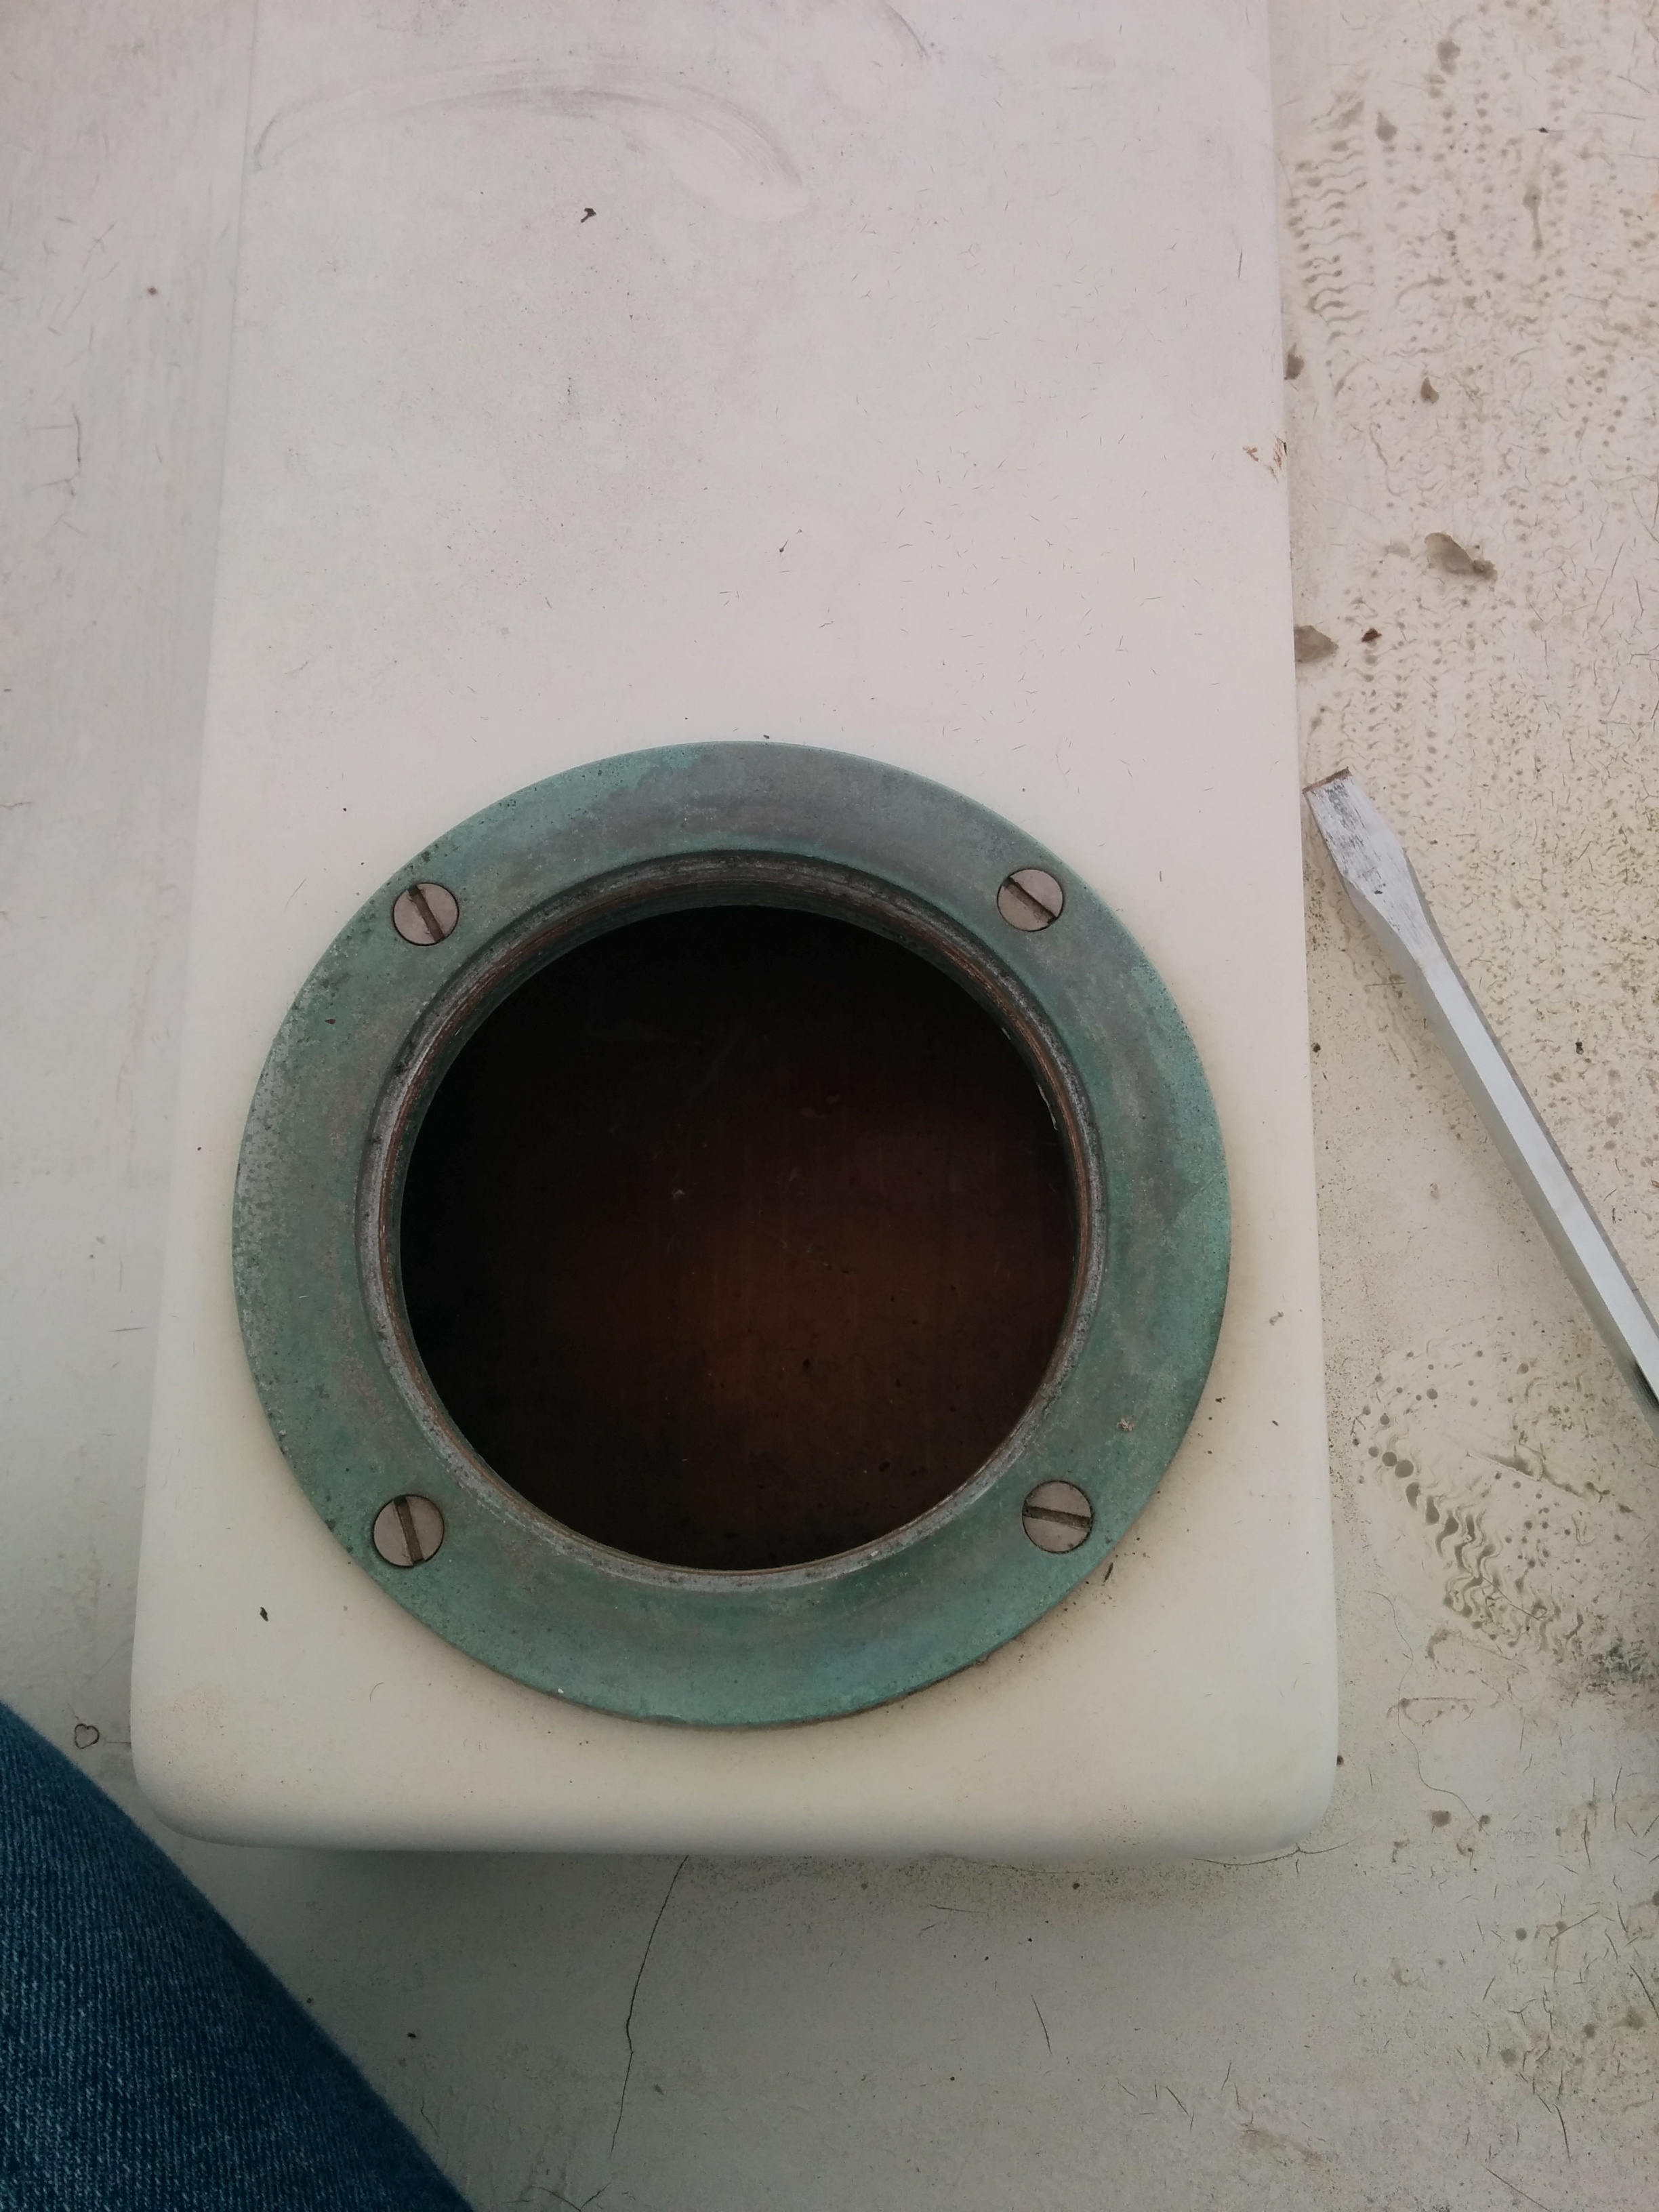
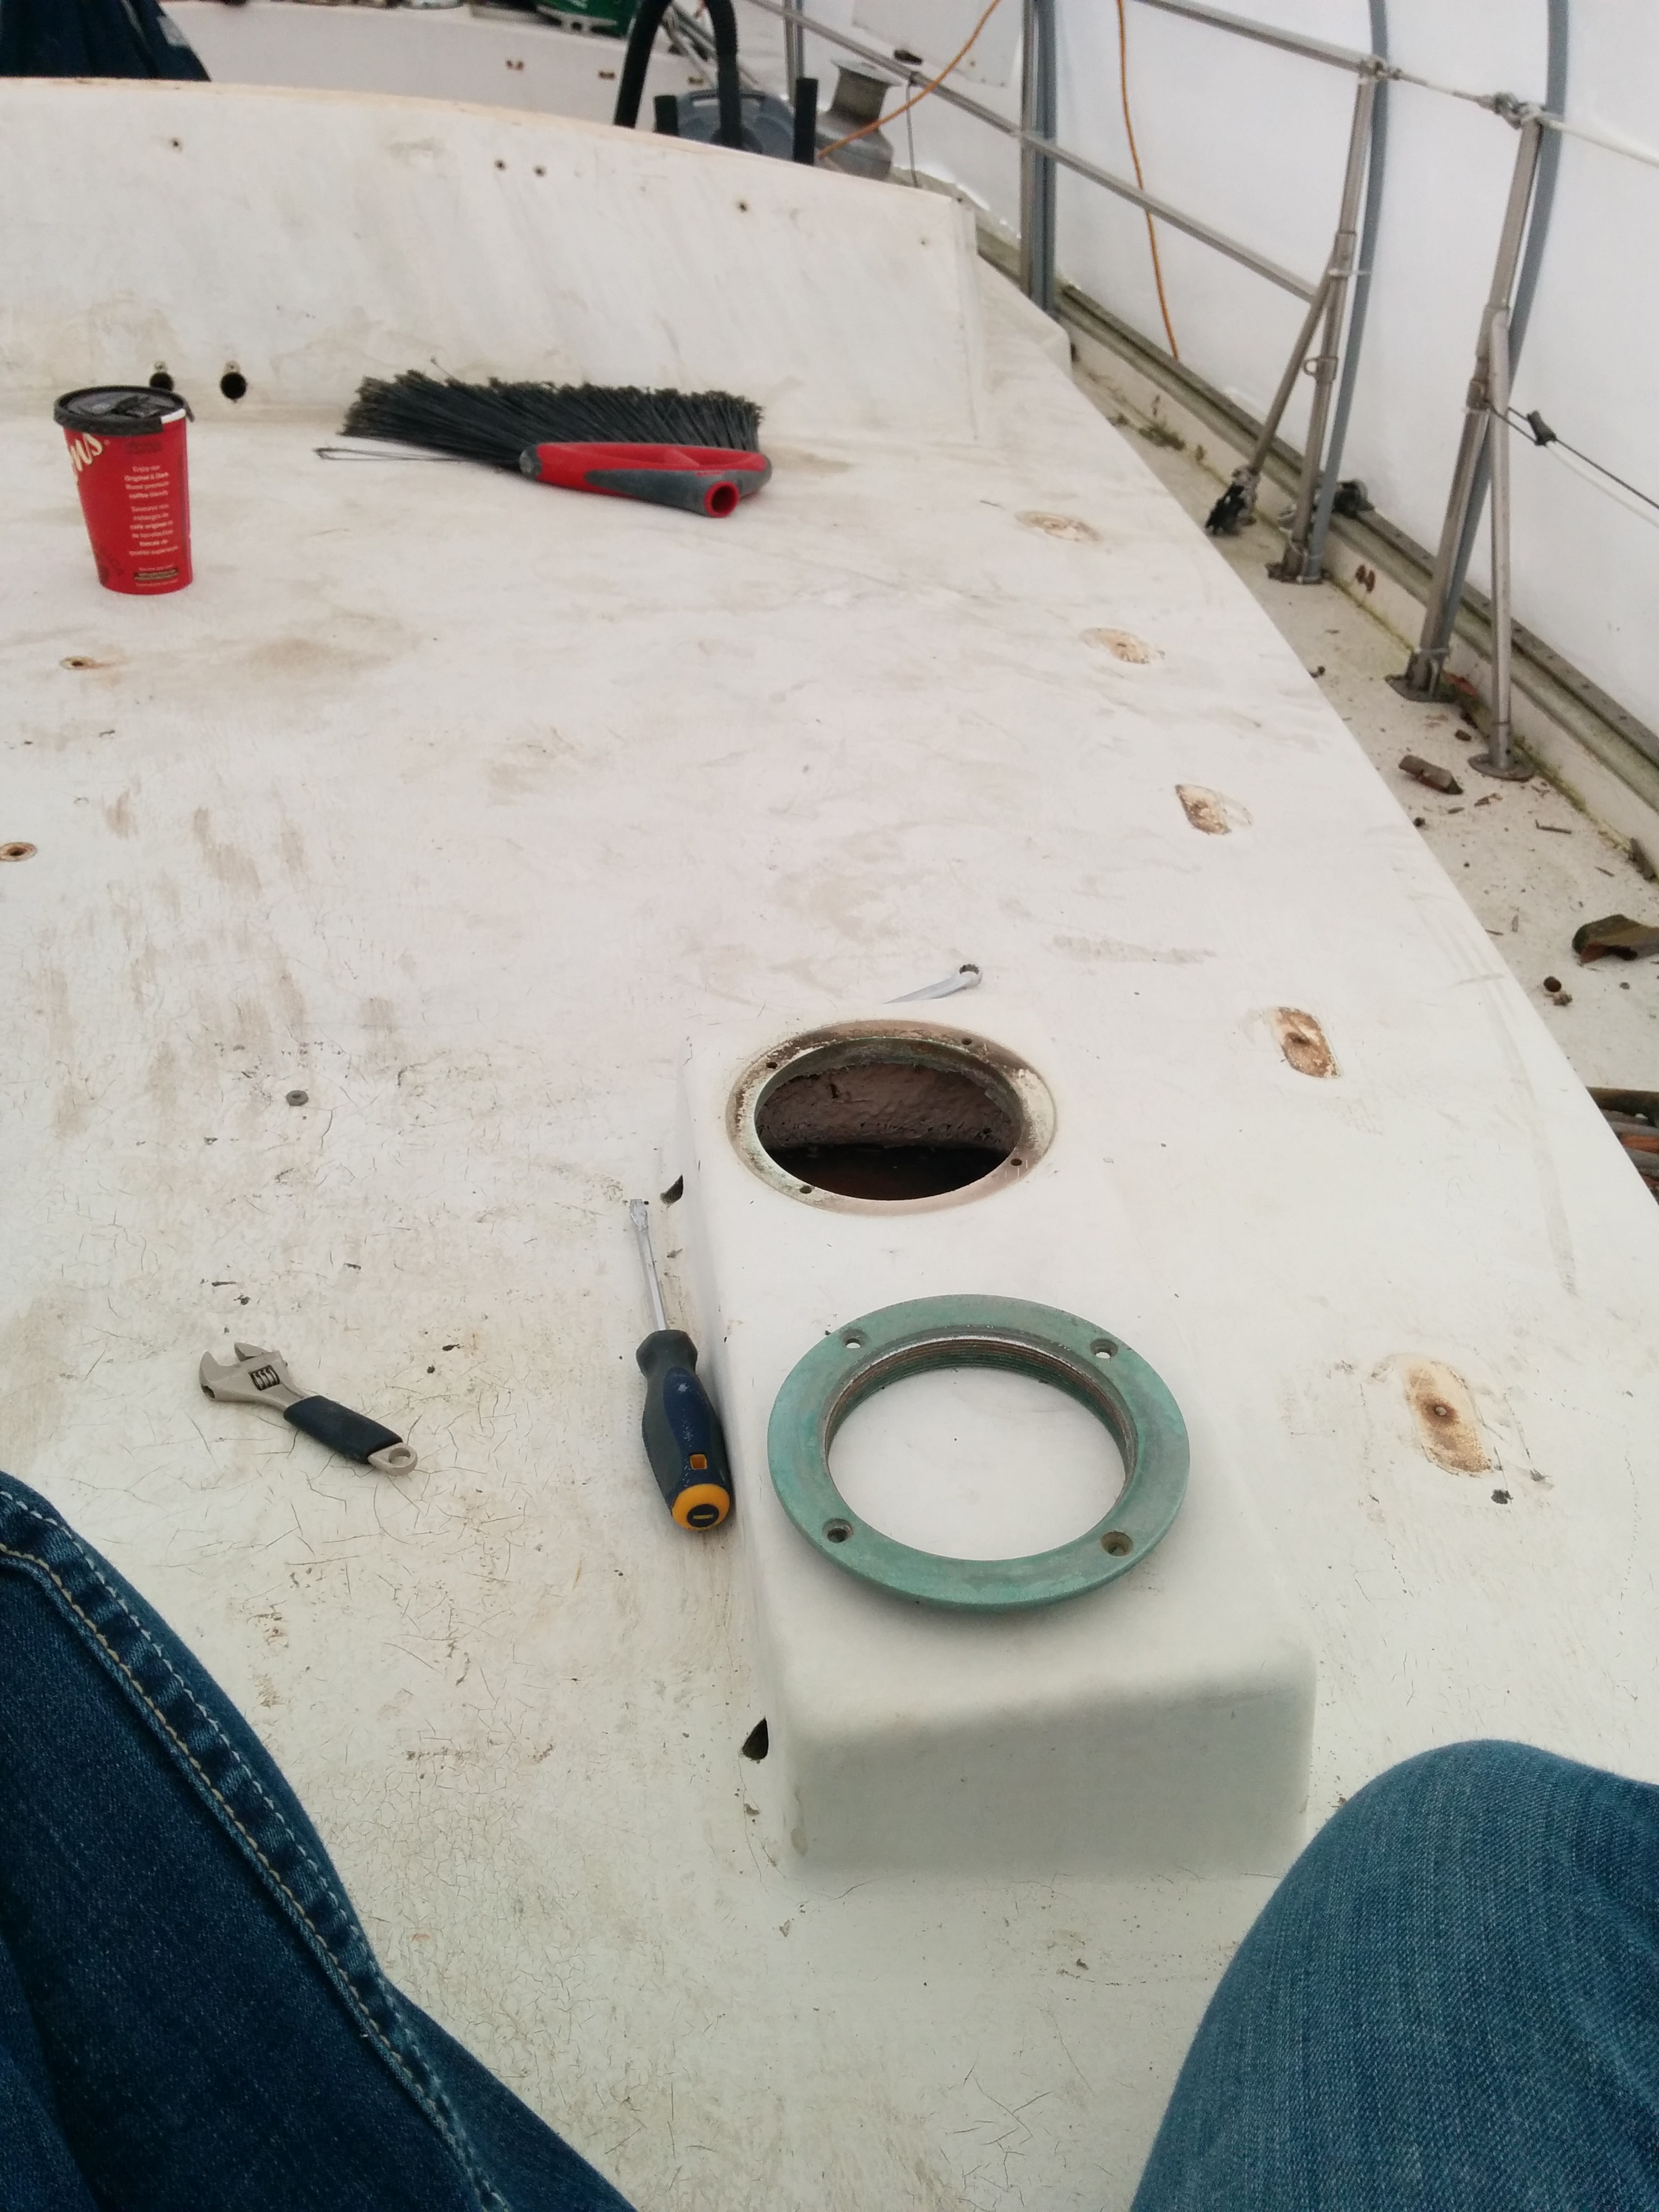
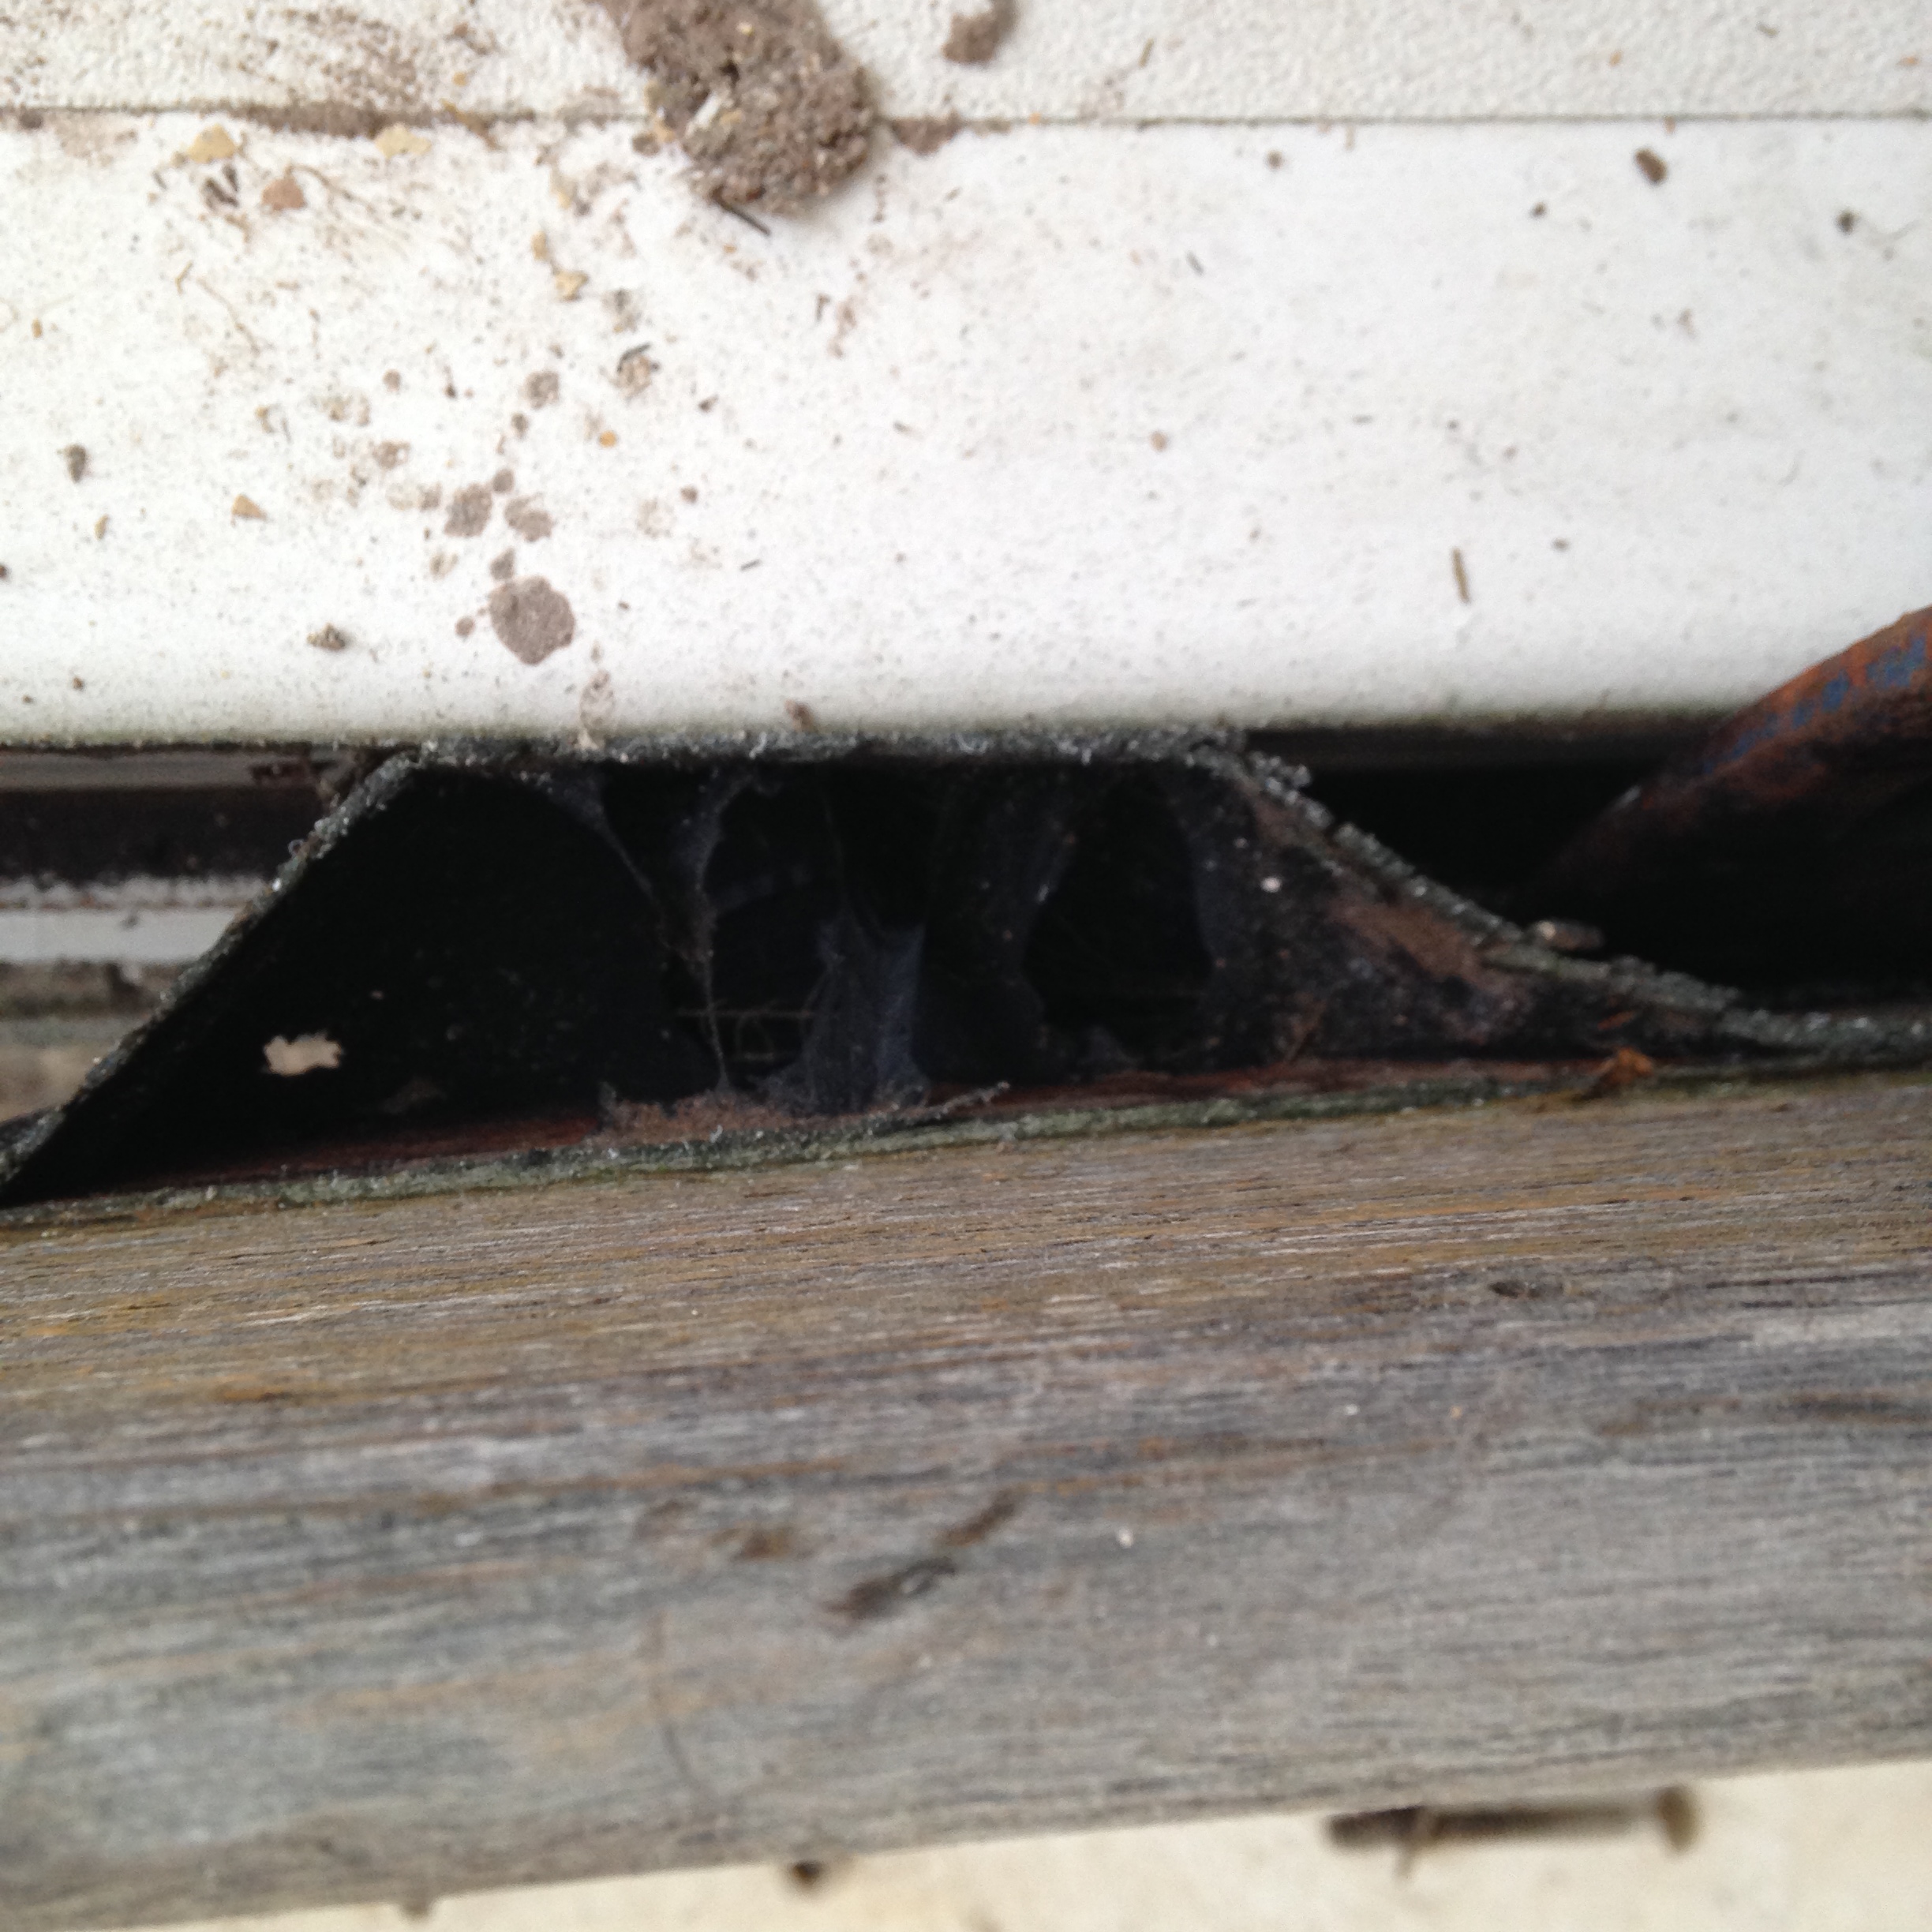
I knew the chainplates leaked. I also knew they leaked fairly badly. What I did not know was that the area of deck where the chainplates make their appearance is cored. I also did not know that the original way these holes were created did not include sealing the coring. Well, it did not take long to find all of this out.
I decided yesterday to start pulling the chainplates in the aft cabin before we get too far ahead of ourselves and to fix the rot in the bulkheads. Fixing the rot in the bulkhead is not going to be that big of a job, but nevertheless I have been putting it off, however the decision was made to begin the fix which necessitates removal of the chainplates. First thing I noticed right off the bat was that the bolts holding the chainplate in place, were not even tight. Hmmmm. Second thing I noticed was that there was several layers of what I can only assume was 3m4200 or something very similar. Of course the 5 spare tubes we found in the cleanout also indicate a preference to this goop. Anyway, after cleaning out as much of the goop as possible, and removing all of the snug bolts, I pried from below decks and Andrea pulled from on deck and sure enough they popped out. This of course presented me the opportunity to discover the facts above. It became quickly obvious that an immediate repair was needed, and it became quickly obvious that I can be almost guaranteed that every other chainplate will require the same repair.
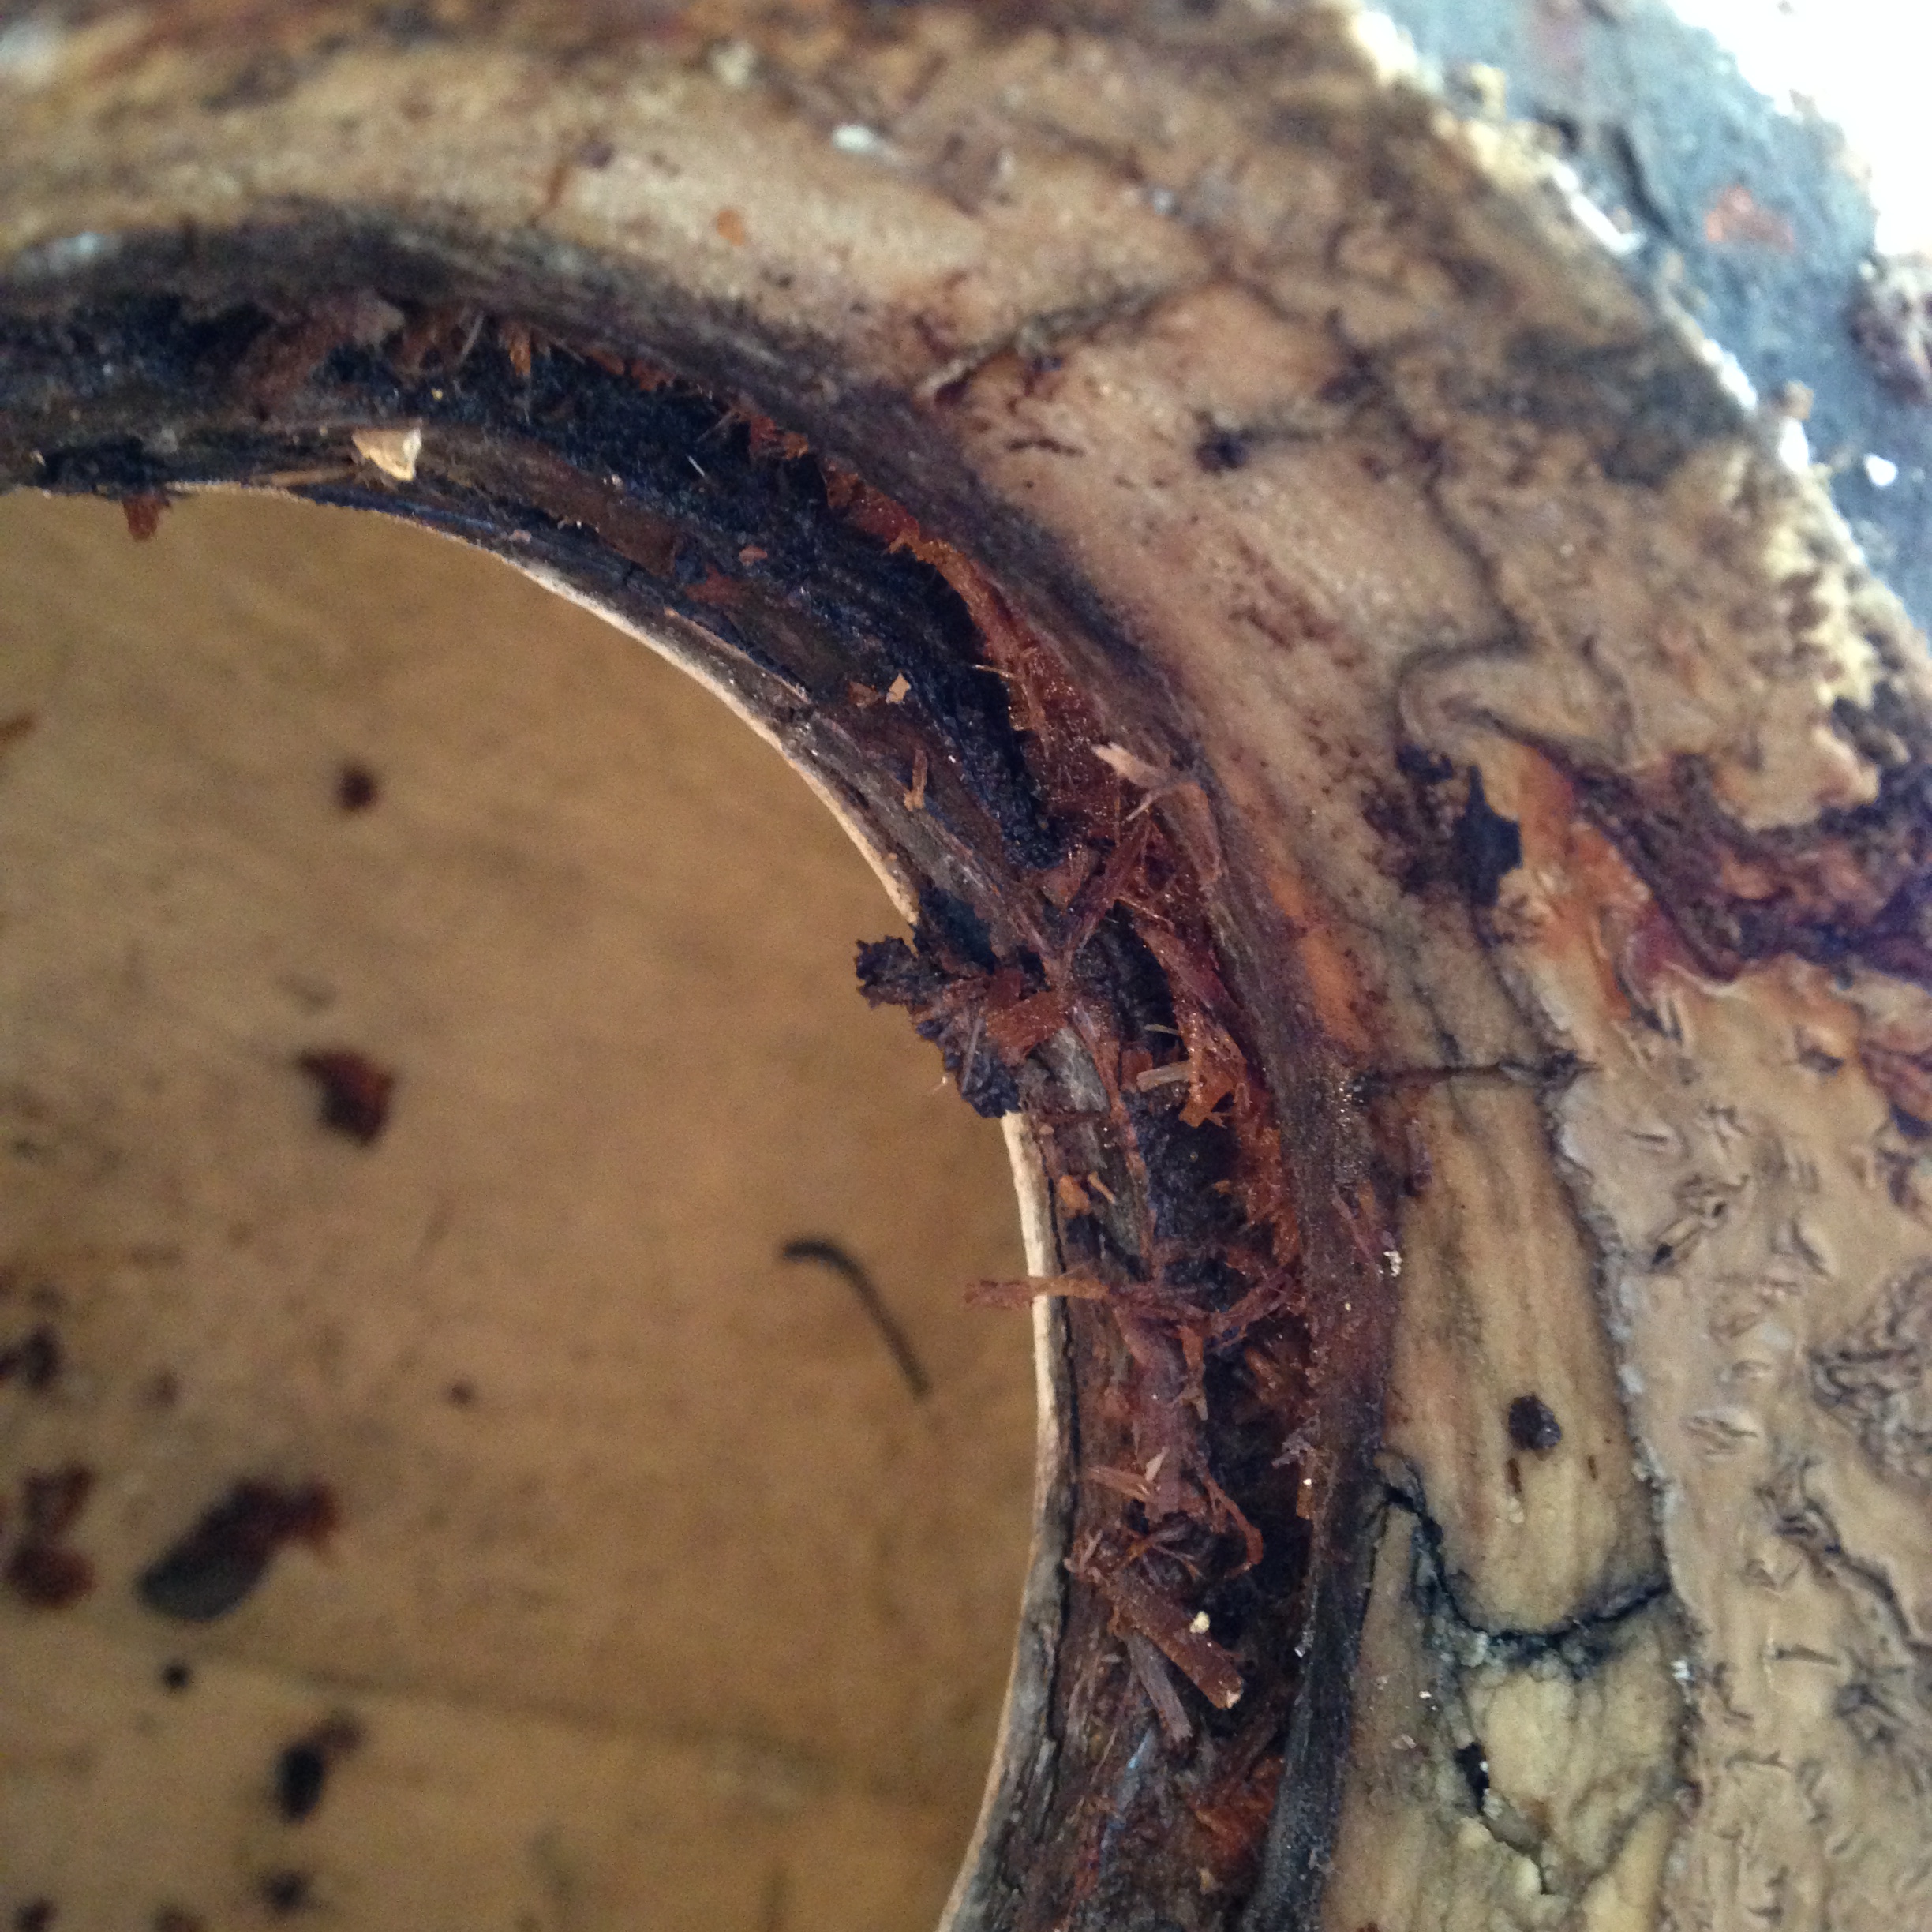
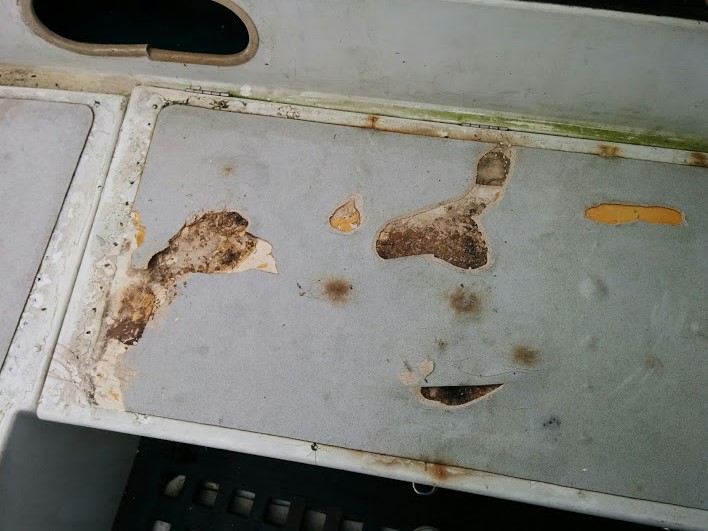
My repair process involved cutting out approximately 5″ square of the top skin around the existing holes. As soon as I began cutting the top skin it was painfully obvious that there was water damage. There is a smell that rotting wood has it and it was in the air. In the pictures you can see black core, which is already rotten and the somewhat light brown colour is wet. After removing this piece of top skin I scraped all of the remnants of coring out of the hole, ground it down with 60 grit sandpaper and cut a plug out of 3/4″ marine ply to fill in the section of now missing core. The original thickness of the coring here is closer to 1/2″ which means that my plug is almost flush with the top skin. This is by design so don’t panic. I placed a small piece of duct tape over the original holes on the bottom skin to prevent epoxy from running down inside of the boat, filled the areas that I had dug out underneath the remaining top skin, poured a bed of thickened epoxy into the hole, and placed the new coring in, completely covering it with epoxy. So now I have a solid area about 6″ square around the old holes.
The next step will be to grind the area concave including farther out than the 5″ piece I cut out in the top skin, drill a hole about 3″ in diameter where the chainplates will be through the plywood coring down to the bottom skin, fill the hole completely with thickened epoxy and add a layup of several layers of glass to the entire area until it is slightly proud of the surrounding deck. At this point I am going to take it one step farther. I am going to raise the 3″ diameter hole that has been filled with thickened epoxy, up past deck level by approximately a 1/2″. This will help eliminate any water intrusion as any water that finds its way on deck will run around the raised area. The purpose of the 3″ solid epoxy hole is that any water that might find its way down the chainplates will not be able to penetrate the coring as they will be surrounded by solid glass.
I only have to repeat this 9 more times for the rest of the chainplates and all will be good in the world again. But I will never have to repair these areas again.
A word of advice to all of the Whitby owners out there. Pull your chainplates, and make sure the coring around them is not wet. If it is not, at least seal the holes with epoxy and make sure it never does get wet.
While I was messing around with pulling chainplates and repairing core, I also replaced all of the temporary screws that were holding in any of the interior panels that we have put back. As I mentioned before in previous posts, every screw that is used on Akupara from here on in will be a Robertson screw. For those of you who do not know what a Robertson screw is, it is a square slot as opposed to just a slot, or a Philips which is a star shape, or any other type of screw for that matter. I have always found Robertson screws afford the best chance of NOT stripping them thereby making them removable for all time.
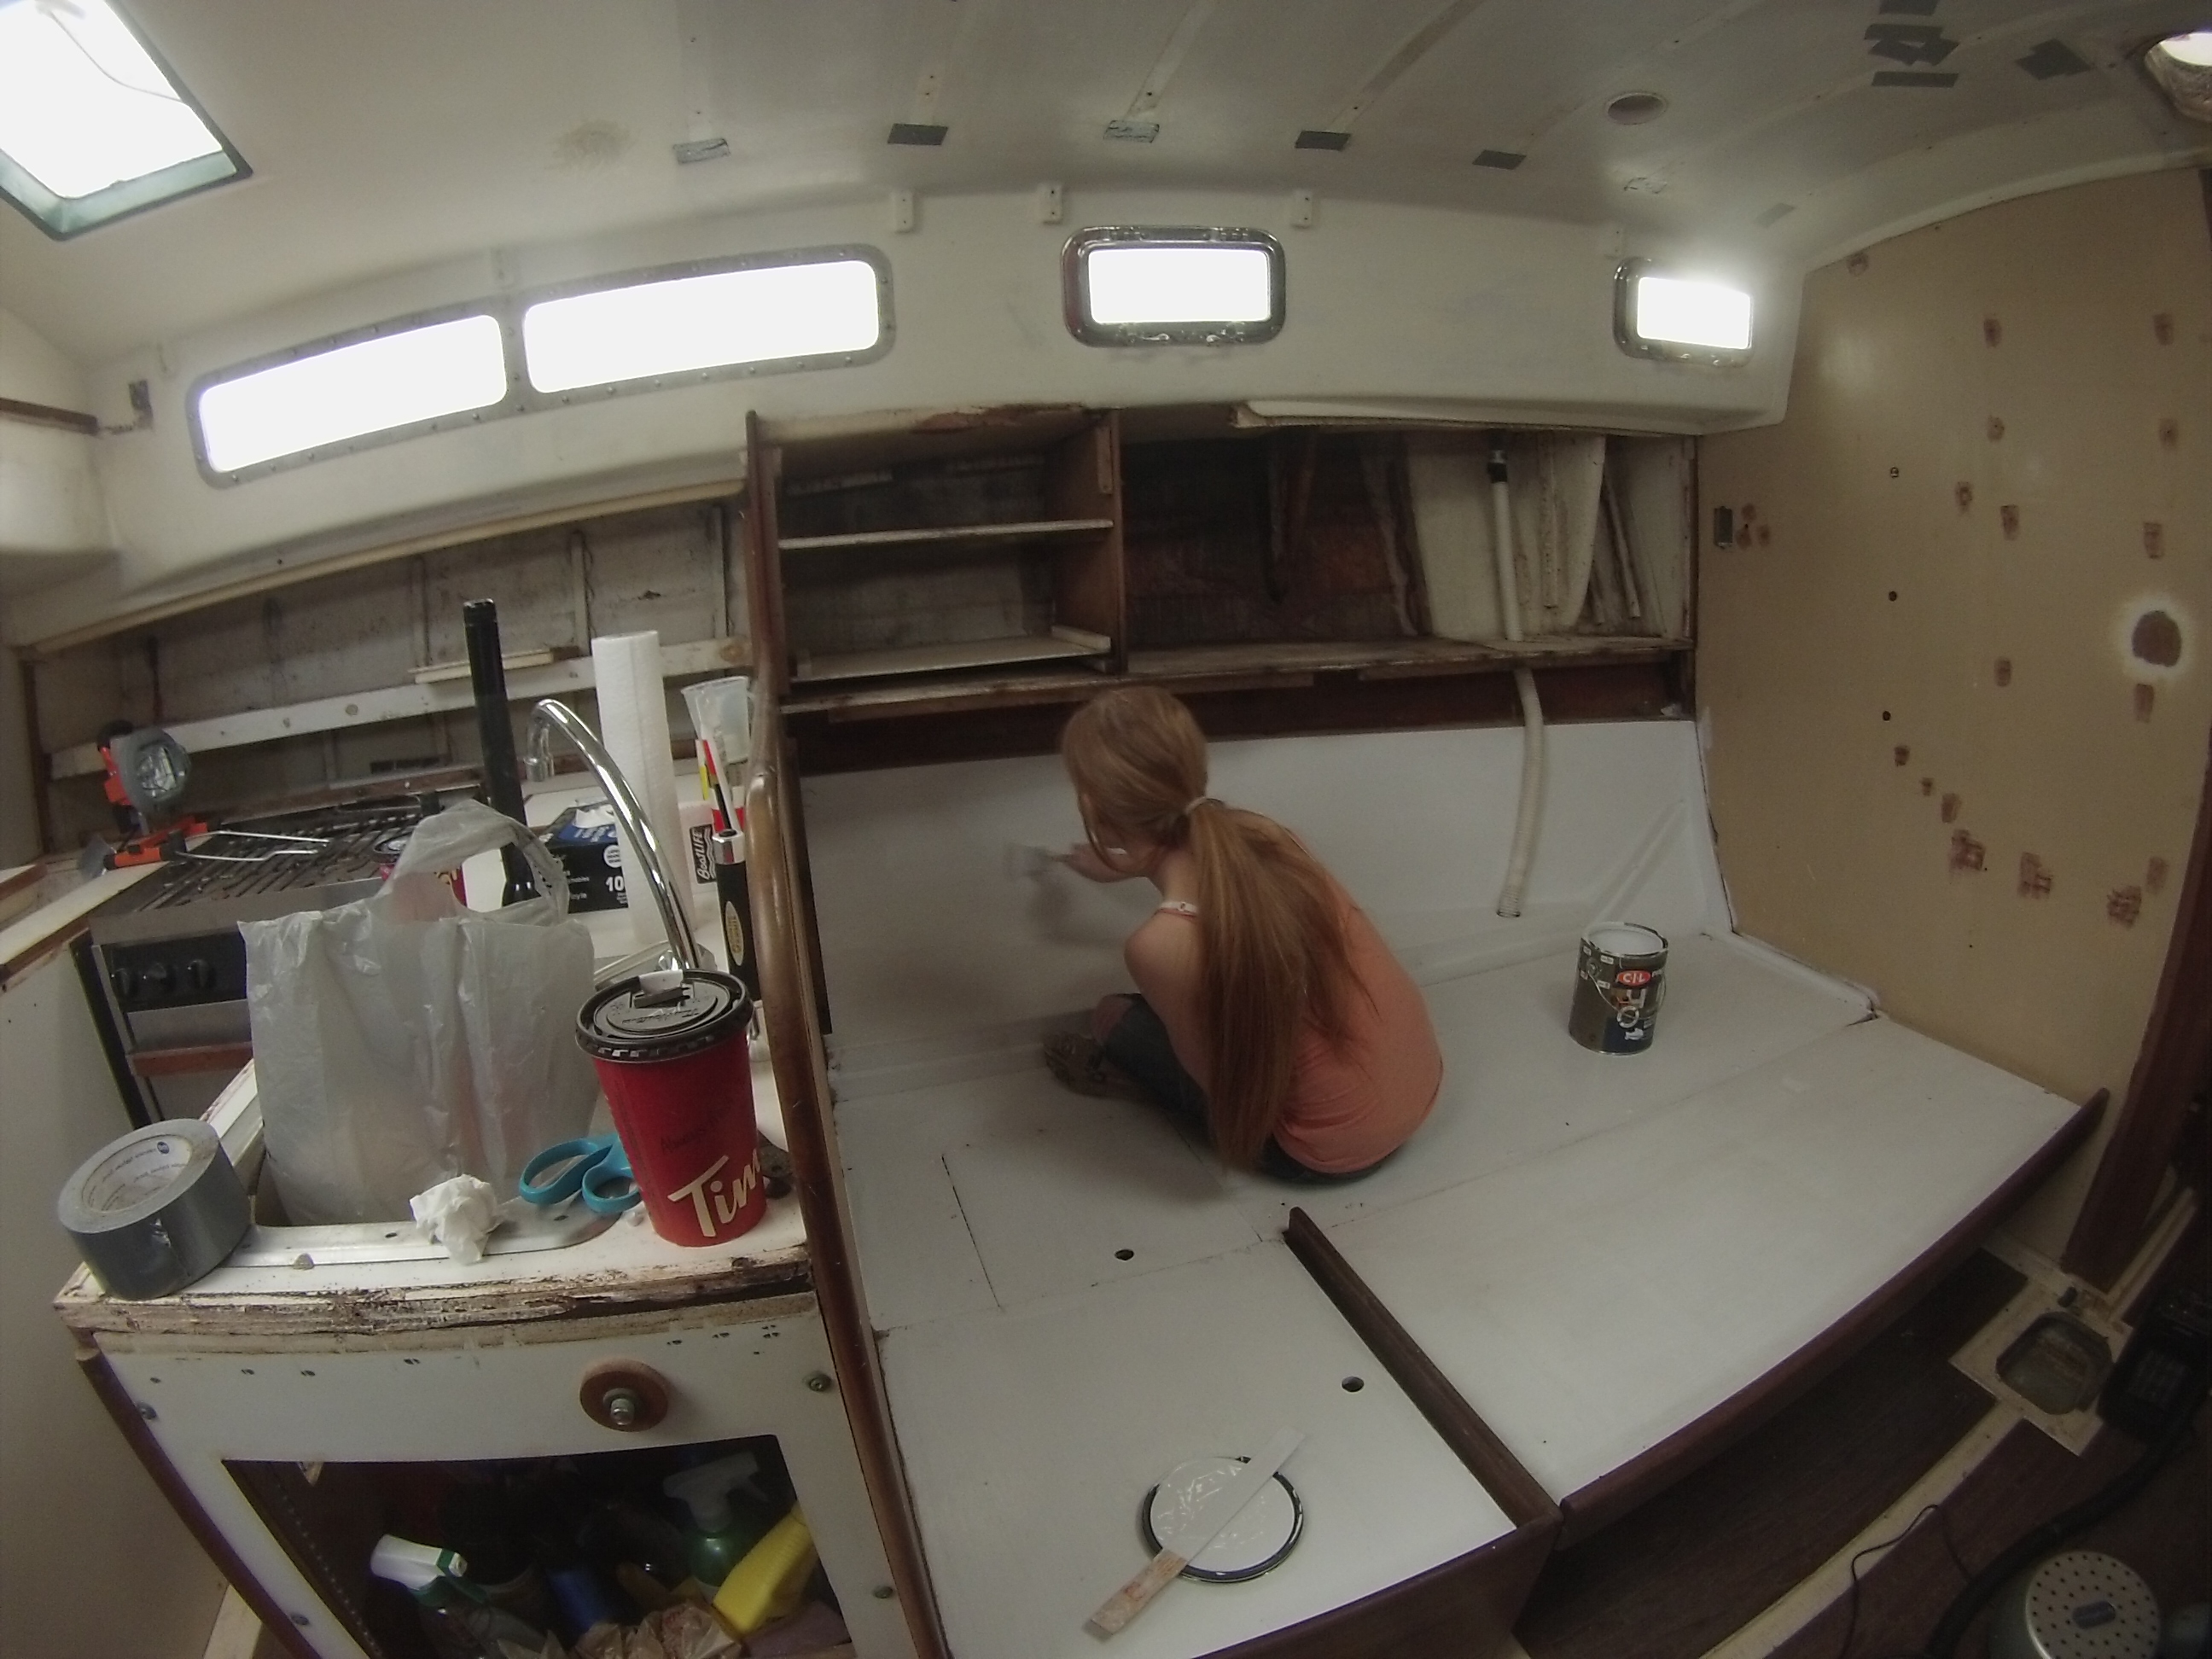
Andrea and Paige began the process of painting all of the bilges and lockers with Bilgekote paint. Andrea wanted white as opposed to the traditional grey, and after seeing the newly painted areas gleaming with fresh white paint, I think she made the right choice. Bilgekote is easy to apply and gives good coverage. It is also very hard once cured and is supposed to be very abrasion resistant. We actually started asking ourselves why we shouldn’t use white Bilgekote to paint the sole in Akupara as well. Abrasion resistant, tough, white, what more can we ask for? I will need to do a little research to see if there is any reason why we should not, but if I do not find anything, I think we have a solution to the 40 year old yellowish floors.
It never really surprises me, okay it obviously does because I am writing about it, as to how many shortcuts people will take. I have been guilty of taking shortcuts in the past as well but I don’t understand buying 10 opening stainless ports at $500 bucks a piece, ripping out the old windows, and jamming in the new ones without filling the old holes, and then wondering why your windows leak!
I will say that at least they used butyl tape and not 3M5200 to put them in…
Paige and her boyfriend Fynn came to help on Saturday and managed to get a fresh coat of paint in the aft cabin, wow it is like night and day. It is of course going to get all dirty again as we continue to work on all the projects but at least it is our dirt at that point.
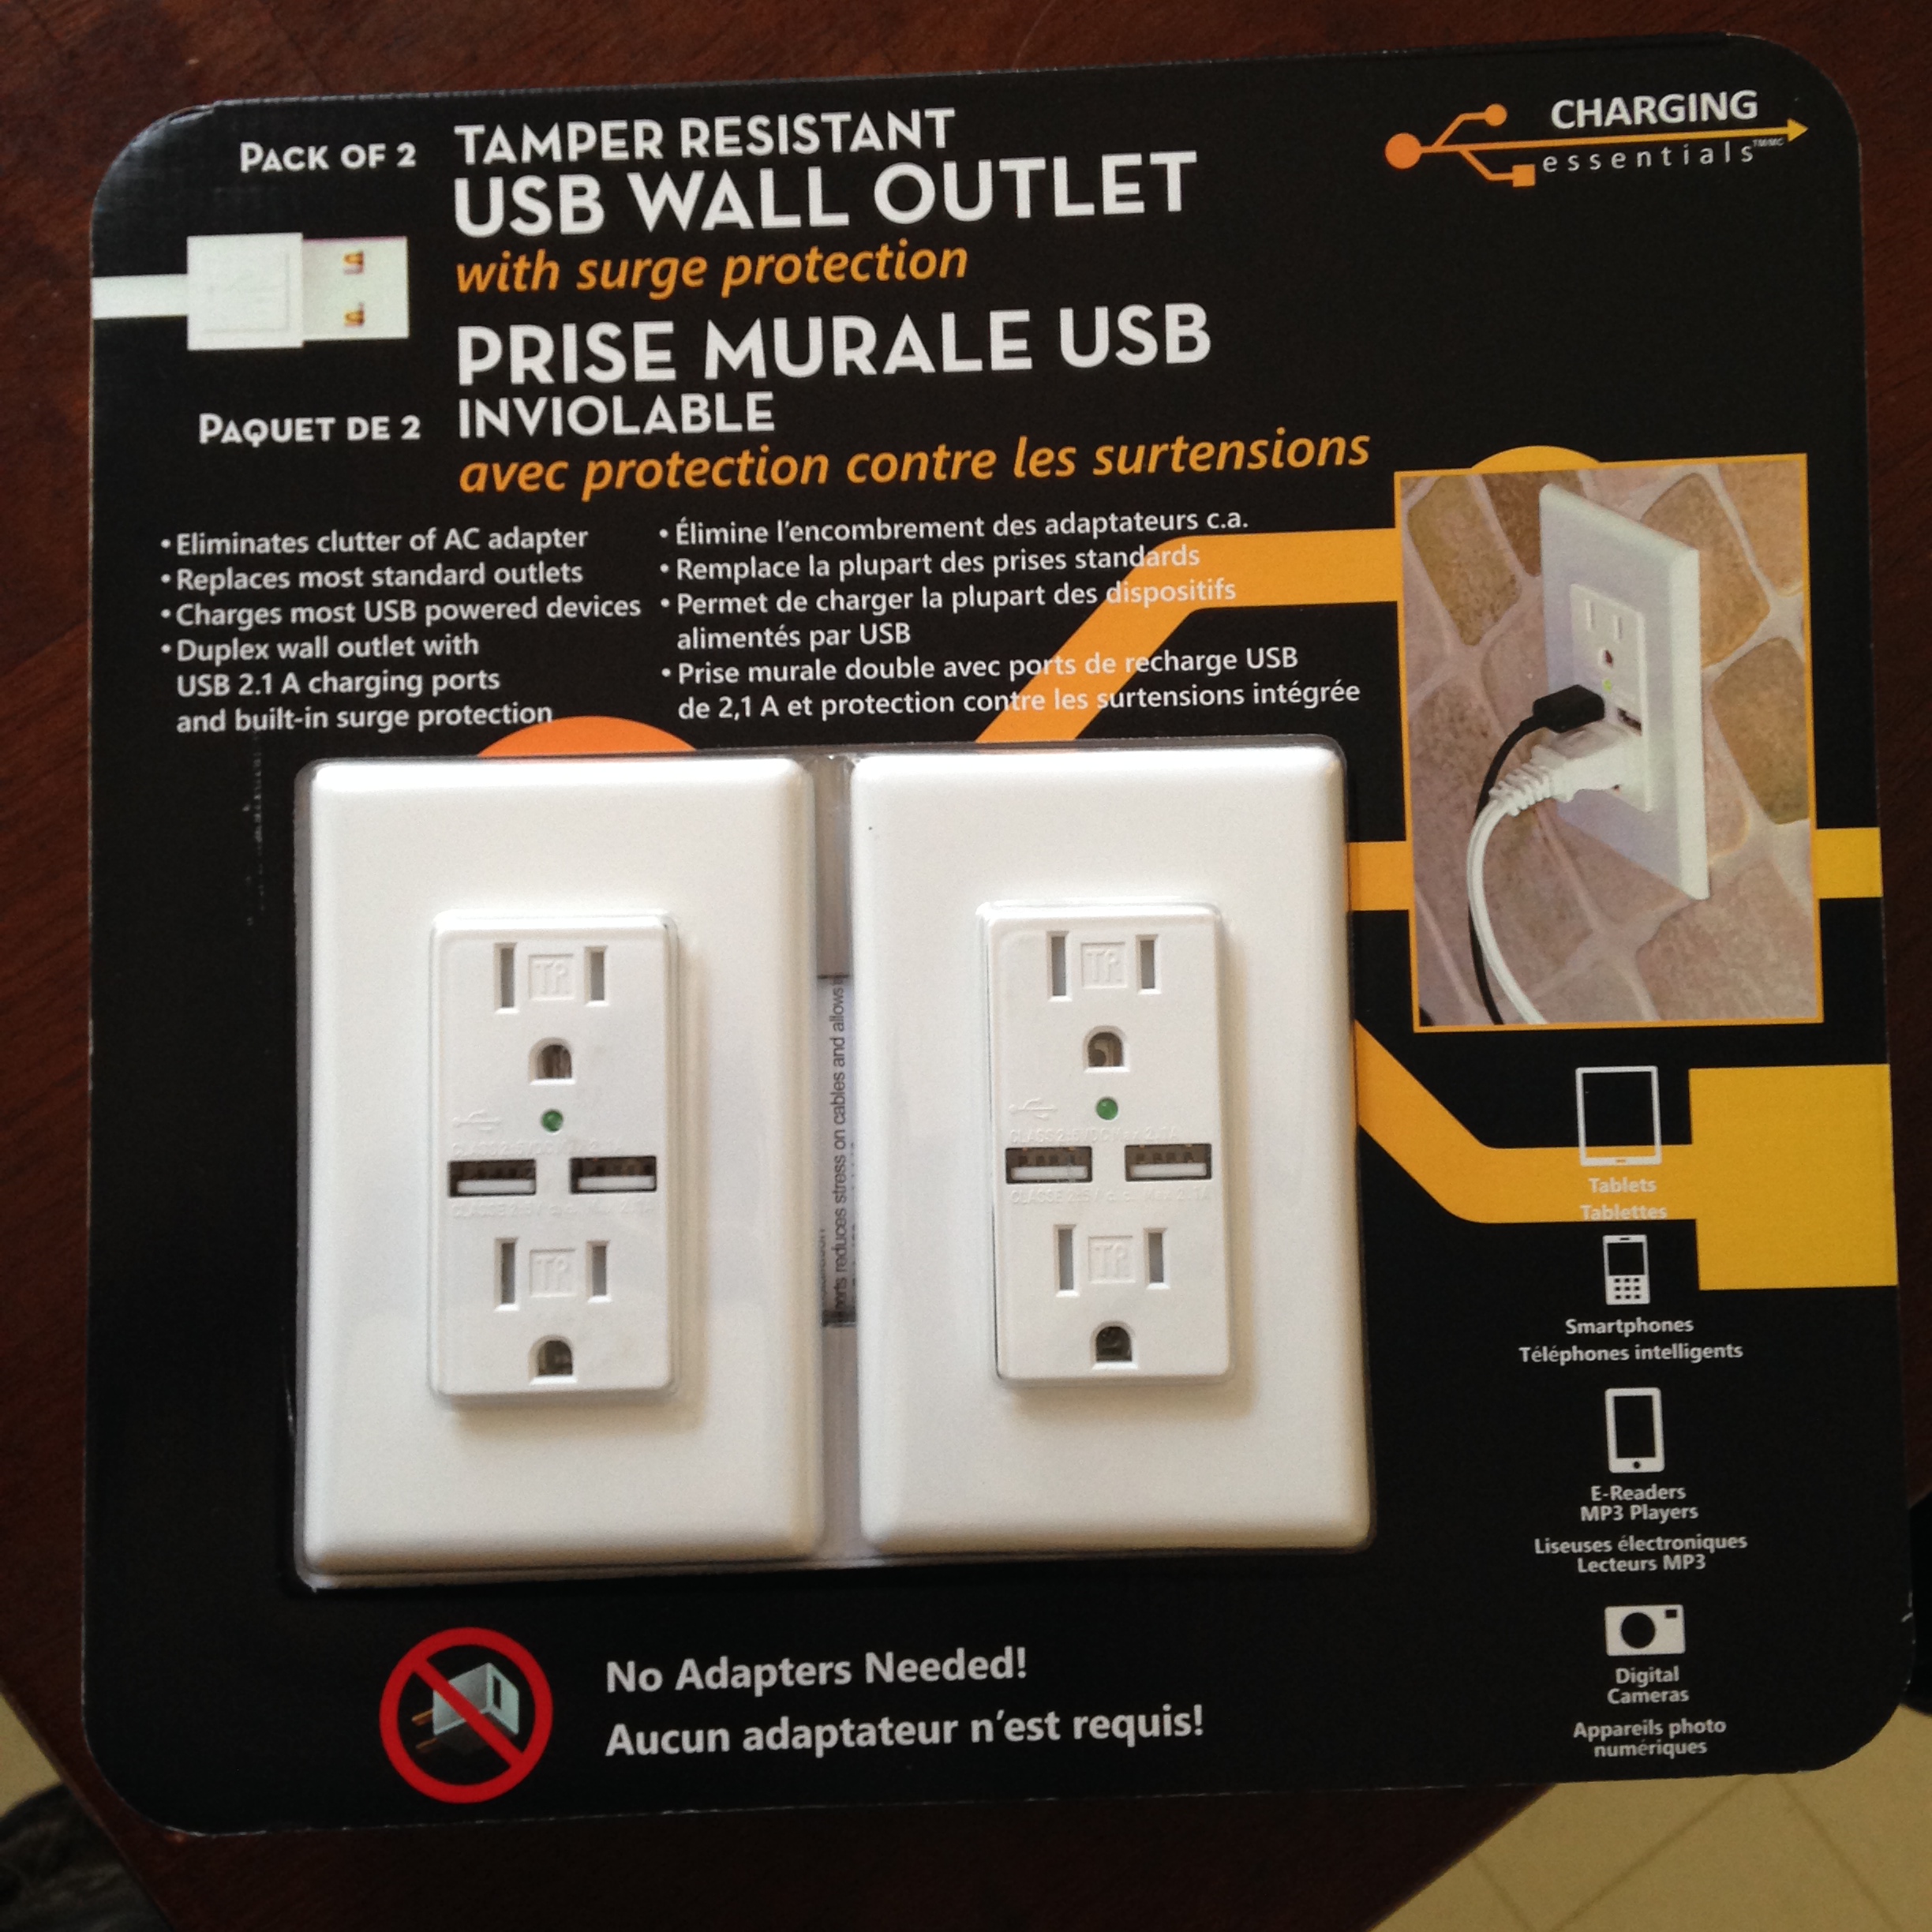
We were at Costco on Sunday and I spotted these little beauties. I had previously priced tem at Home depot and they were about $30 each but we got these for $26 for two. These ones are destined for the vberth but the more I think about it, the more I want to go back and purchase them for all of the electrical outlets in Akupara. I hate having some kind of device to charge and not being able to find the silly little wall wart.
It was extremely hot on Saturday so we did not manage to get a whole heck of a lot accomplished but it feels good to be back working at her again. I am also on holidays next week so hopefully I will be able to make some good progress. This weekends plan is to remove all of the rest of the windows and start filling some of those extra holes if all goes well.
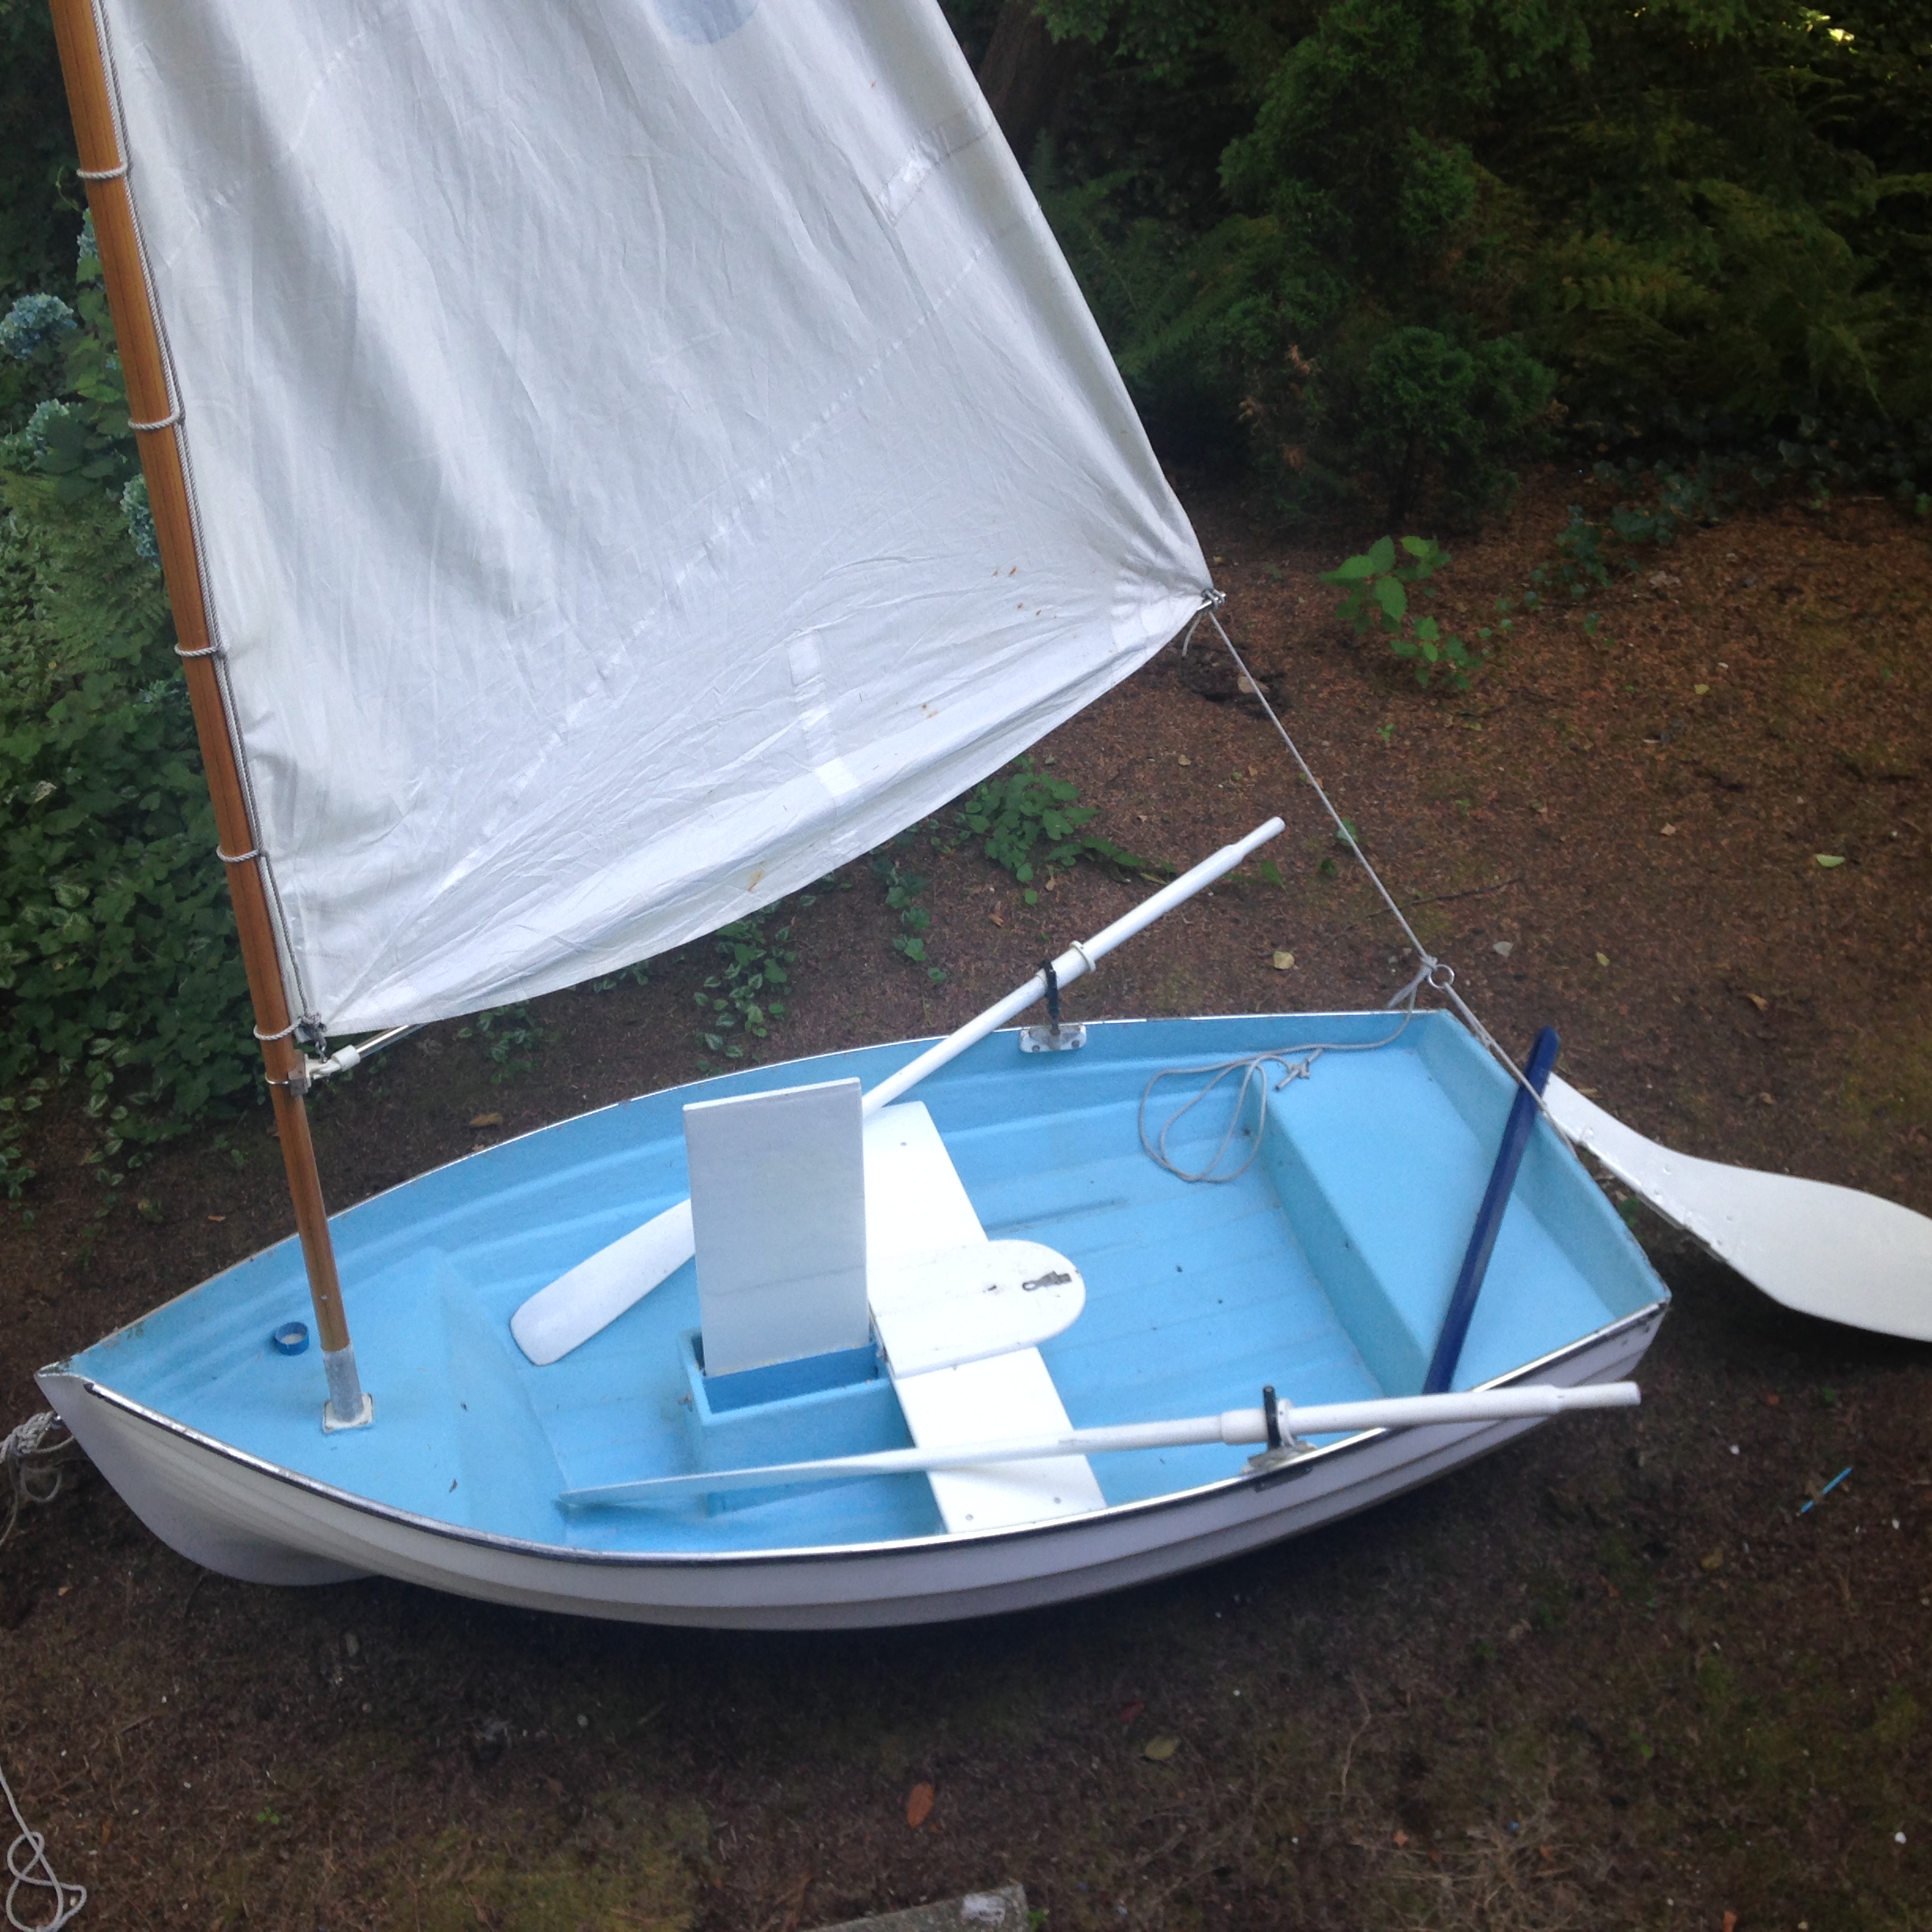
And finally I sold our little sailing dinghy last night. I had grand plans of keeping it as a backup tender and sailing through anchorages on warm days but the reality is it would be one more thing to drag on deck, one more thing to store all of the extra parts, one more thing to worry about, and we already have two rigid hull inflatables, how many dinghies do we really need?
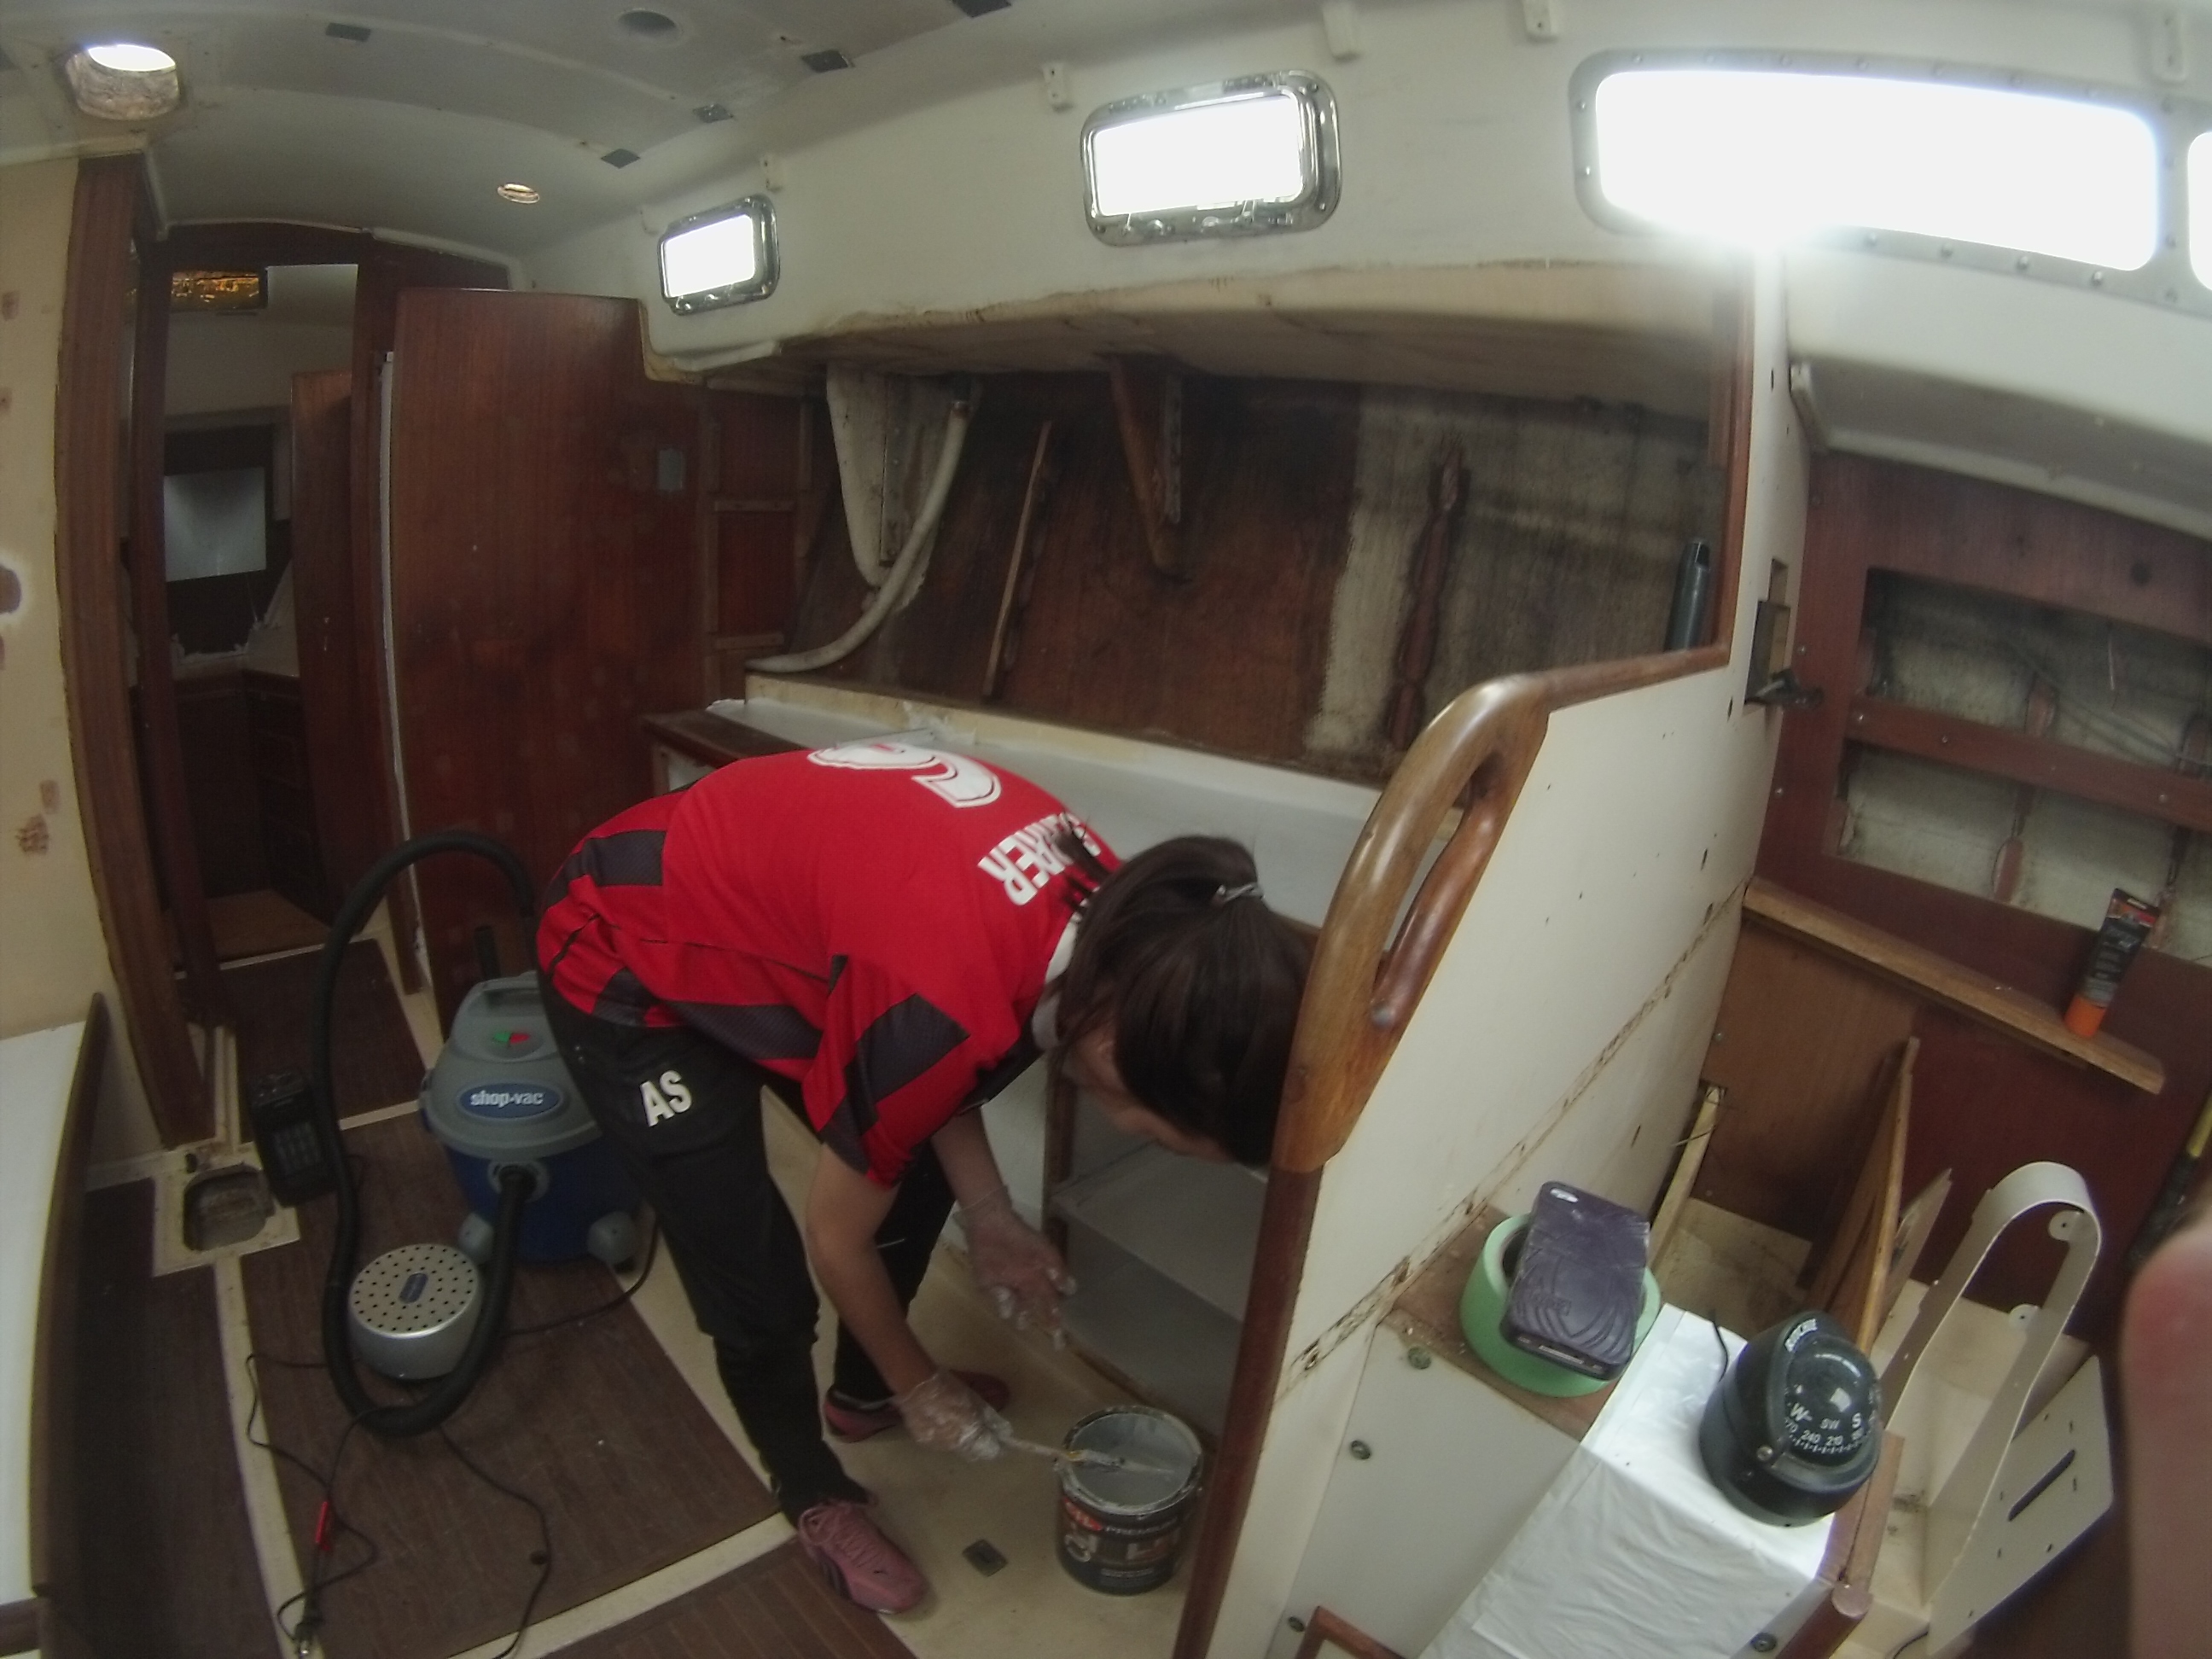
We managed to get a lot of much needed work completed yesterday. Once again Graeme joined us, and the 5 of us set about on our tasks and we hustled for the majority of the day. Paige being the smallest, climbed into the anchor locker and painted the entire thing while August started with the second coat in the vberth. In the pictures you can see many pieces of duct take on the ceiling. Each one of these is preventing epoxy from flowing through into the cabin and will be removed.
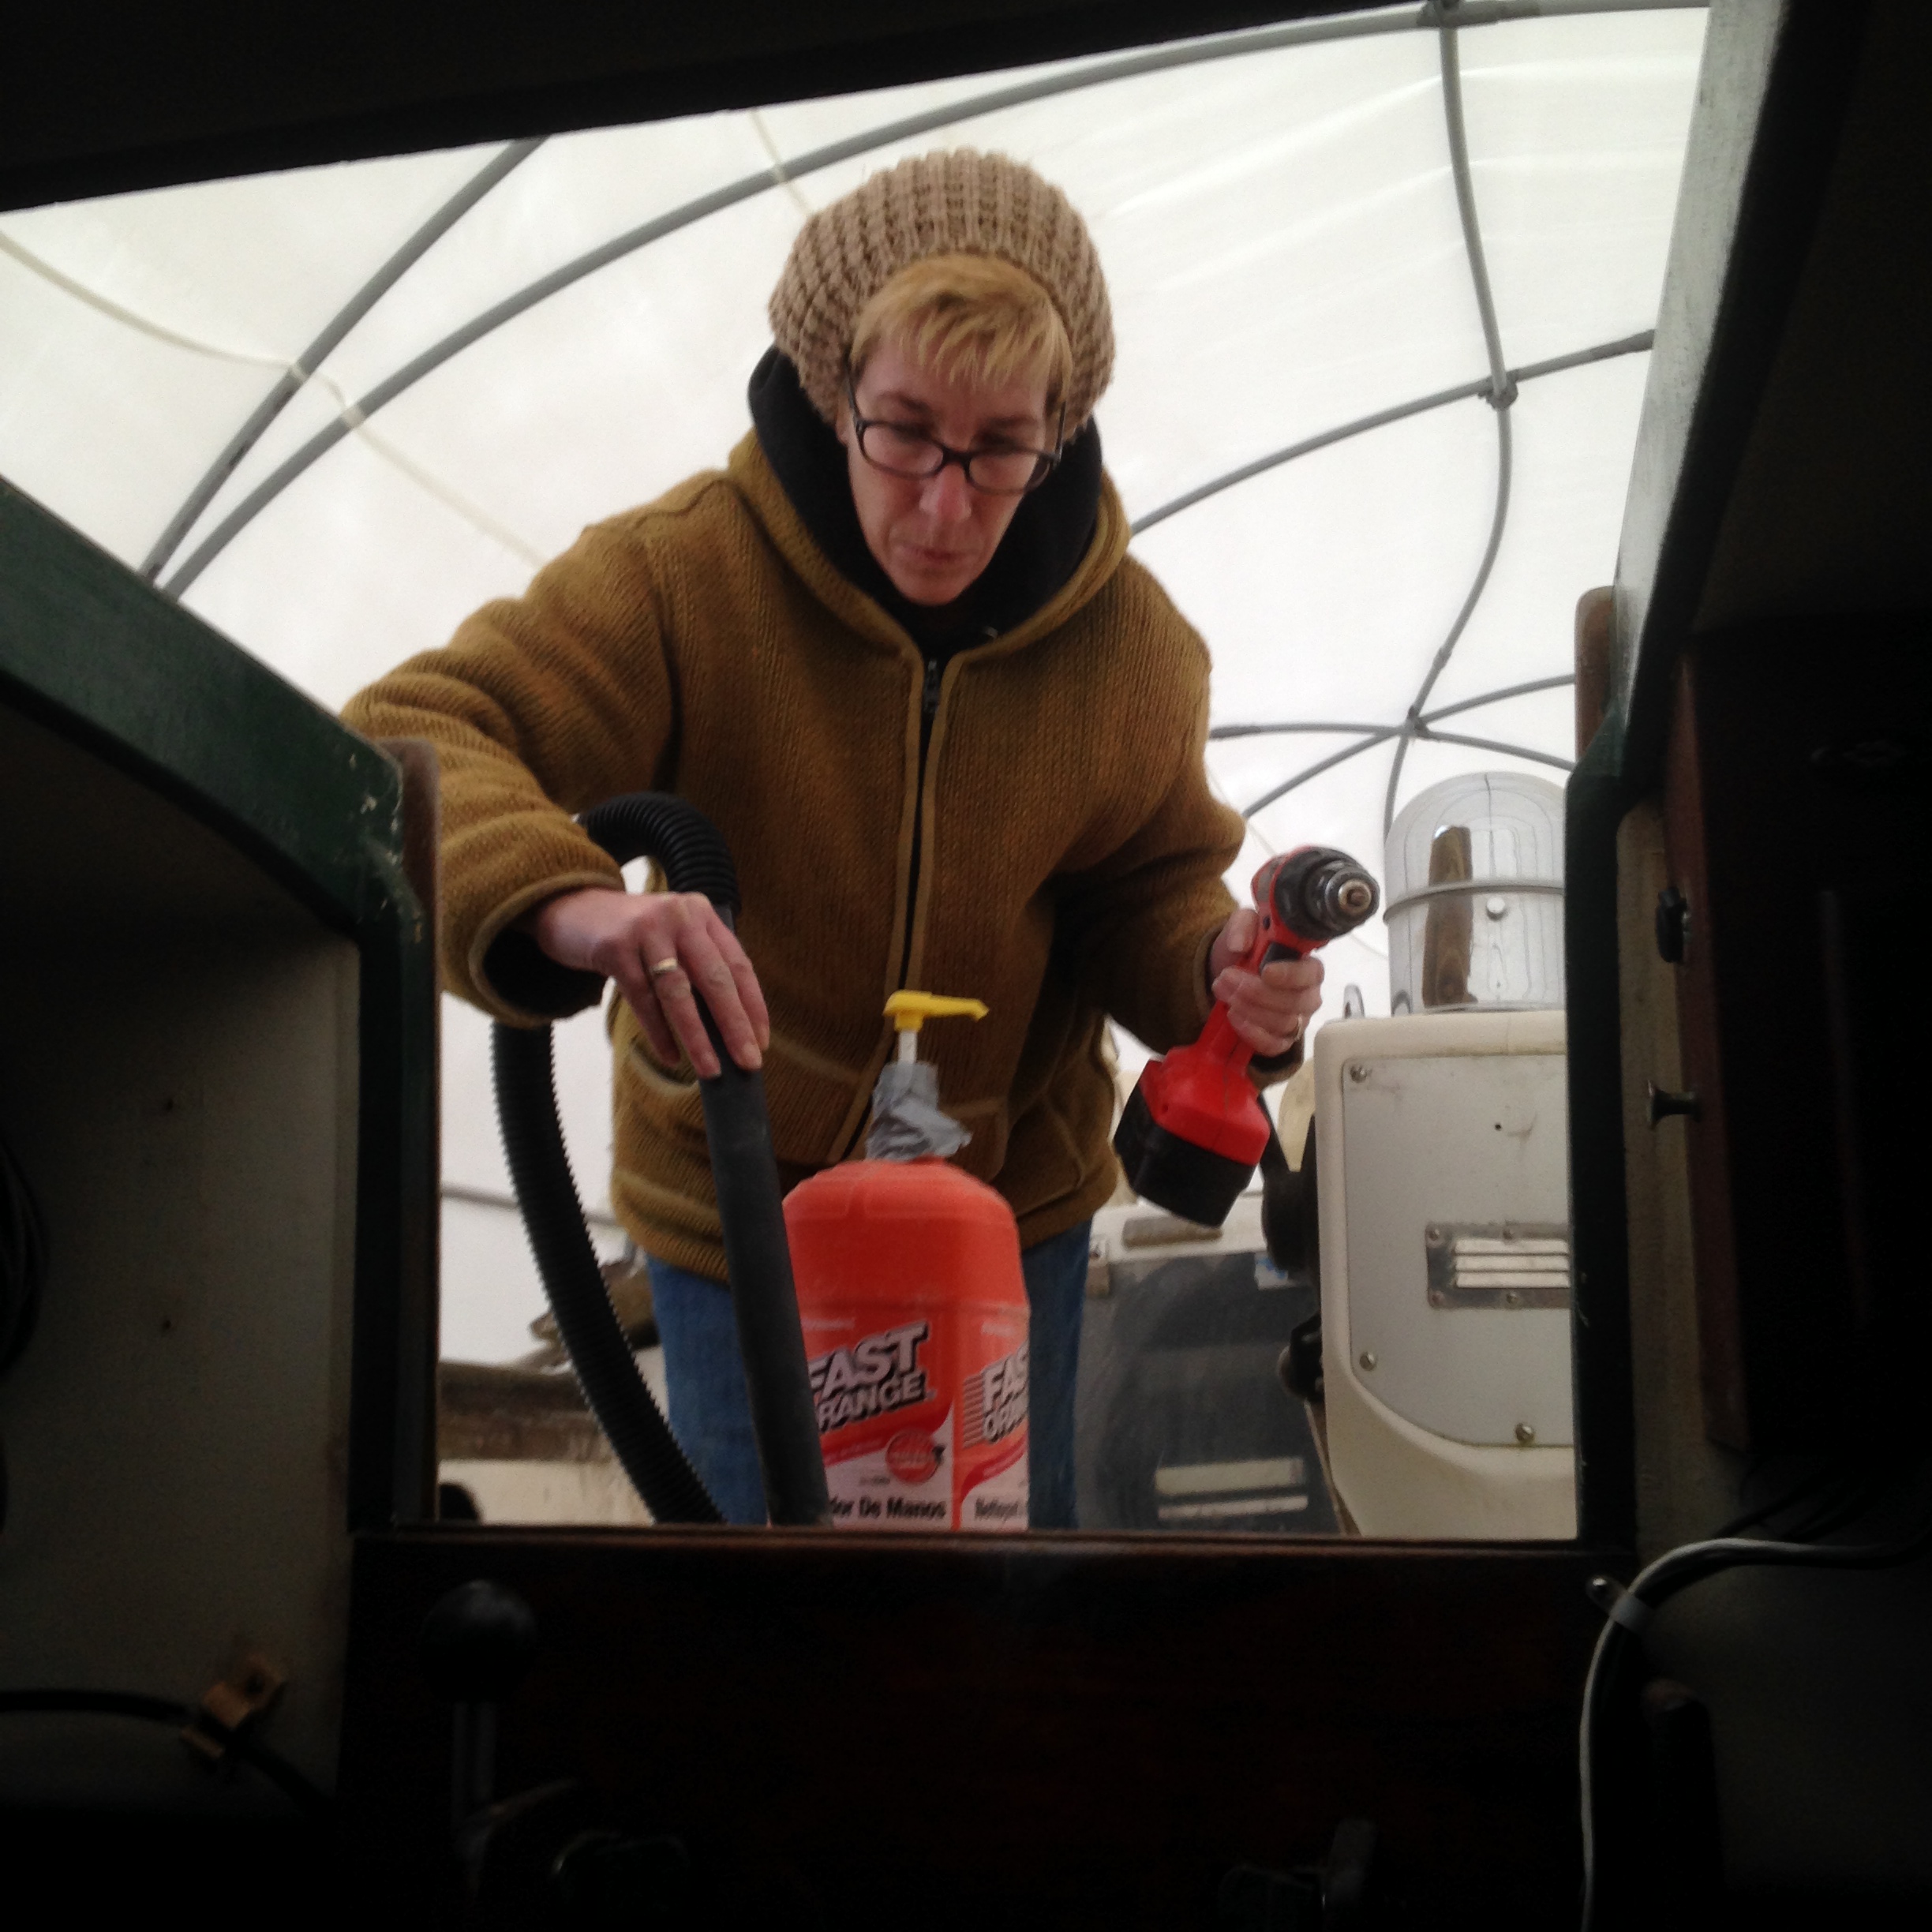
Andrea went to work with wood filler and sealed about 200 tiny screw, nail, and other such holes in any of the wood that will be left exposed. I asked Graeme to start by over-drilling any of the holes on deck that I had missed and I started mixing epoxy. Graeme soon ran out of holes to drill and he joined me in mixing and pouring epoxy.
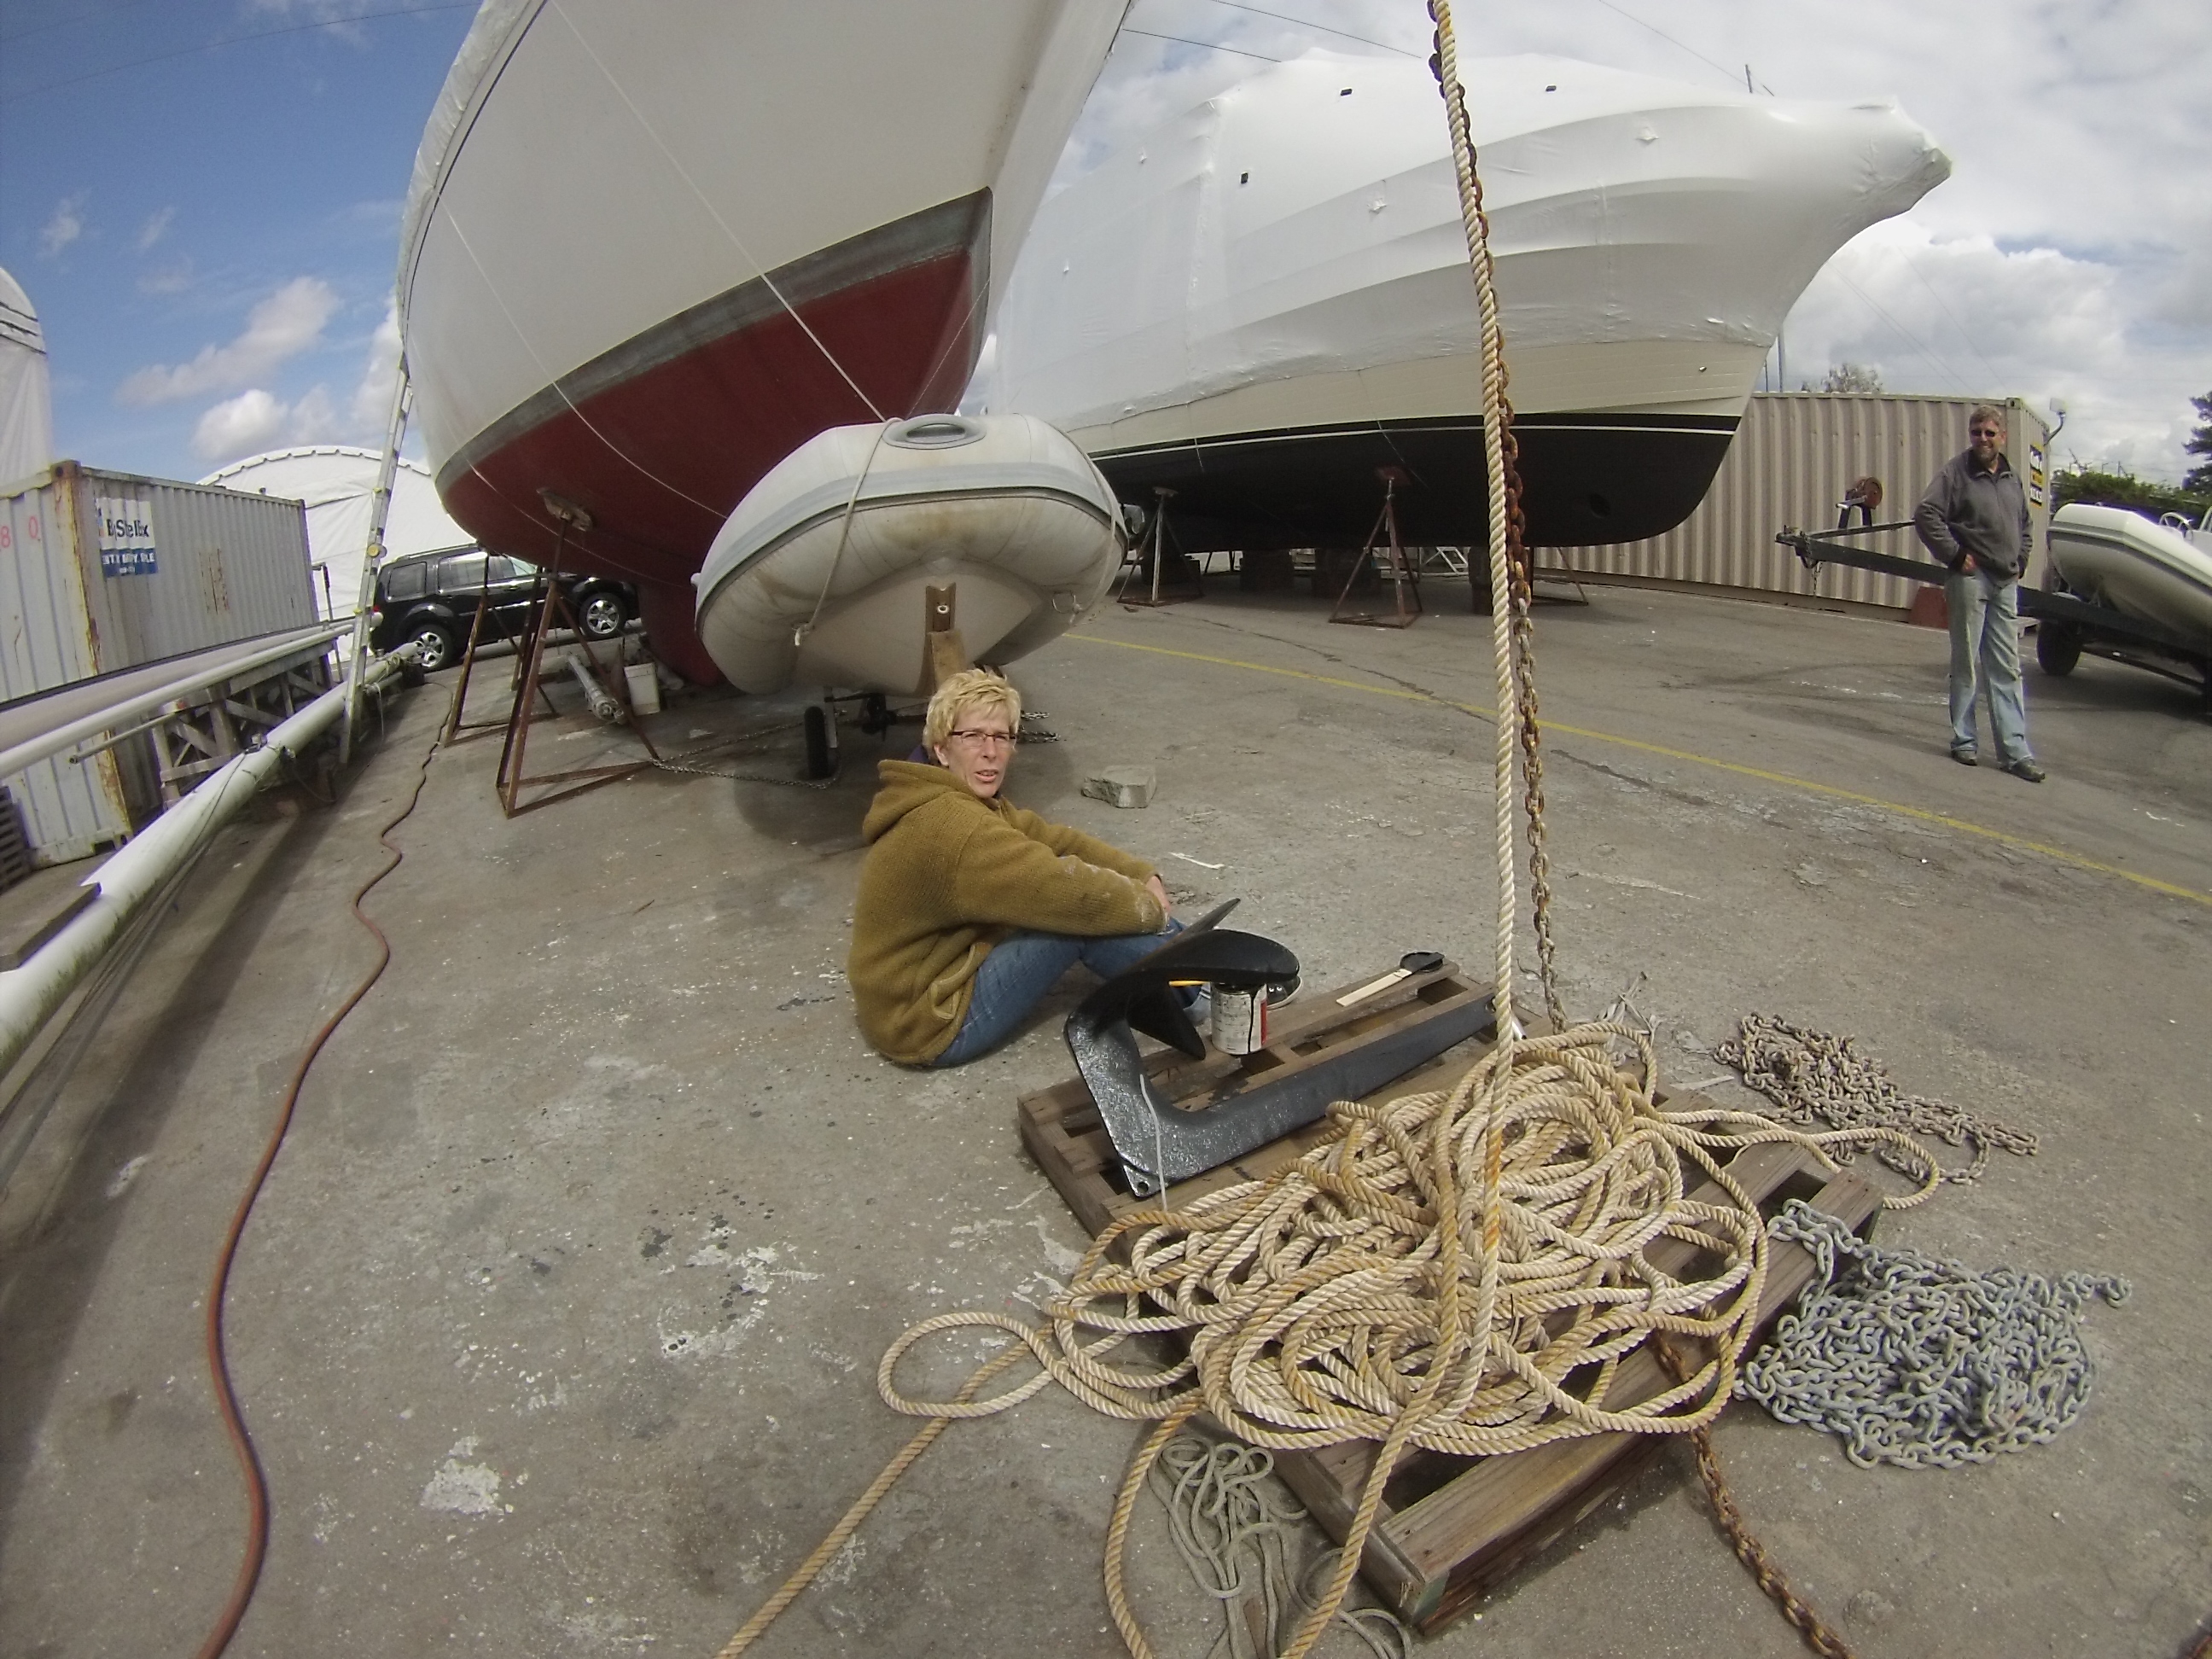
As the day progressed, Andrea ran out of wood holes to fill, so she went and applied a second coat of paint to our bruce anchor, At least that is what she told us she was going to do.
See, the admiral has the uncanny ability to strike up a conversation with anybody and in my opinion, maybe get a little distracted from what she is doing at the time. She on the other hand, always reports back that she has been performing research, or learning the ways of the locals, or making a future needed connection. She also has this way of explaining it to you with a heavy serious tone that makes it sound like she has been on some sort of secret spy mission and the outcome of that conversation will help to save the world or some such thing. Yet typically, the look on her face when you catch her, gives away the perhaps not so obvious motivation behind said spy mission. Proof in point, Take a look at the picture – facial expression – serious with a note of oh crap – busted! Sky behind – hmmm turning blue. A bit of shadow in the picture – hmmm warm sun perhaps?? 😉
I will add that Graeme and I were on deck filling holes with epoxy and had heard every bit of conversation for the last half hour at least.
August and Paige ran out of places to paint and joined the epoxy crew on deck, and eventually Andrea did as well. So the net result of our day is that every hole on the cabin top, both aft and main, have been drilled, and filled with West System epoxy and structural filler, we have a 2nd coat of paint on all of the areas we previously painted, as well as on the bruce anchor, all immediately visible holes in the wood bulkheads have been filled, and I managed to start filling some of the holes on the interior exposed fiberglass. We are almost at the point of being watertight!!
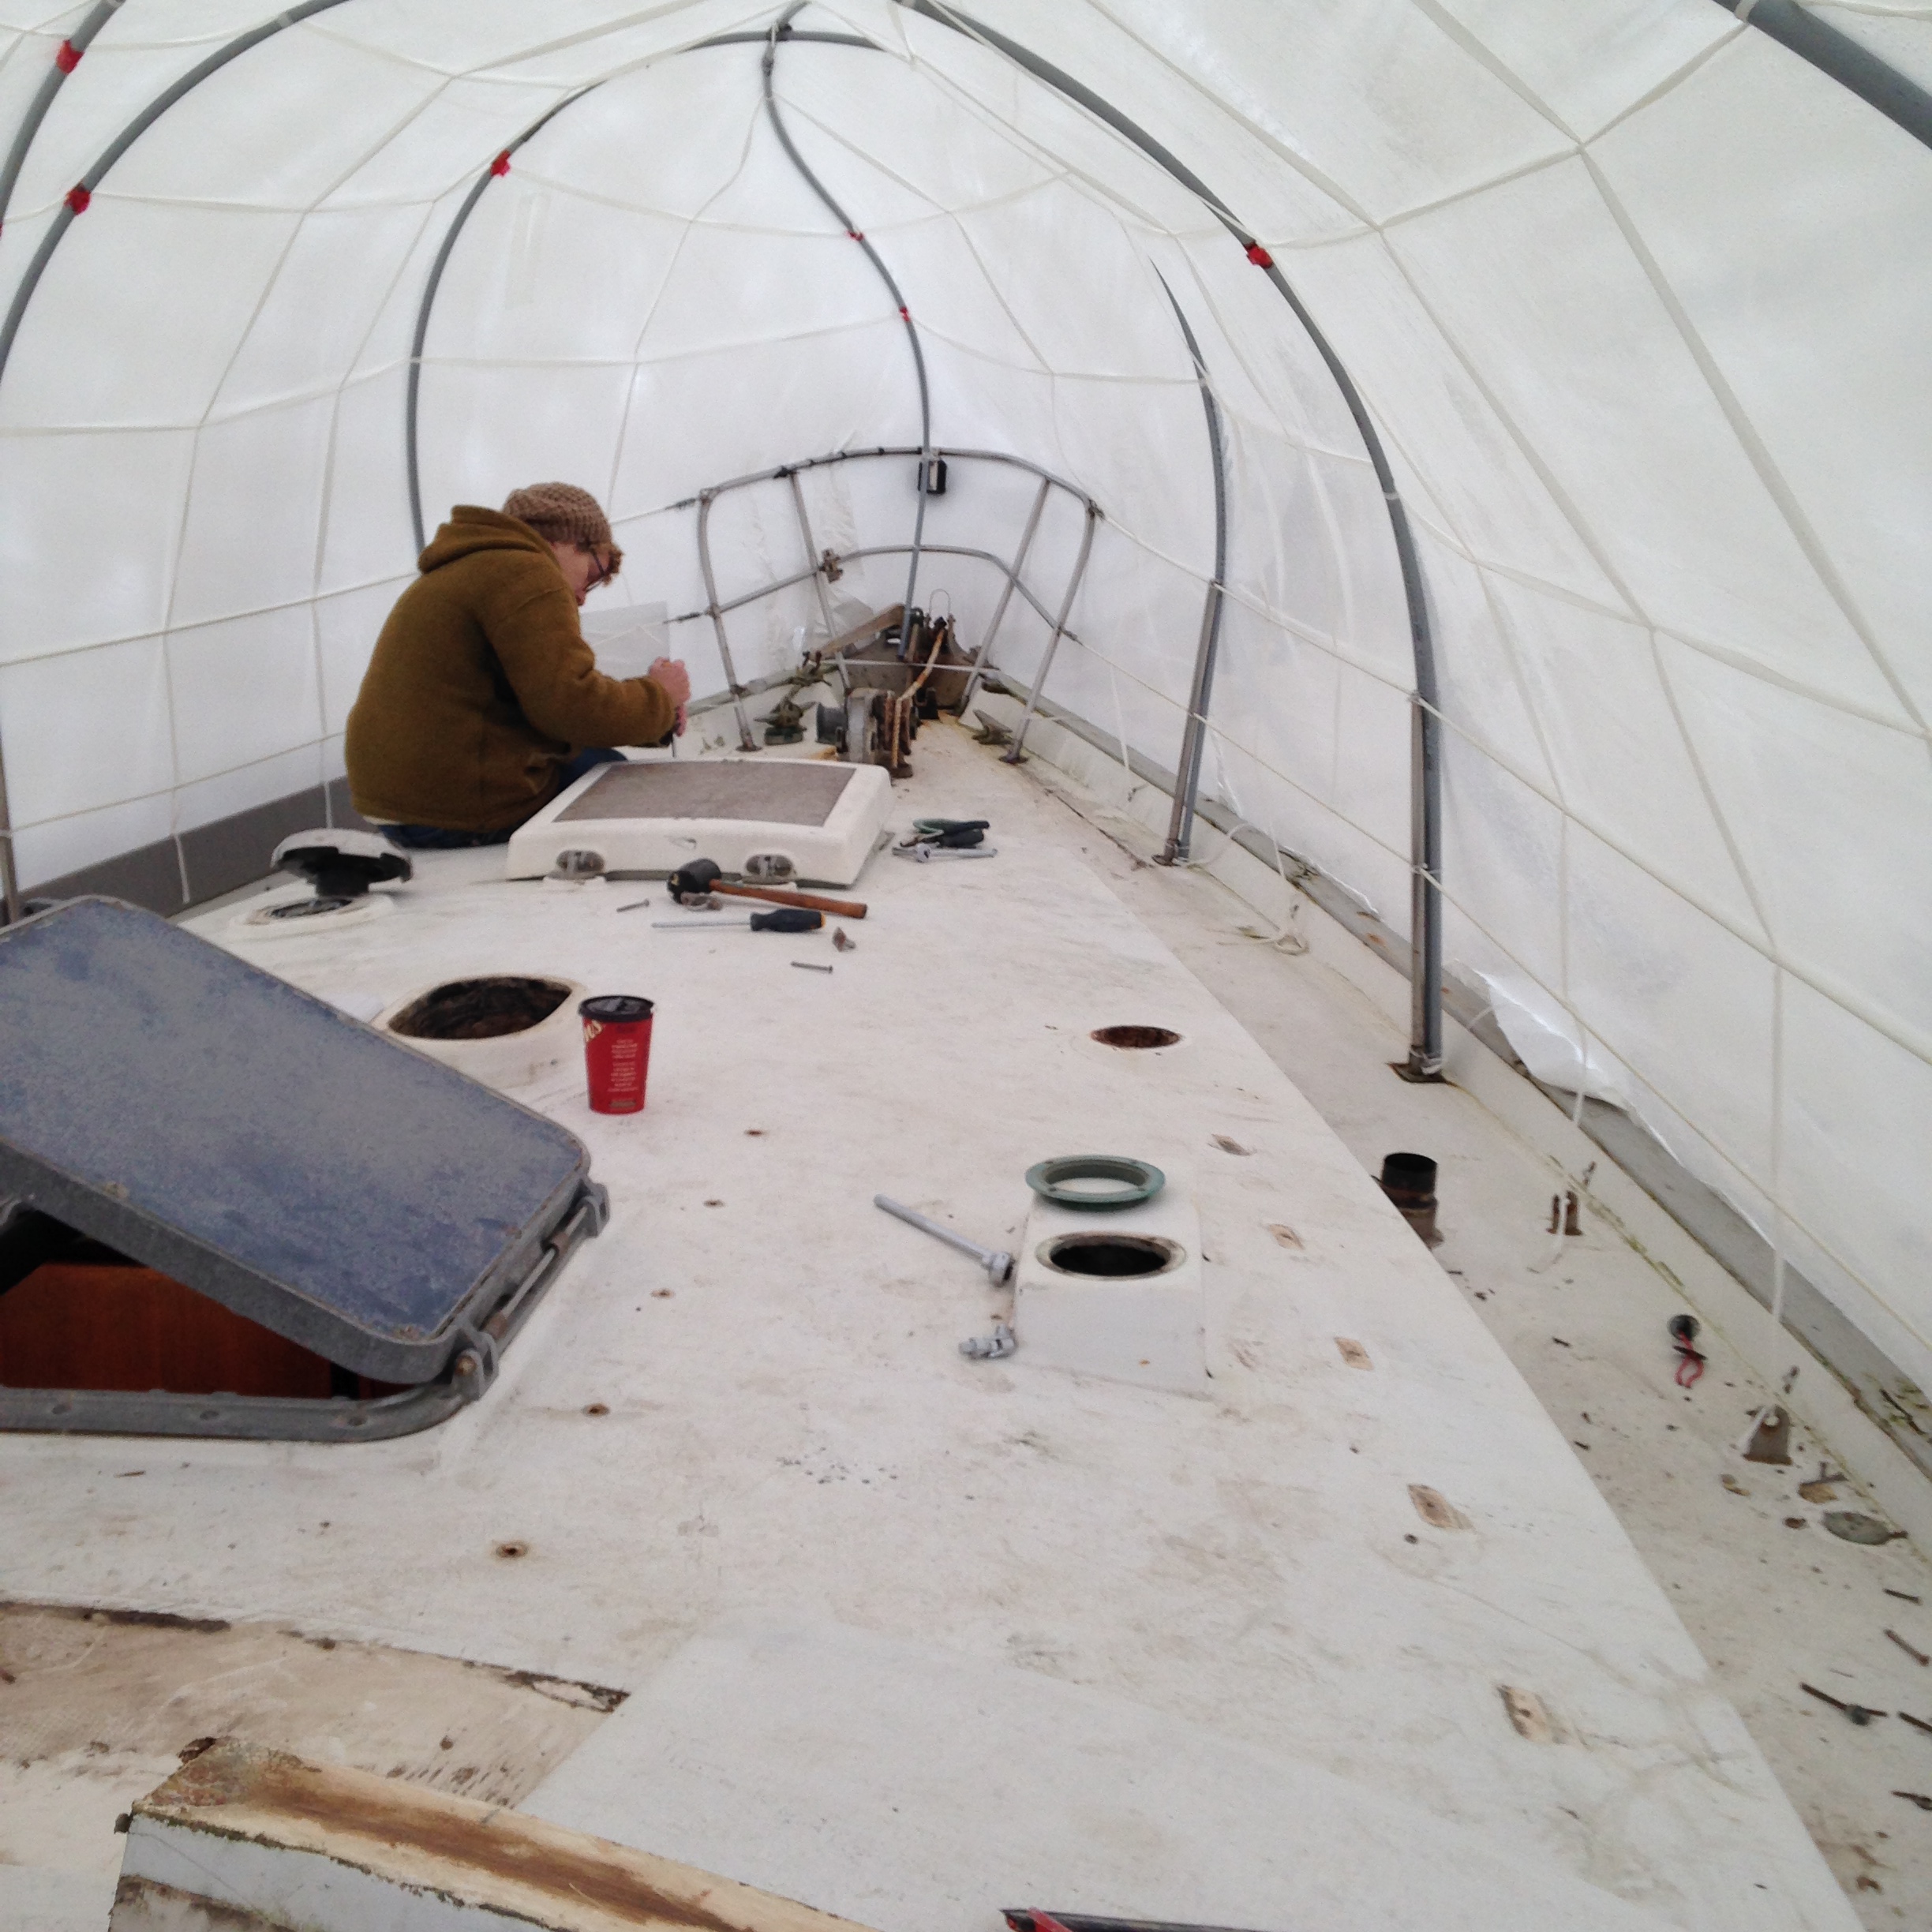
Holes left to drill and fill with epoxy – all of the stanchions, chainplates, and about 5 deck fittings that are giving us a hard time. As well, we still need to address holes on any vertical surface, as I only had slow cure epoxy hardener which would have resulted in a huge mess. As well, we need to cut wooden plugs to fill the instrument cutouts in the cockpit beside the companionway so that we can epoxy and glass them over.
To all boat owners everywhere. If you have a deck leak, please take the time to address the situation properly to prevent unnecessary damage!
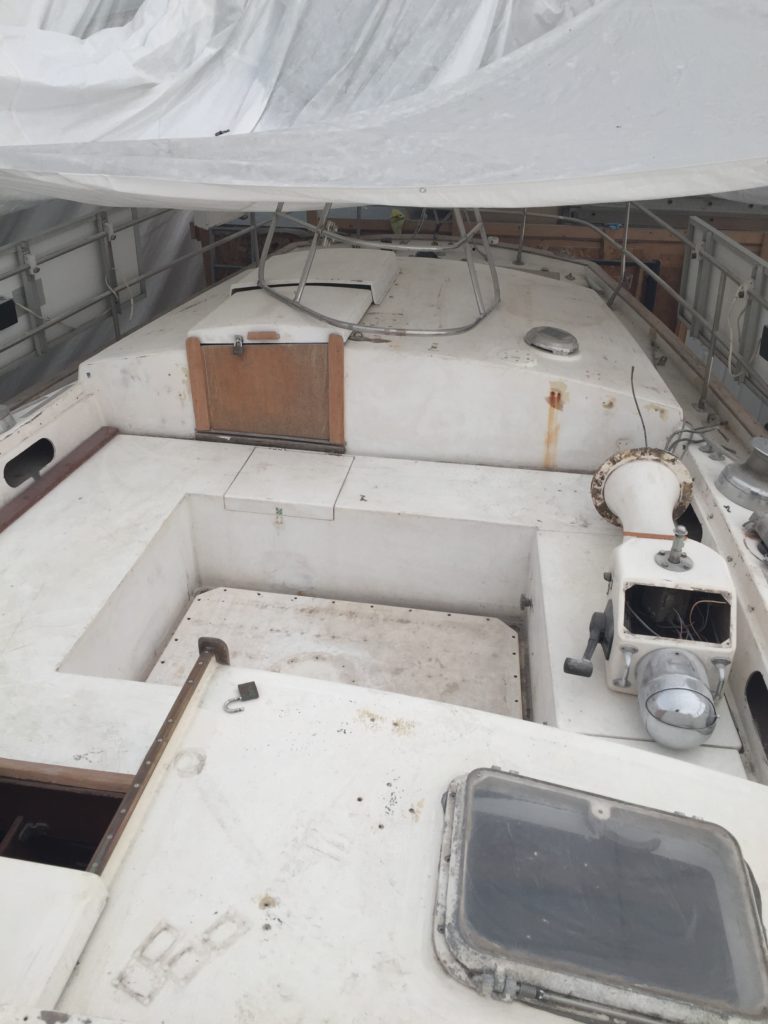
Akupara was built in 1976. That makes her 39 years old. We expect to find issues considering her age and that there have been several previous owners, which is why we are doing a complete rebuild which includes completely gutting the entire interior, electrical, plumbing, and mechanical. Had we just launched her as is, we would never have been aware of some of the more serious issues that we are slowly discovering. We knew we had a large foredeck repair coming and since then have discovered that the anchor locker bulkhead will need to be completely replaced, and yesterday as August disassembled the aft cabin, I had my first really good look at the mizzen main chainplates. The chainplates themselves have been replaced which is great, but they will need to be removed, and I will need to perform some surgery on the aft head bulkhead and aft dressing table bulkhead. It seems that whoever did the replacement, removed the old chainplates and discovered some wet plywood in the bulkheads. Rather than completely cut out the wet wood, and glass in a proper repair, they simply used a hole saw and drilled a bunch of holes enough to chisel out the immediate area of the chainplate, used some kind of a block of plastic and reattached the chainplate. I was stabbing it with a screwdriver to try to identify how big of an area will need to be fixed. Prior to that, it actually did not look that bad.
 Thankfully, the actual knee that the chainplate is bolted to, which is on the other side of the bulkhead, seems to be solid and dry so the repair will be limited to replacing a portion of the bulkhead only. As well, the repair will be hidden inside the upper lockers in the aft cabin as since it is a rather tight area to get to, the repair may not turn out as visually pleasing as I would normally like. This does allow for a more robust repair though, which is good.
 So, we have some more grinding and glassing to do but when we are finished, it will be as solid as it was originally. Did I mention that we will be using all marine grade plywood for repairs? Household plywood has absolutely no place on a boat.
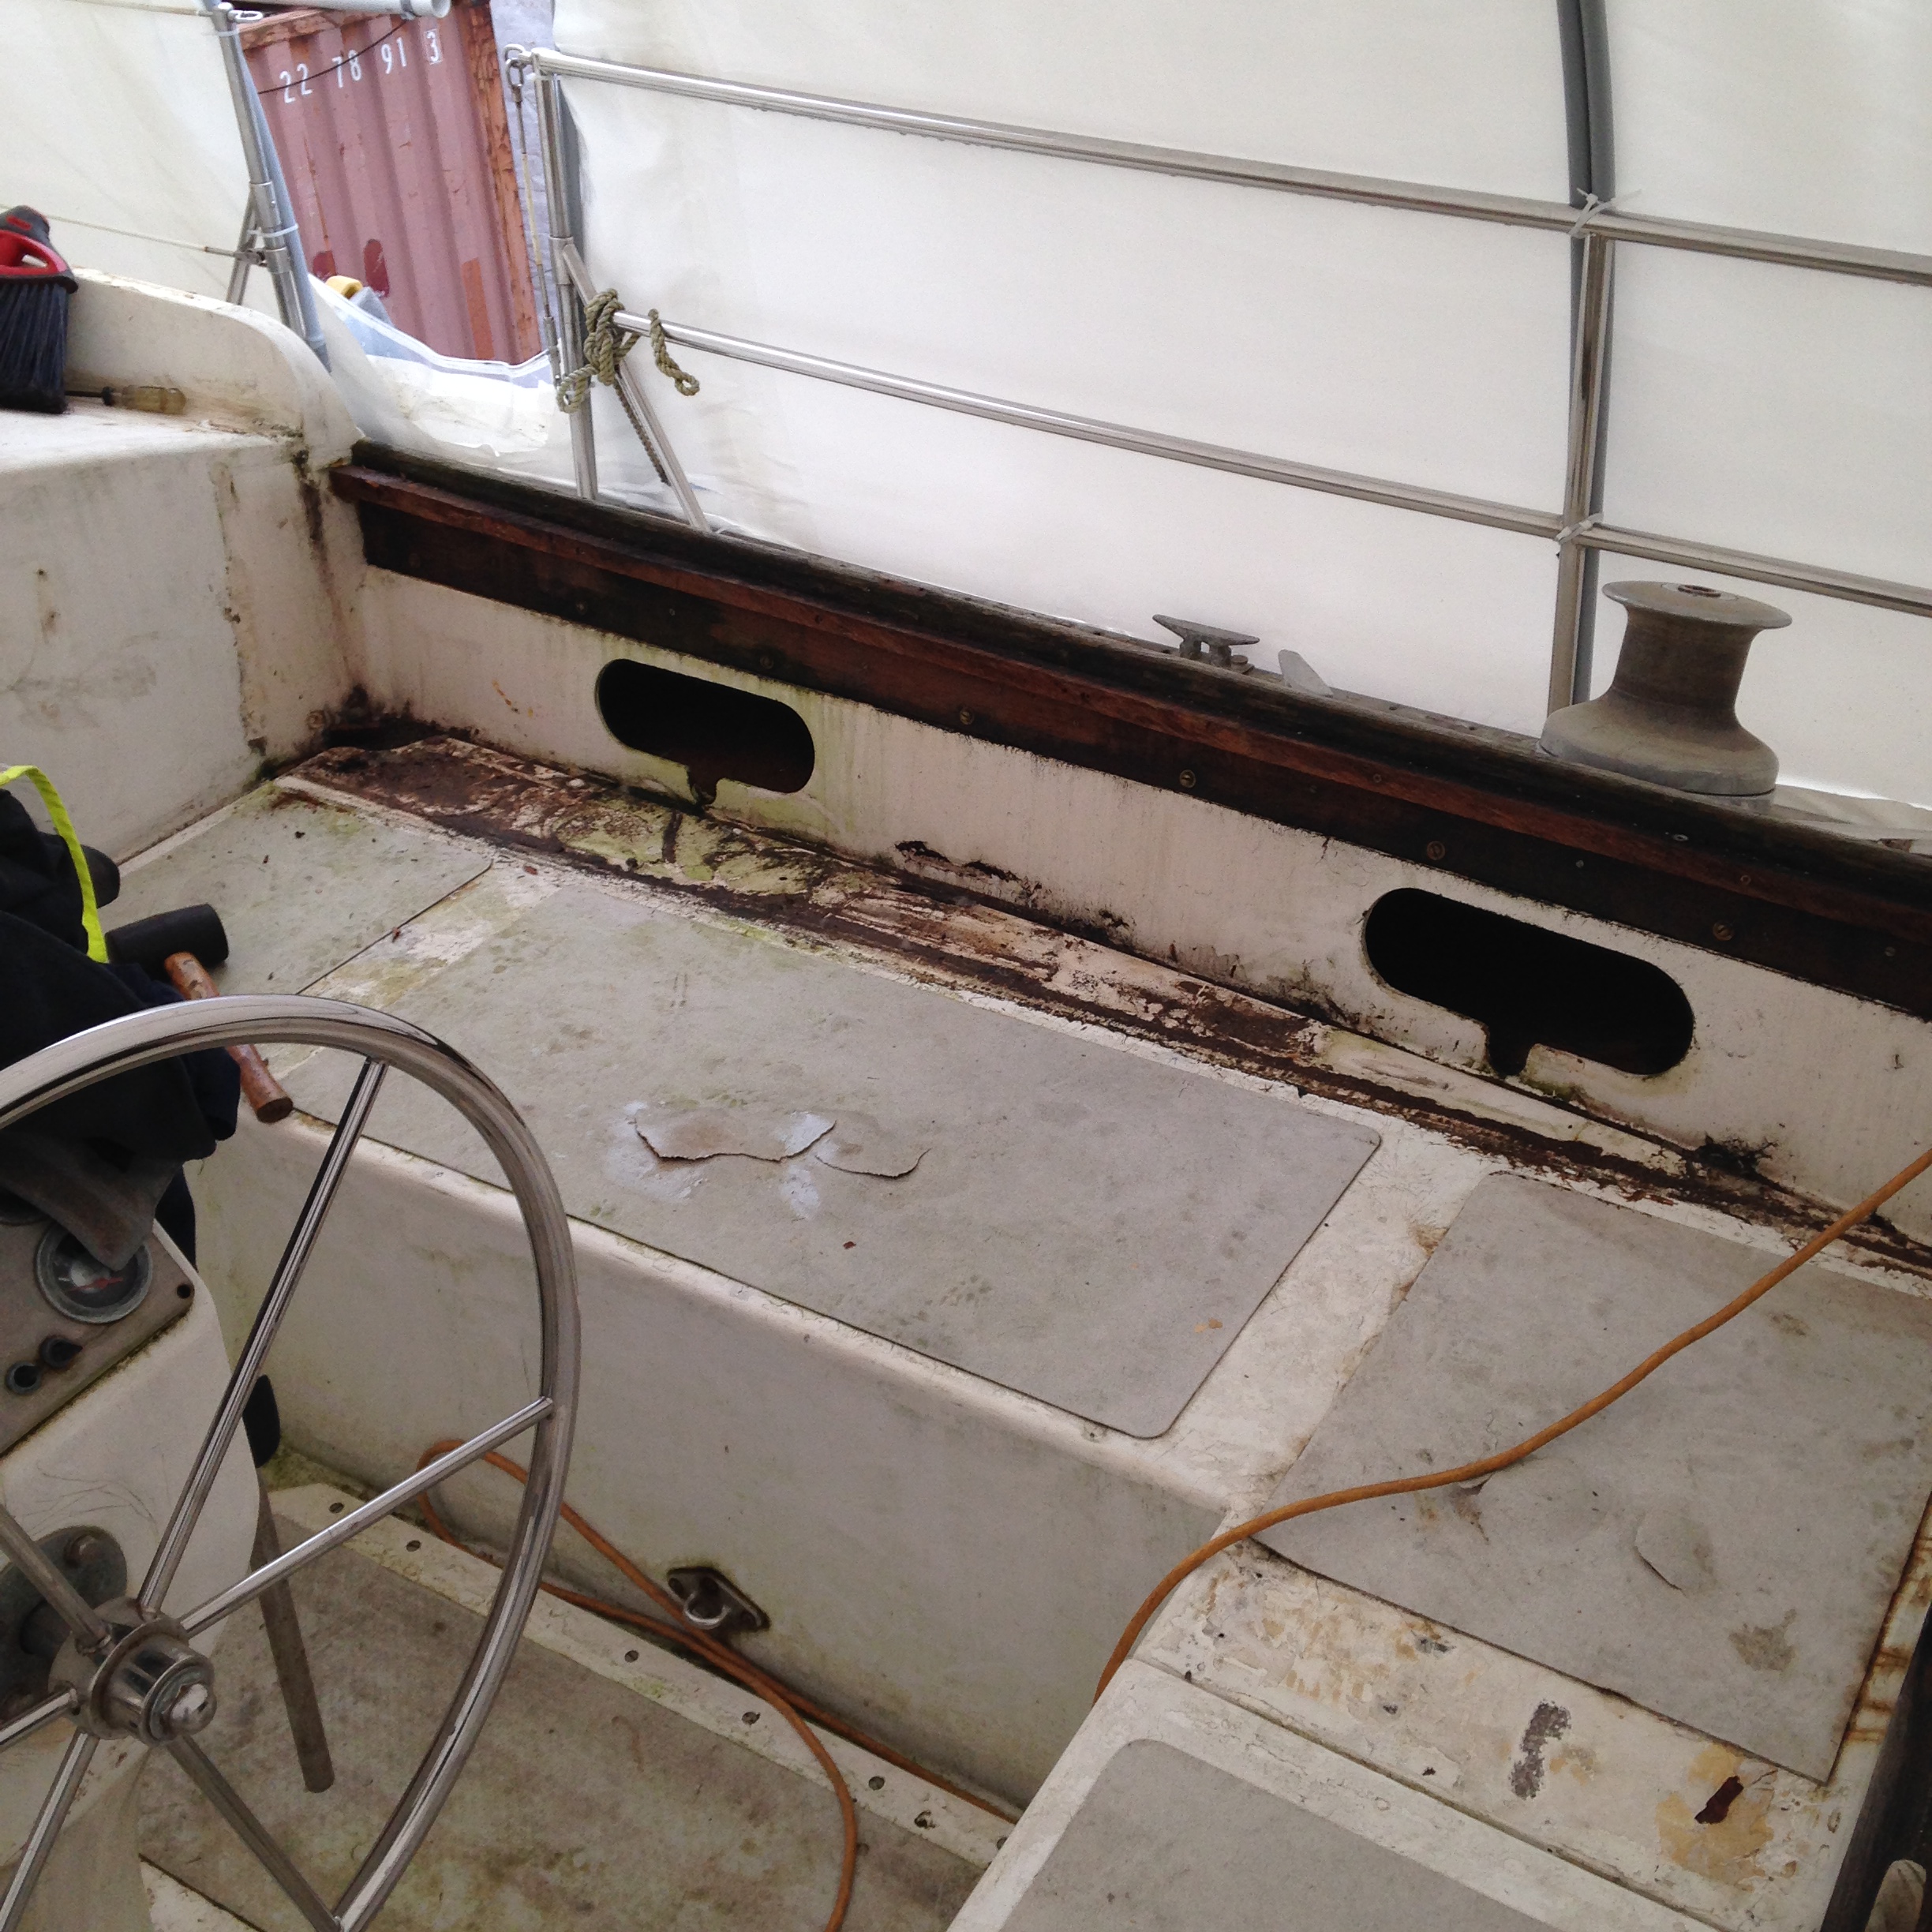
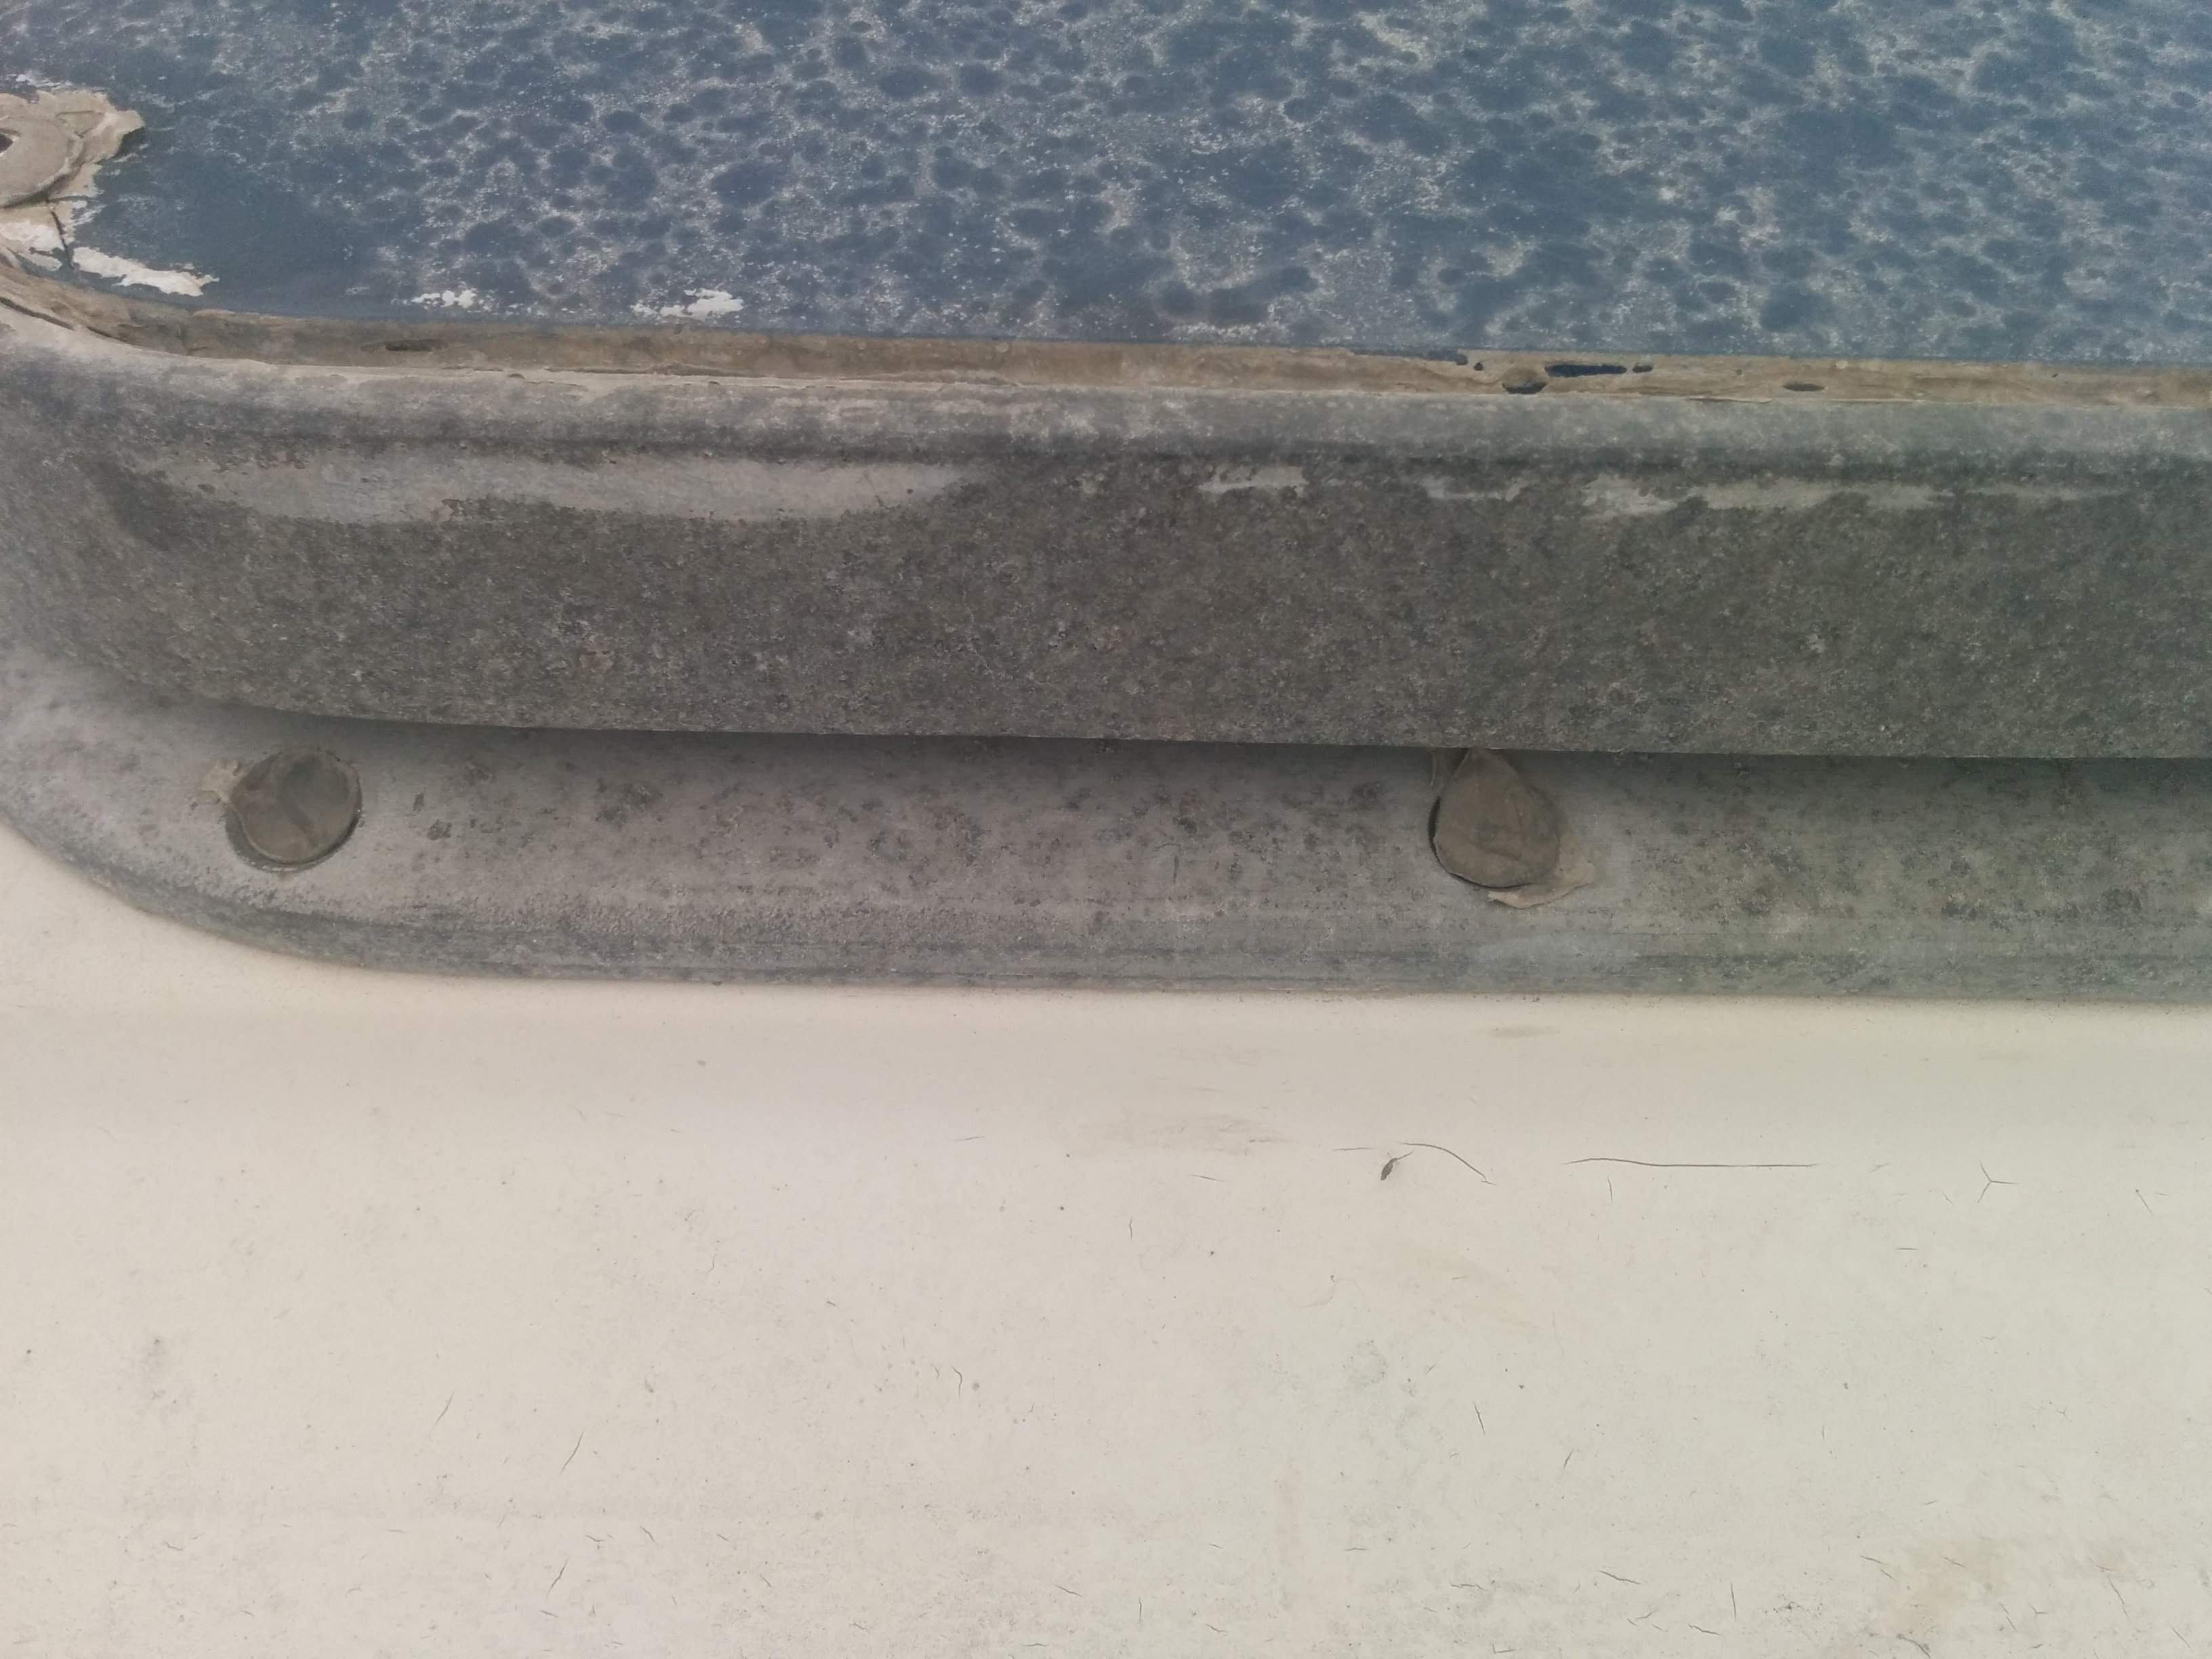
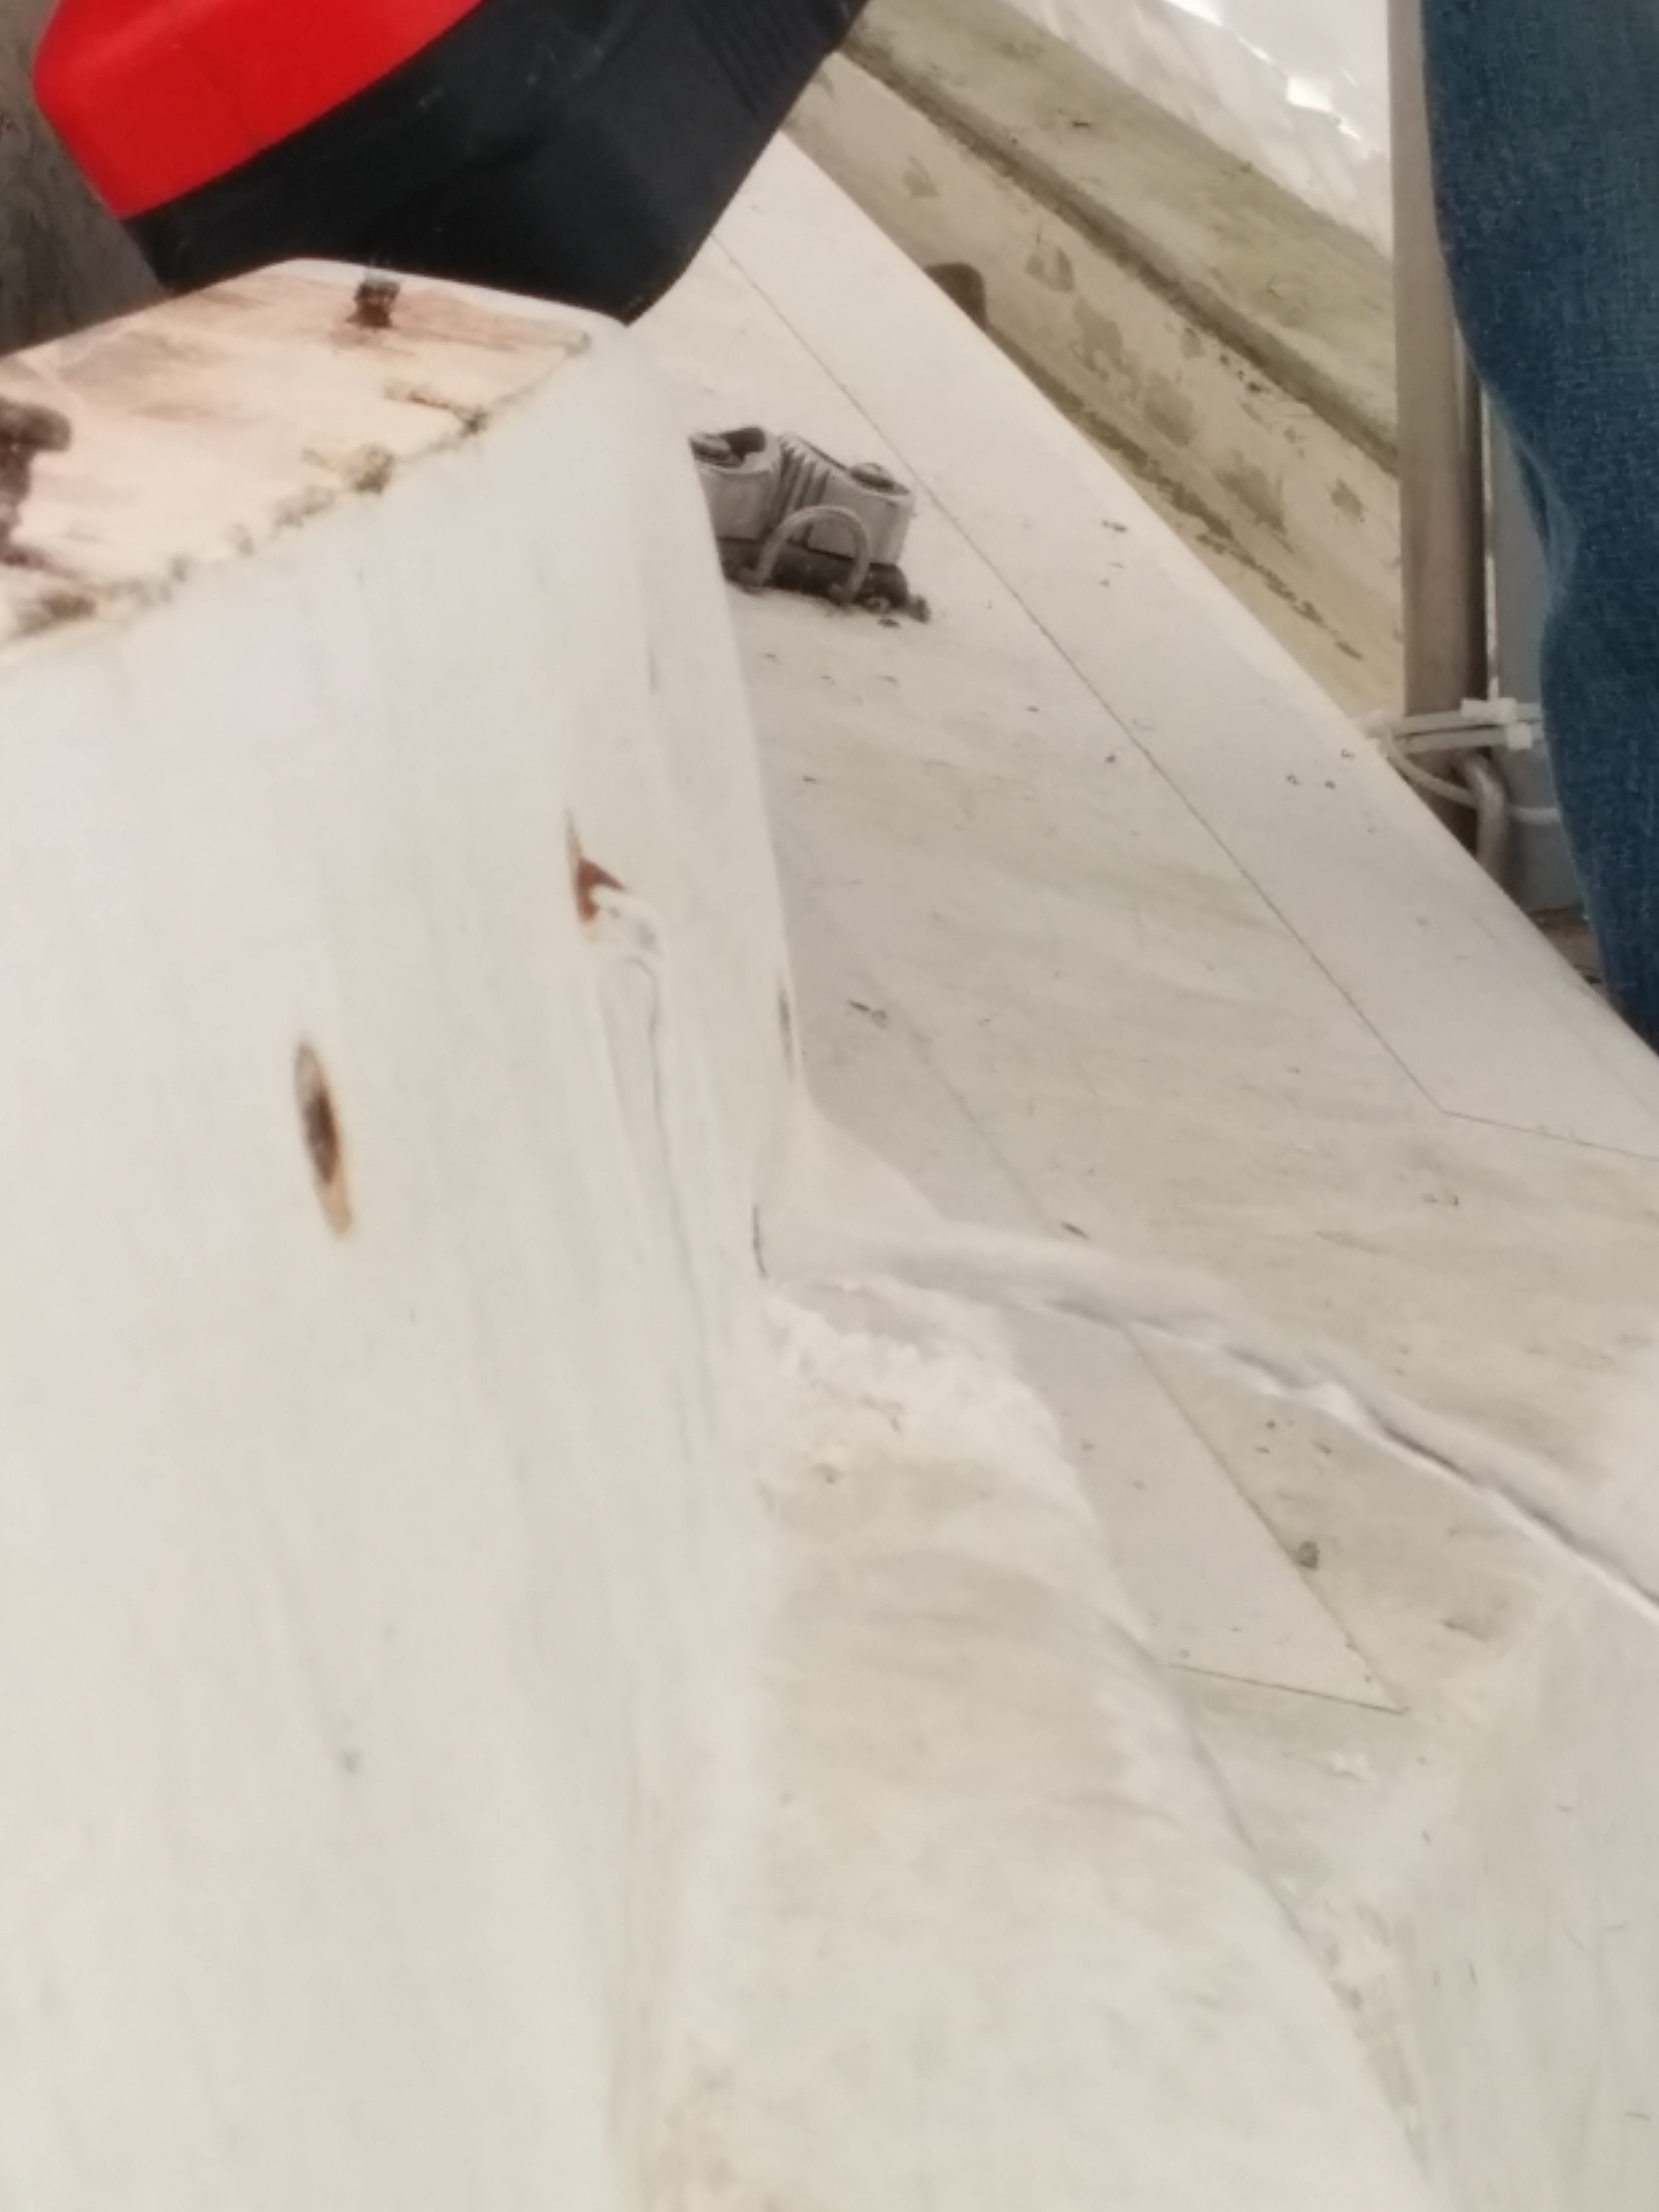
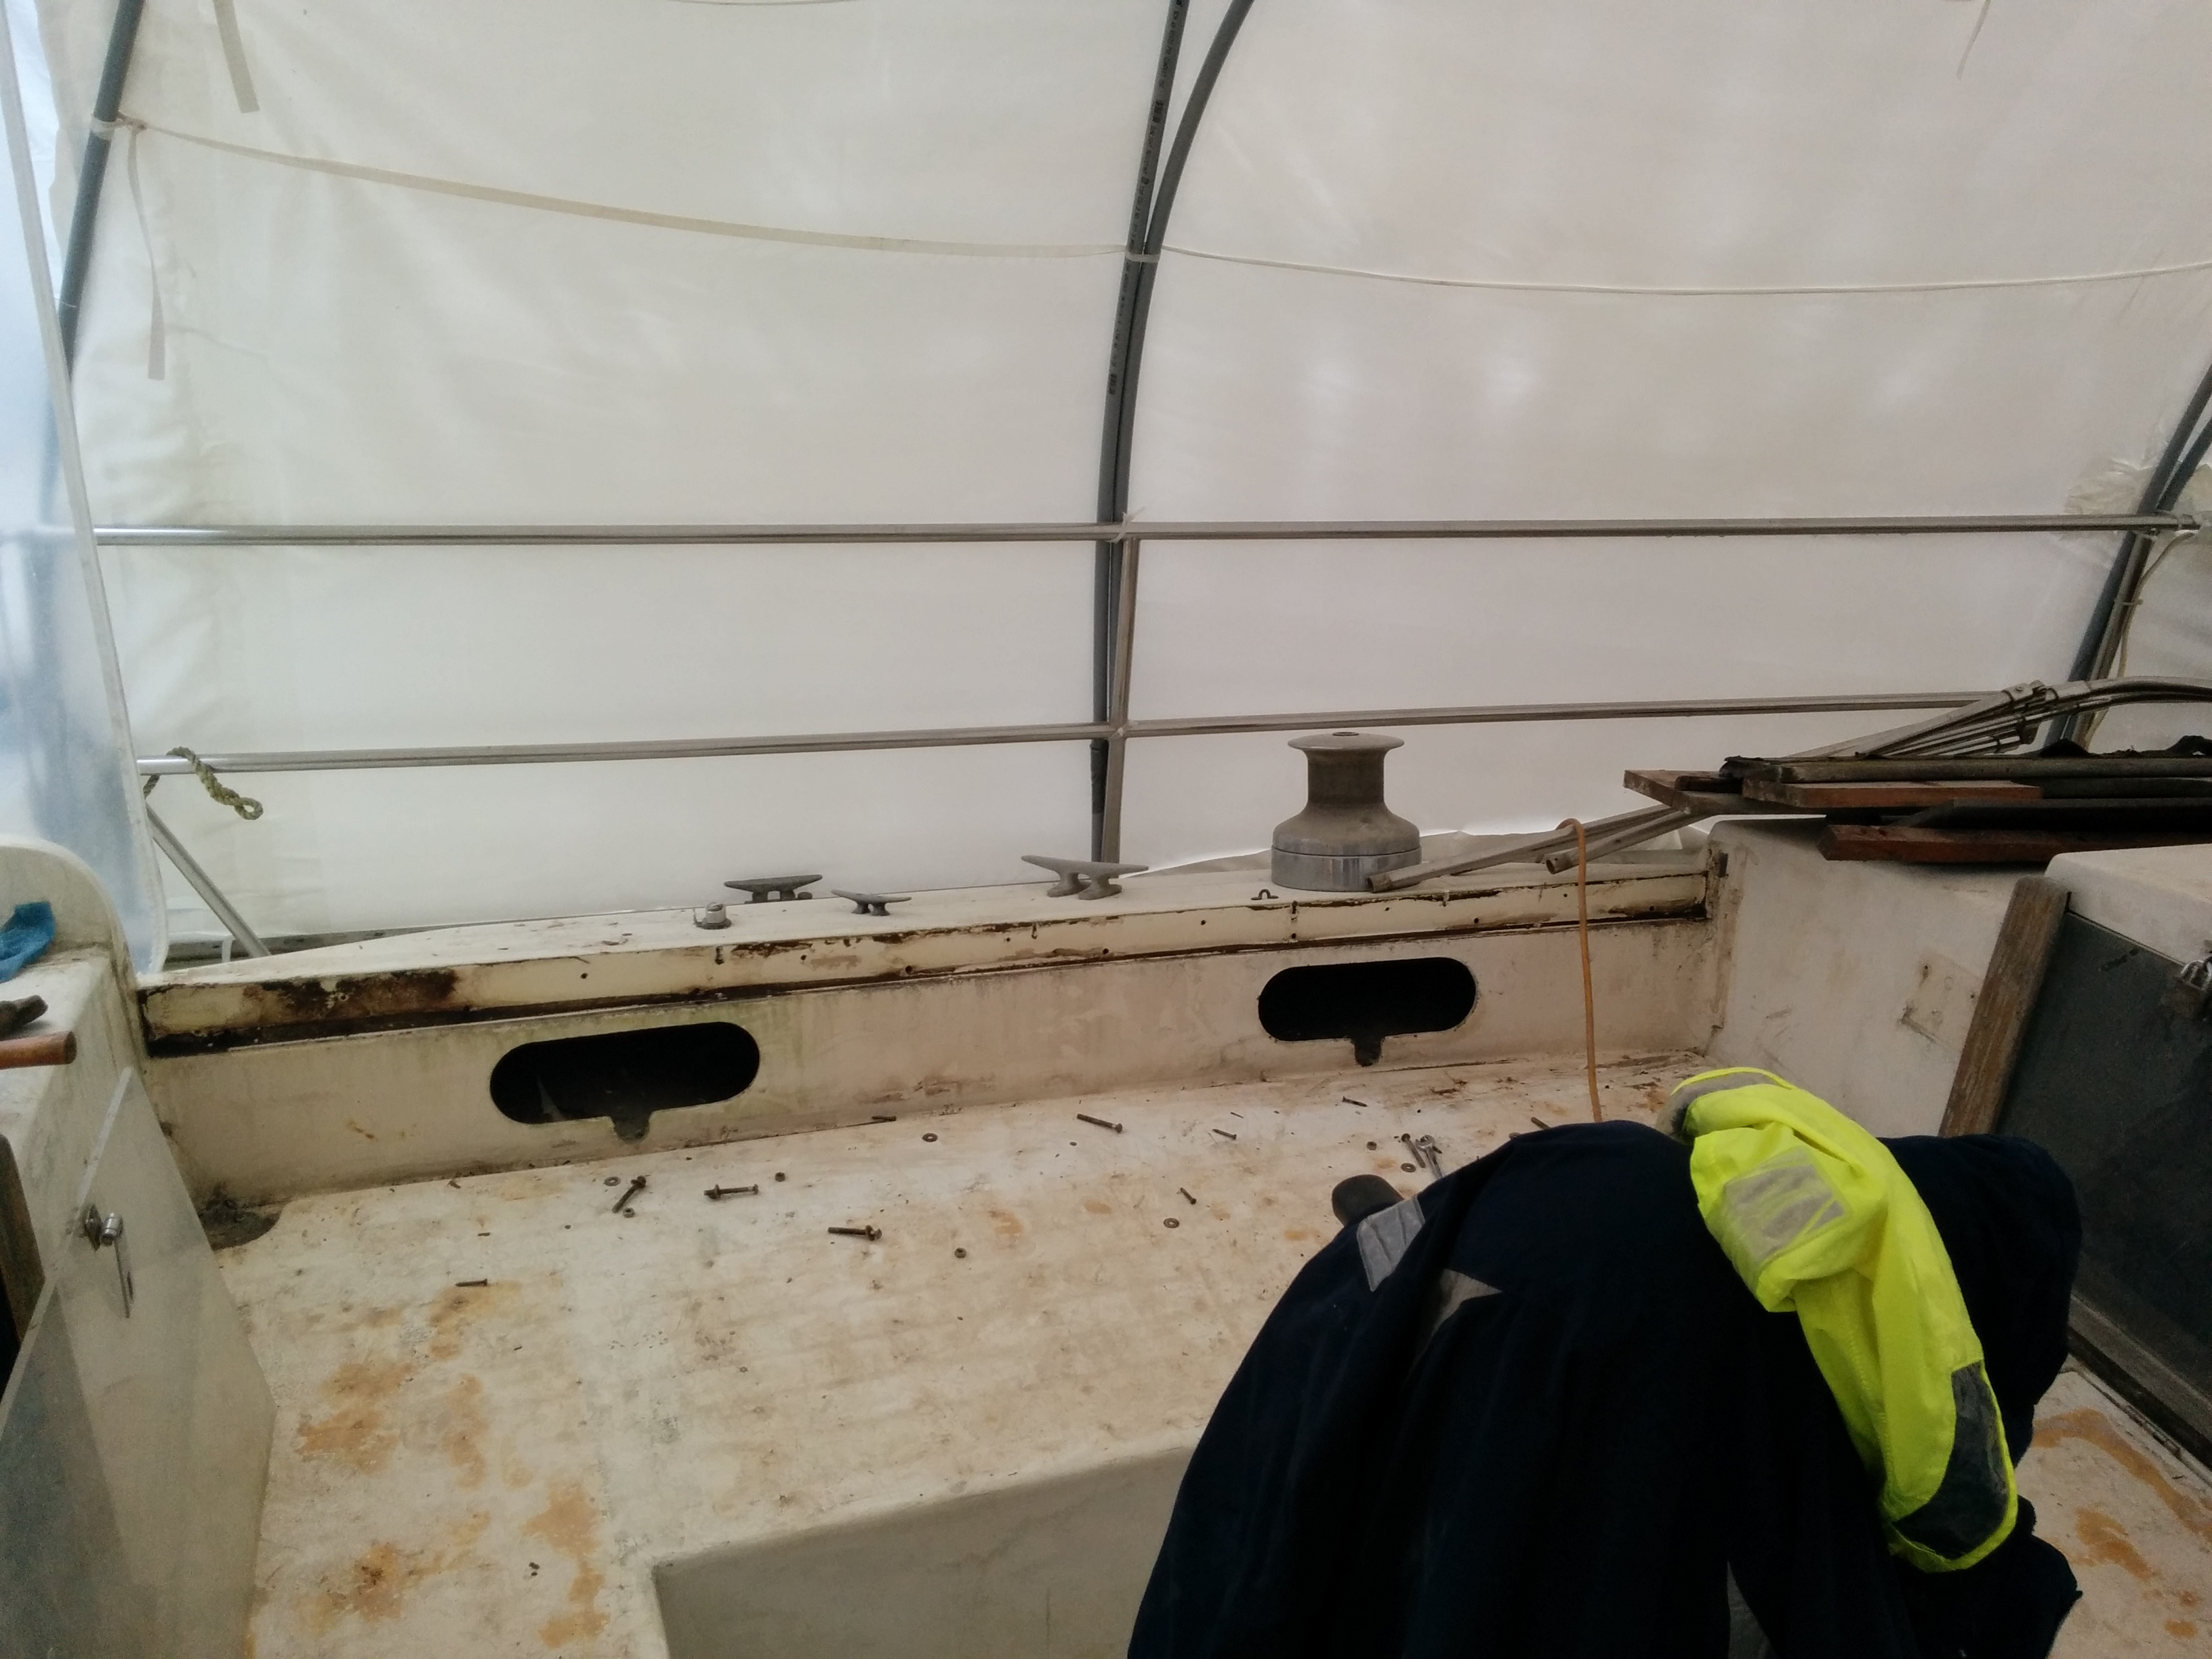
Oh and there is also a very good look at some of the condition of the deck fitting bolts. You can actually see water dripping from one bolt. These are for one of the stanchions which we have not removed as of yet.
For those of you who have been following along, you may be wondering why we seemed to switch to dismantling the interior. We decided that we needed to gut the interior as soon as possible to allow Akupara to thoroughly dry out inside. All of the “pegboard” that lines the hull inside the lockers is simply trapping moisture, and hiding cockroaches 😉 and needs to be removed asap and given a chance to dry as well as quite a few pieces of wood.
I firmly believe that there is a common misconception out there that stainless steel is a miracle material that will never stain, never rust, and never corrode.
After removing every screw, bolt, nut and washer from Akupara’s decks I can assure you that this is not true. Every single screw, bolt, nut and most washers was either rust stained, partially rusted, or completed corroded all the way through. We broke as many screws as we managed to successfully remove, when trying to get them out.
Some of them we were able to remove after they broke, but some of them still need to be removed. Almost all of the corrosion starts approximately 1/16th of an inch below the deck. So it isn’t on any visible part, and if you could remove whatever fitting it is without removing the screw, you would not be able to see anything wrong. However, back the screw out 1/16th and the issues start to appear.
When we begin reinstalling things, we hope to avoid some of these issues with the way that we will countersink the deck and add little rings of butyl tape around the bottom of each screw. When the time comes, we will document the process on the sight for everyone to see.
Take this as a warning to anyone who doesn’t re-bed their fittings on a regular basis, perhaps it is time to check all of that stuff?

So we had our first, of many I’m sure, contractors out to Akupara last weekend to take a close look at the decks and provide an estimate to having them media blasted.
He seemed like a thoughtful contractor. He discussed the project at length, he examined most of Akupara’s decks, he even took pictures of some spots. He discussed portioning off parts so as to minimize the dust etc. and we took a screwdriver and scratched off some of the non skid to attempt to determine how thick it was.
When he had gathered enough information, he thanked us and was on his way, but then about 2 minutes later there was a knock on the hull. He asked if there was a piece that he could bring back to his shop in order to run some tests. That way he would have a better idea as to how much material he would need to remove the non skid and paint. I reluctantly removed one of the aft locker lids and let him take that on his way.
The next day I received an email with a nice quote all typed up and professional, but to my horror it was $9300! How in hell can a rough estimate go from $1300 with one company to $9300 for another.
Well, the answer lies in one’s understanding of what gel coat actually is. In the email exchange that followed his quote, he kept talking about how much effort was required and how much media he needed to get the paint and non skid off. I know some of these products can be hard, but I was still in sticker shock so I didn’t really pick up on certain subtleties of his spoken word. In any event, I made it clear that I was not going to proceed at that price and we made an arrangement to meet so that I could get my locker lid back.
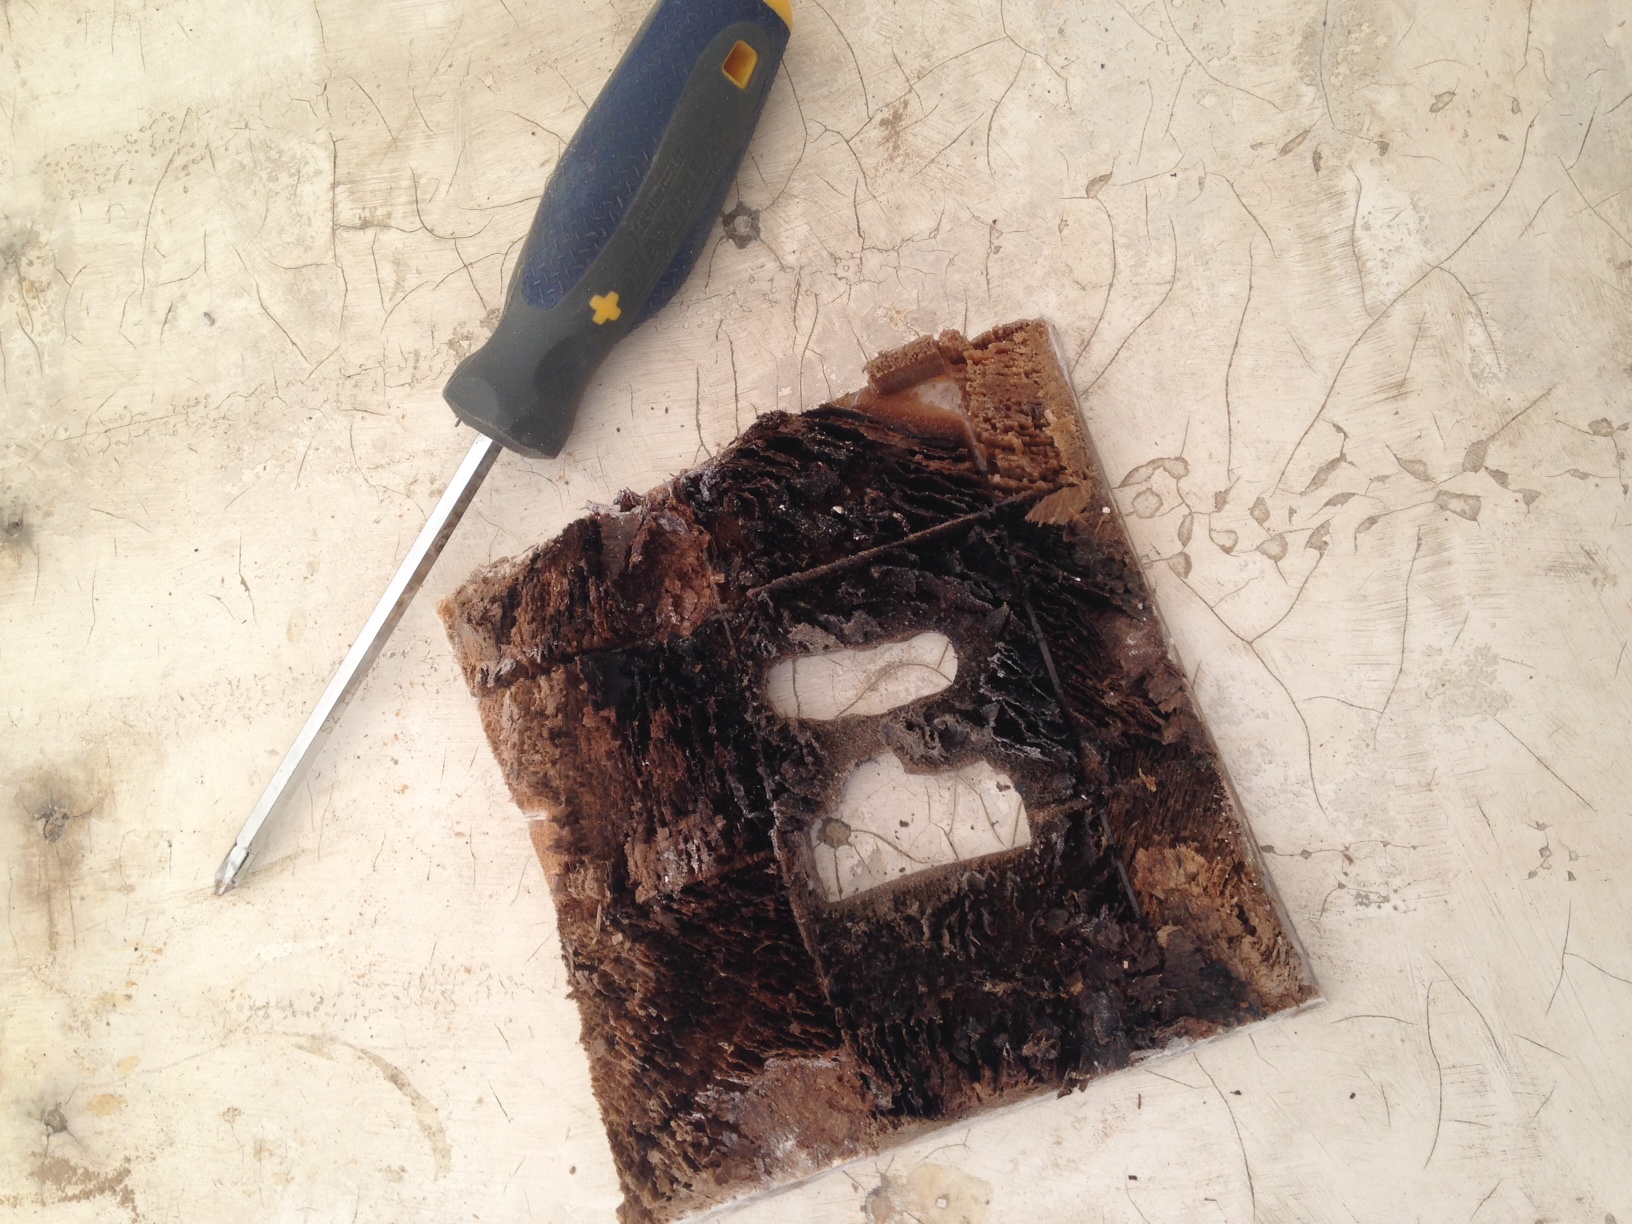
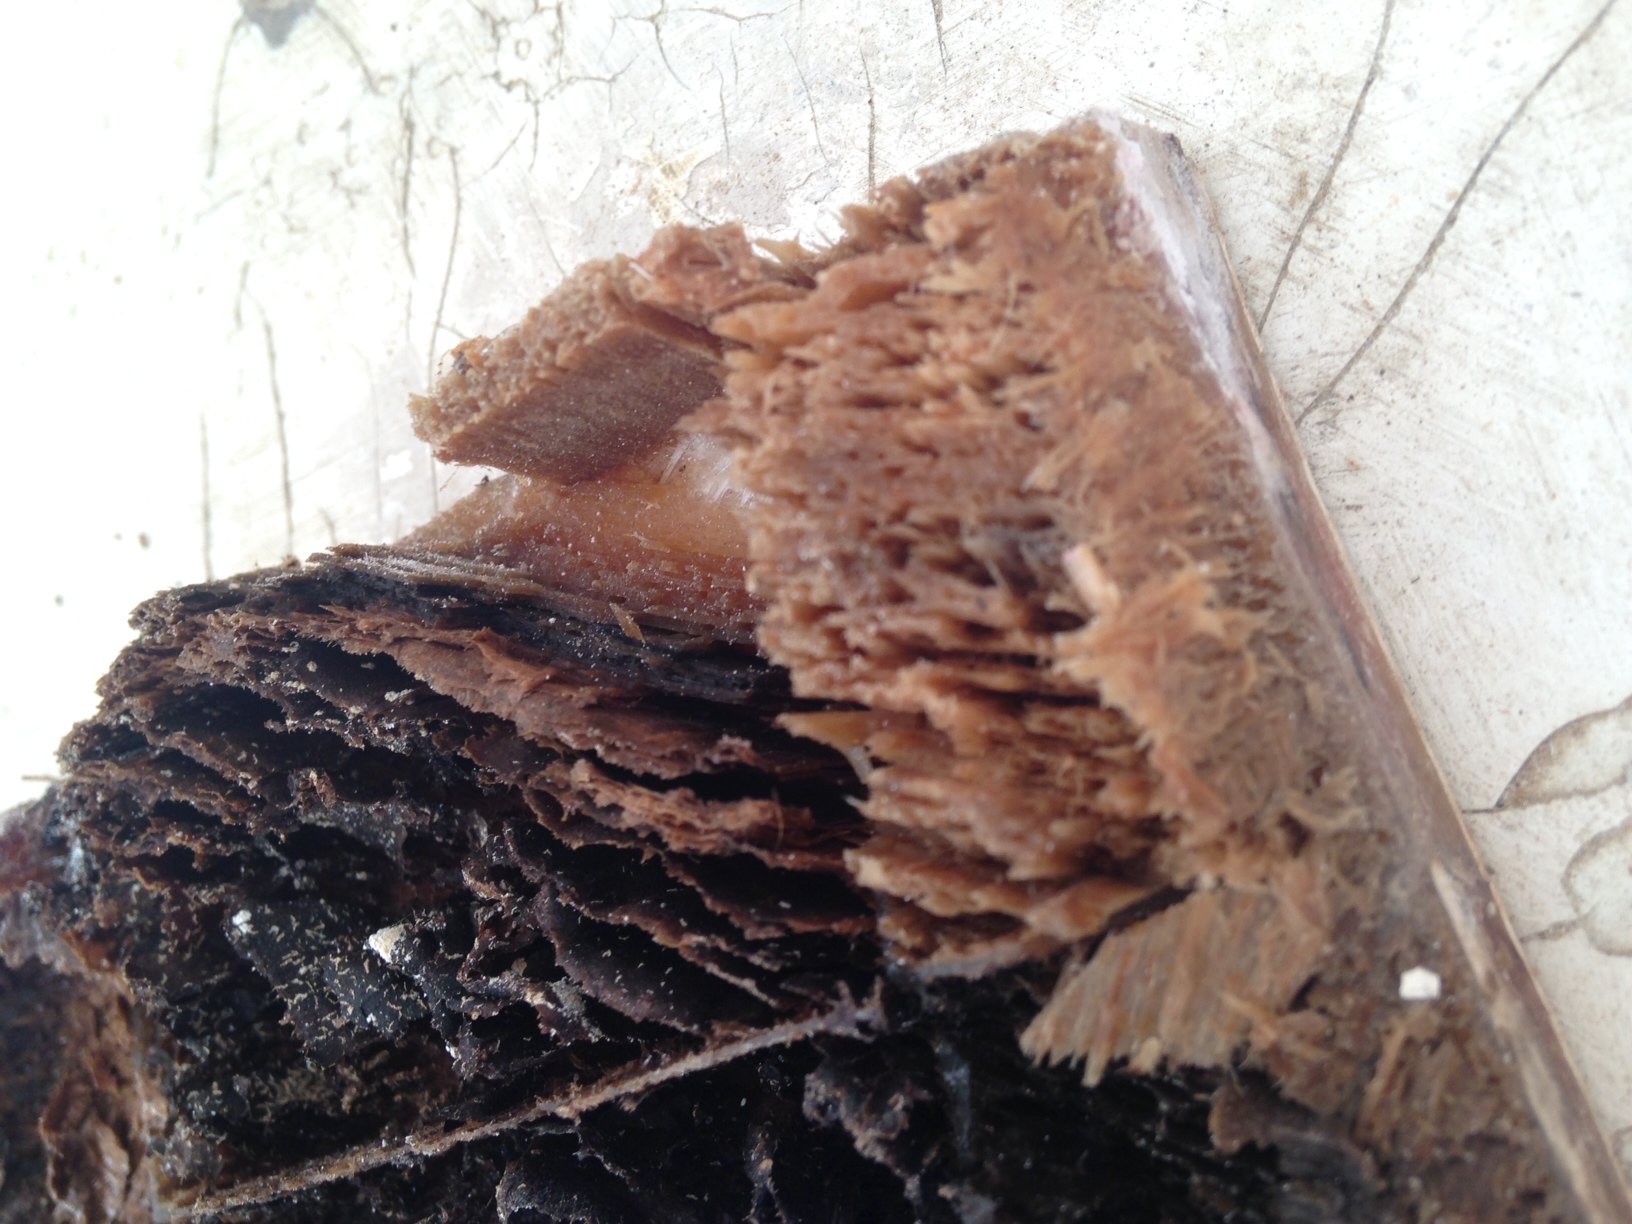
Imagine my surprise when I went and picked it up and saw this.
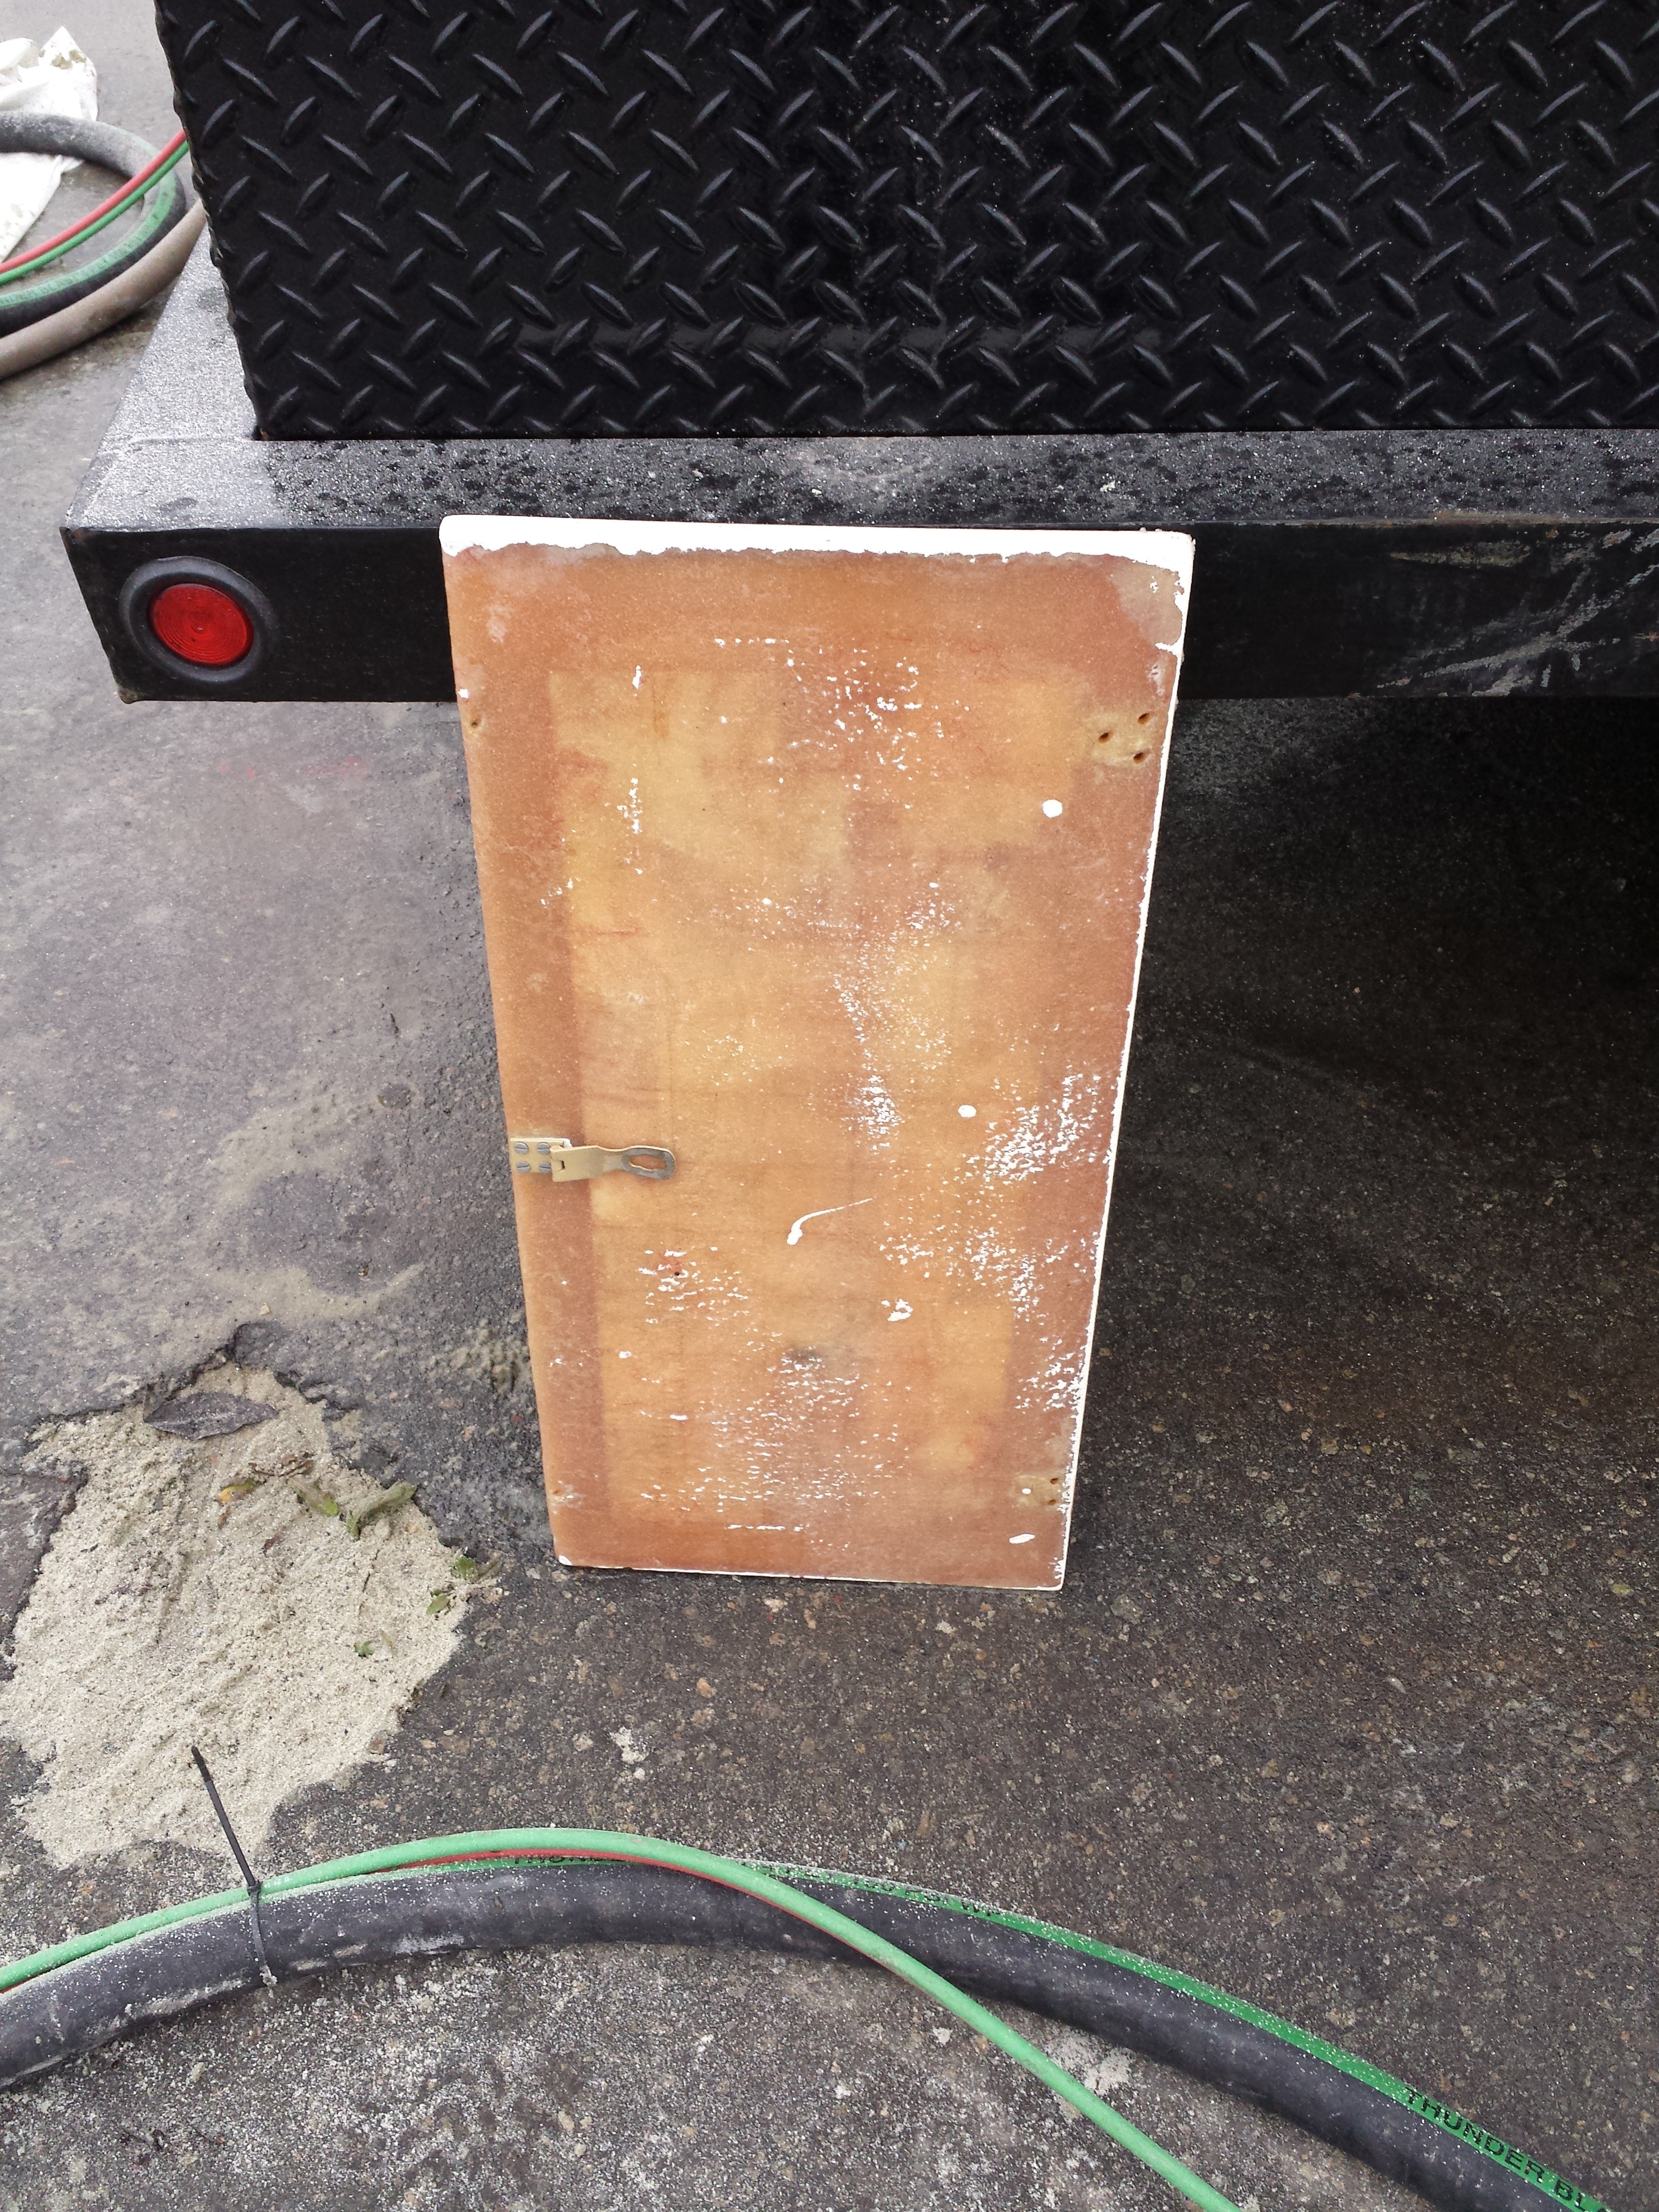
It seems that in all of his eagerness to obtain the job, he may have forgotten (if he ever knew) what gelcoat is, or perhaps he got confused and thought I had said, take off all of the gelcoat, but in any case, all of the non-skid and al of the paint and all of the gelcoat has now been removed from my locker lid.
Oh well, now we can practice our filling and fairing techniques as well as our painting and non skid applications. 🙂
All I can think is thank god I didn’t just give him the go ahead and come back to find half of Akupara’s decks down to raw glass…no wonder he had such a hard time getting the paint off!
UPDATE:
Turns out the marina where Akupara is stored only allows 1 company to do media blasting and they only use iron or glass. They are not able to remove only the paint and in fact would probably remove most of the first layer of glass. So much for media blasting. The only option would be to move the boat to a yard that does allow it, and that just makes the cost prohibitive. Back to sanding I guess.
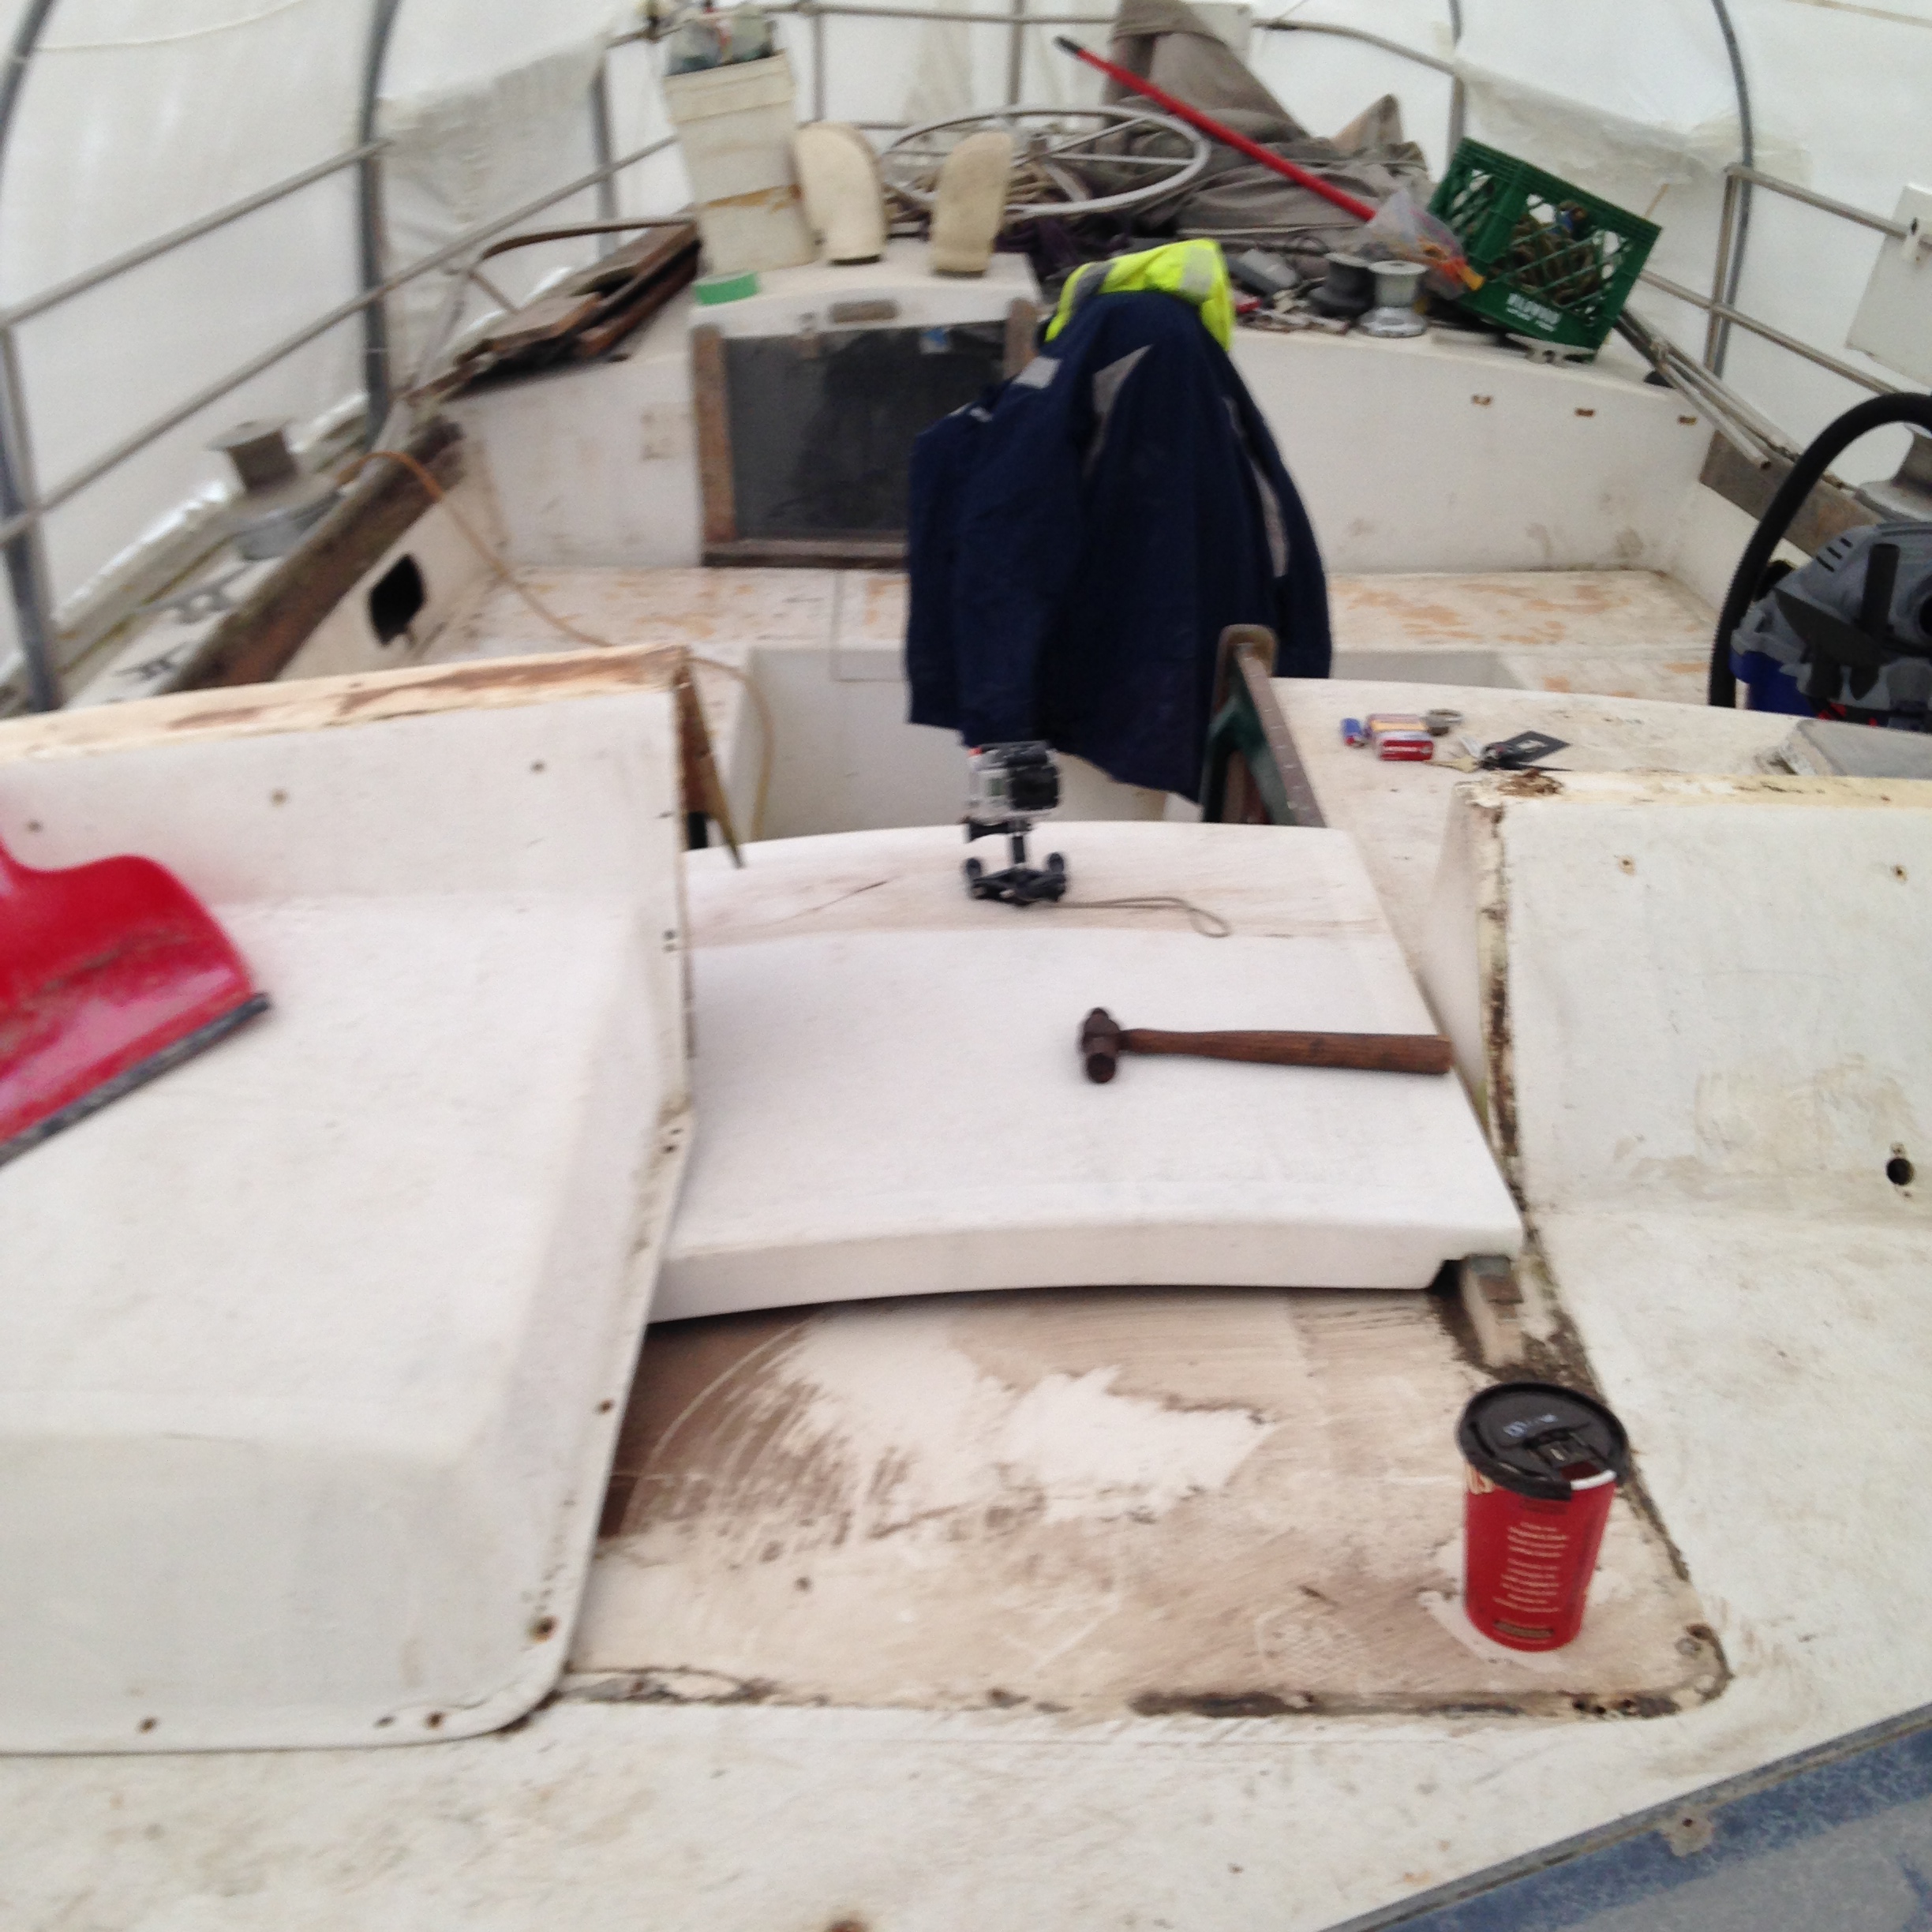
Well the last 2 weekends have been absorbed by slowly removing bits and pieces from Akupara’s decks.
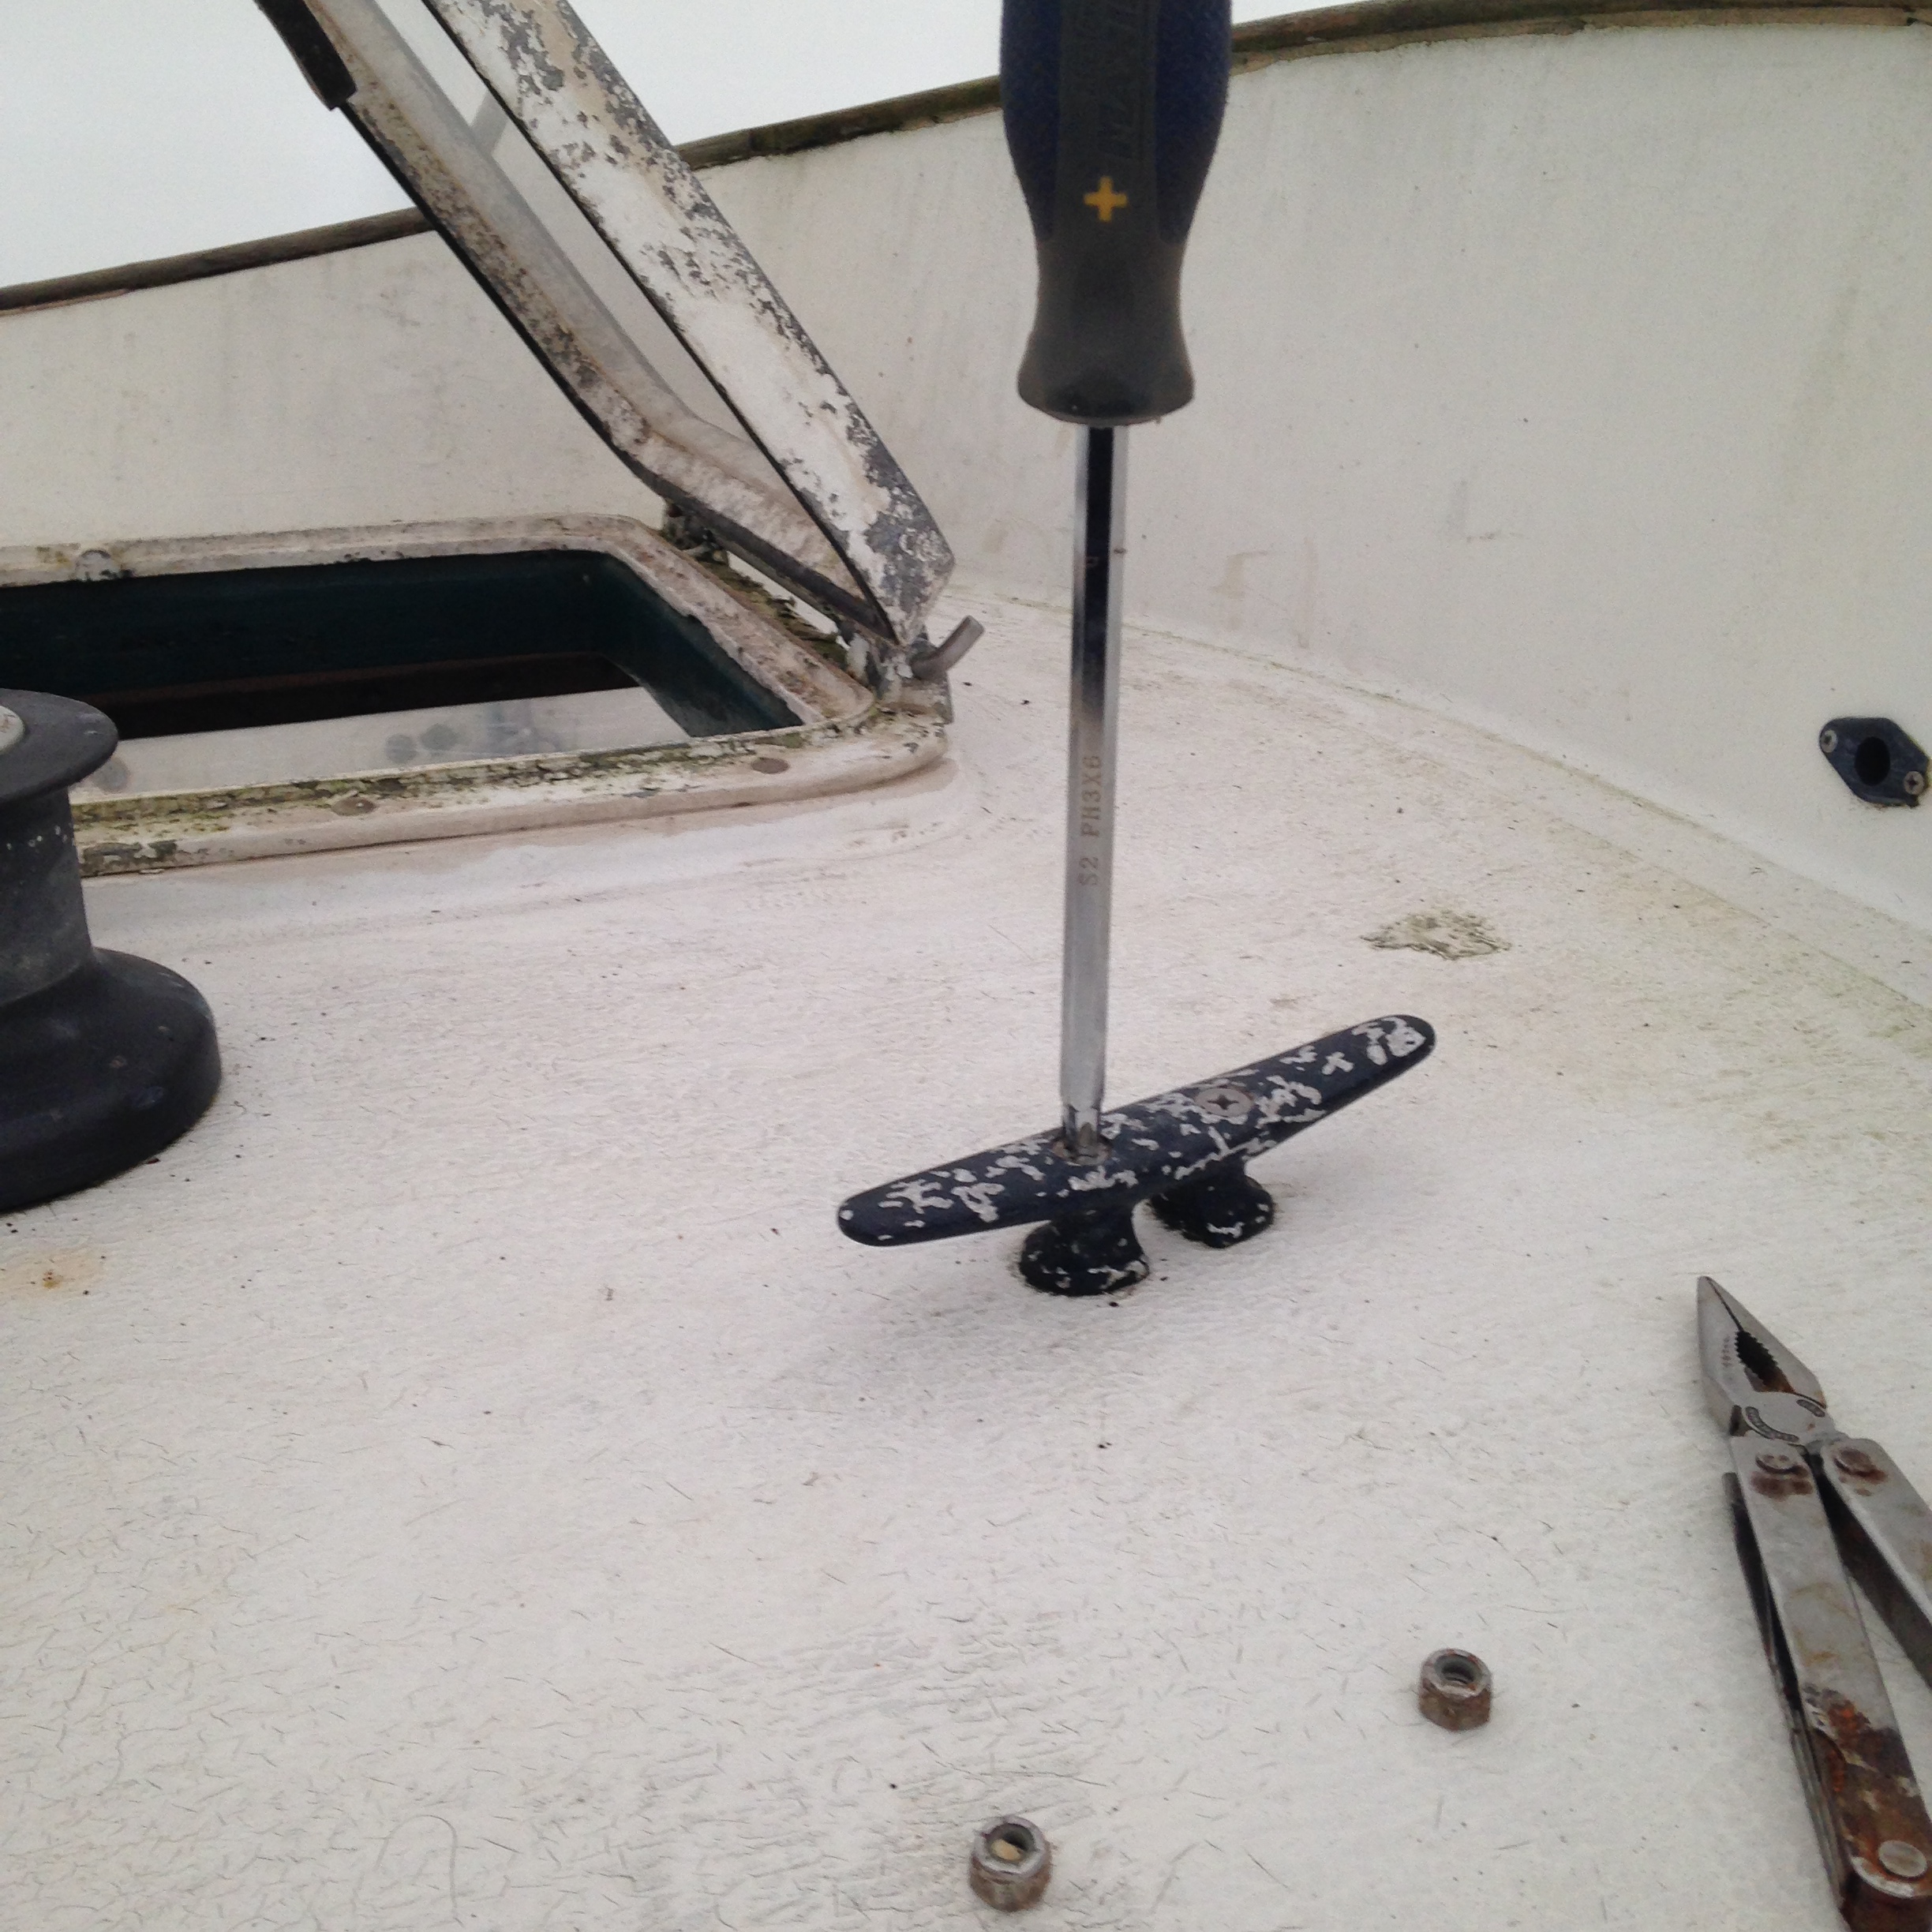
We are bound and determined to remove every nut, bolt, screw and every kind of adhesive and sealant known to man. So far we have managed to strip half of the cockpit and everything on the main cabin top.
Including all of the wood trim, which will not be going back on.

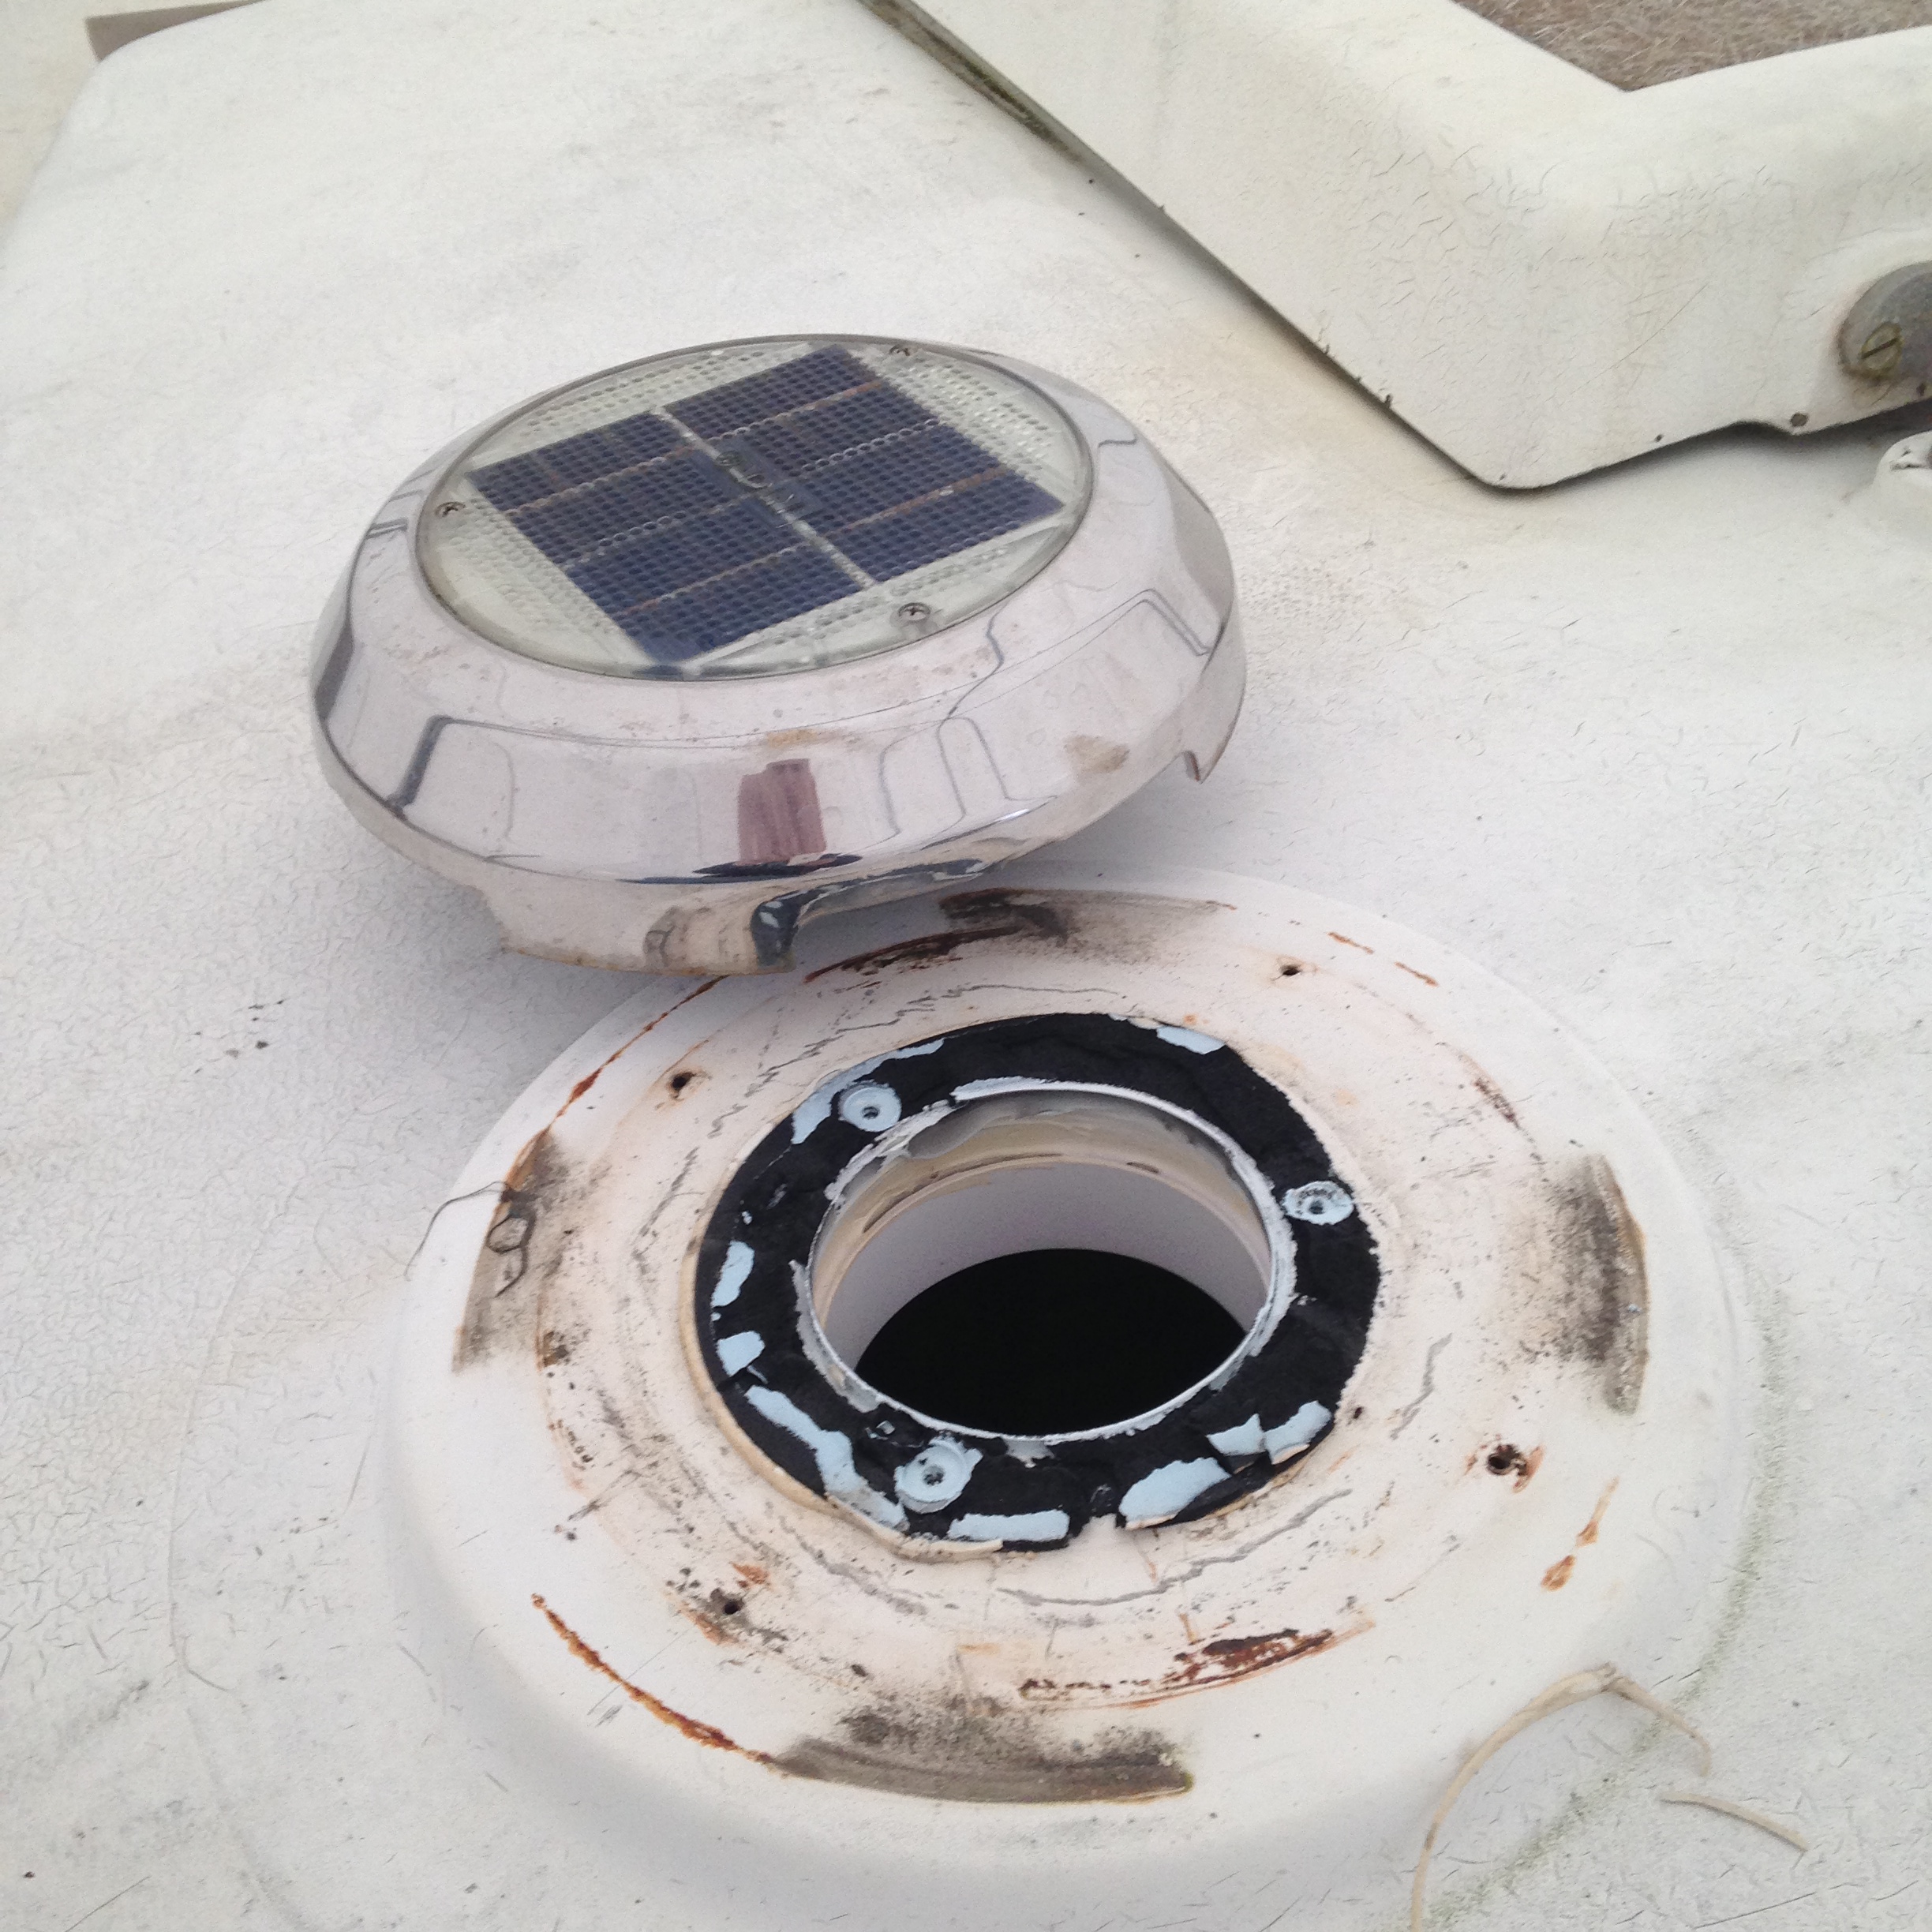
What should be an easy job, can sometimes turn out to be incredibly frustrating. For example the nice little brass rings that the dorade vents screw into.
They are held with 4 little machine screws with nuts on the back. No combination of tool that I currently possess will do the job. The only way we finally managed to get the last screw out in each vent was by holding a socket with a pair of pliers and one hand inside the dorade box as the other person turned the screw. We messed with these for over an hour, but we finally got them all out without breaking anything.
Speaking of screws, the only type of screw we have yet to find is a Robertson. You know, the only type of screw that actually makes sense in 2015. We have big slots and little slots, and medium Philips and tiny Philips but not one Robertson. Every screw that we have removed thus far has been destined for the trash bin and every screw that we put back in place will be a stainless Robertson screw!
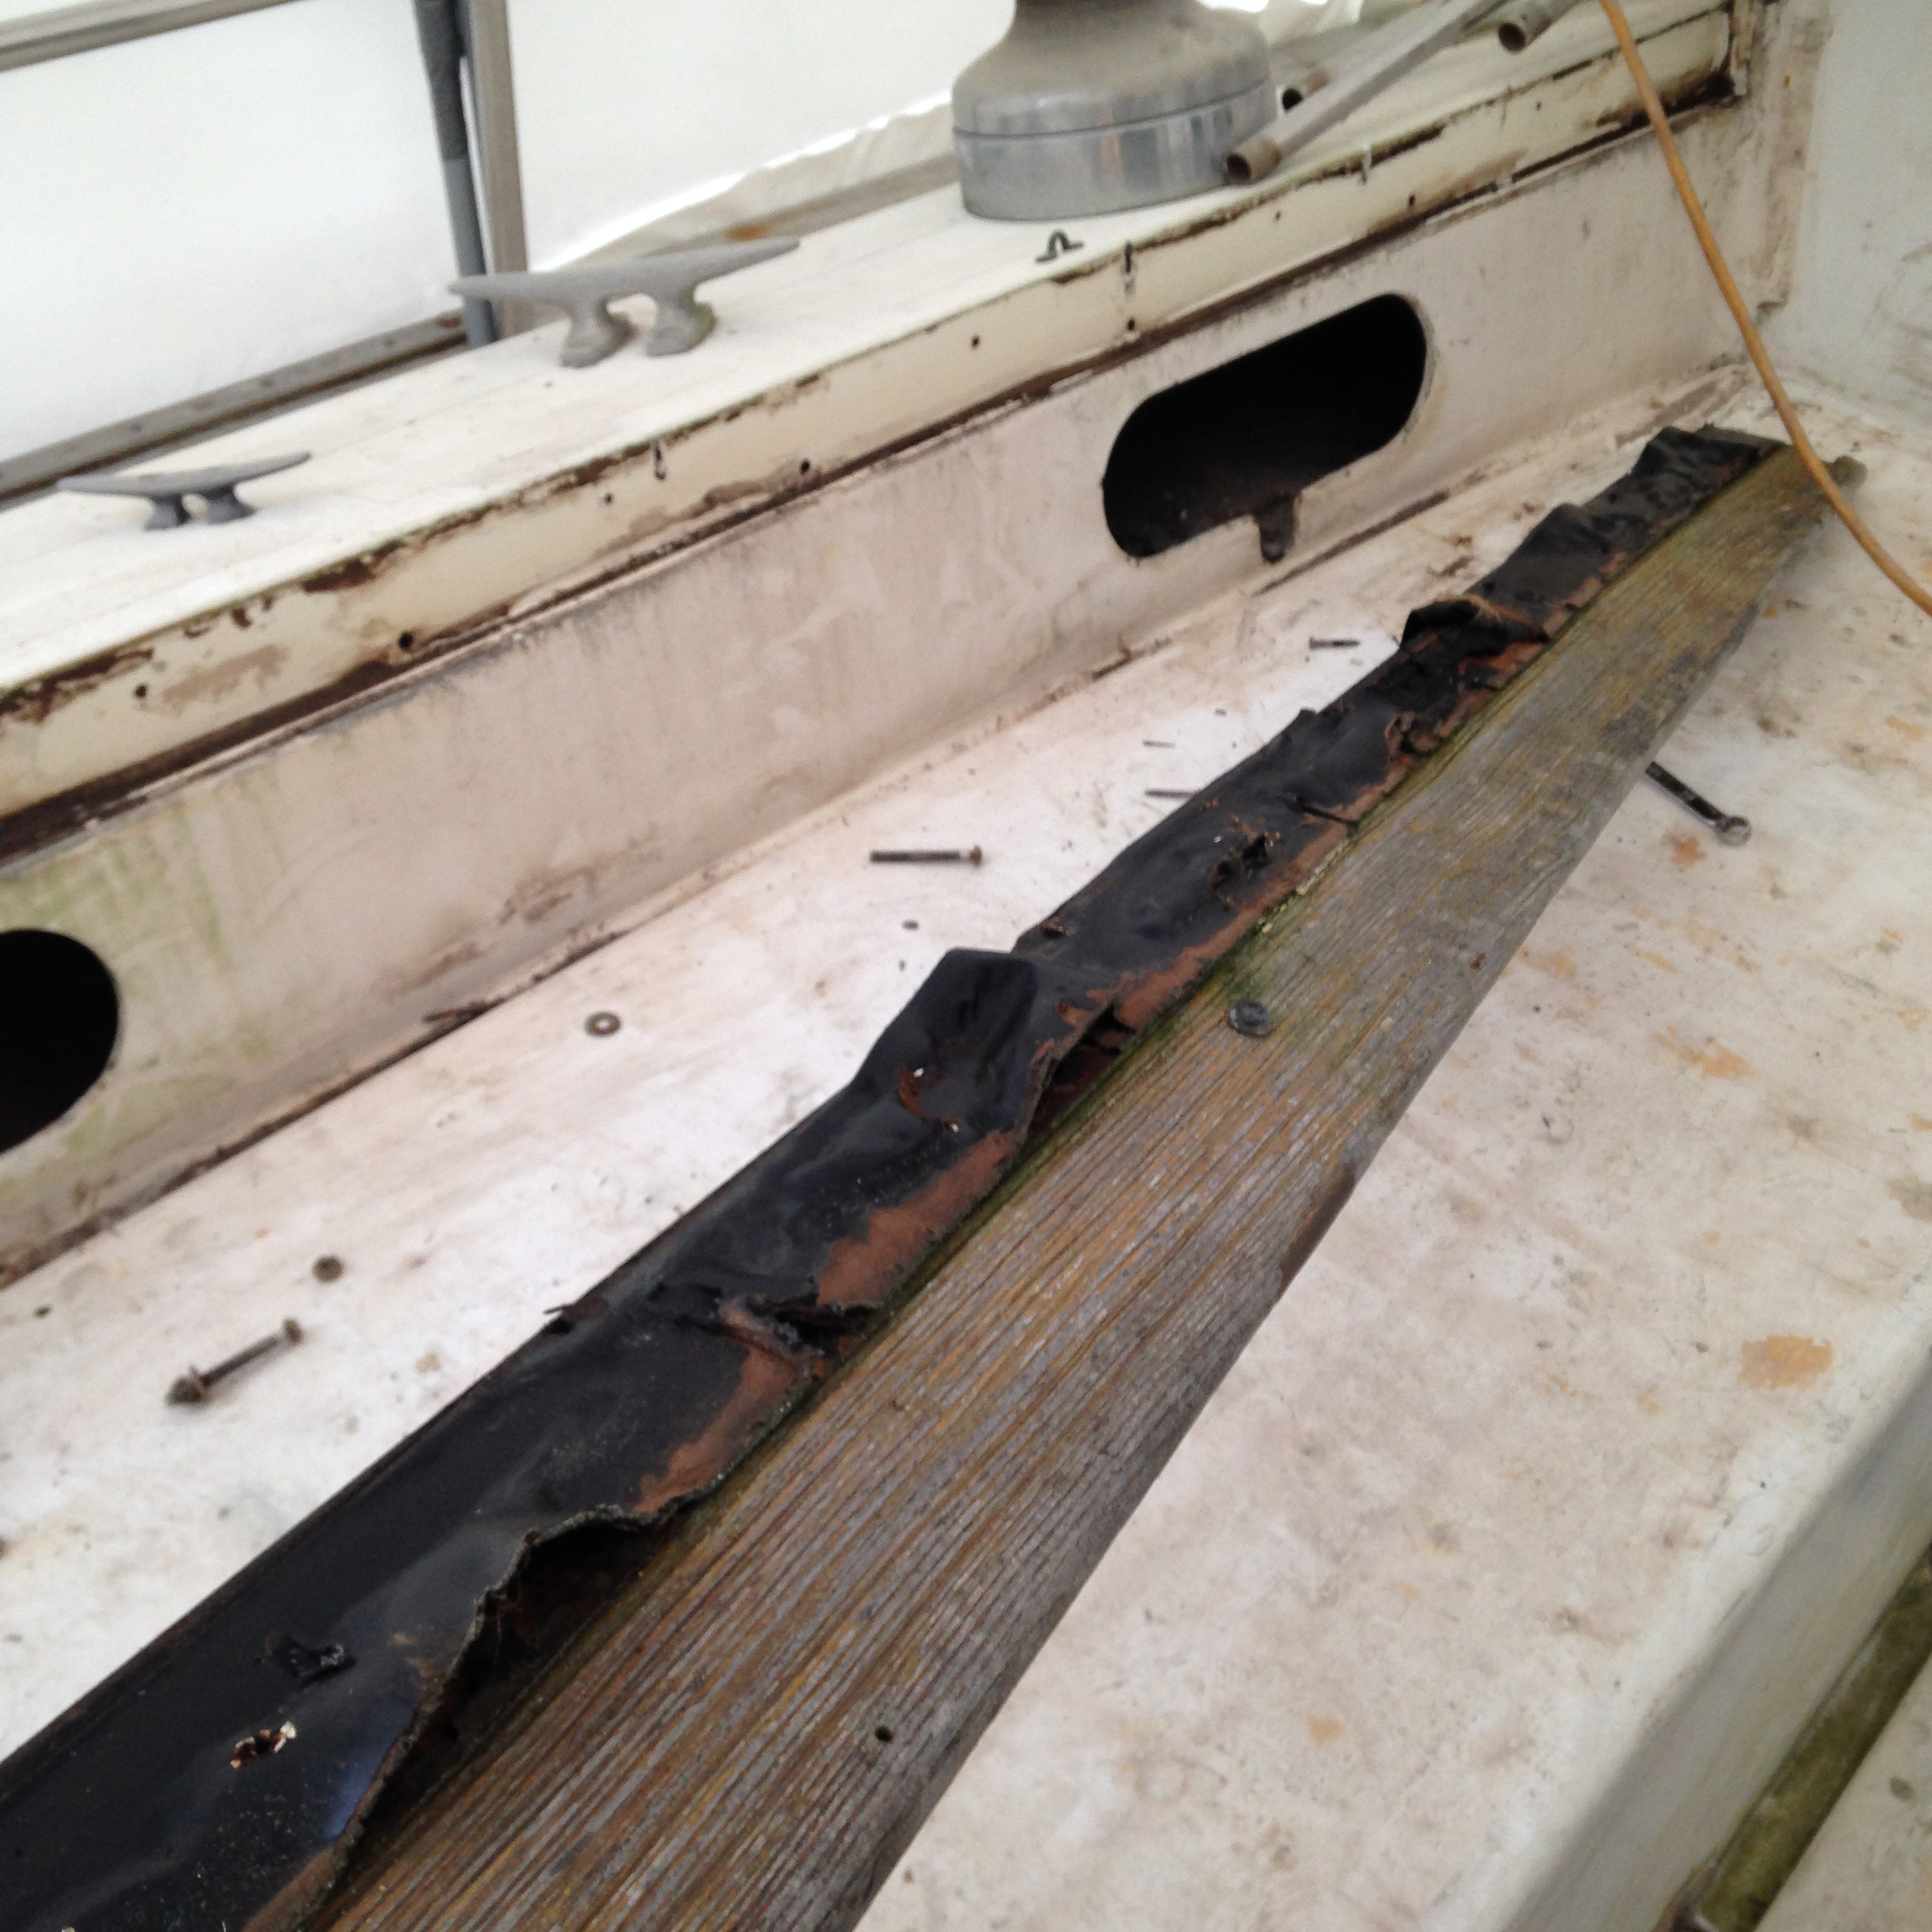
In our dismantling of everything we knew that we would discover more issues than what we originally planned for and yesterday we discovered some bad core around the chimney.
Thankfully based on sounding the deck, it does not seem to be very far spread, but the truth will only be discovered completely when we start the repair. We are not sure at this point if we will even put the molded chimney piece back.
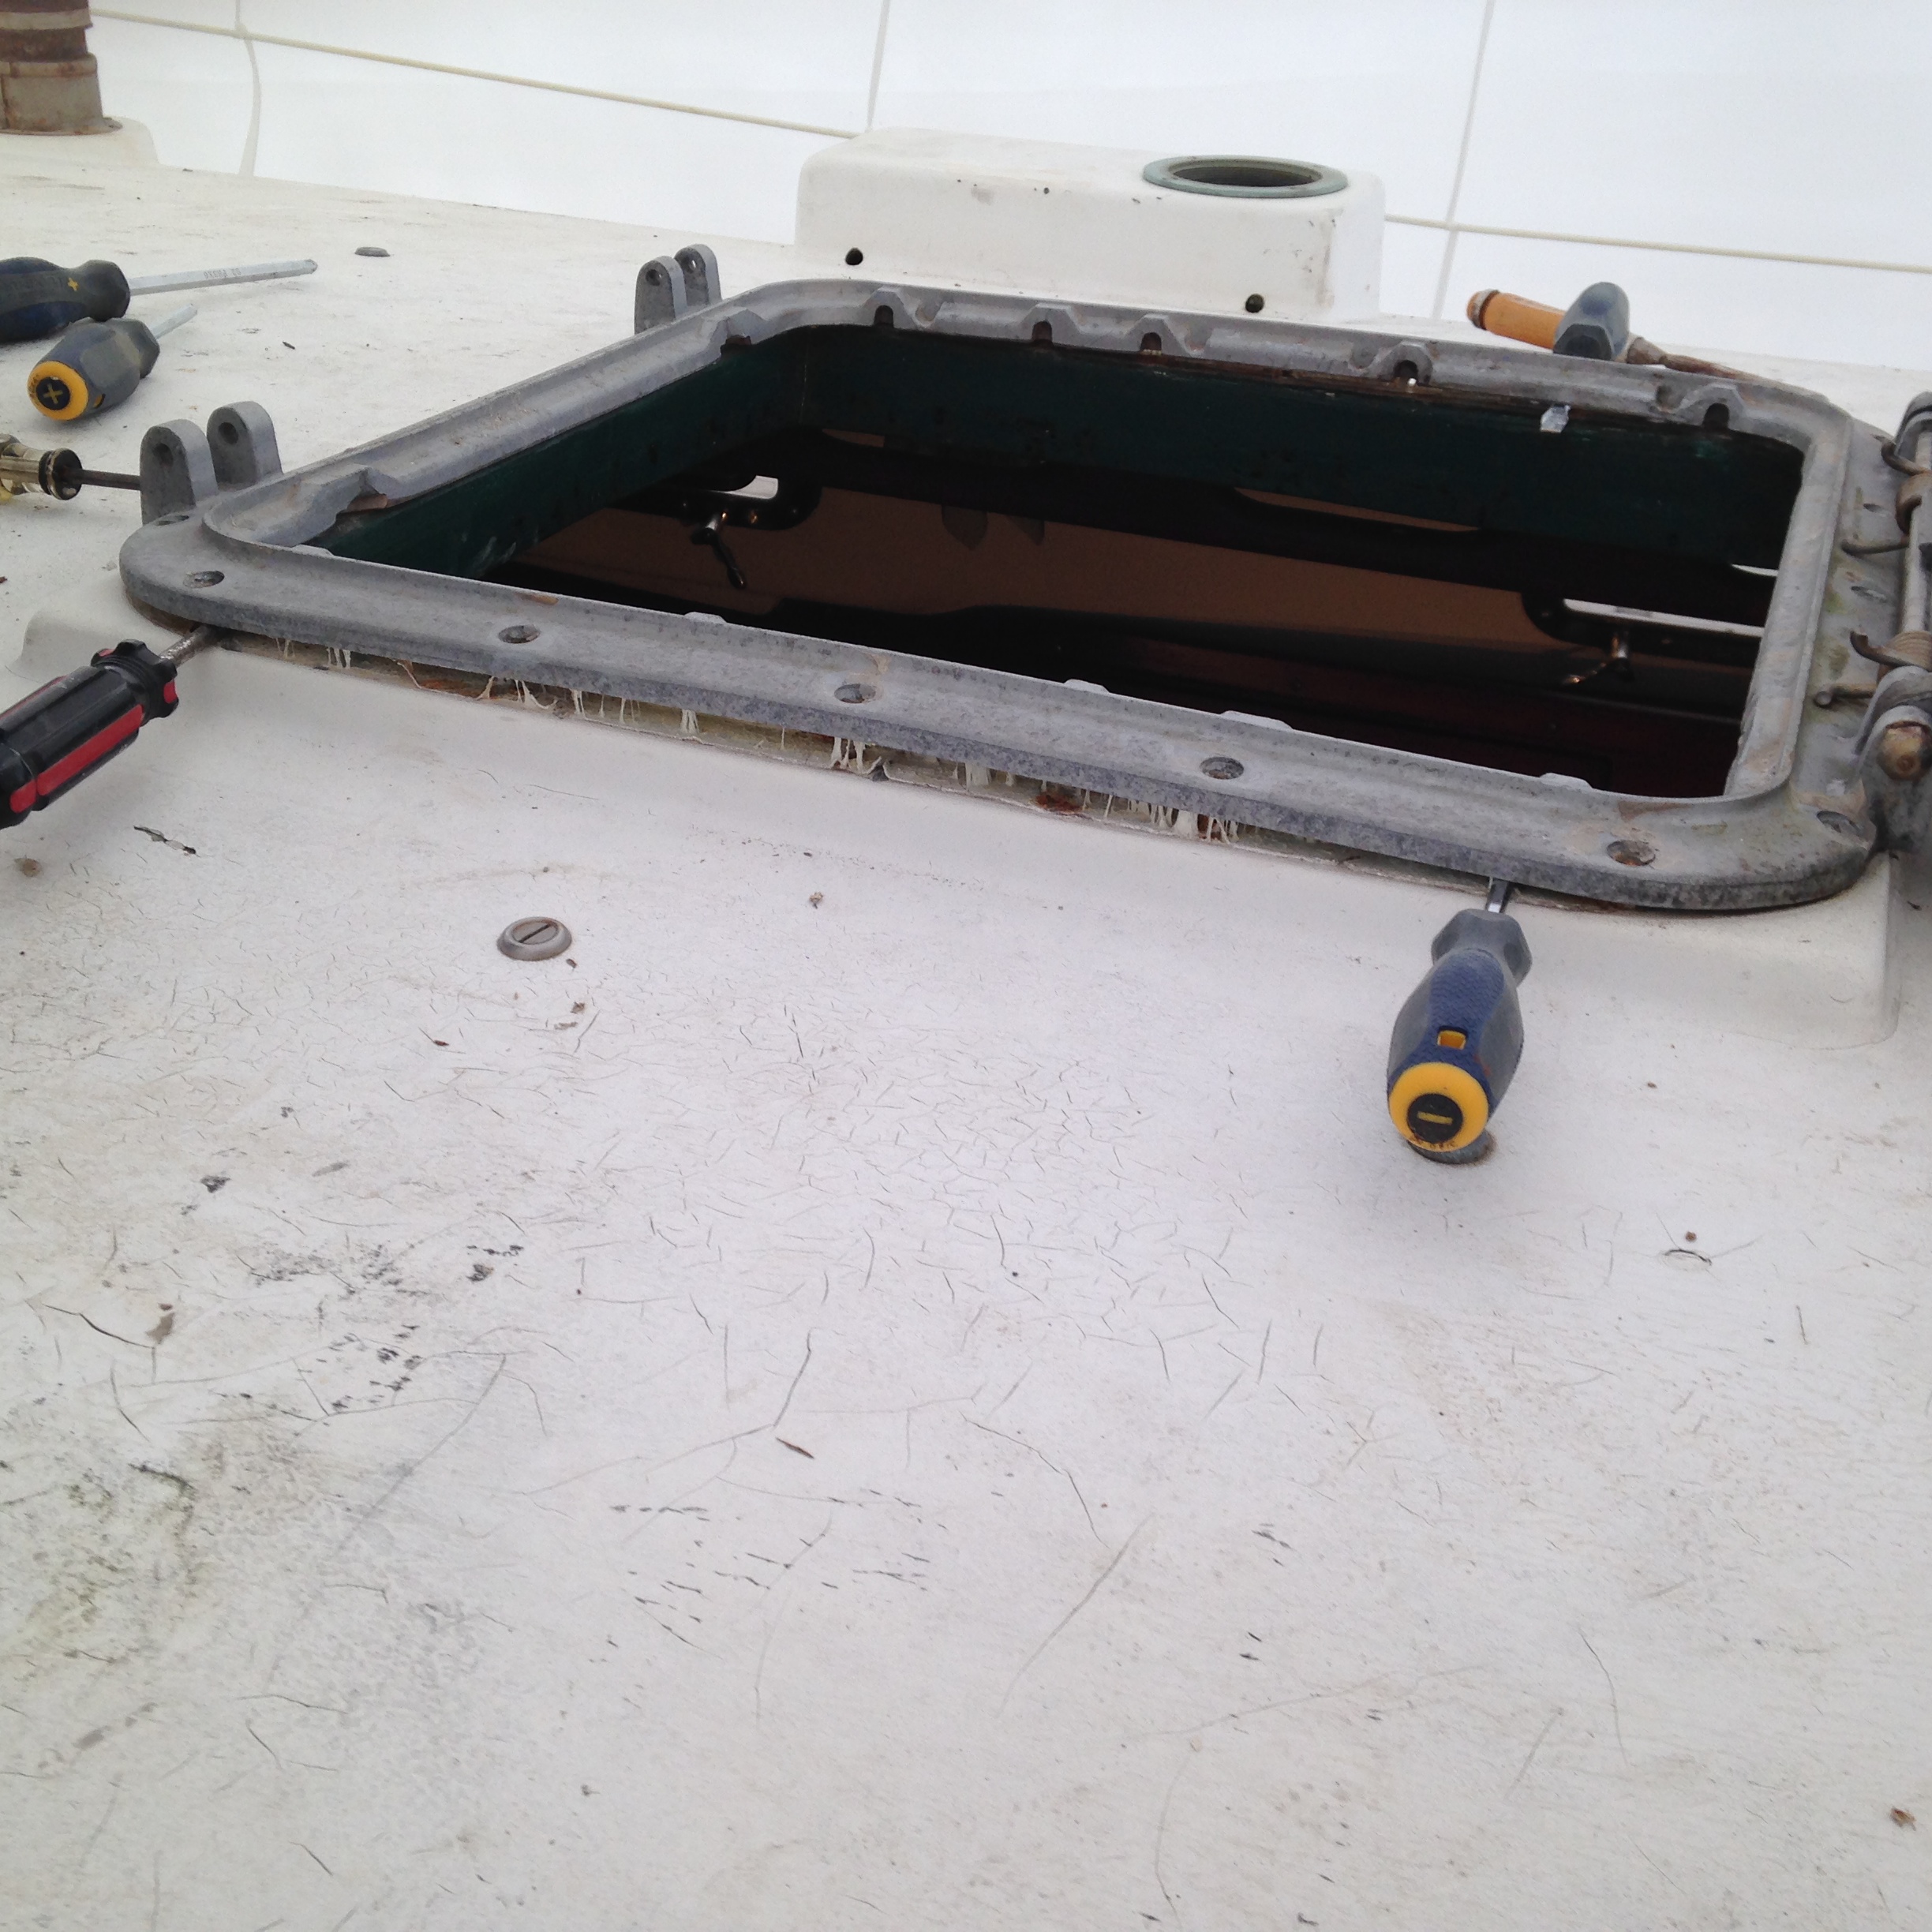
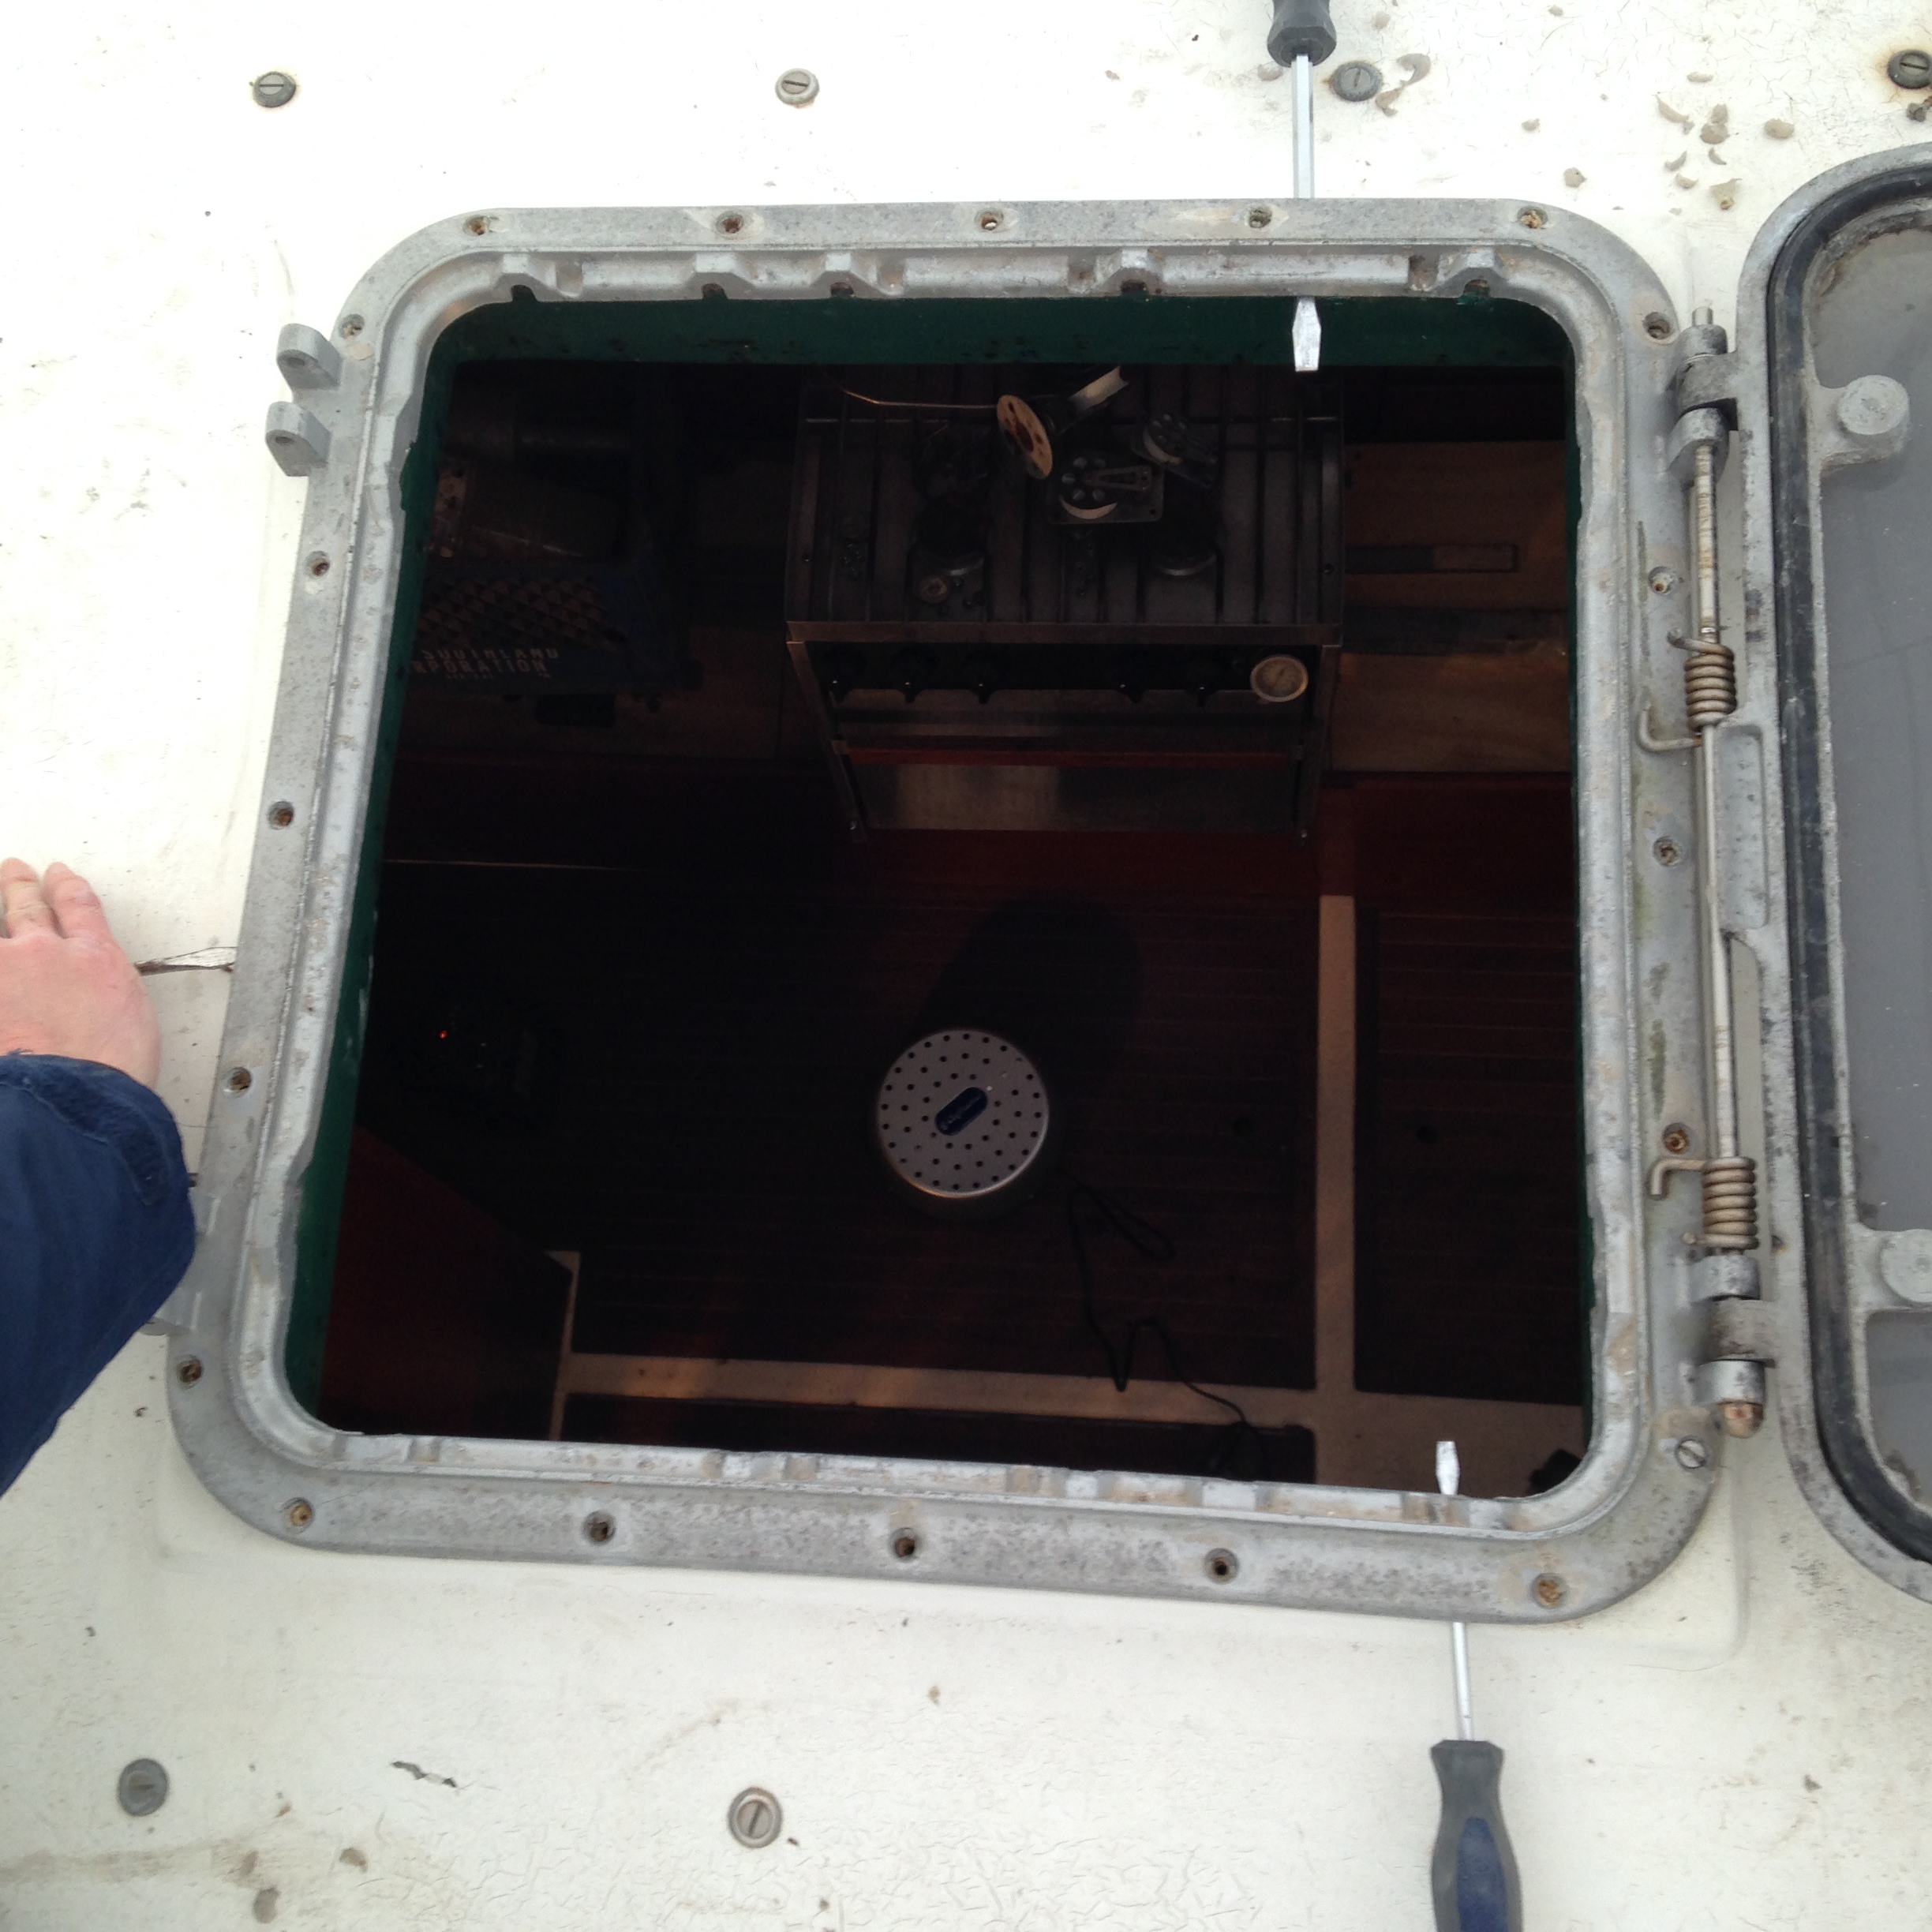
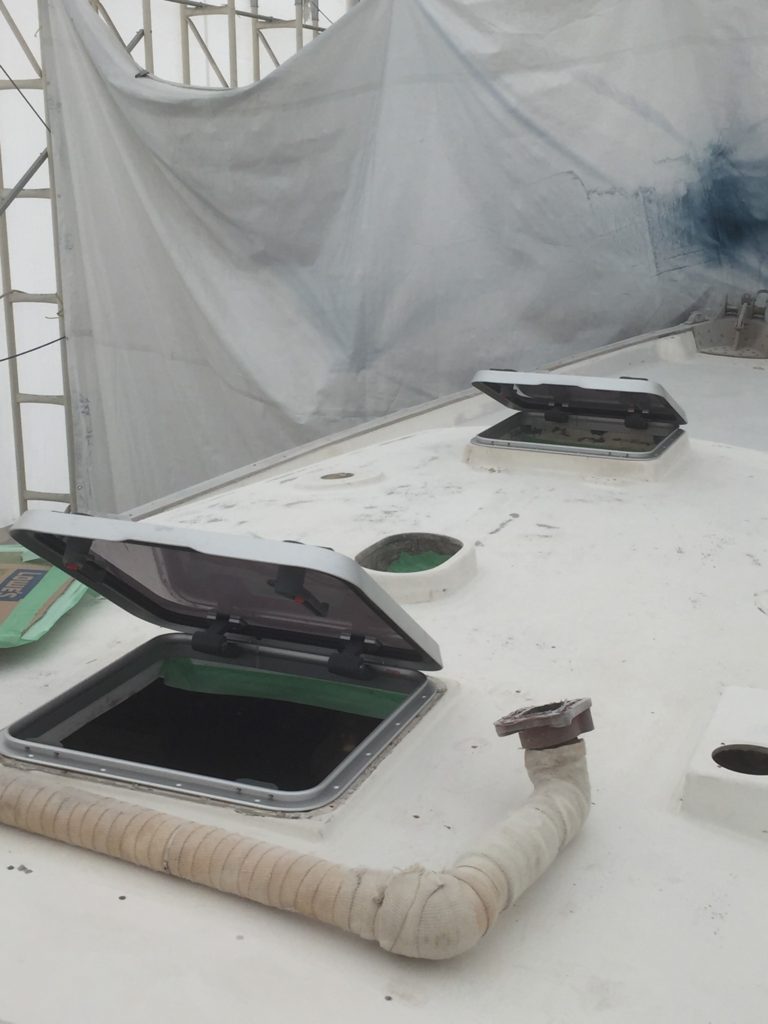
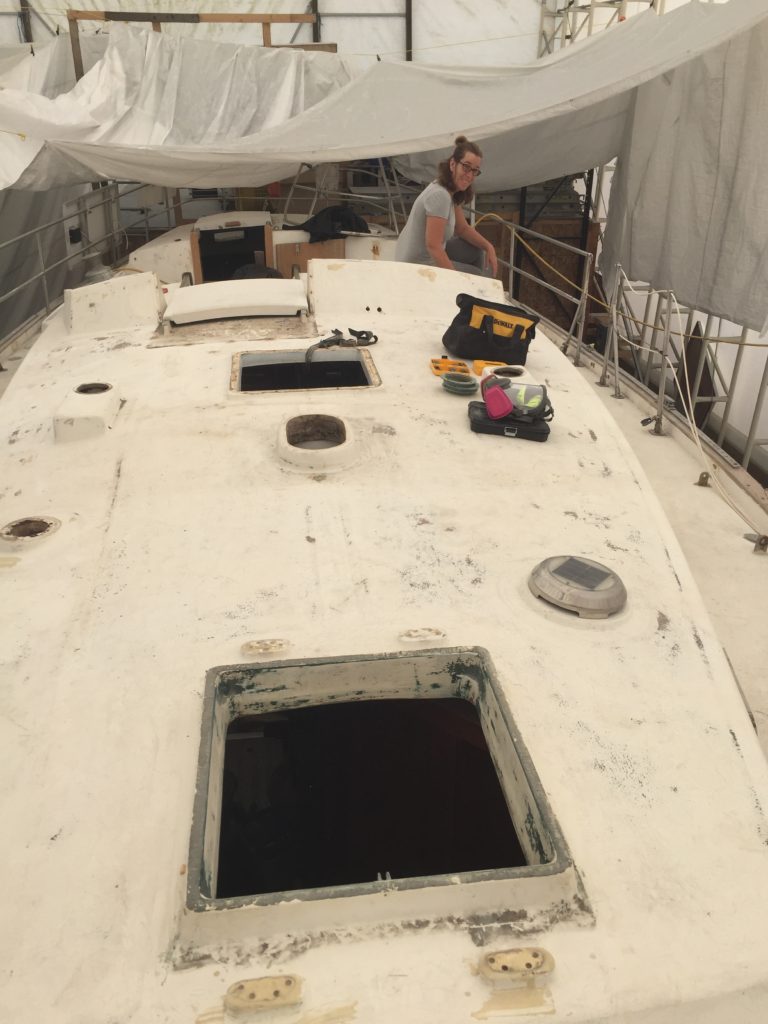
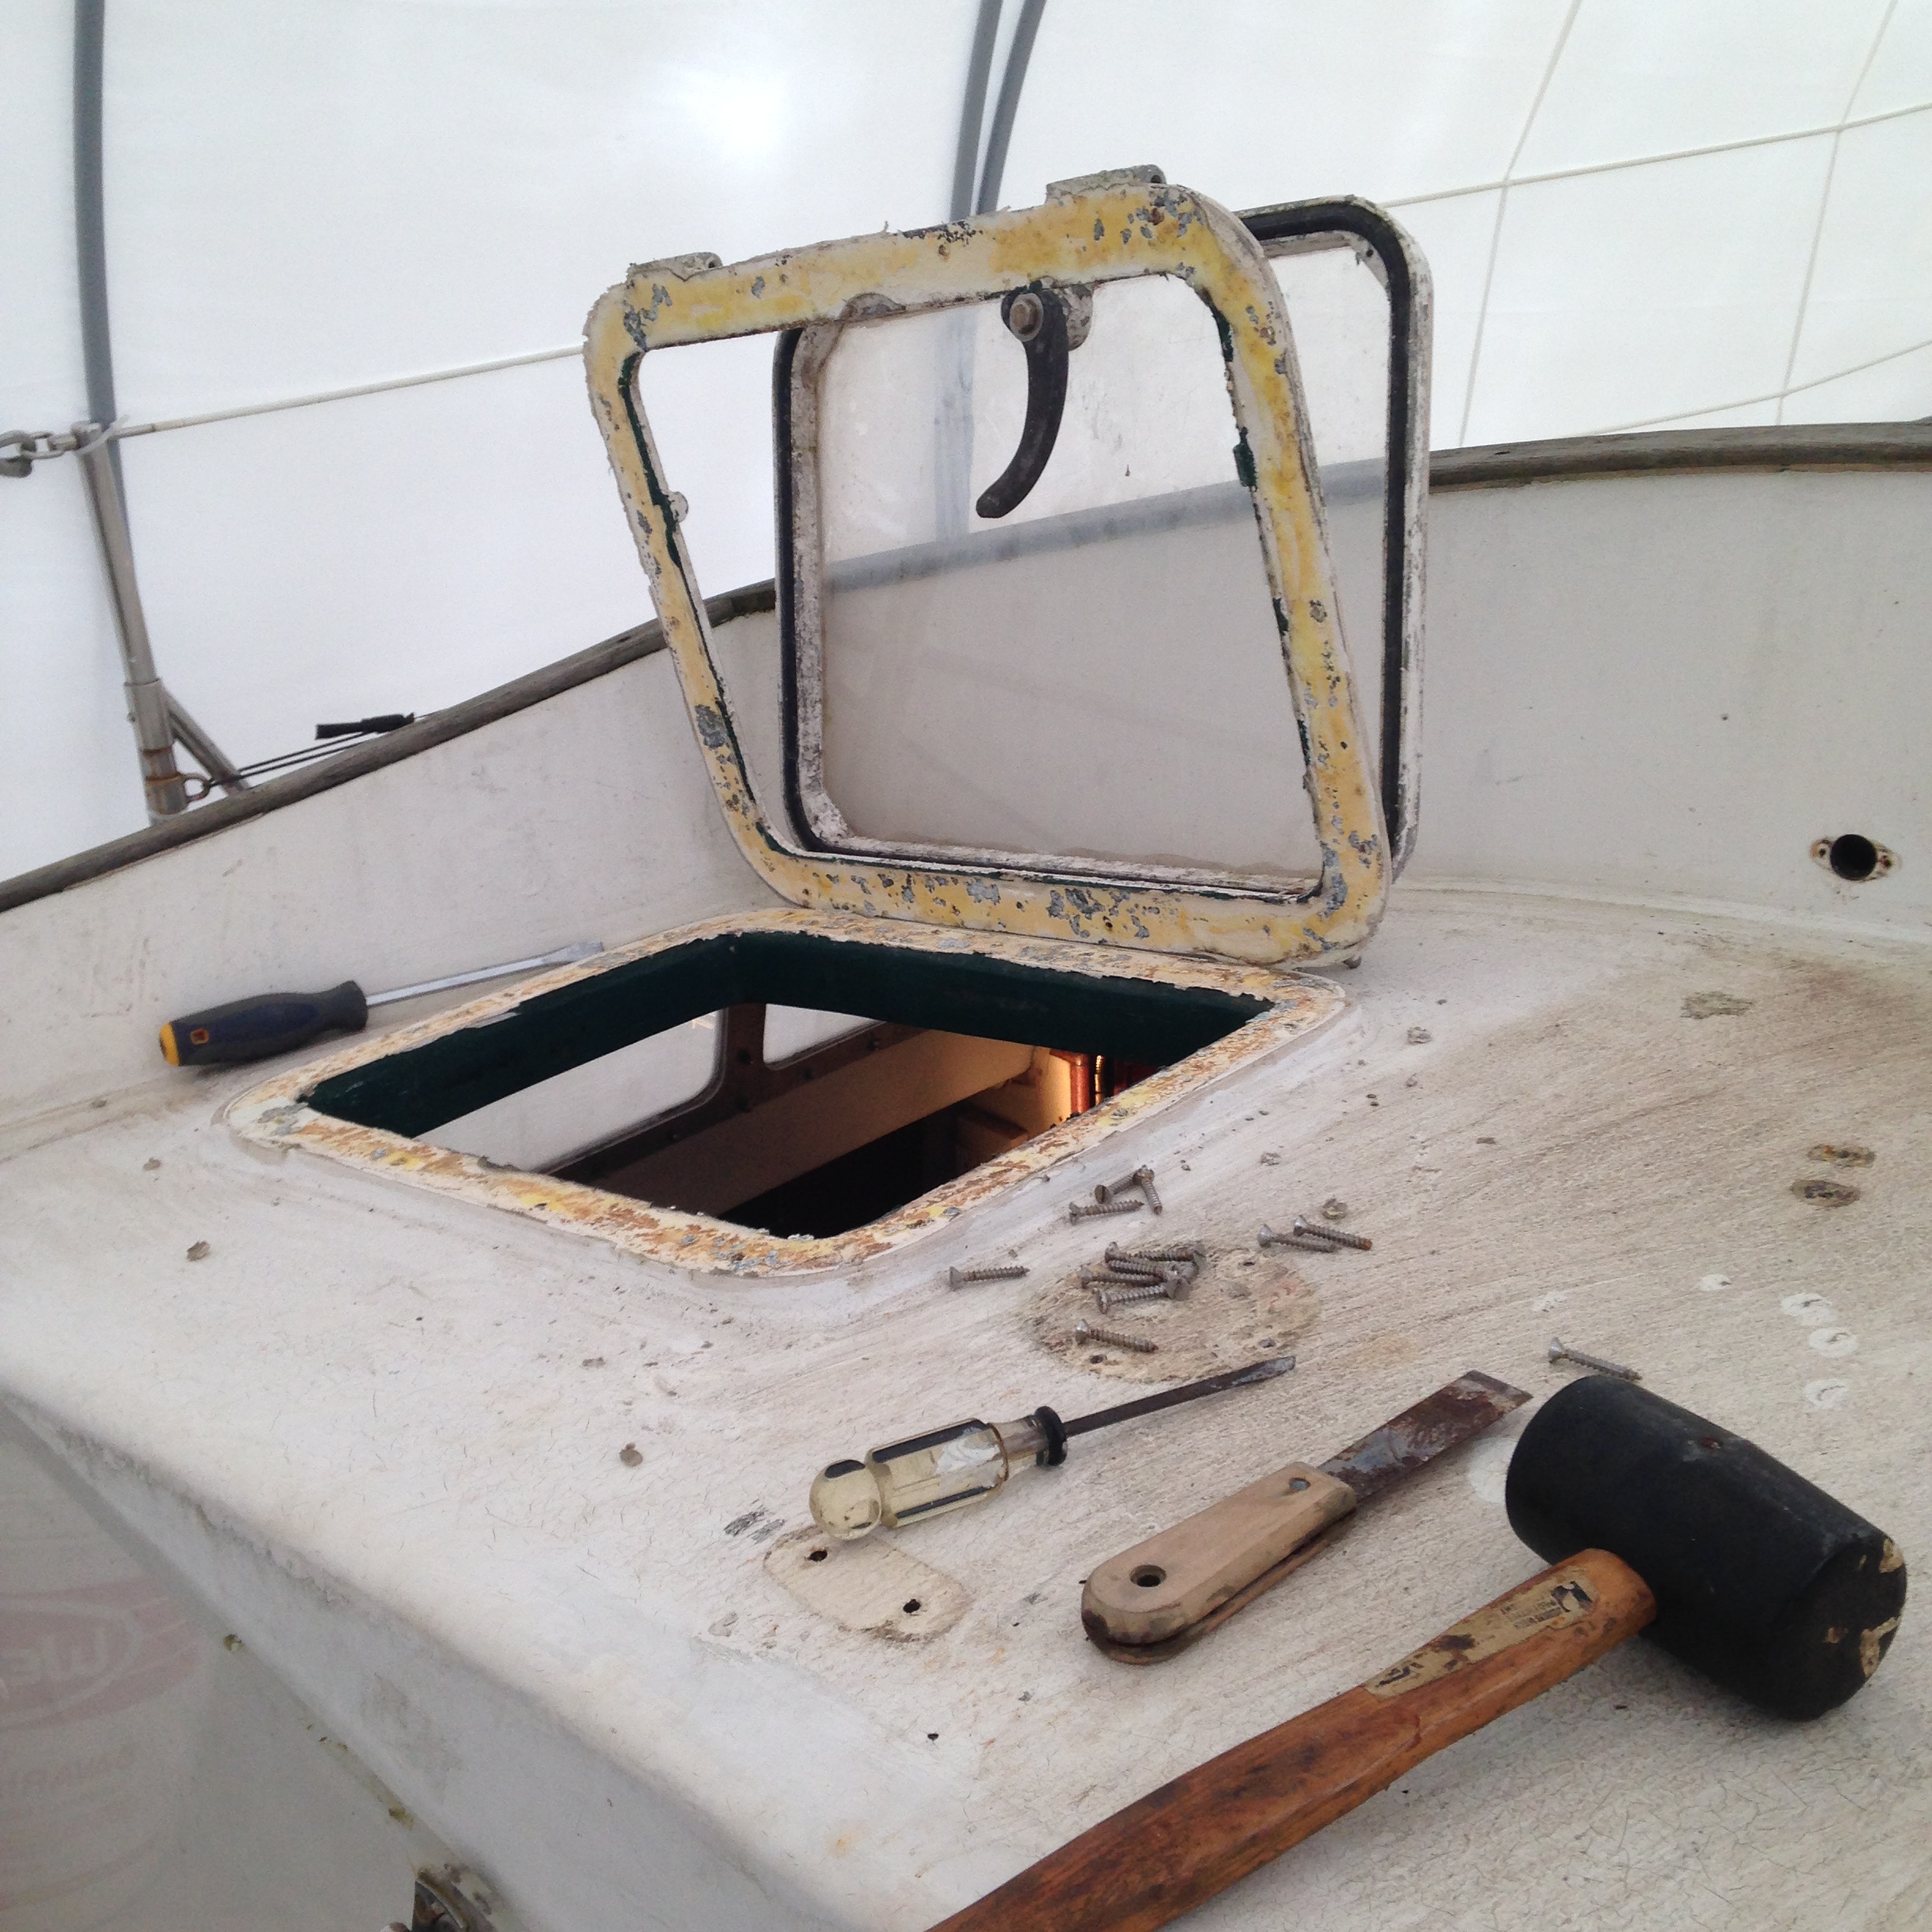
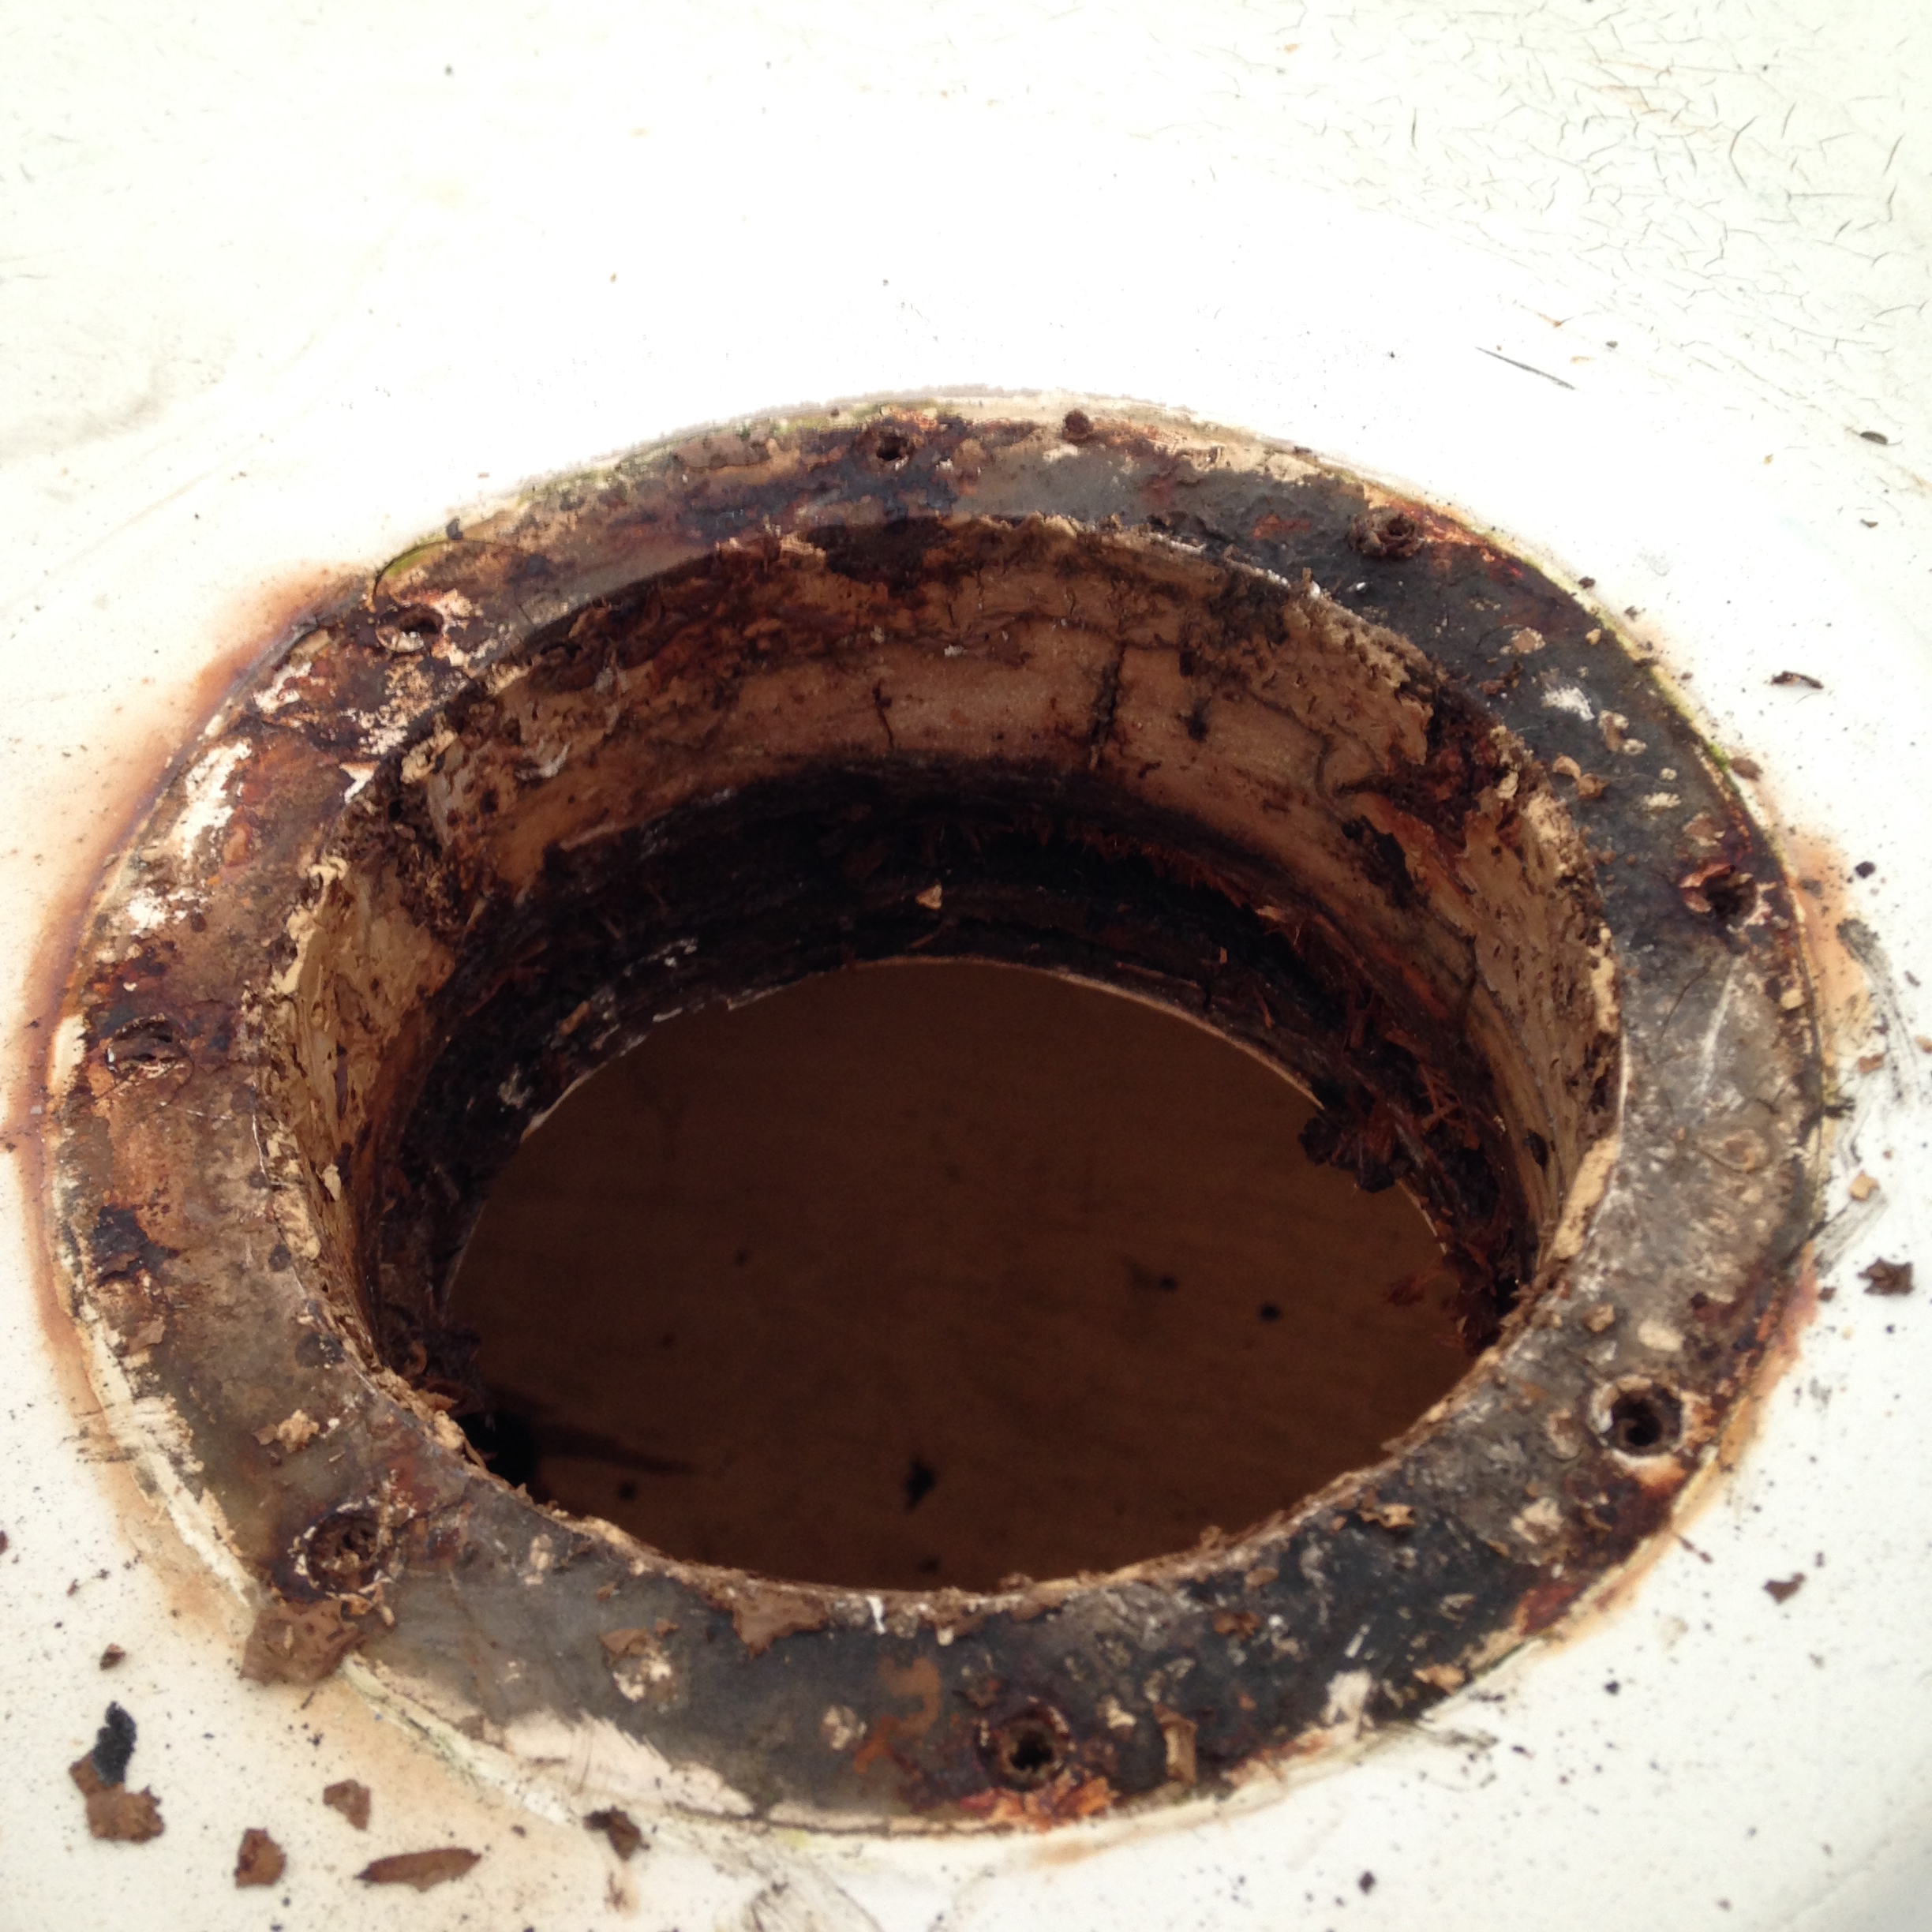
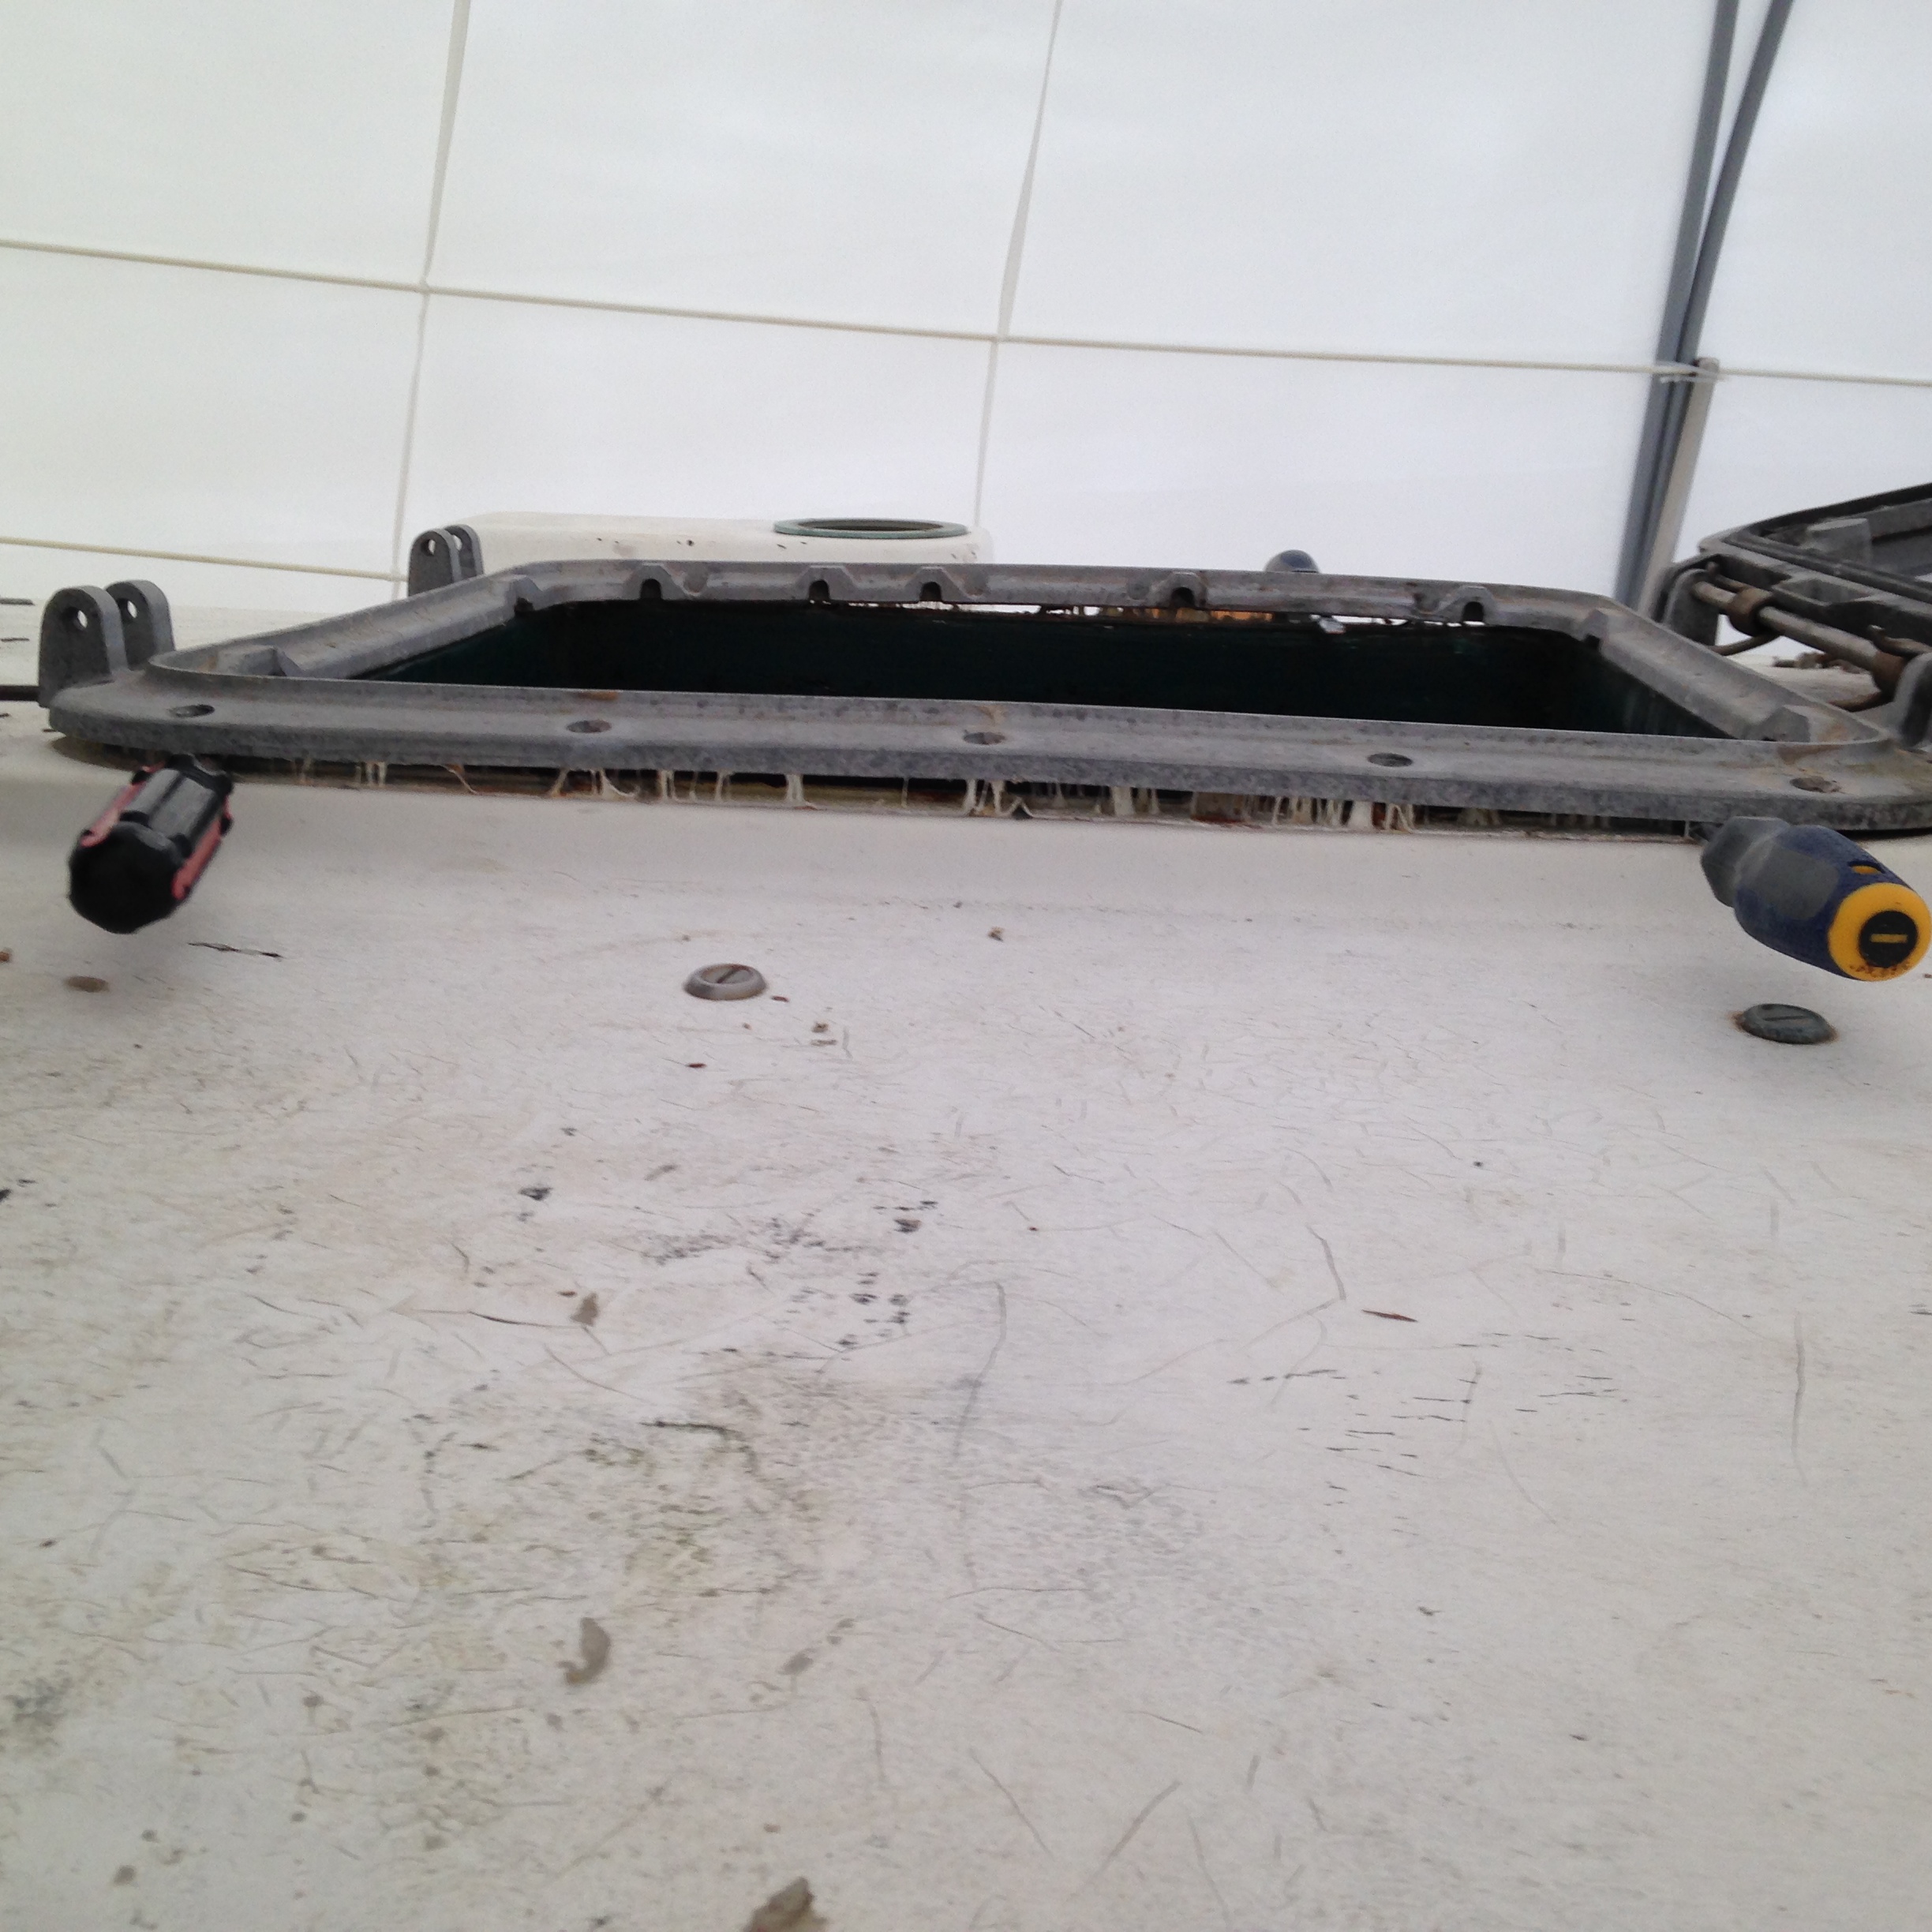
All of the opening hatches on the cabin top have been removed and are currently only held on by 2 screws each. Our plans are to replace all of them with new ones as the aluminum frames are very badly corroded. Each and every screw hole in the hatch frames had been filled with caulking on top of the screws, go figure.
To this point we have identified several distinct types of goop. Some of it is clear silicone, some of it looks like bathroom silicone, then we have of course the 3m 4200/5200’s, and finally butyl tape.
The interesting part is that the butyl tape appears to be from the original build, and although it is 40 some years old, it is still as flexible and goopy as new stuff.
It is also one of the most tenacious not counting 4200 and 5200 of course. A note to the wise. Any time you grab a tube of goop, and the first word is “Adhesive.” Stop and think if you, or any other person on the planet, will ever have to remove that part again. If the odds are greater than 1%, please, please, do not use 3m 5200.
We had our first contractor on Akupara to look at media blasting the decks, thanks to a very smart guy (Martin). We have received one guestimate already of $1300 to soda blast all of the paint and non skid, however this was based on pictures that I sent him. Let’s see, 500 sheets of sandpaper, 3 months of sanding morning to night, sore back, sore arms, burnt out sanders, lung contamination from breathing in all of the particles versus paying someone to do it in a day. I will let you decide which is the better course of action. I haven’t completely ruled out sanding yet, but that’s only because I am cheap and always think I can do it for less…;-)
As I was writing this we received the 2nd quote, $9300. Uhmm, something isn’t right here, $1300-$9300. So as I was saying 500 sheets of sandpaper isn’t really all that expensive…
Another surprise yesterday was as I was removing the last of the screwed in snaps from the dodger, a nice stream of water started spurting out.
I immediately grabbed my drill and made a bigger hole and added one on the other side as well. It seems that water has been getting in from badly bedded wood trim and over time filled up the moulded section. I am probably going to leave these holes, just to ensure this never happens again. Thankfully this area has no open coring to be concerned with.
 All in all it has been a good couple of days, it seems slow and it seems like things are getting worse at times as we slowly disassemble Akupara, but soon enough we will be on to the restoration part.
What’s that saying? It is always darkest before the dawn?
I almost forgot. I also brought the old dodger to the dumpster and committed it to the great beyond. (Great beyond as in farther down the boatyard towards the back when someone pulls it out) This was a hard thing to do for me. It was a approximately a $3000 decision as that is a ballpark guess as to what a new one will cost us. Had I not pitched it, I would have been tempted to try to fix it and put off the cost etc etc. It would look like hell on Akupara once she is all fixed up. Decision made. Move on. 😉
What more can a guy ask for?
It is absolutely amazing how much difference 4 hands makes over 2. When we first purchased Akupara, the Admiral found a scraper and immediately began trying to take off the grey sticky plastic crap that was all over the cockpit seats. It was more of an exploratory effort than a real one and up until now it was a little hard to look at.
 Well, since we have now started stripping the decks, we attacked it with a heat gun, 2 scrapers, the admiral broke the first one, and a belt sander to clean it all up. There is still a bit of extremely hard adhesive left, but all of the grey crap is off and the majority of the glue. Sadly enough, once the belt sander made it through the glue and into the top layer of paint, you could start to see where the old original teak strips were. We definitely will not be putting teak back on, the closest would be some type of fake teak.
We are also seriously thinking about NOT putting the wood box back in on the starboard side of the cockpit. Once I removed it, I was amazed at the amount of extra space the starboard bench had. Our plans for now are to have some serious cockpit cushions made that will result in a luxurious starboard cockpit sofa, great for lounging and entertaining, maybe not so great offshore, but it is all about sacrifices. 😉