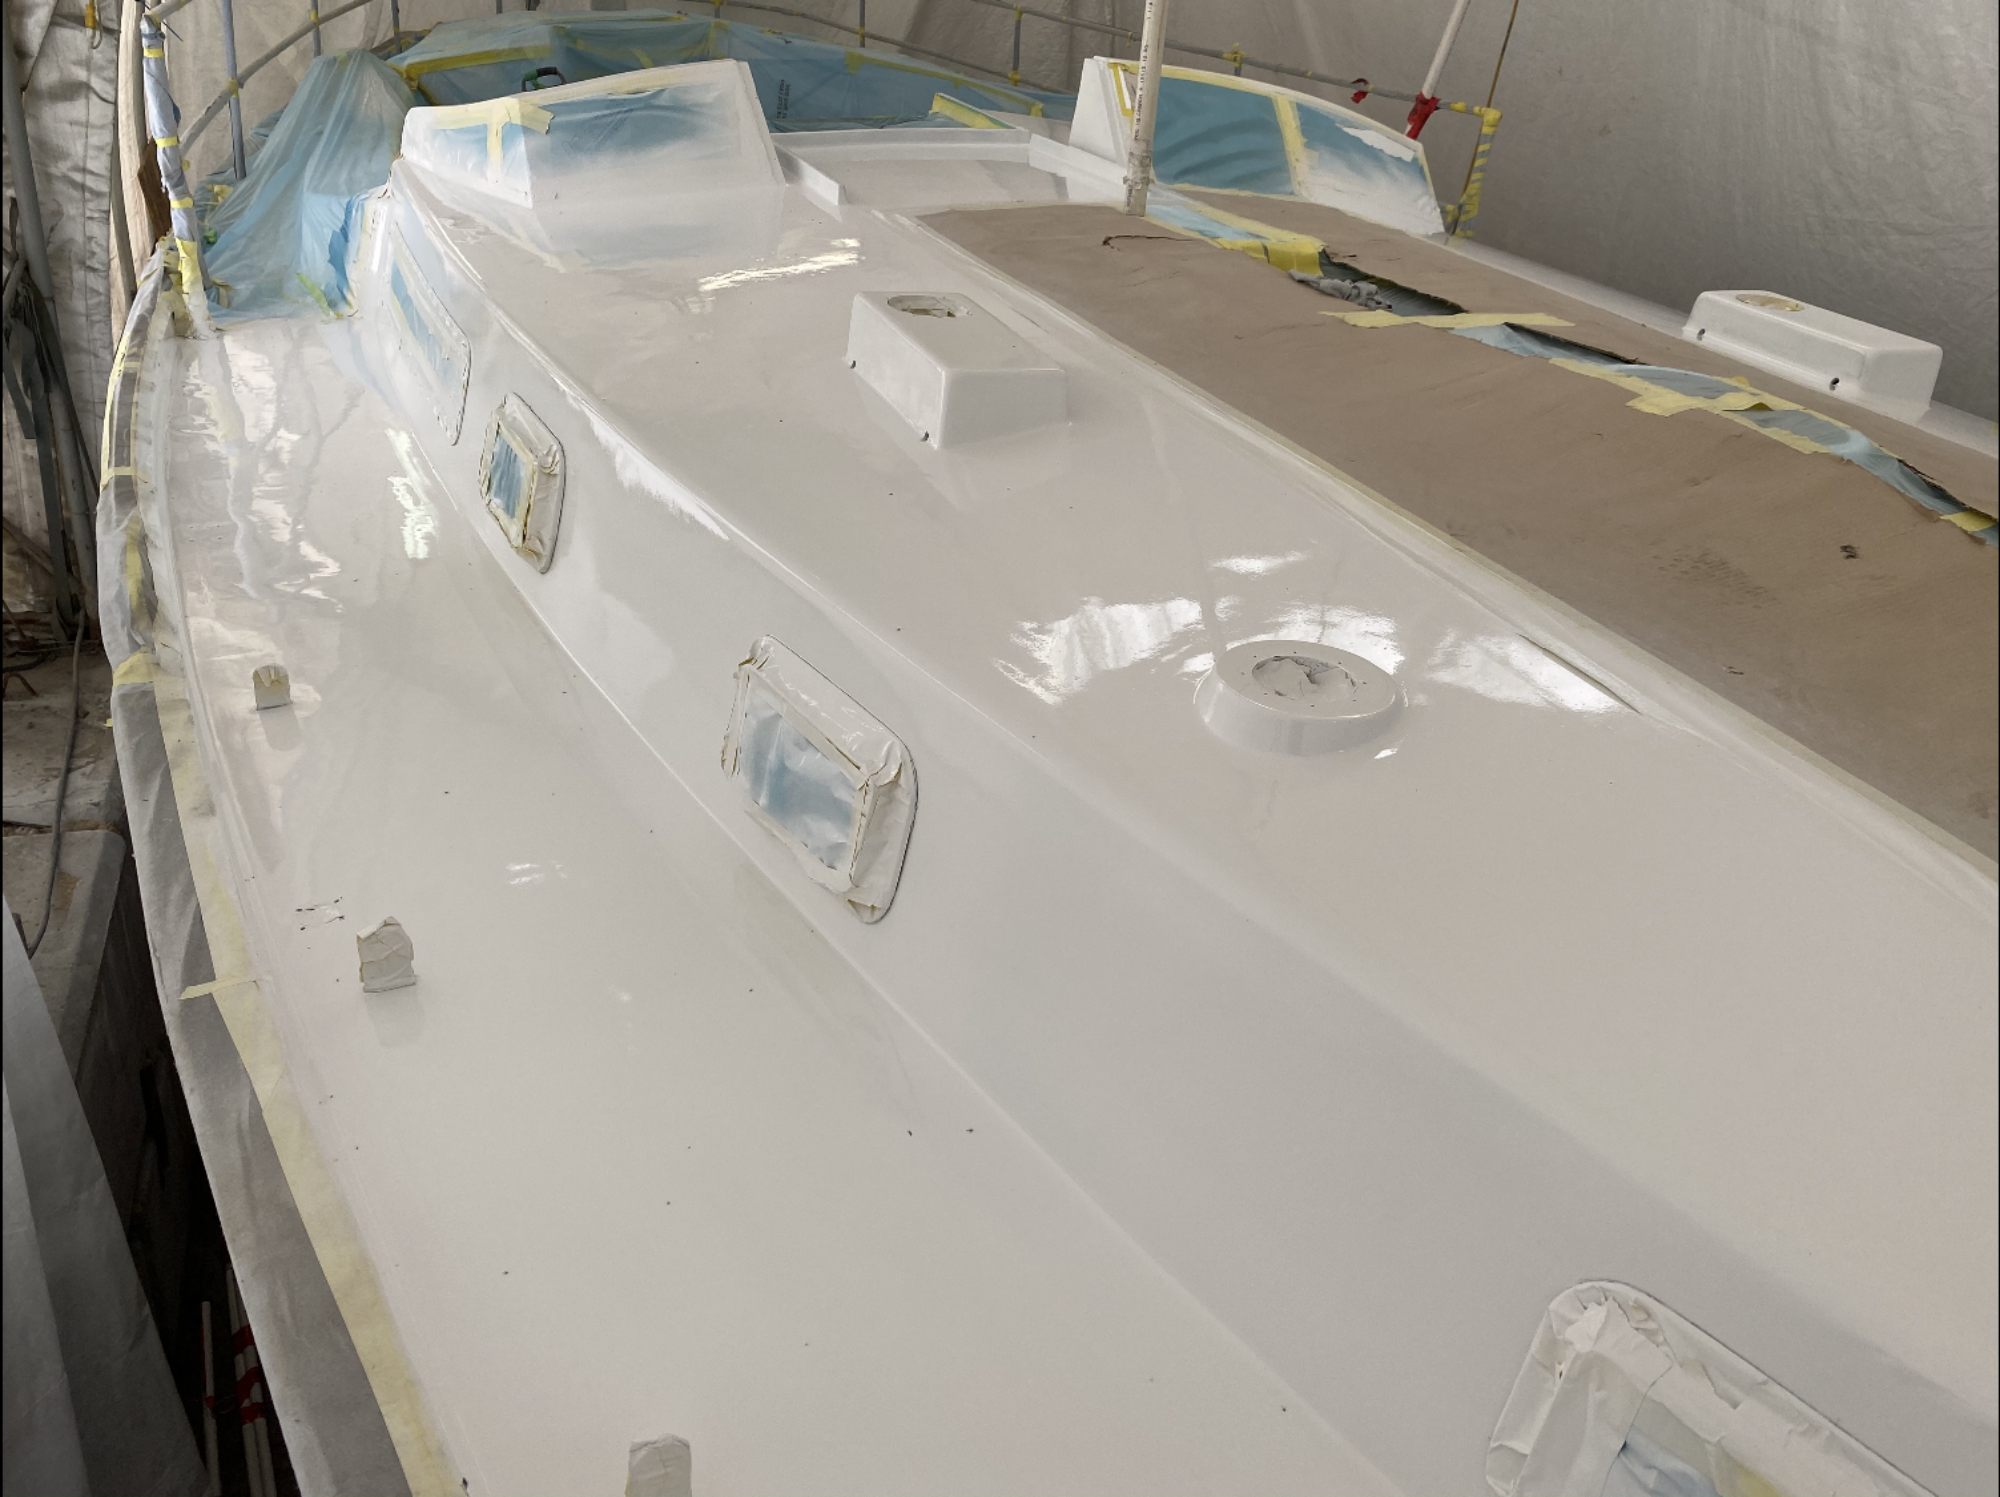
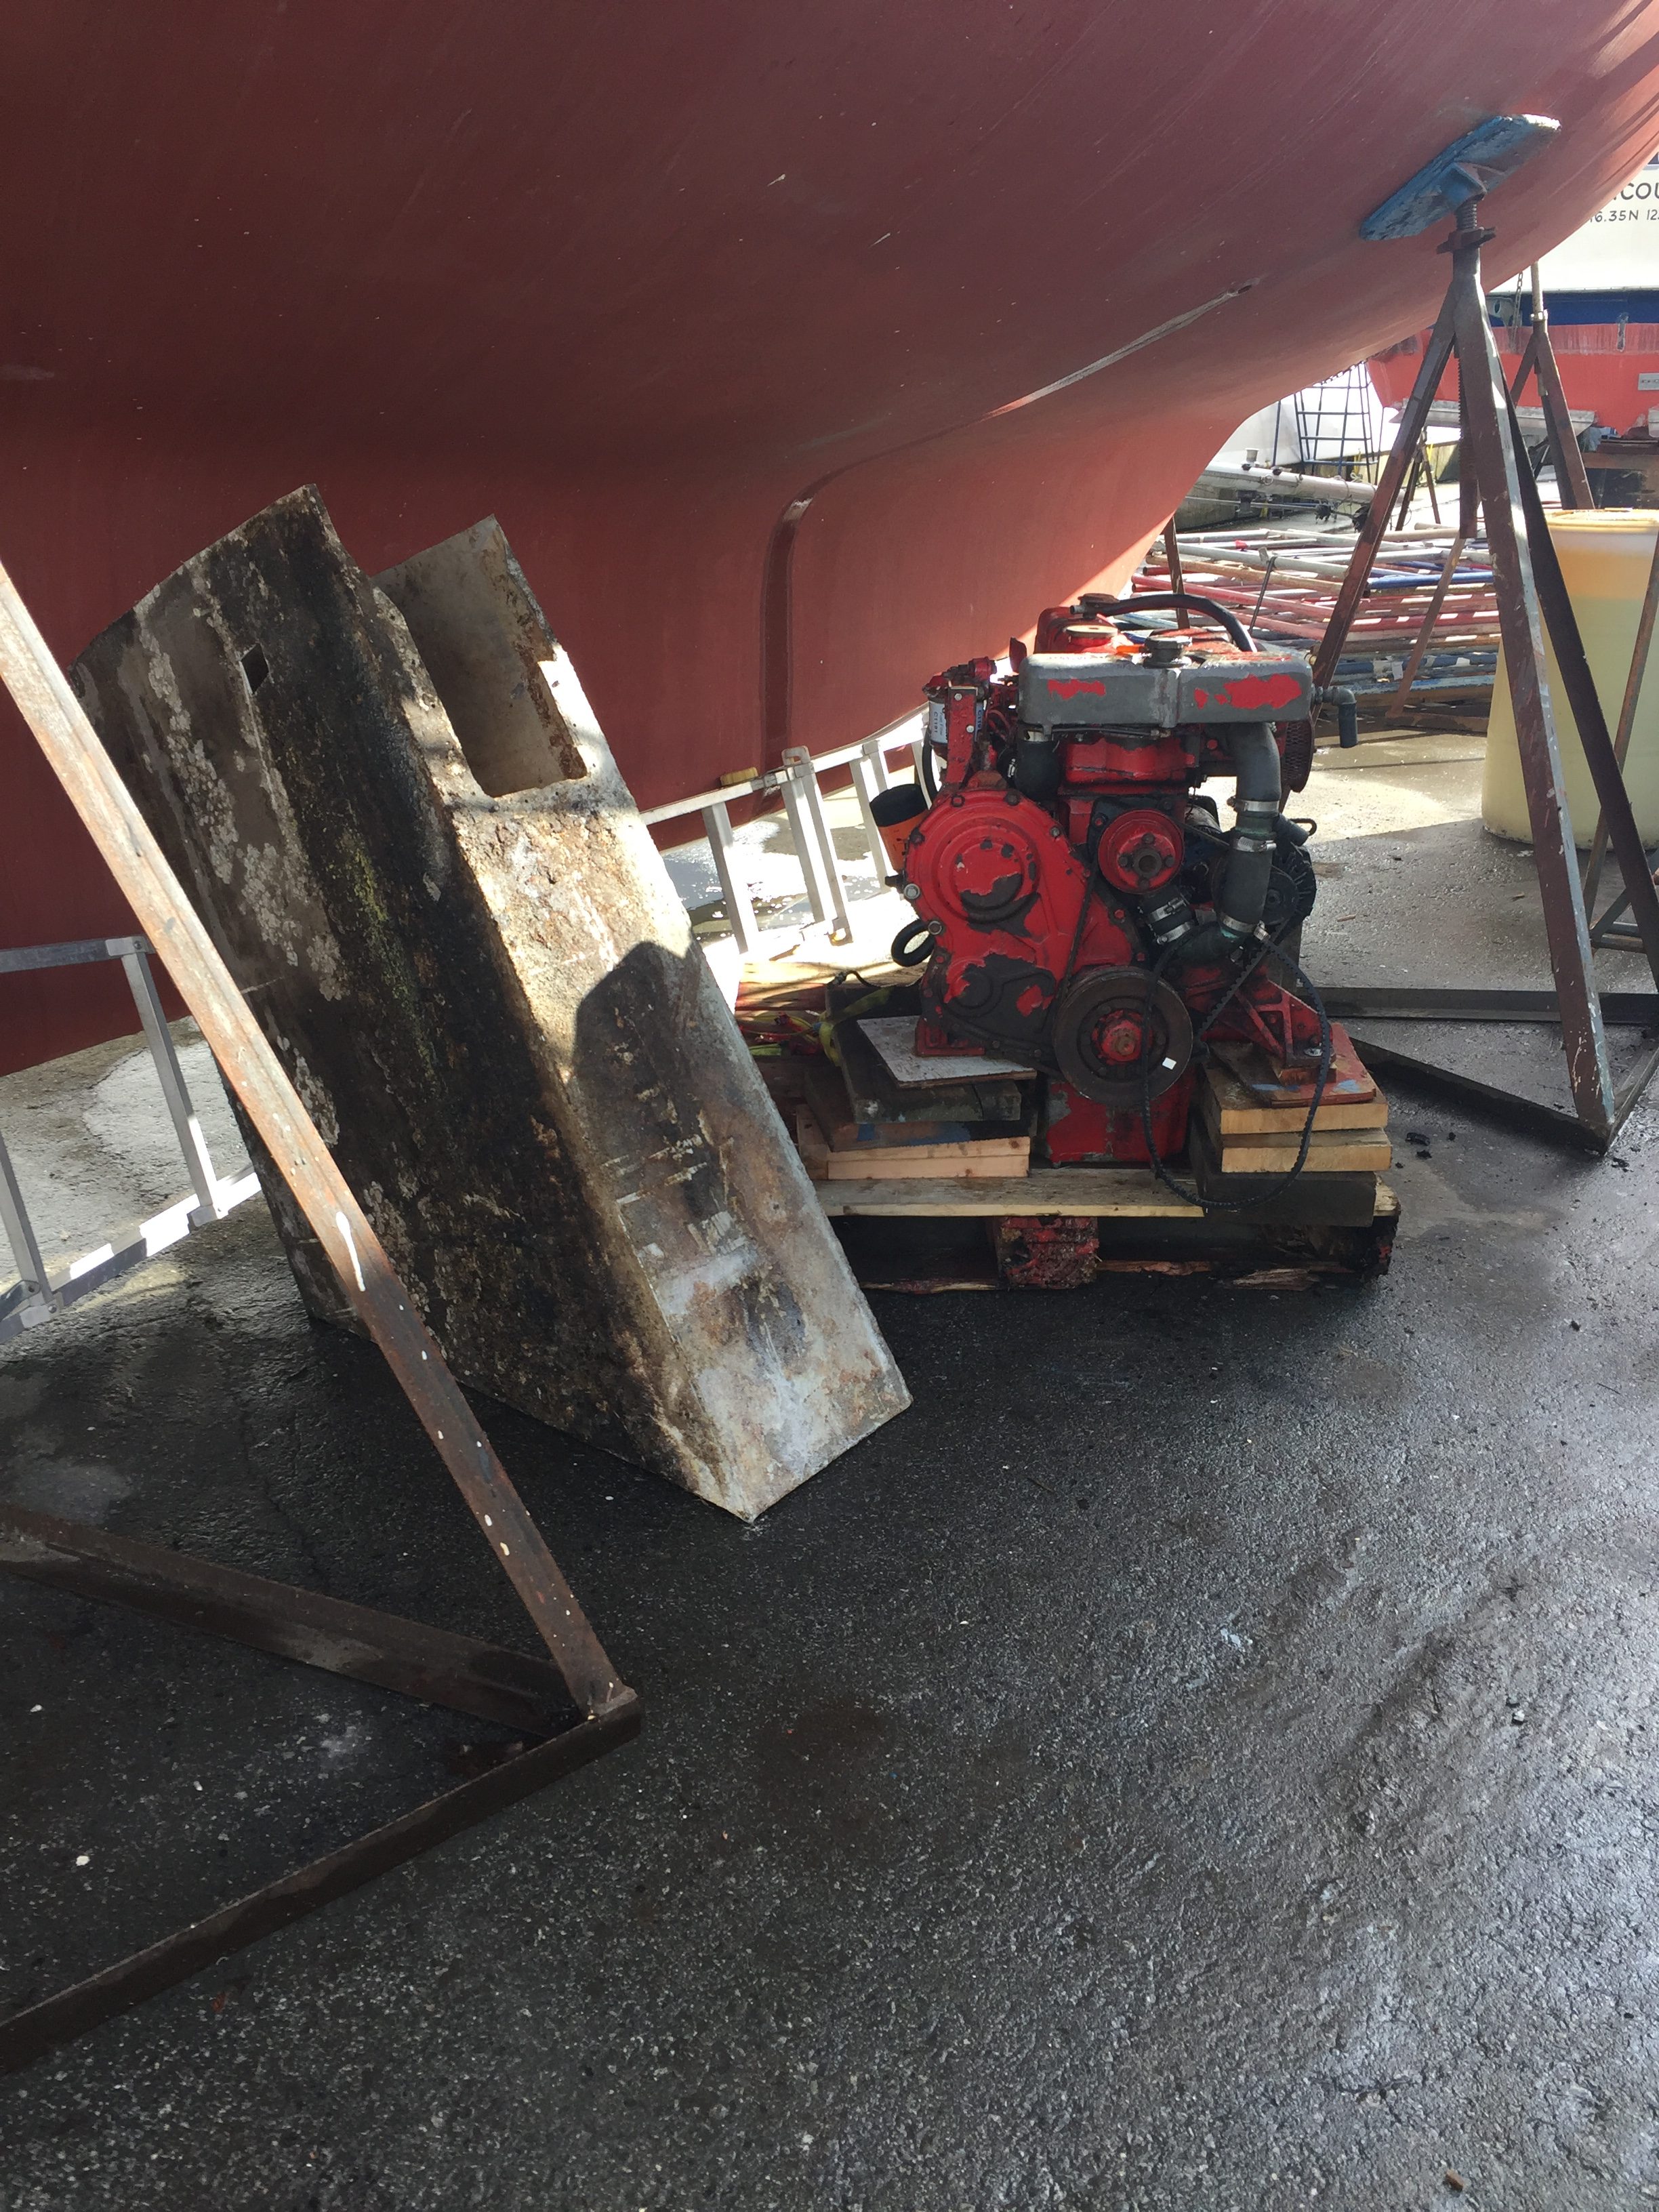
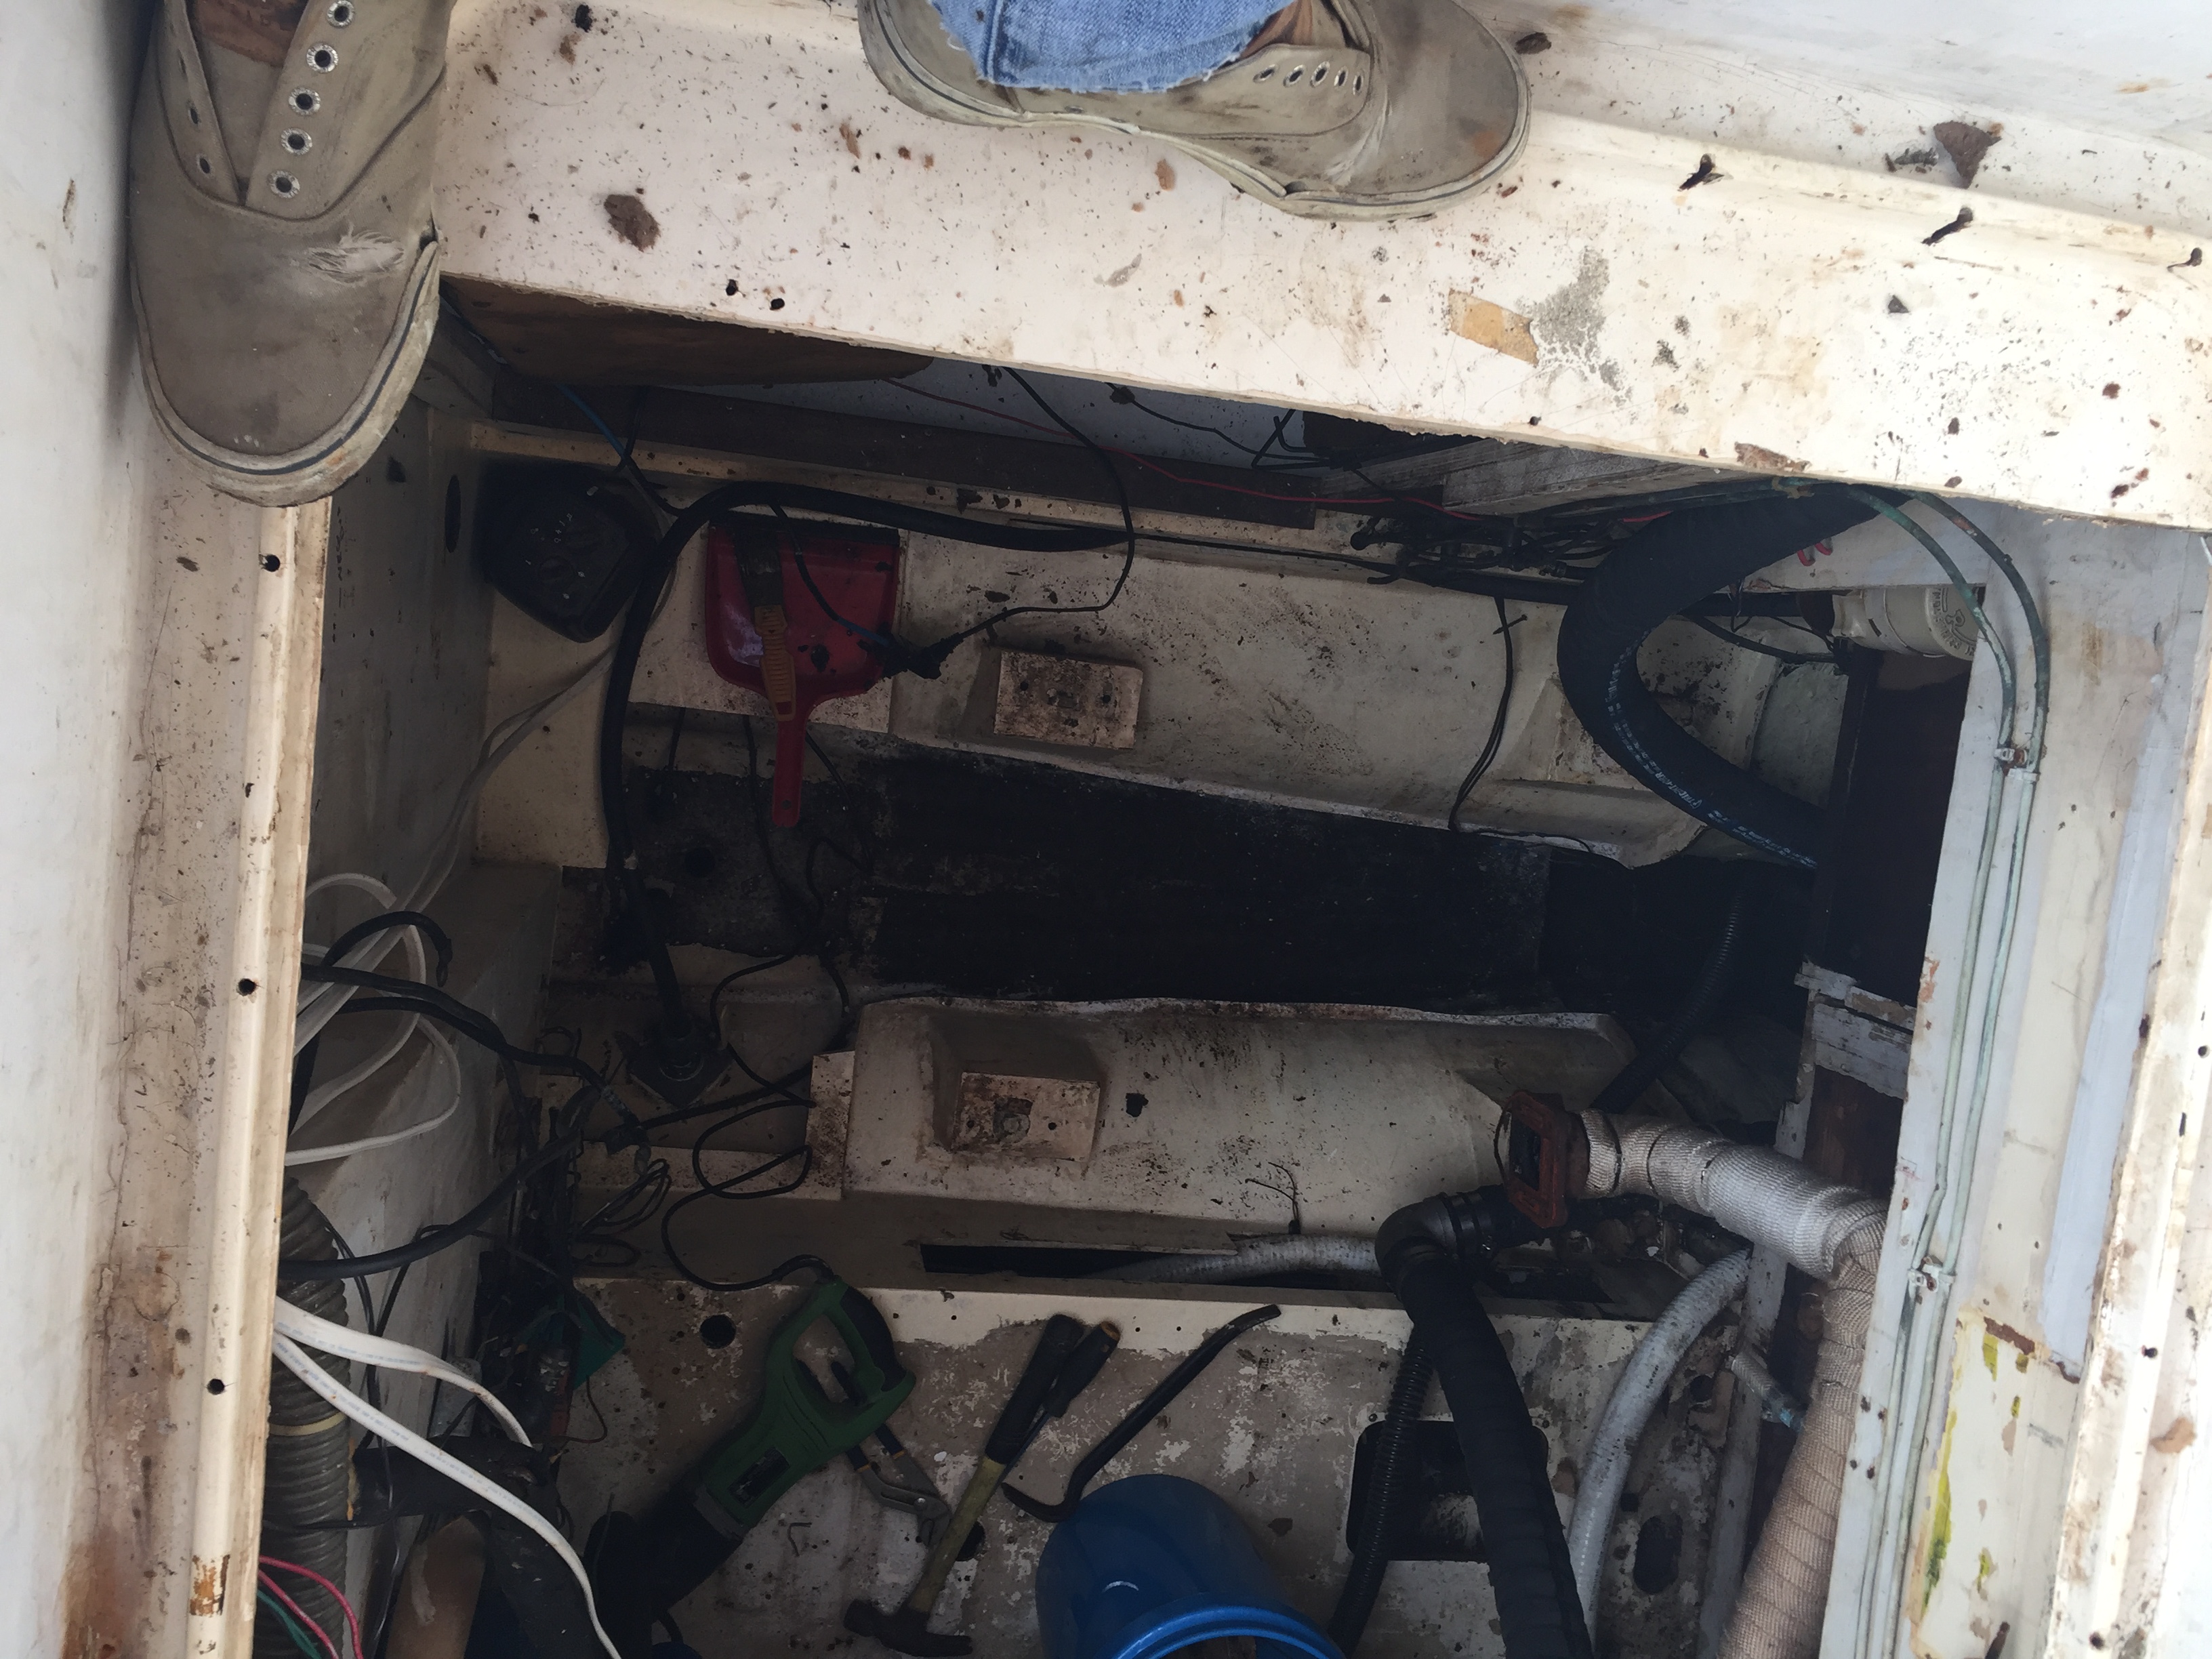
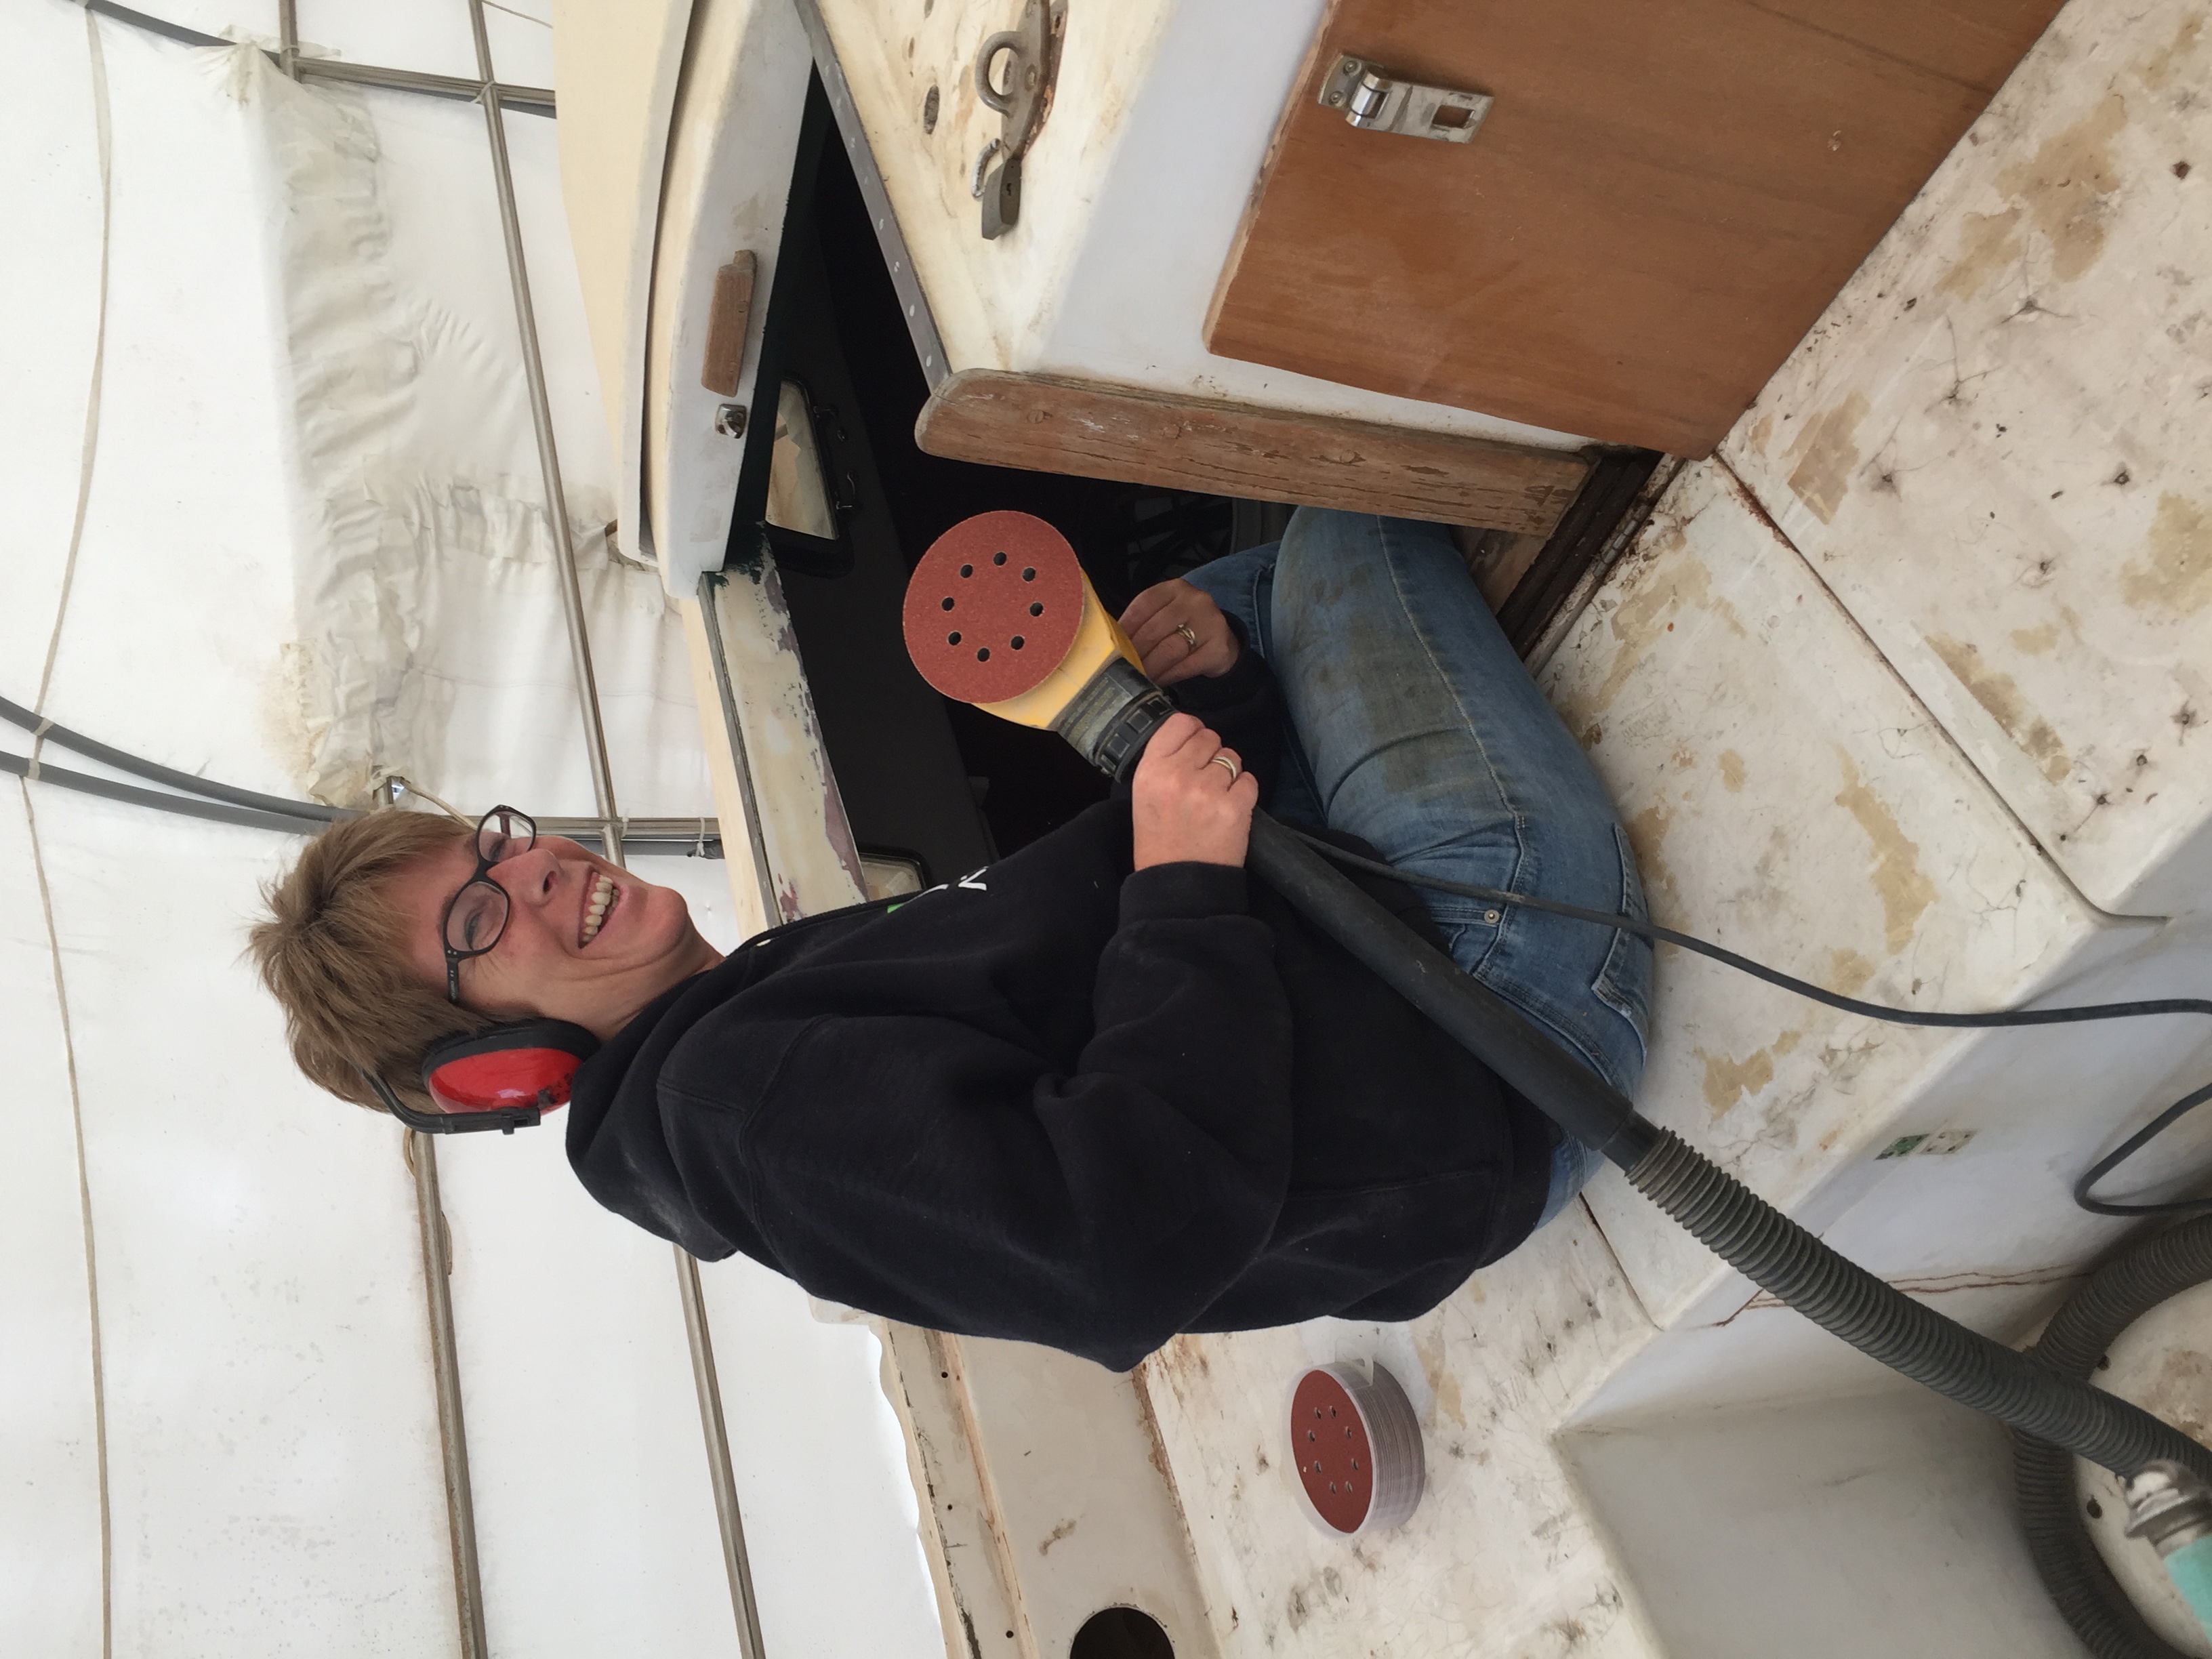
We have officially moved from demolition to renovation in the engine room! There is a lot of cleanup left, still need to remove a few old fuel lines, some sanding, some painting, install some insulation, have the new tanks made, install them, and then Prodigy Marine will do the new engine install, but we have officially moved out of the darkness and into the light.
Akupara looks like a bomb went off inside of her with fiberglass dust everywhere and panels from around the tanks and all kinds of stuff, but is it ever nice to be done this job! I don’t mind the new work, it is much easier of course!
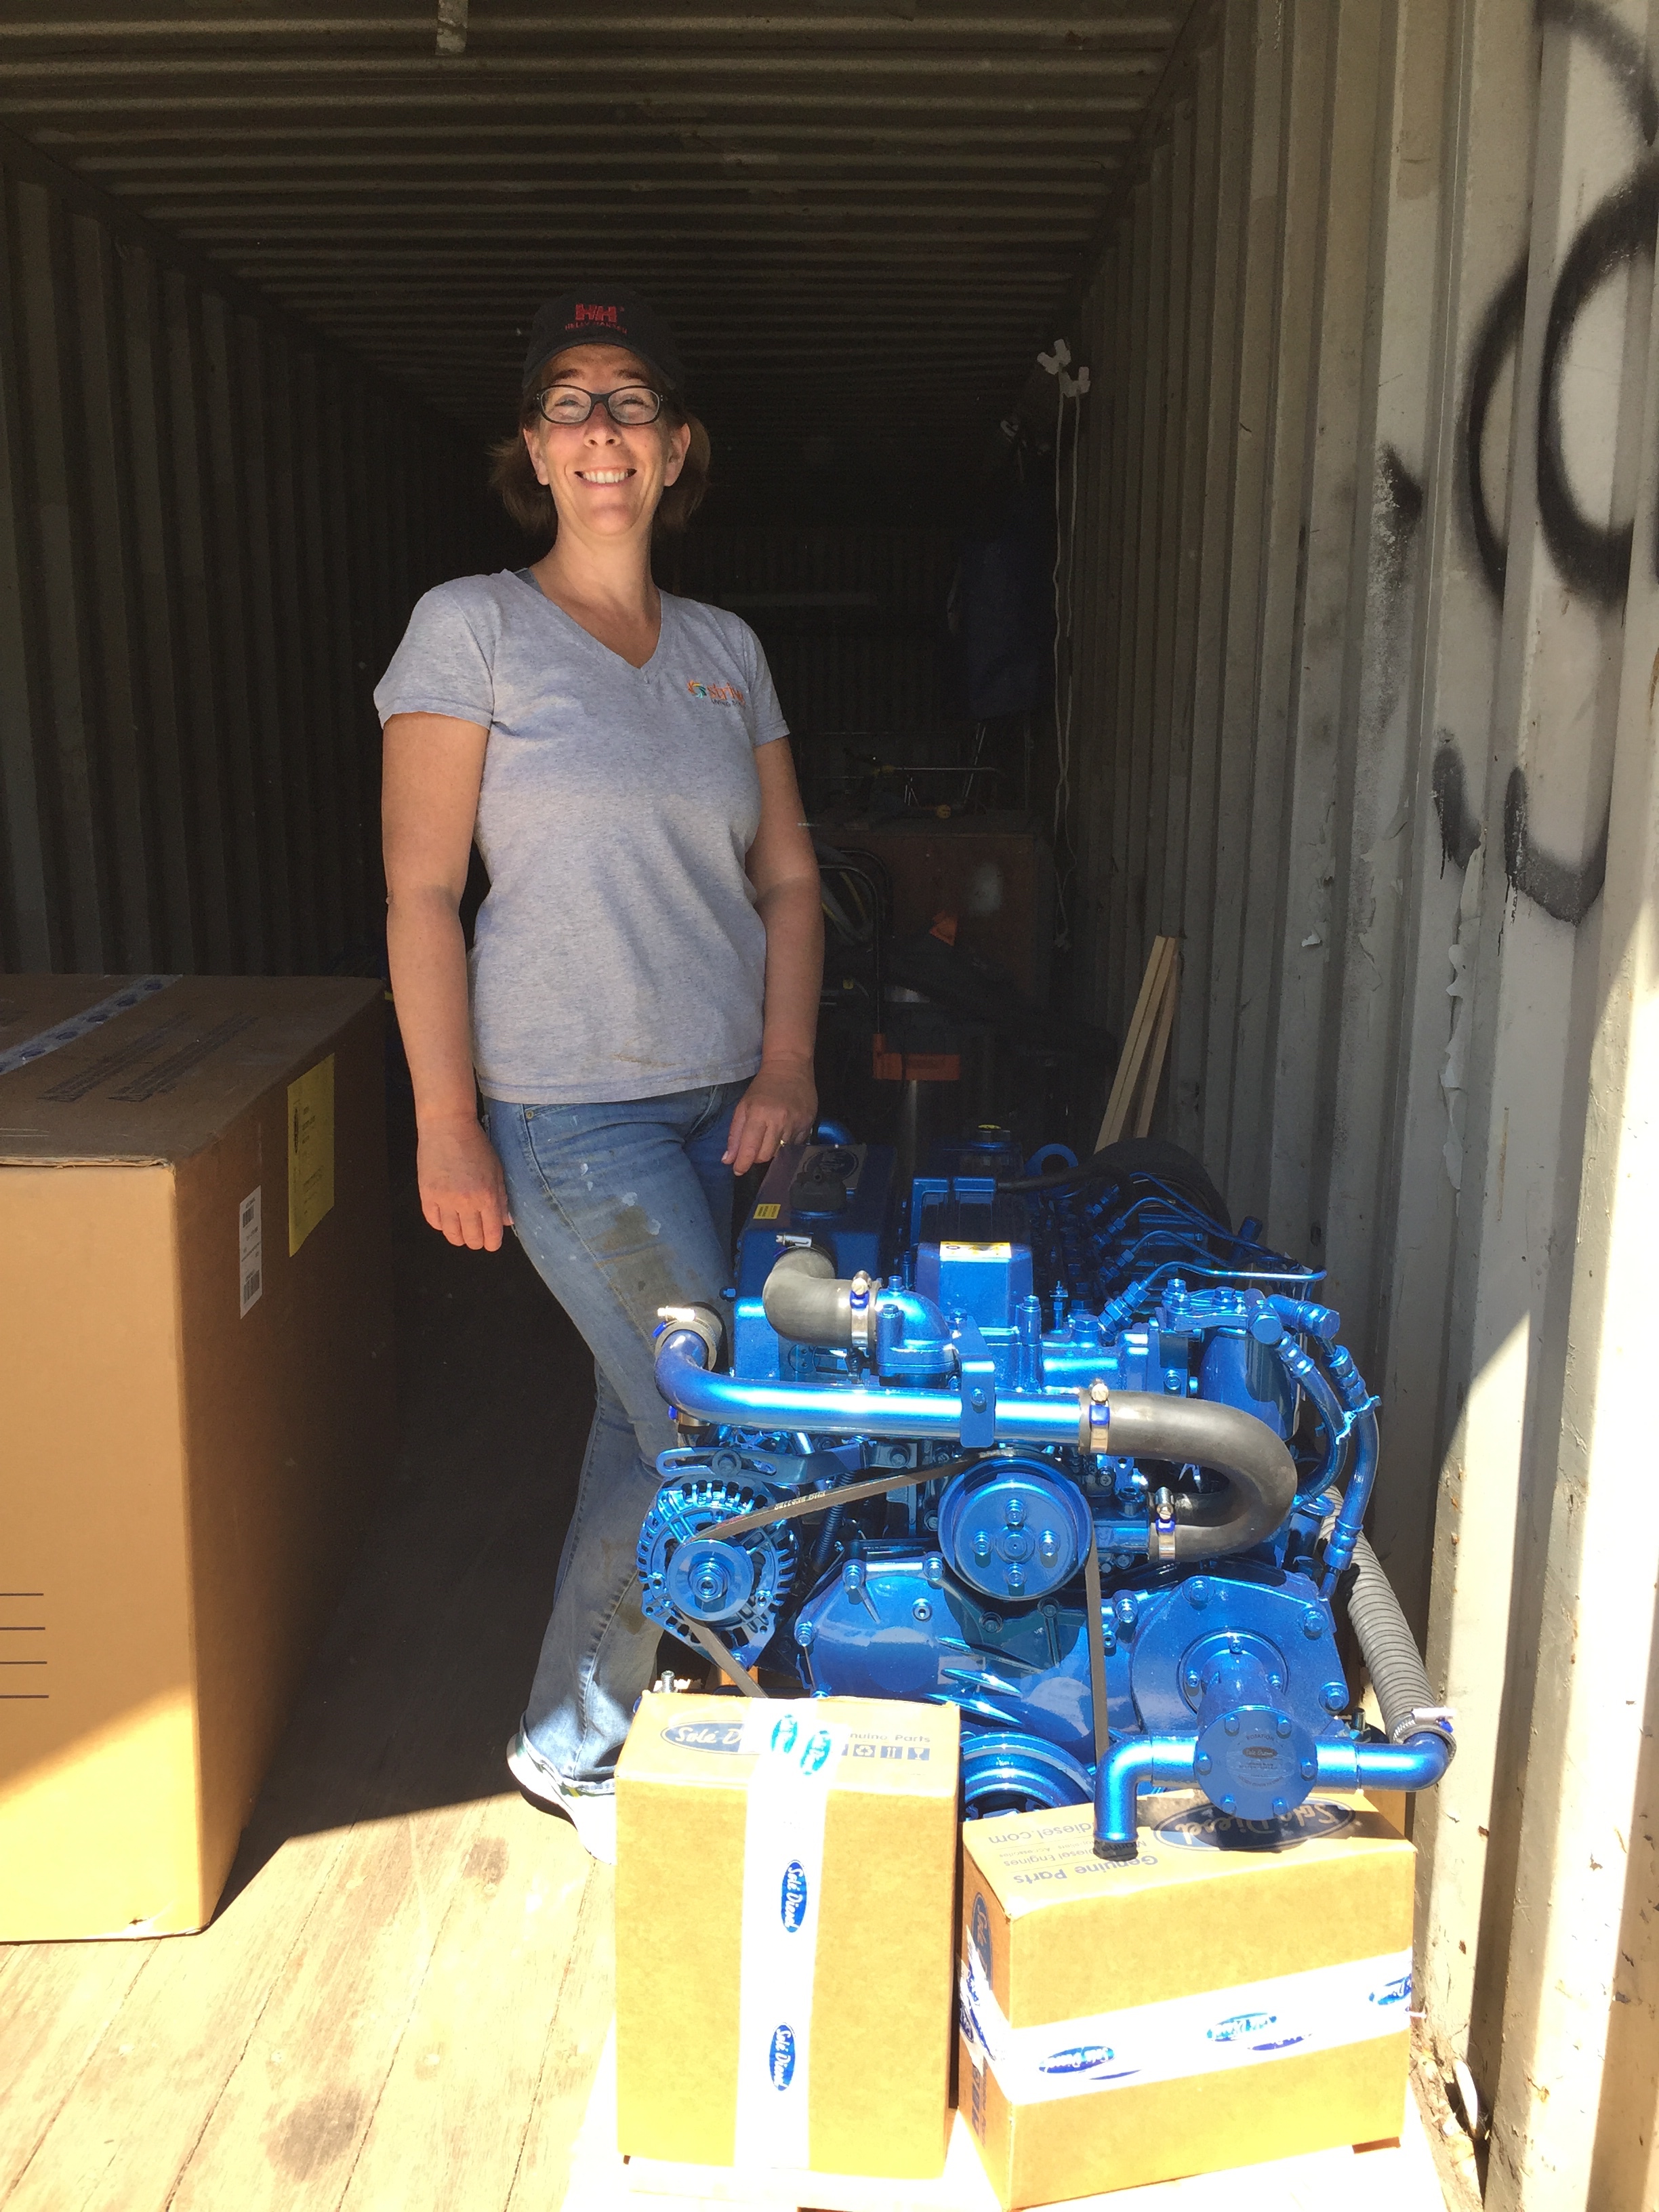
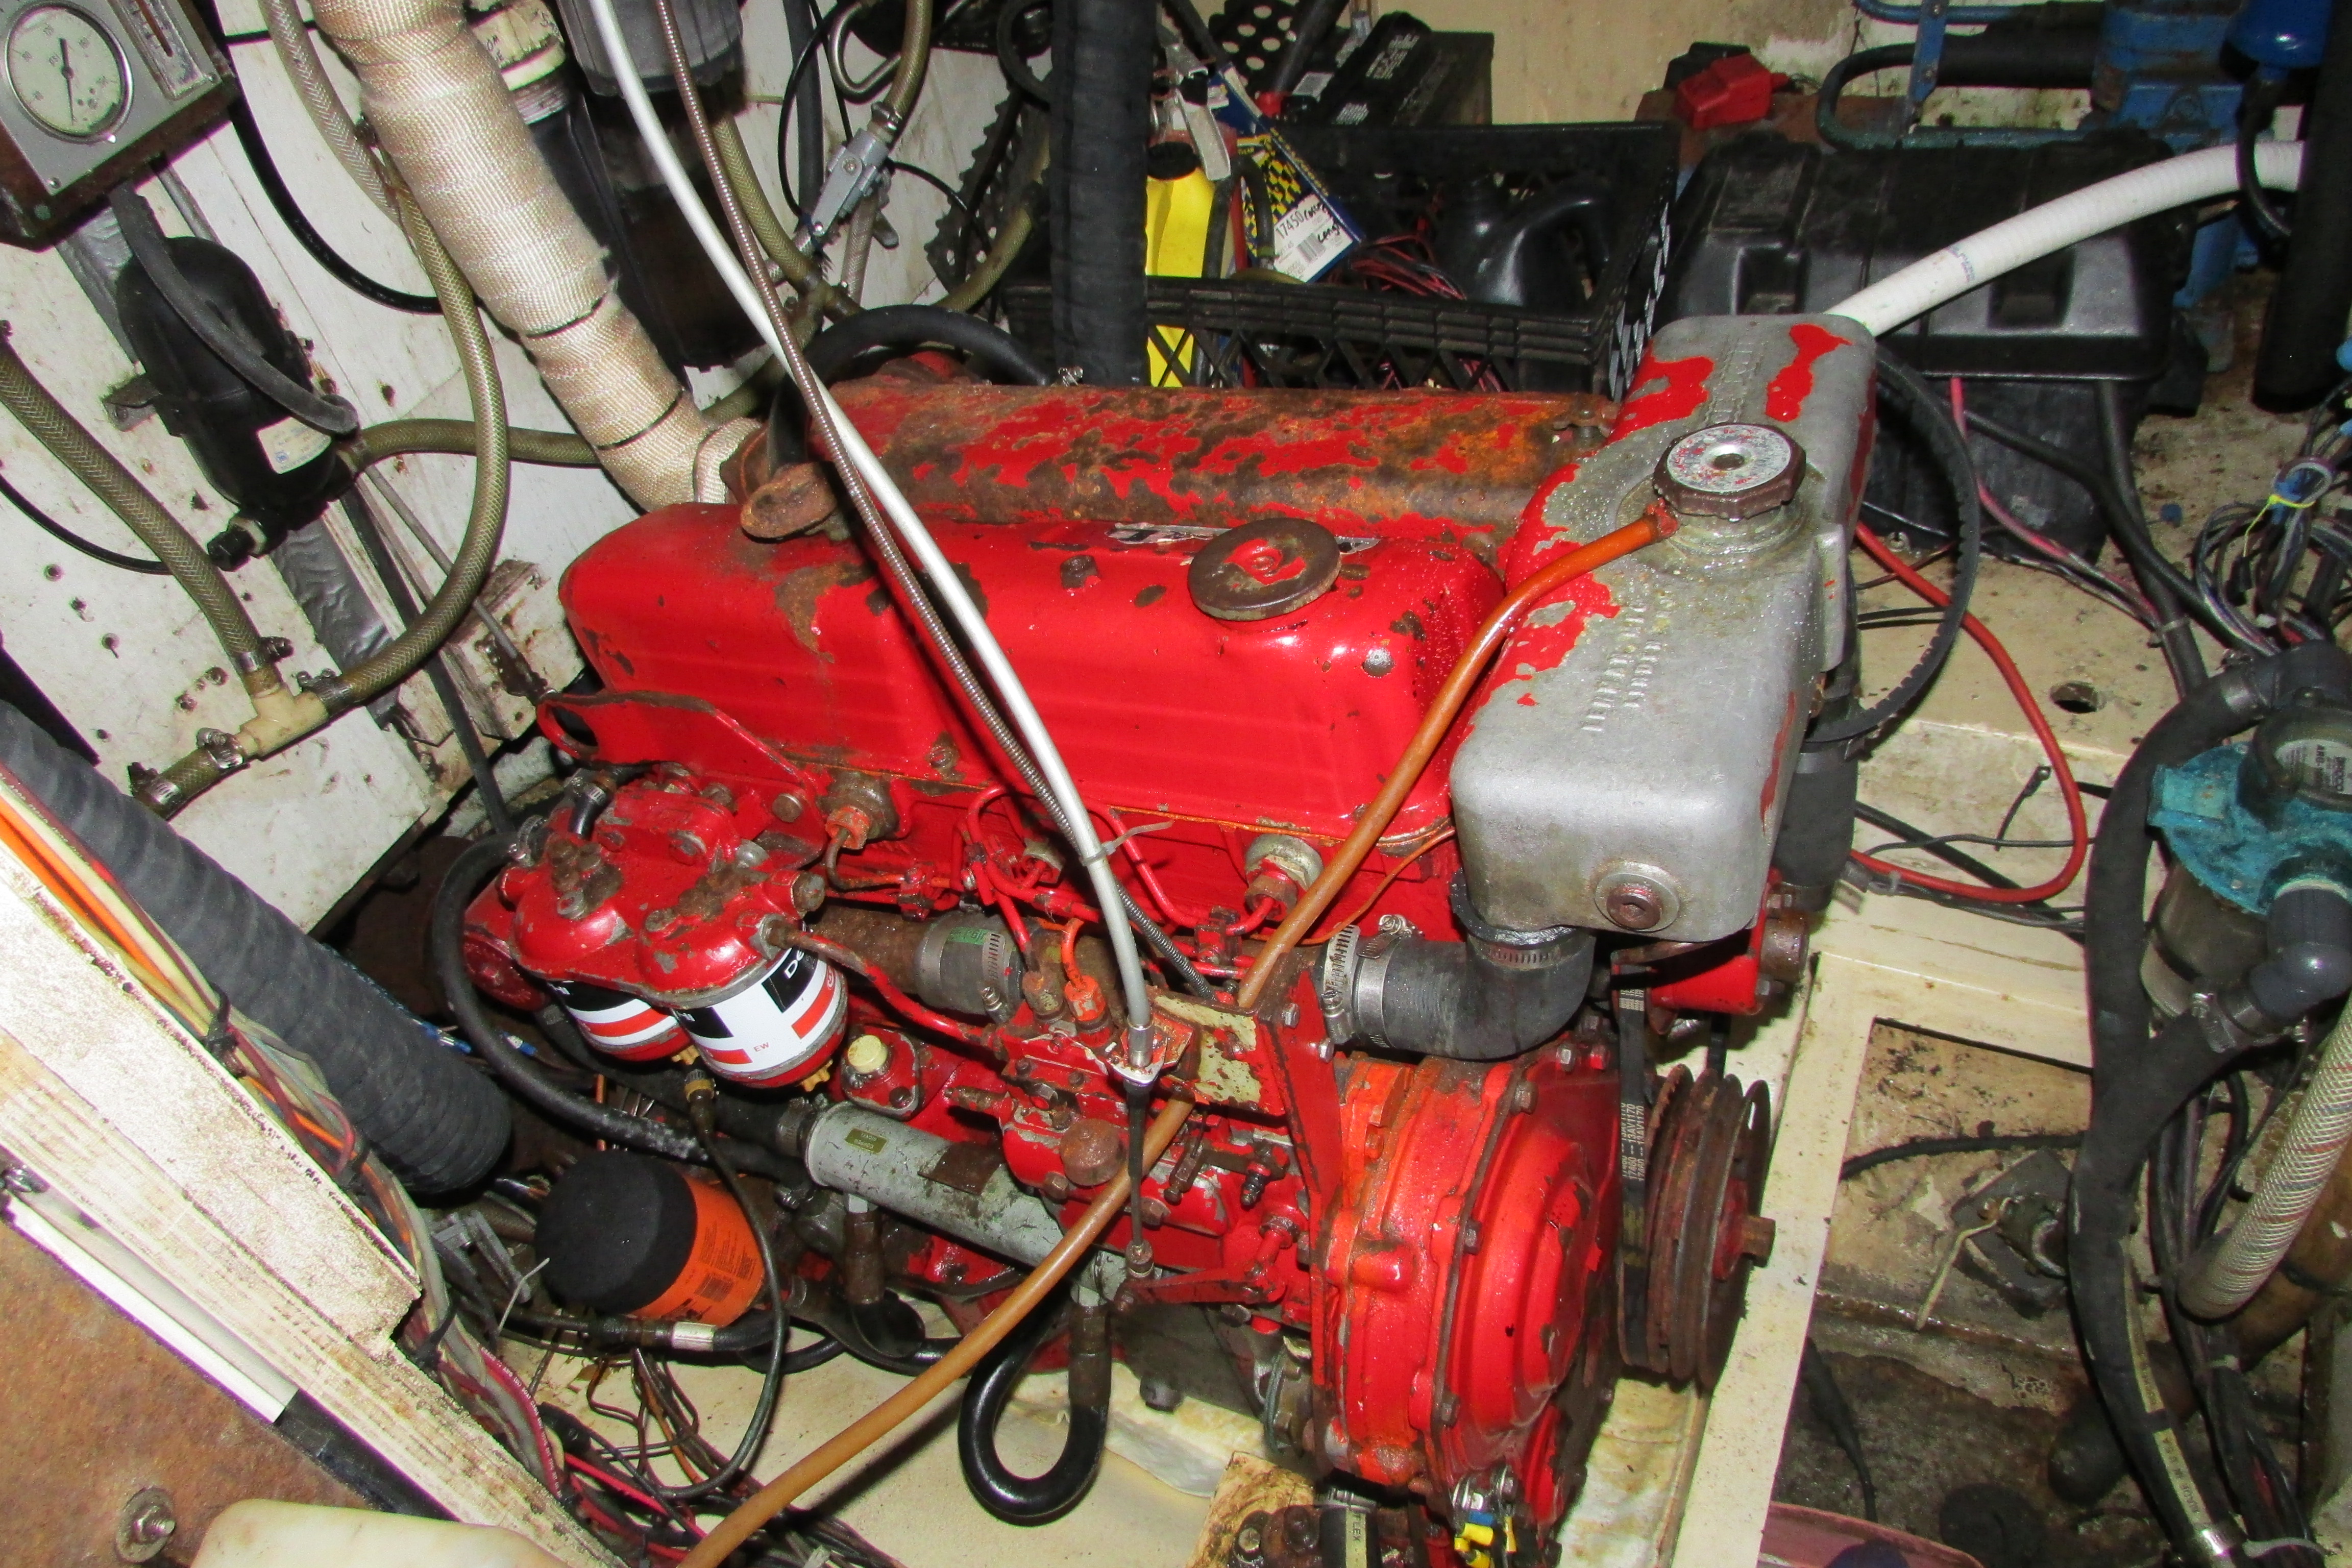
And the Admiral got to see the new engine yesterday! She said it sparkles! I guess that means it’s ok! 🙂
I have to say that was one of the worst jobs I have ever had to complete on a boat. I have never been so dirty, smelly or sore in all my boat renovation projects.
I am going to let the pictures tell the story and will keep my comments short.
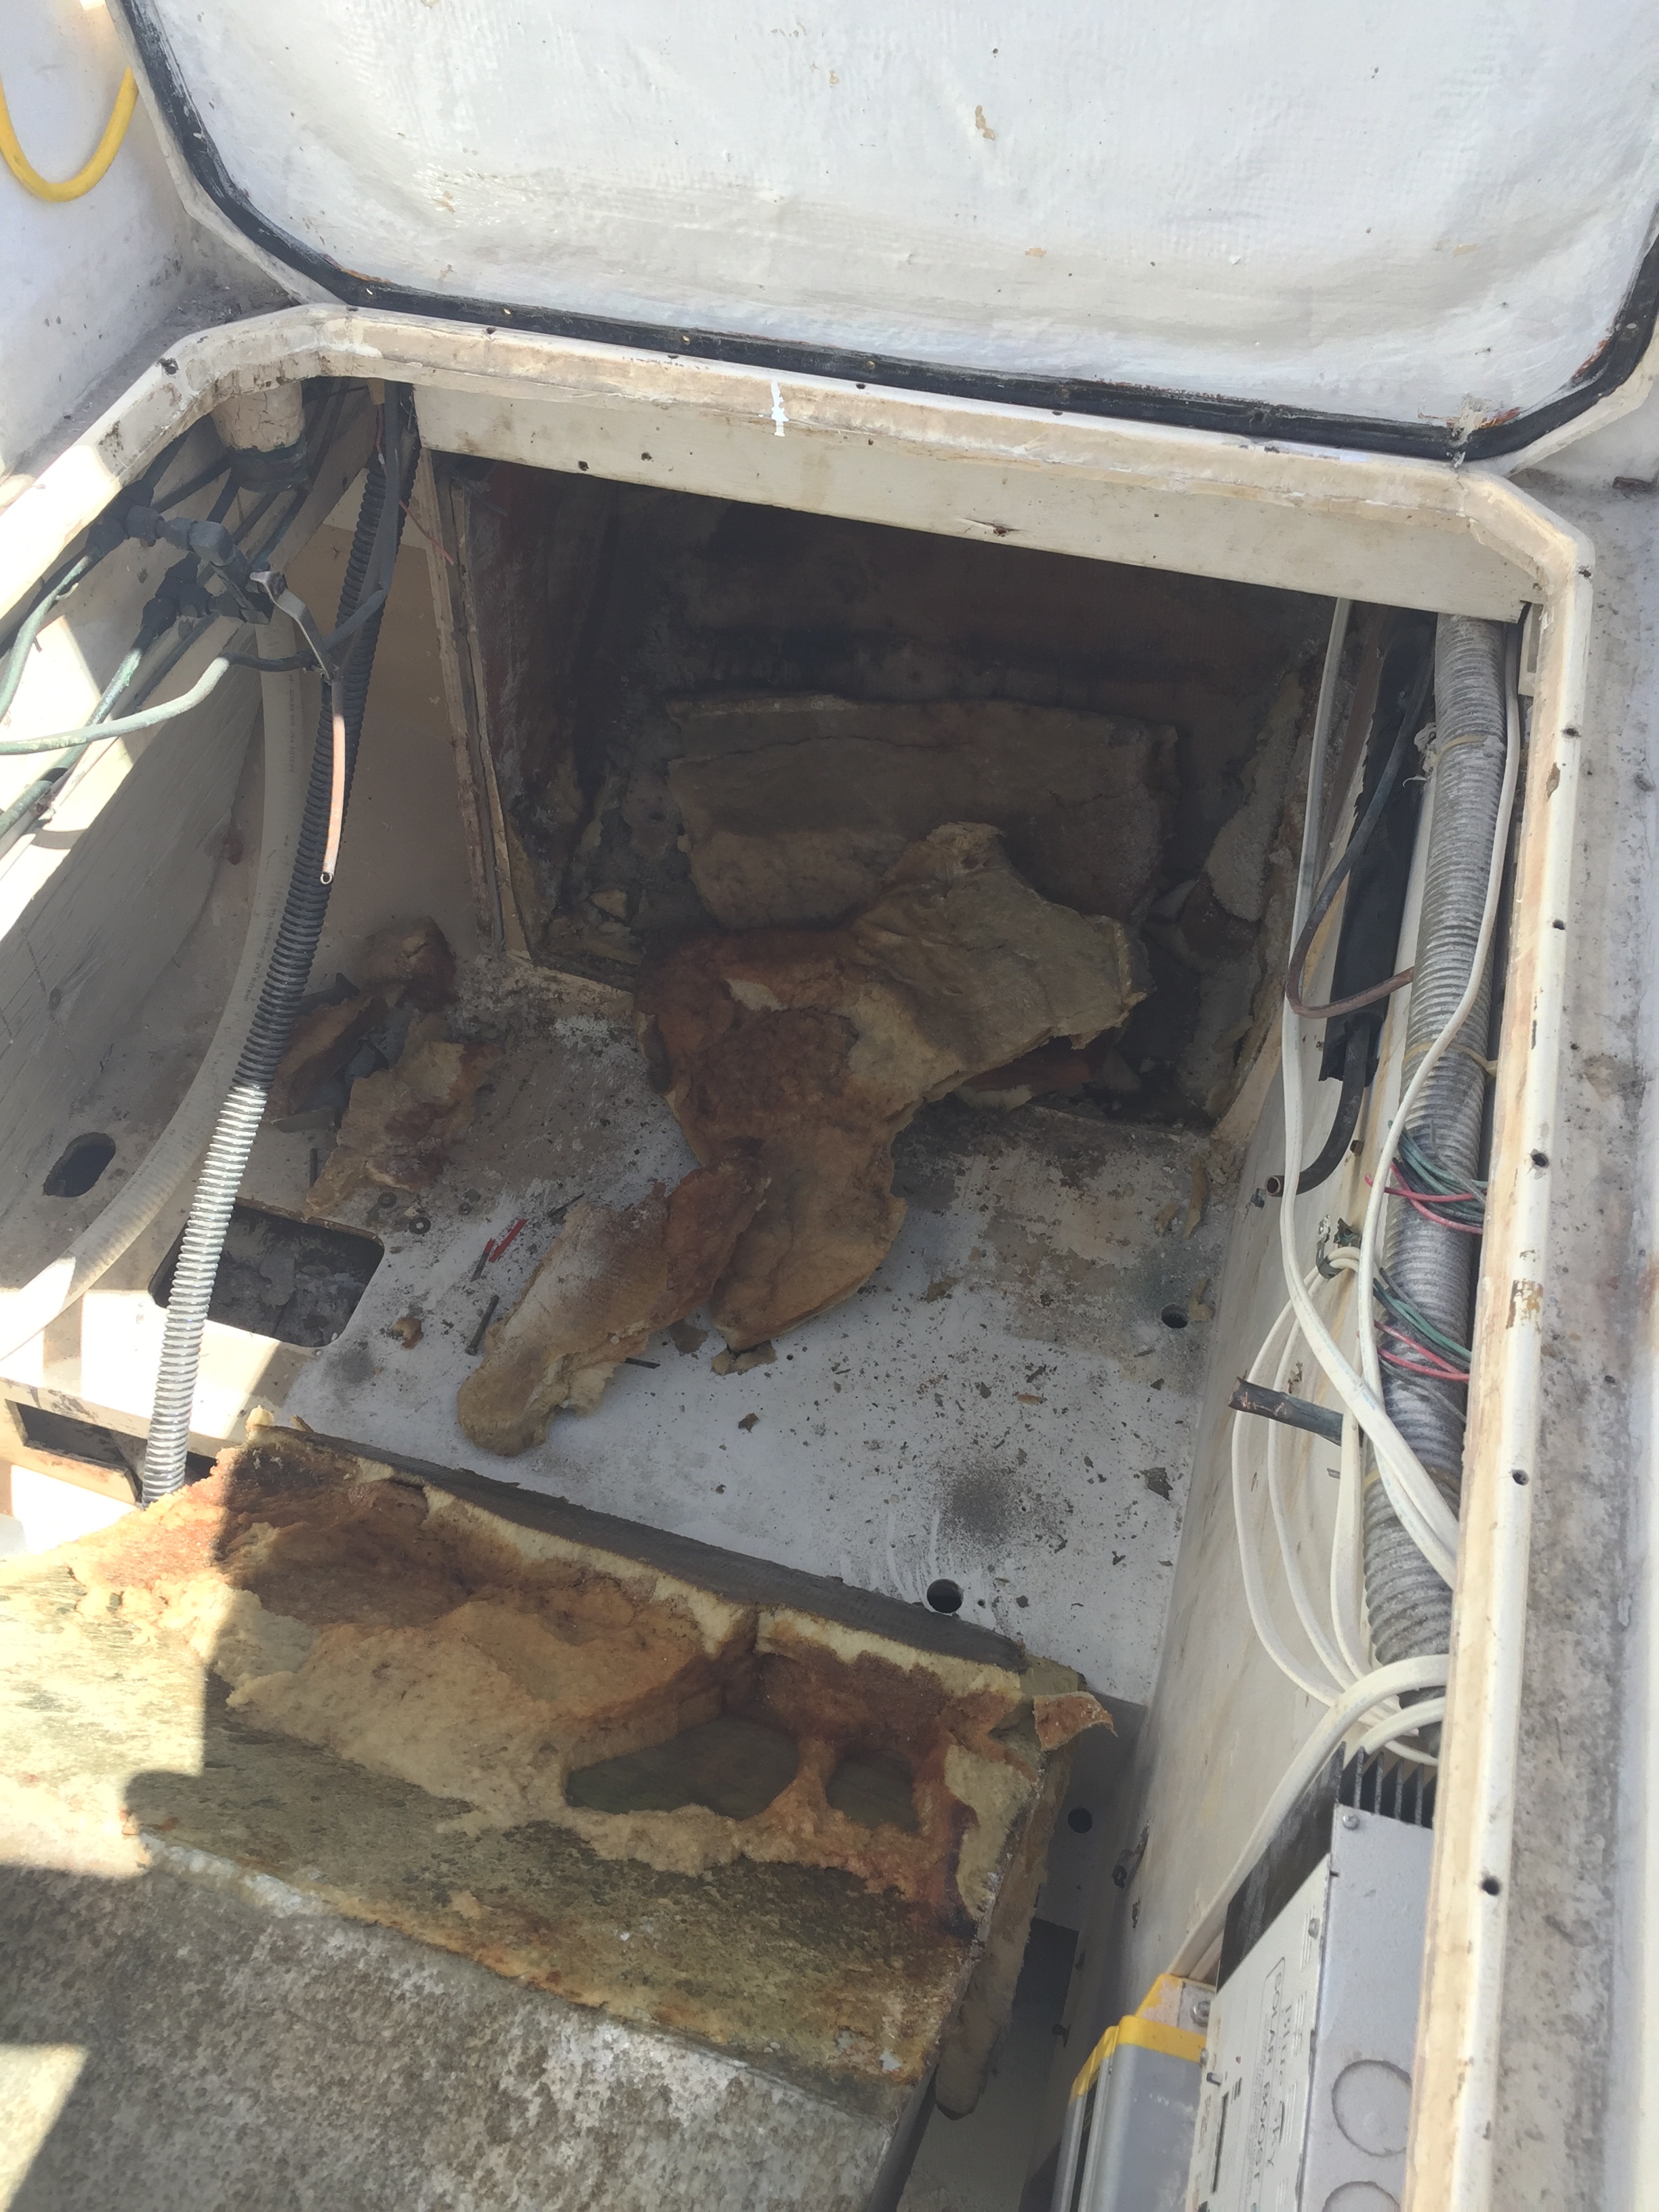
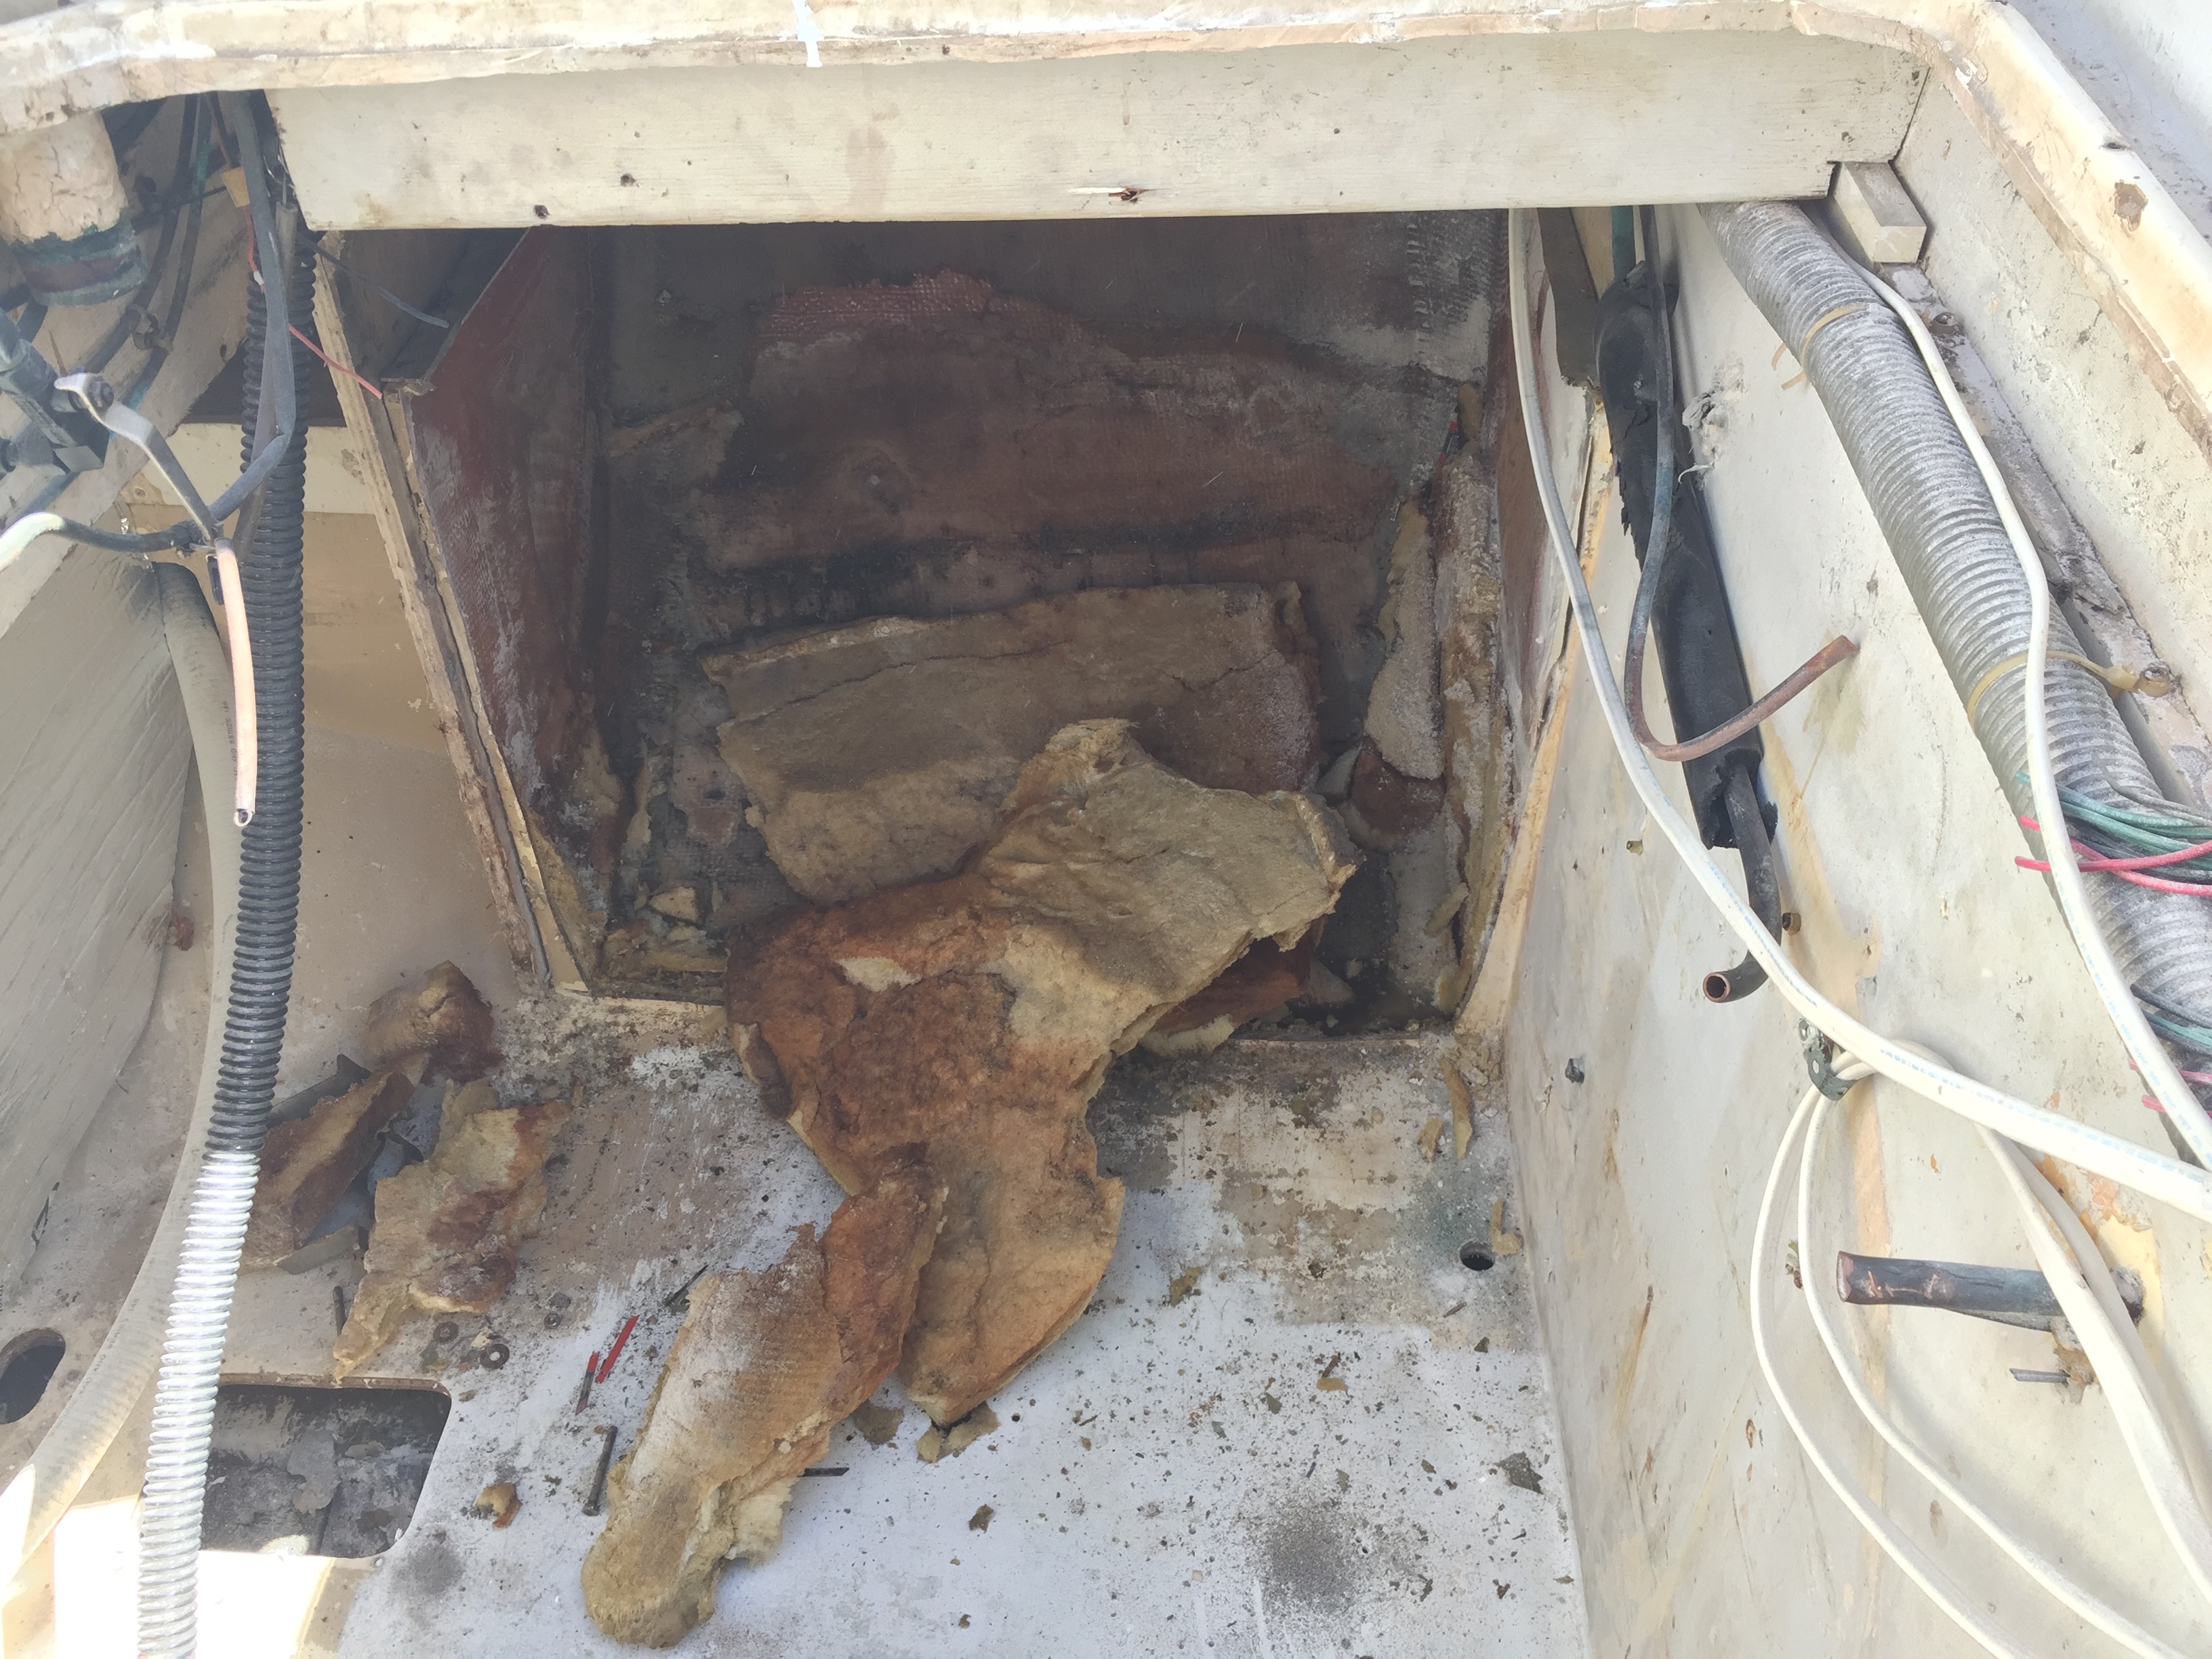
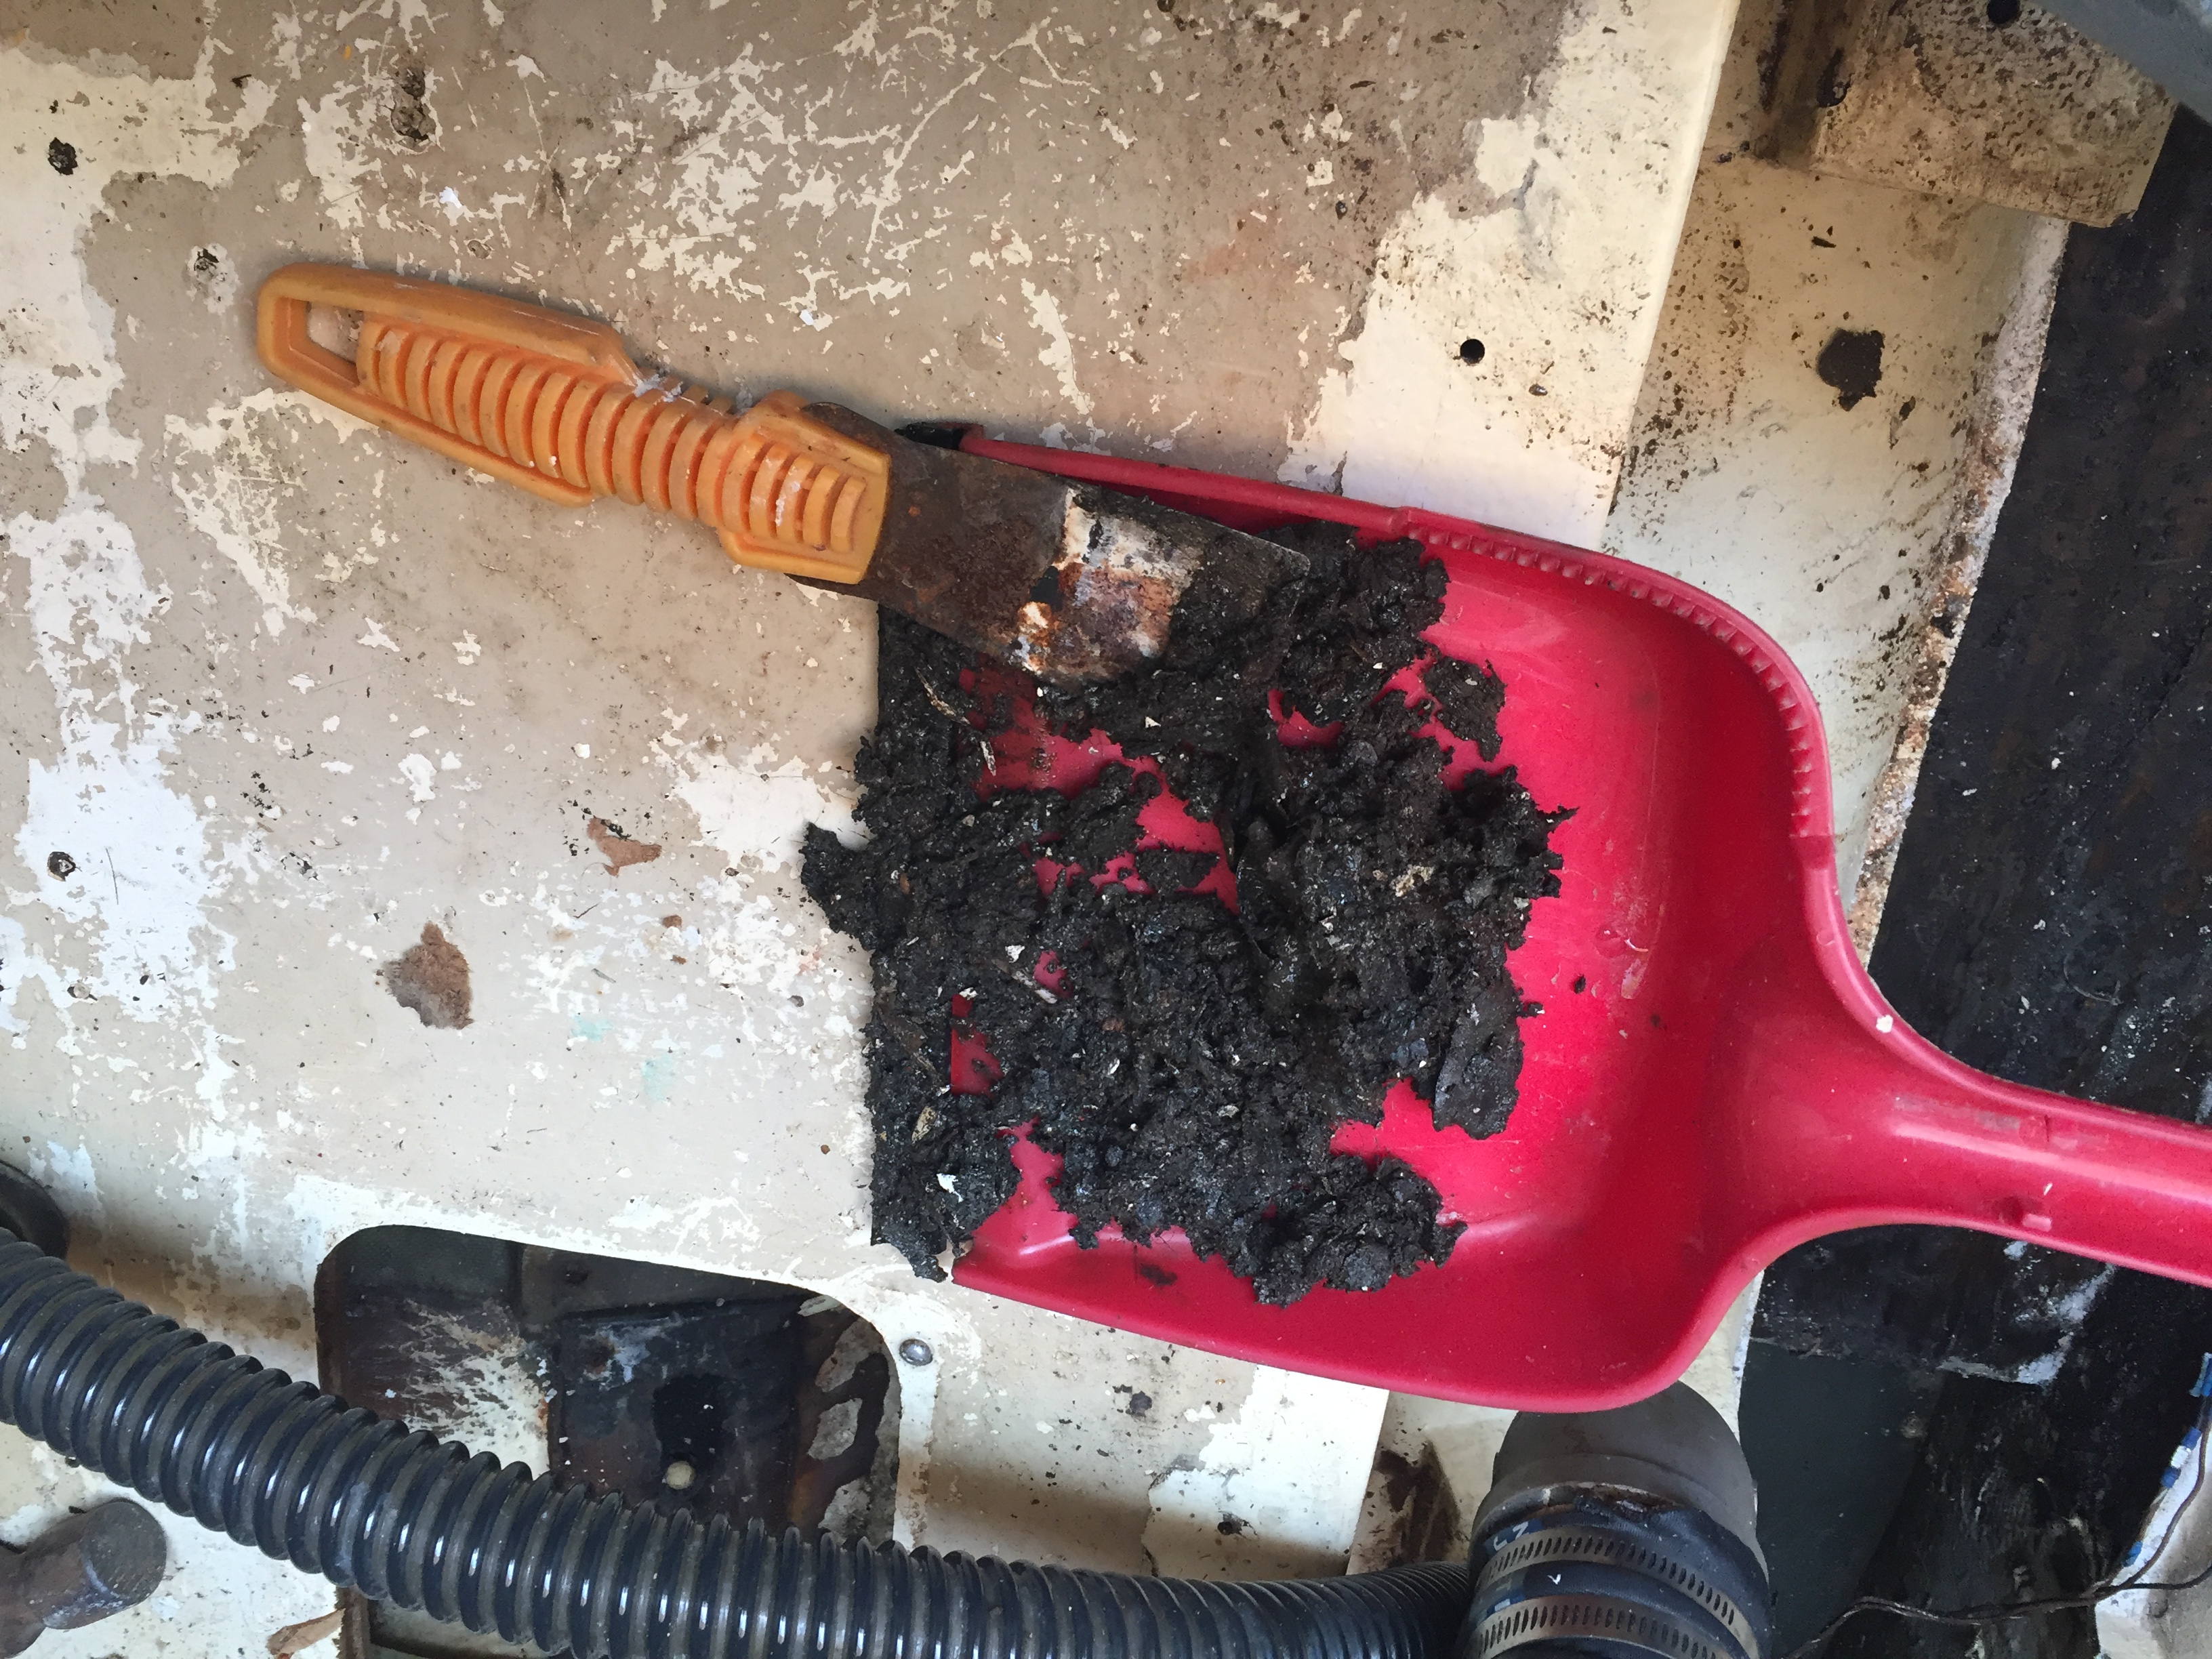
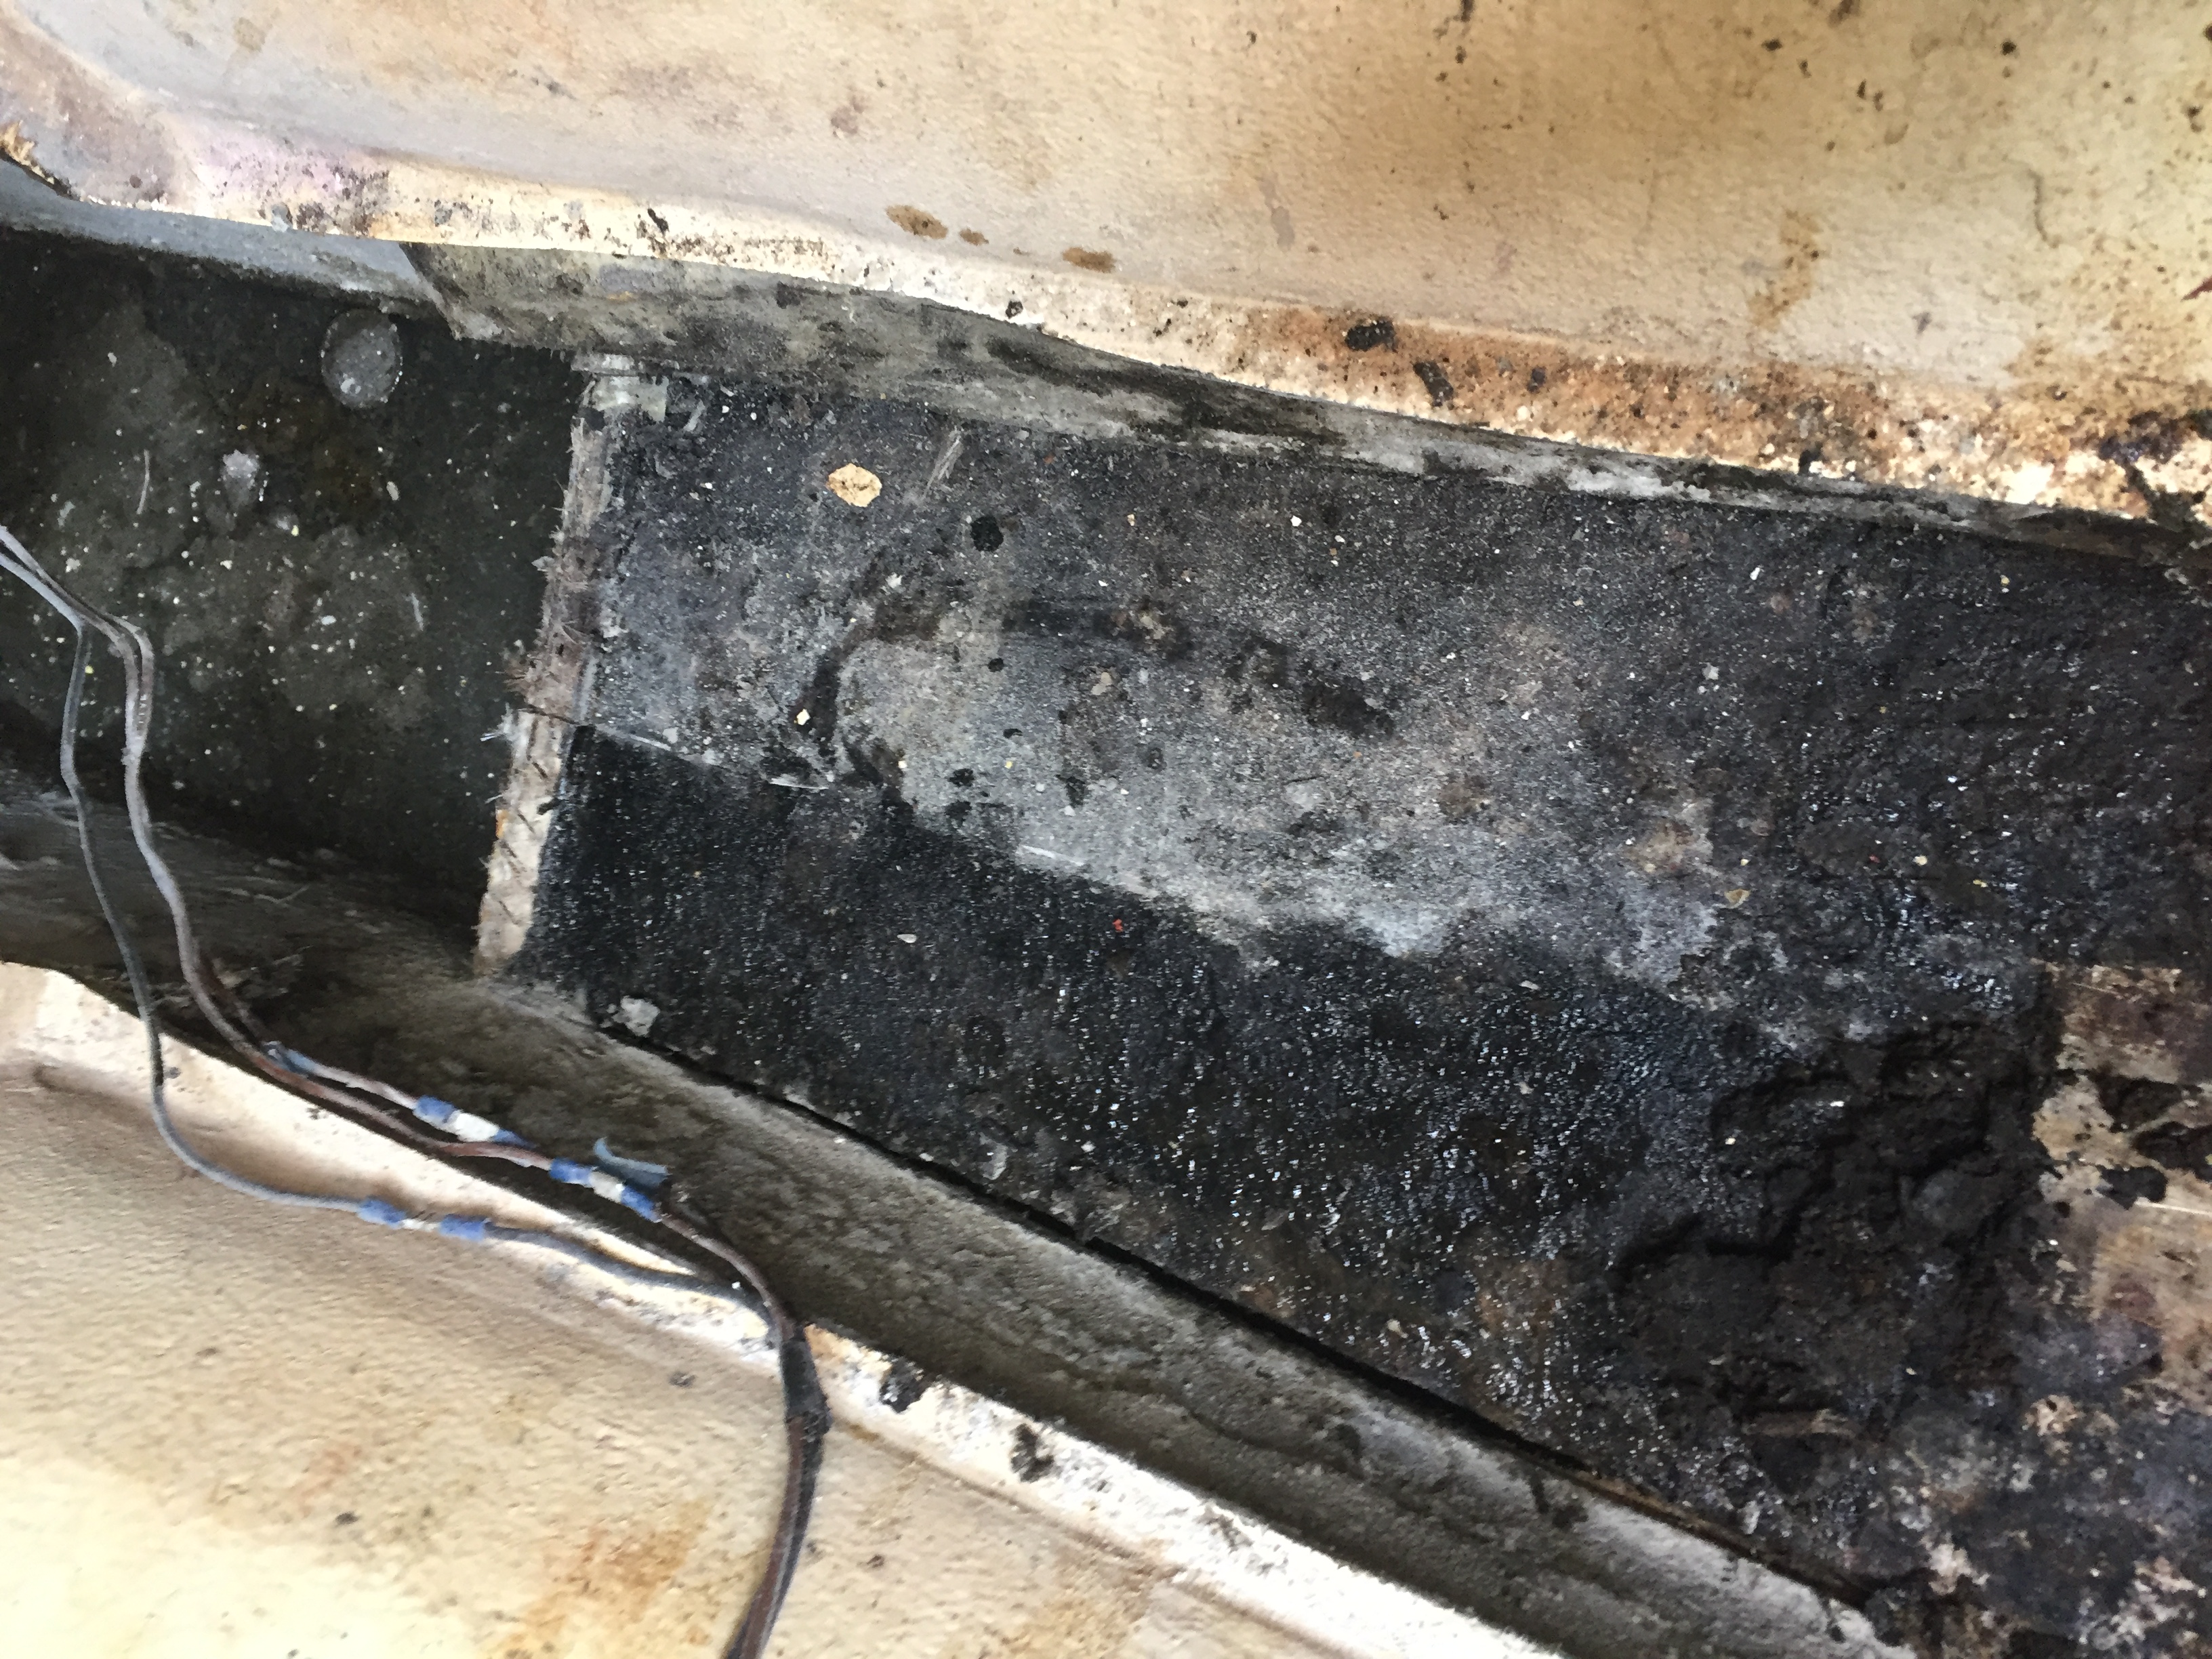
Here I have managed to cut the rest of the glass flange that is holding the tank in place and I was able to move it a couple o finches without any issue so thankfully I knew it was free.This is not as quick and painless as it looks, getting to this part from initially freeing the tank was about an hour.Something strange with that light, seems to add a shiny spot on the top of my head…Post tank removal. Now there was about 4 inches of shit to clean out. I assume it was what was left of the foam but of course it was drenched in black crap. So what did I learn from this project?
On our last boat we had a strange smell that only surfaced when we were under way. We had cleaned every square centimetre of the bilge multiple times and when at anchor or moored, the bilge smelt like flowers. Get the boat moving and it was disgusting. I have a solid belief that I know what the cause was now. There was no keel tank, however I think the encapsulated ballast had seawater fermenting around it, it is the only thing I can think of.
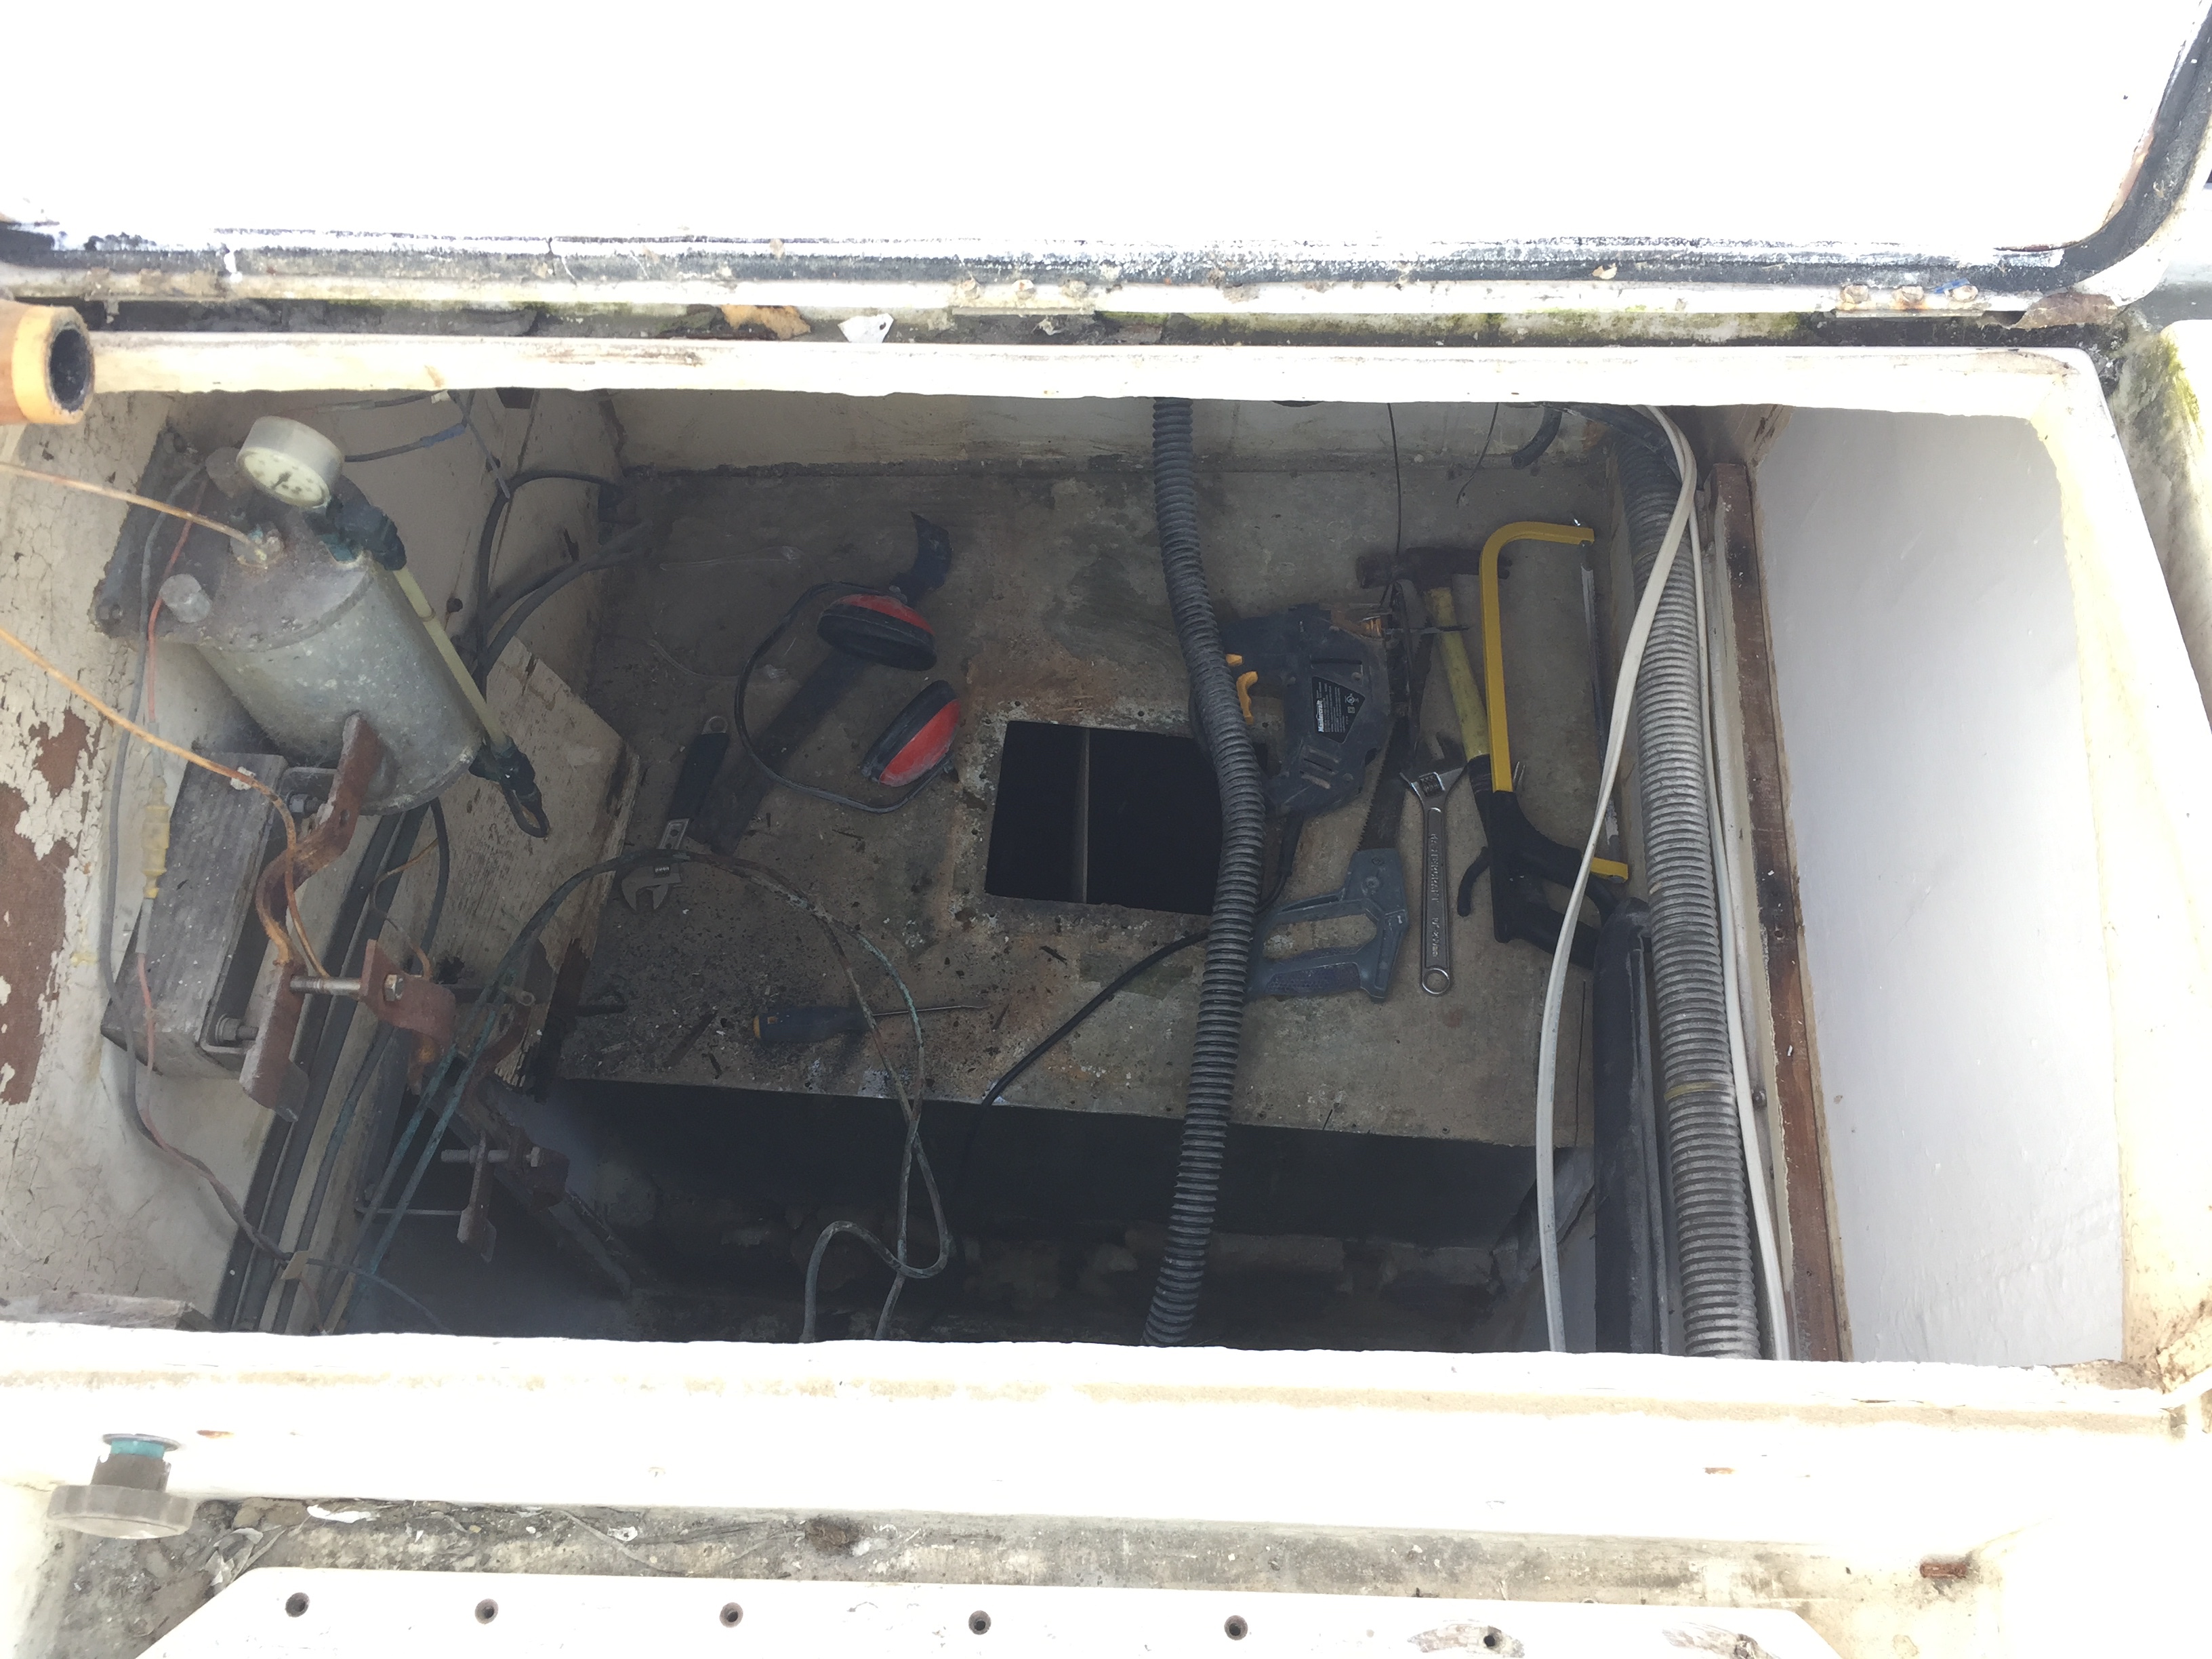
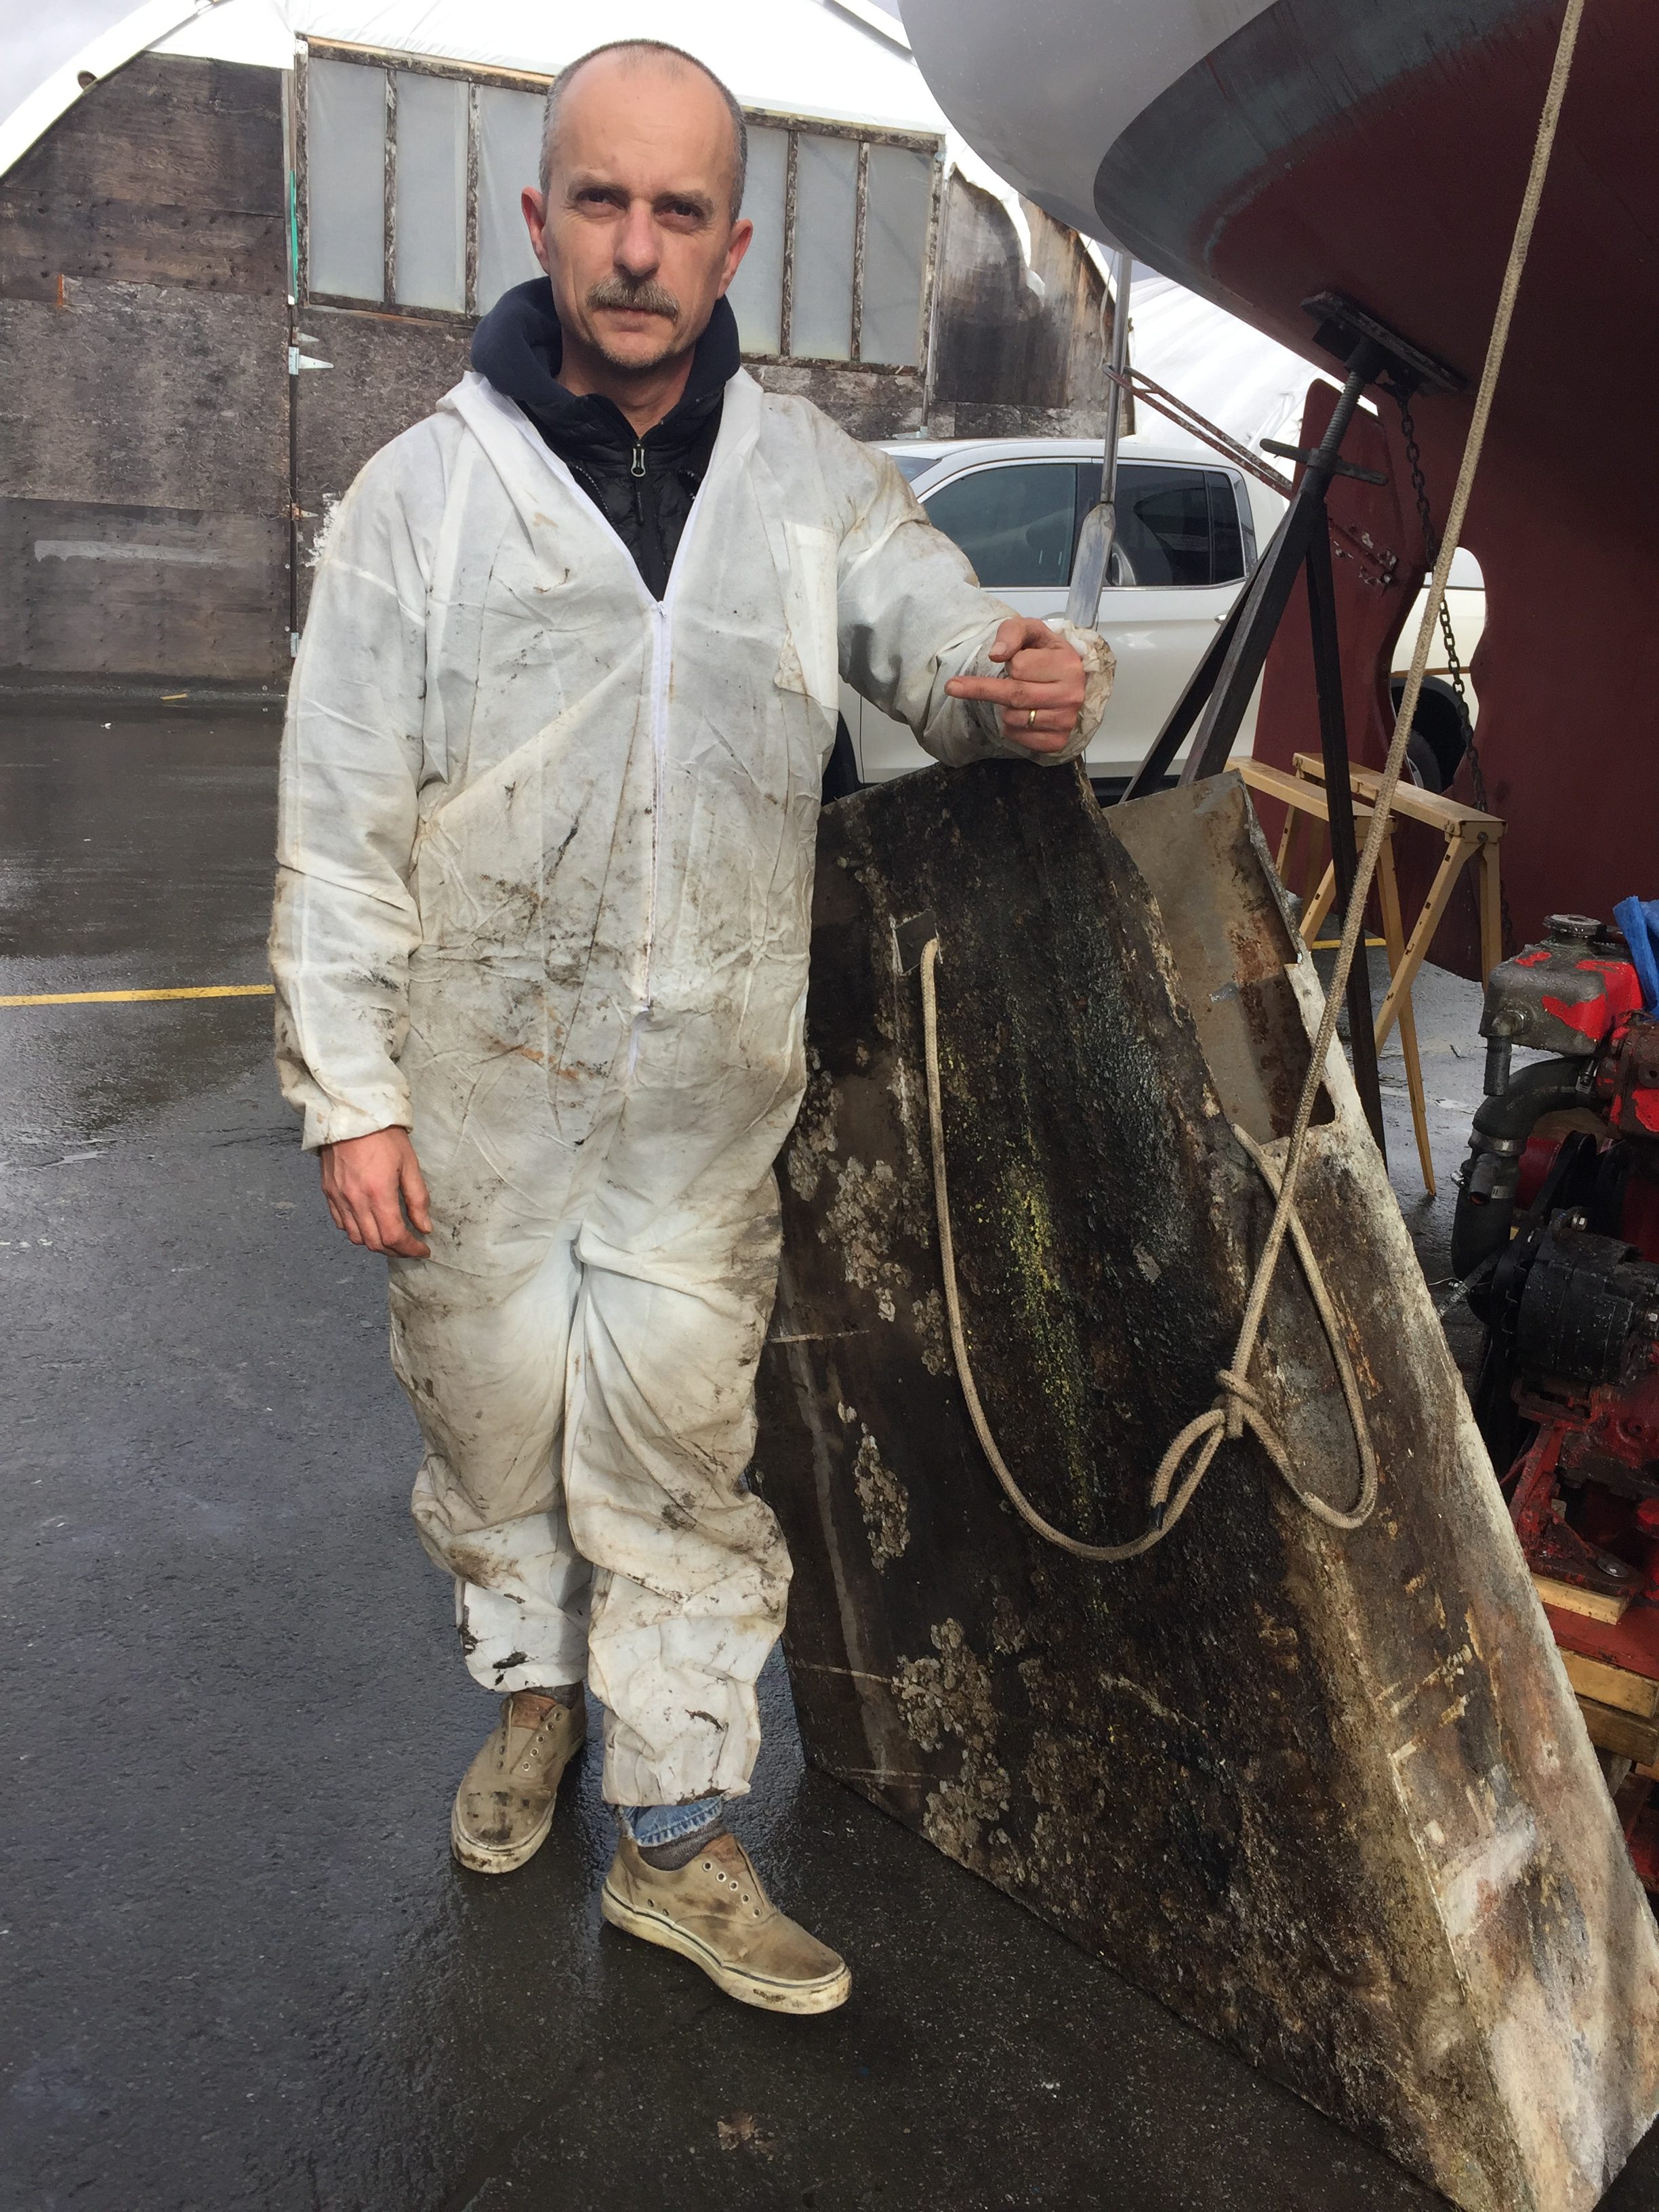
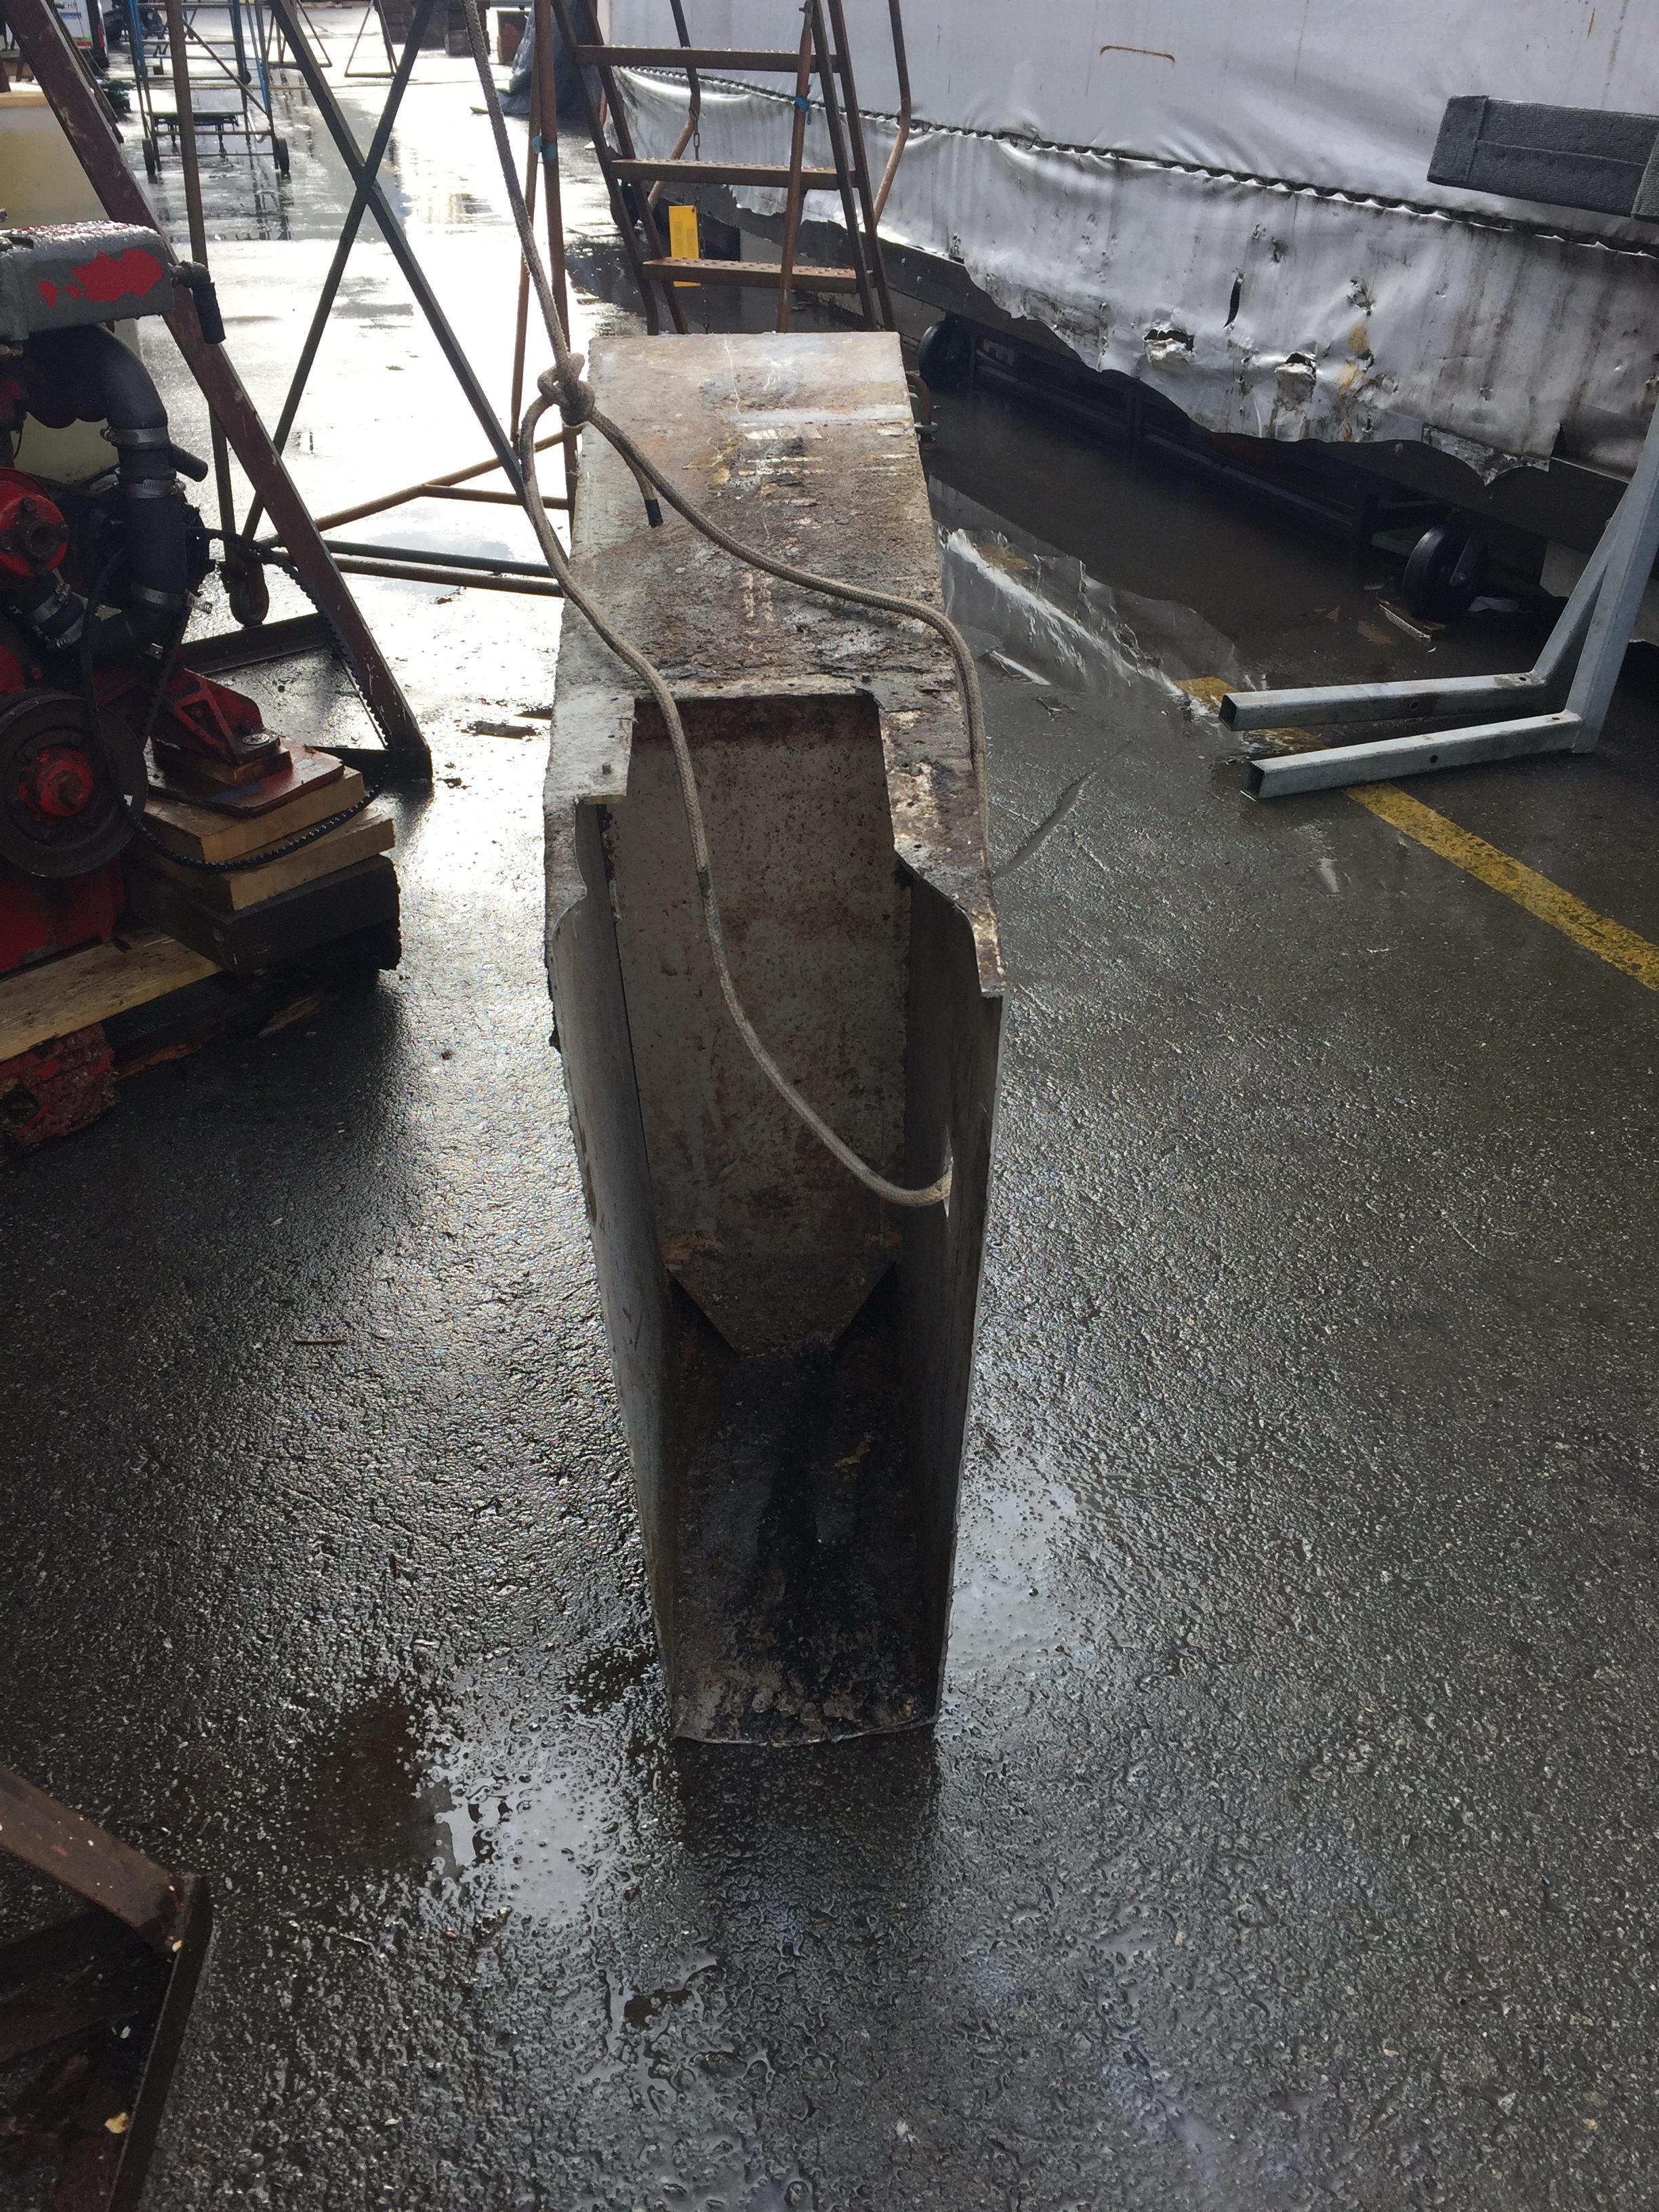
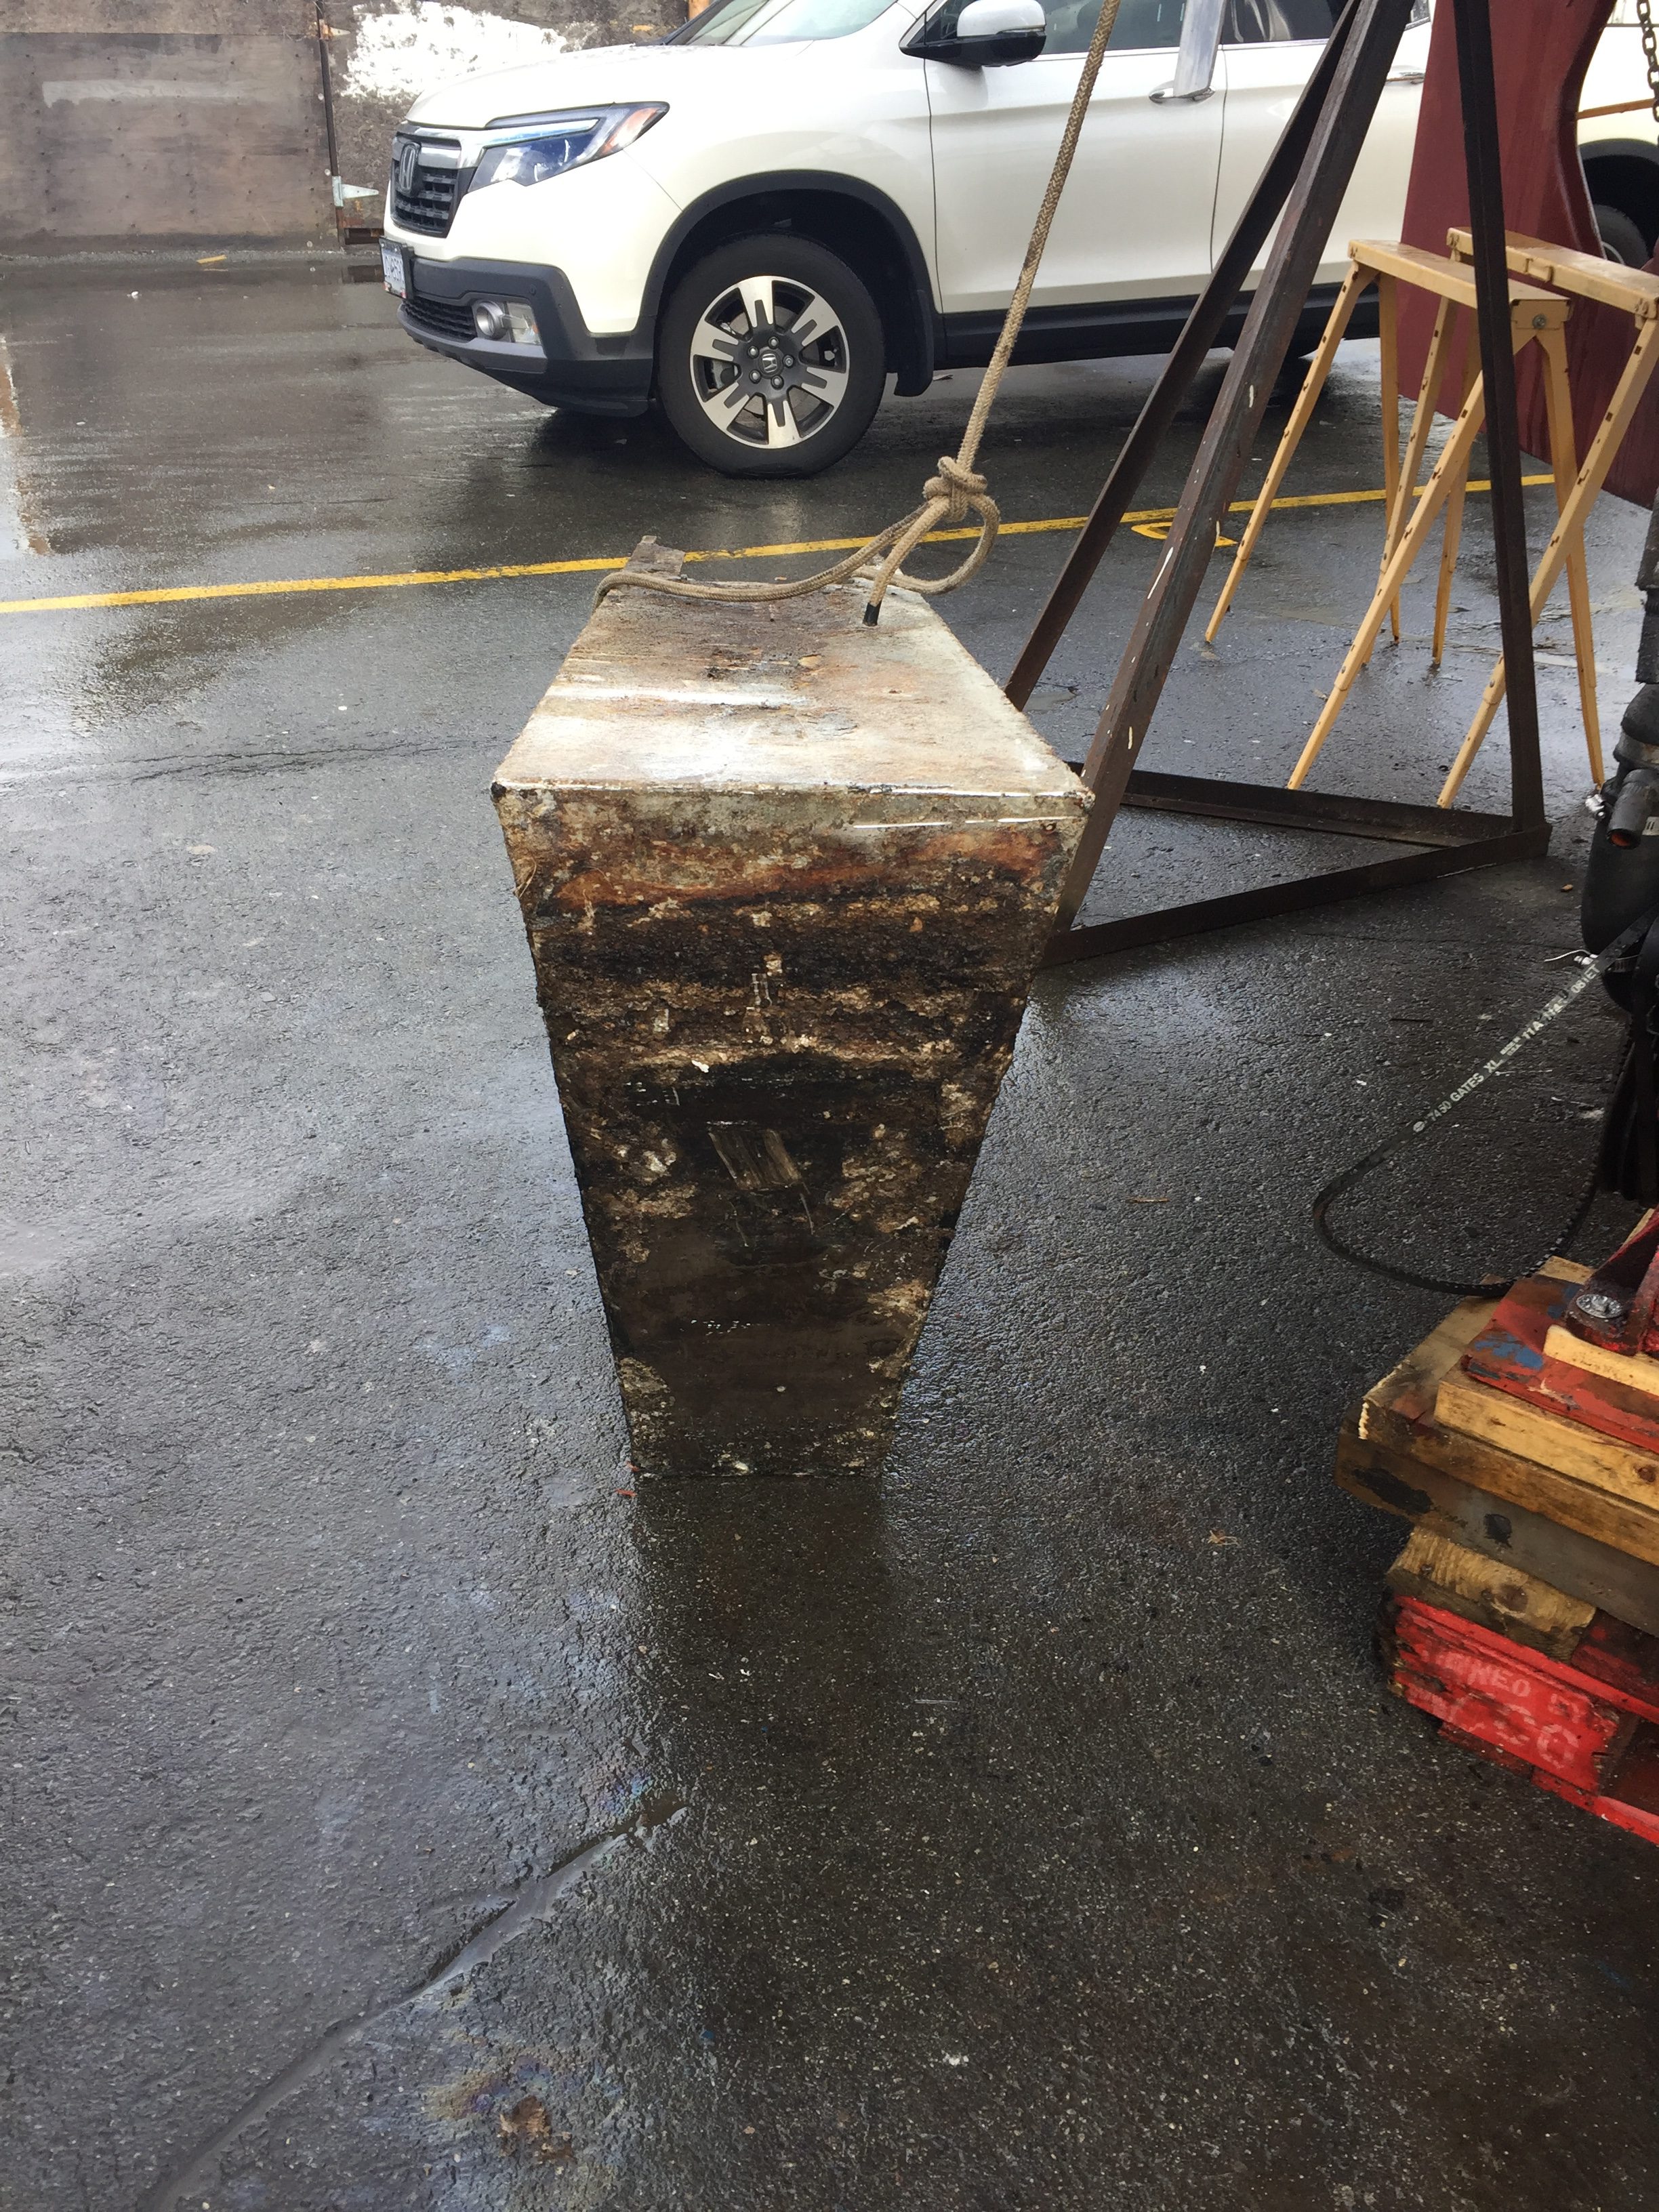
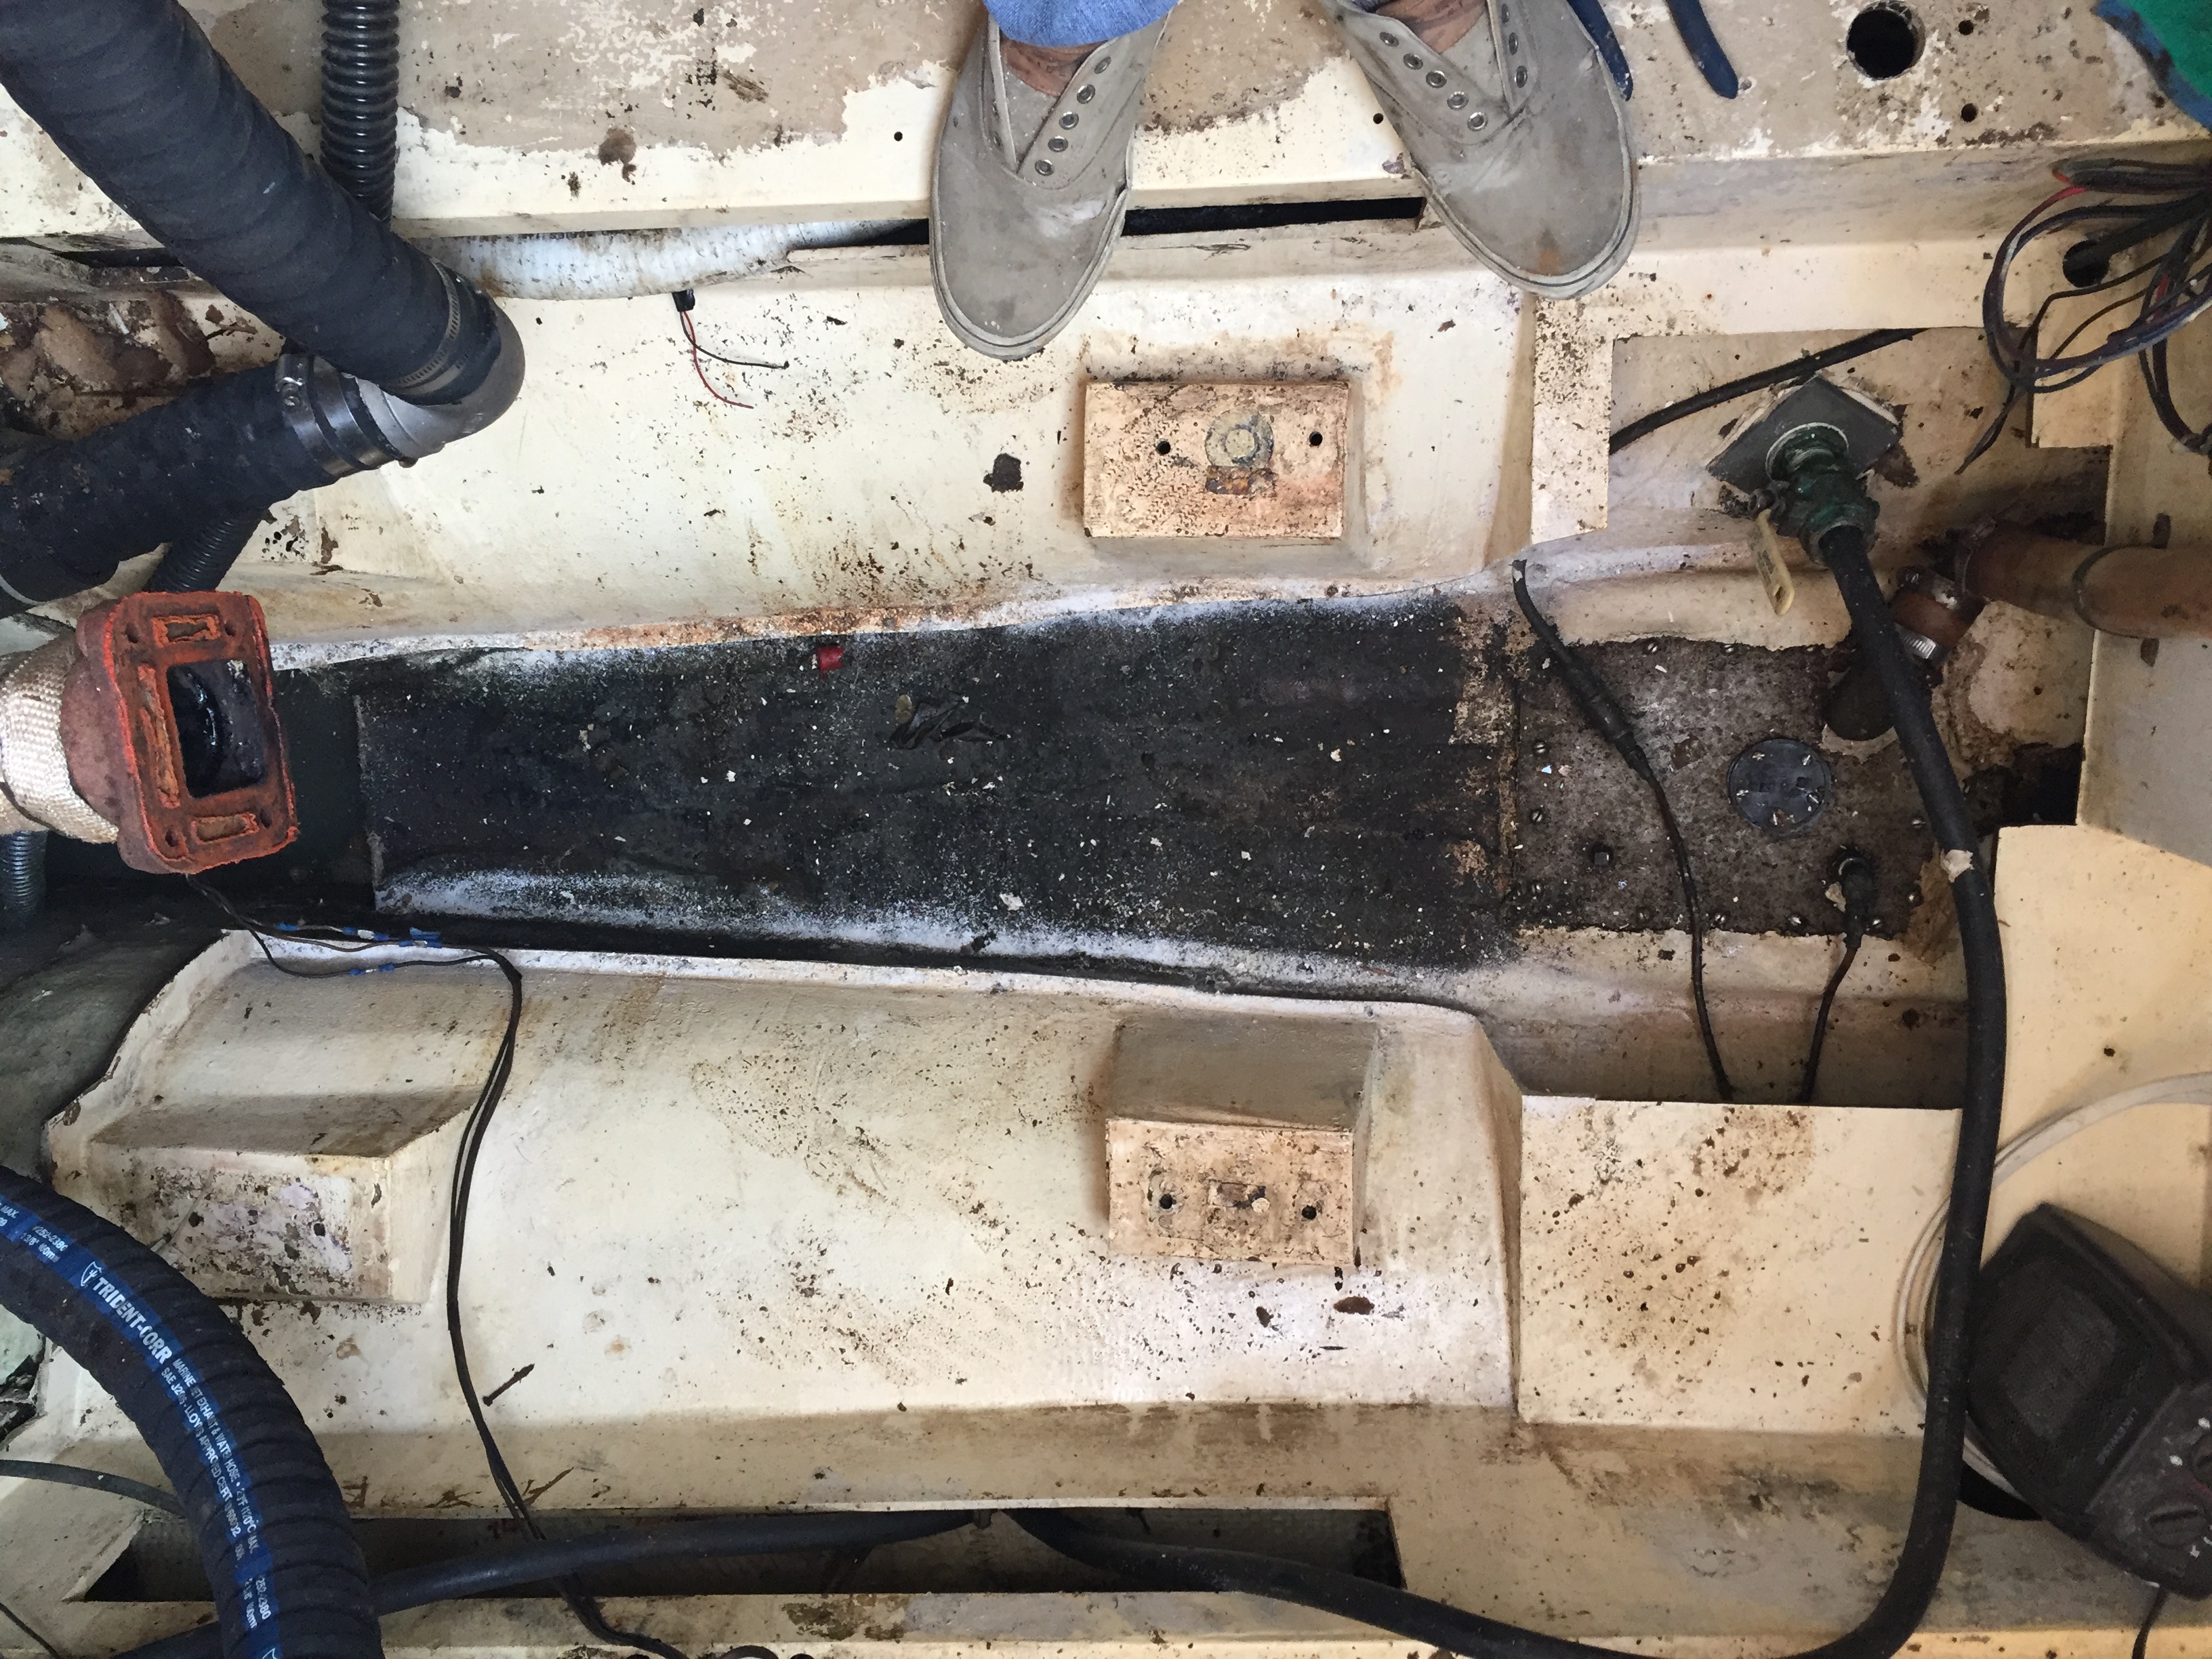
The keel tank is absolutely MASSIVE in size. I will be putting another tank down there, but it will not be aluminum or stainless, it will be plastic so nobody (me when I am 90) ever has to deal with a rotted out tank down in the bilge.
In hindsight we probably should have done this job right in the beginning when I was 3 years younger.
Nothing in boat repair is impossible for the do it yourselfer. We could have paid to have this done, but where is the fun in that?
Another Whitby owner who did this job commented that if he had to do it again, he could probably do it in about 3 1/2 hours. Well, I am sure I could make the same claim, or close to it now, but as is common with everything, take your initial estimate and multiply it. In this case, basically 3.5 hours meant 3.5 days for us.
I also learnt that I am getting tired of rebuilding boats.
At some point, I will put all of this together into a handy guide for any other Whitby 42 owner, in the meantime, if you have questions, please send them my way, and I will be glad to do everything in my power to talk you into paying someone else to do the job! And no I am not doing it 🙂
Okay so the tank won on the 2nd day as well. All in all I spent 7 hours working on this project today. Why so long? Let me explain.
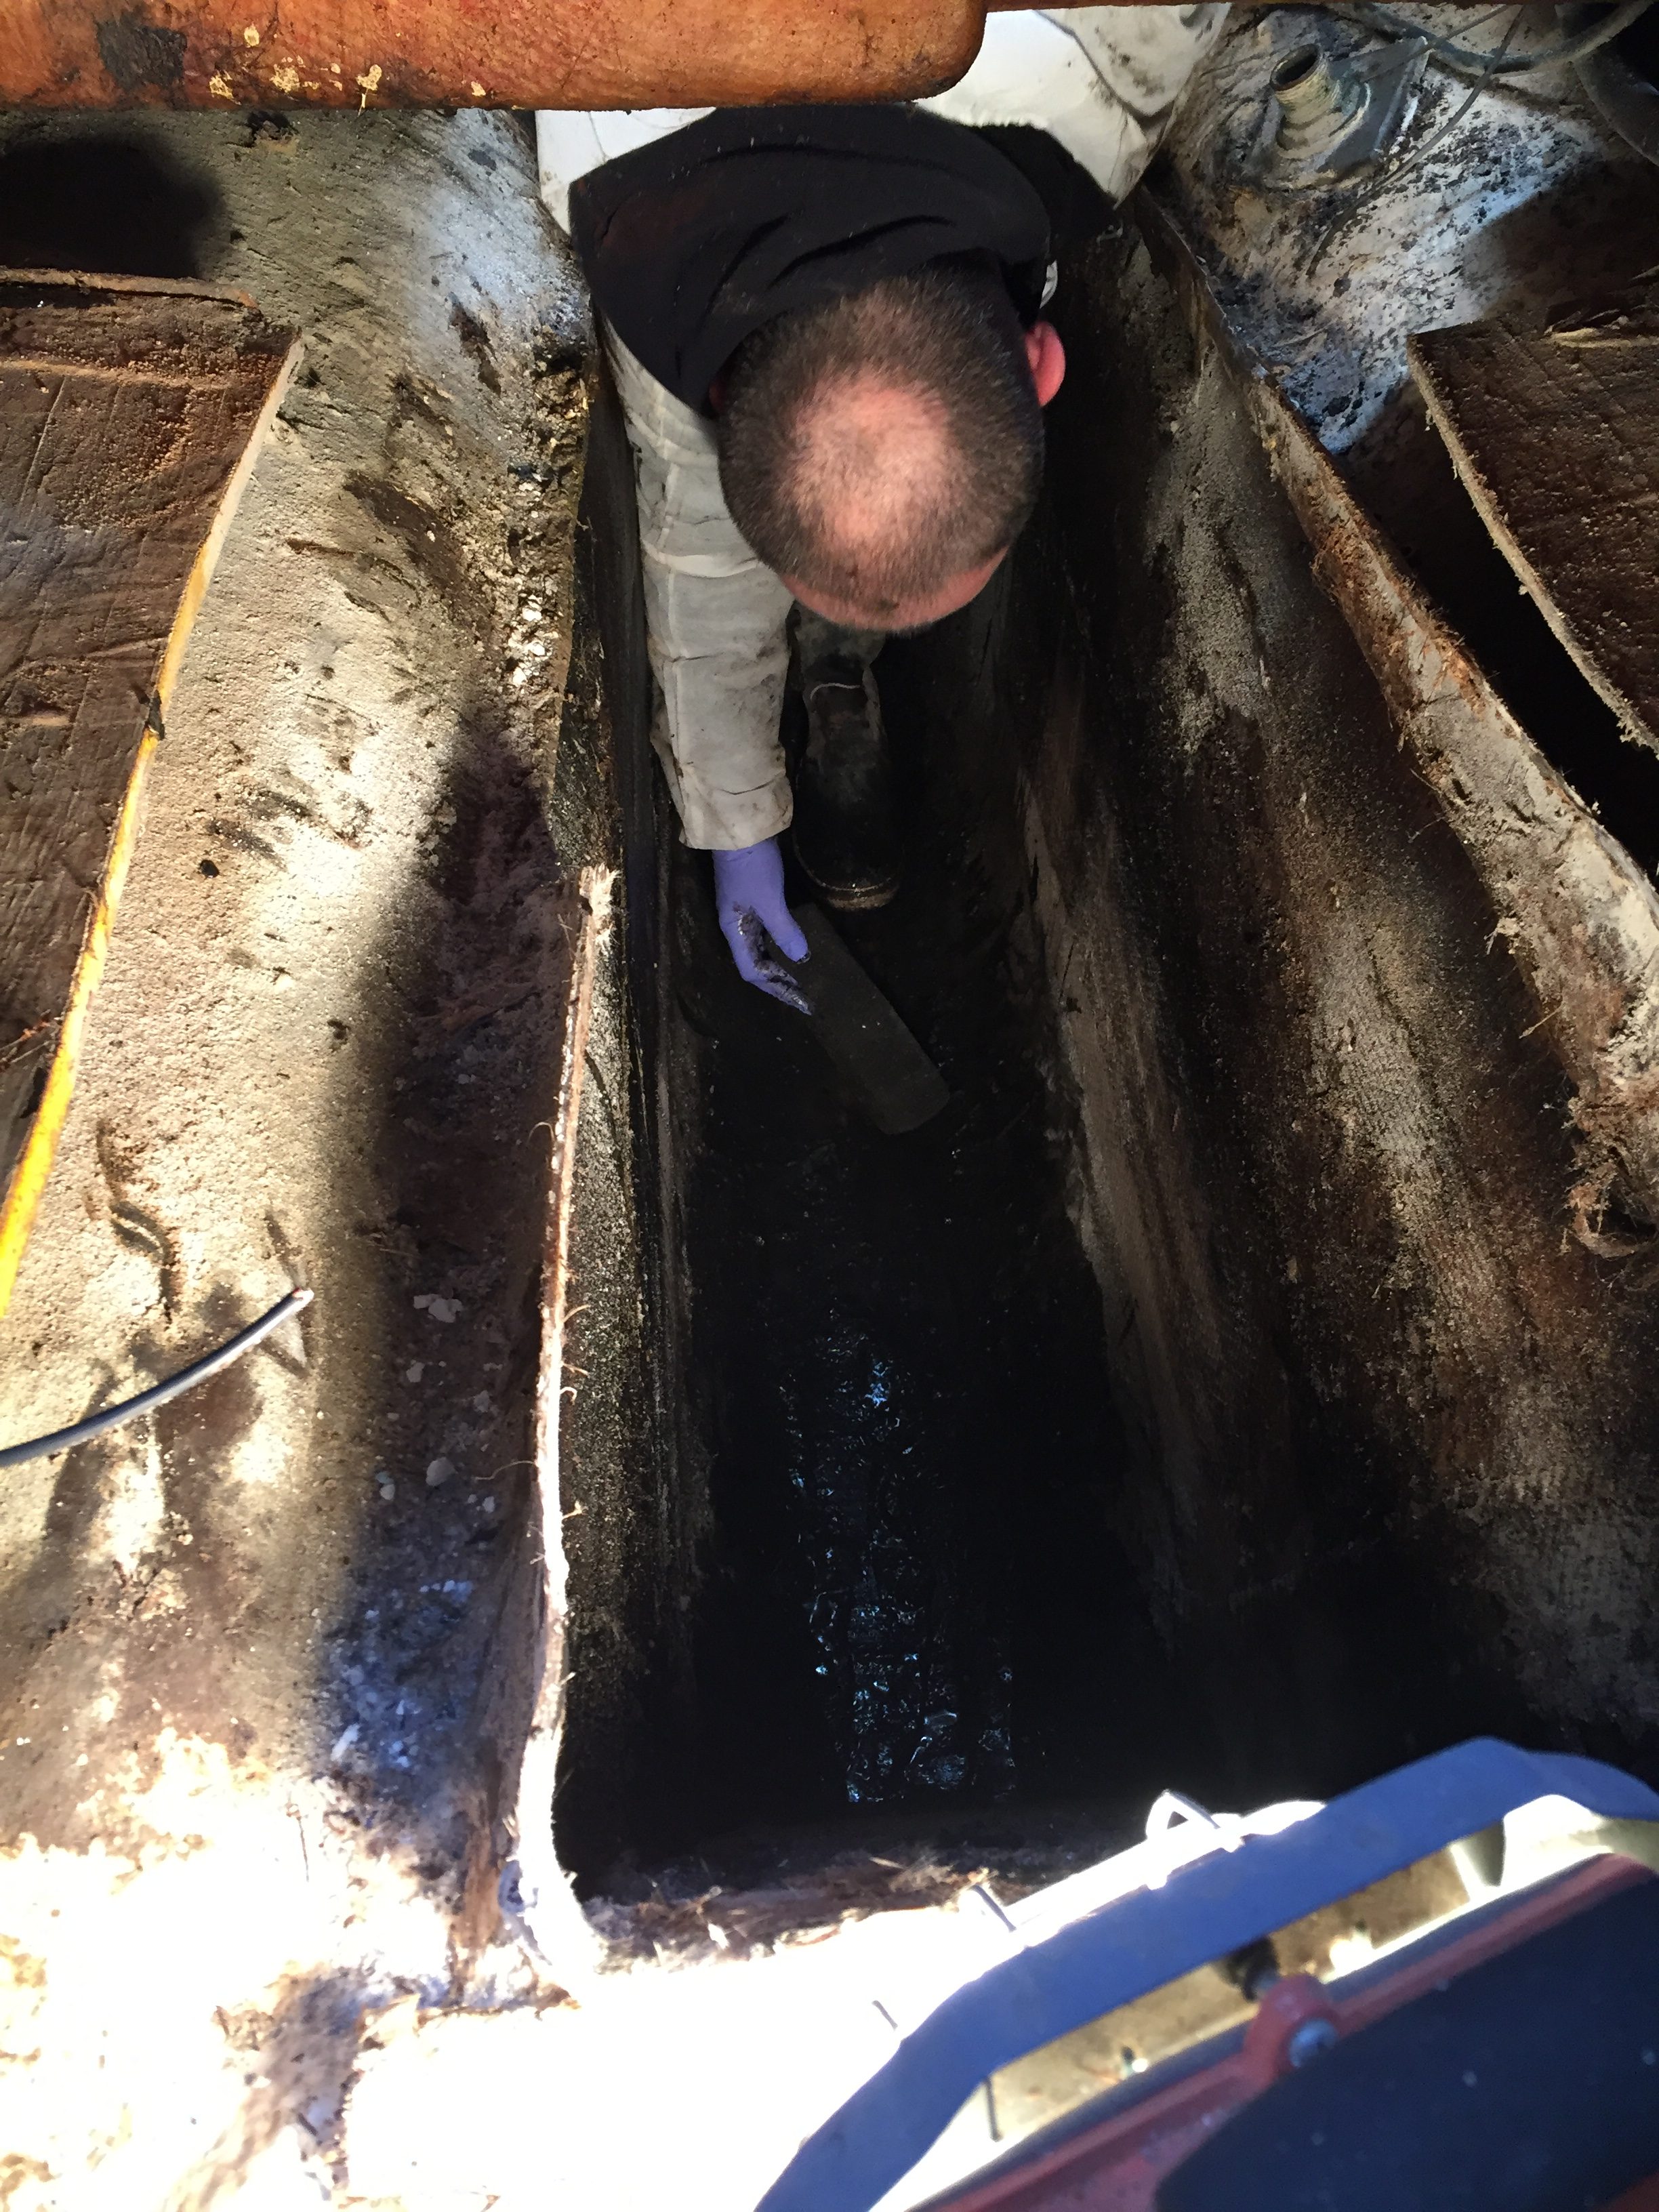
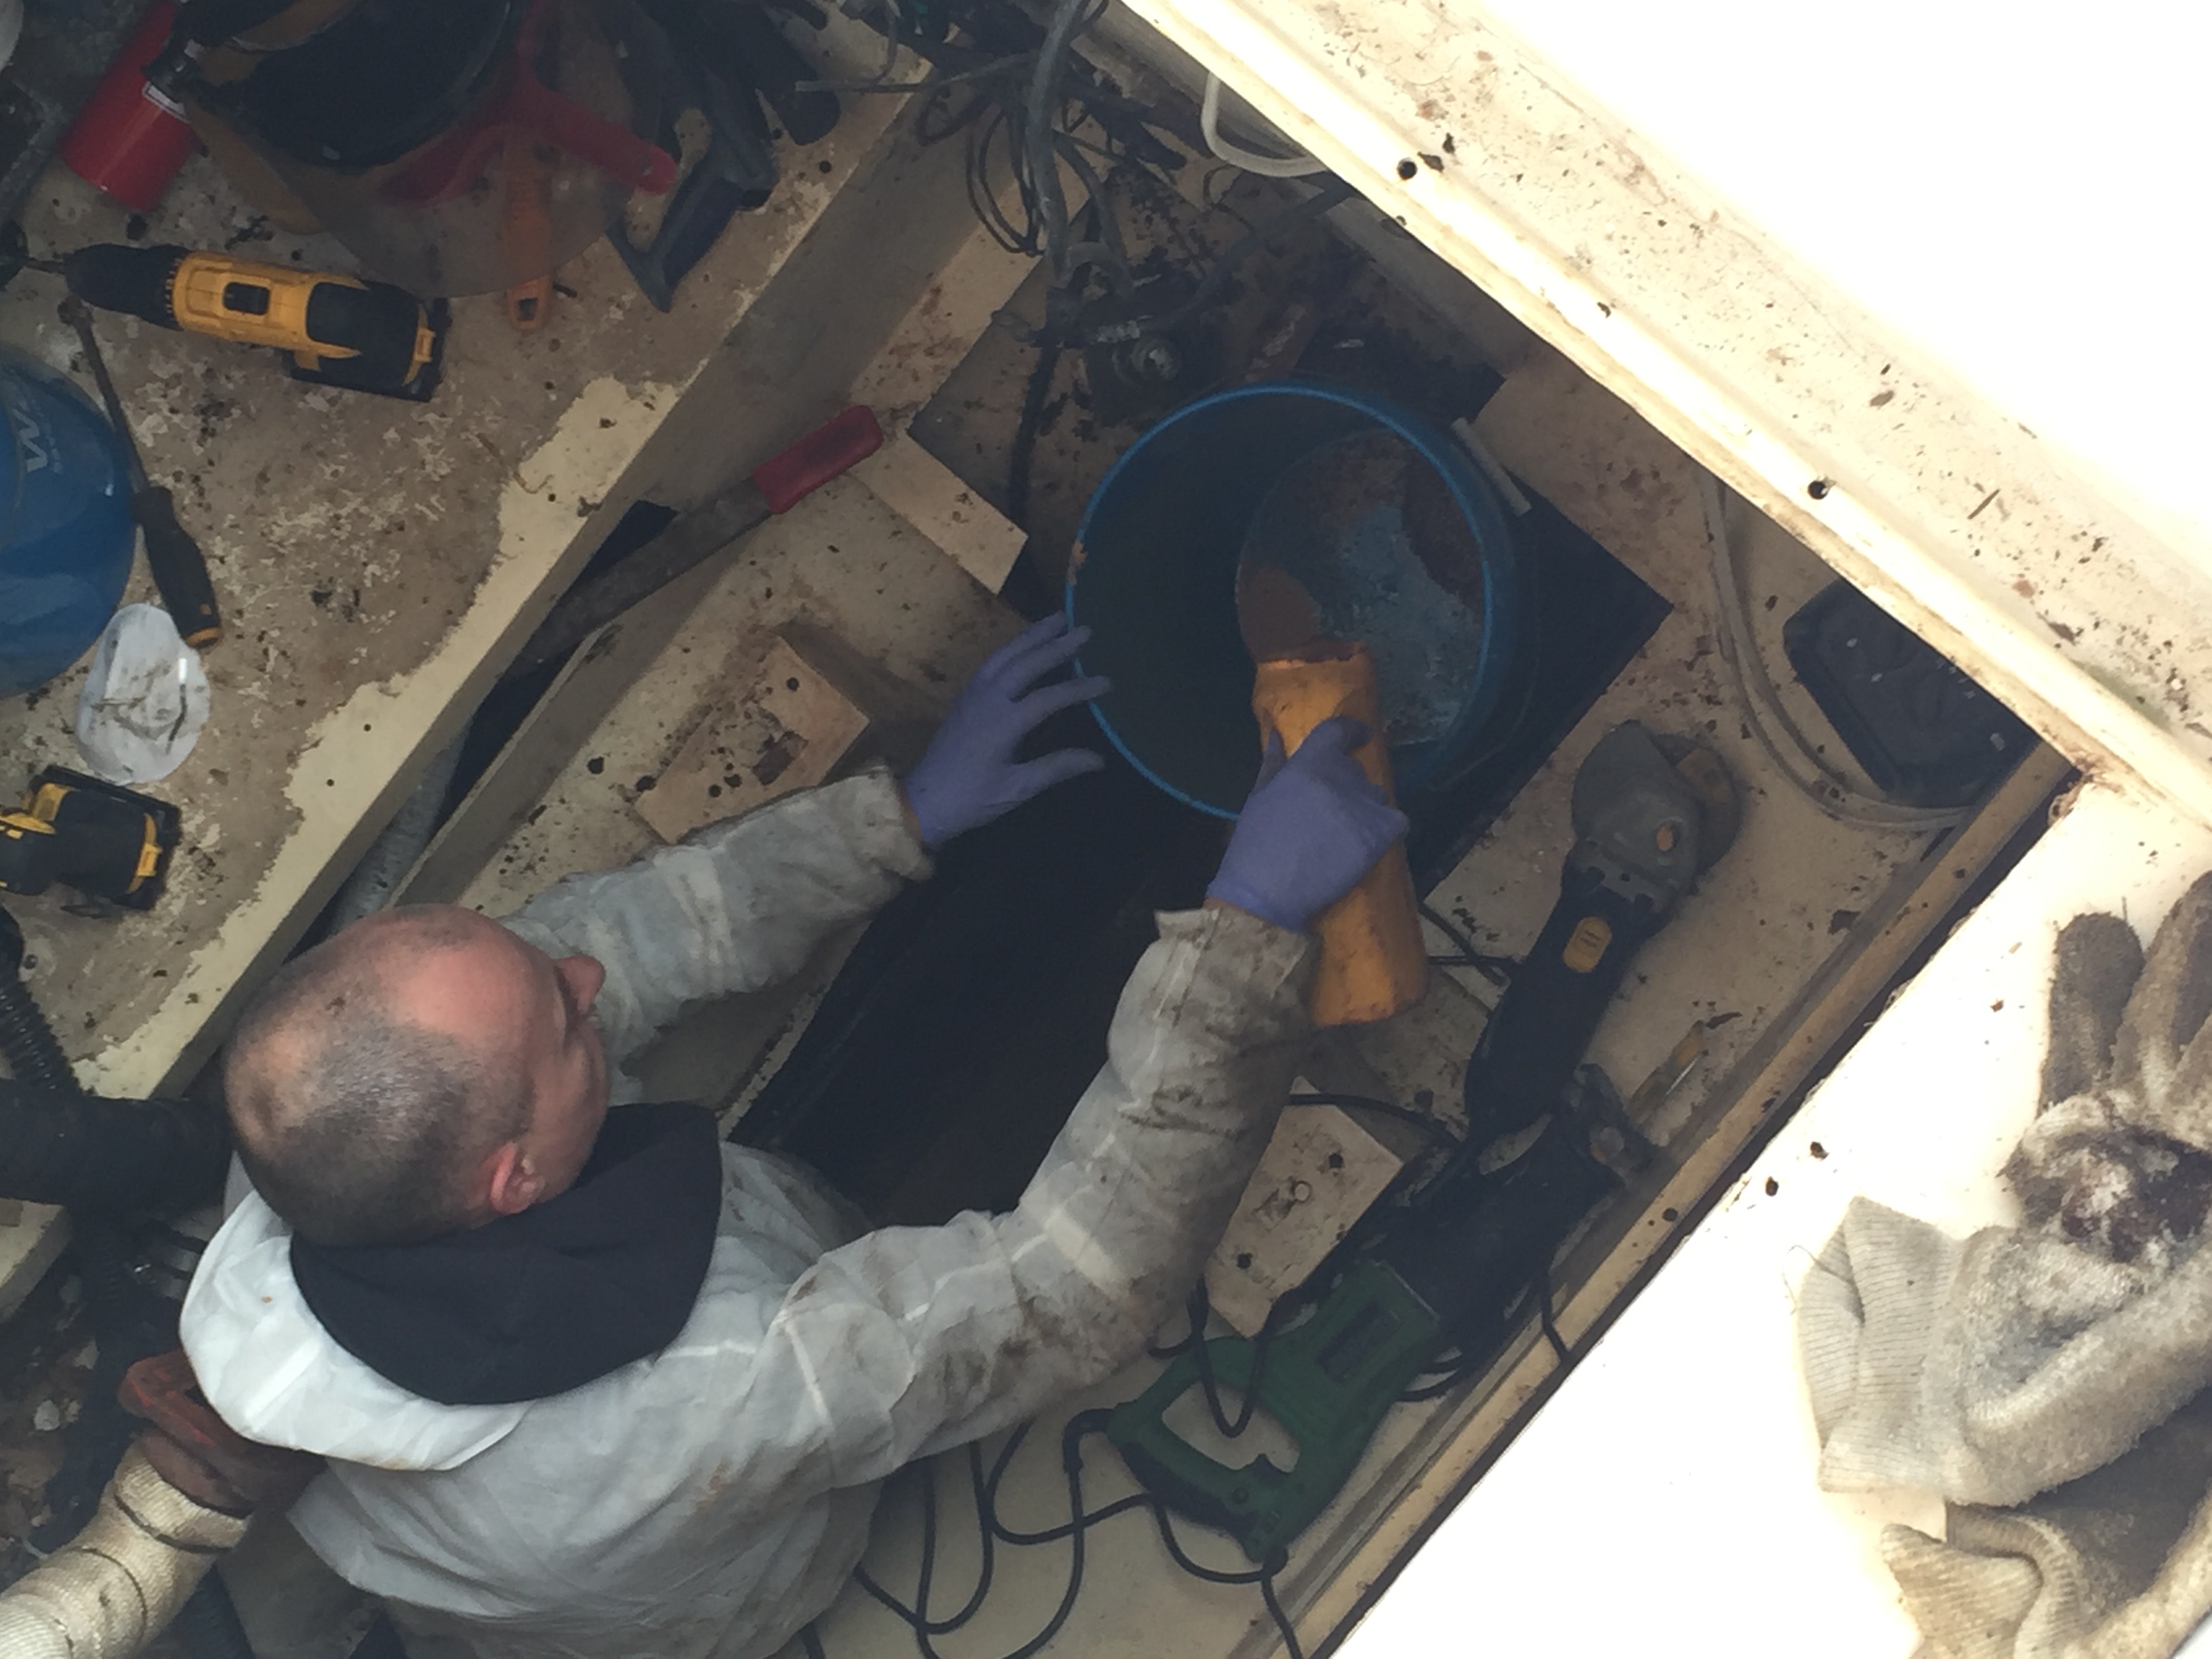
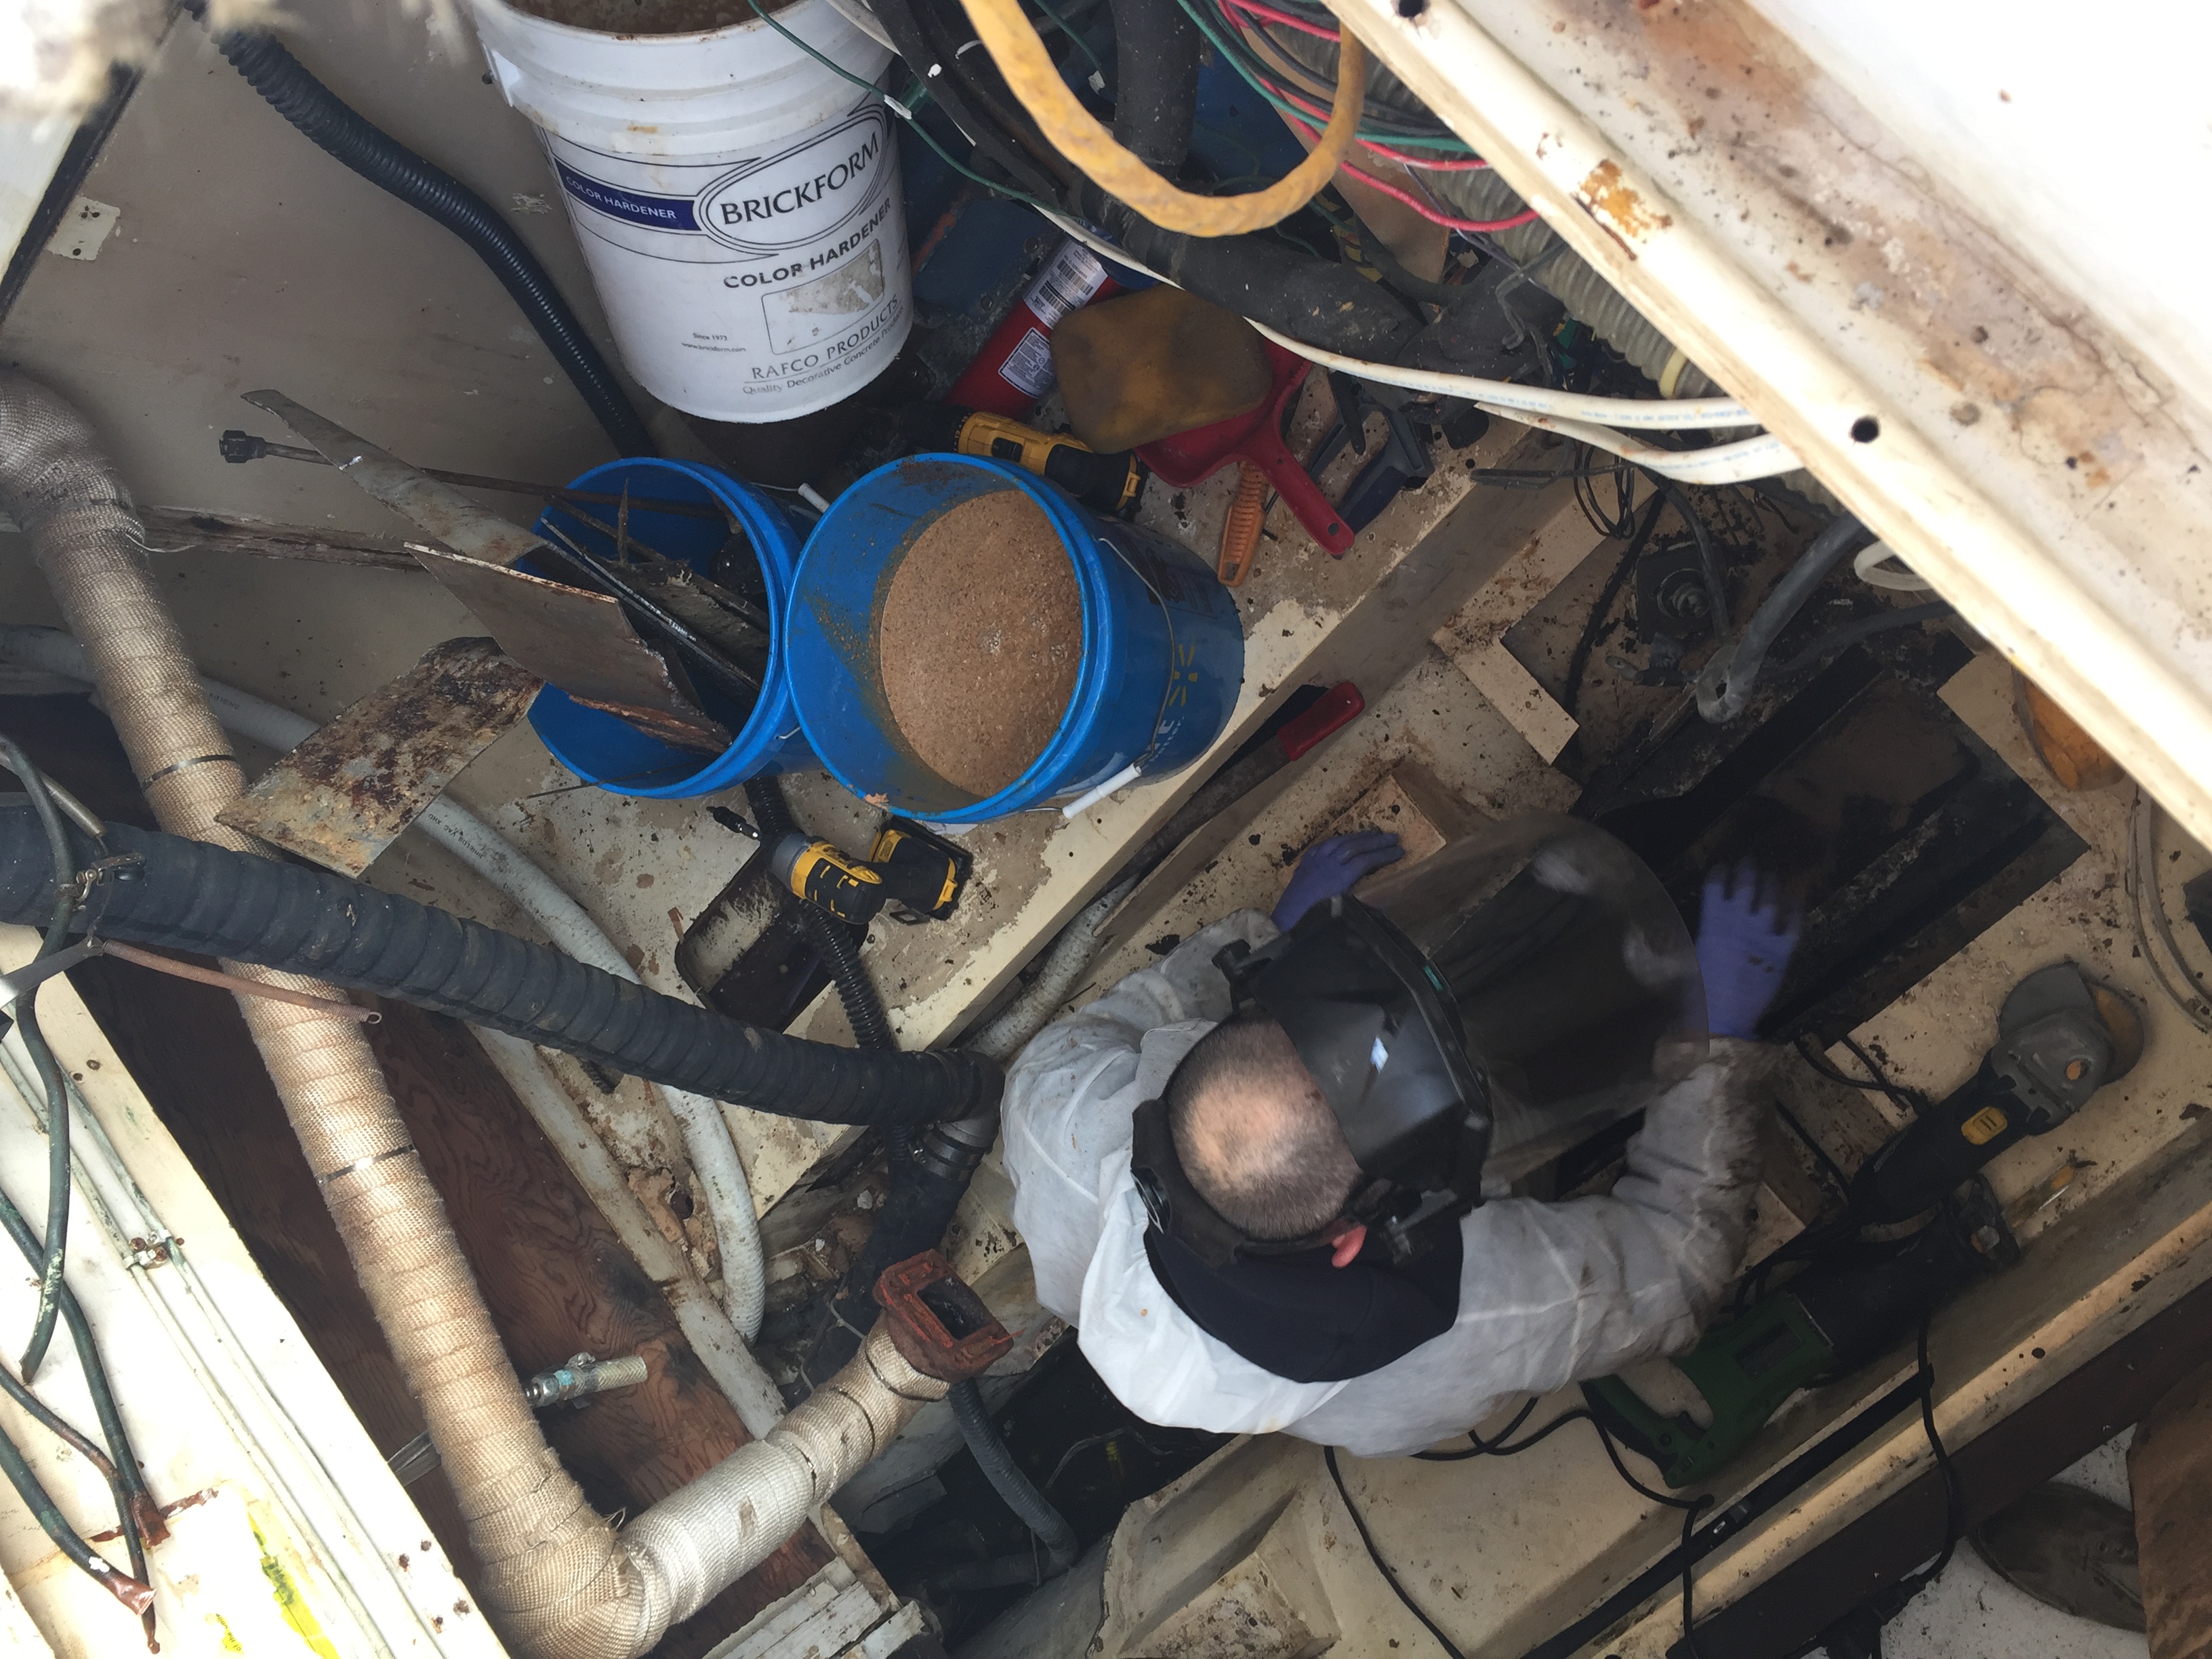
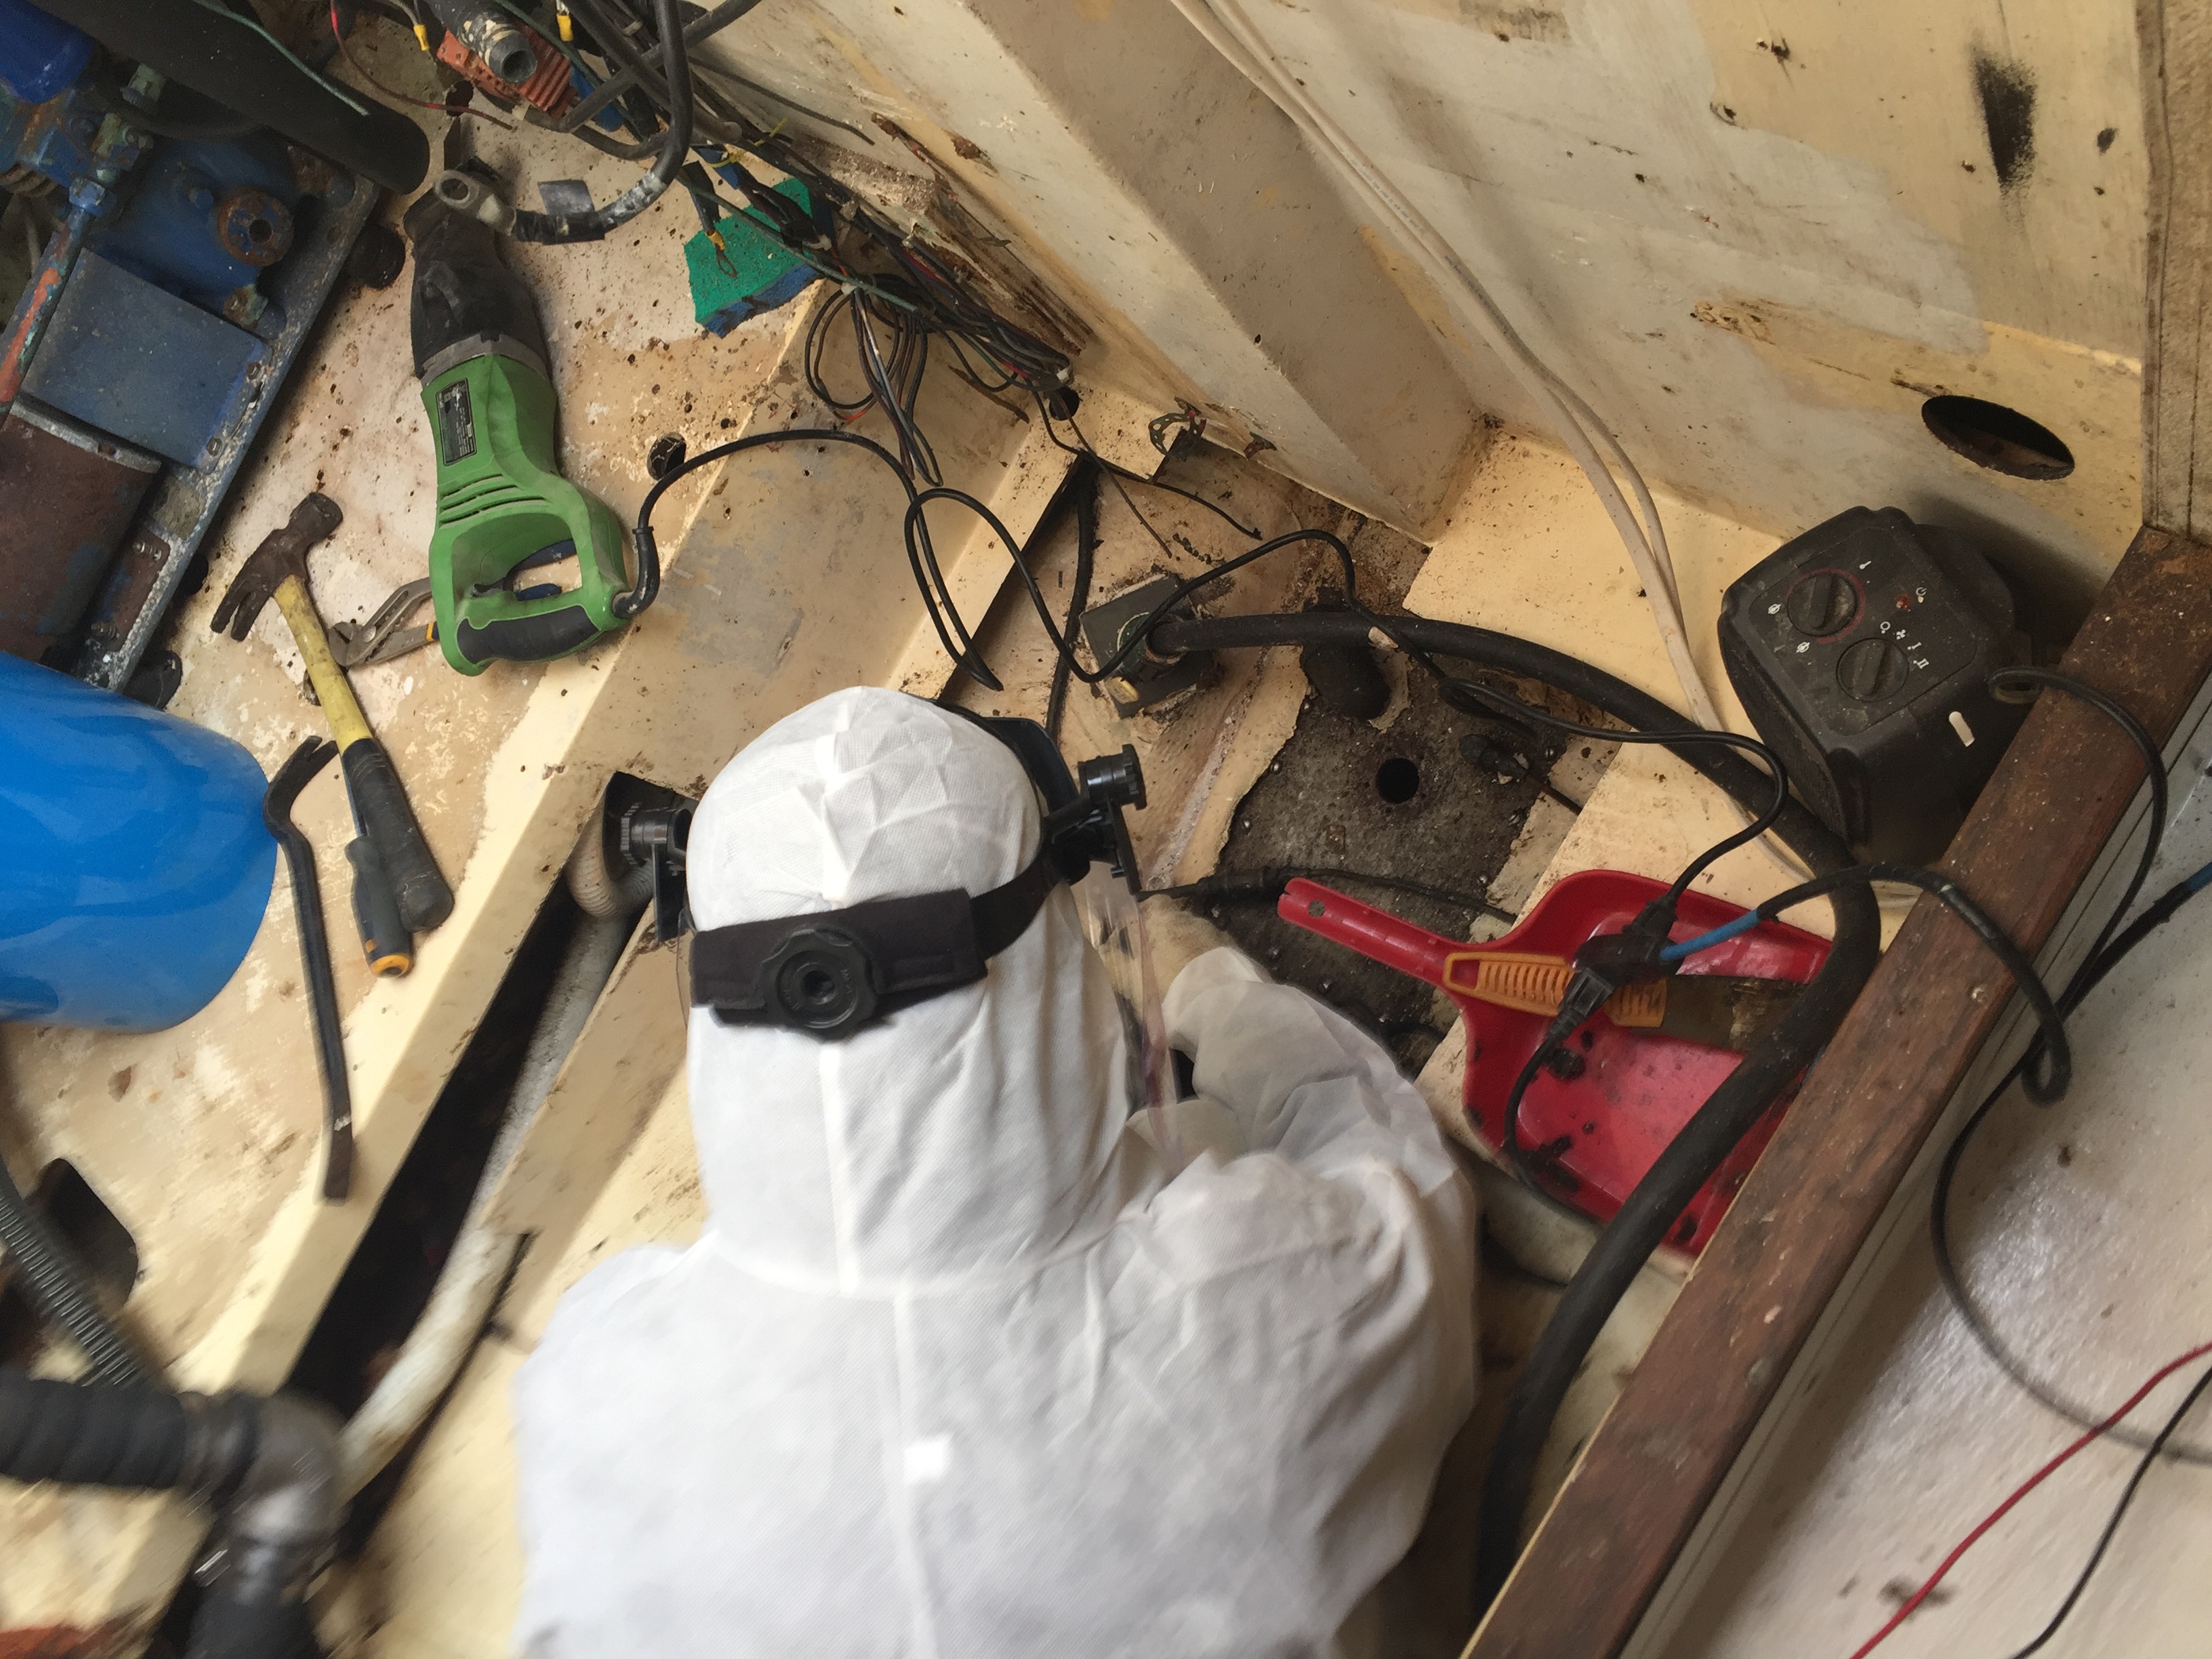
In order to cut the tank in half so that it can be removed I needed to get rid of the last of the sludge in the bottom of the tank. This process involved standing inside the tank and using a scoop to fill 5 gallon buckets. But before that I am missing the part about cutting the top off.
Cutting the top of the tank off, well at least the portion from the old inspection plate to the back was very simple and went really quick. Sawzall and good quality Dewalt metal cutting blades did the trick in minutes. Unfortunately there is not enough room between the tank and the keel to be able to cut it in half with the sawzall. That would have made things a lot easier. once the top was off, I could get down inside and clean it out a lot better.
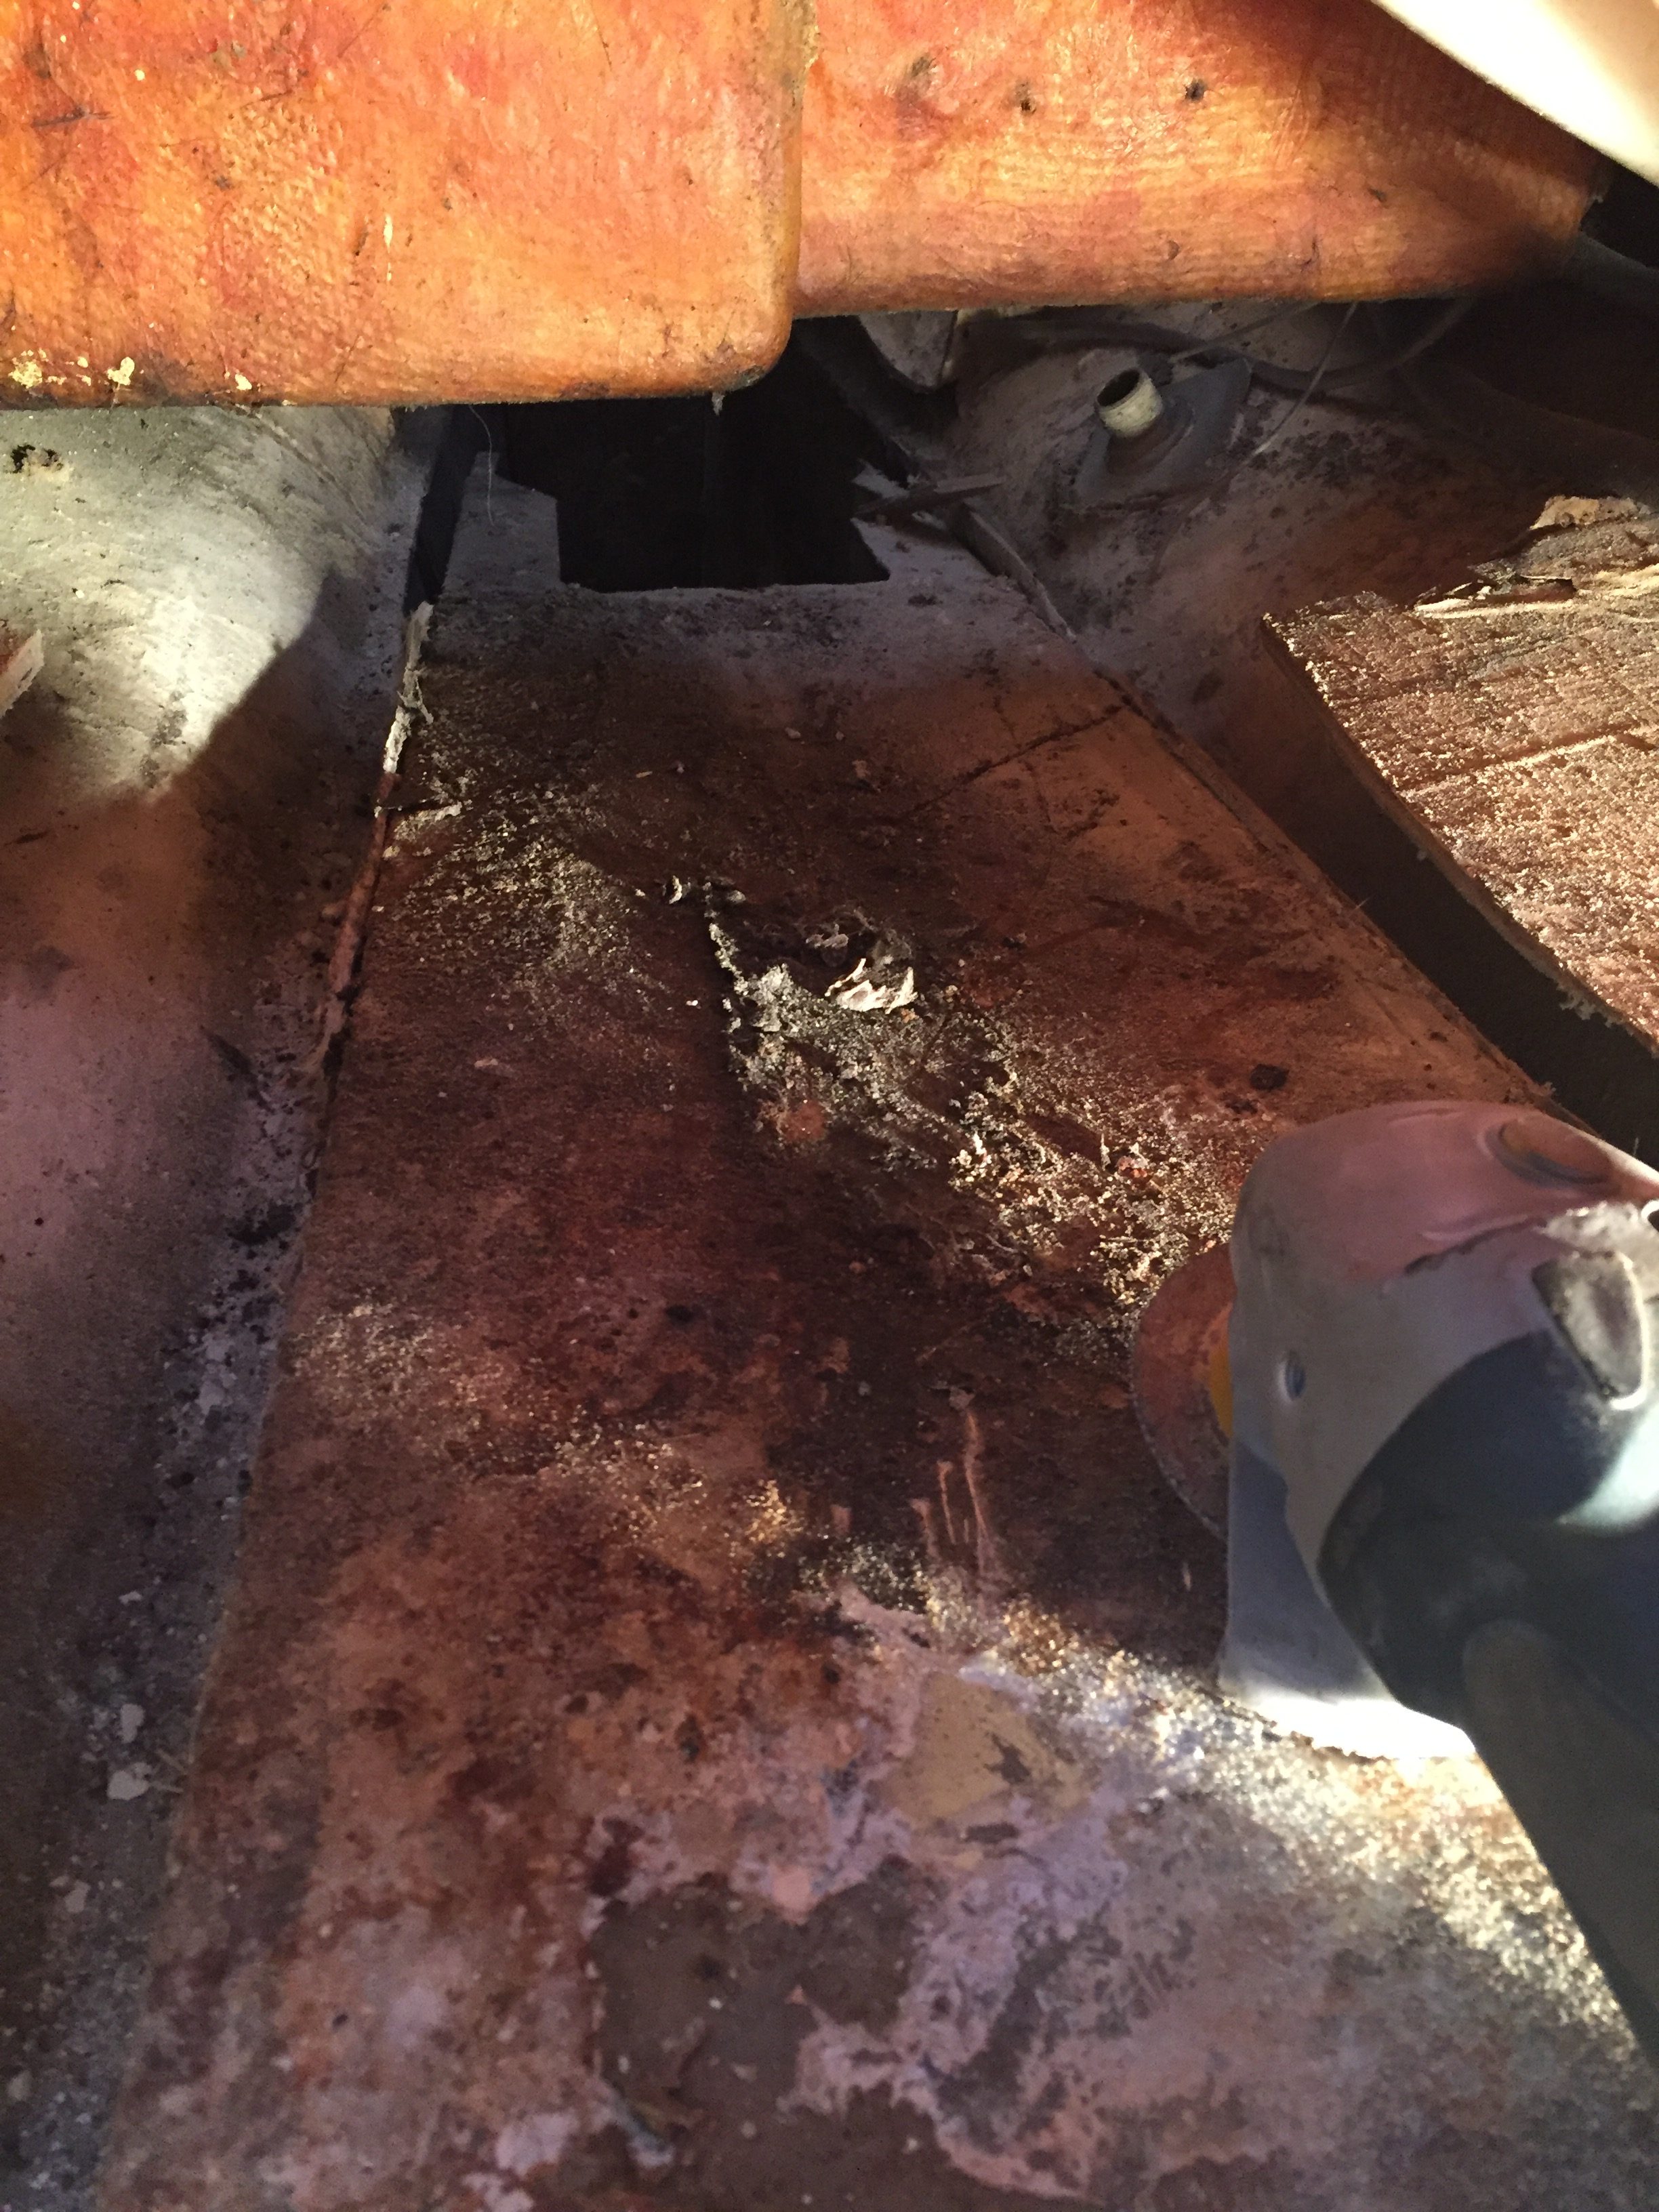
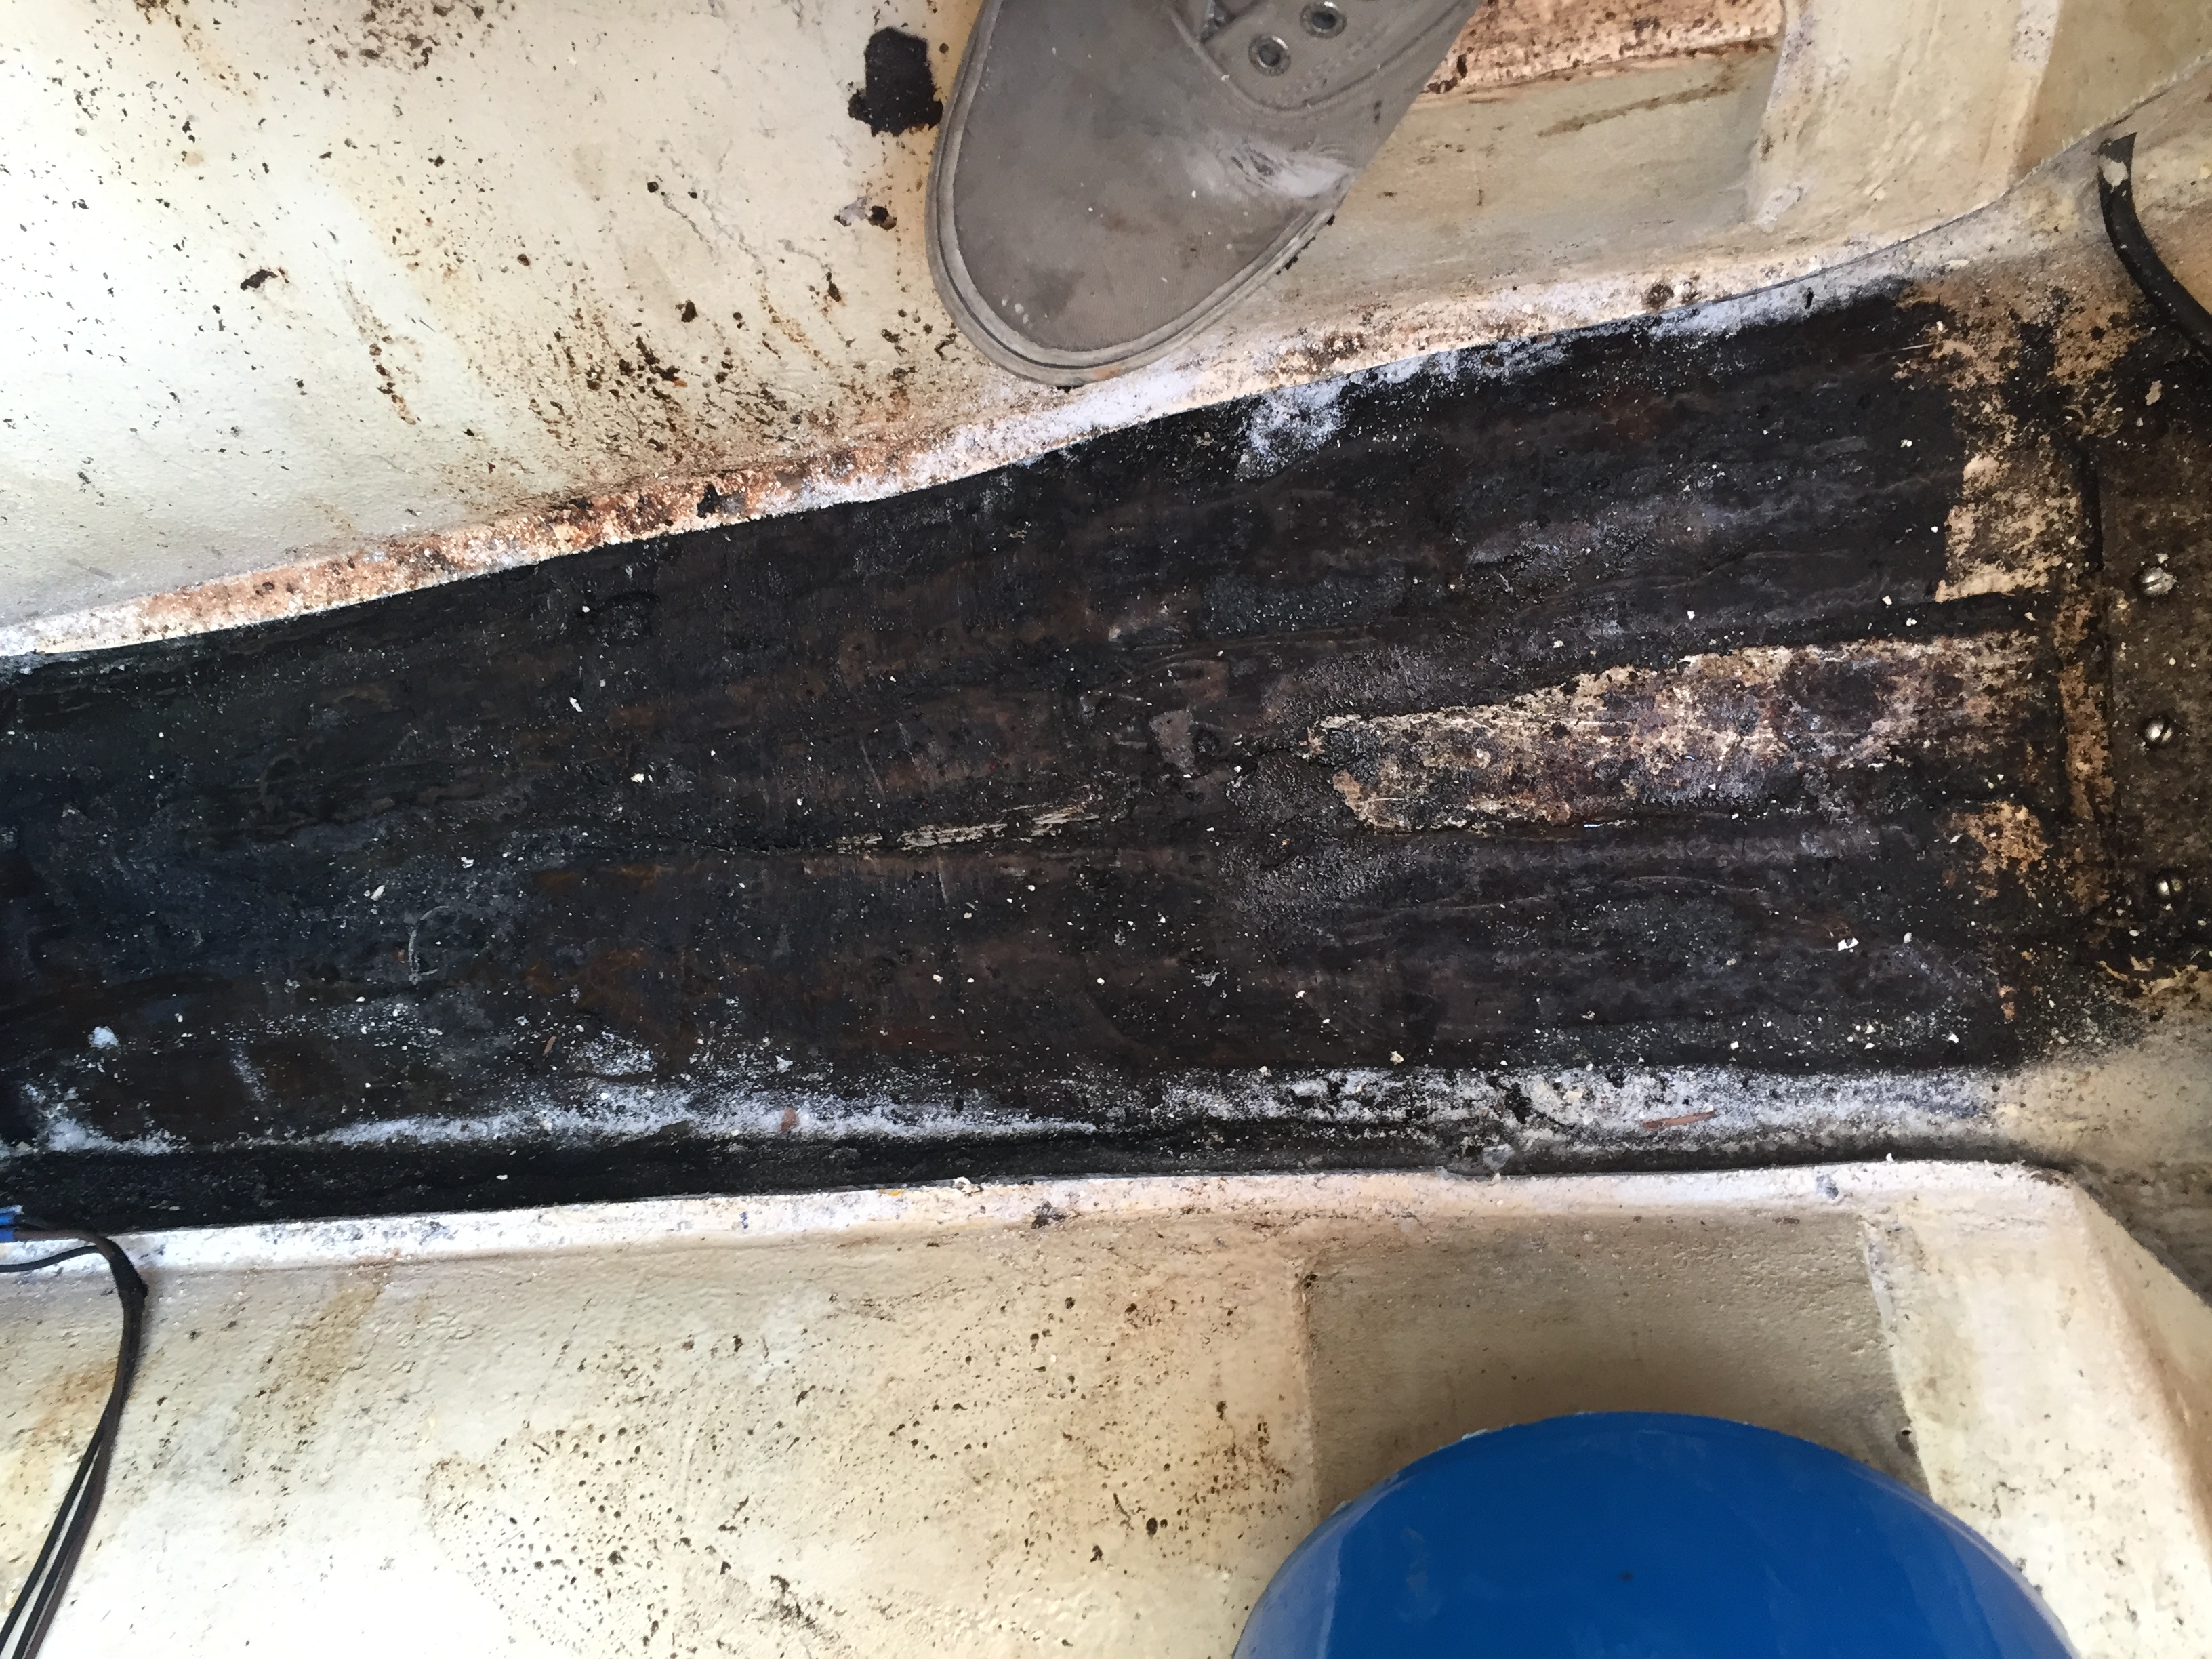
Unfortunately, as I mentioned yesterday, the entire tank is sitting in a puddle of water/diesel/grease and god only knows what else. The inside of the tank had a water mixture with what looks like beer fermentation foam on it. All of this had to be scooped out into 5 gallon pails, carried up on deck, down the ladder and dumped into a 40 gallon drum. And this process had to be repeated as I cut down the sides of the tank and all of the other goop poured in.
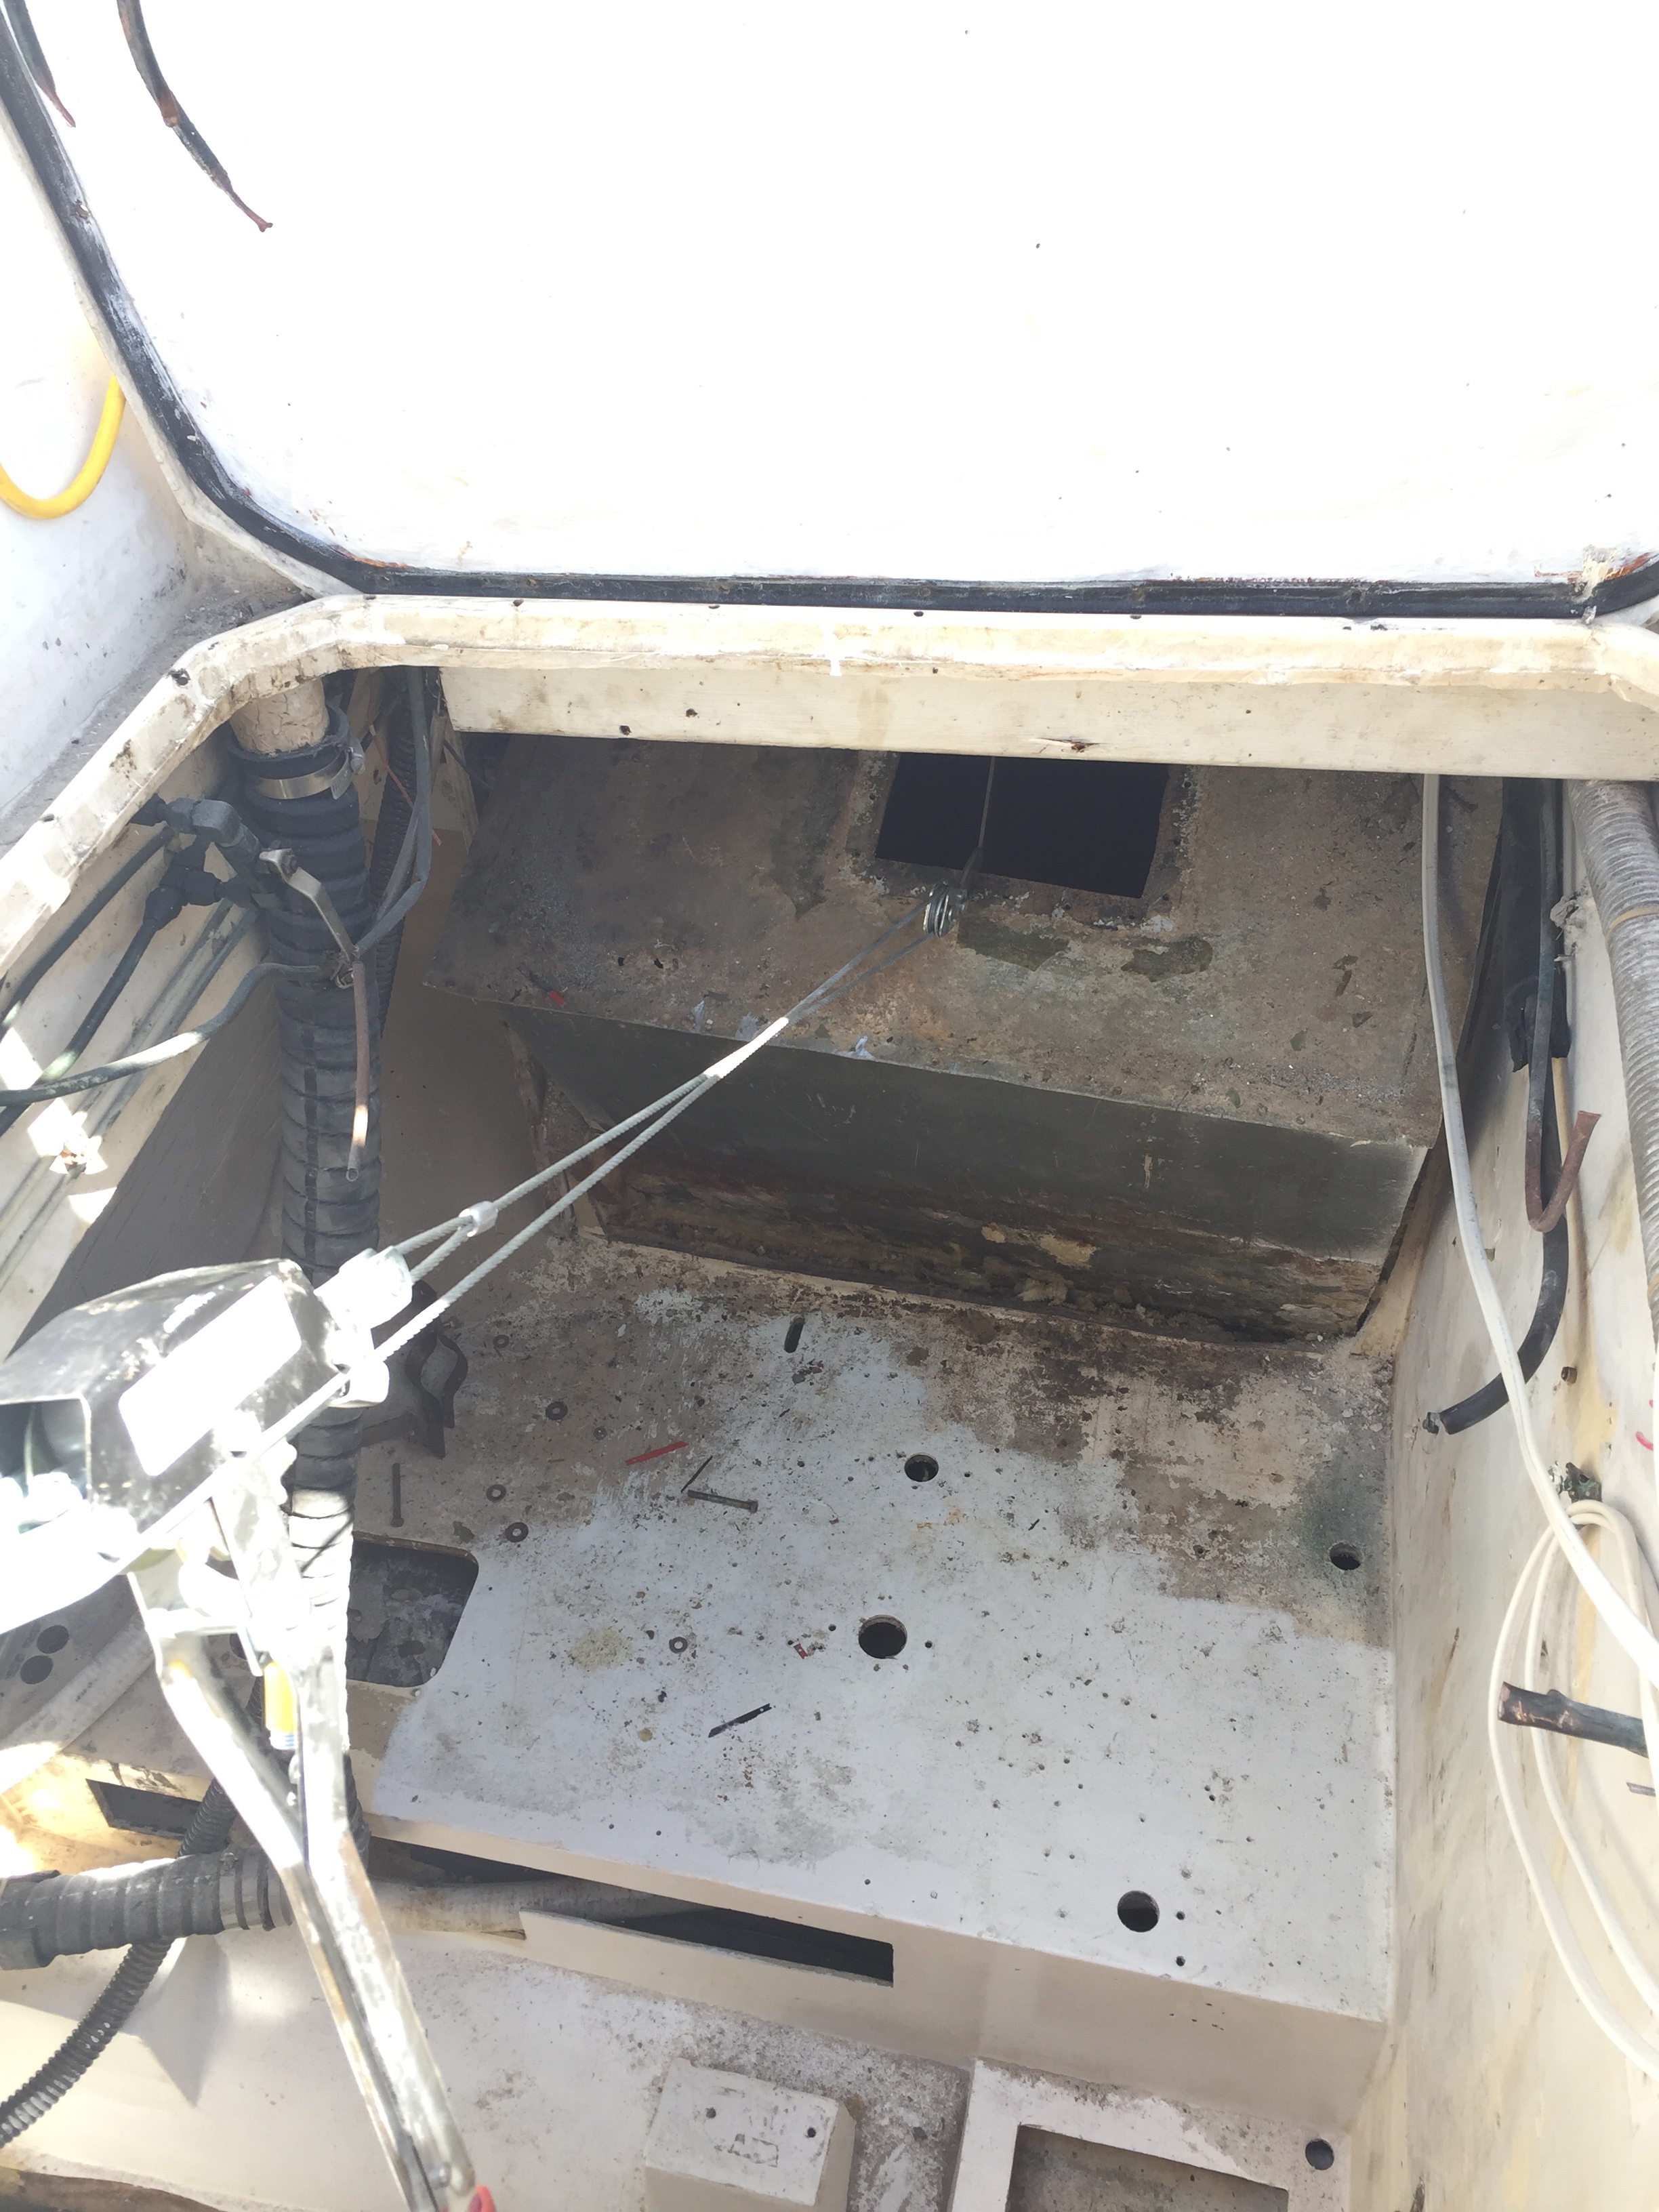
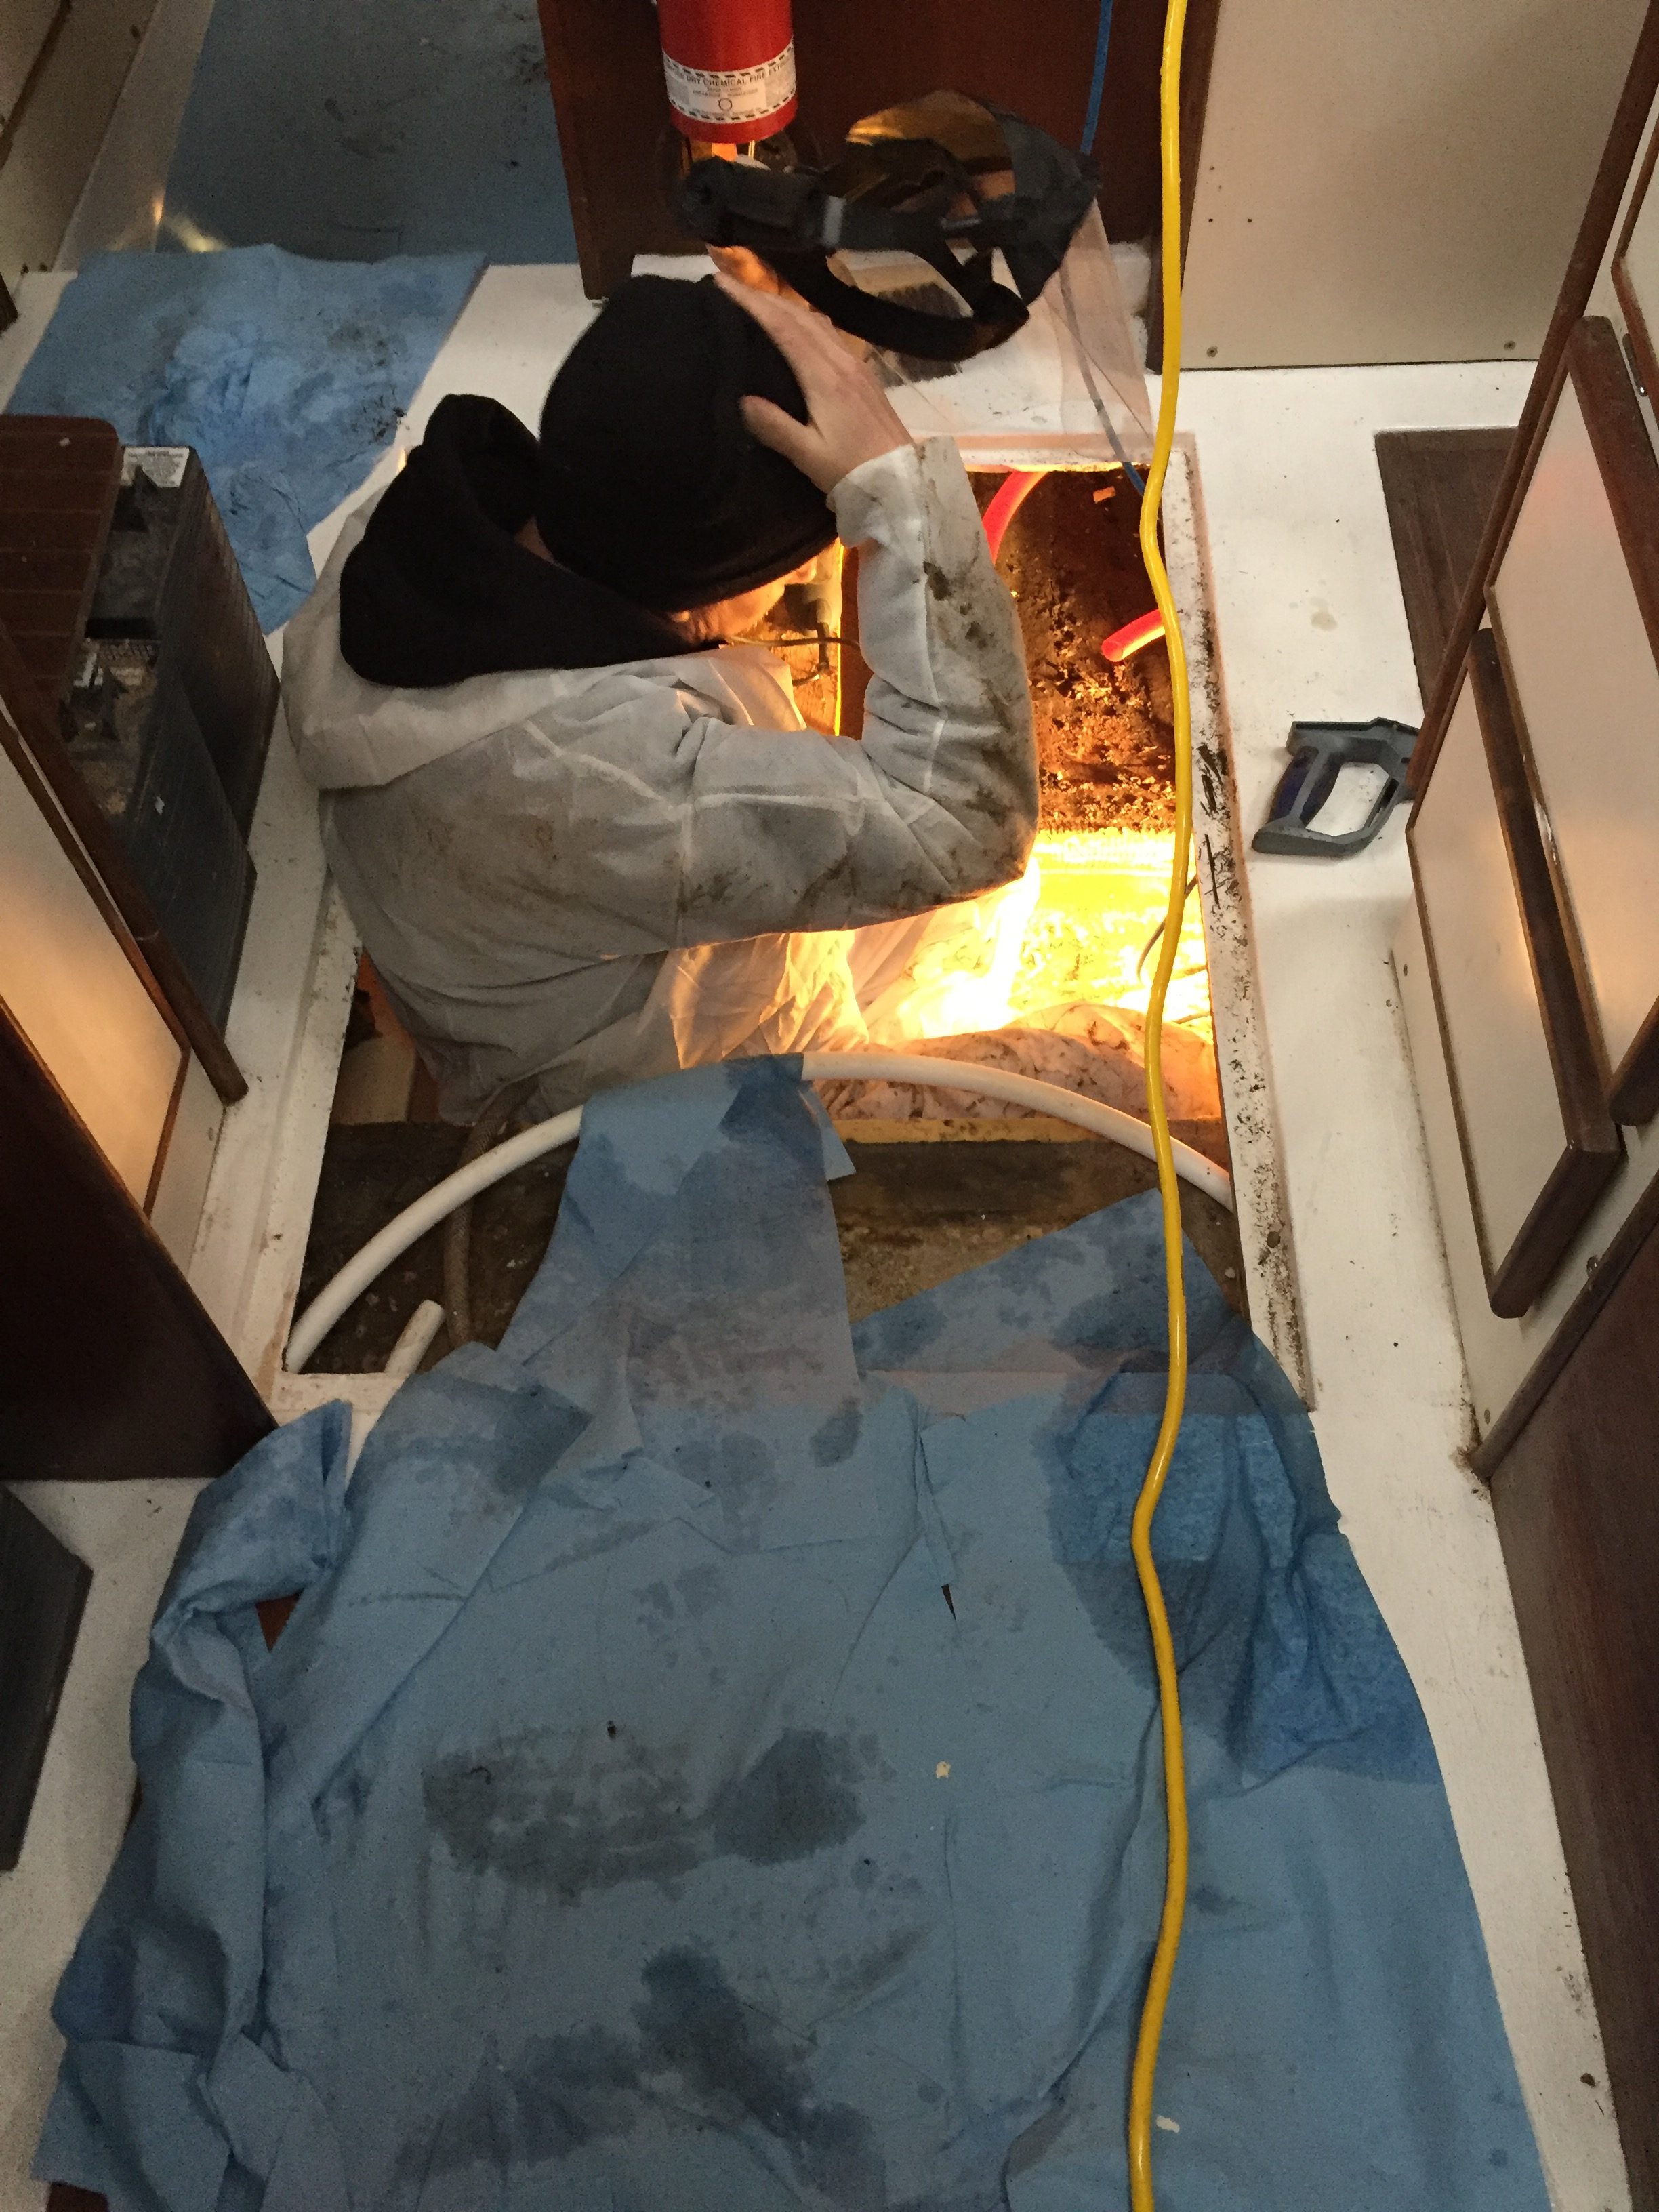
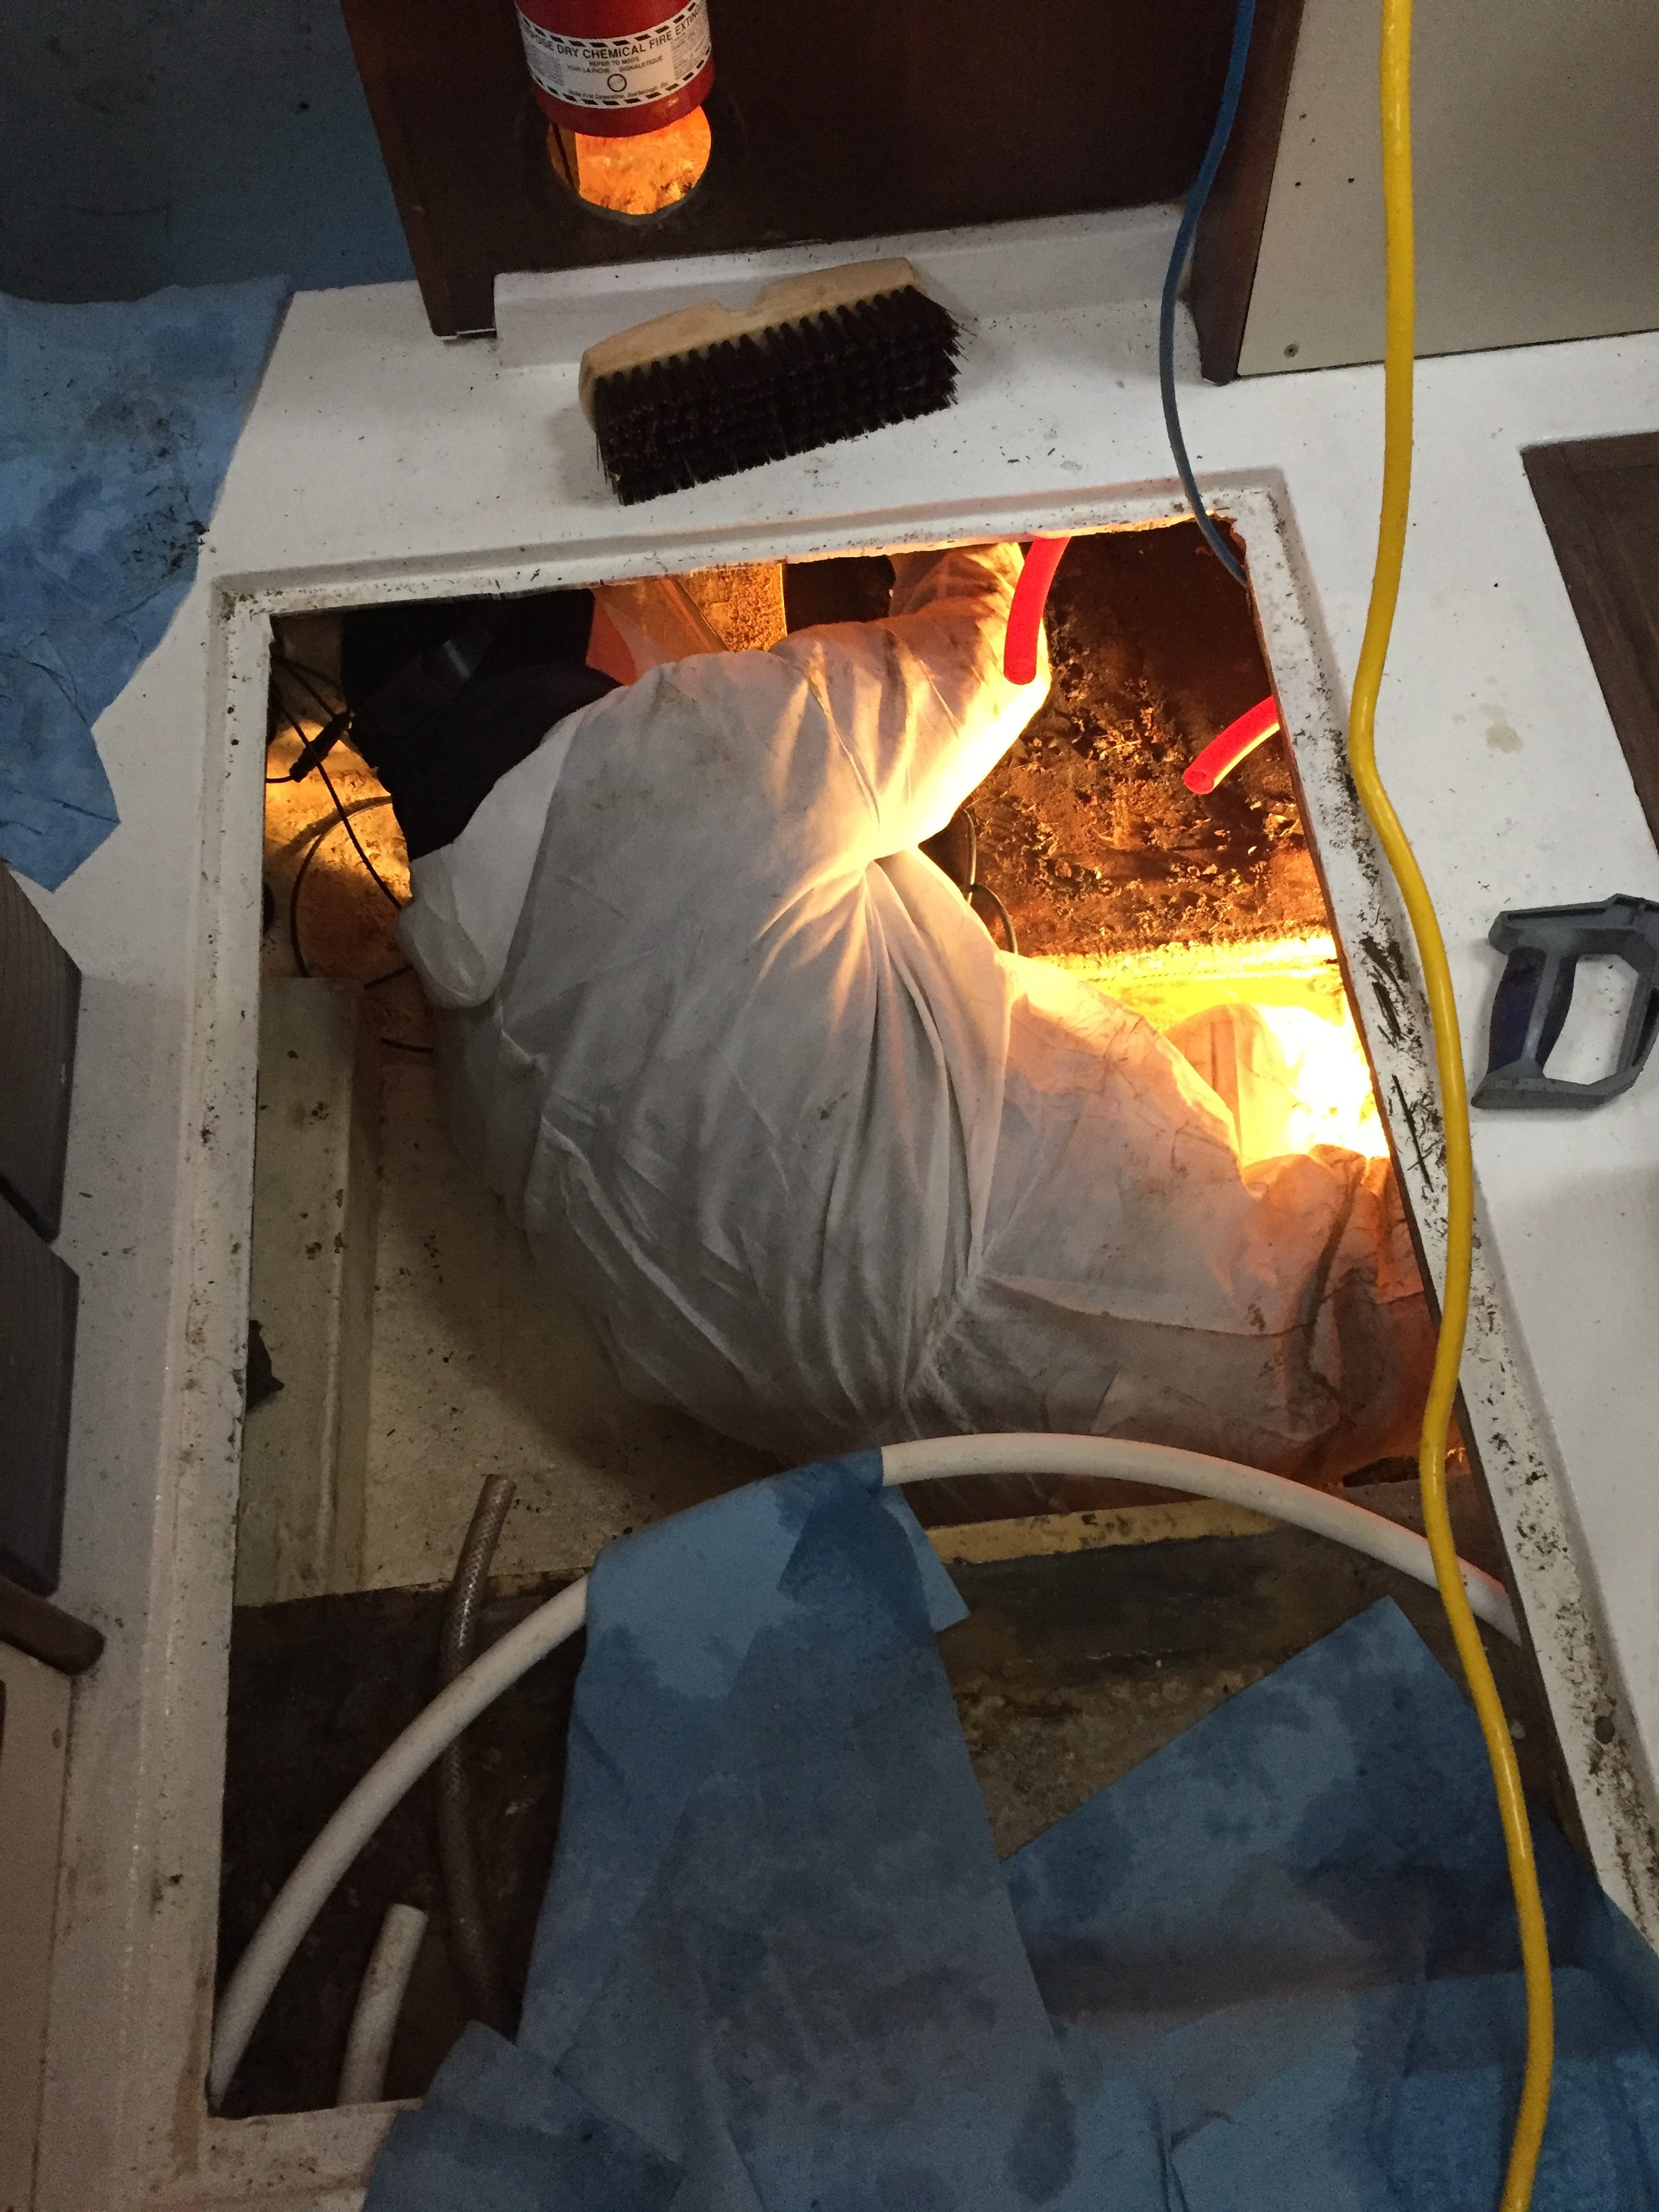
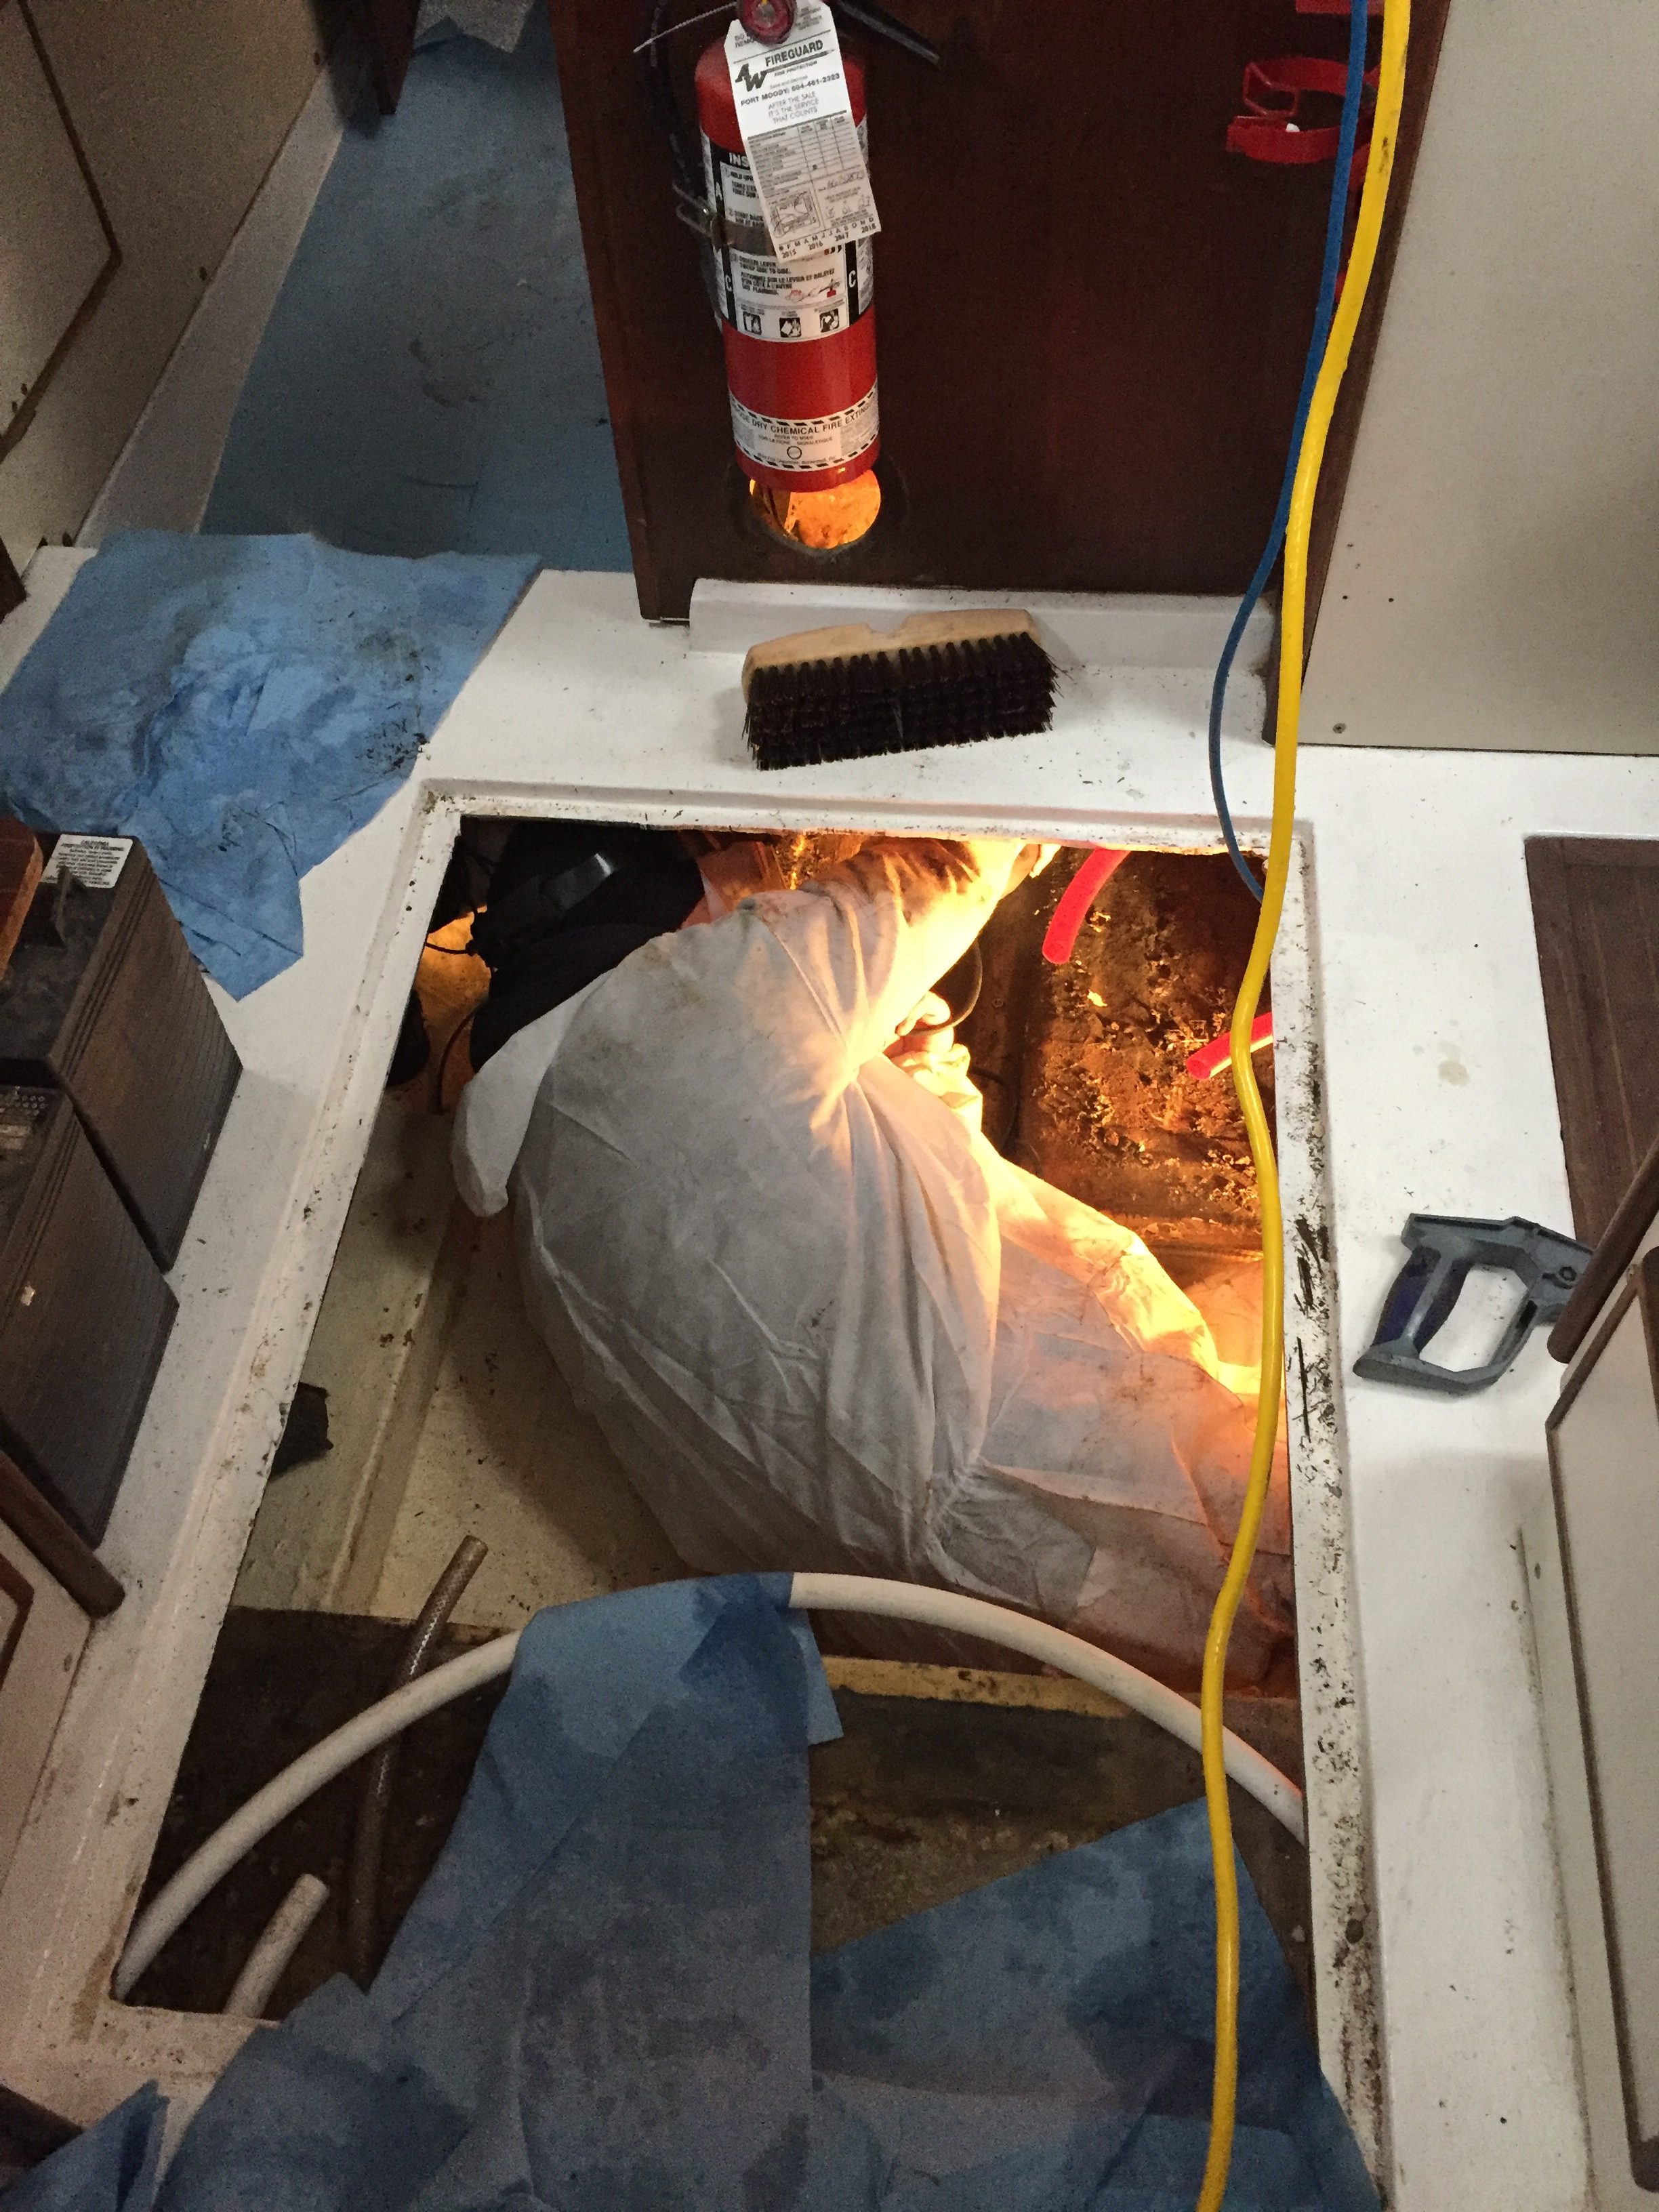
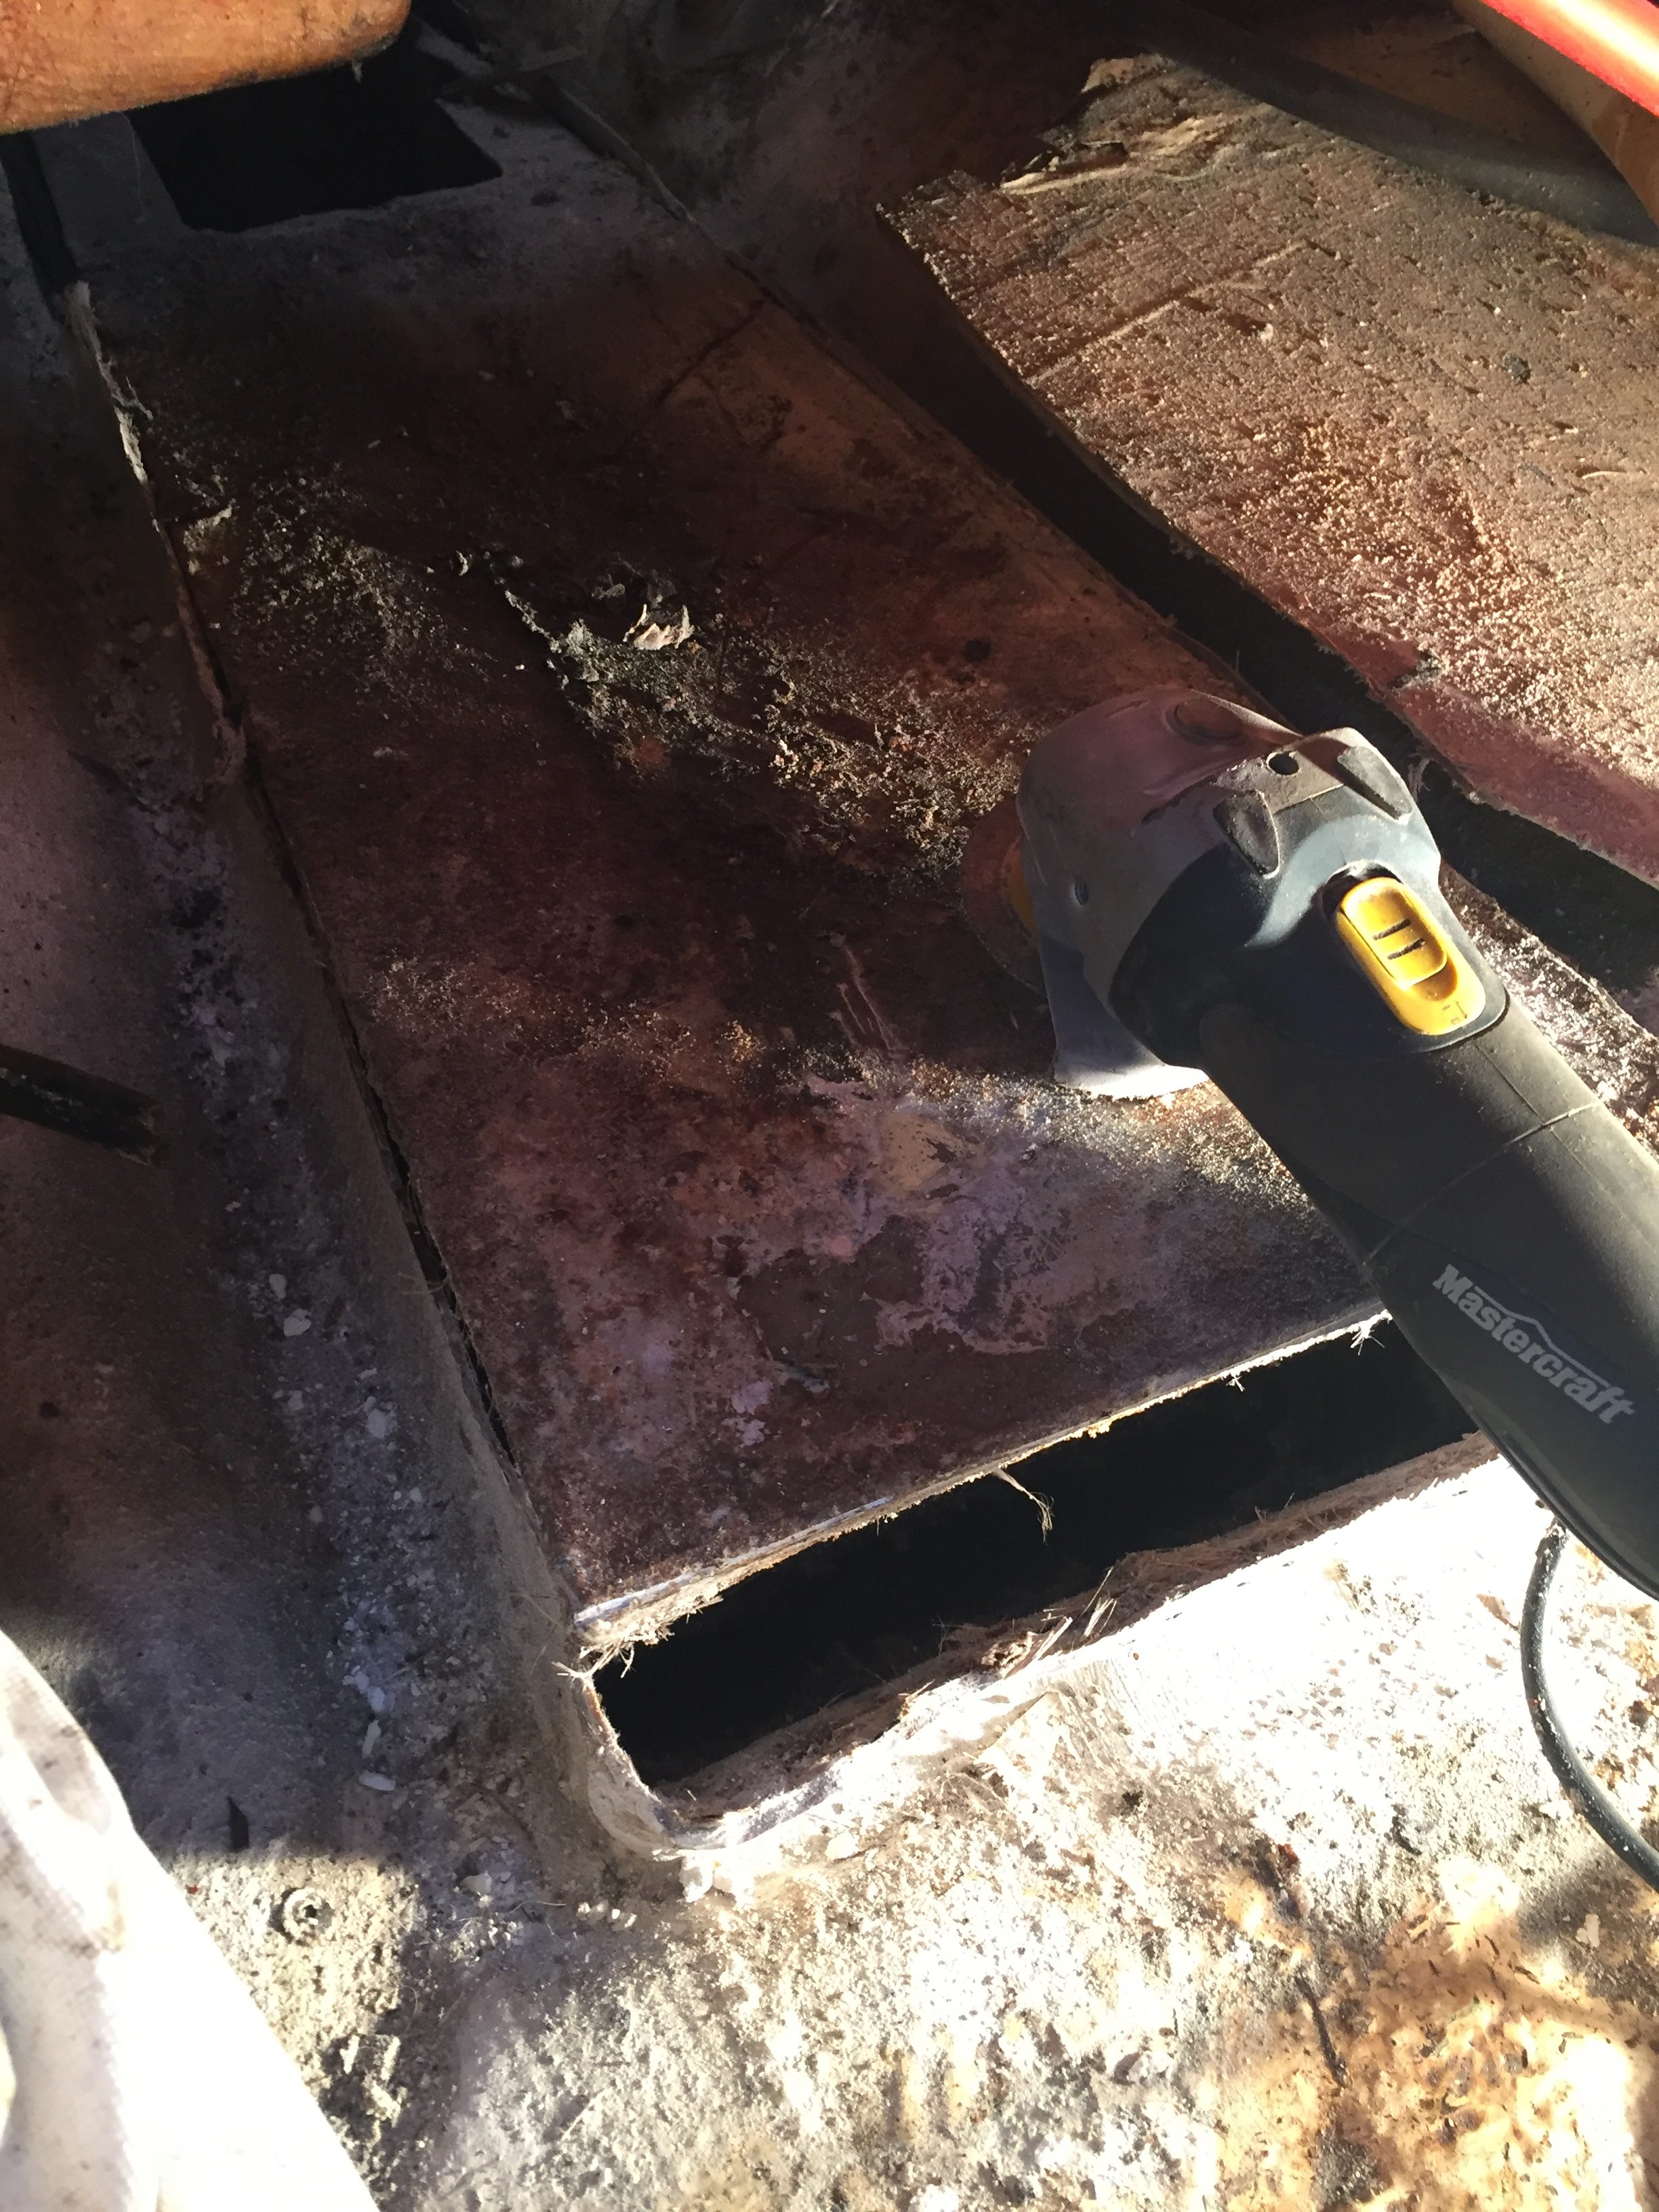
In order to cut the tank in two, I had to stand inside of it and cut it with the grinder and a good cutting blade. This process in itself isn’t really all that time consuming with the exception of all the liquid on the outside of the tank. Every time I cut the side down an inch, I had to wait until the liquid drained down to that level. This is what took so bloody long. I could not simply cut it in two as I was standing in the liquid using power tools. Not my idea of a fun day to electrocute myself removing a keel tank.
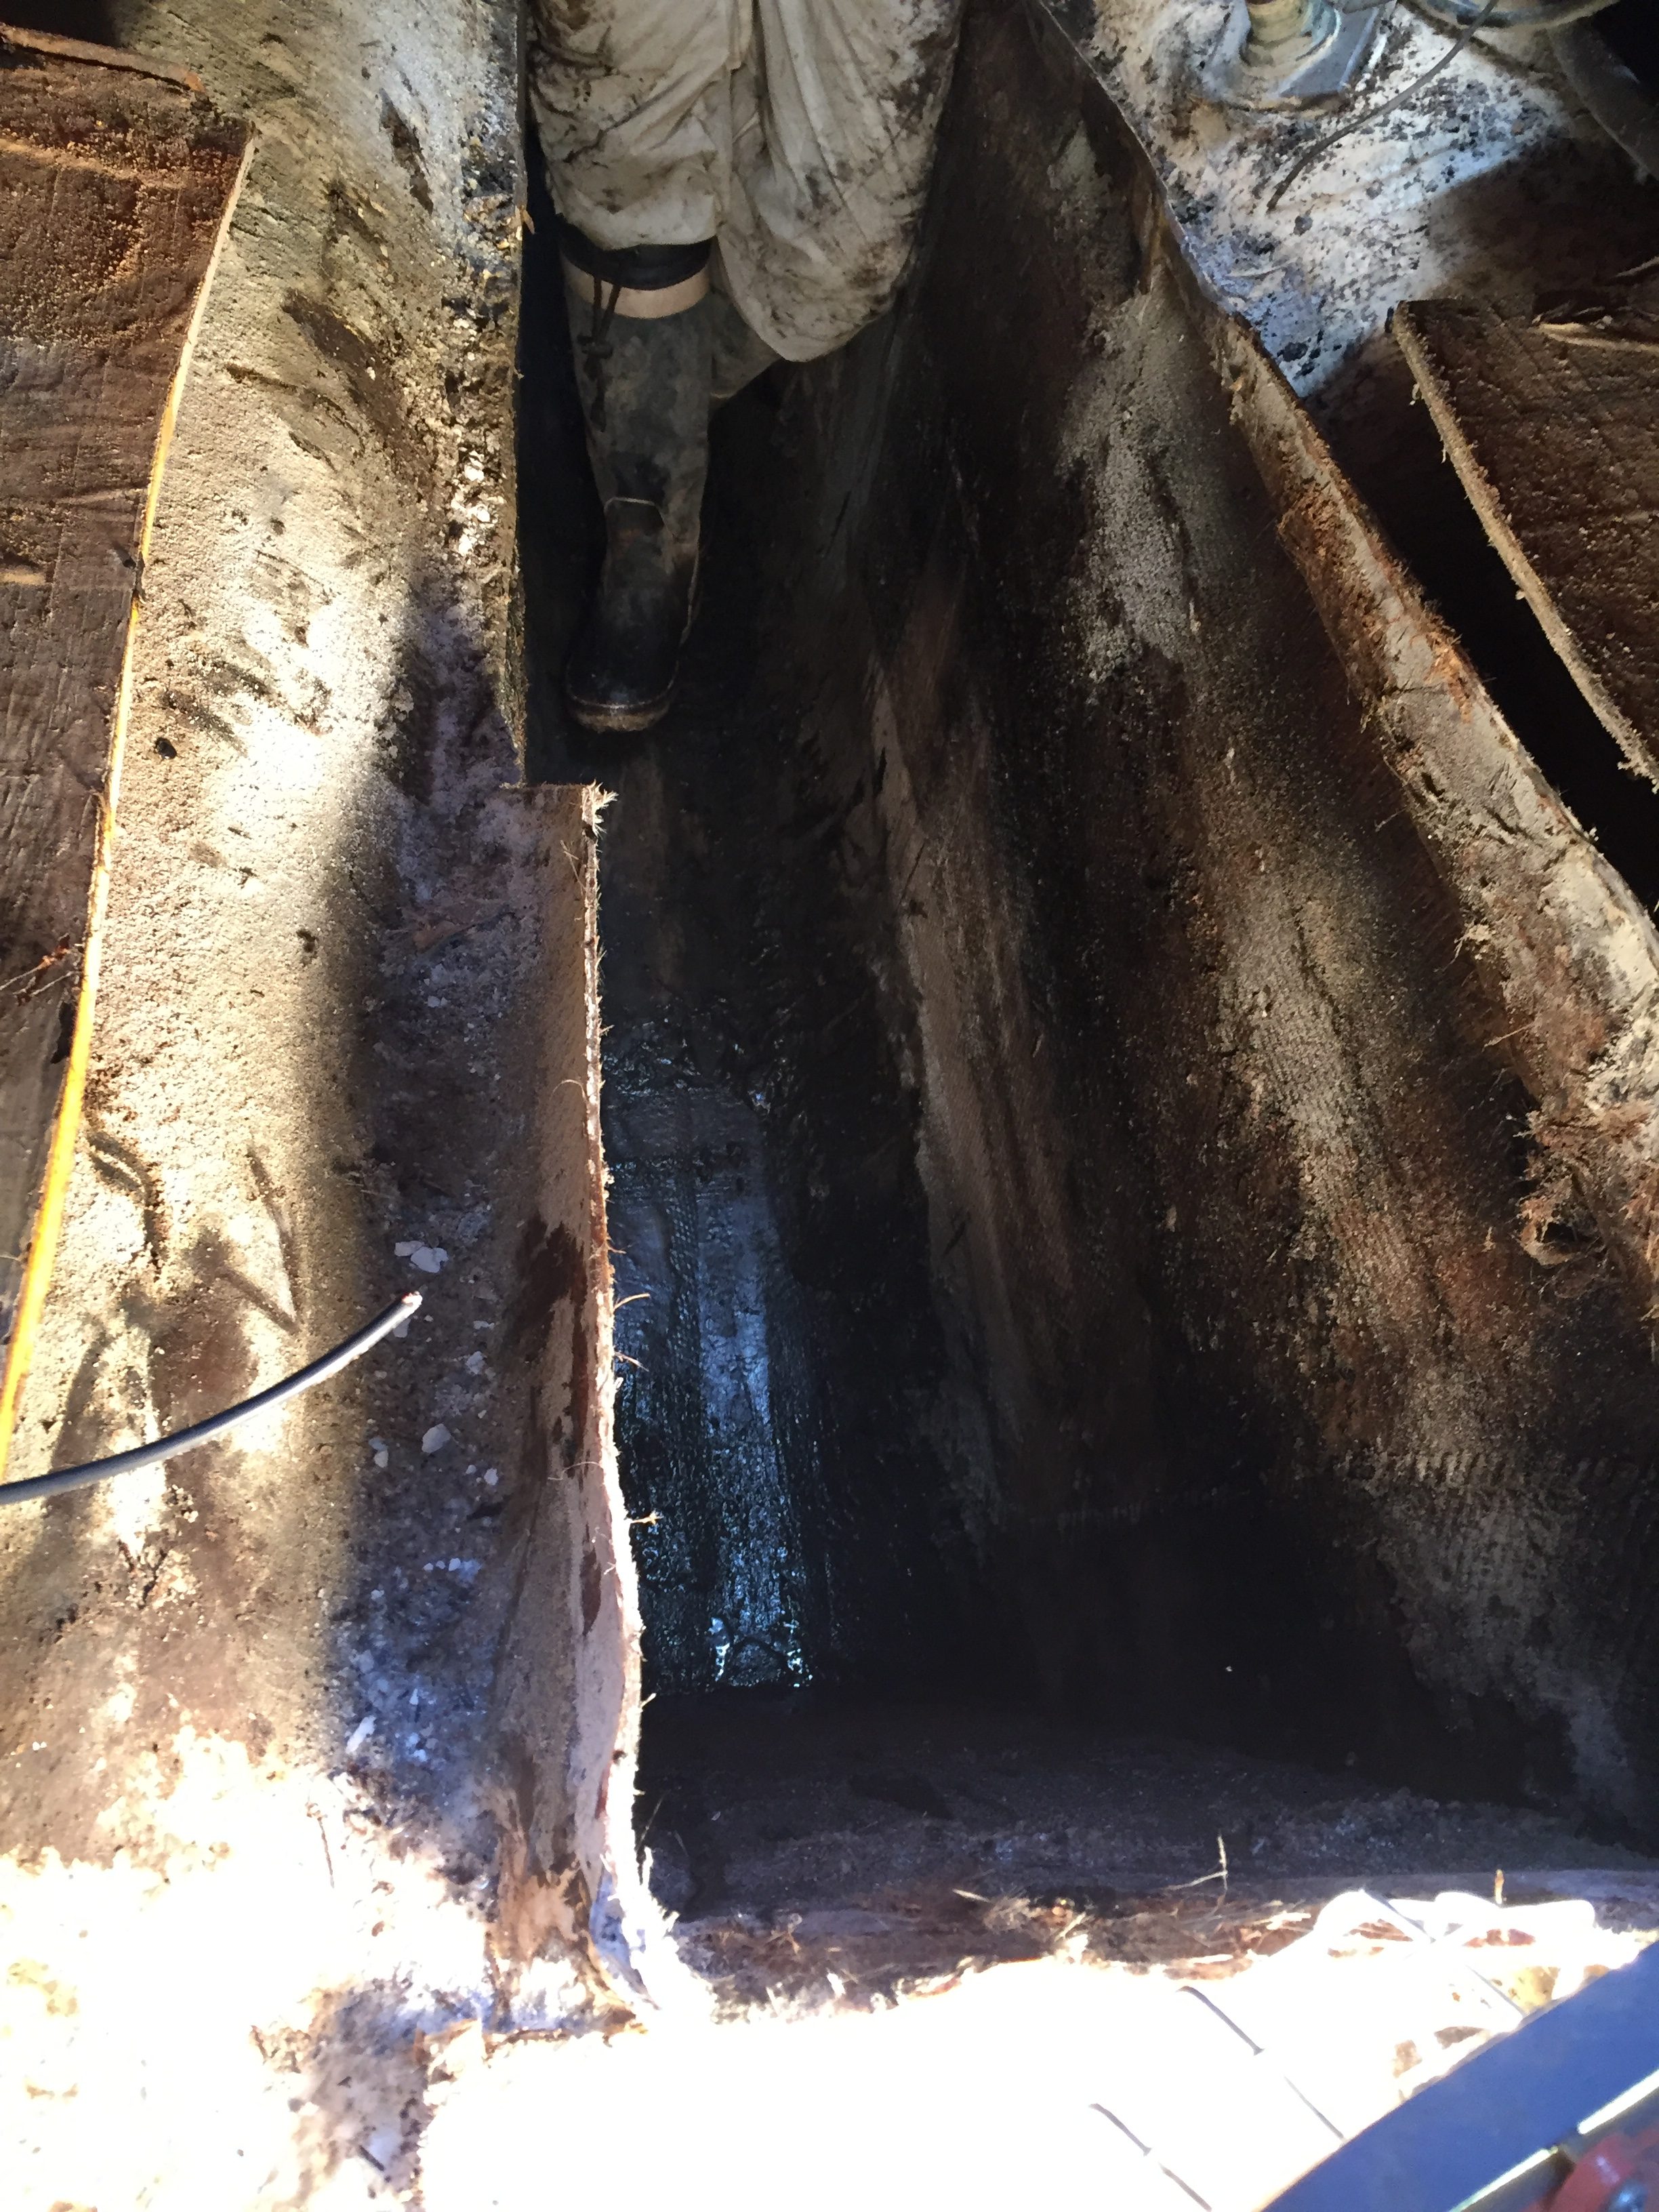
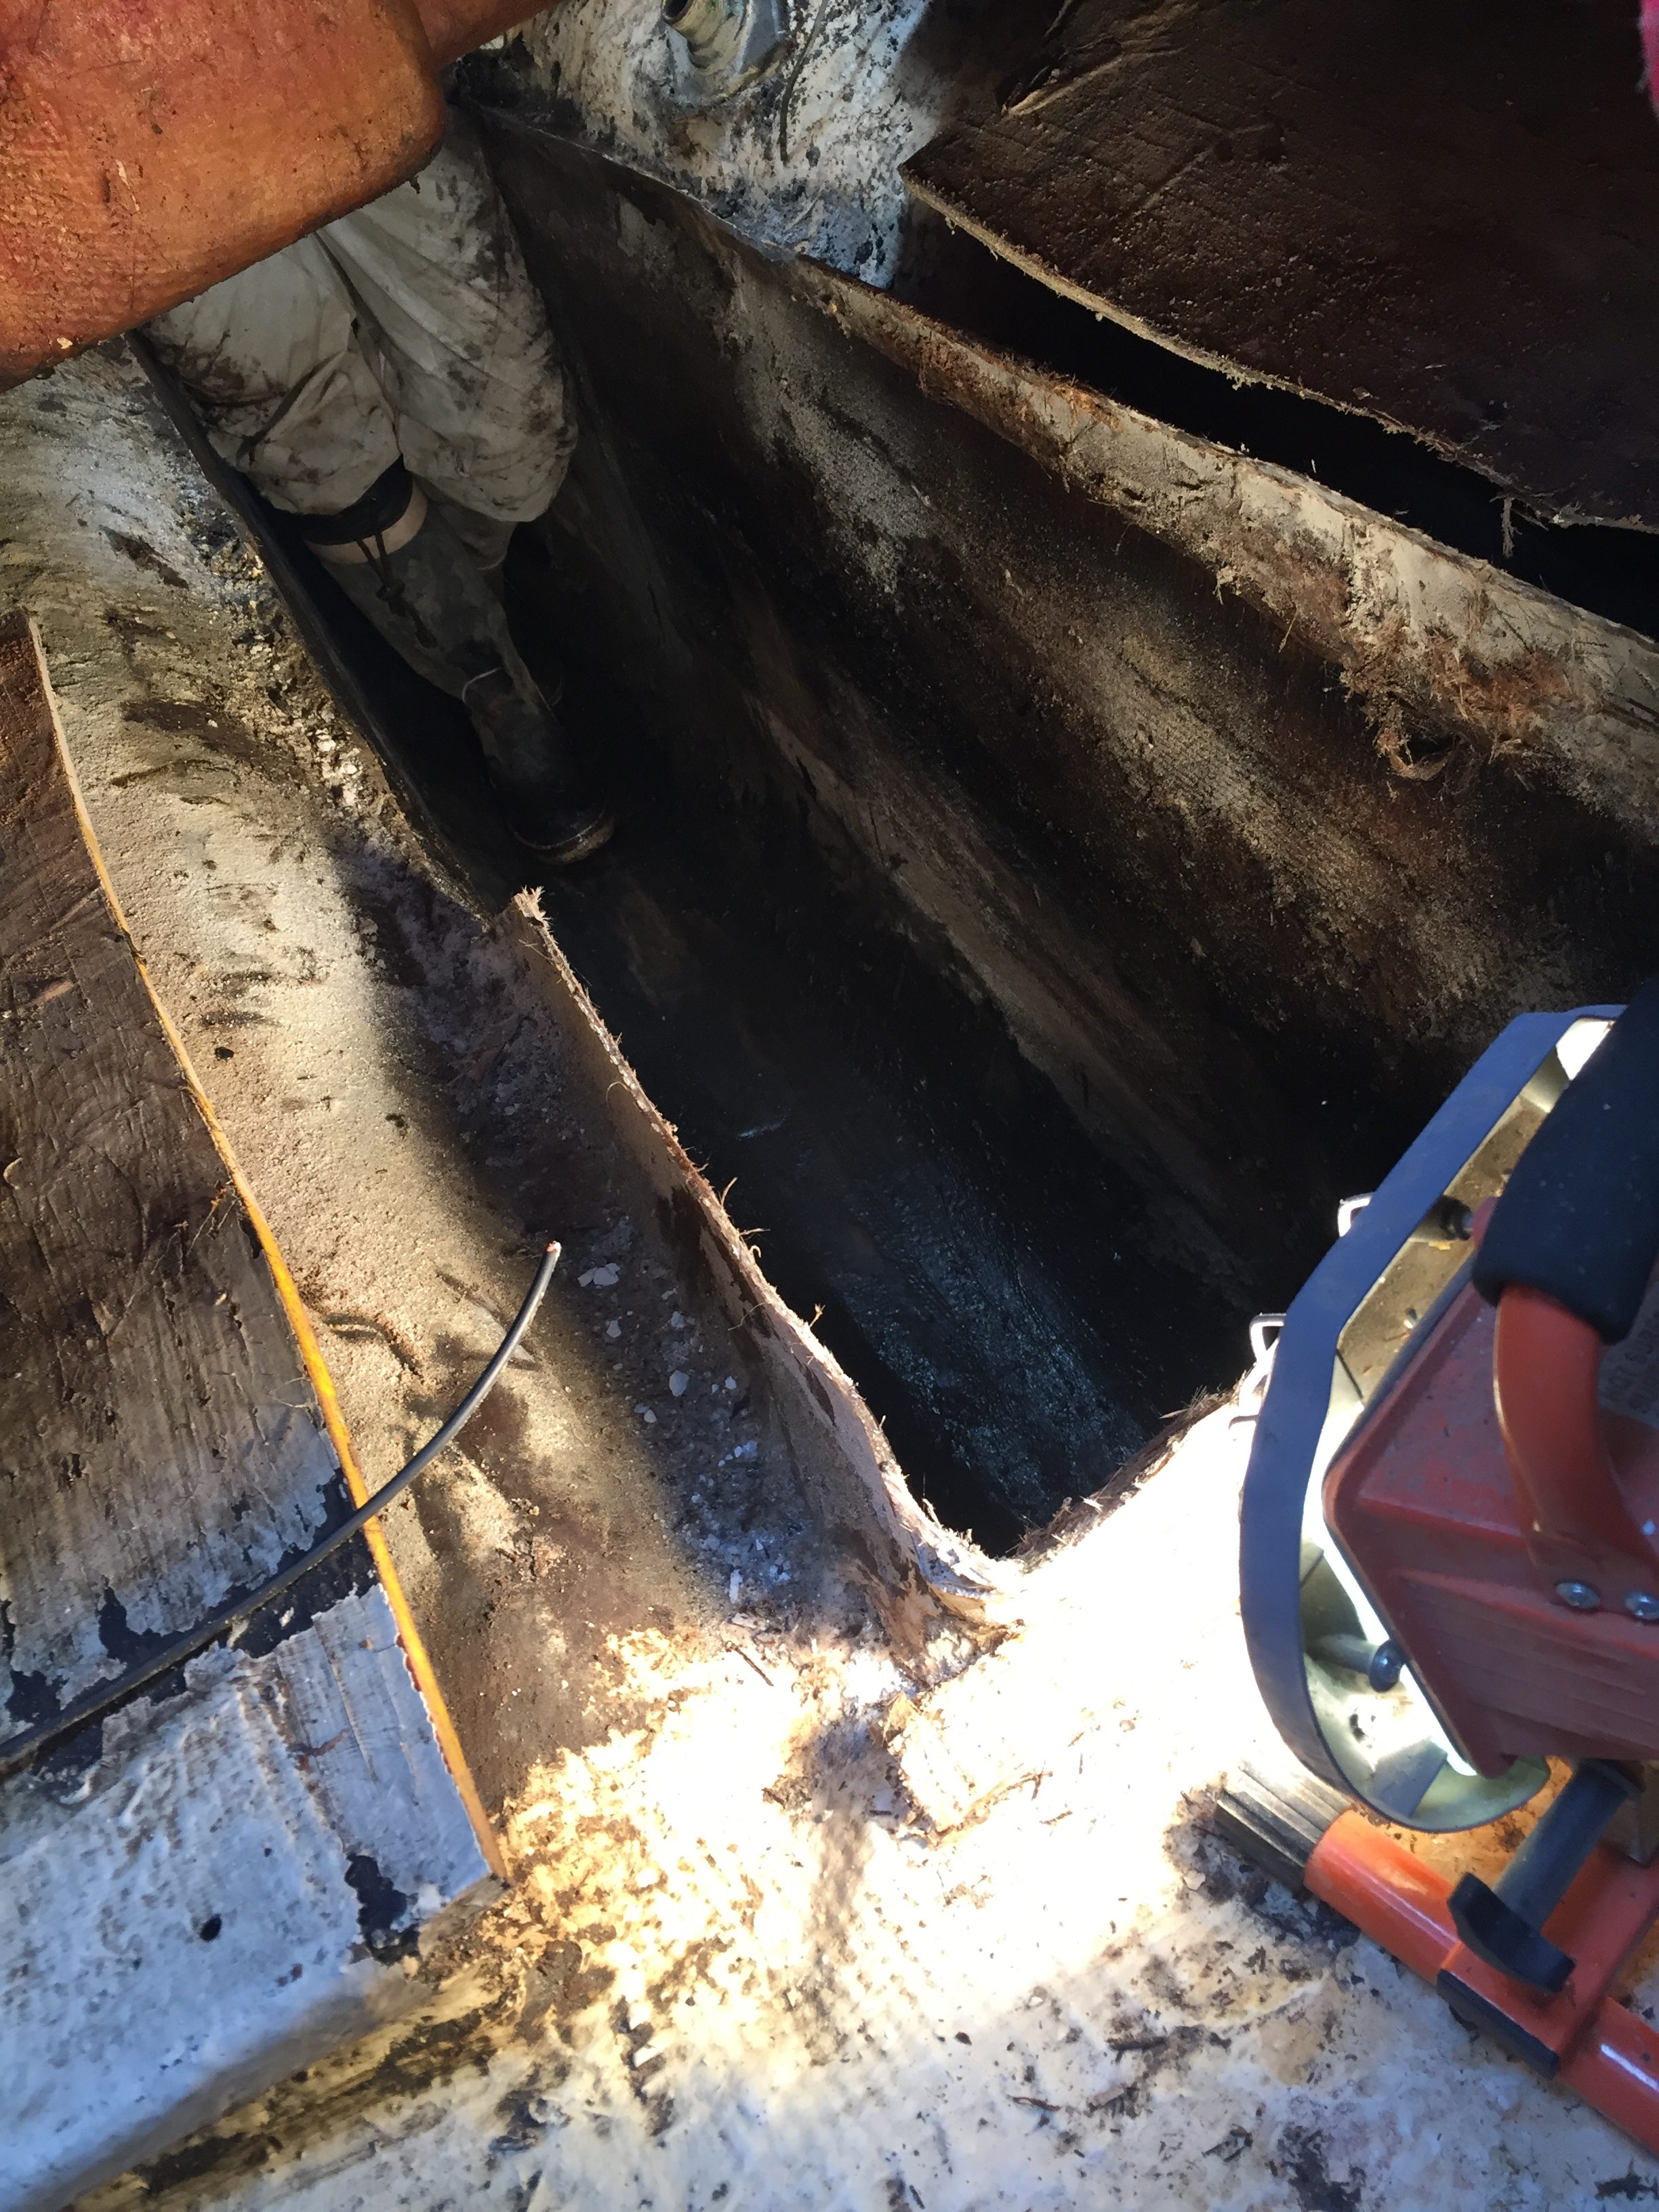
I am not sure how anyone can possibly do this job without standing inside the tank. It is a long way down to the bottom and would be impossible to cut the very bottom without standing inside, bent over and doing it with a grinder. To speed it up a little bit, I drilled a series of holes in a straight line across the bottom and finished it with the angle grinder. Of course, the grinder only fits so well into corners so I had to do a fair bit of screwing around right at the bottom.
I am not sure of the exact depth yet, but there is a fair amount of space underneath the tank itself. I thought I might be drilling into the keel, but nope.
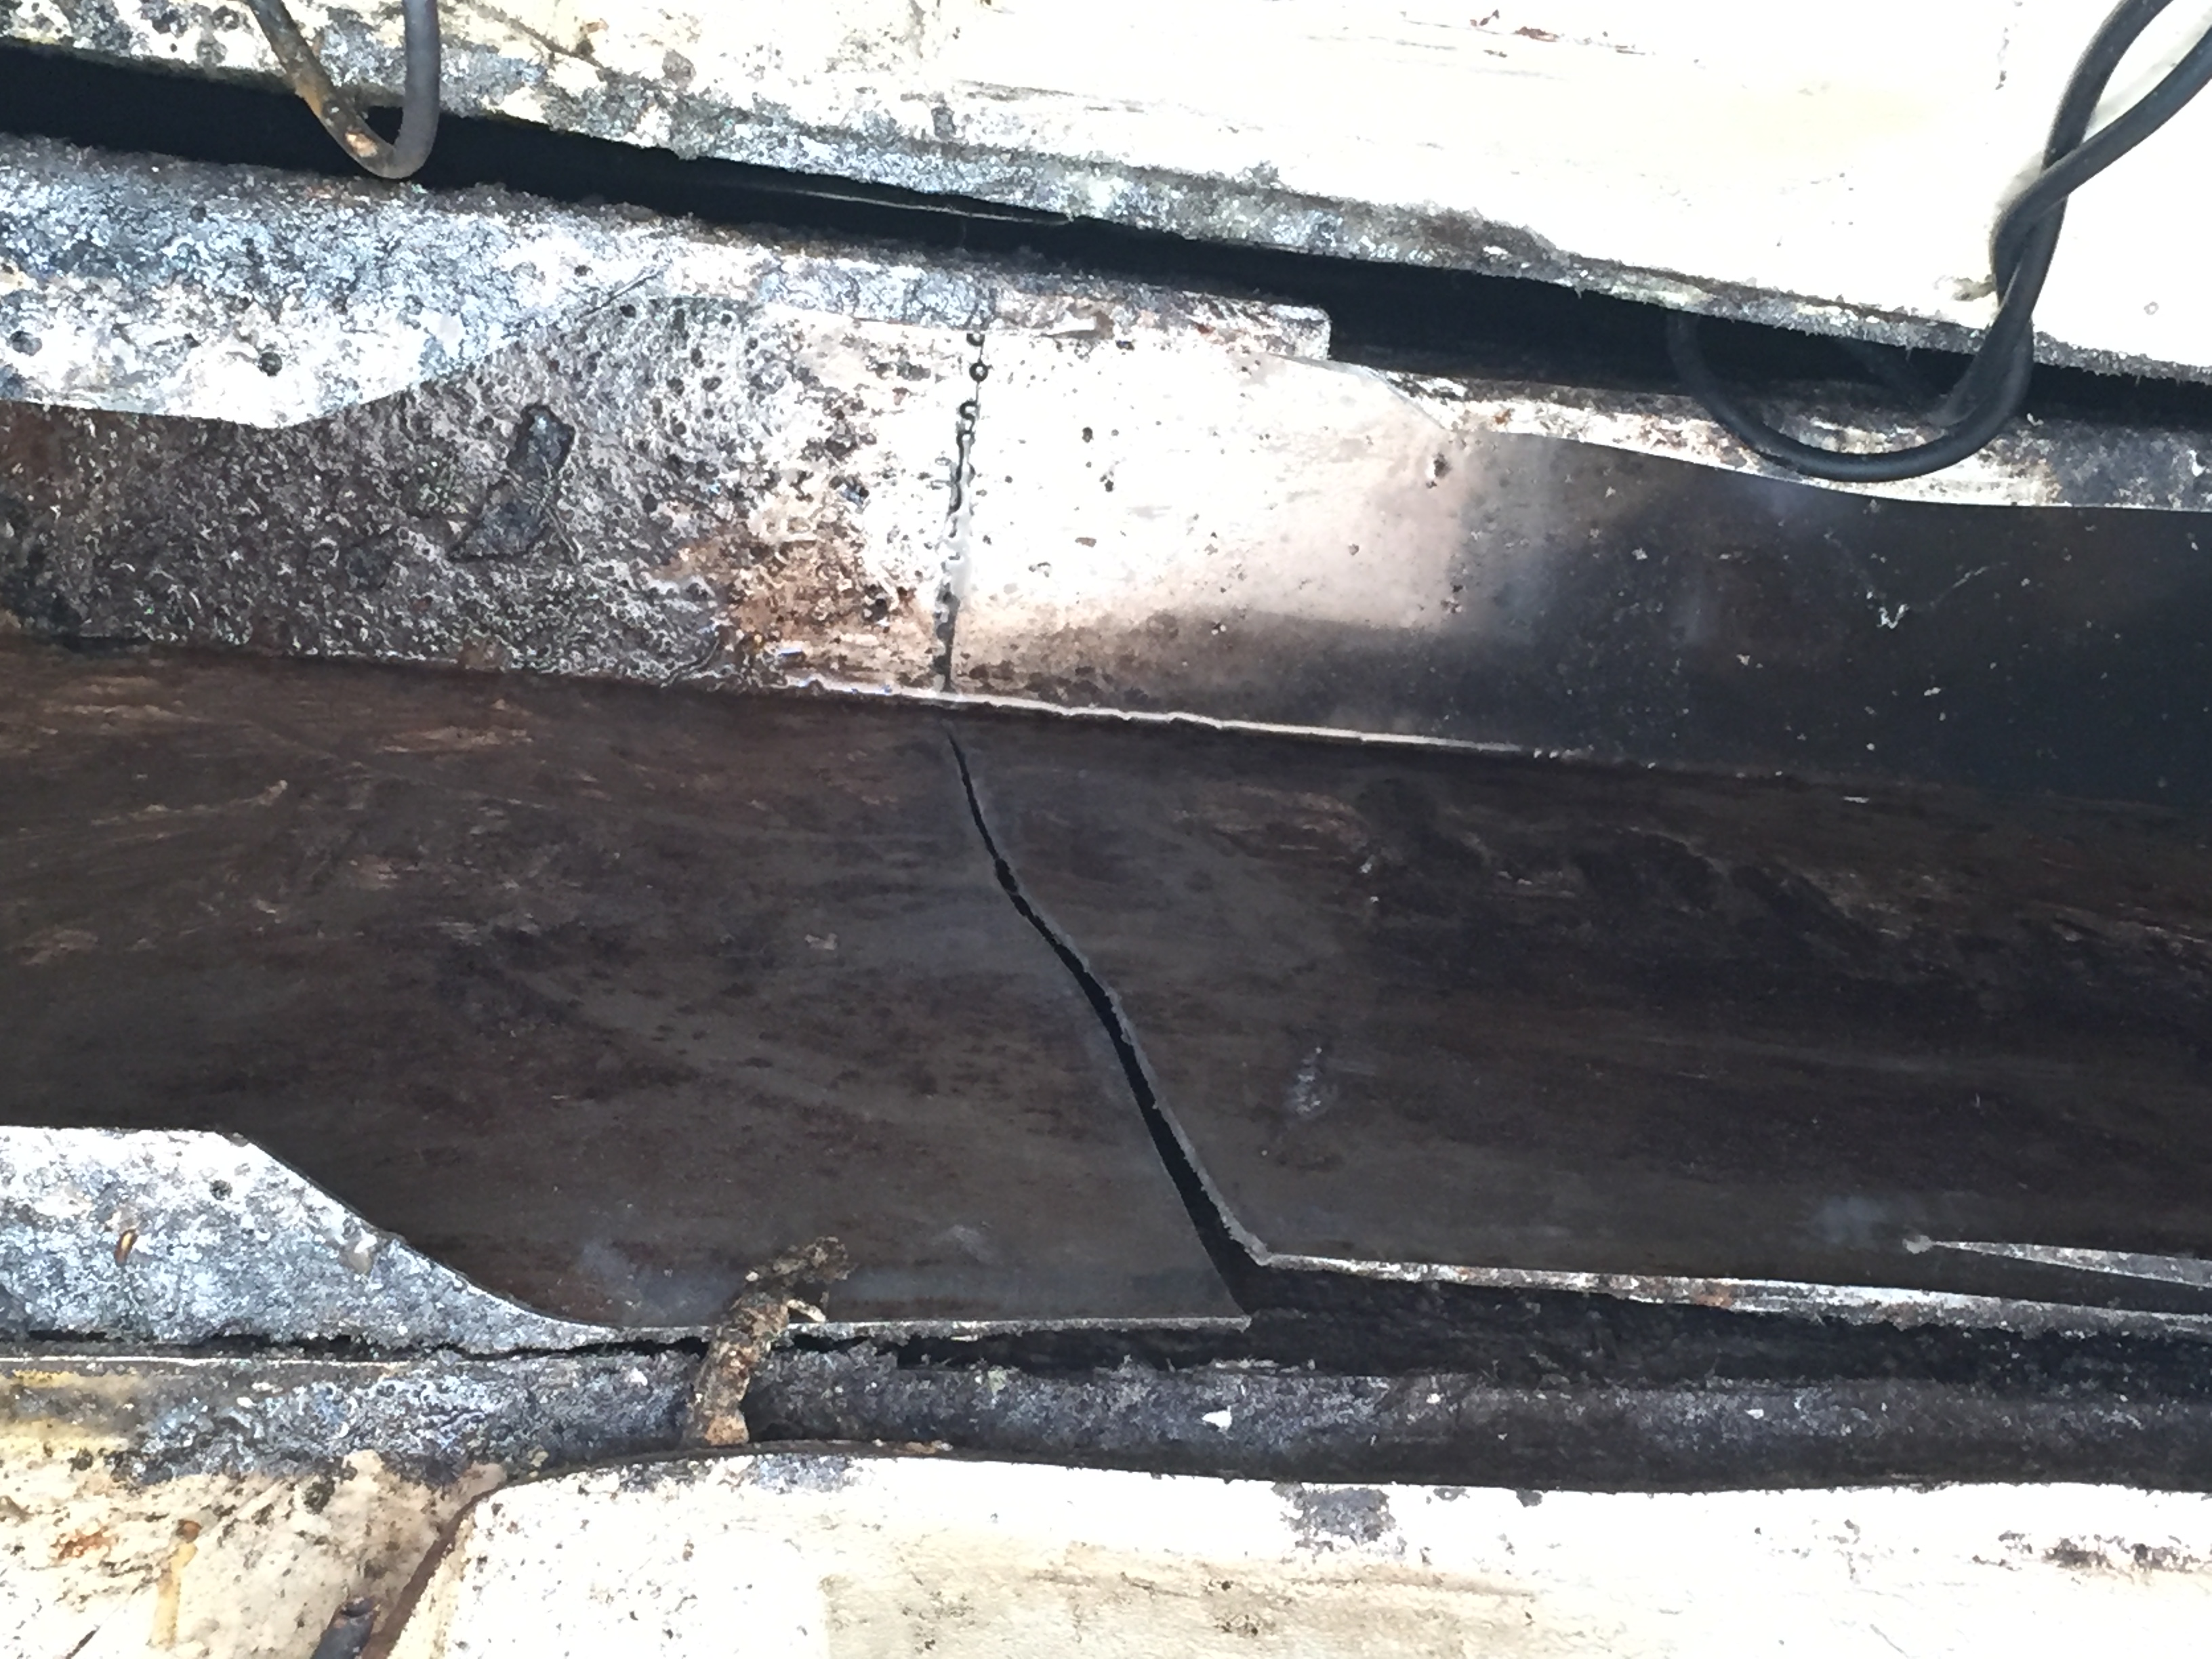
For anyone who reads this blog and is contemplating the same job here in a nutshell are things I learned today. Bending over cutting an aluminum tank while standing in it sounds like a lot of fun I know, but it is cramped, which means you are cramped, which means you are bent over for hours trying to do this. Also, make sure the angle of your cut is in the correct direction. Mine ended up being in the wrong direction needed to remove the back half of the tank first, which meant I had to go back in and cut v notches into the tank wall.
Buy good quality blades, Dewalt worked great for me.
Whatever this mess of liquid is stinks up to high hell and even after a 30 minute super hot shower with lots of soap, you can still smell it on yourself.
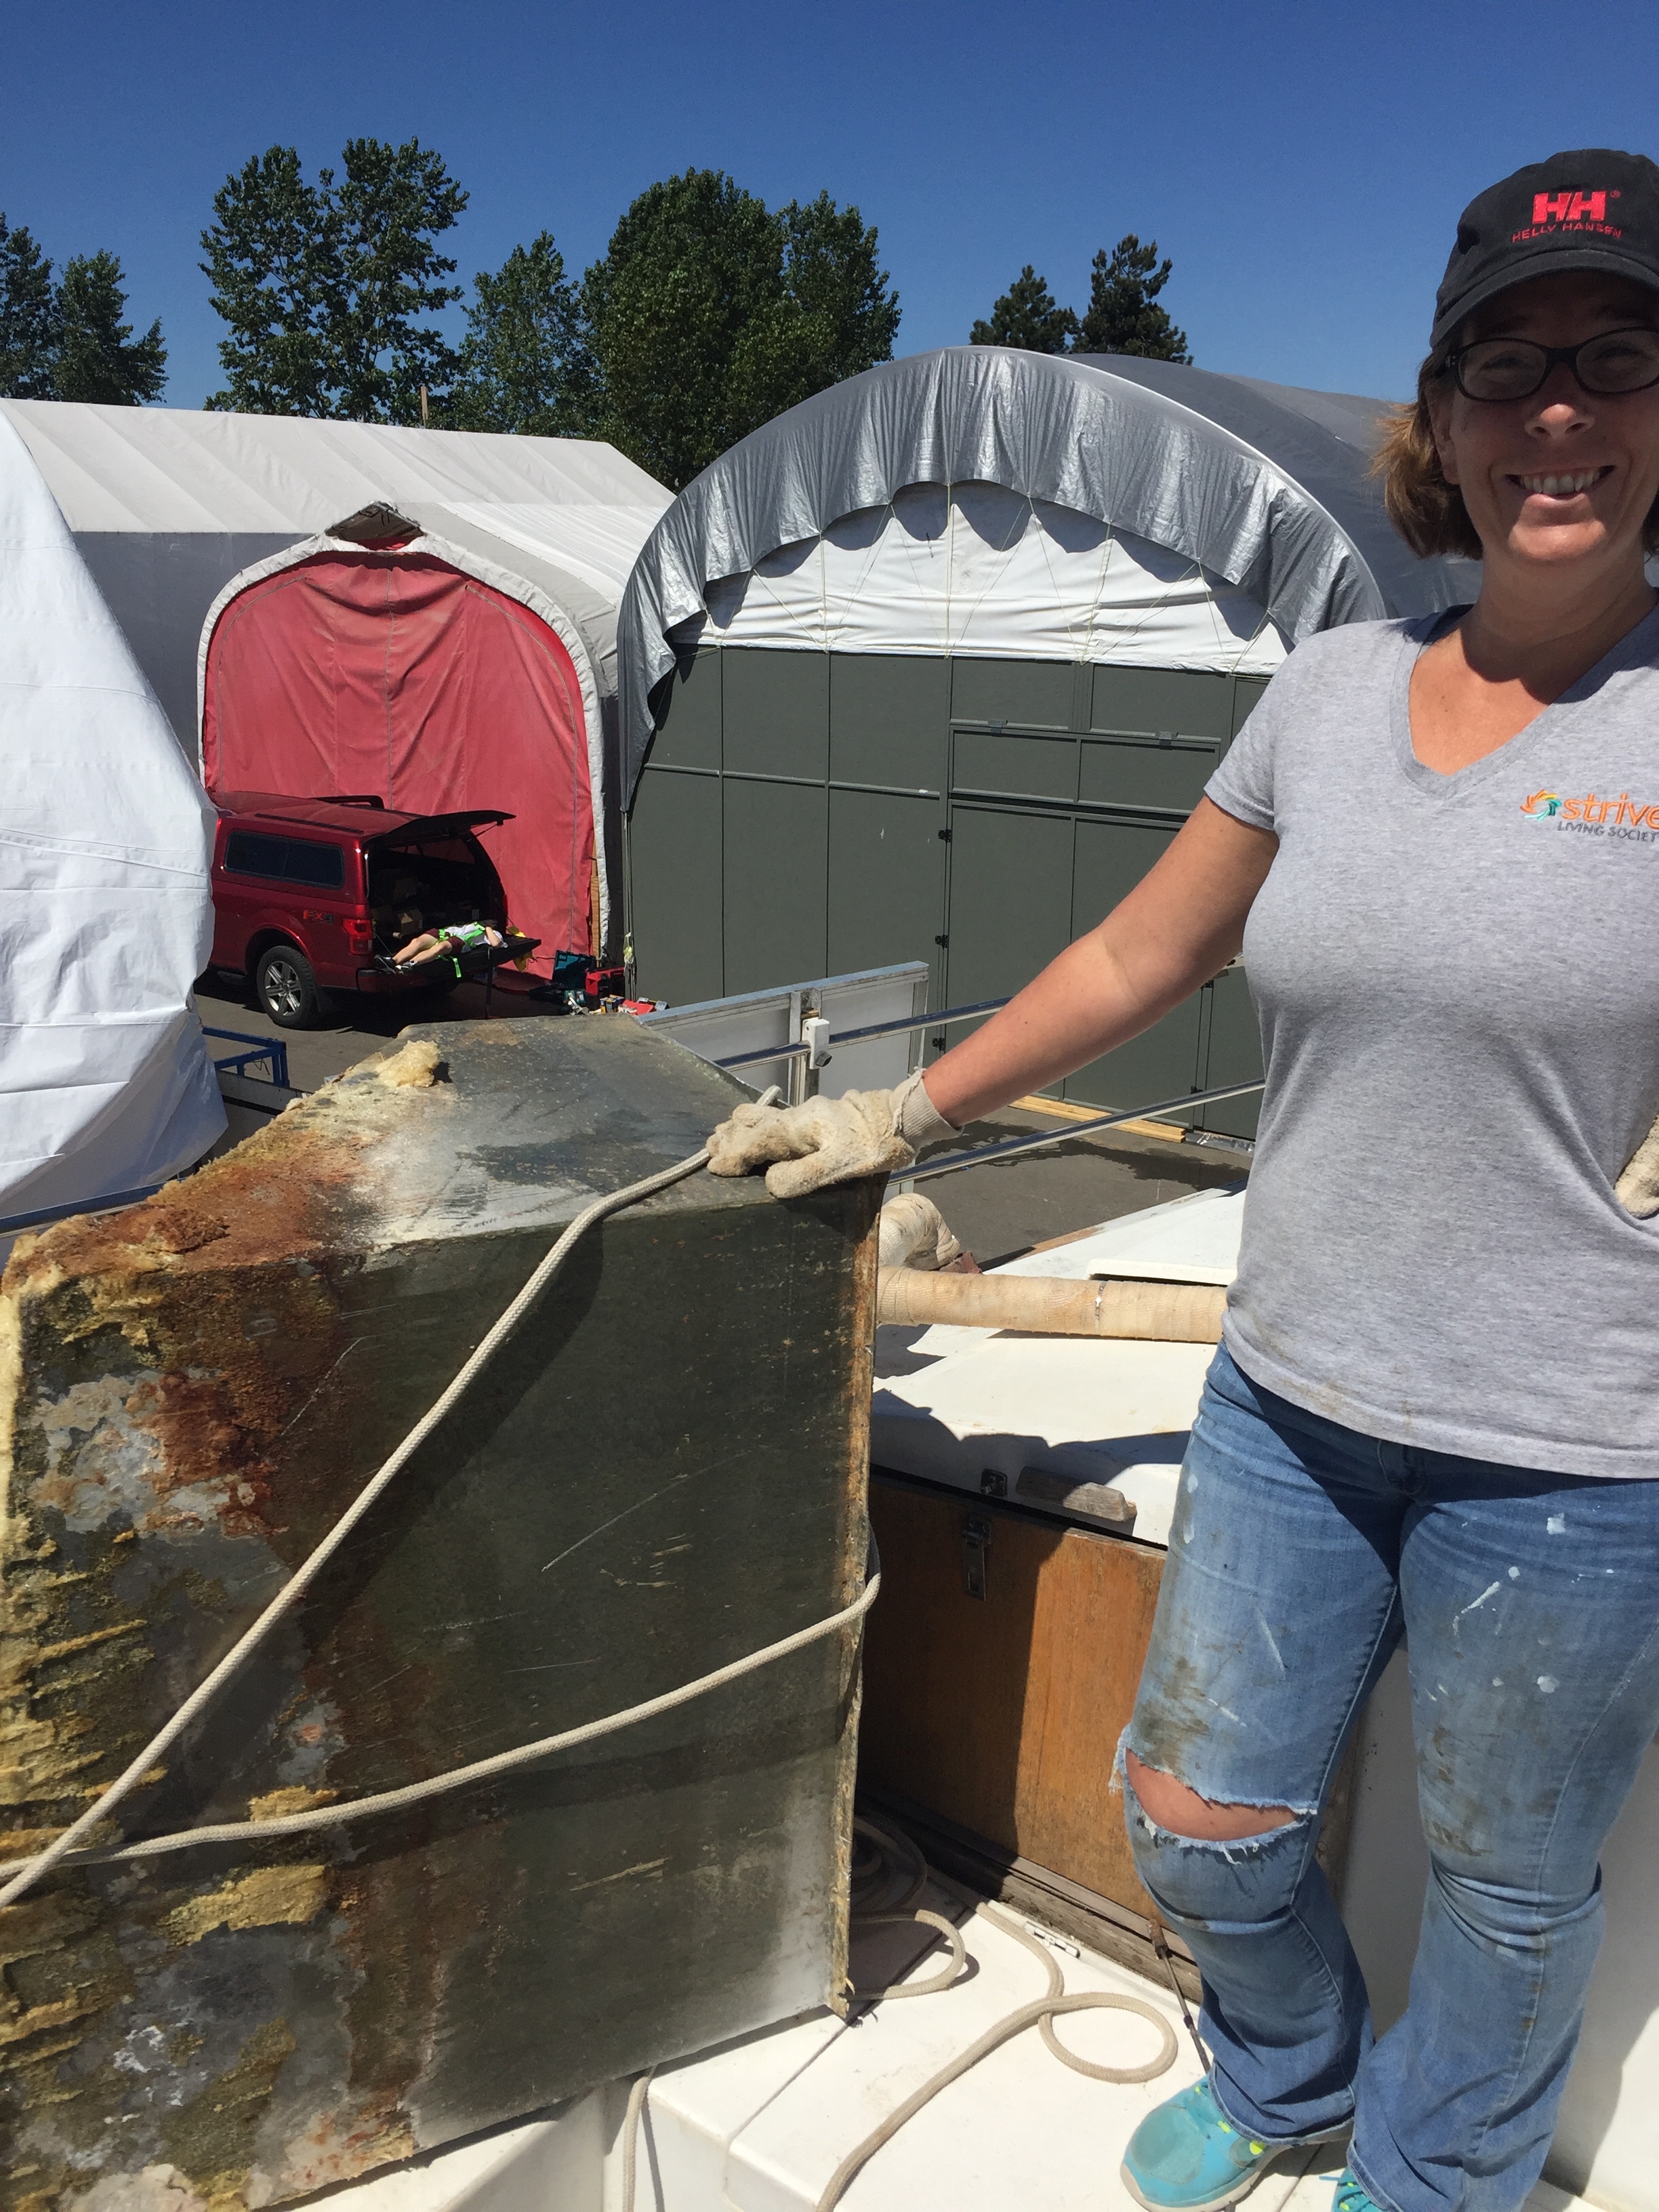
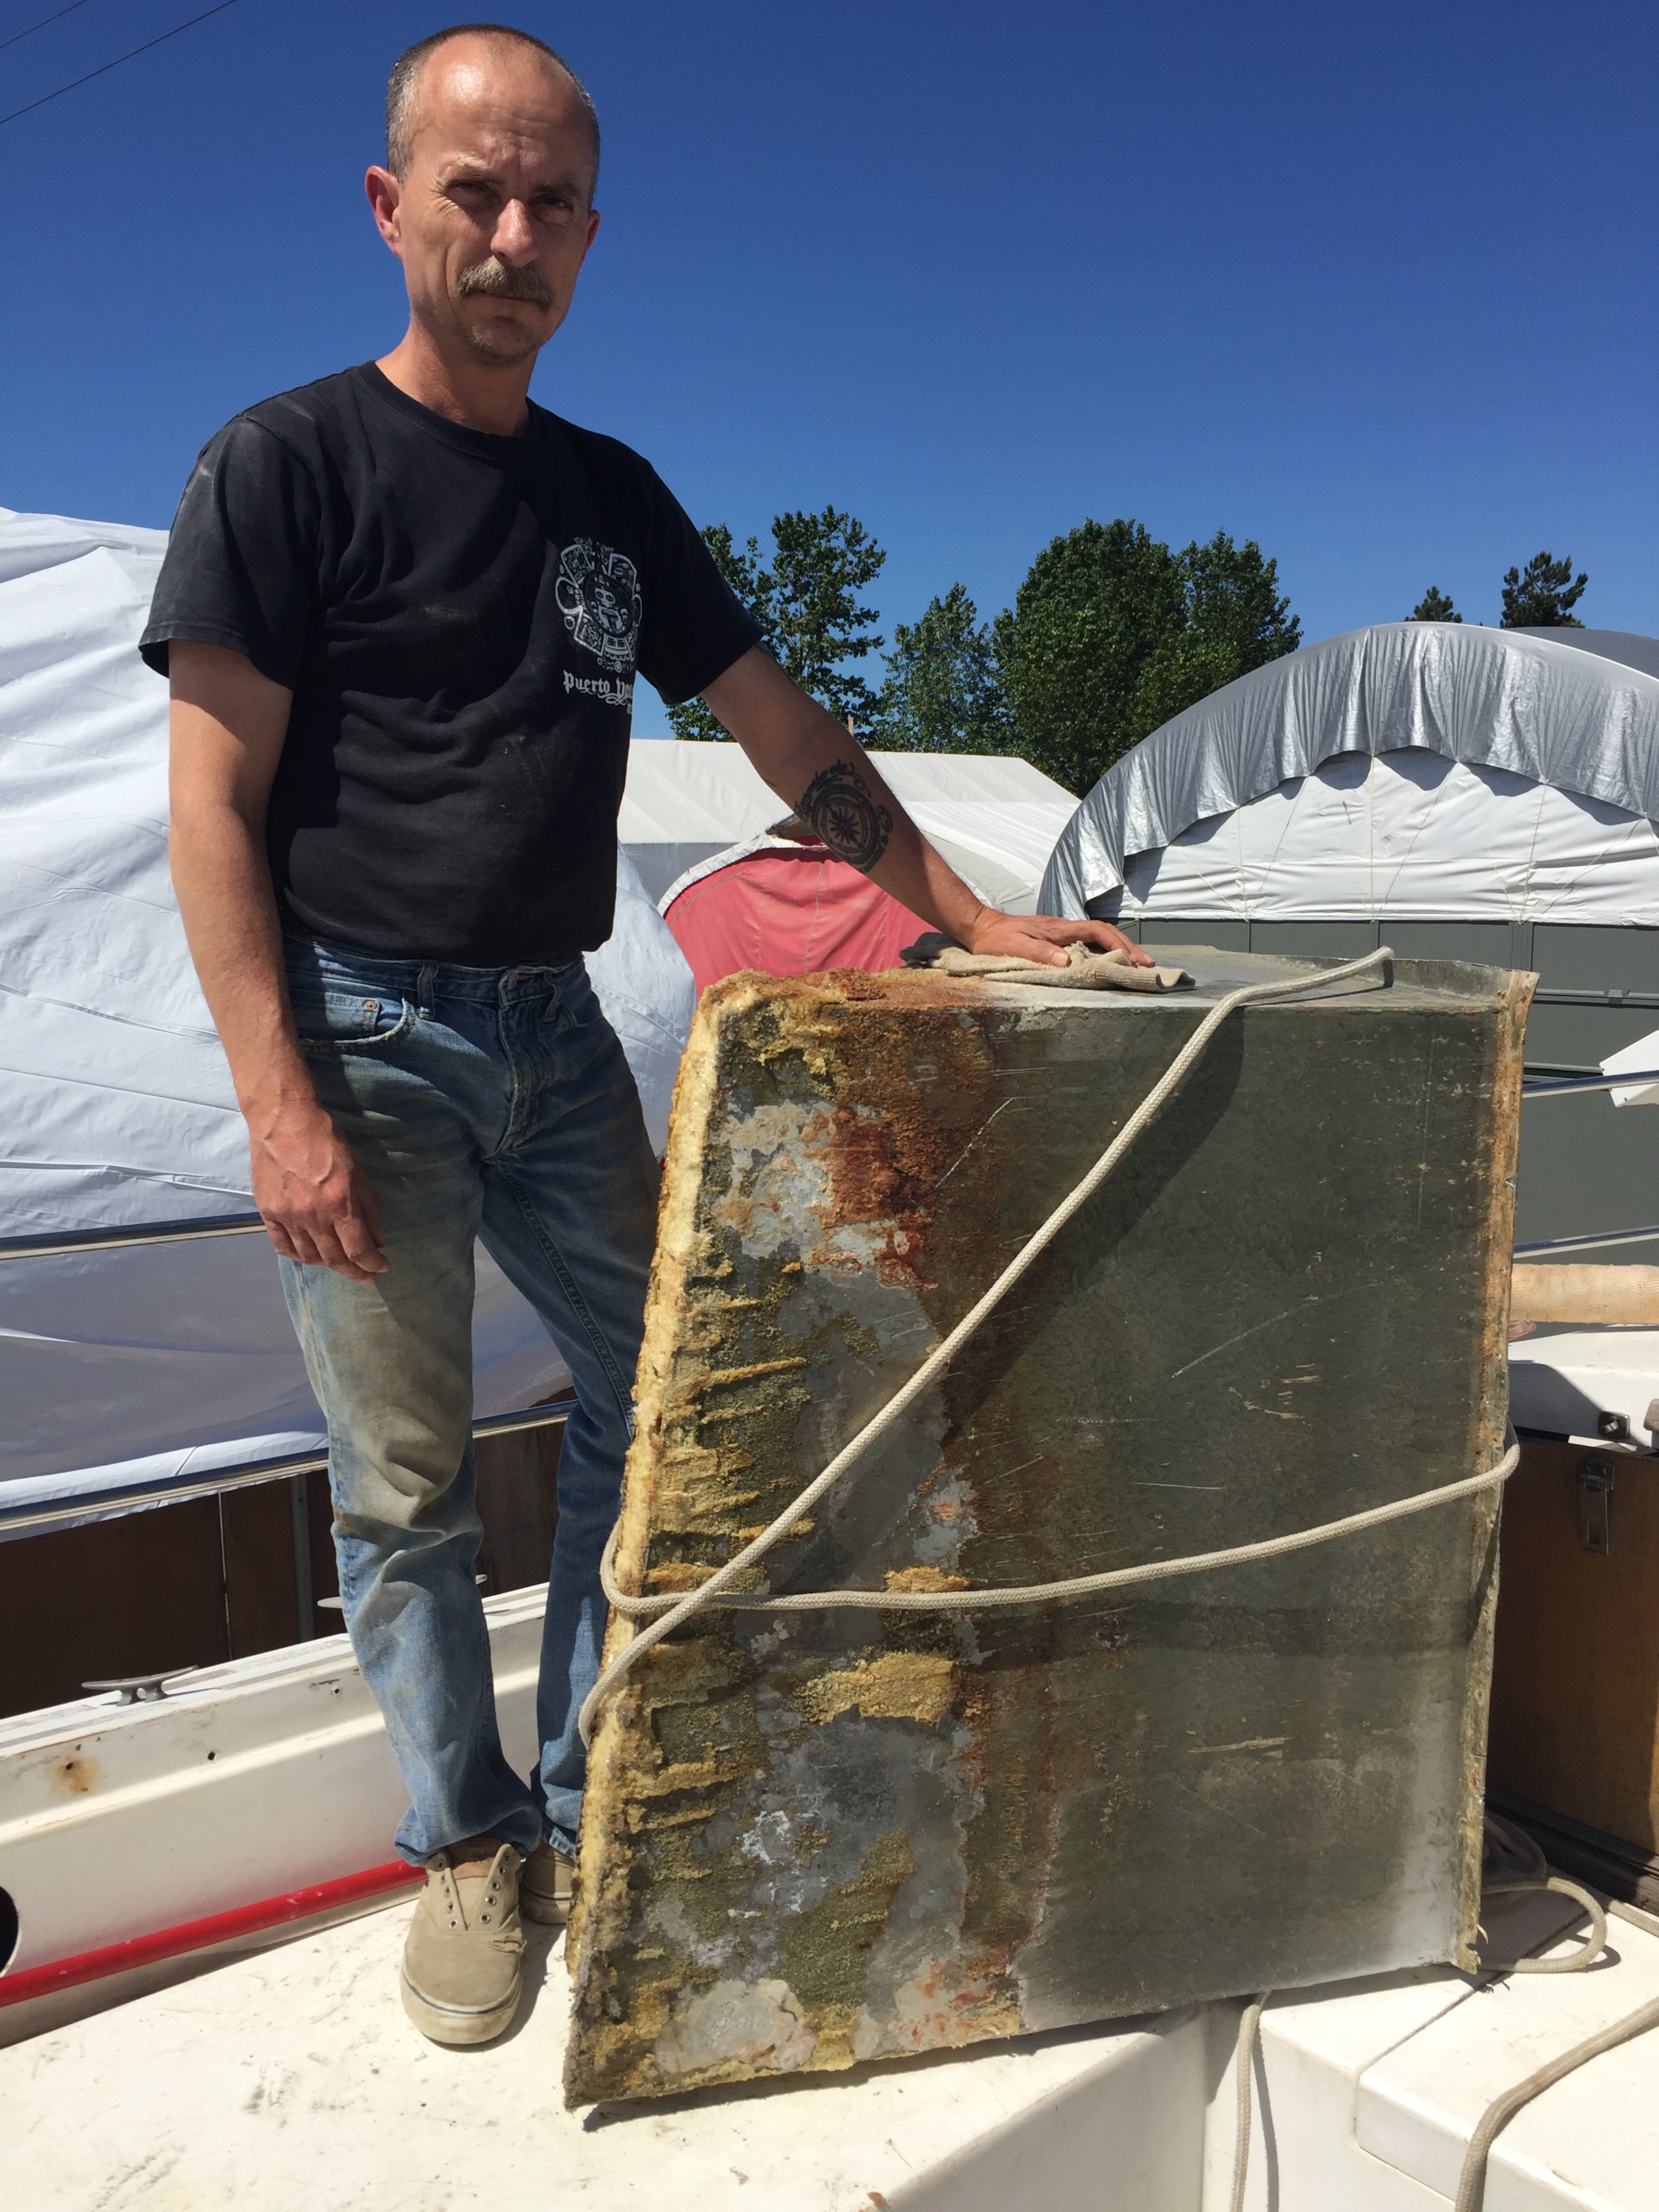
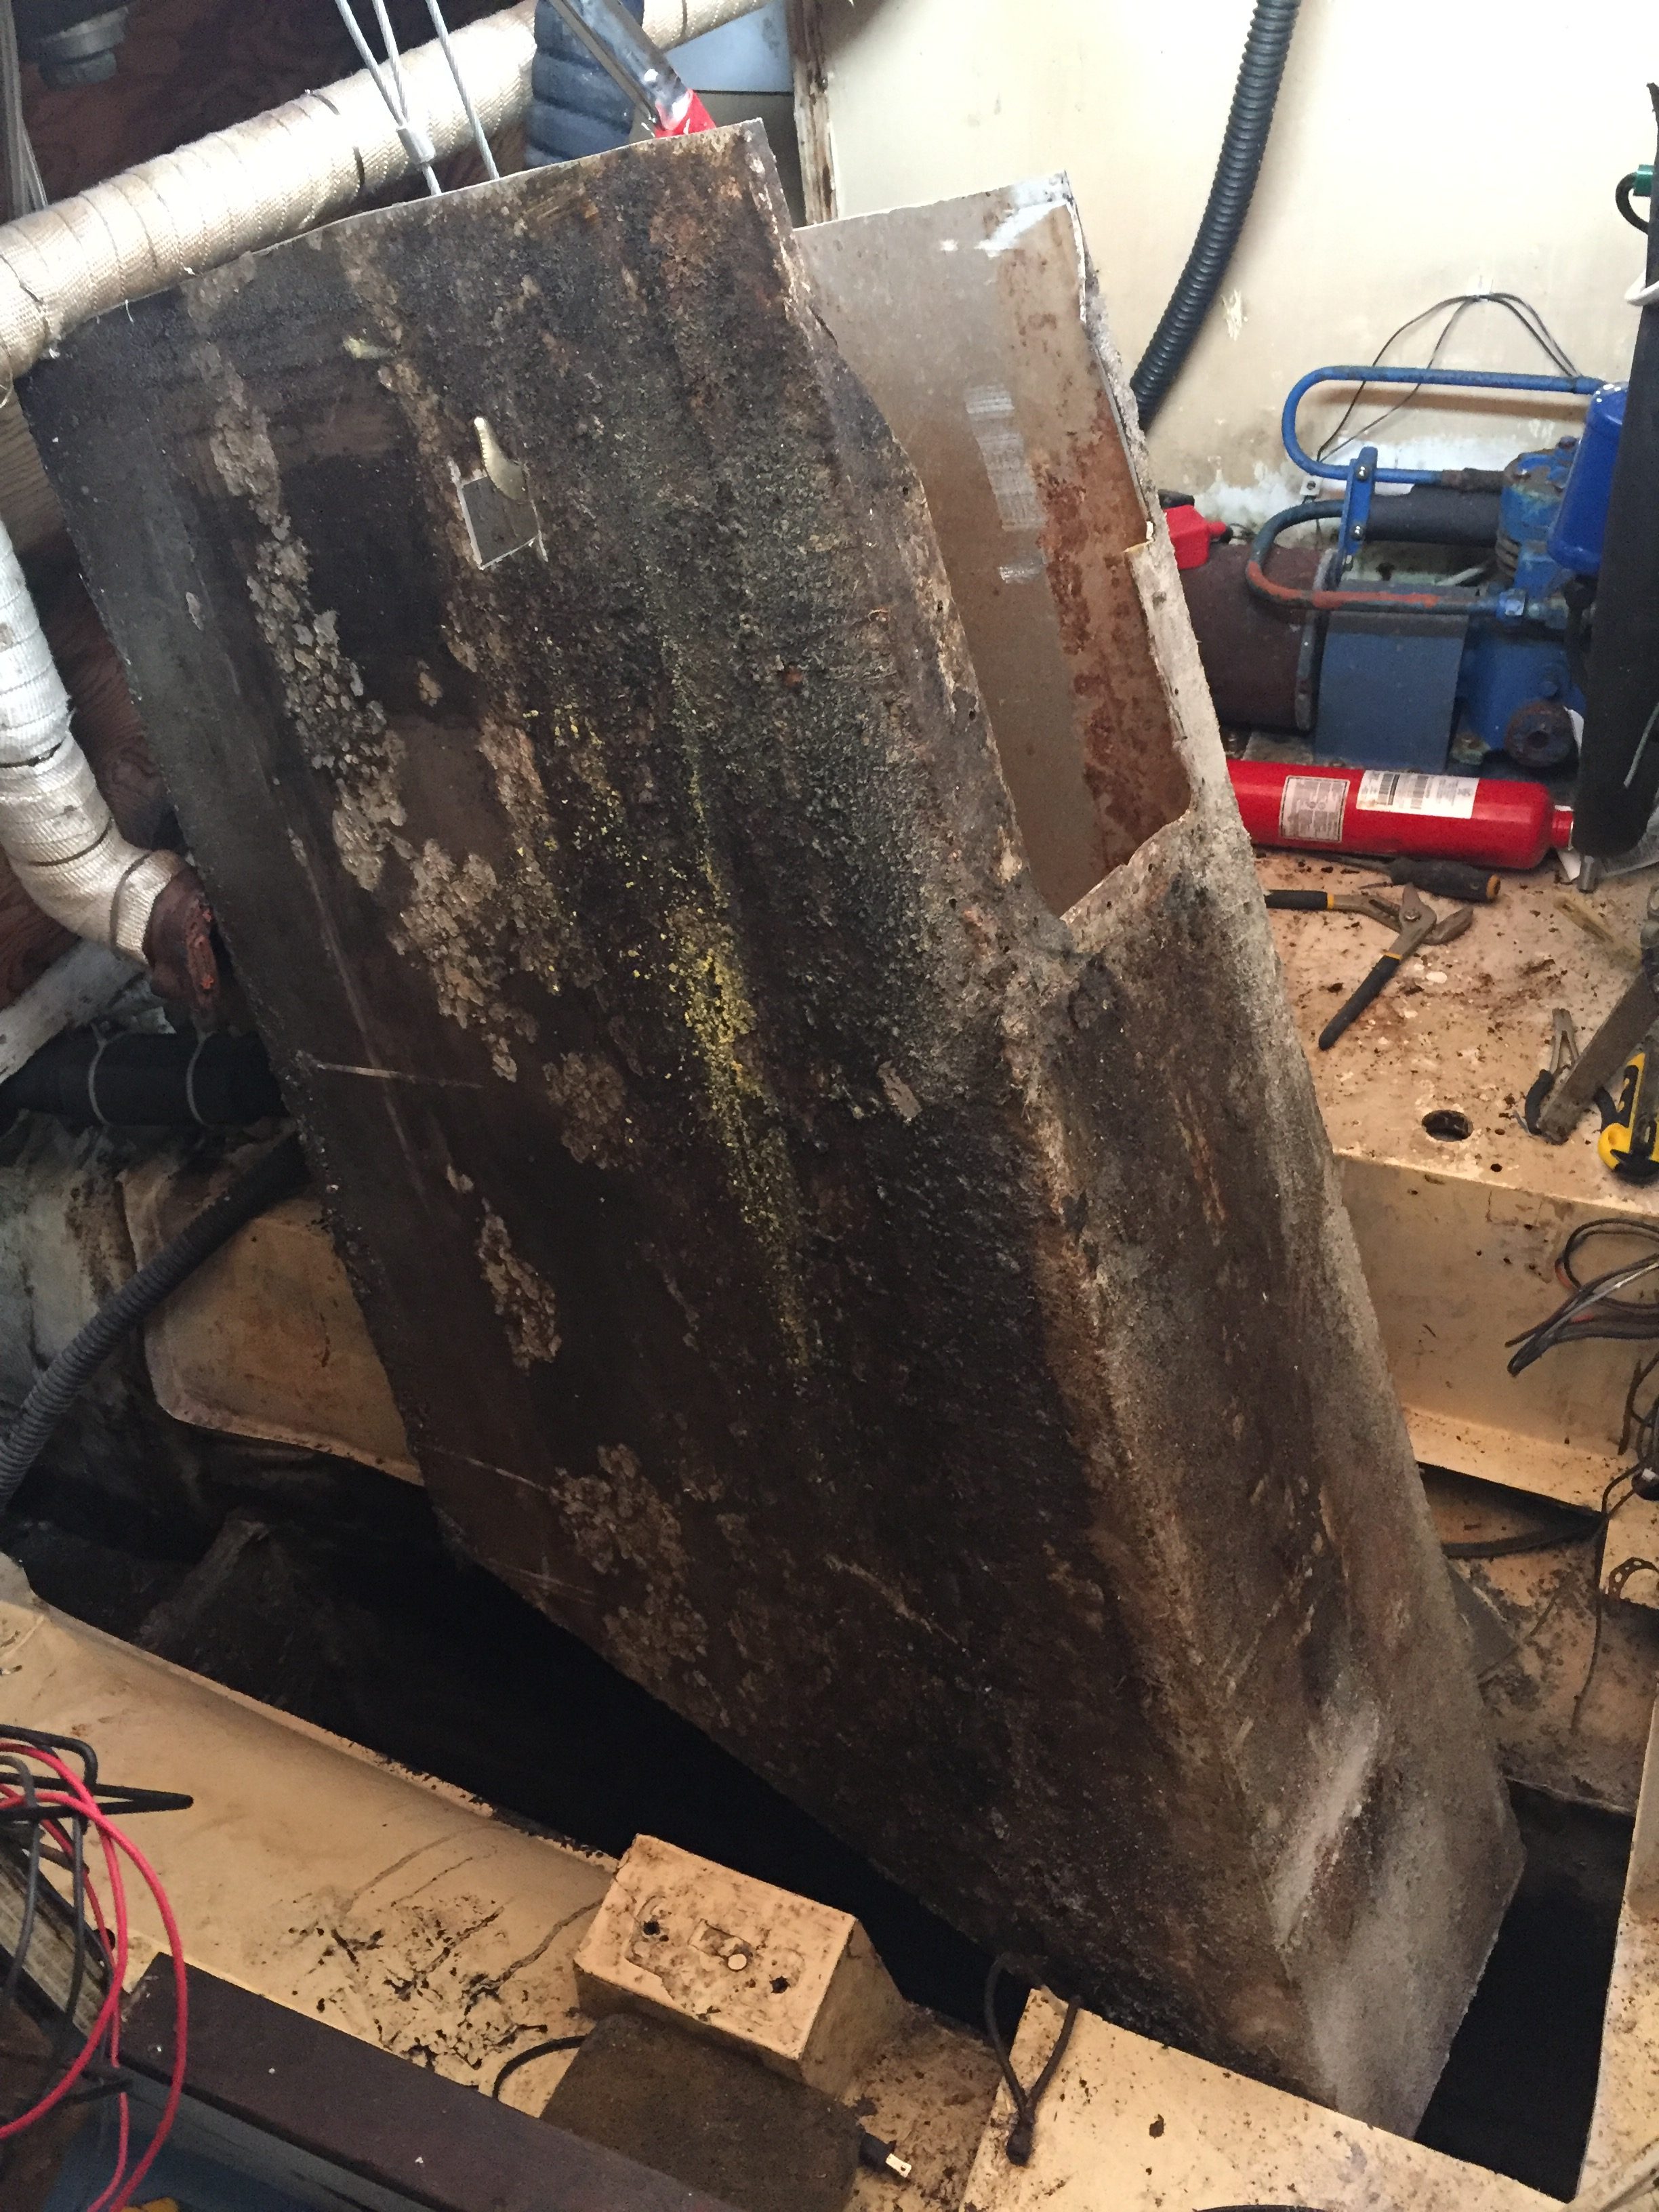
The success for the day is that the tank is officially in 2 pieces now and the back chunk should come out now.
This is definitely one of those jobs that make you ask yourself why. Why rebuild boats? I am so sore this morning it is nuts (I work in software, not physically demanding jobs) Sure we could pay someone to do this but it would be expensive and it would take all the “fun” away.
I am going to try to finish this job today, but I have to return to work tomorrow and I would like a little bit of relaxation this weekend so I am not sure how far I will get, and of course I feel like I was hit by a train.
Did I mention I am sore?
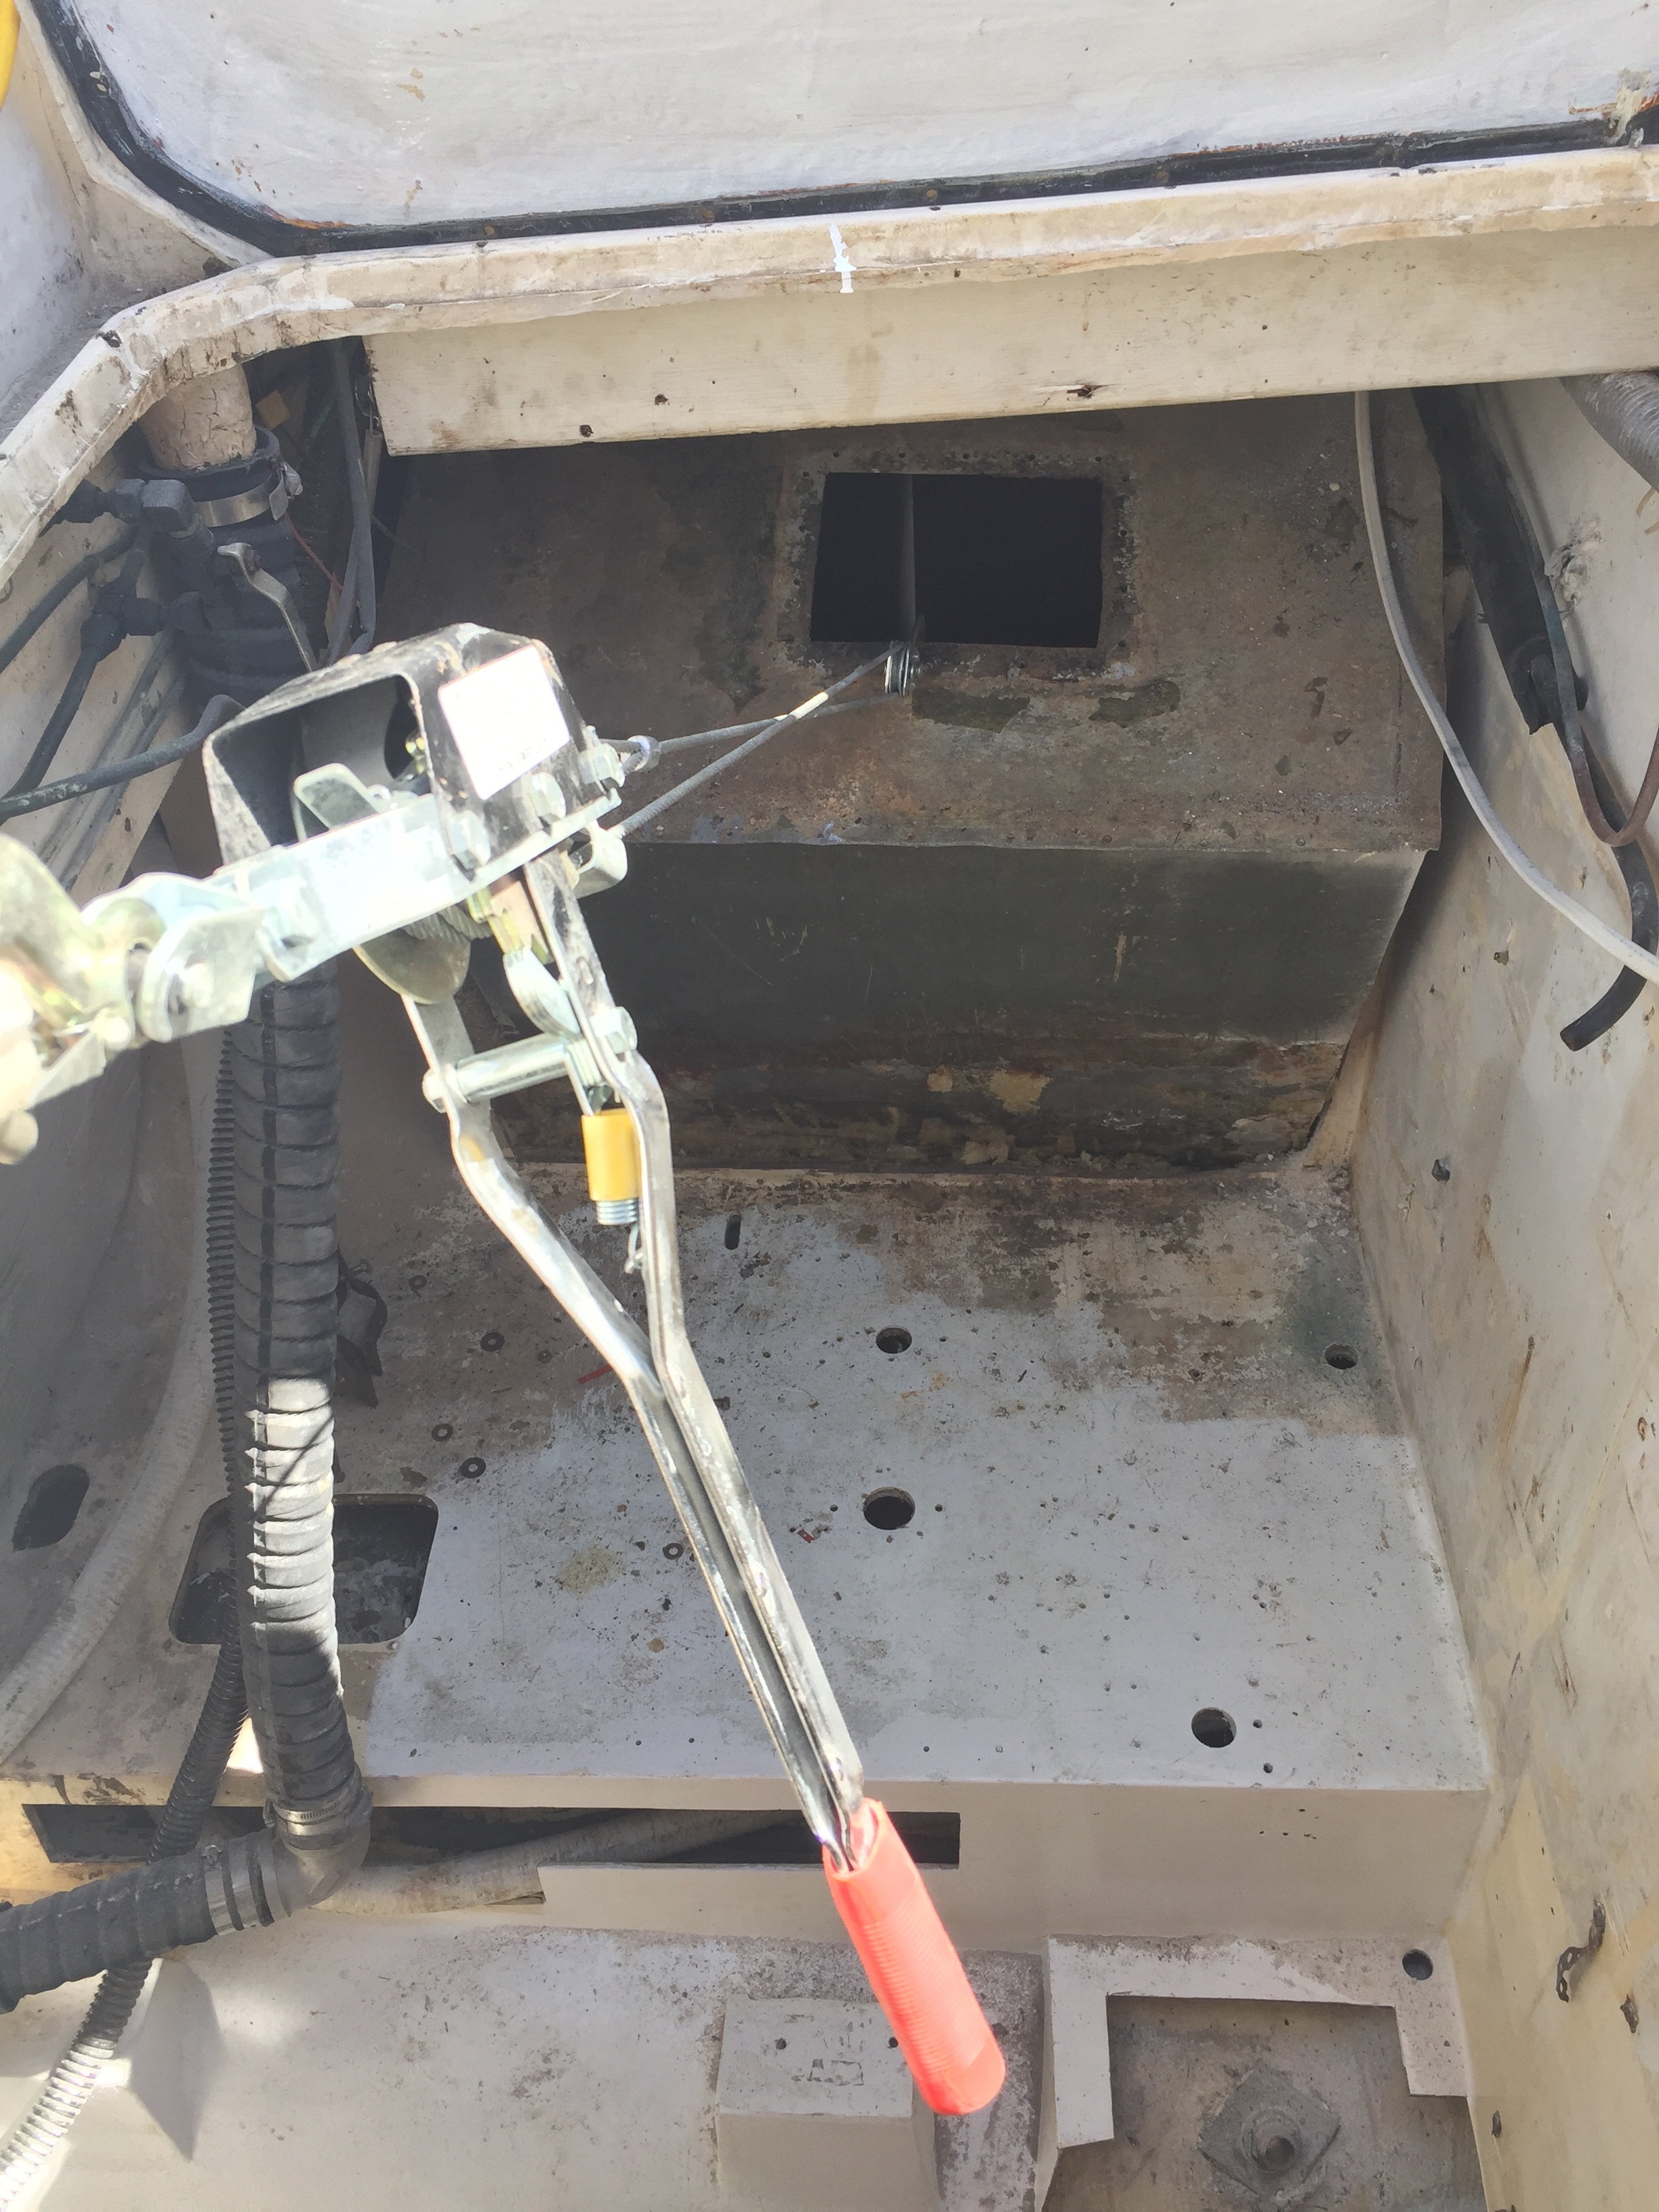
Total time to actually cut the tank, including a 1.5″ x 1.5″ hole to attach the winch to get it out – 2 hours
Well like any big job in life, the first step is always the hardest. Actually taking a sawzall to the drip pan was intimidating to say the least. I mean I could have just sealed off the tank and let someone else deal with it, but once I made that first cut I was committed to tanking it out.
So I have read everything I can find on the net about removing this beast right up to cutting a giant hole in the side of the keel to get it out. I decided to take the internal approach.
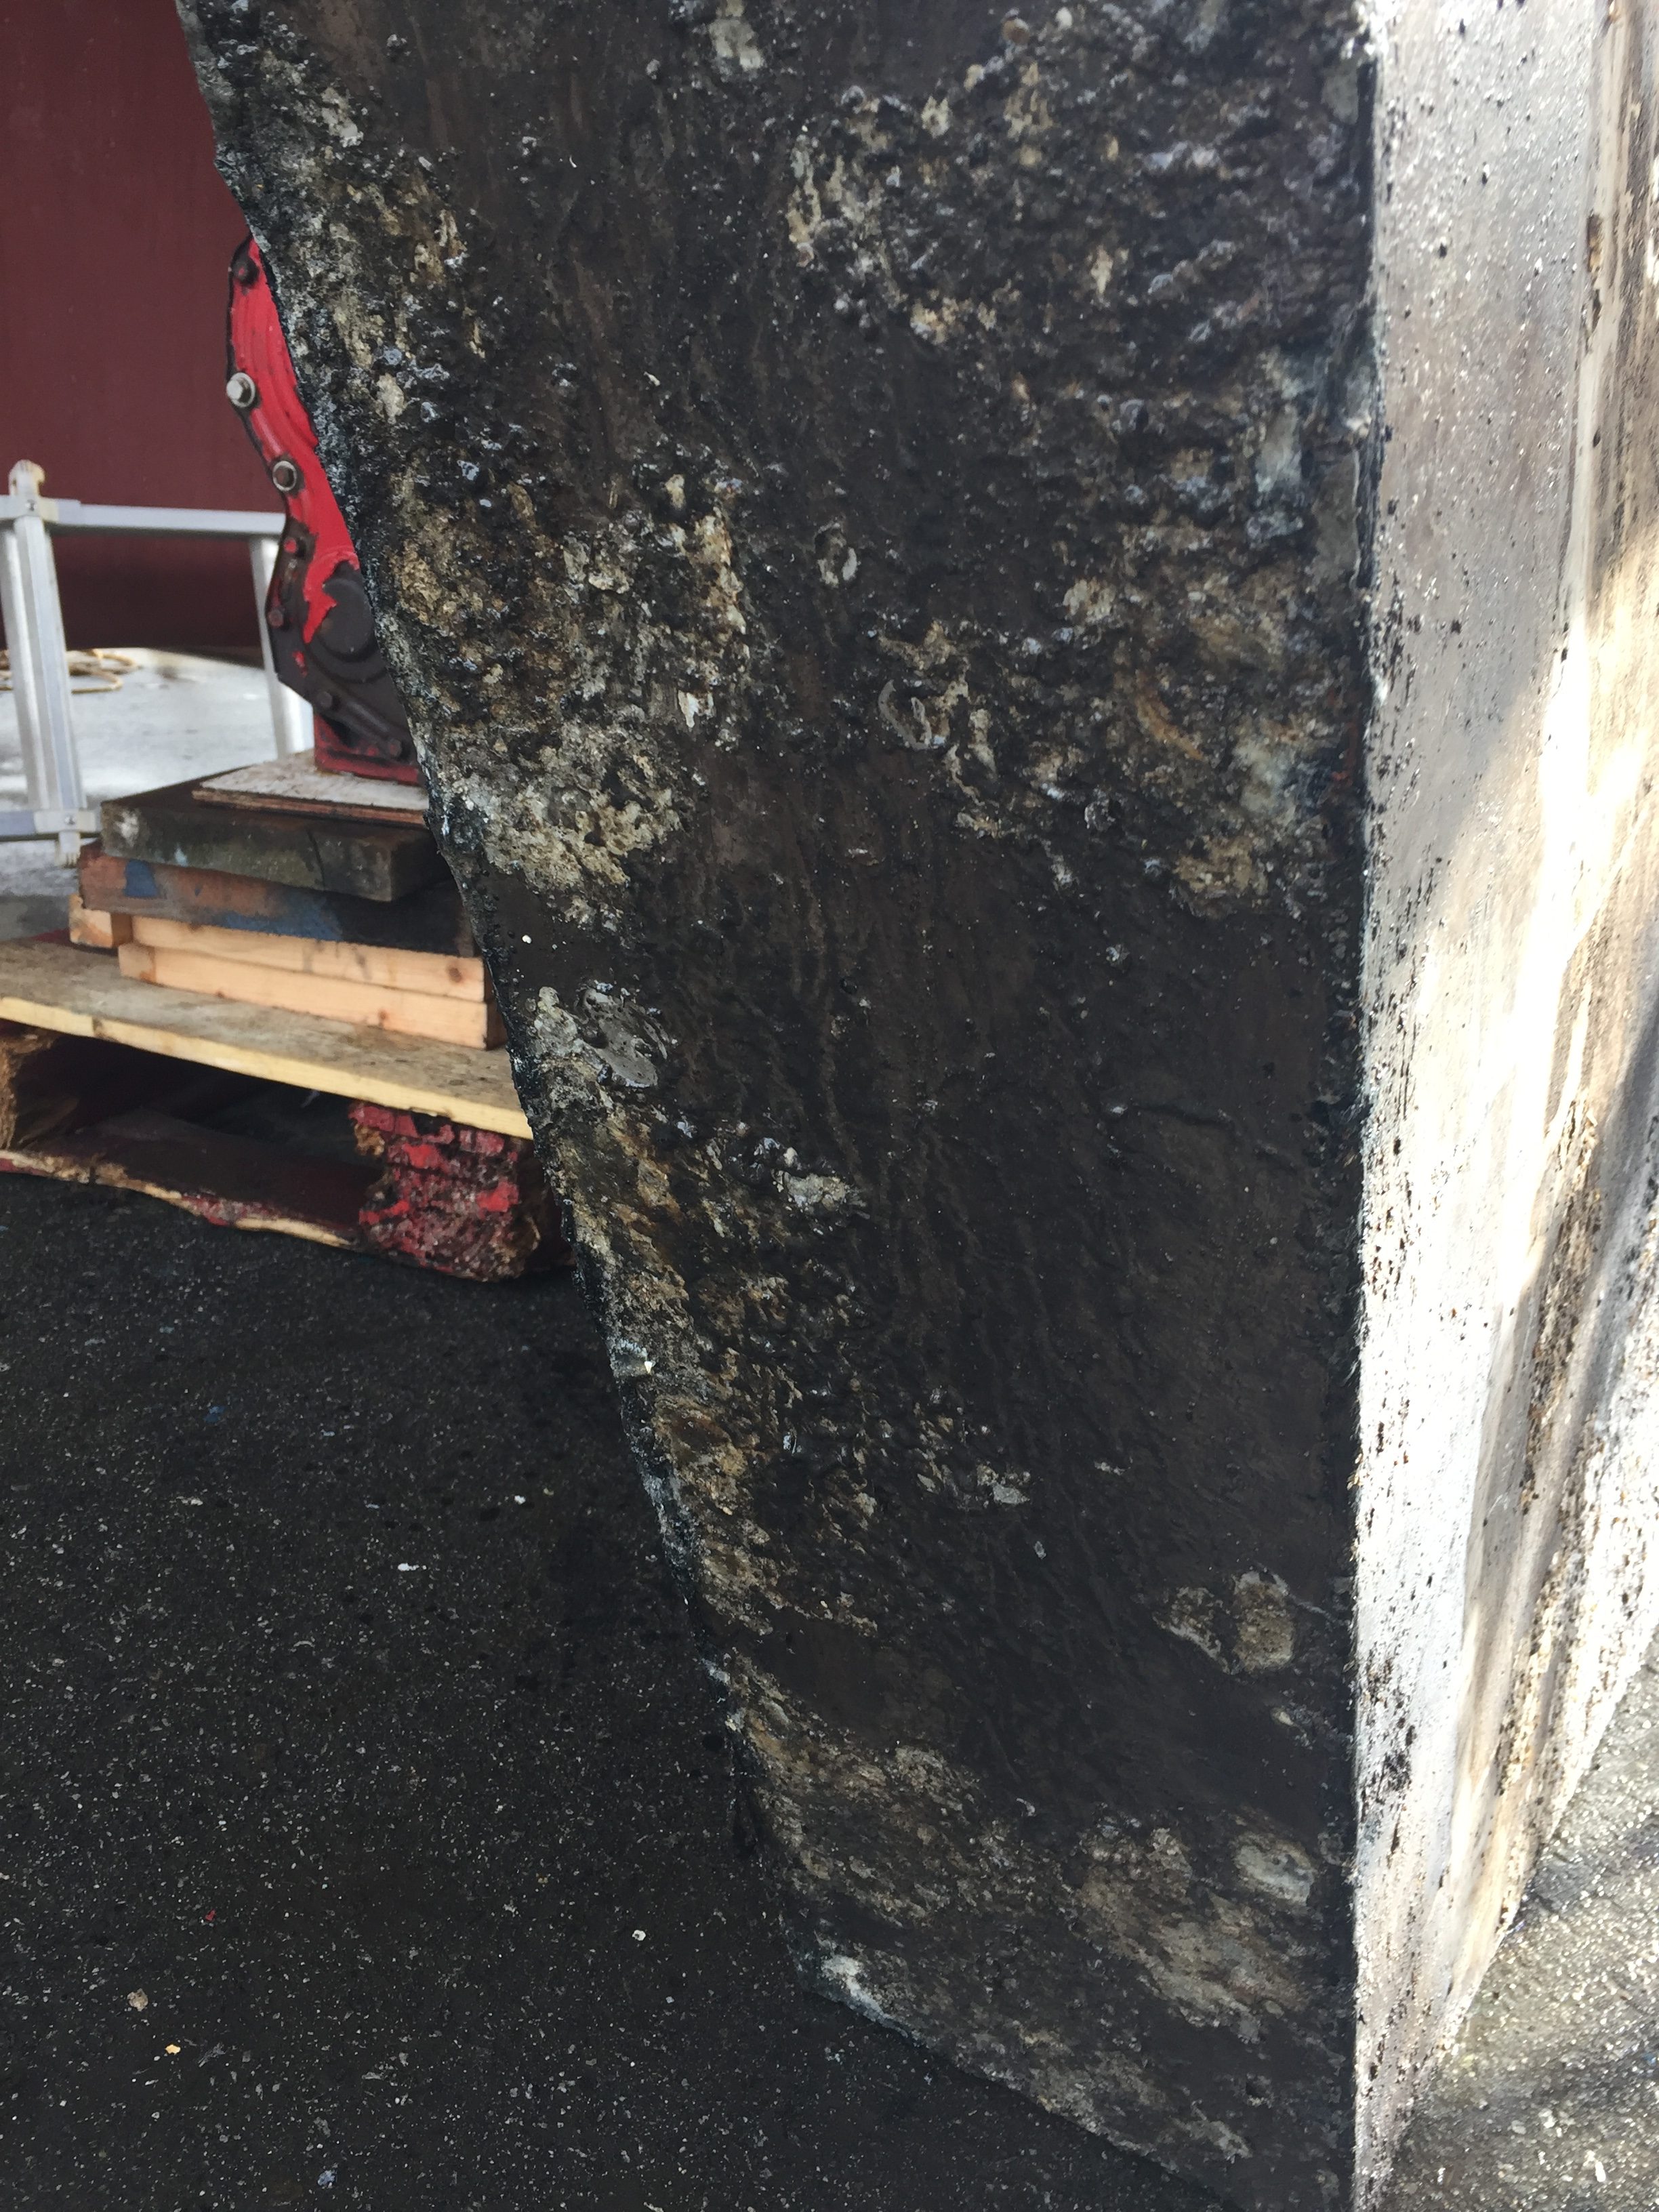
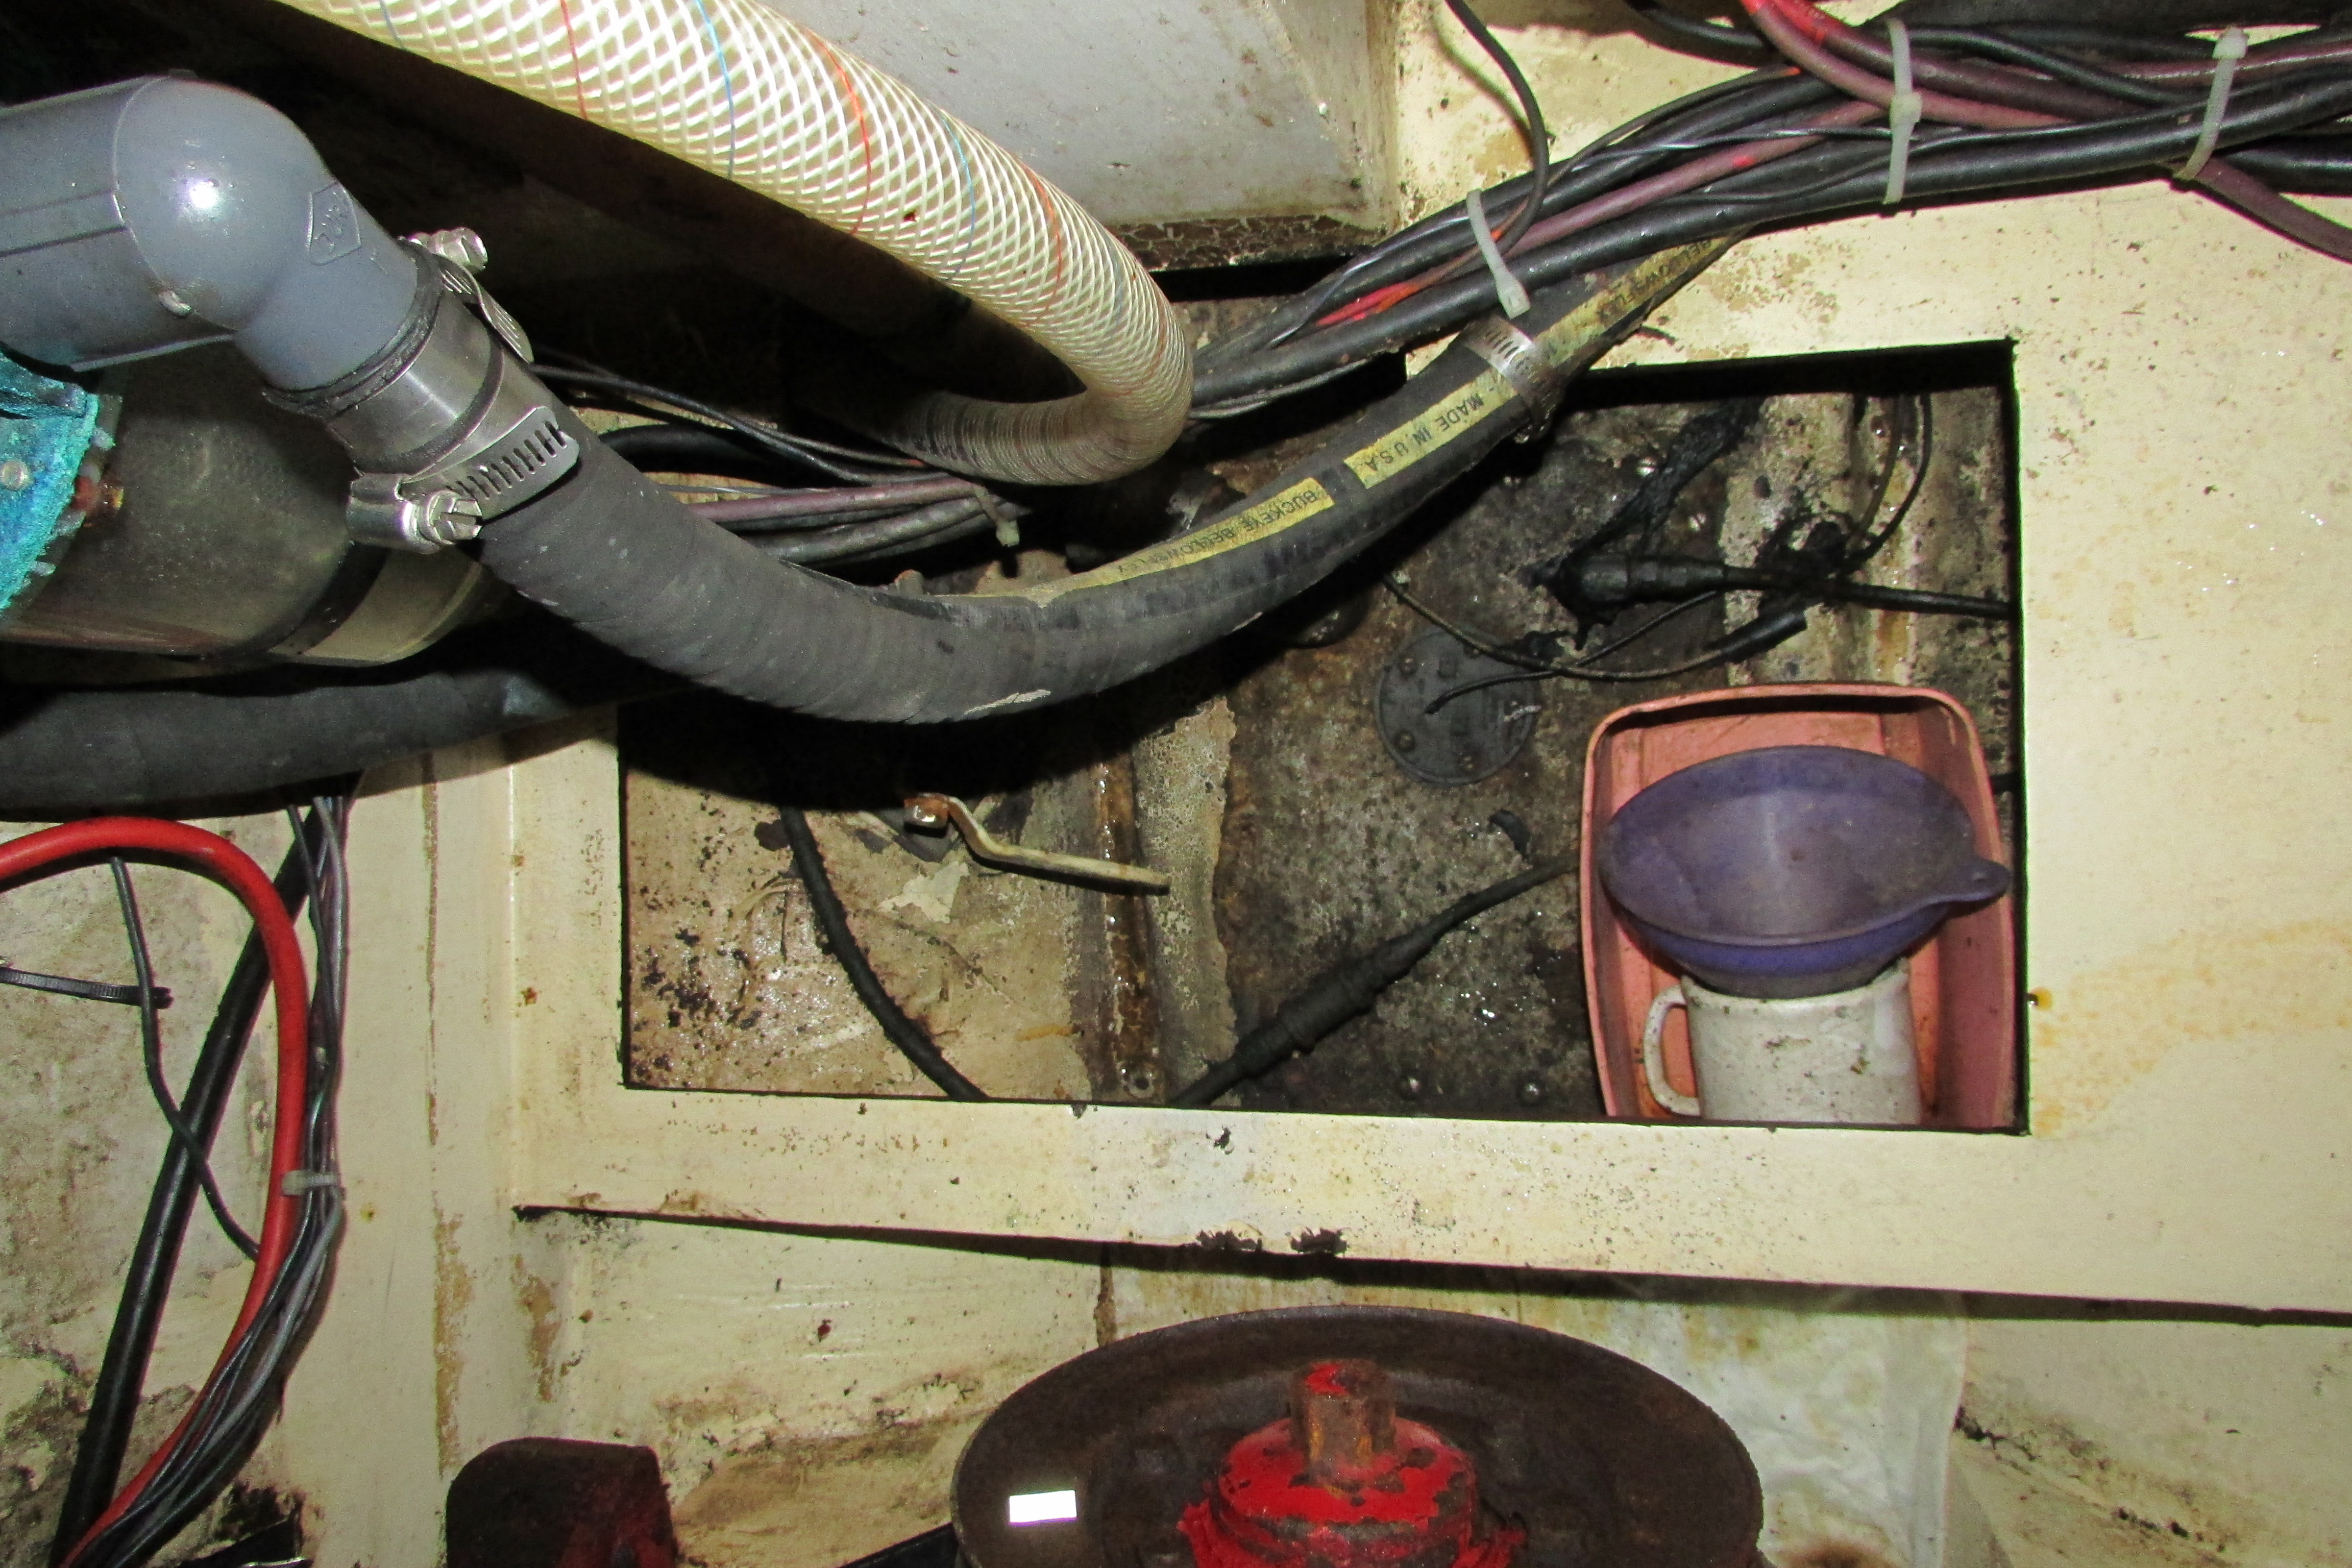
Now perhaps Akupara had been neglected more so than other boats but in all honesty, although the pictures look pretty disgusting, it is just grease, oil, diesel and dirt. It all cleans up with the right degreaser. I knew from when we bought Akupara that the keel tank was coming out as there was an old badly repaired spot on the bottom of the keel from a previous running aground episode that was leaking black ooze. We had the area repaired, see a previous post, but I knew that the tank was leaking. Interestingly enough now, I am not so sure. I will be once we get it out, if I find any holes but as of this moment I am not.
Step one is to cut out the drip pan. Approximate time, not including cleaning, 15 min.
Step 2 is to cut off the tabing on the top of the tank. Again with a sawzall where it would work, but primarily with a grinder using a cutting disk. Approximate time not including cleaning, 20 min.
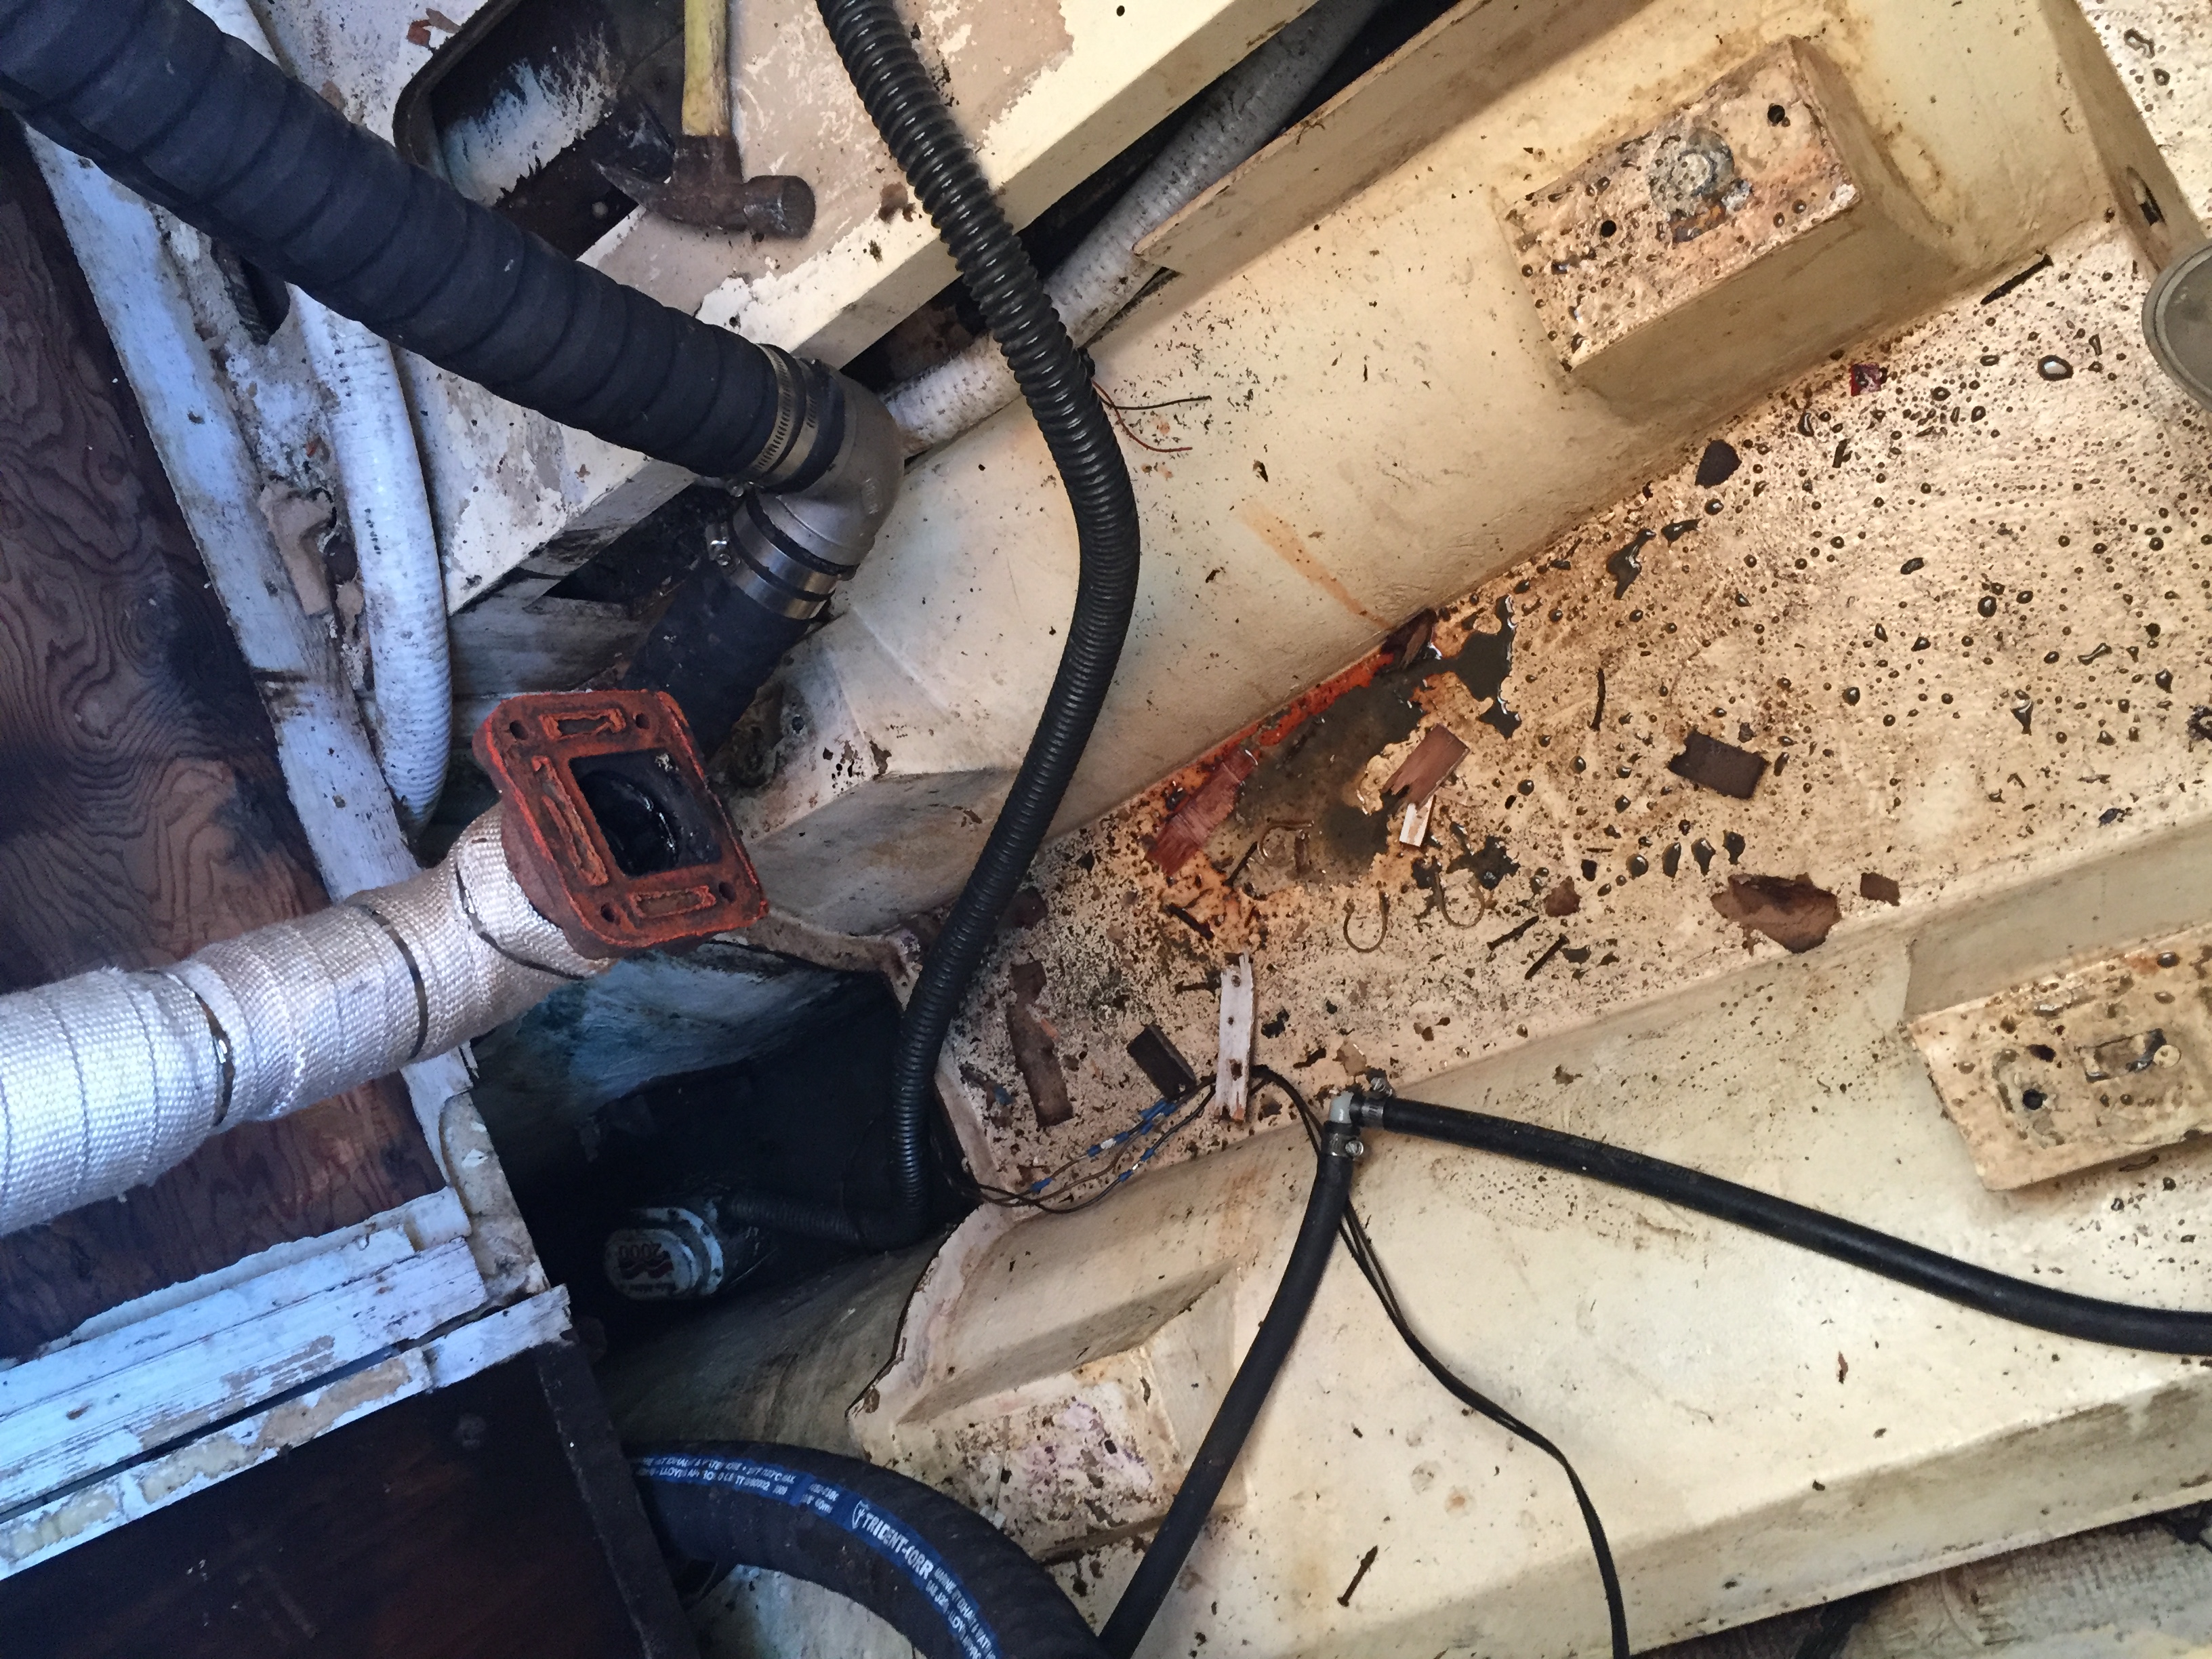
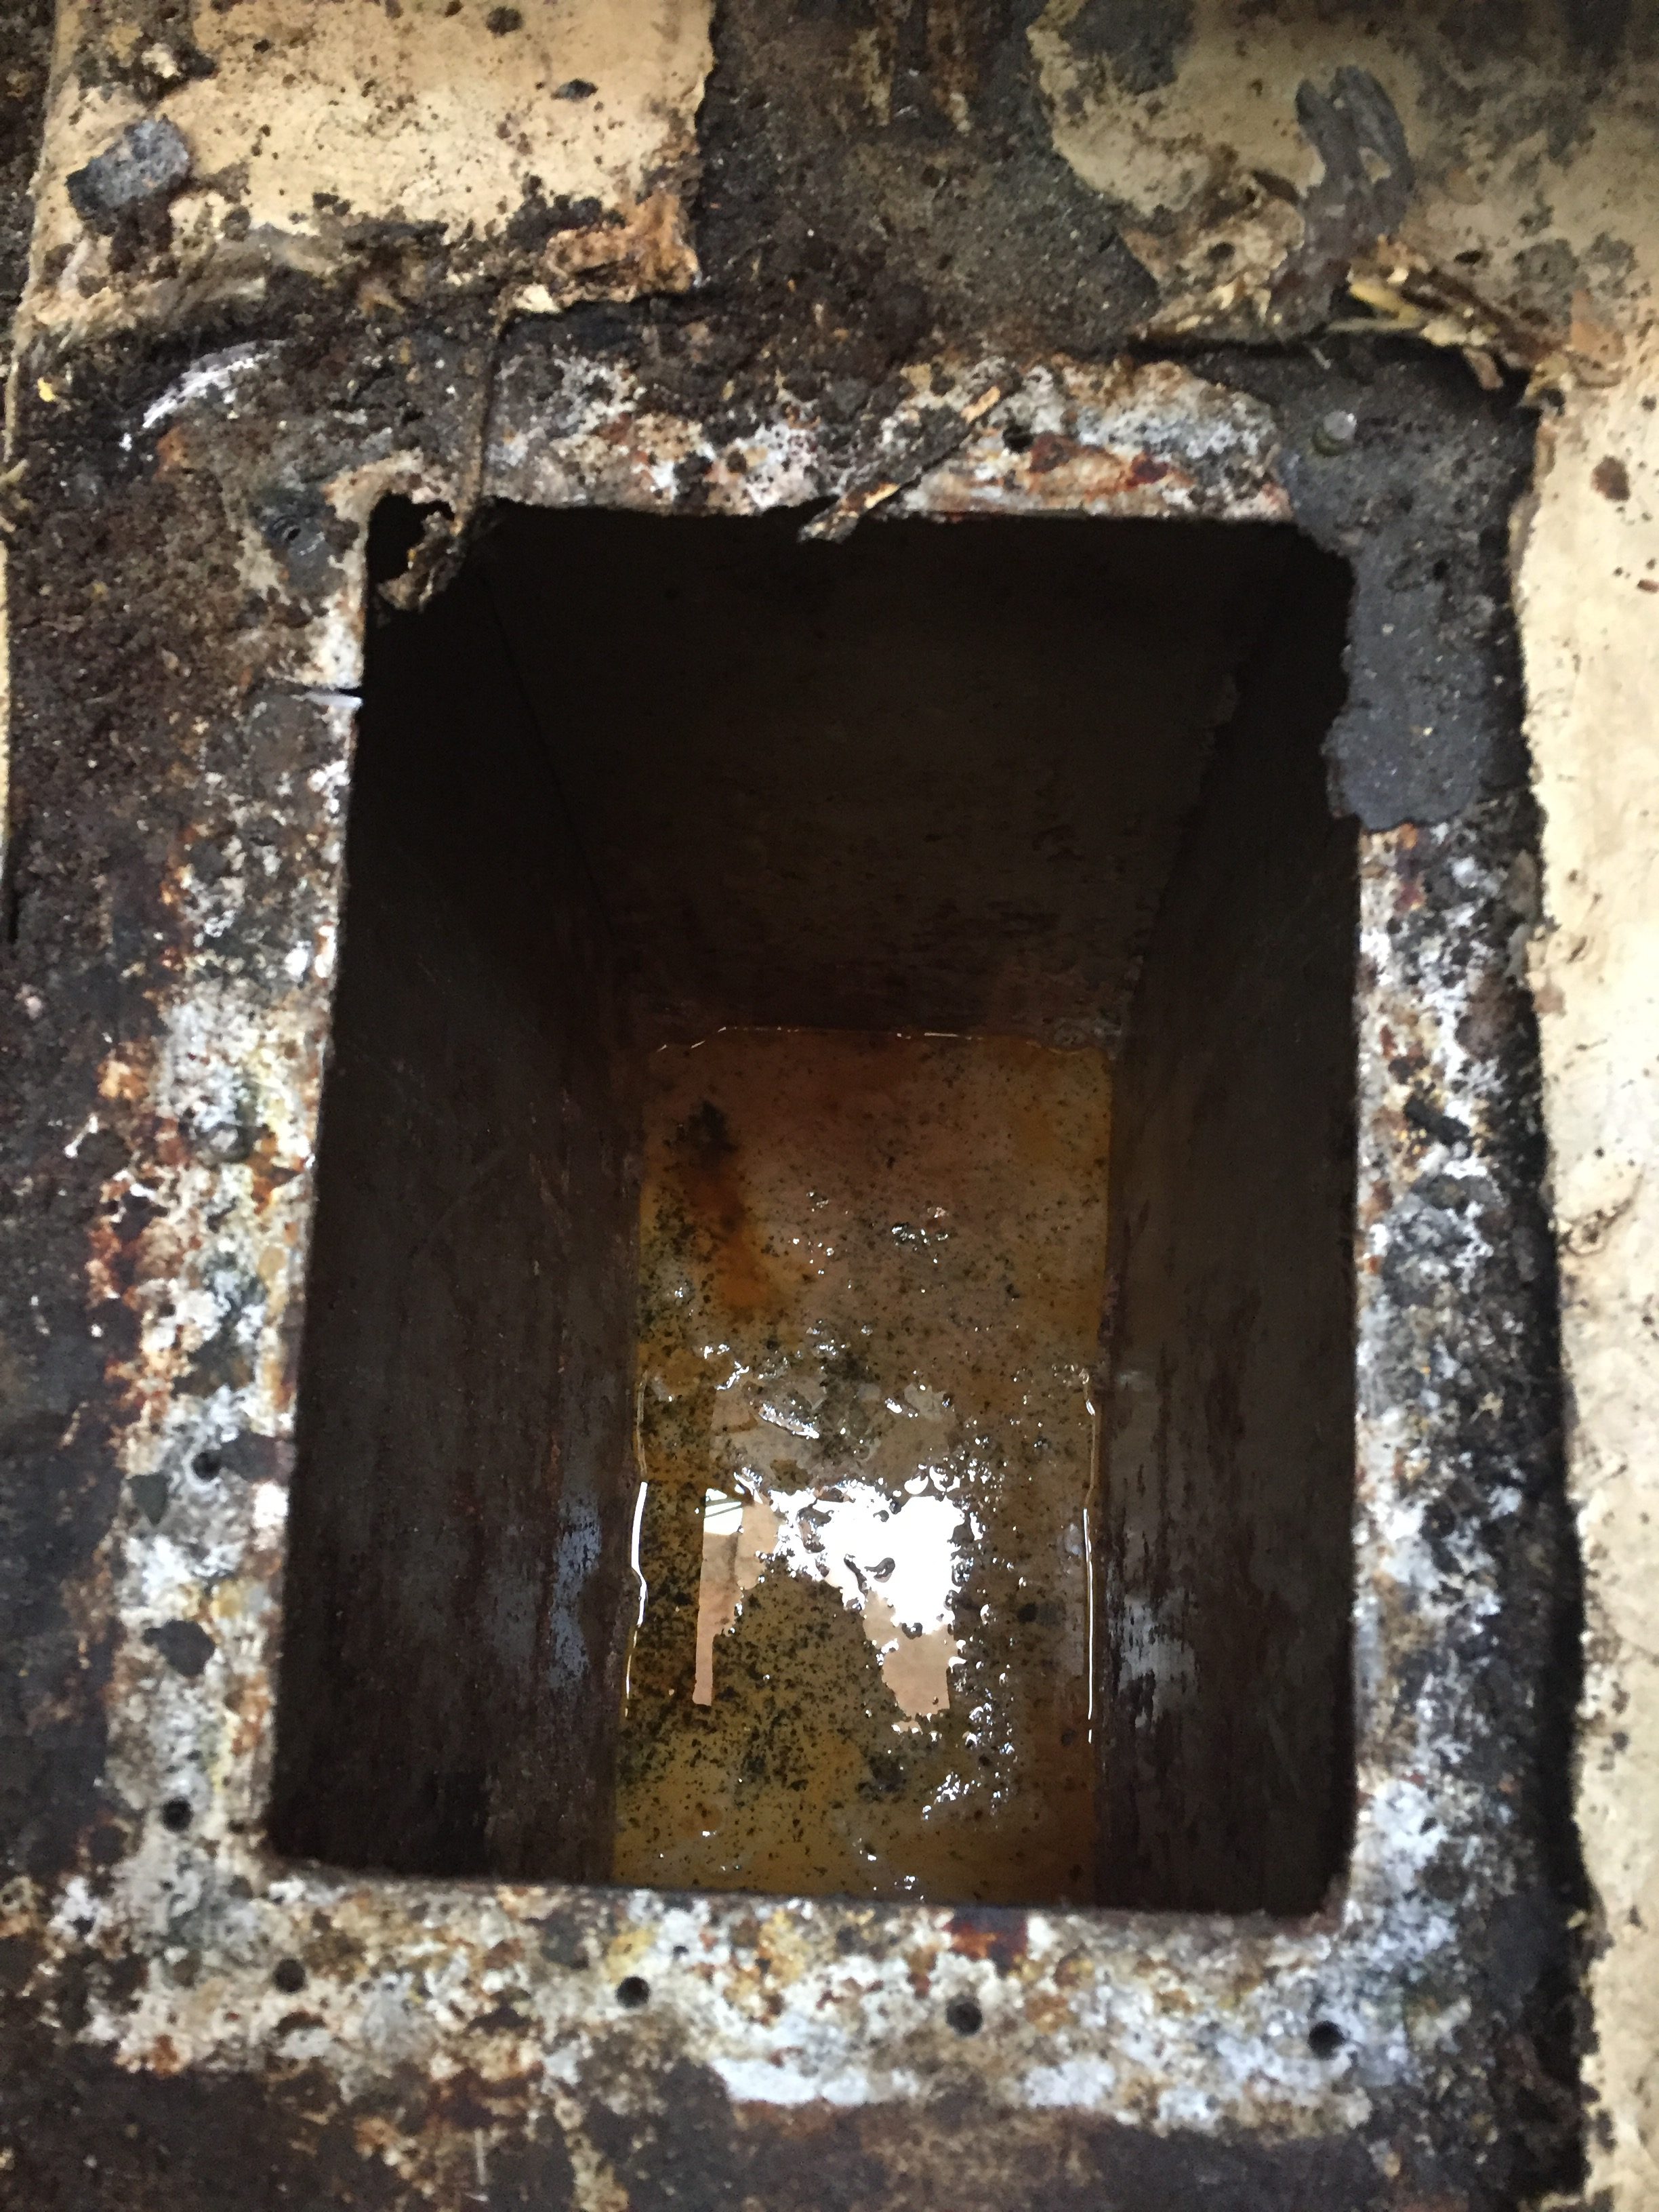
Step 3 I used my new hand saw to poke around to see what this dreaded foam that is holding the tank in place was all about. On Akupara, that foam is either non existent or has deteriorated to the point of non existence. What I learnt at this stage is that so far it looks like the tank is not the culprit of the leaks or the smell. The tabbing was partially peeling in places which I believe sometime over the last 40 years has allowed bilge water and probably spilled diesel and heaven only knows what else to leak down the sides of the tank and slowly fill the area, thereby dissolving the foam.
If you look closely in the picture above, this is looking down from the top of the tank approximately where the front of the engine would be, you can see the water that has accumulated in there.
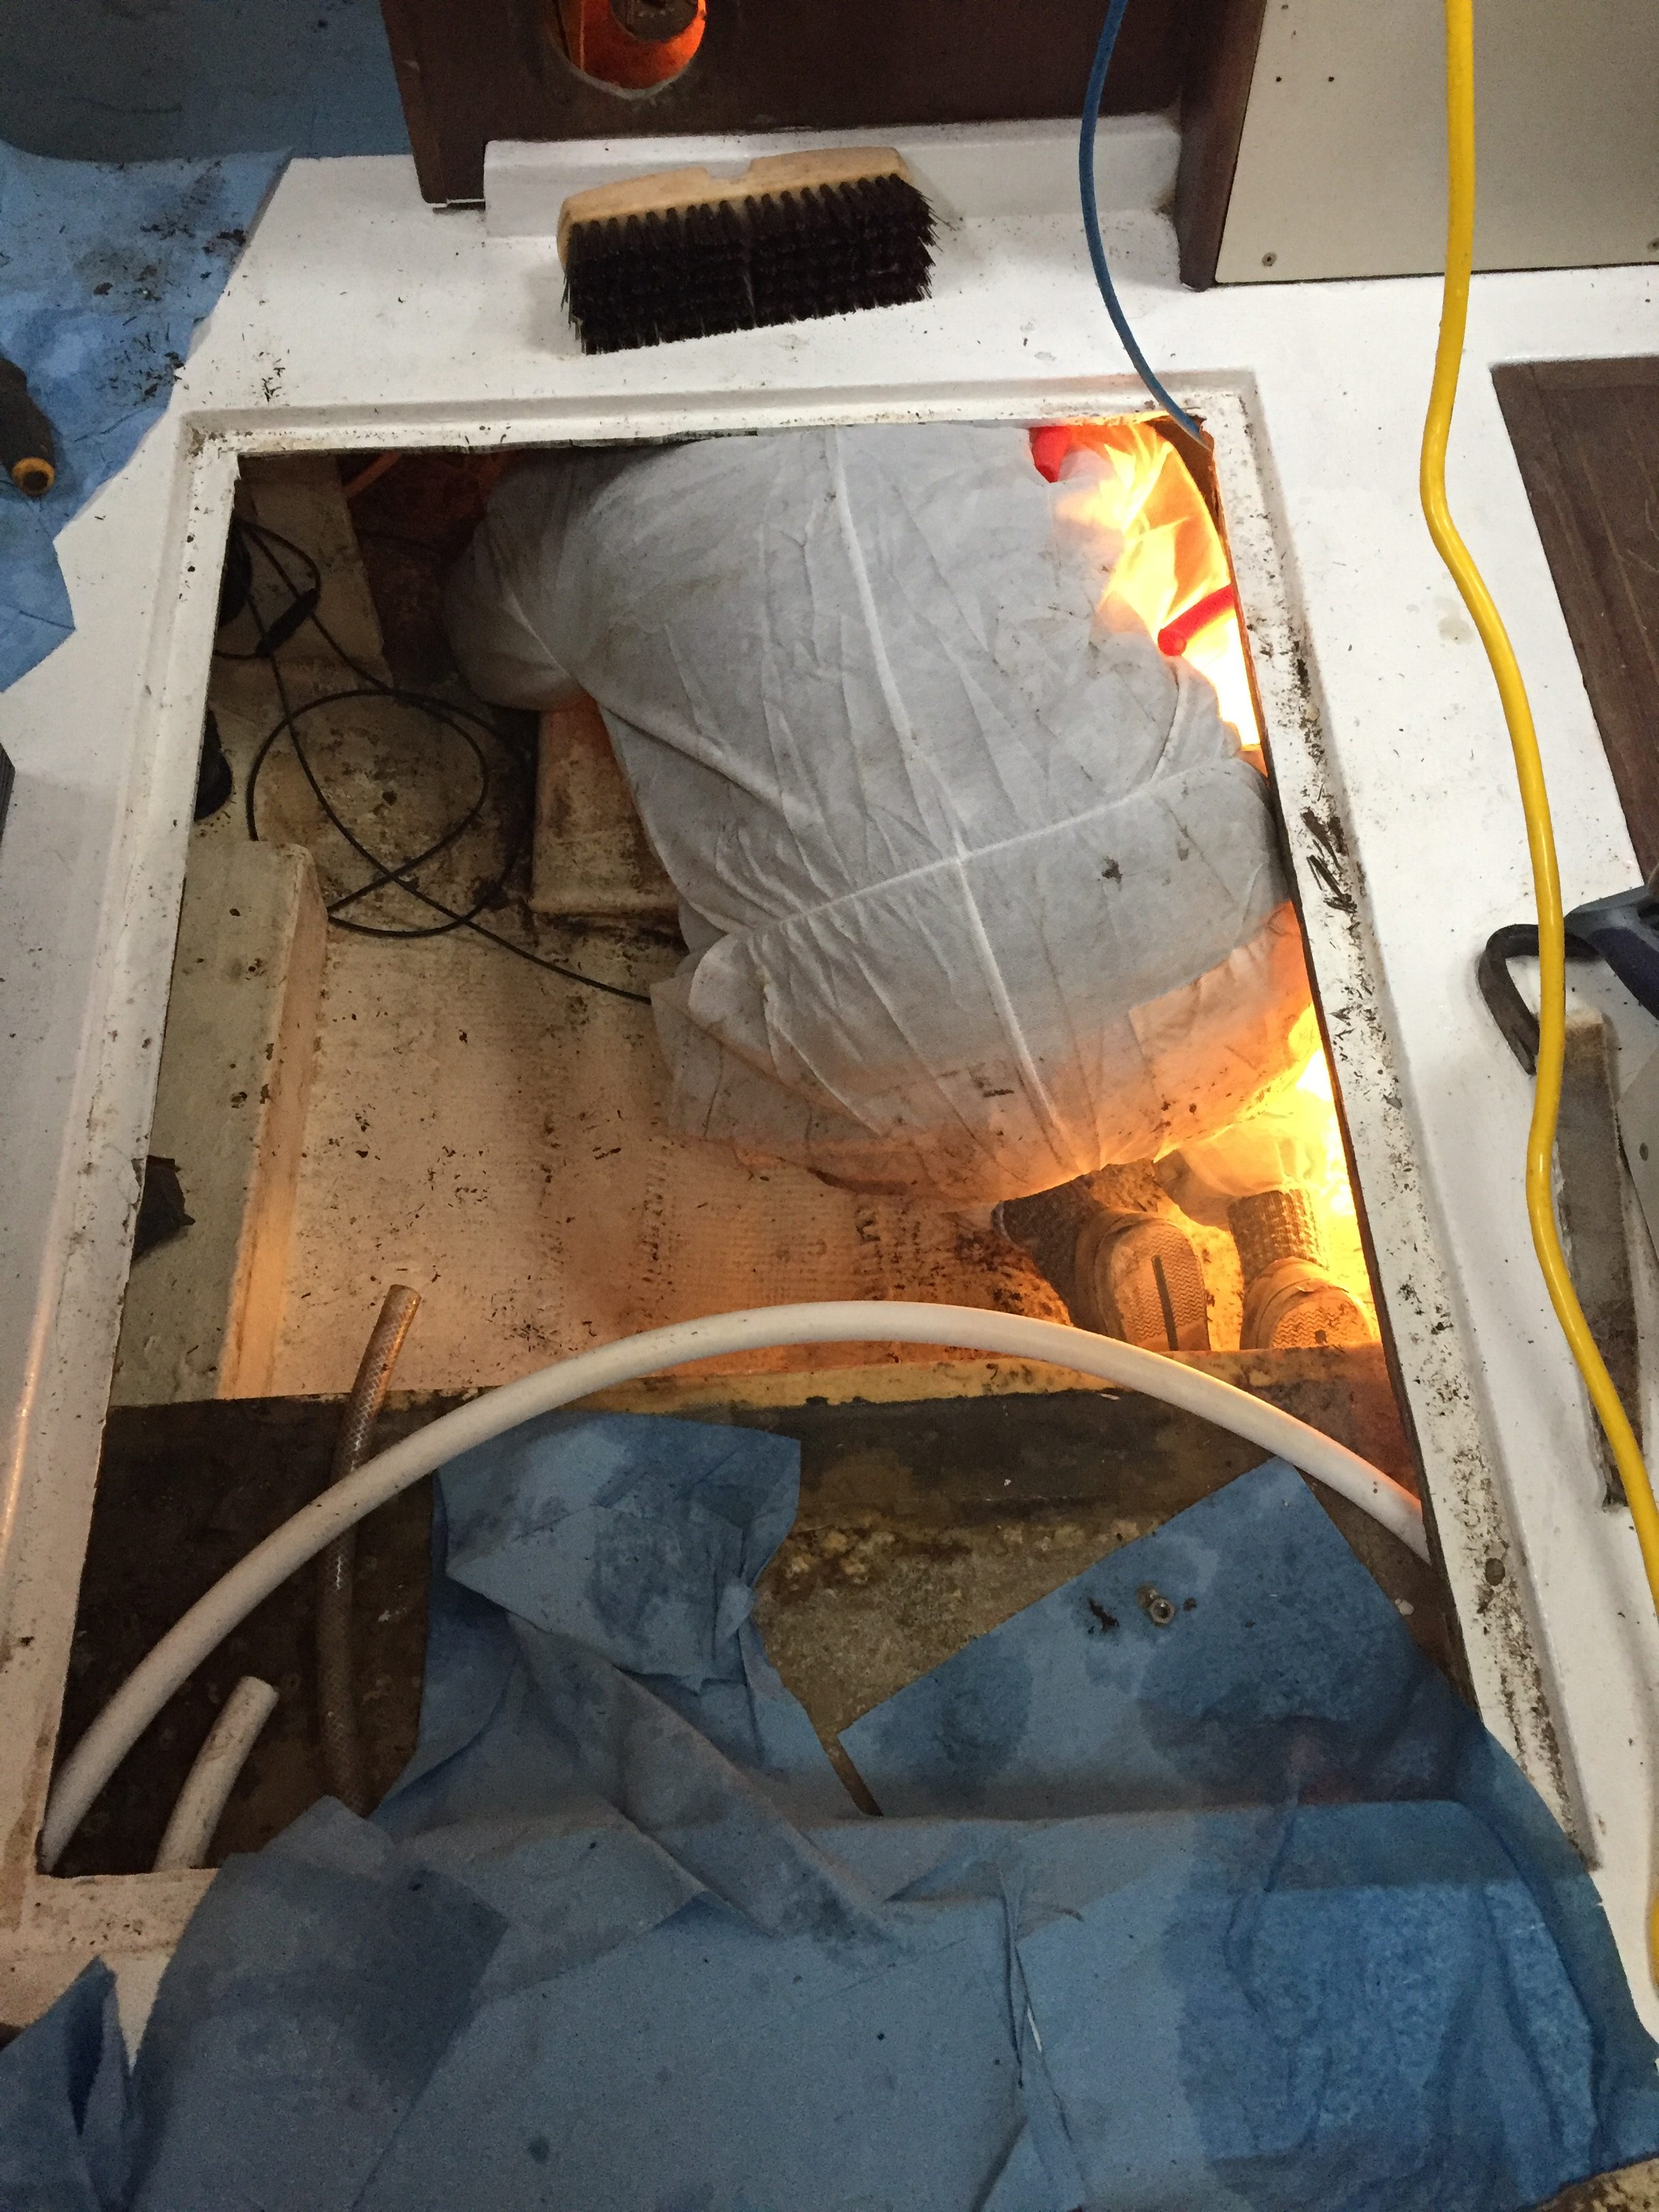
At one point I had a bit of smoke or steam that was rising up from the depths and I decided to play it safe, rather than have an even bigger issue on my hands. I have seen video of fiberglass boats burning and the thought has always been put it out before it gets started or abandon ship because then it would just be too late.
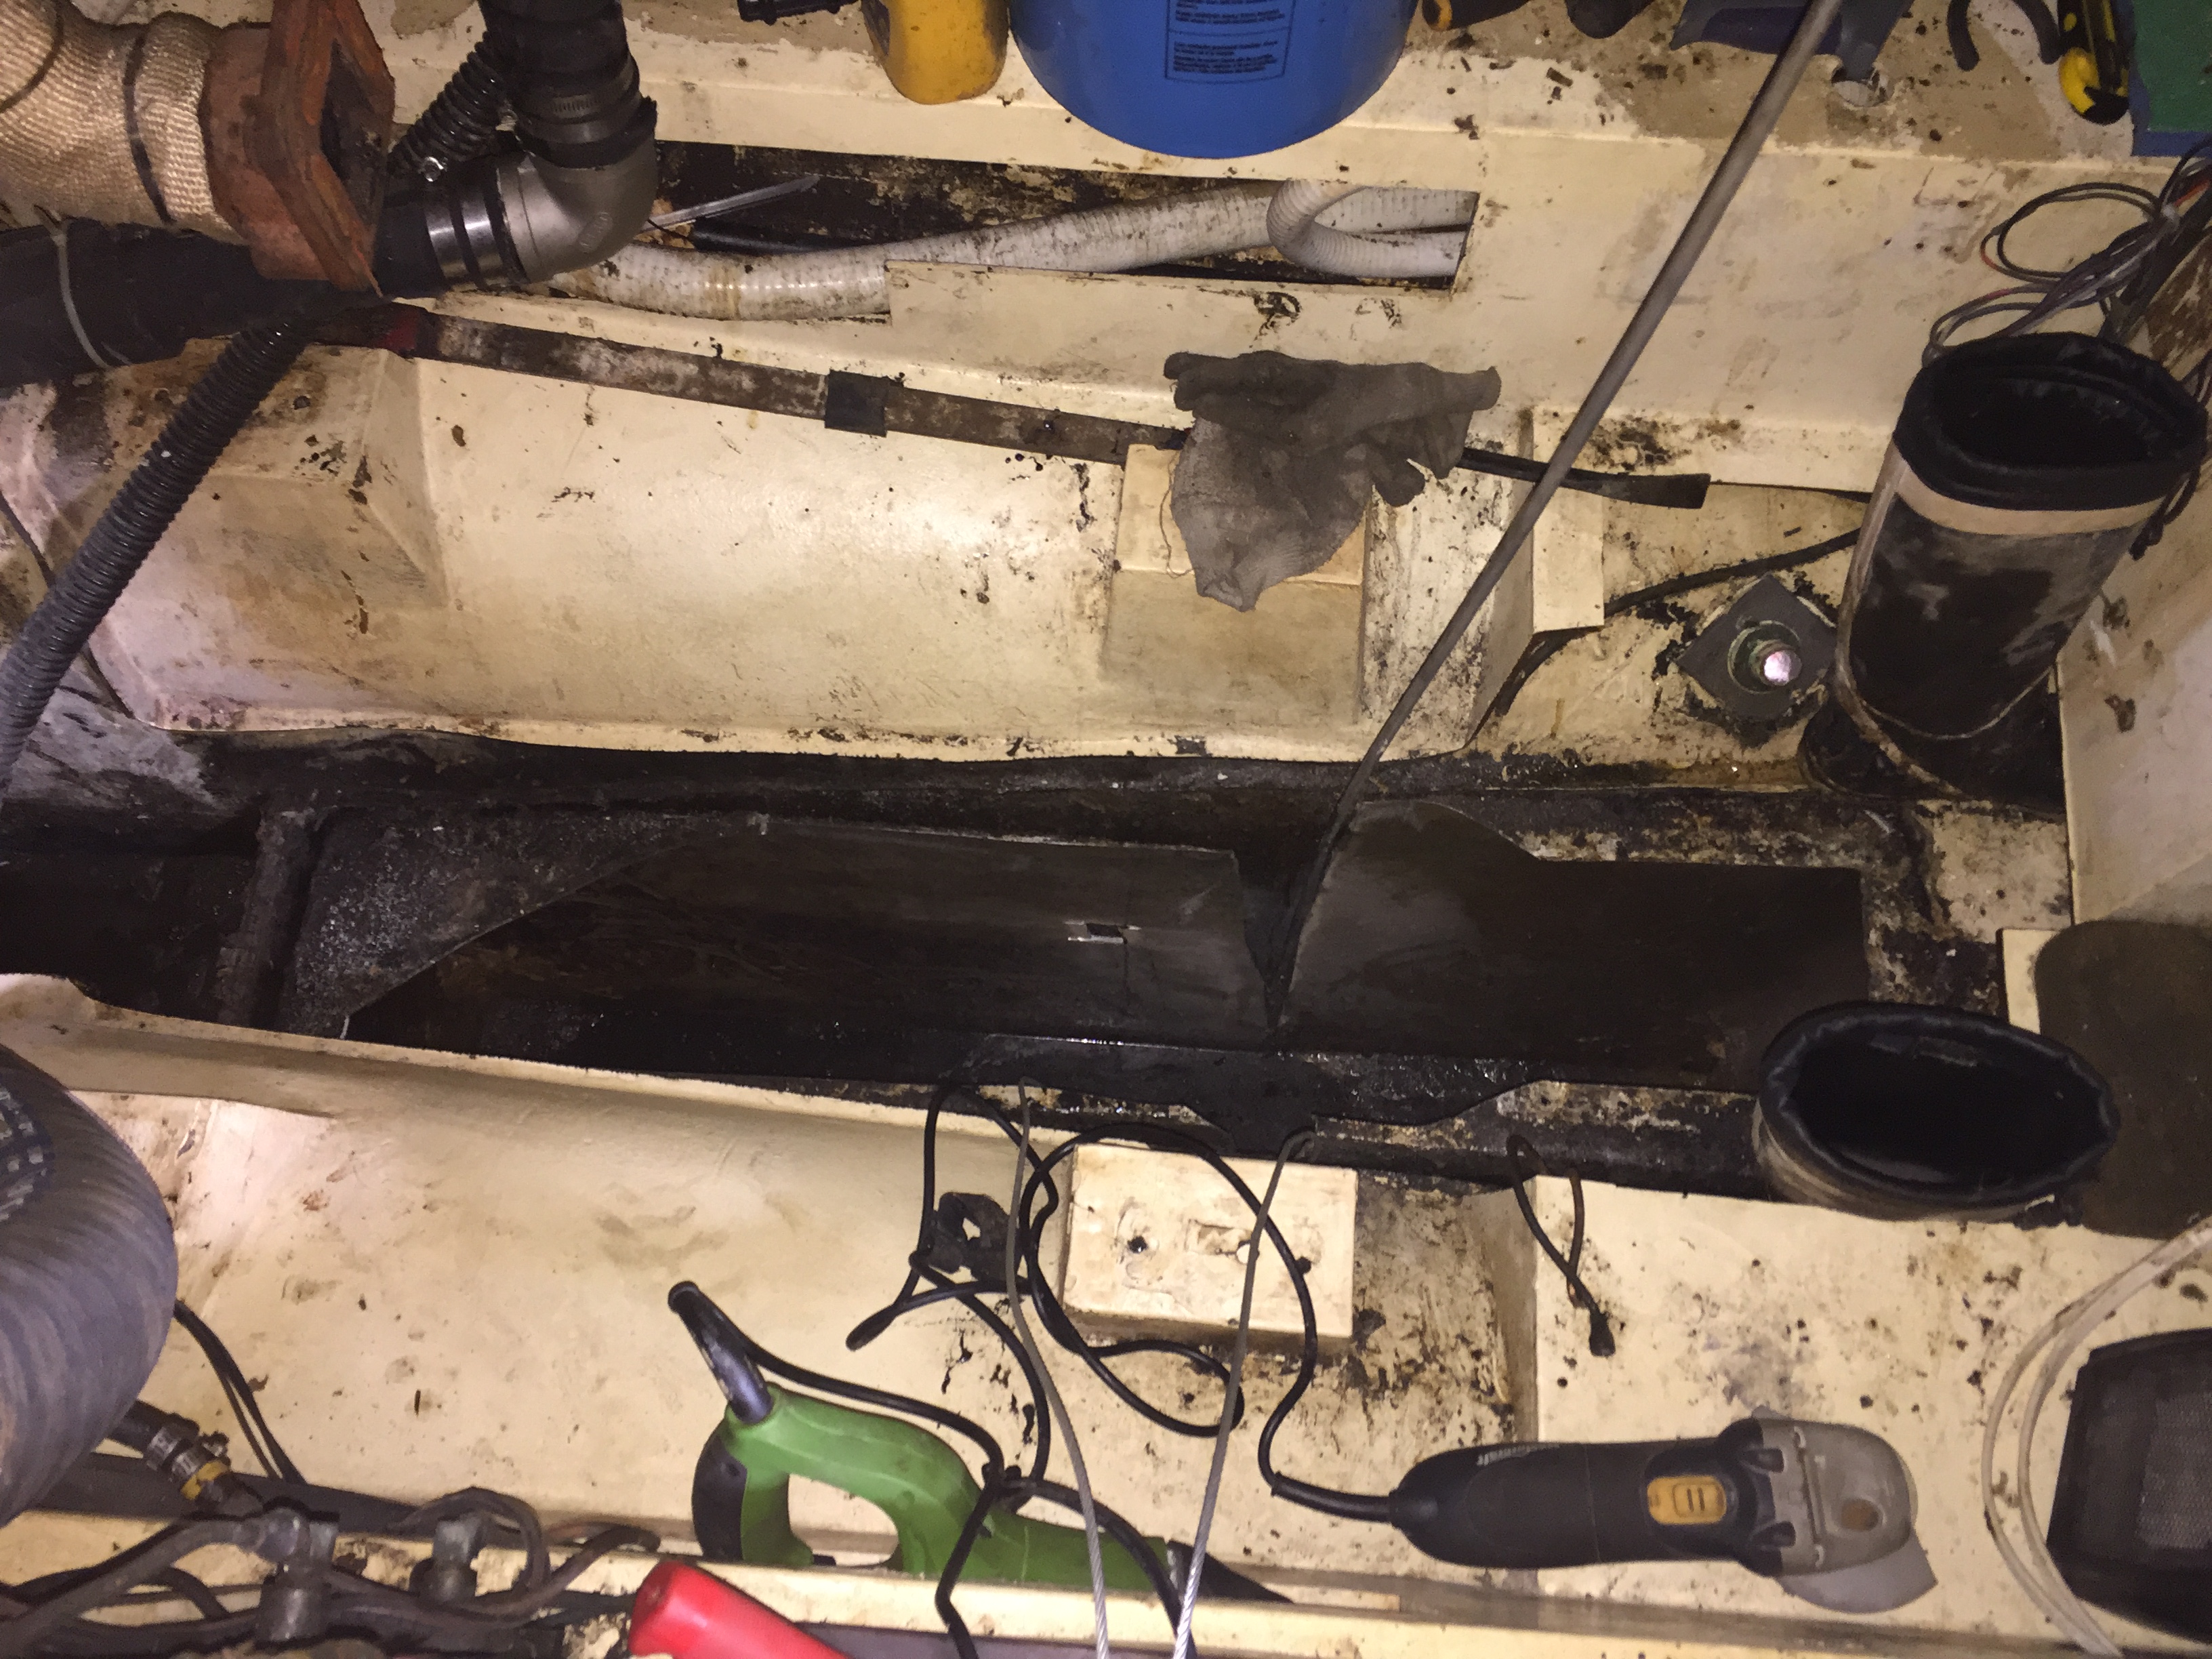
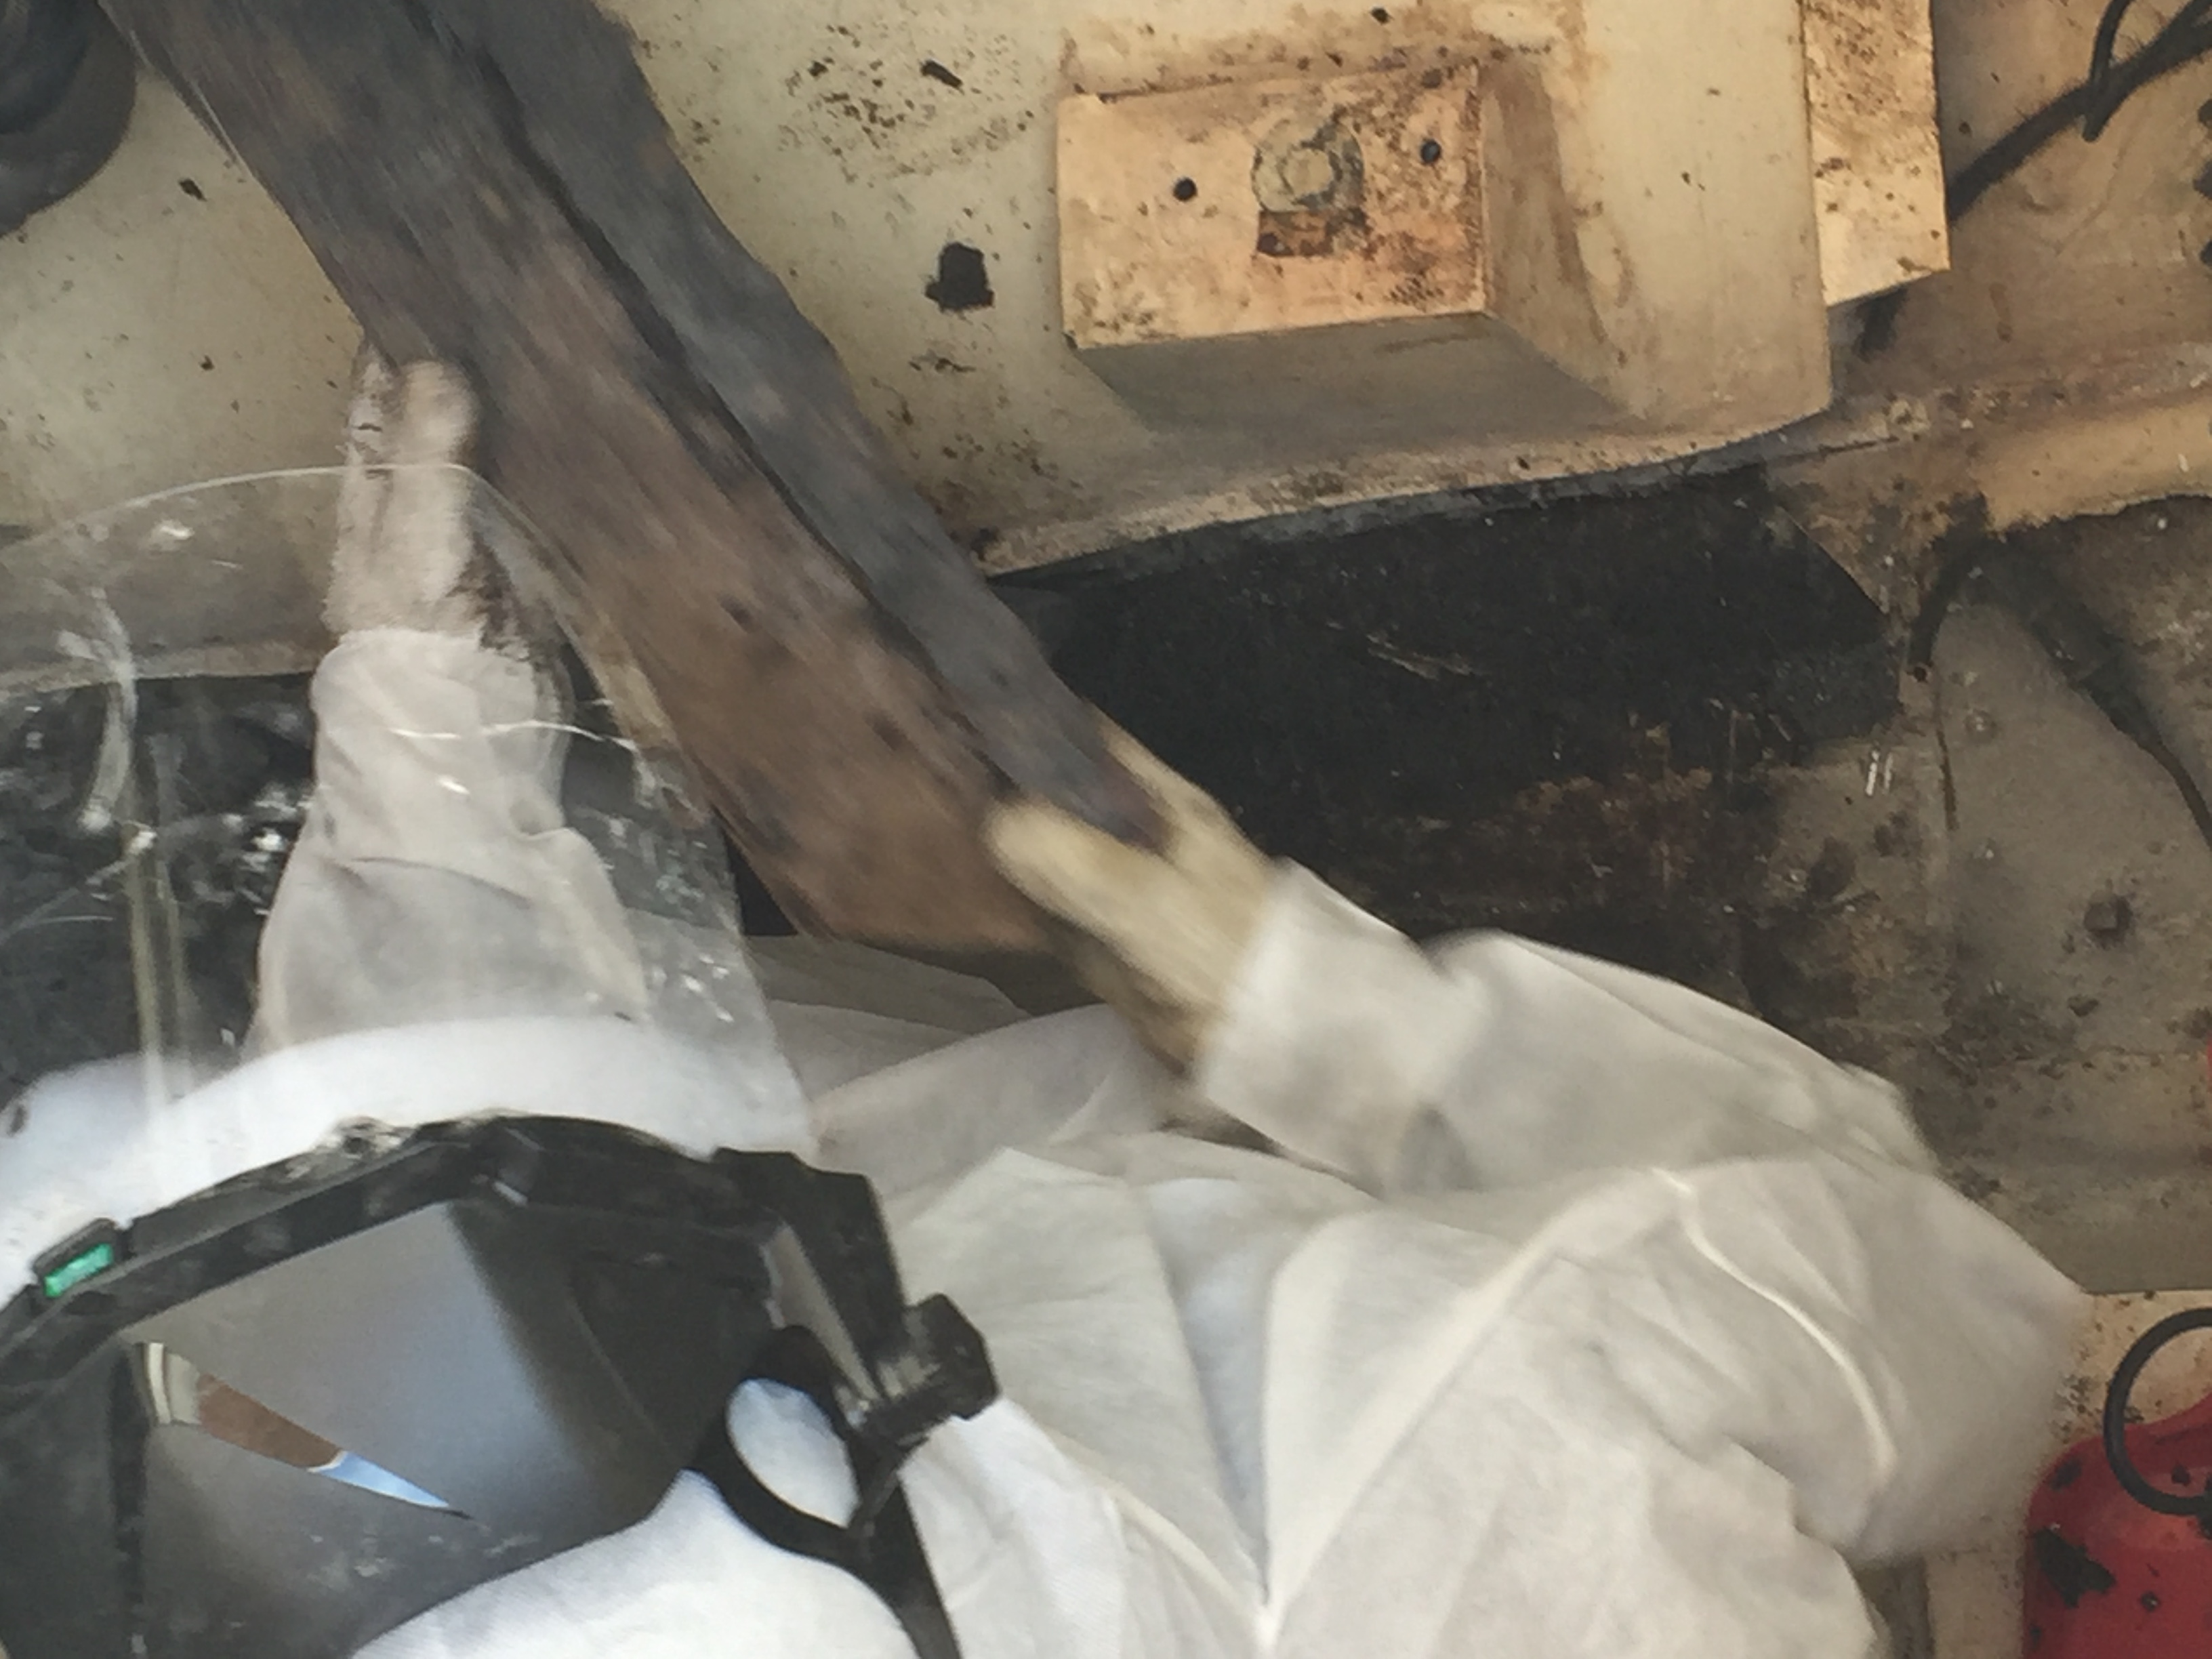
One of the longest battles I had in this entire process was removing the damn inspection plate. I could not get the grinder under the old fill tube in order to cut off one screw that was totally inaccessible. The fill itself had been cemented into place with something that was a lot stronger than I. At this point I also thought damn, I am almost done, I didn’t realize the tank ended right there. (See the aluminum at the top of the picture) ya it doesn’t, that is simply one of the baffles and the tank continues up all almost into the galley. I also lost a lot of time trying to pump that sludge out to no avail. Today will be the old bucket method if all else fails.
So in all honesty the actual time spent thus far has been 5 hours. Out of that 5 hours, I spent an hour disconnecting 8 batteries that have been hidden up under the hanging locker aft of the galley in what I can only assume is the old holding tank. I needed to remove all of that to gain access to the forward quarter of the tank. I will need to crawl under the floor today and cut the remaining portion of tabbing. I also lost a fair bit of time being really careful. Lots of cutting than stopping etc in order to ensure I wasn’t cutting into the hull itself.
All in all so far there have been the usual frustrating moments and I was pretty tired last night and fairly sore this morning, but other than the dirty aspect, it has not been TOO bad. Of course I am trying to be optimistic since I have to go back today 🙂
stay tuned, hopefully the tank comes out today and tomorrow is just cleaning and grinding! :fingers_crossed:
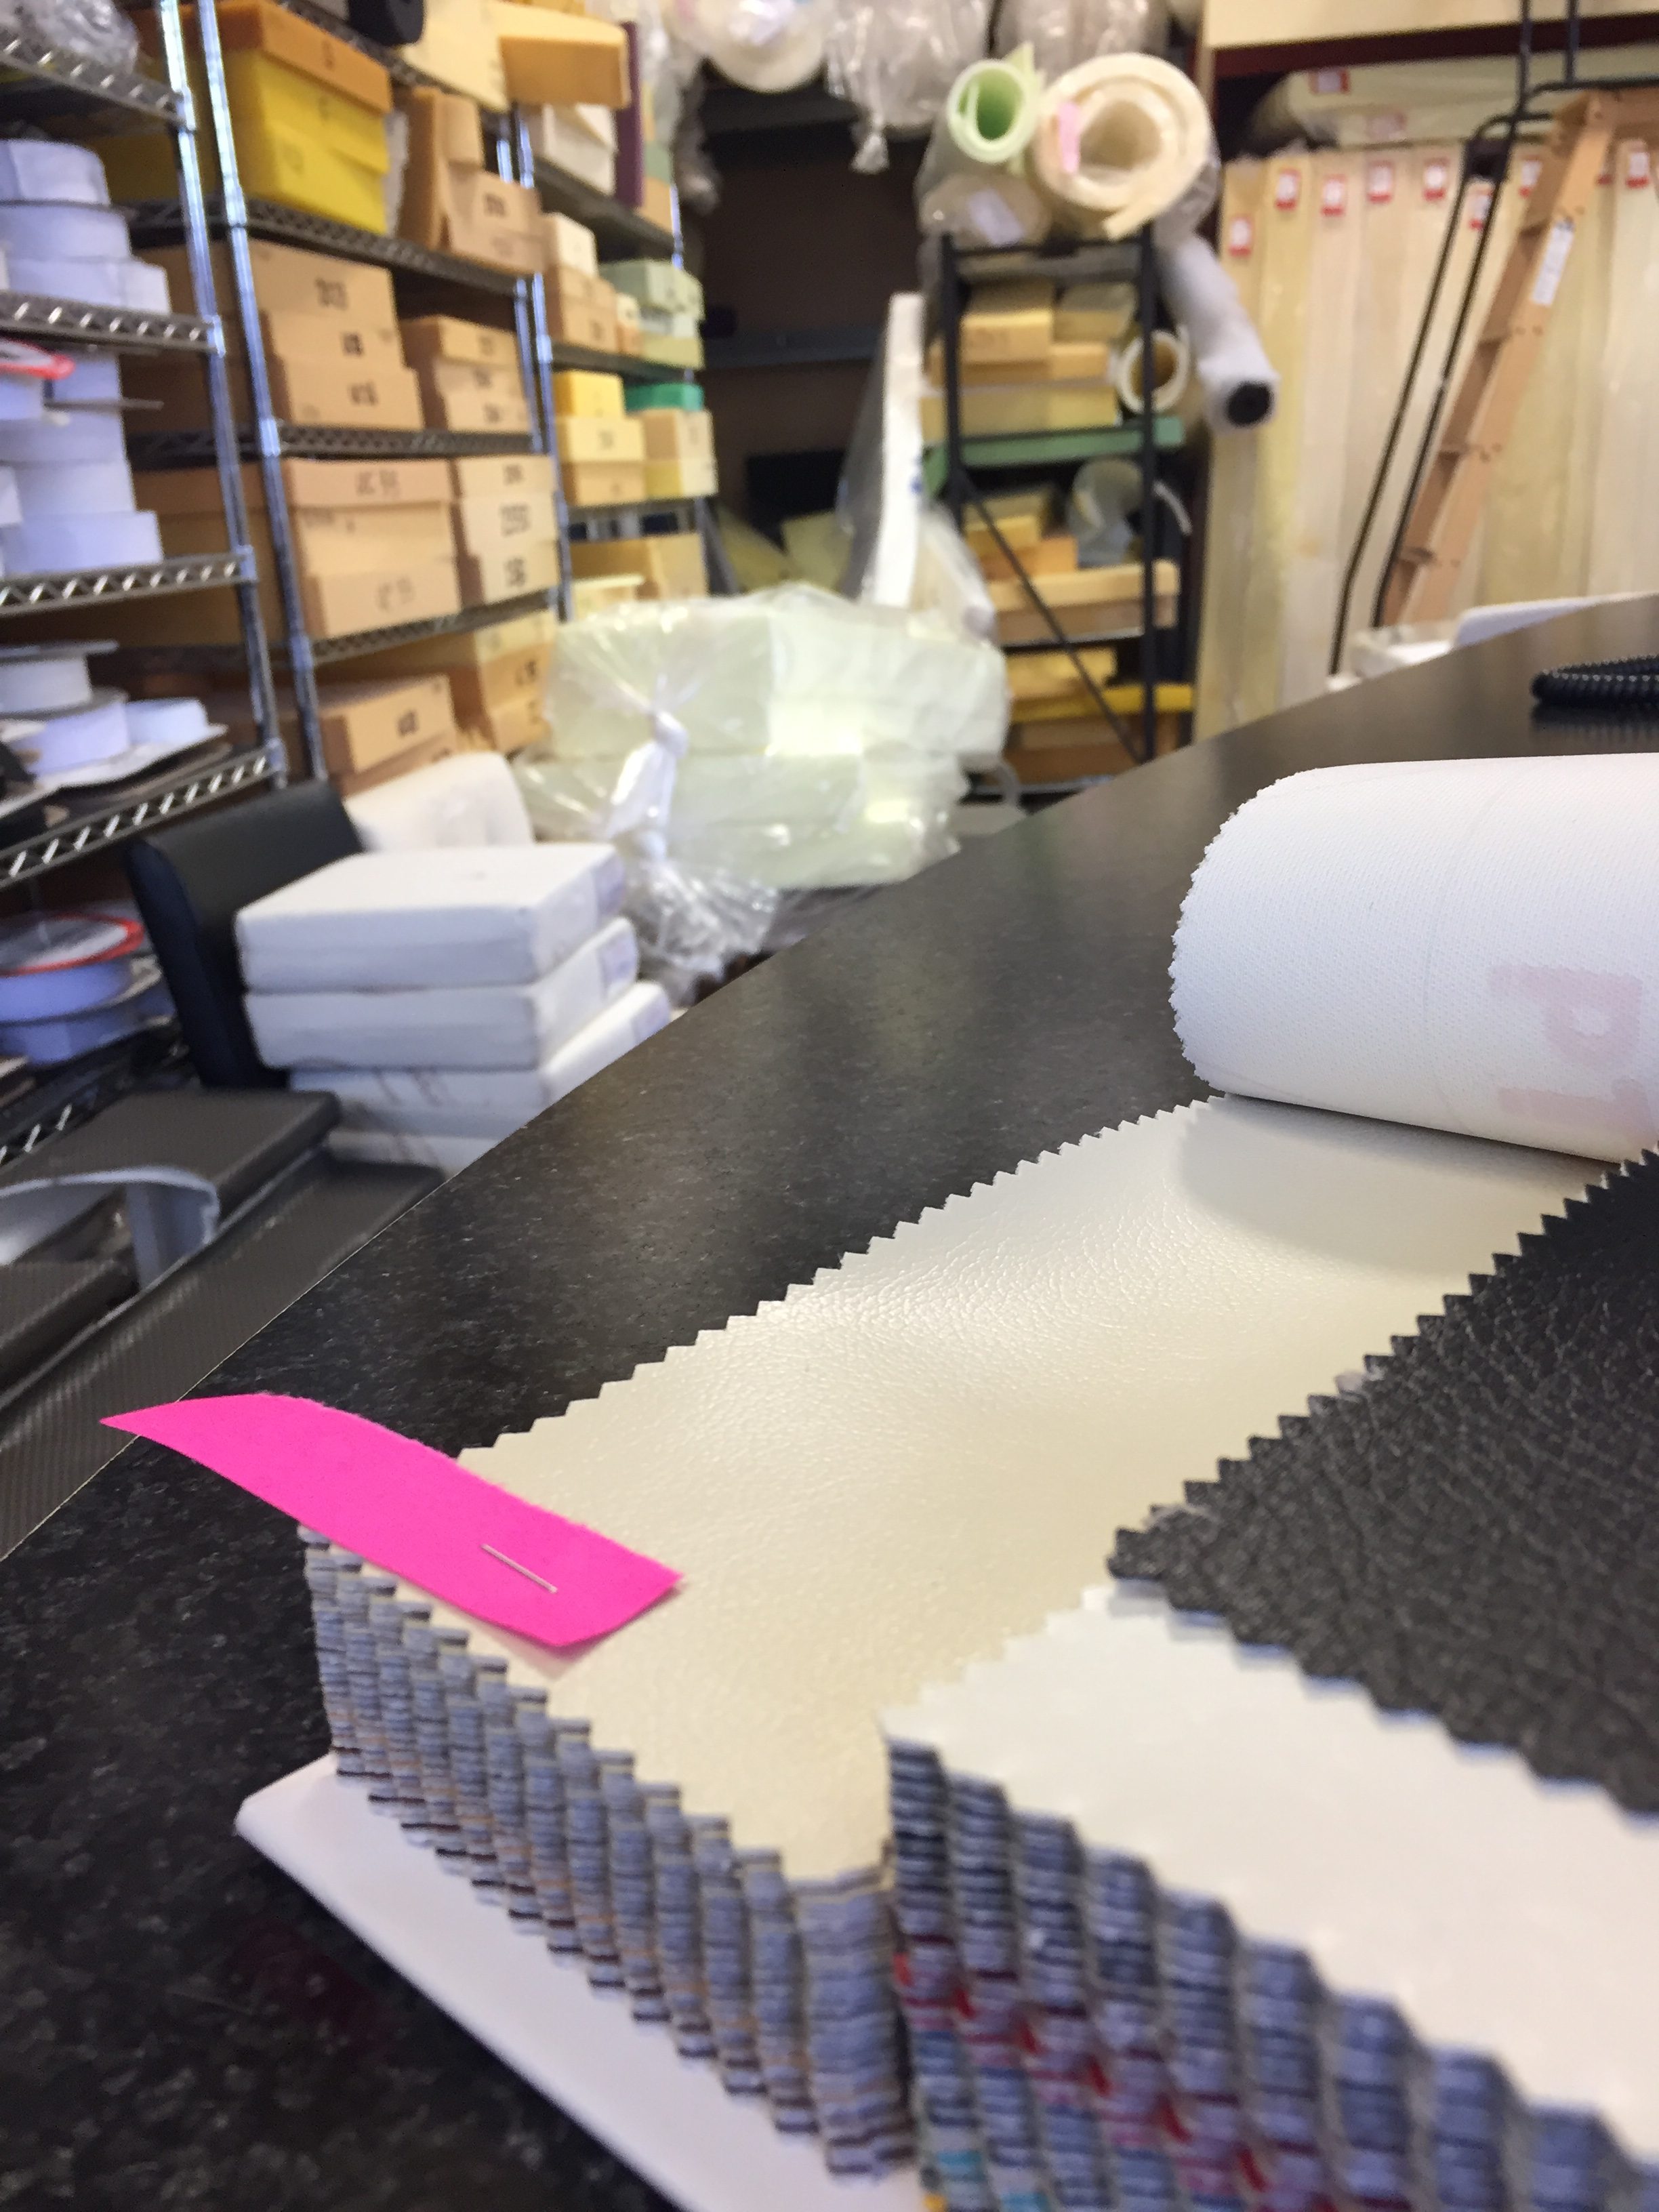
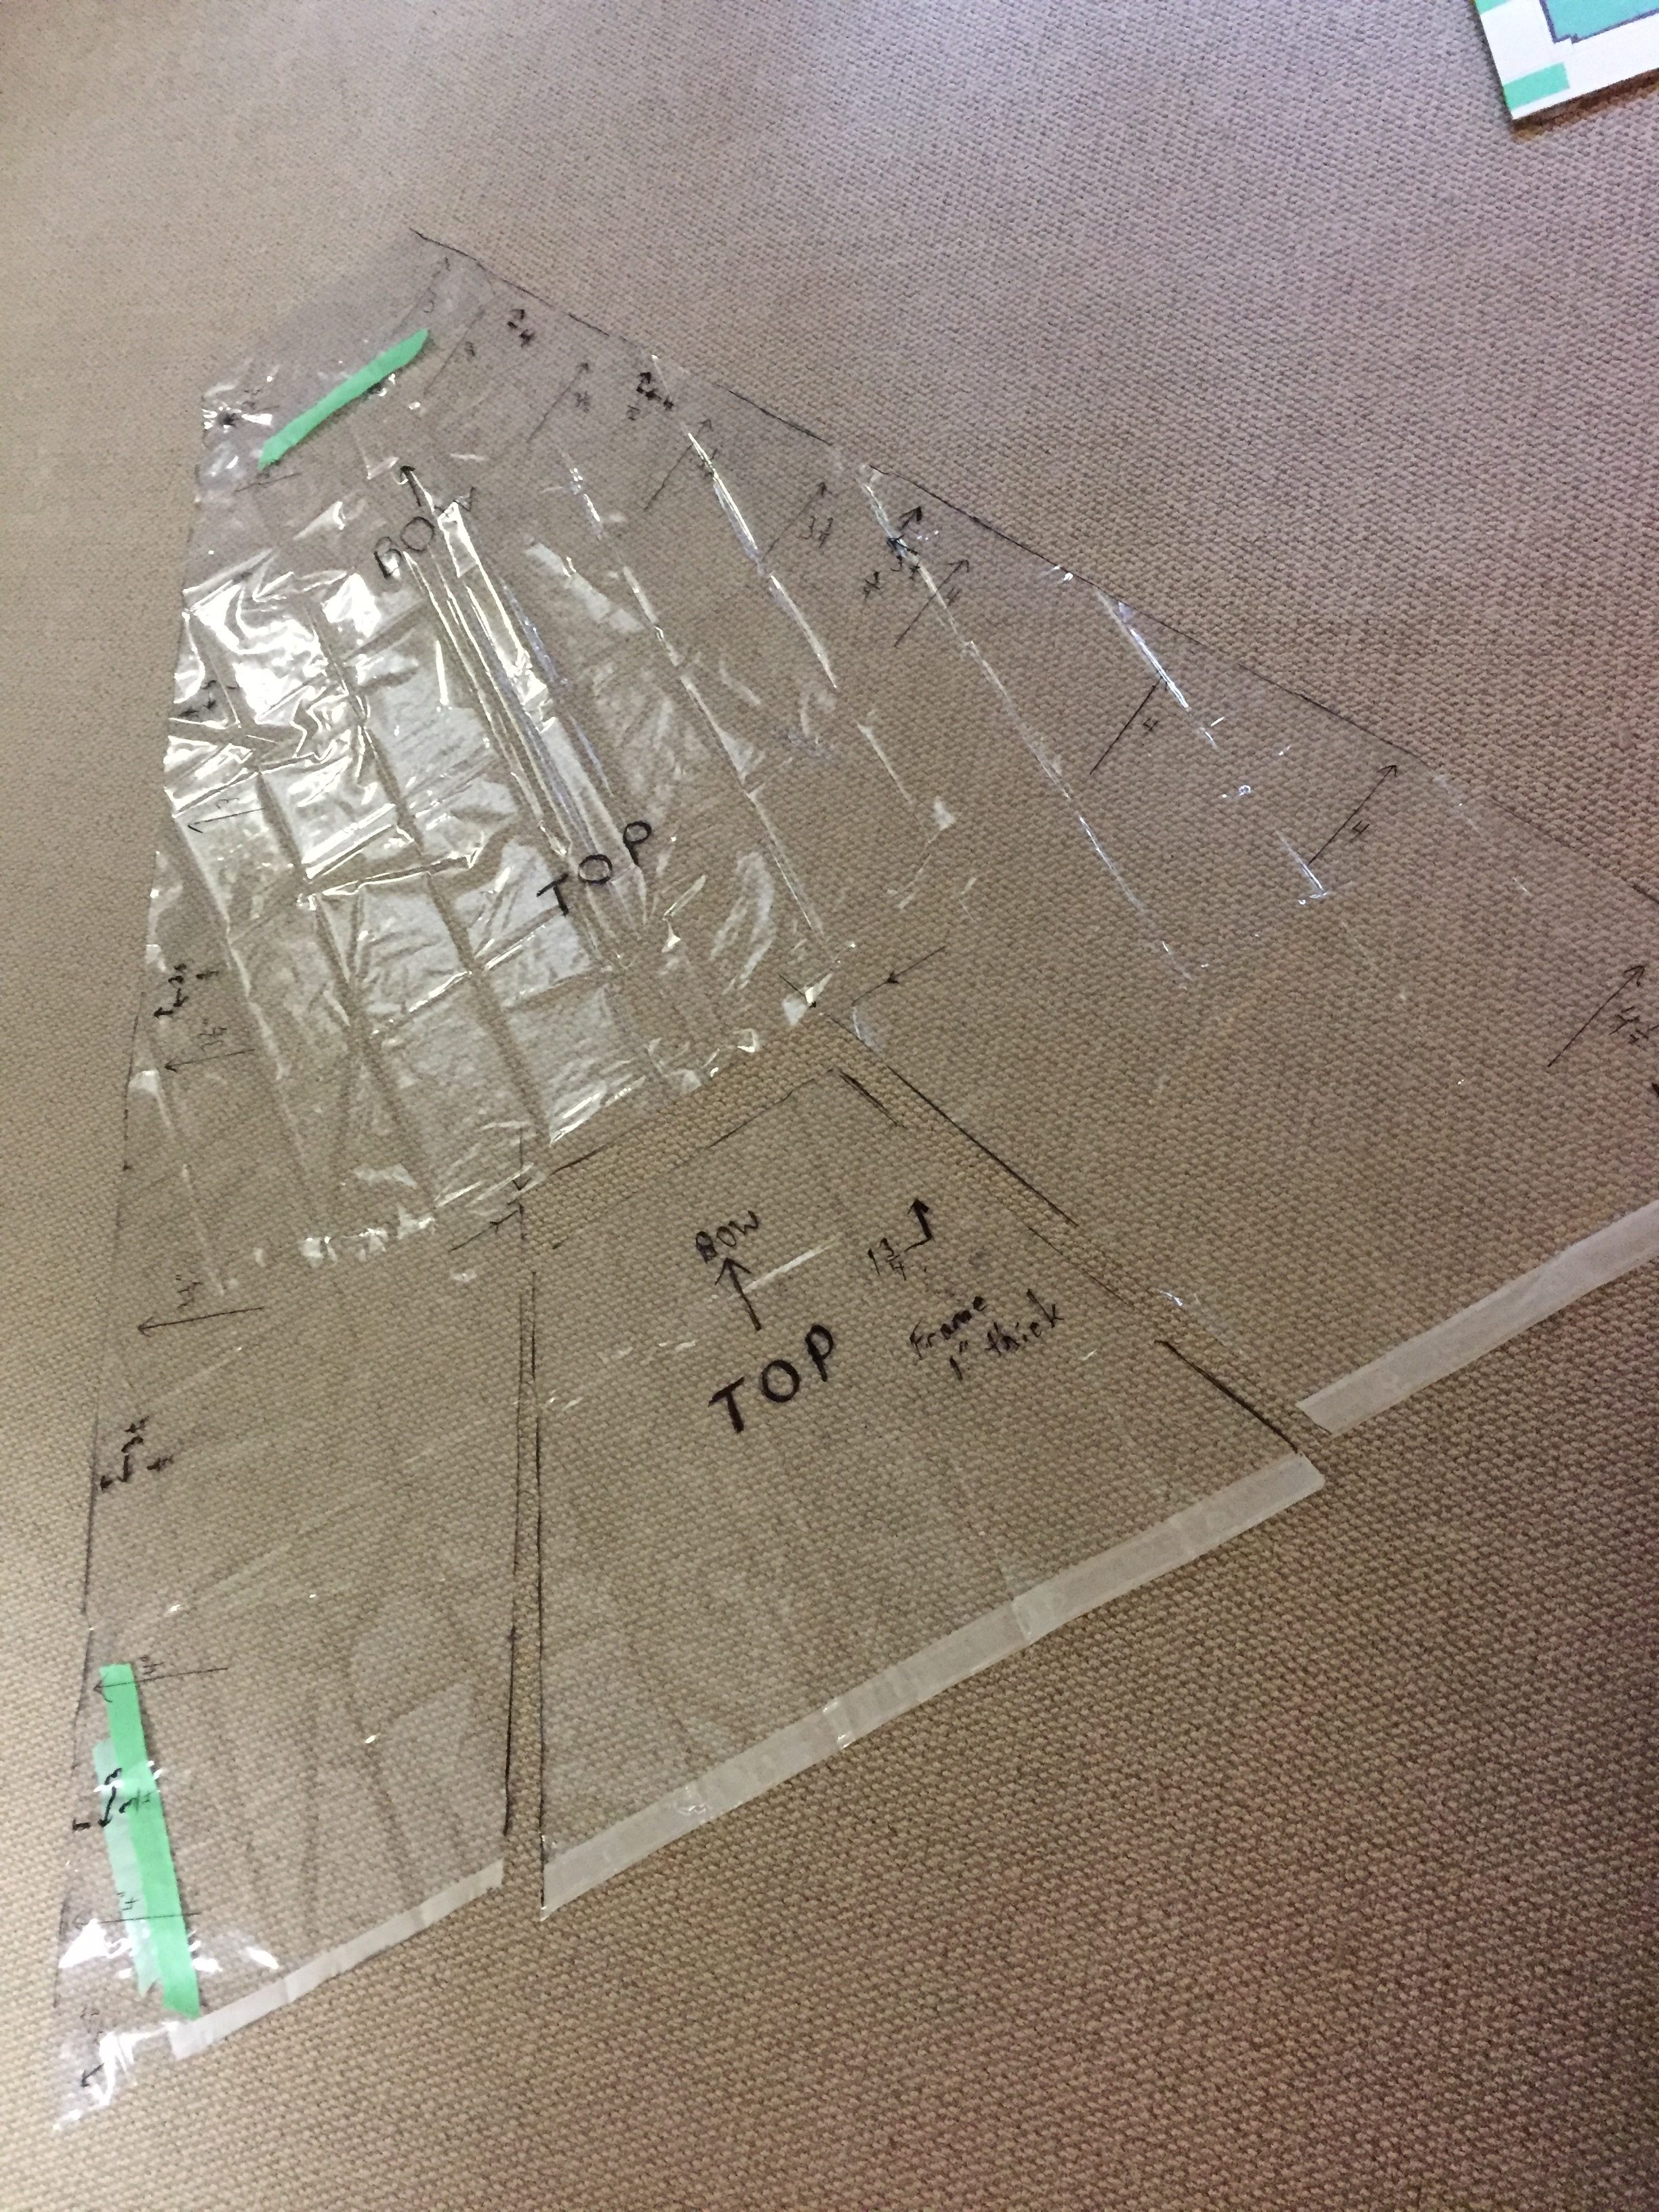
It has been a very busy time since the boat show with lots happening. We have ordered all new foam and material for the main salon, 5″ thick and the v-berth and aft cabin 8″ thick. We are going with an off white leather like material for the main salon and are still deciding on the material for the mattresses. We pick up the mattresses on Saturday! Then my evenings will be spent on sewing up the covering!
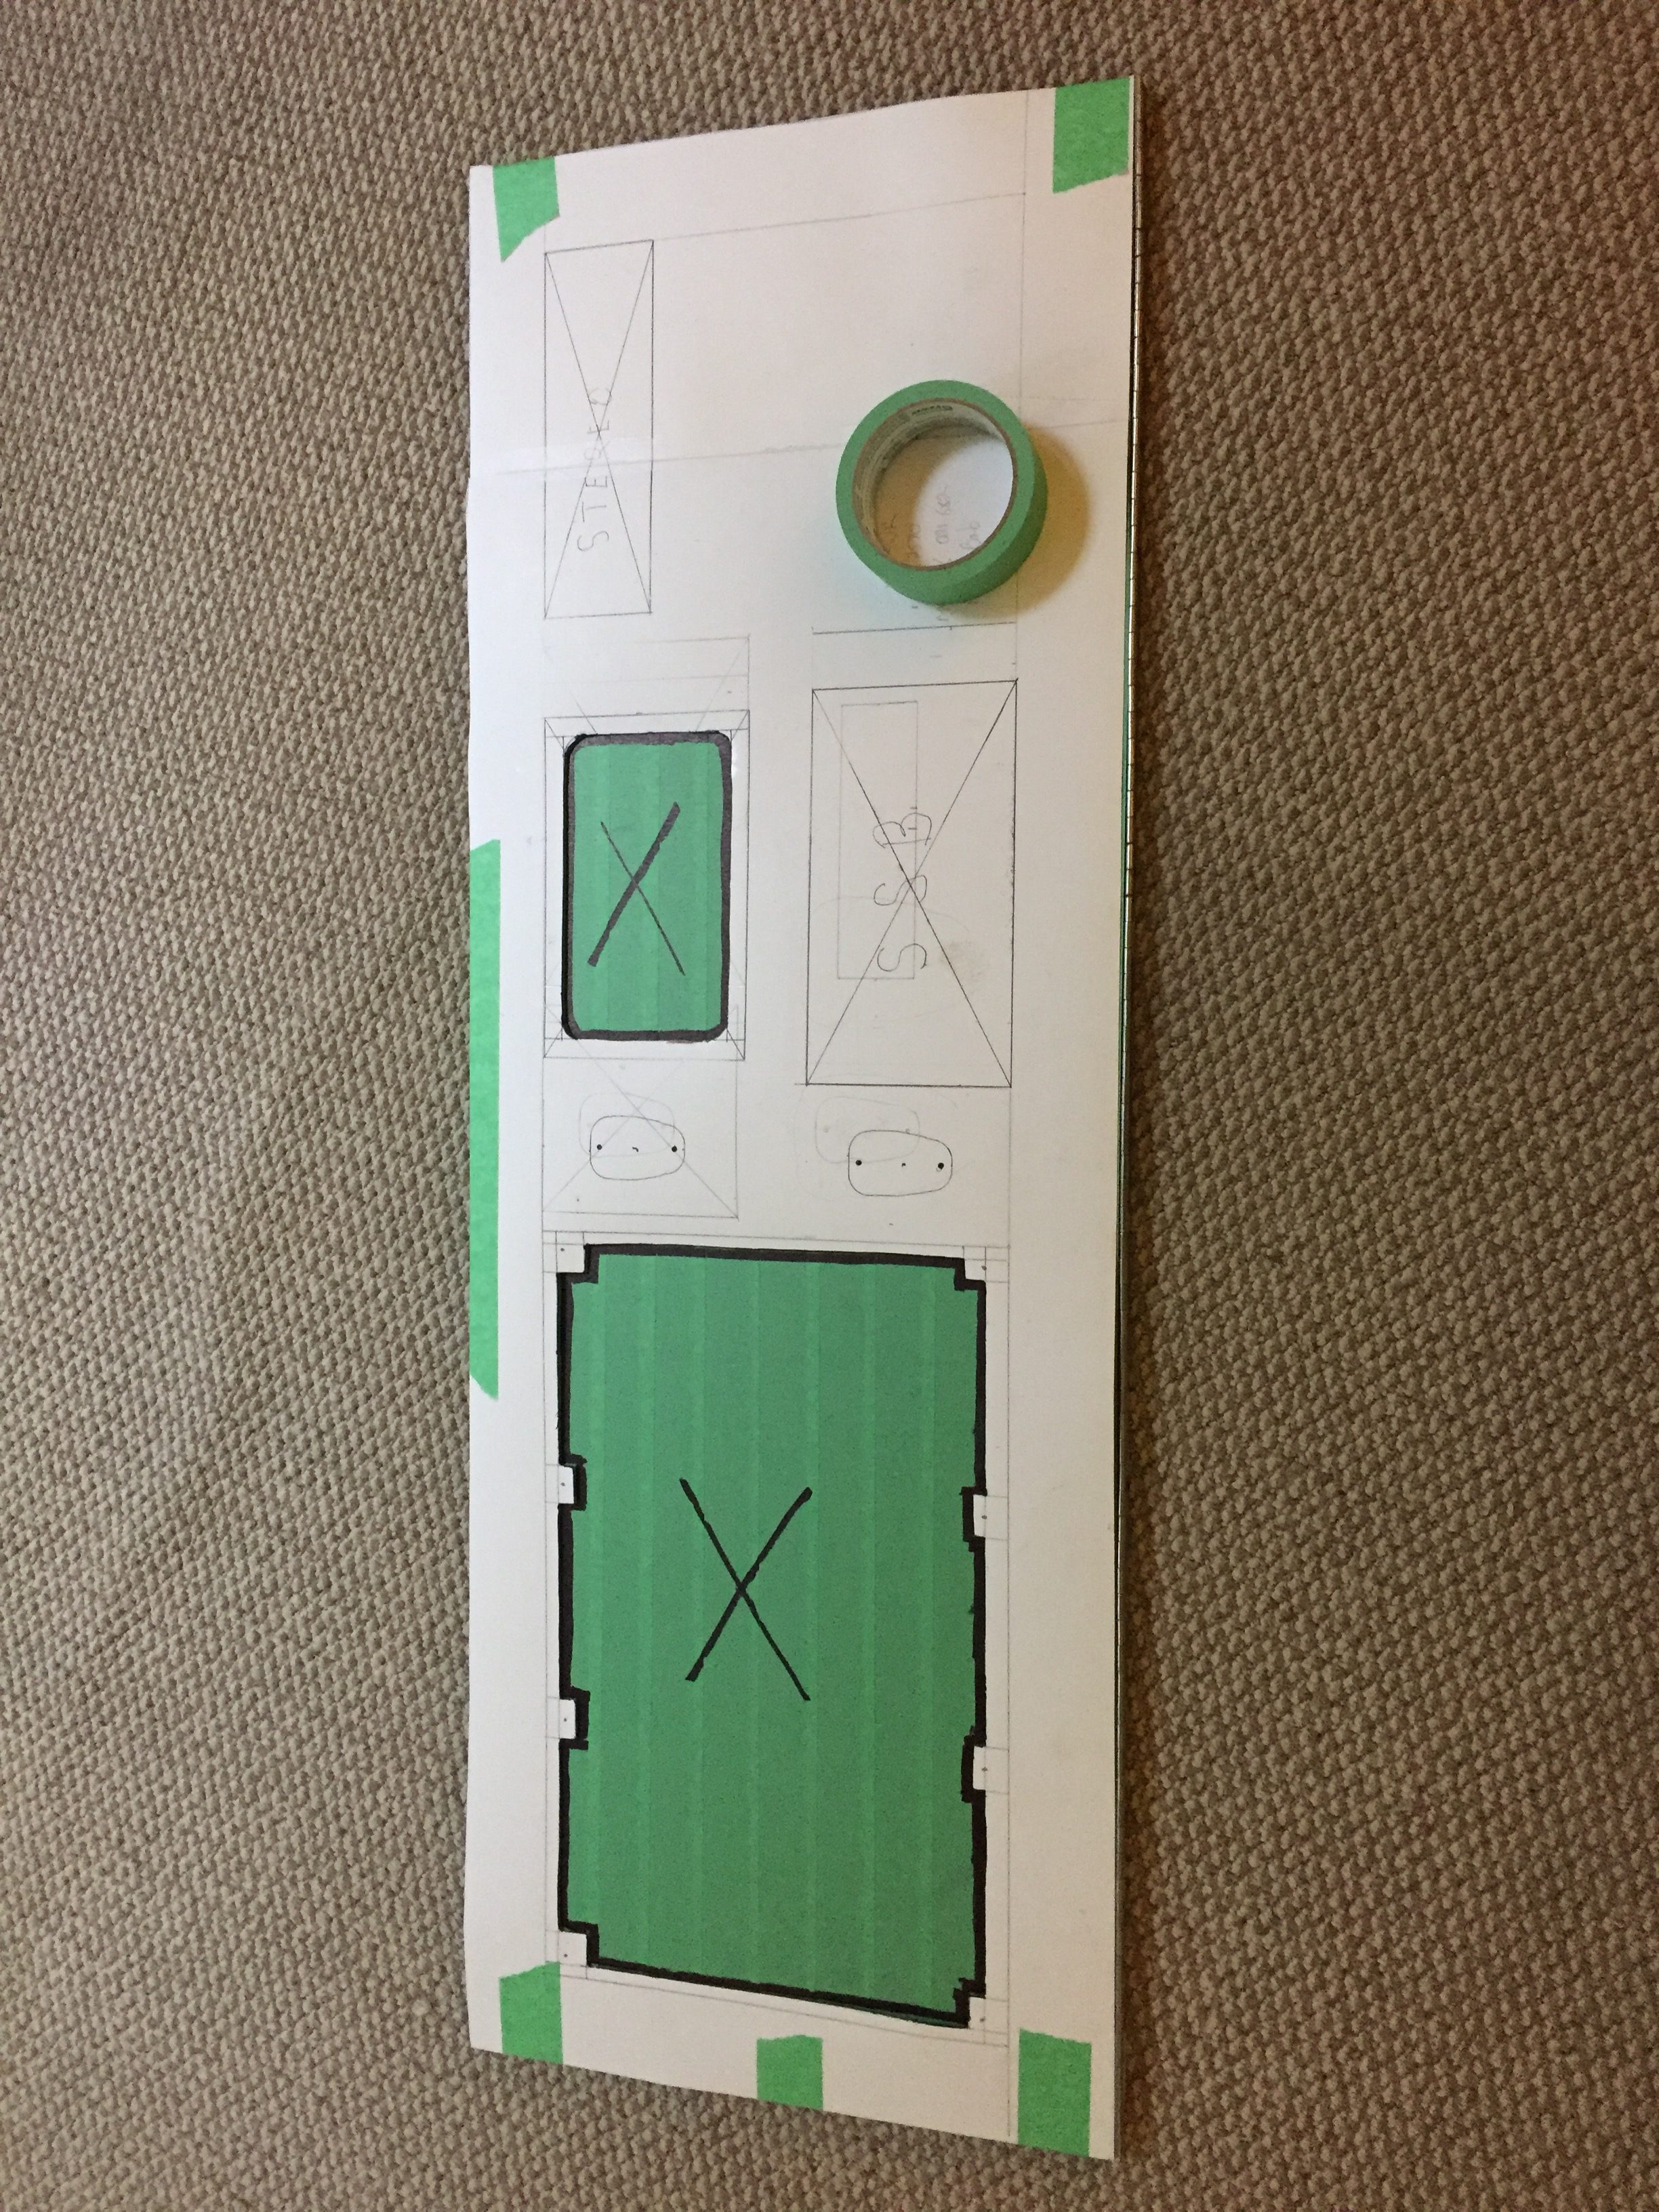
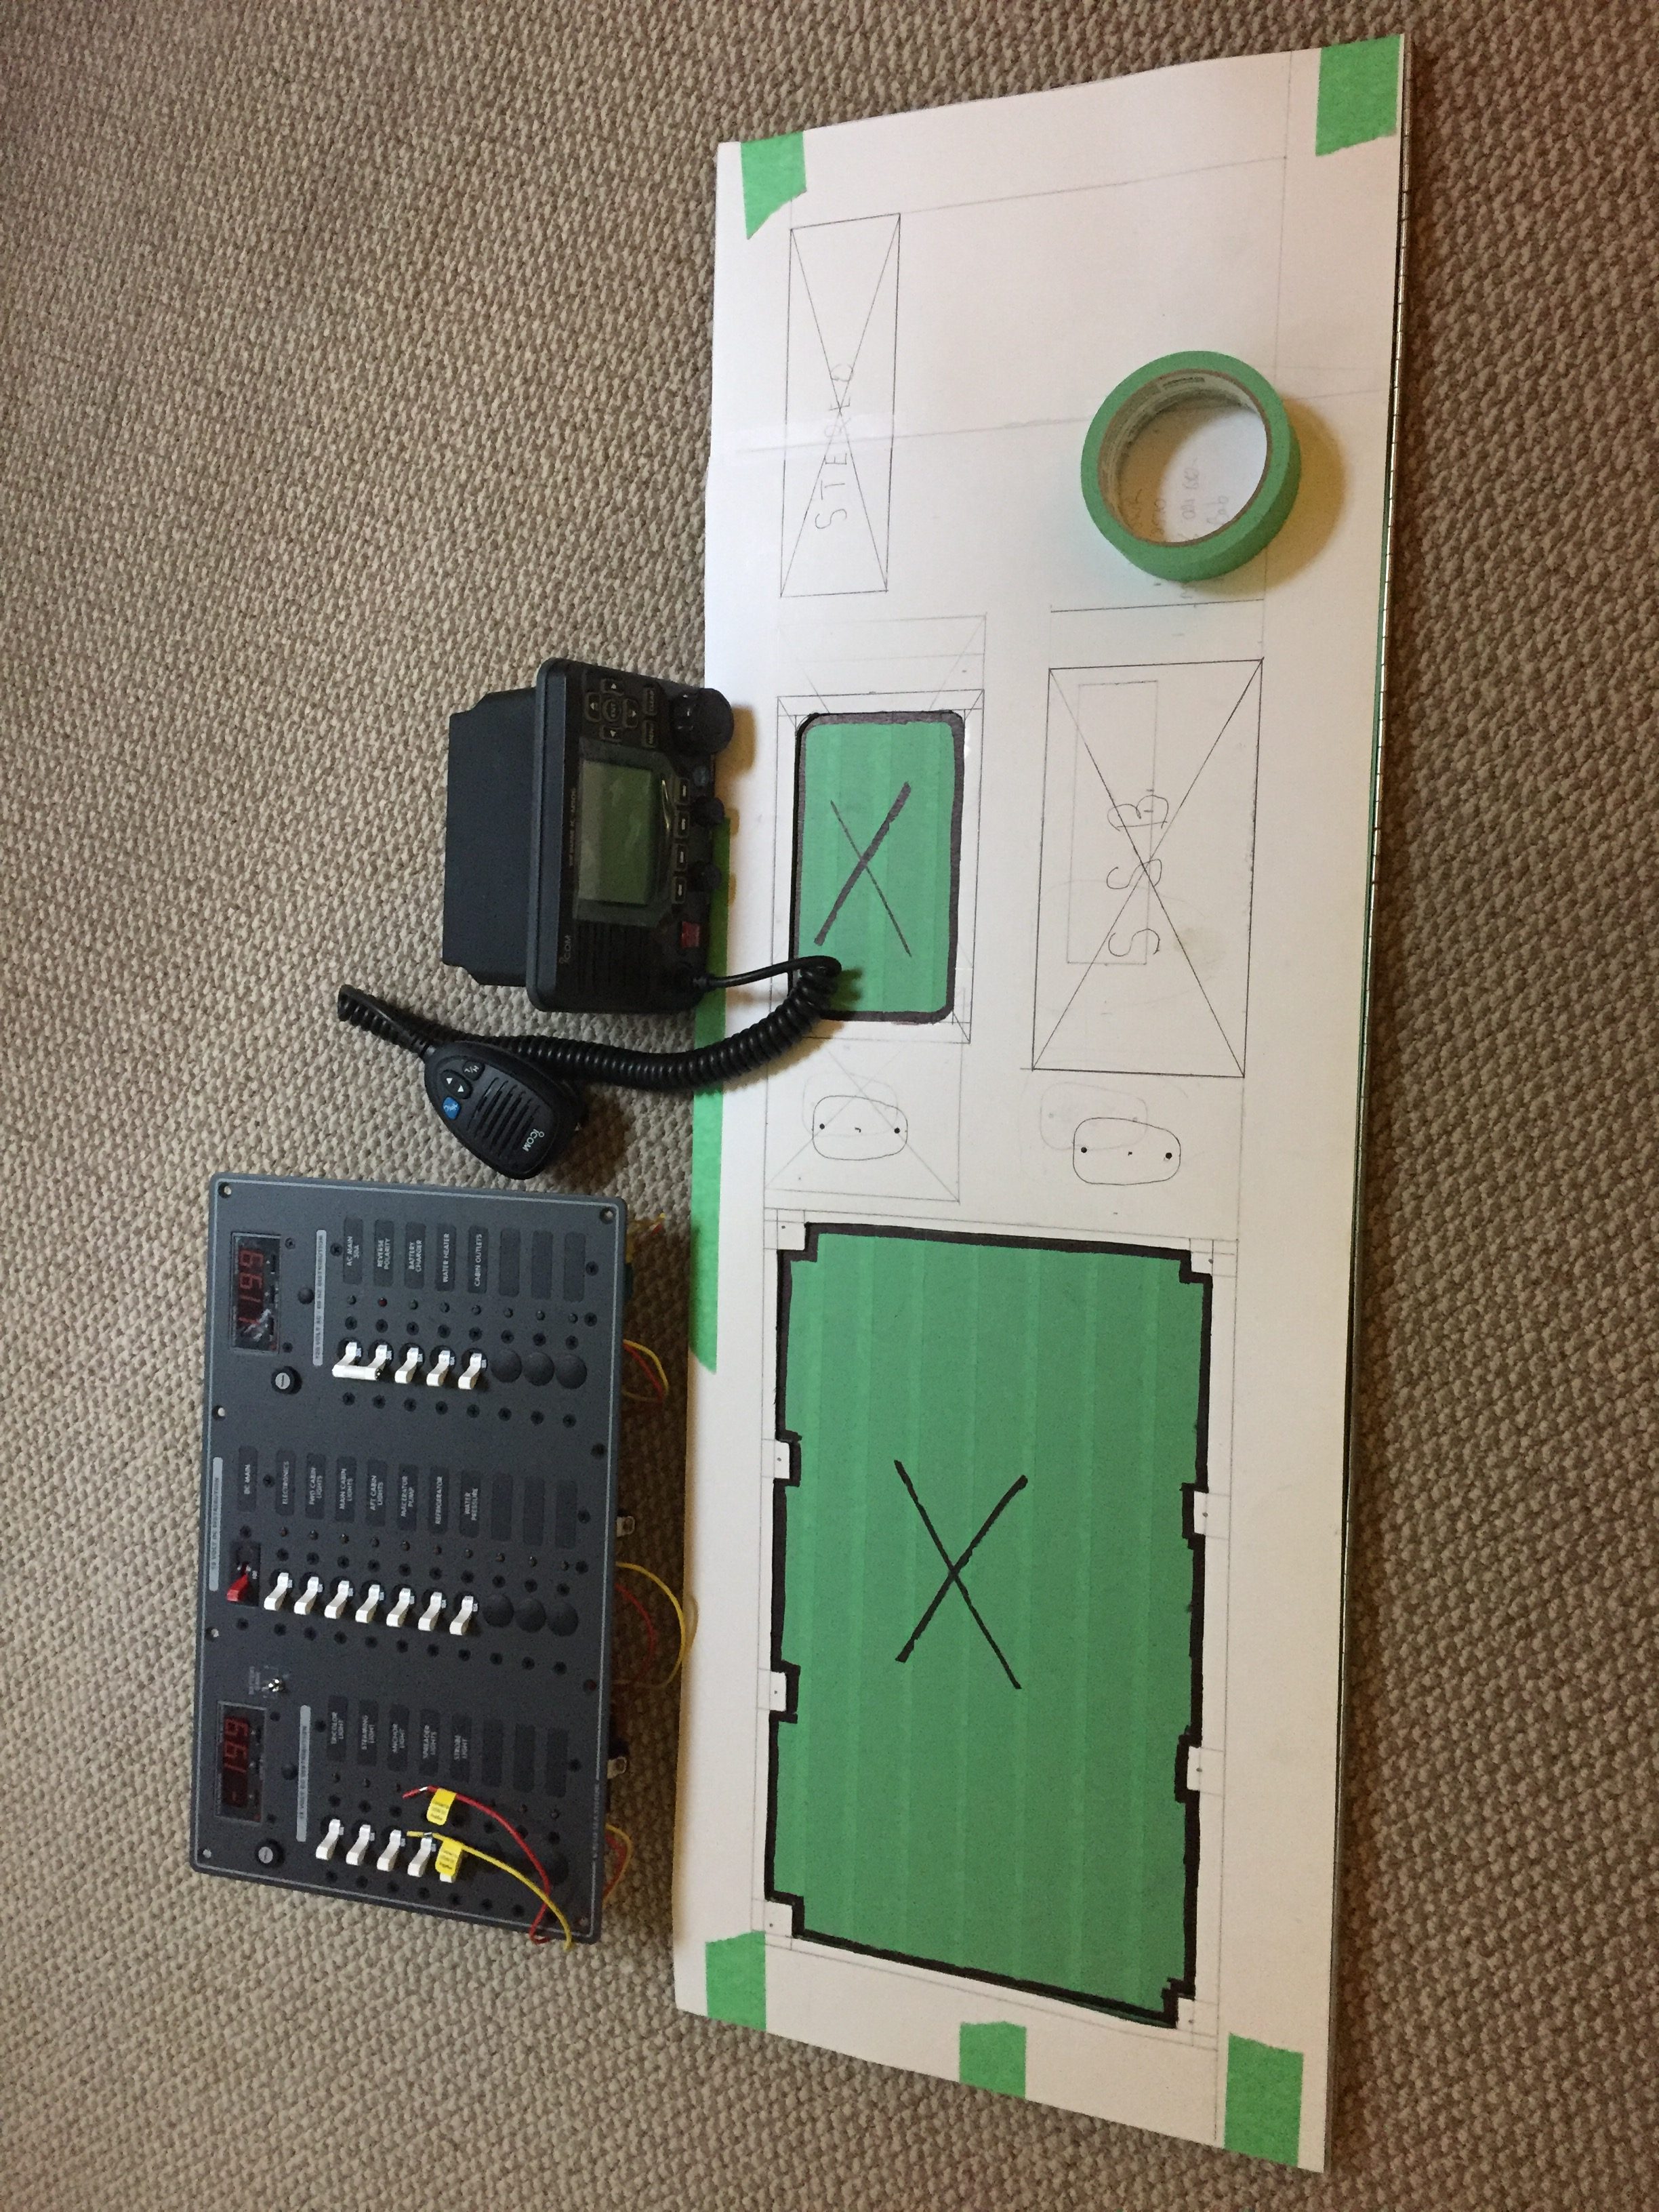
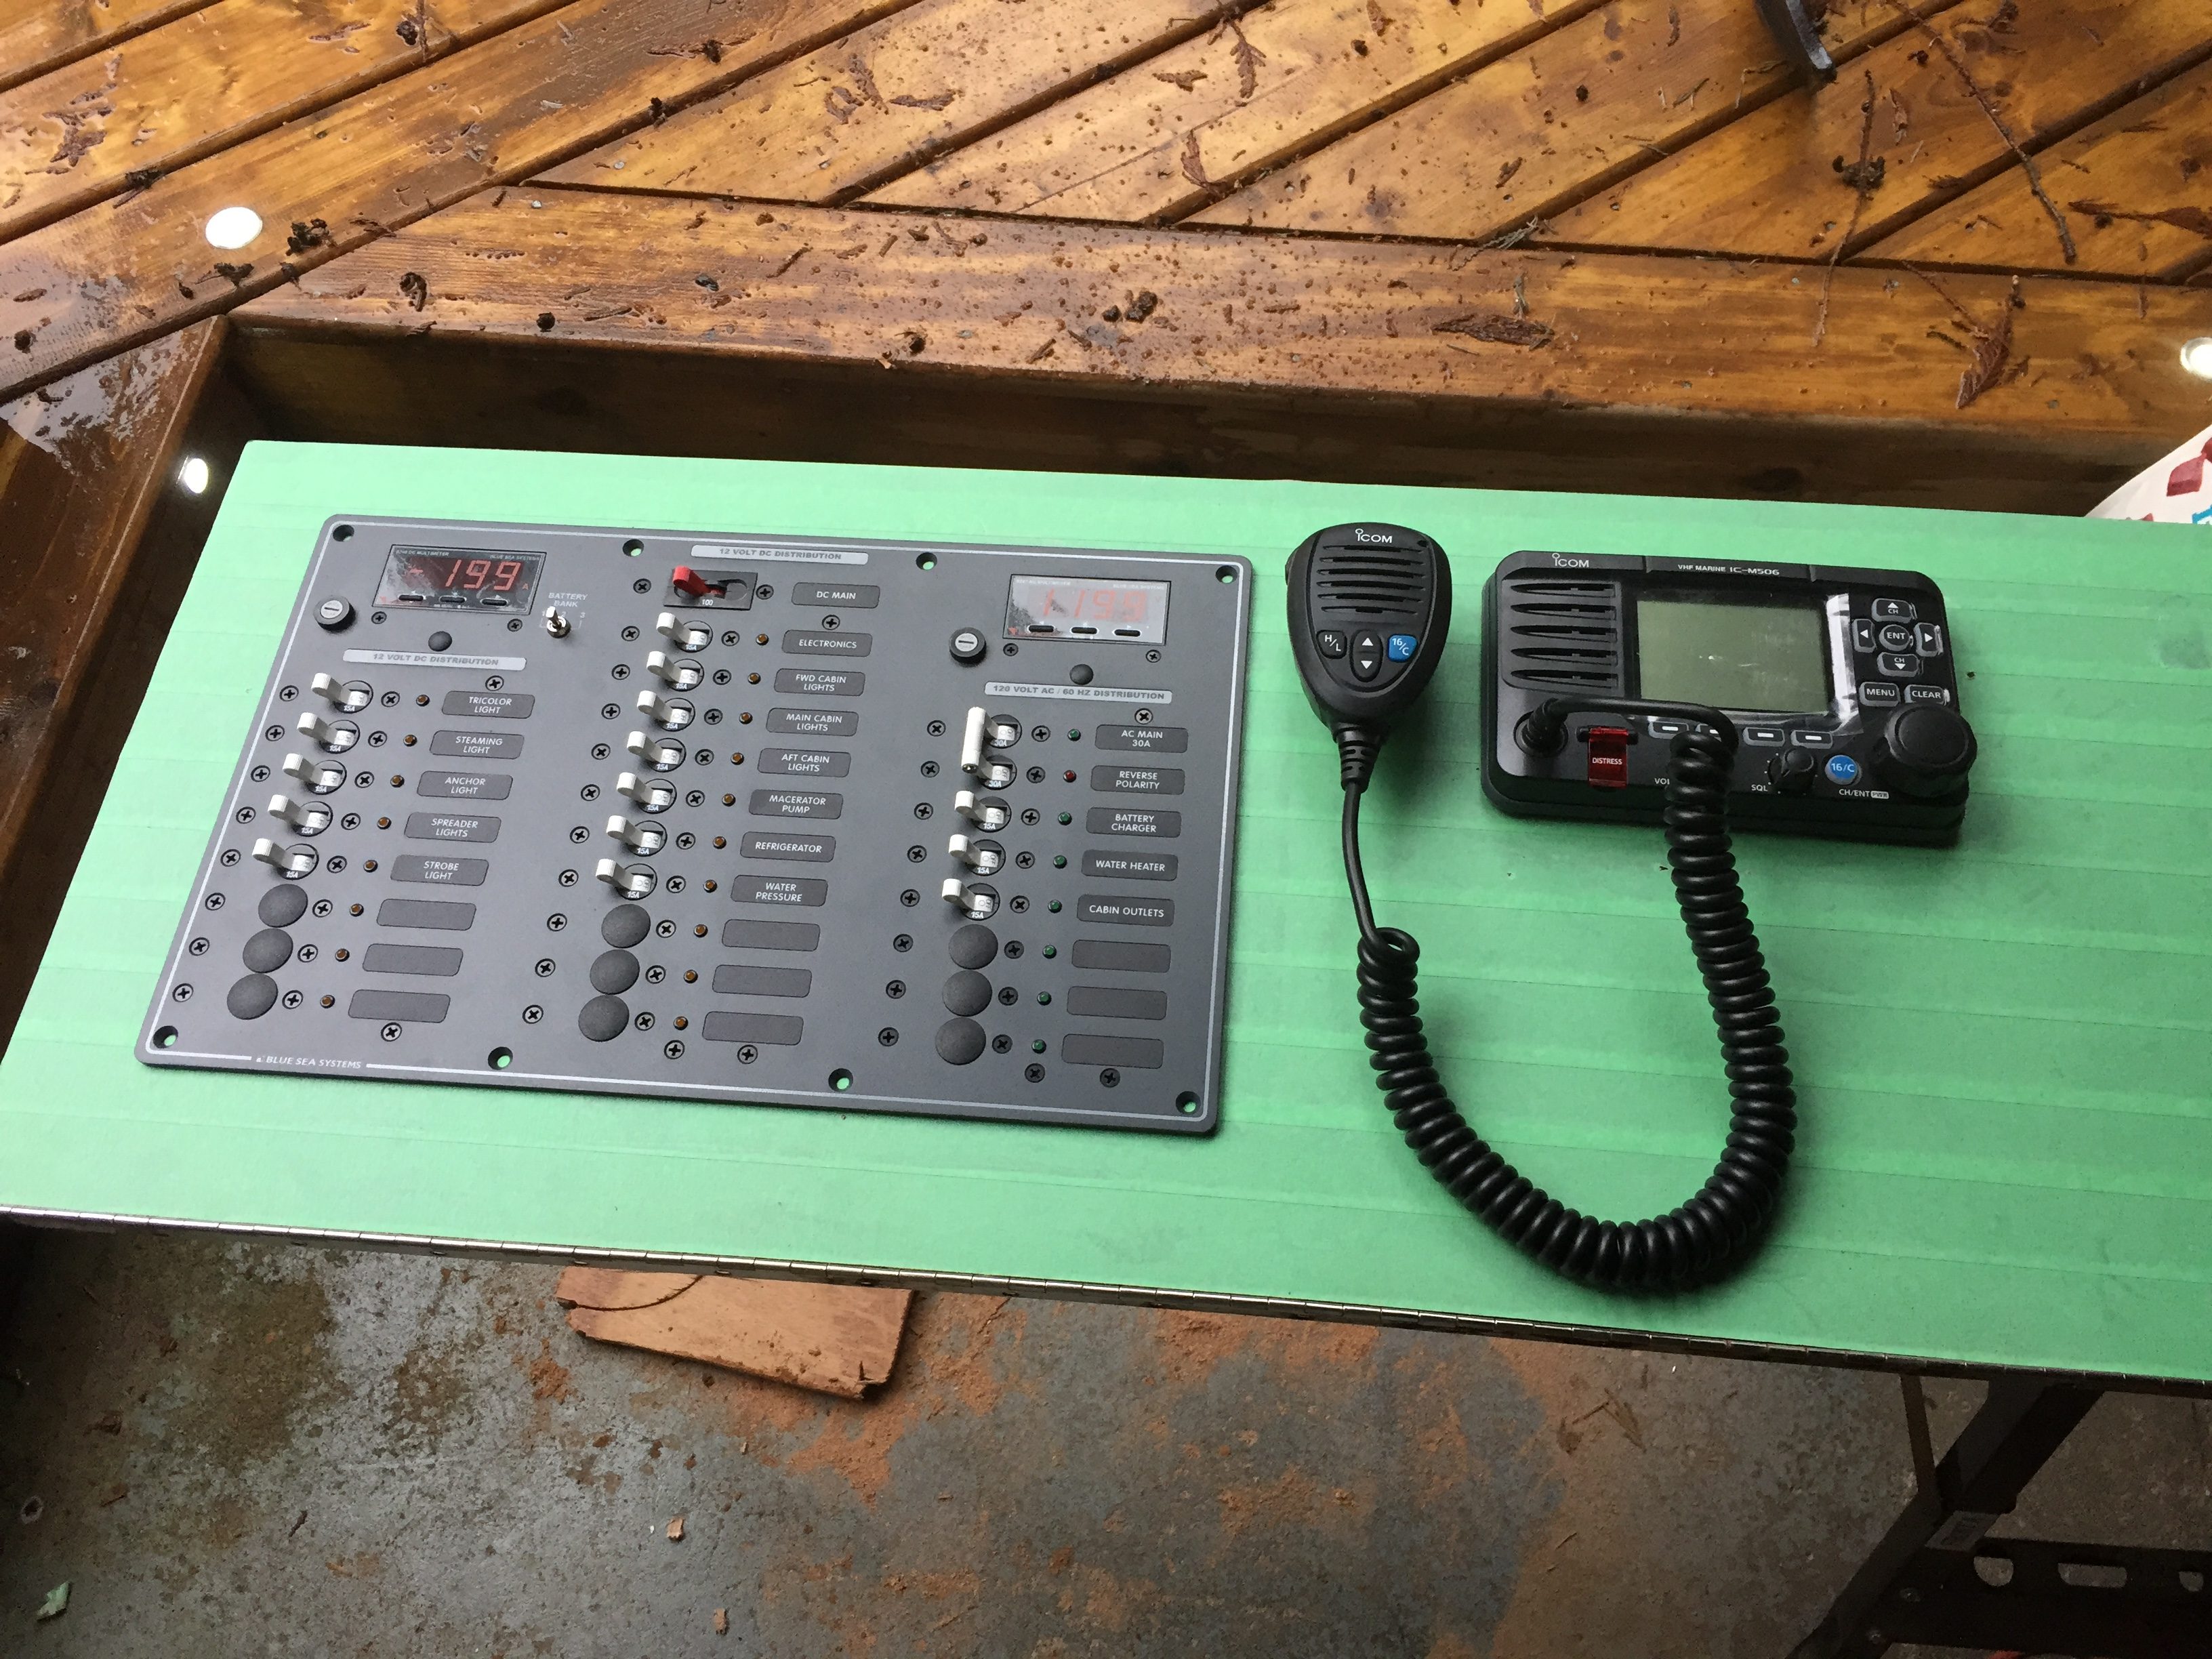
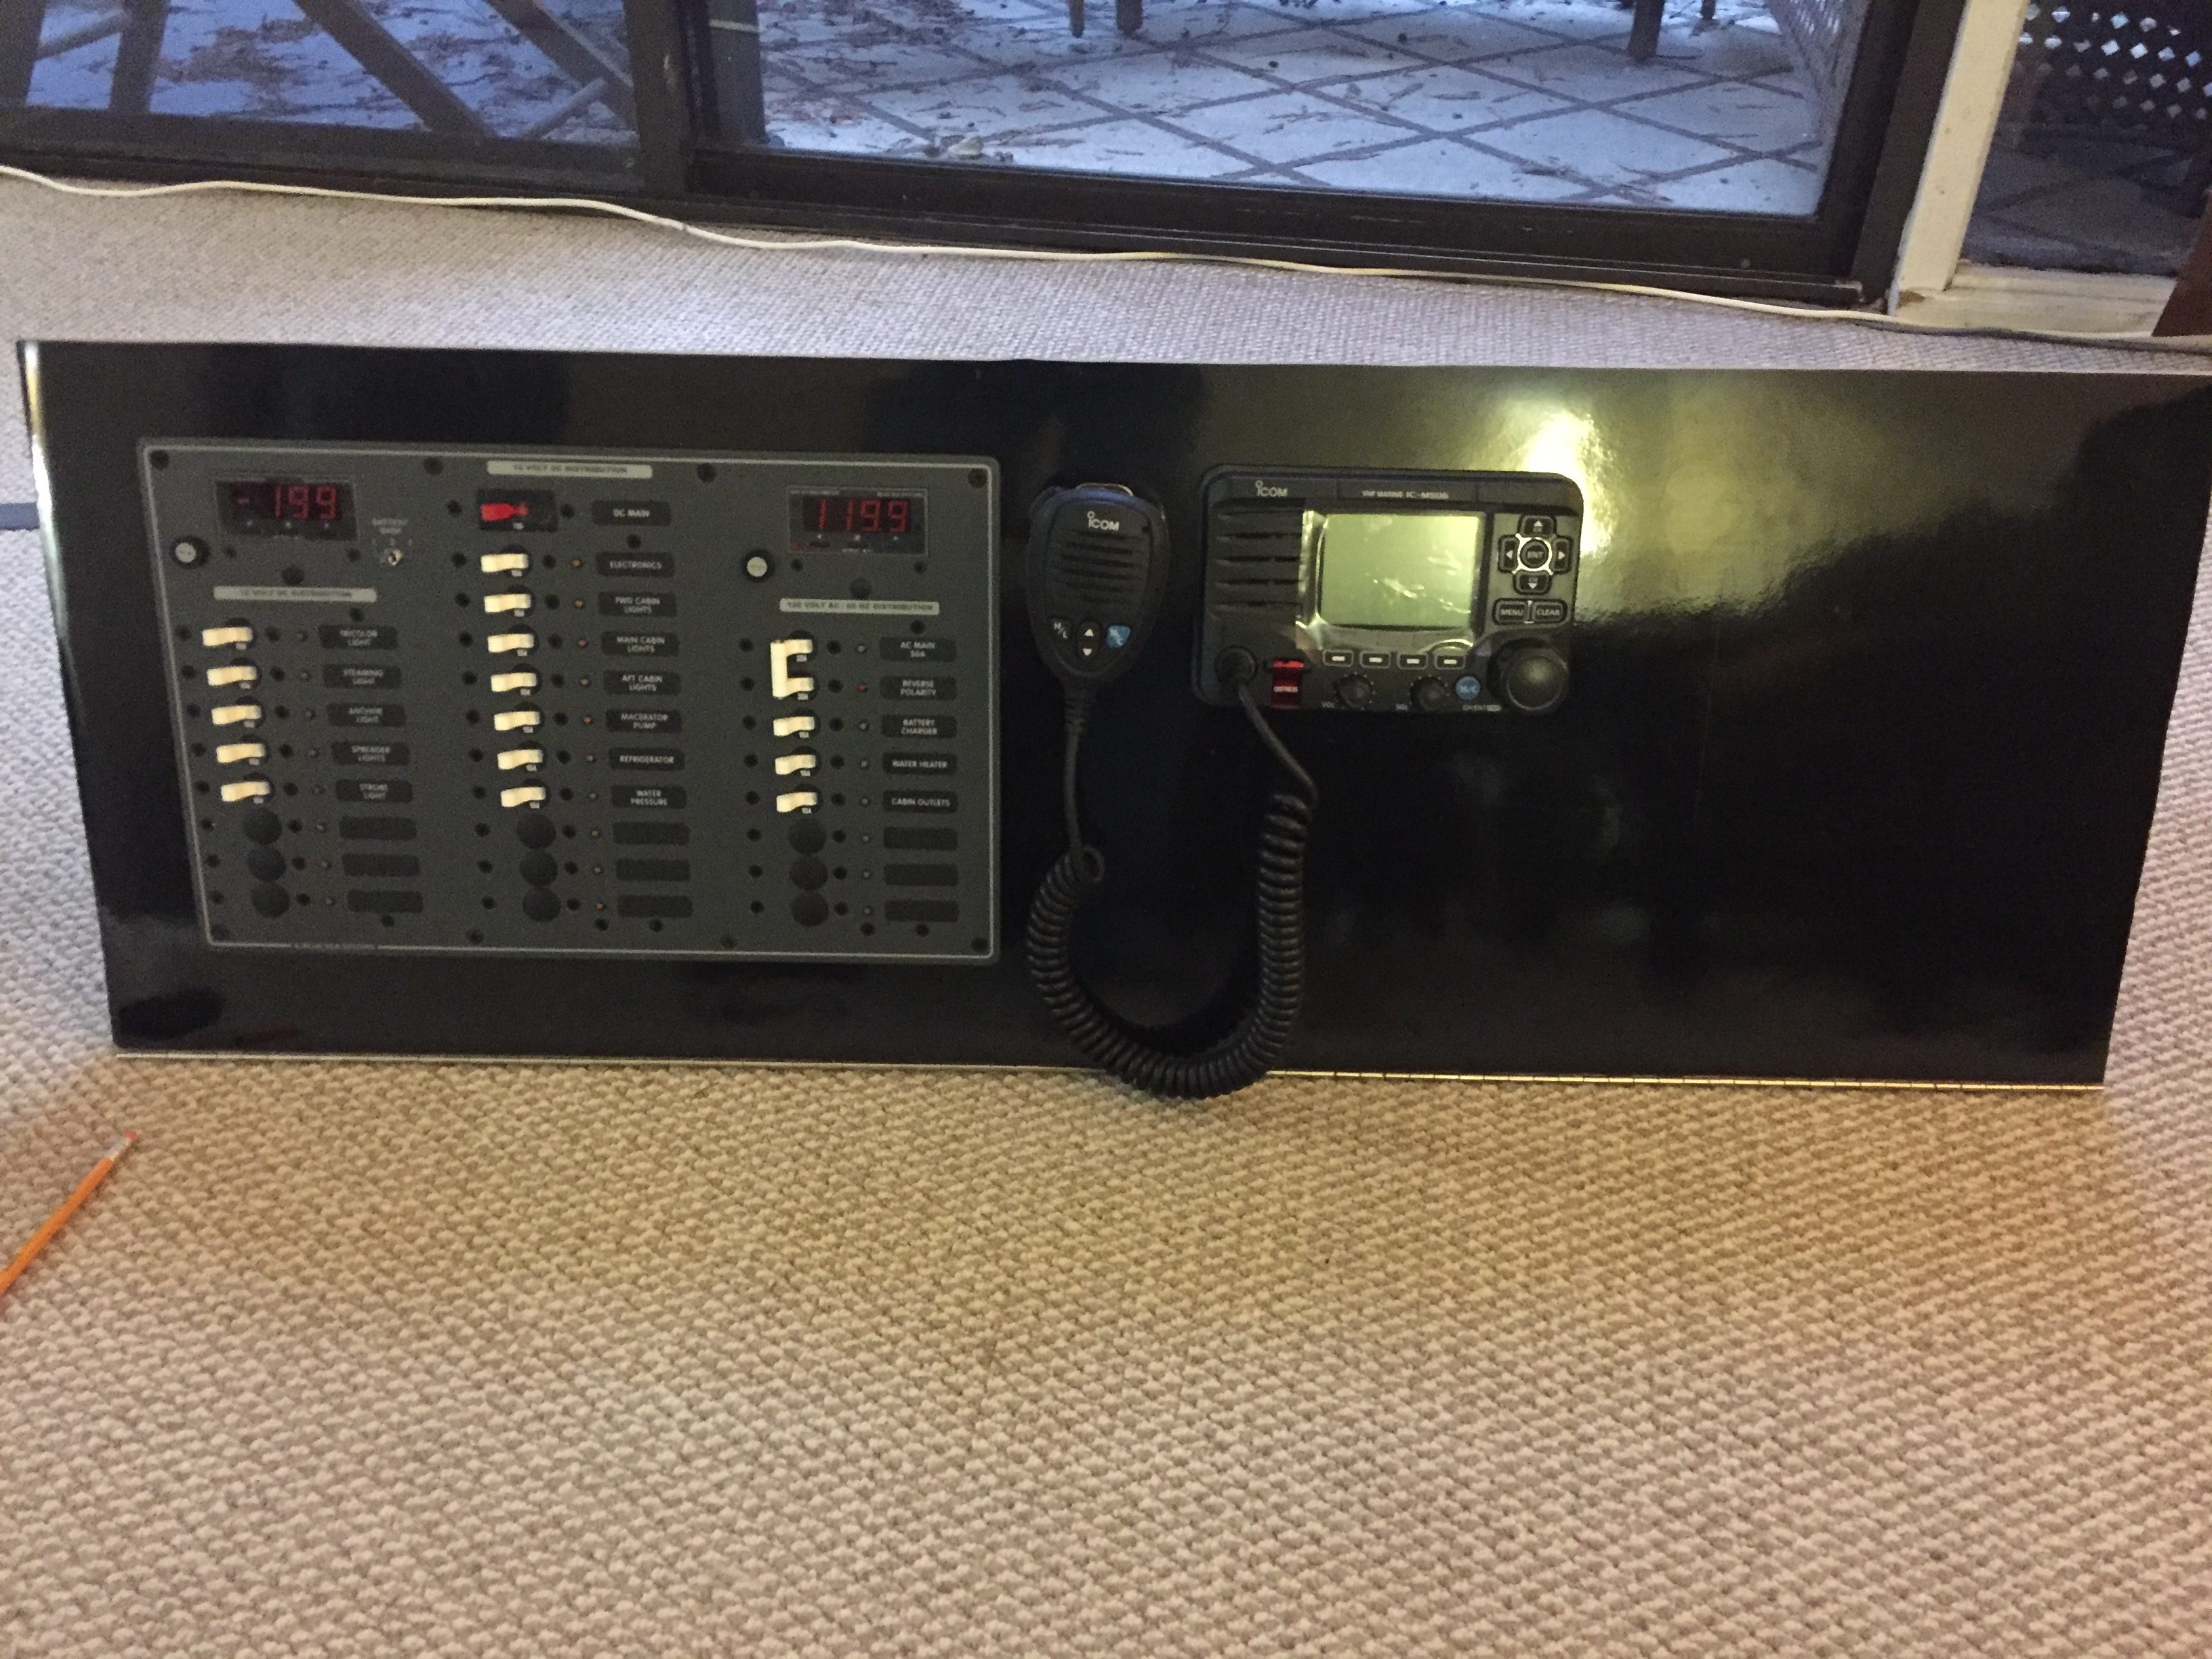
We have mounted the electrical panel and the new VHF into the electrical panel board which is designed to open in order to give full access to any of the electrical and or electronic connections. Still need to actually wire it up of course, but we are getting there. Have to go and buy a couple hundred connectors and some more wire.
I really took my time with this project as I didn’t want to screw up the door. Everything needs to be perfectly square or it will just look bad.
We made patterns for all of the cushions and mattresses, my god, the aft cabin is huge when you bring the pattern home and lay it on the carpet. The v-berth is pretty standard in my opinion. I used cheap $4 shower curtain liners from Walmart in order to make the patterns.
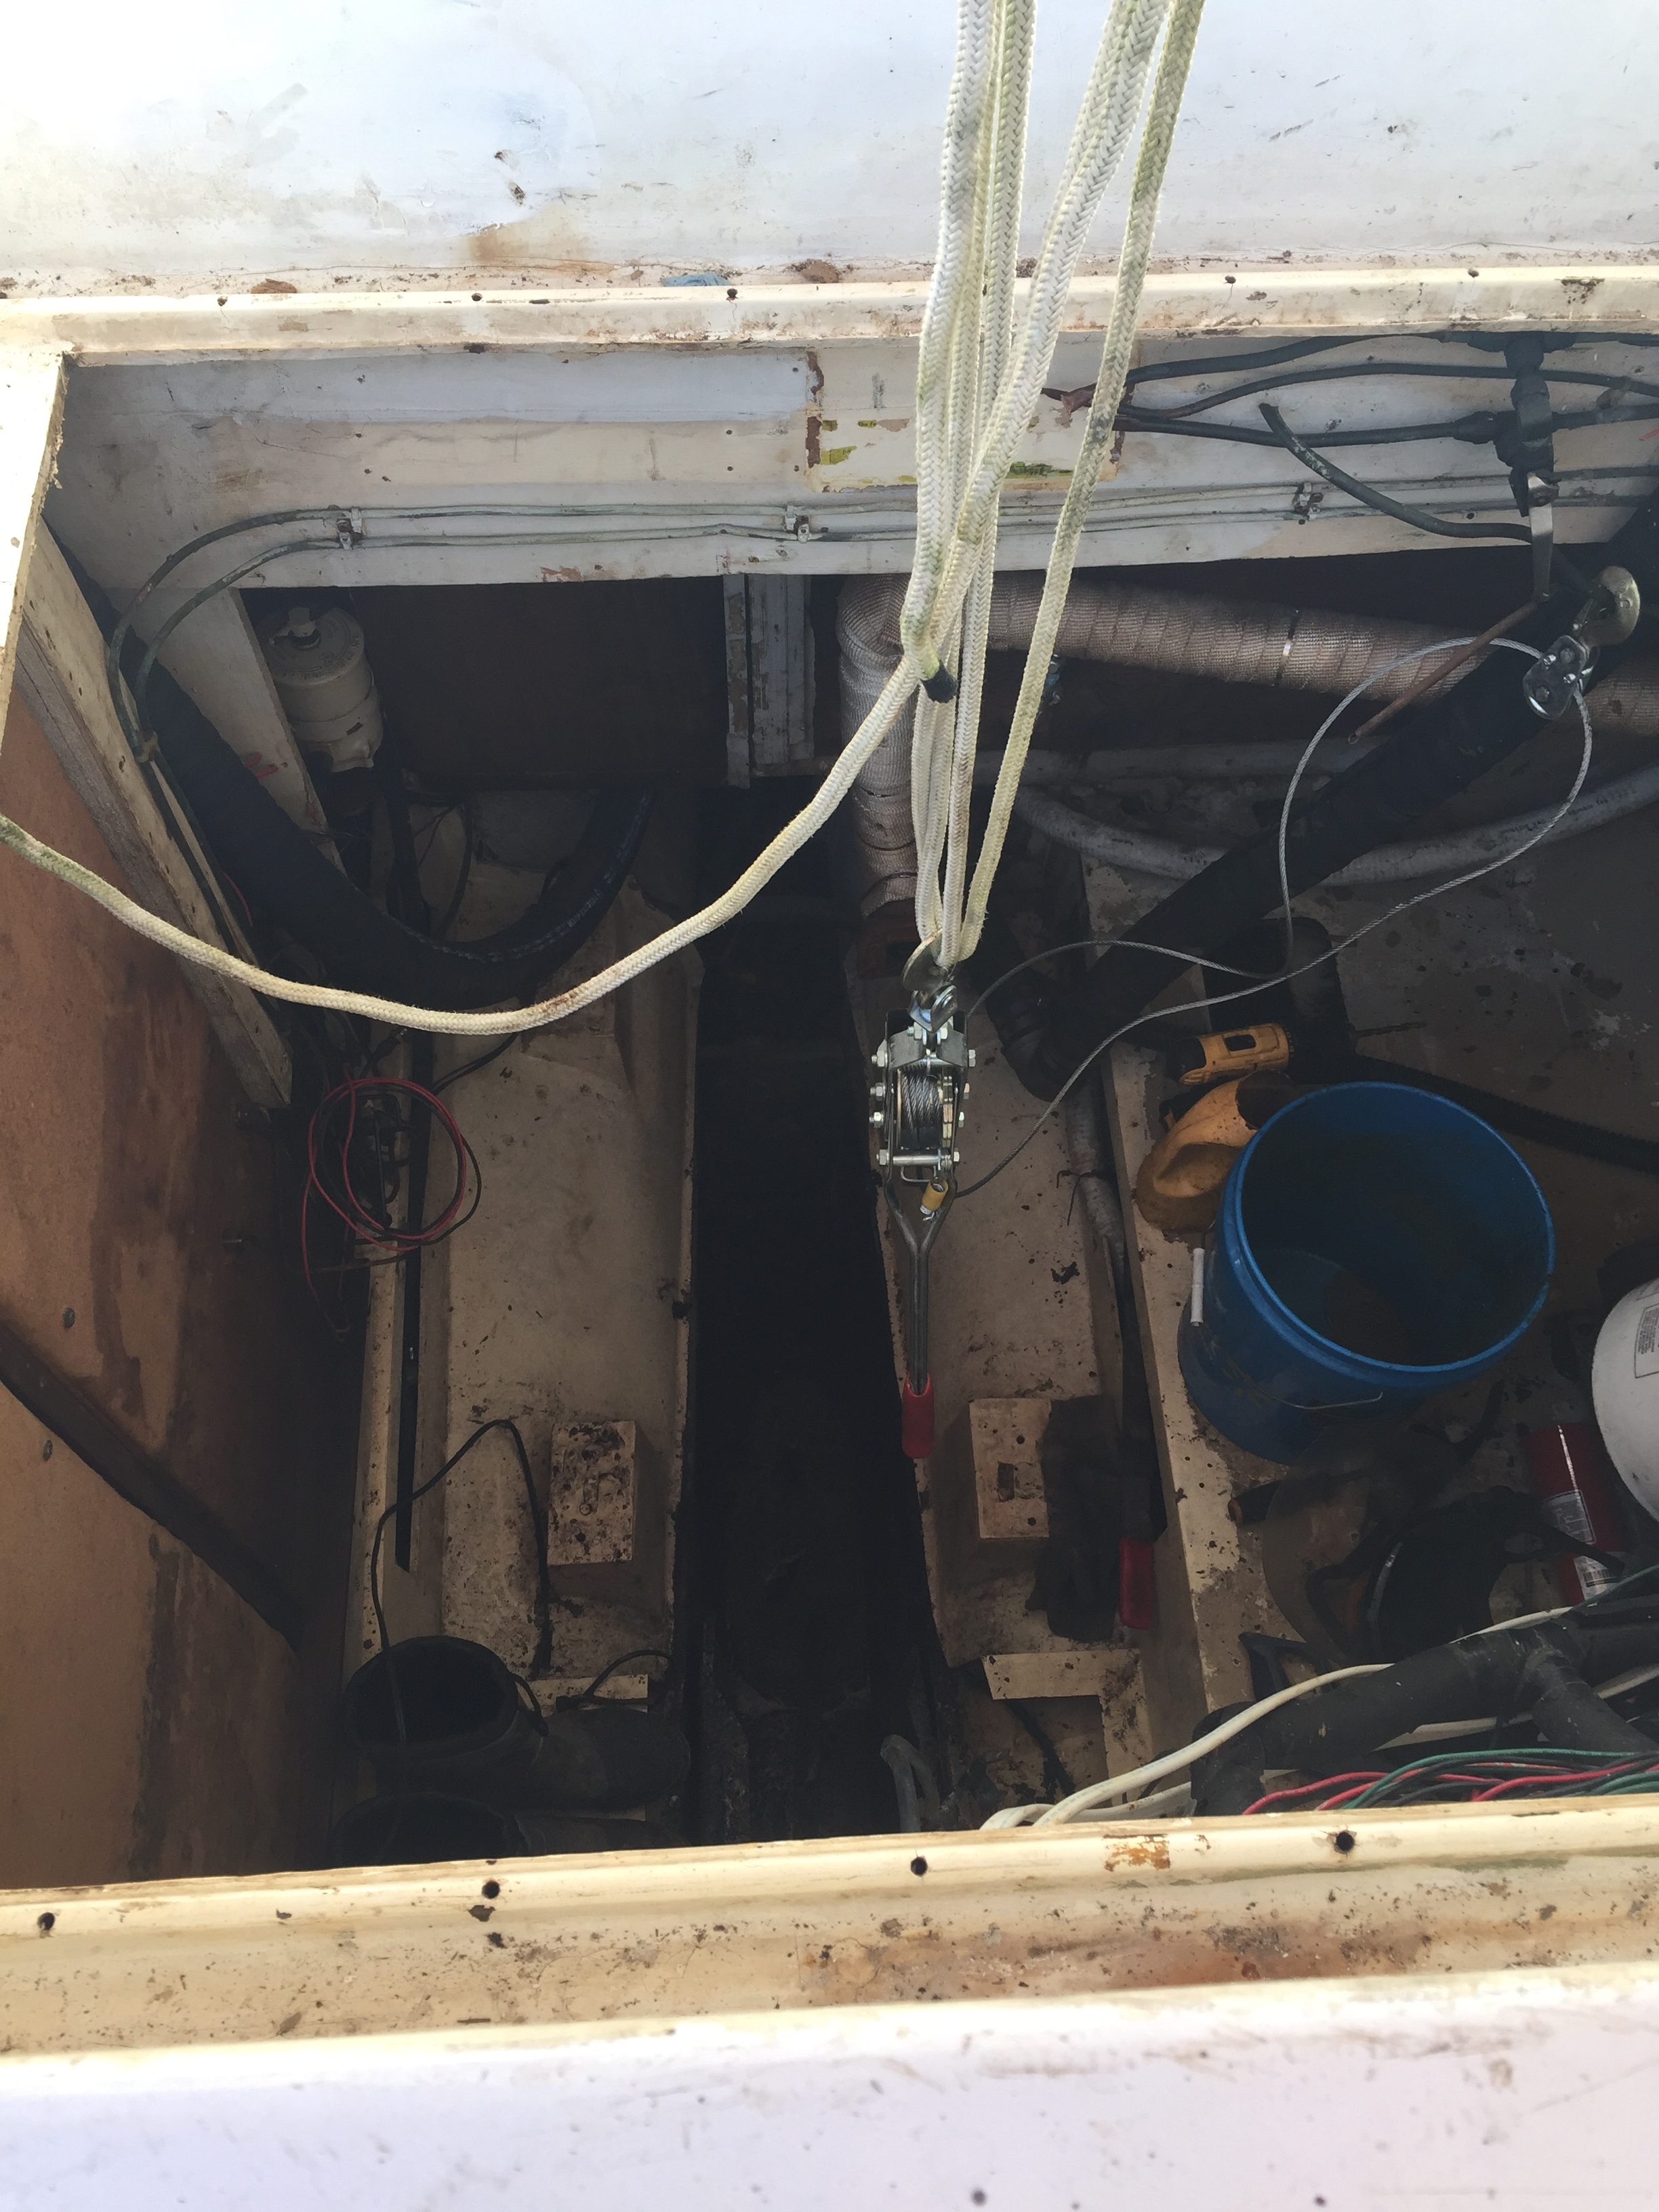
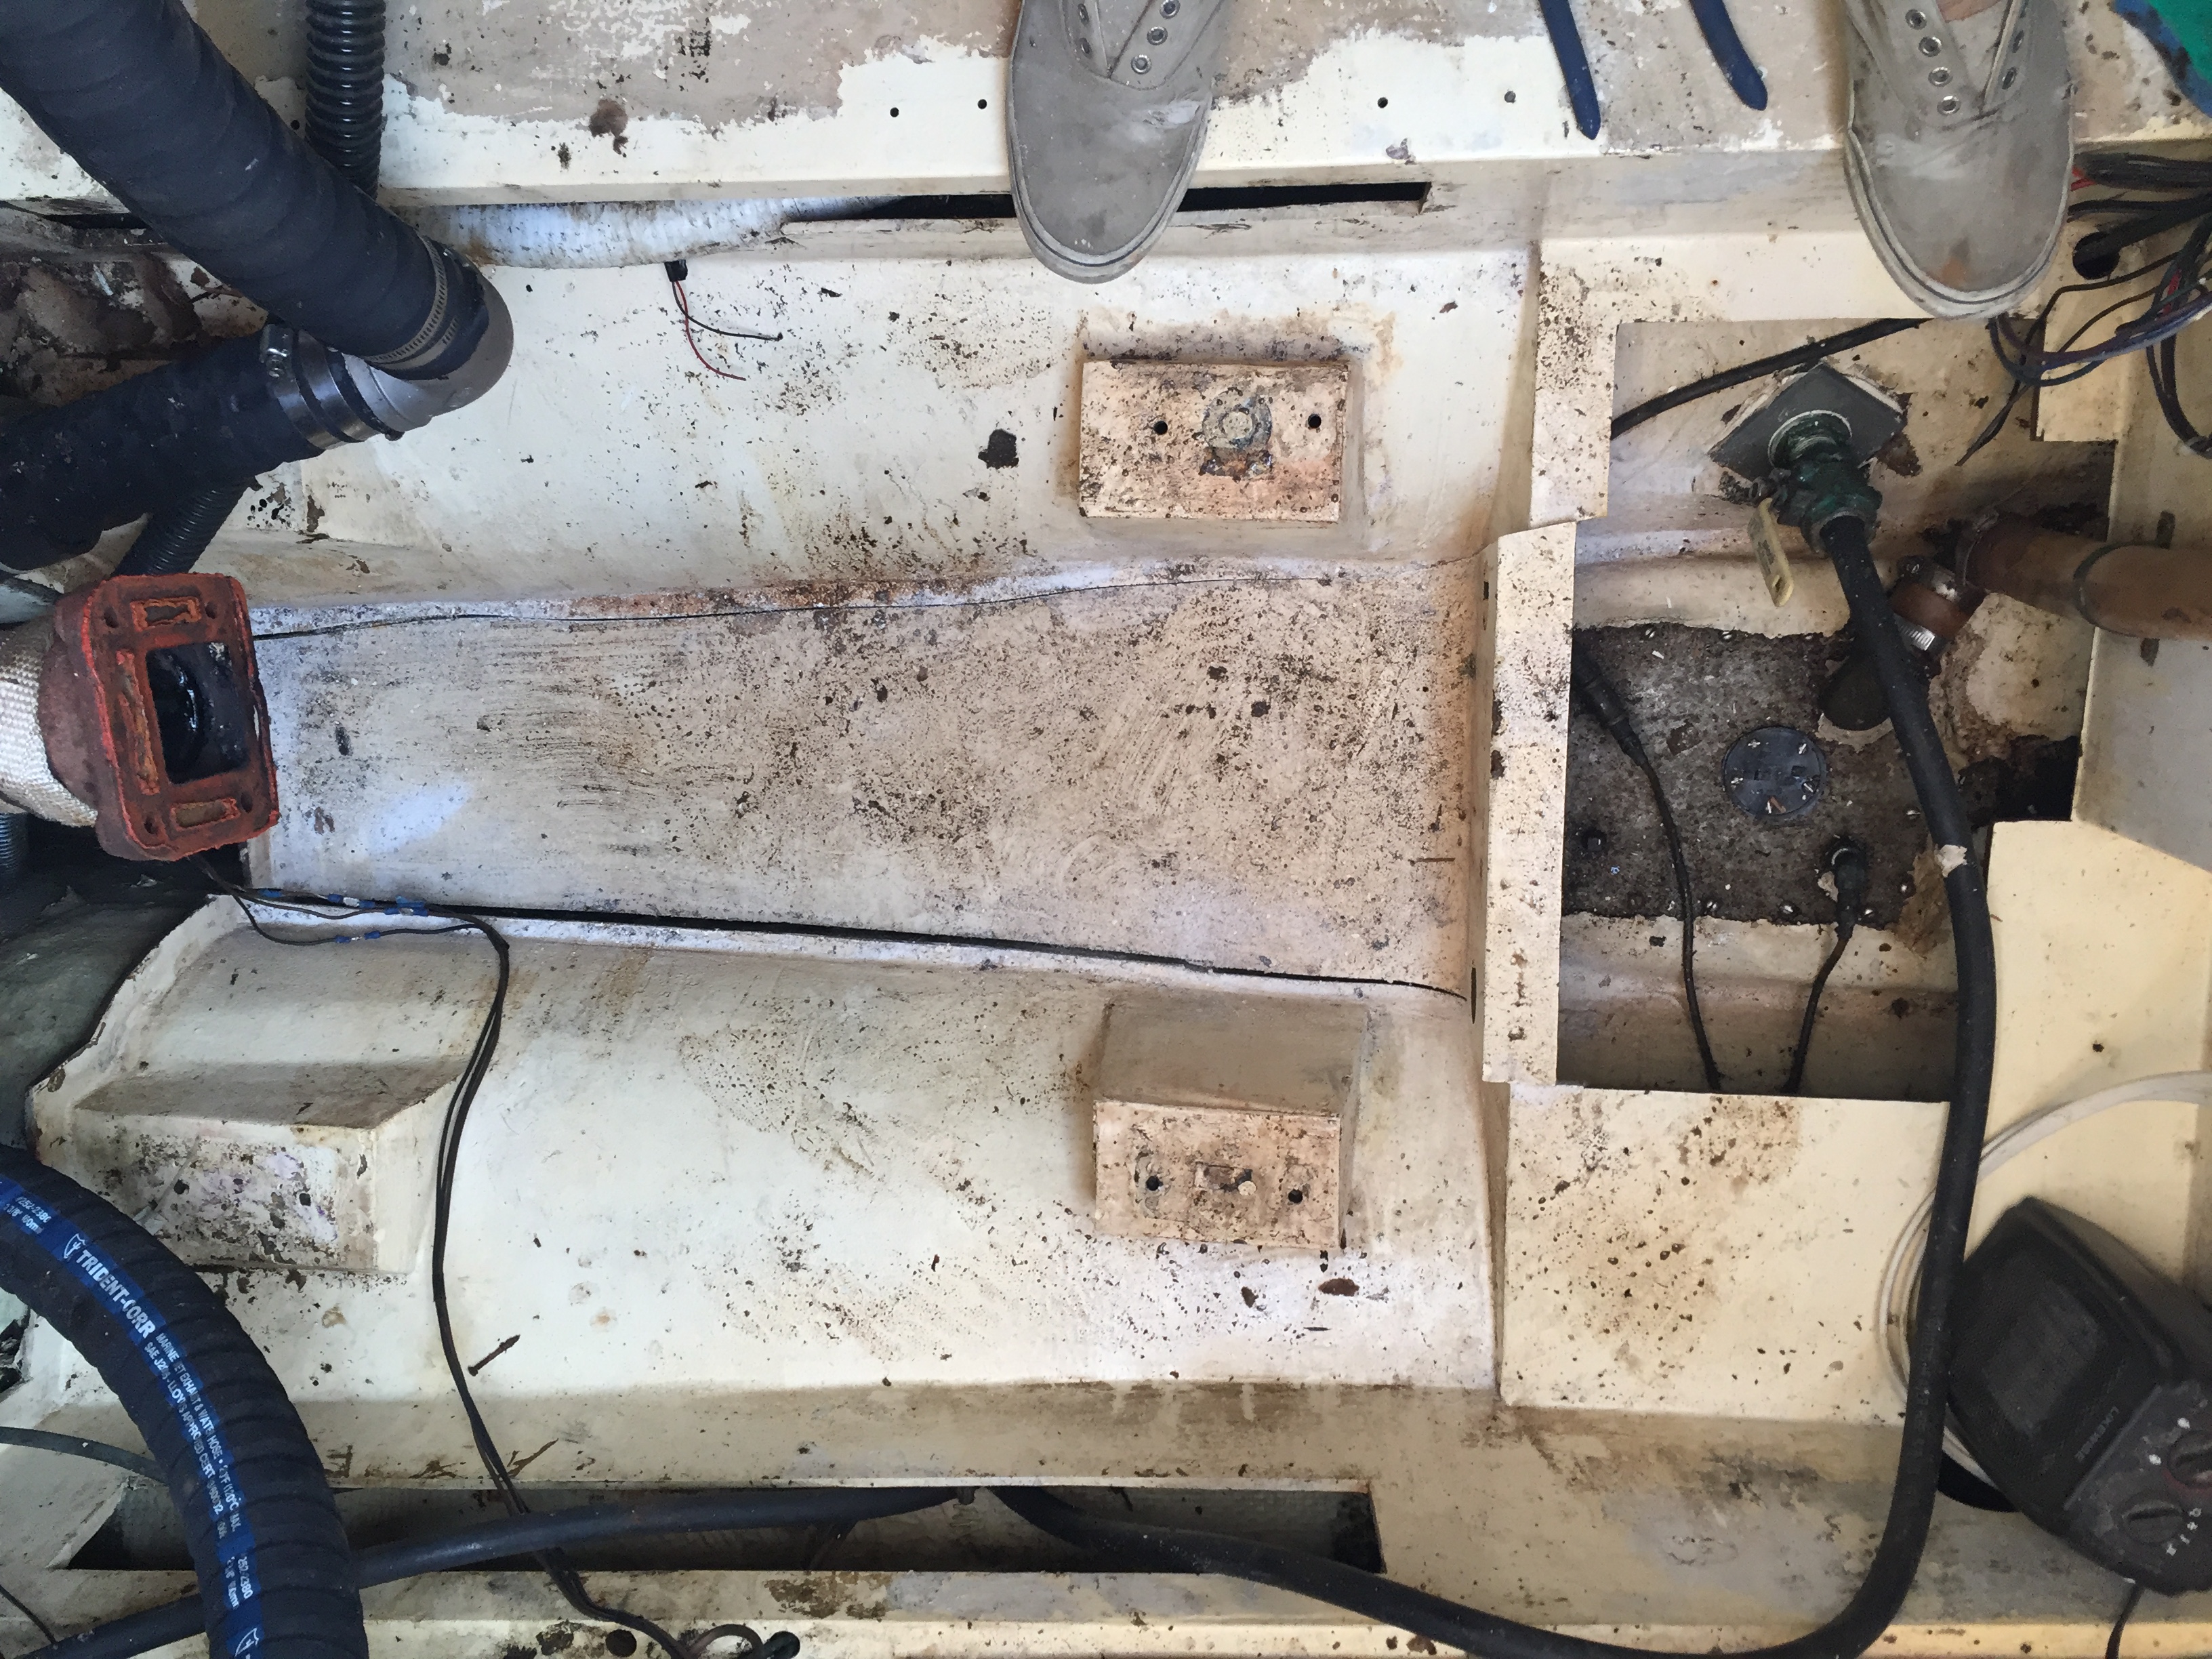
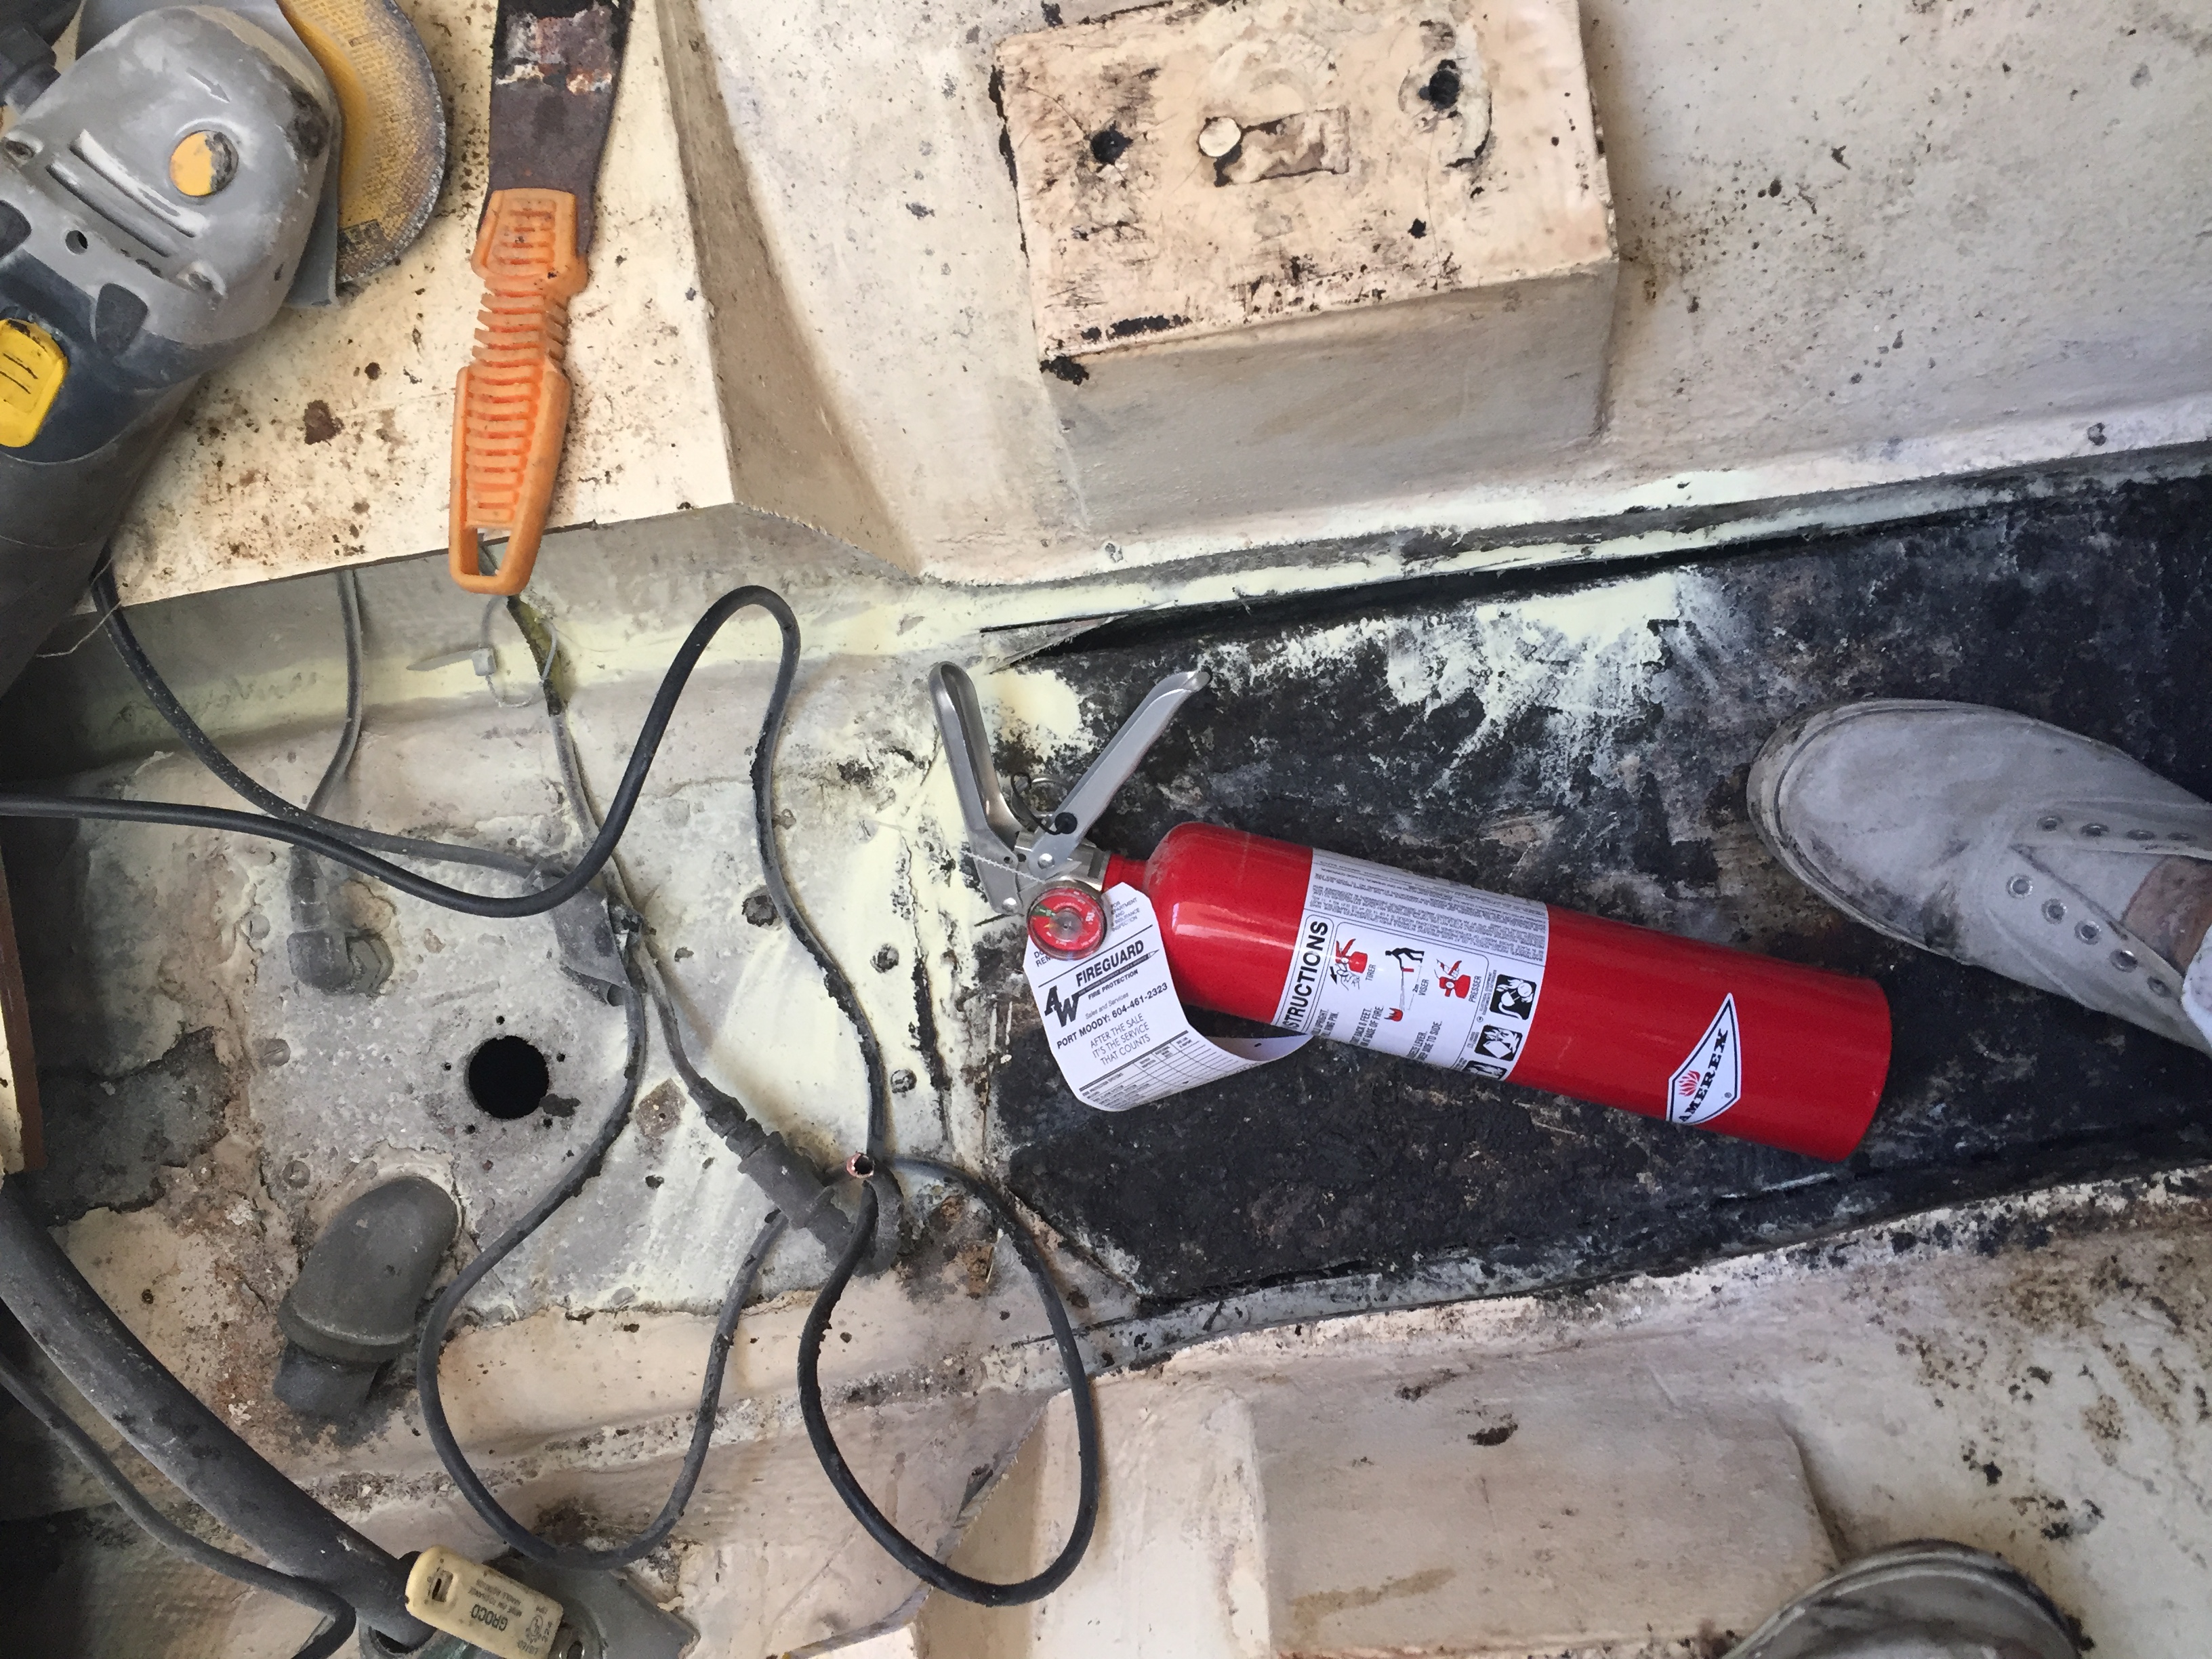
And finally the big news! Yes it finally happened. Yes this is the last BIG, dirty, messy, smelly job! We have purposely left this to the last as it is also going to be the most expensive project on the boat! The old engine (read mooring anchor as it didn’t run) is gone! Out, vanished, disappeared, gonzo, how ever you want to word it, it is gone!
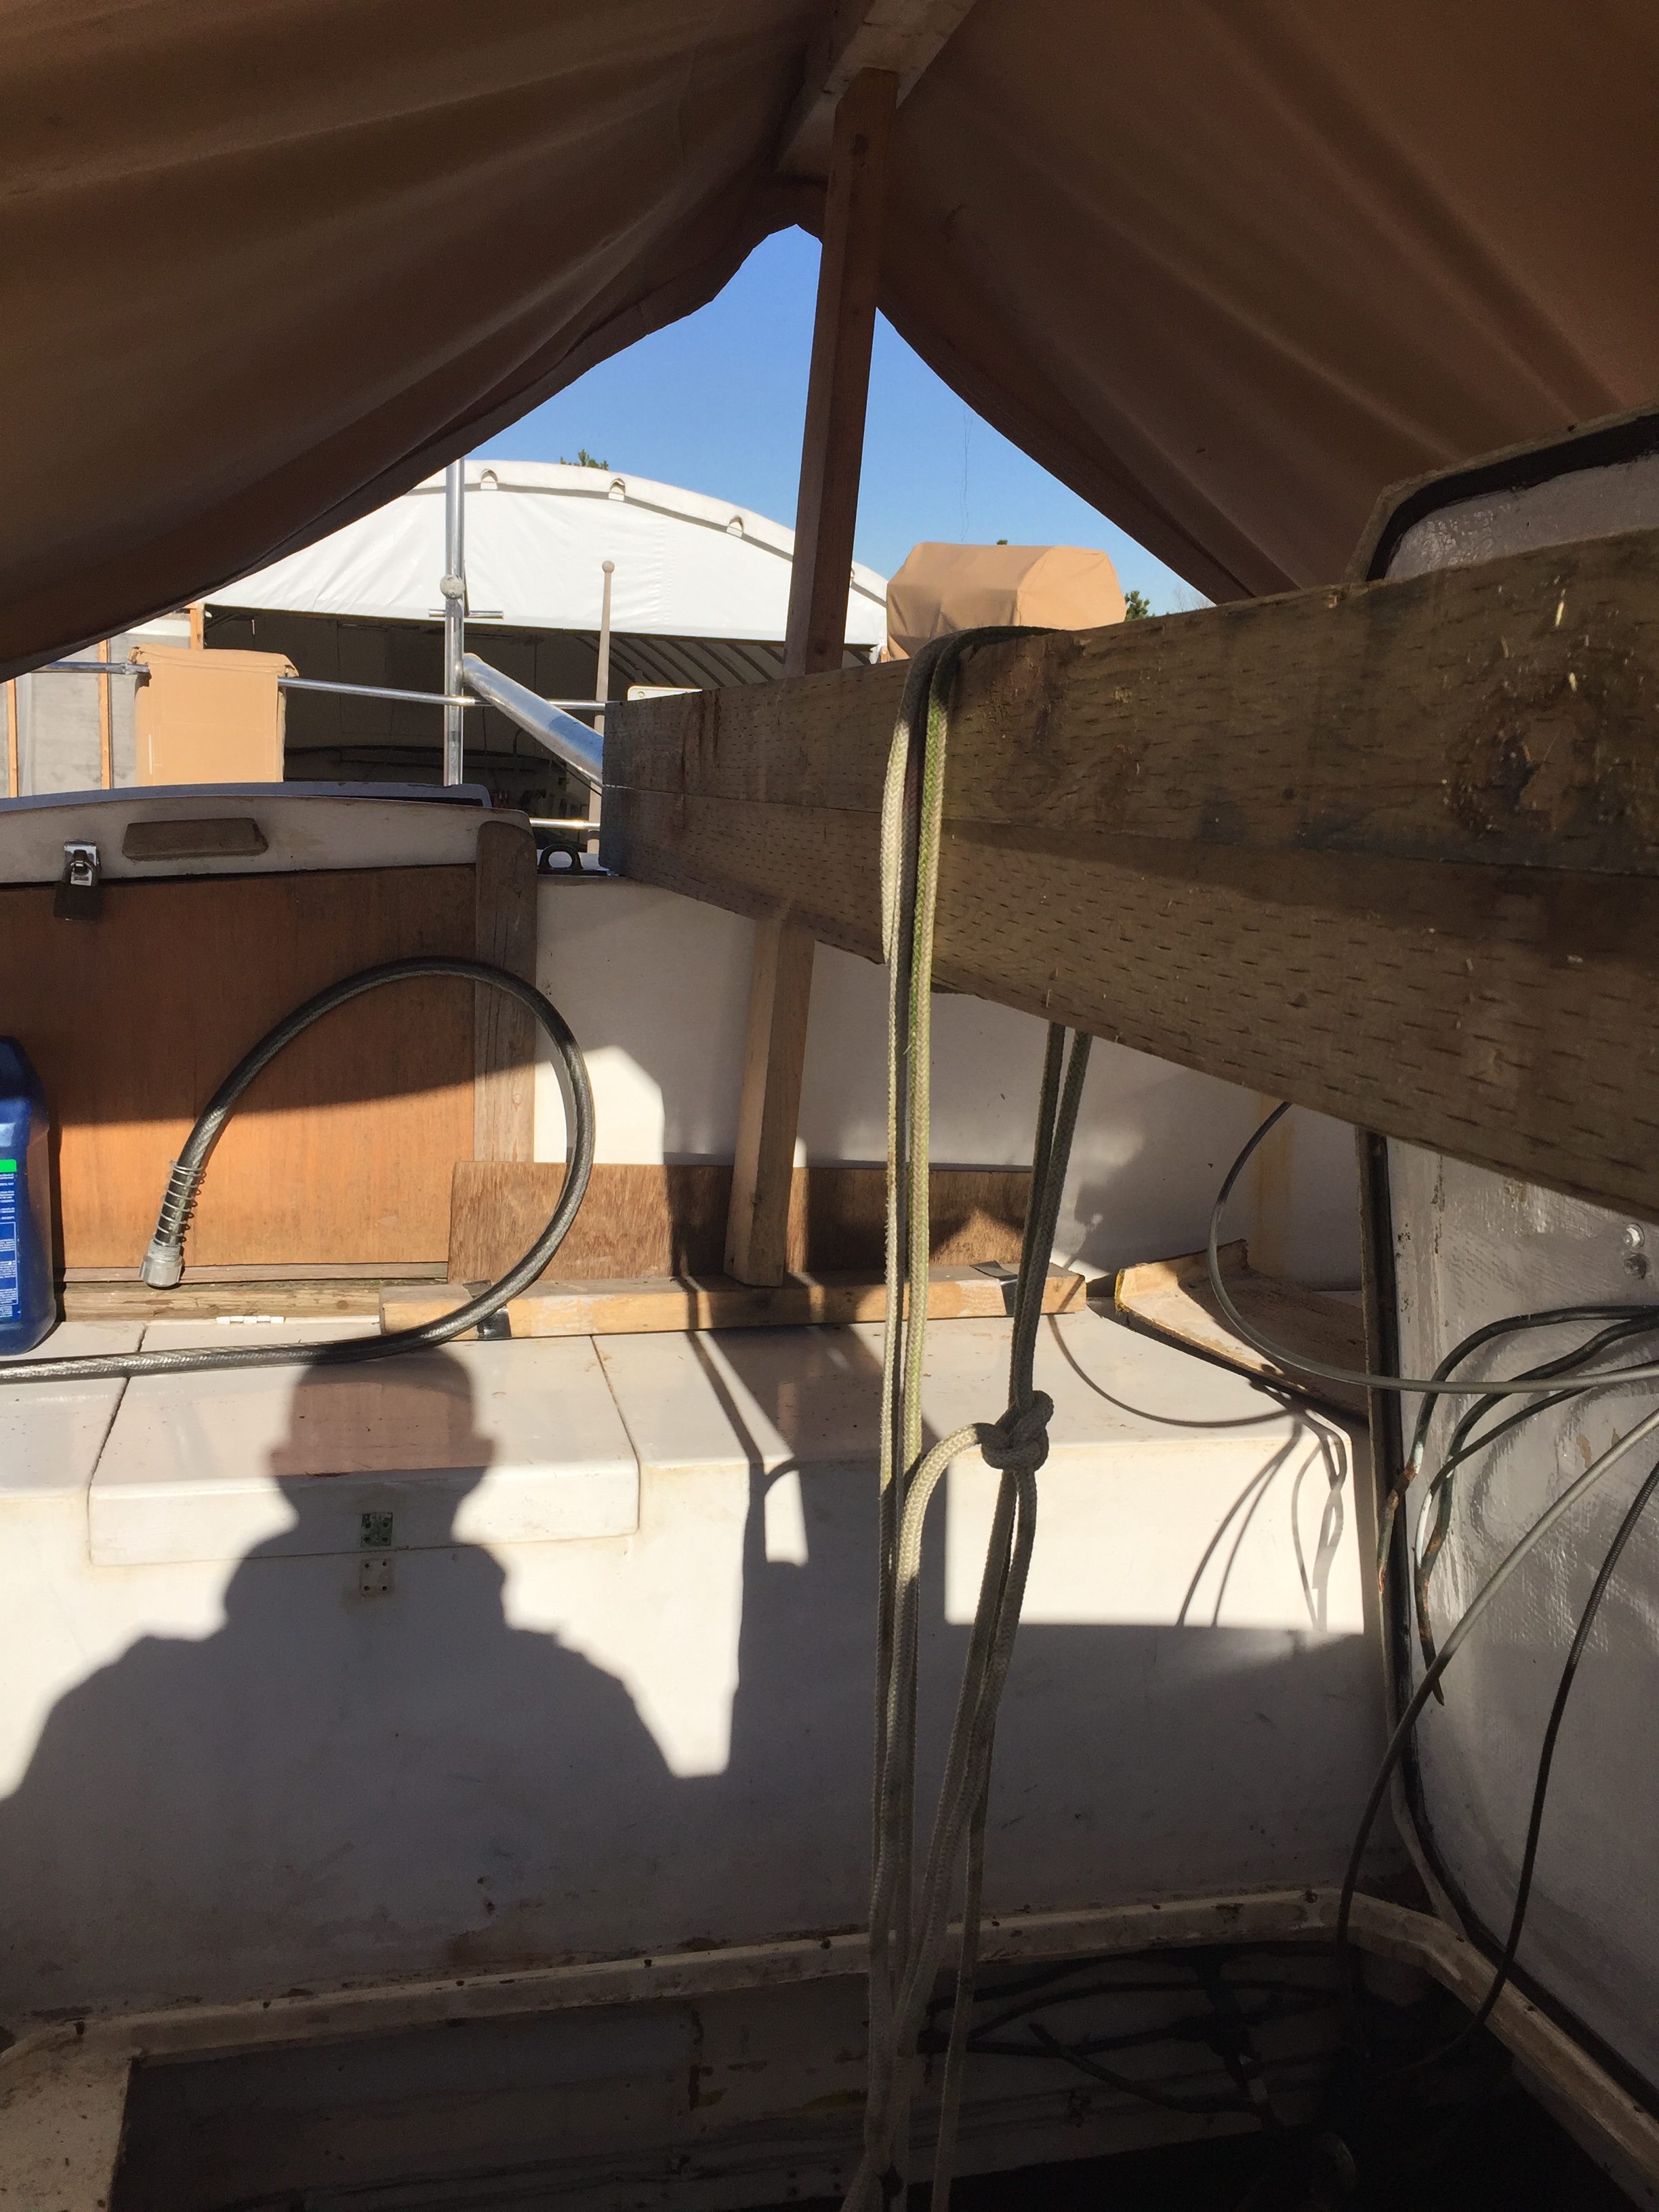
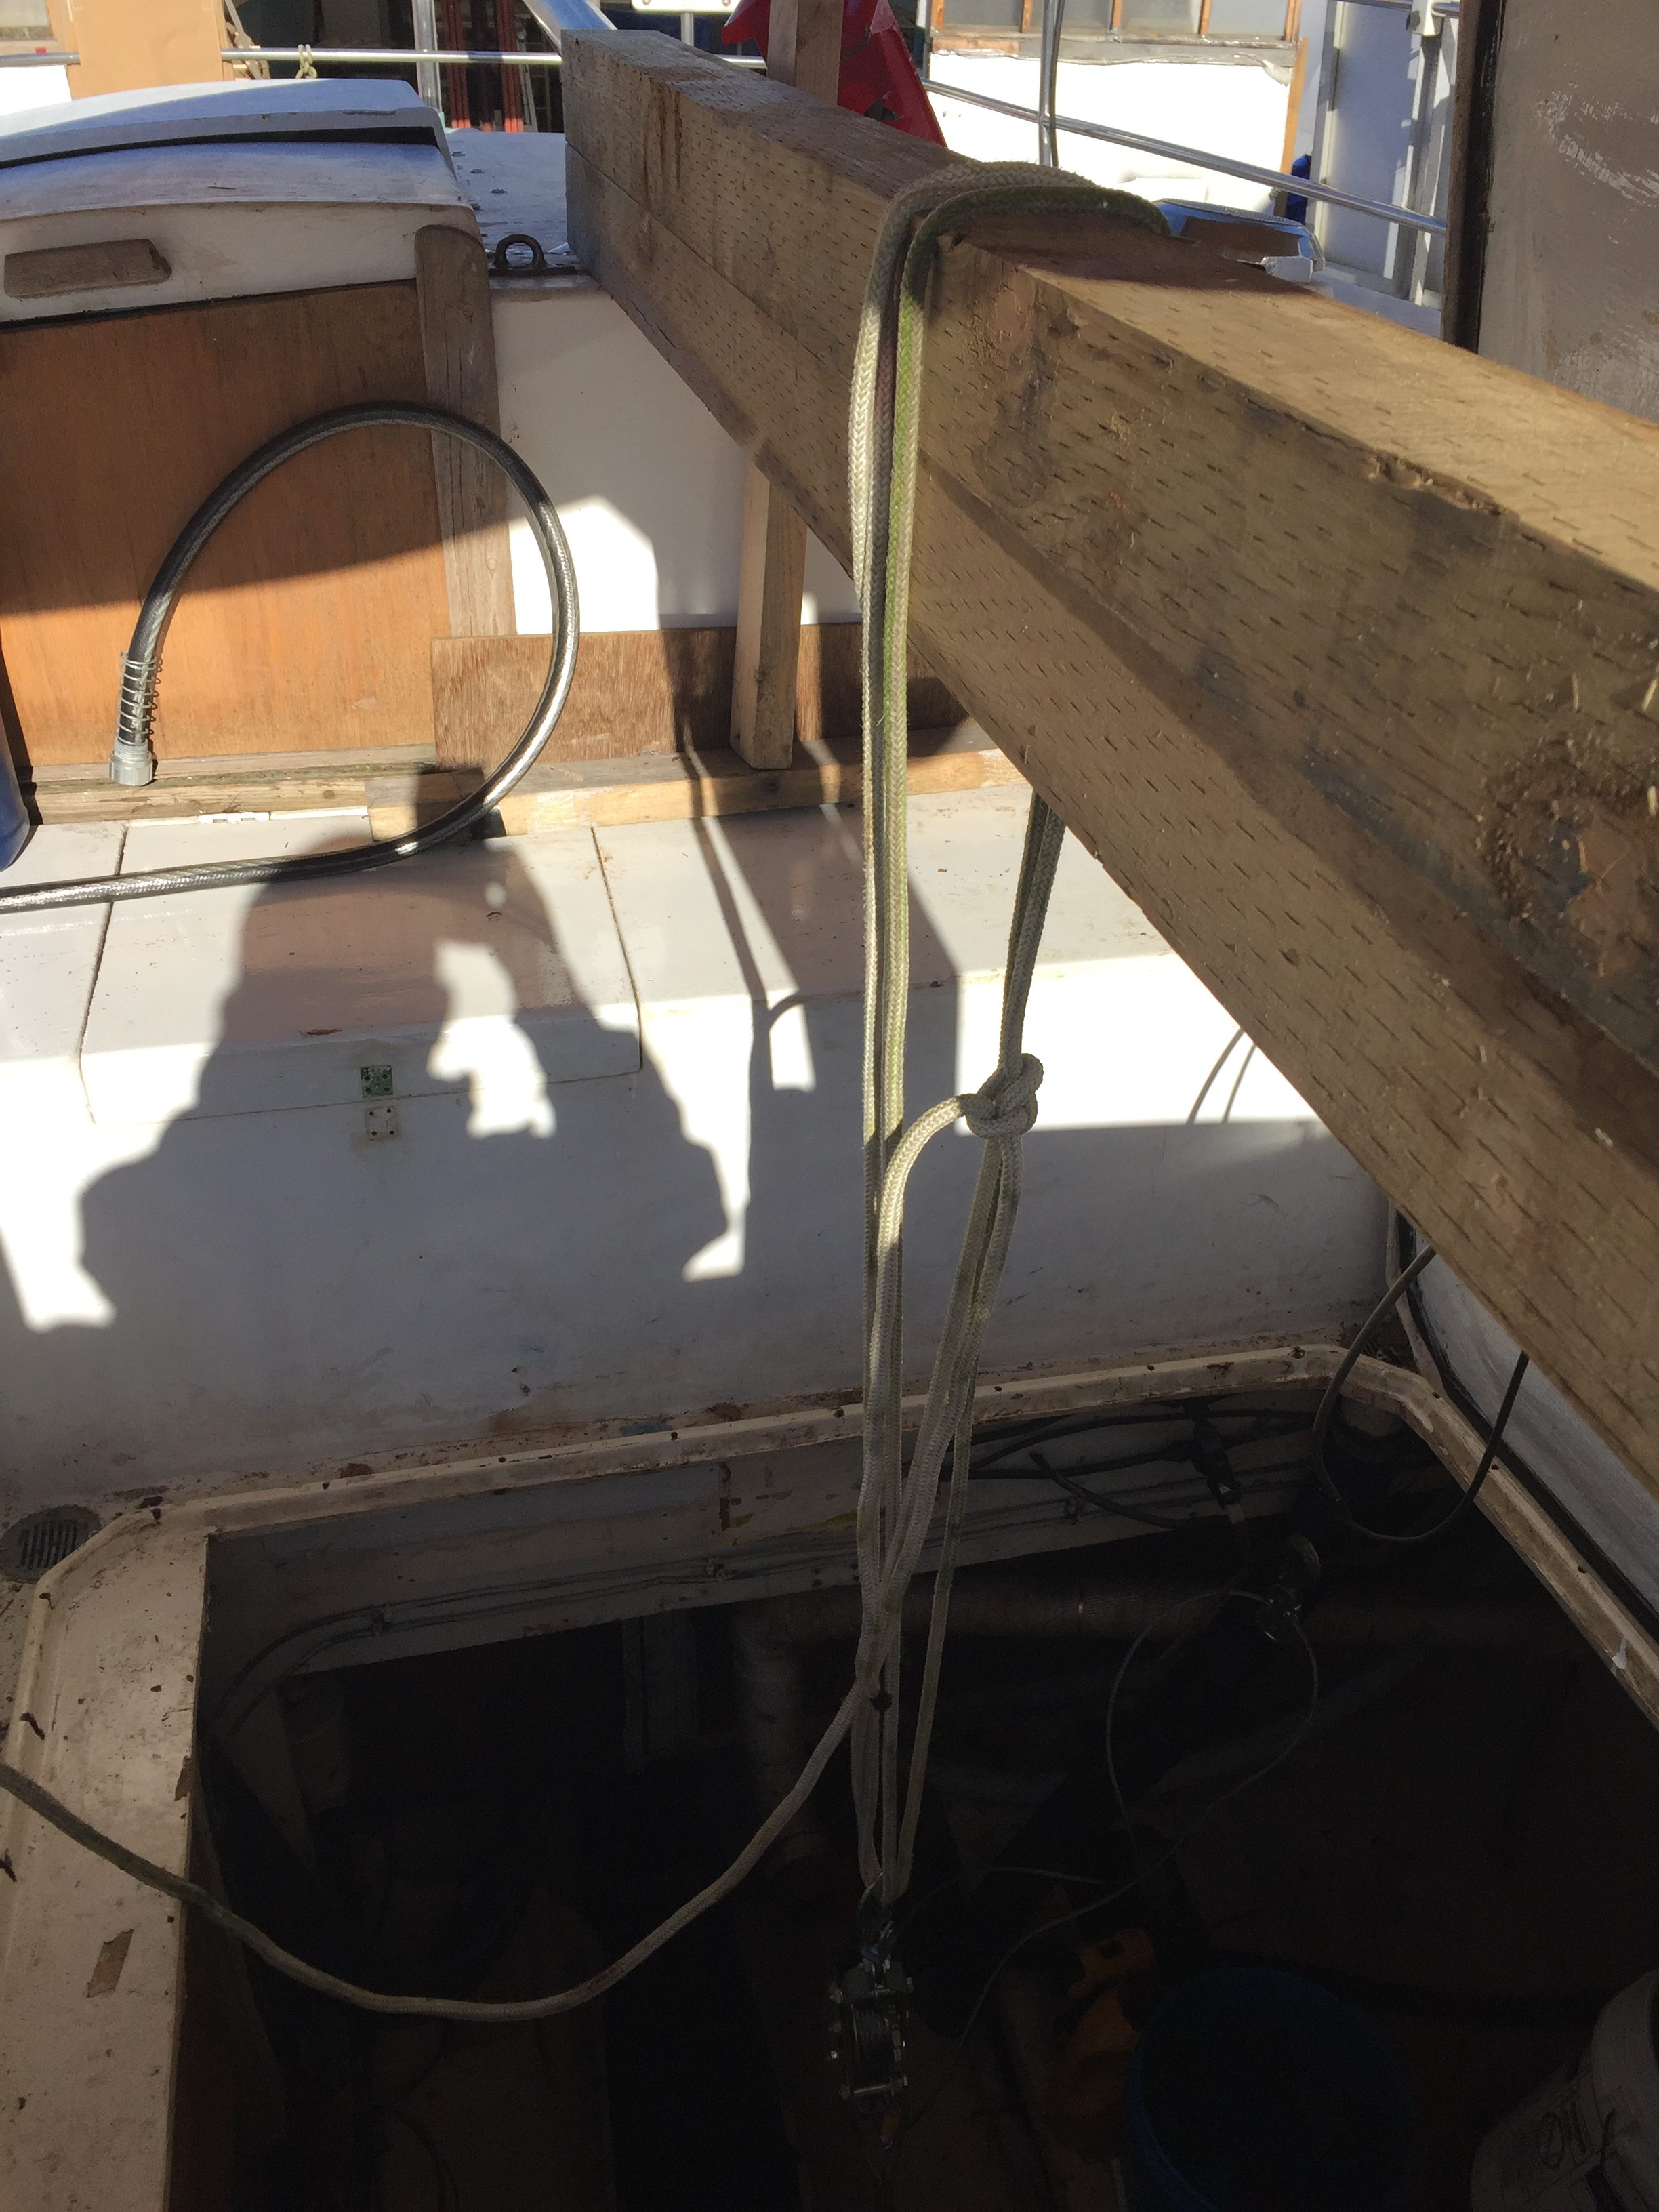
Believe it or not, I am really excited about this huge mess!! Ya I know, I am nuts! I can not wait to get in there and degrease and clean and replace some of the old wood and paint and make this last room ready for the new engine! I still need to cut out the keel tank which I am sure is going to be a bitch, and I need to determine if the wing tanks are ok or if they need to be replaced but that is fine.
When I got the call today that the engine was coming out I actually started to get very nervous! We are committed now and things are going to happen fast! Of course it is easy when someone else does it while you are at work, makes it seem really fast! Anyway, hoping to get some good before and after shots for the blog!
Wow, February 1st already – so much to do before July!!
Well in the past I have to say that there have been lots of times that I have went to the boat show and maybe spent $20 on stuff just so I did not feel like I didn’t get anything, yesterday was a bit different.
I managed to get a couple of good deals!
I scored on a new Icom VHF with built in AIS for the nav station and the Commandmic remote for the helm! Got a great deal as well!
Of course the really BIG news is that we have ordered a new engine! Happy Dance!
I will add all of the details later and give the explanation as to how we arrived at this particular engine but we are pretty excited! Need to speak to the dealer this week to ensure we get the correct transmission gear ratio but other than that, it will be ordered and should be here in about a month!! Also spoke to our guy and Akupara will be moved back up to the front of the yard, the old engine should come out asap, which will give me time to reno the engine compartment prior to the new engine arriving. Plan is to have new cutlass bearing, new dripless packing gland, and a new shaft installed, and of course, if the old prop isn’t right, a new one as well!
So, we should be powered by the end of March, fingers crossed!
Almost forgot, we also reserved our slip for July 1st!
We ARE going back in the water! 159 days until Akupara is in her slip!
As we approach the 2 year mark the Admiral is still smiling. Hmmm maybe we should buy a bigger boat?
Sometimes I wonder if we had just saved all of our dimes and nickels for all this time, we probably could have a bought a working version of Akupara by now. But then again, we would have an unknown boat with all kinds of yet to be discovered issues. At least with Akupara we will be 100% intimate with every nut bolt screw wire fixture fitting piece of wood rope material and know for sure that if and when there is an issue exactly how to fix it.
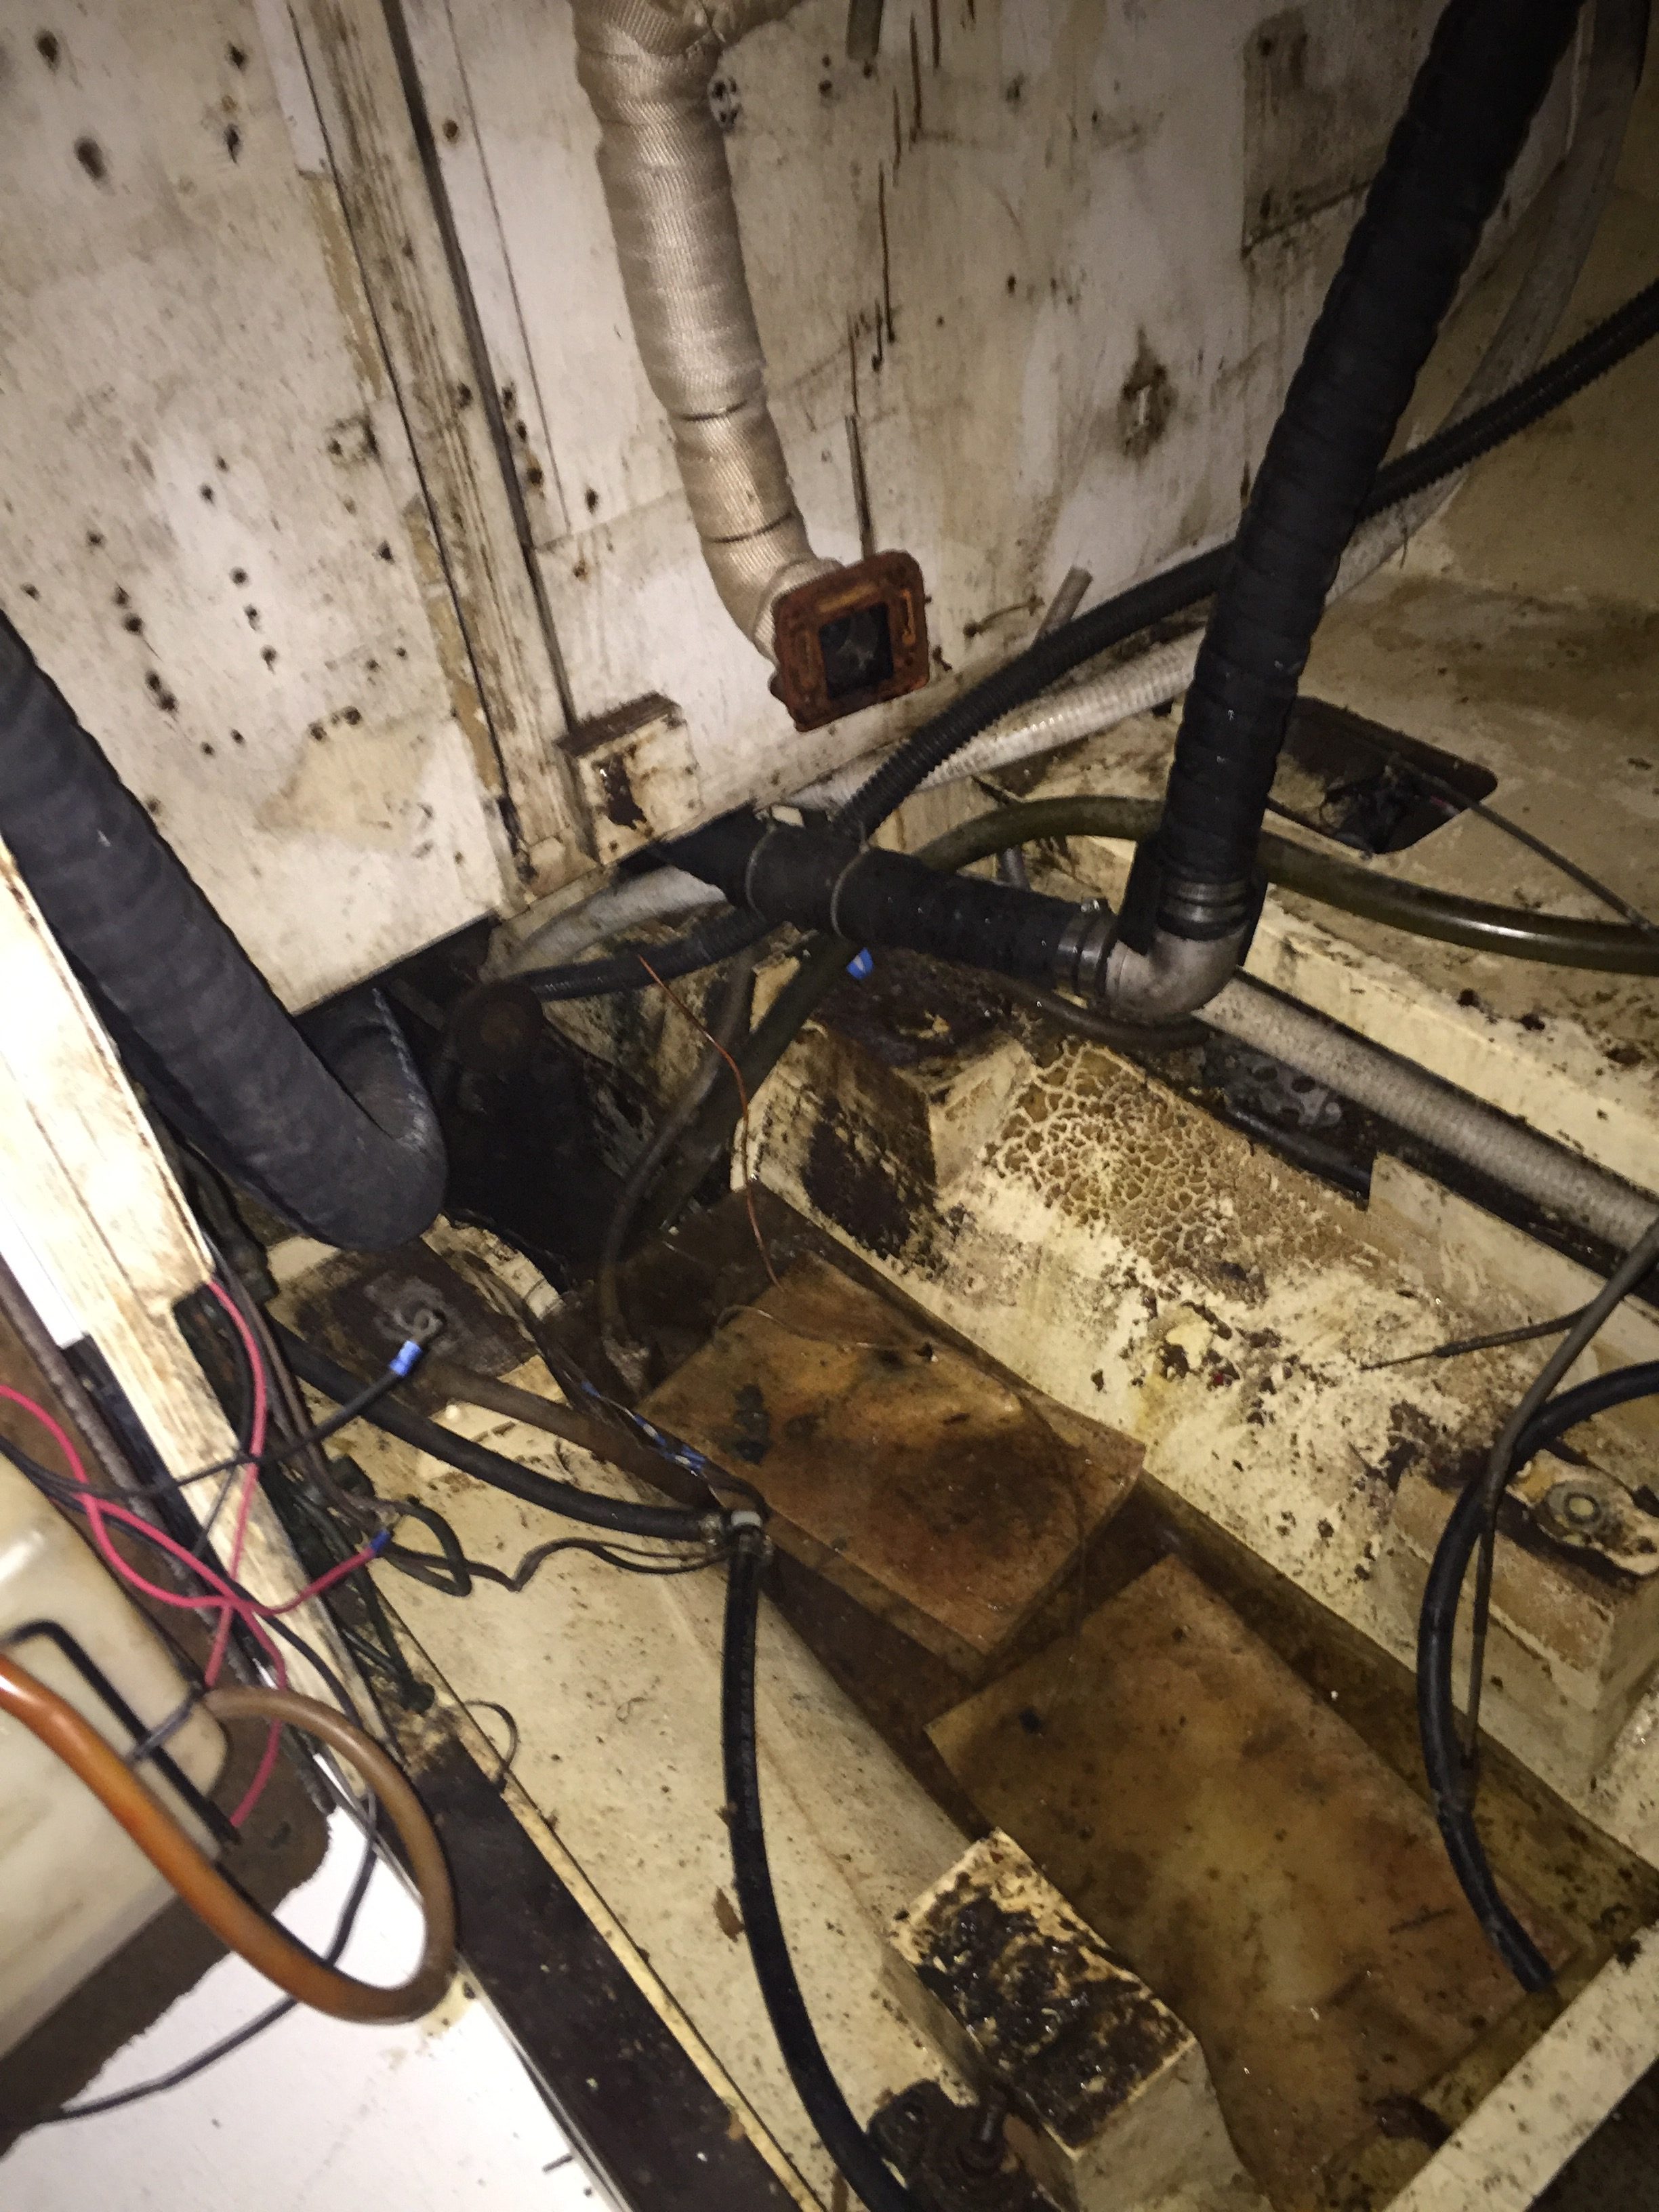
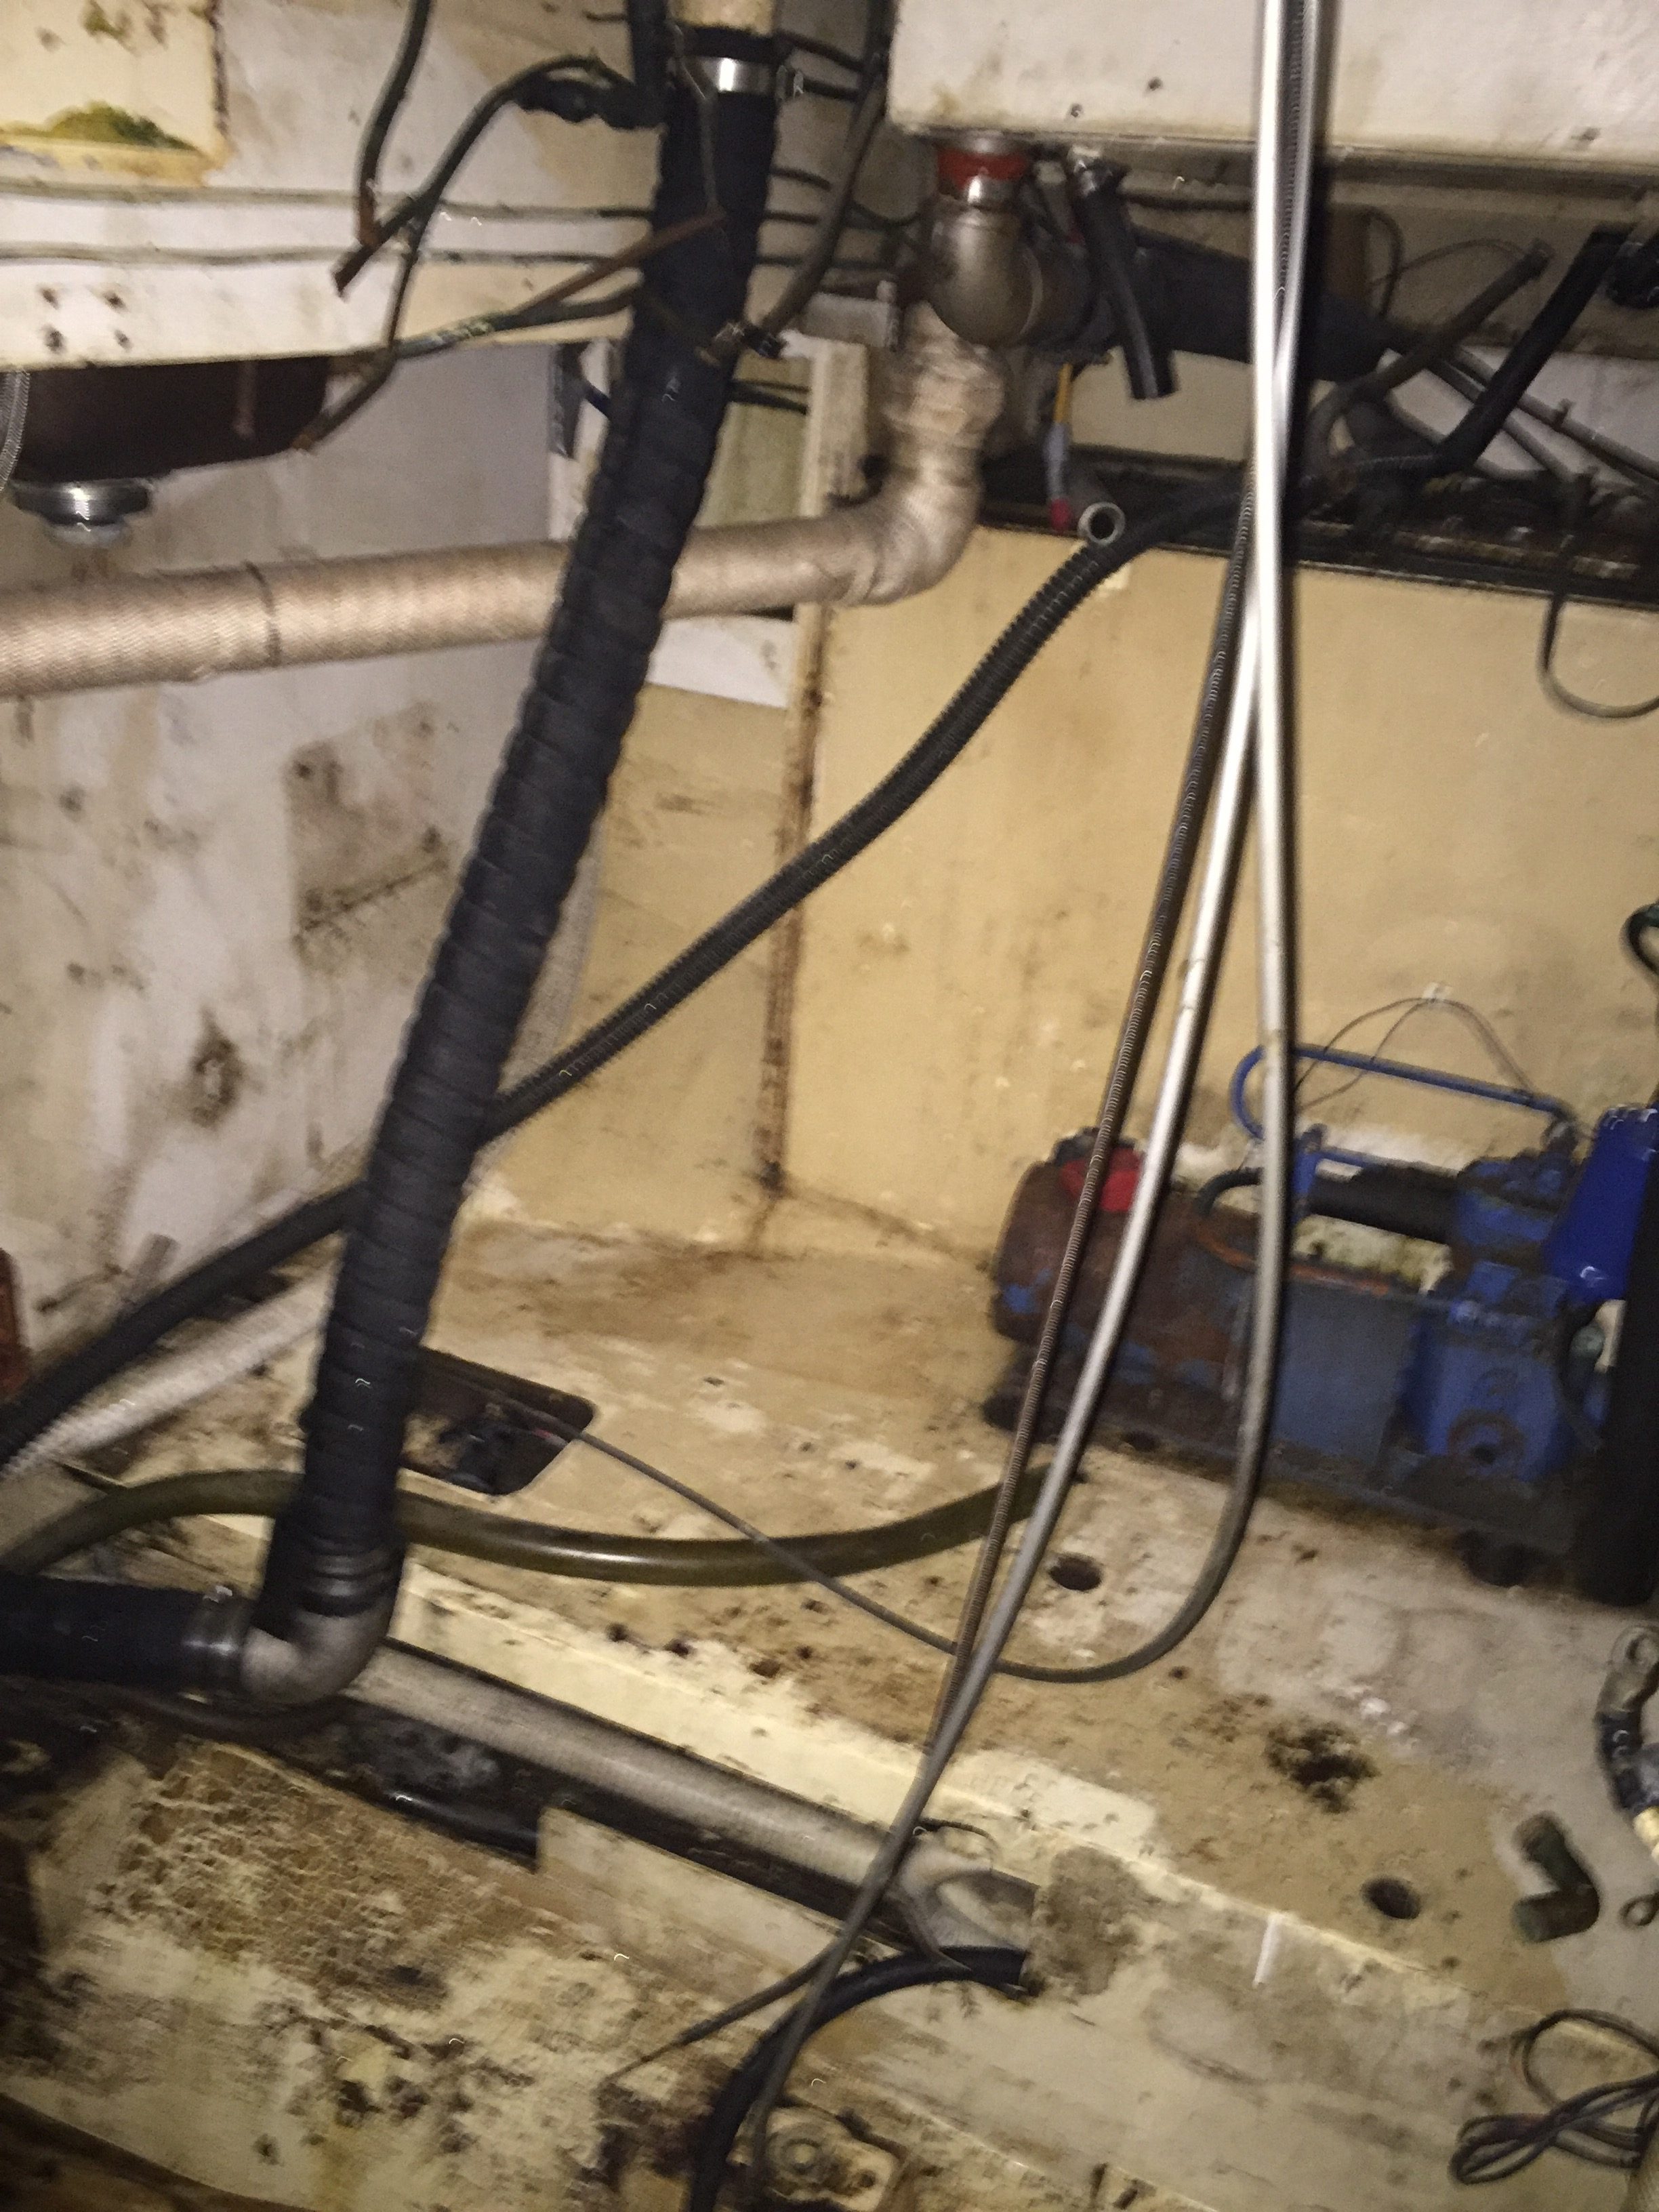
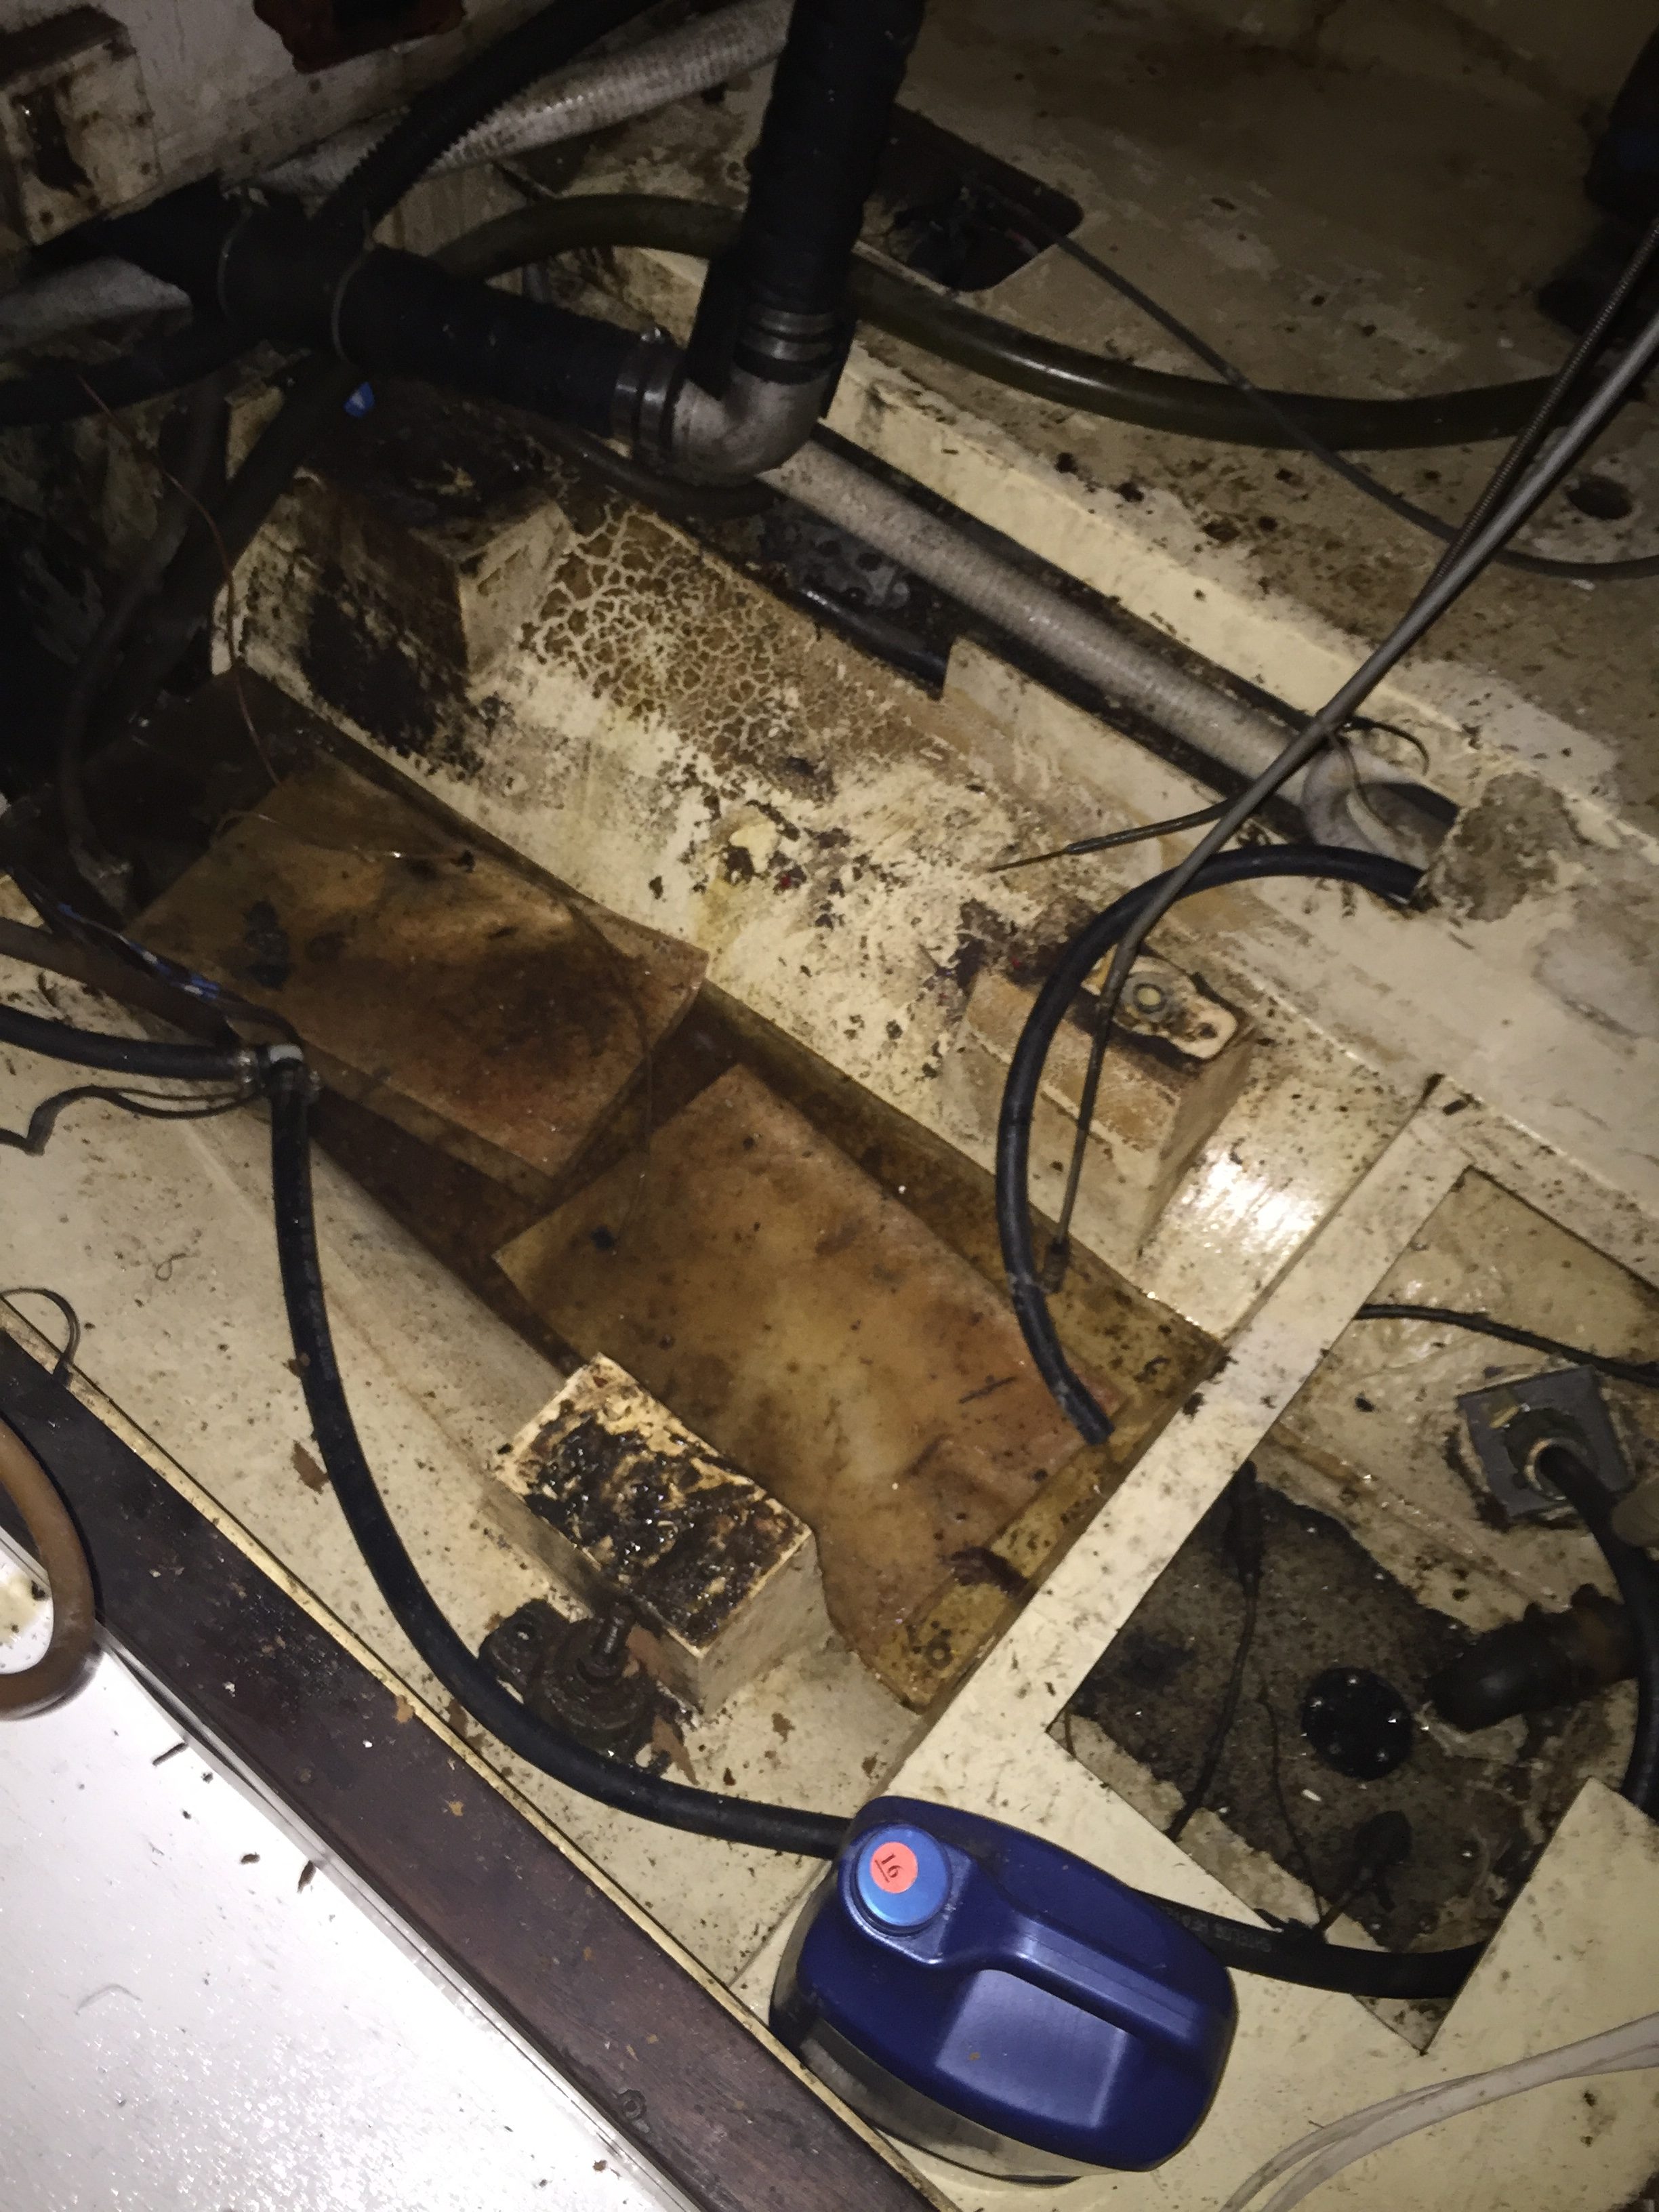
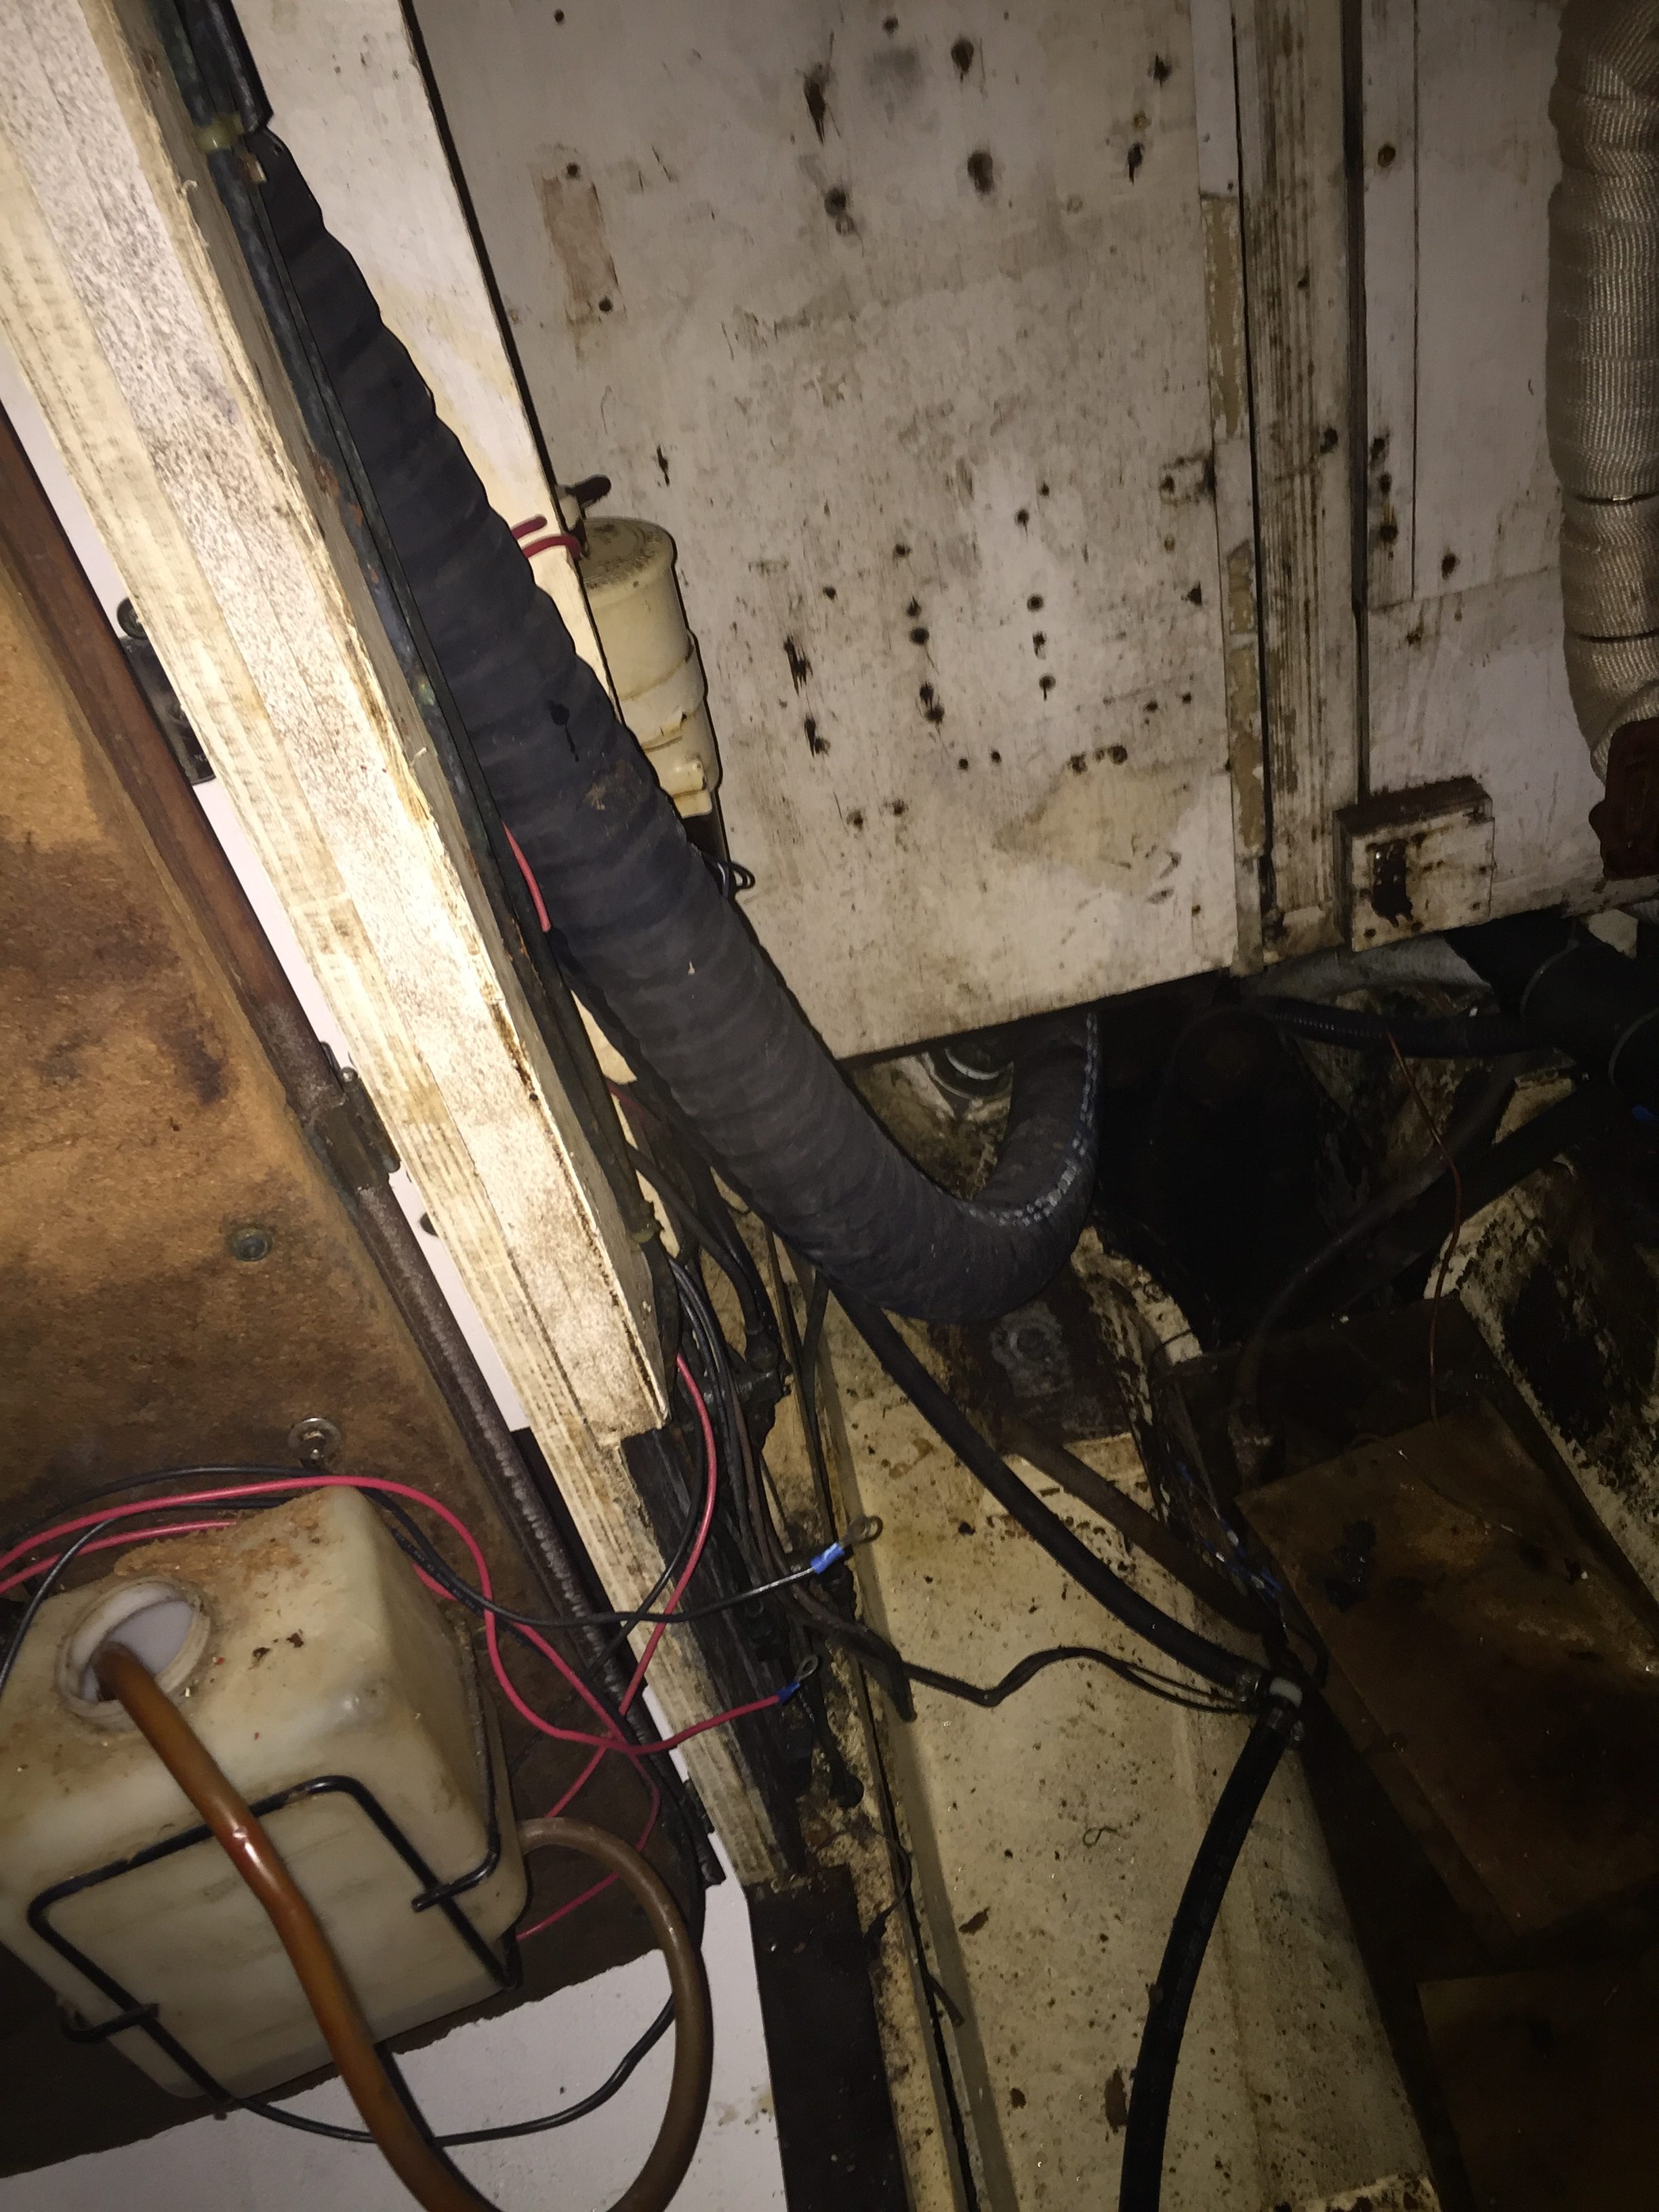
Over the last 20 years of looking at boats and researching different makes and models and looking at for sale ads, I have always been shocked by how a lot of people treat their engine rooms. Many times I have seen ads where the introduction says something like “Immaculate condition” and as you continue on to through the pictures there is a dark, greasy, oily, dingy, rusty old piece of machinery crammed into some inaccessible hole that is called the engine room. You wouldn’t send your worst enemy in there as they may never come back out.
One of the things that drew us to the Whitby 42, okay me anyway, was the fact that she has a proper engine room. You can’t stand up in it but there is enough room to move around and you have pretty decent access to the engine as compared to a lot of other sailboats.
Akupara’s engine room currently falls into this category!
It is not up to standards. It isn’t up to anyone’s standards let alone mine.
On Sunday I had to venture in to the pit in order to remove the battery charger and the inverter, funny thing, it says right on them not to install in a hot machinery space, but that is another post, and I got to thinking that this was totally unacceptable and how exactly was I going to be able to make it acceptable. At the same time, I had been cleaning up a little and putting away tools etc. I have now commandeered almost every drawer, cupboard, and cavity with tools. This is also unacceptable! Especially when the admiral finds out!
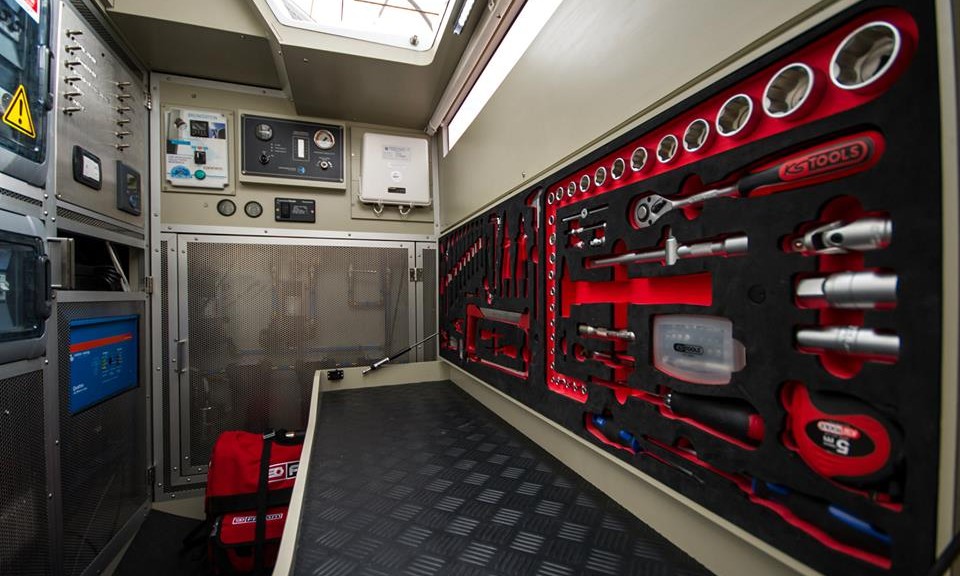
And then it happened. I came across a bit of inspiration. It is possible to have an impressive engine room! It can be done. And no, grease, oil, grunge or any other detritus needs to be a part of it.
Now this is how an engine room should look!
Well, now I have my goal and my vision! Look at this! Not only is it immaculate but all of the tools are in an organized tool chest, not to mention clean, exactly where you need them. The cabinet becomes a work bench and all of the machinery is enclosed with protective screens so it would be impossible to get your sleeve caught in something if you had to go in there in a rolling sea! This is fantastic!
Okay so to be honest, I have pretty big doubts that Akupara’s engine room will ever look like this, but hey, if you don’t try, it definitely will never happen. If anyone knows where a guy can get one of those tool cabinets, let me know!
We had a very fruitful information gathering day at the Vancouver Boat Show yesterday. Unfortunately the boat show itself changes very little from year to year and to be honest, in my opinion, is not really worth the money paid to get in the doors anymore. I guess once you have gone to a whole bunch of these, they start to all just become the same. The same vendors, the same dealers, the same products with “Boat Show Sale” plastered all over them.
For new boaters or for someone who is shopping for a new boat, it is probably a fantastic show, but as we do not fall into either of these categories, it could have been a lot better.
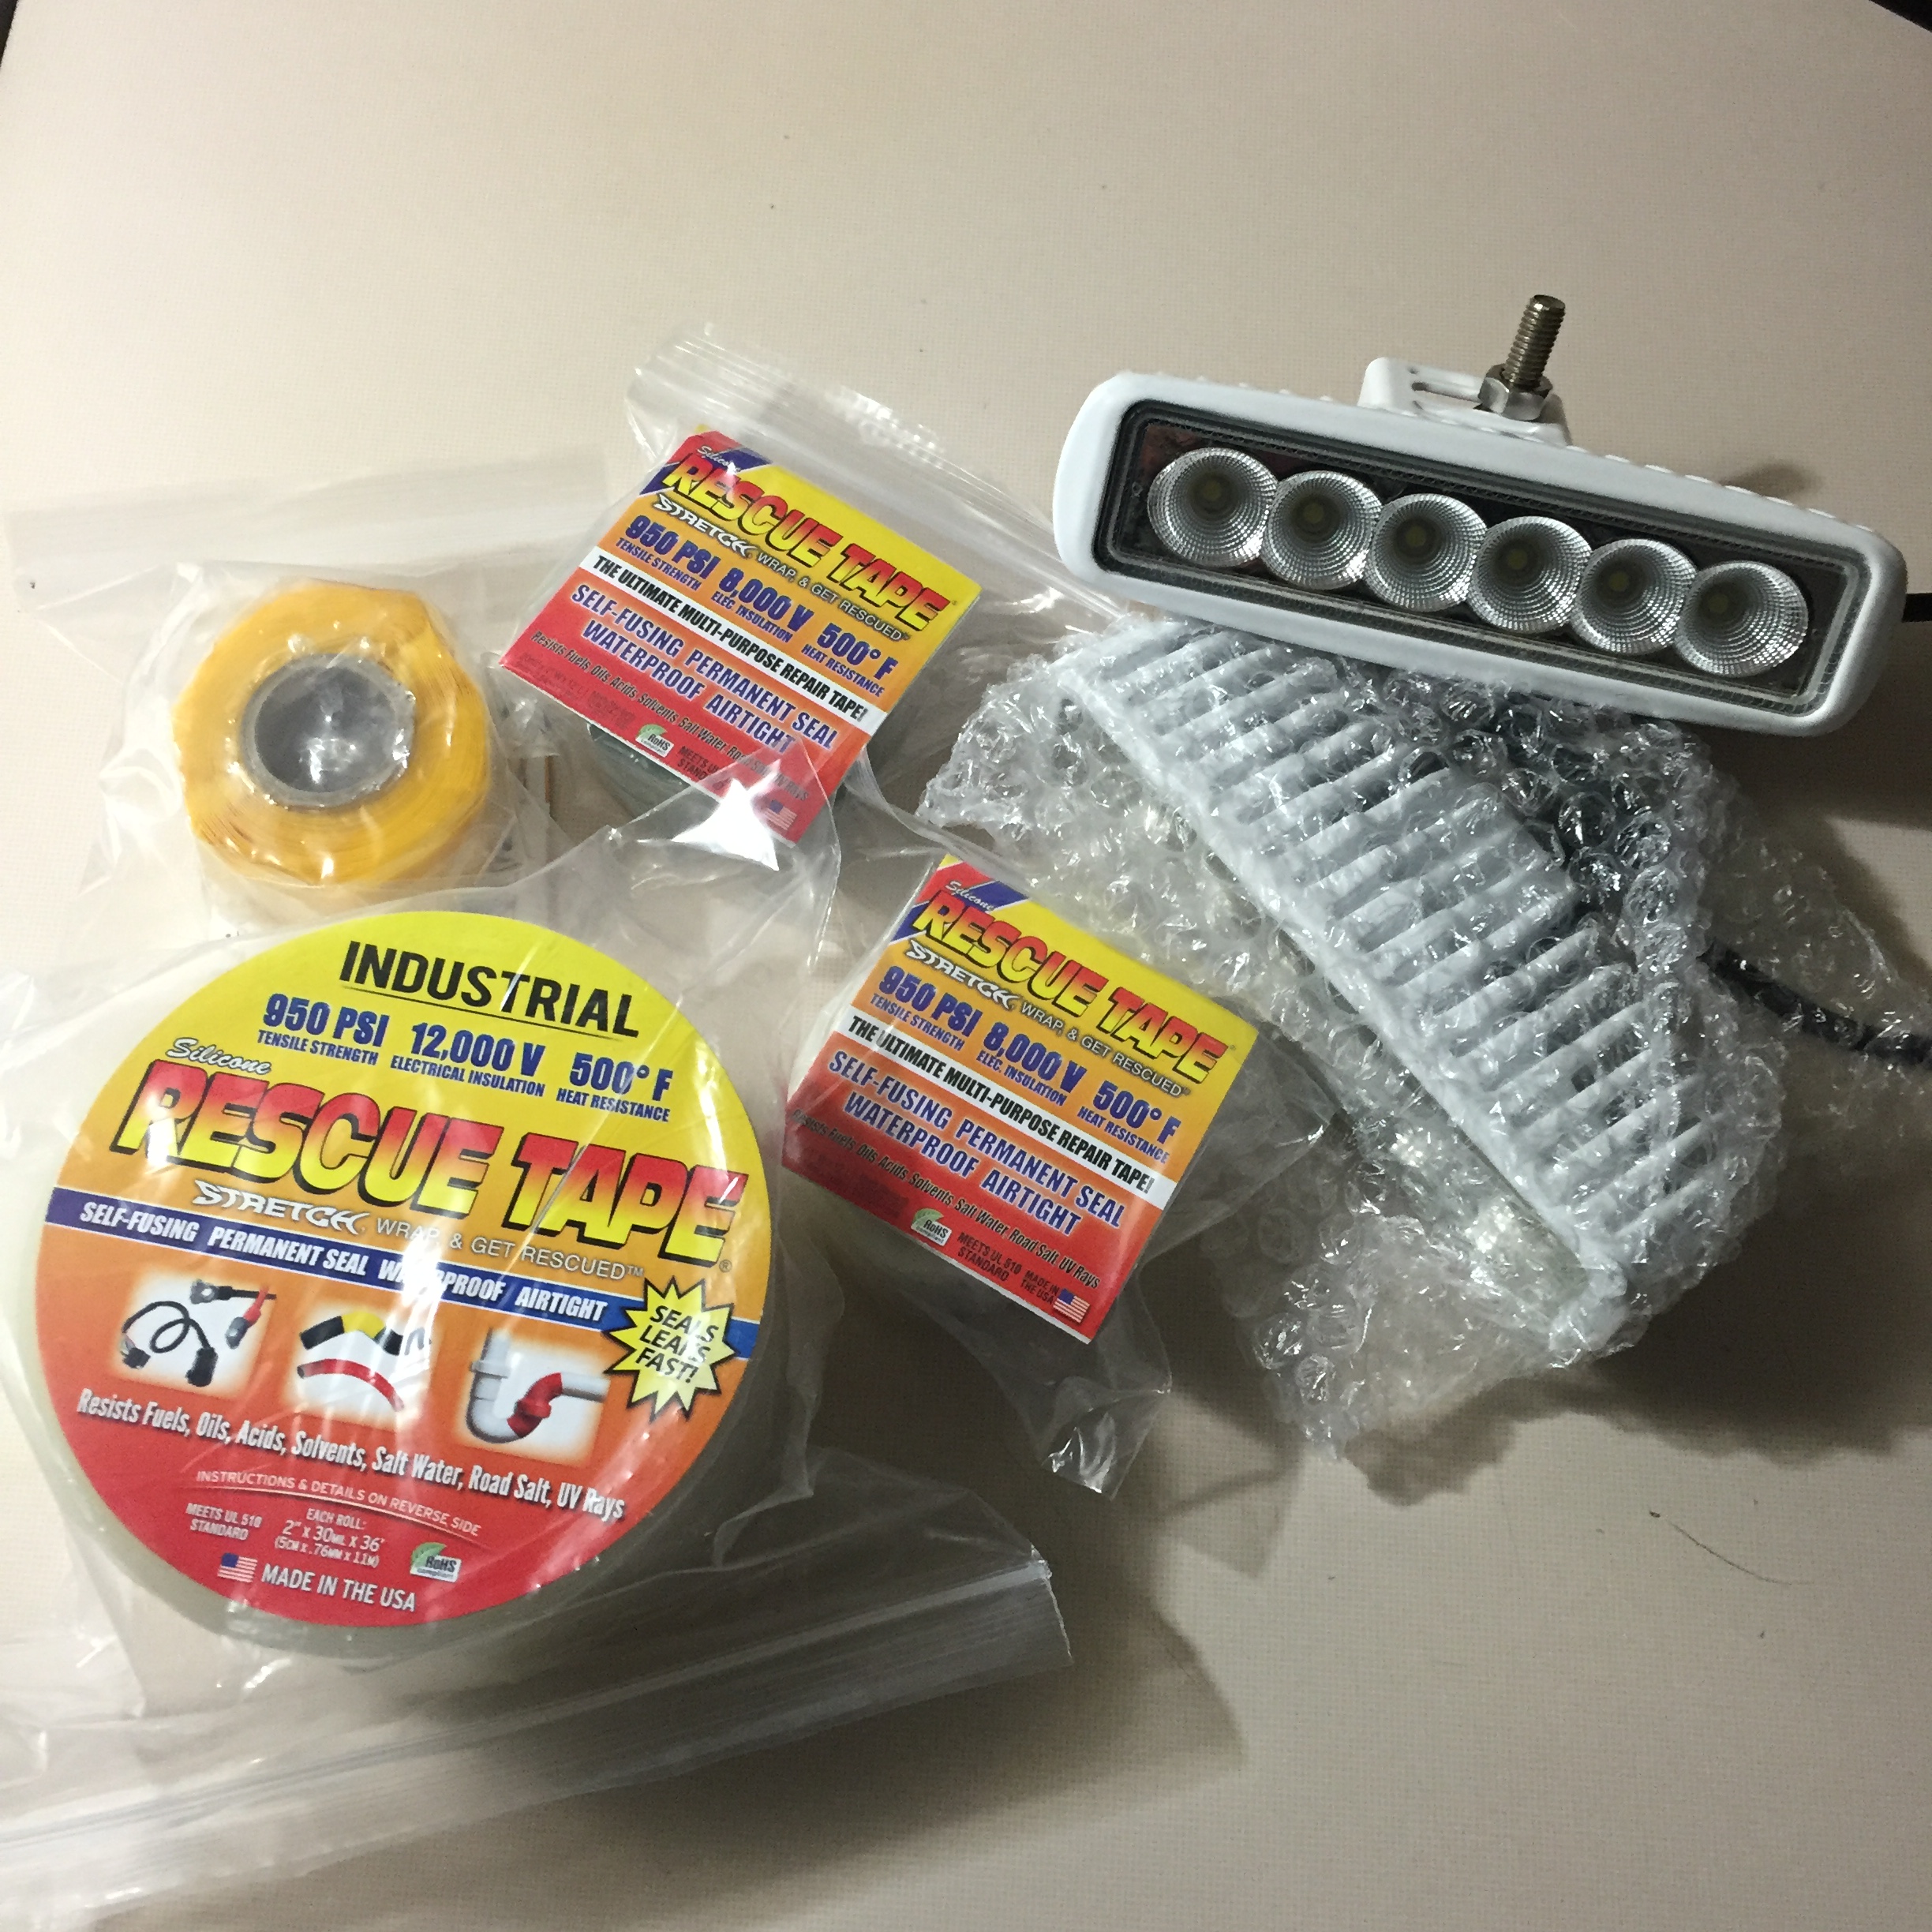
Andrea and Paige came with me and we did the rounds of all the booths stopping to talk at several that were of interest. Before going down there were 3 things that I wanted to get some answers for. Engines, watermaker repair, and interior cushions. On top of that we did get some current prices for items that we know we will want down the road, but as for spending money, I think grand total we spent less than $200 including admission. The only reason we spent so much, is that I found a great set of LED Spreader lights that I knew we needed, and of course I had to restock on Rescue Tape.
Rescue Tape and Spreader lights
Rescue tape has become my standby for more uses than I can possibly explain here. For those of you who have never used it, I would suggest buying several rolls and throwing them into your toolbox on your boat! I always buy Rescue tape and I always have several rolls hanging around! This time I bought 3 small rolls and 1 large one for $50. I don’t like plugs for products but this is one that has saved our bacon on a couple of occasions, including when the water pump bearings disintegrated and I had to MacGyver a fix with an old deck wash down pump to get us home. Another time when a cooling hose rubbed through on the alternator and we did not have a spare hose. It was not pretty, it would not have went 1000 miles, but as long as we kept the RPM low we were able to limp 30 miles back to the marina on an absolutely windless day. Check out their website Rescue Tape and seriously get yourself some. You will find a million uses for it. And maybe they will send me a few free rolls for this plug! 😉
The spreader lights we purchased were not a planned item but in this case I managed to get them for about $50 each.
We spoke to a representative from La Fabrica Marine and discussed high level the overall plan for the upholstery, the mattresses, the cockpit cushions, and the dodger and bimini. This is going to be a very expensive endeavour with initial ball park estimates of $8000 plus. That being said, we are not looking at this project as a weekend boat where it would be okay to have 3-4 inch mattress pads, and will be going with real custom mattresses and we also have some fairly specific requirements that I will not give away just yet. As well, La Fabrica does very nice work. They have our name and number and we will set up an appointment post boat show for them to come out and take some measurements and give us a more accurate quote.
Lots of information to review
And finally the big reason we went to the boat show. To get some information and pricing on the repower. Let me start this by saying any time I have a hard time getting a price online, I smell a rat. Try searching for a price online for 75hp diesel engine from one of the name brands. Good luck and if you find a place that actually lists prices let me know, and I will post it here for everyone to have access to. The second thing that makes me squirm is when they pull out their little list of model numbers and prices exactly like a slimy used car salesman. Their is no mystery to the fact that the 10% off boat show special is a crock. And you only have until February 29th to make a deposit and secure that price. I happen to know that the price for a Yanmar is almost the same this year from last. Hmmm. In any case here are the numbers and the models for each of the engines we looked at.
Beta Marine – Beta 75 – $18871
Beta Marine – Beta 60 – $15535
Nissan – SN110 – $14897
Mitsubishi – SM105 – $19123
Yanmar – 4JH4 (75hp) – $16917
All of these prices include mounts, basic panel, and gear box with slight variations as to what each of those are.
The gentleman who we spoke to from Beta Marine actually ran the numbers for the Whitby 42 and although I do not have them memorized, the 60hp would do the job providing for hull speed at max RPM but there would be nothing in reserve. The 75hp would provide hull speed at around 2800 rpm and still have quite a bit in reserve. That sealed the deal and eliminated the 60hp. I have been in a situation where I needed a bit more power and didn’t have it, and I do not want to be there again.
I have not studied the graphs yet as I said but high level the Yanmar claims to be the most fuel efficient.
The major question I have in my head right now is something that the Beta marine dealer said. He claimed the Beta is a lot more like the Ford Lehman in that it is a big solid engine that will last forever. The Yanmar on the other hand seems to be the favourite. Everyone claims they have a Yanmar as though it is a status symbol. I am concerned that it is marketing hype and perhaps not of the same heavy duty construction as the Beta.
Everyone we spoke to ball parked the install at around $5-$6. So with taxes, we are looking at a $25000 job. I will take my time with this decision as I do not want to have to do it again that’s for sure.
Repower info
As we dream about getting closer to launching Akupara the inevitable question of where are we going to find moorage is starting to come up of course. All of our boats since we moved to Vancouver have been kept at Point Roberts Marina in Point Roberts, Washington, and we had the good fortune to run into Tanya who works in the office at the boat show. Tanya has always been fantastic to us! She is always happy to see you and always willing to find a way to help you out. We have never had a complaint at the marina that was not taken care of almost immediately, and so far, we have never been concerned about the safety of our boats in the marina. There is quite a community at the marina and we have made lots of great friends there. Tanya assured us that when we get close to launching to let her know and she will do everything she can to get us into a slip. It is nice to know that some places actually value and want your business. I think we will be putting Akupara there until the day when we move aboard, at which point she will need to come back into Canada.
We are leaning more and more towards replacing critical components with all new systems. Originally we considered keeping the engine and having it overhauled but as we get farther and farther down this path, we are leaning farther and farther towards a new one. This same thought process is happening with everything on Akupara.
Some would argue why spend all the extra money when you can save a bunch by fixing and reusing what is already there. I agree with this thought process completely but, the last thing I want to do is to be in a nice tropical anchorage and be worrying about my 45 year old engine, or the 45 year old wiring that is behind the walls and that I can’t see.
This is going to be our last big boat and we plan on keeping it for a very long time and we would like to have as many years as possible without having to worry about old systems.
The other side of this is that yes we could keep the existing engine and have it rebuilt, but how long will it take to spend $5000? I would guess that the starting price at rebuilding is close to that, and it wouldn’t take long to be creeping up to the $10000 price range. One or two major problems after that and we have just spent the cost of a new engine, on a 45 year old engine.
This of course opens up a whole other can of worms as now we are going to have to start thinking about fuel tanks as well. If the engine comes out, we might as well replace the 3 tanks while we have the access rather than discover a problem a year down the road.
We are still trying to feel our way through this decision process, but all of the indicator lights are currently pushing us towards going all new. And hey, in the end we will have a brand new 1976 Whitby 42, how many people can say that? 😉
Now, I need to start offsetting the cost of the new engine so who needs parts for a 60hp Ford Lehman ?? I will even consider selling the engine whole for $800, if you pay the costs associated with removing it!