The Refit of a 1976 Whitby 42 Ketch – Akupara
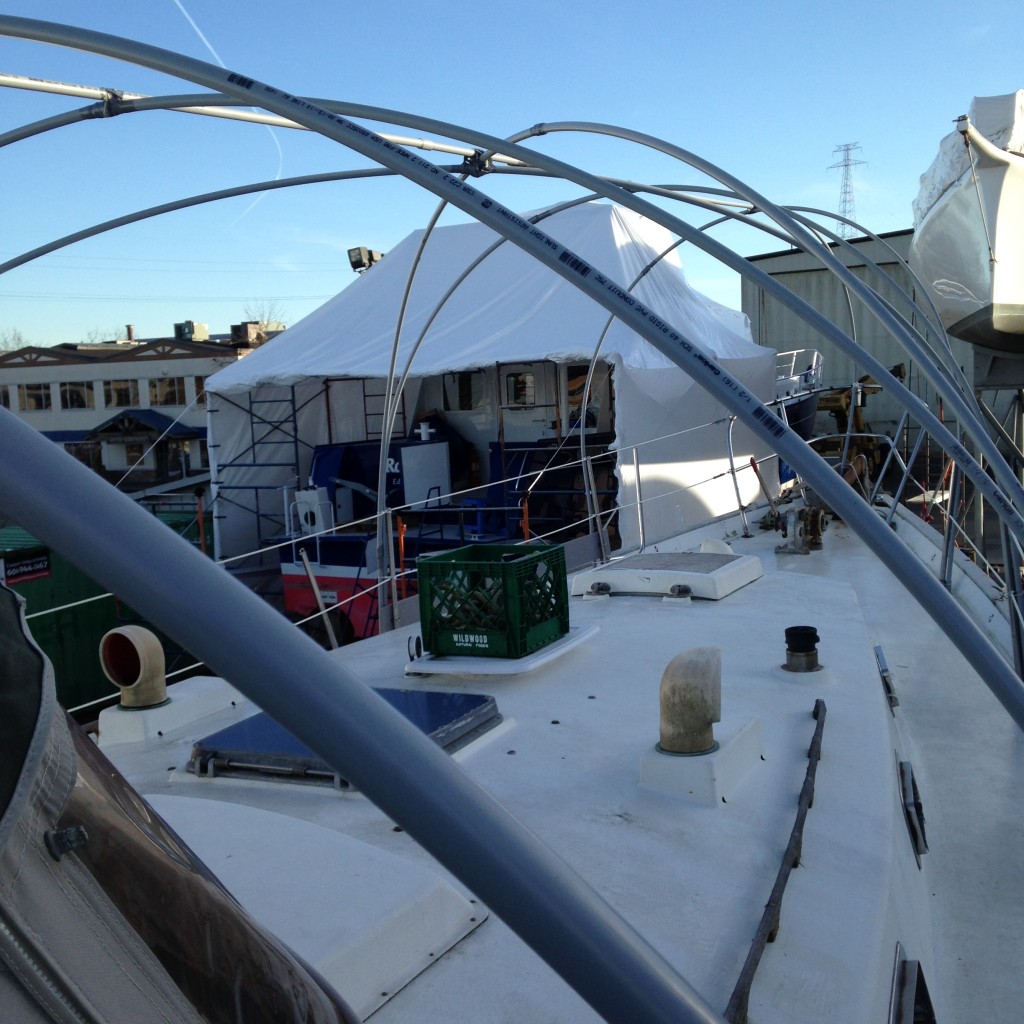
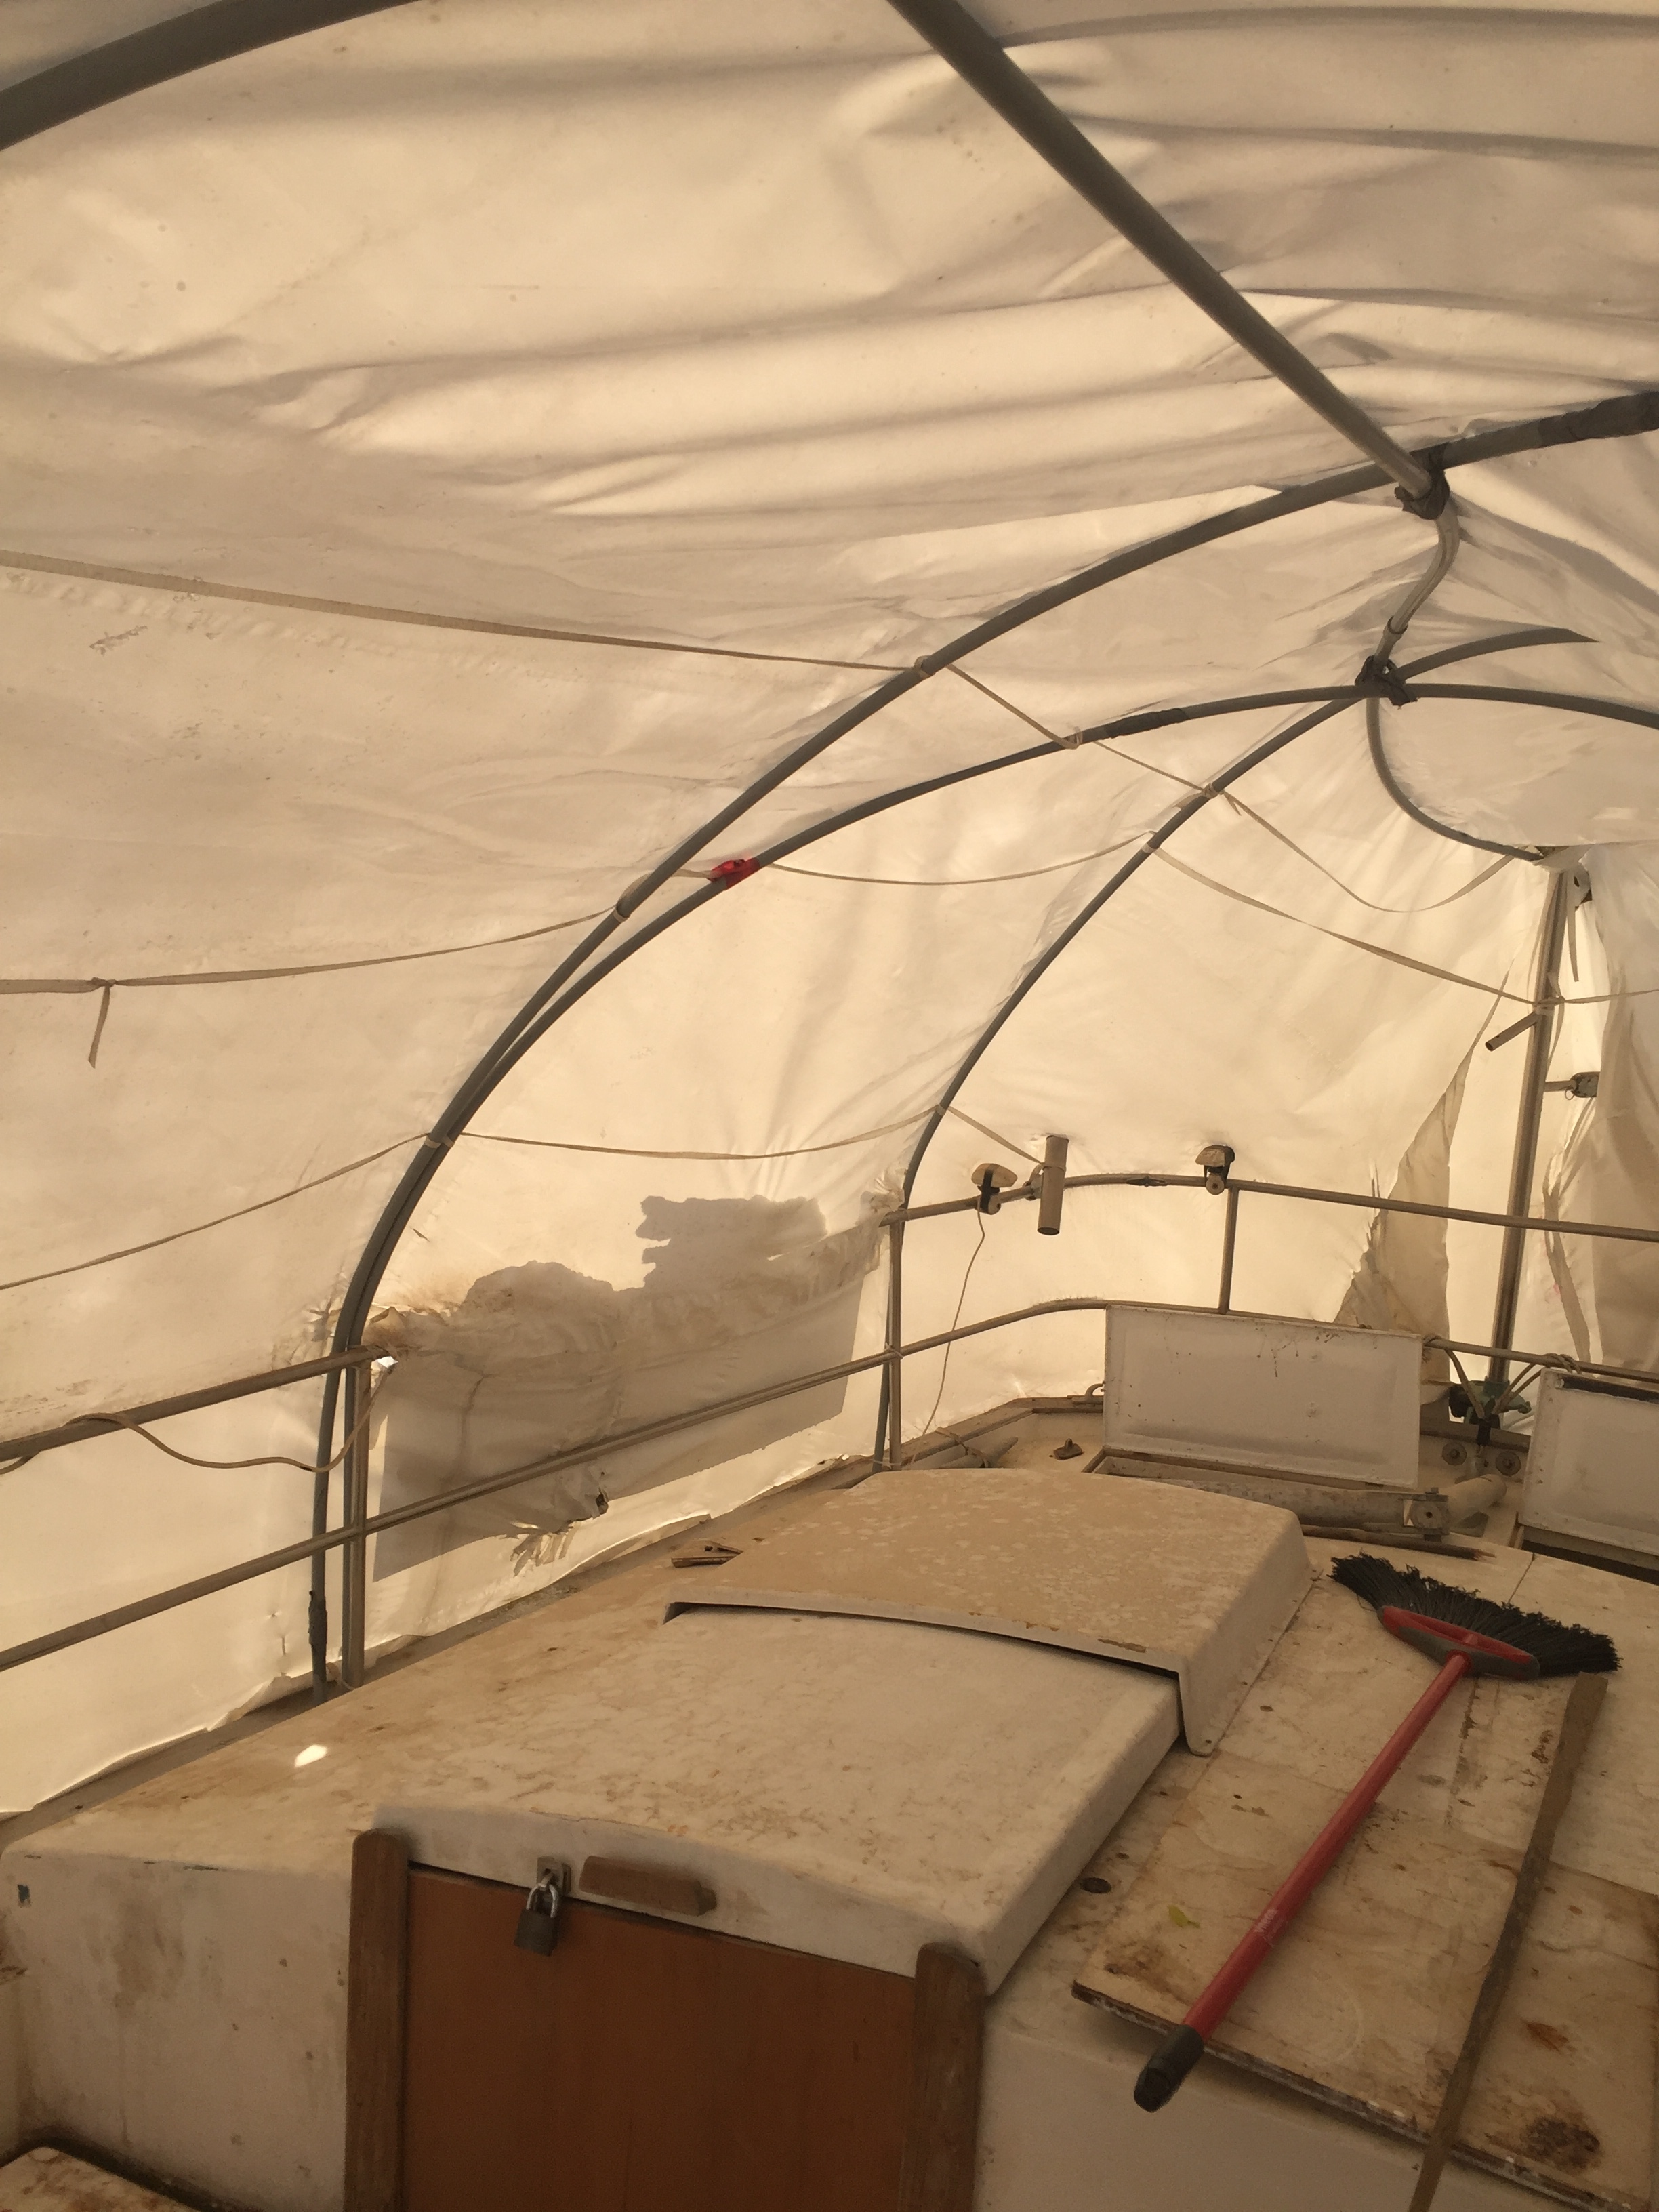
Well, hopefully work on the decks will resume shortly. The completion of the painting and non skid was delayed due to COVID 19 believe it or not. The painter has been stuck in the USA due to the border closure. He is on his way back and will need to self isolate for 14 days, so he will be isolating in the shed where Akupara is. Hopefully he can wrap up the decks and the clear coat on the hull so that we can get on with completing this gargantuan project.
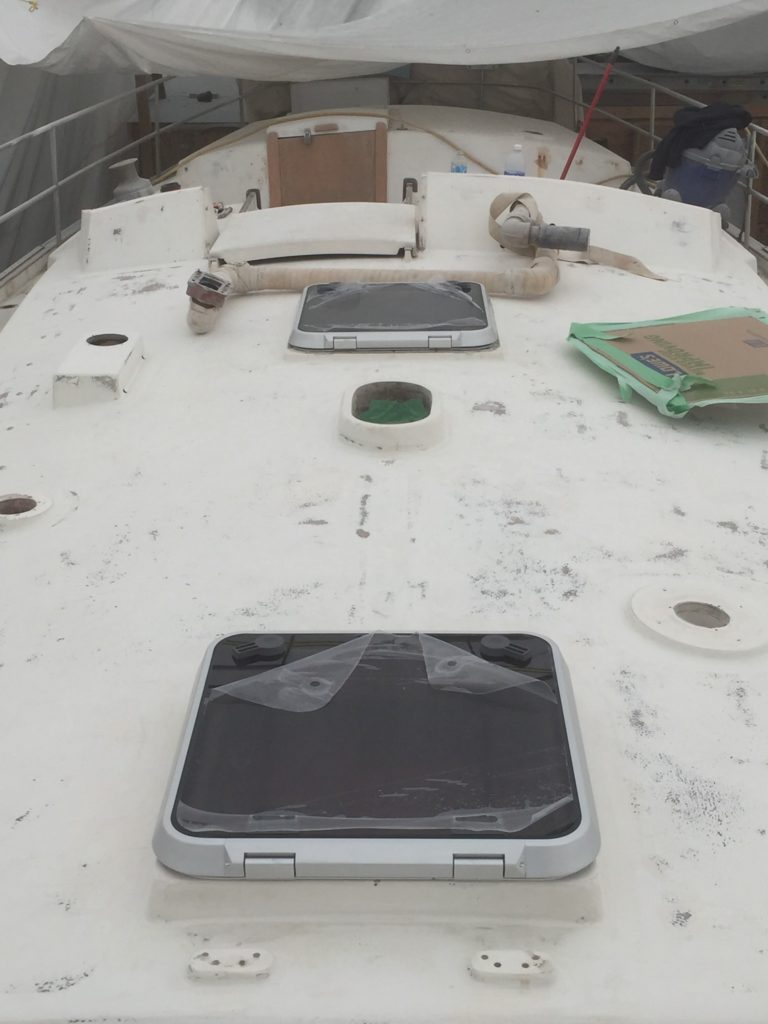
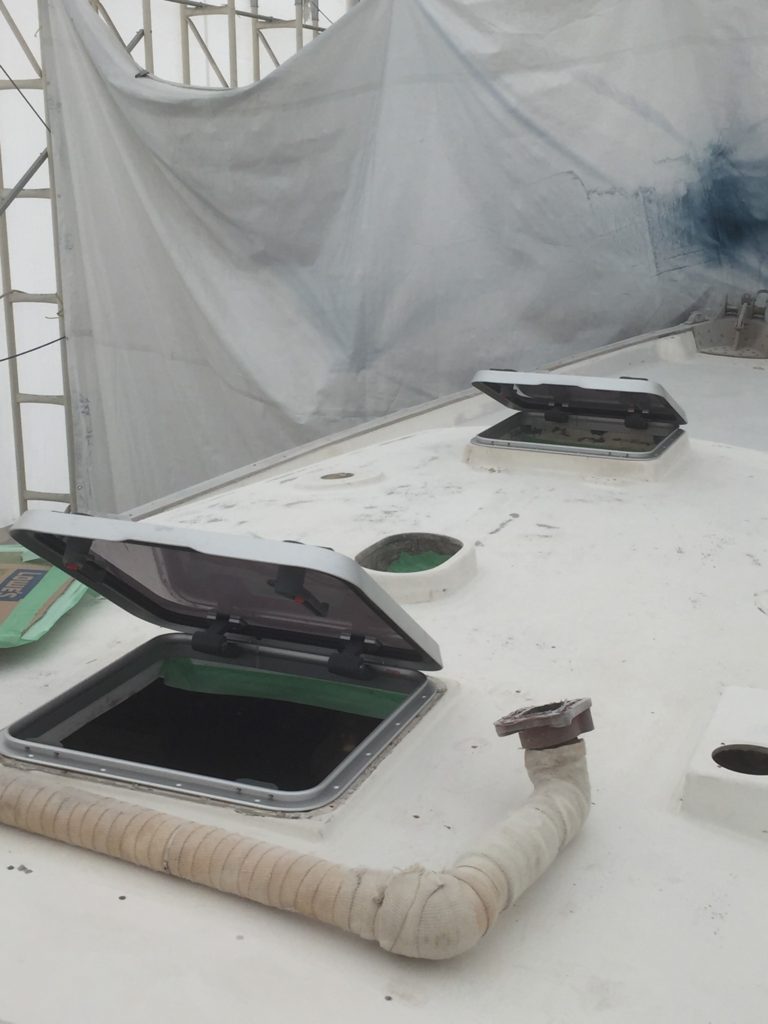
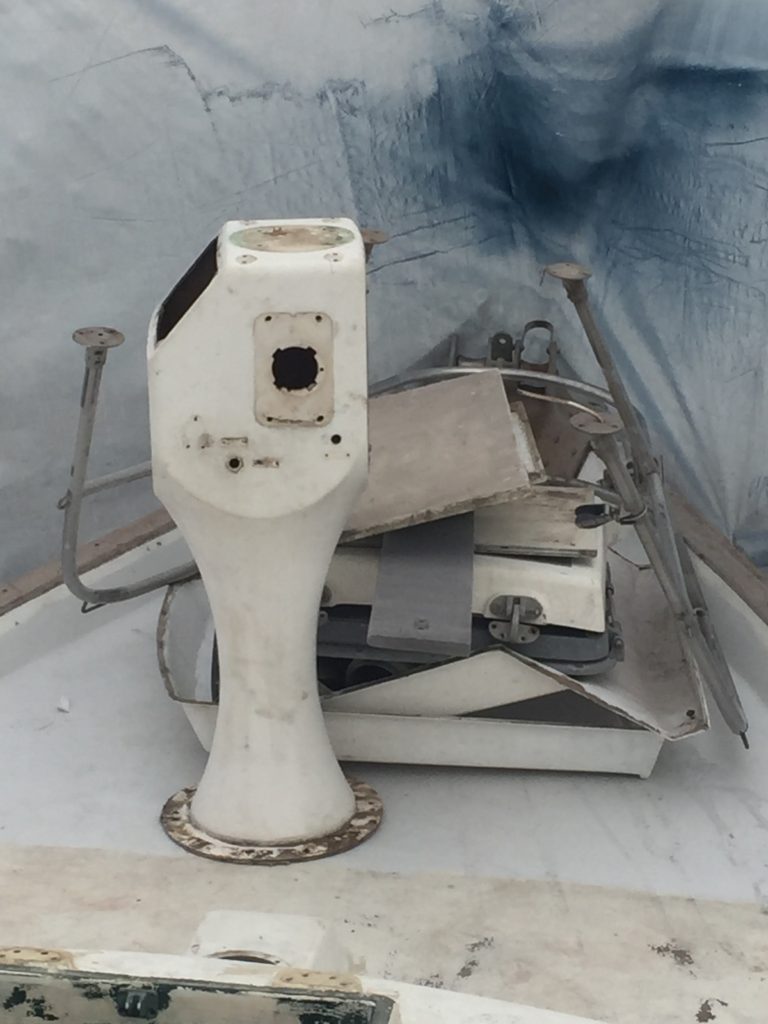
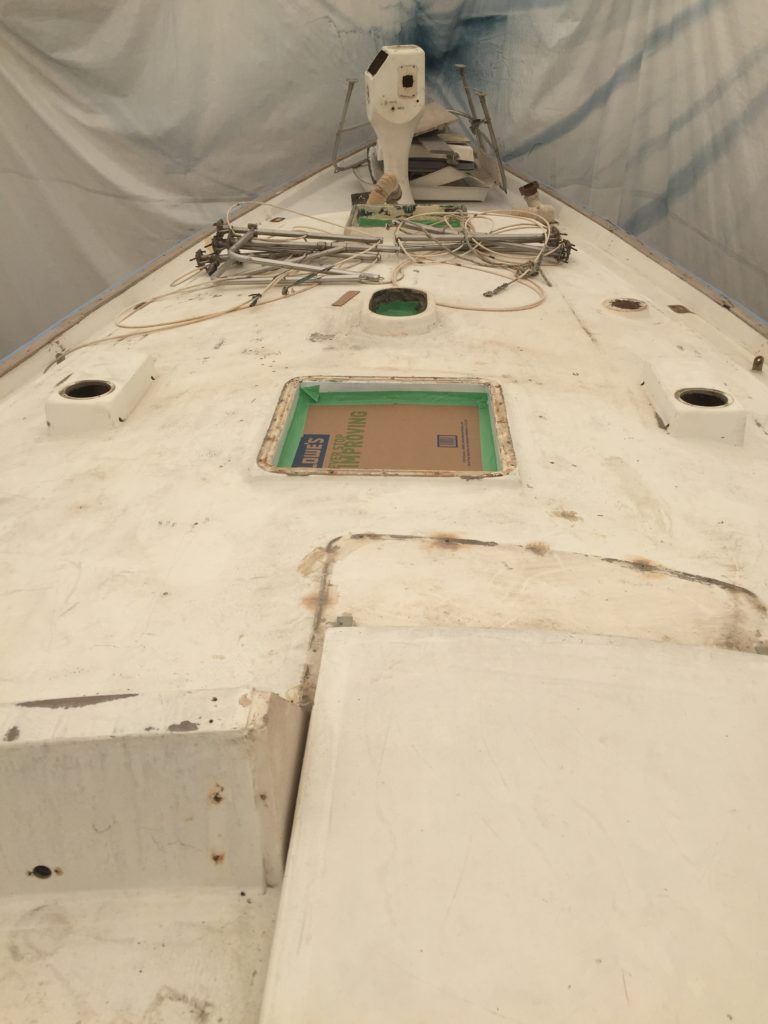
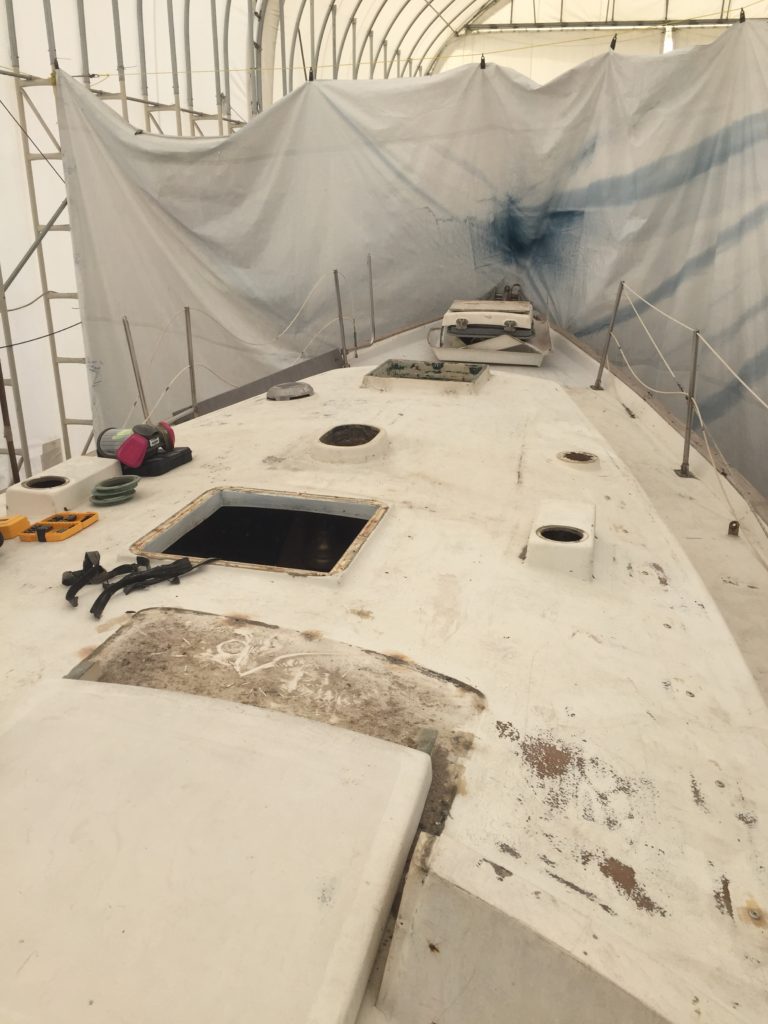
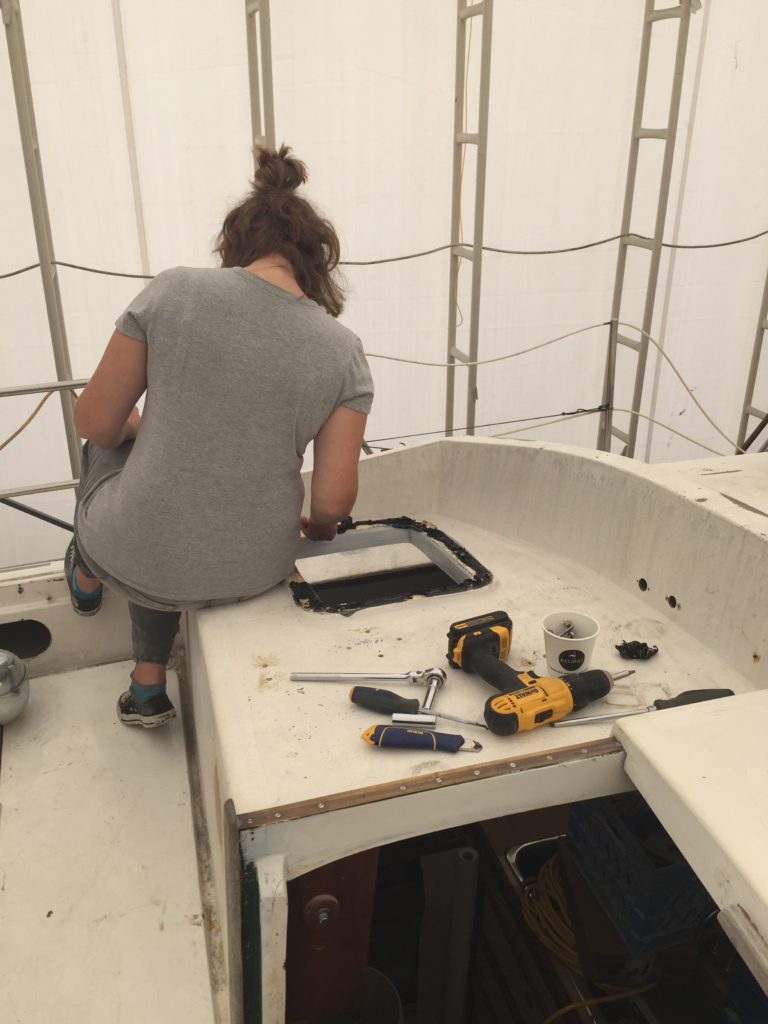
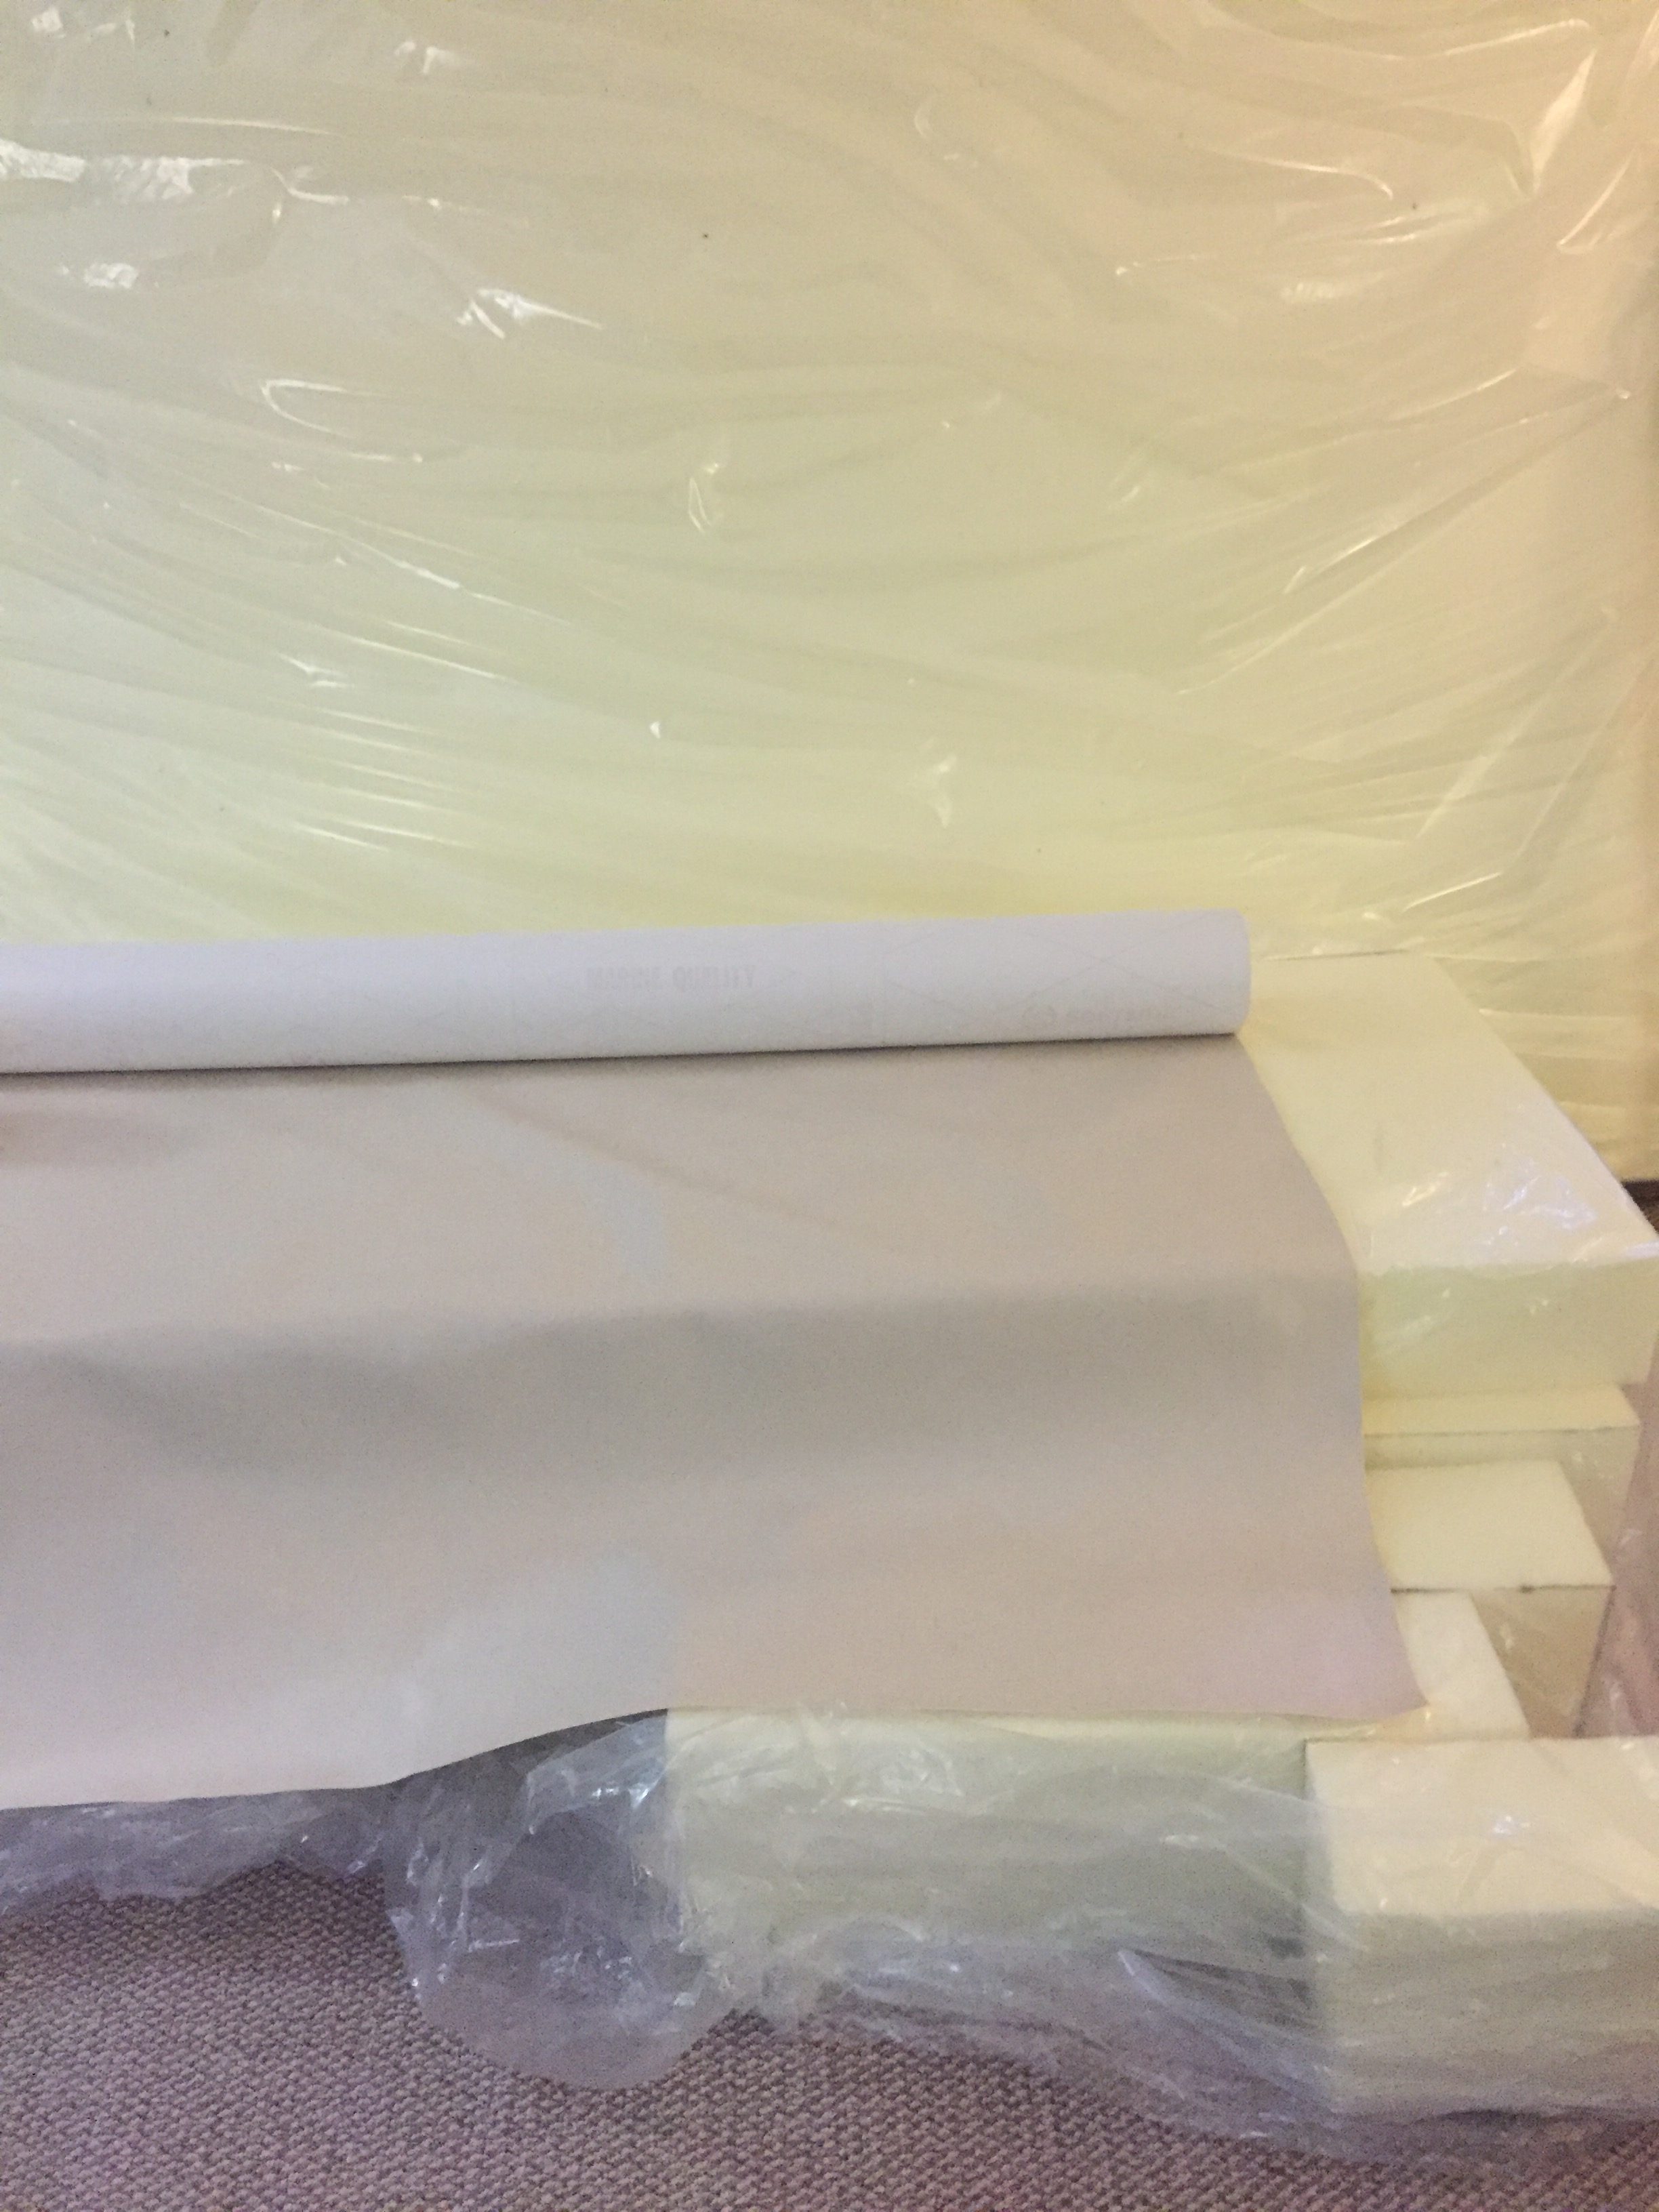
Sneak peak at the new hatches we have purchased for Akupara. These were taken while we were sanding the decks so they are not on the new paint of course!
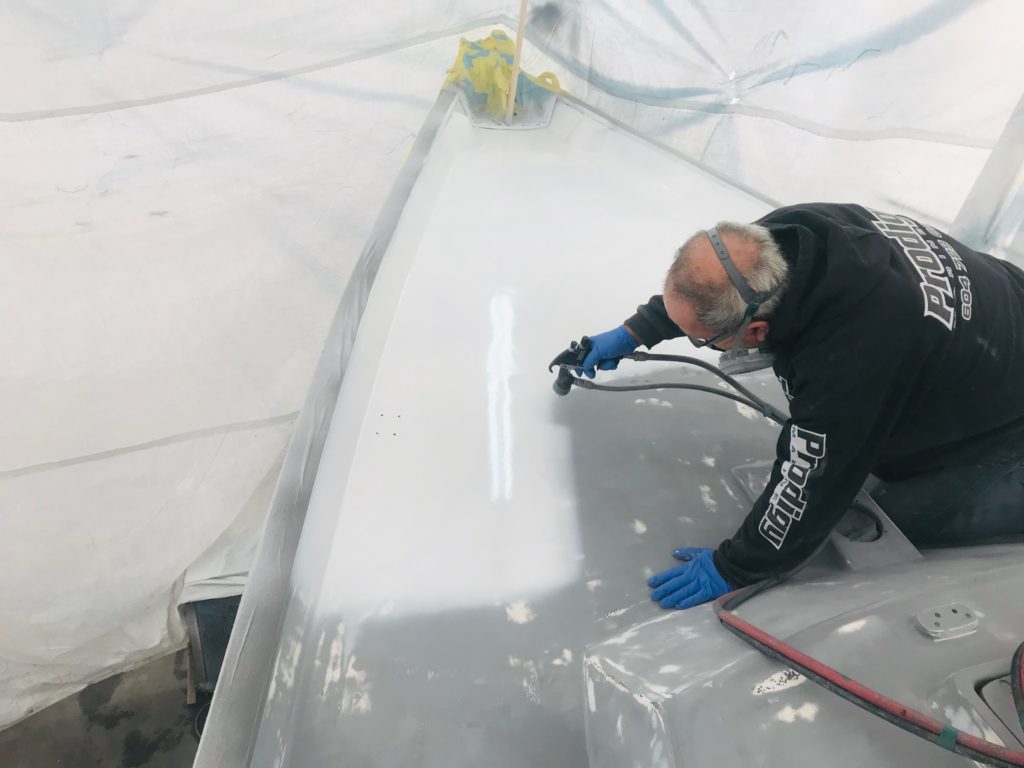
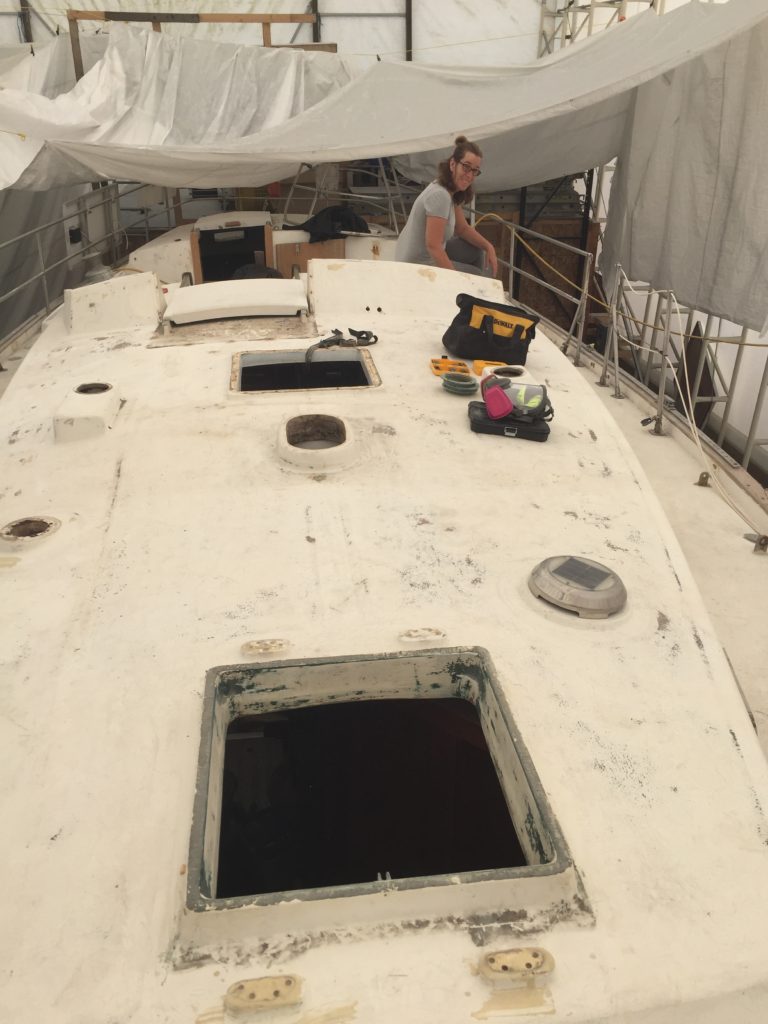
So after the Admiral and I spent a combined 18 hours of sanding the decks, Prodigy Marine took over the job! Thank heavens! My poor belt sander will never be the same!
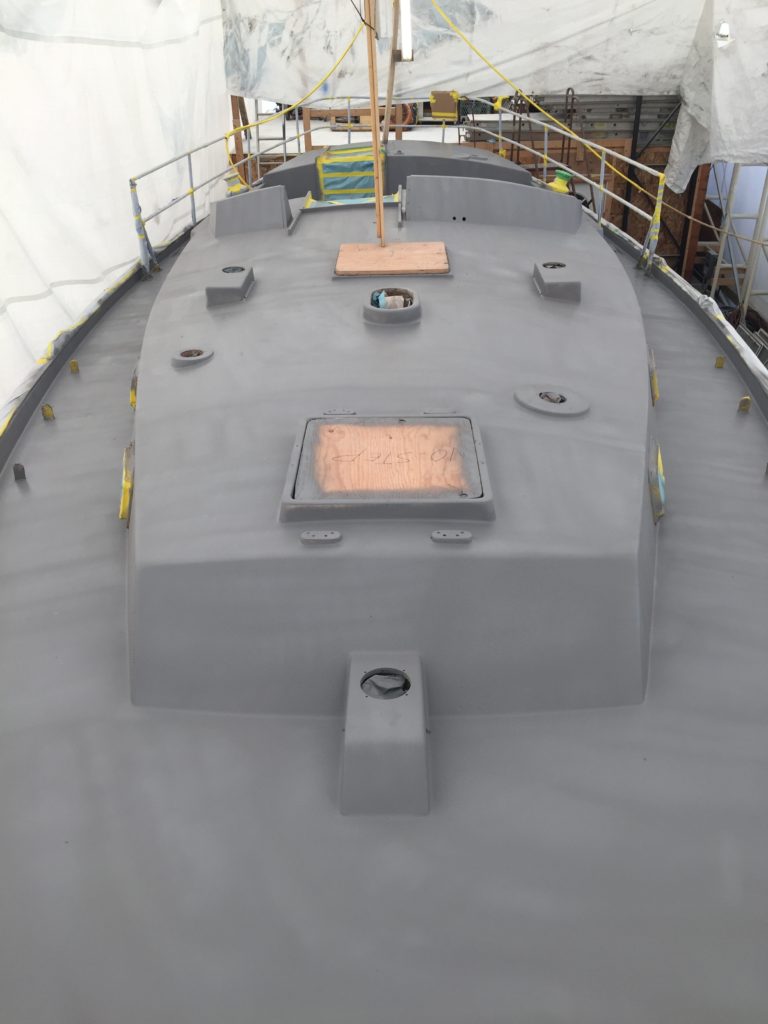
They spent about a week sanding it and sprayed the first primer. Then went back and faired, sanded, sprayed and then faired, sanded and sprayed again.
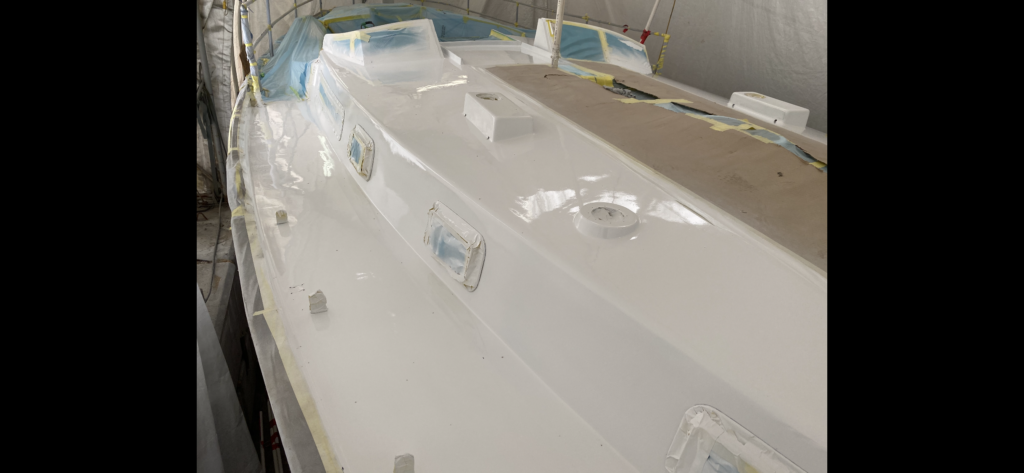
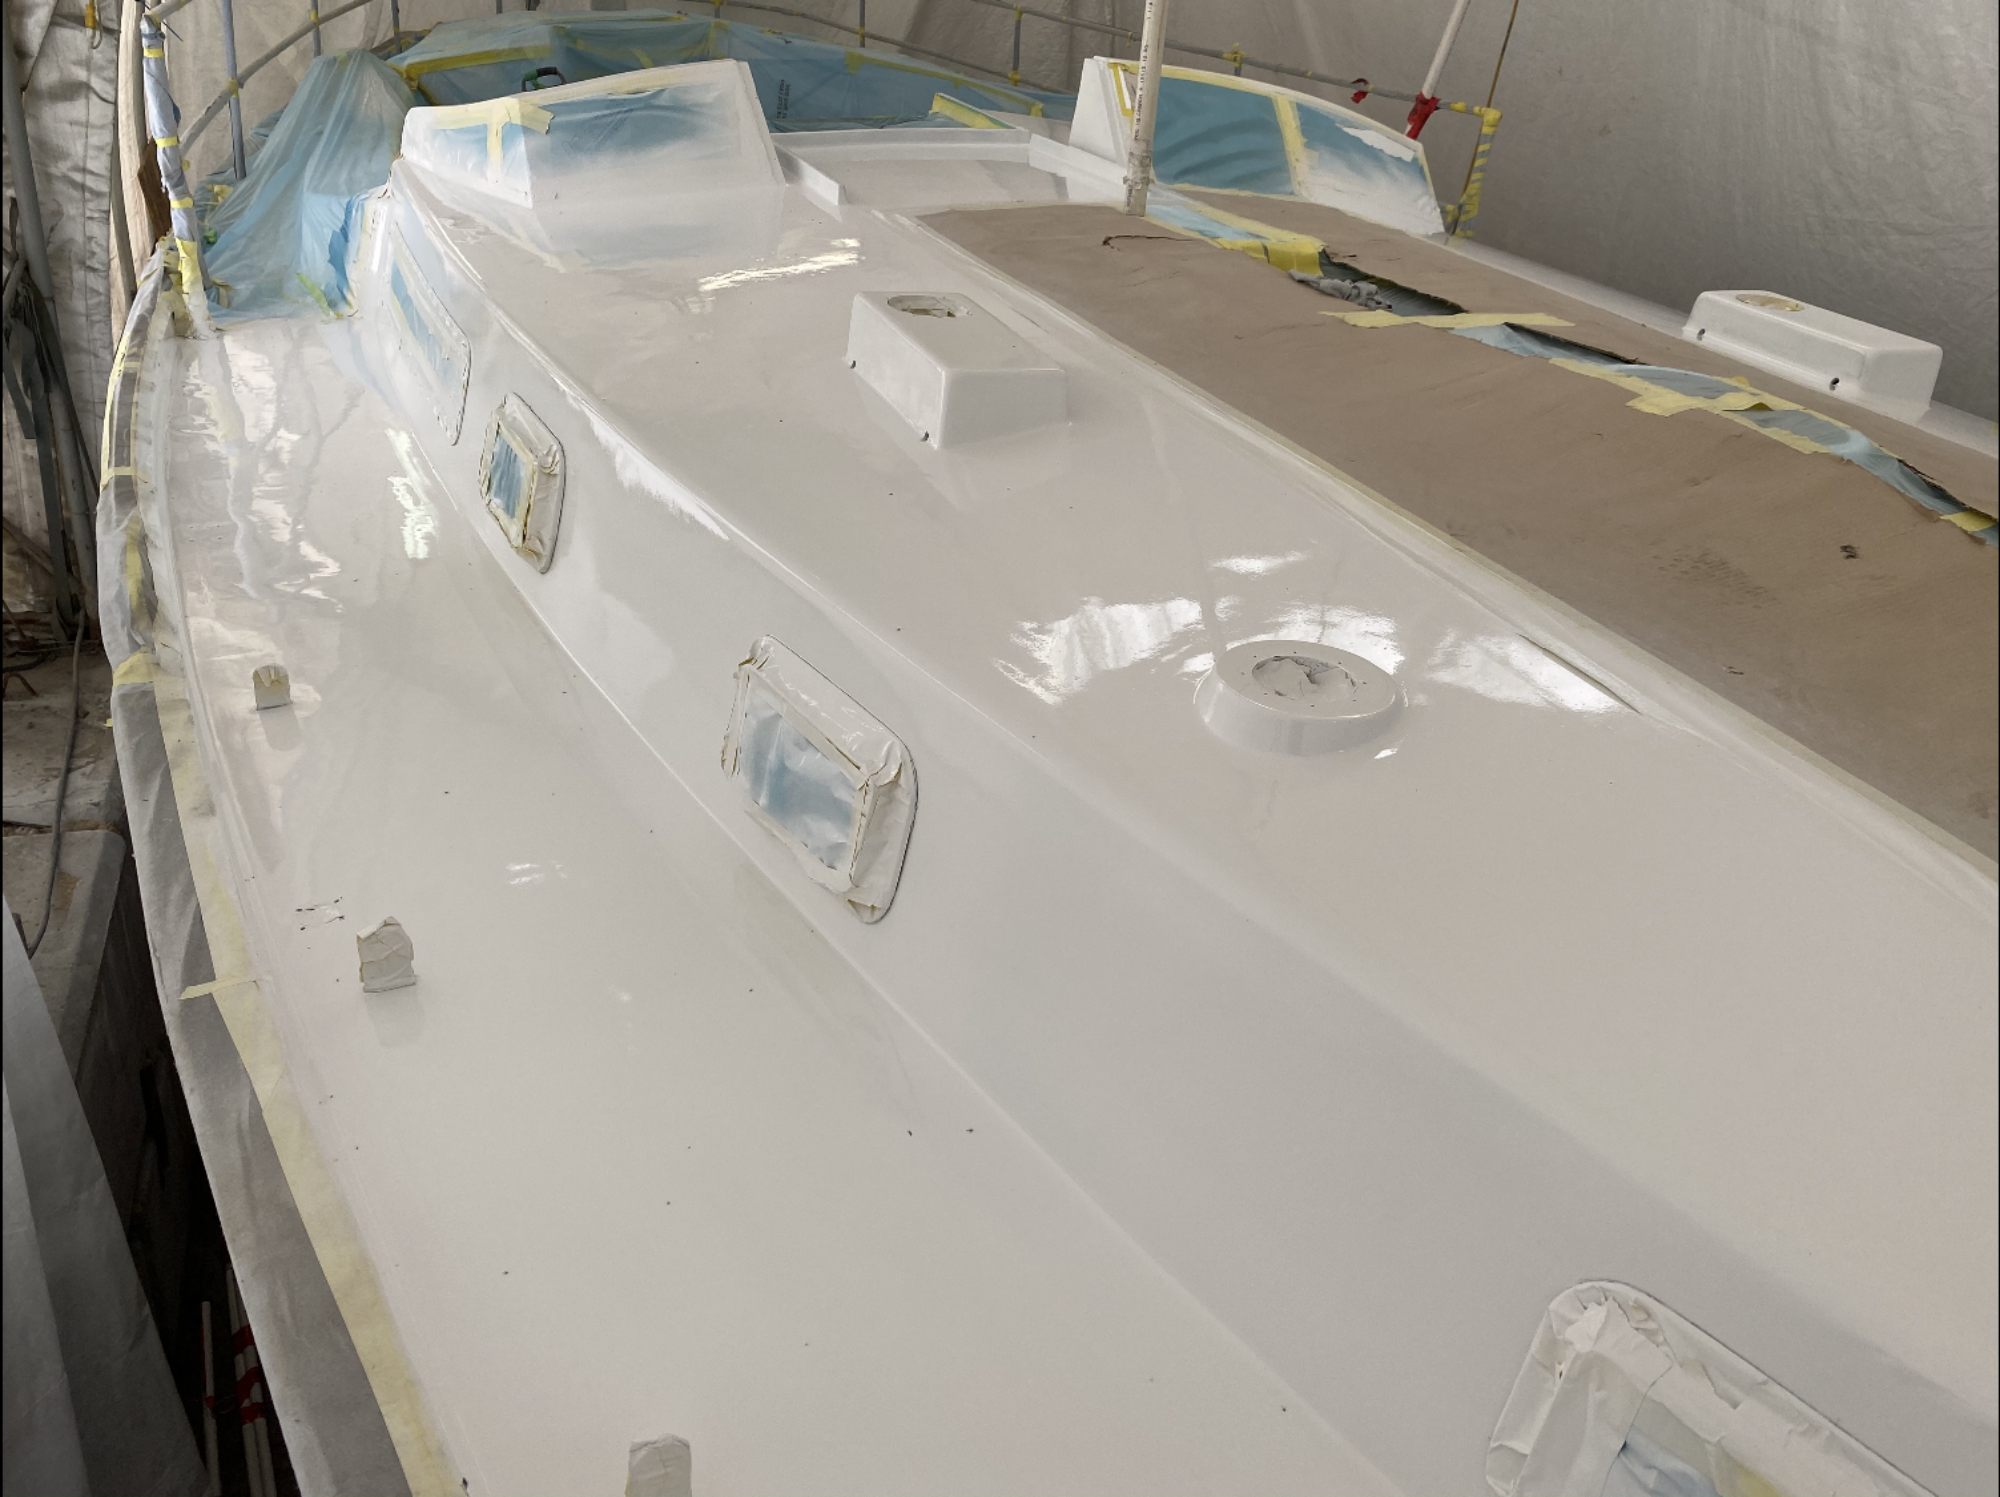
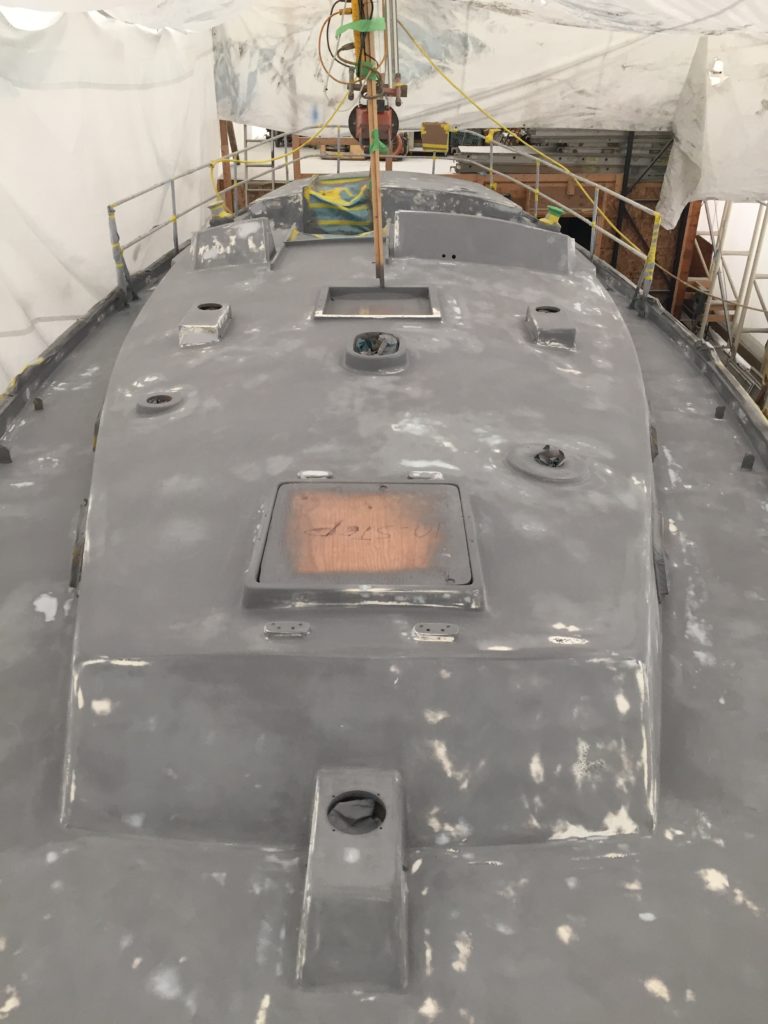
The primer they were using was battleship grey. Ugly as hell, but even seeing that was enough to get us excited! The decks are smooth as a baby’s arse, and cleaner than they have ever been!
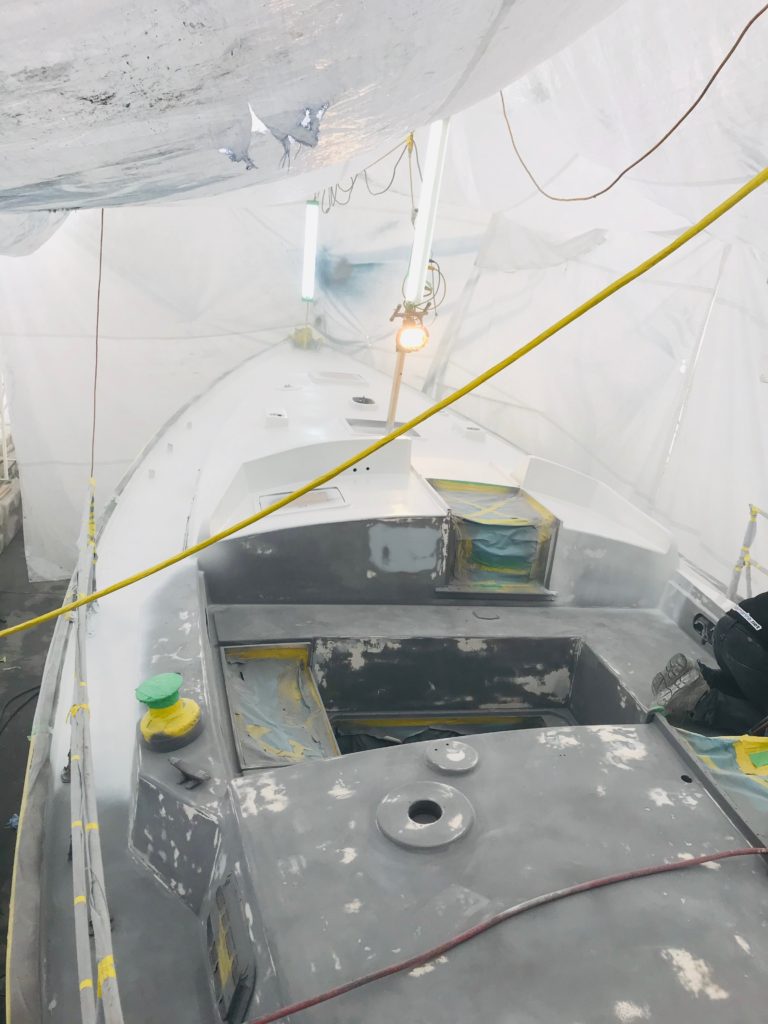
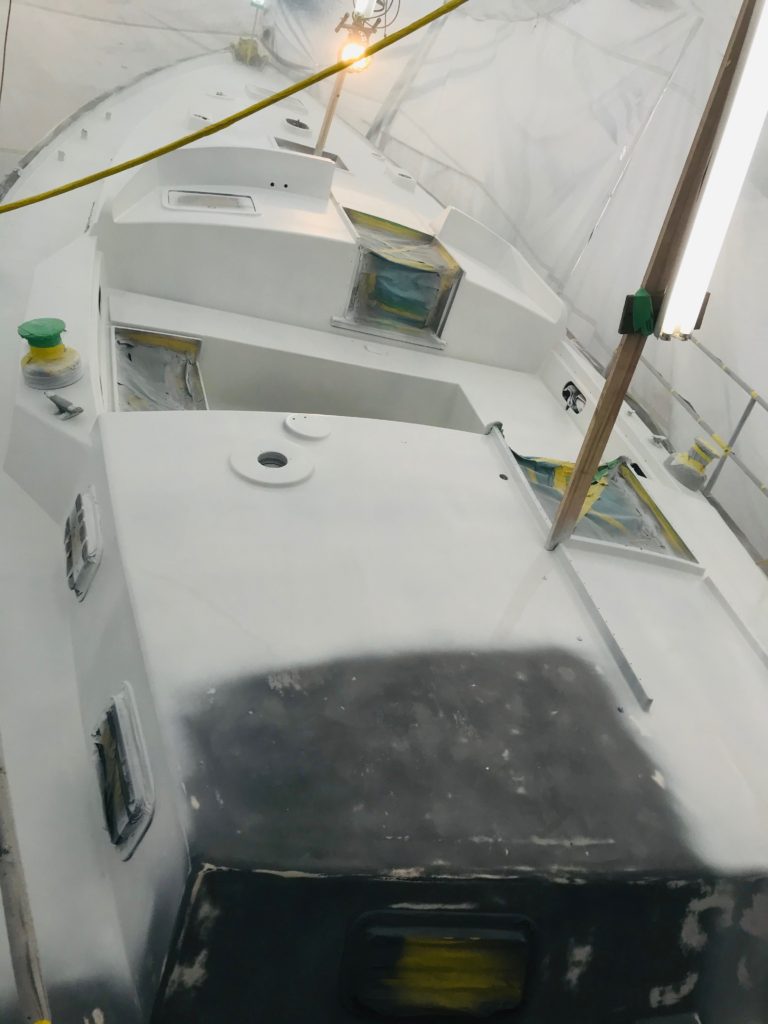
Last week they sprayed the final coat of primer, white.
My god seeing it in pictures was one thing but seeing it in person was another! It literally brought tears to my eyes!
We have been staring at the old gross crazed dirty decks for 5.5 years now. To see them clean and white was overwhelming!
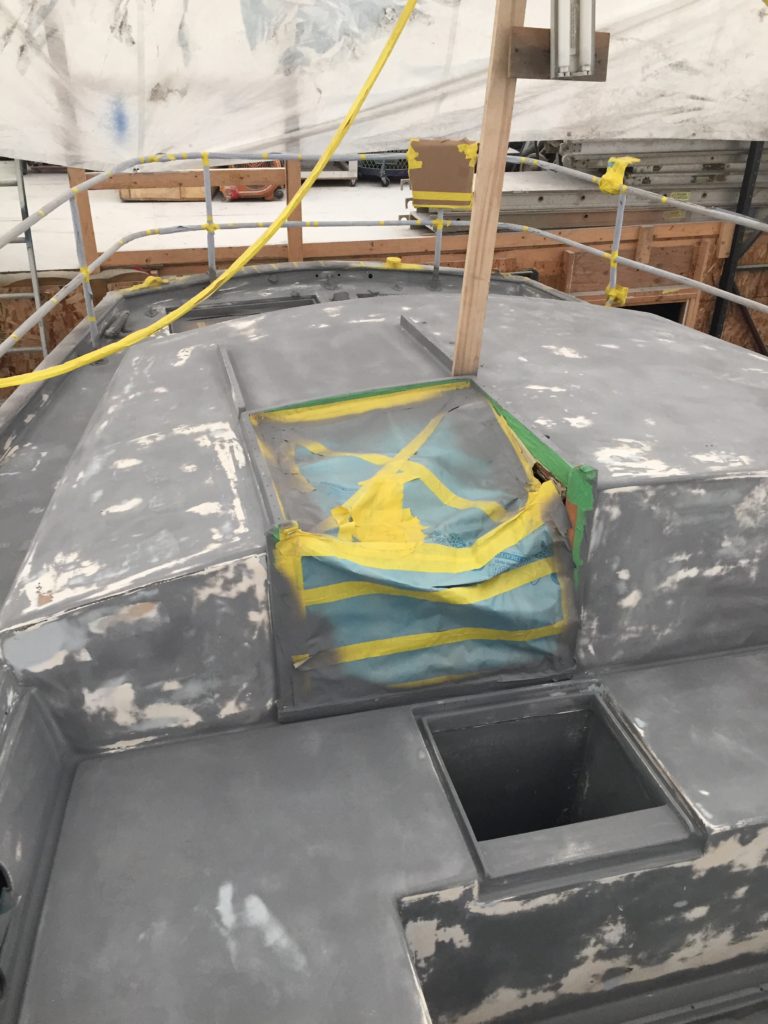
One more sanding with 320 this week, and they will spray topcoat next week. When that sets, they will mask and spray the nonskid. Can’t freakin wait!!!
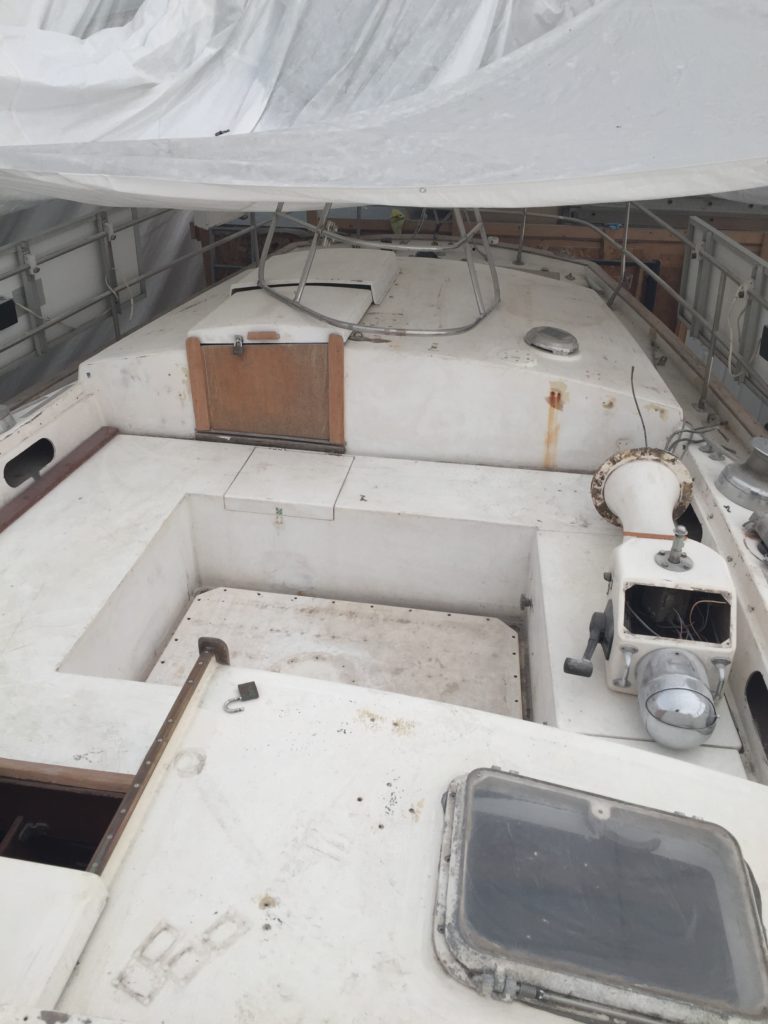
We have been busy prepping the decks for sanding and eventually paint. 42 years of grime, dirt, old paint, rusted fittings etc all need to come off.
Sanding day is going to be nasty!

taken from: https://www.vocabulary.com/dictionary/pertinacious
pertinacious. If you won’t take no for an answer, you’re pertinacious. The same holds true if you stubbornly push on a door despite a sign that says “pull.” Pertinacious means unyielding or perversely persistent. We get pertinacious from the Latin pertinax, which combines per-, “thoroughly,” with tenax, “tenacious.”
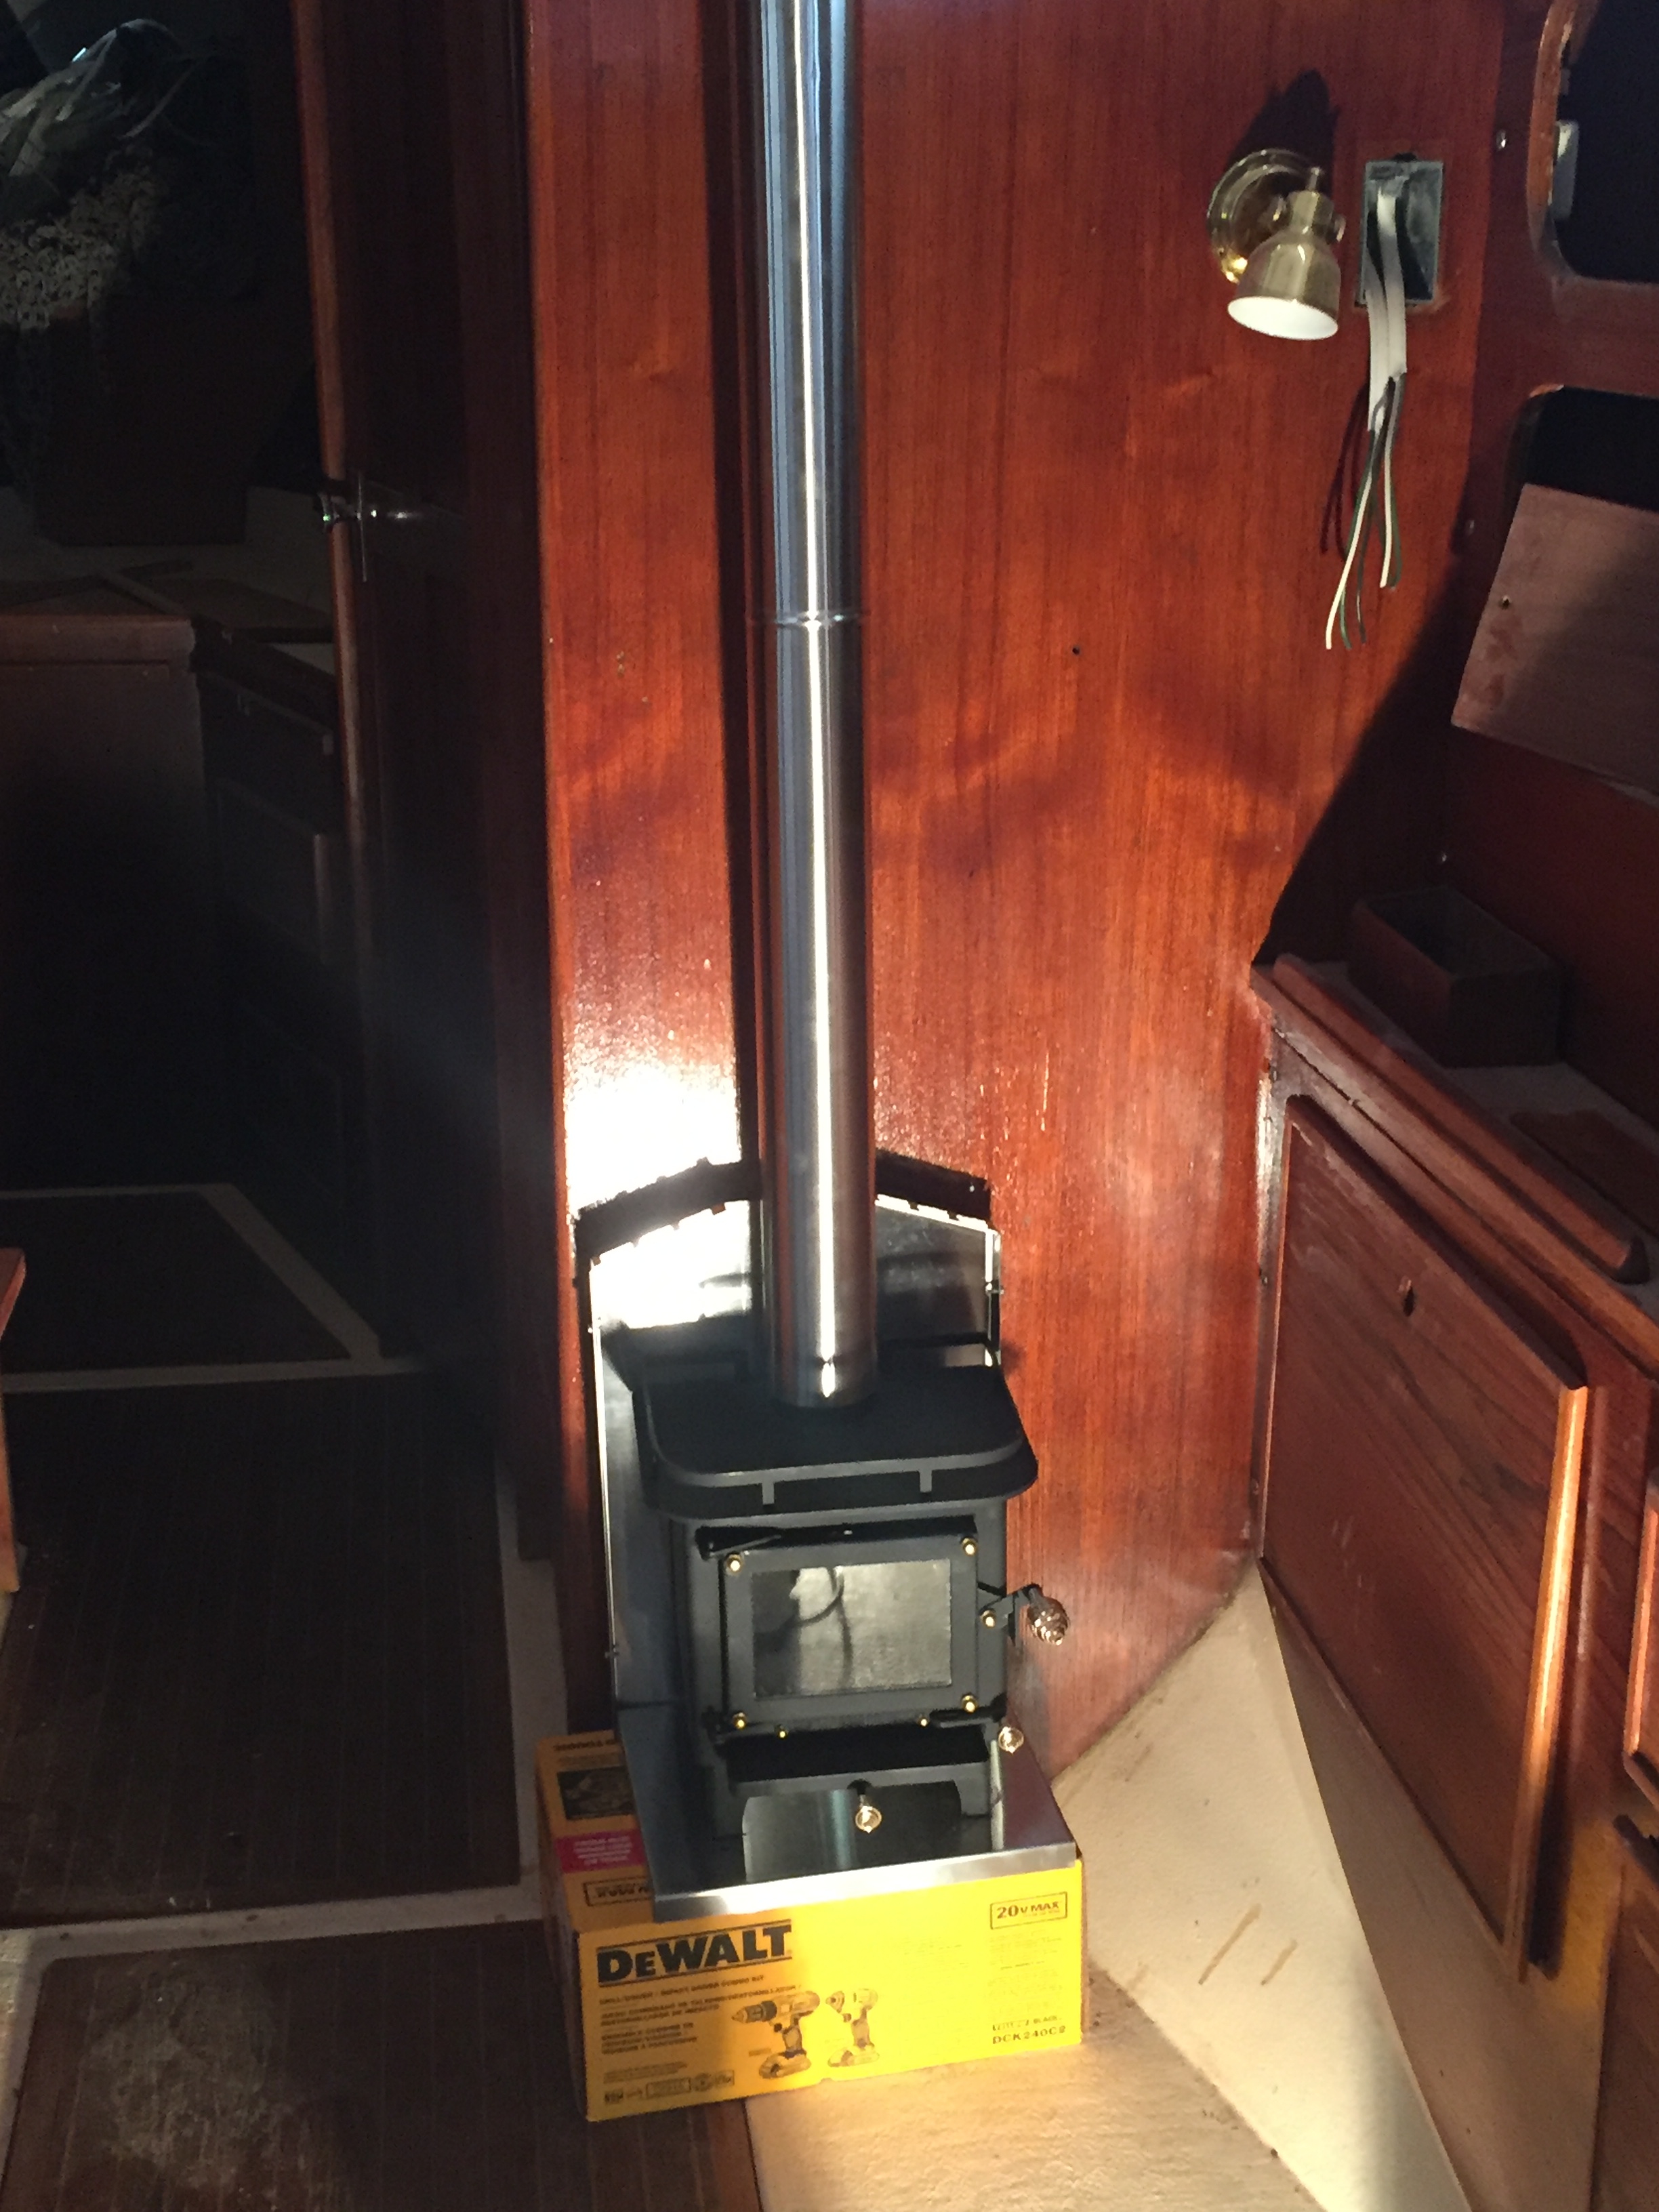
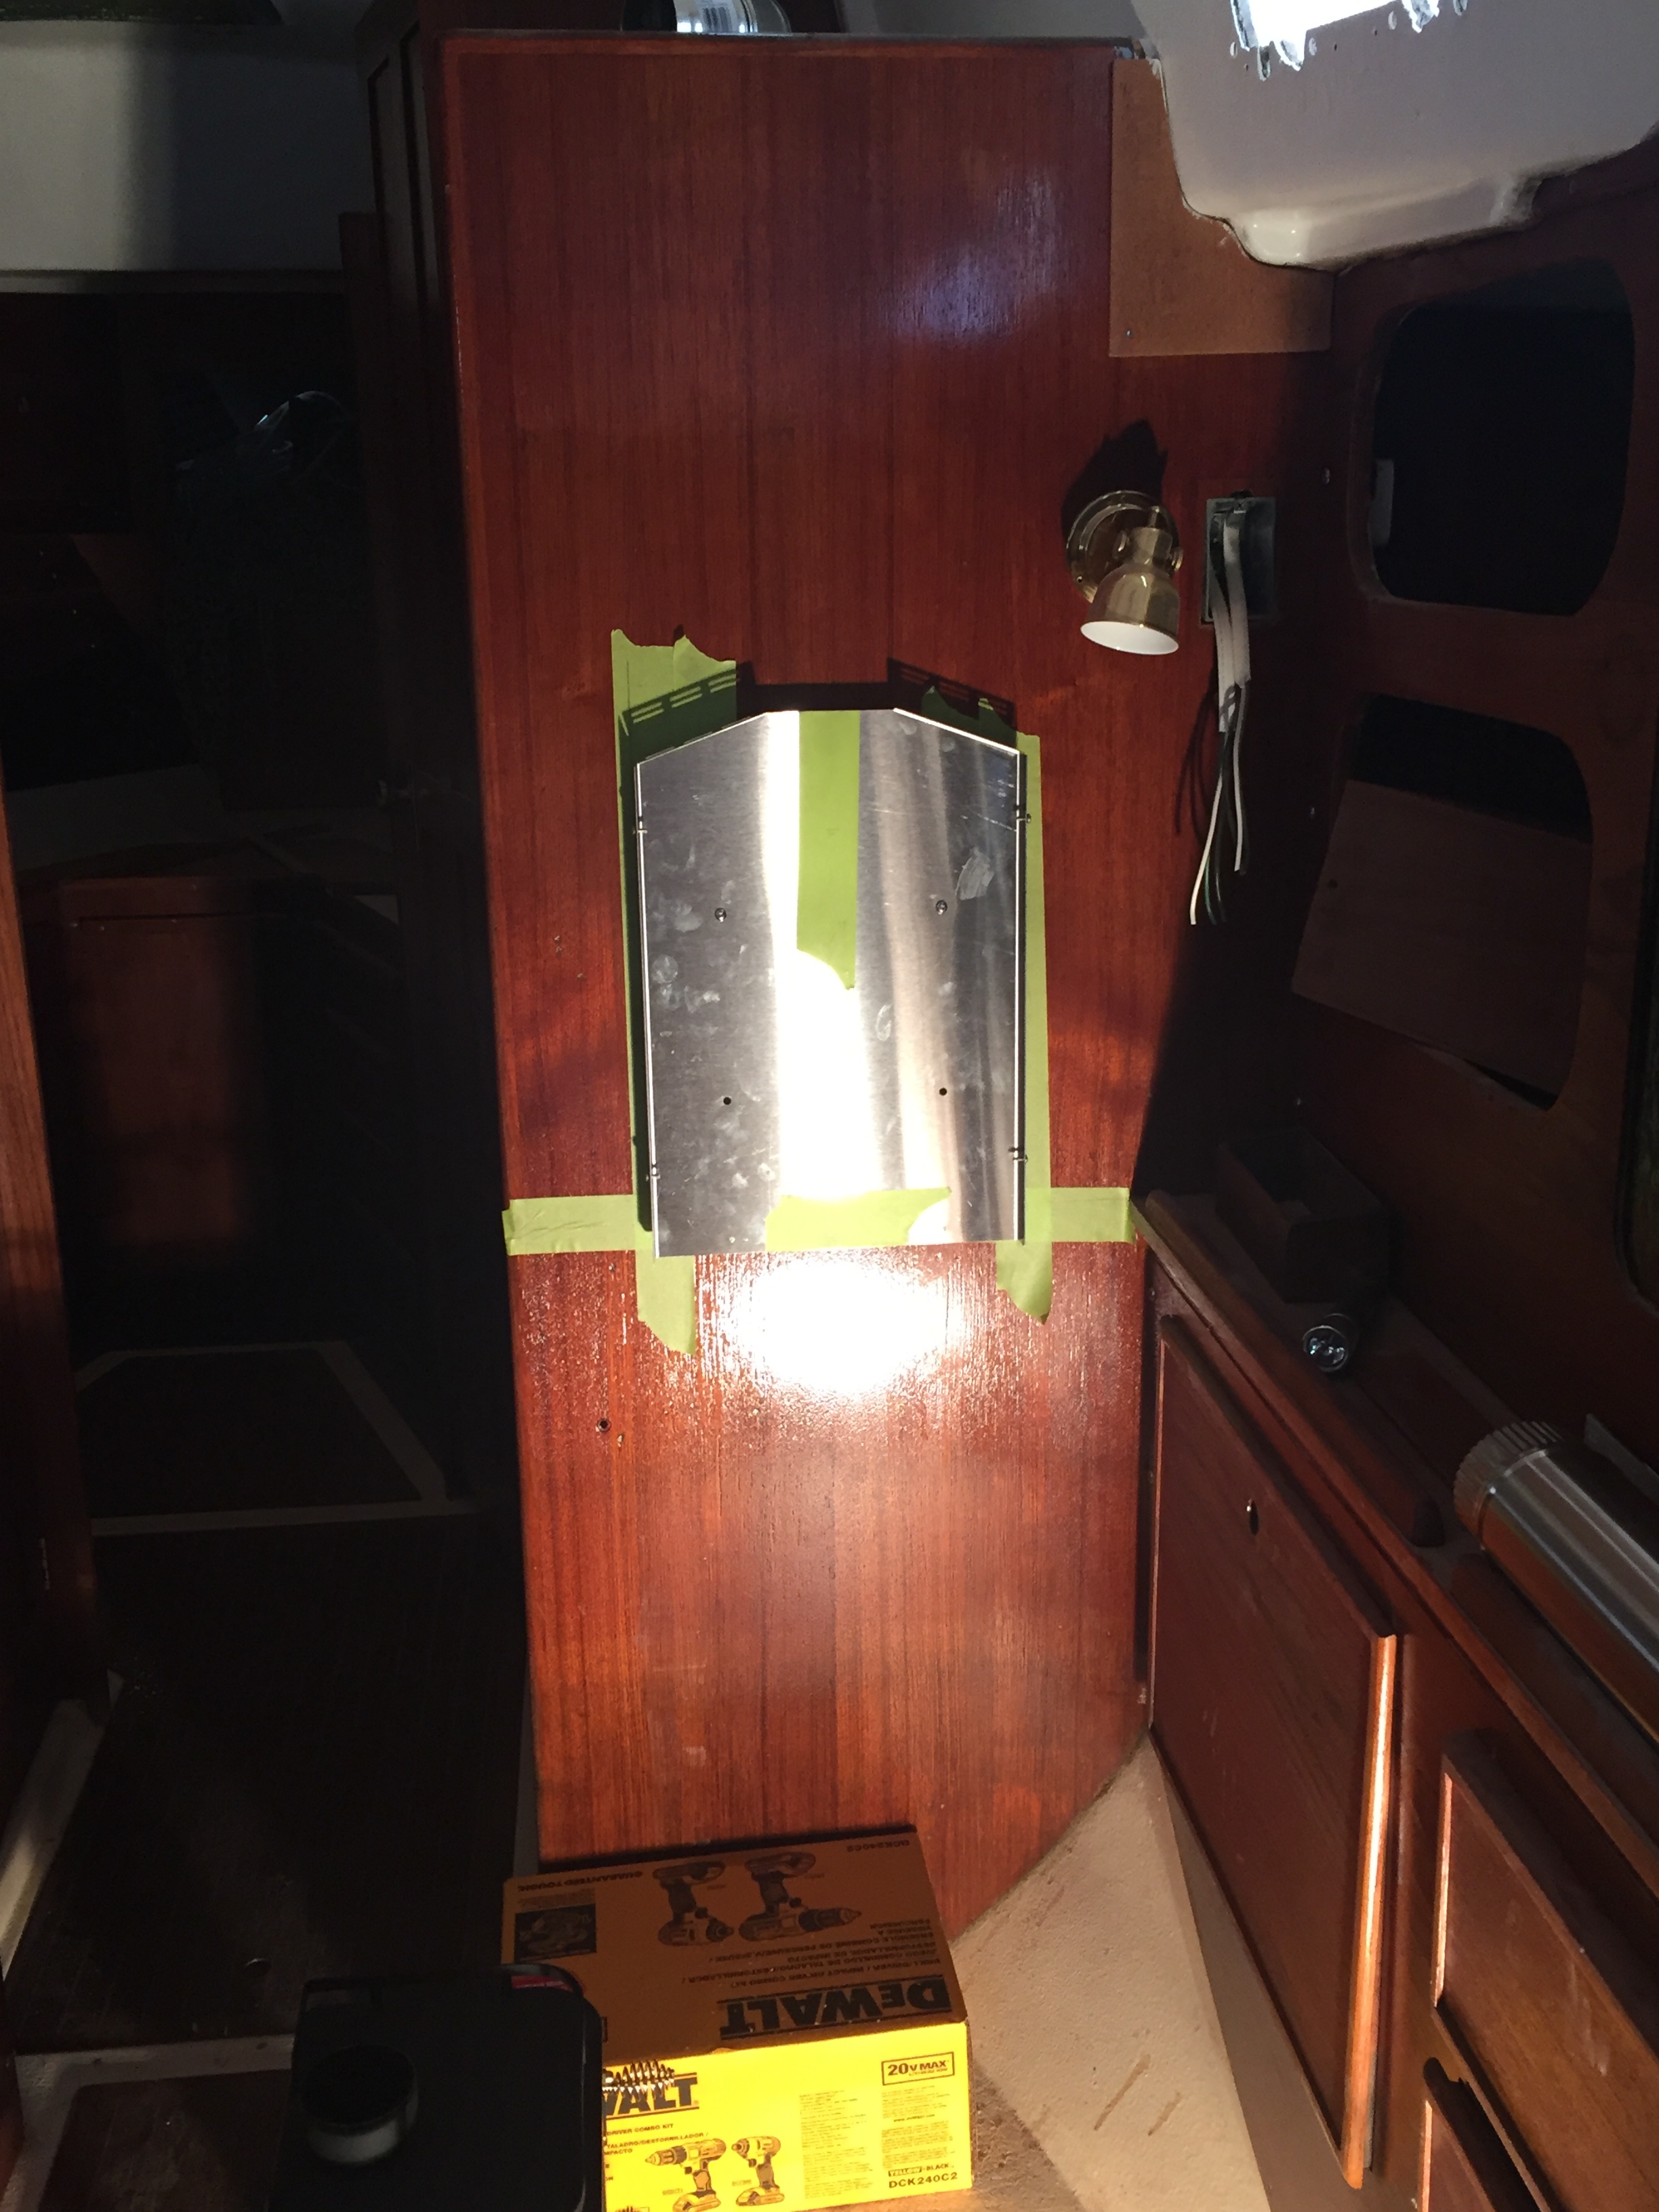
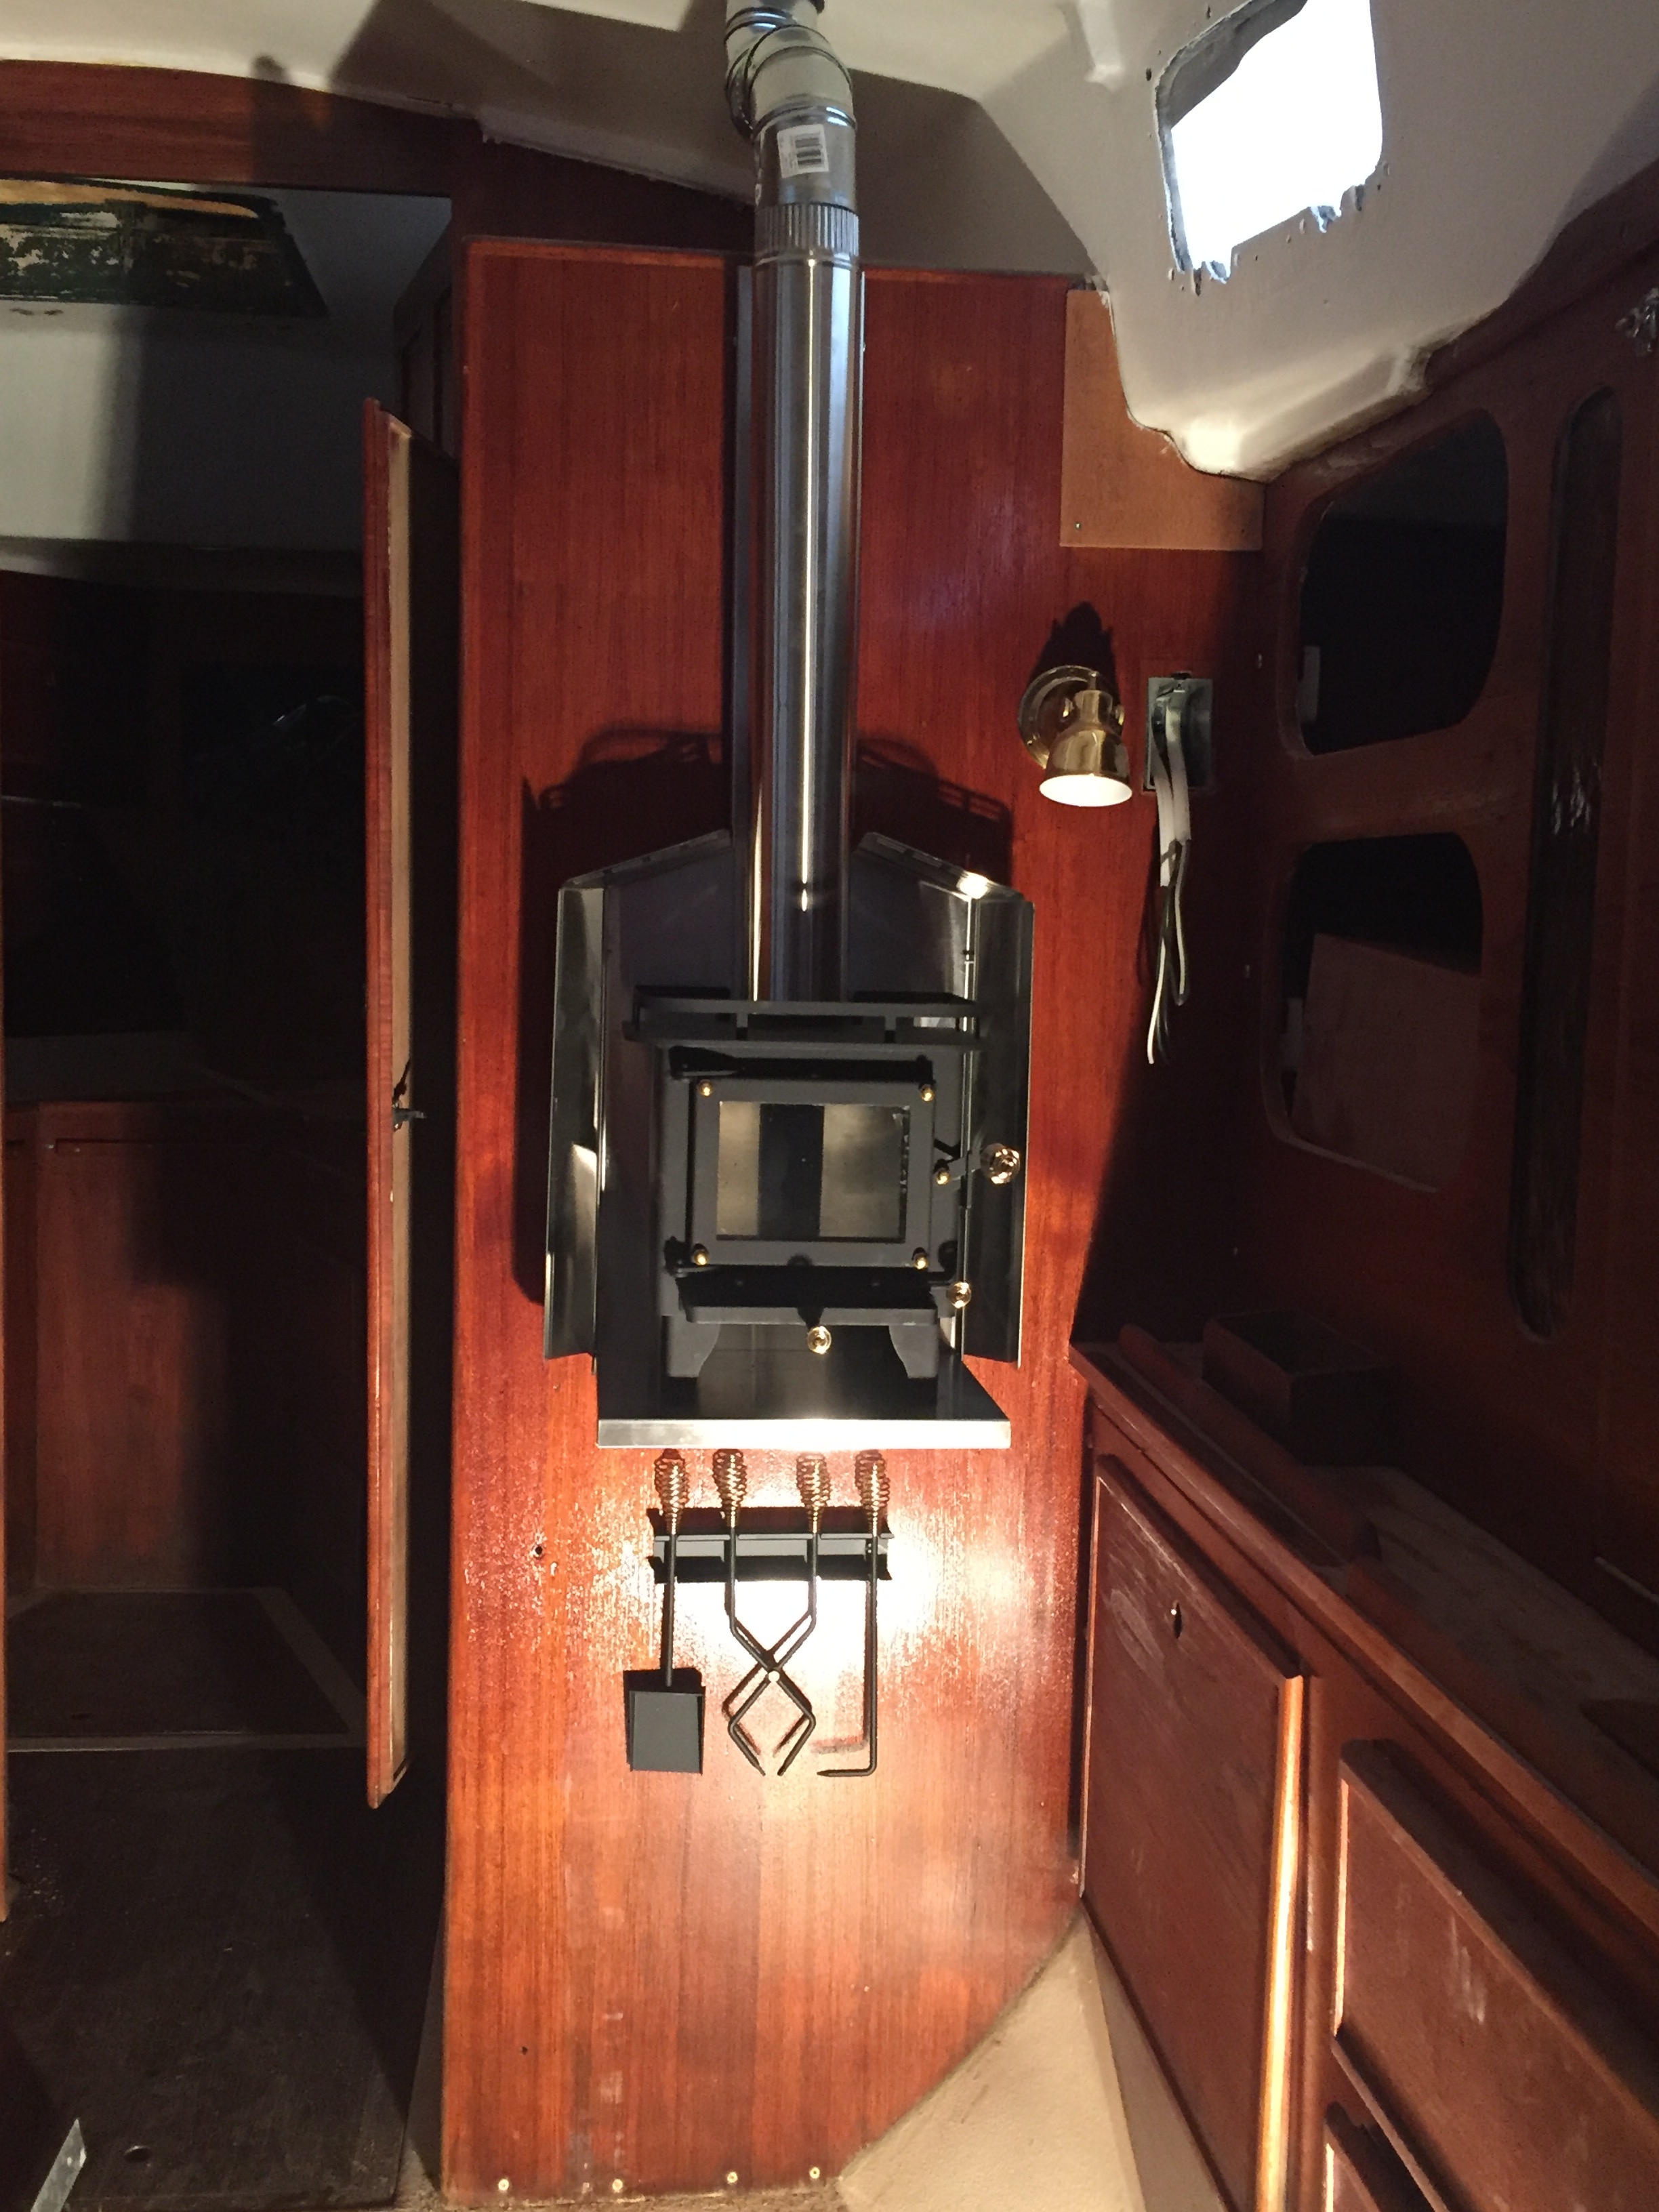
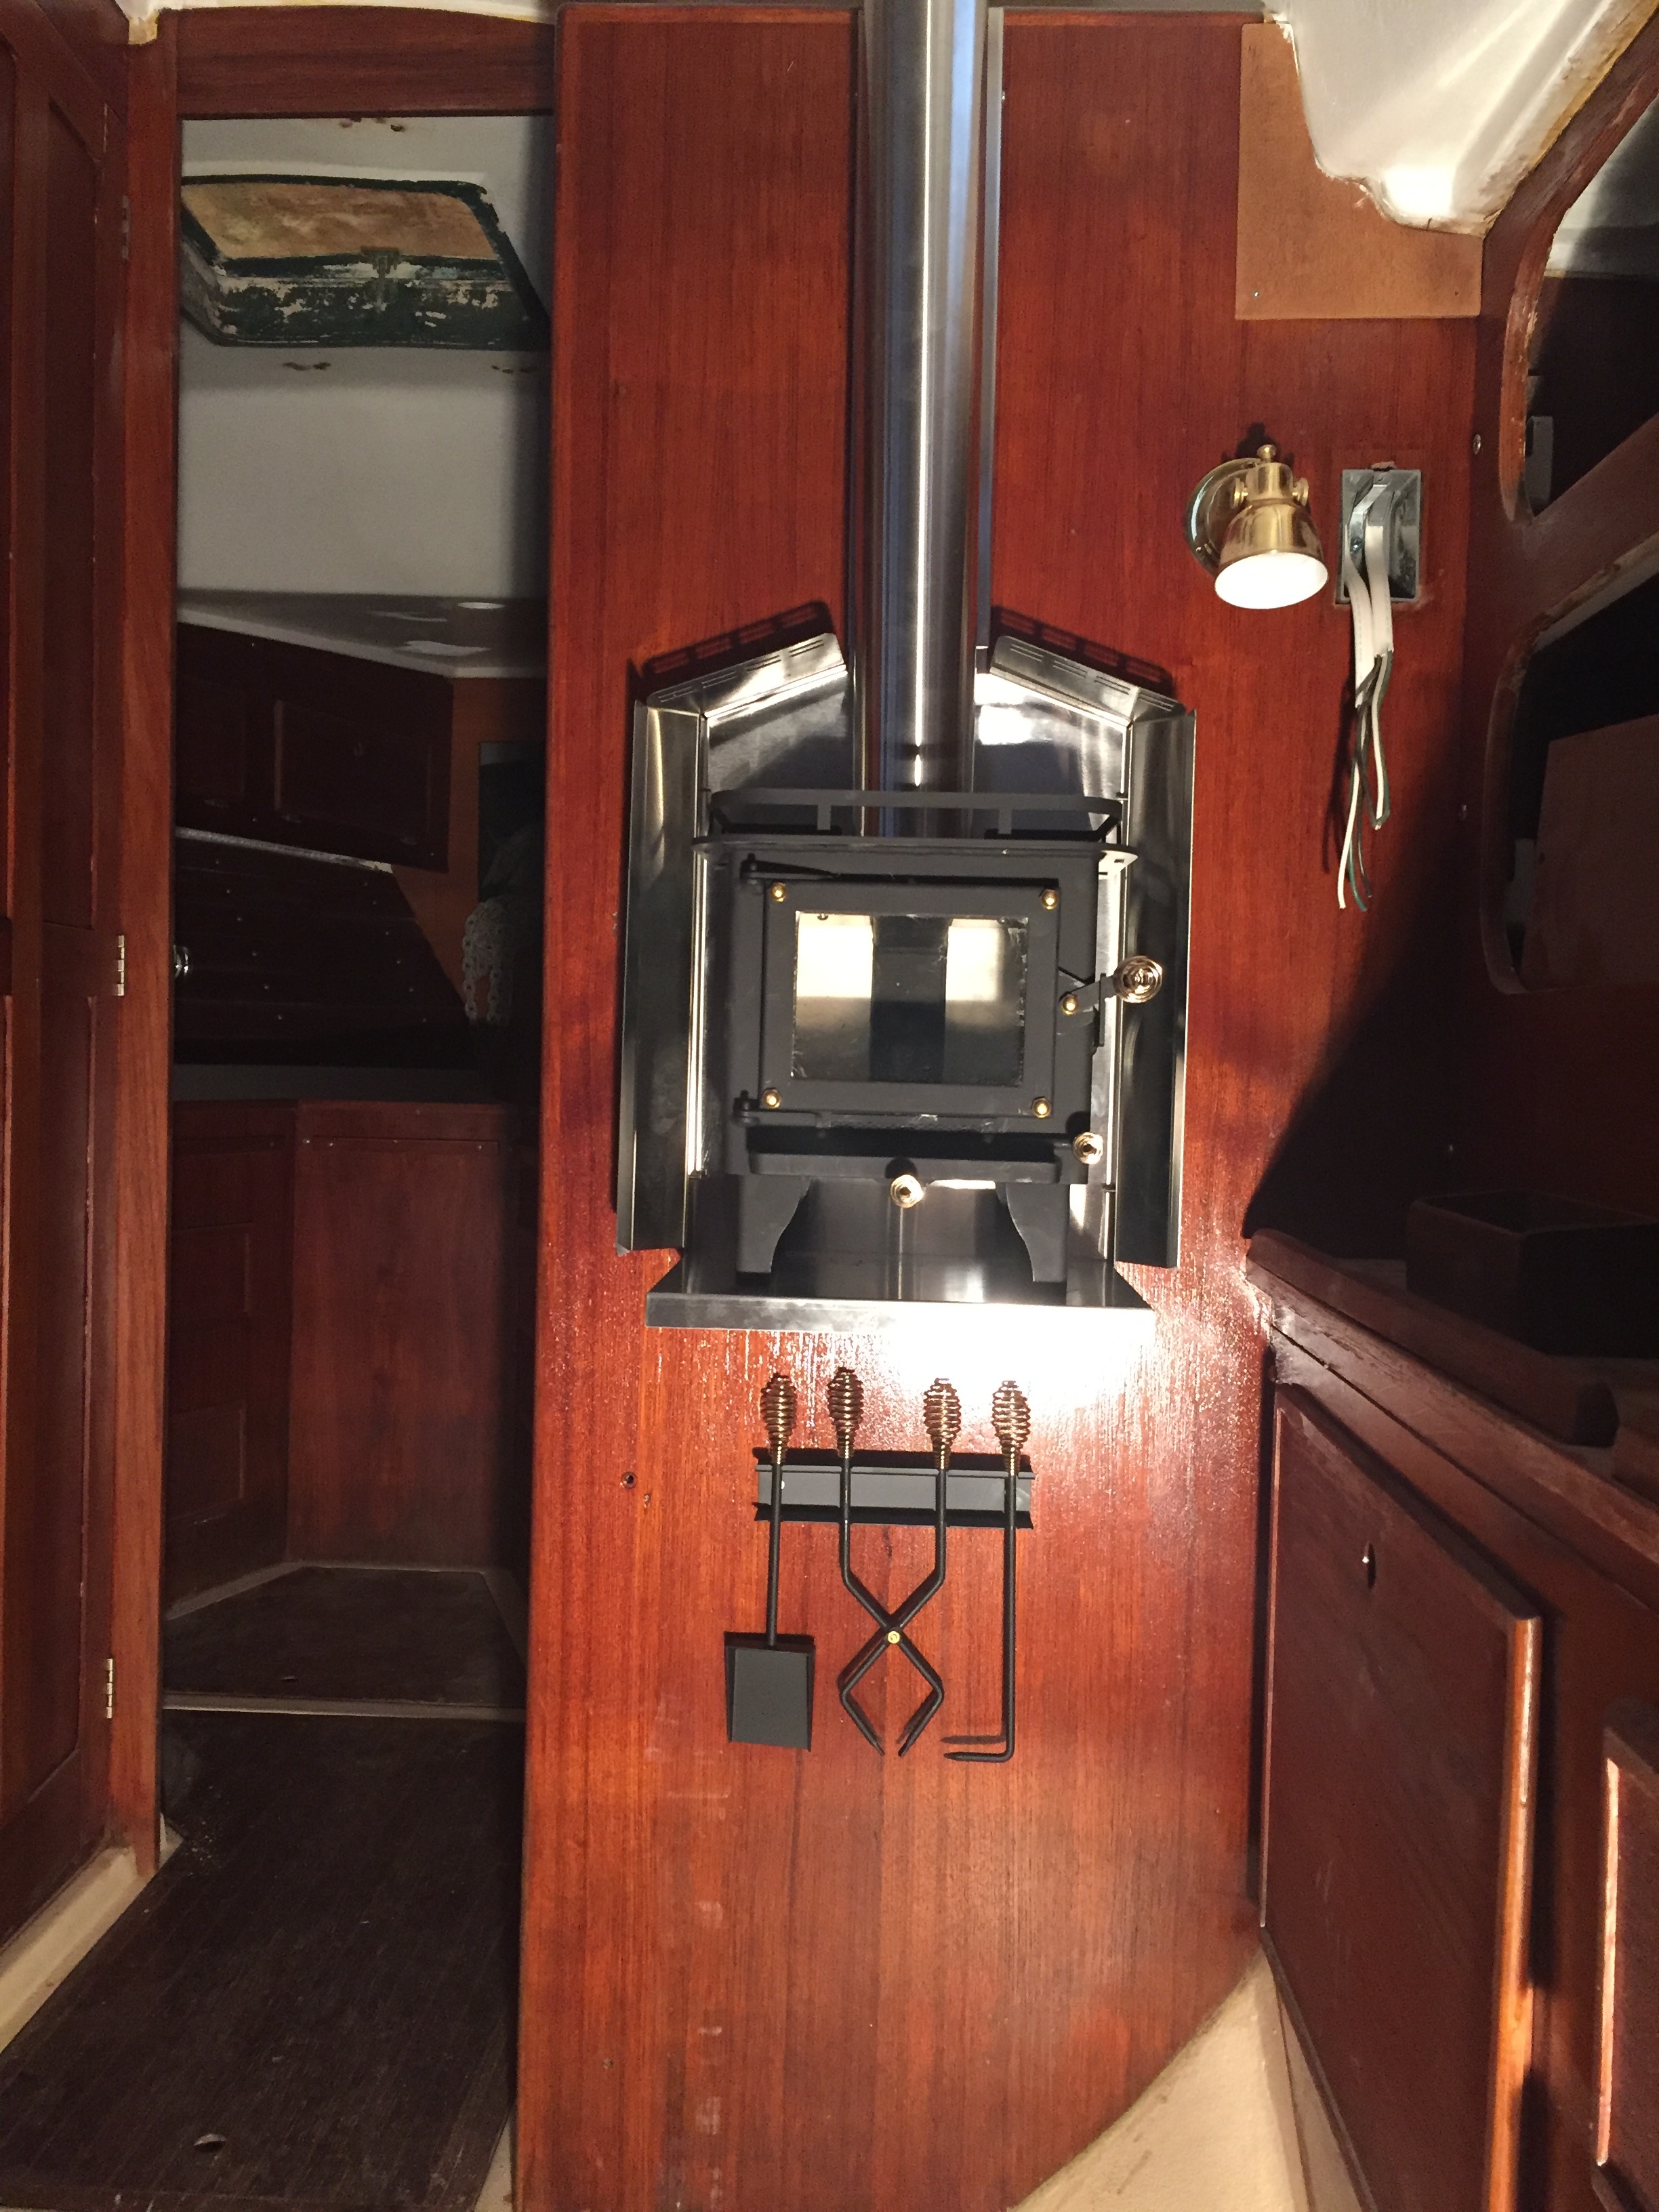
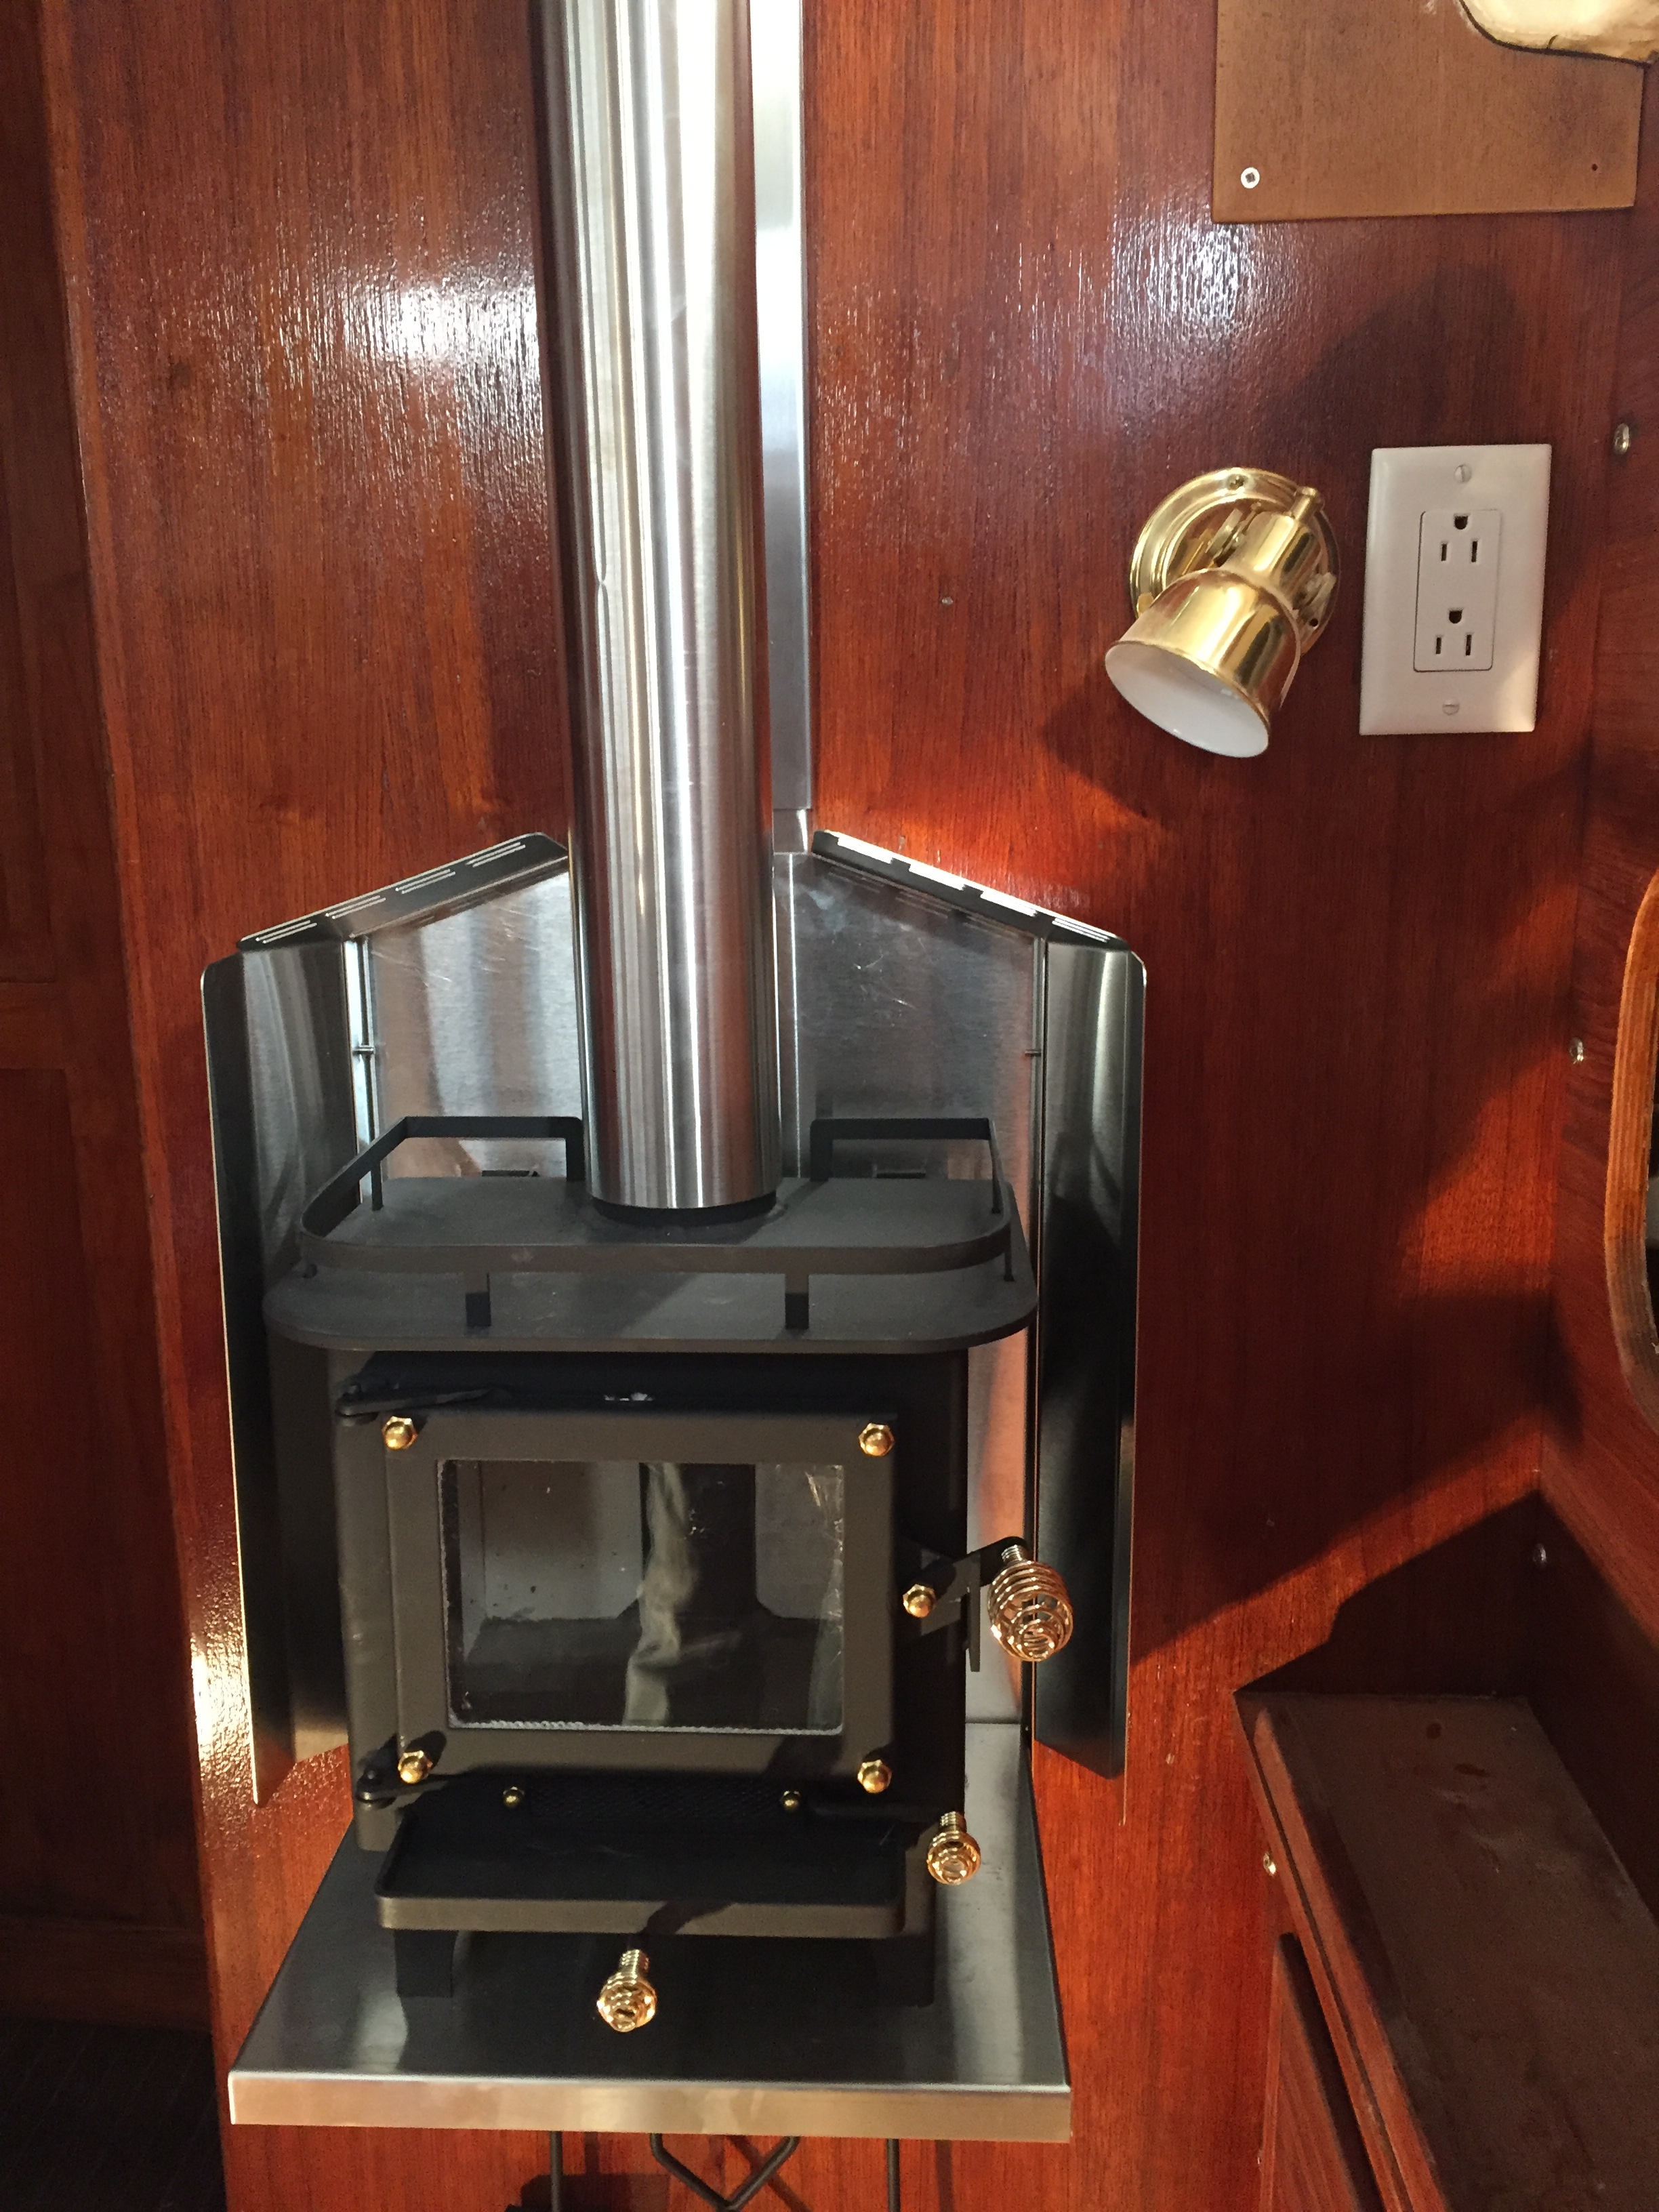
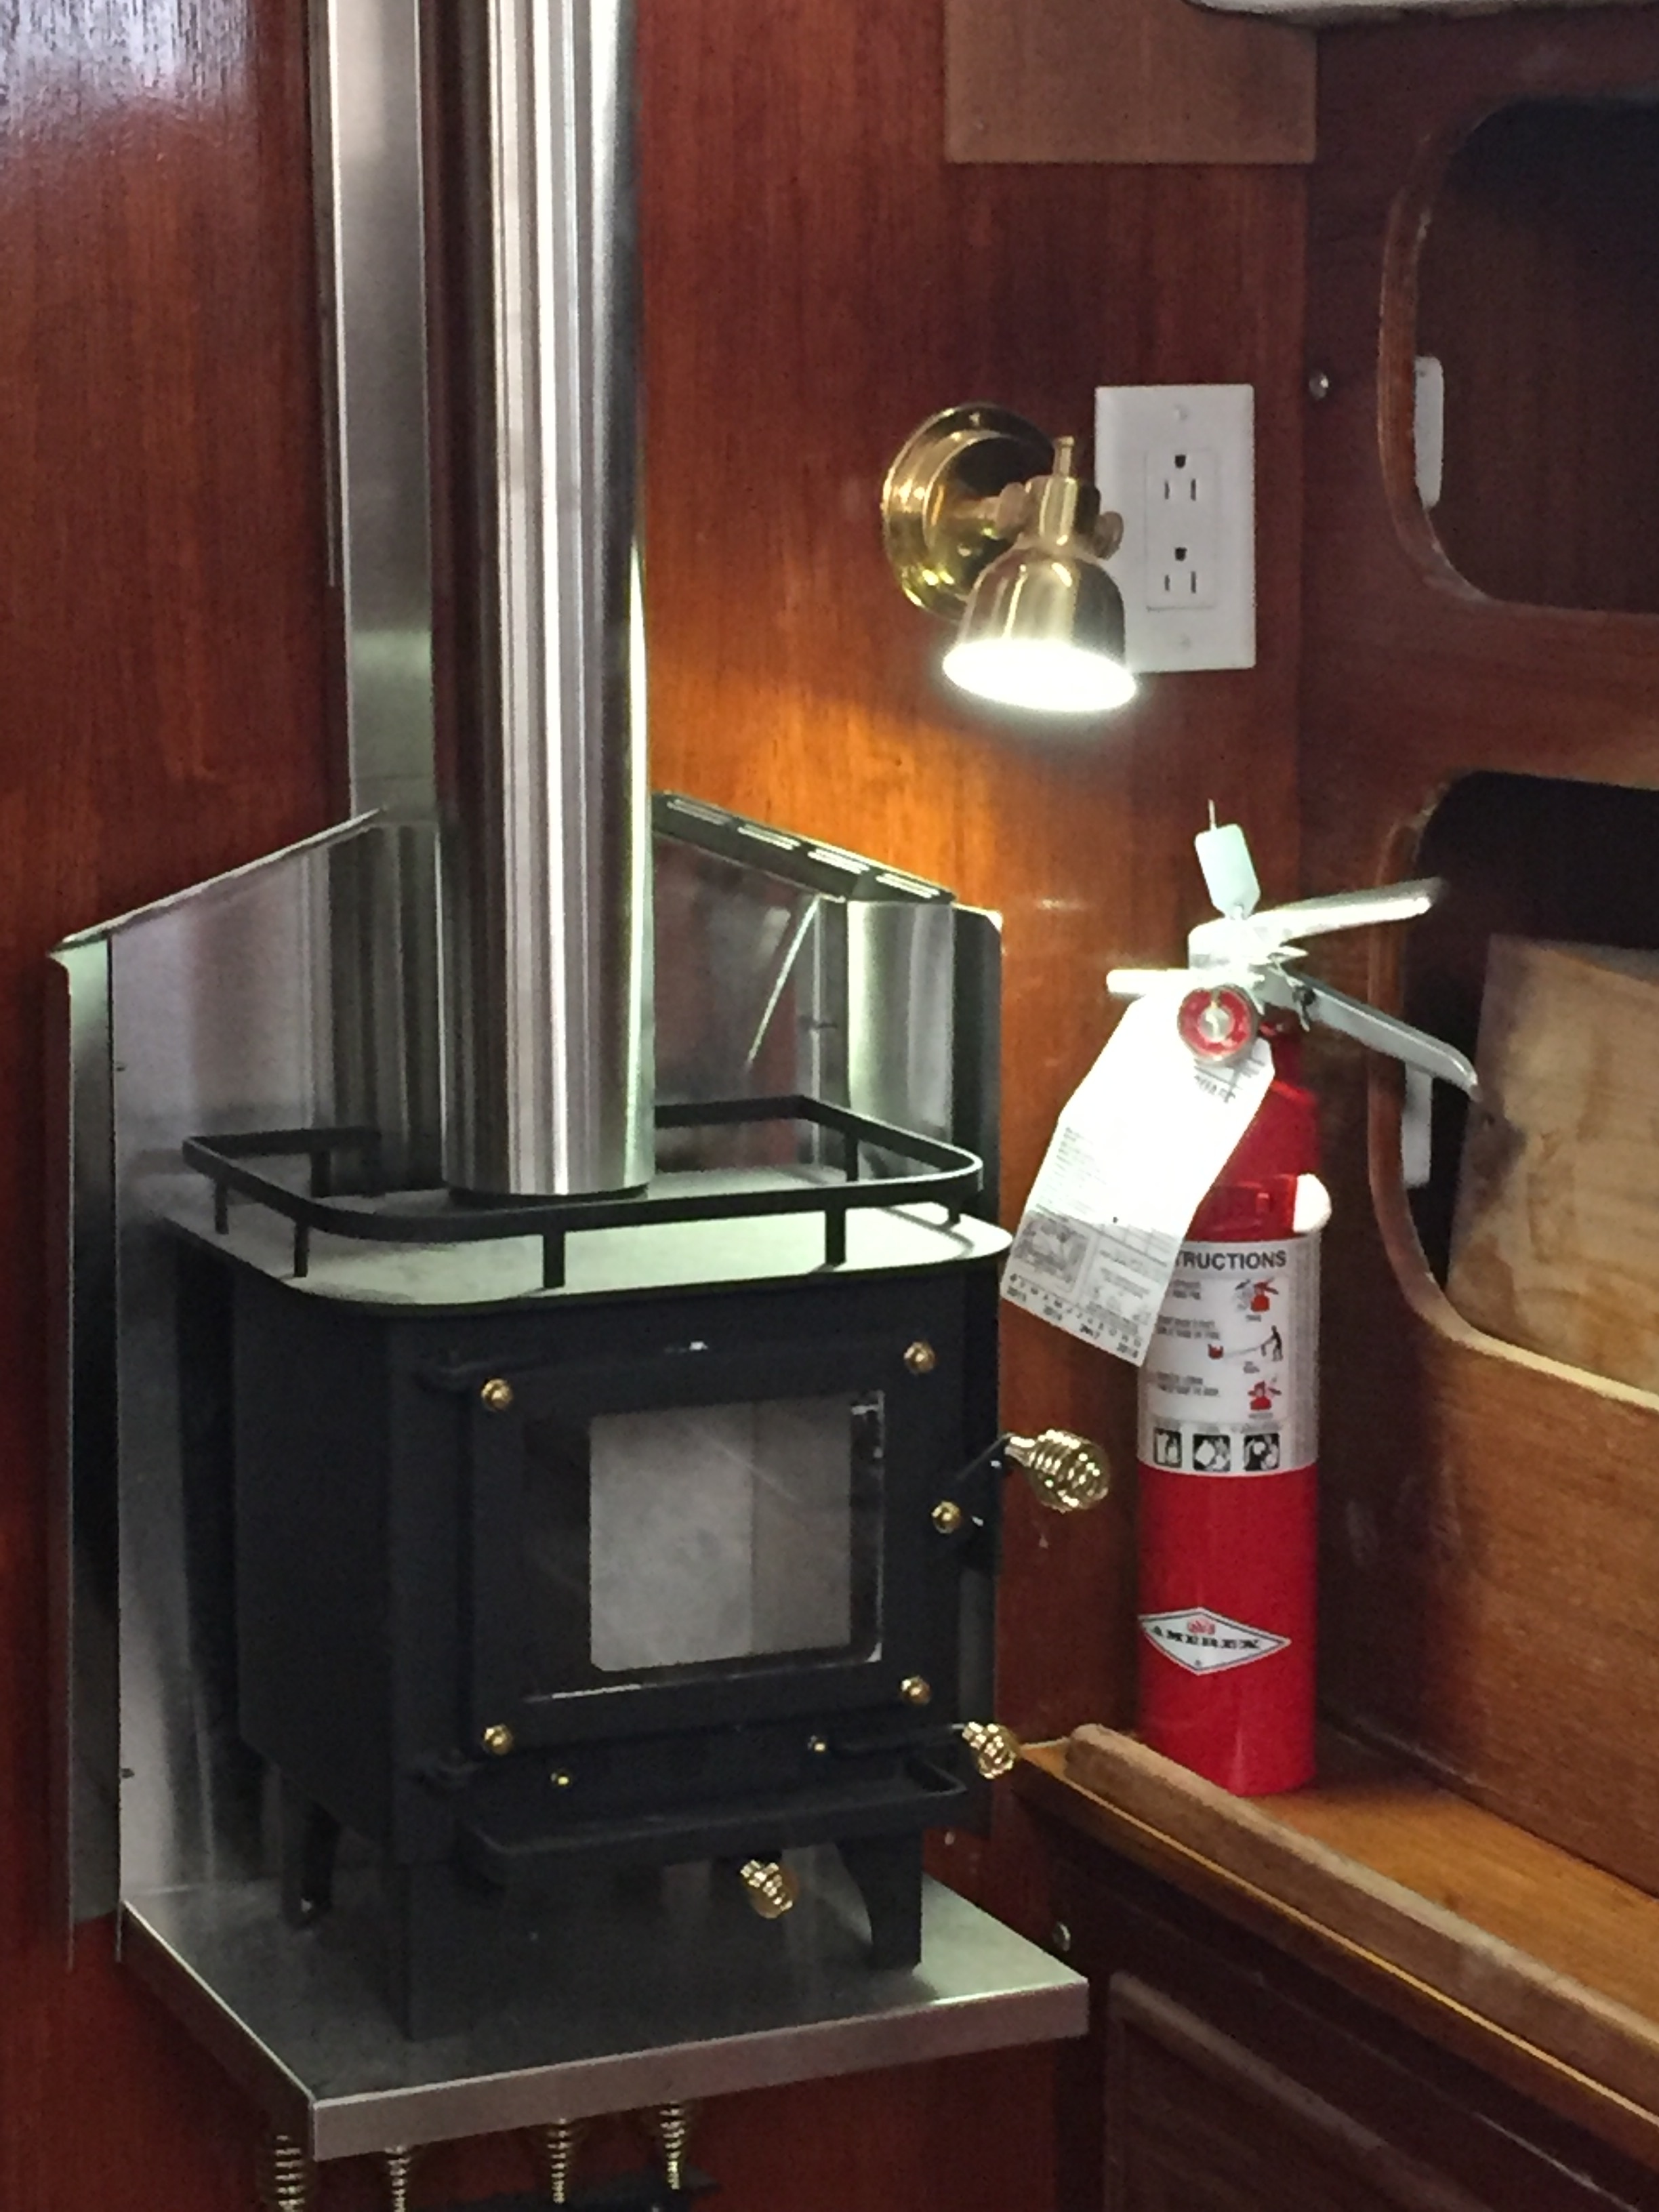
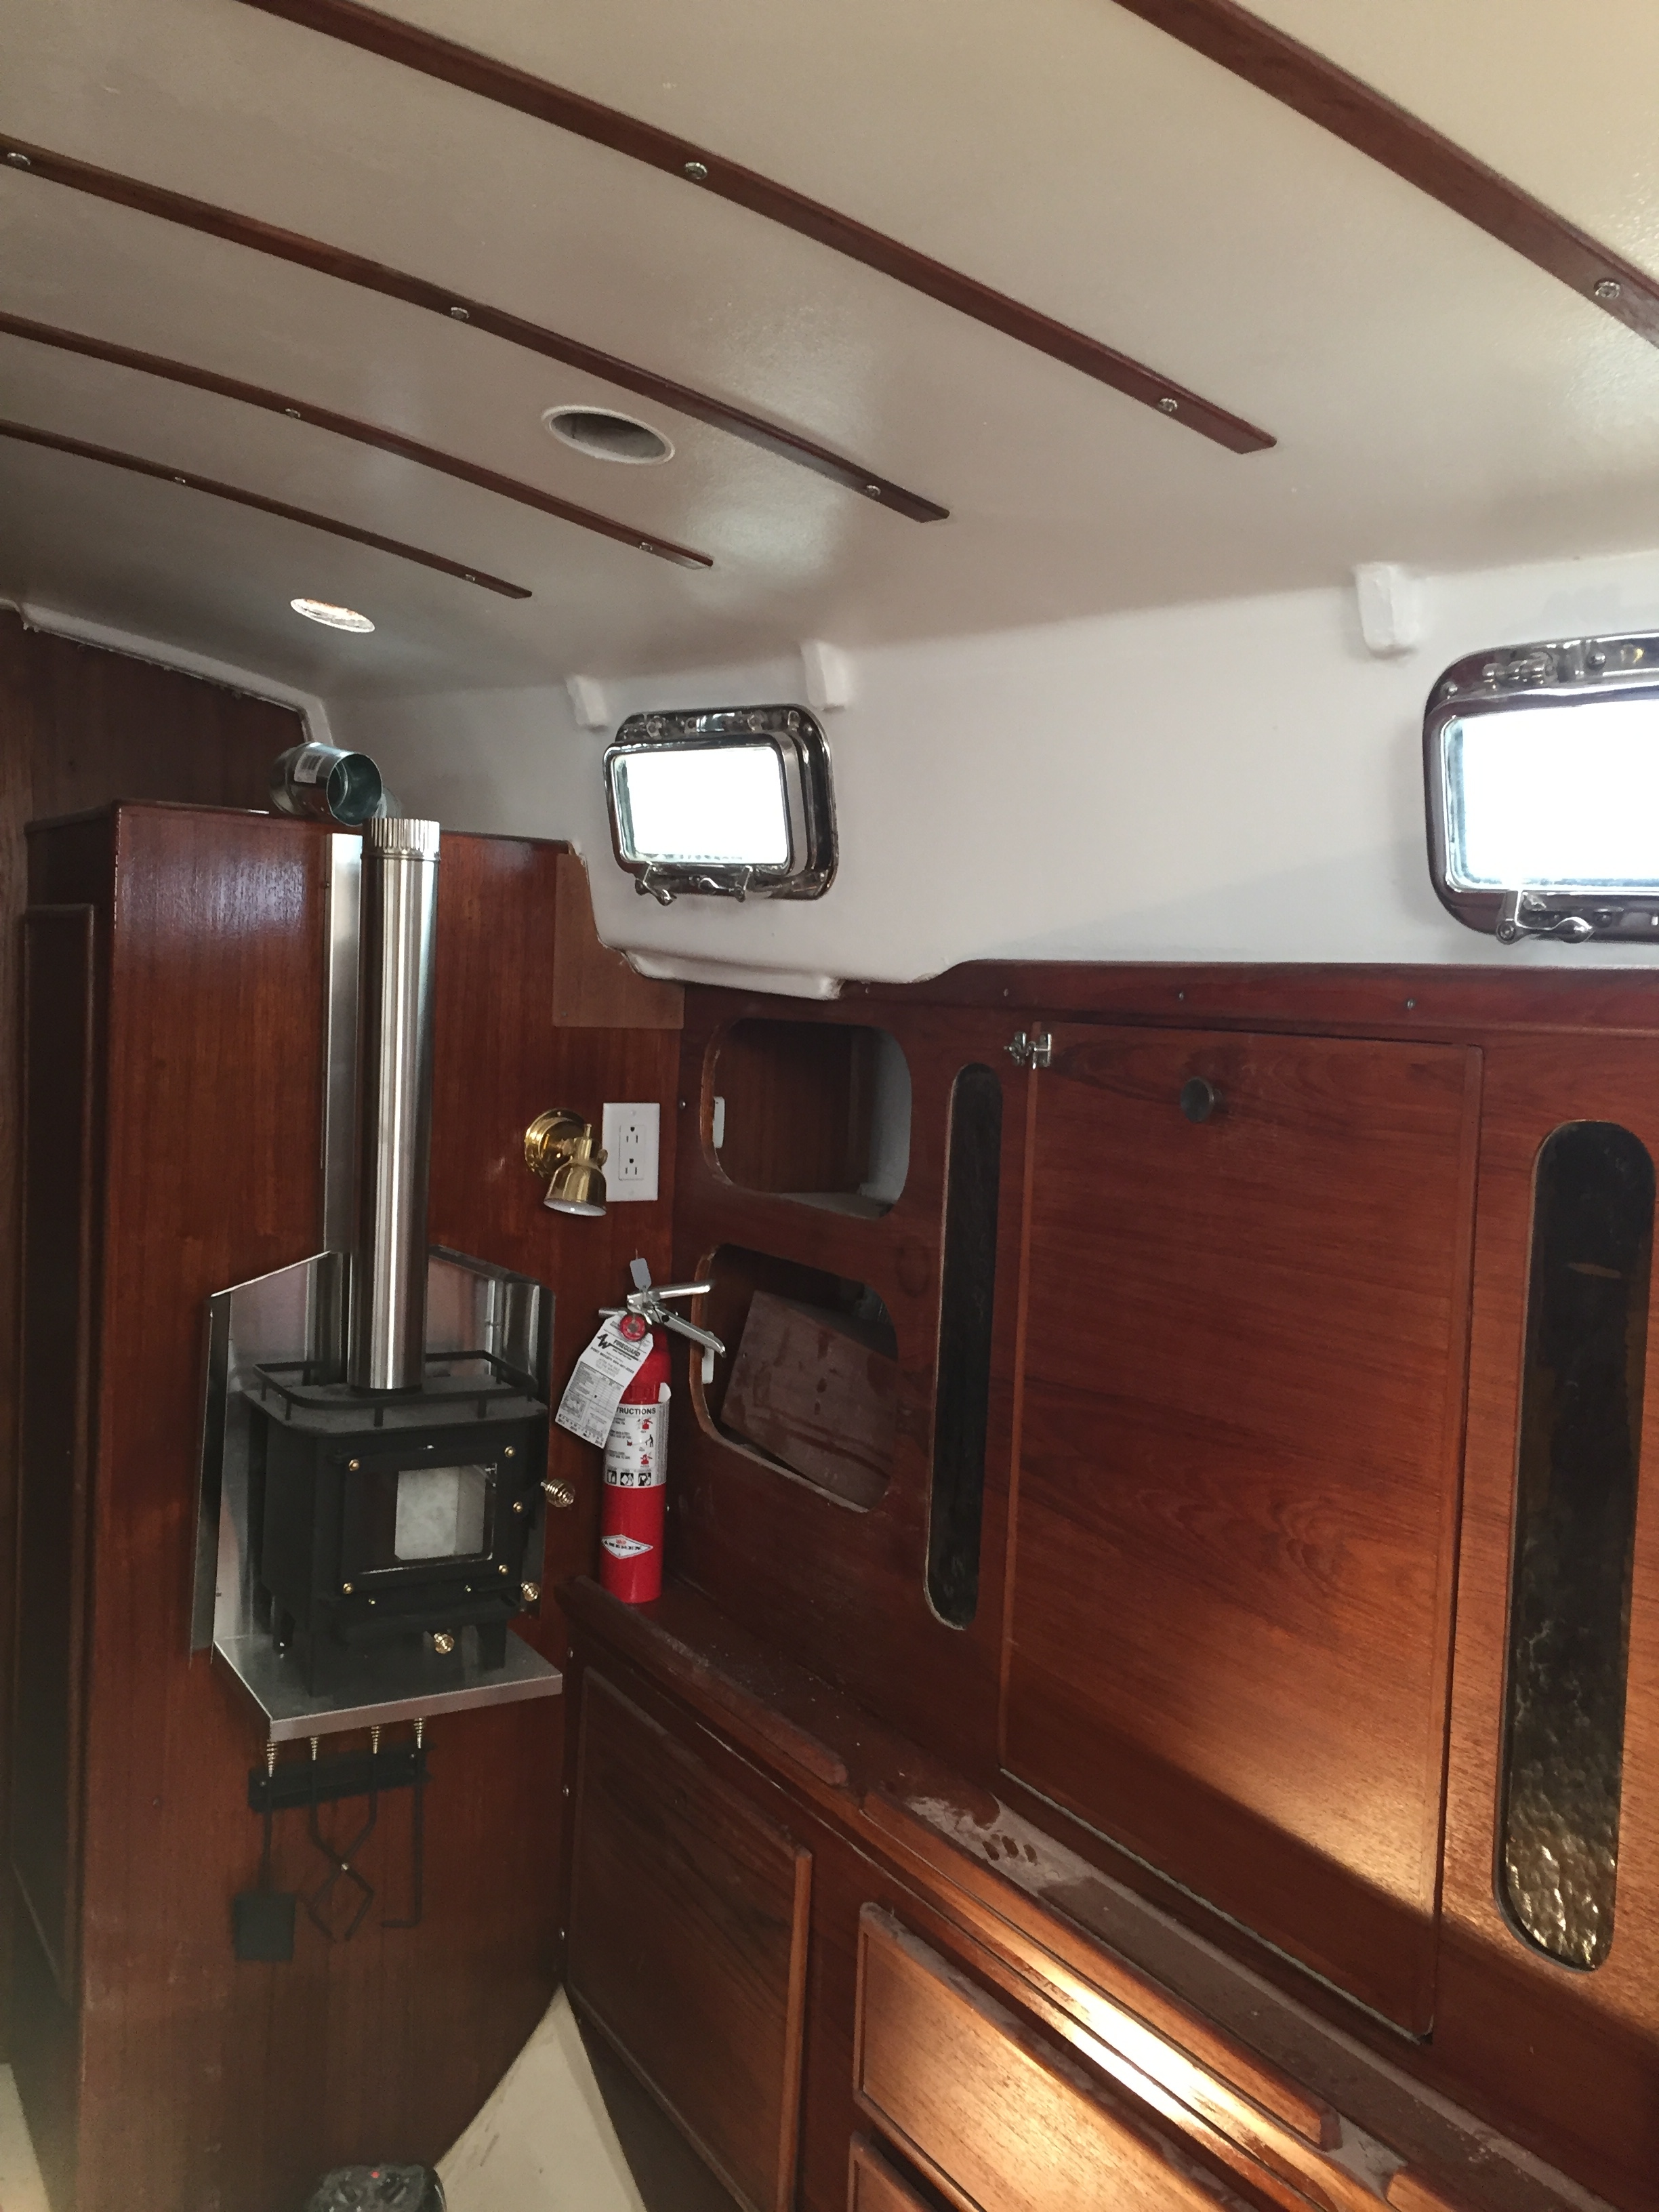
This project has had many ups and downs. It has taken way longer than we ever anticipated. We expected to be sitting at anchor sipping drinks by now but we still have a lot of work to do before we are ready. To be completely honest there have been a couple of periods where we have simply lost interest. Akupara became more like an albatross than a dream. It has seemed like all we did for several years was work on her and write cheques, it has been downright depressing to say the least. We have had a few highs, the removal finally of those old stinking fuel tanks, even though the keel tank was the worst job an Akupara yet. When I finally installed the new electrical panel and had lights inside for the first time, when we installed the Cubic Mini Woodstove and had the first test fire! Those day were fun.
The biggest transformation and probably the most exciting has been the painting of Akupara’s hull! It took damn near 2 years but when it finally happened, my god, she is beautiful.
For the first time ever since owning Akupara, I had a small panic attack as we were removing the lifelines and a turnbuckle fell overboard dan near scratching the hull. That is a monumental step forward!!
So what has kept us going? Good question?
We have had many of these conversations over the last few days and we have now made it a priority to try to remember all of the reasons we started this project in an attempt to rekindle the fire! We have been talking about everything we enjoy, and everything we miss about sailing and generally being out on the water. With each new memory (things remembered) we can slowly feel the fire coming back.
It is of the utmost importance that now, especially now, we concentrate on all of the good things in order to make it through! If all goes well we have less than a year to finish her and get her in the water! It is just like running a marathon, you are tired, your feet hurt, your legs hurt, you are out of breath, you want to quit, but then you see that finish line and all of the negativity leaves and somehow you find the extra reserve of strength to push even harder!
Let’s hope we can find that last little bit! It’s time to get busy again!!
So are we pertinacious, or is there such a thing. Somehow I think that anyone who is described as such, consciously chooses to focus on the end results as opposed to the darkness and the hurdles that are immediately in front of them and I think they spend a lot of time forcing themselves to do so!

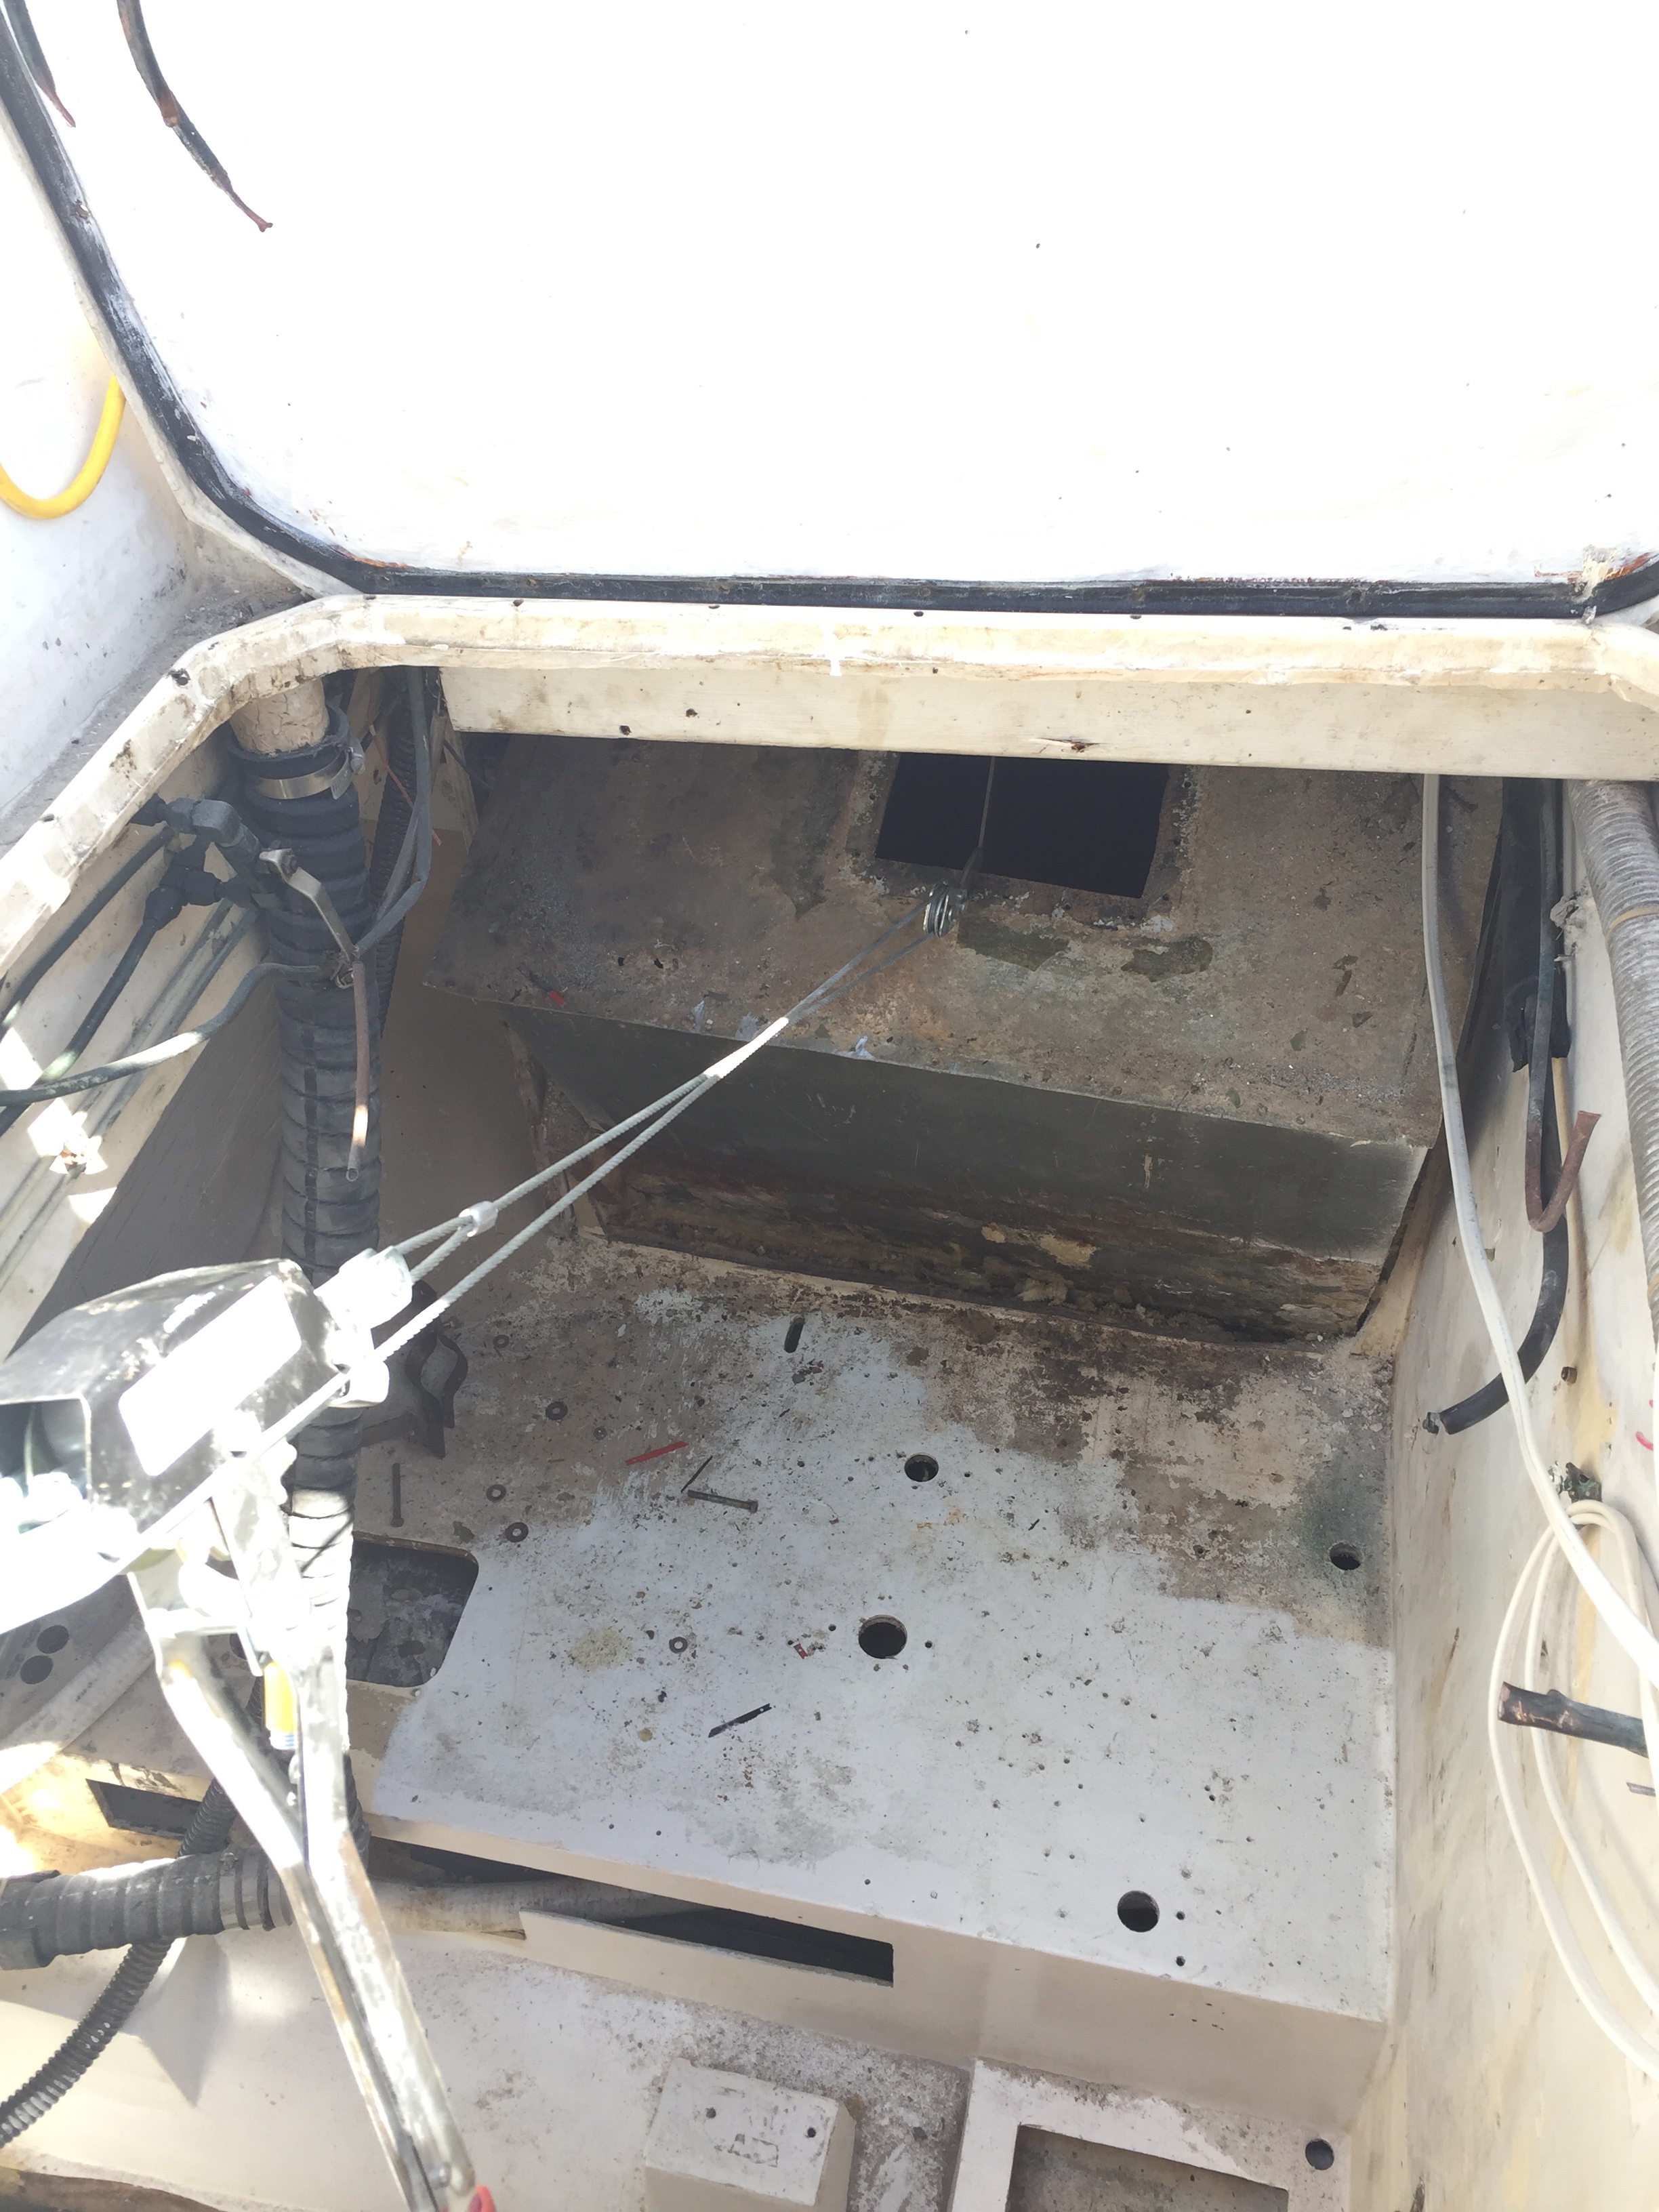
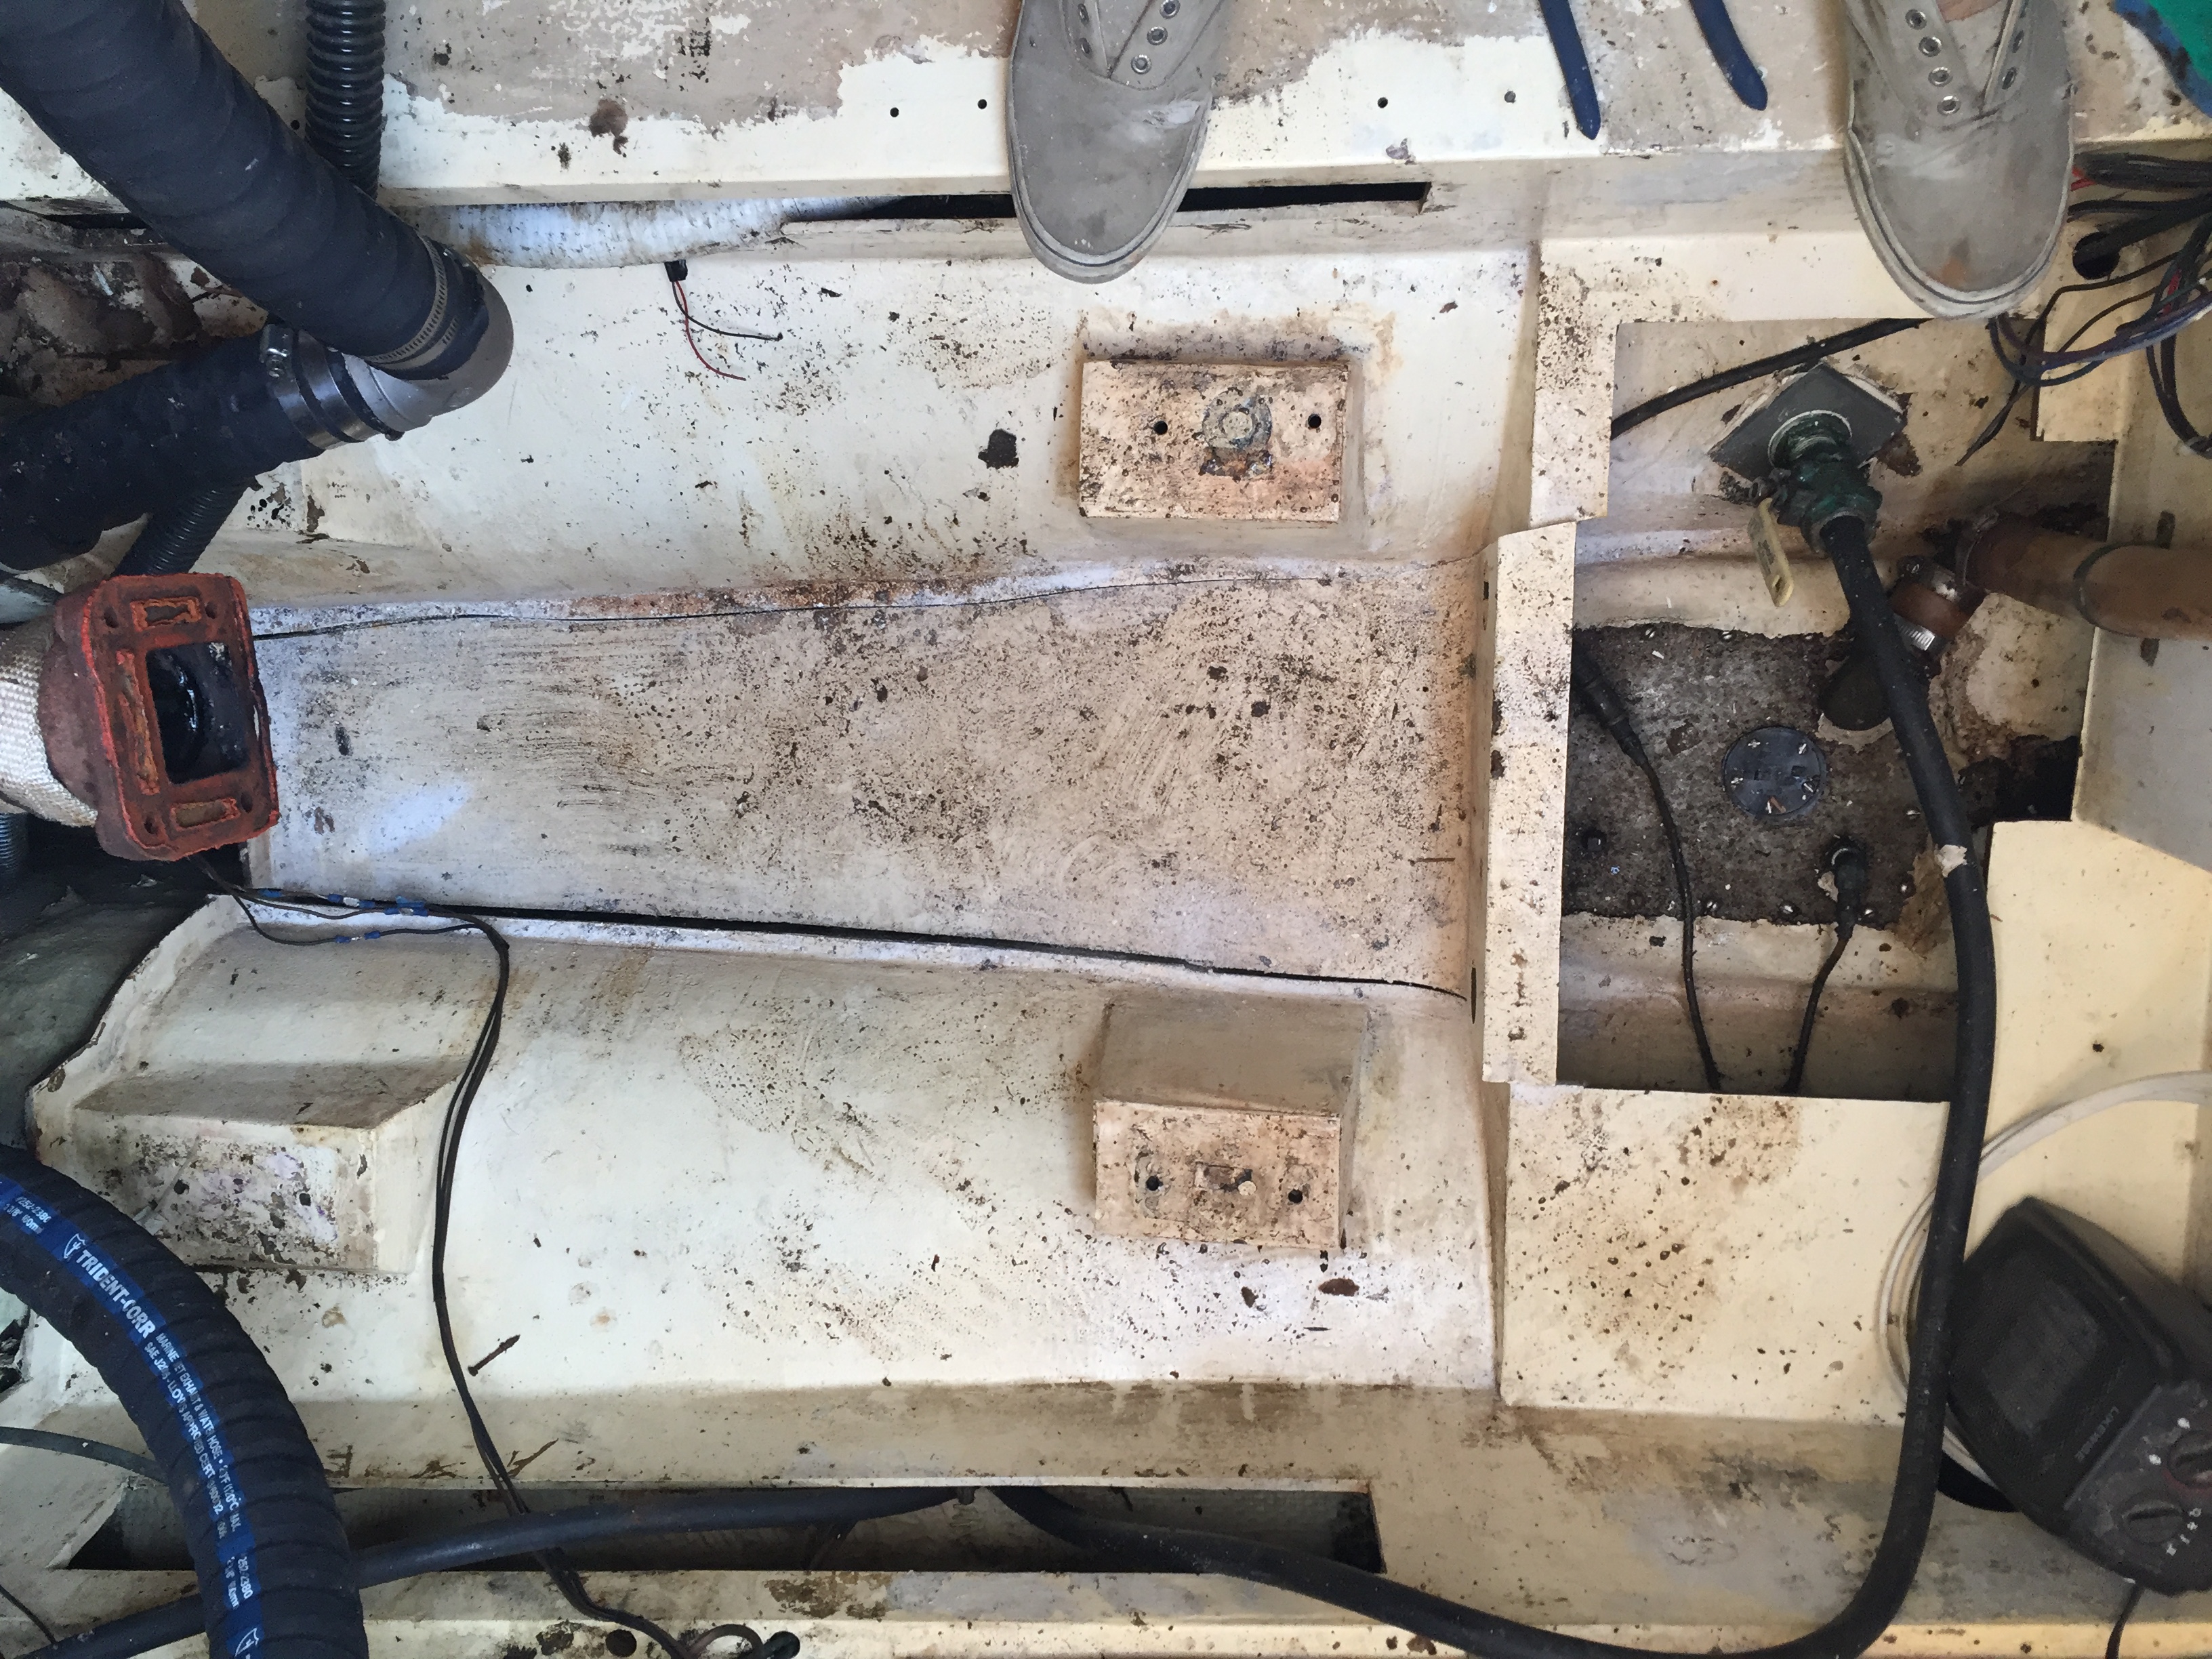
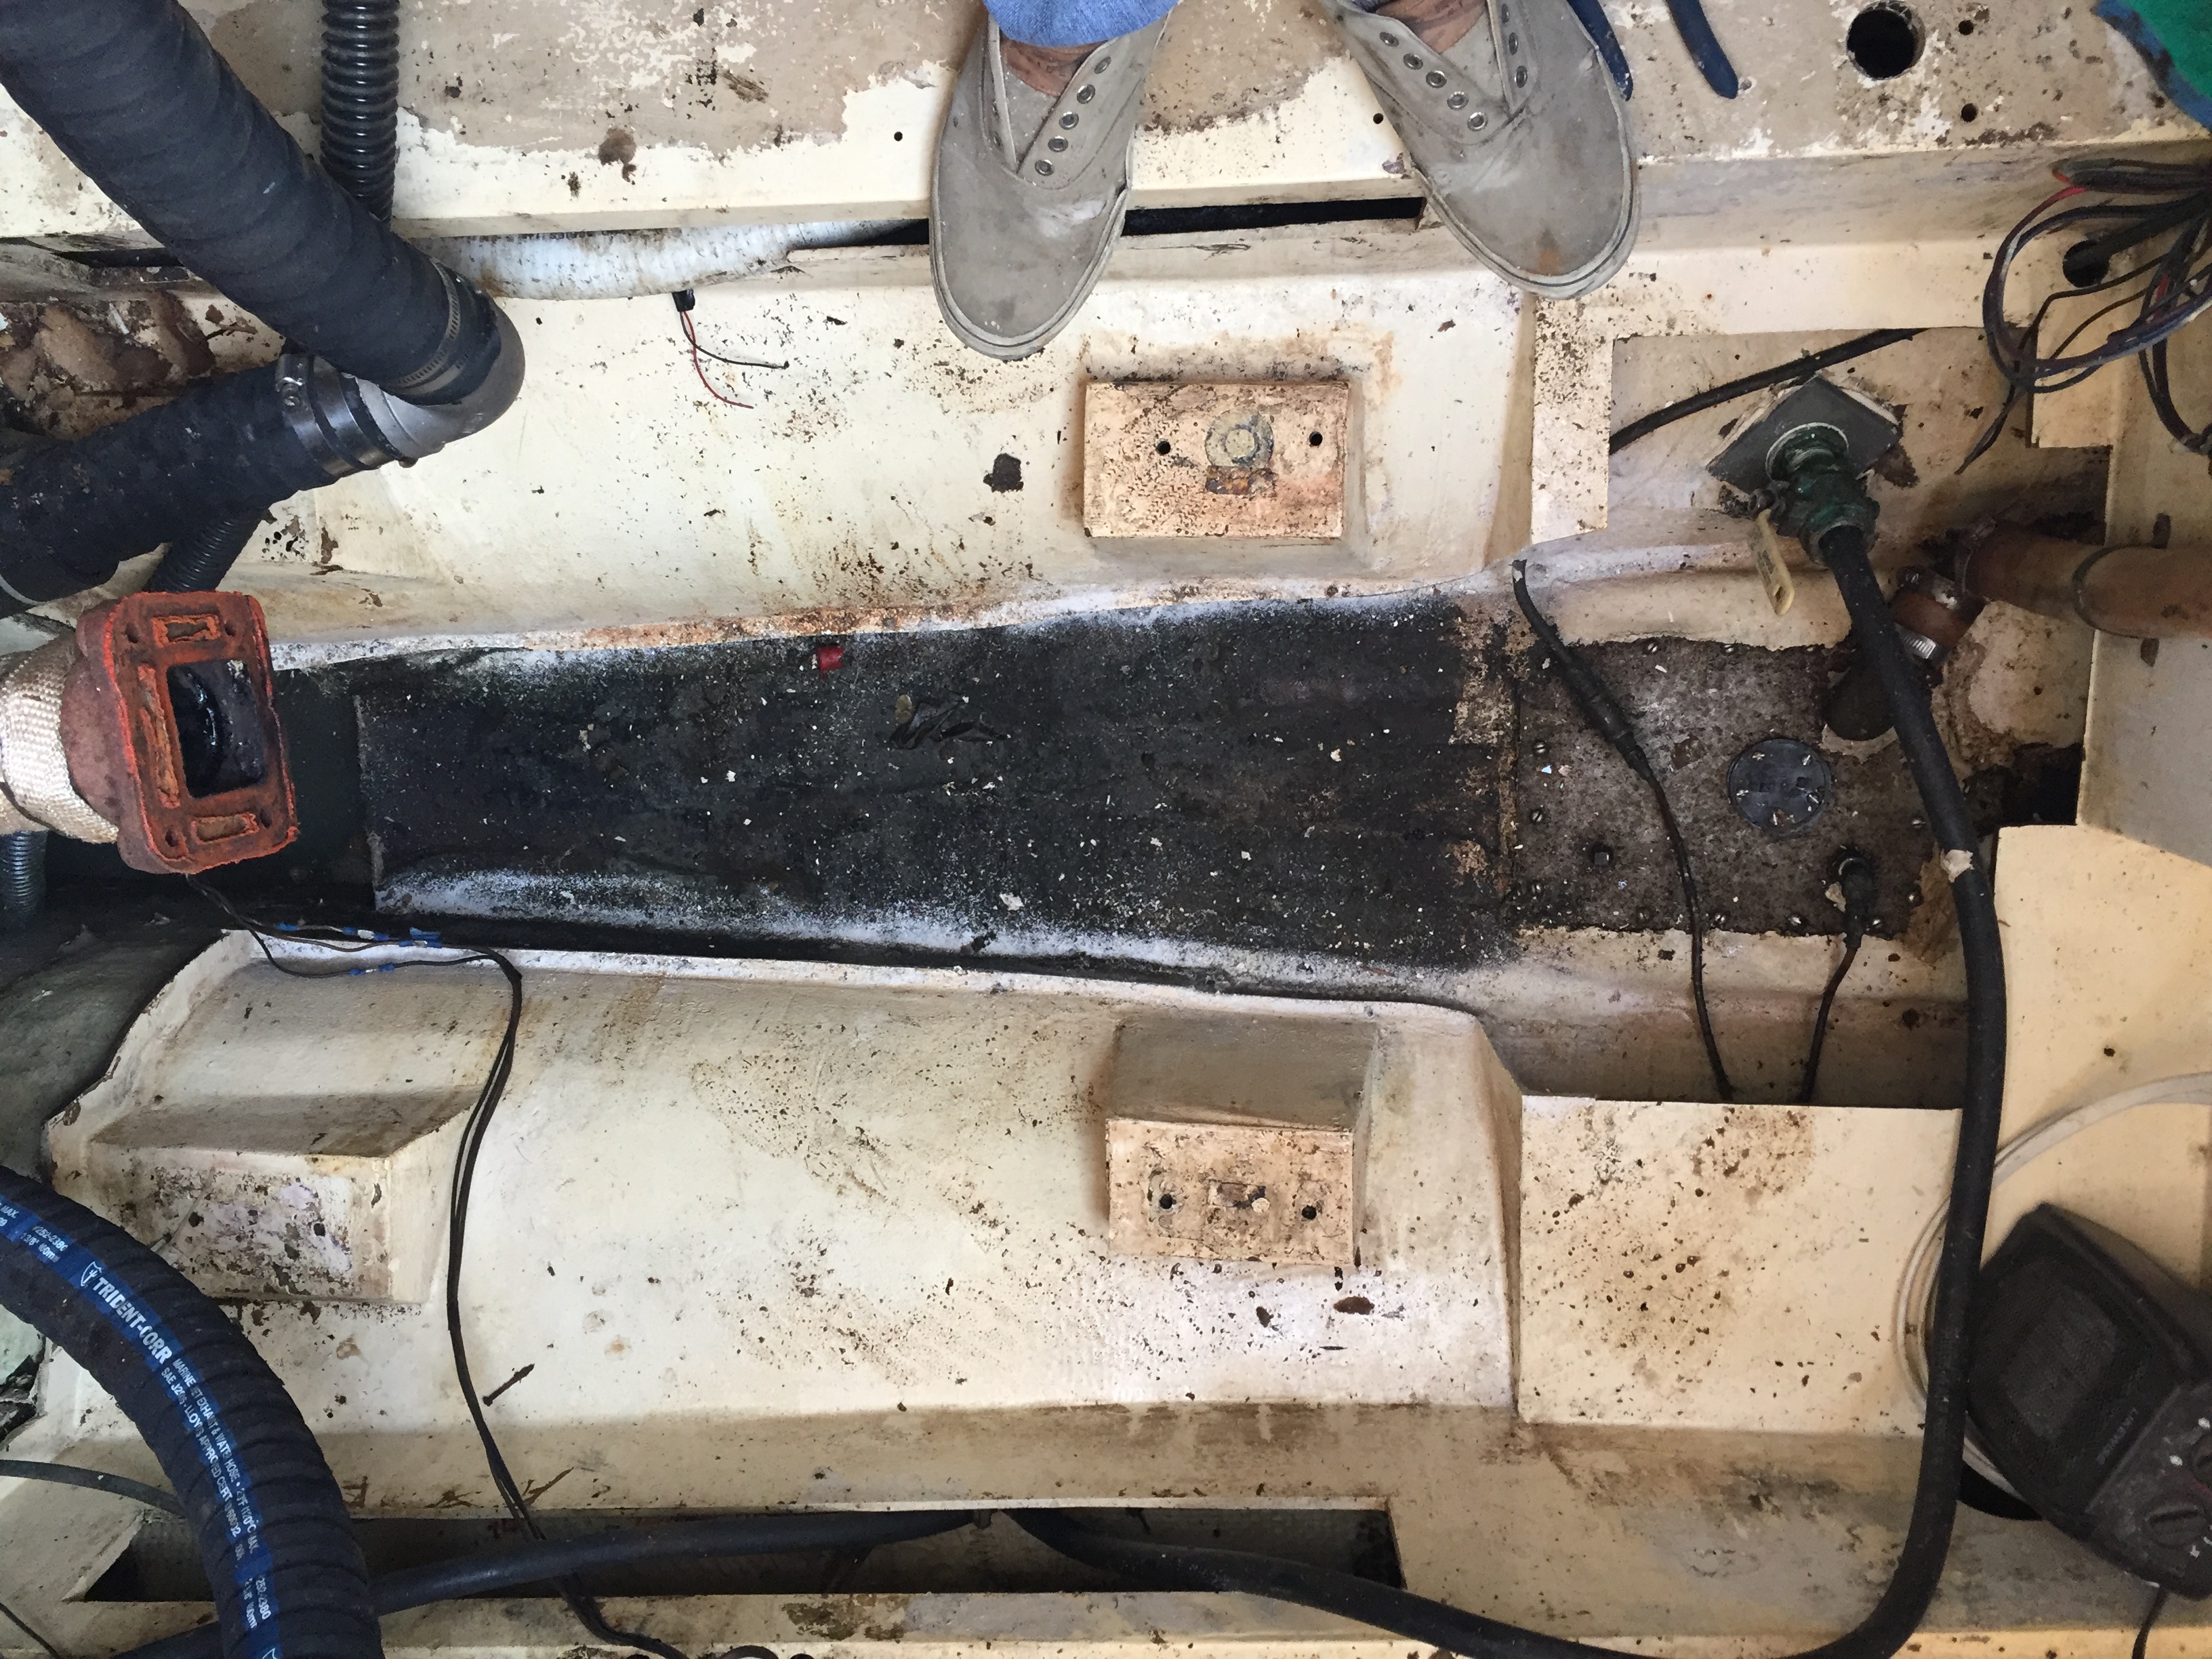
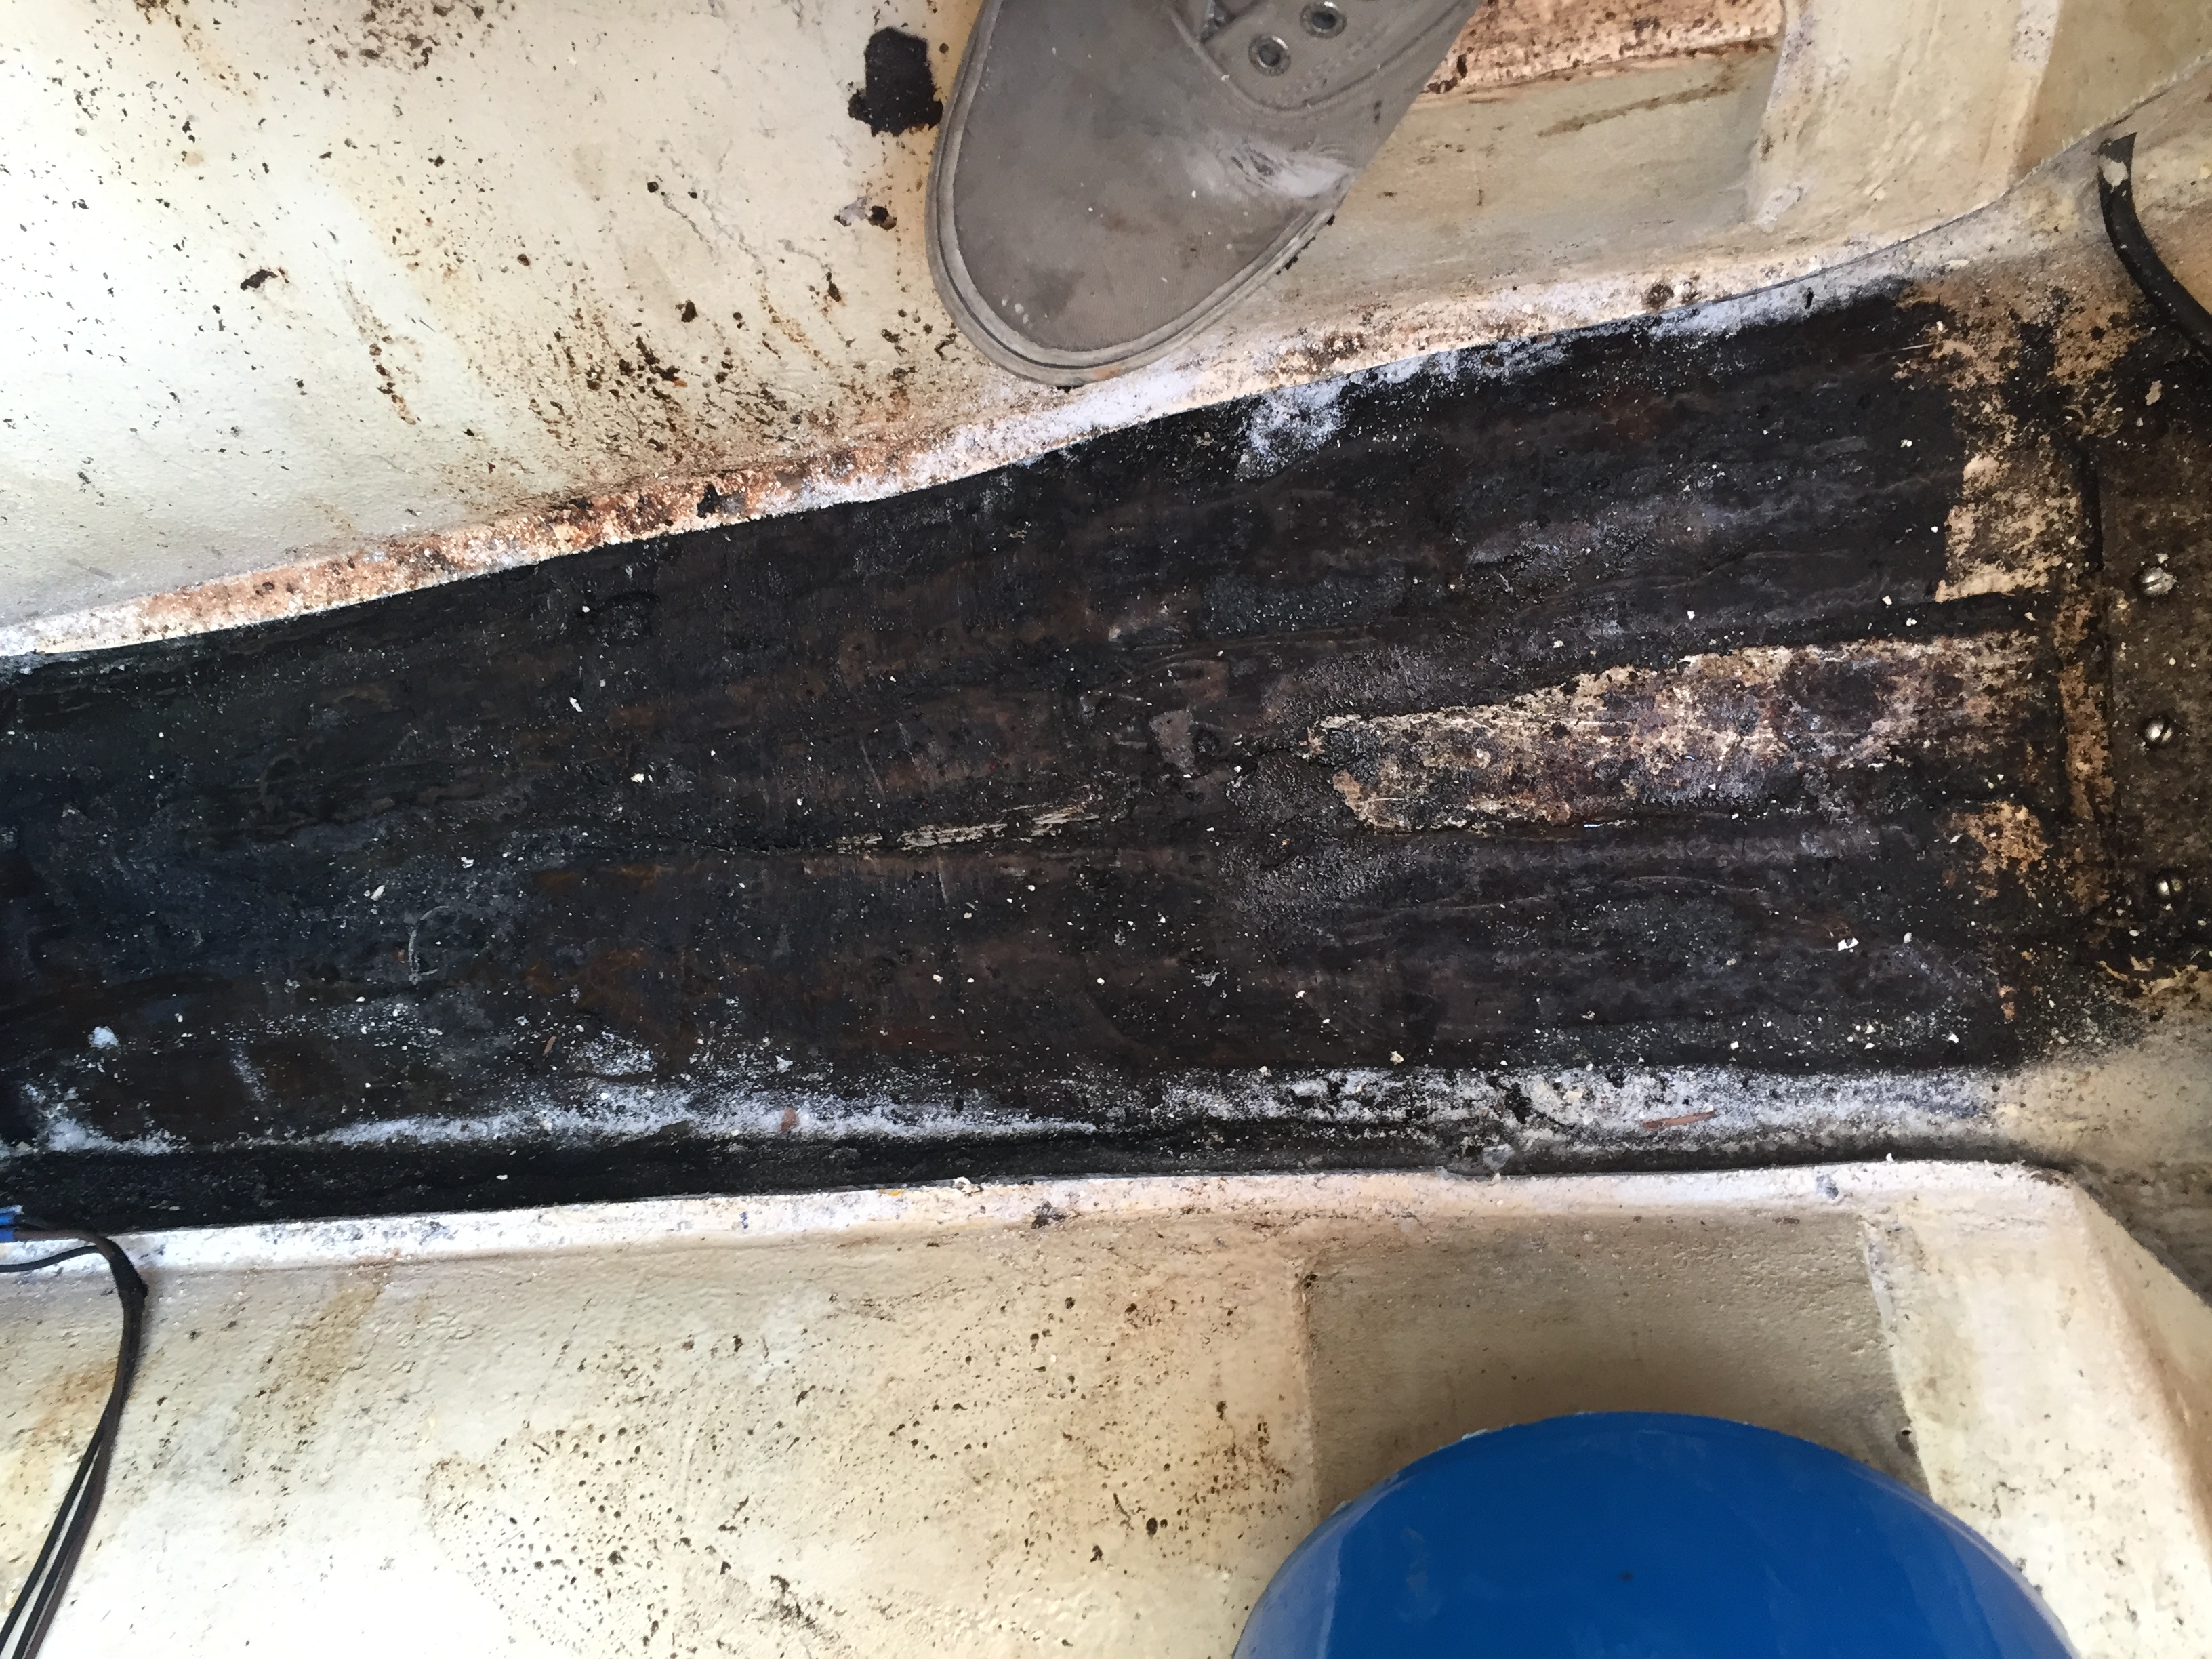
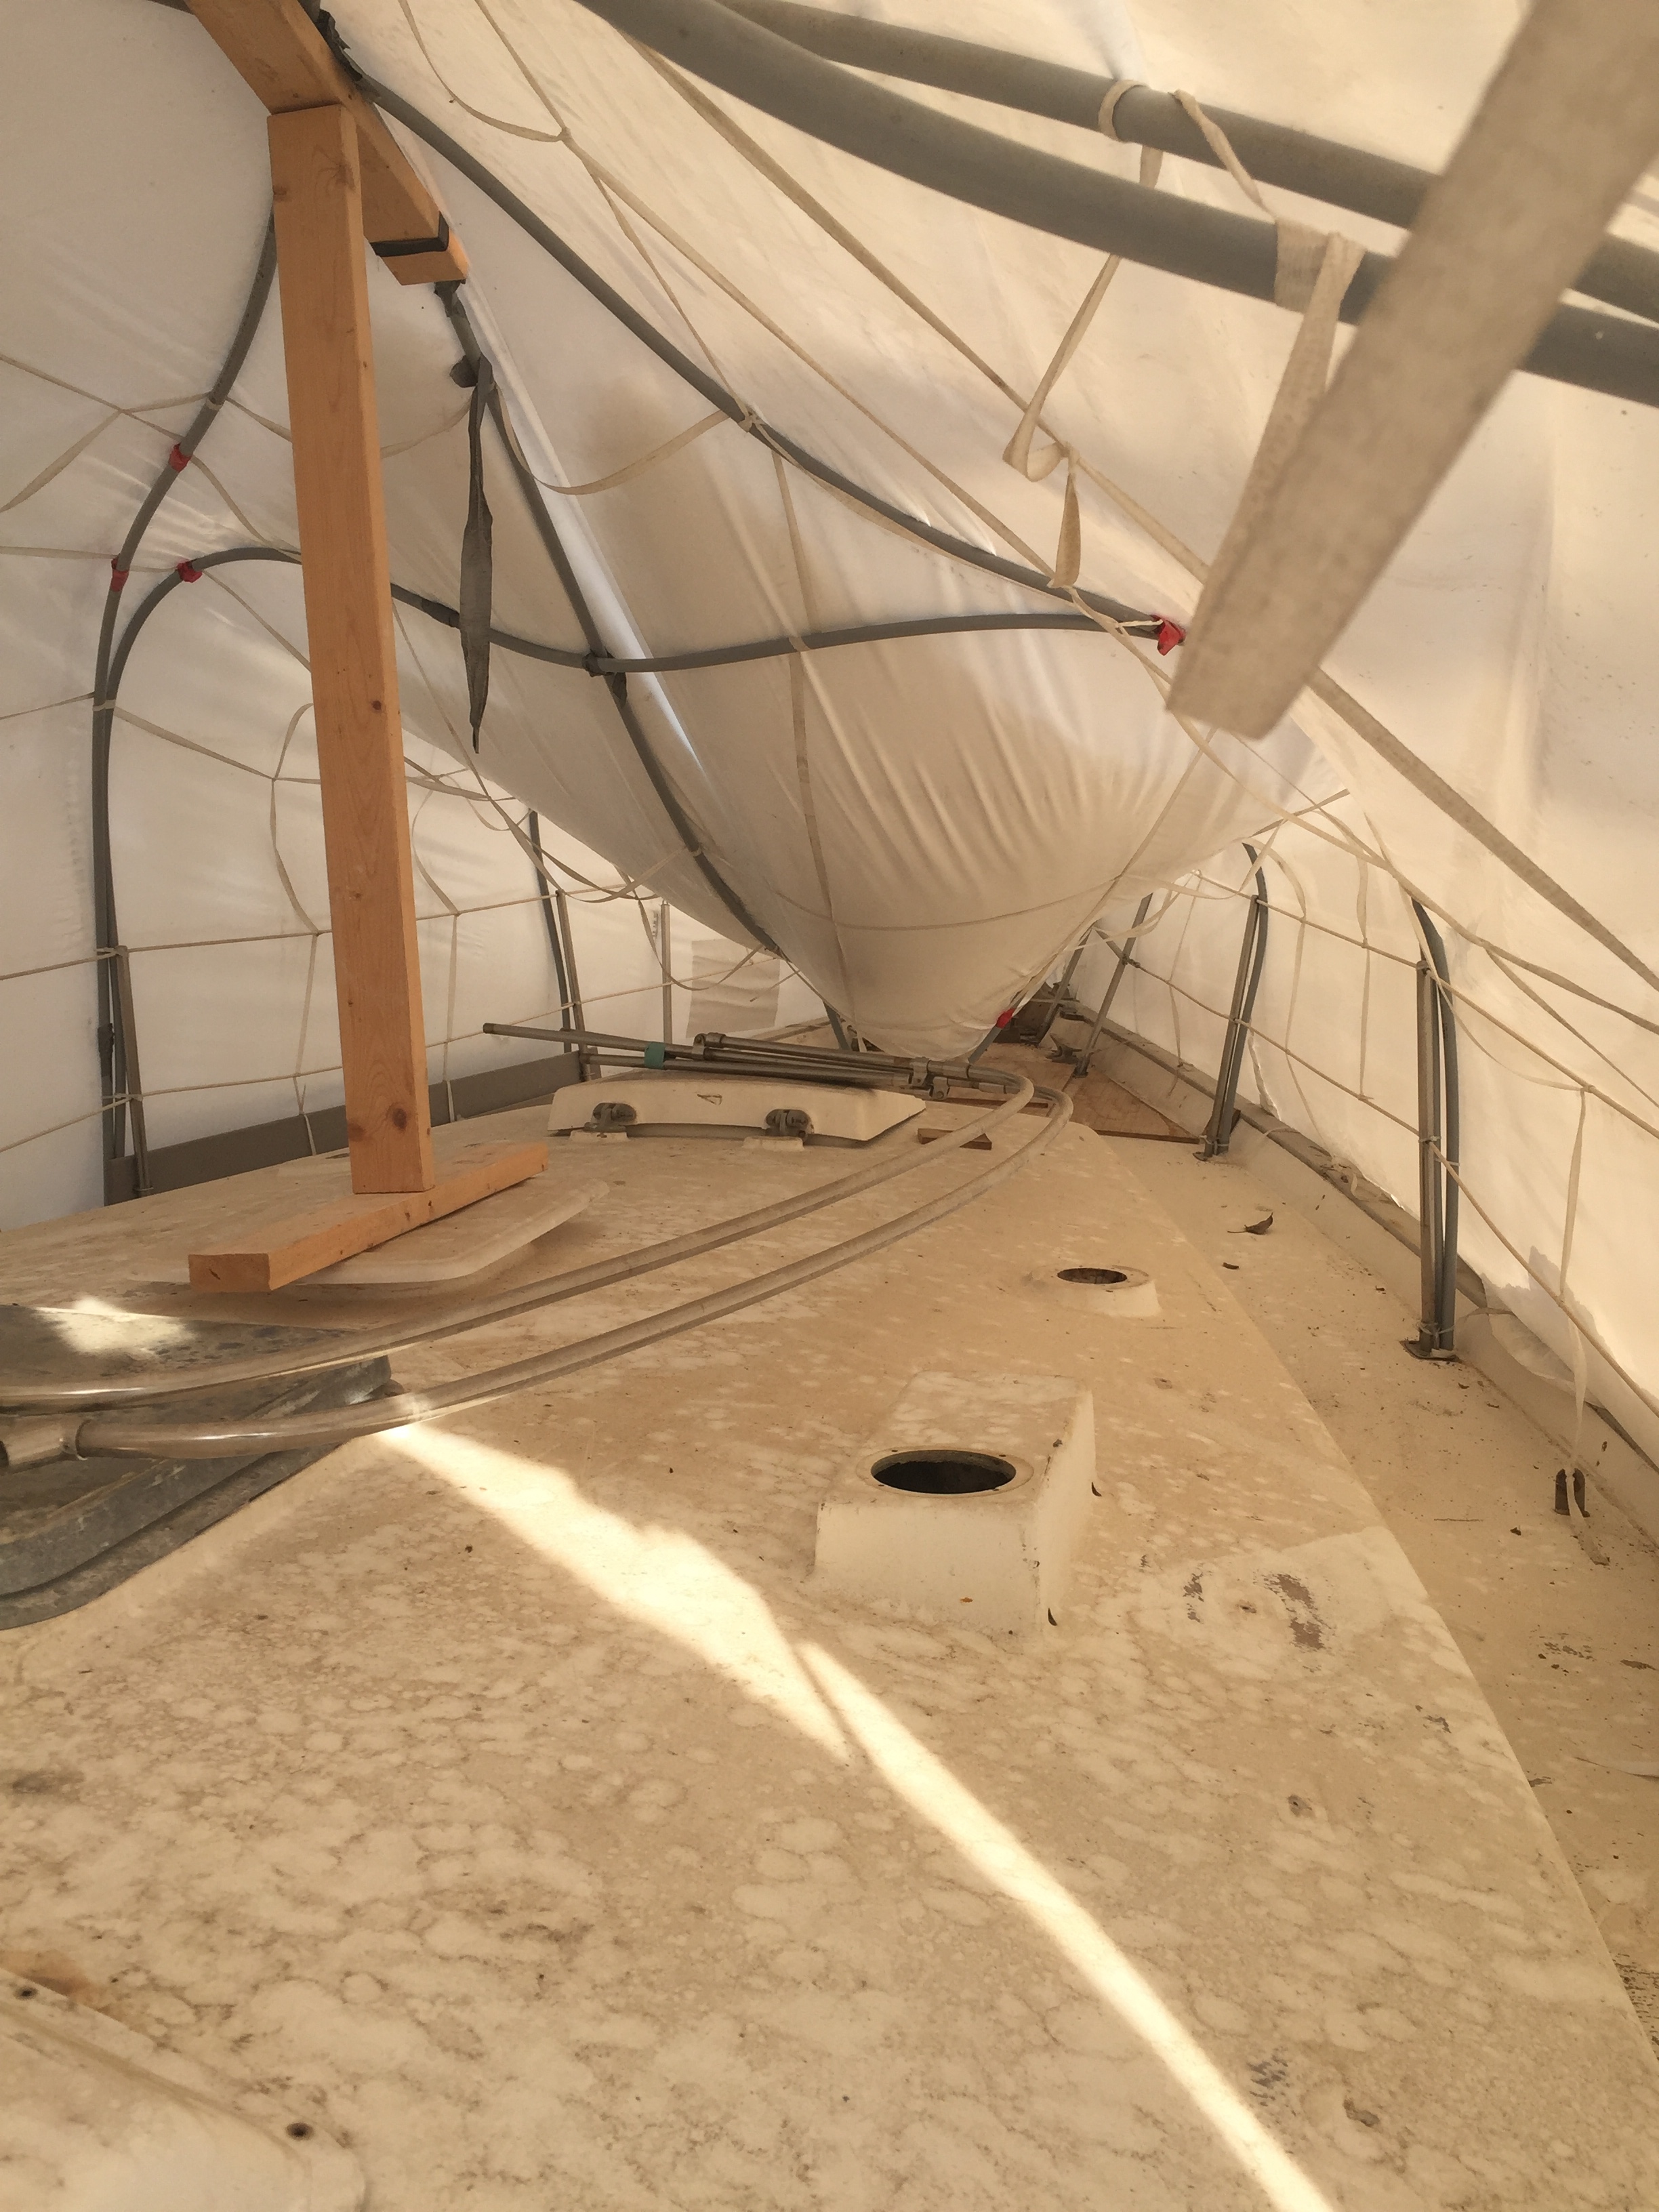
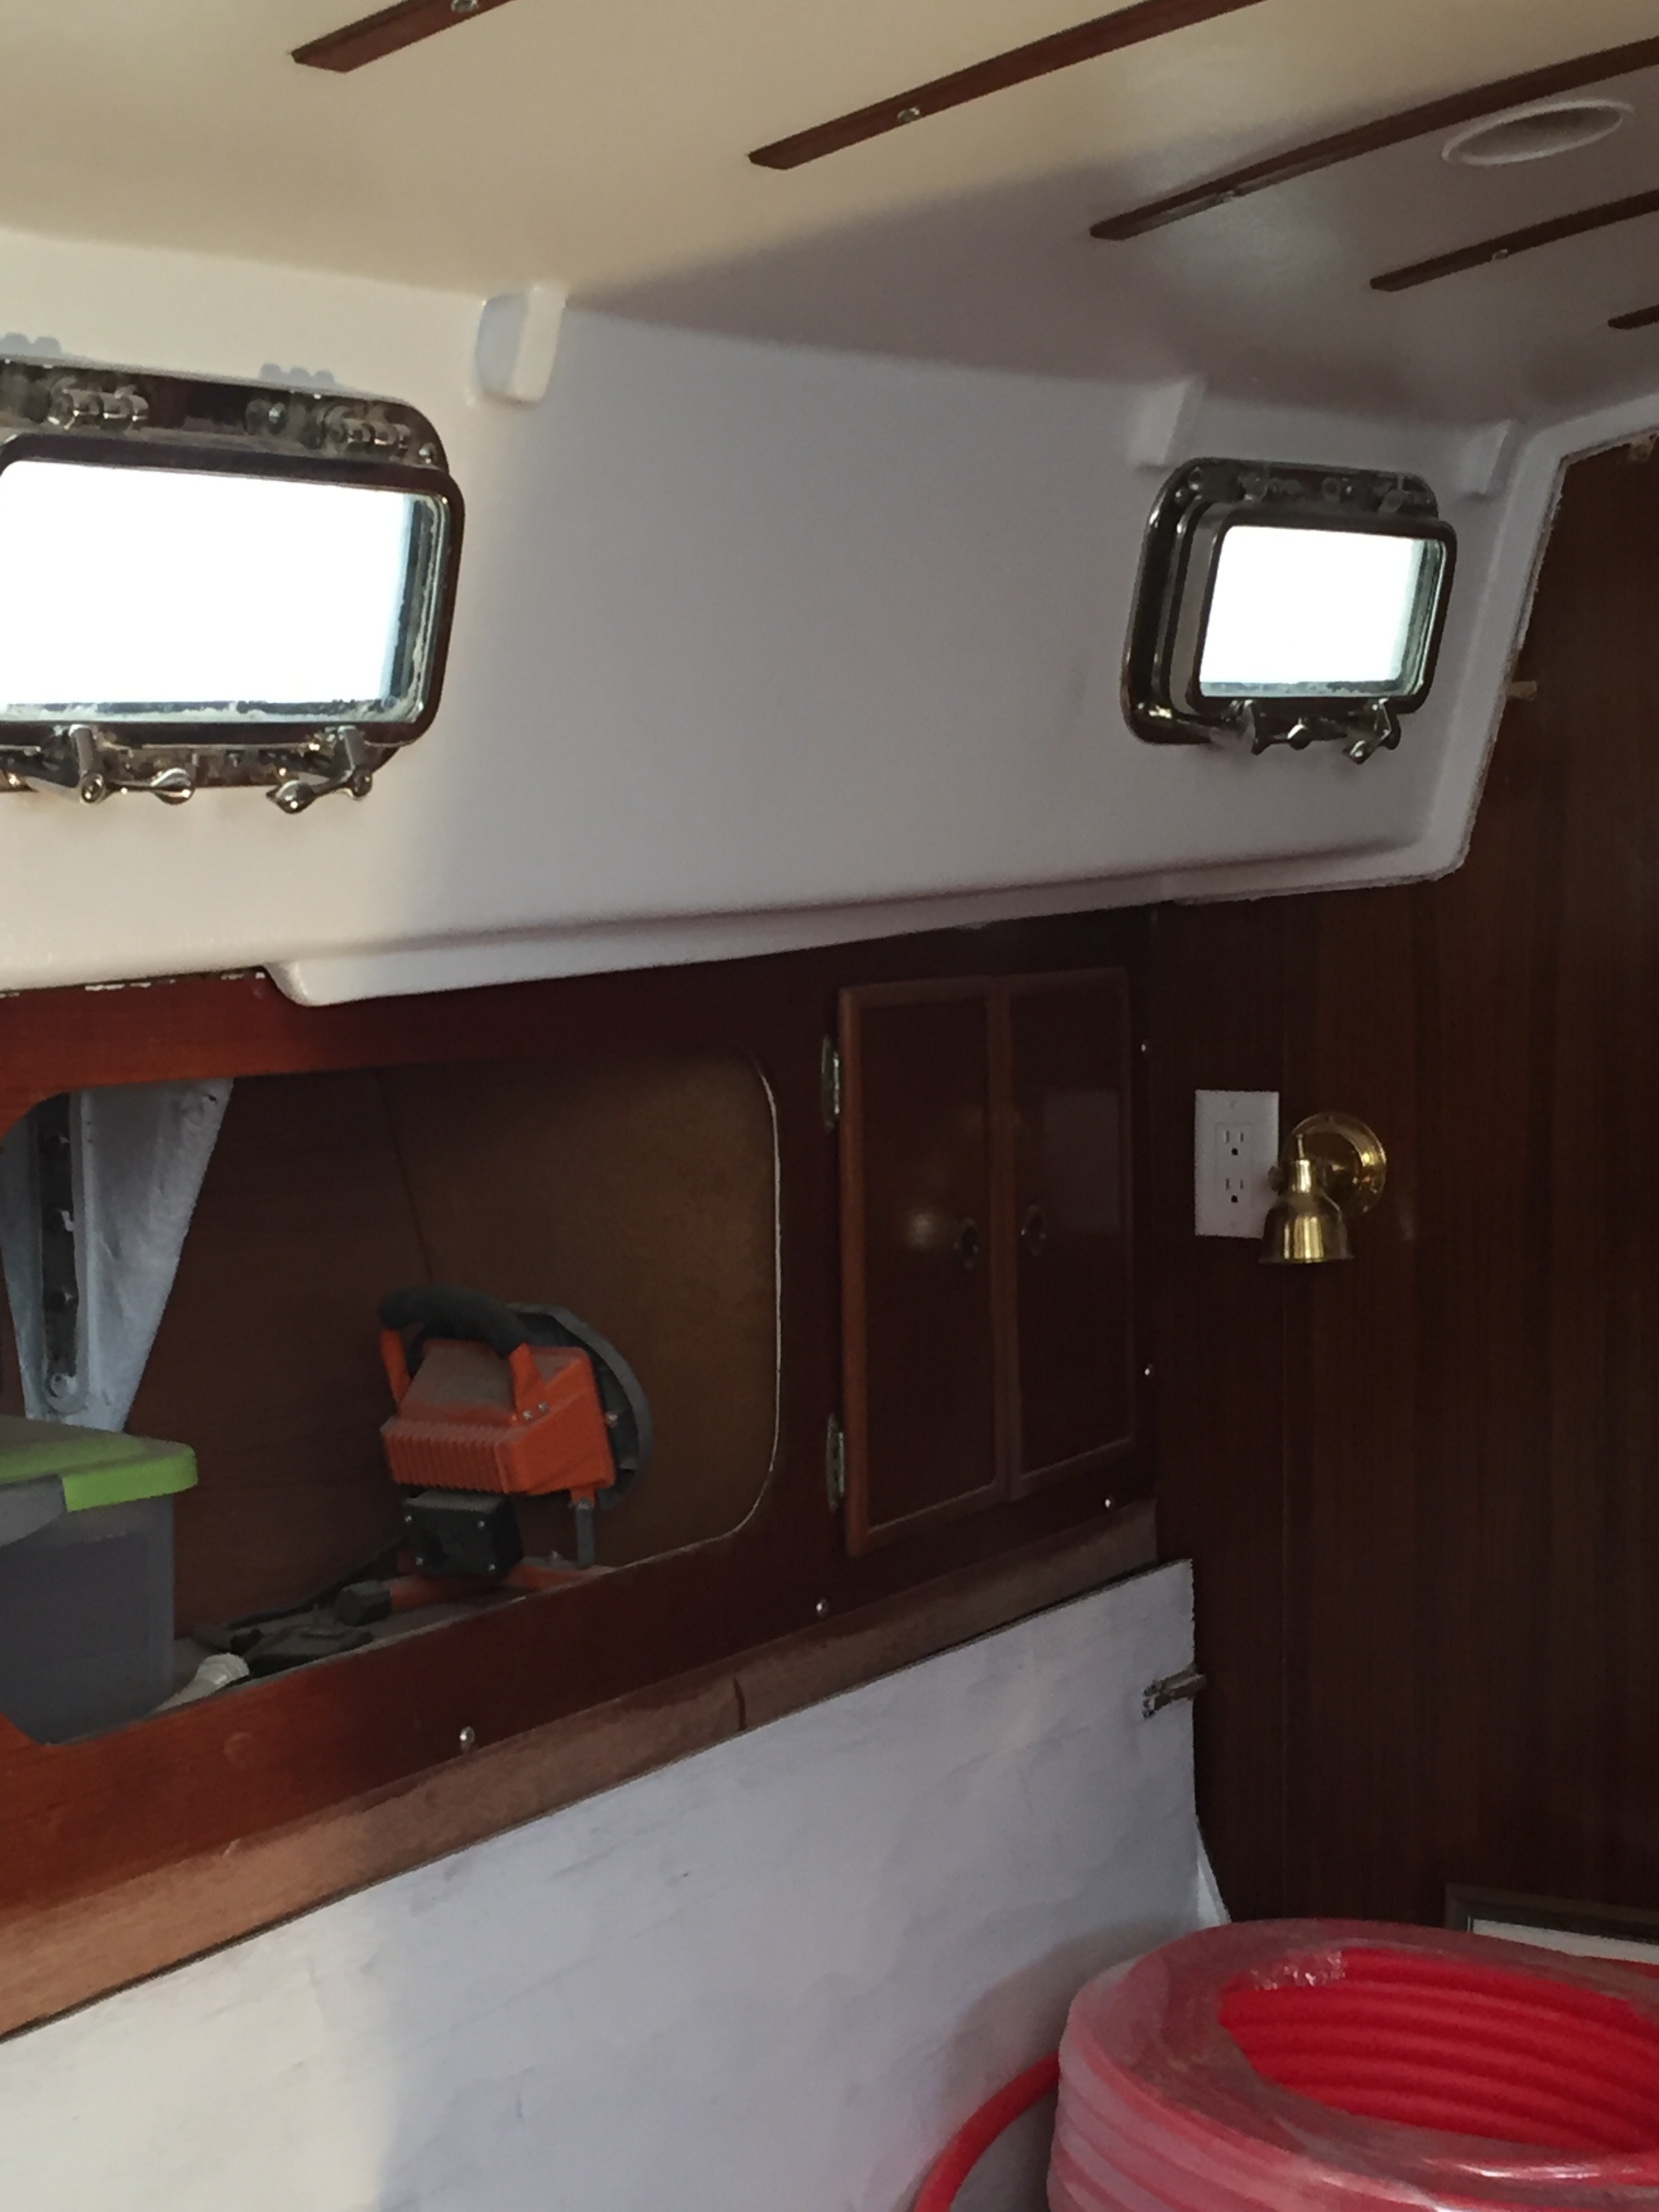
We have officially moved from demolition to renovation in the engine room! There is a lot of cleanup left, still need to remove a few old fuel lines, some sanding, some painting, install some insulation, have the new tanks made, install them, and then Prodigy Marine will do the new engine install, but we have officially moved out of the darkness and into the light.
Akupara looks like a bomb went off inside of her with fiberglass dust everywhere and panels from around the tanks and all kinds of stuff, but is it ever nice to be done this job! I don’t mind the new work, it is much easier of course!

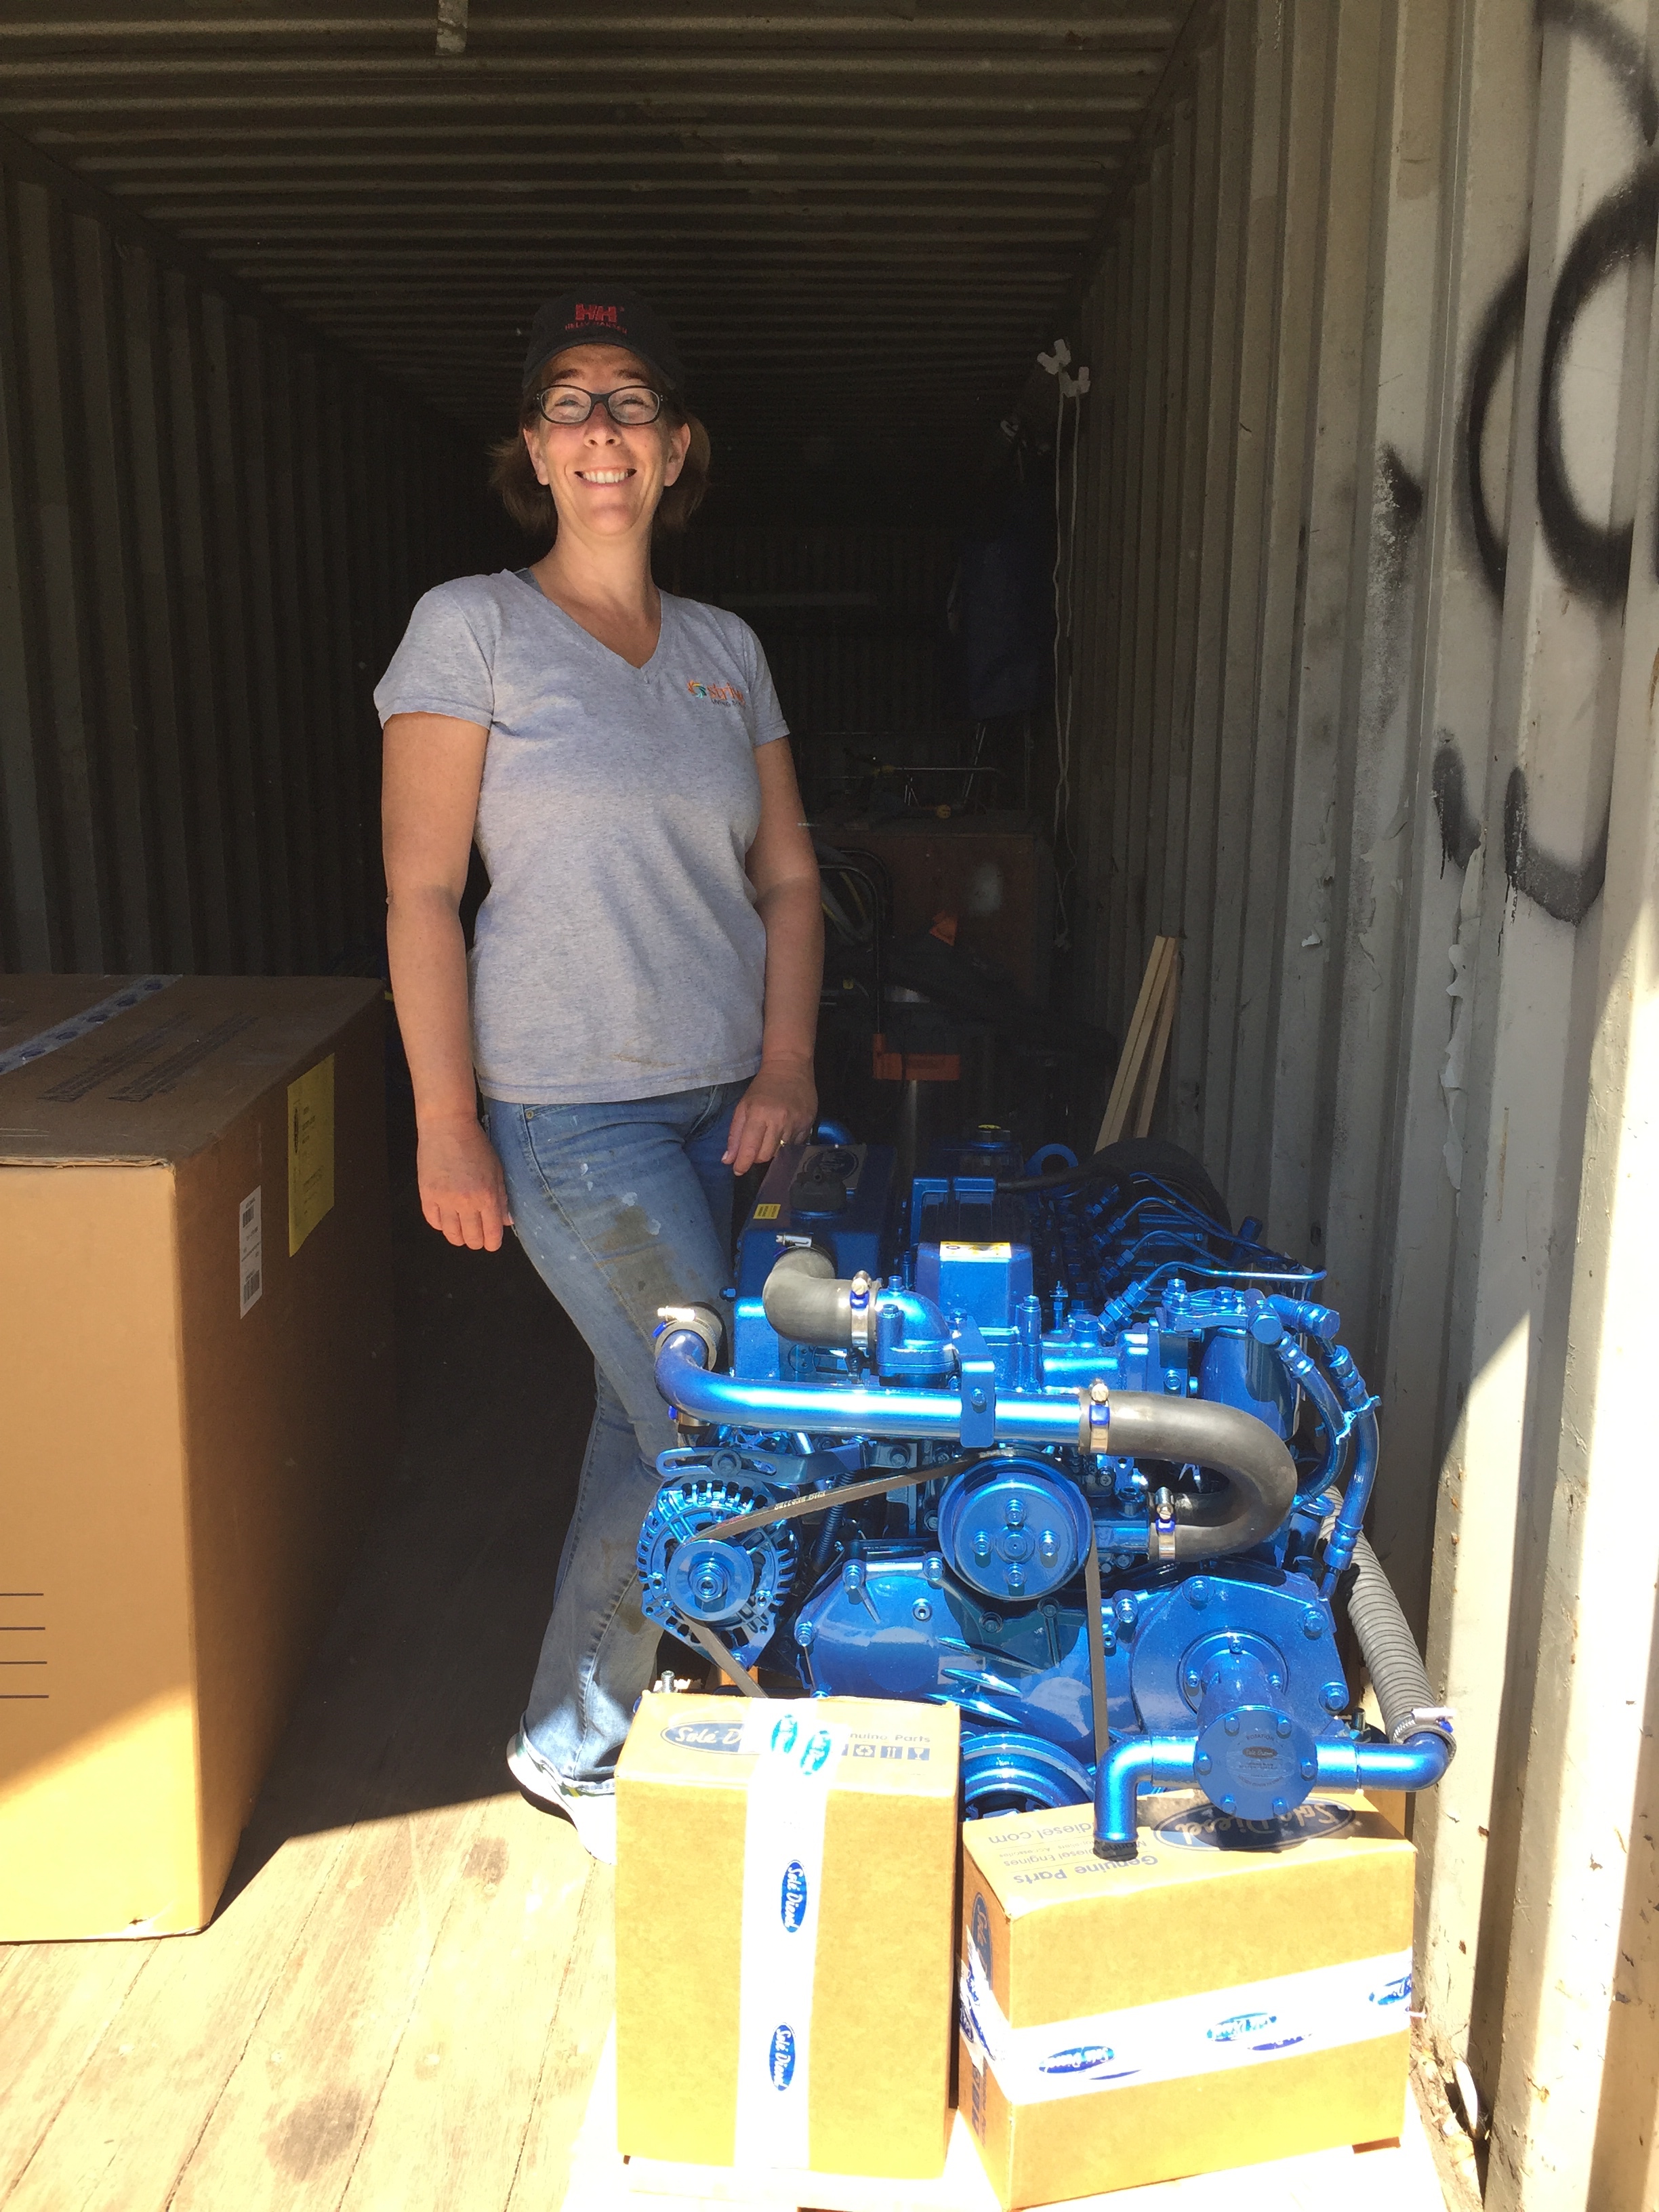
And the Admiral got to see the new engine yesterday! She said it sparkles! I guess that means it’s ok! 🙂
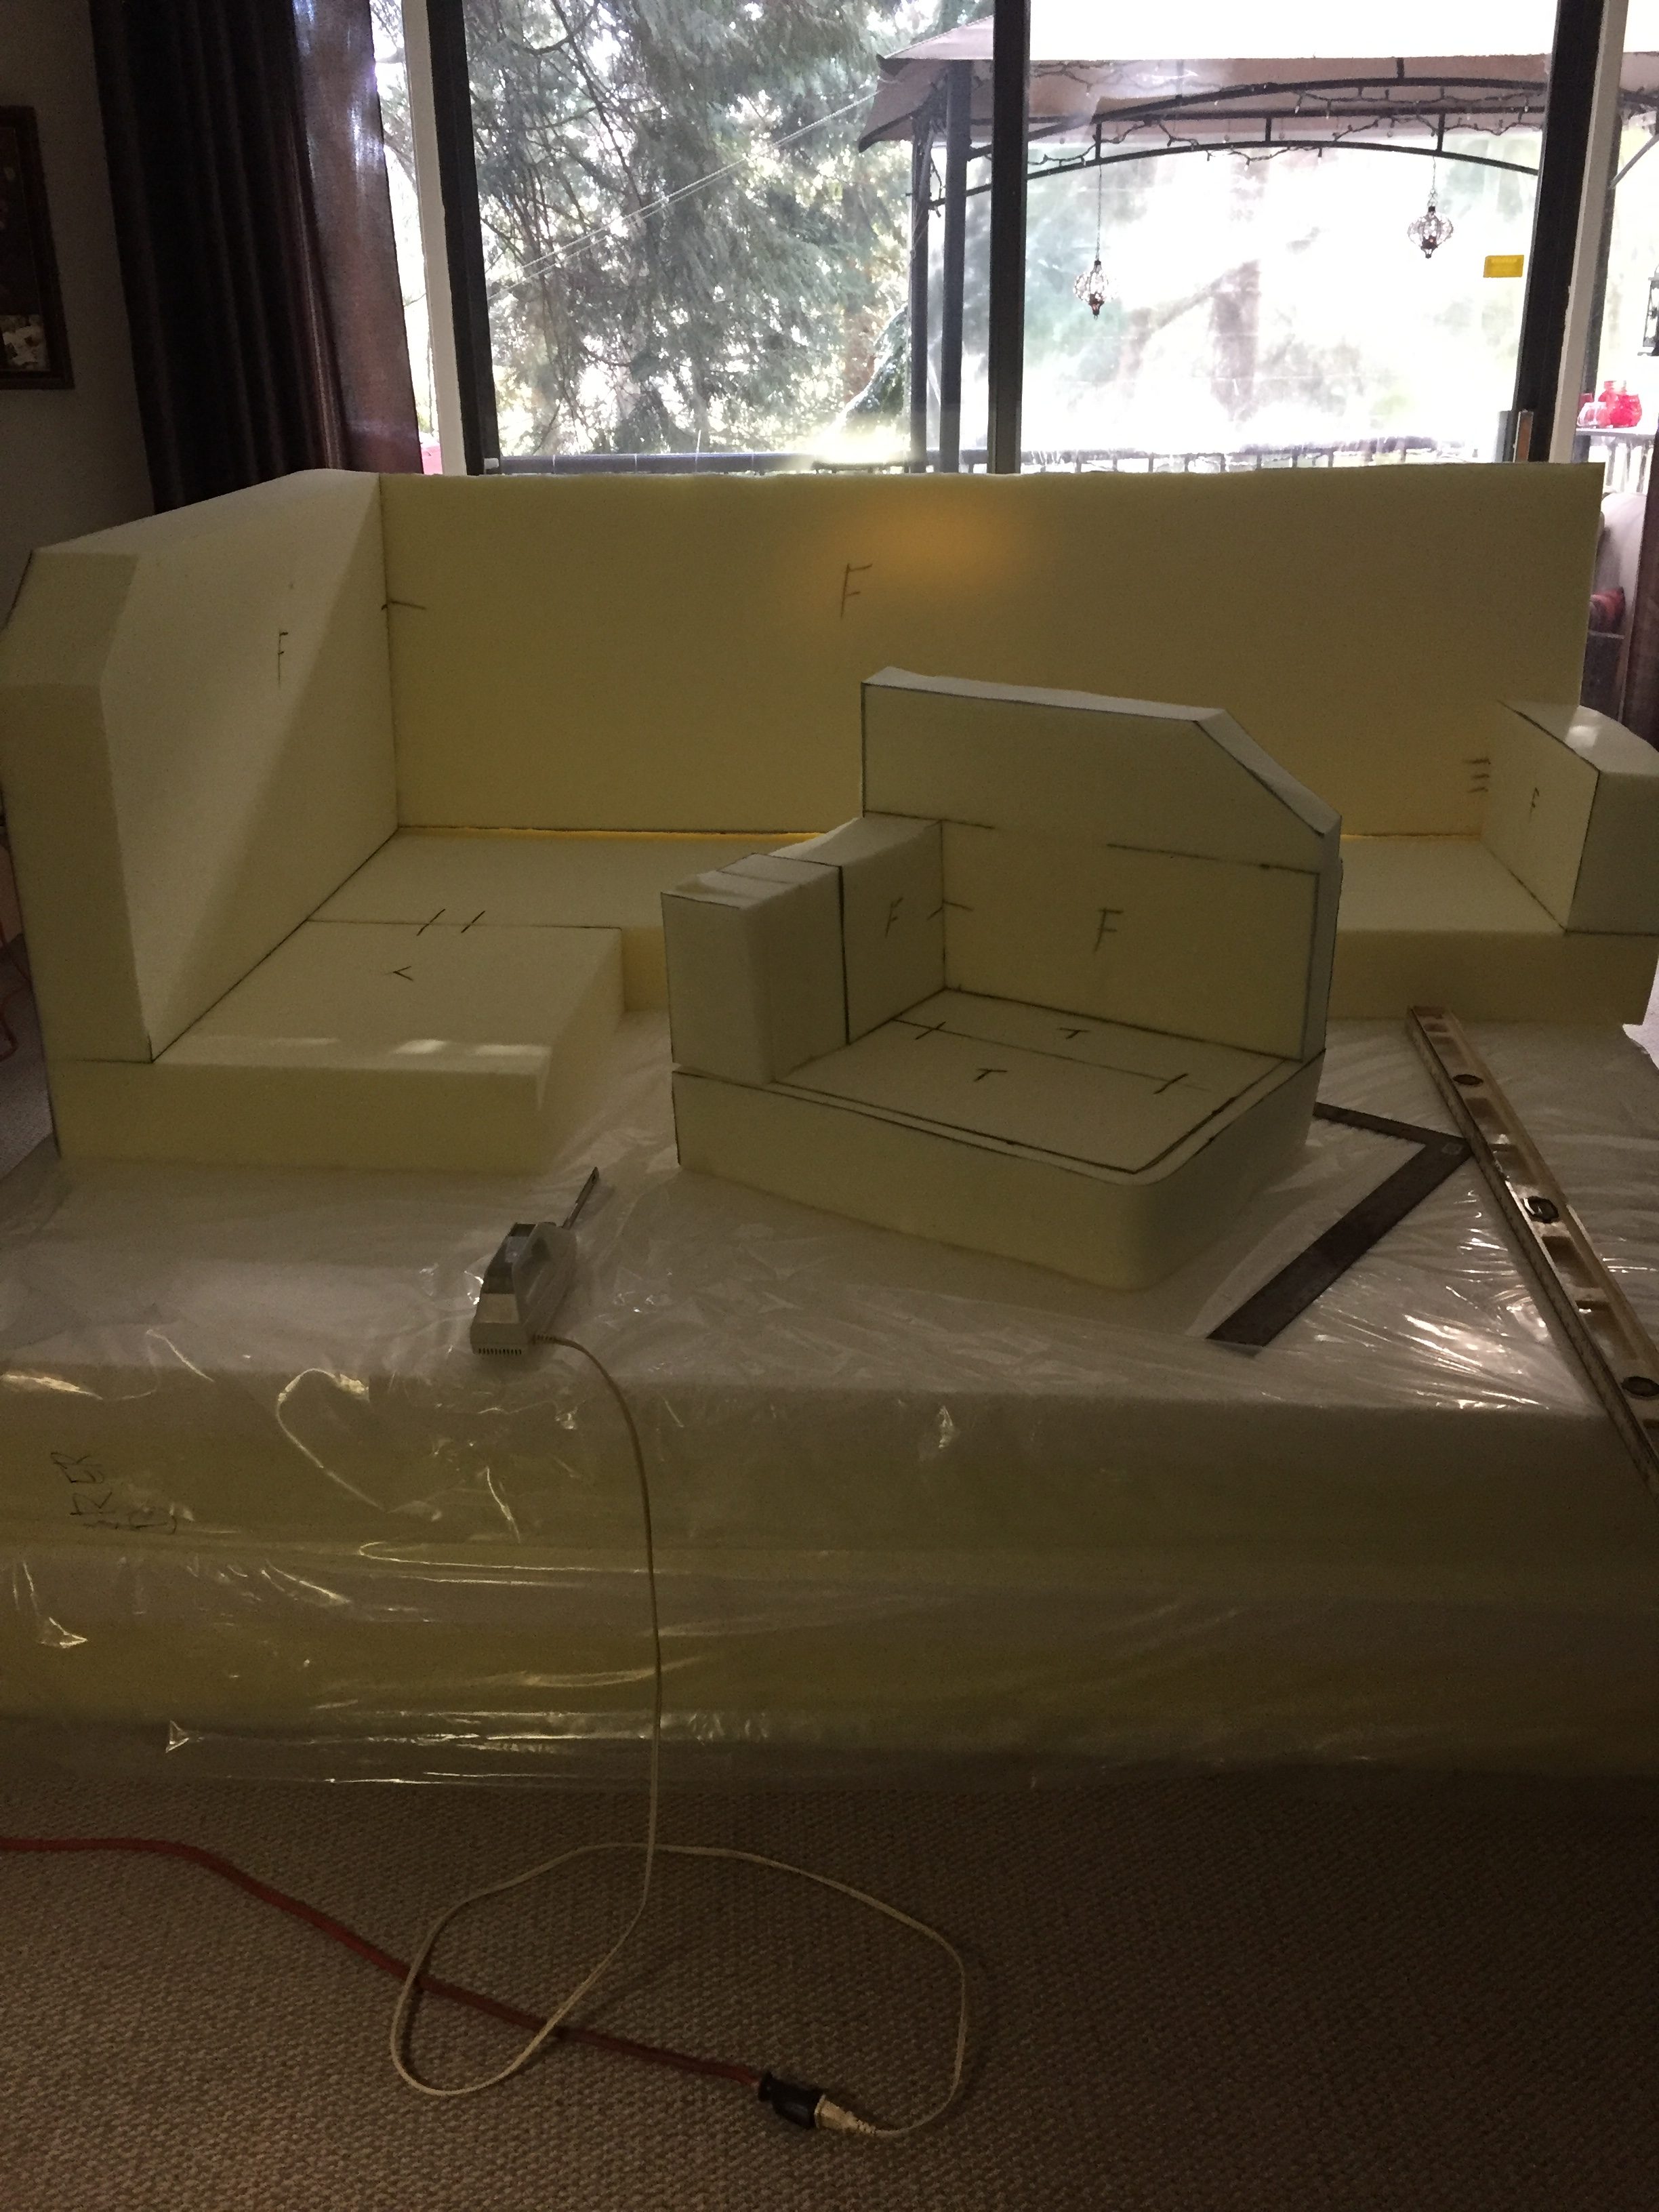
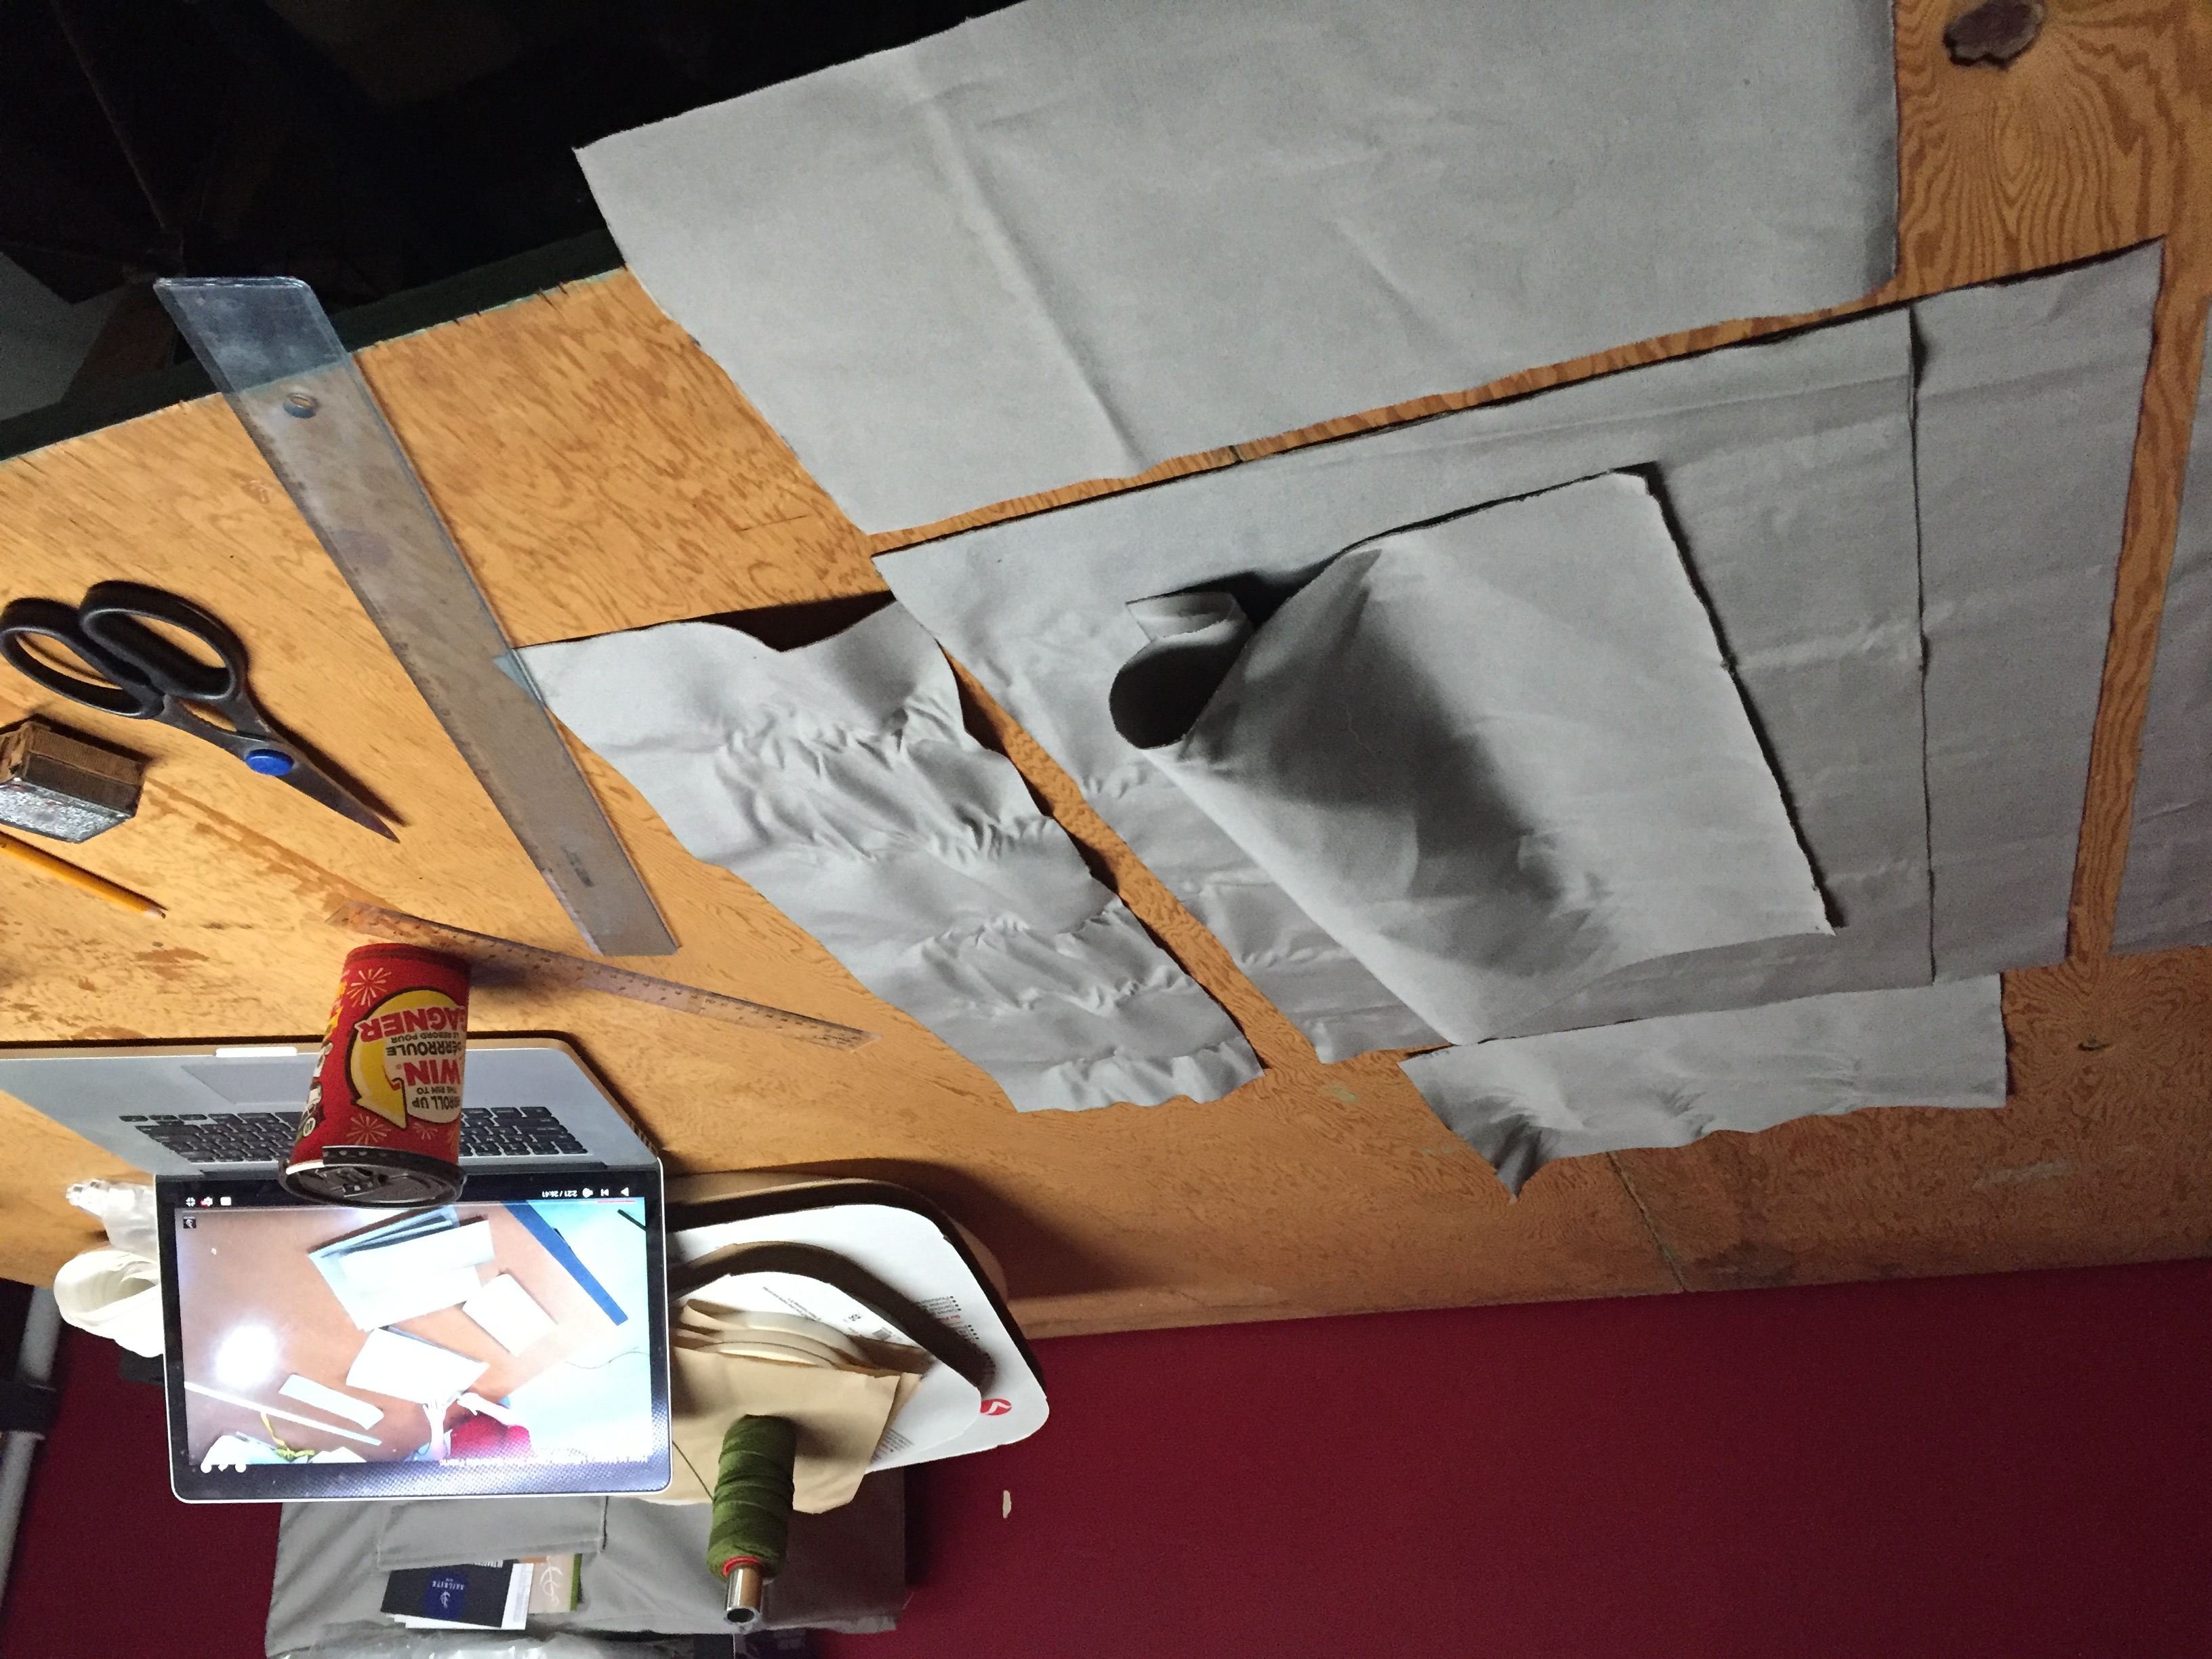
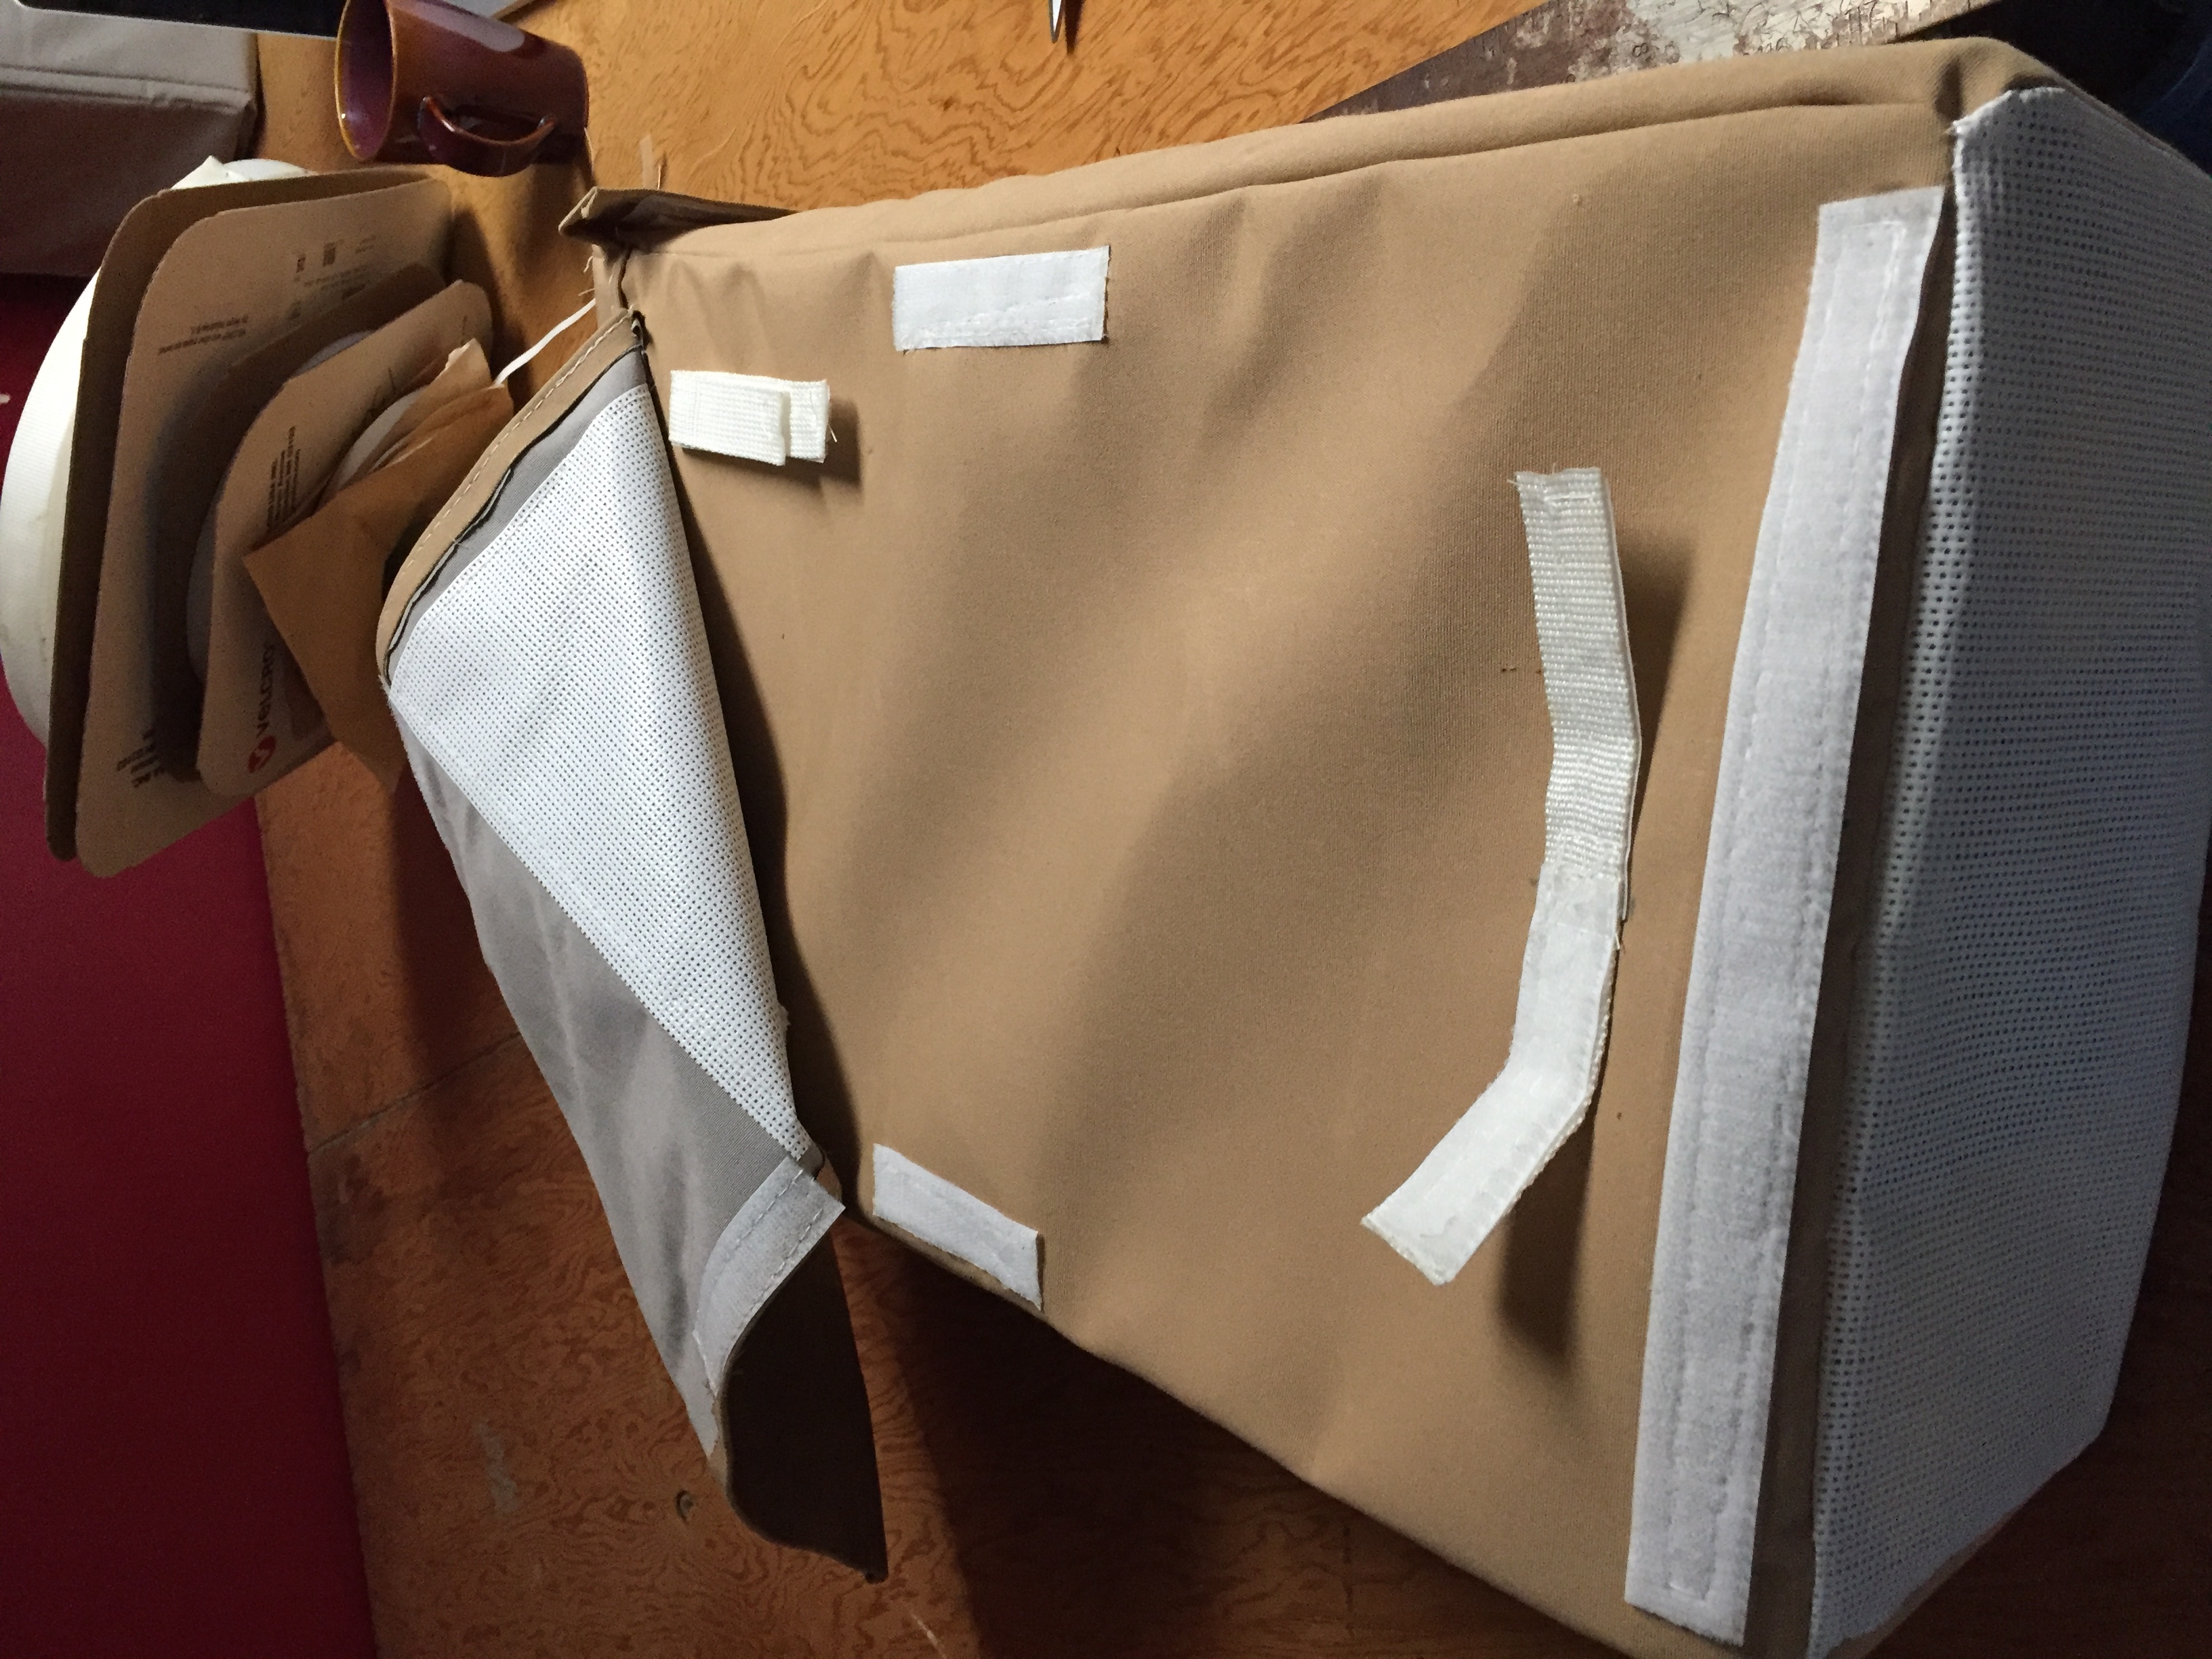
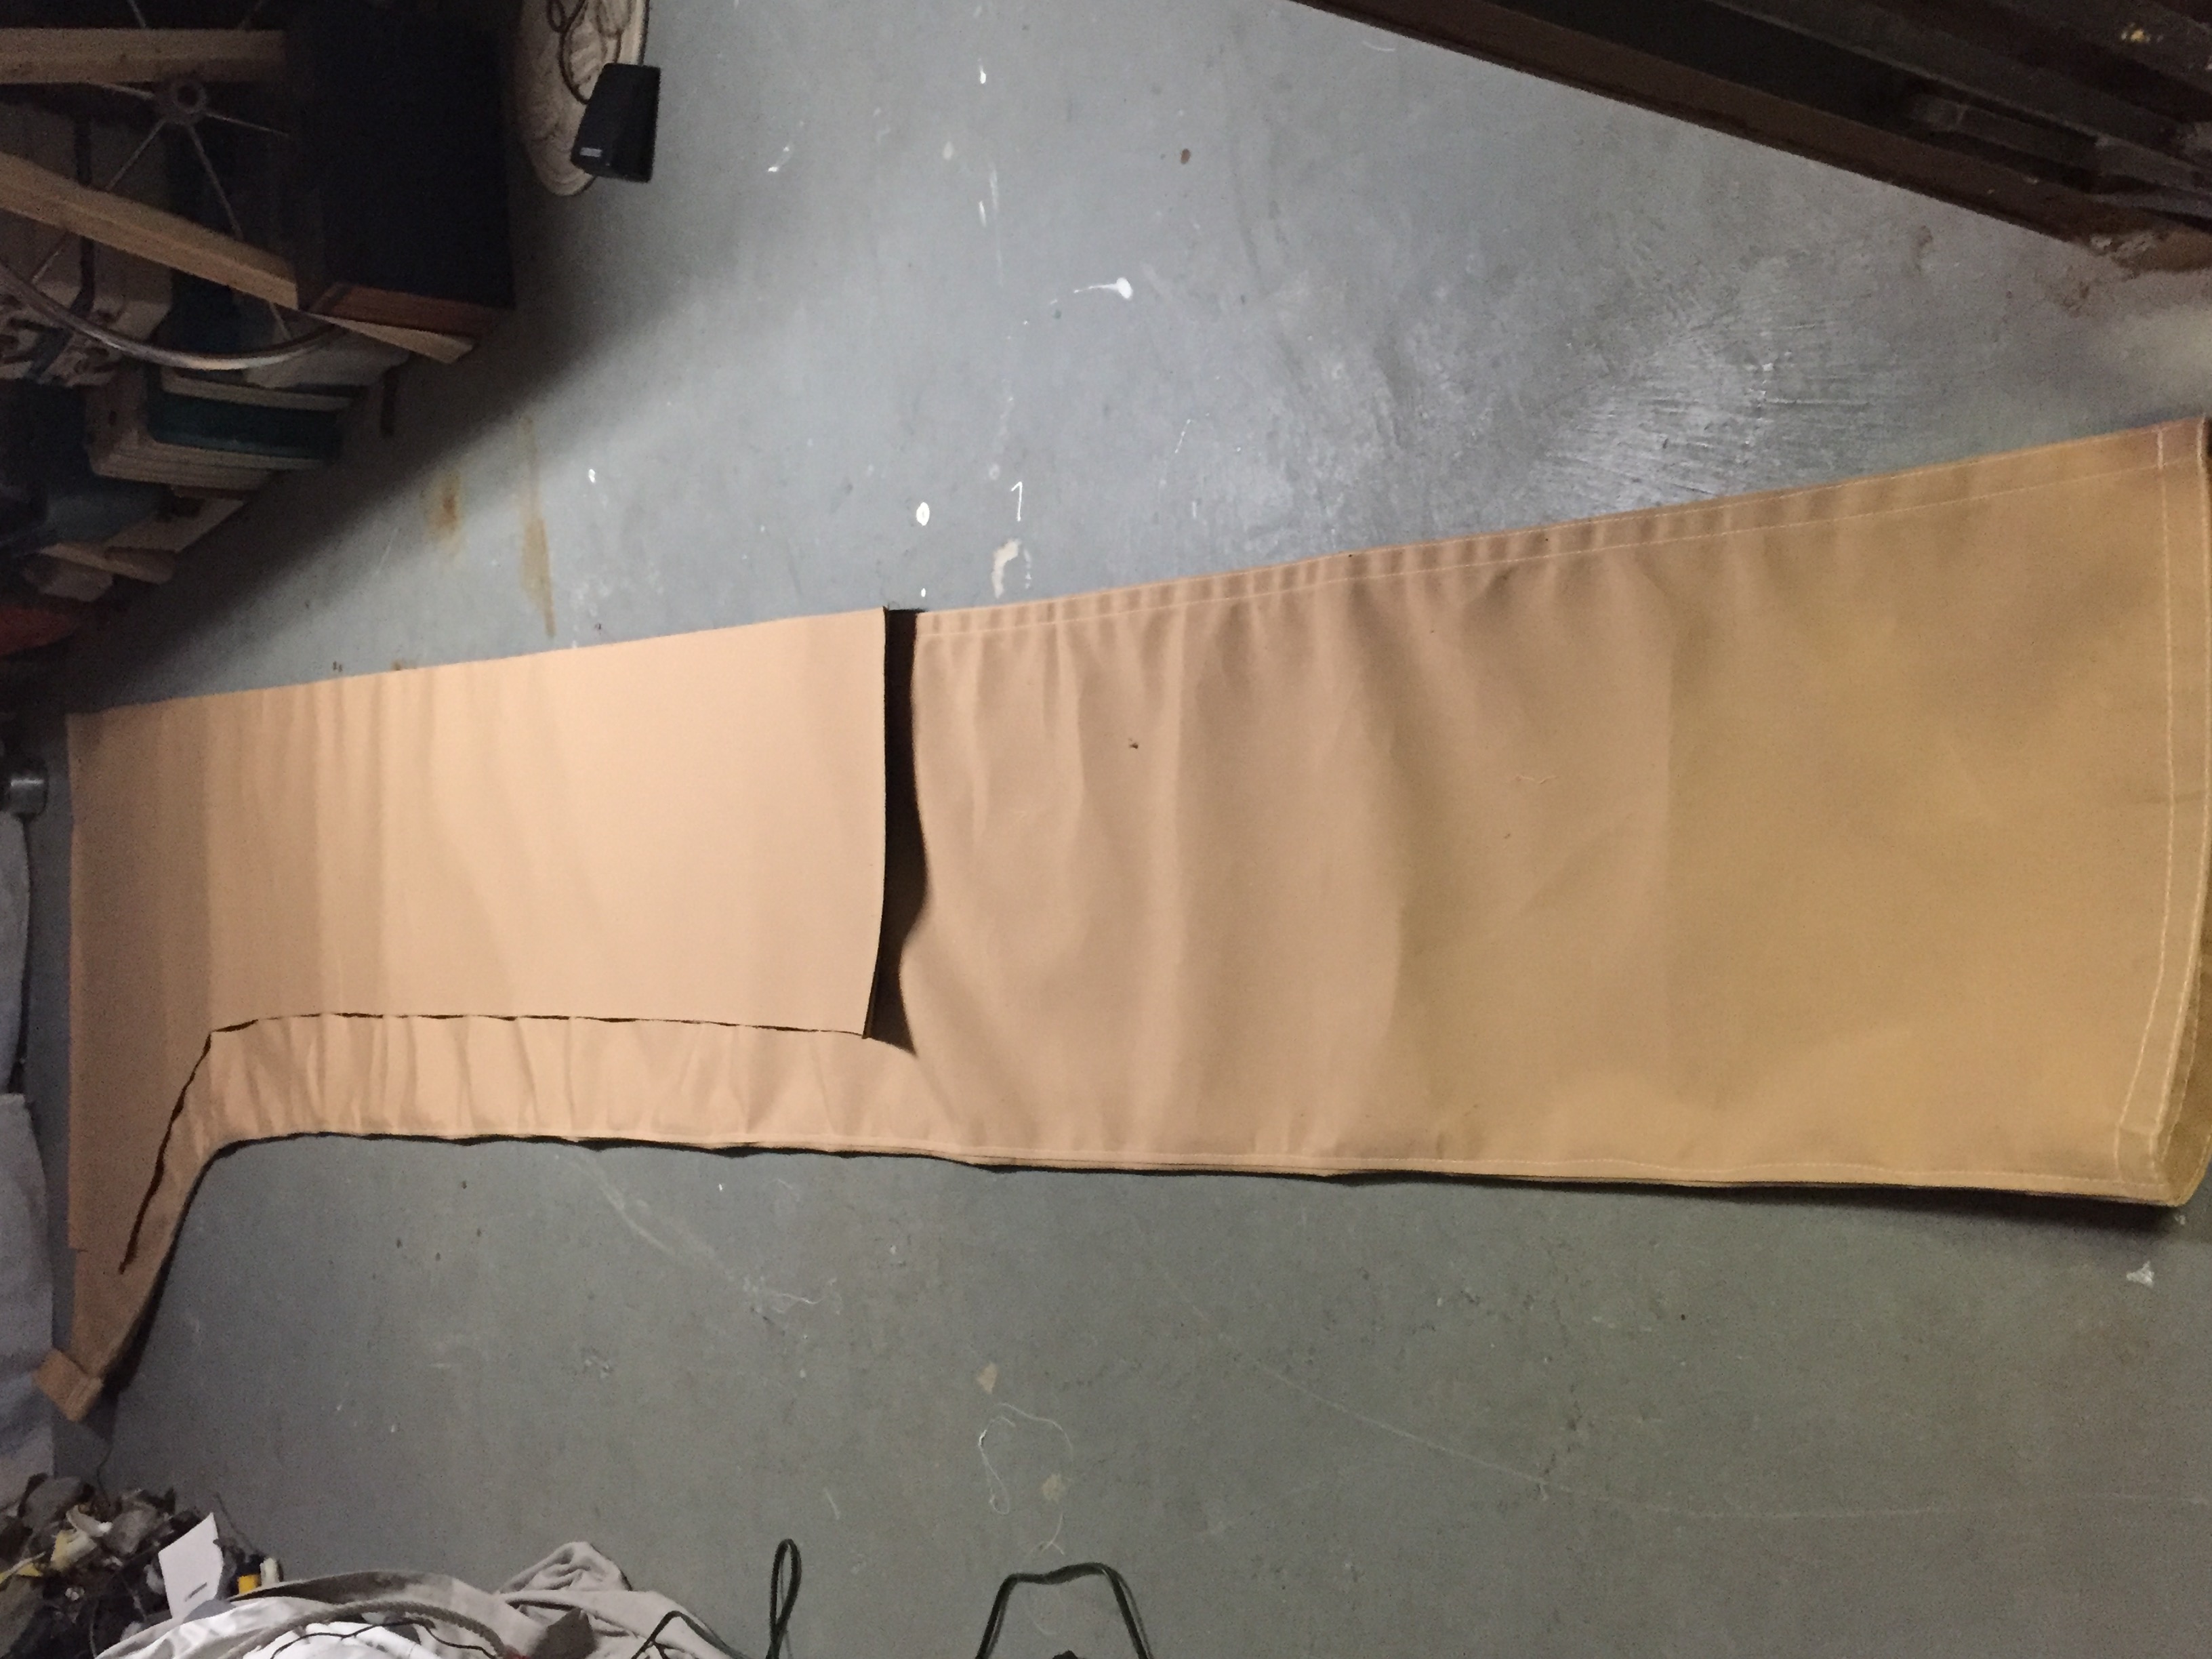
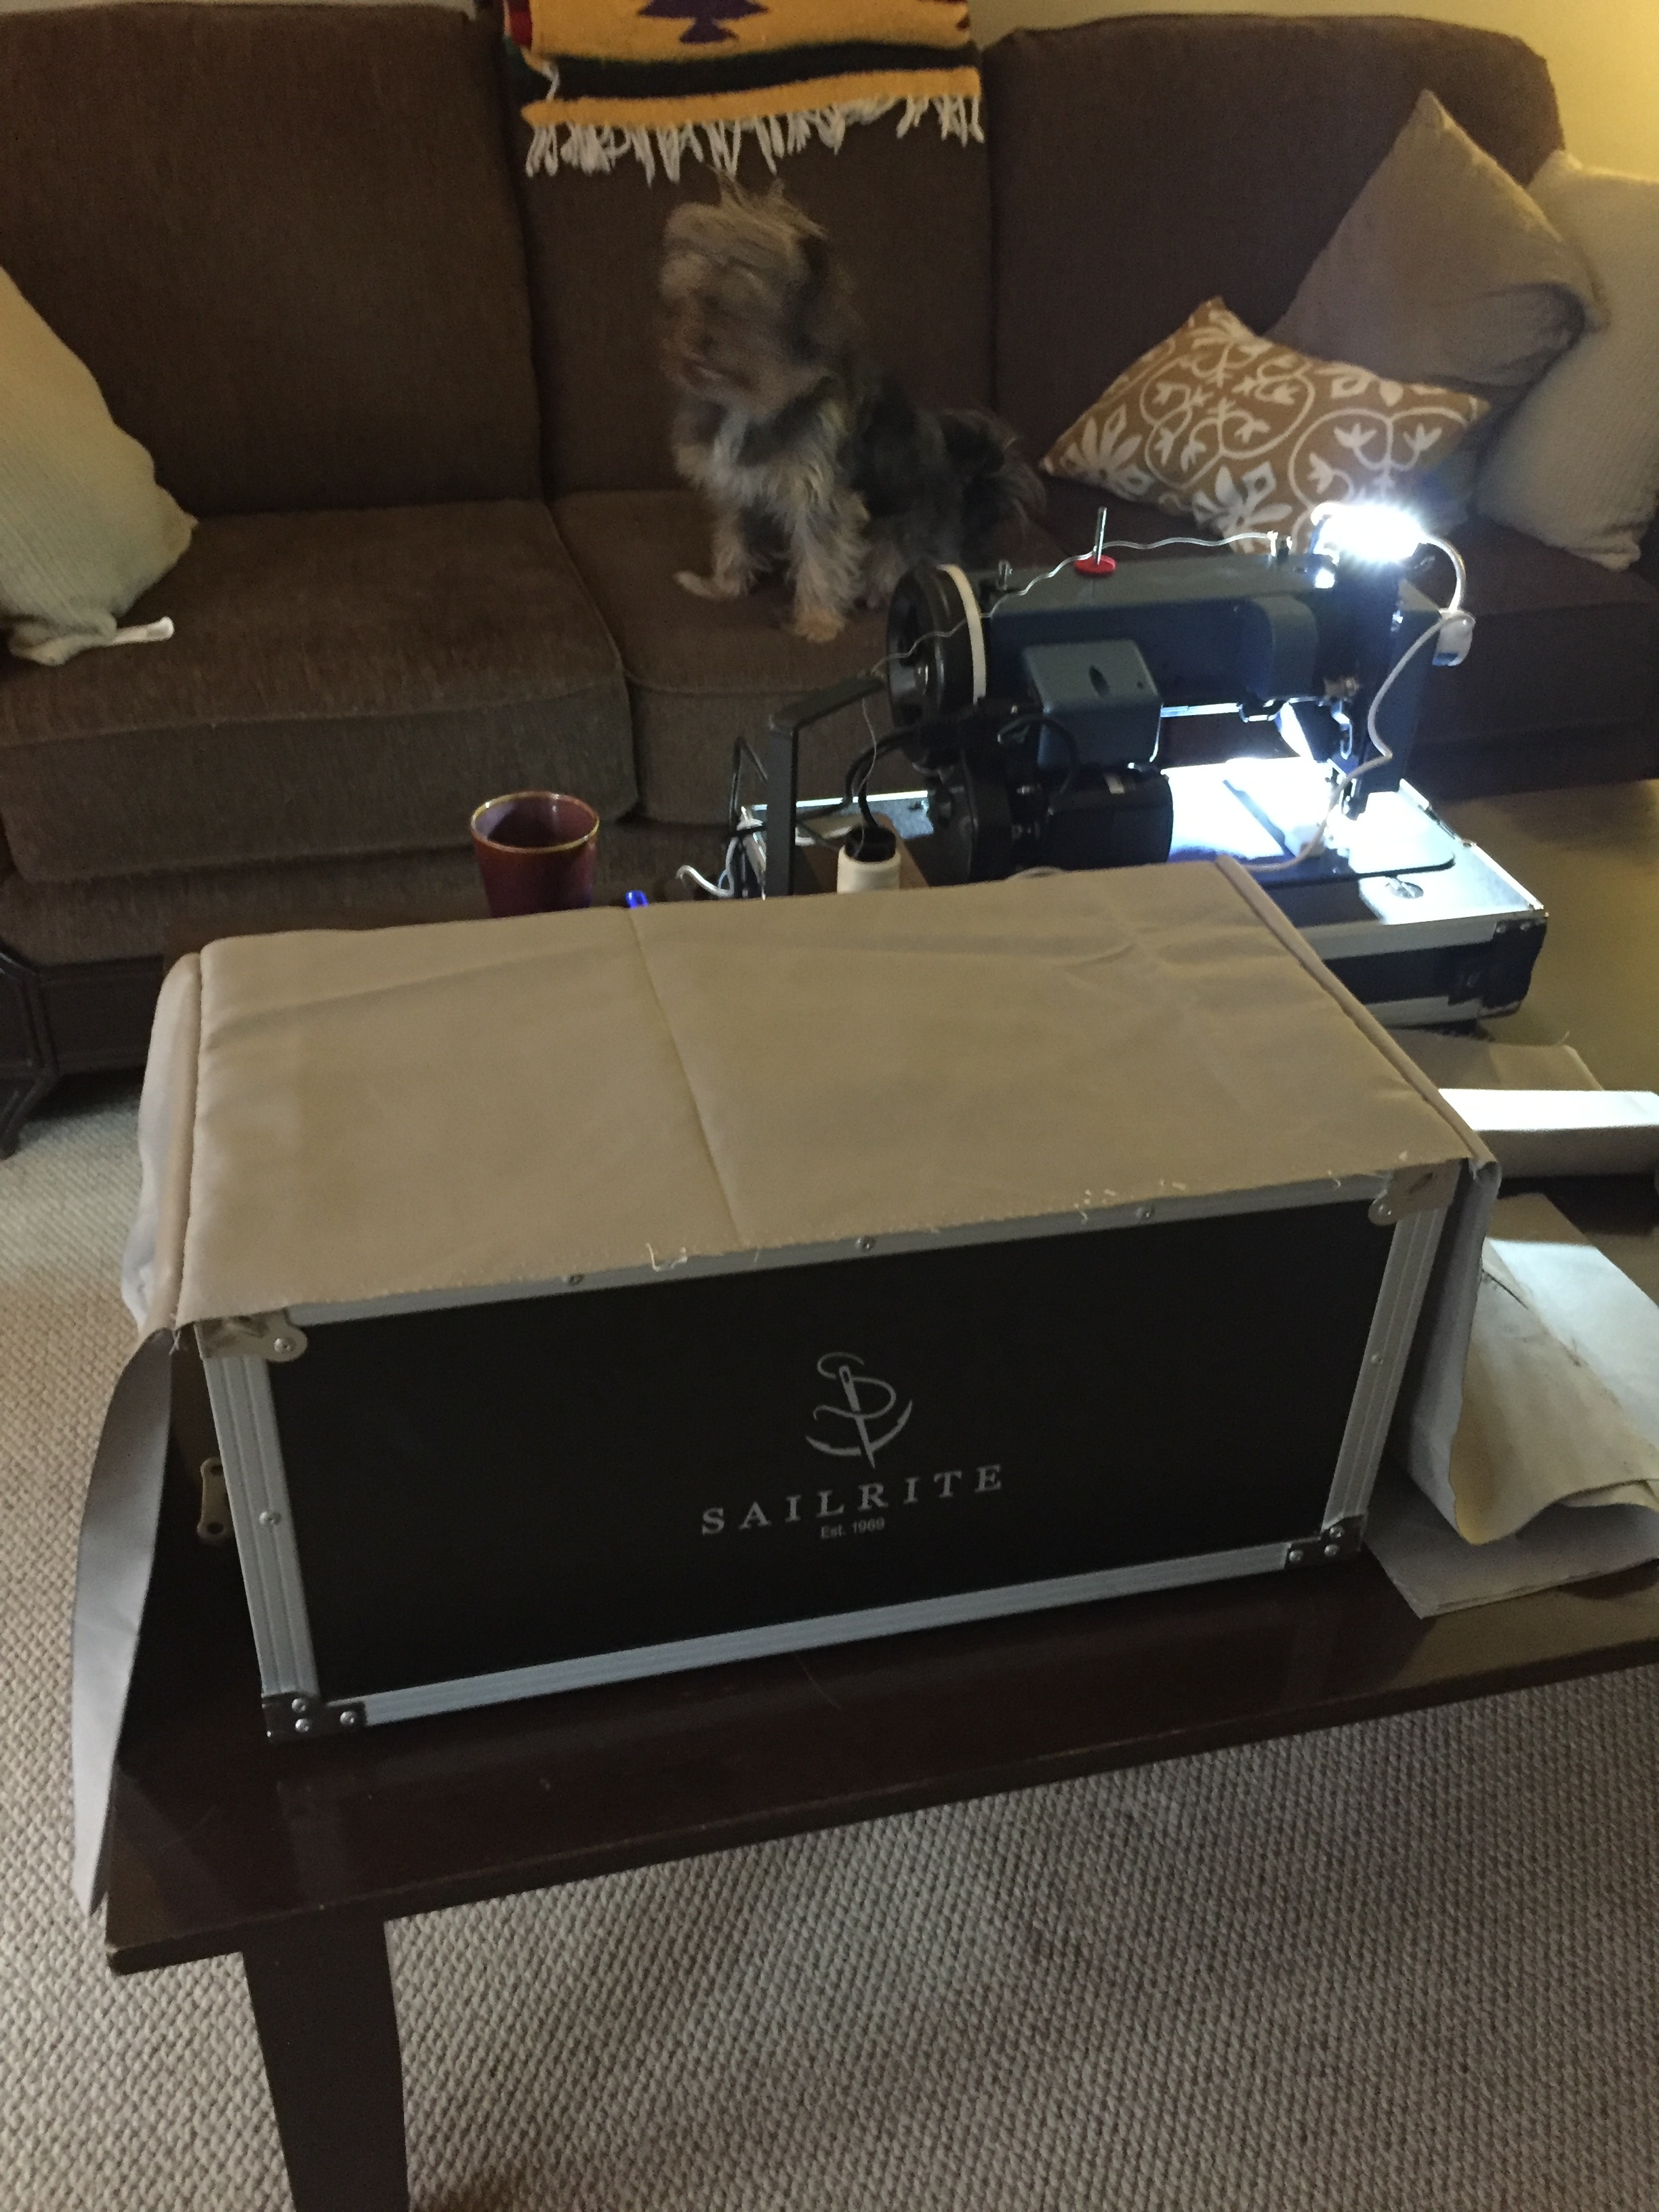
All of the mattresses were made from detailed patterns. Learn how to do it on sailrite.com if you do not know how already. We brought them down for a test fitting as I wanted to make sure before I finished covering them that I had actually made them correctly. Turns out the only adjustment I had to make was the aft cabin keystone cushion. I will clean up the hack job when I get it home and before I finish the covers.
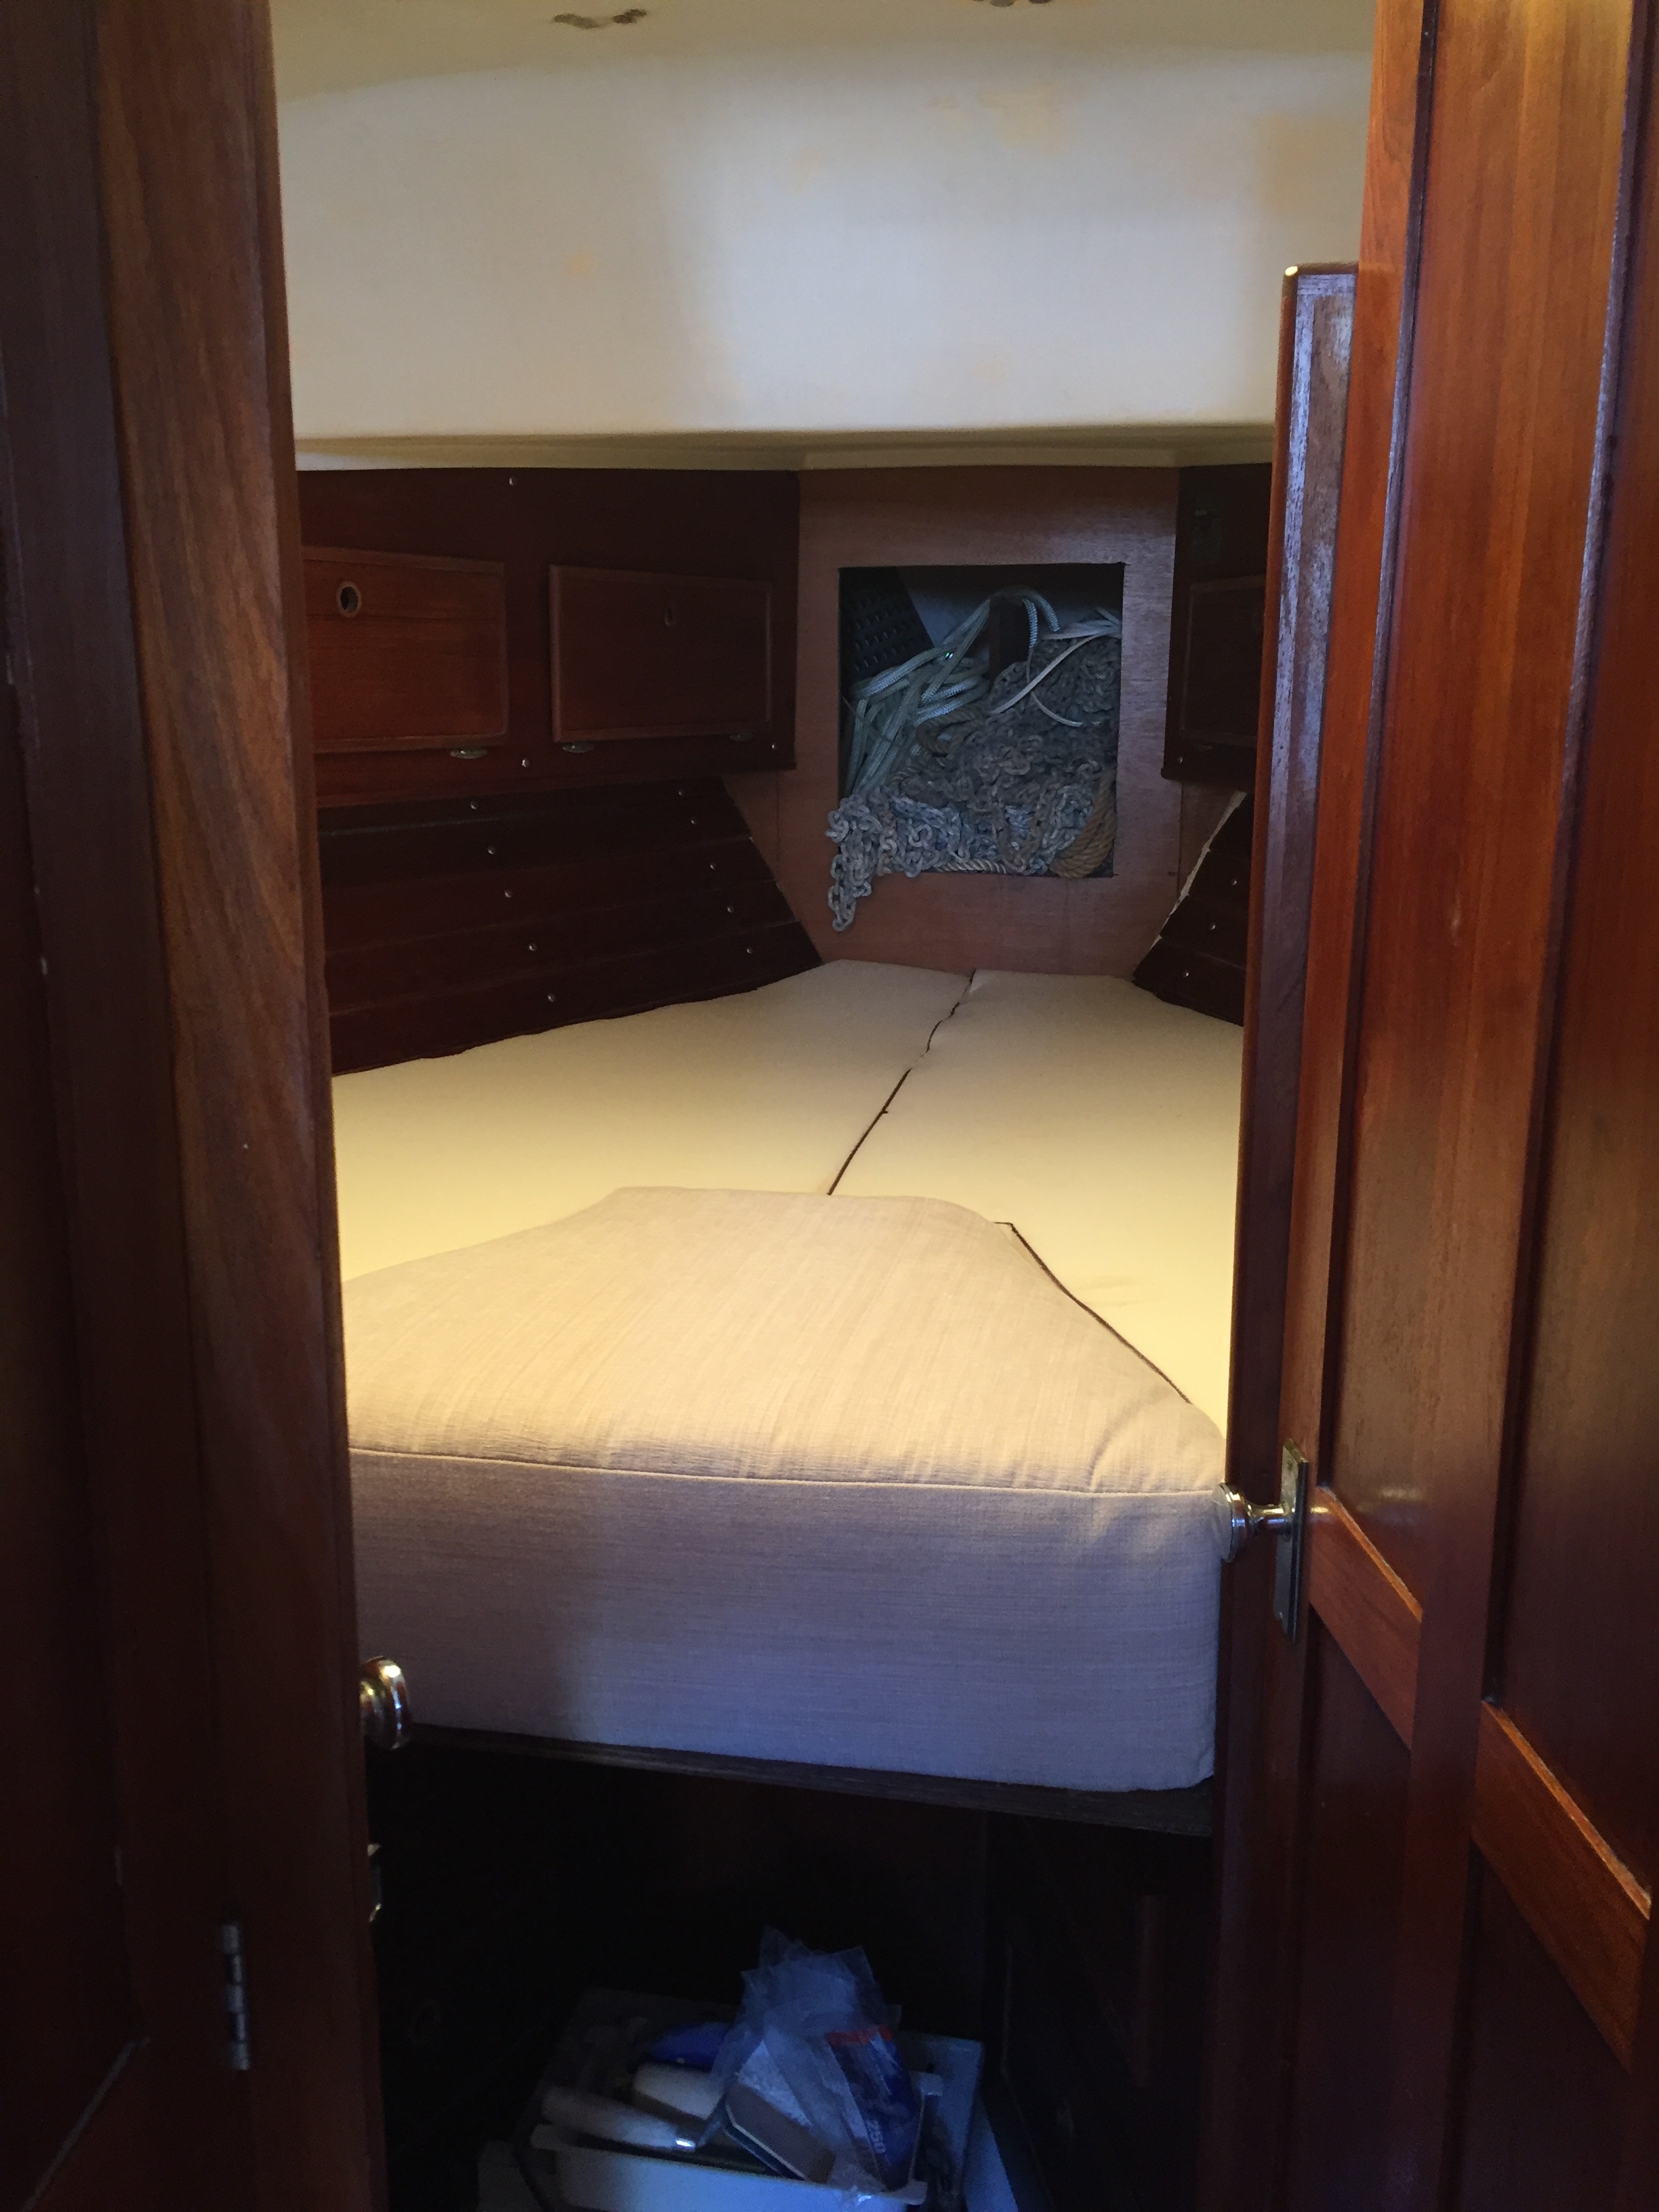
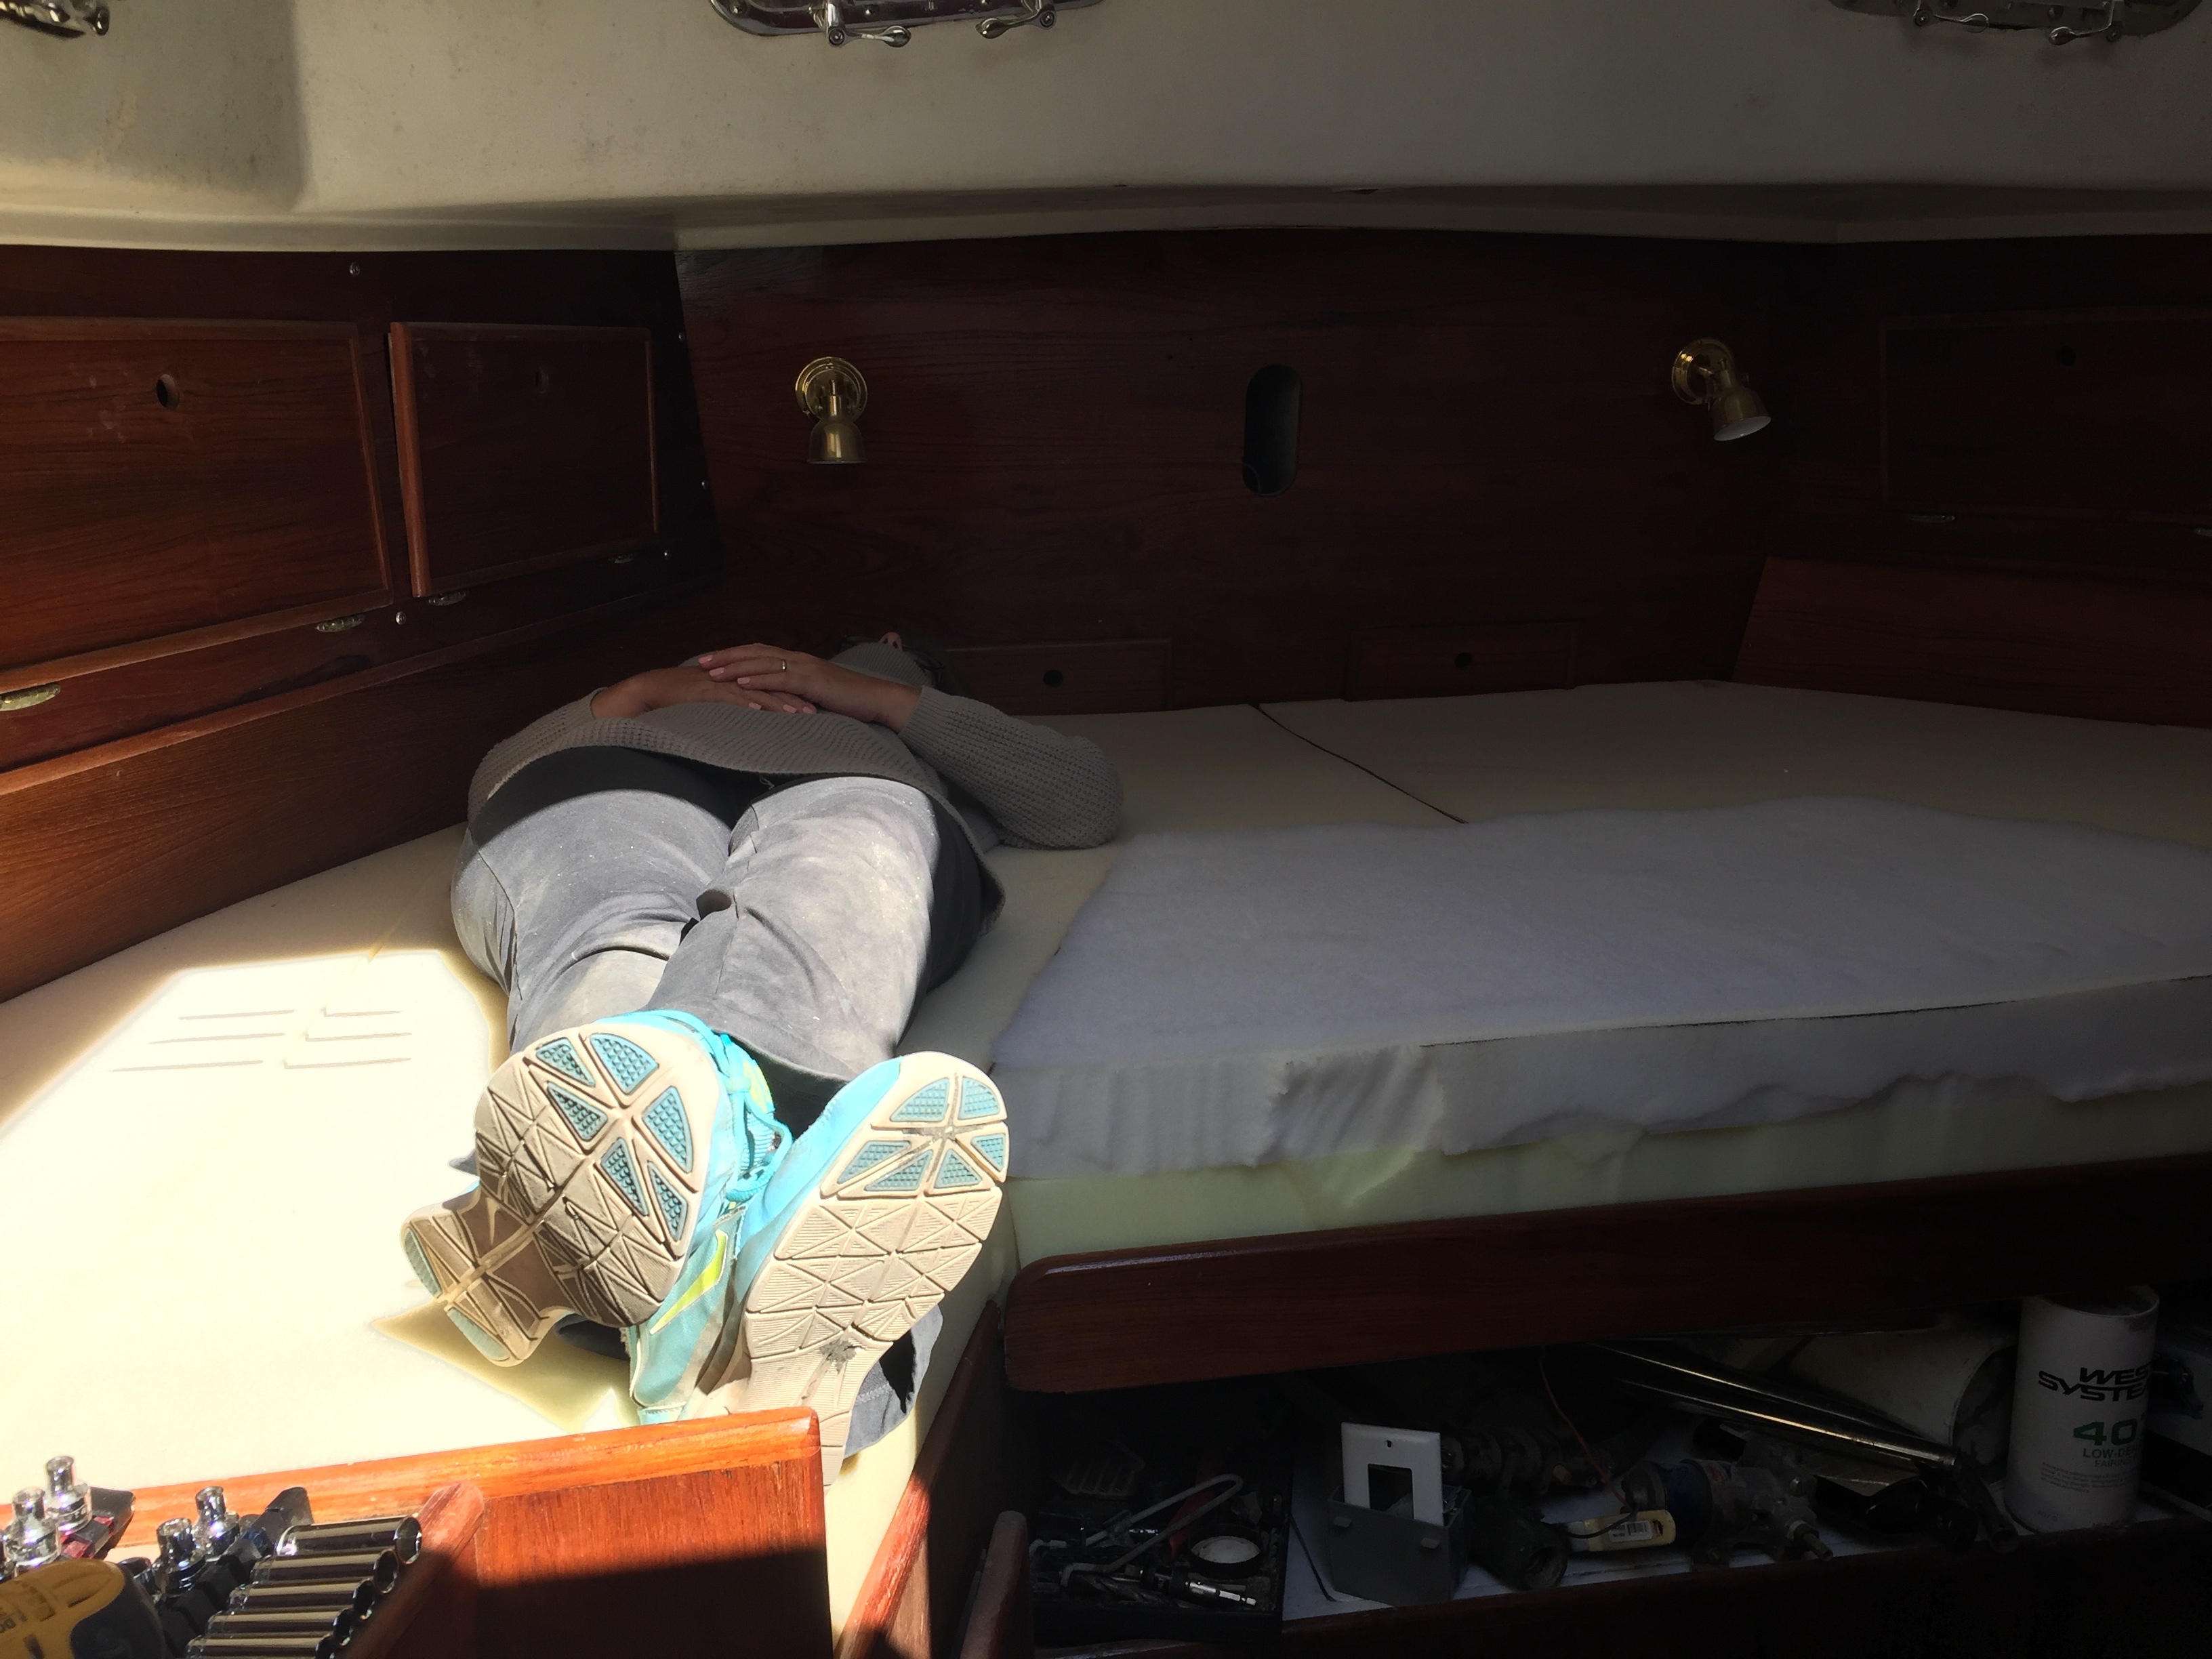
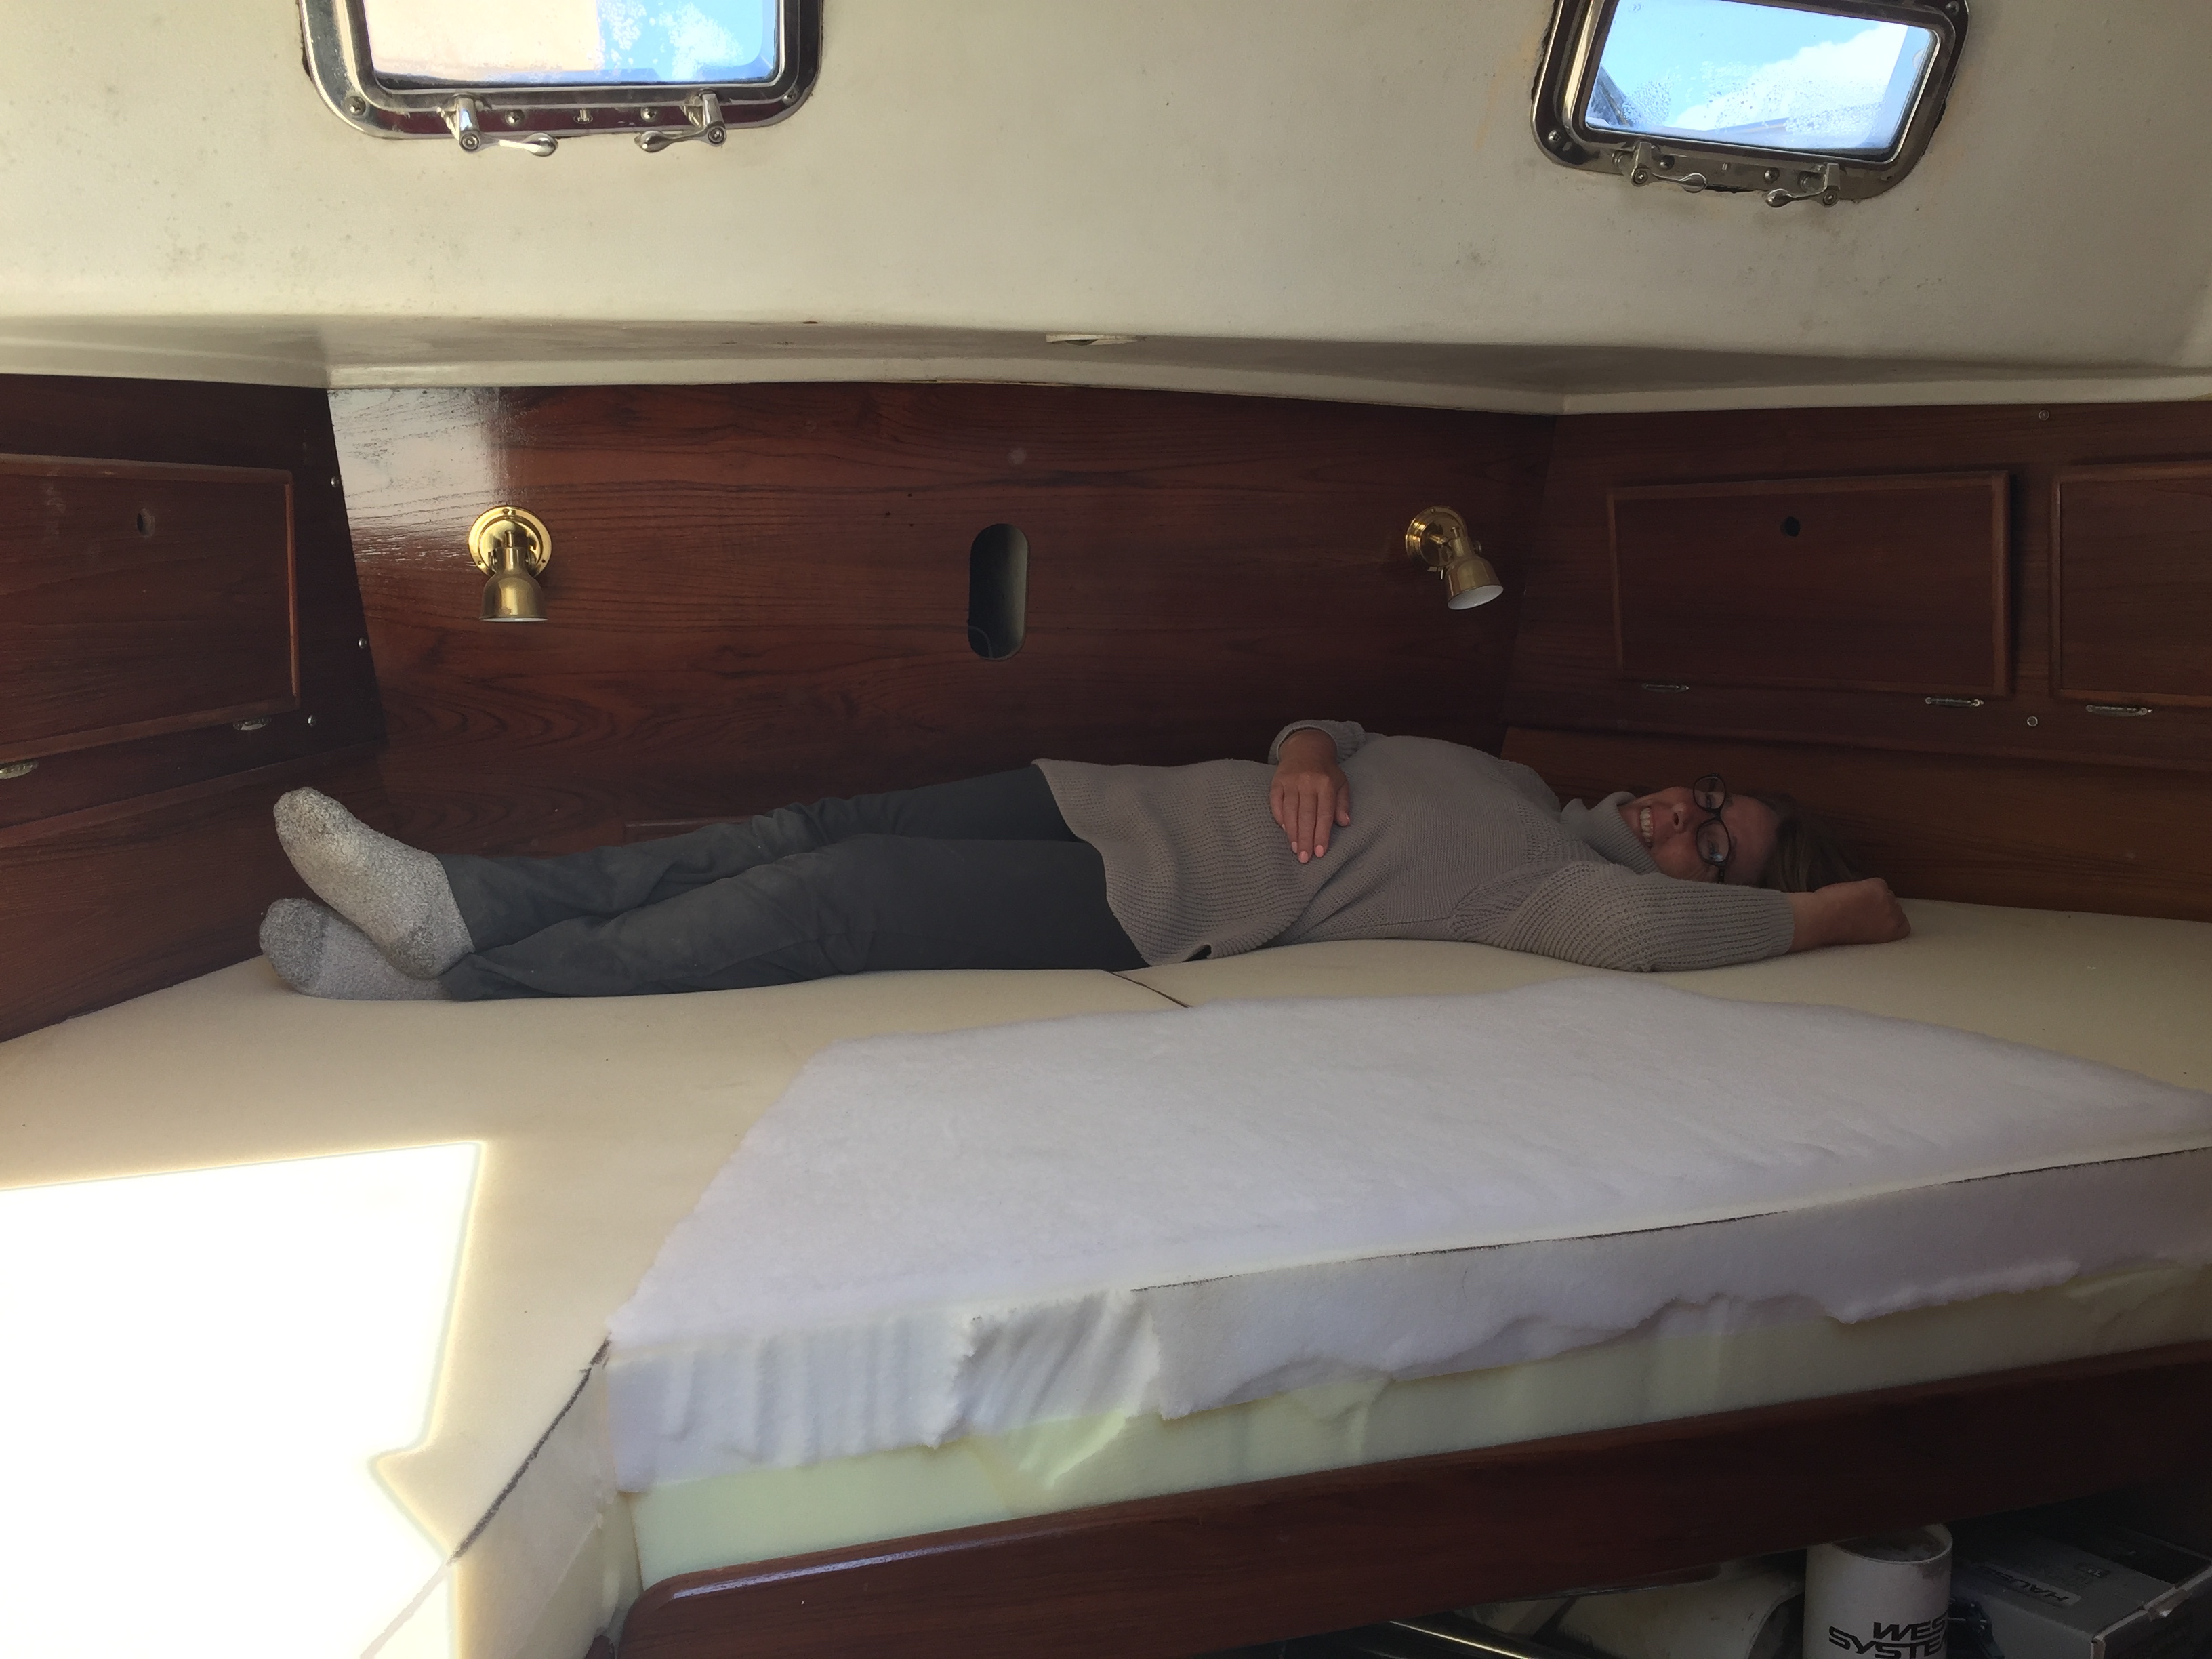

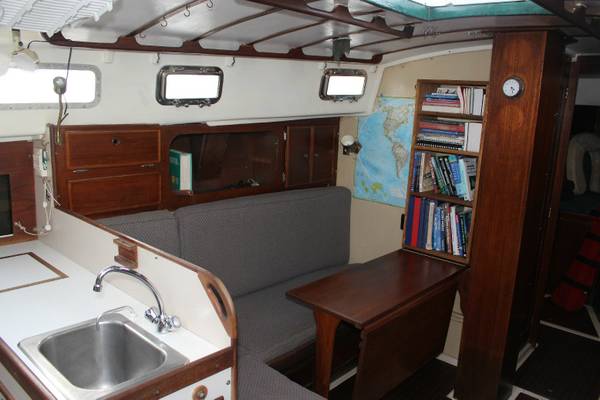
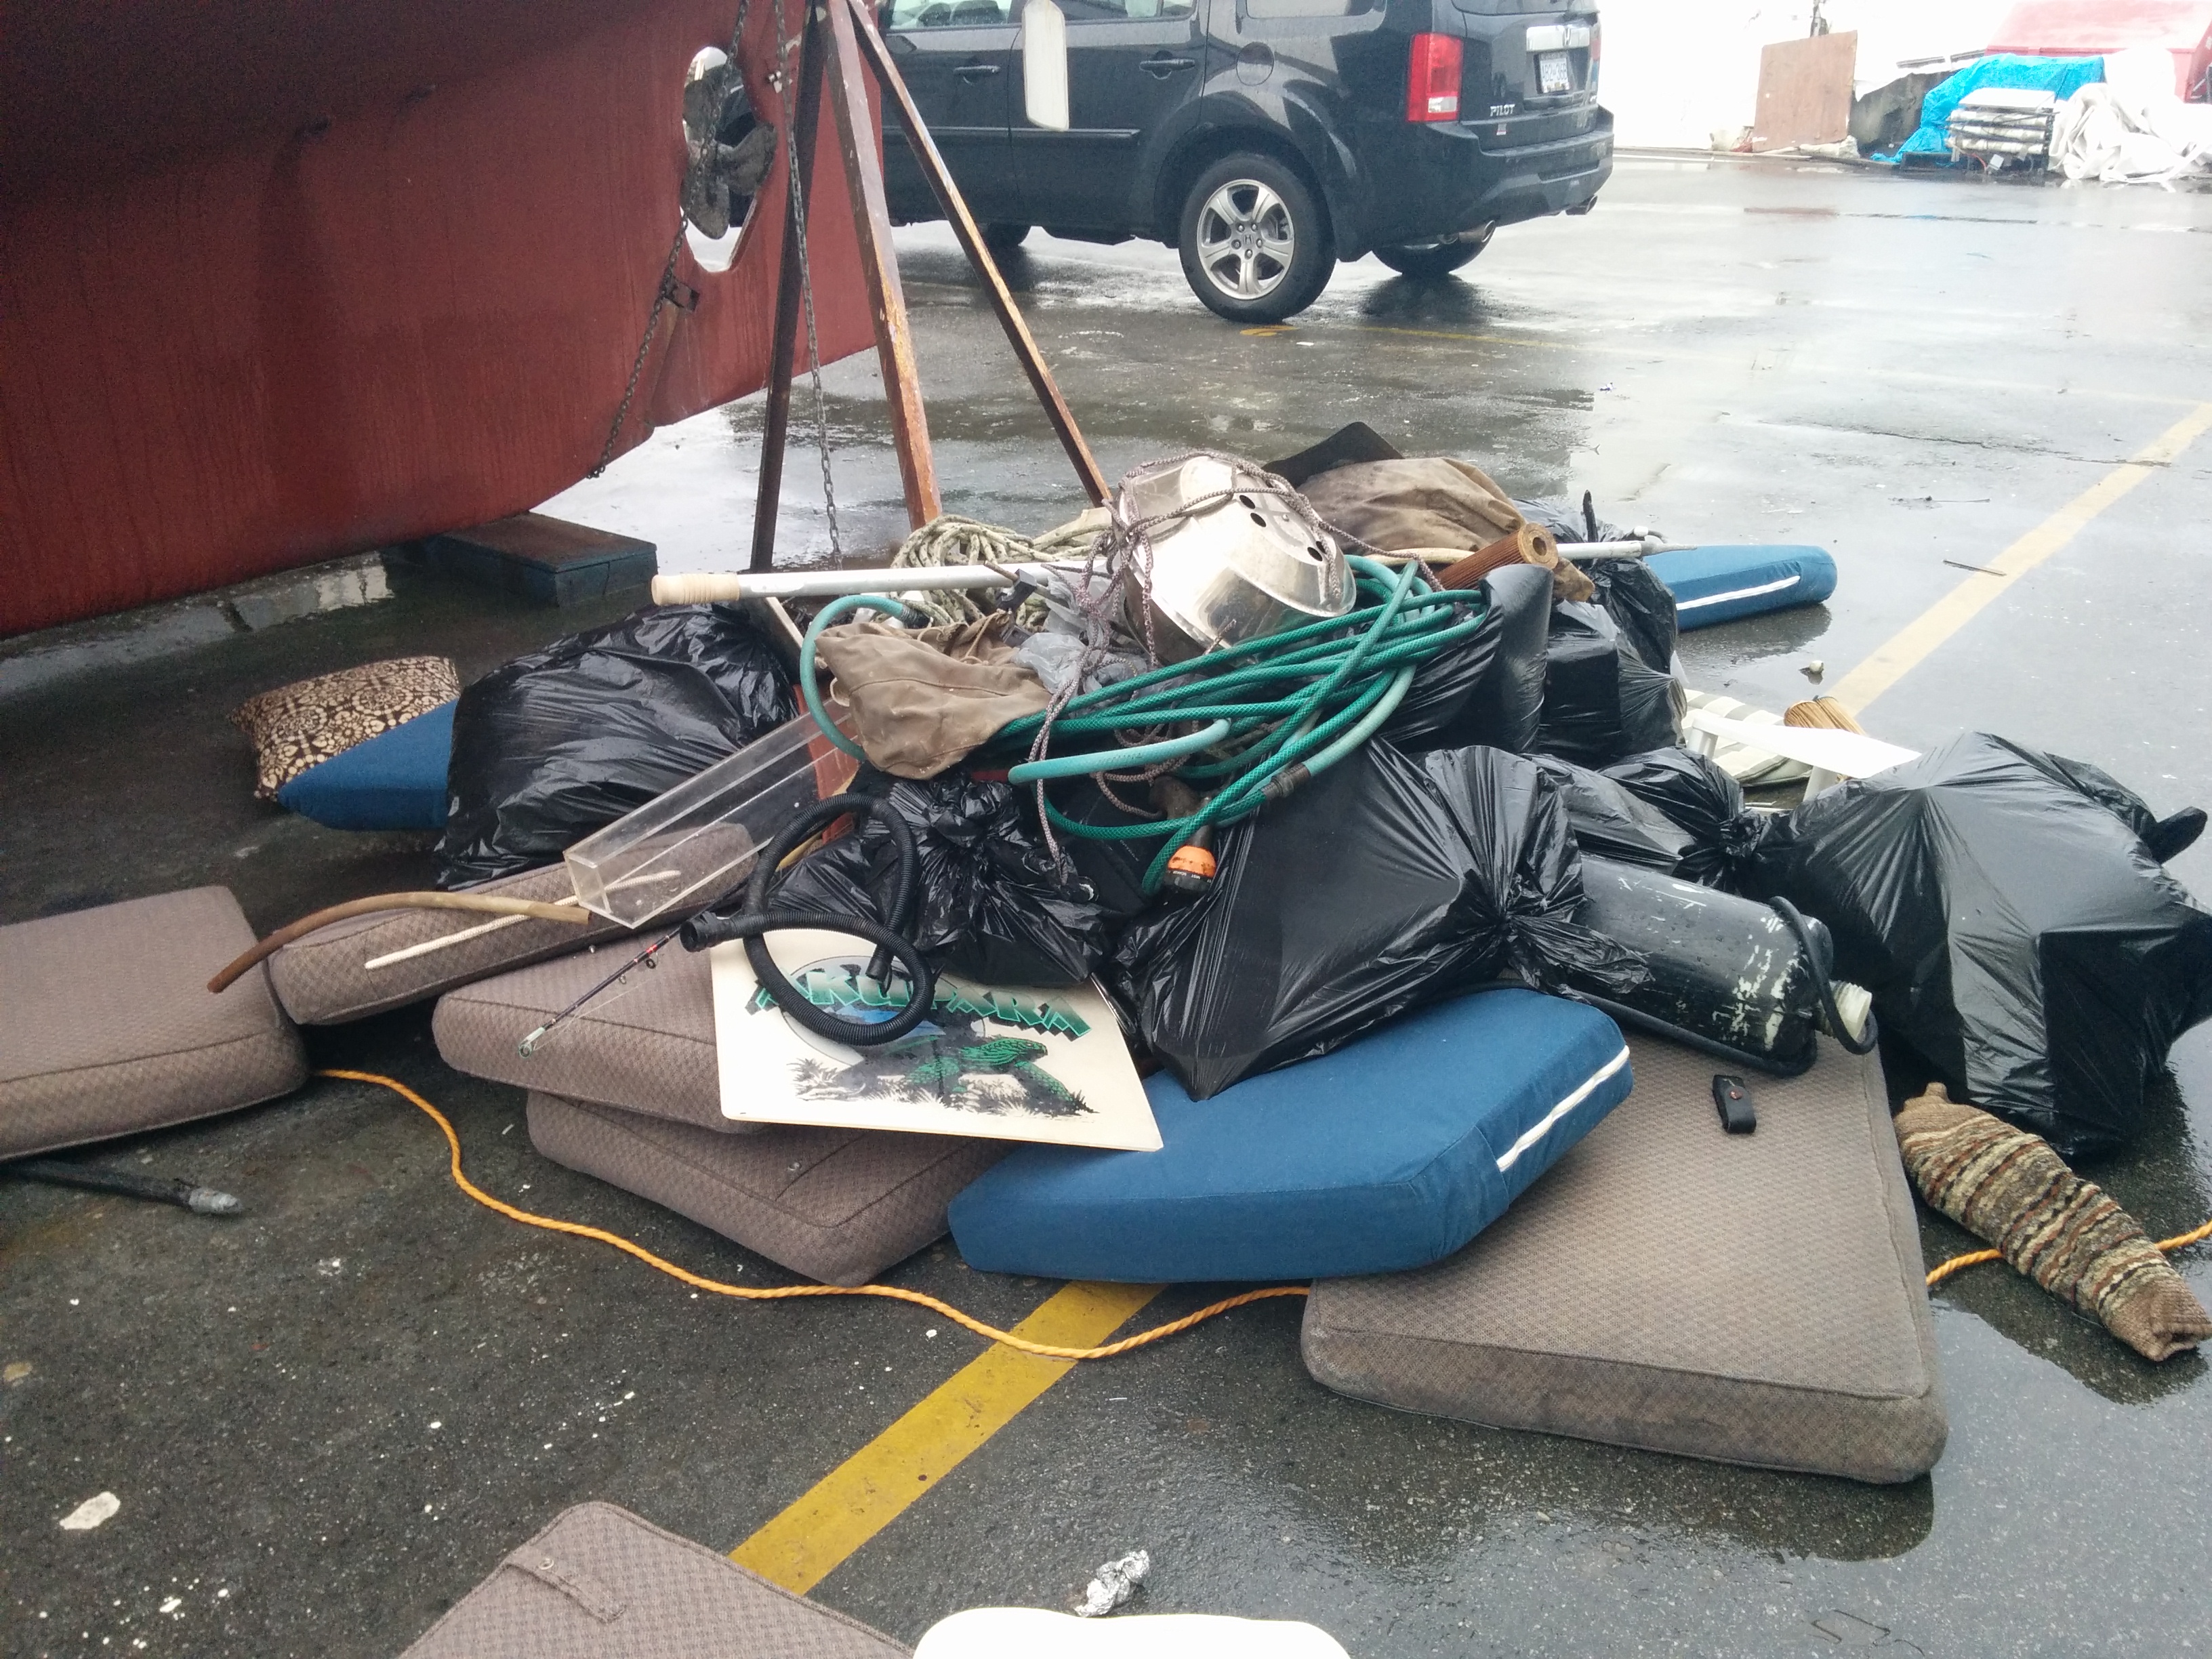
When we purchased Akupara, all of the interior cushions were mismatched and in really rough shape. We knew we were going to replace them all so one of the first things we did was throw them all out.
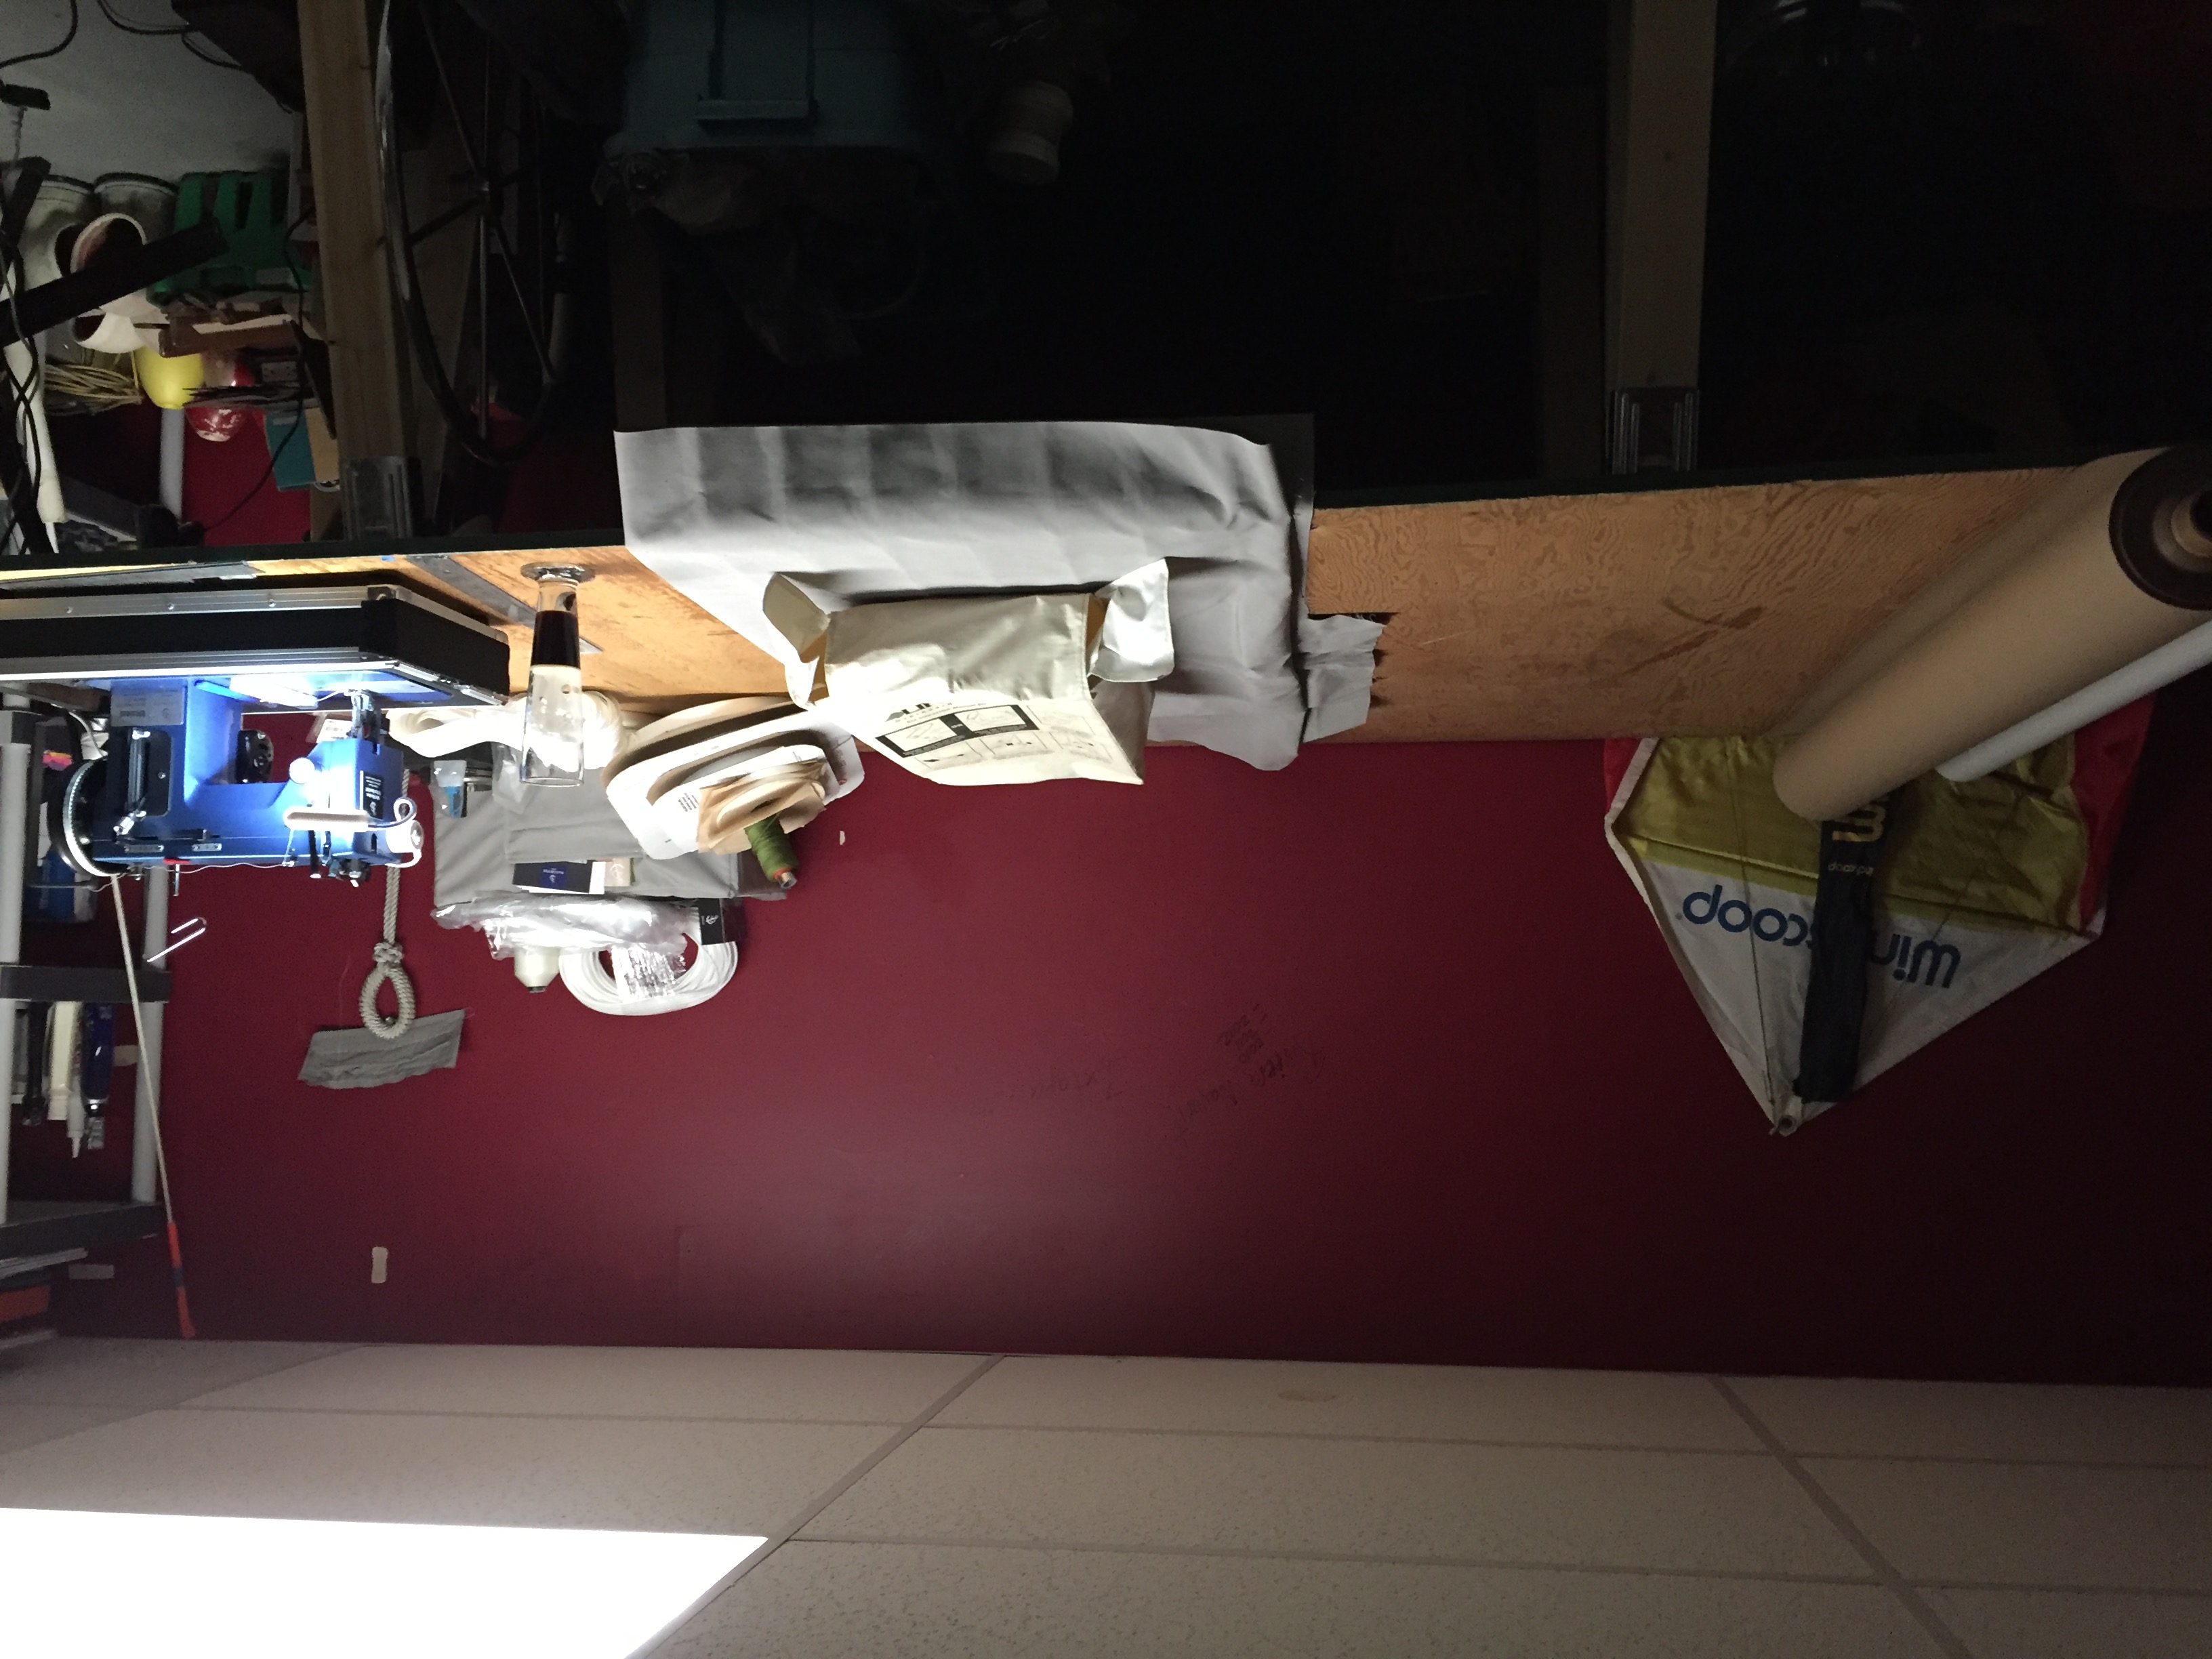
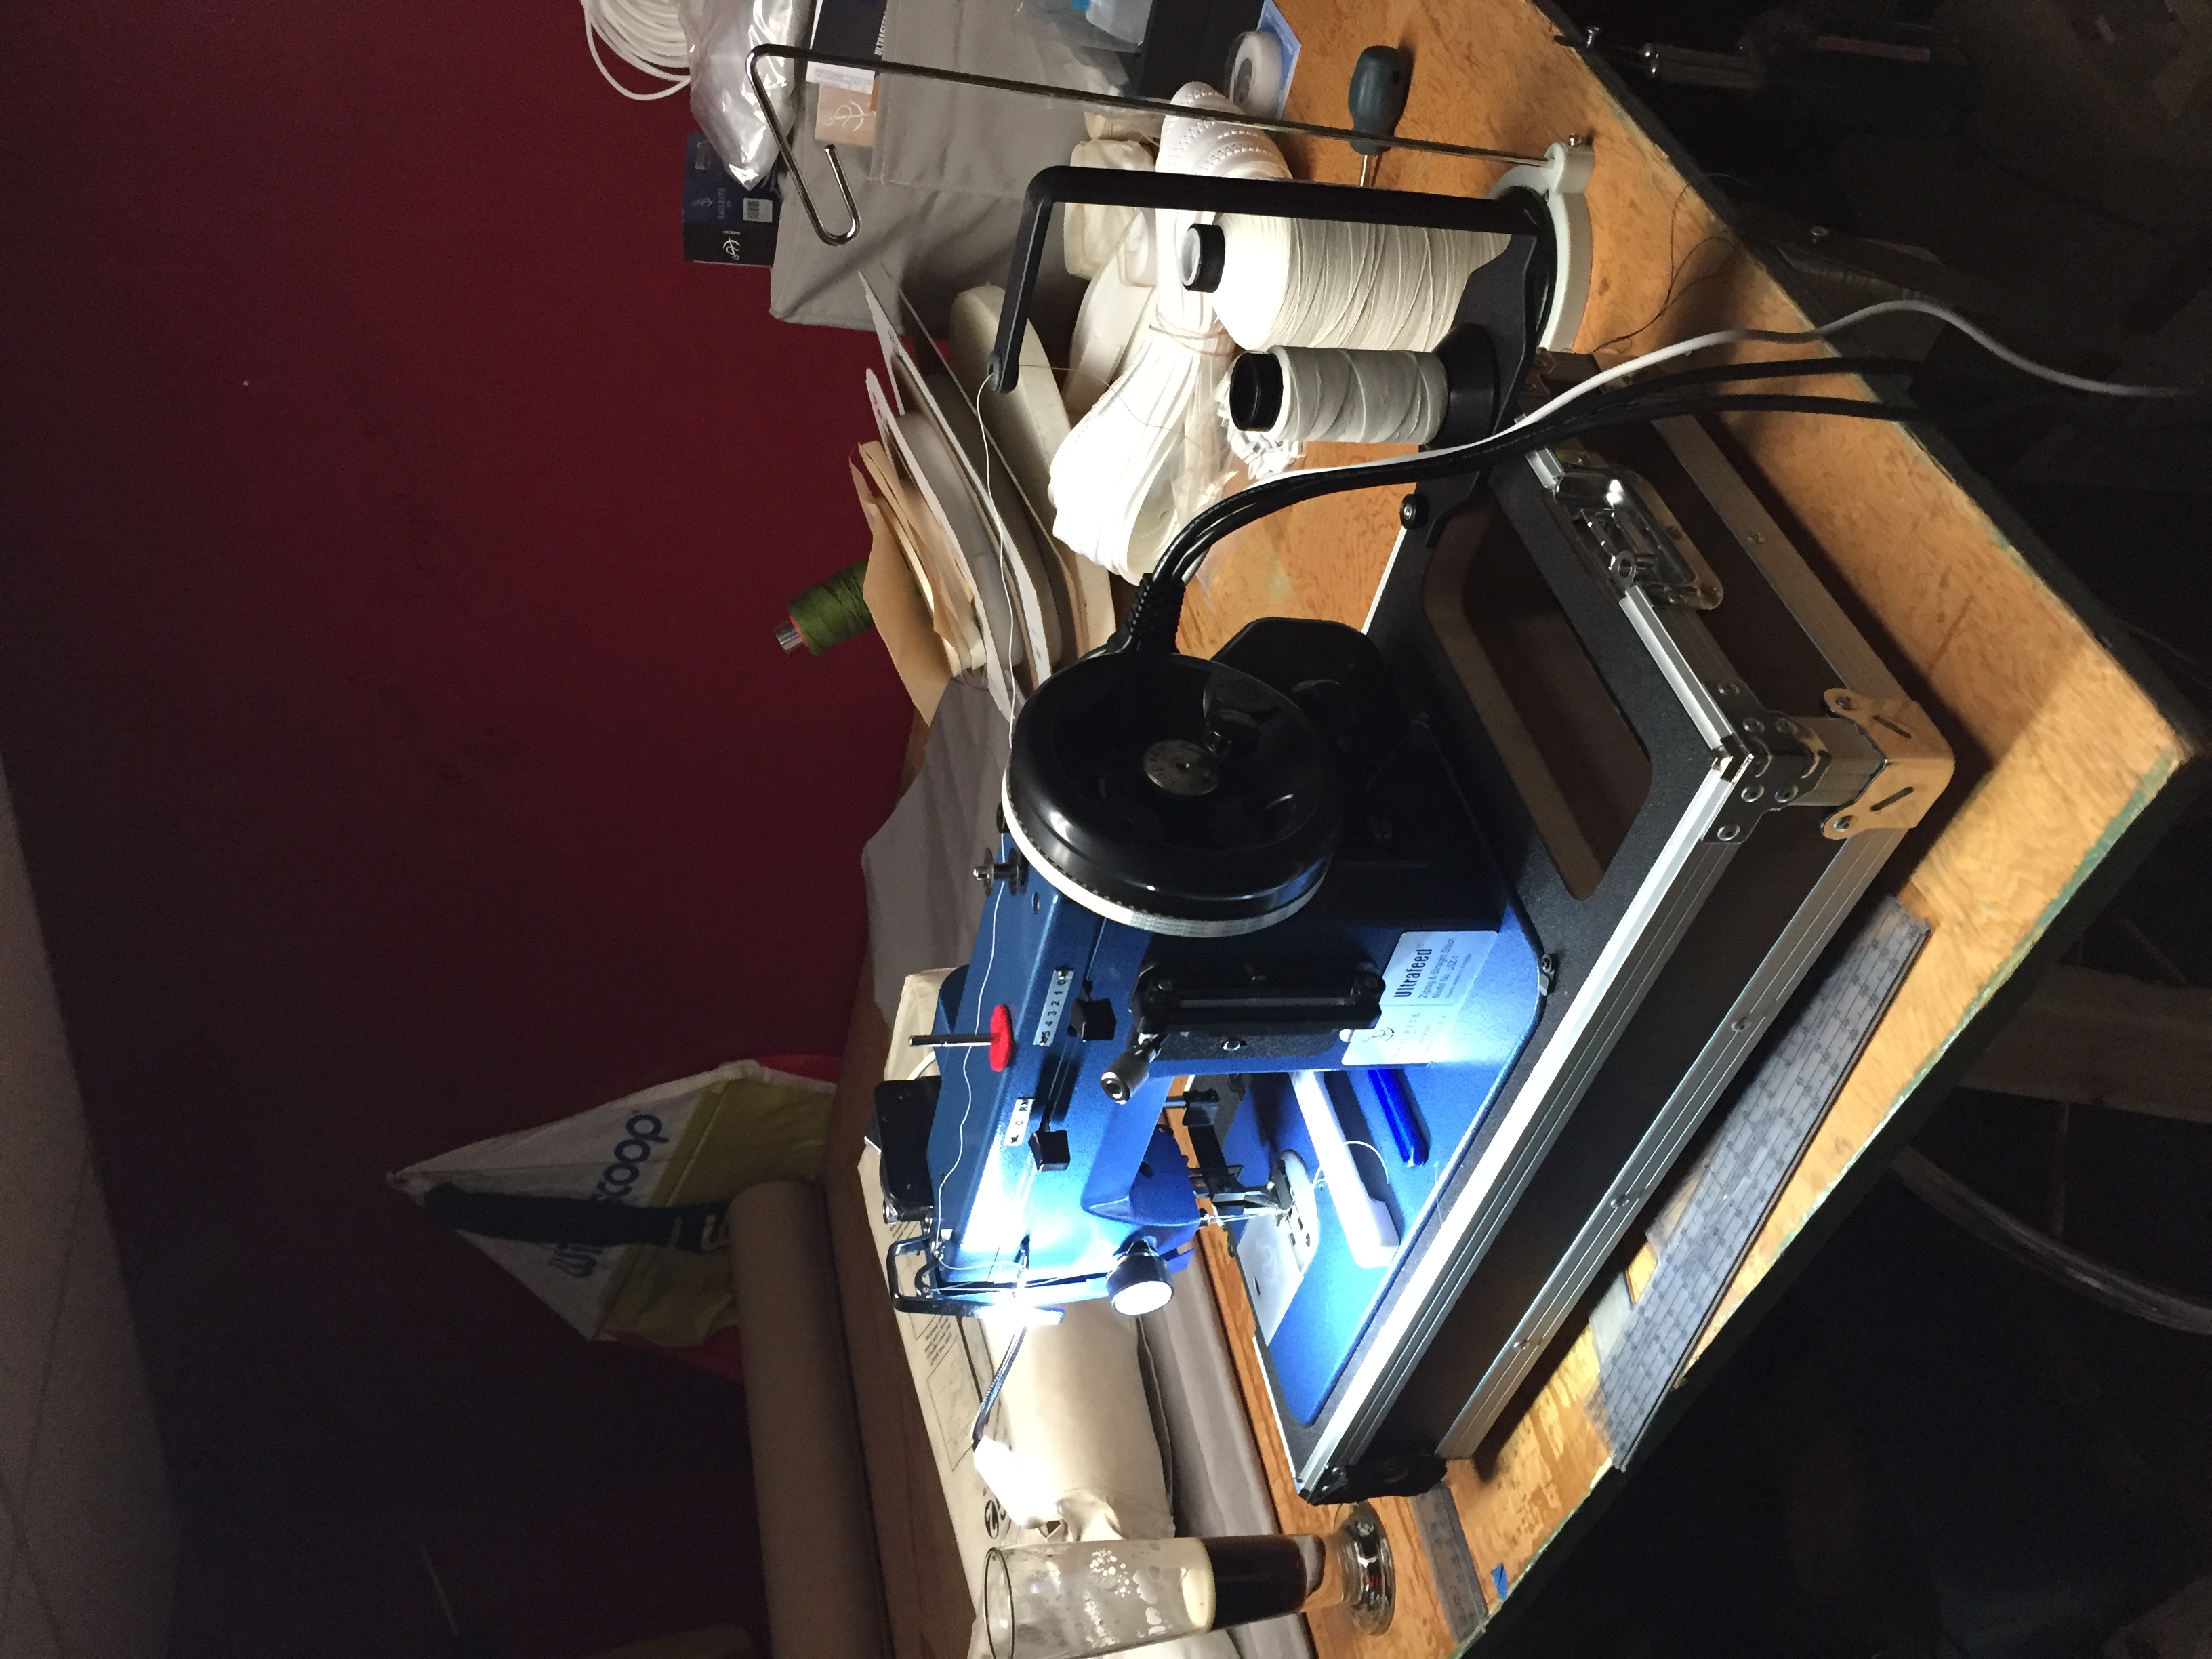
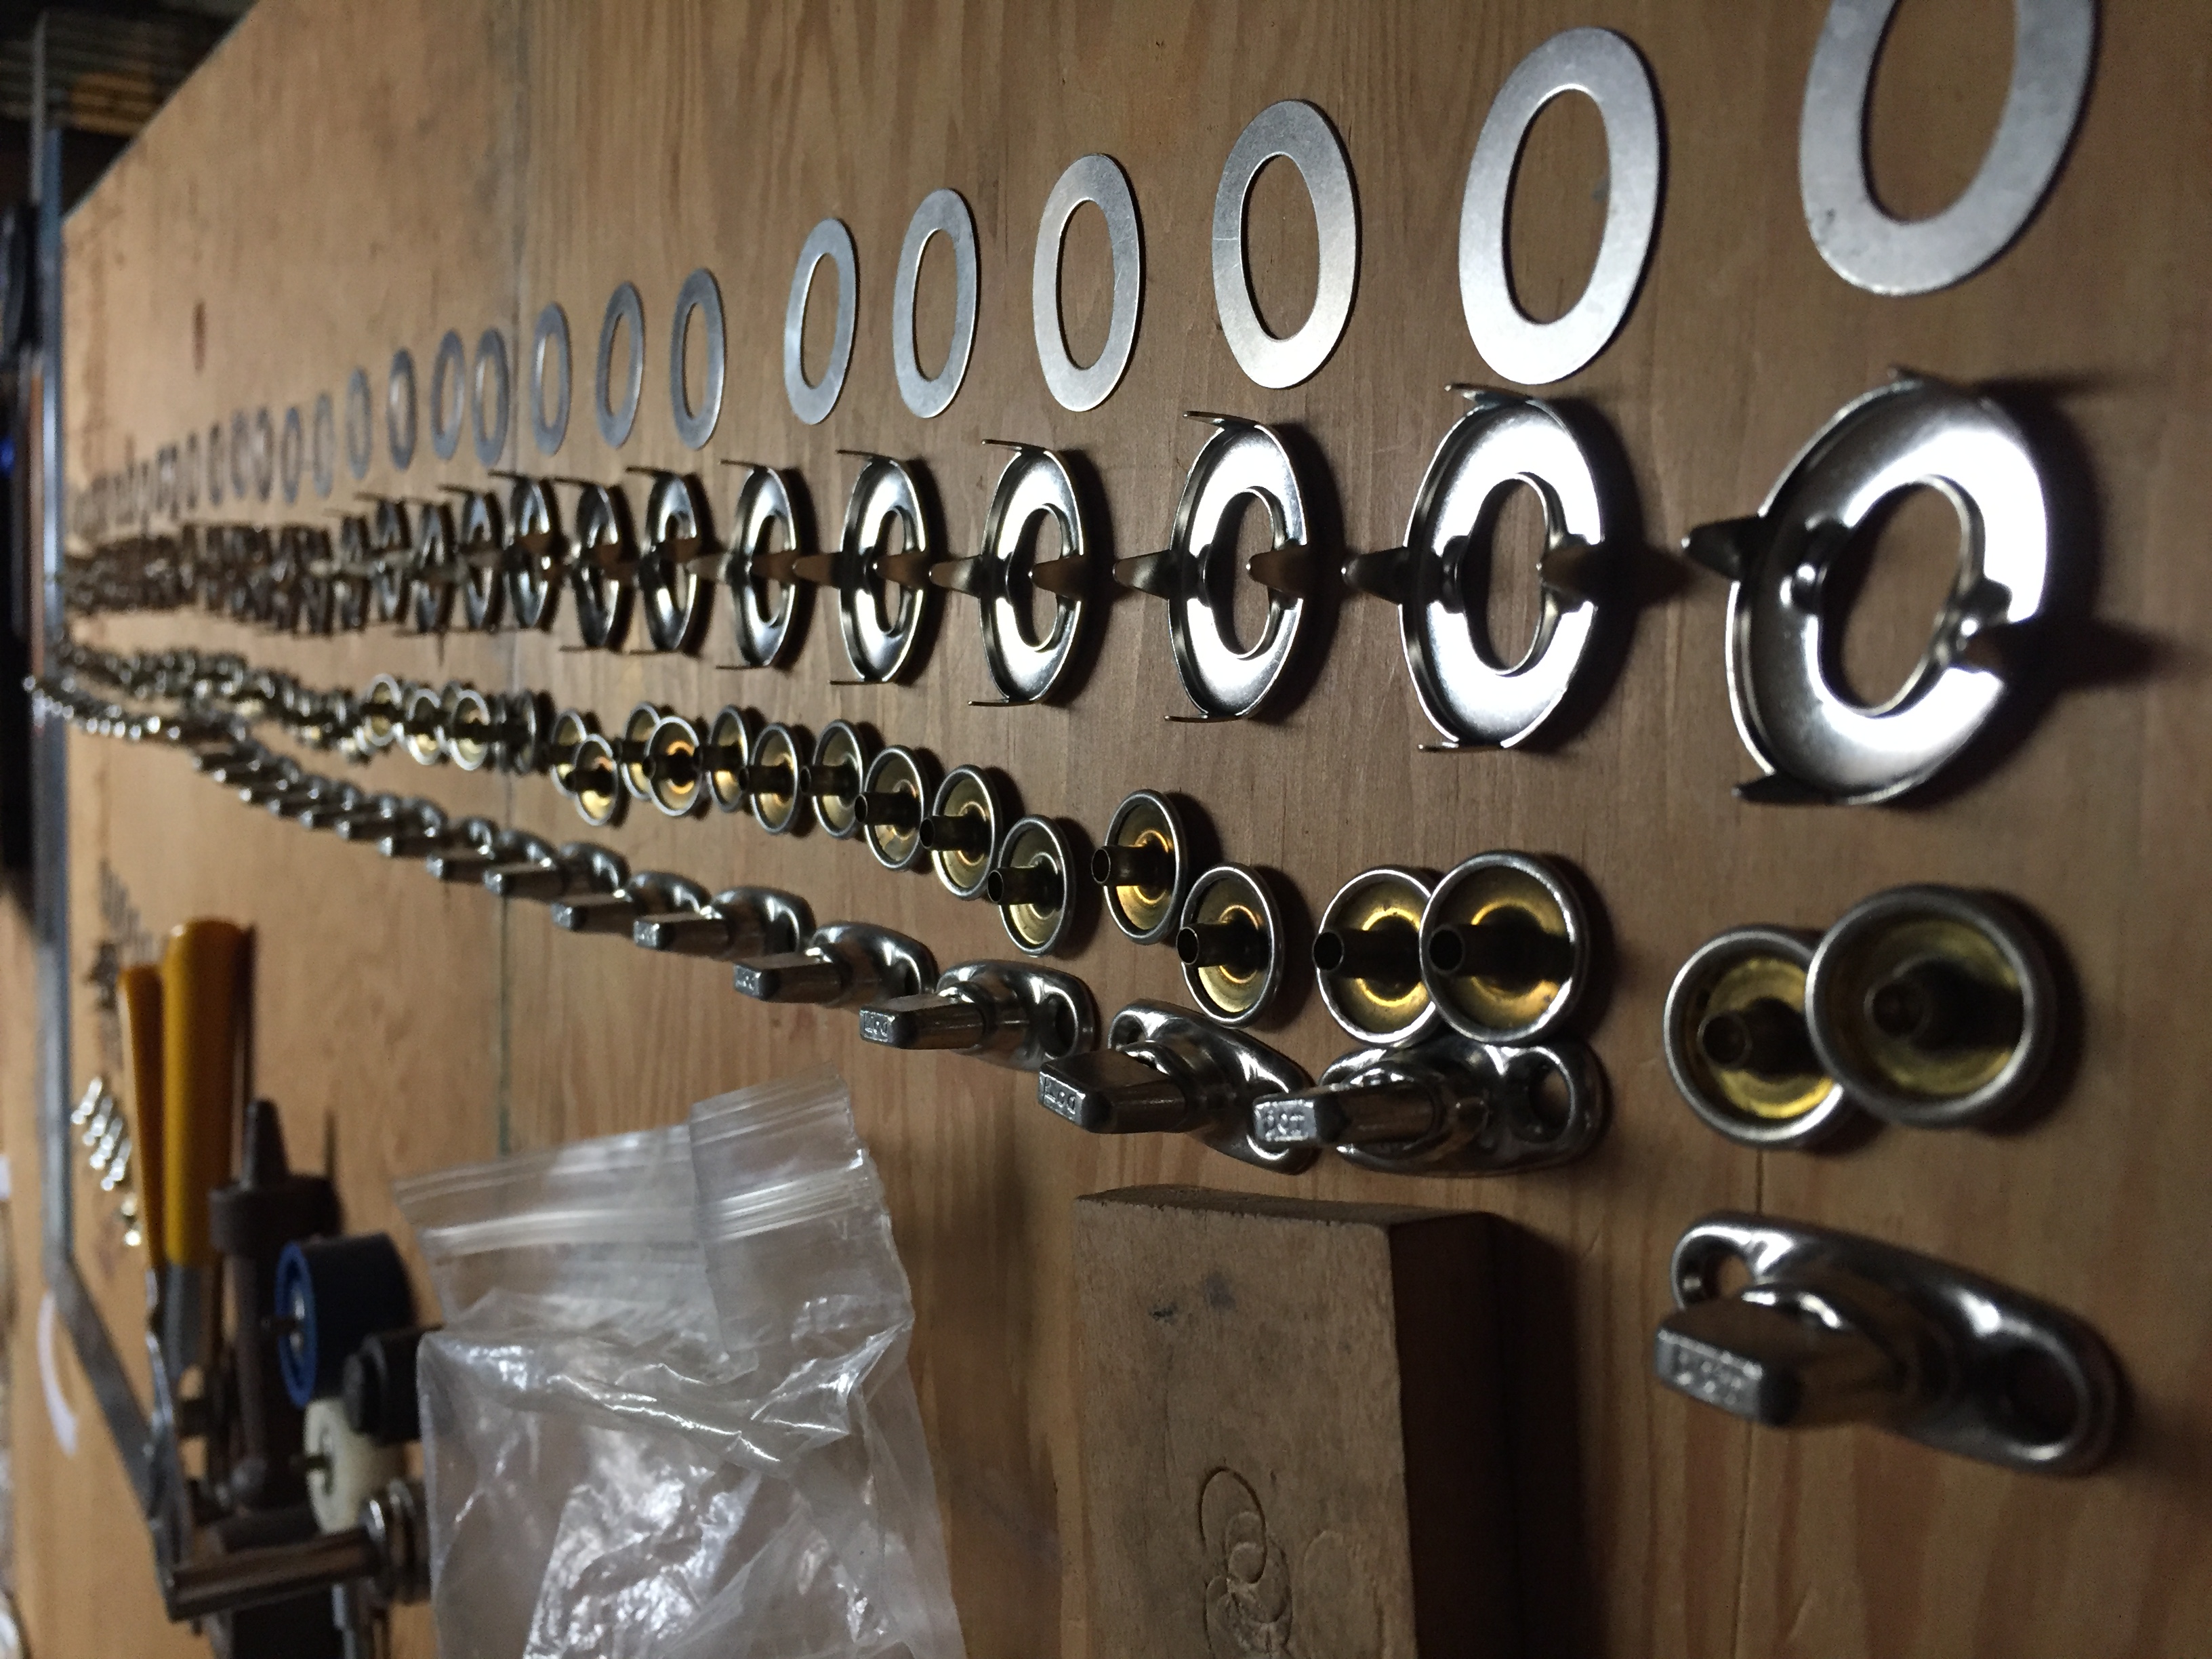
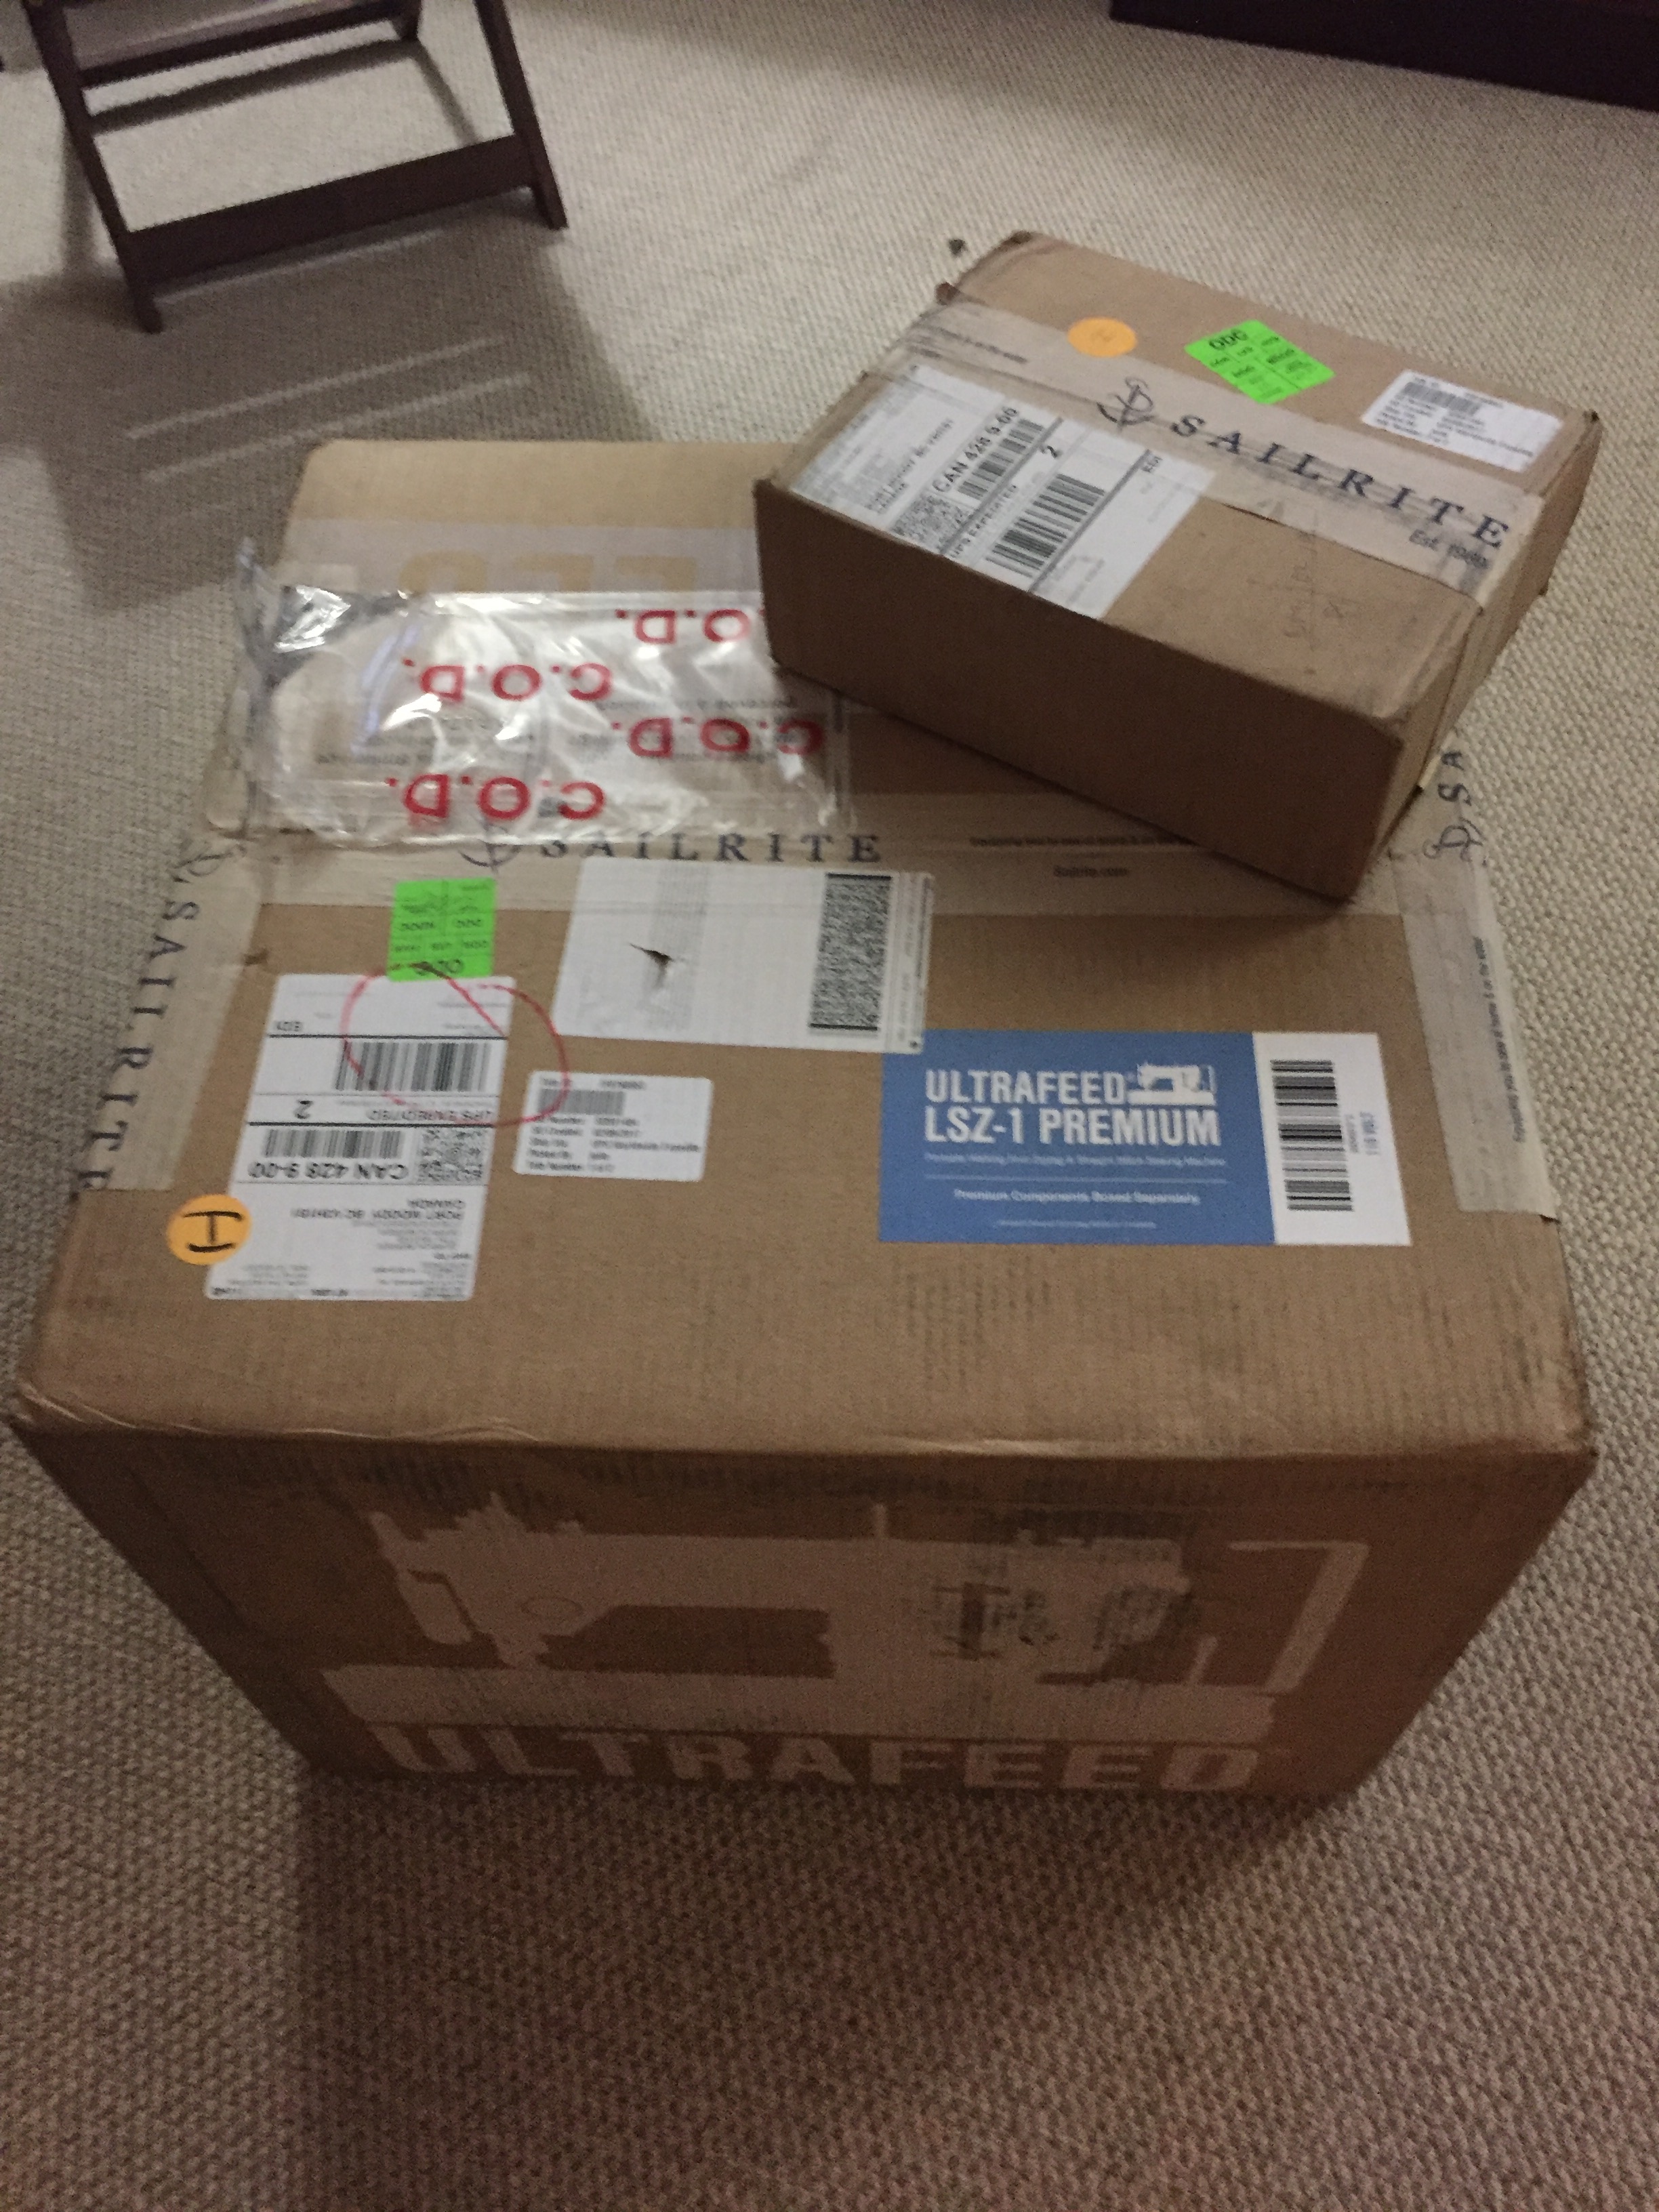
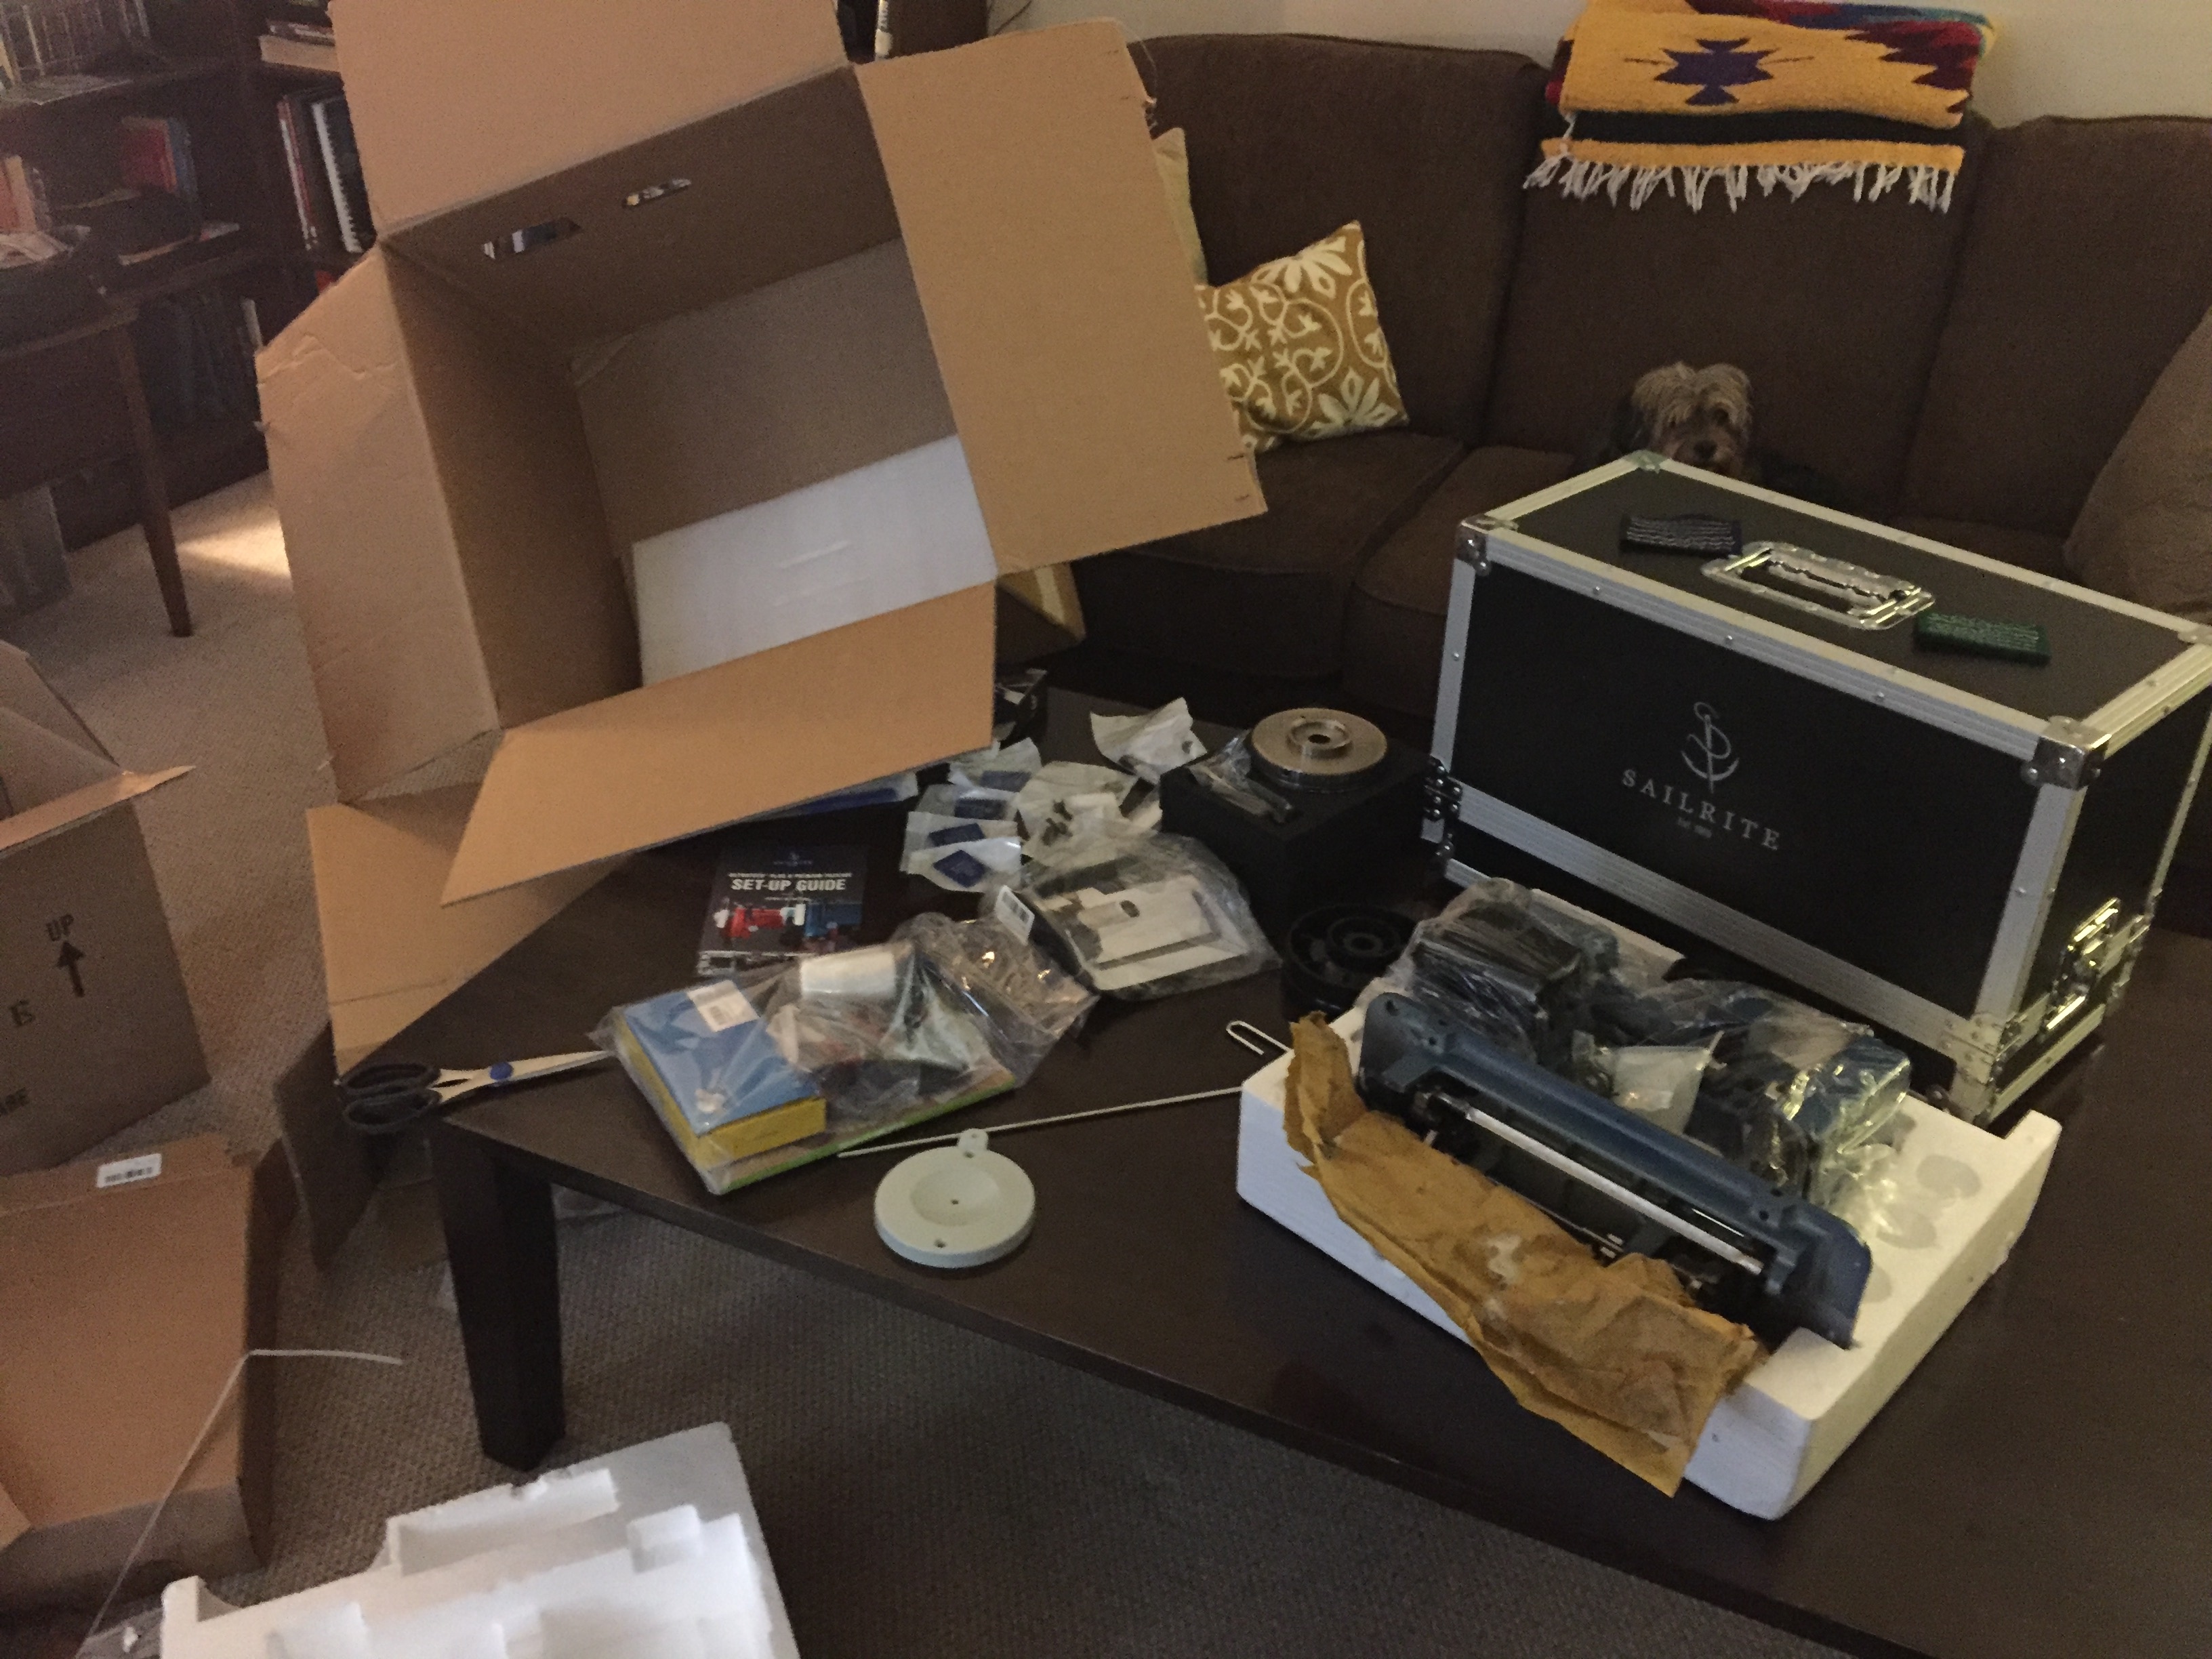
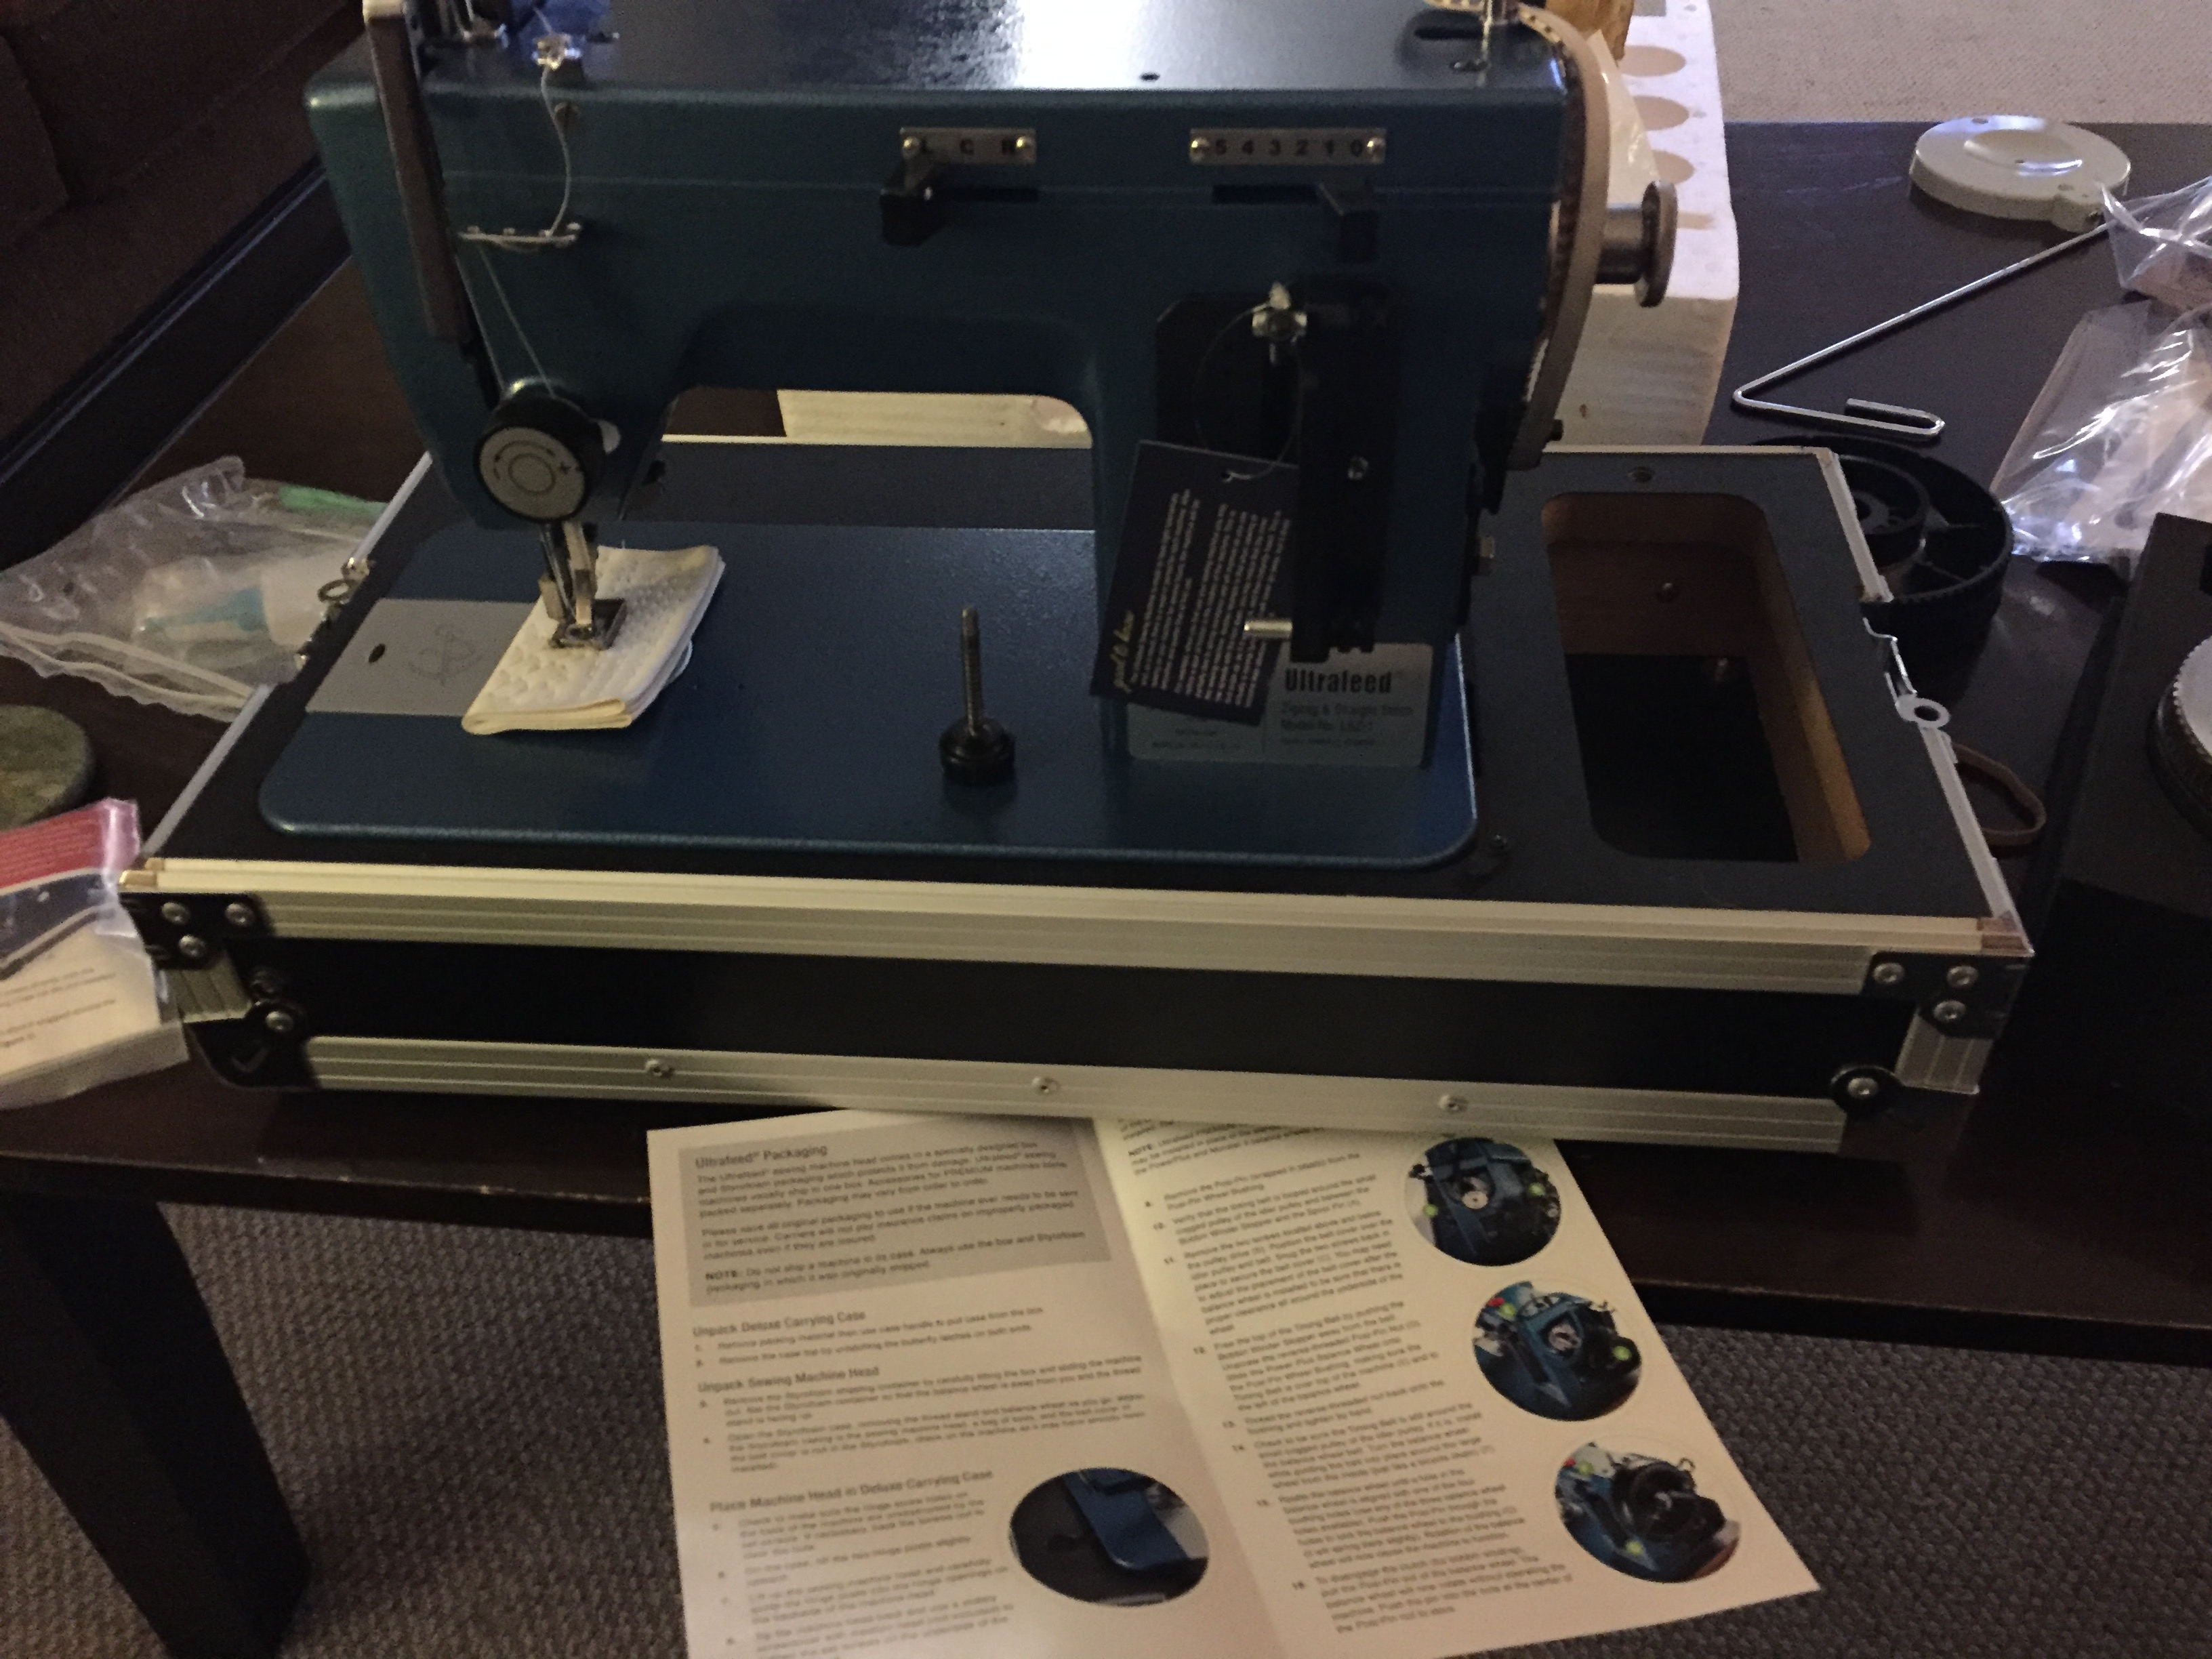
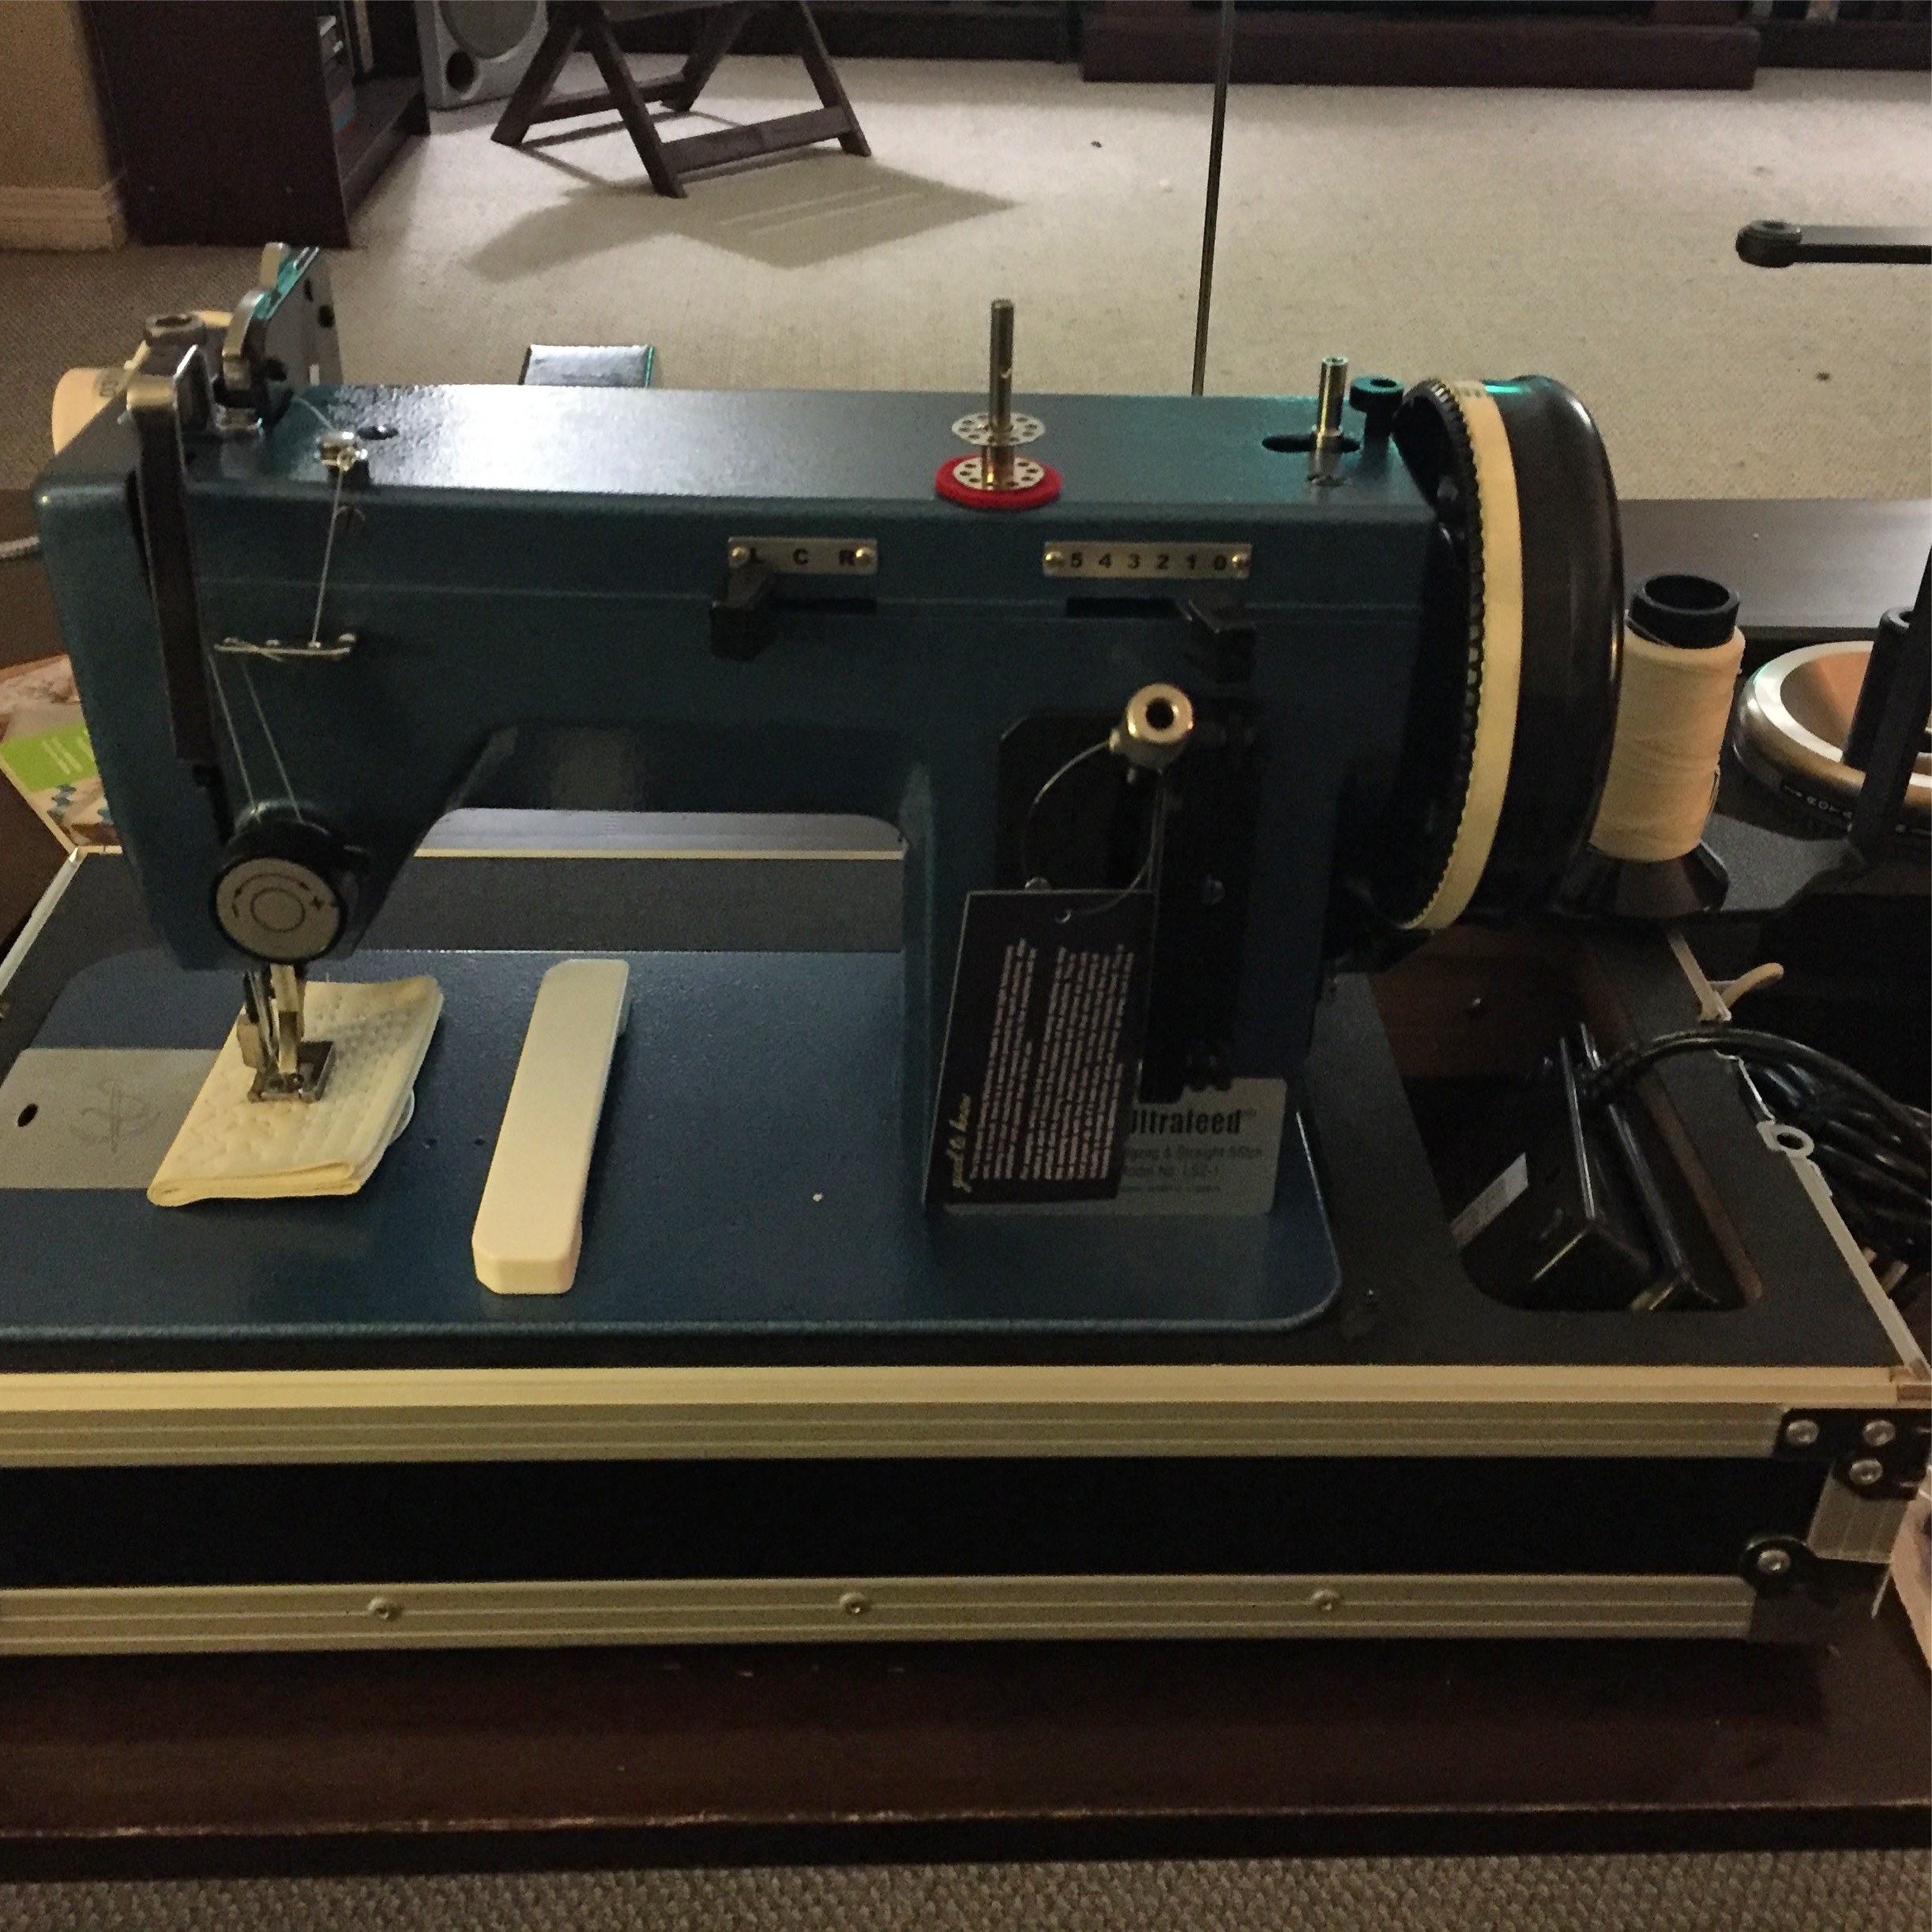
It has been a long time coming but we have finally started on replacing them all, which is an additional reason why I purchased the Sailrite LSZ1 sewing machine last year.
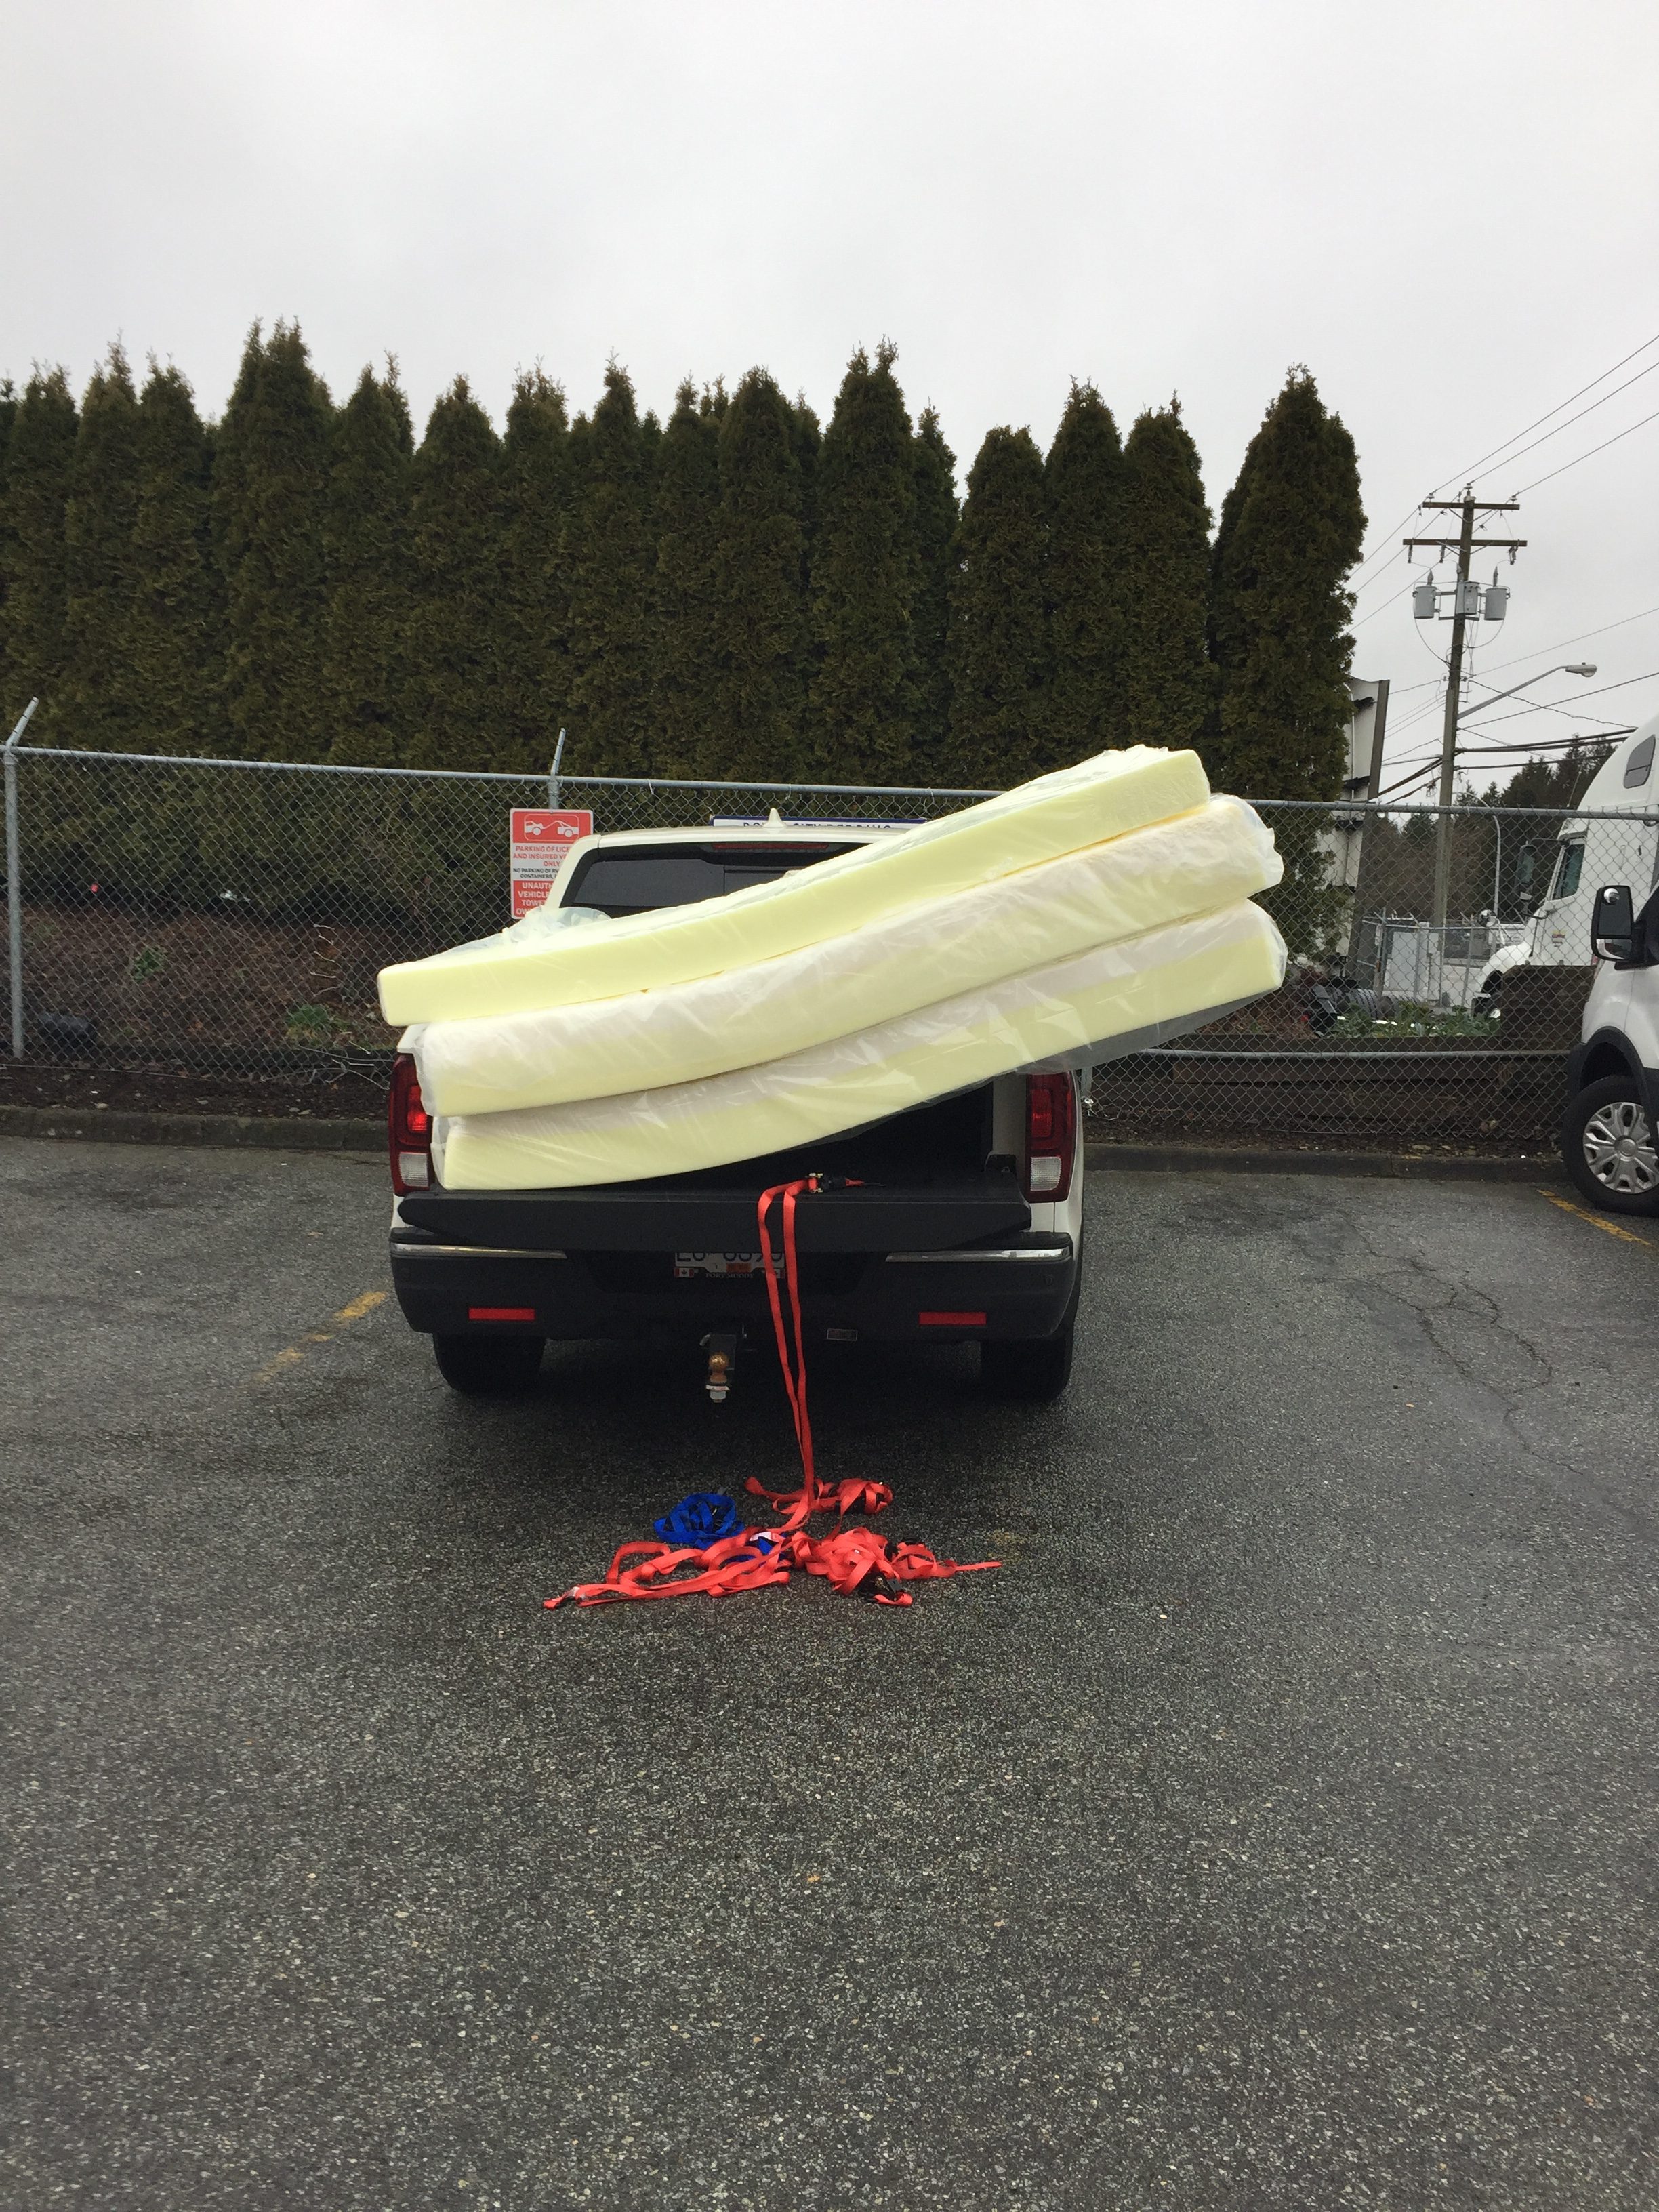
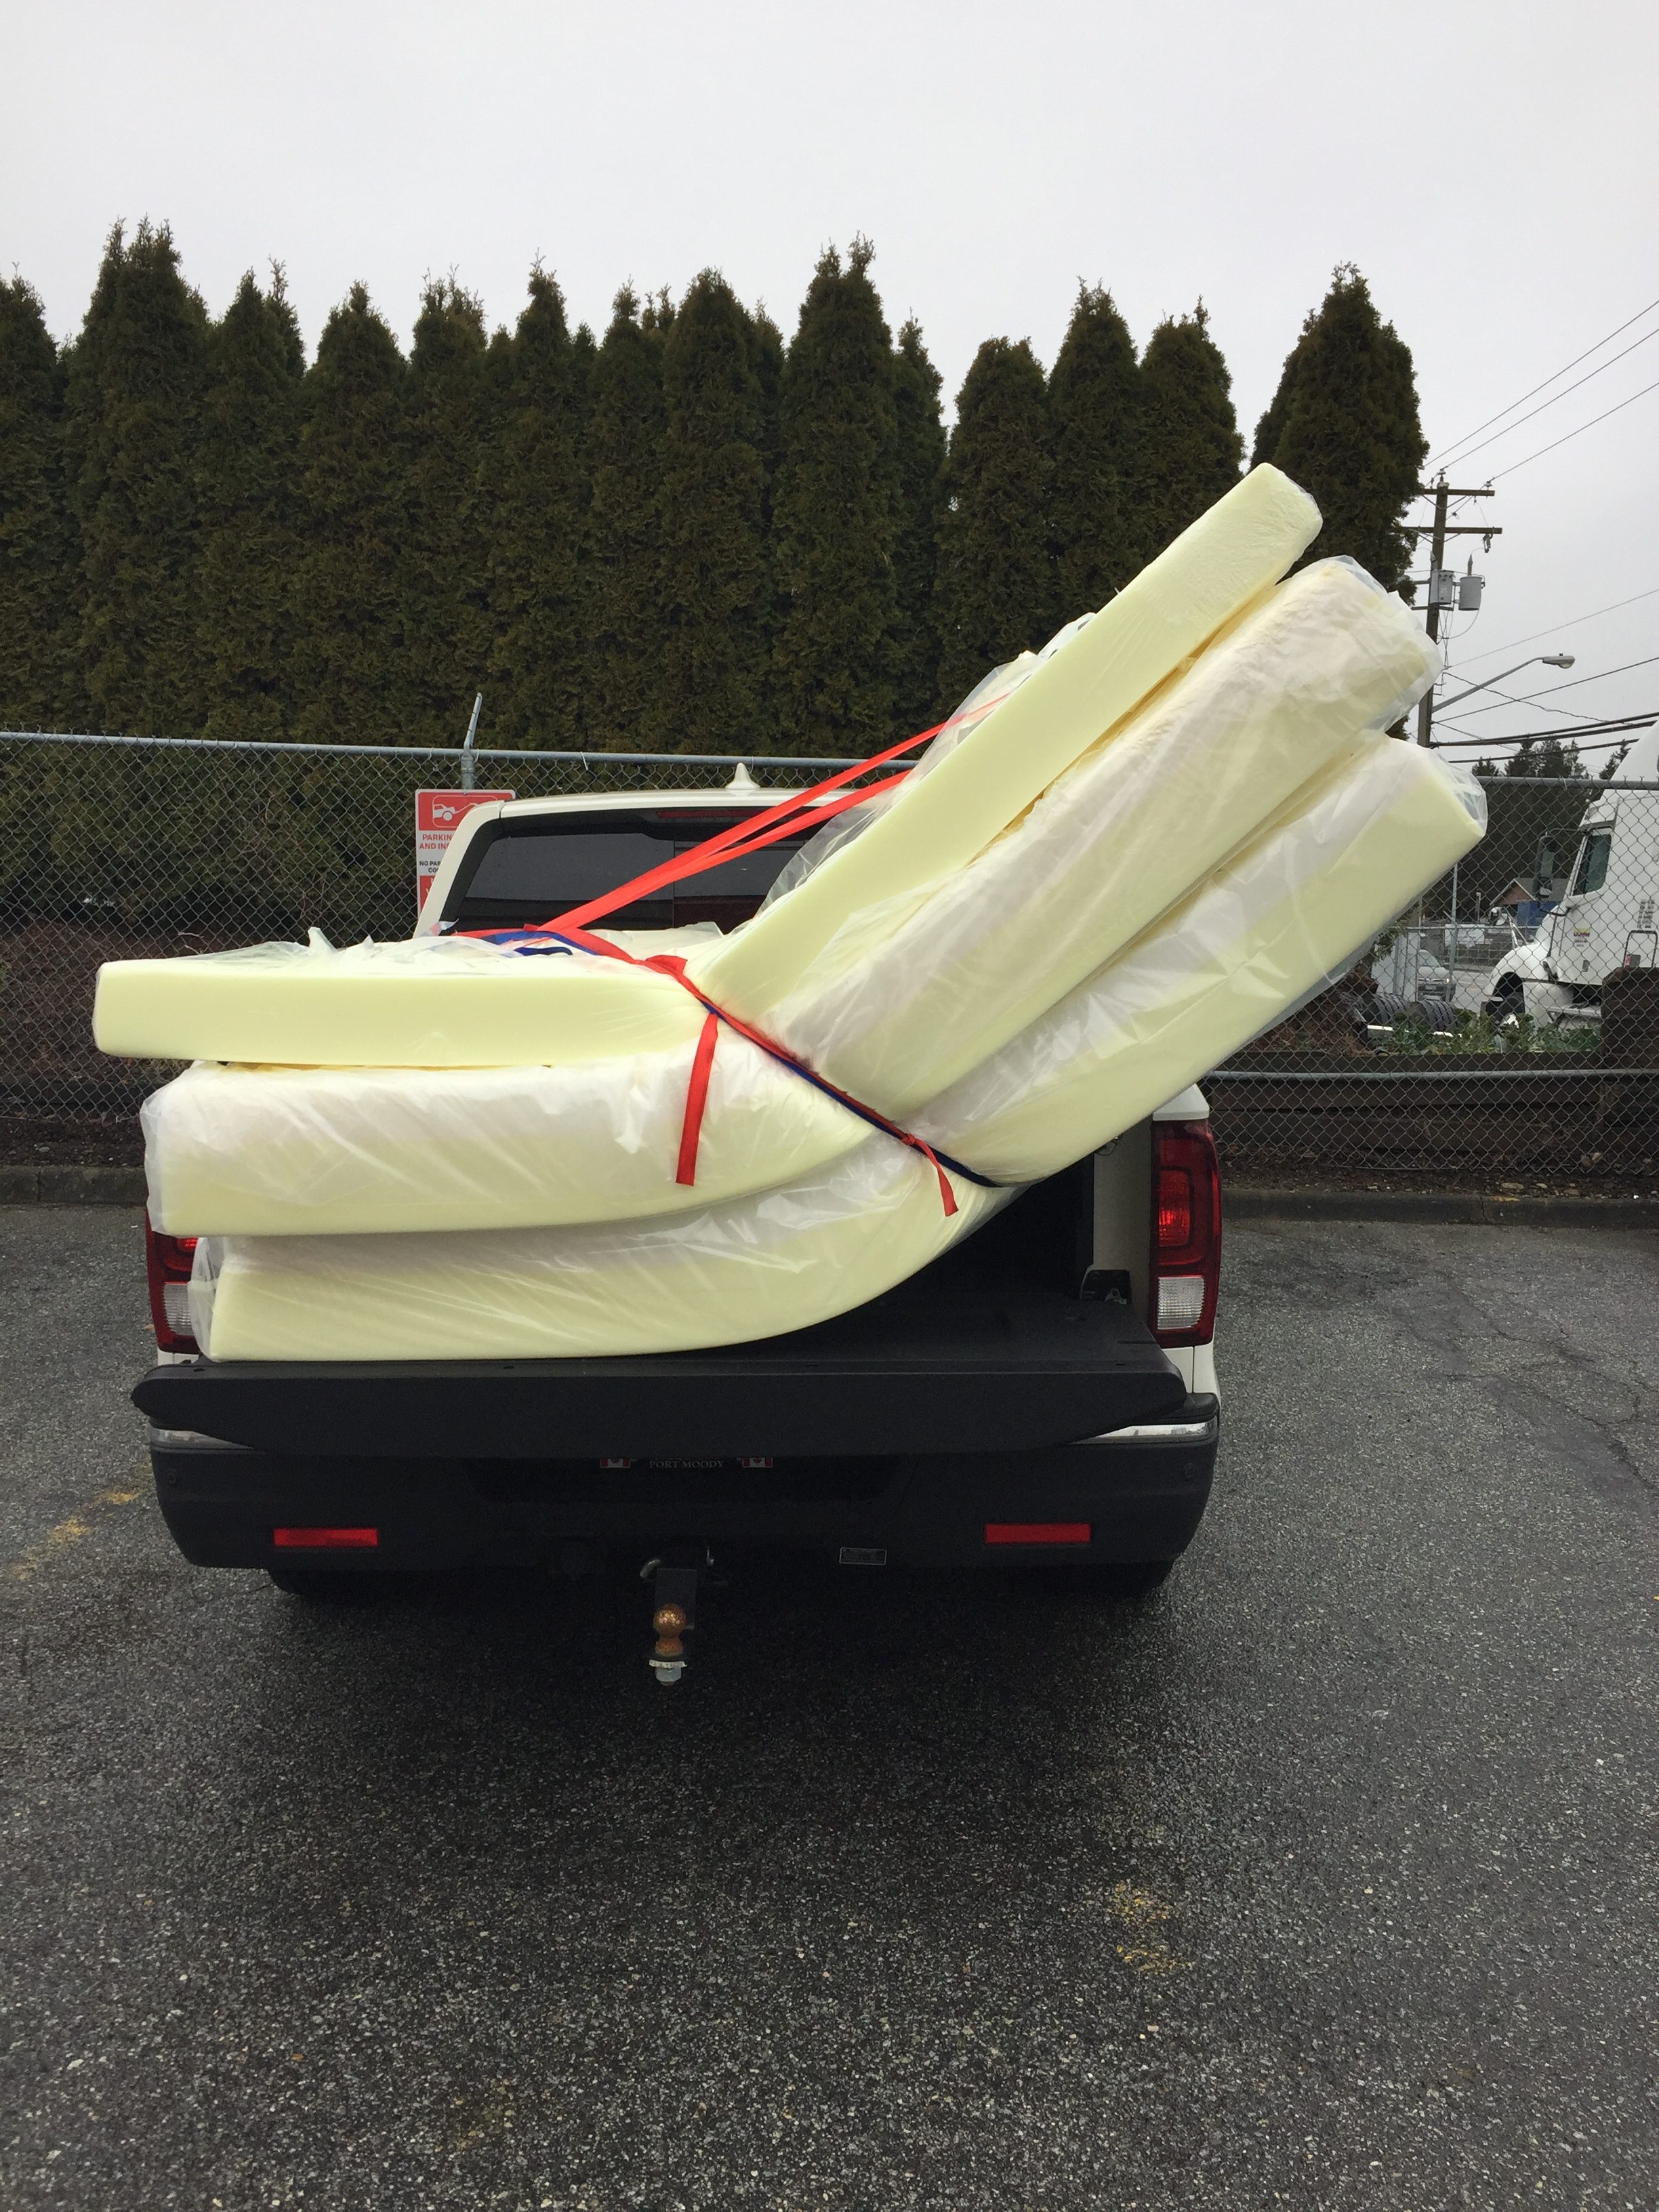
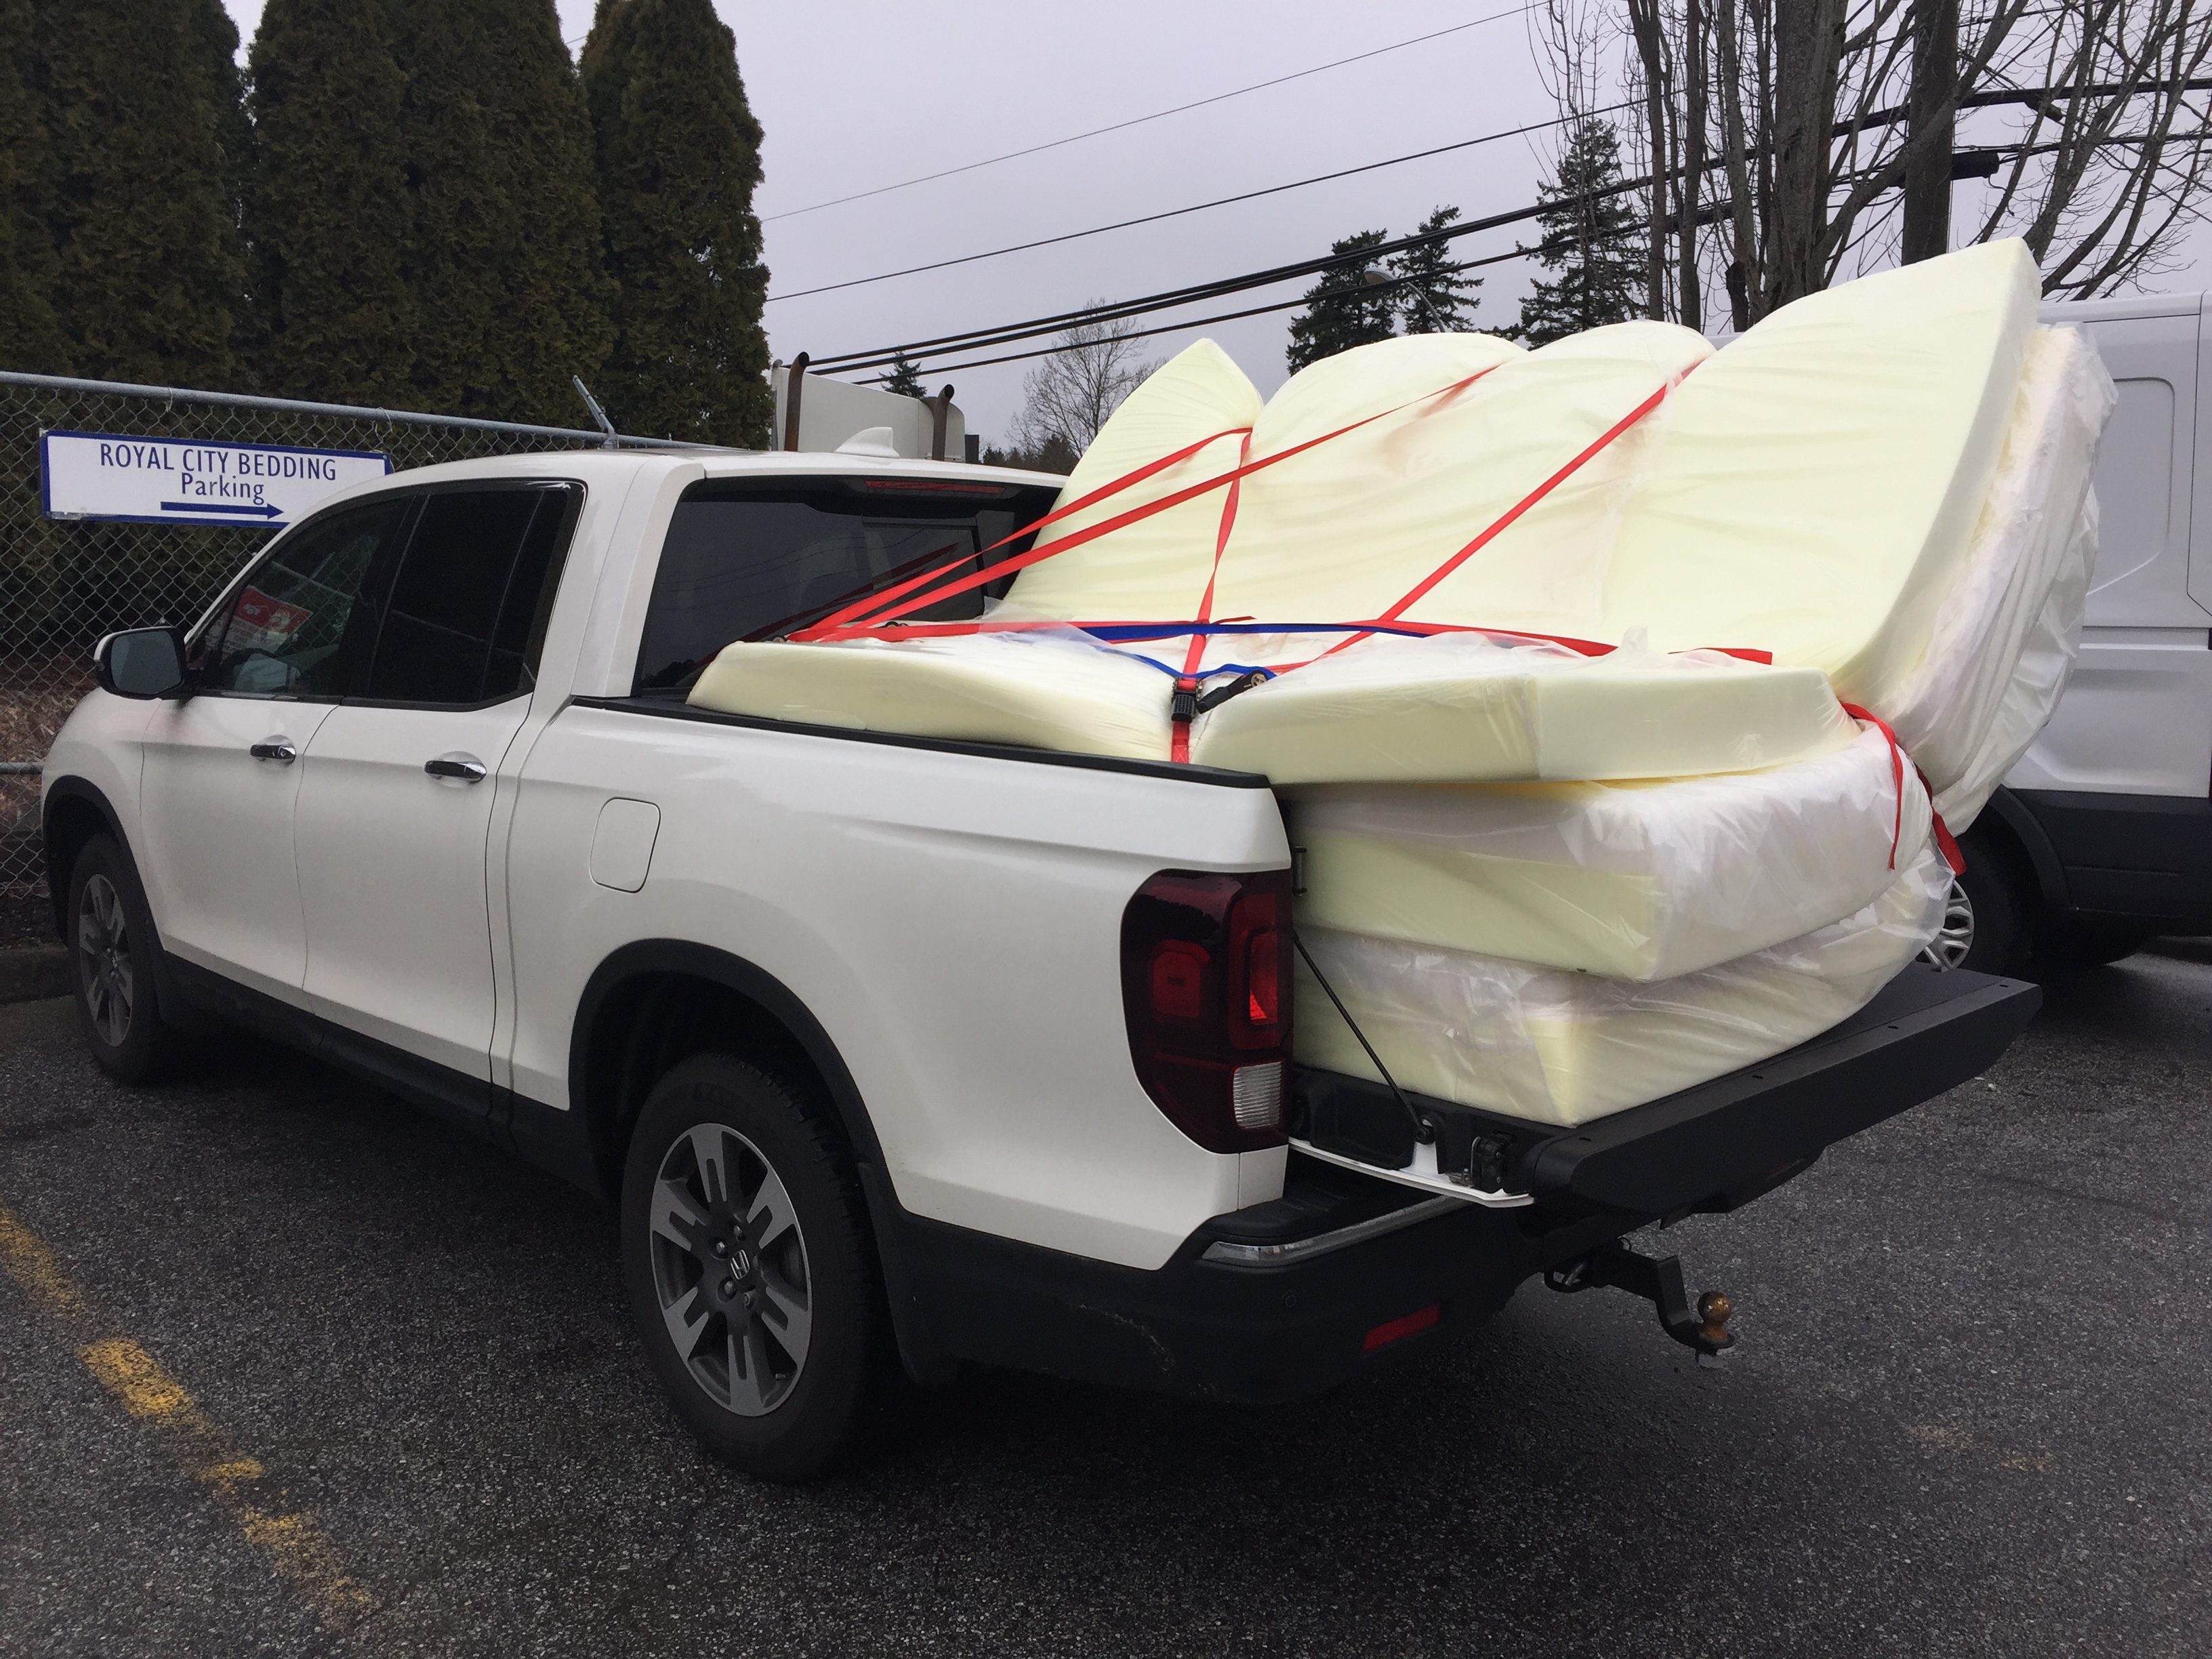
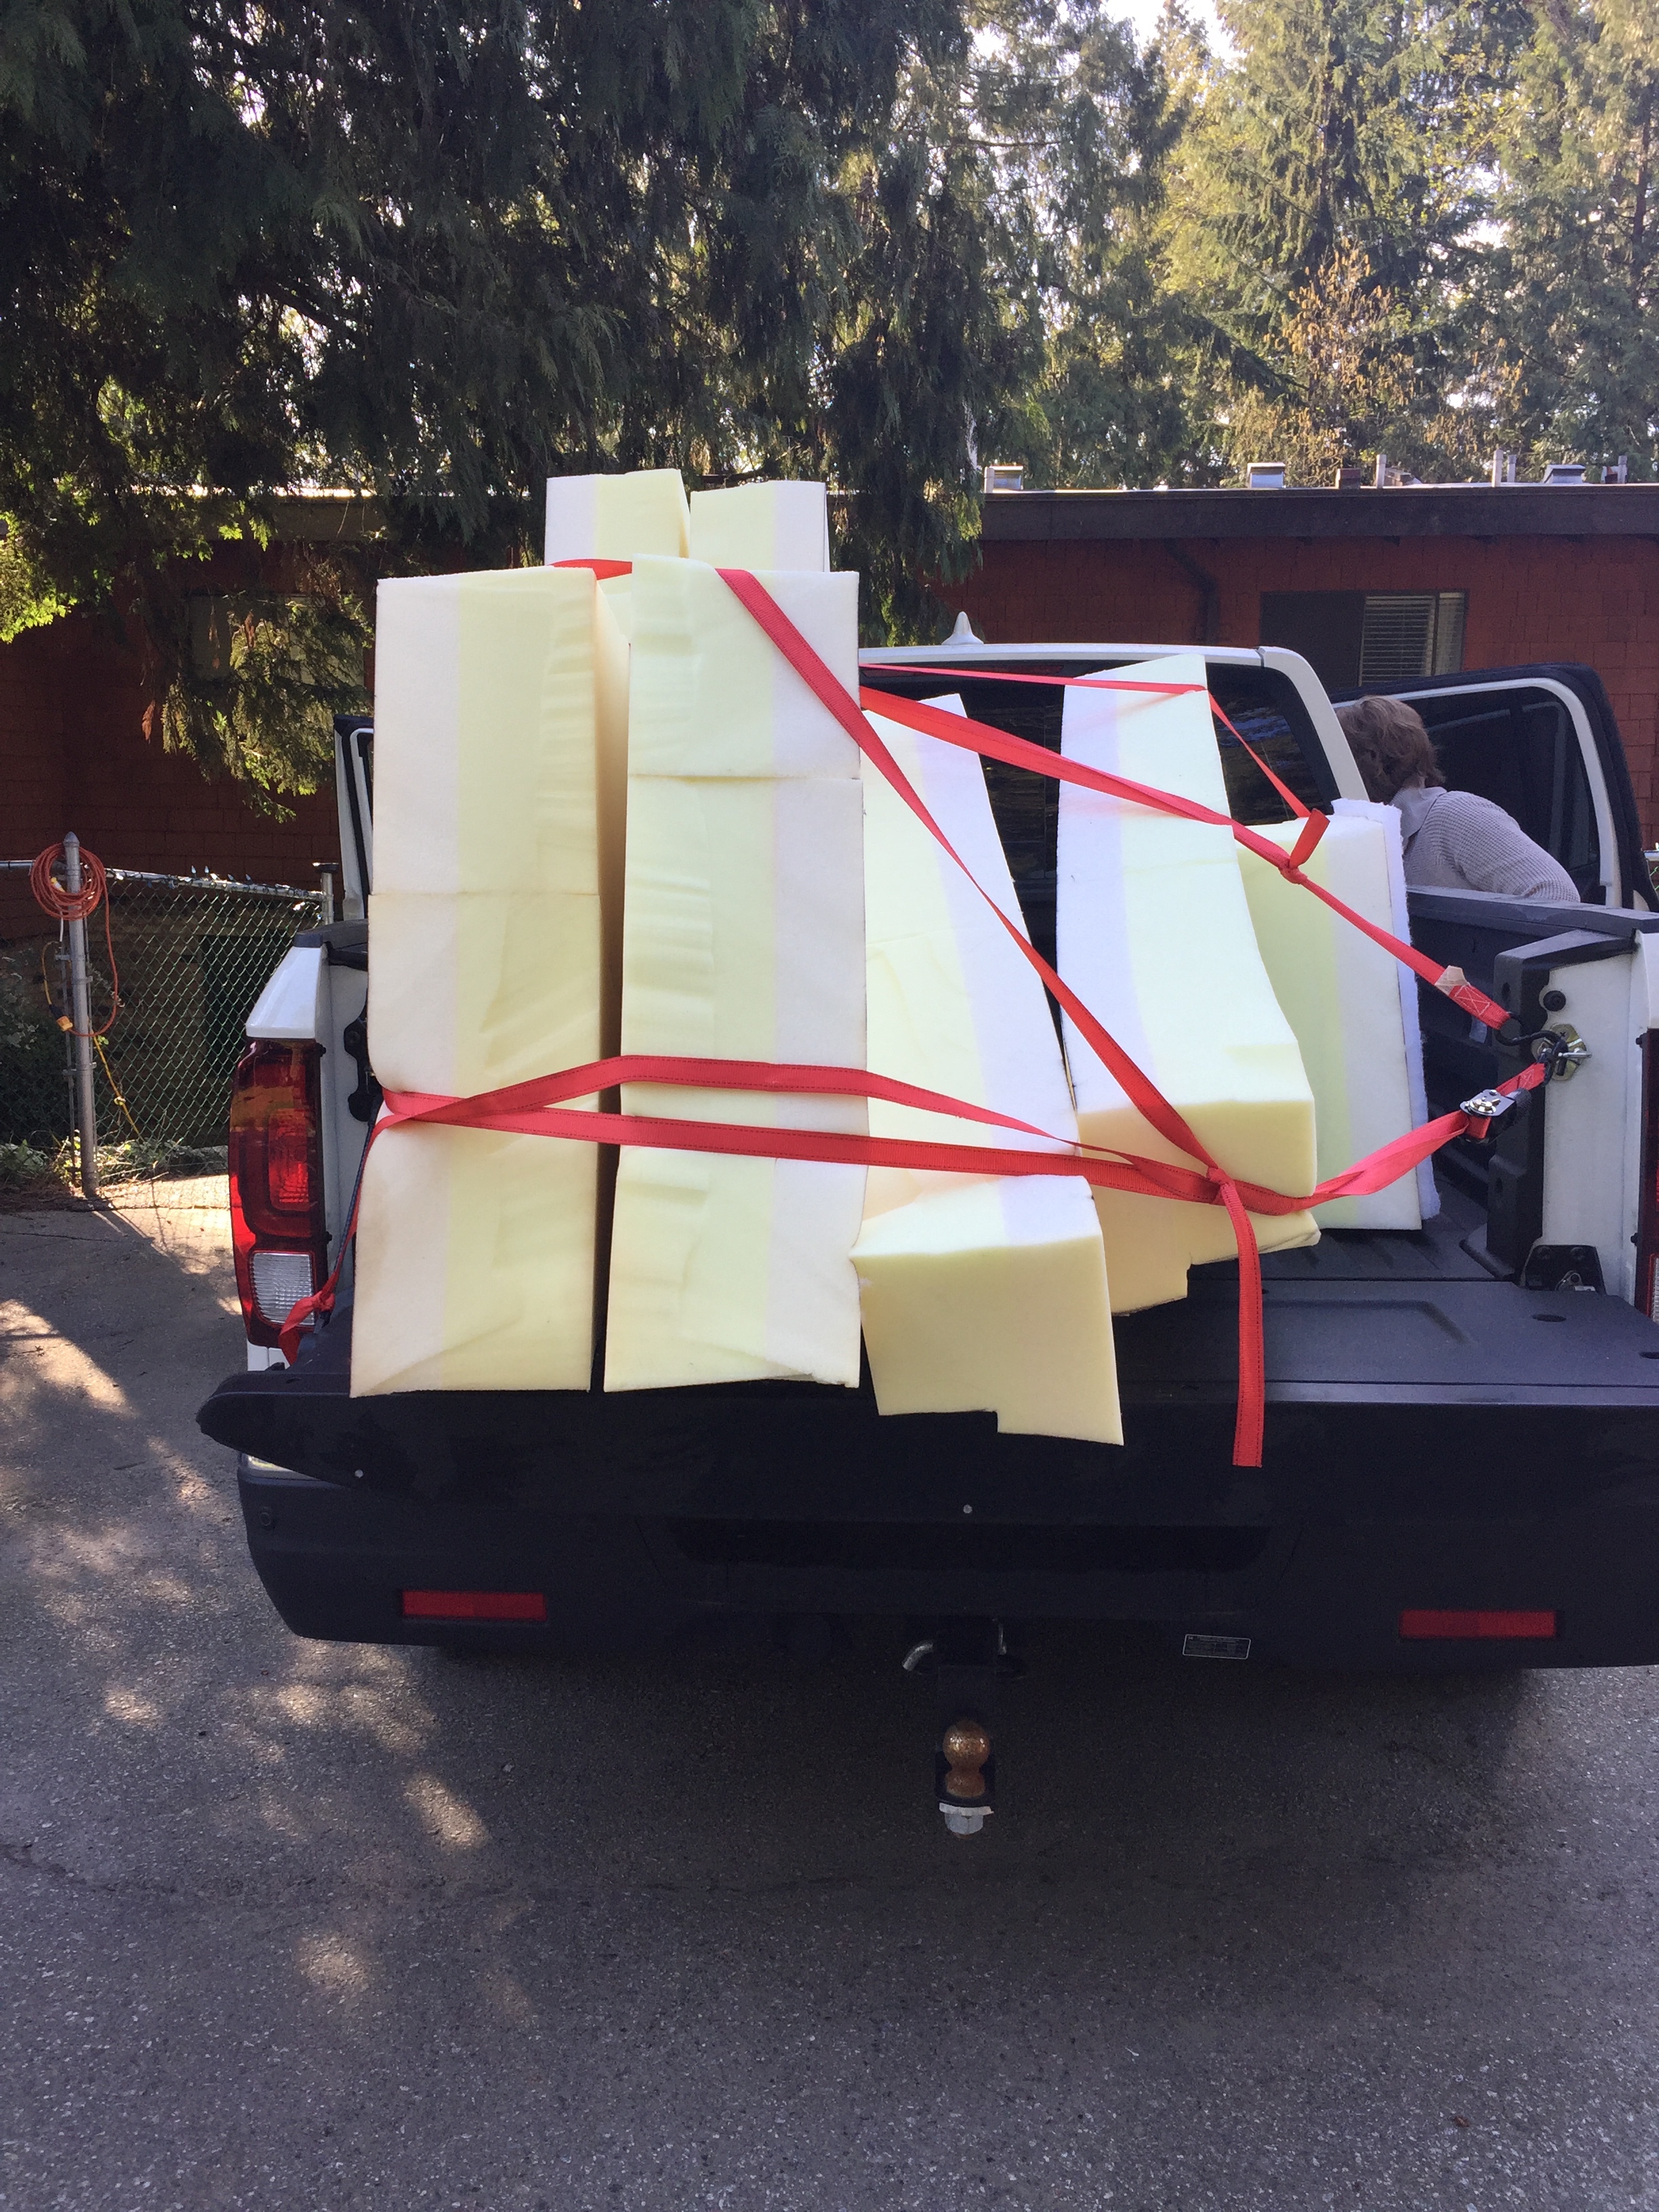
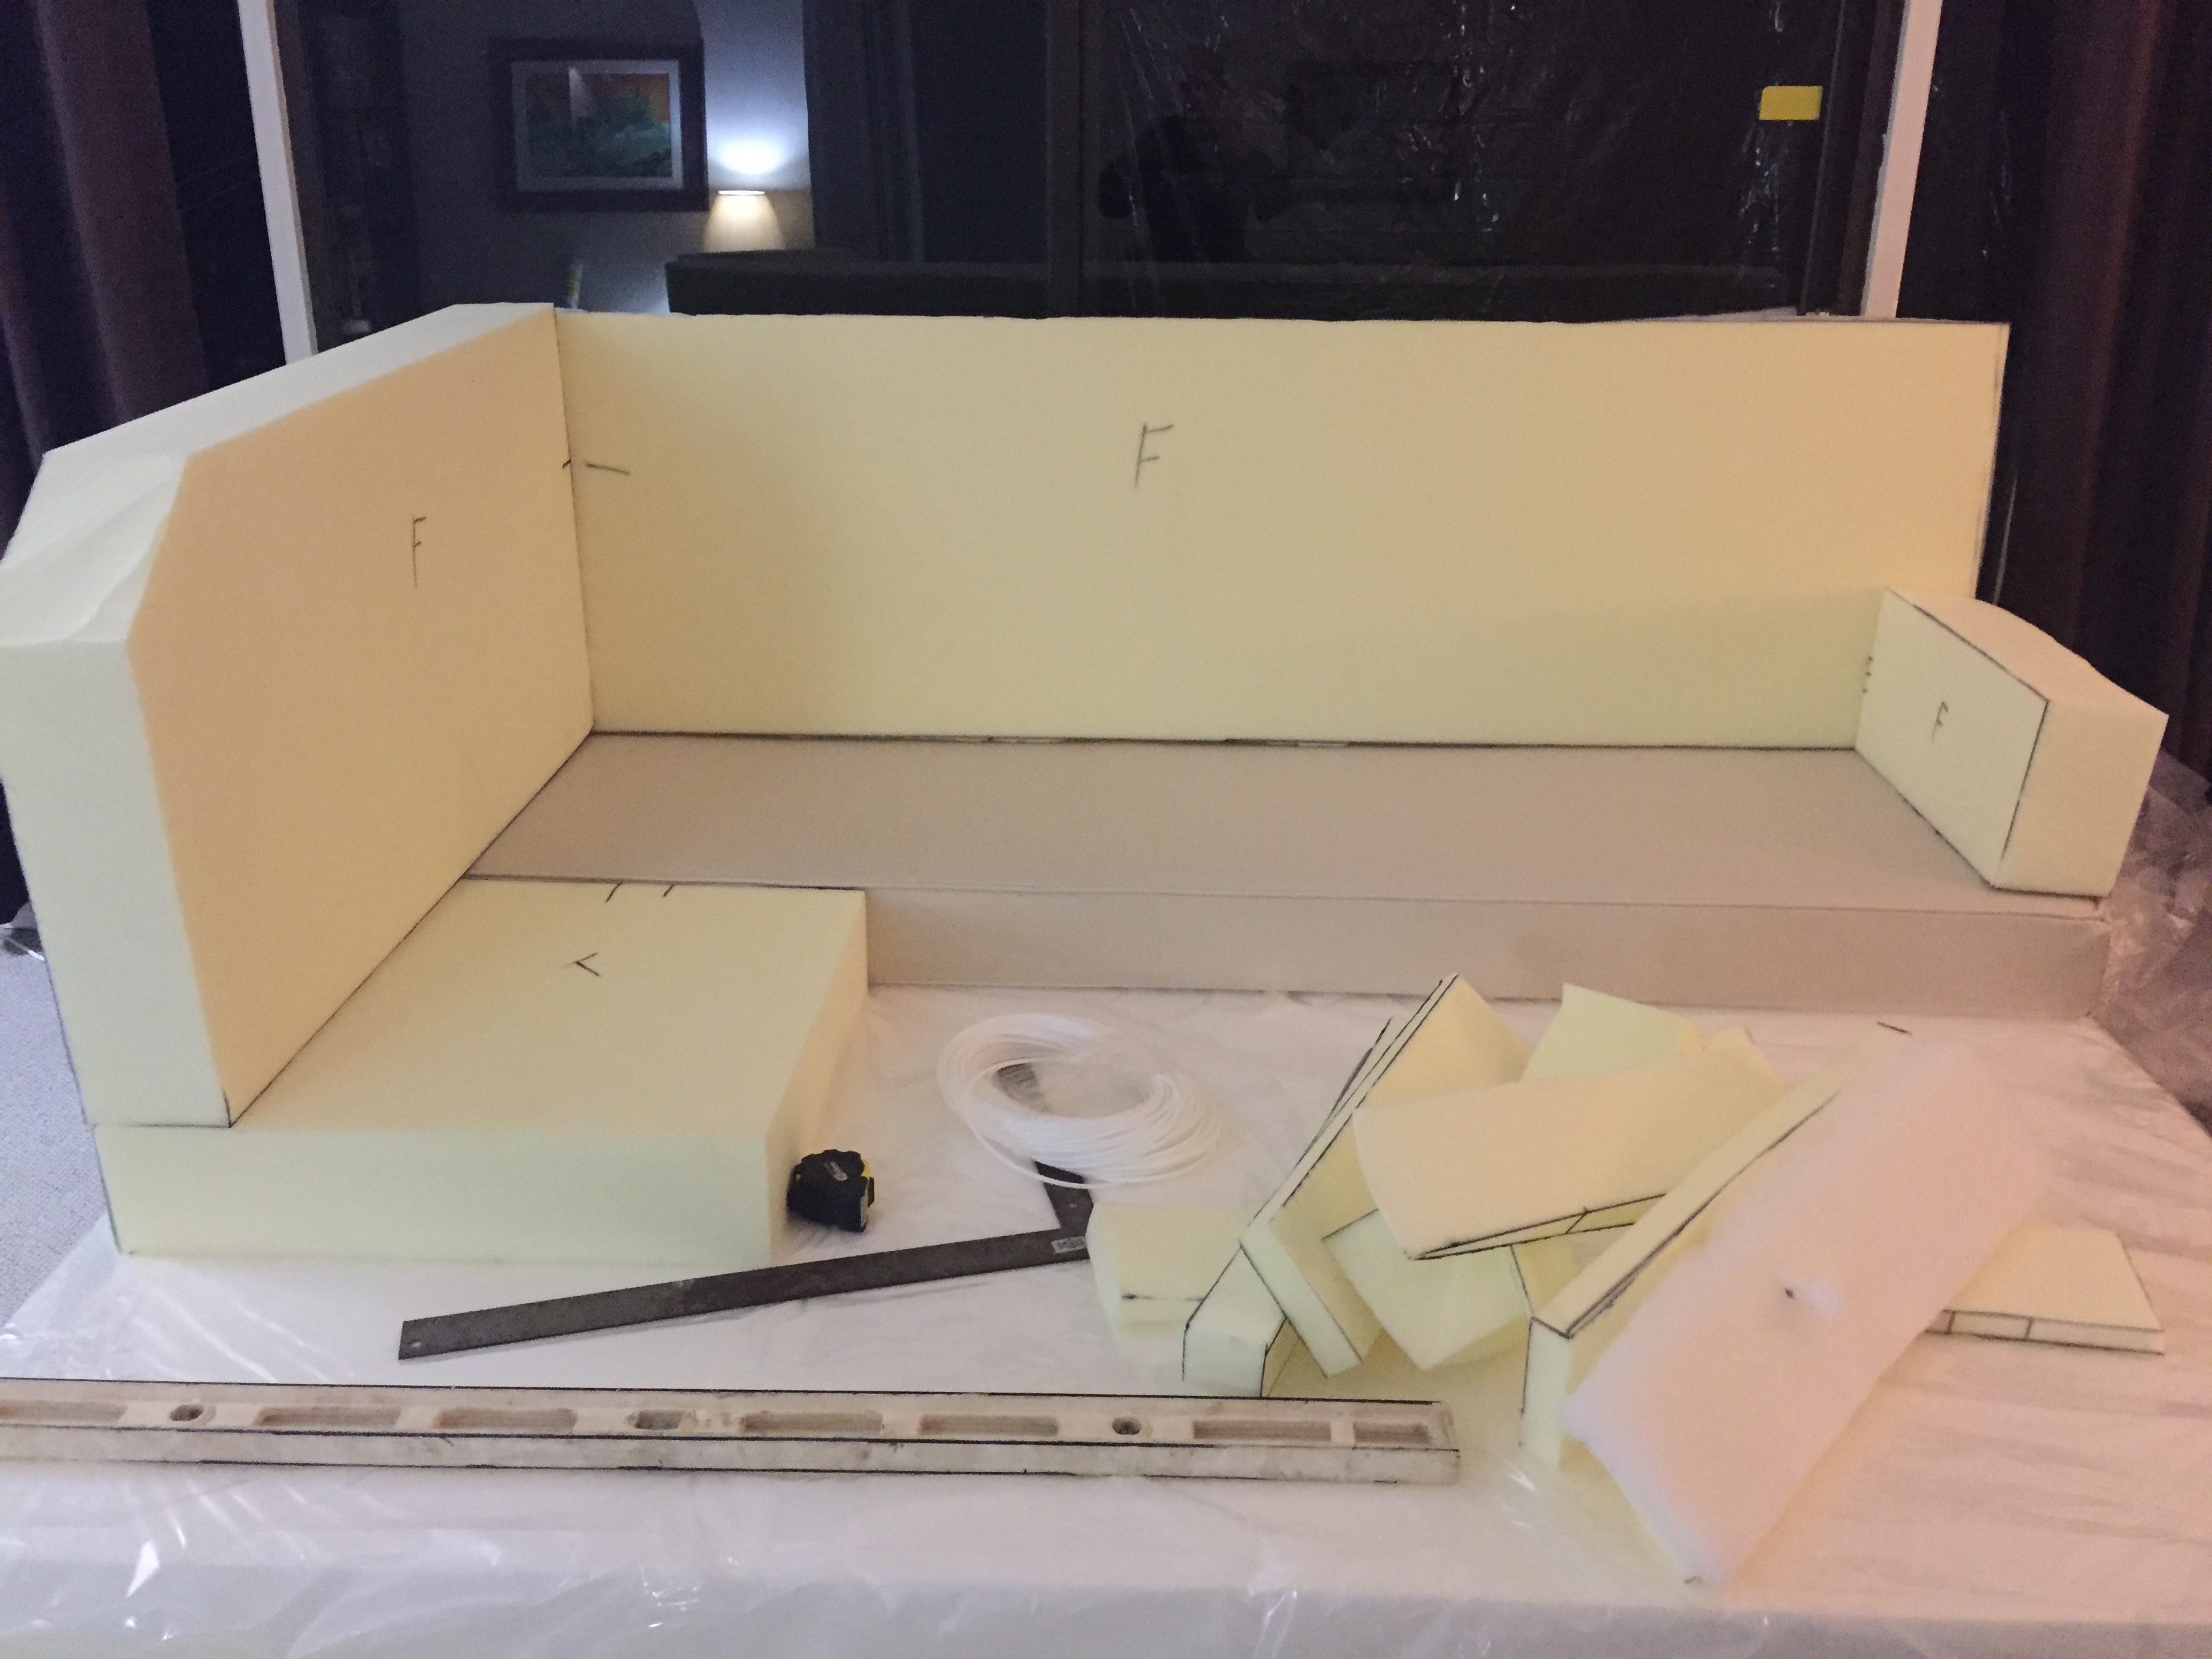
2 years ago at the boat show we picked the foam we were going to use and this year we purchased it. The aft cabin and the v berth will have 8 inches of foam, 5 inches of a firmer foam and 3 inches of a softer foam glued together. The main salon has 5 inches of the harder foam. We went with a harder foam in the main salon to deter extra over night guests, joke 🙂 , because we wanted the cushions to last as long as possible and we all know that in time they will soften.
Fitting 3 King size pieces of foam, 2 8″ thick and one 5″ thick into my truck was a little challenging, but we managed.
I have made cushions for boats in the past but on a home sewing machine and just reusing the old foam. They didn’t look too bad but they were very simple boxes and there was a lot of room for improvement. The second time I made them, for our Alberg 30, we paid to have the main salon cushions made and were less than impressed so I made the v berth. This time, I guess I am putting my money where my mouth is, and doing ALL of the cushions/mattresses.
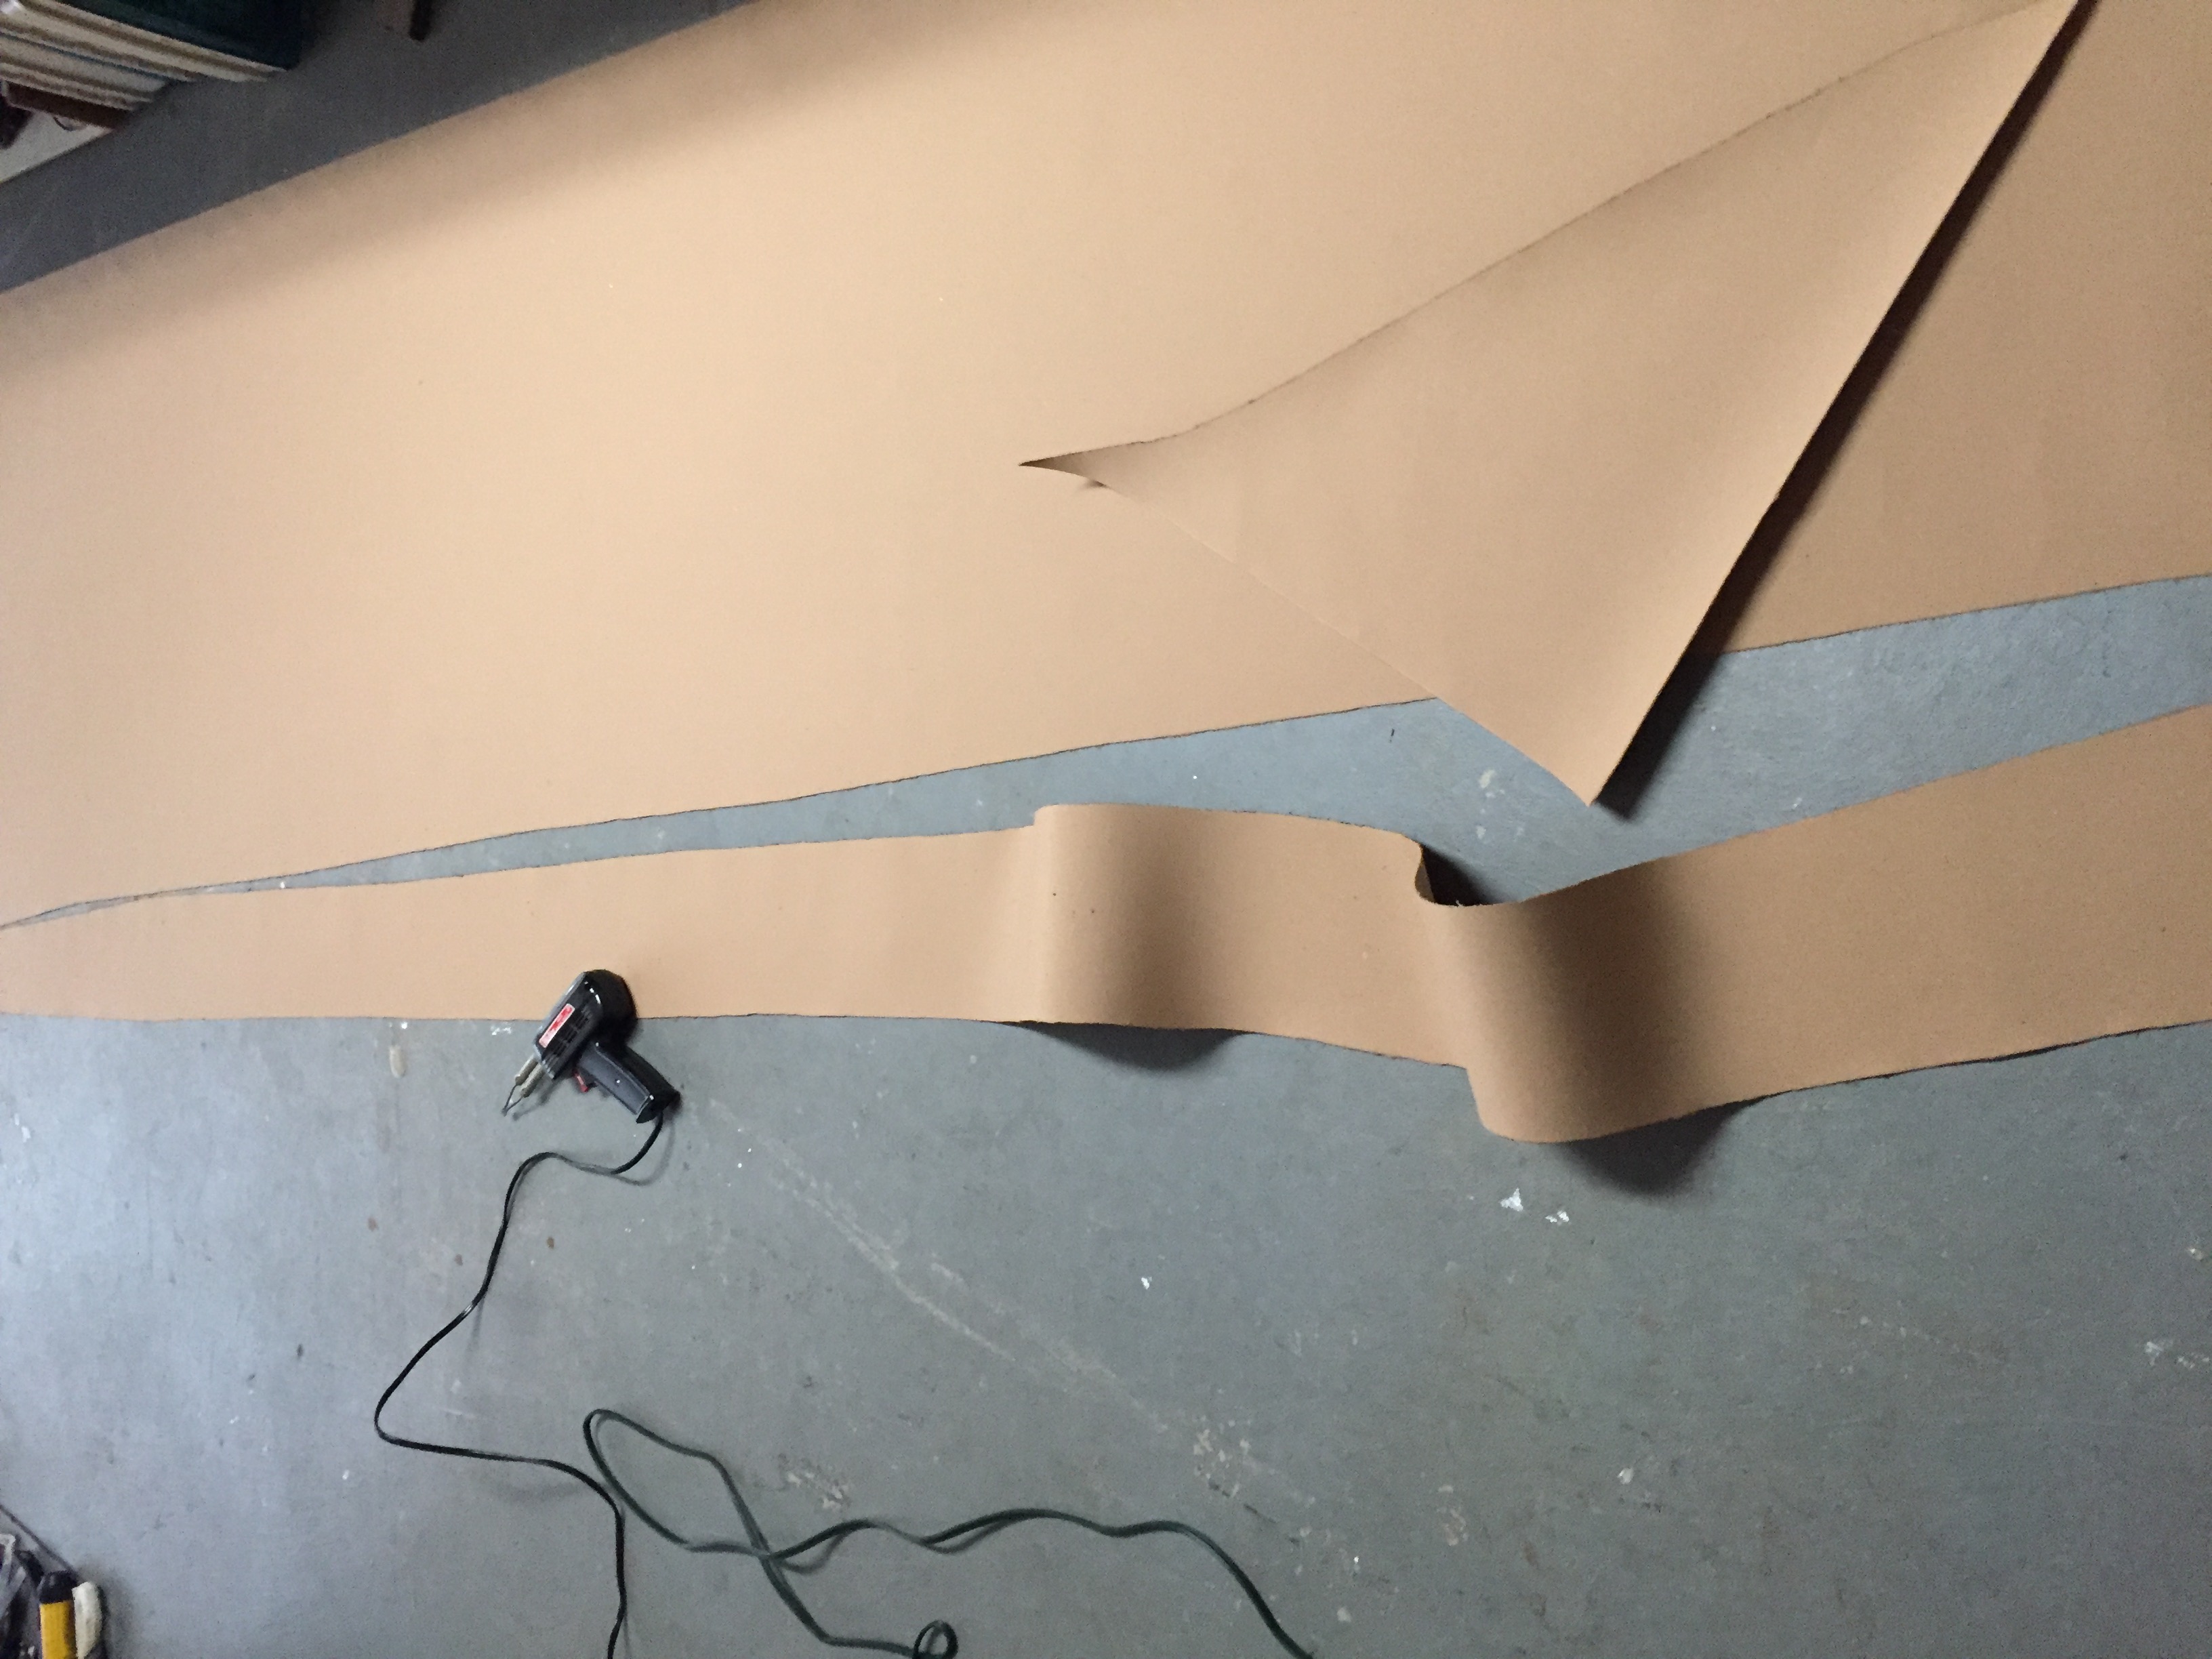
The first part of course is cutting the foam to size.
These pieces are the main salon settee and the Nav station.
I had rough plans but needed to take exact measurements before cutting. The 5″ foam cut really nice with our electric kitchen knife. We will see how it goes with the 8″ thick.
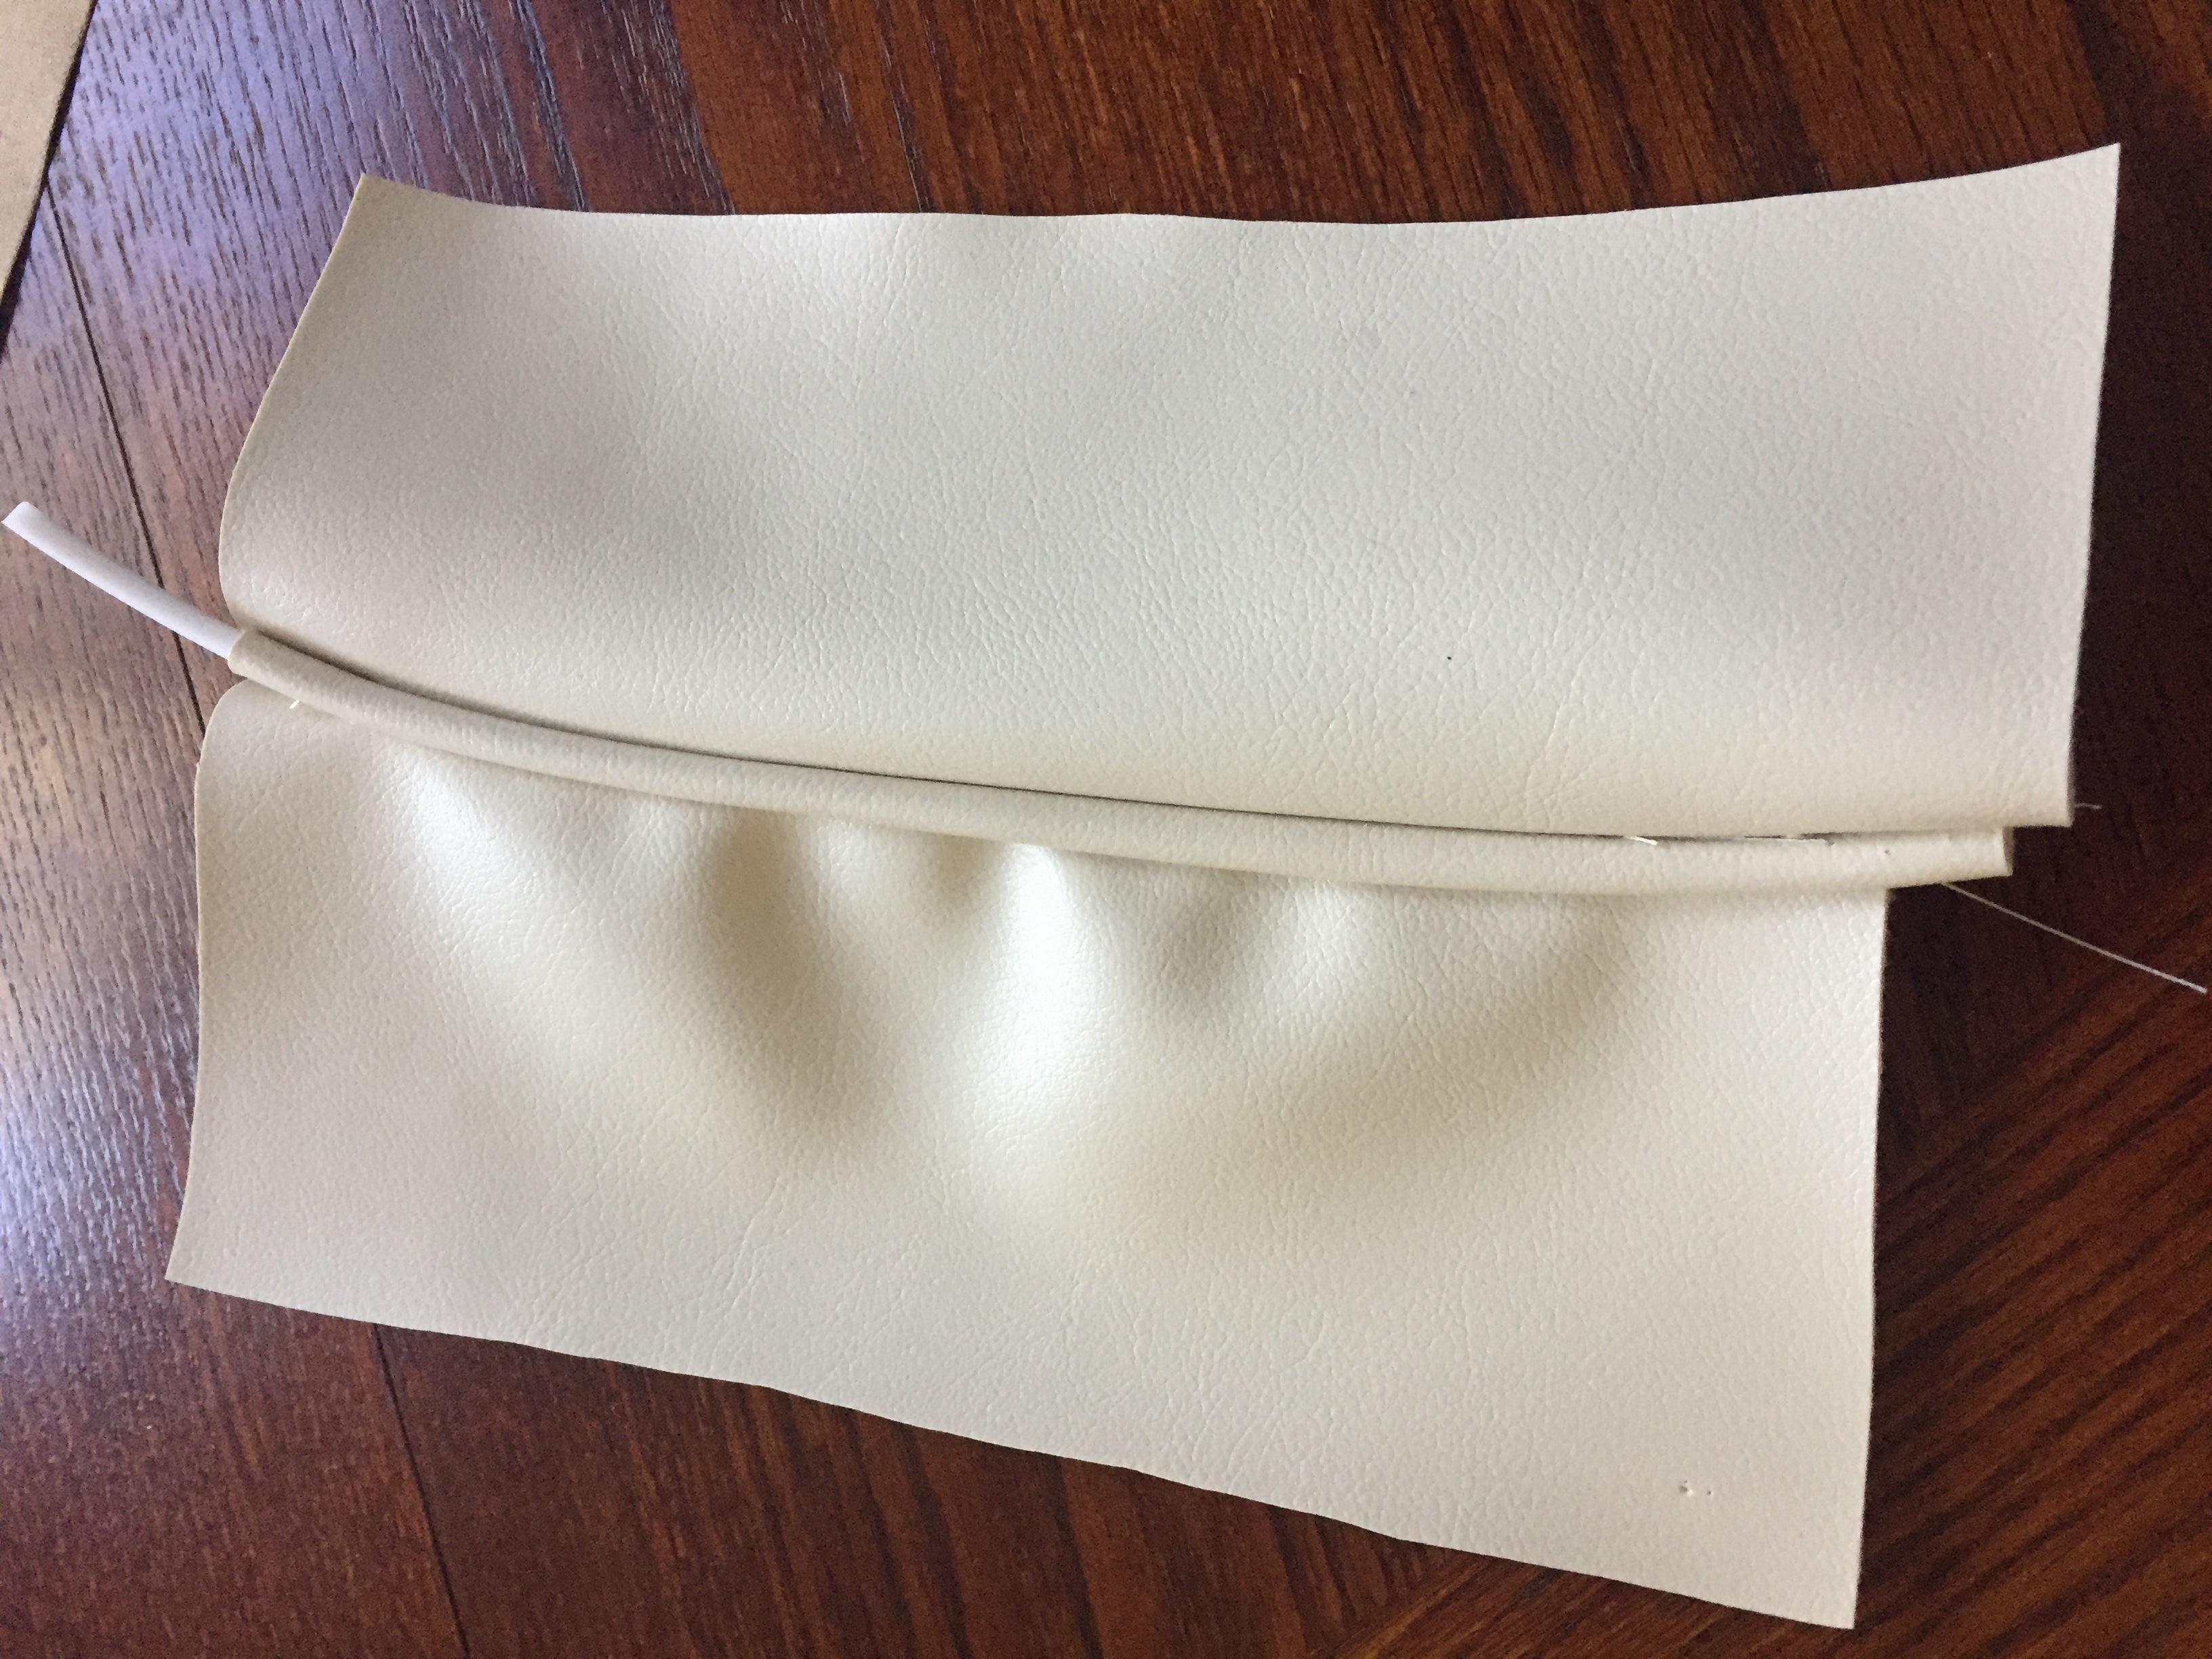
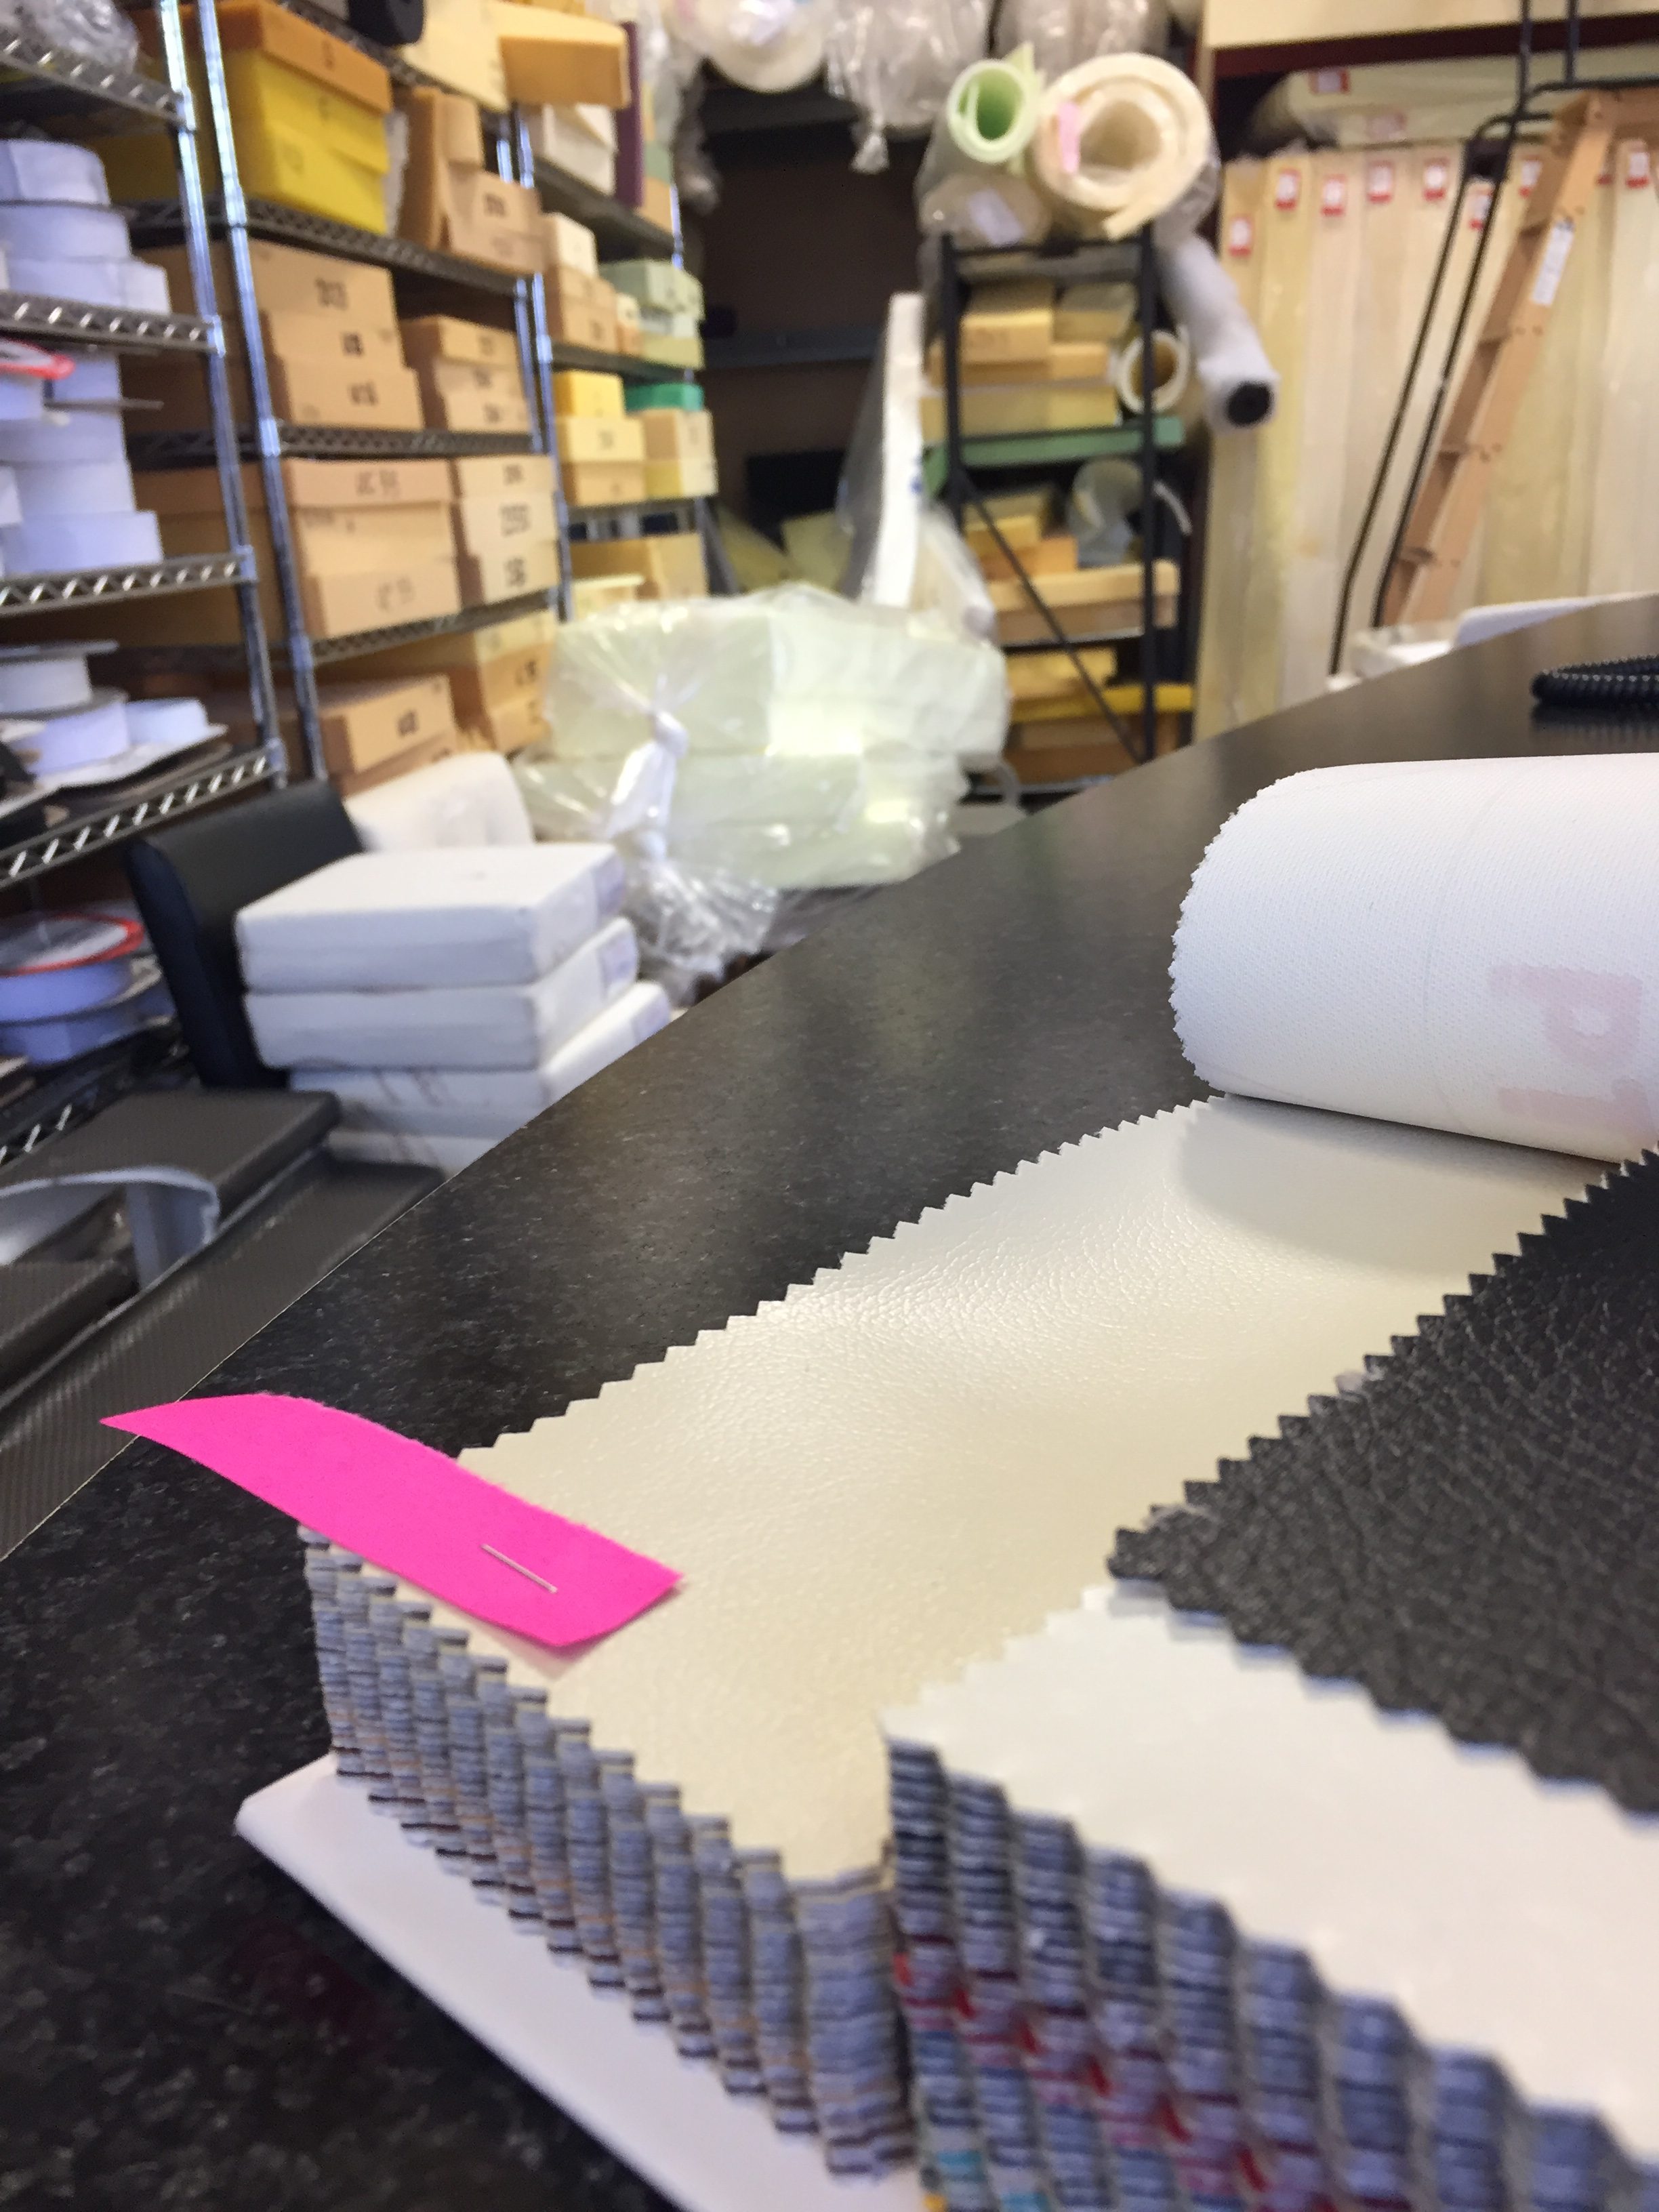
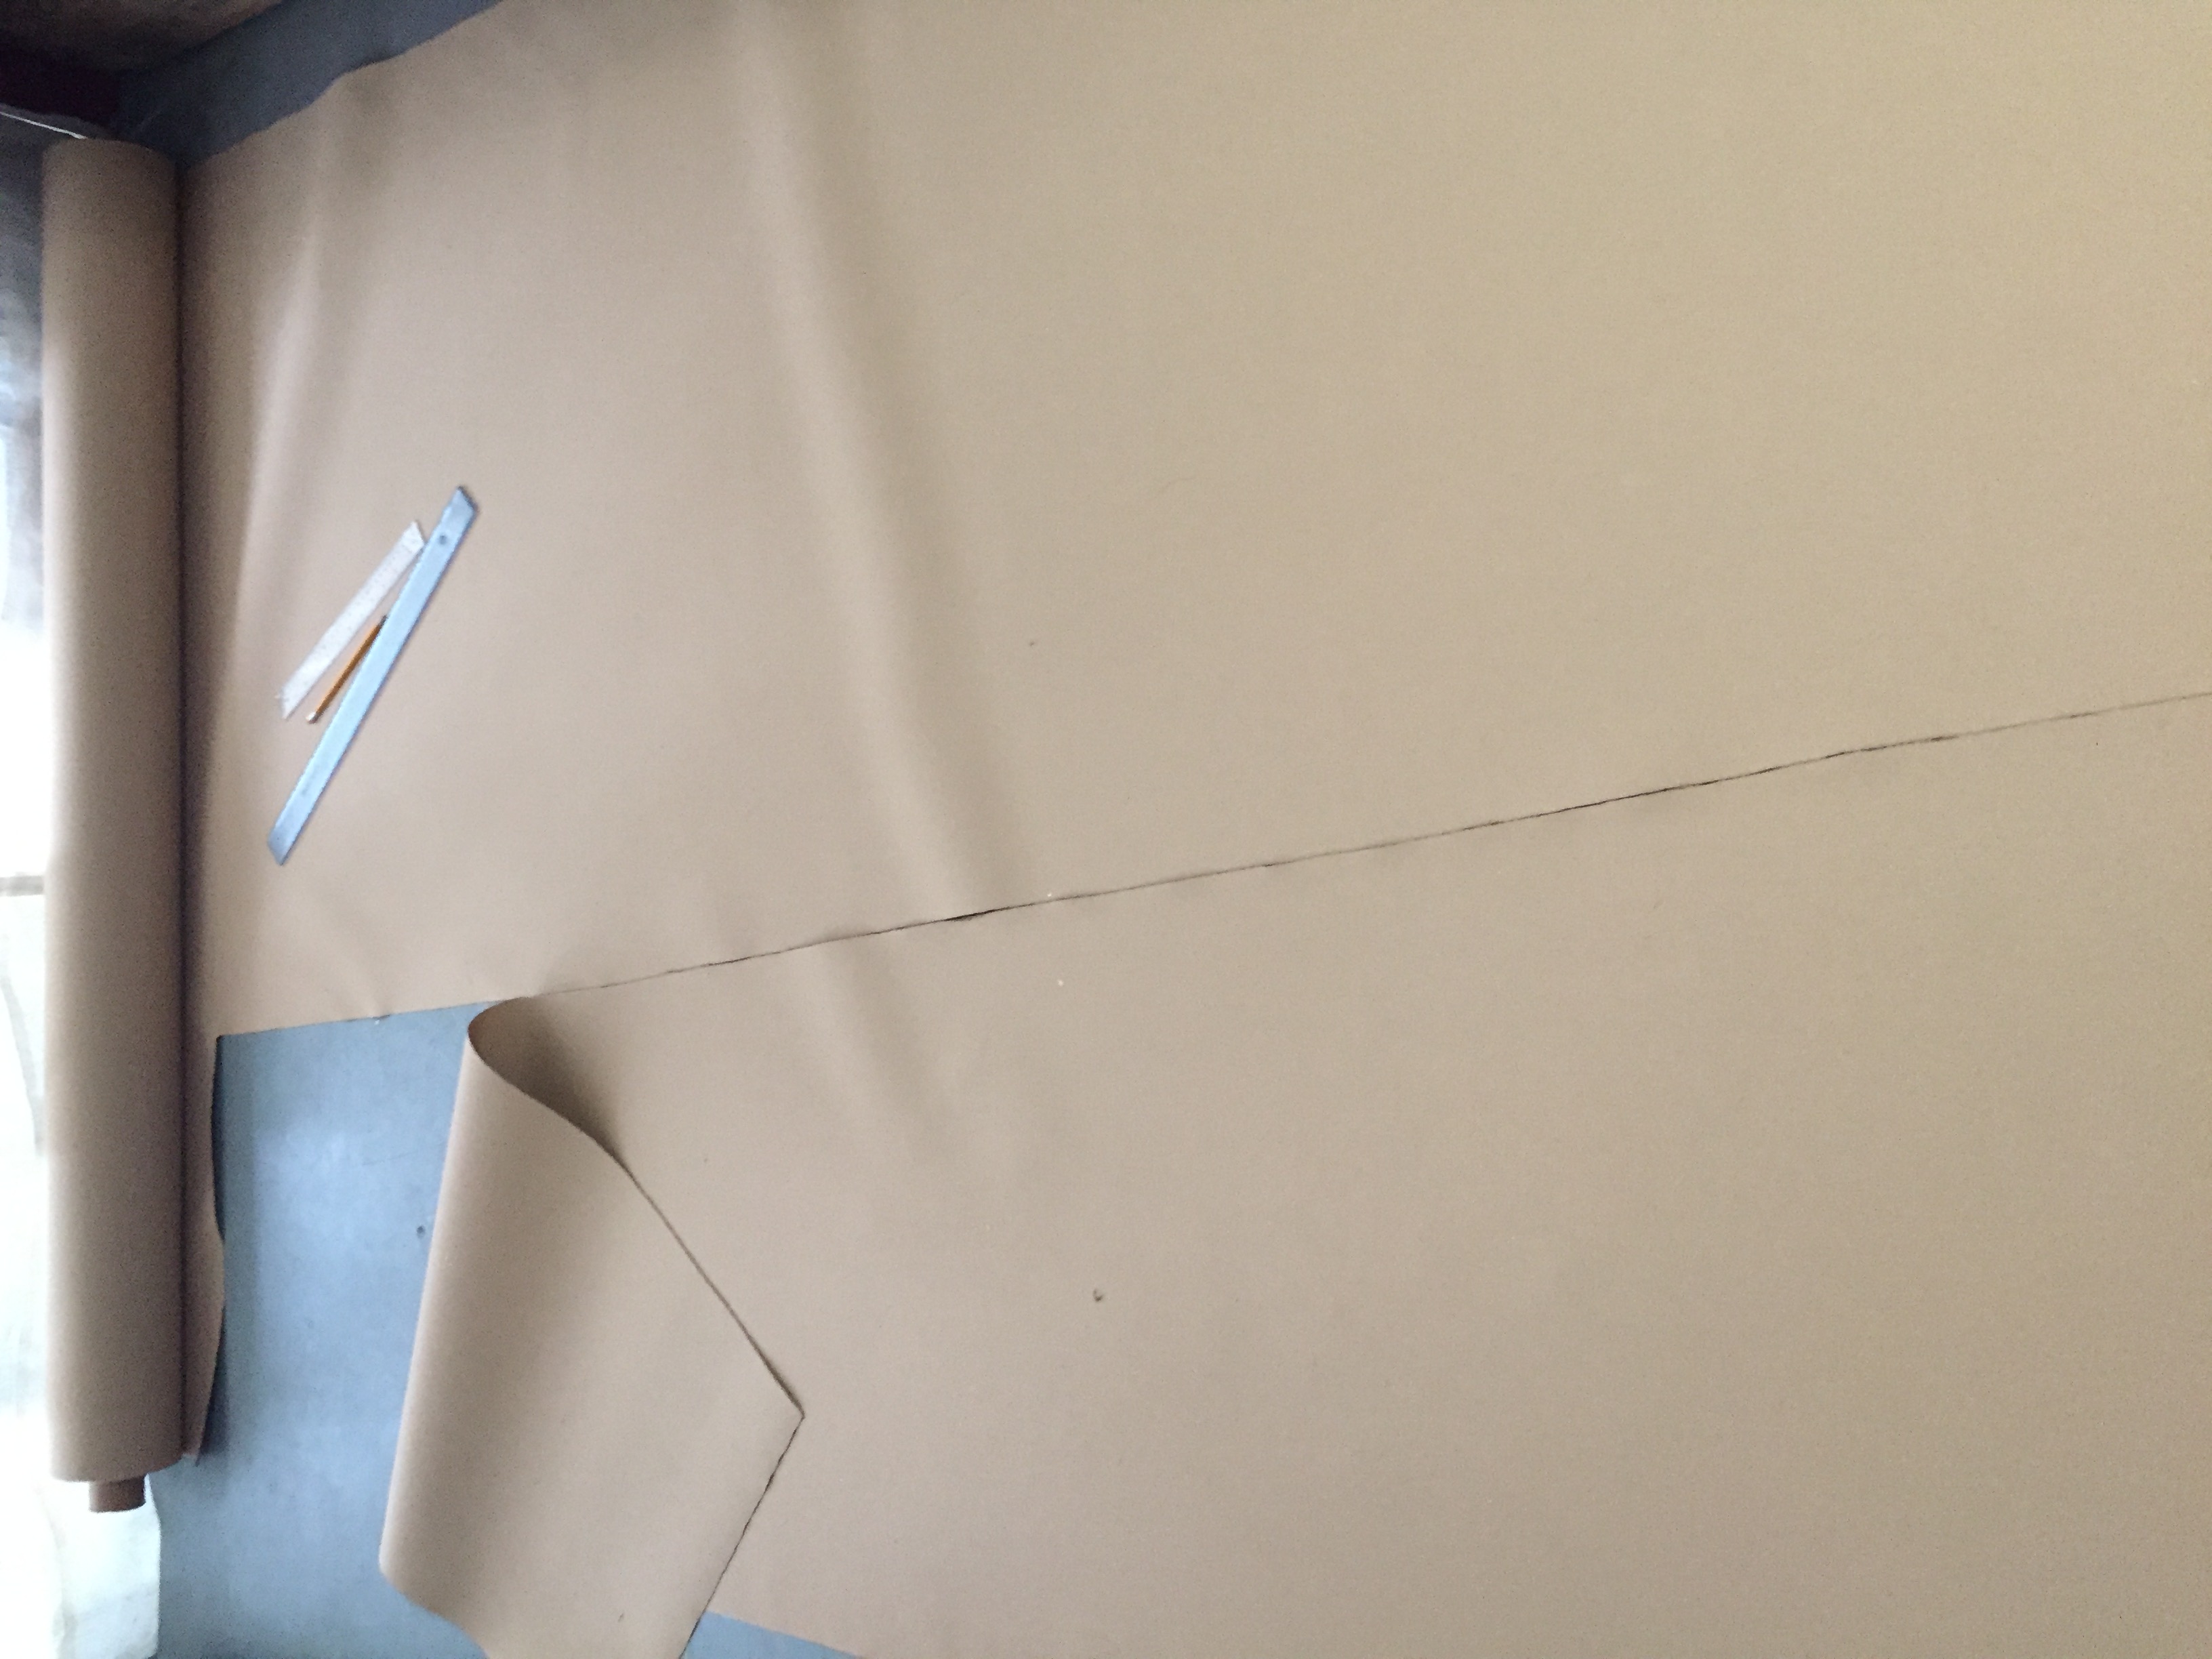
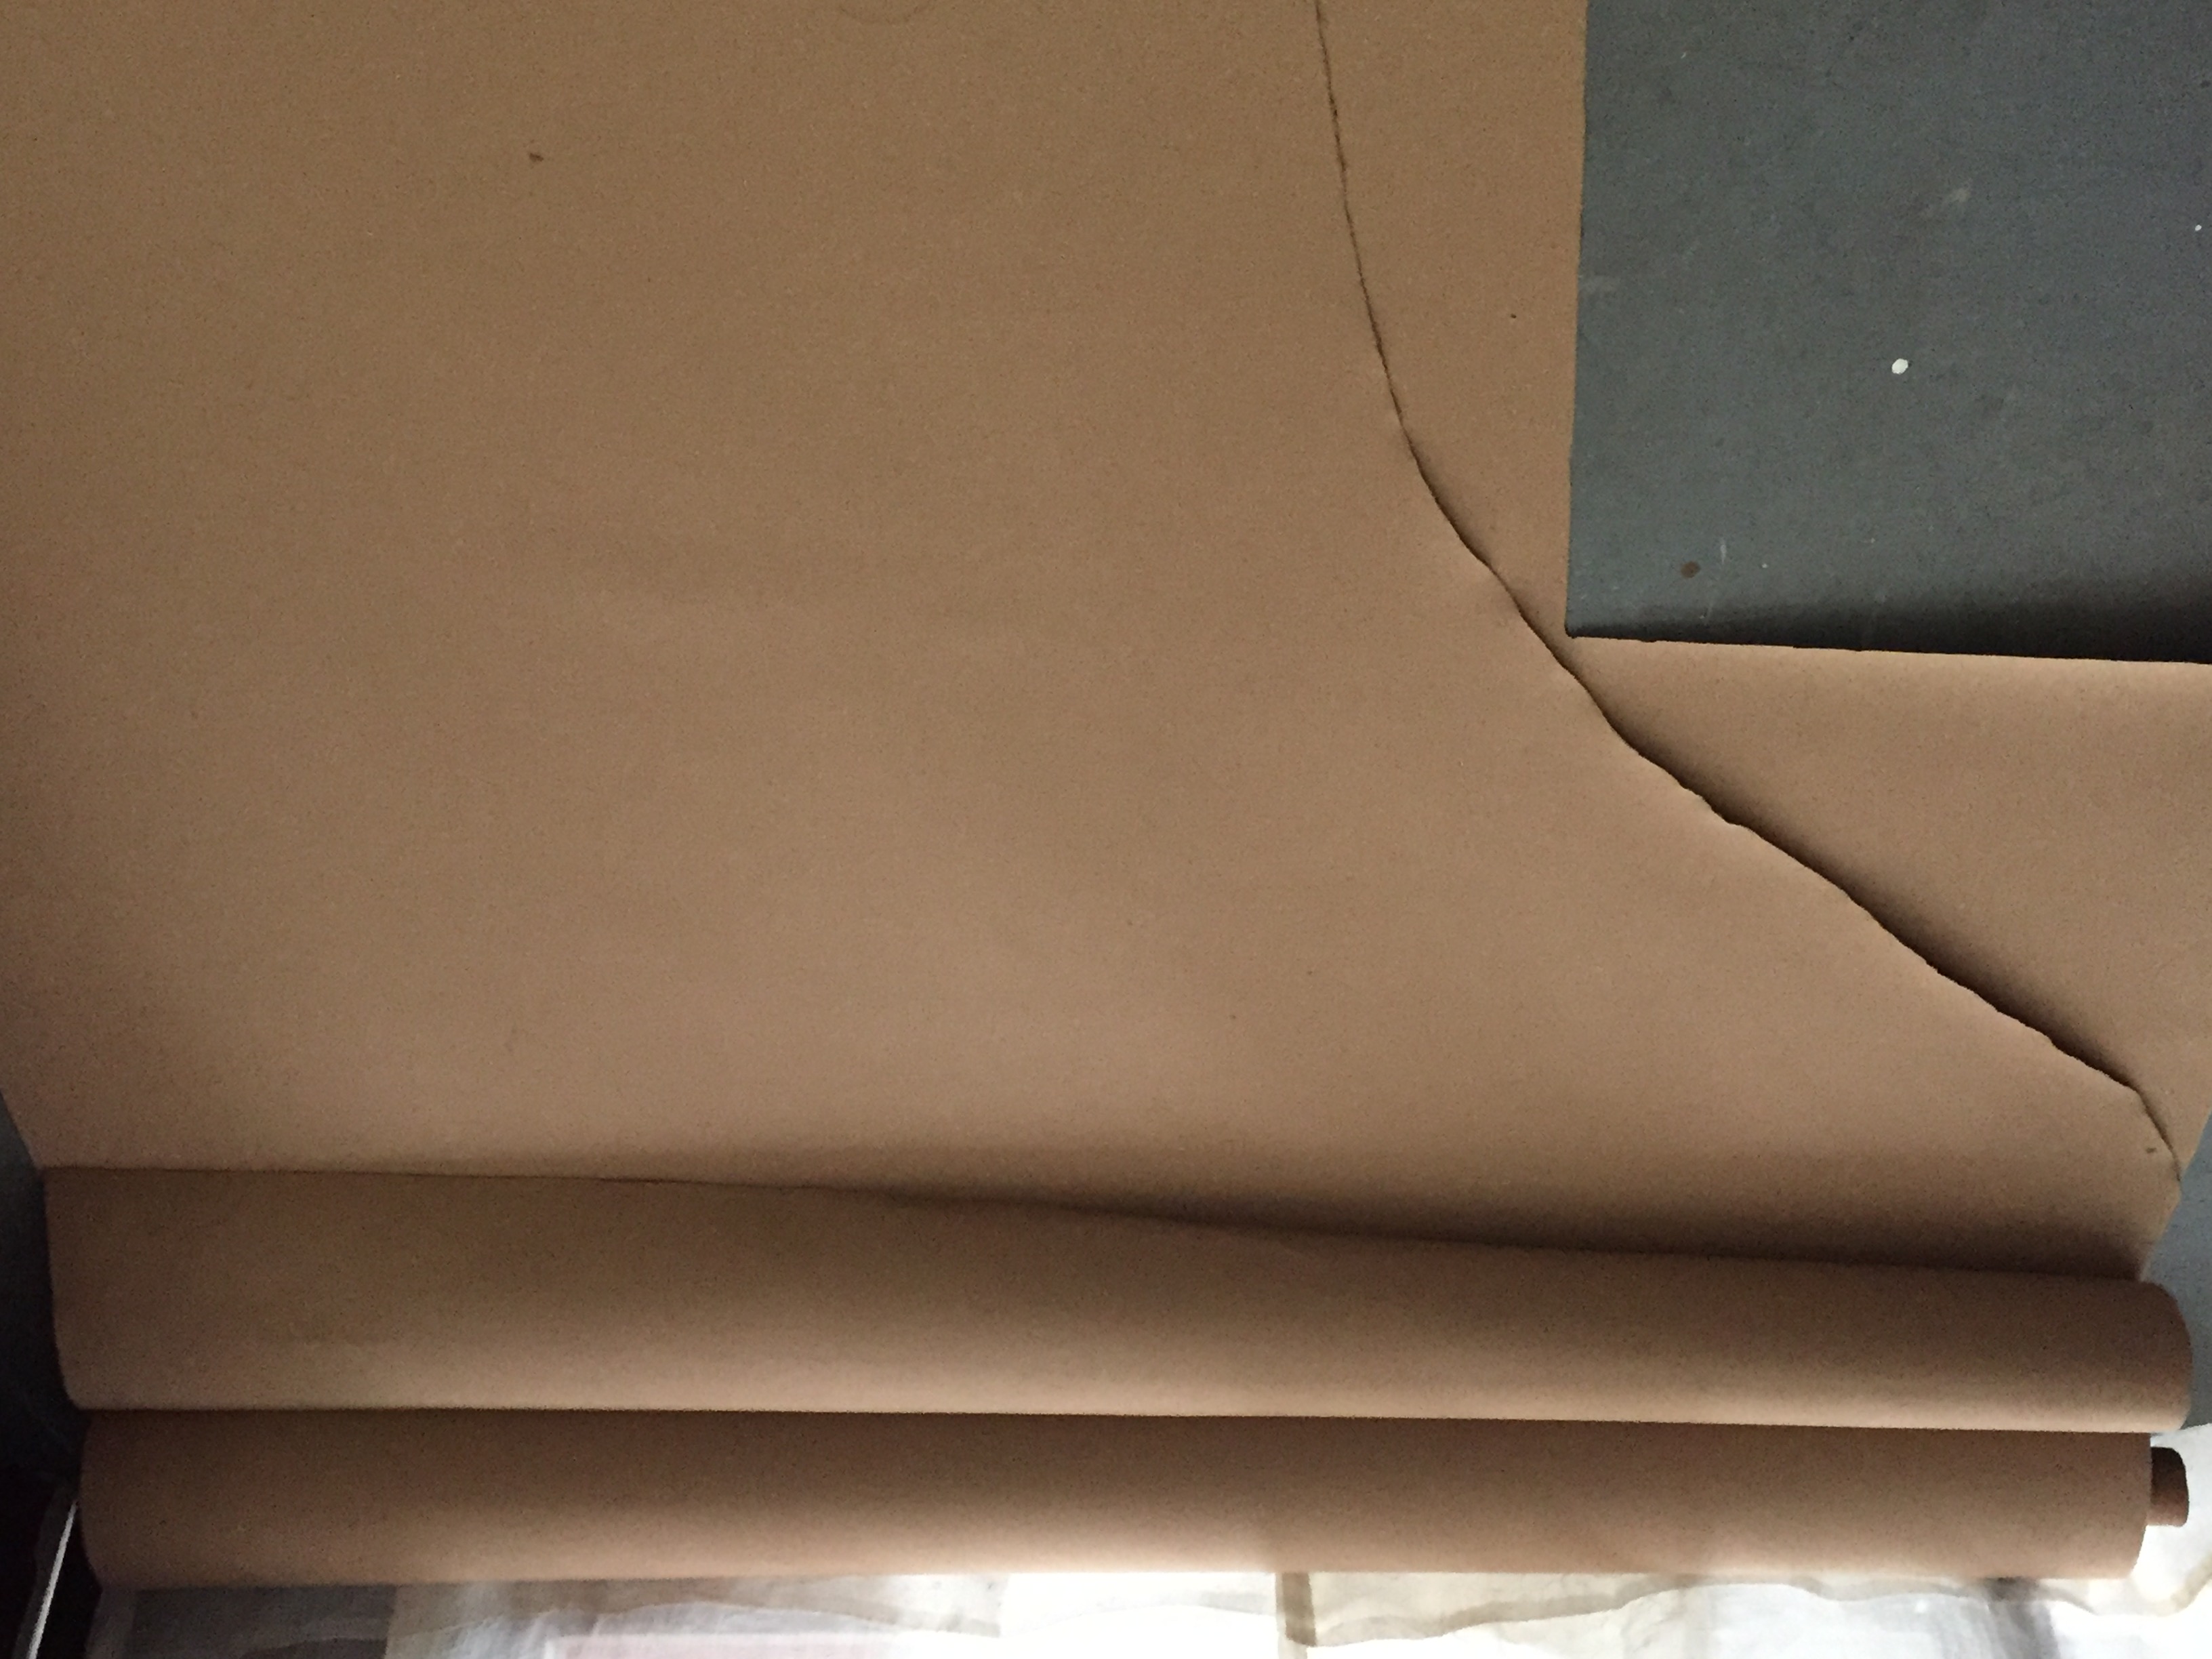
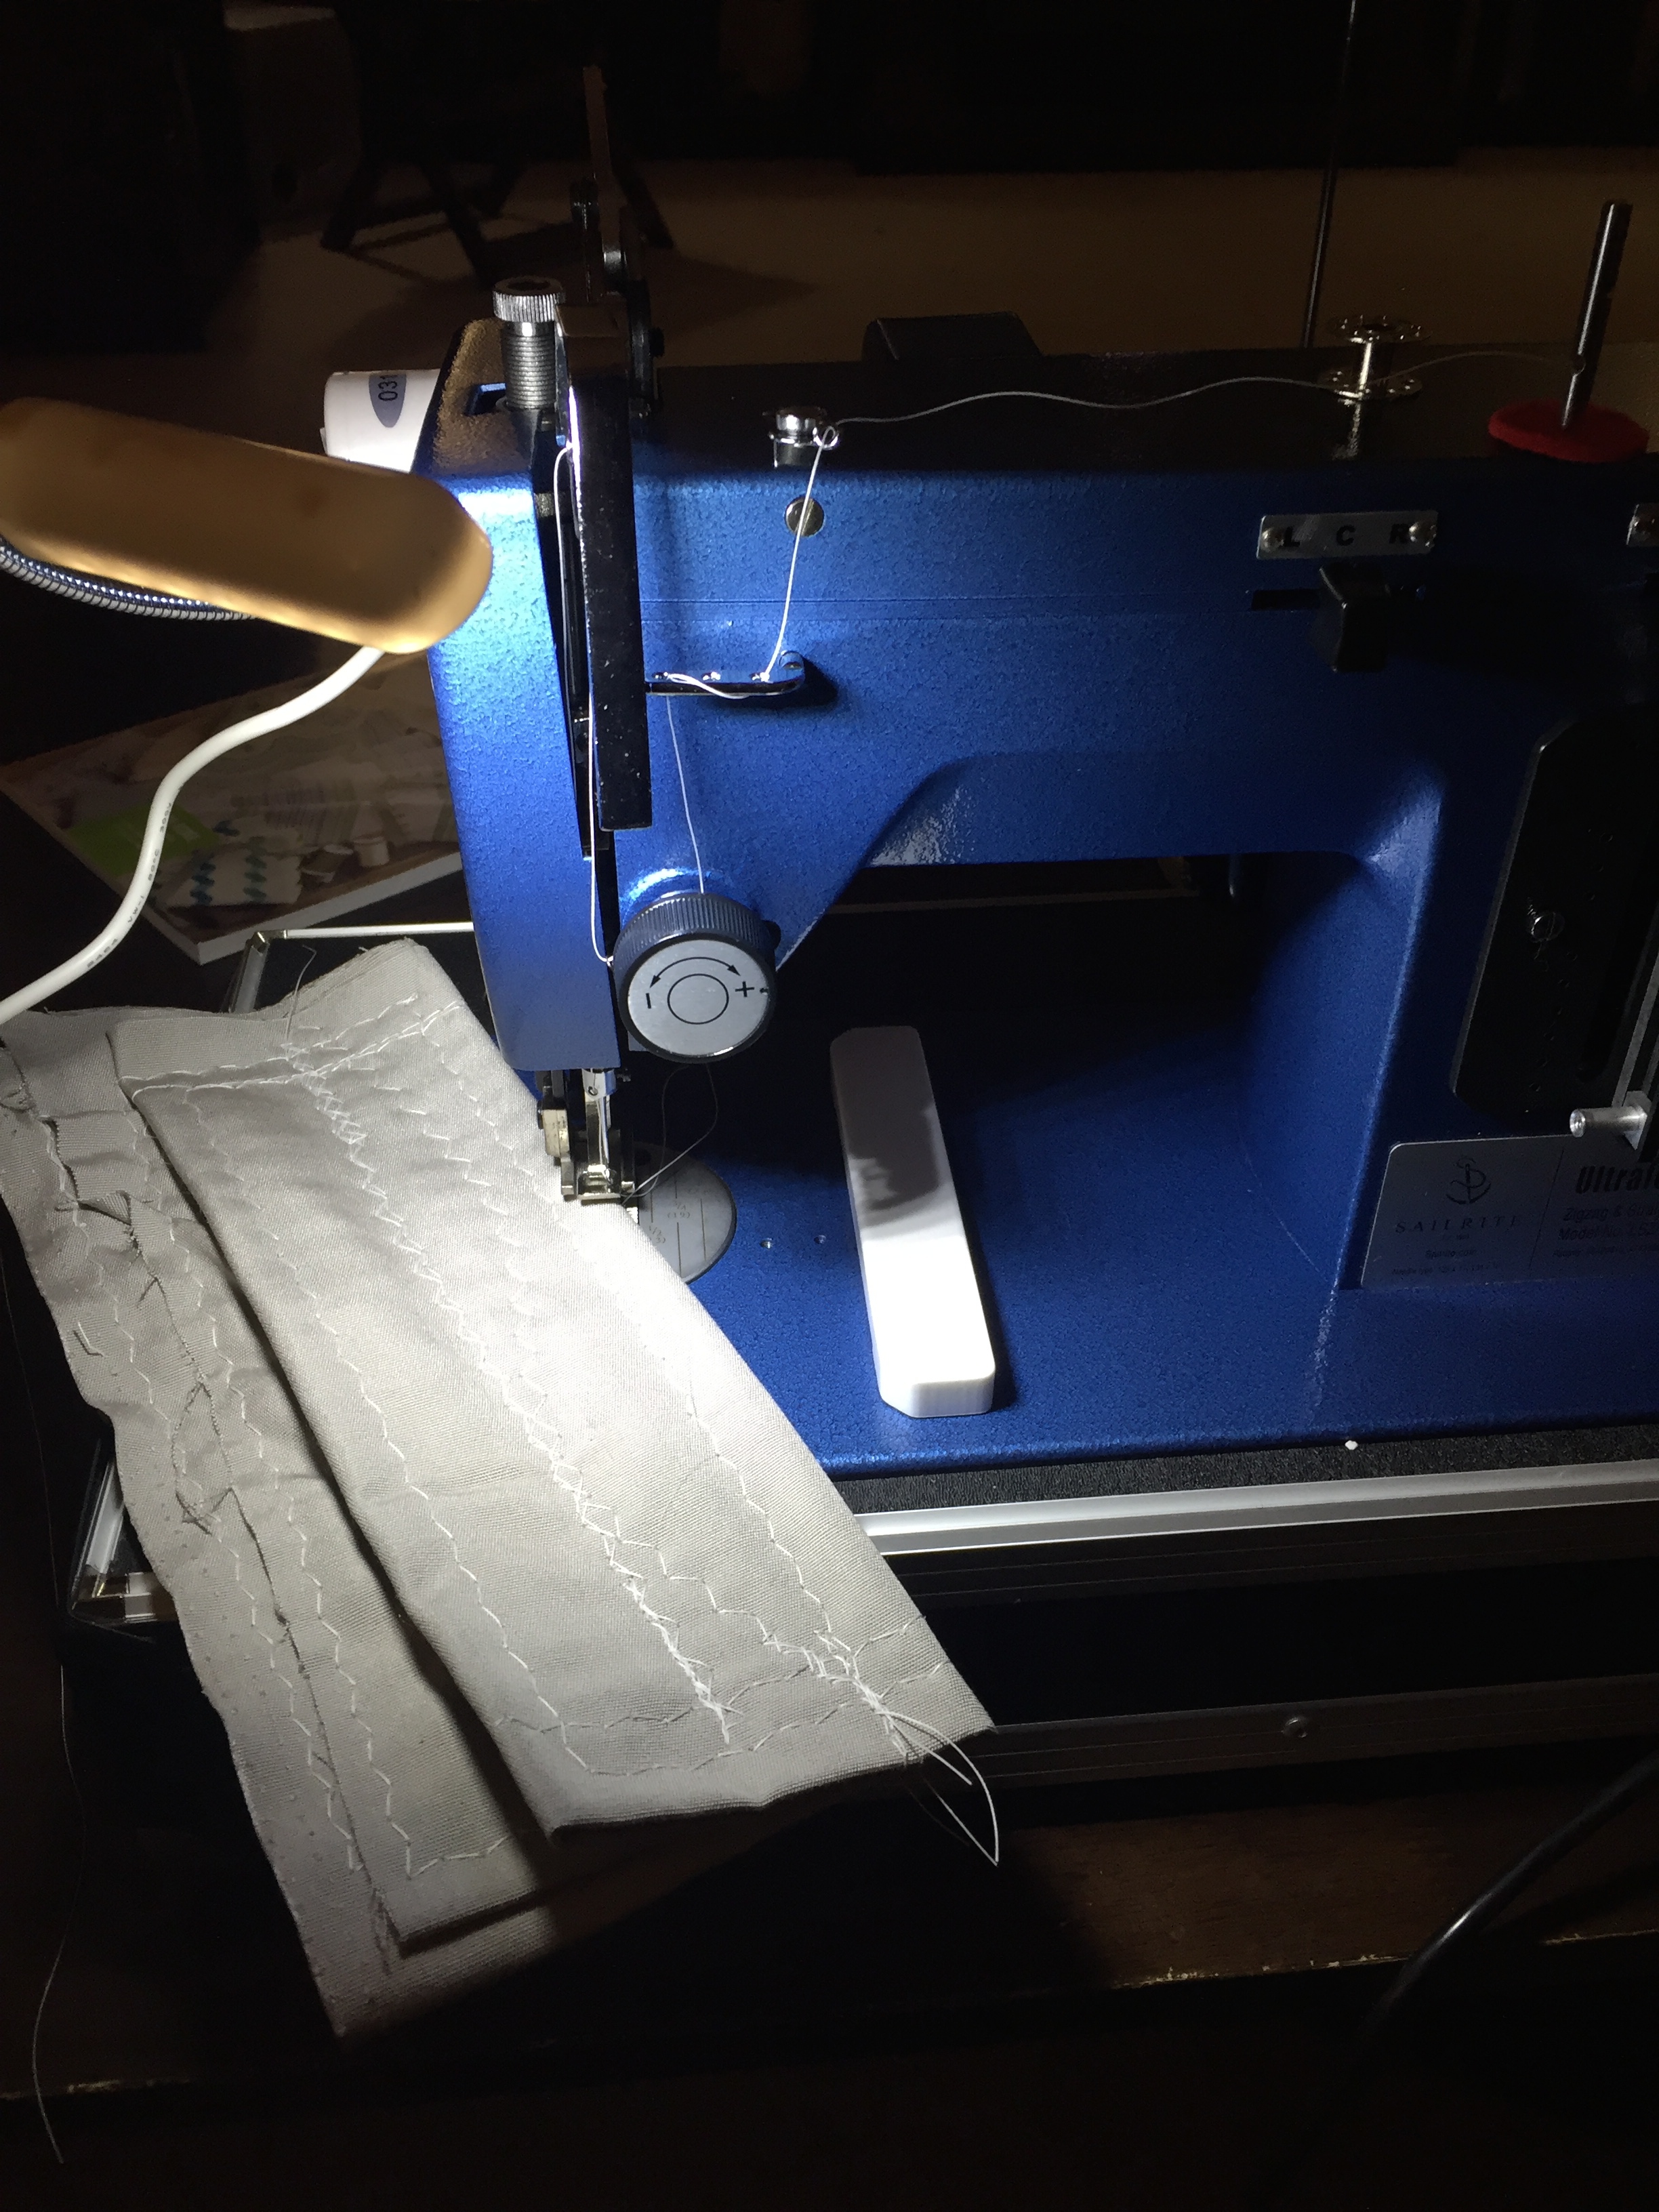
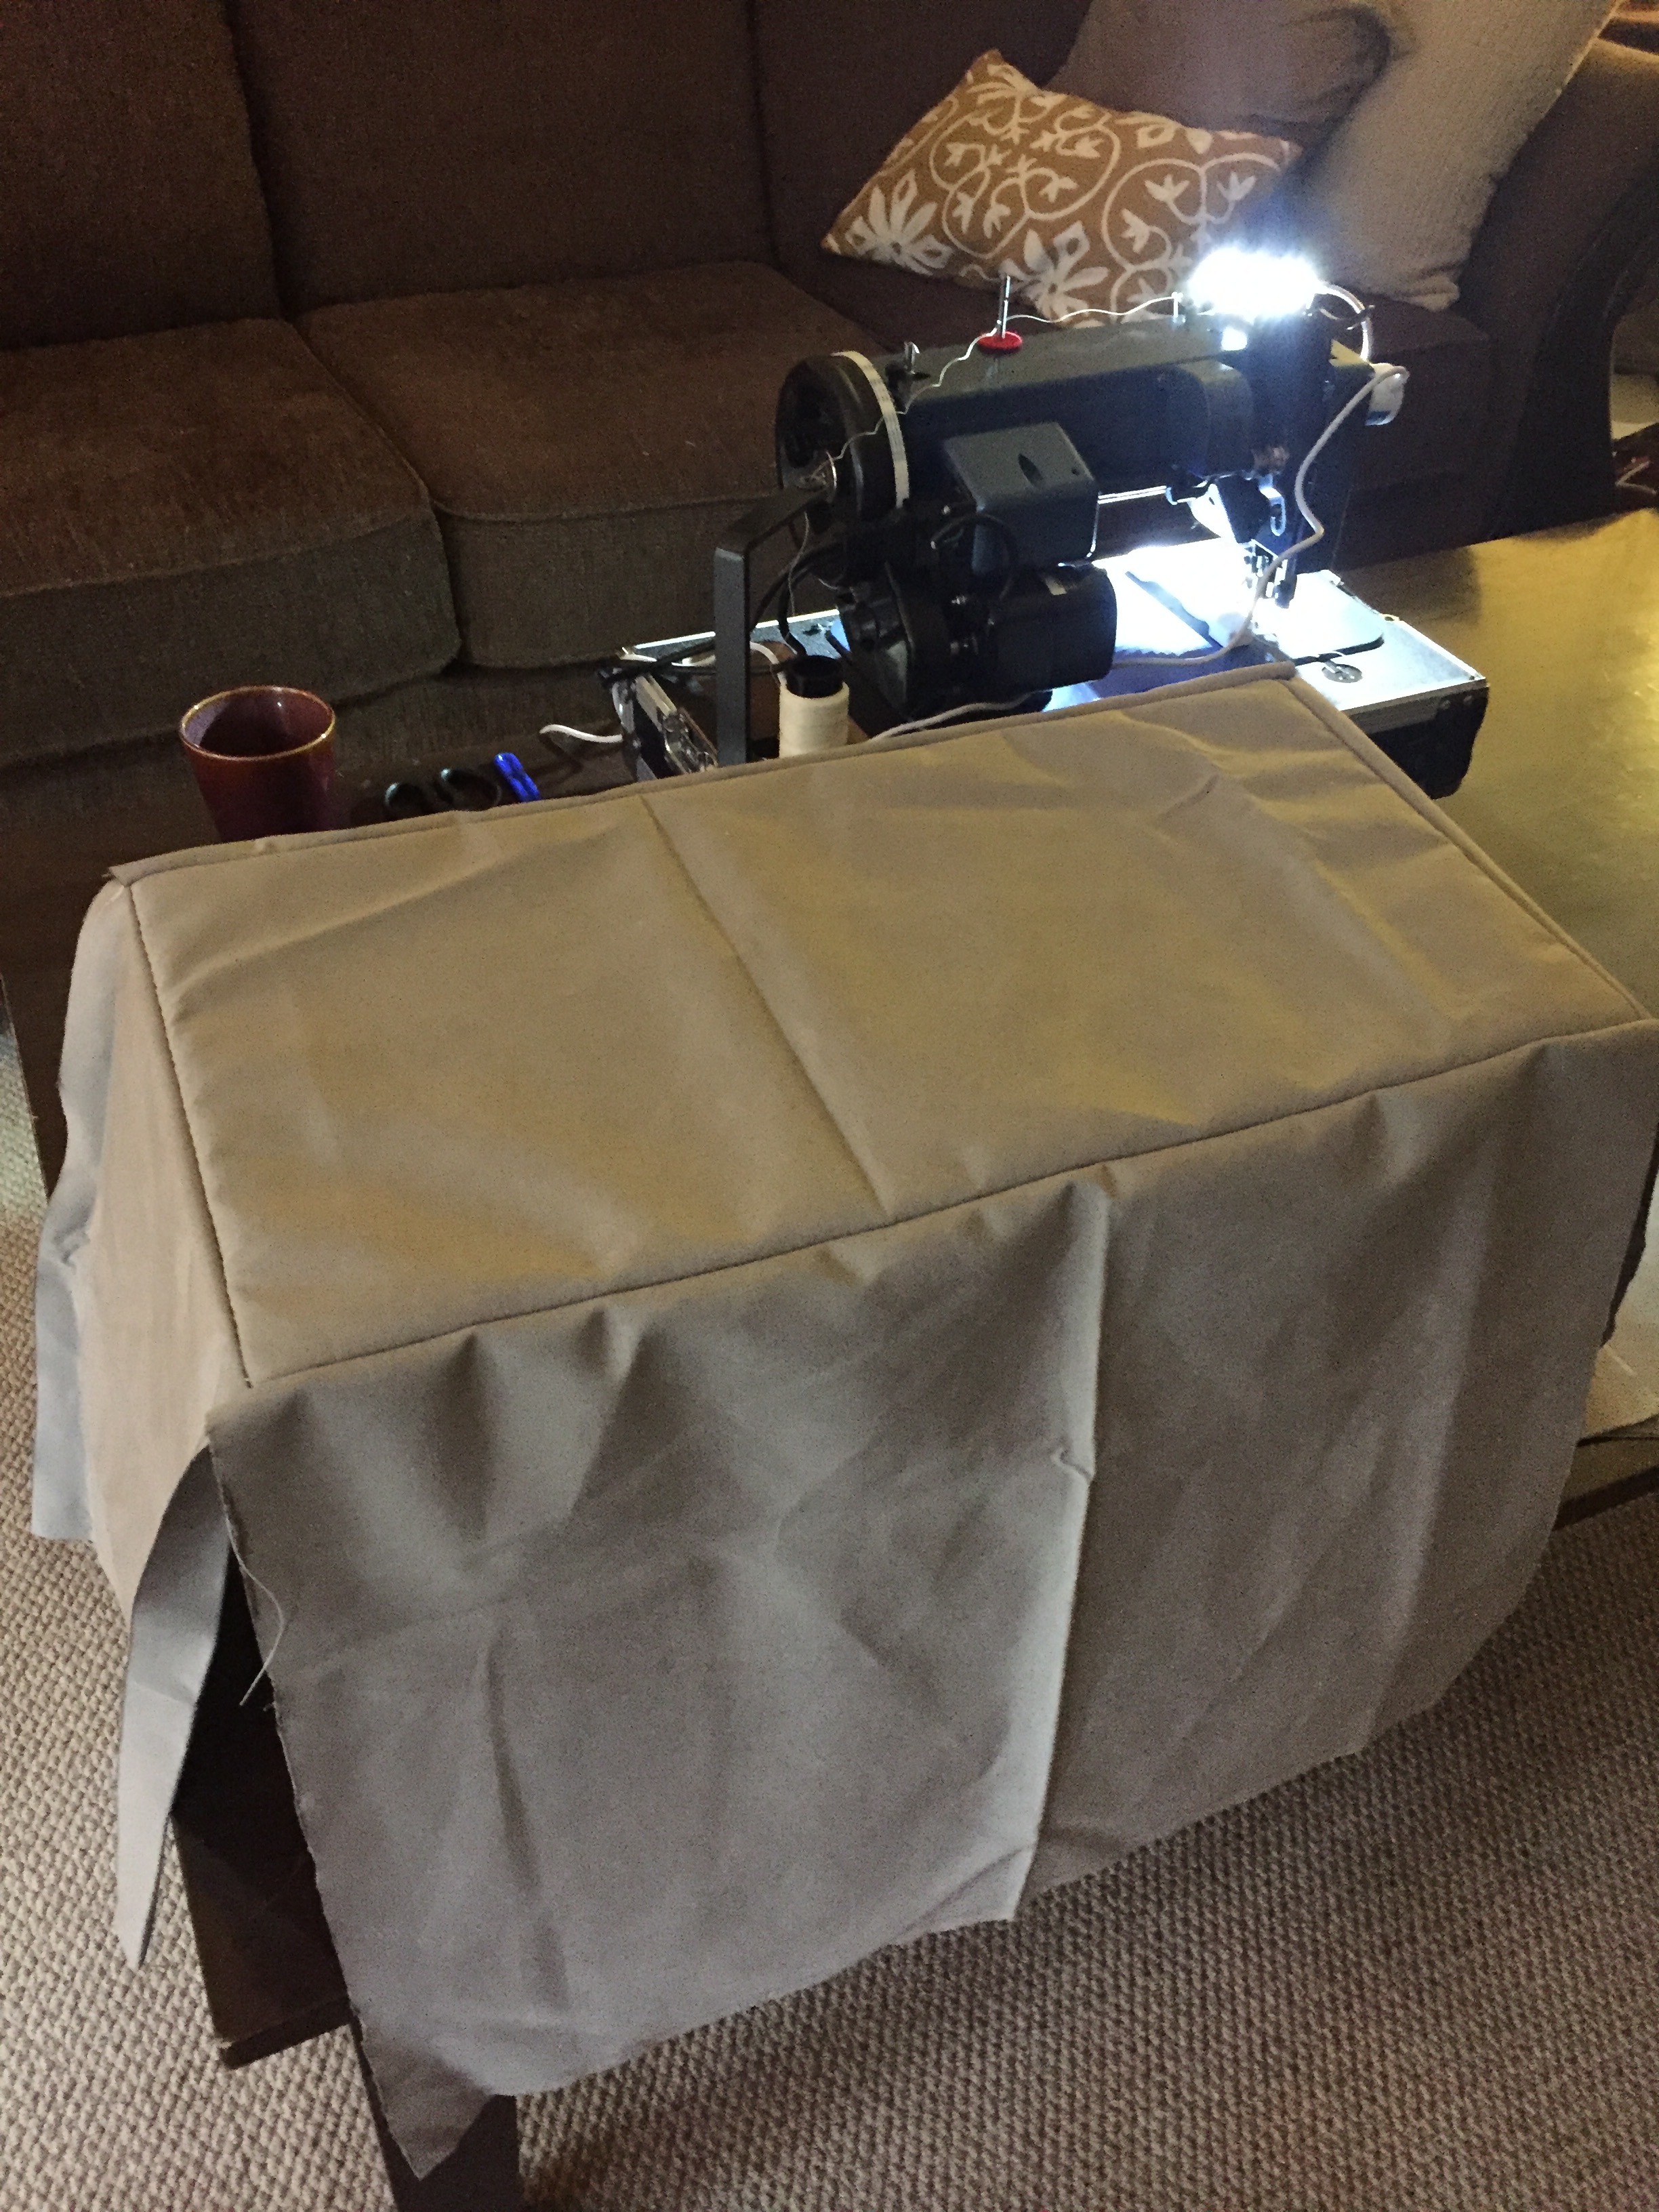
Once we had the material it was time to do a test piece. We had originally wanted to go with Ultraleather but could not justify the cost with 2 dogs, so we chose vinyl. Yup, I said it. Vinyl! Now before you pass out, shut down your computer, or merely dismiss me as a lunatic, you need to understand that vinyl is not the same as what it was on your dad’s boat. The vinyl we bought is a marine grade highly wear resistant material that is very close to Ultraleather but less than half the cost.
If anyone ever asks for advice on how to do interior cushions, my response is going to be measure 10 times, cut once, and test fit every single thing you do!
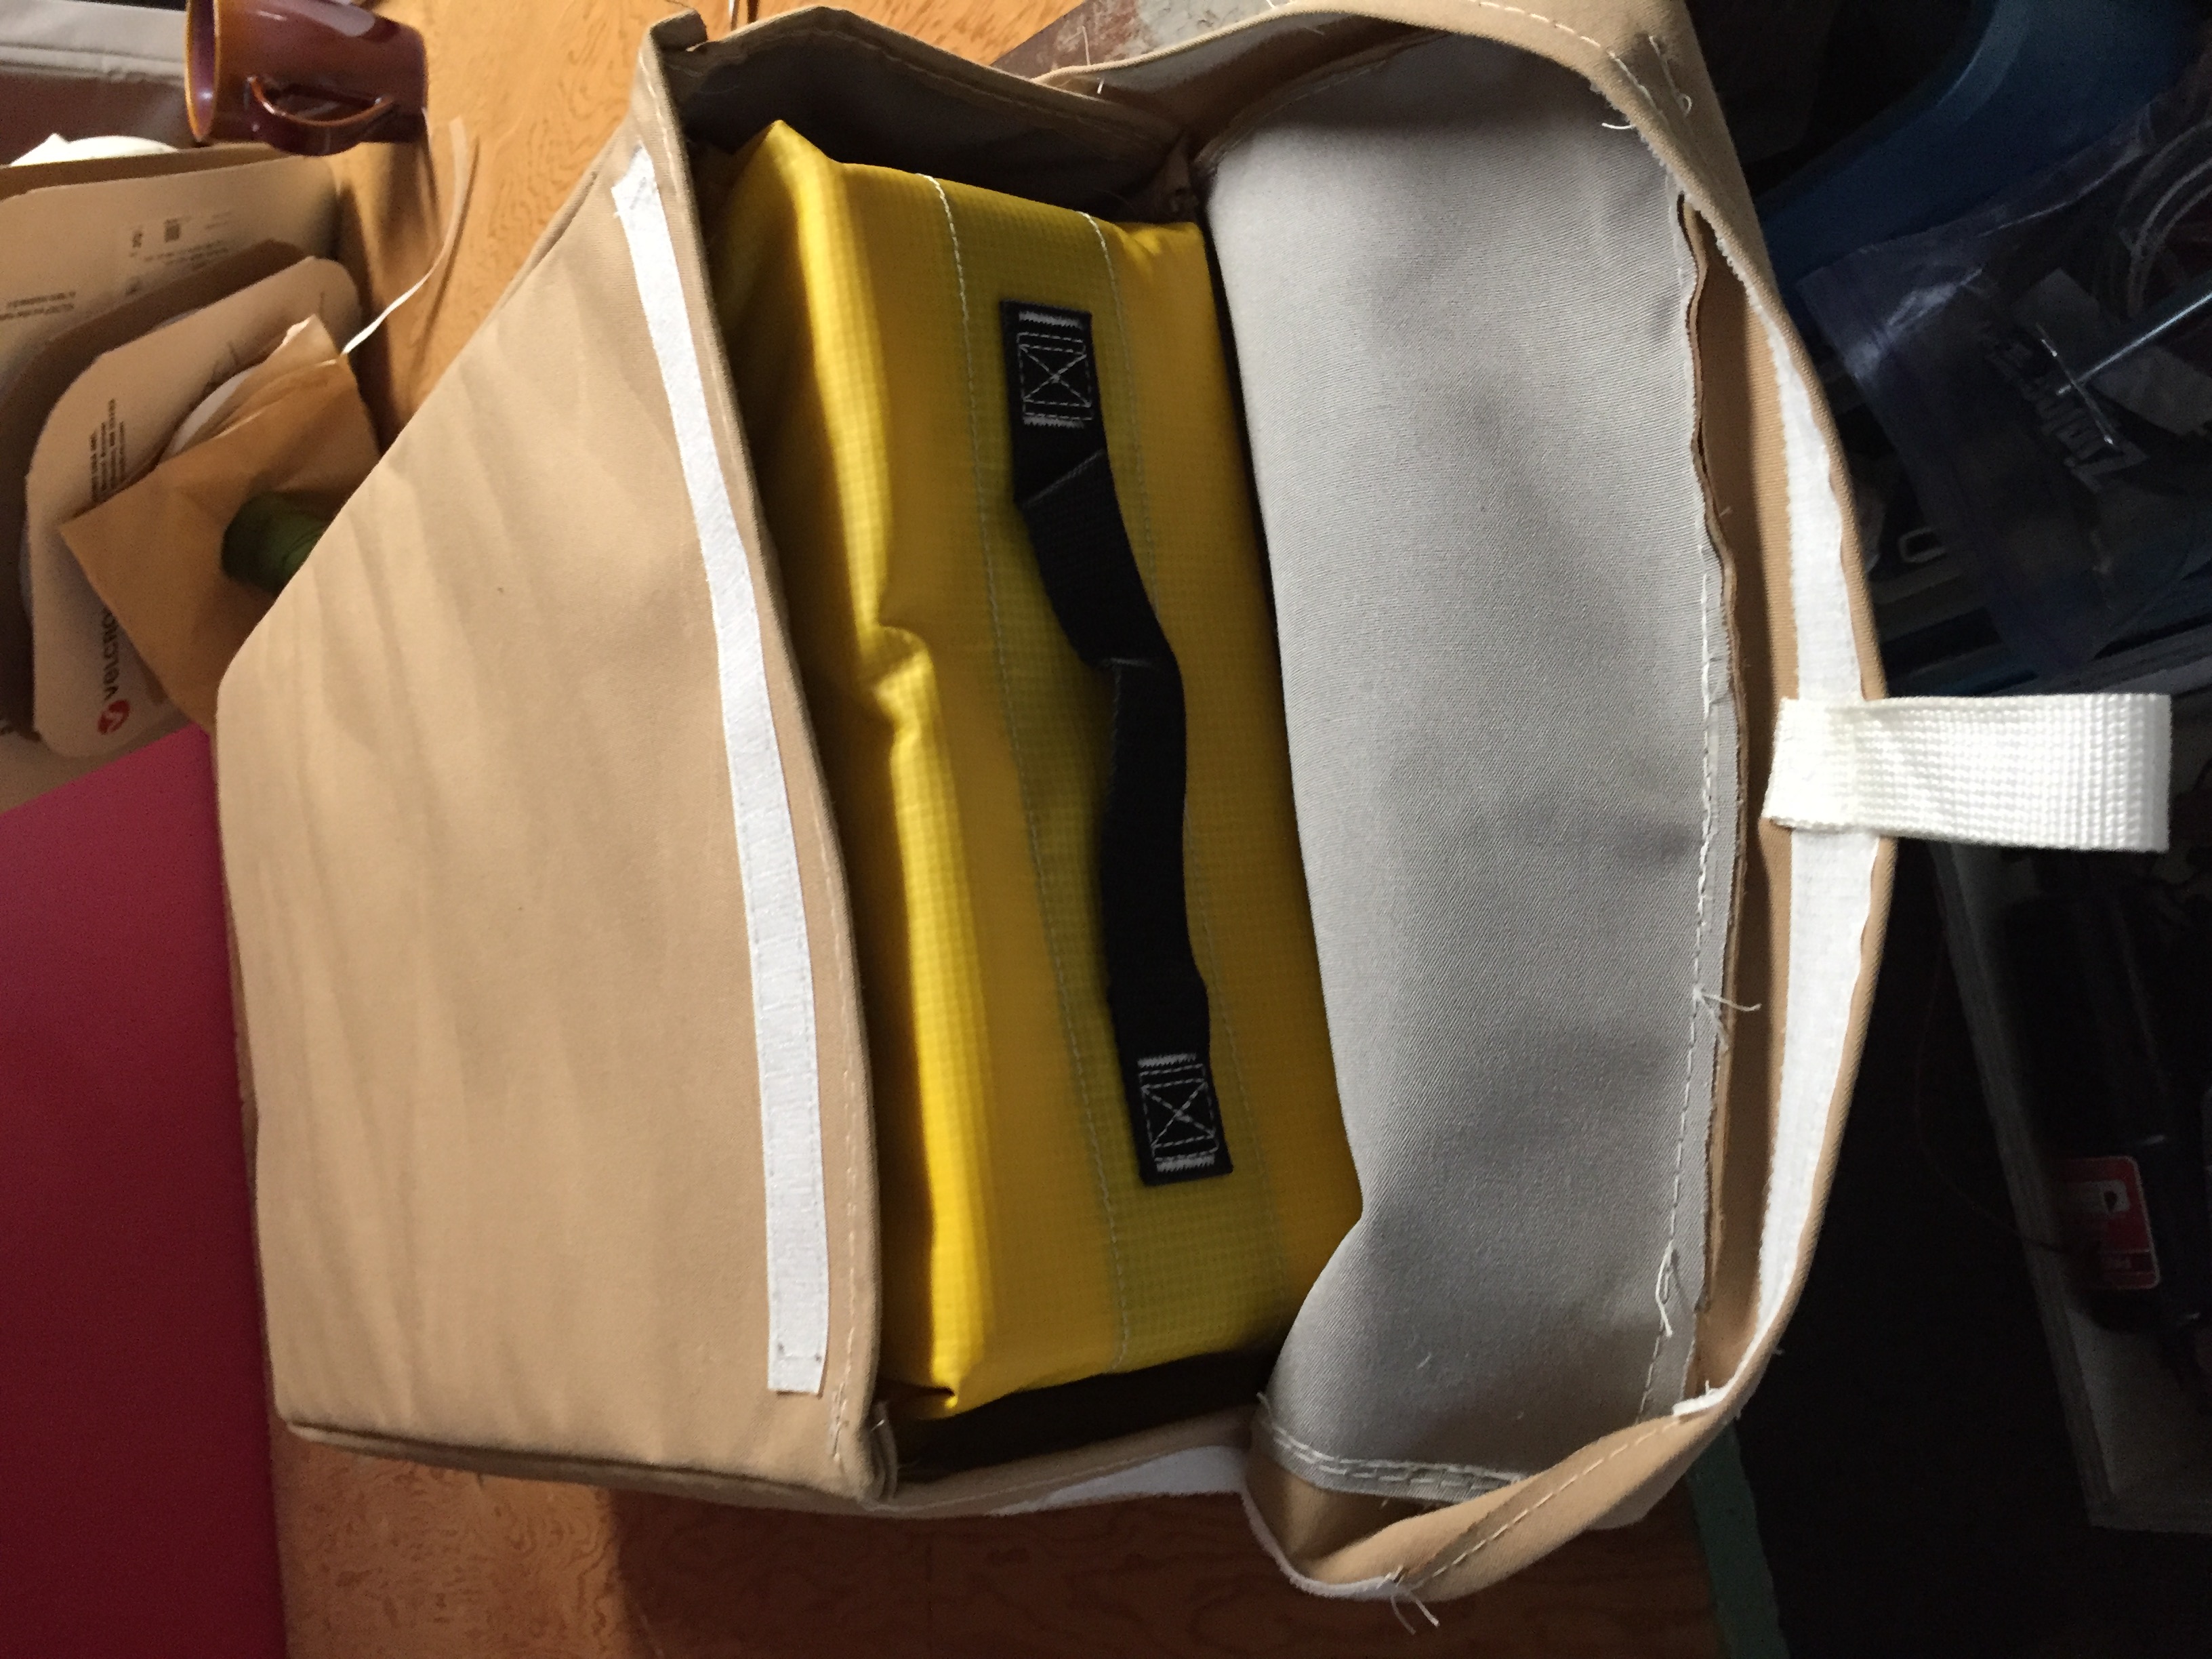
 This picture above is about the 5th time test fitting, sew a little, test fit again, and repeat. You can see the side are not attached yet.
And once you have it all figured out, insert the foam and discover all of your mistakes.
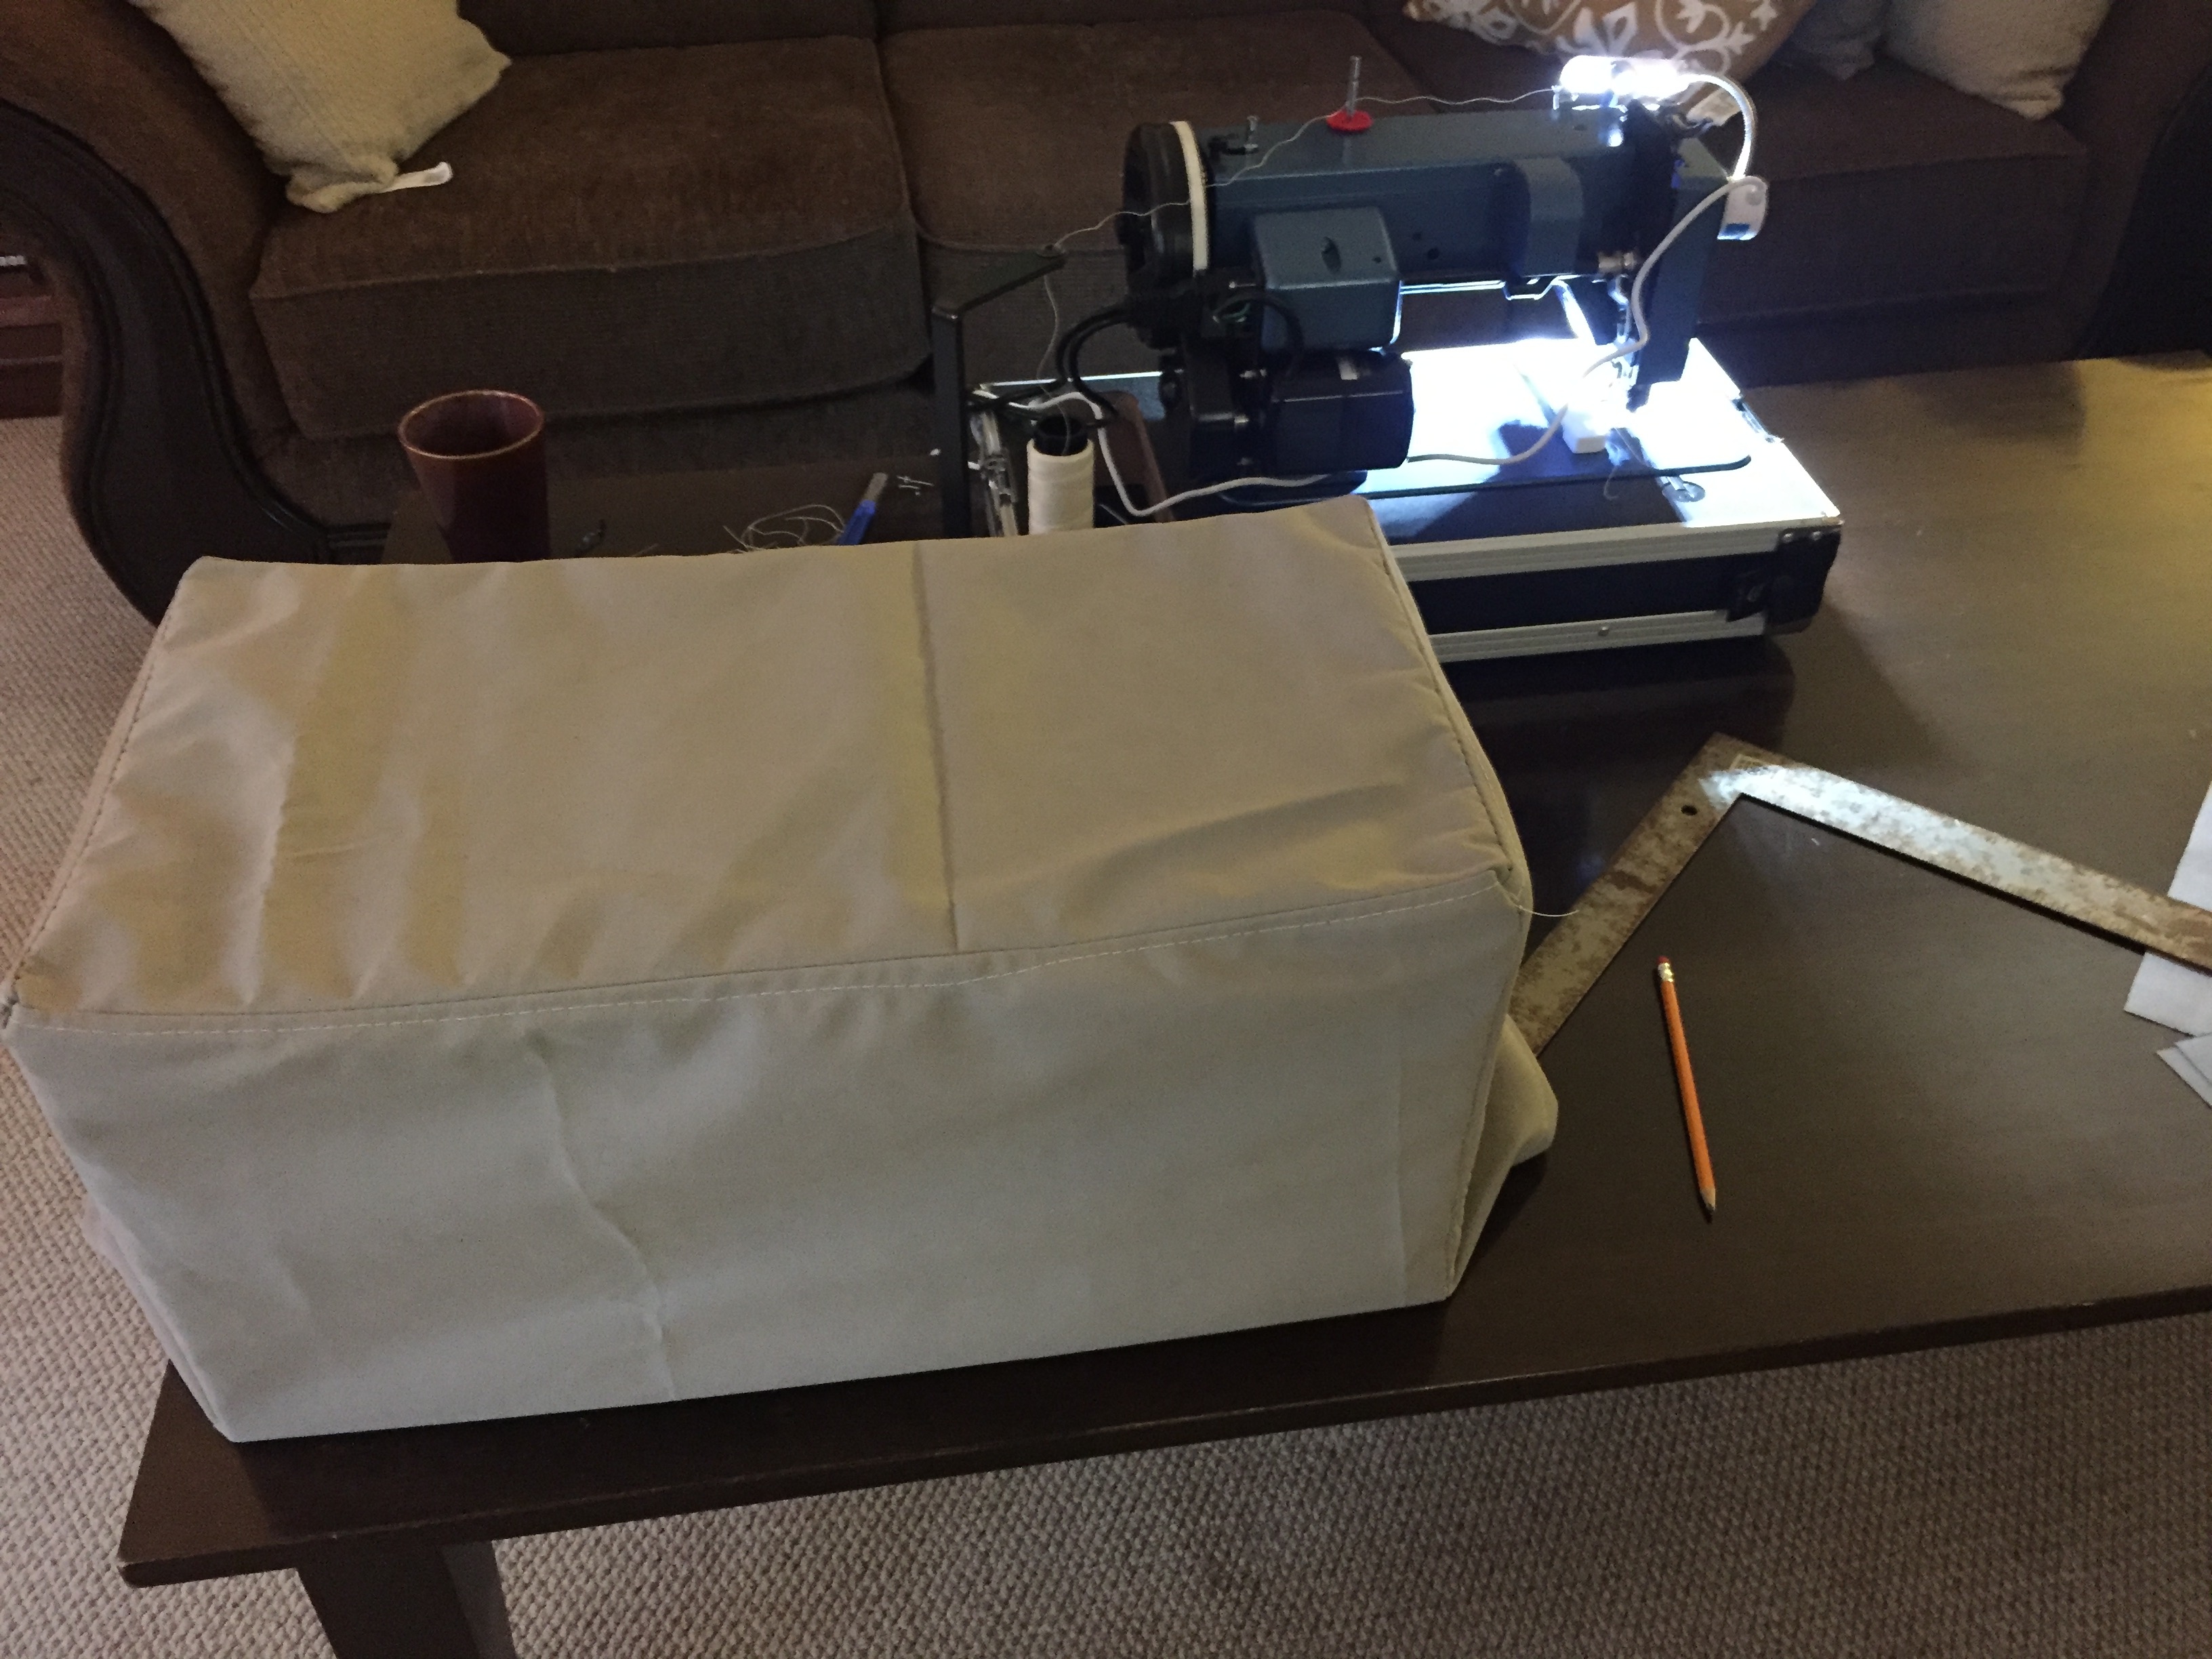
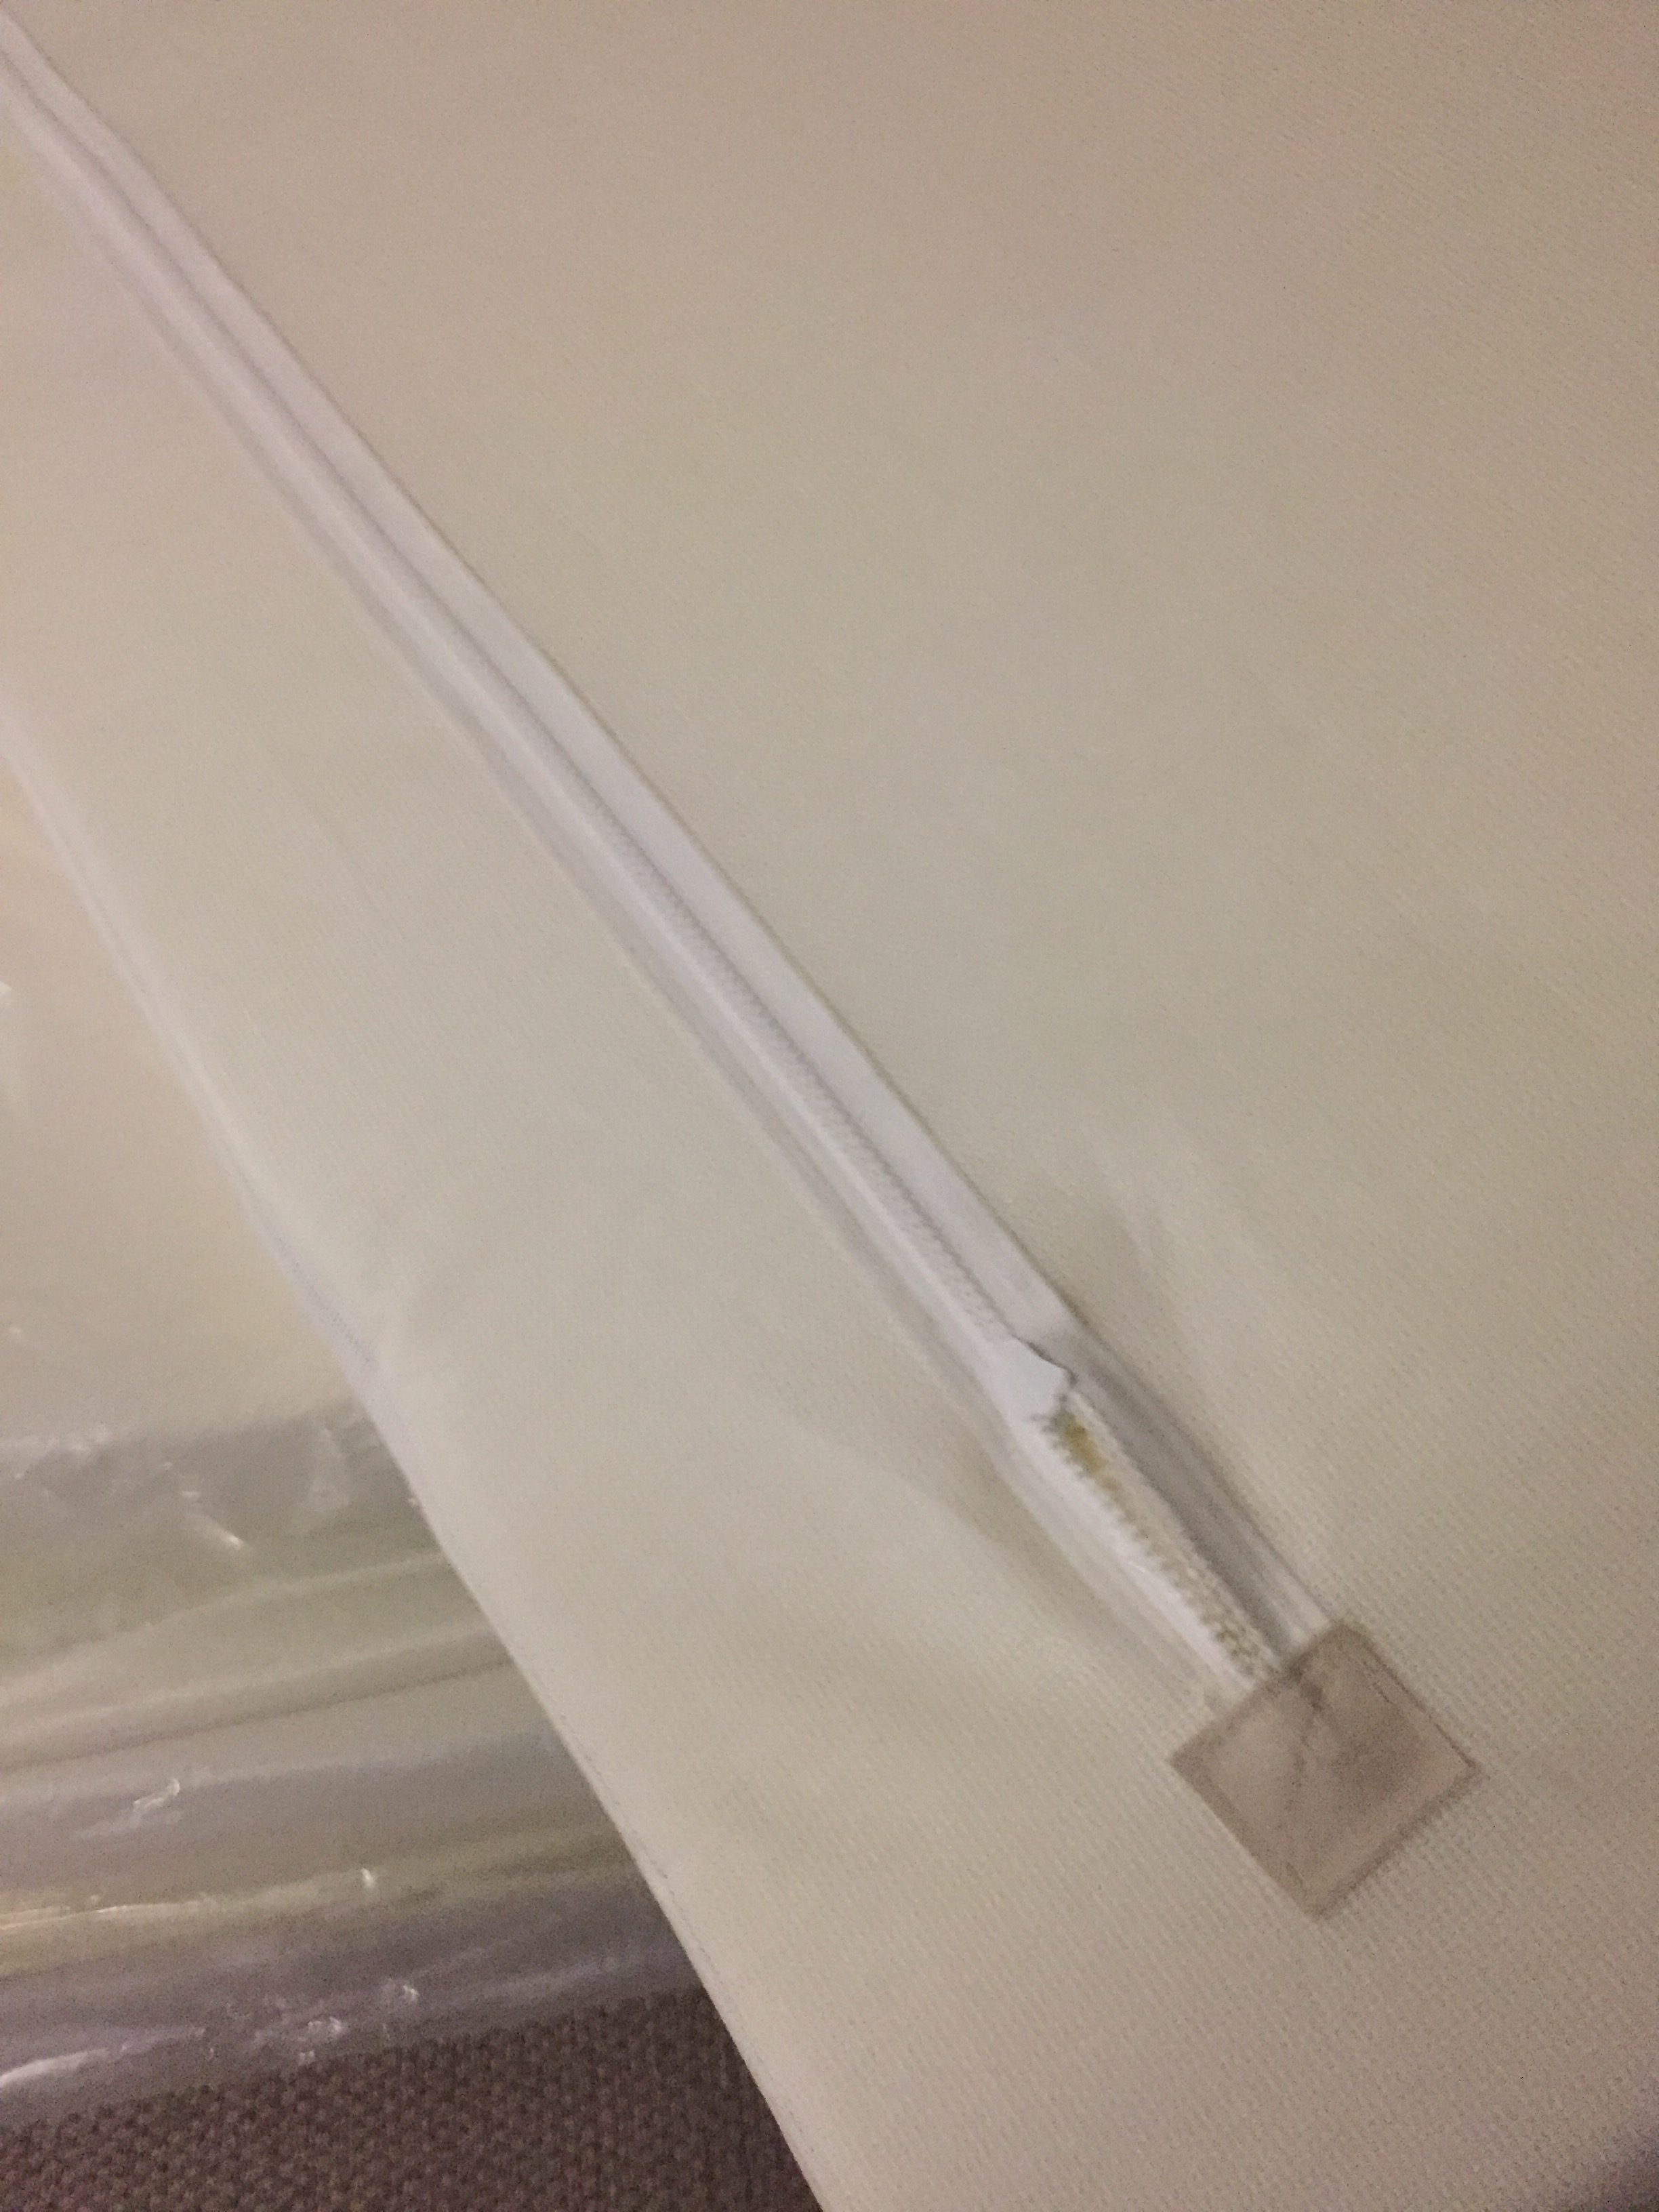 Like this one above. Yup, I put the zipper in upside down. And the entire time I was thinking to myself, don’t put the zipper in upside down. Thankfully it is an easy fix.
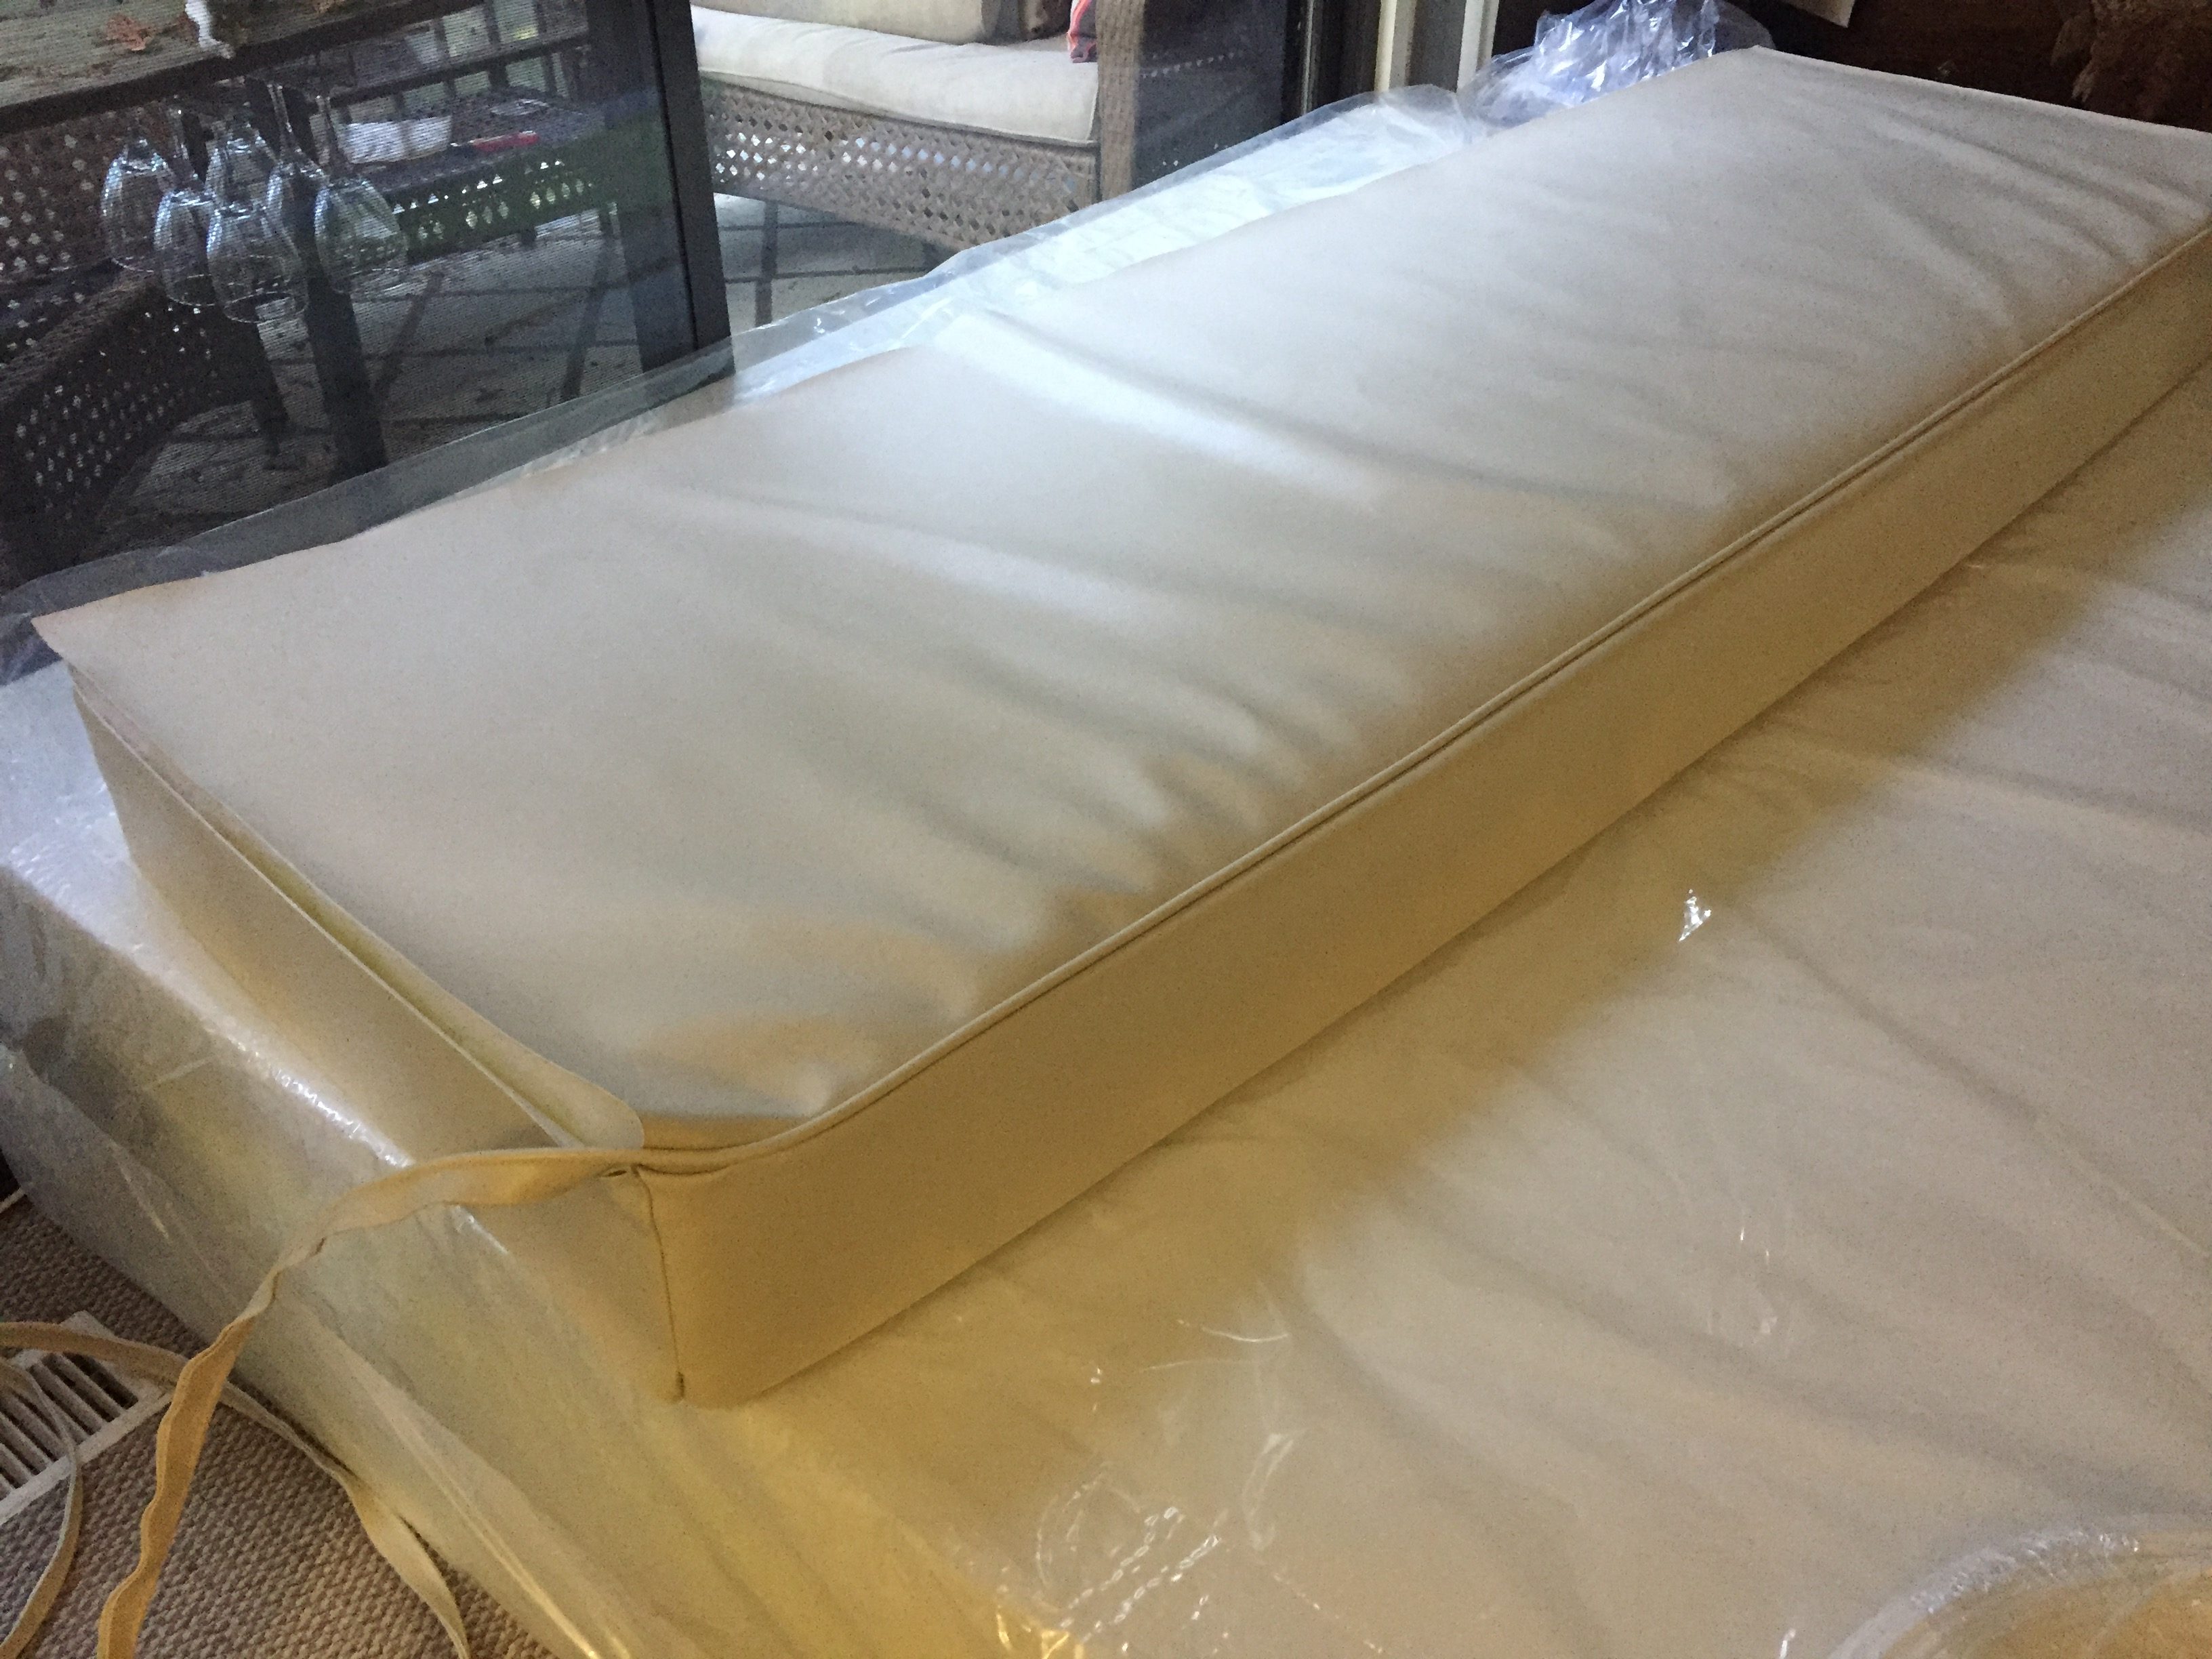
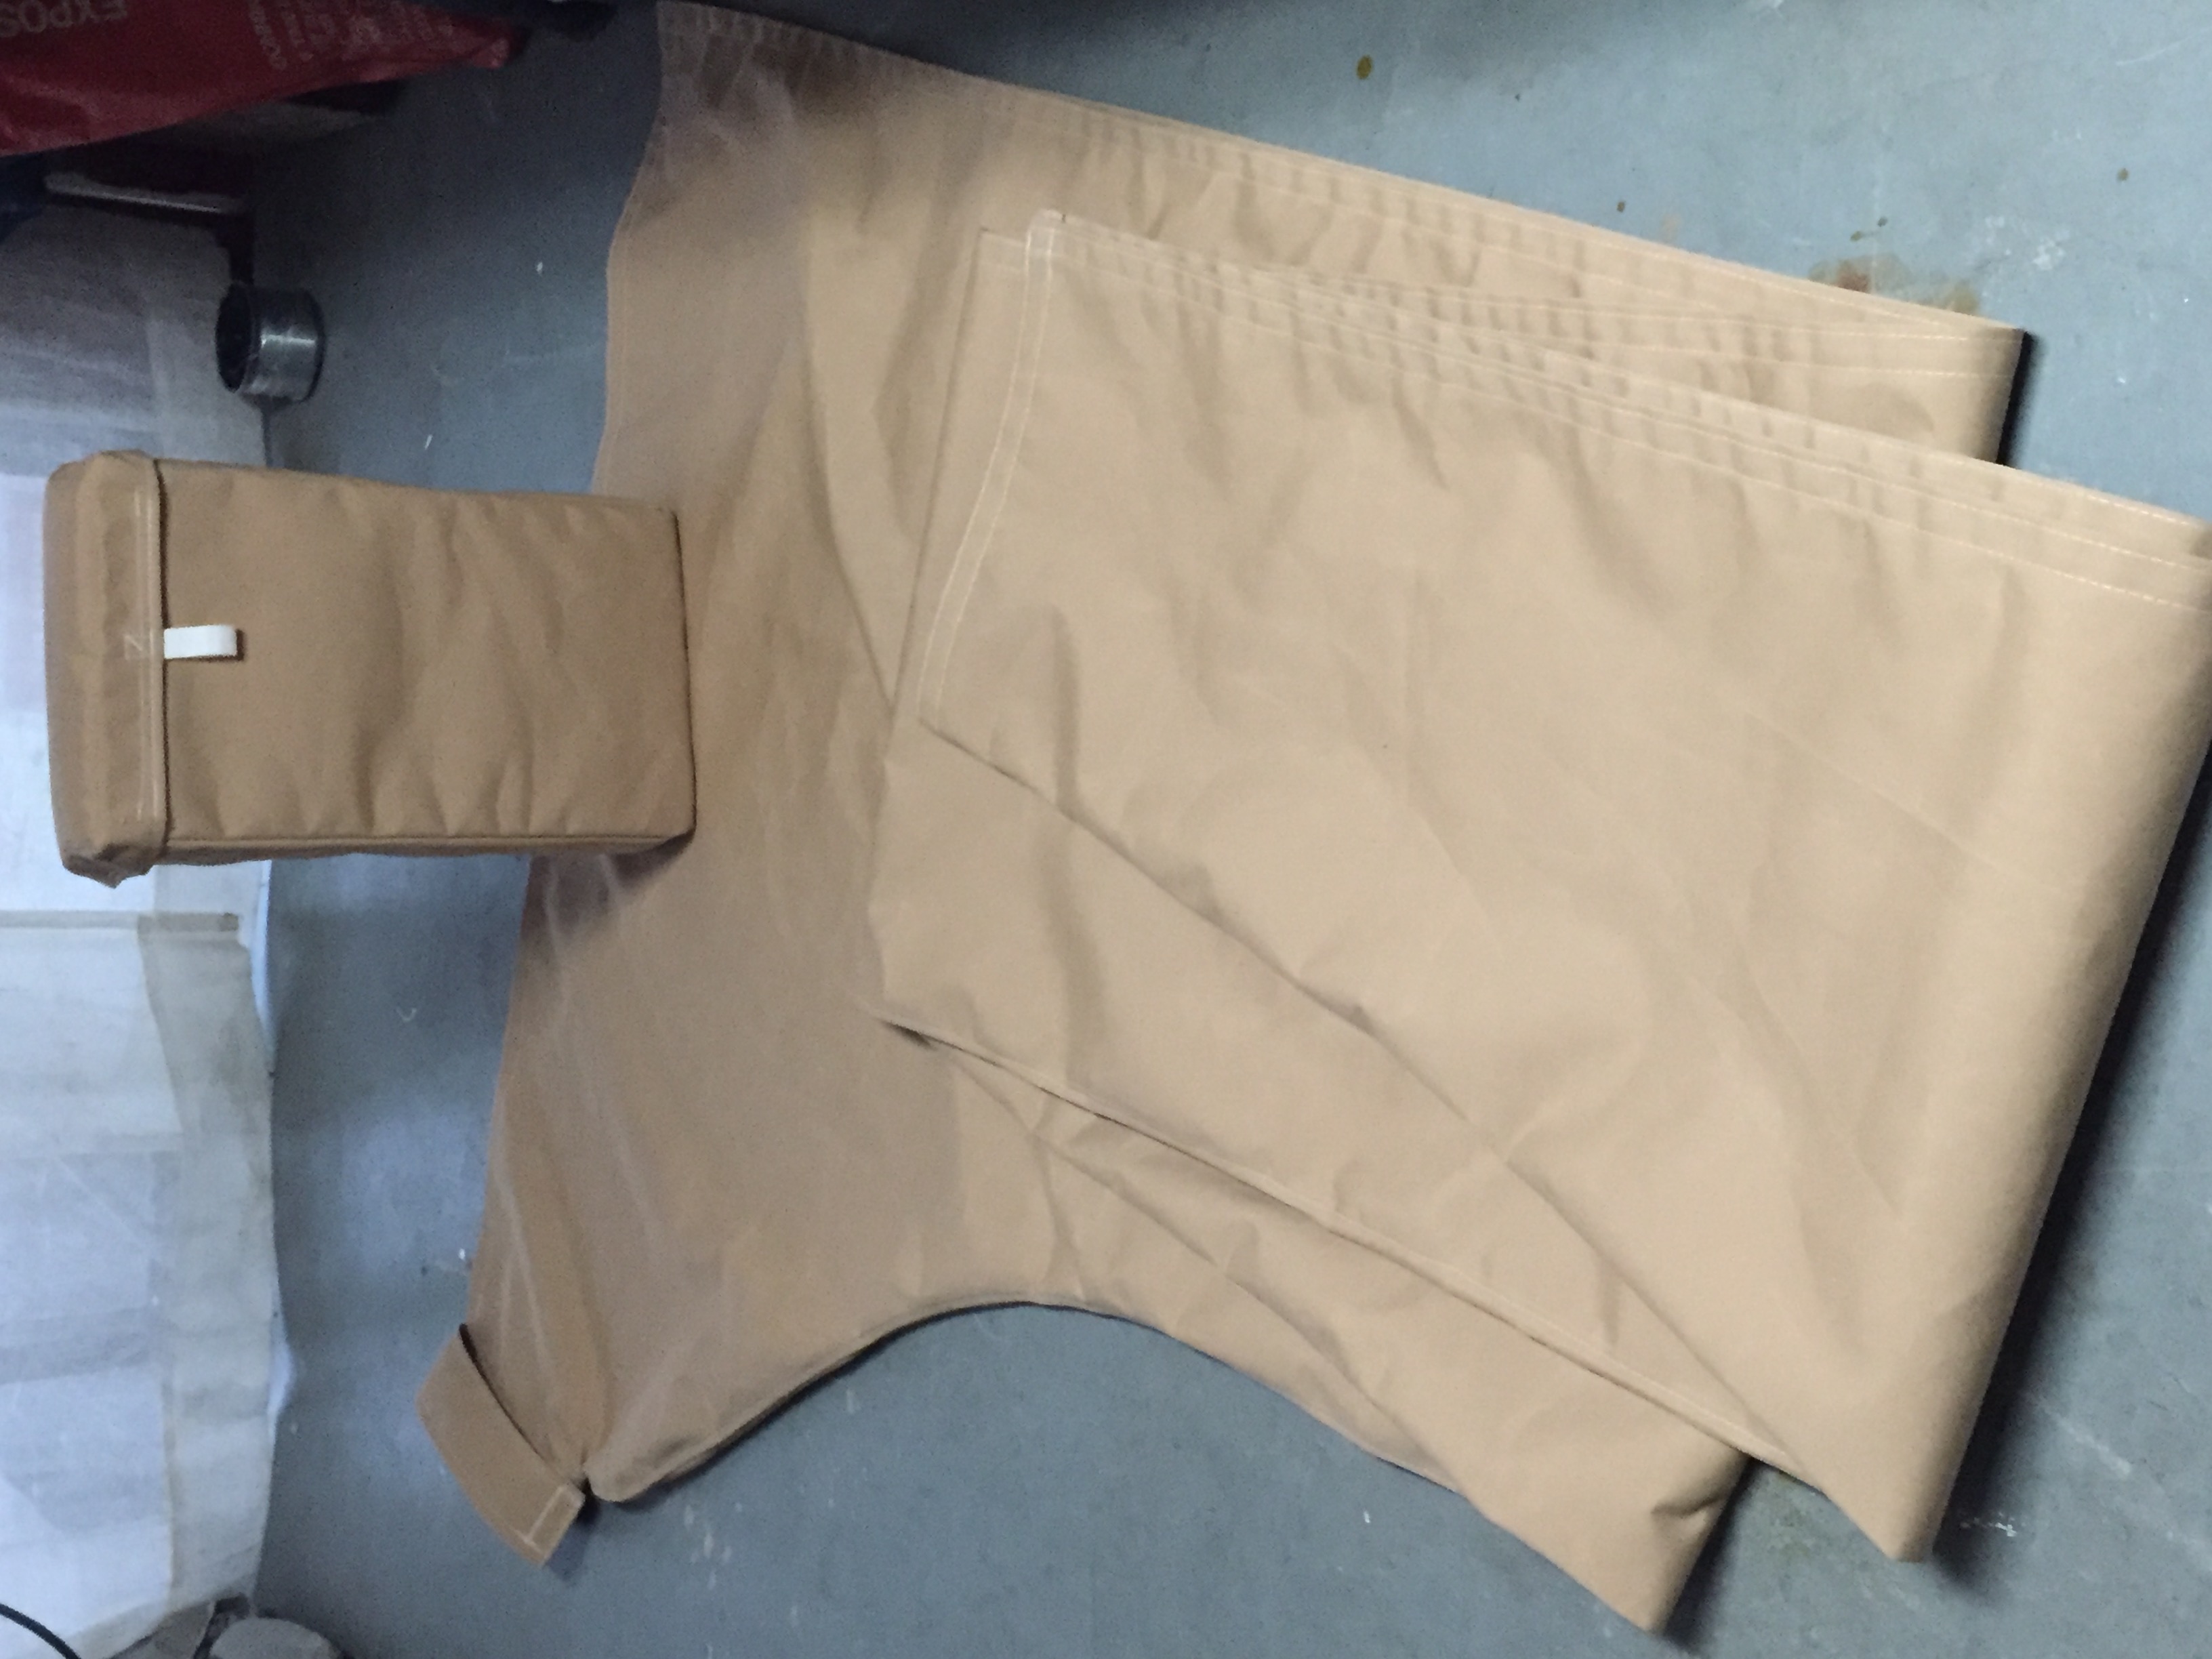
I still have to fix my corners, corners with piping is challenging and the learning curve is pretty steep, but here is the first cushion completed, almost.
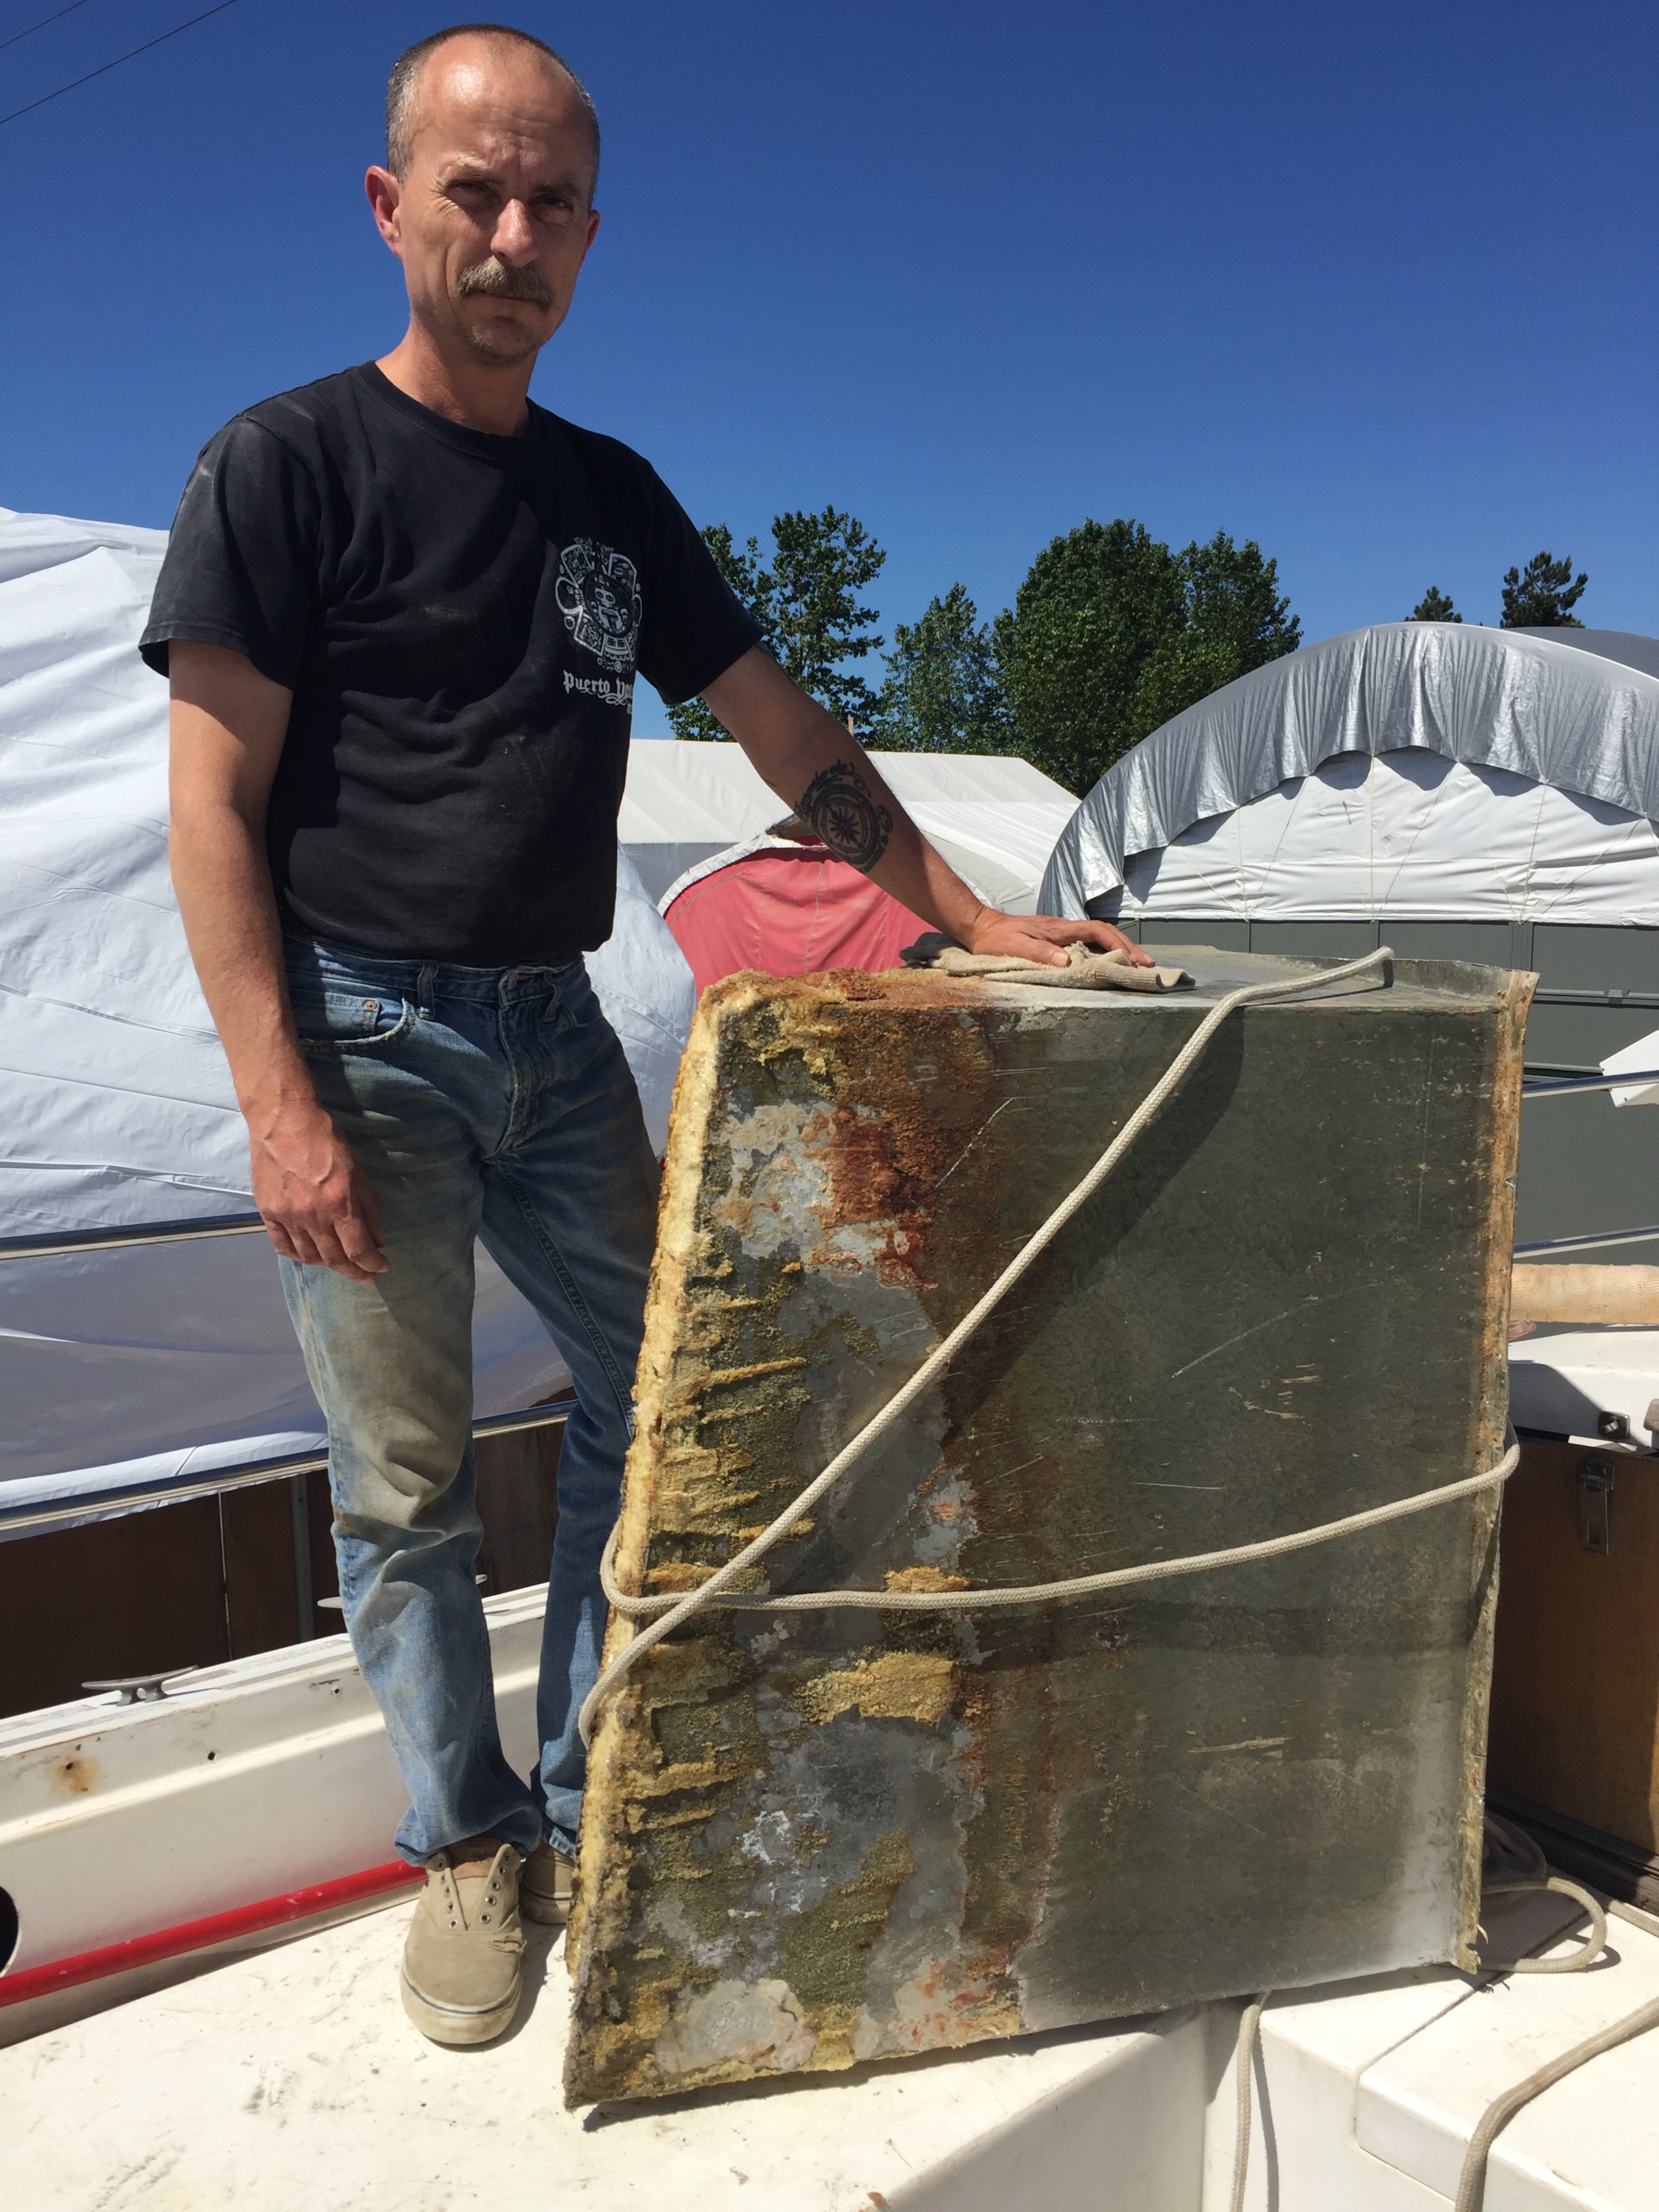
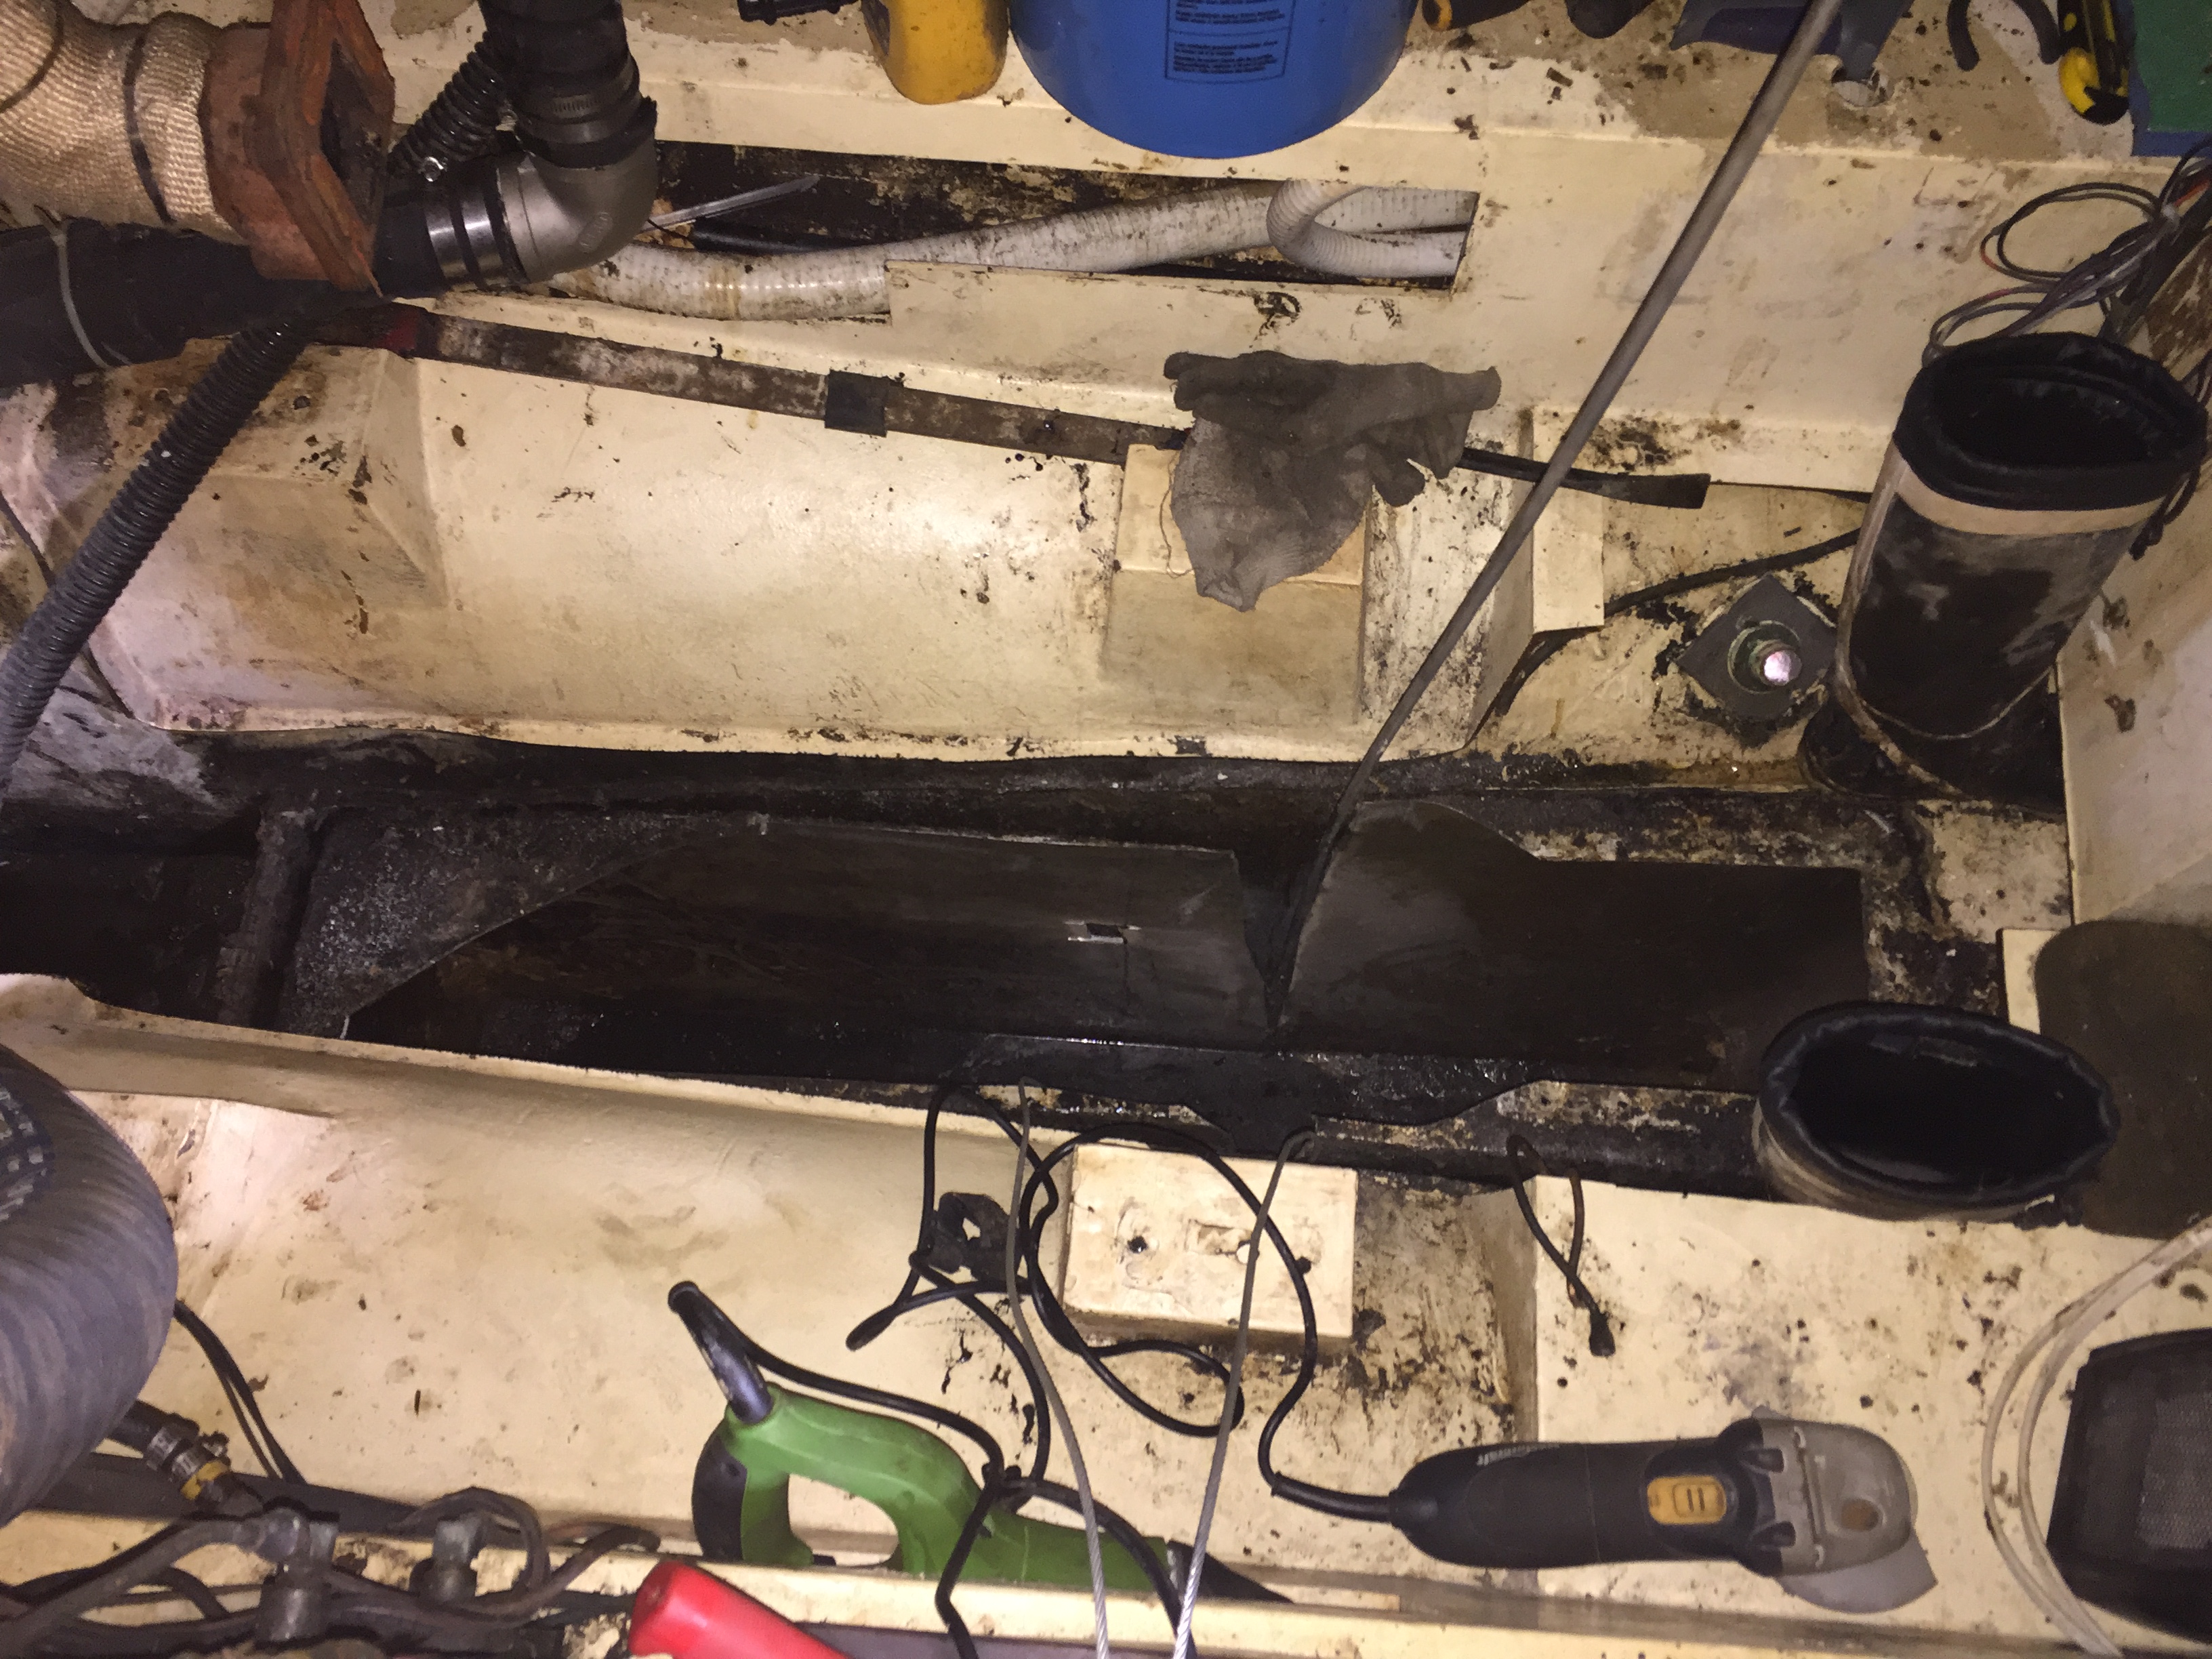
It’s out. Finally!
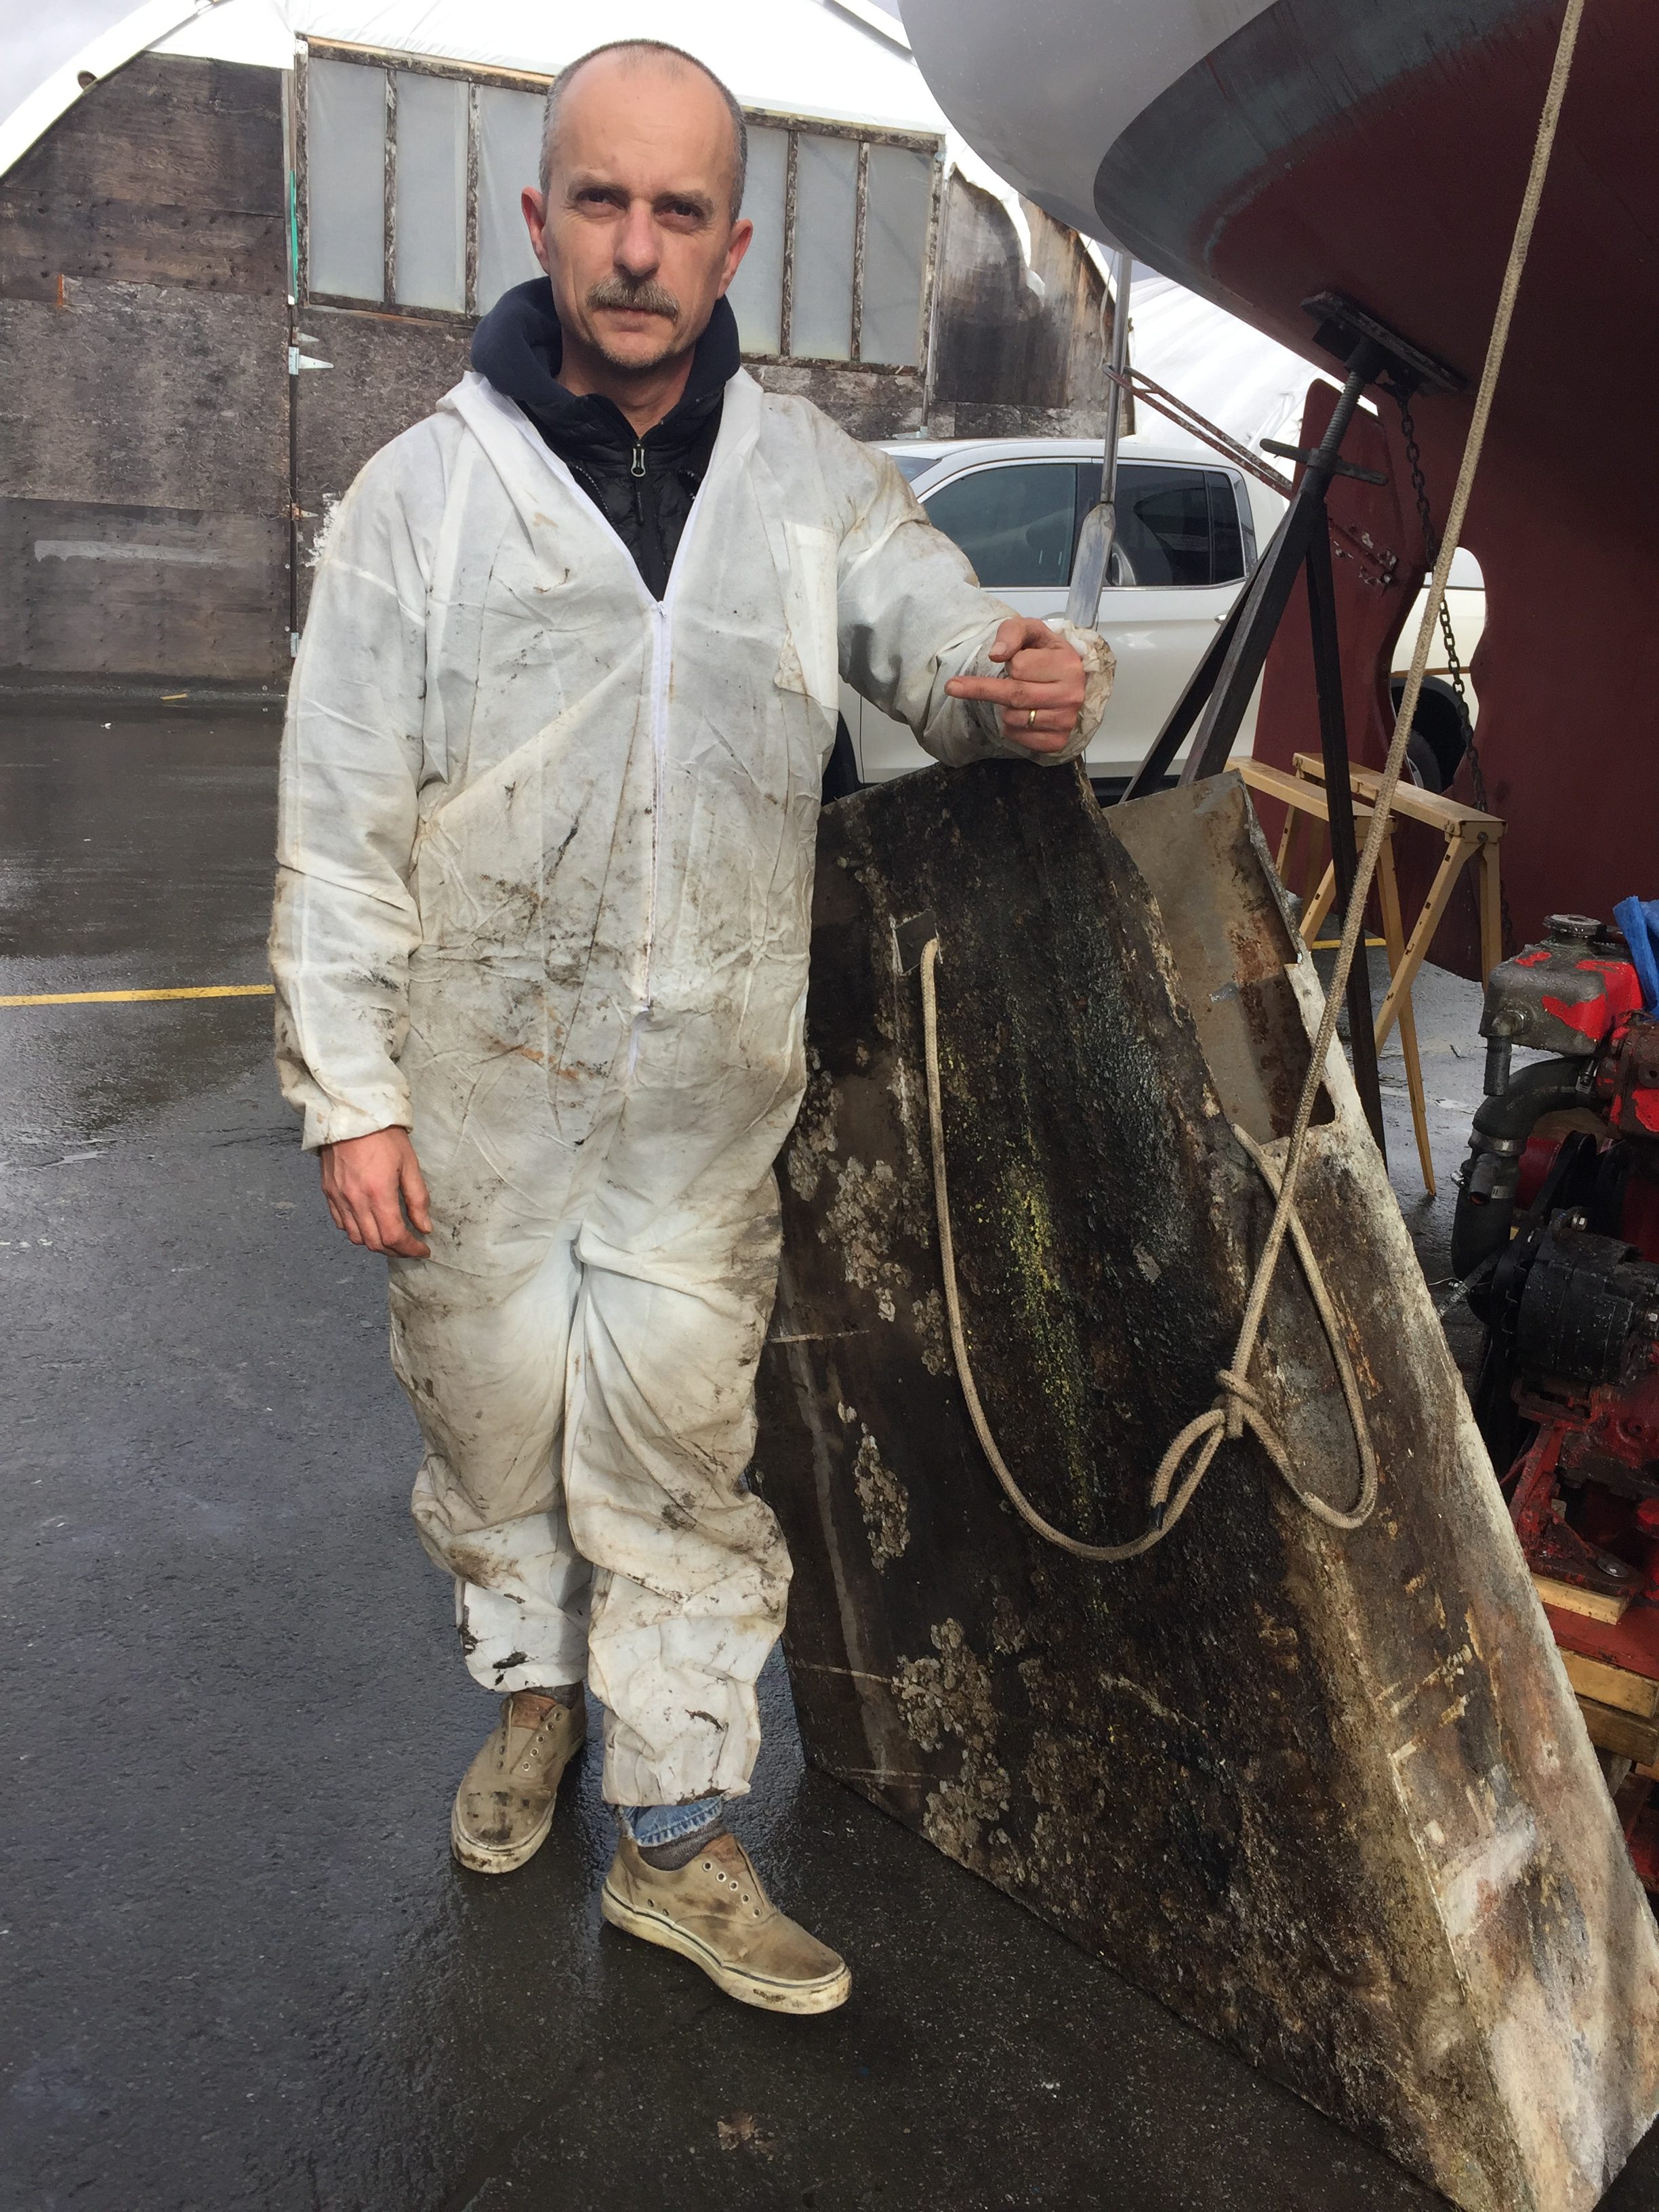 I have to say that was one of the worst jobs I have ever had to complete on a boat. I have never been so dirty, smelly or sore in all my boat renovation projects.
I am going to let the pictures tell the story and will keep my comments short.
 Here I have managed to cut the rest of the glass flange that is holding the tank in place and I was able to move it a couple o finches without any issue so thankfully I knew it was free.
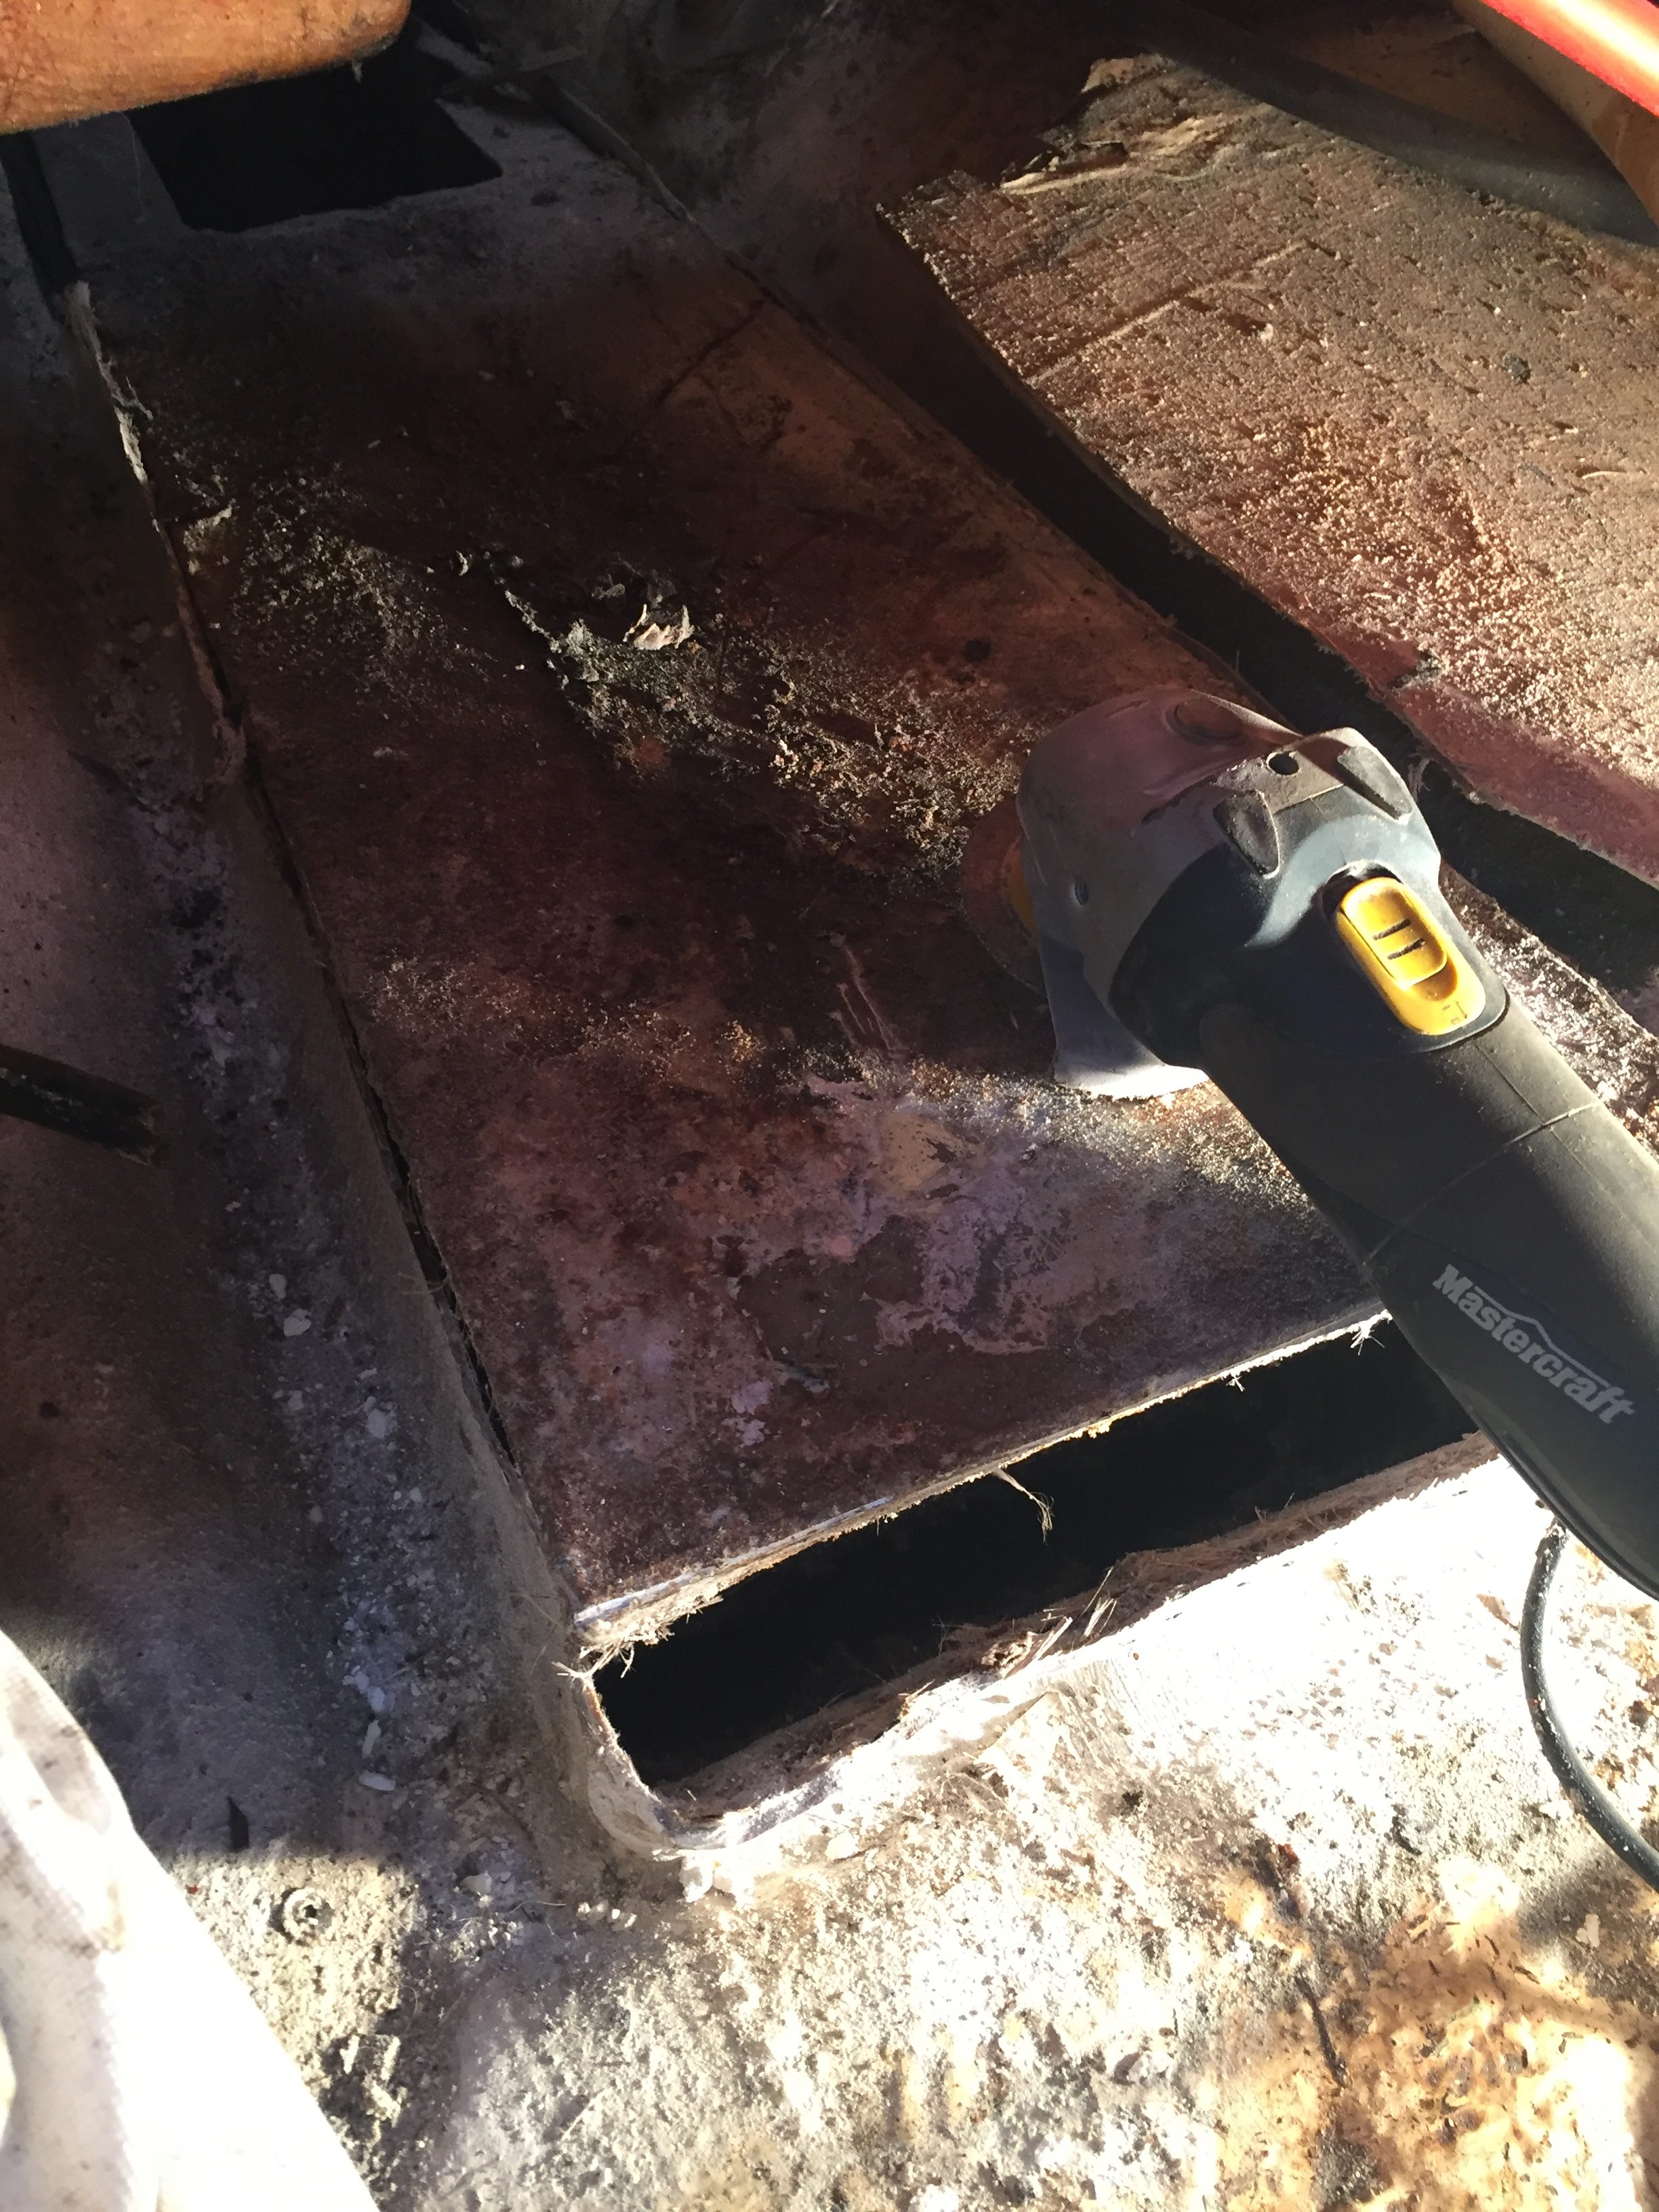
 This is not as quick and painless as it looks, getting to this part from initially freeing the tank was about an hour.
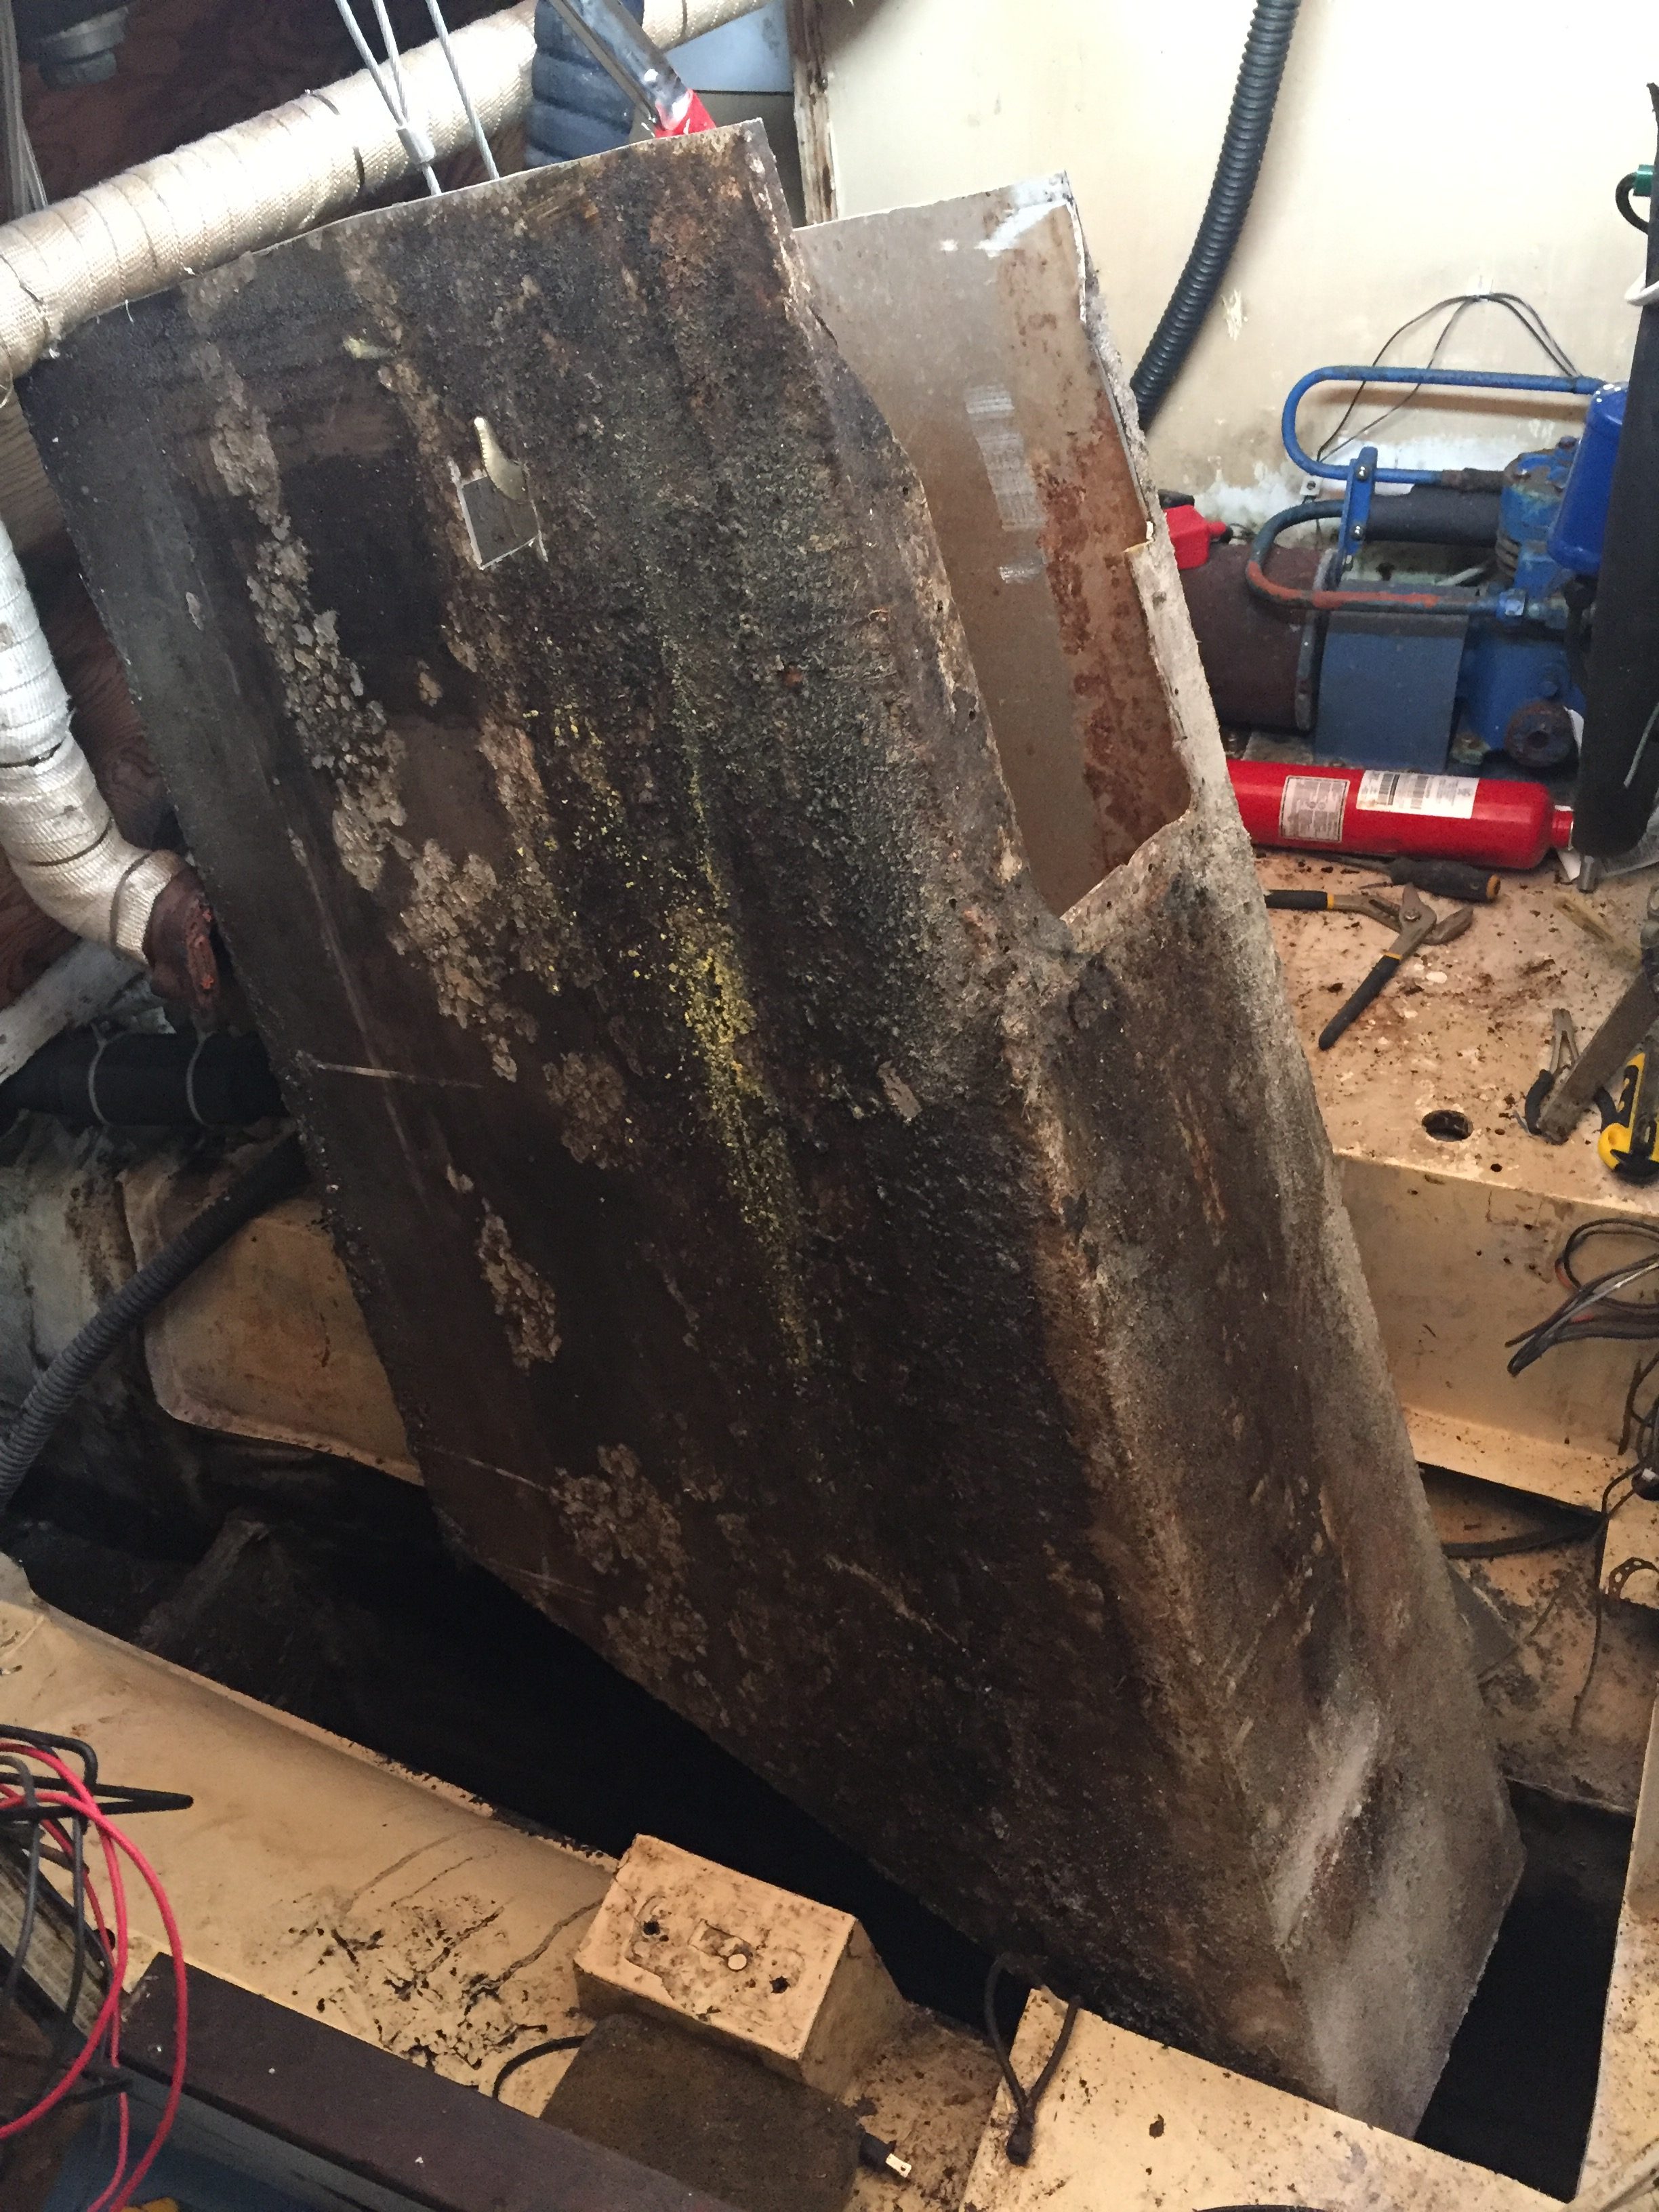

 Something strange with that light, seems to add a shiny spot on the top of my head…
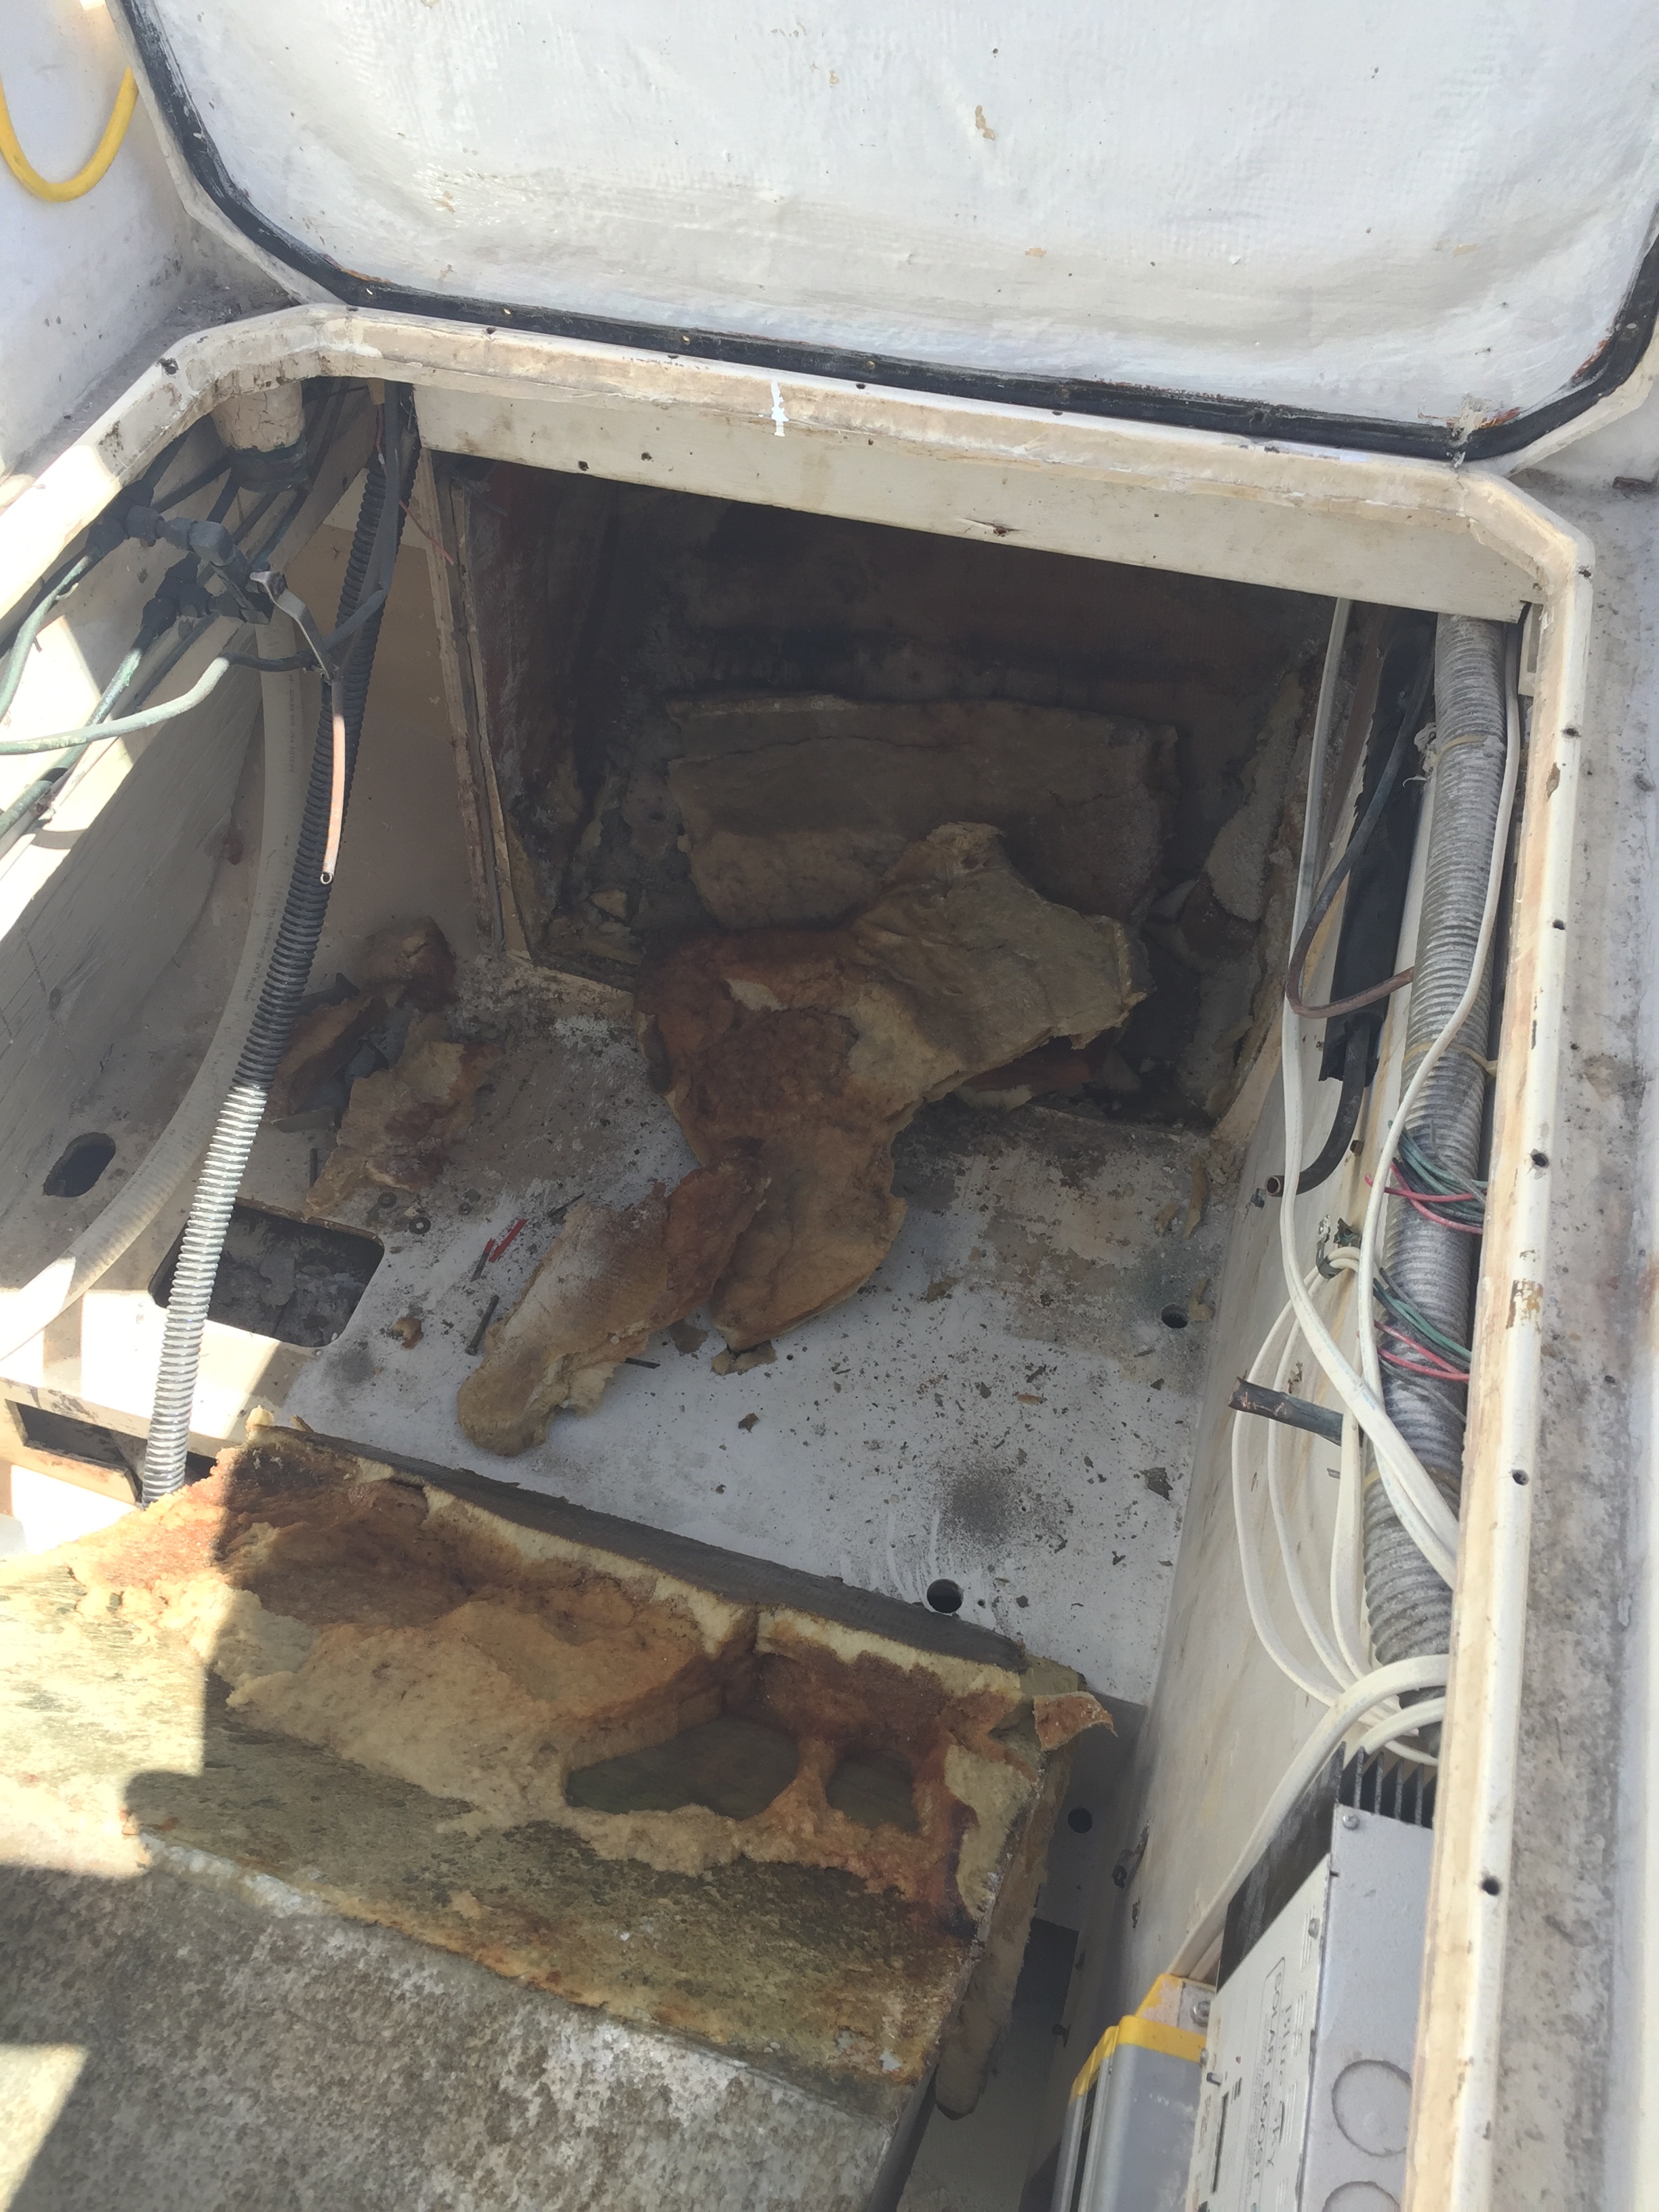
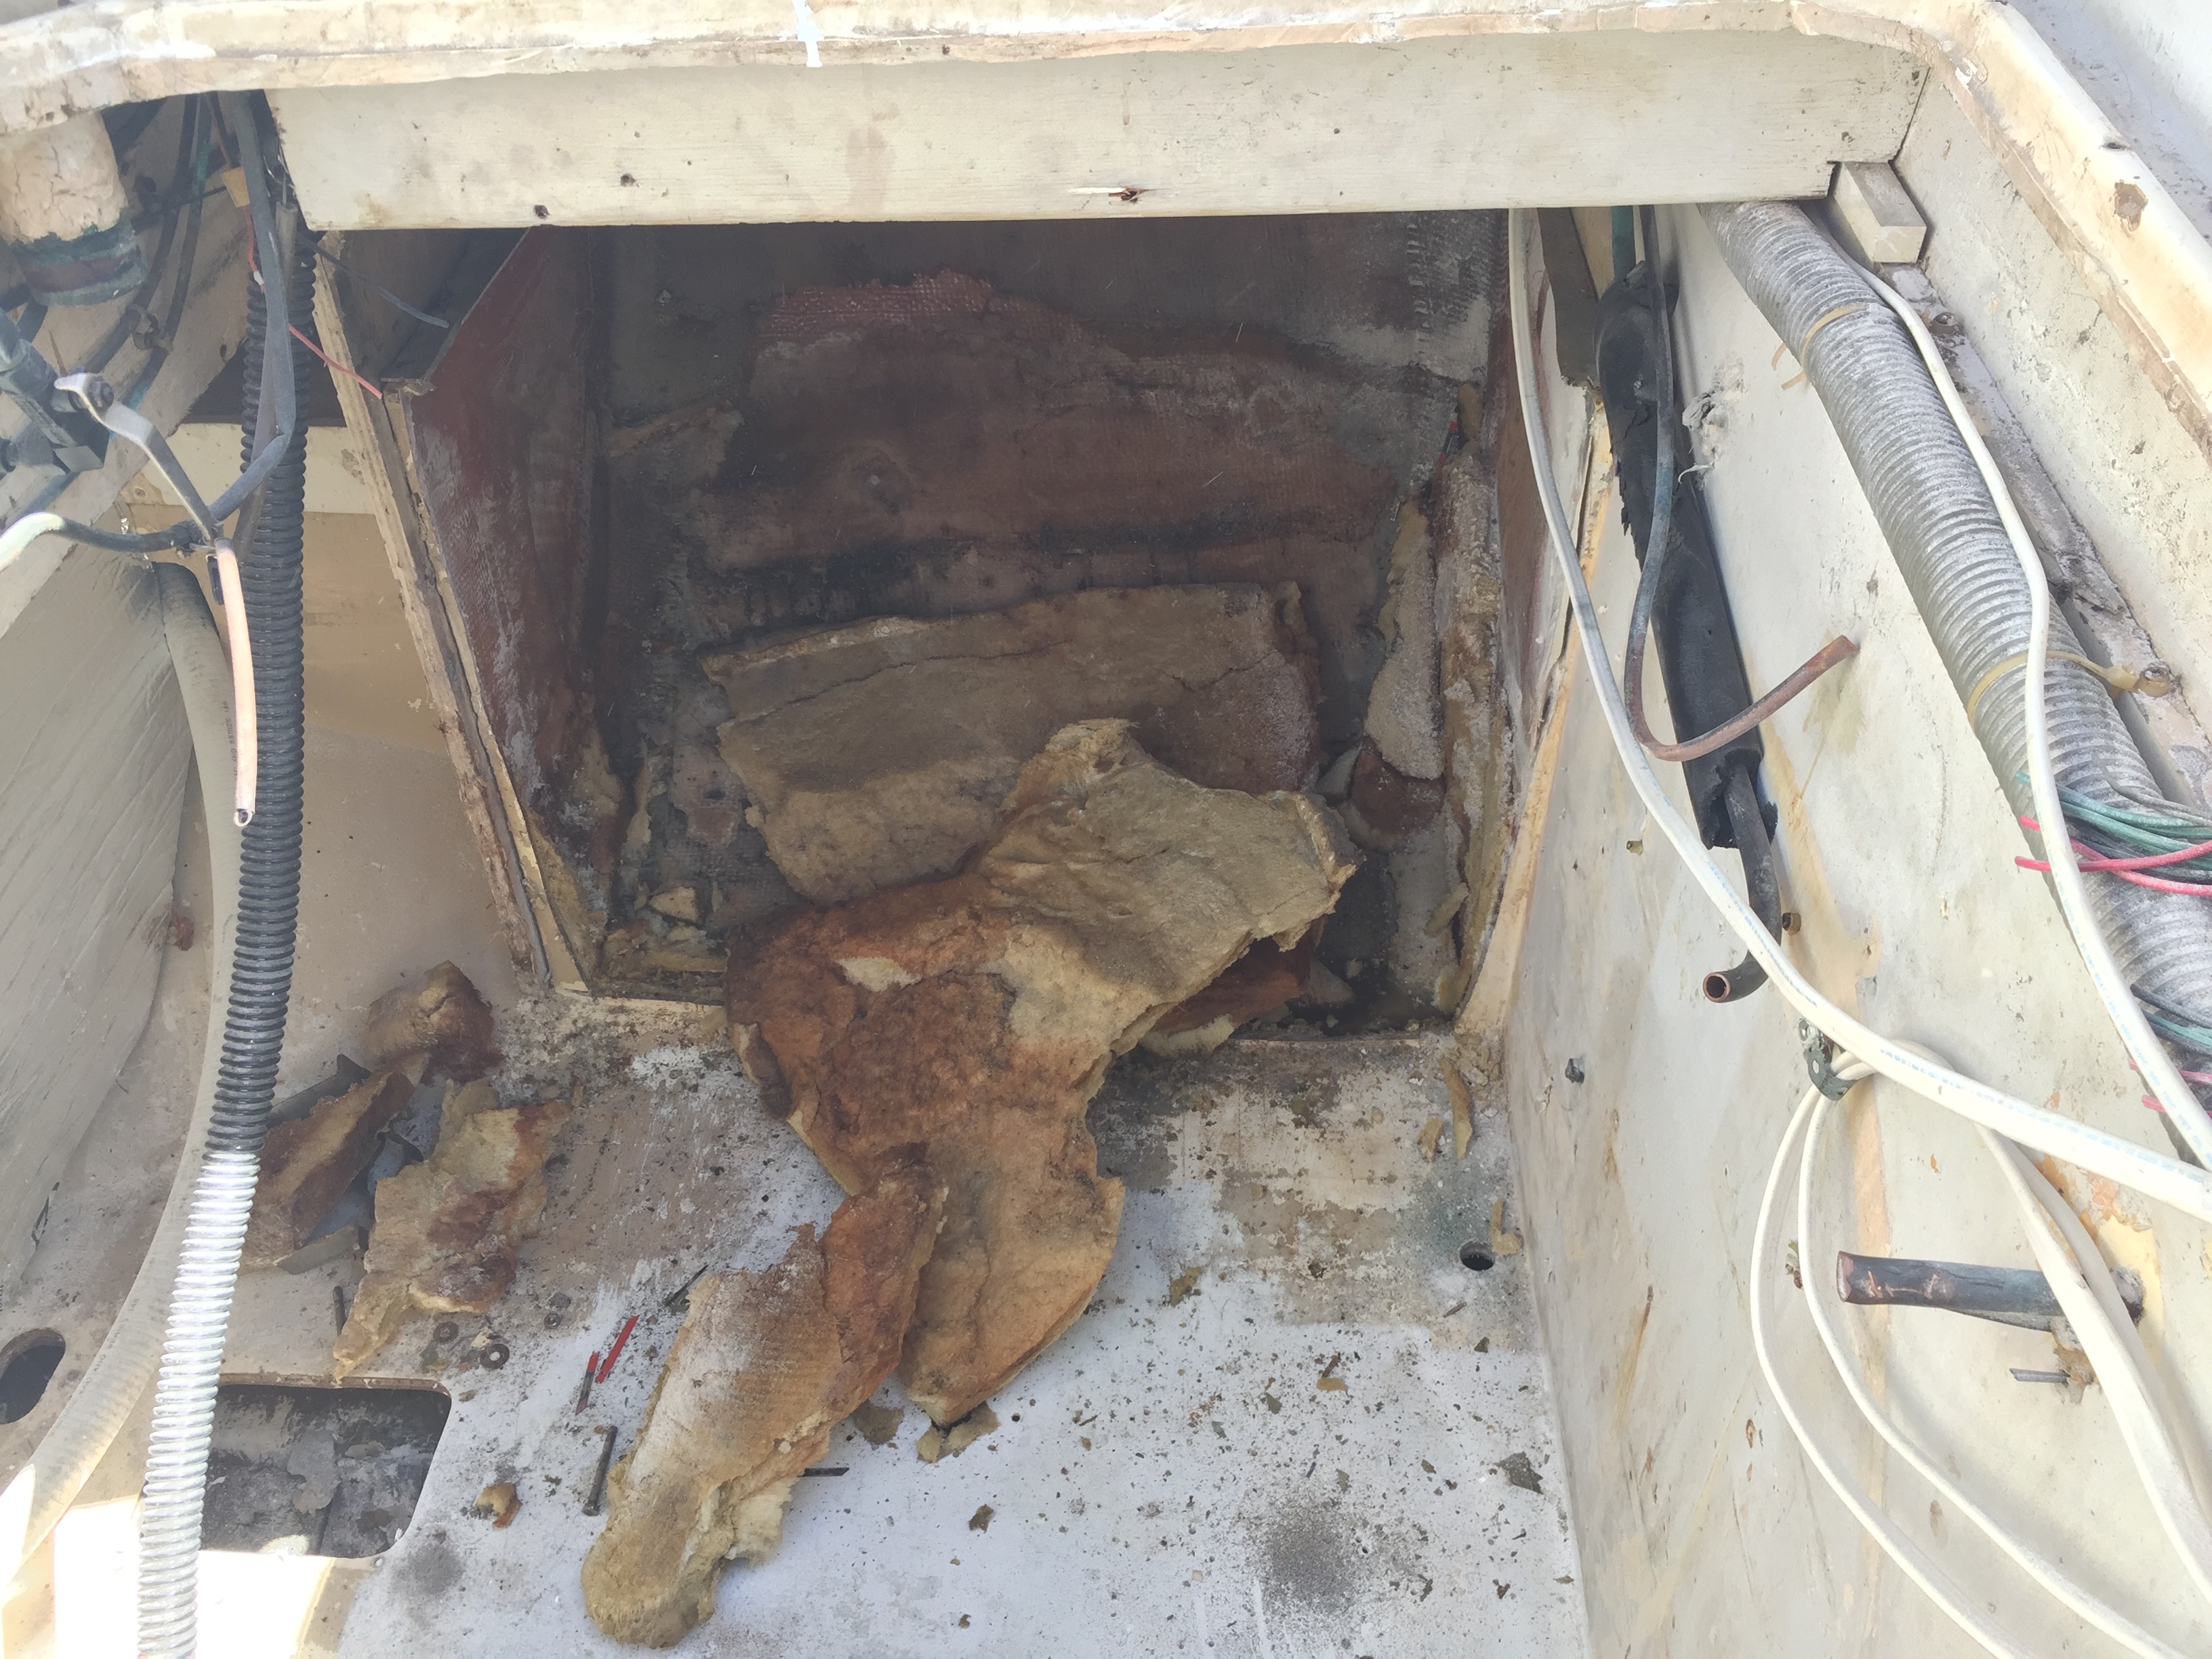
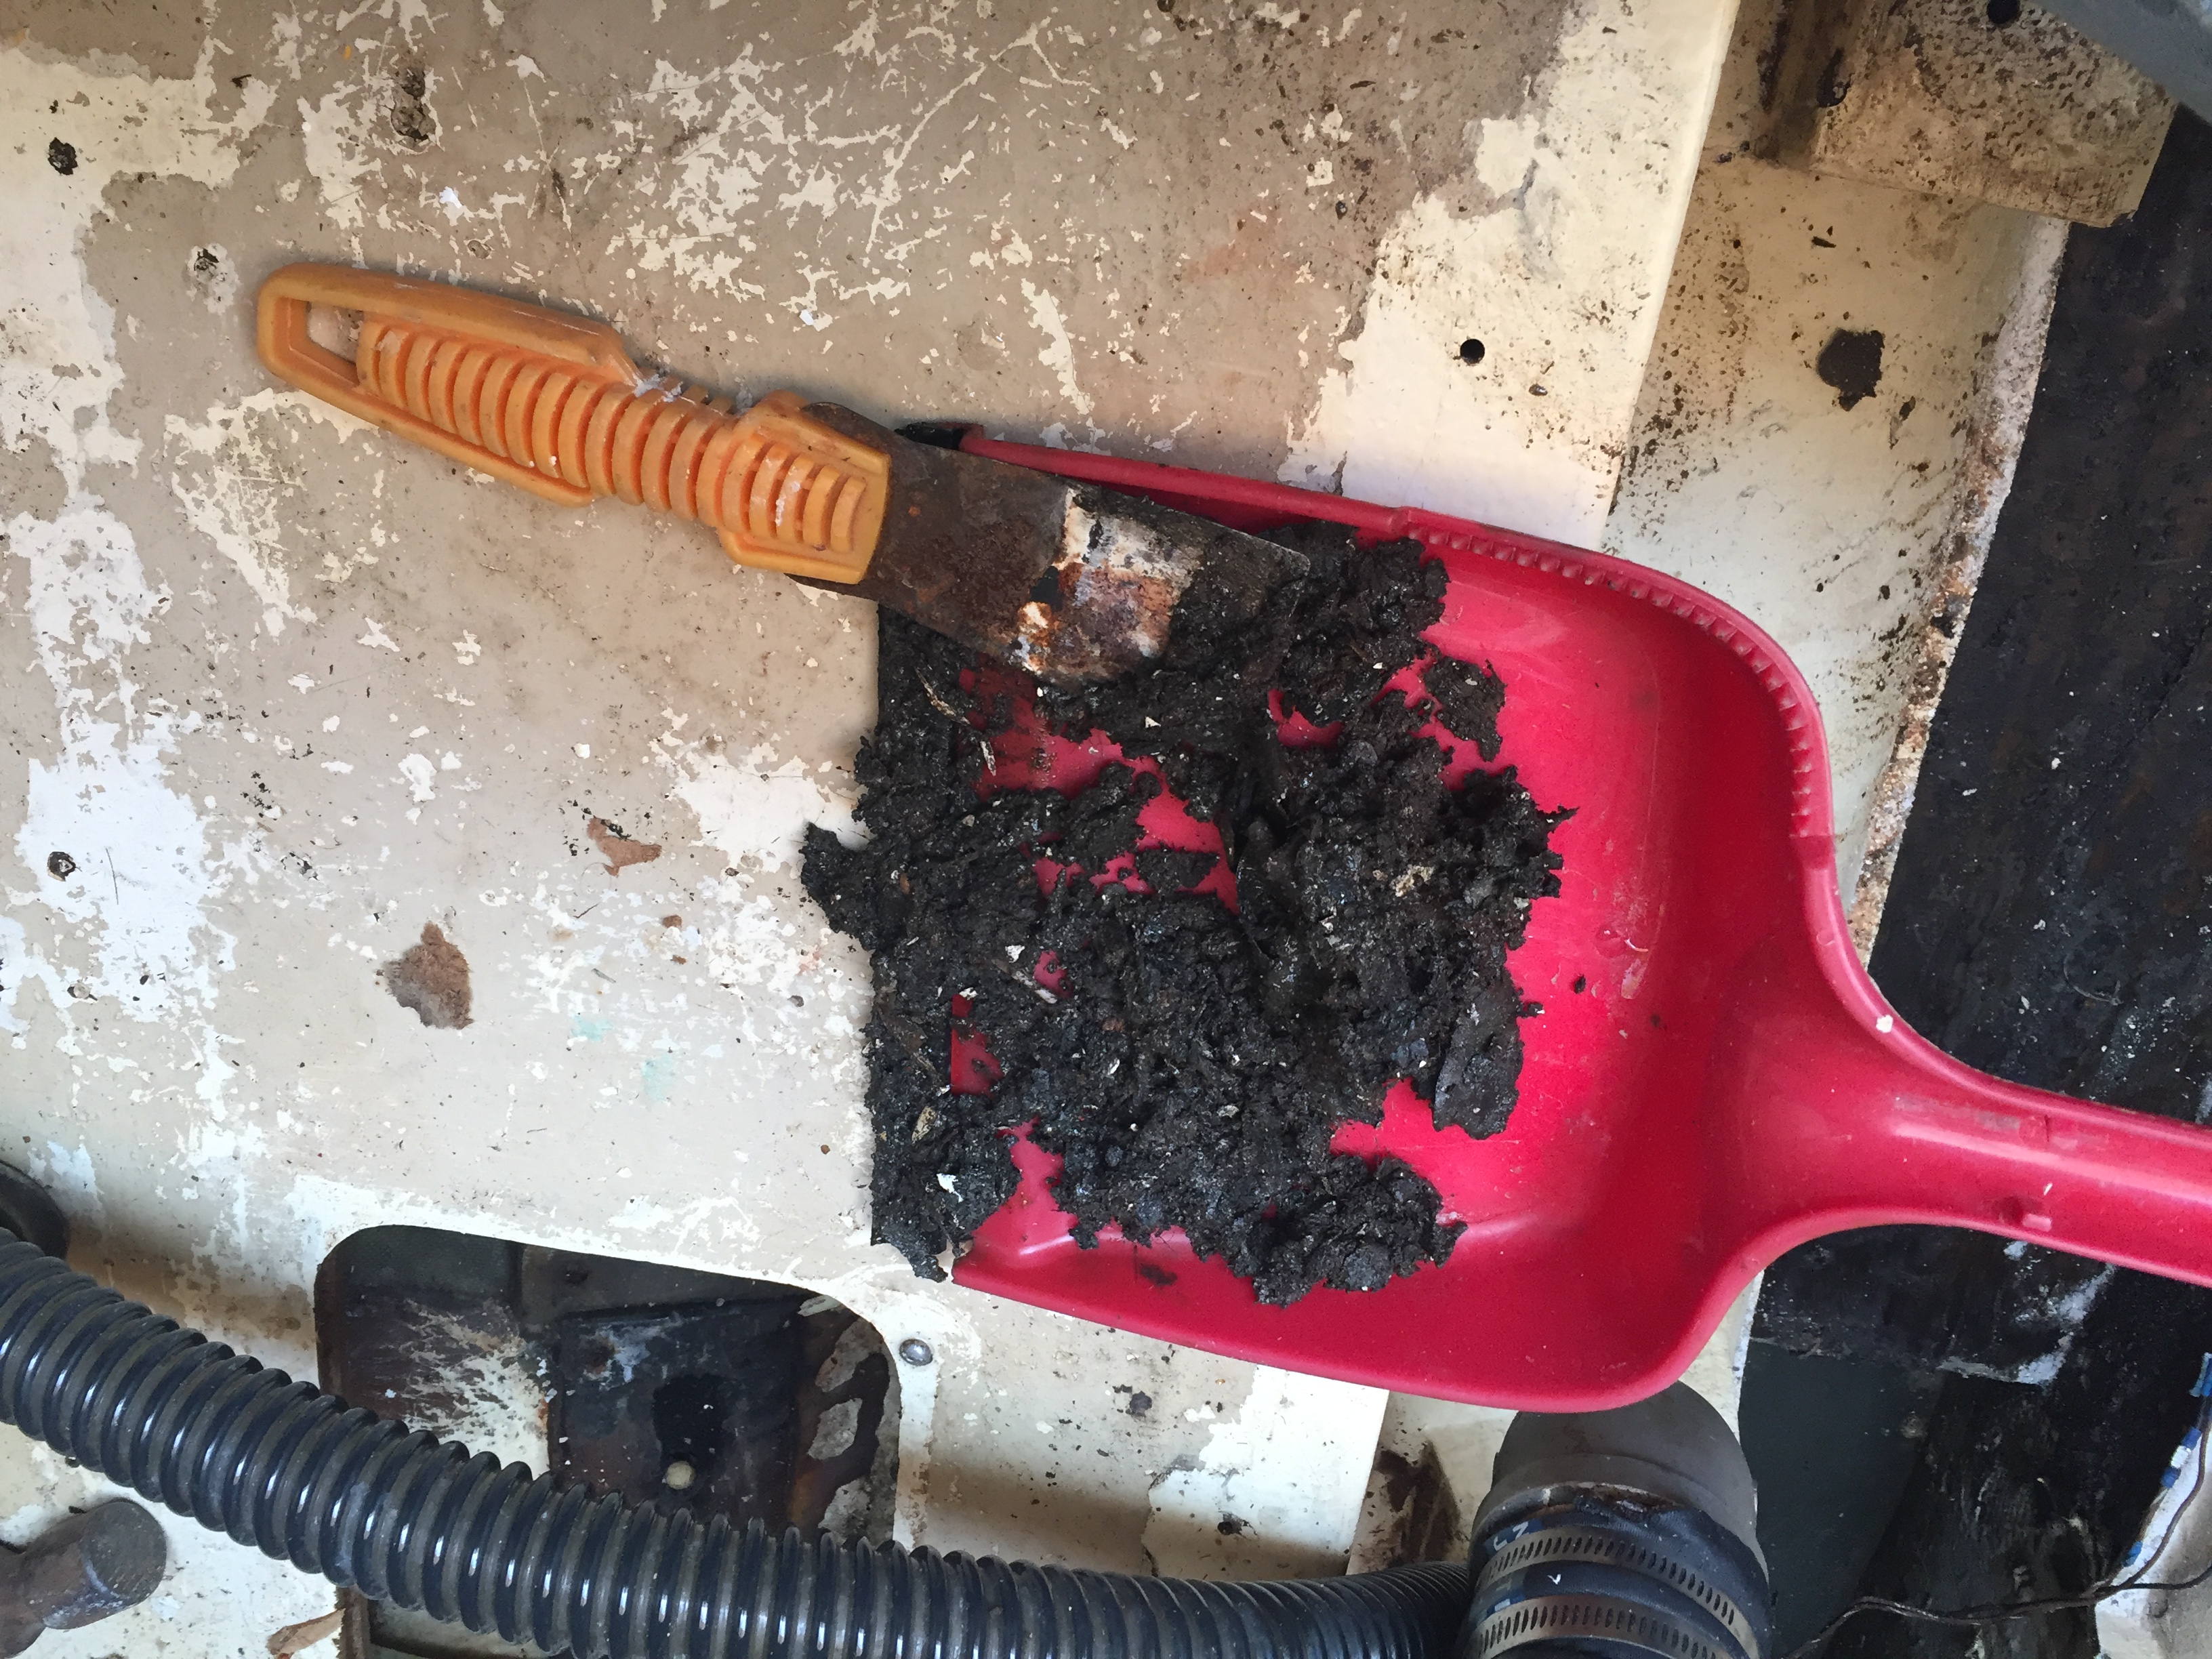
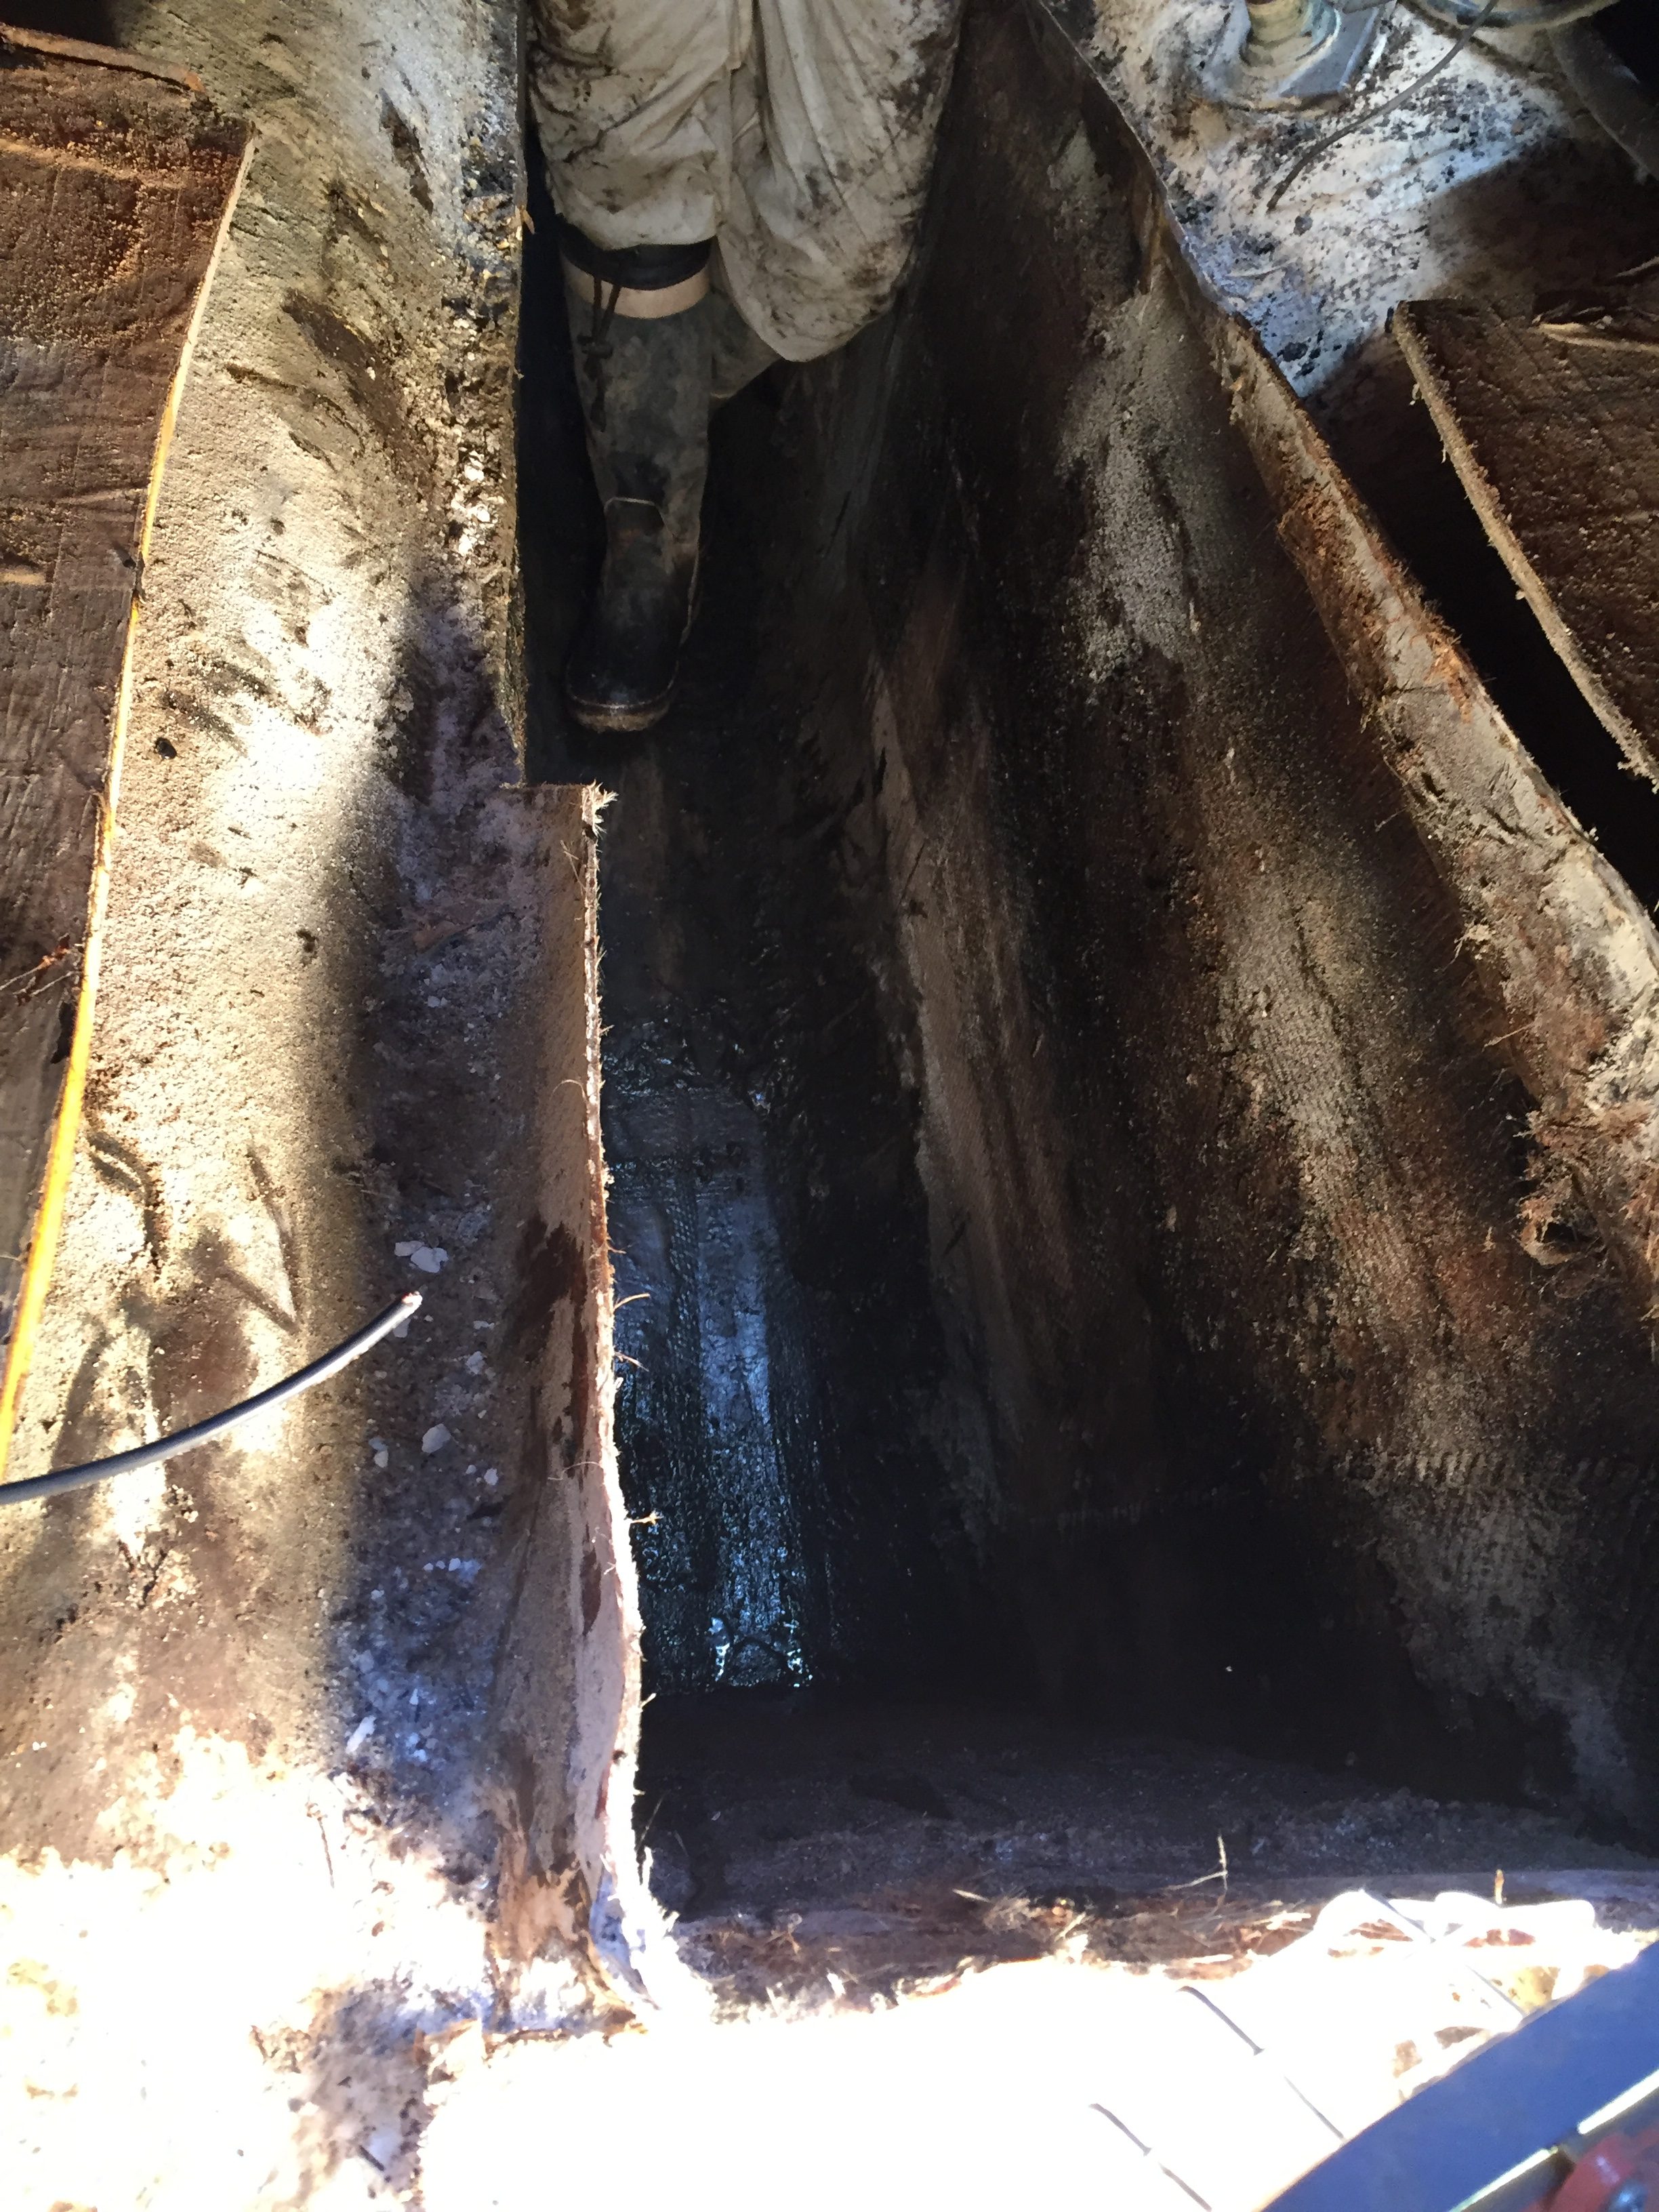 Post tank removal. Now there was about 4 inches of shit to clean out. I assume it was what was left of the foam but of course it was drenched in black crap.
 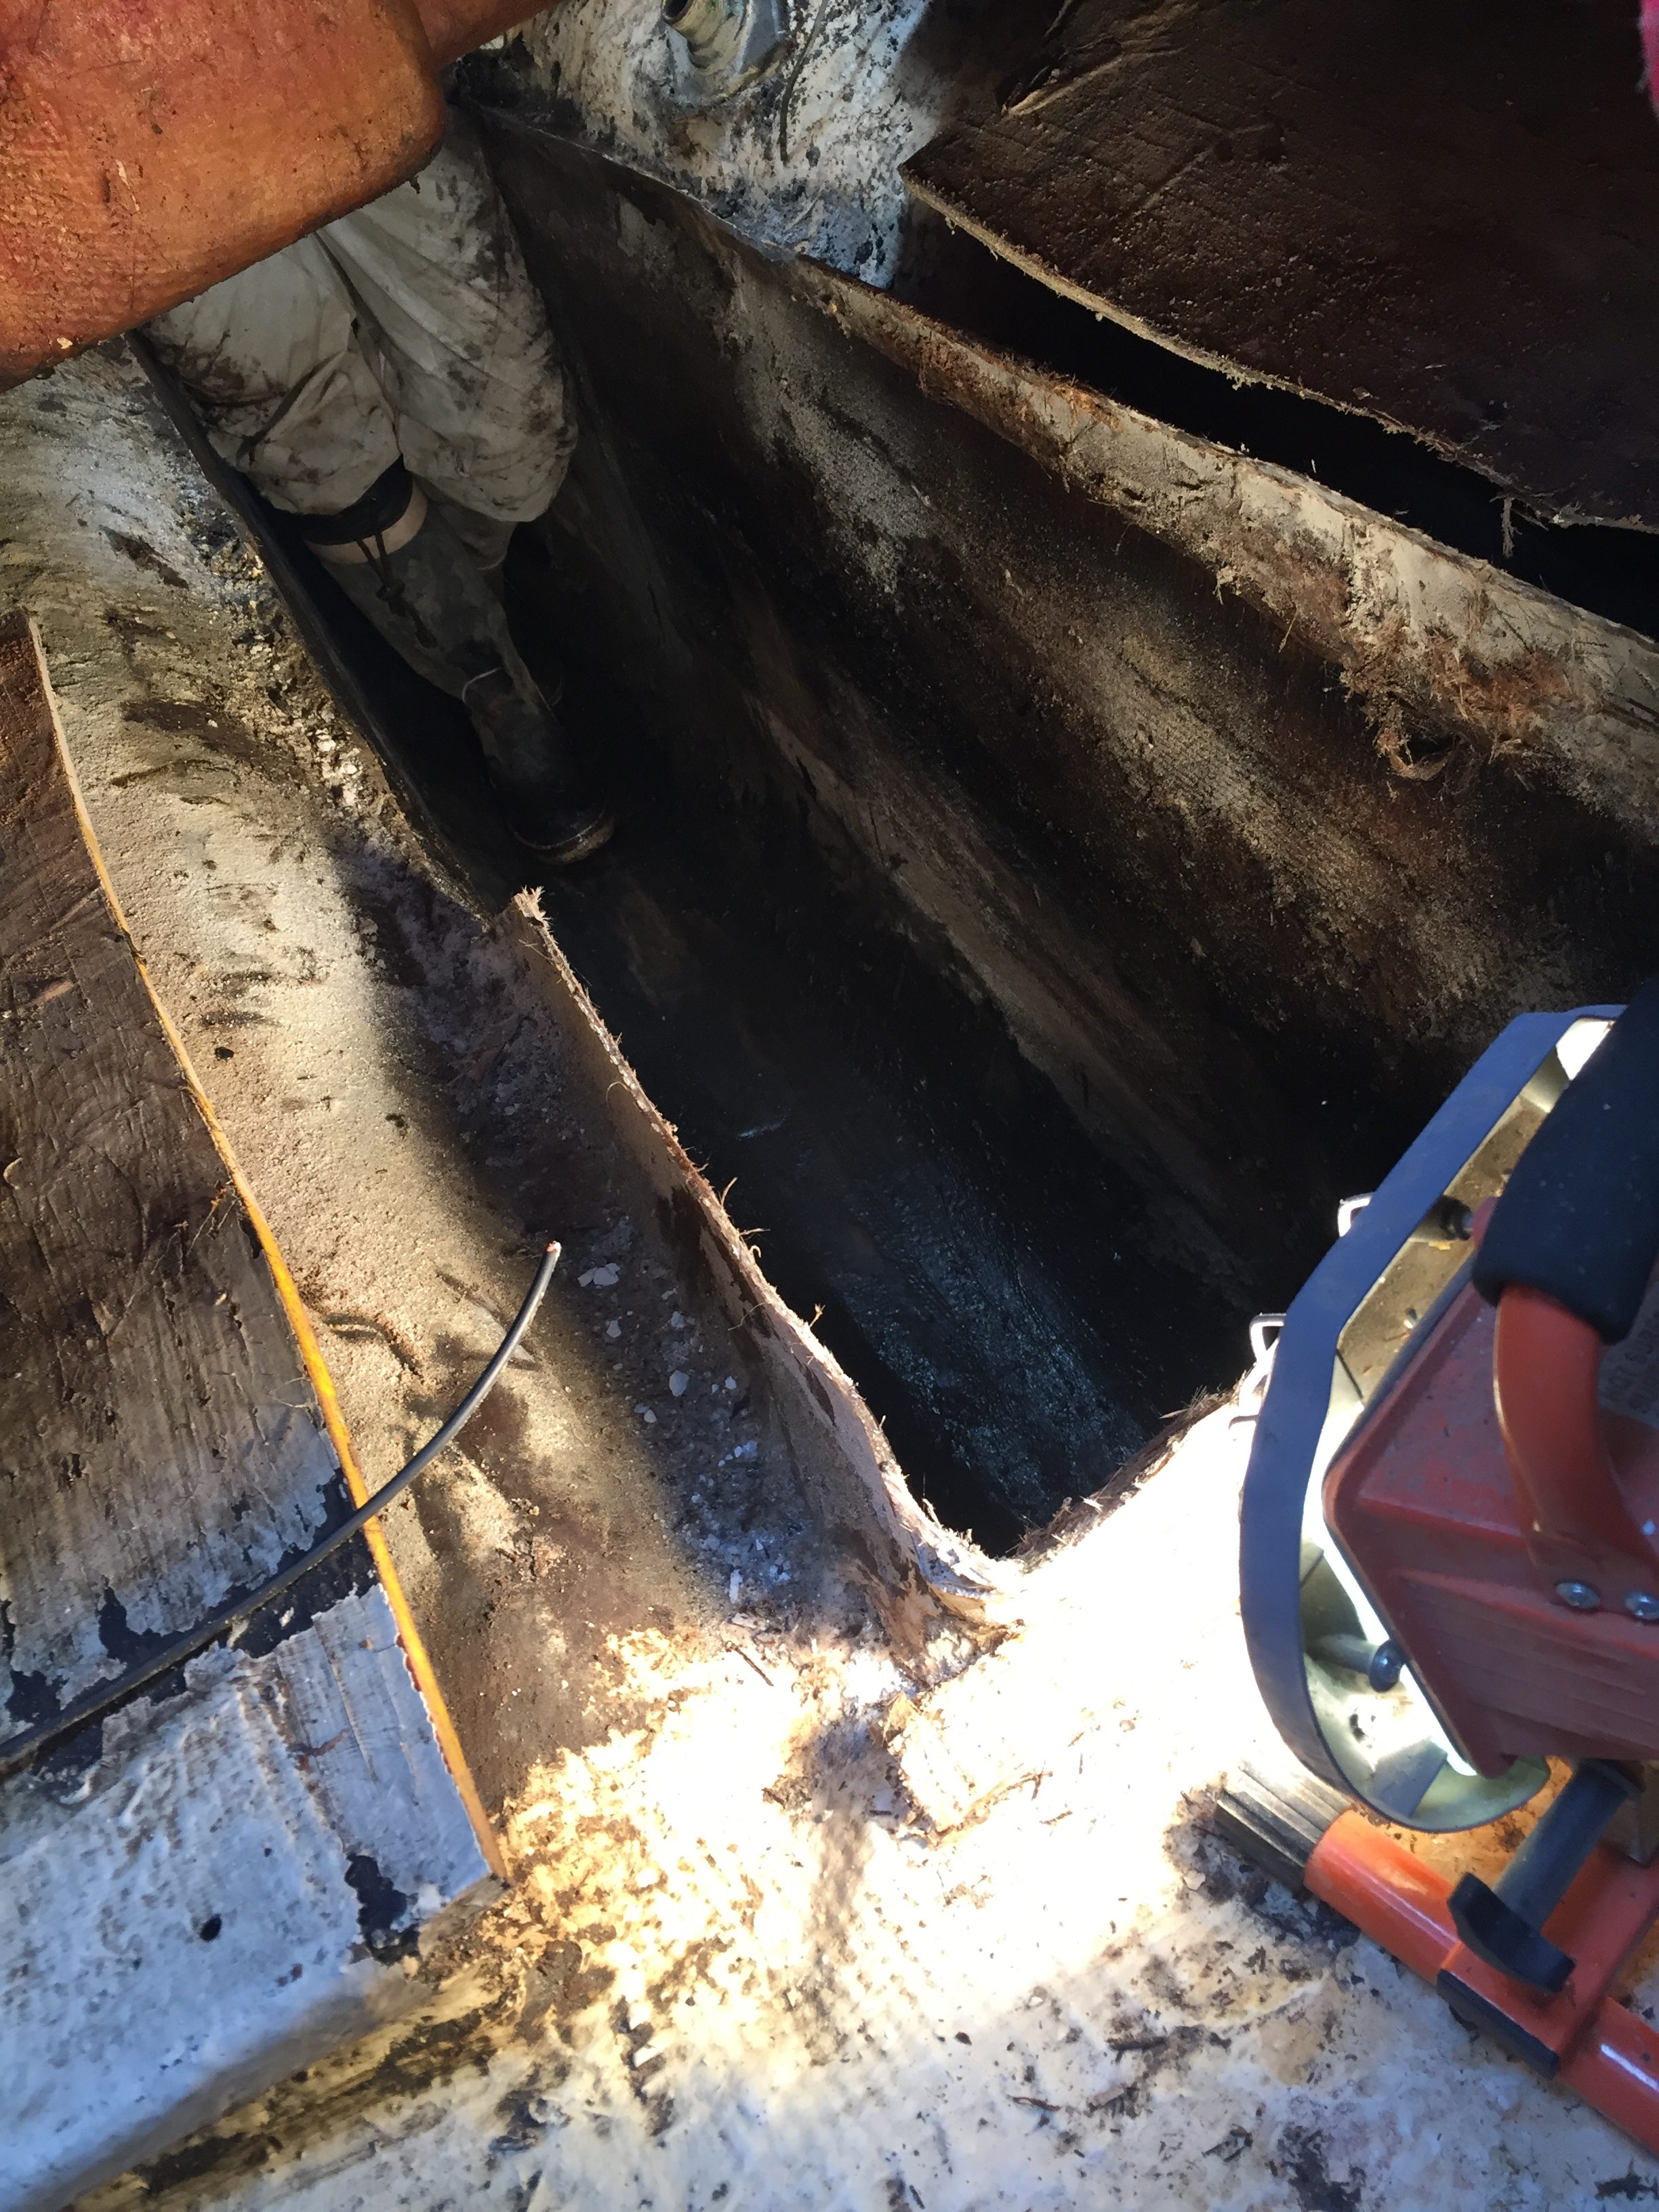 So what did I learn from this project?
On our last boat we had a strange smell that only surfaced when we were under way. We had cleaned every square centimetre of the bilge multiple times and when at anchor or moored, the bilge smelt like flowers. Get the boat moving and it was disgusting. I have a solid belief that I know what the cause was now. There was no keel tank, however I think the encapsulated ballast had seawater fermenting around it, it is the only thing I can think of.
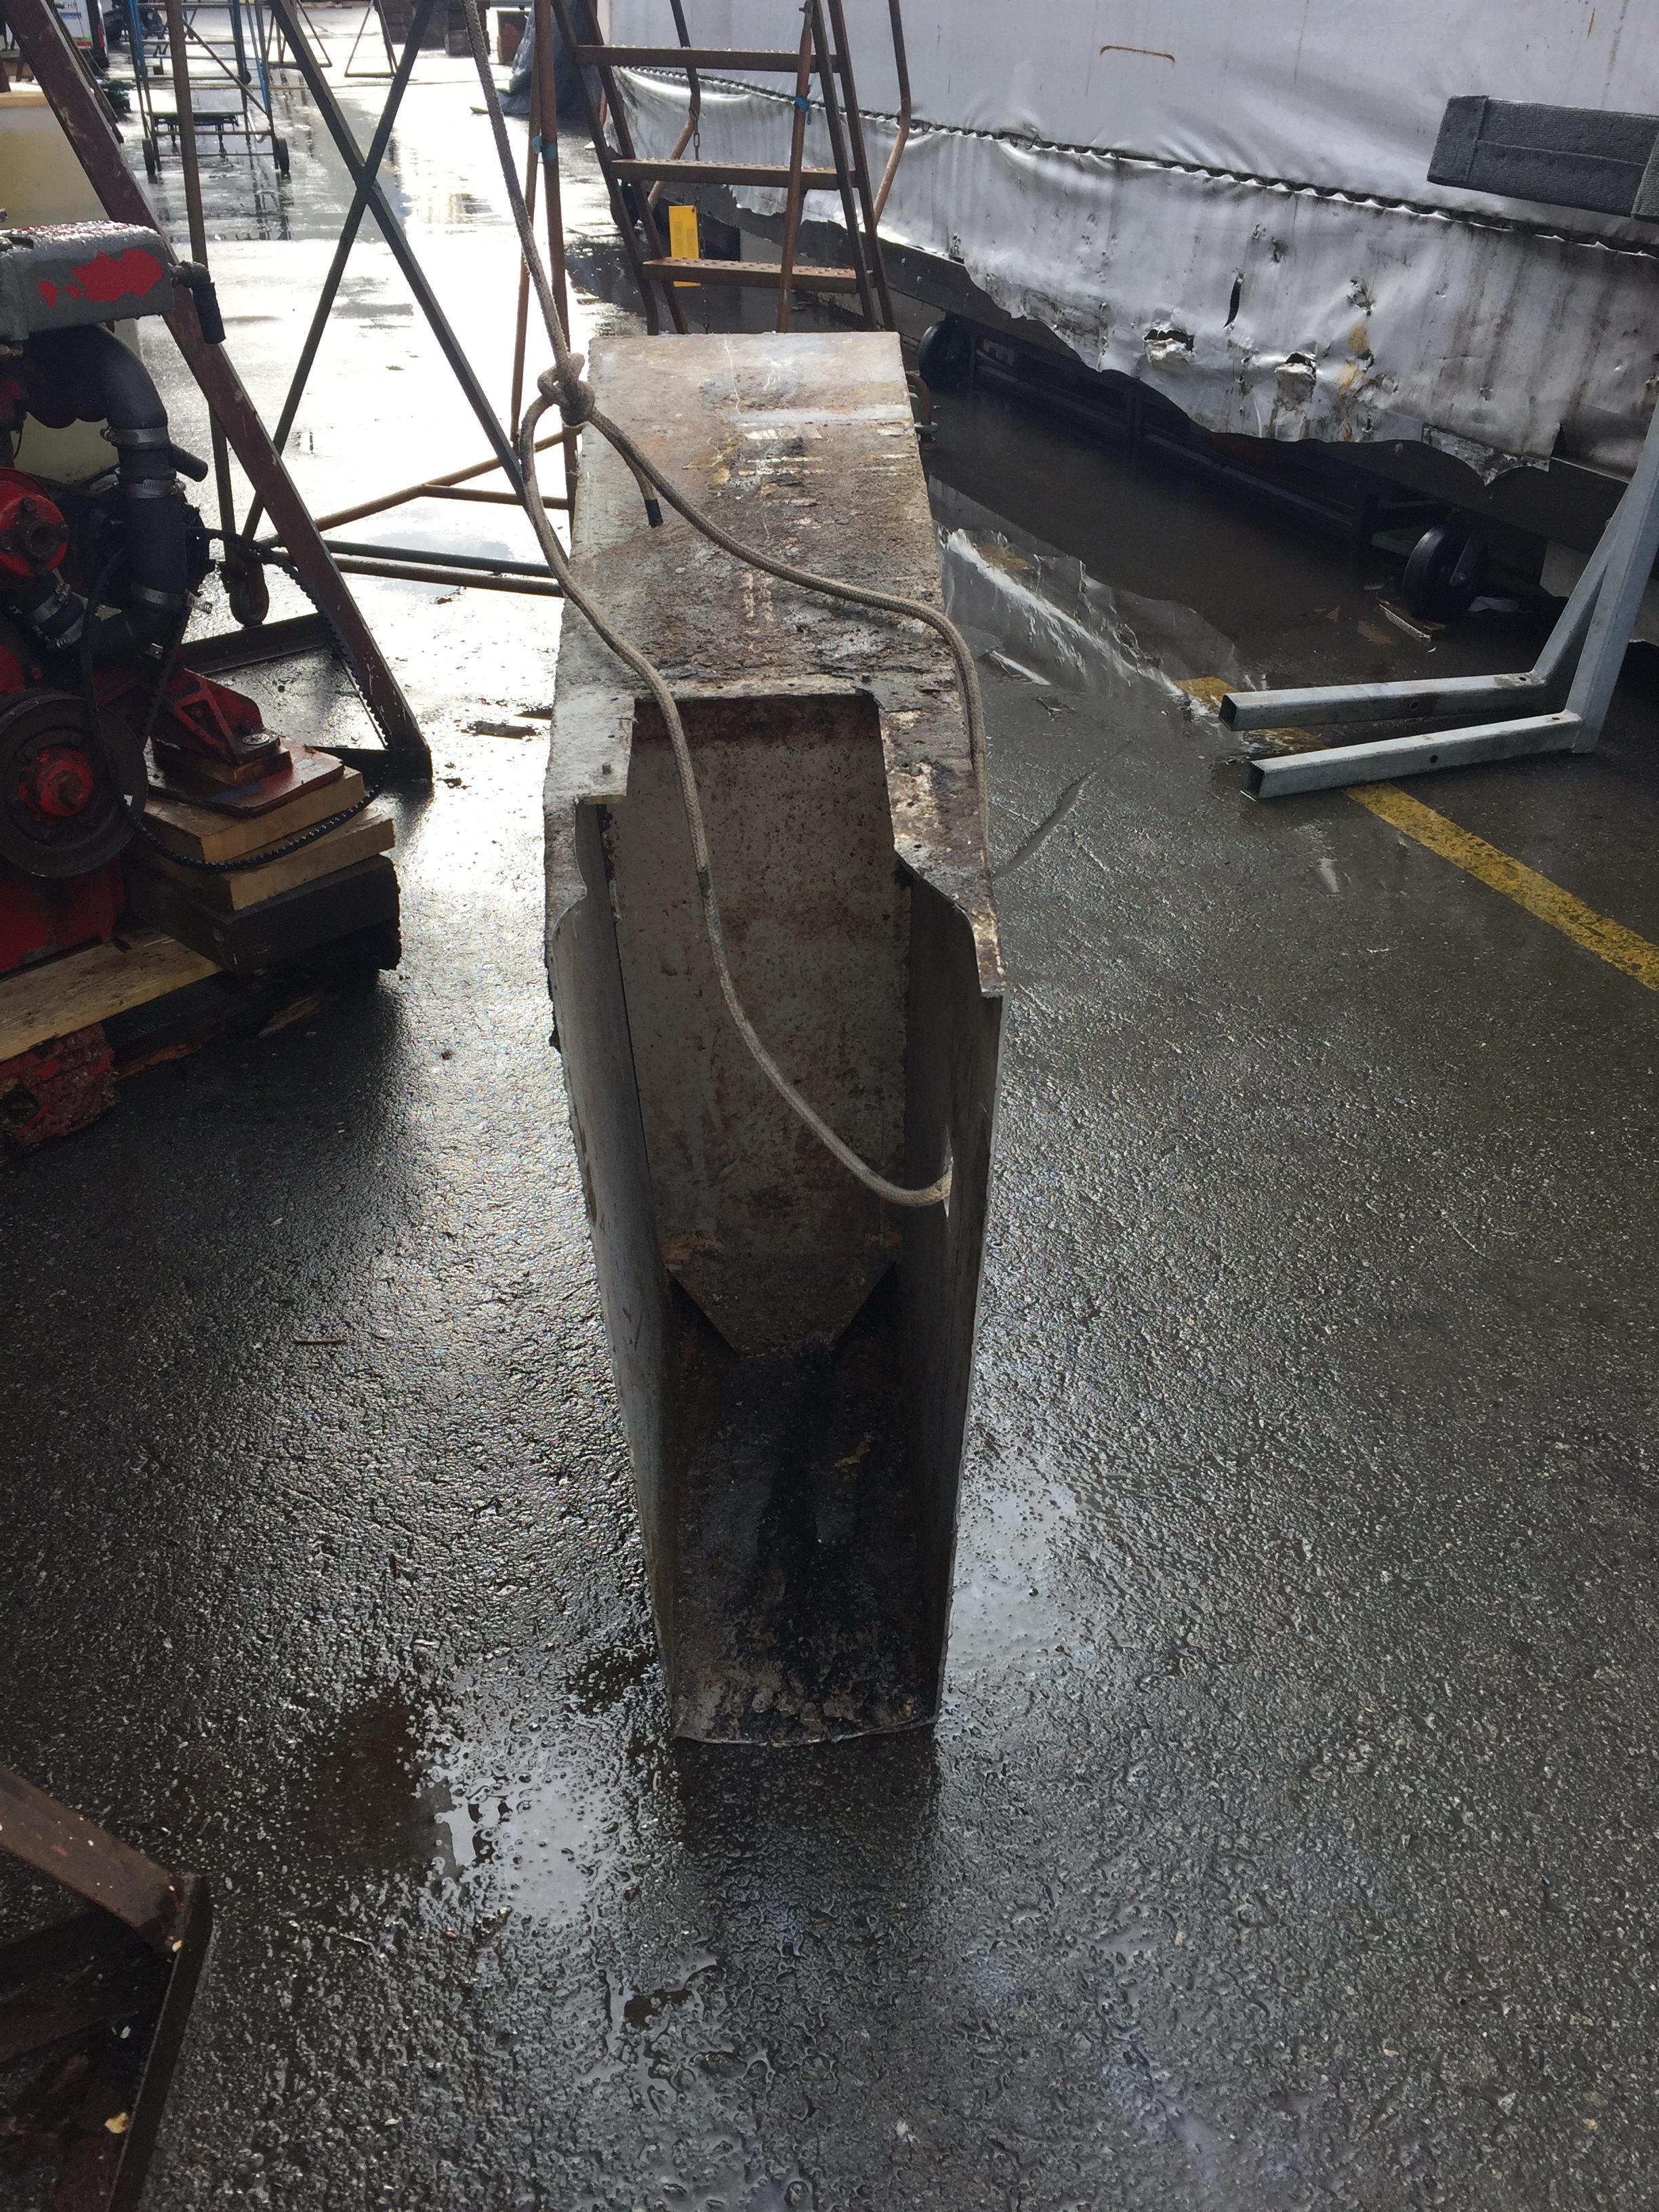
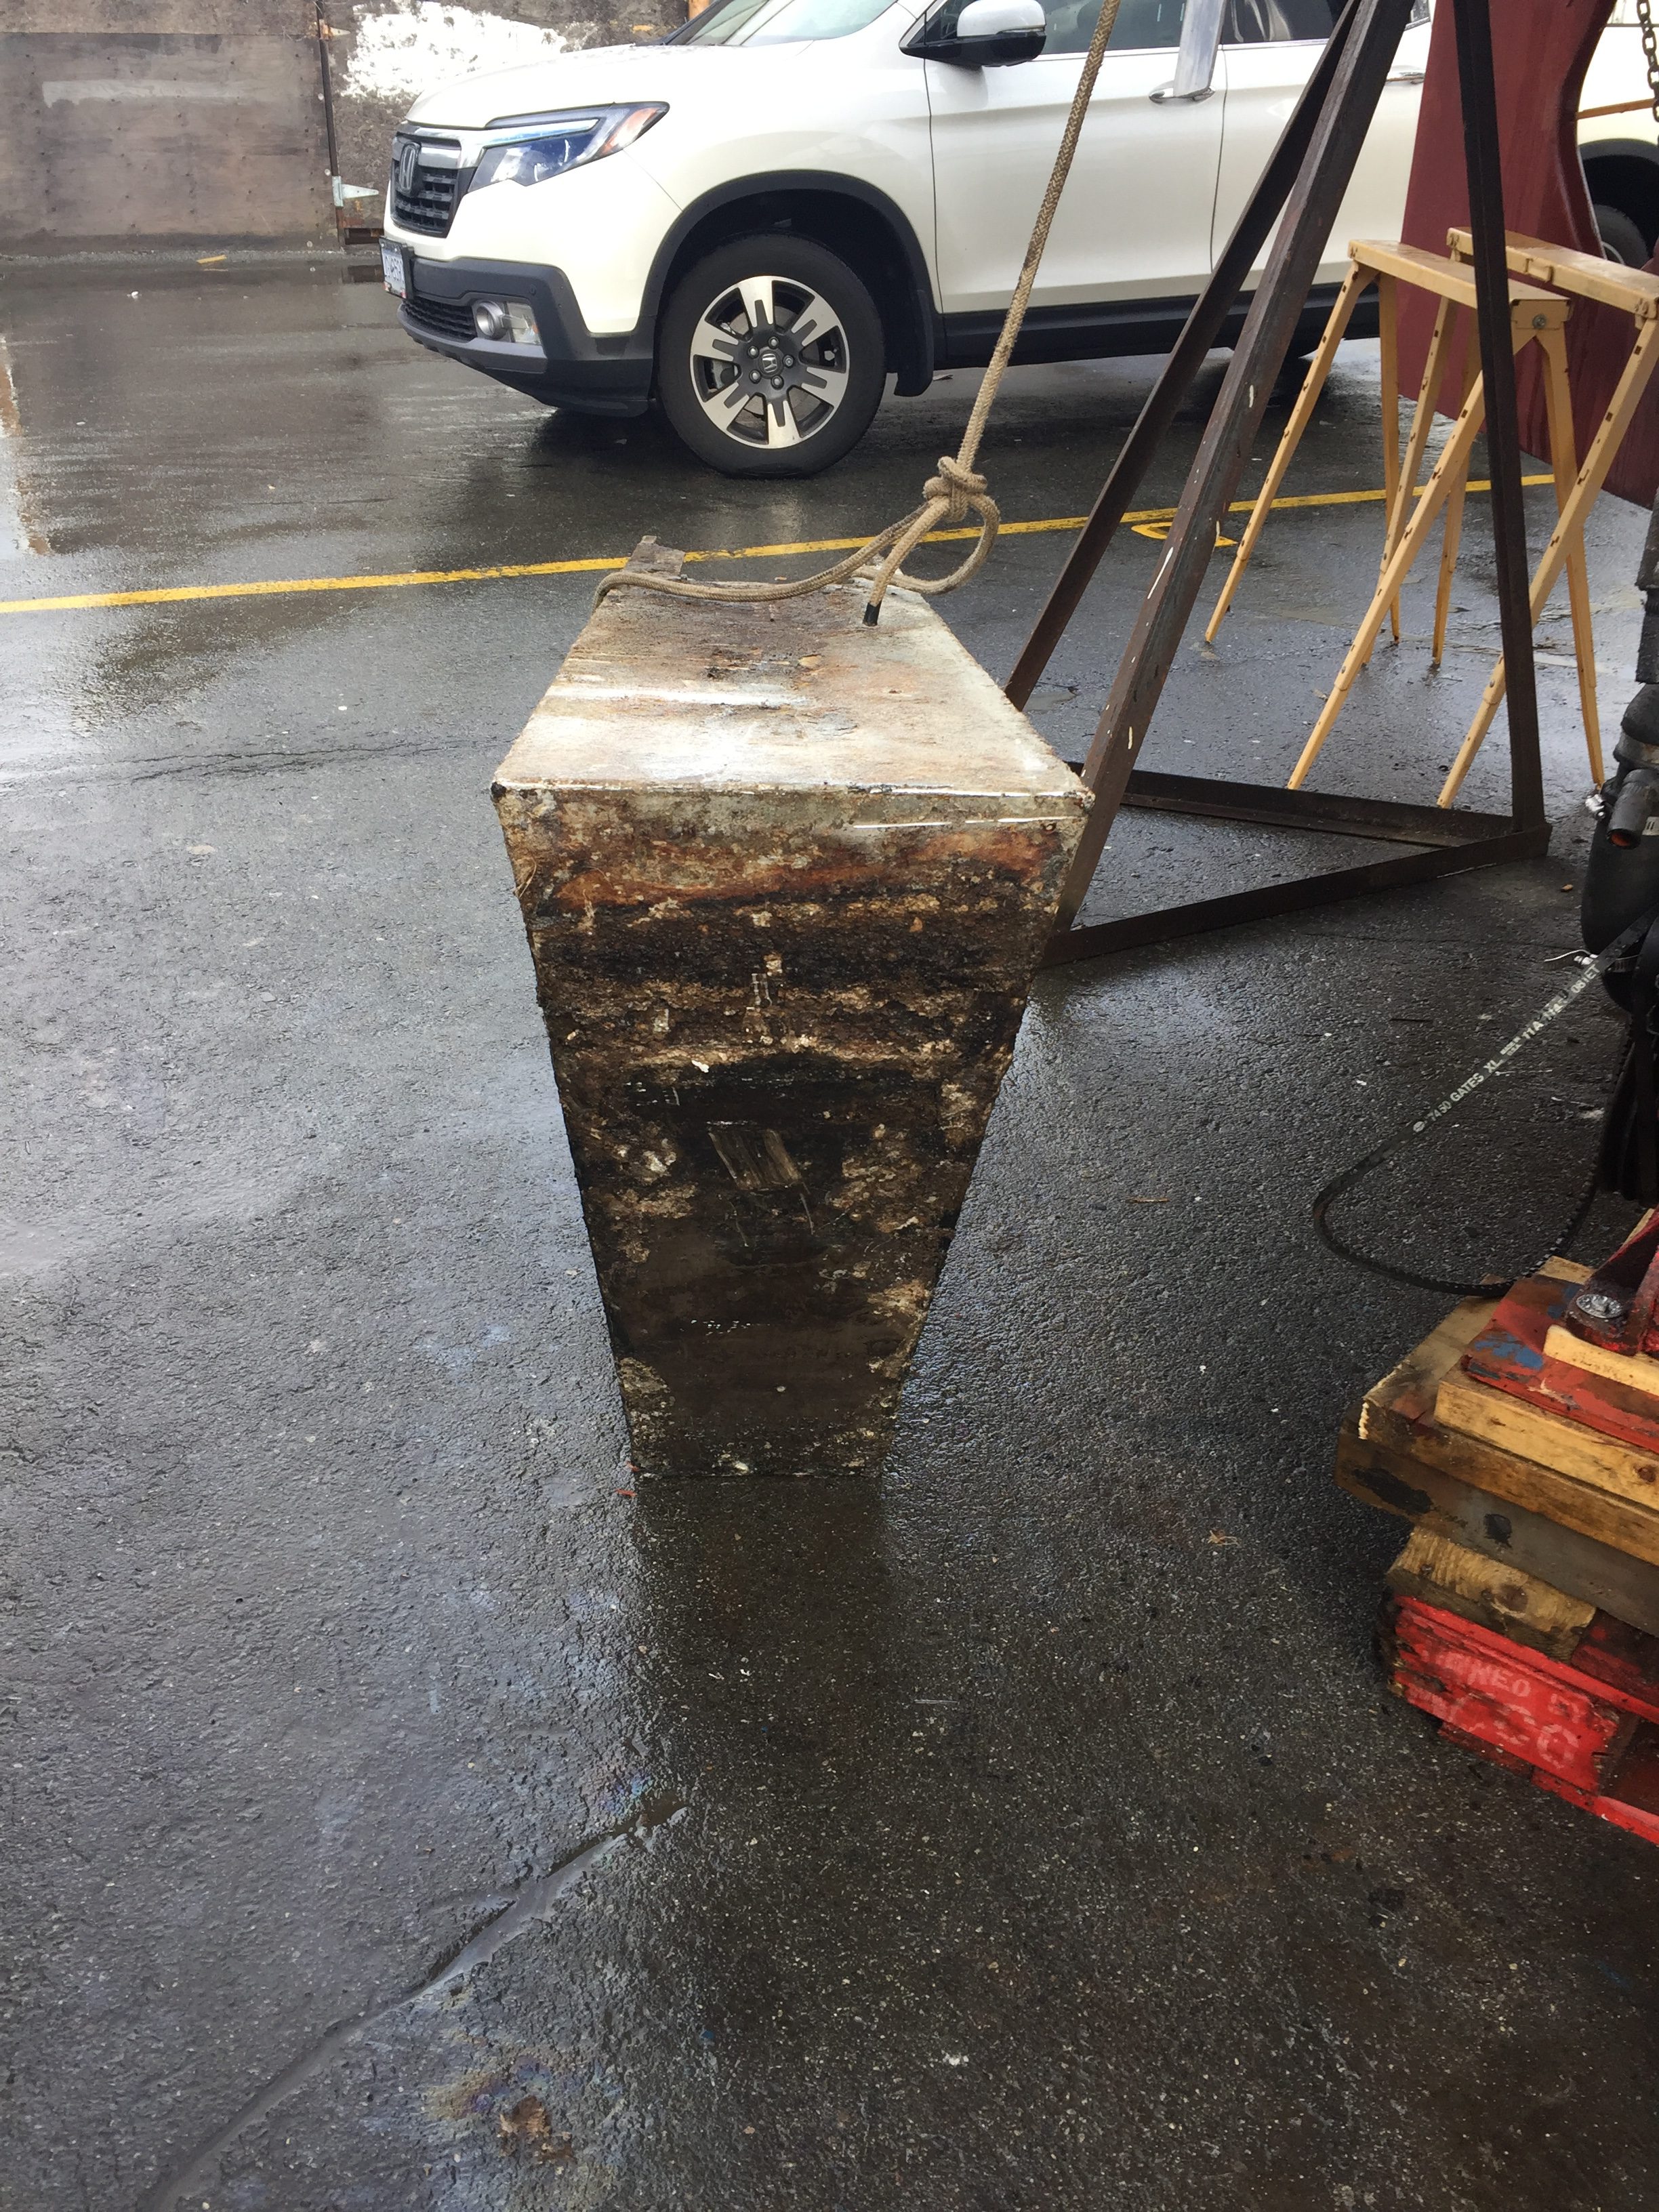
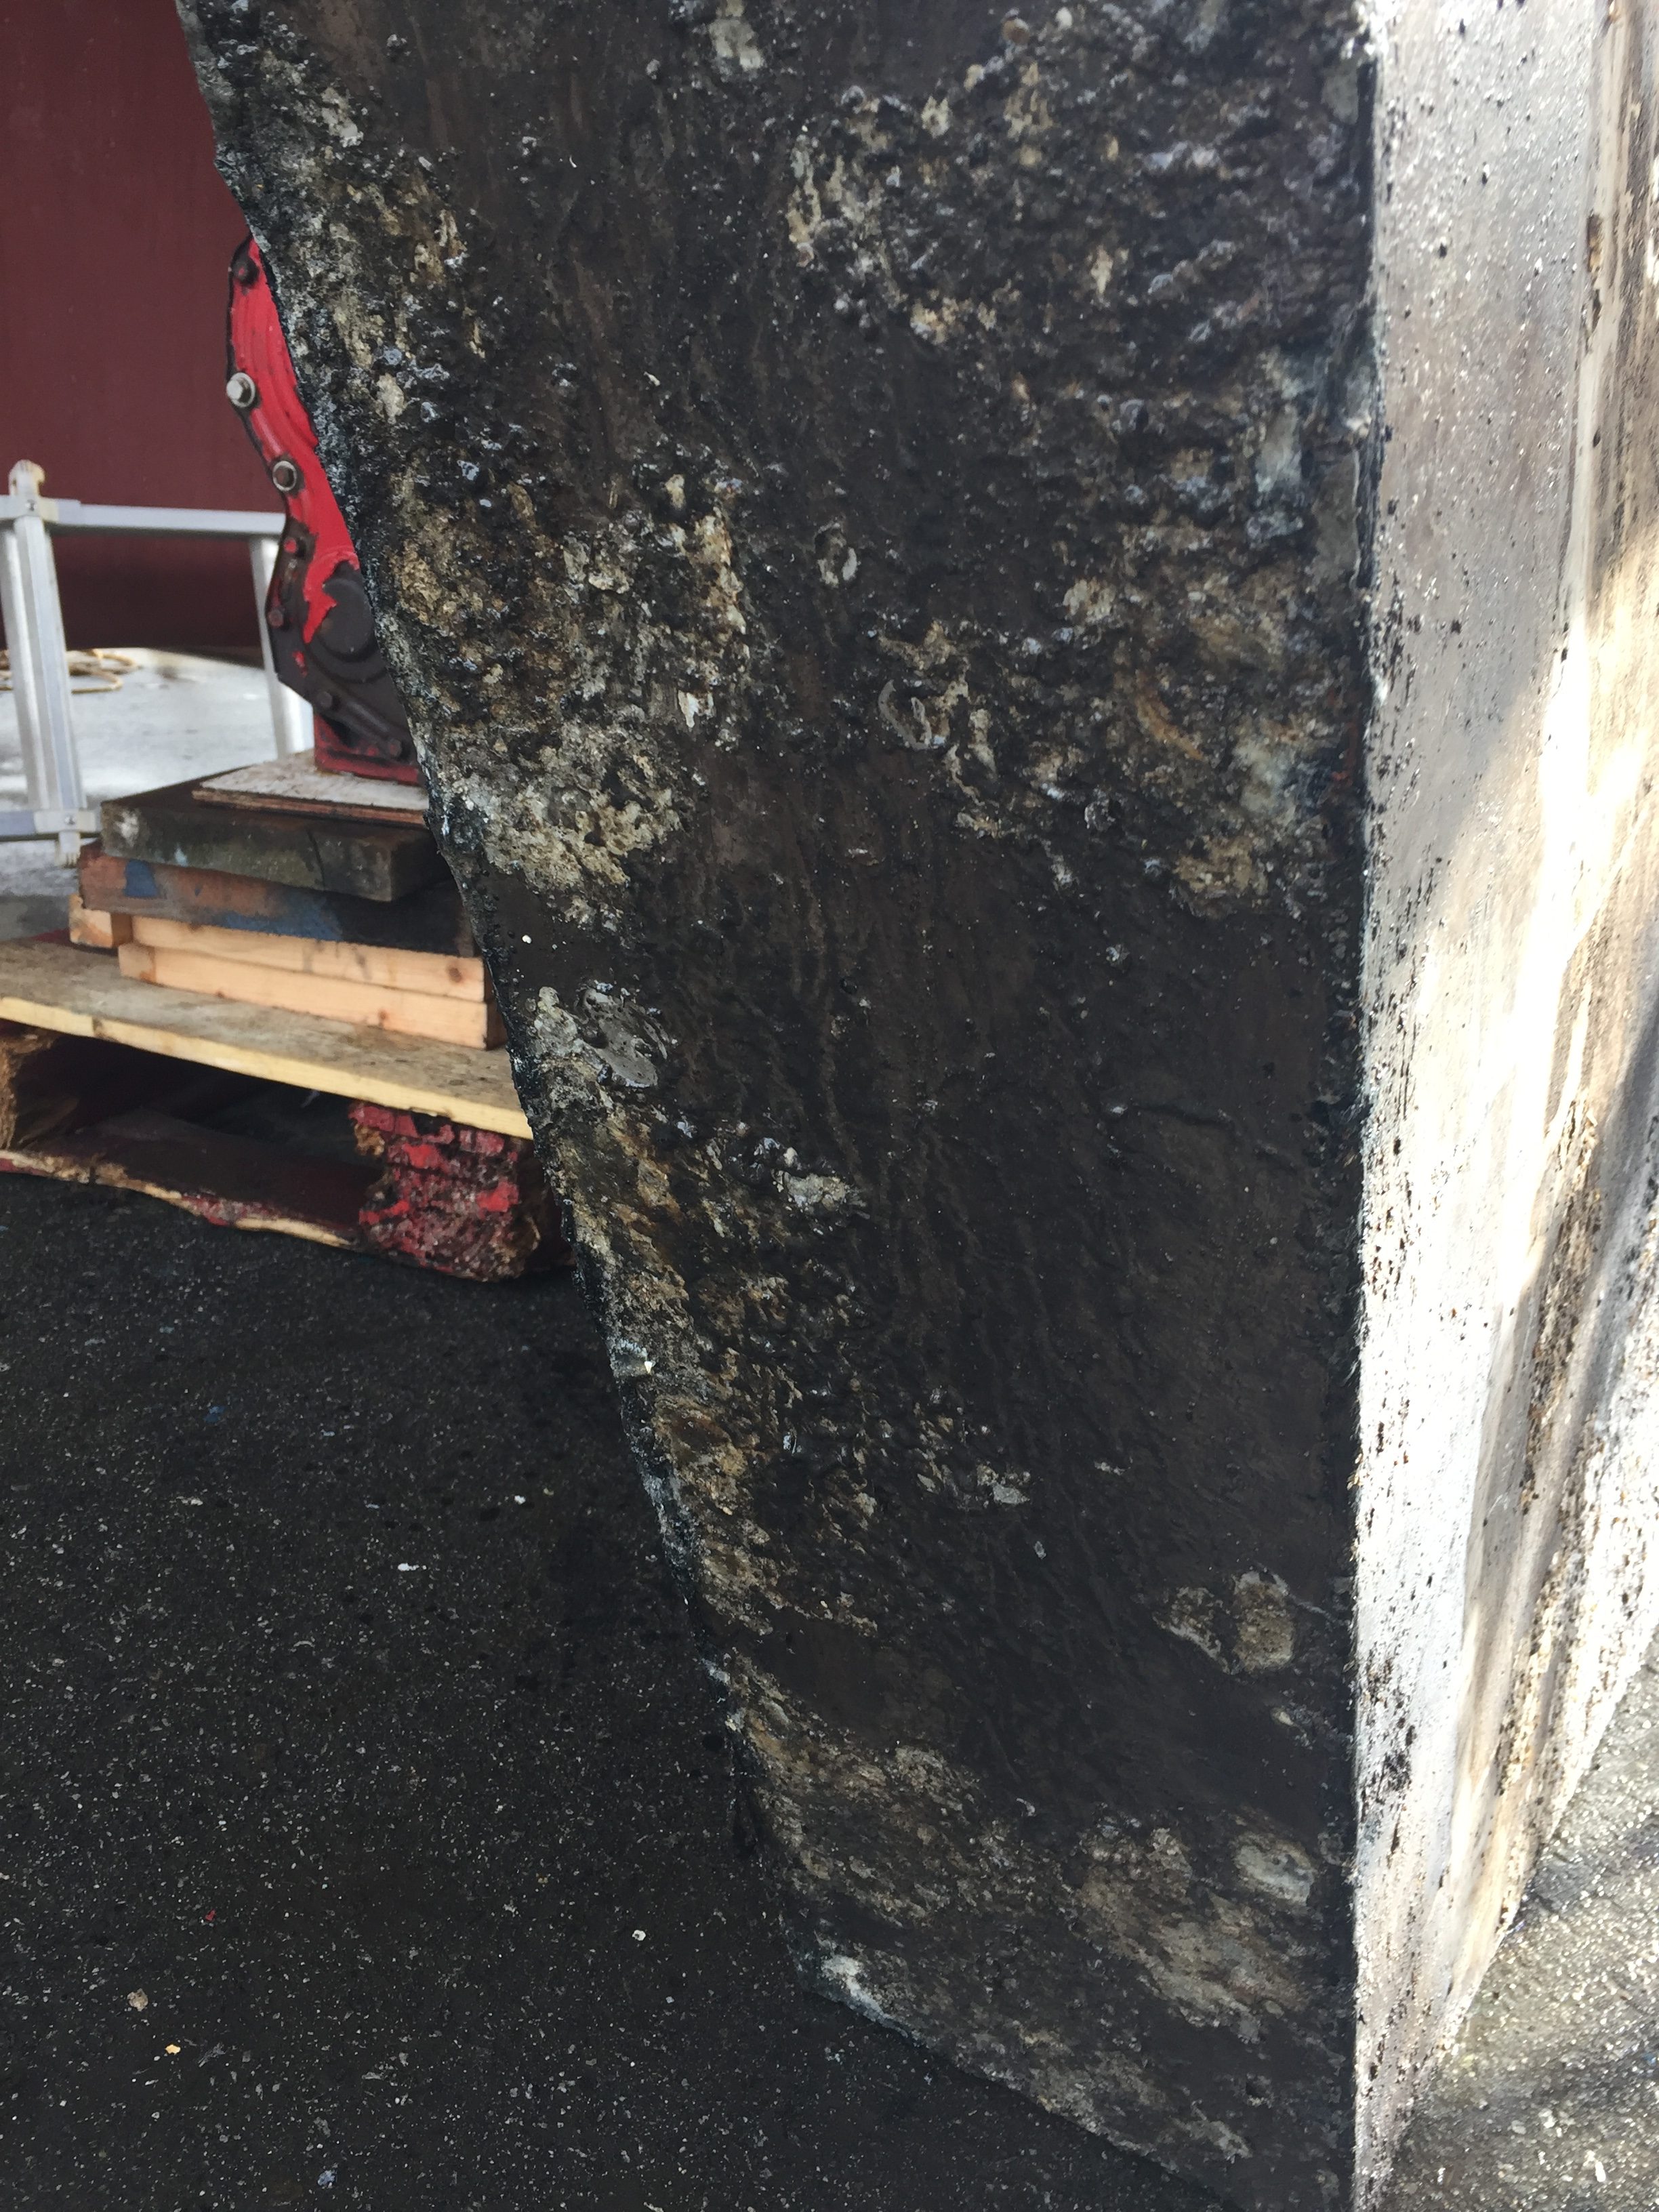
The keel tank is absolutely MASSIVE in size. I will be putting another tank down there, but it will not be aluminum or stainless, it will be plastic so nobody (me when I am 90) ever has to deal with a rotted out tank down in the bilge.
In hindsight we probably should have done this job right in the beginning when I was 3 years younger.
Nothing in boat repair is impossible for the do it yourselfer. We could have paid to have this done, but where is the fun in that?
Another Whitby owner who did this job commented that if he had to do it again, he could probably do it in about 3 1/2 hours. Well, I am sure I could make the same claim, or close to it now, but as is common with everything, take your initial estimate and multiply it. In this case, basically 3.5 hours meant 3.5 days for us.
I also learnt that I am getting tired of rebuilding boats.
At some point, I will put all of this together into a handy guide for any other Whitby 42 owner, in the meantime, if you have questions, please send them my way, and I will be glad to do everything in my power to talk you into paying someone else to do the job! And no I am not doing it 🙂
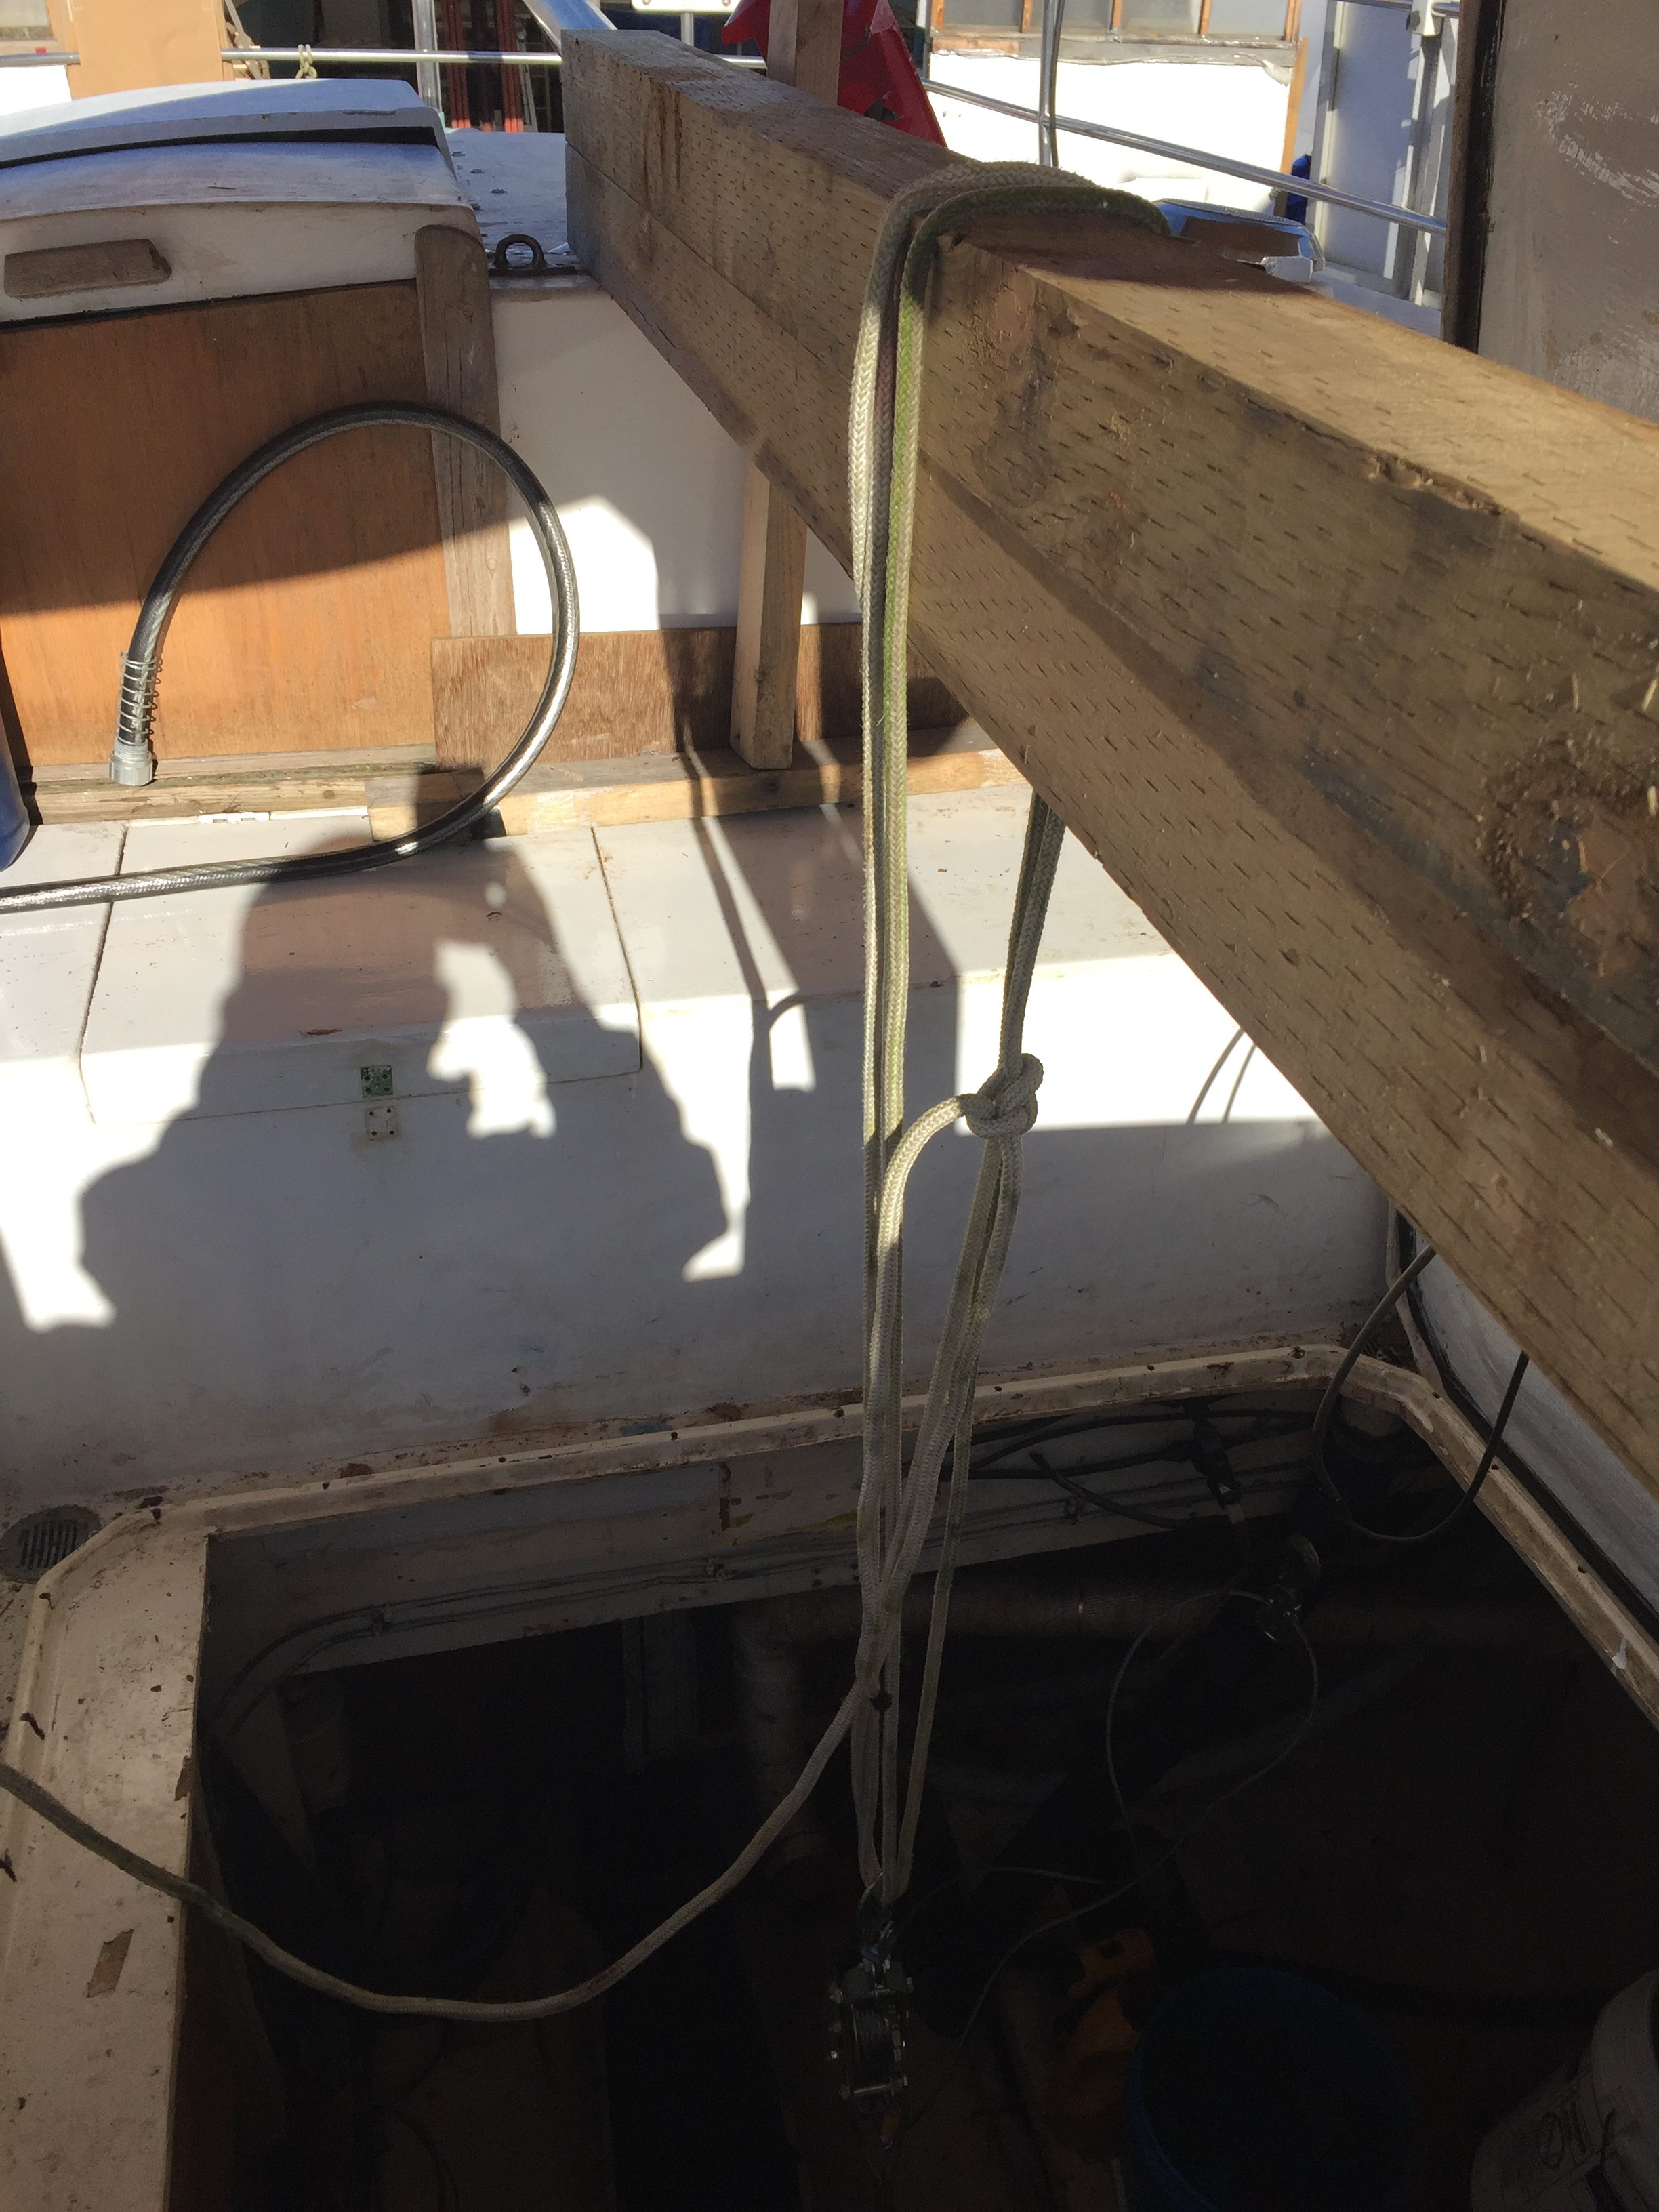
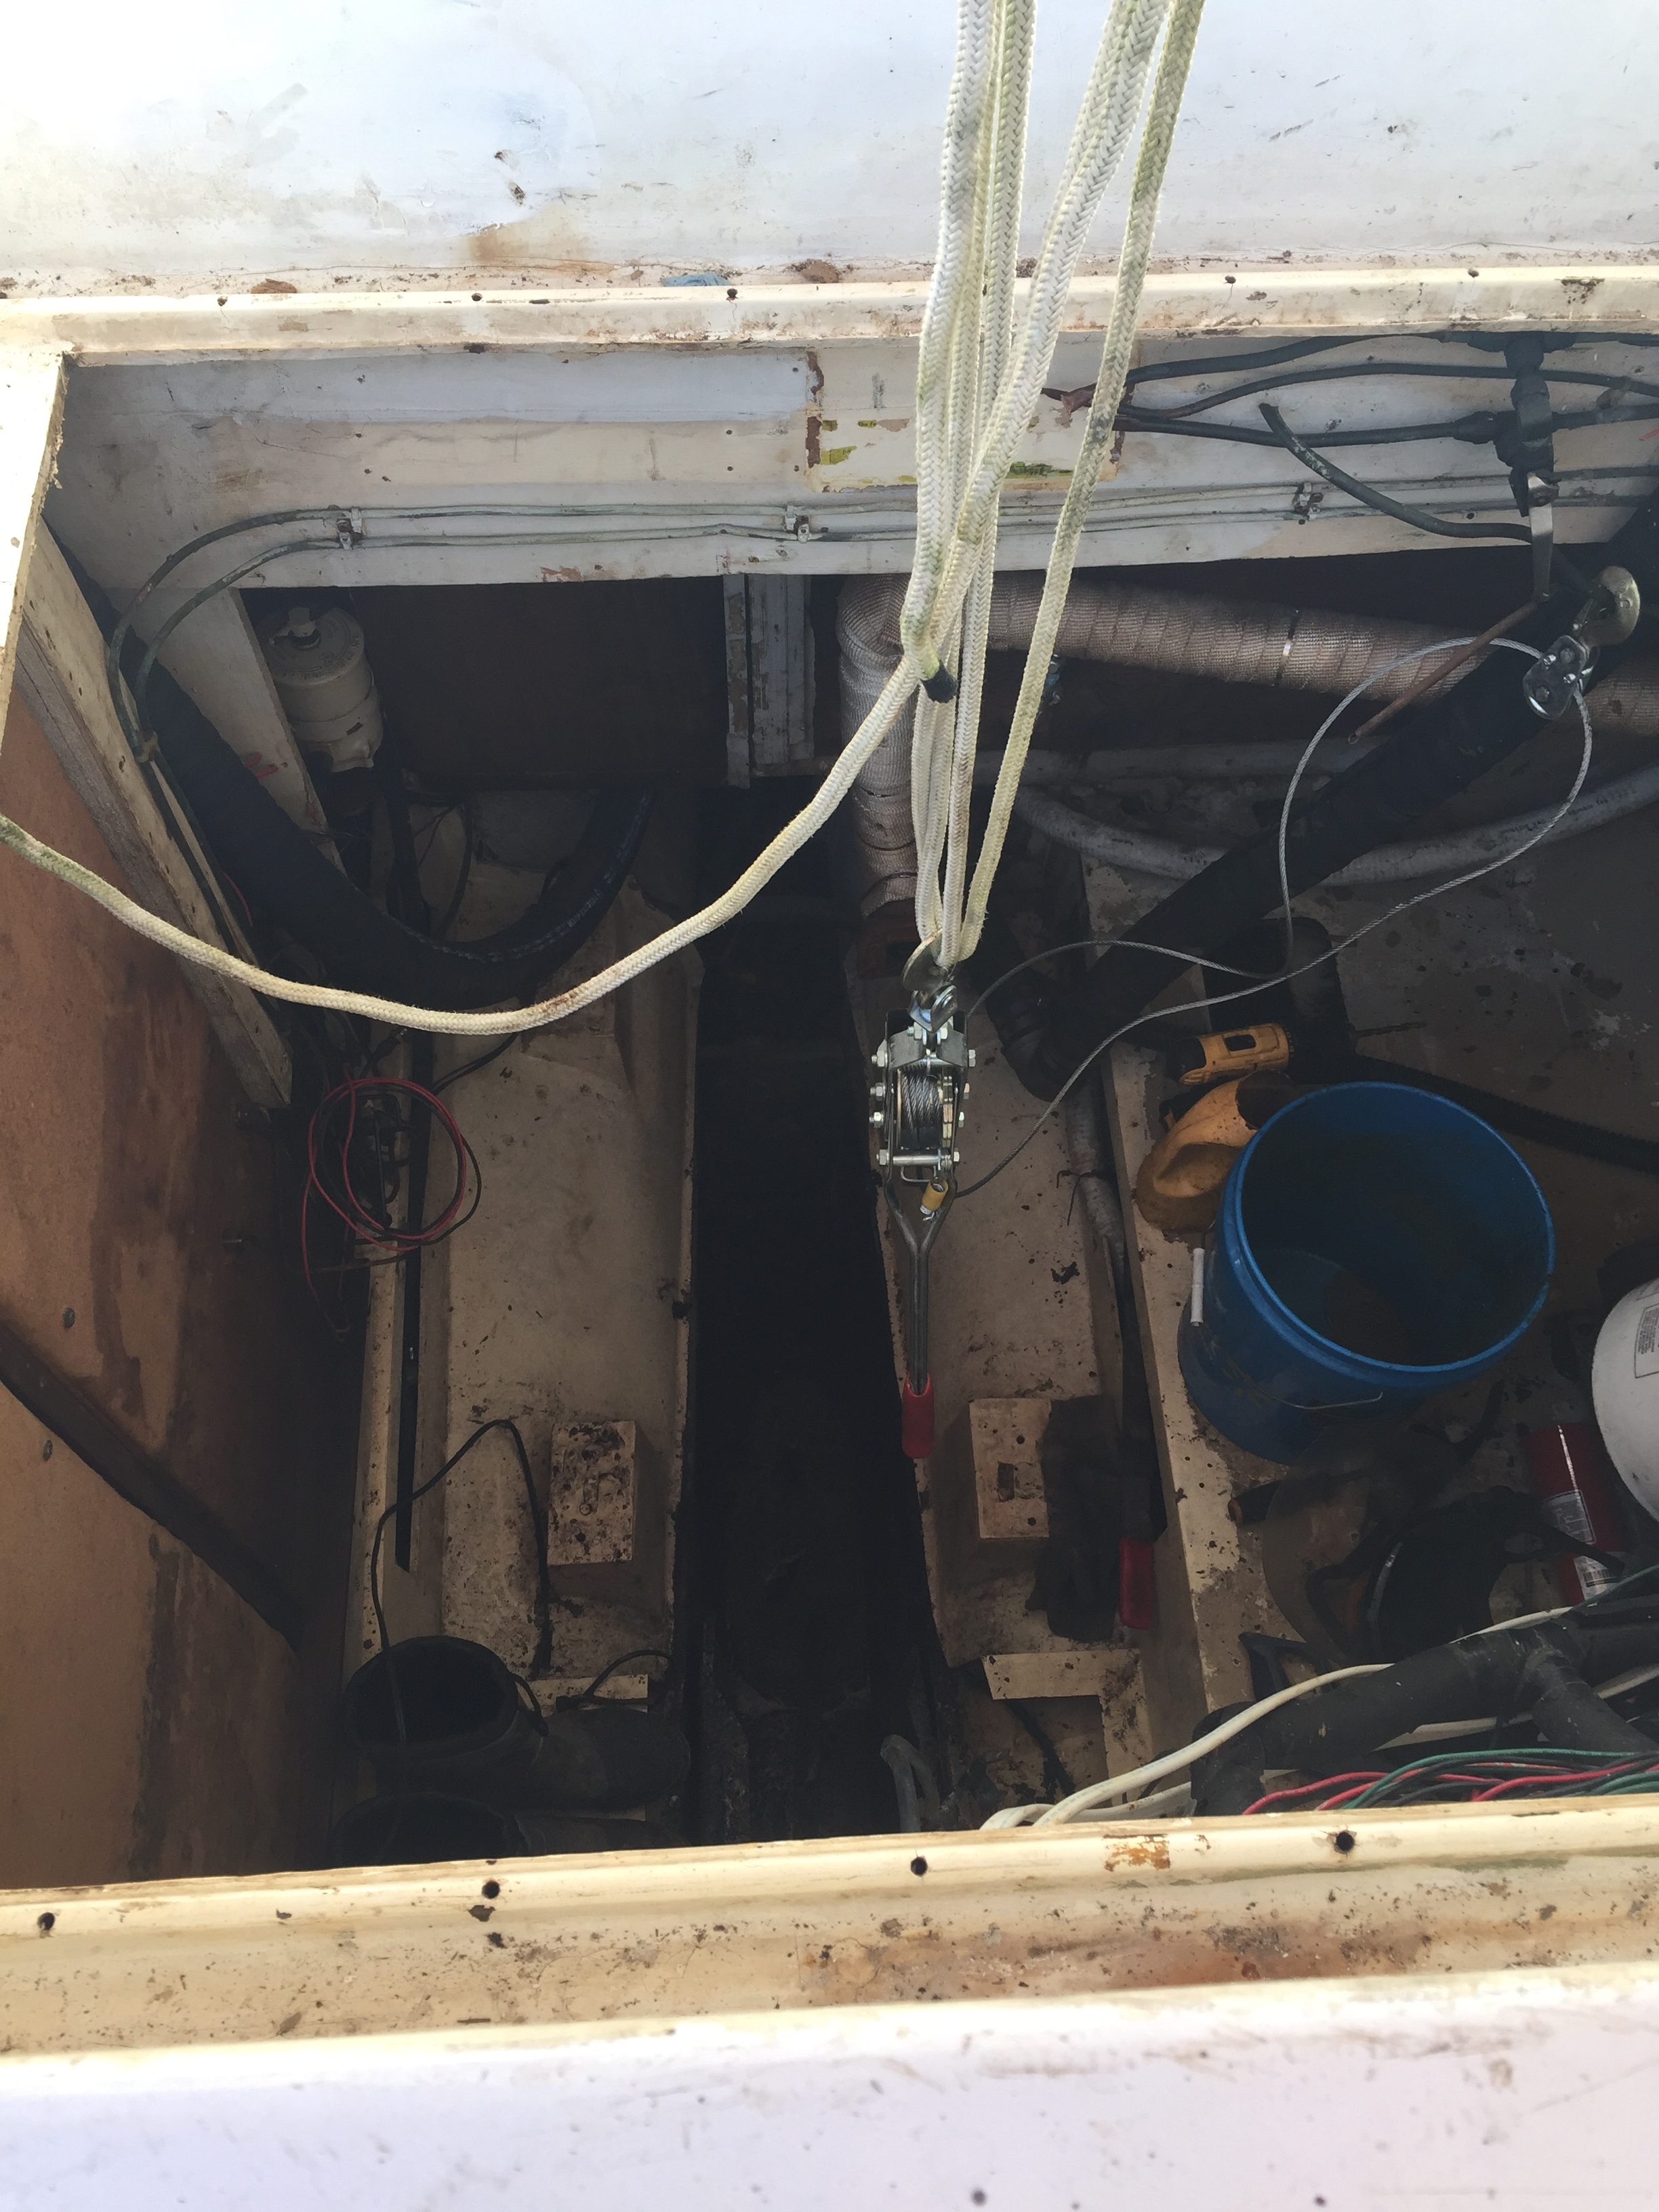
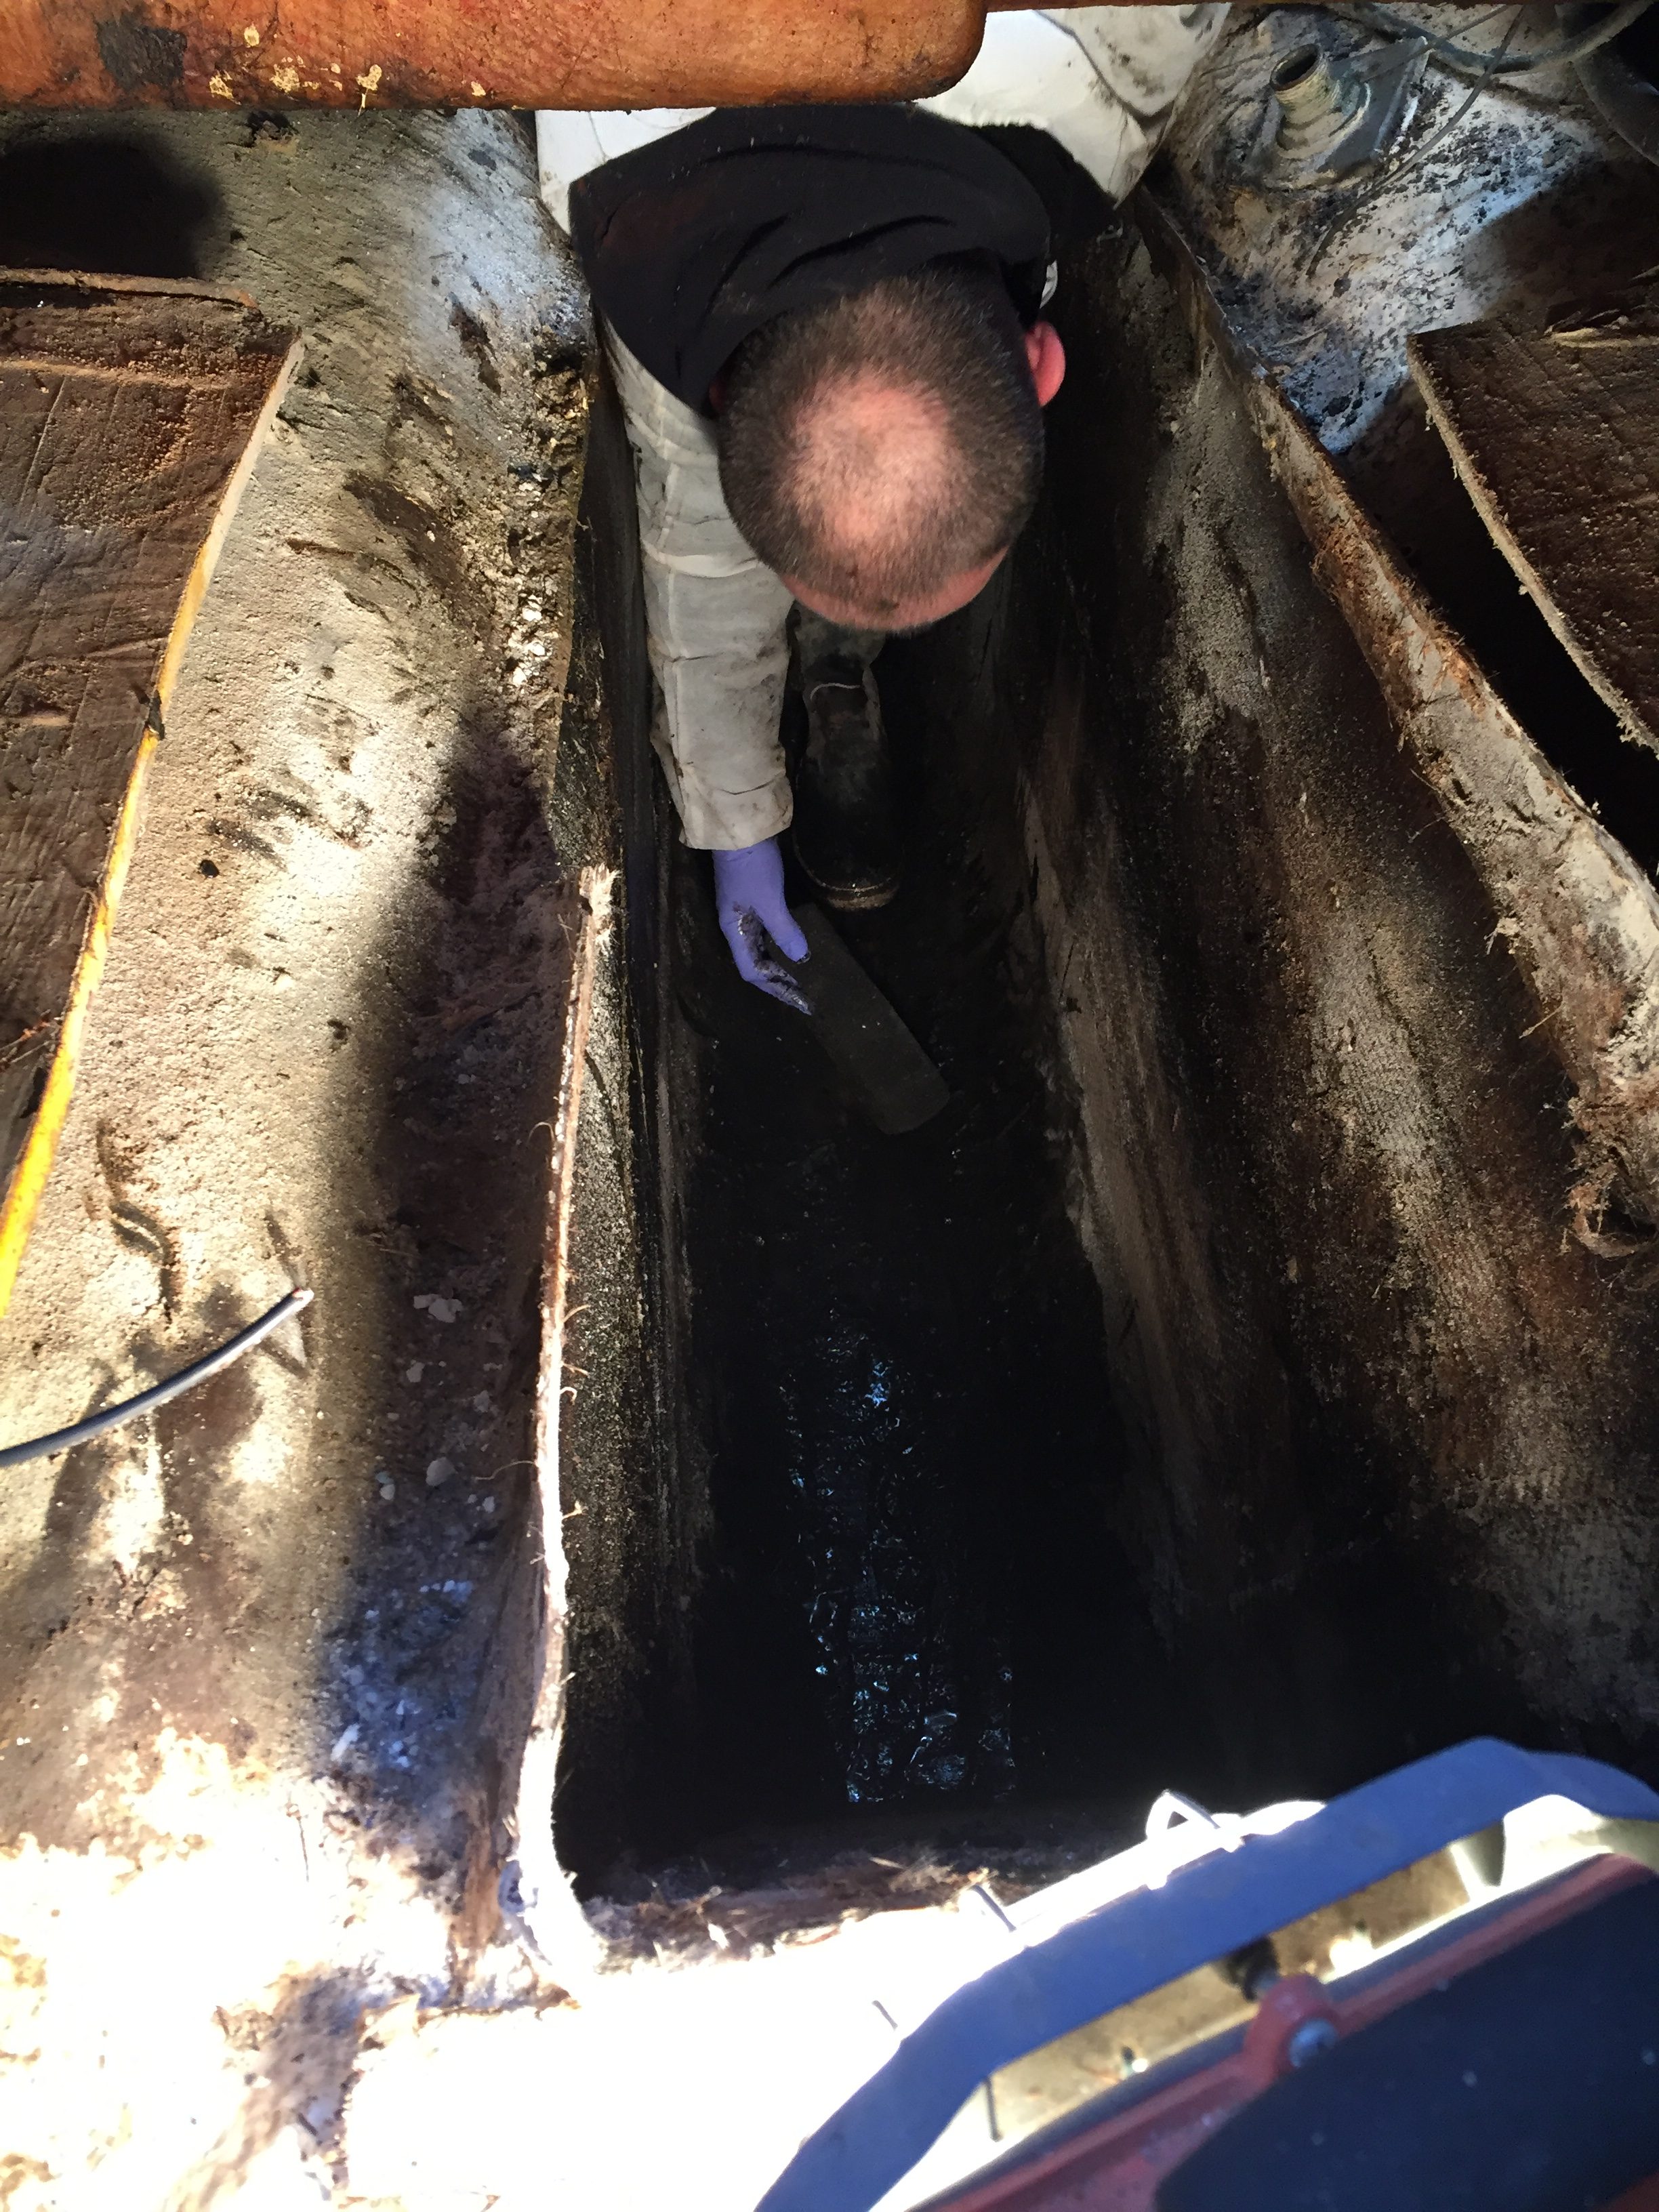
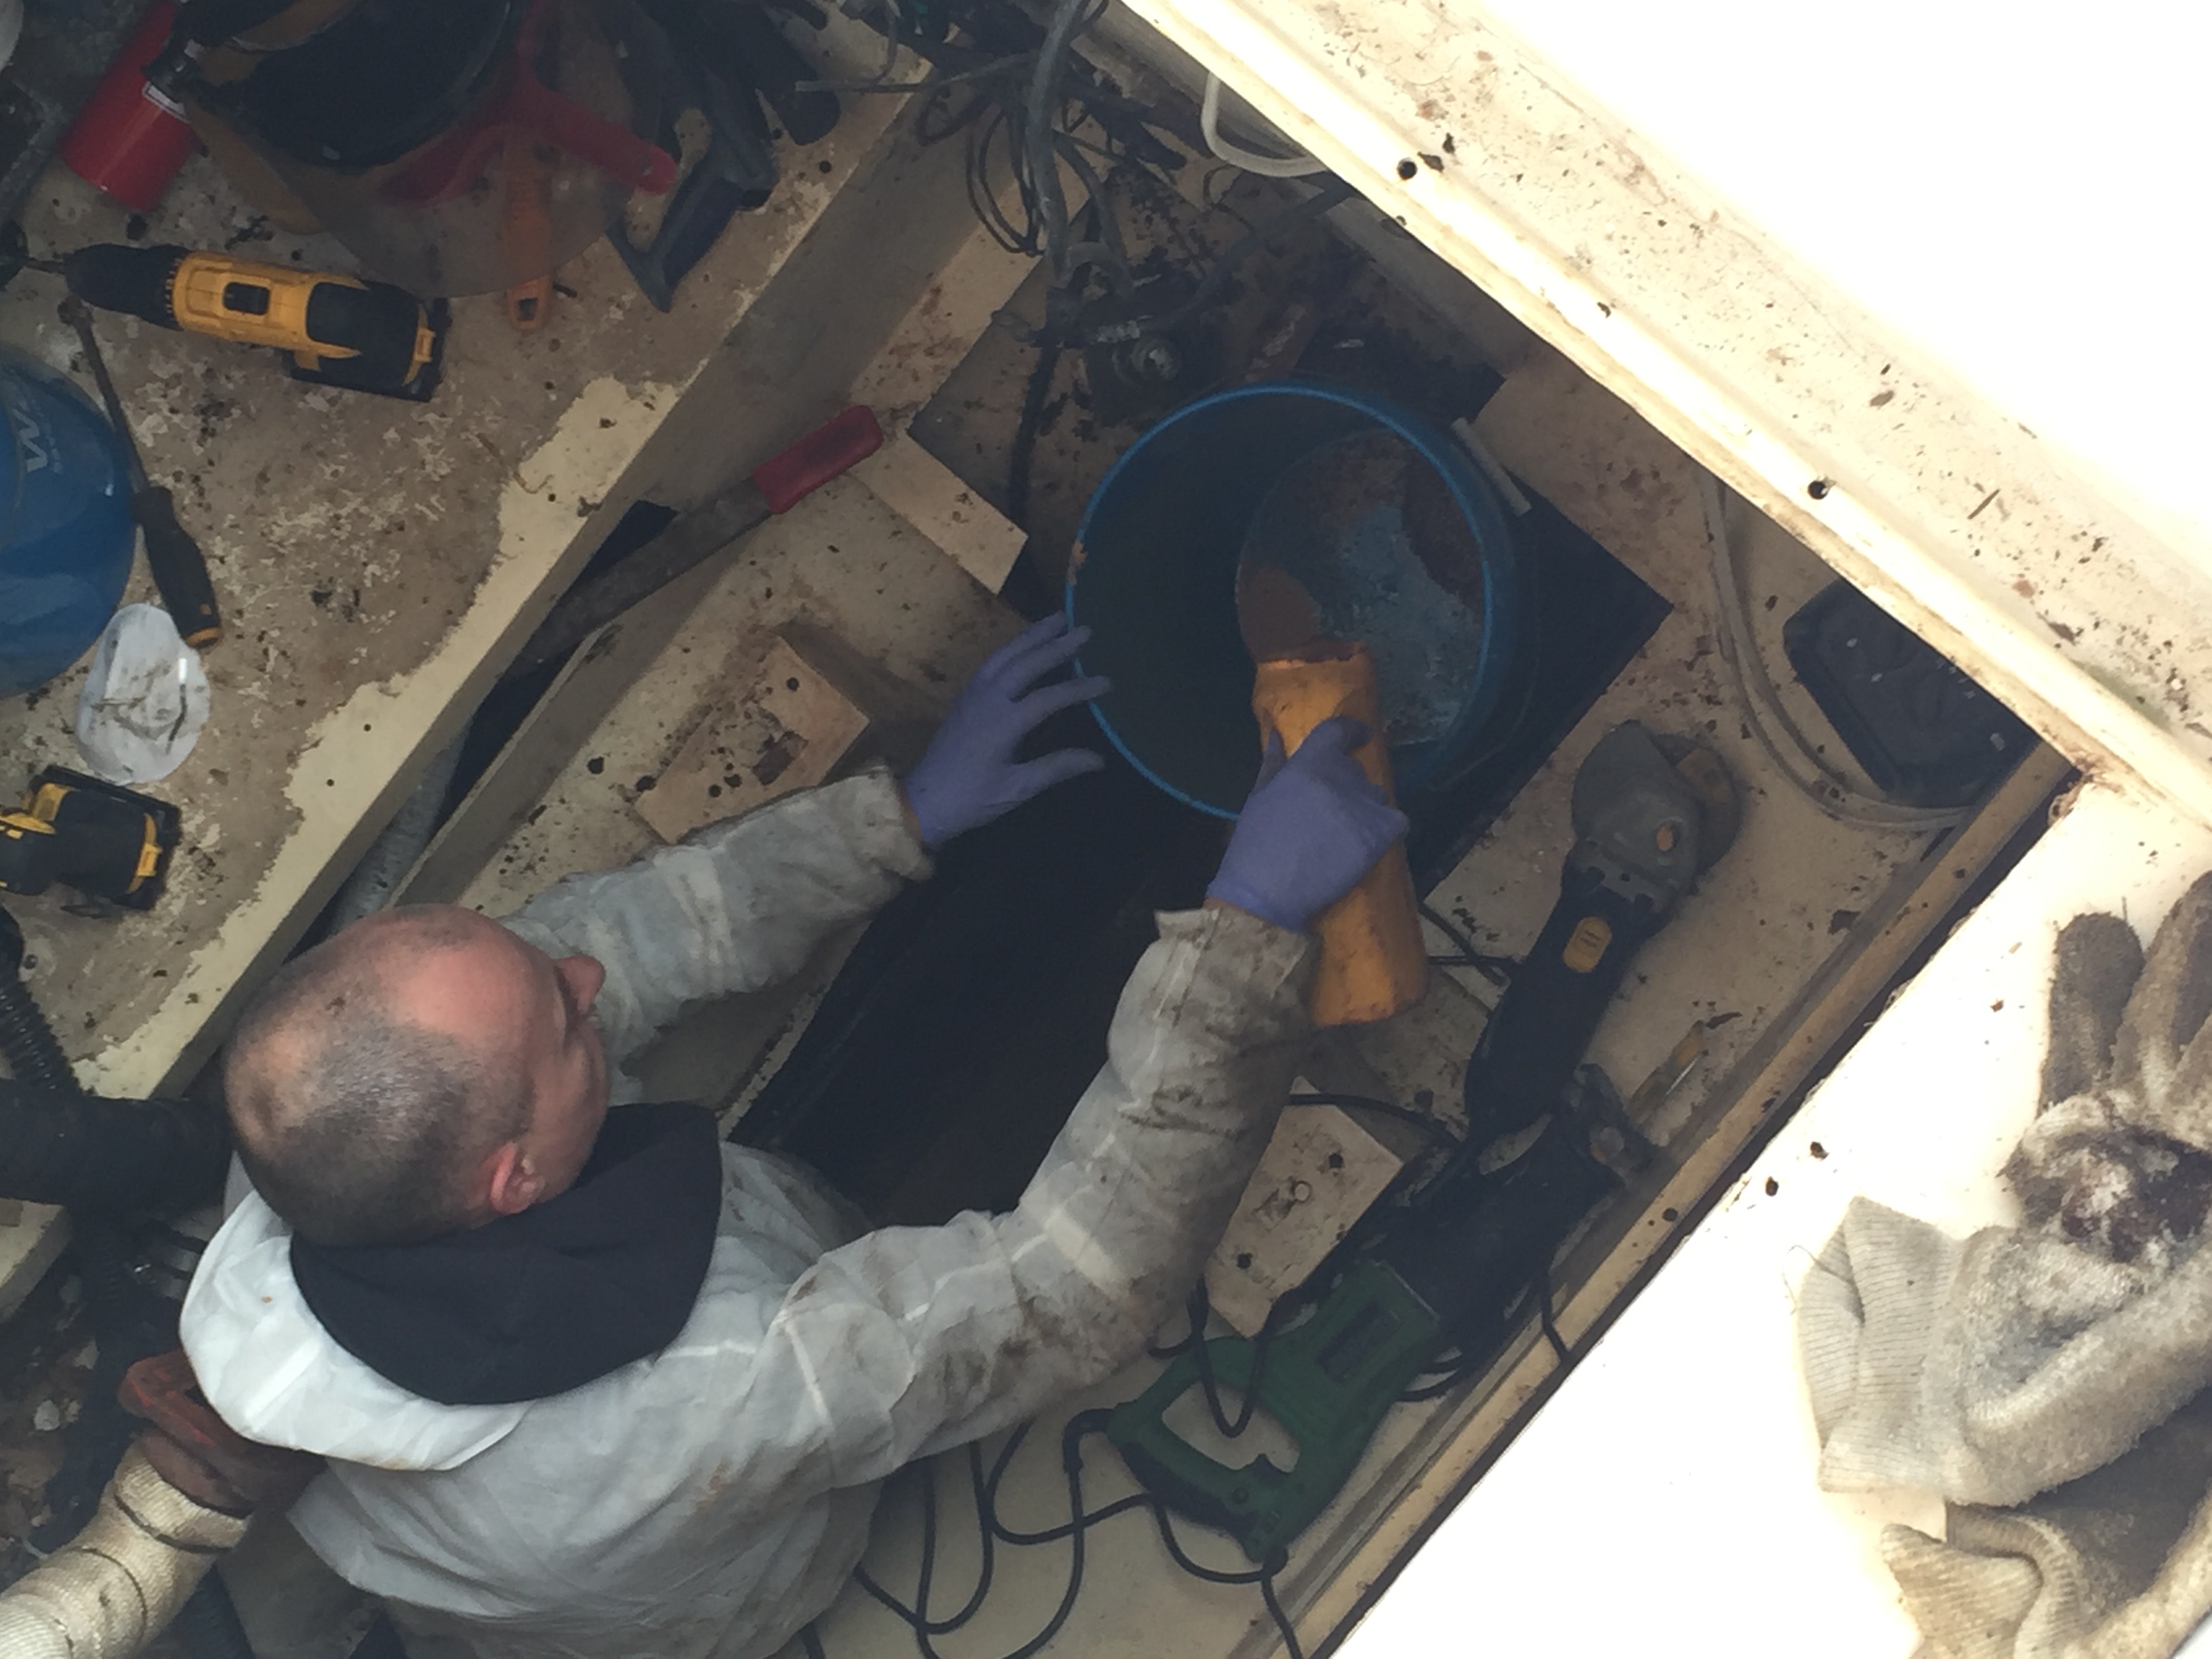
Okay so the tank won on the 2nd day as well. All in all I spent 7 hours working on this project today. Why so long? Let me explain.
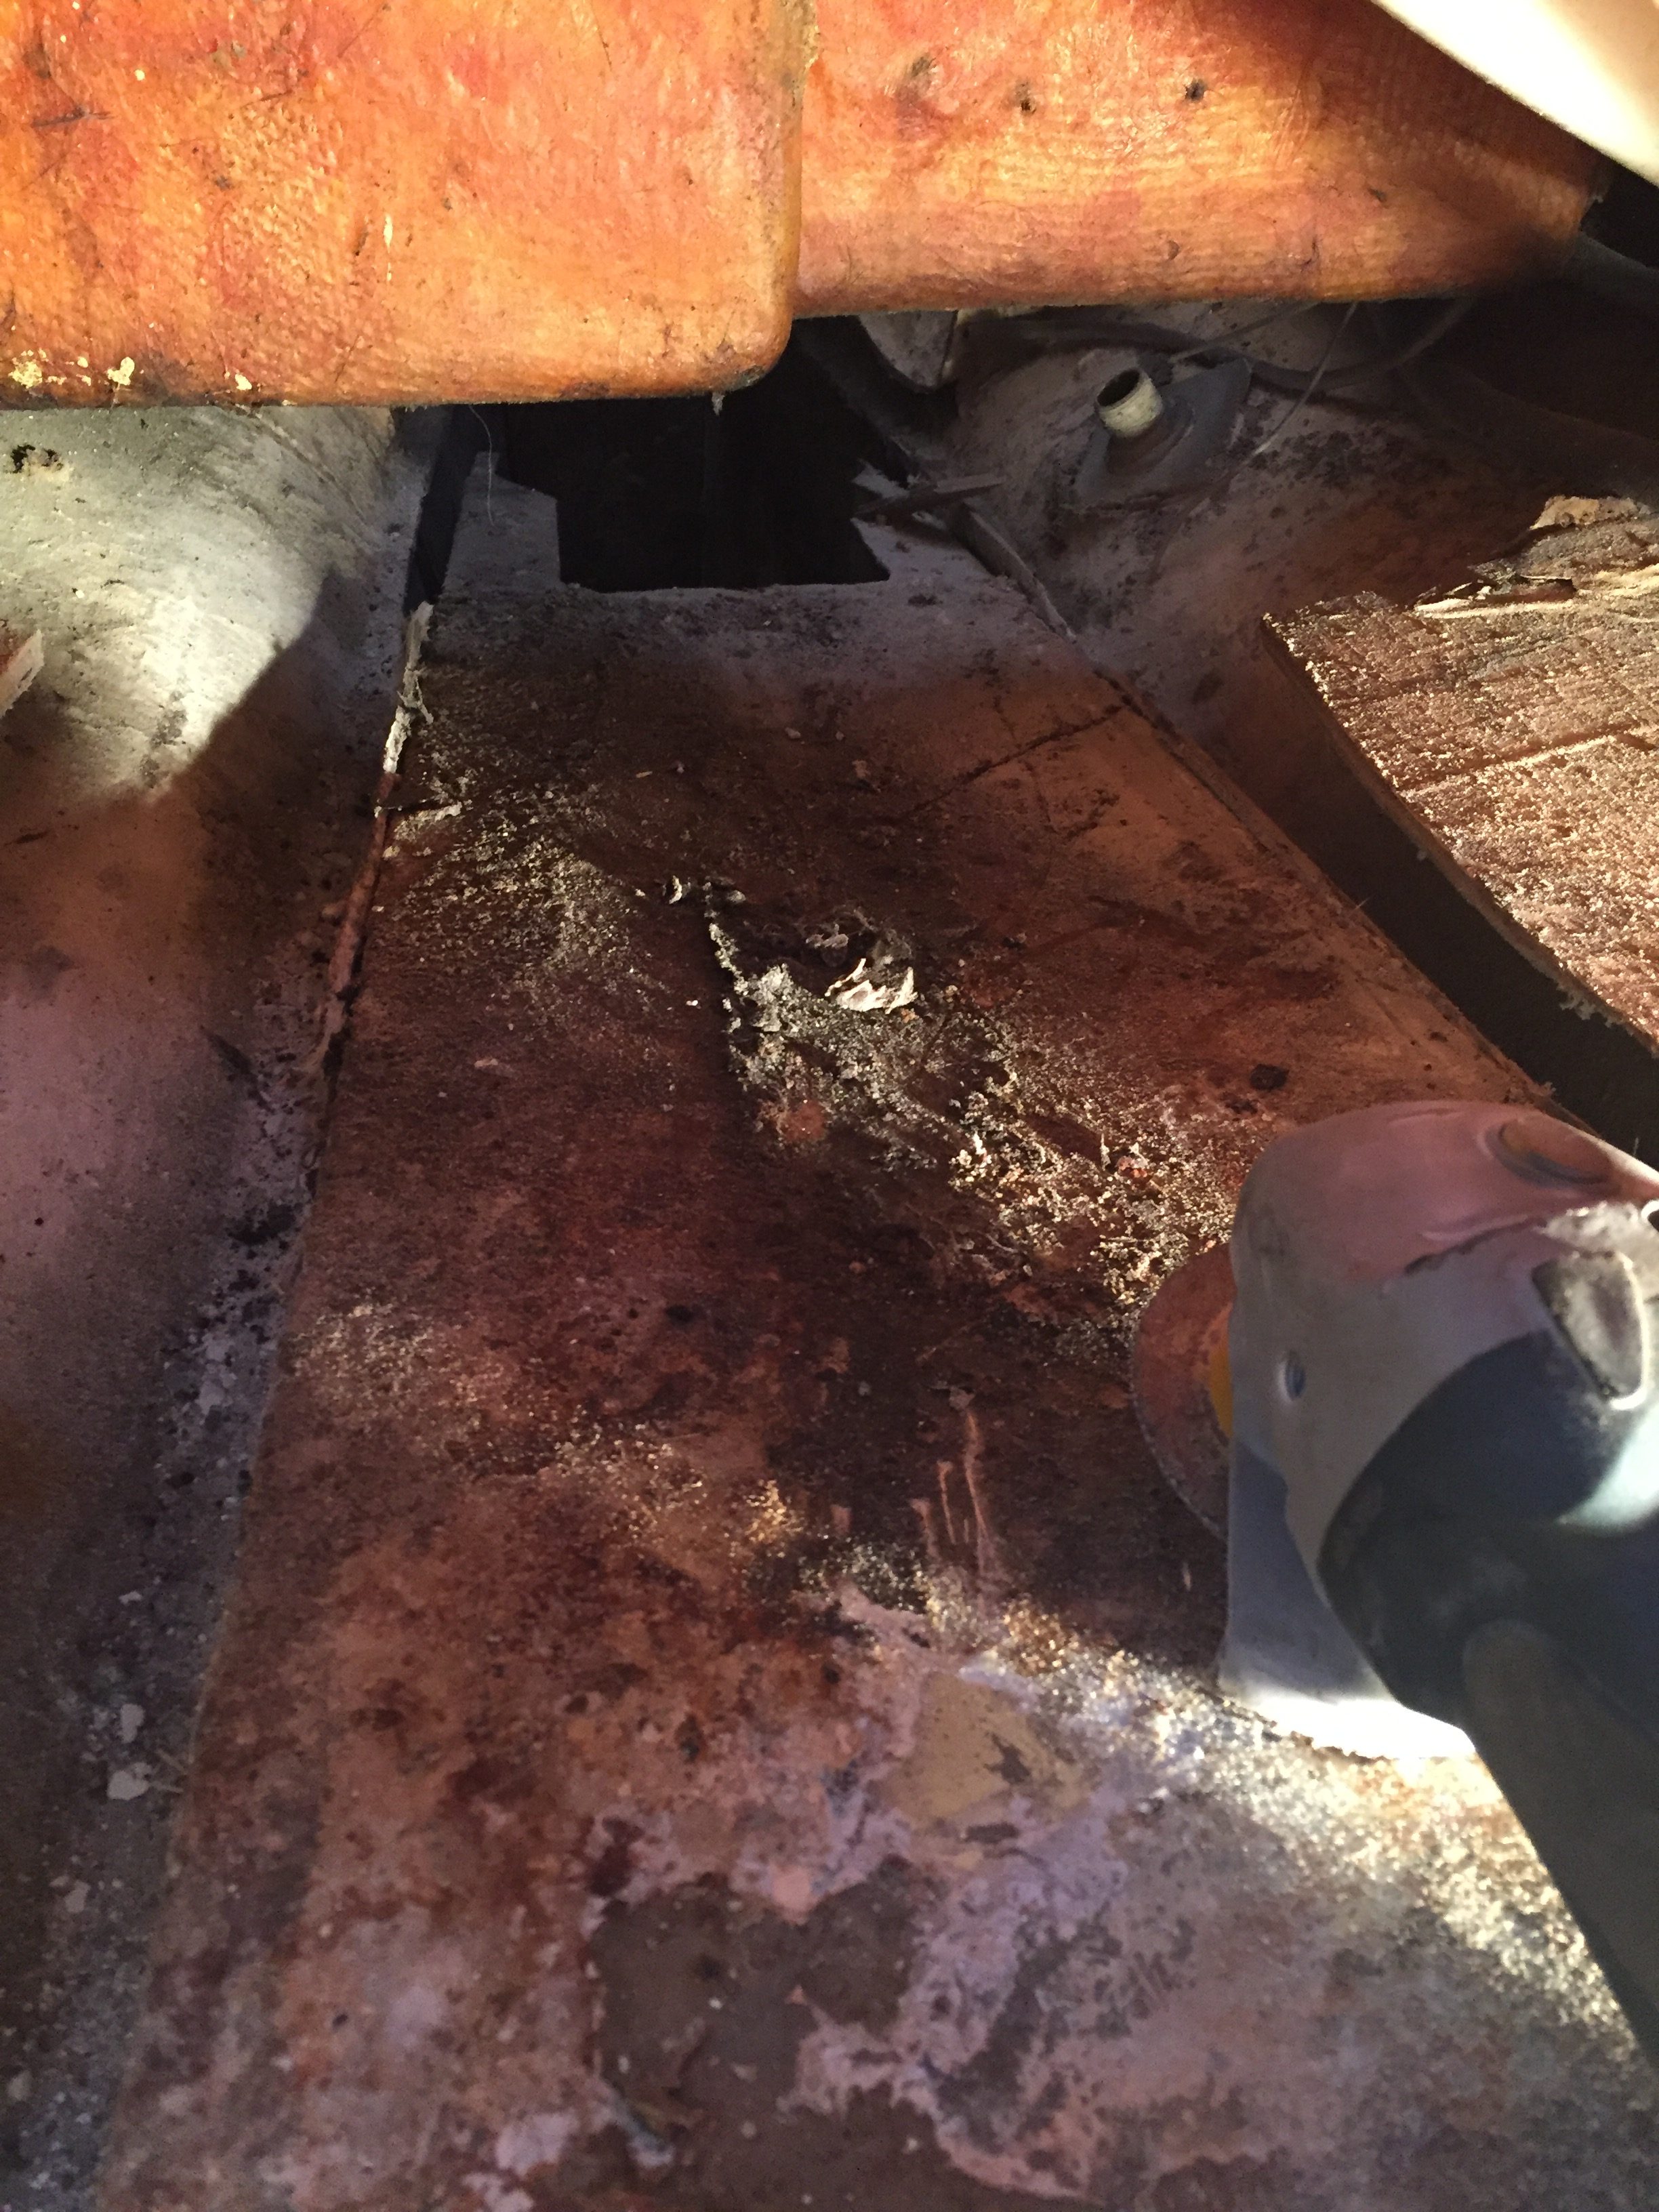
In order to cut the tank in half so that it can be removed I needed to get rid of the last of the sludge in the bottom of the tank. This process involved standing inside the tank and using a scoop to fill 5 gallon buckets. But before that I am missing the part about cutting the top off.
Cutting the top of the tank off, well at least the portion from the old inspection plate to the back was very simple and went really quick. Sawzall and good quality Dewalt metal cutting blades did the trick in minutes. Unfortunately there is not enough room between the tank and the keel to be able to cut it in half with the sawzall. That would have made things a lot easier. once the top was off, I could get down inside and clean it out a lot better.
Unfortunately, as I mentioned yesterday, the entire tank is sitting in a puddle of water/diesel/grease and god only knows what else. The inside of the tank had a water mixture with what looks like beer fermentation foam on it. All of this had to be scooped out into 5 gallon pails, carried up on deck, down the ladder and dumped into a 40 gallon drum. And this process had to be repeated as I cut down the sides of the tank and all of the other goop poured in.
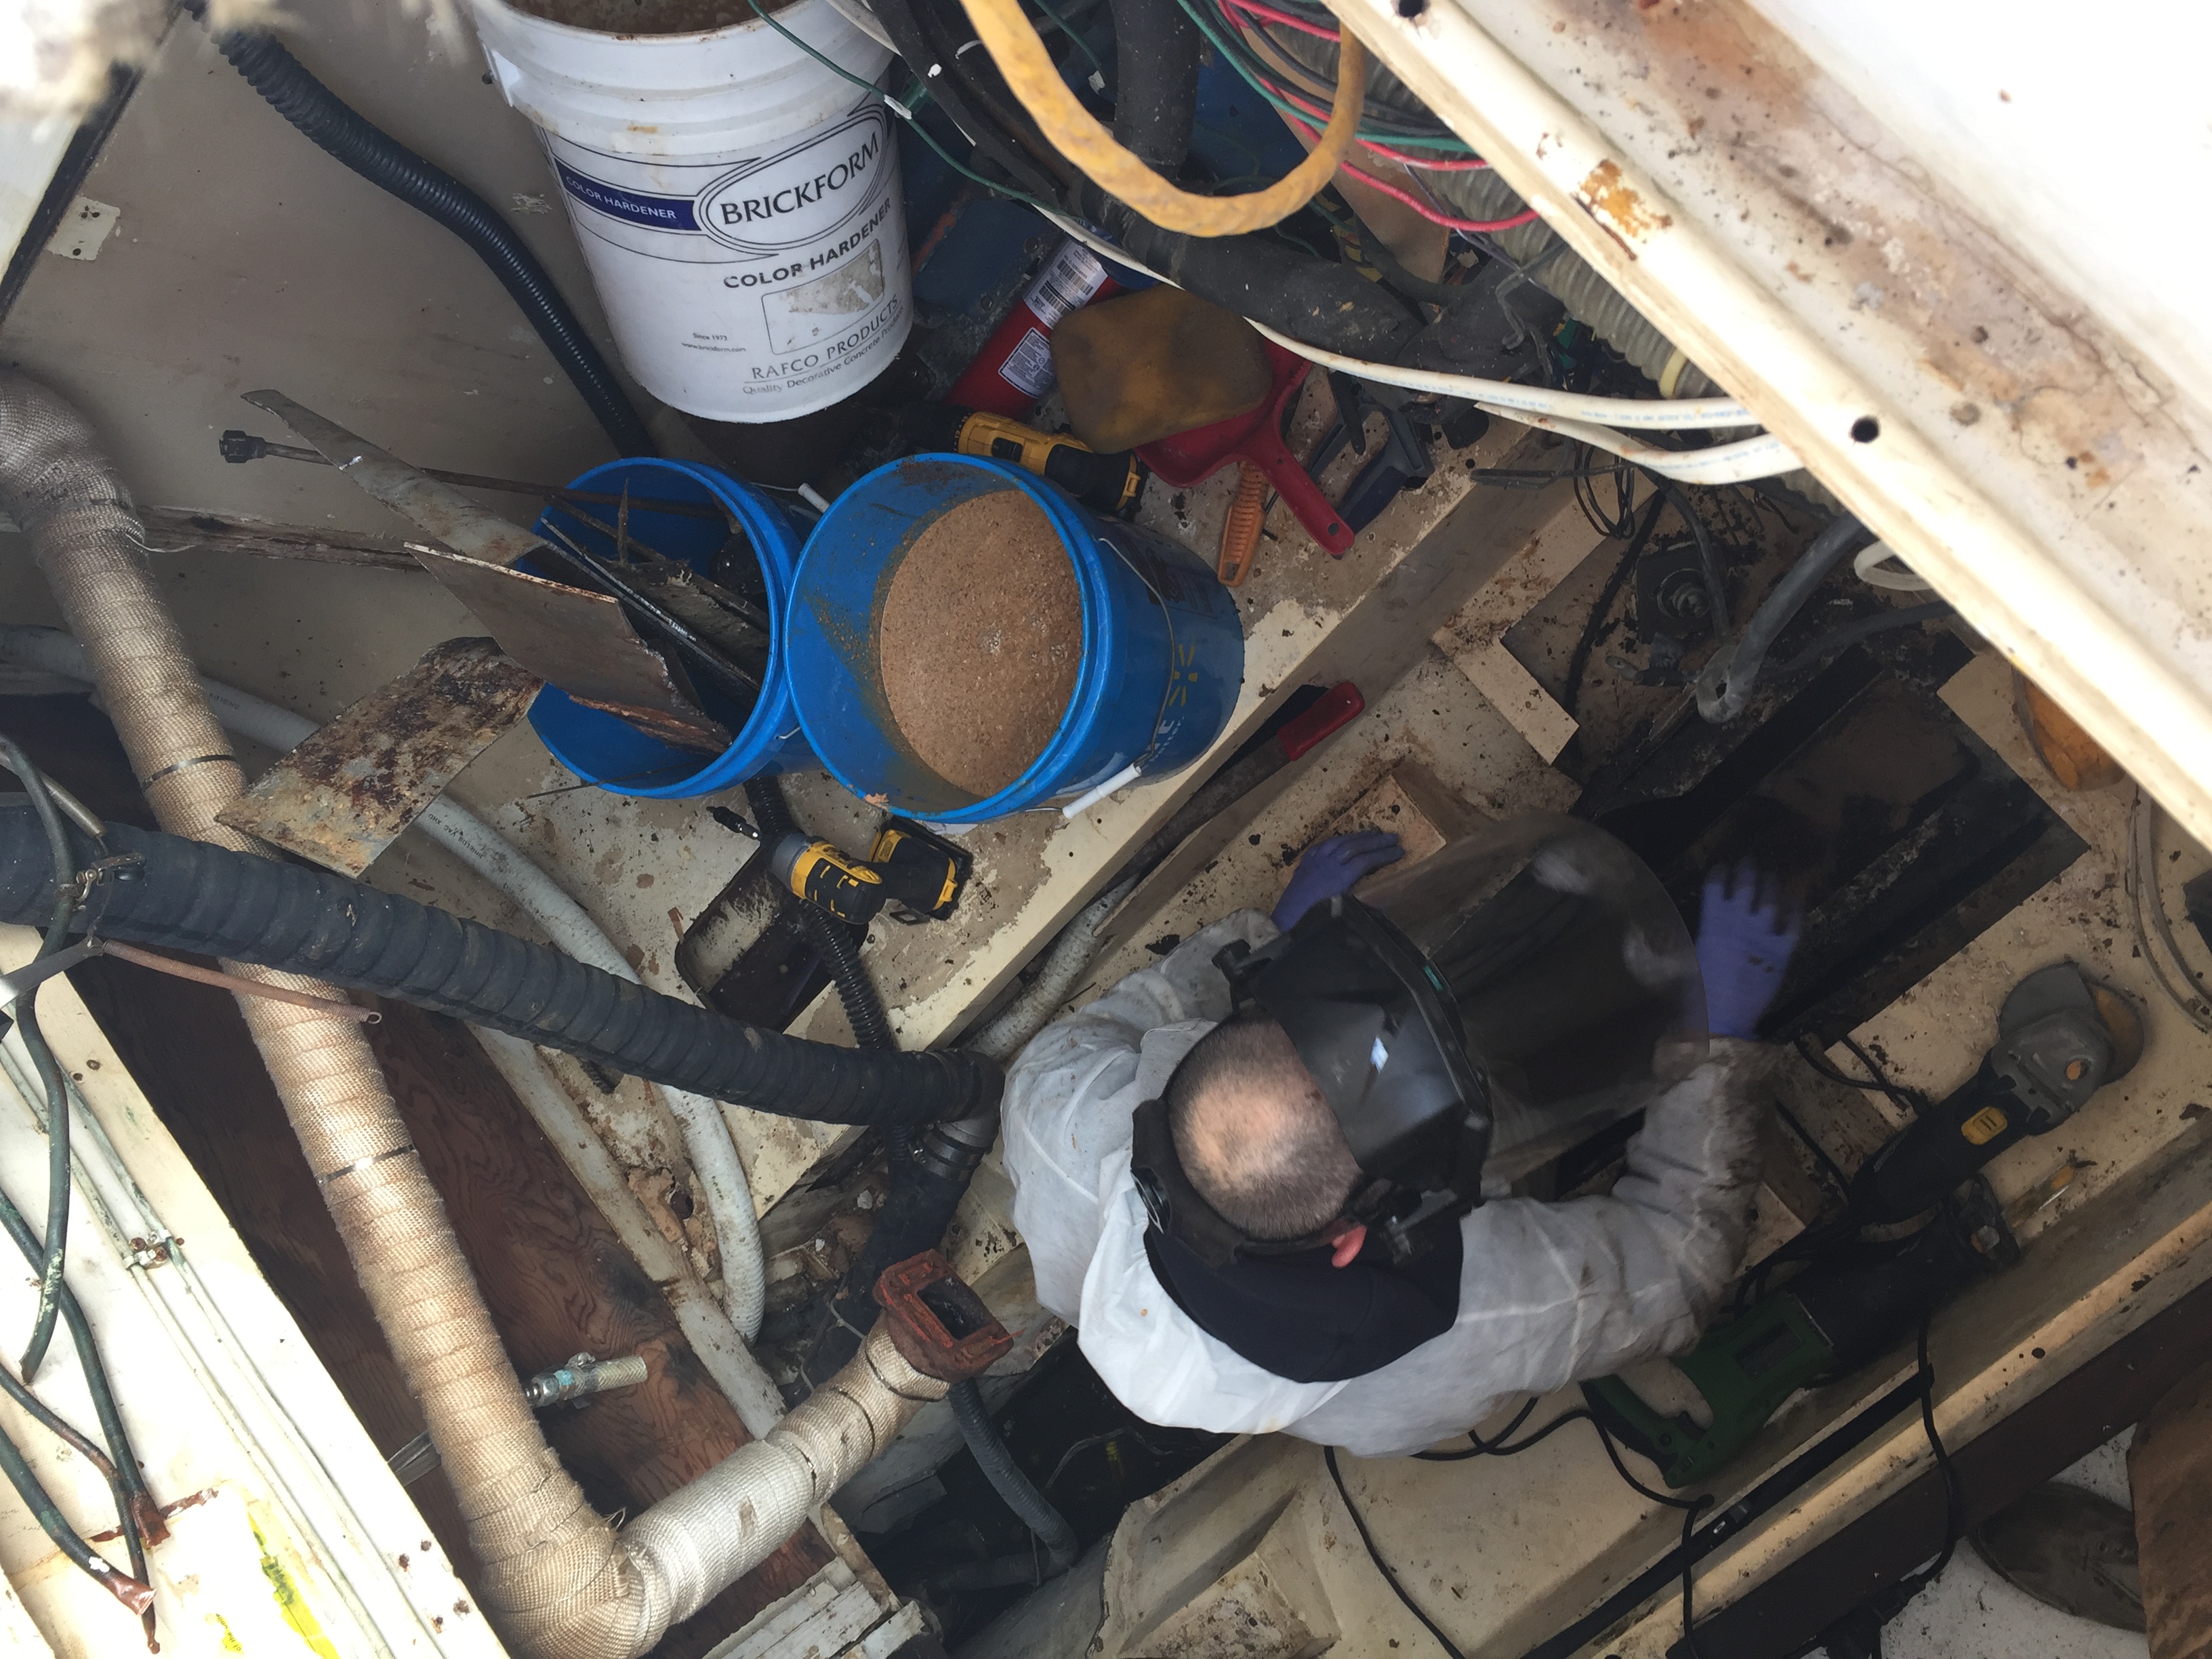
In order to cut the tank in two, I had to stand inside of it and cut it with the grinder and a good cutting blade. This process in itself isn’t really all that time consuming with the exception of all the liquid on the outside of the tank. Every time I cut the side down an inch, I had to wait until the liquid drained down to that level. This is what took so bloody long. I could not simply cut it in two as I was standing in the liquid using power tools. Not my idea of a fun day to electrocute myself removing a keel tank.
I am not sure how anyone can possibly do this job without standing inside the tank. It is a long way down to the bottom and would be impossible to cut the very bottom without standing inside, bent over and doing it with a grinder. To speed it up a little bit, I drilled a series of holes in a straight line across the bottom and finished it with the angle grinder. Of course, the grinder only fits so well into corners so I had to do a fair bit of screwing around right at the bottom.
I am not sure of the exact depth yet, but there is a fair amount of space underneath the tank itself. I thought I might be drilling into the keel, but nope.
For anyone who reads this blog and is contemplating the same job here in a nutshell are things I learned today. Bending over cutting an aluminum tank while standing in it sounds like a lot of fun I know, but it is cramped, which means you are cramped, which means you are bent over for hours trying to do this. Also, make sure the angle of your cut is in the correct direction. Mine ended up being in the wrong direction needed to remove the back half of the tank first, which meant I had to go back in and cut v notches into the tank wall.
Buy good quality blades, Dewalt worked great for me.
Whatever this mess of liquid is stinks up to high hell and even after a 30 minute super hot shower with lots of soap, you can still smell it on yourself.
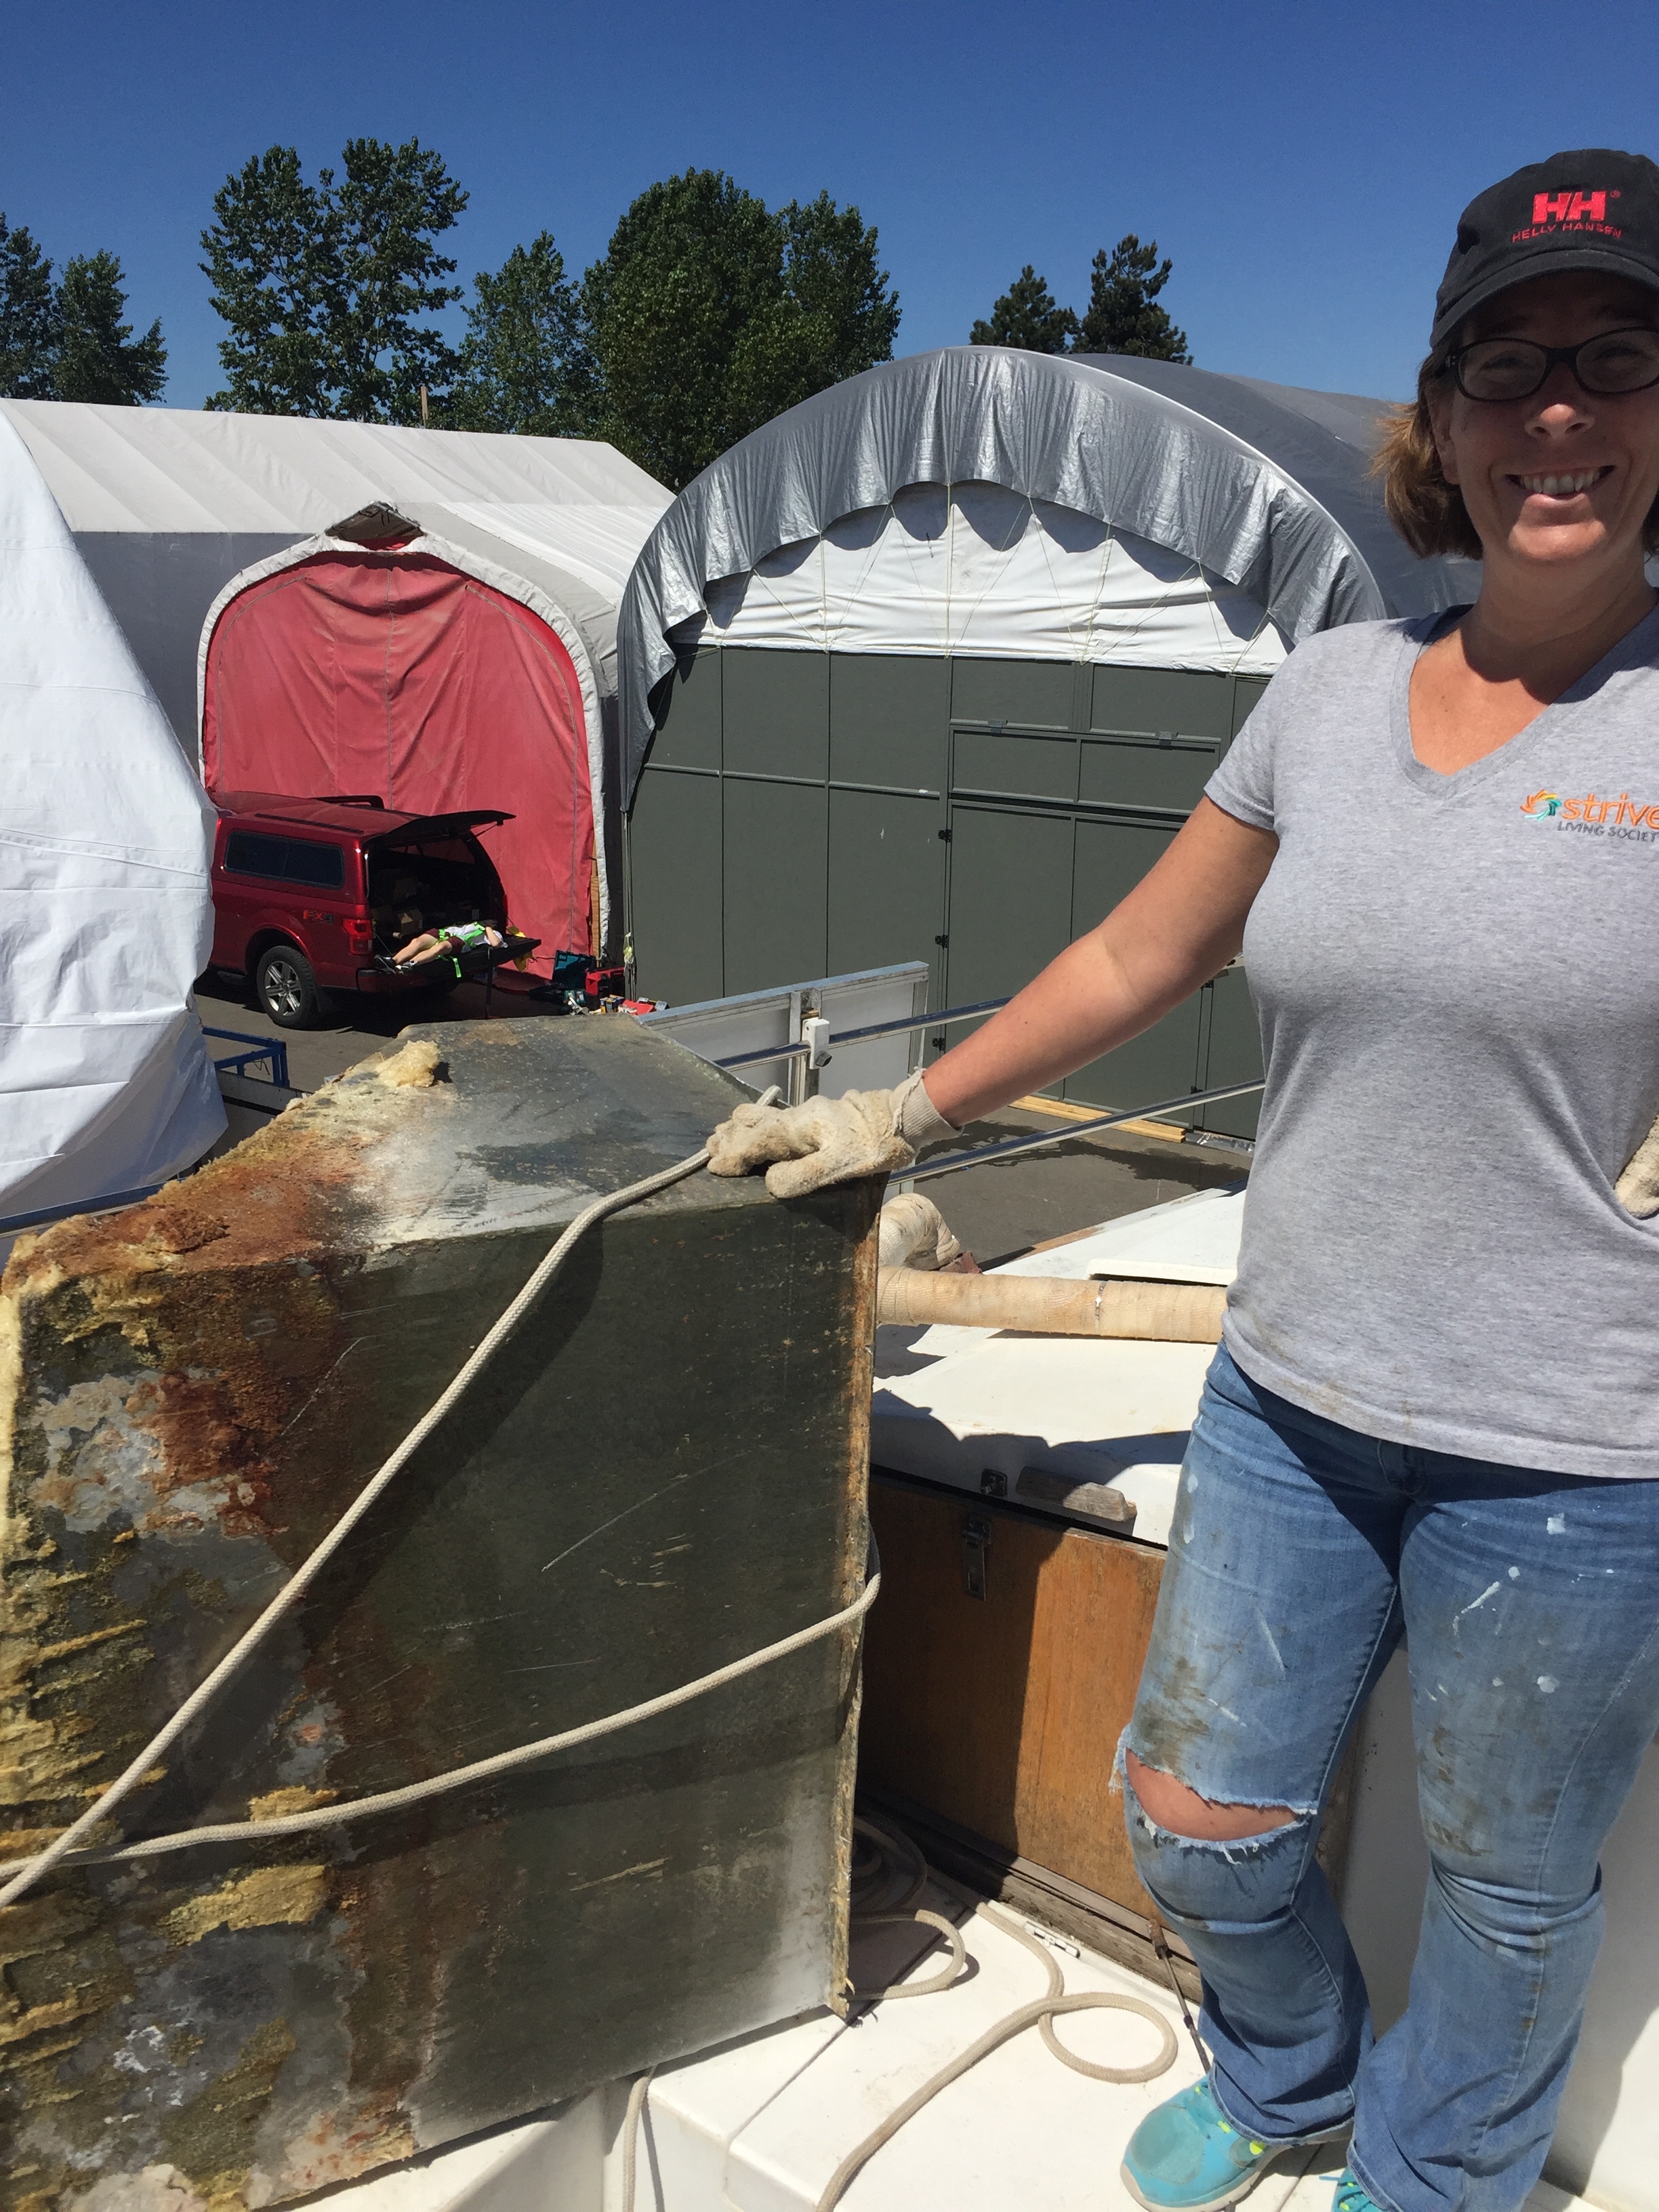
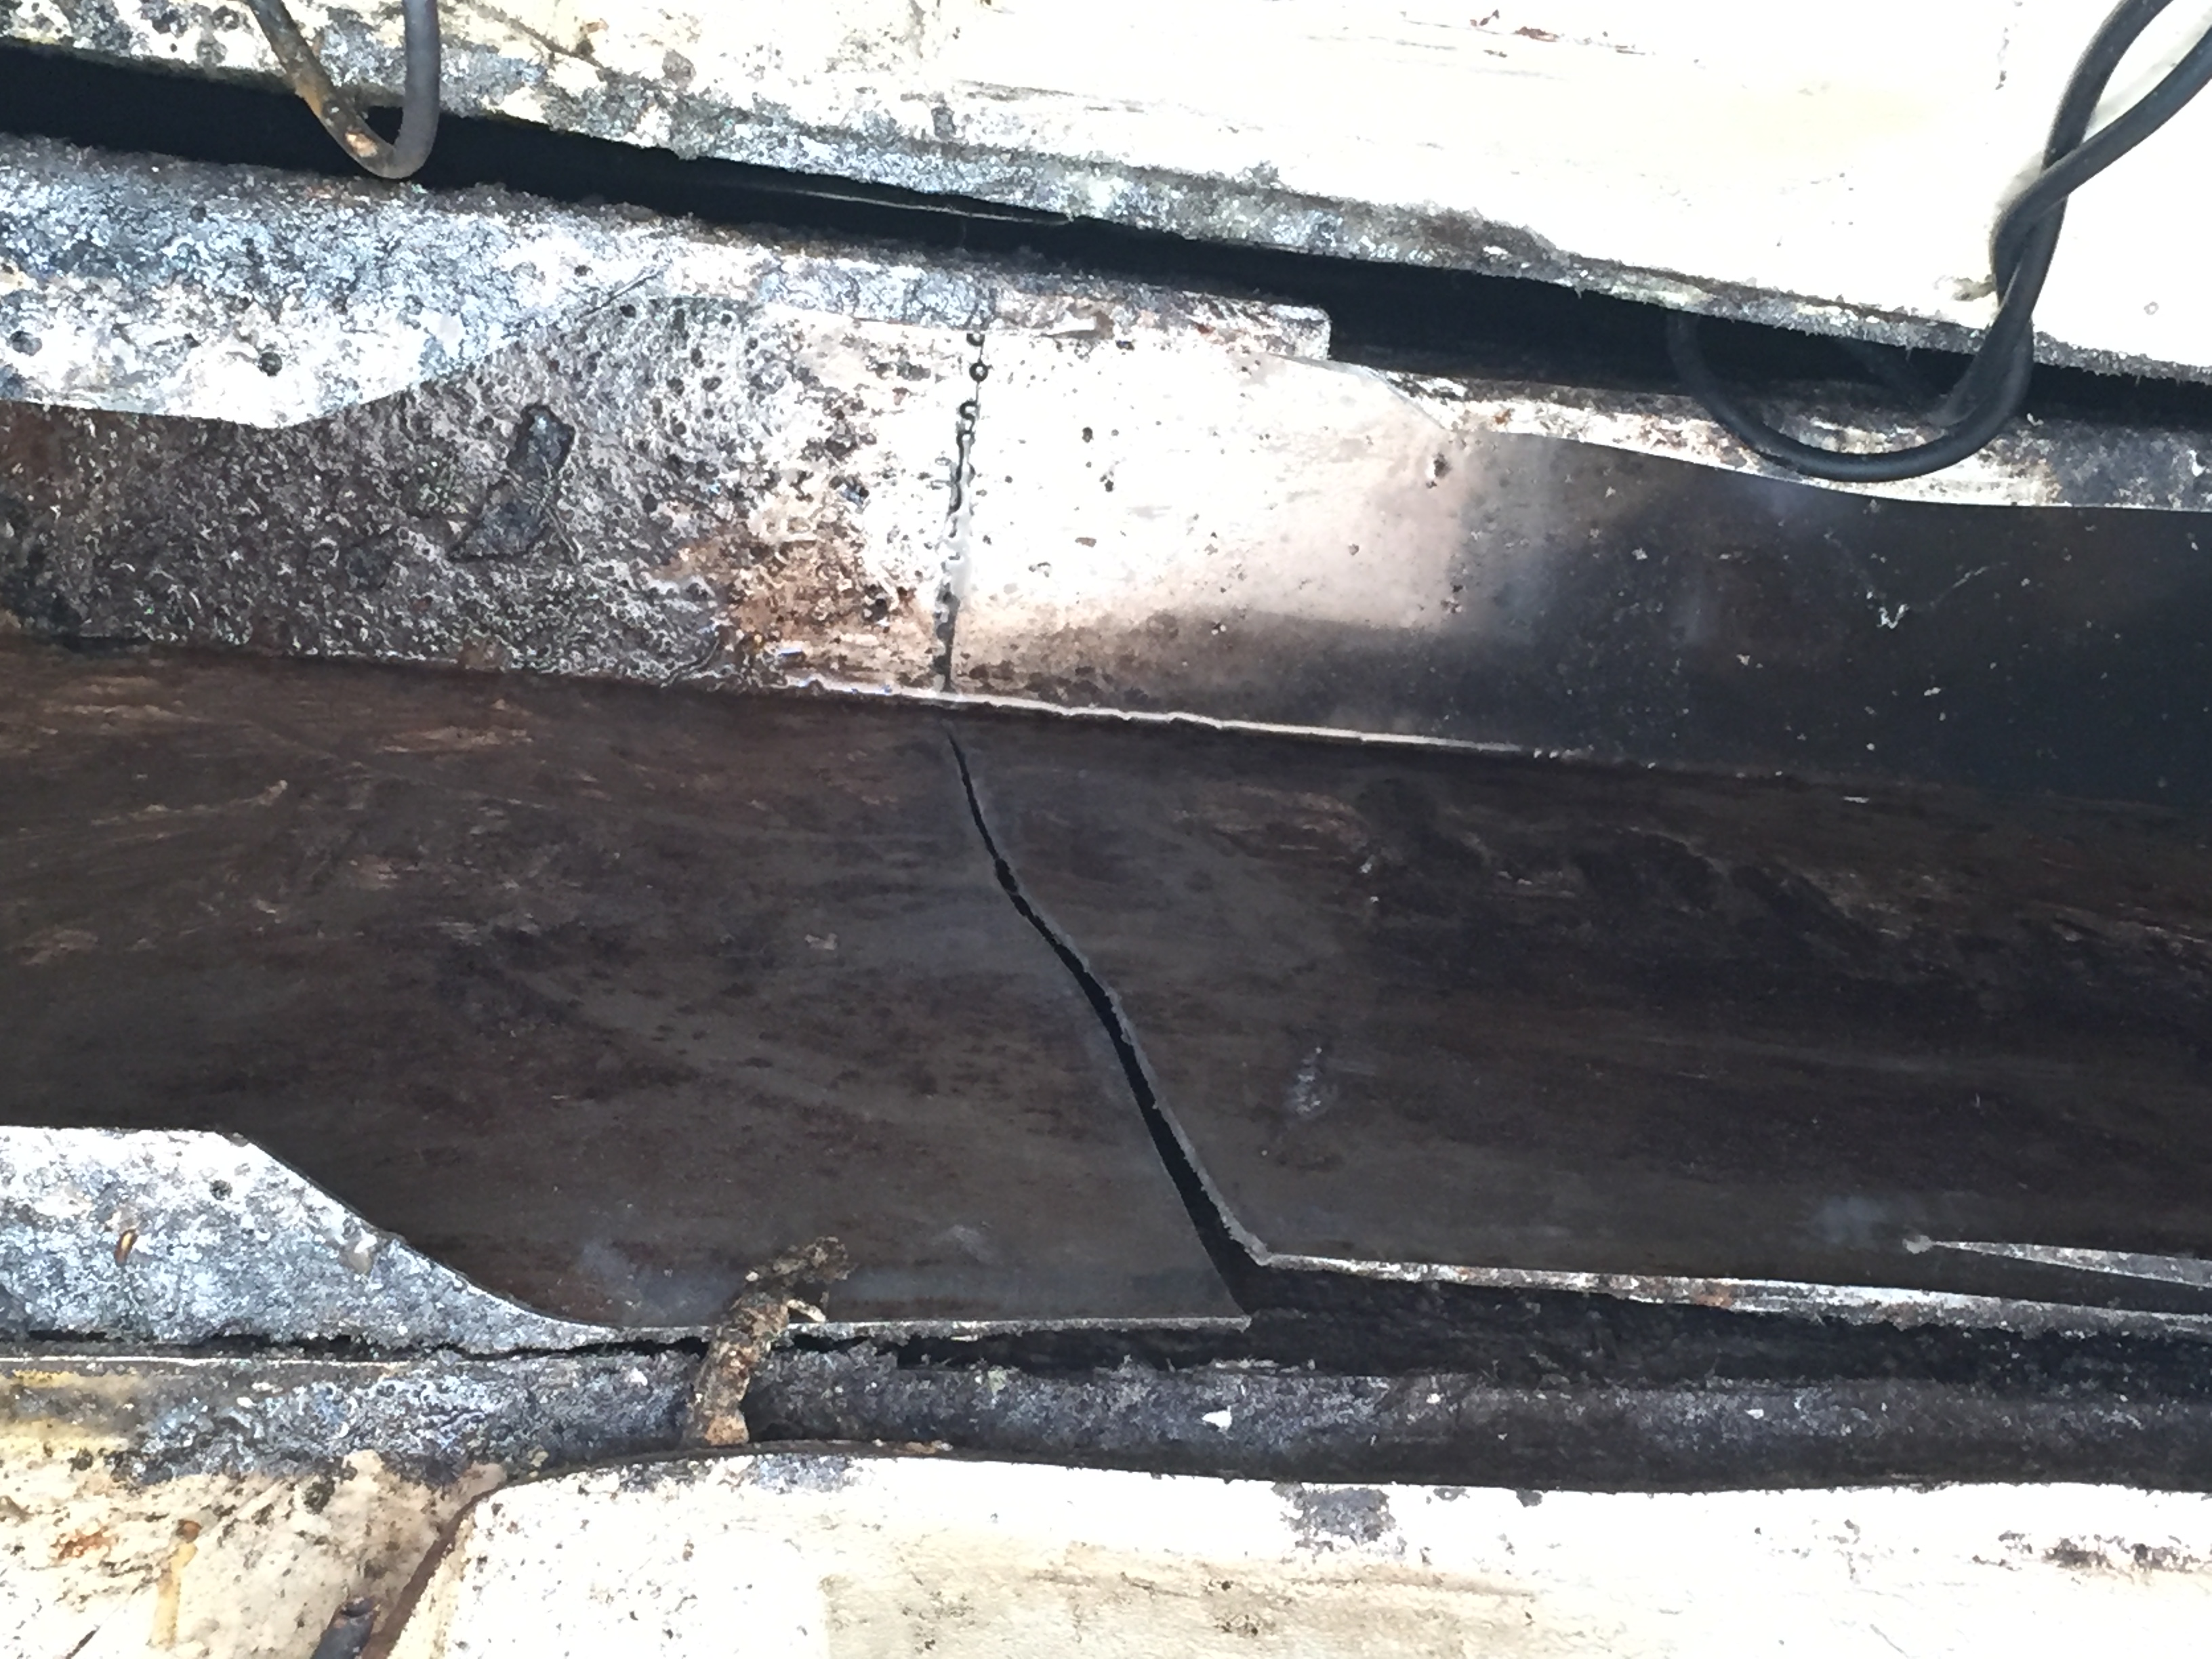
The success for the day is that the tank is officially in 2 pieces now and the back chunk should come out now.
This is definitely one of those jobs that make you ask yourself why. Why rebuild boats? I am so sore this morning it is nuts (I work in software, not physically demanding jobs) Sure we could pay someone to do this but it would be expensive and it would take all the “fun” away.
I am going to try to finish this job today, but I have to return to work tomorrow and I would like a little bit of relaxation this weekend so I am not sure how far I will get, and of course I feel like I was hit by a train.
Did I mention I am sore?
Total time to actually cut the tank, including a 1.5″ x 1.5″ hole to attach the winch to get it out – 2 hours
Well like any big job in life, the first step is always the hardest. Actually taking a sawzall to the drip pan was intimidating to say the least. I mean I could have just sealed off the tank and let someone else deal with it, but once I made that first cut I was committed to tanking it out.
So I have read everything I can find on the net about removing this beast right up to cutting a giant hole in the side of the keel to get it out. I decided to take the internal approach.
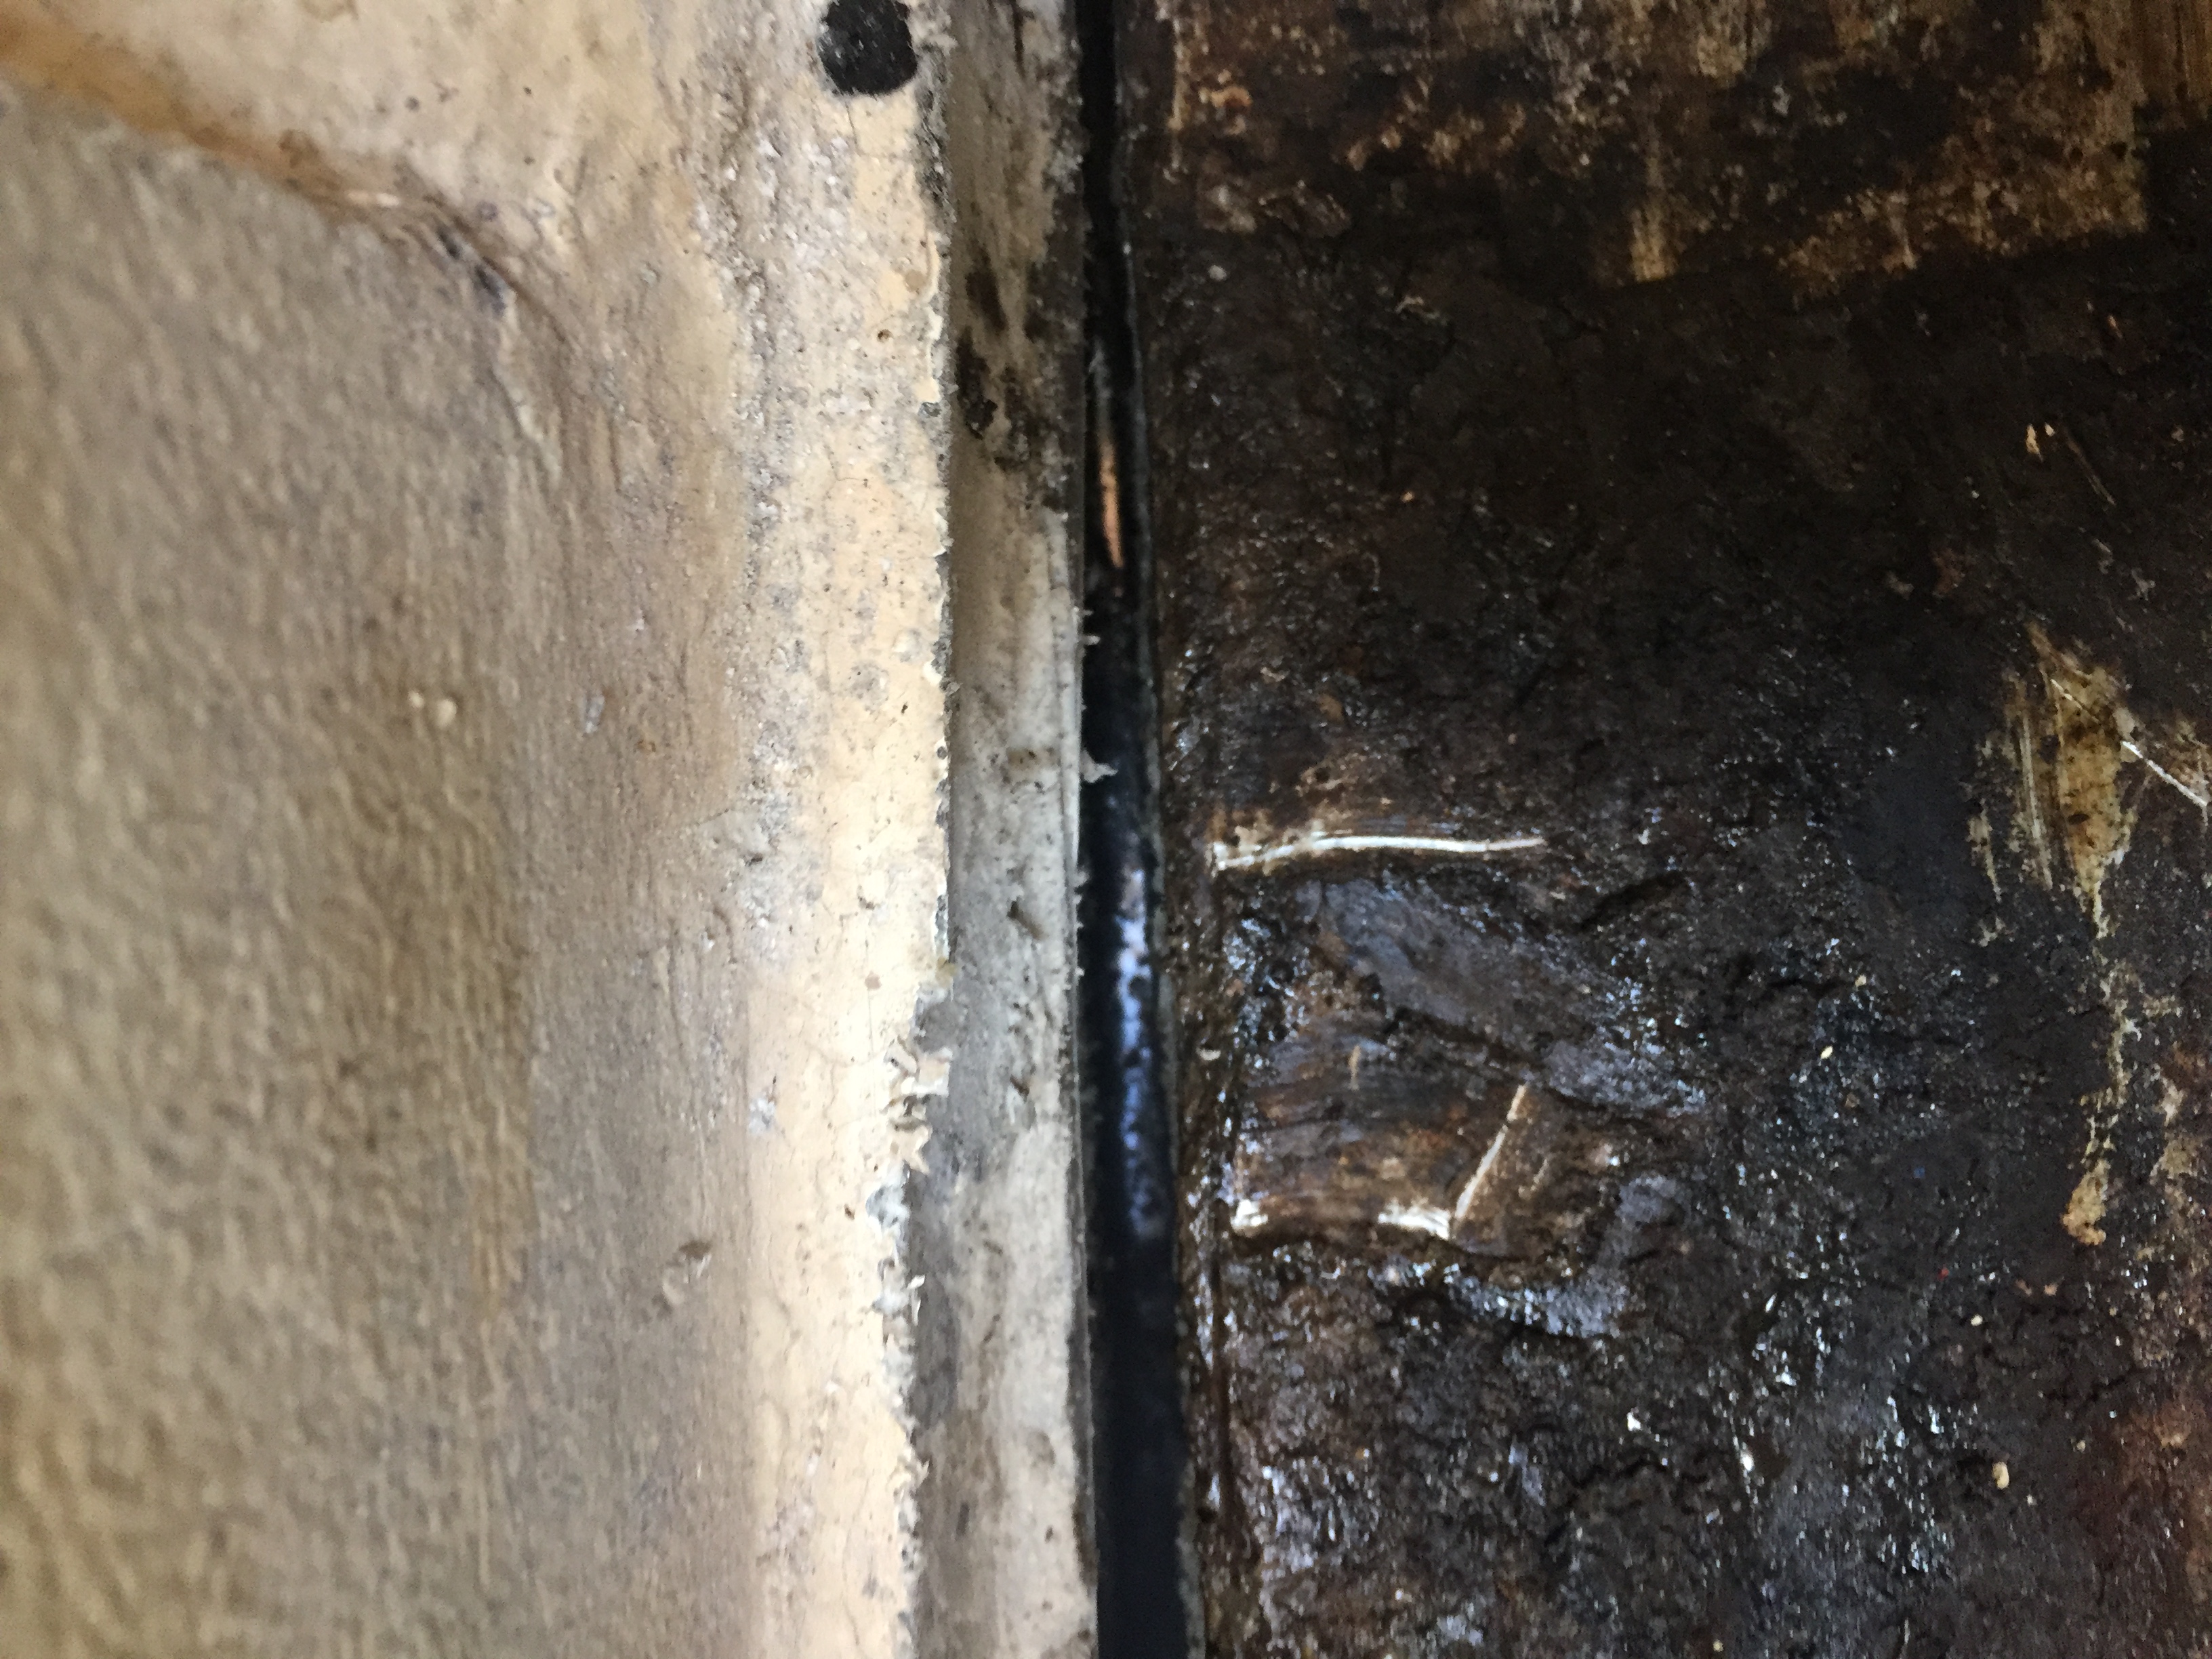
Now perhaps Akupara had been neglected more so than other boats but in all honesty, although the pictures look pretty disgusting, it is just grease, oil, diesel and dirt. It all cleans up with the right degreaser. I knew from when we bought Akupara that the keel tank was coming out as there was an old badly repaired spot on the bottom of the keel from a previous running aground episode that was leaking black ooze. We had the area repaired, see a previous post, but I knew that the tank was leaking. Interestingly enough now, I am not so sure. I will be once we get it out, if I find any holes but as of this moment I am not.
Step one is to cut out the drip pan. Approximate time, not including cleaning, 15 min.
 Step 2 is to cut off the tabing on the top of the tank. Again with a sawzall where it would work, but primarily with a grinder using a cutting disk. Approximate time not including cleaning, 20 min.
 Step 3 I used my new hand saw to poke around to see what this dreaded foam that is holding the tank in place was all about. On Akupara, that foam is either non existent or has deteriorated to the point of non existence. What I learnt at this stage is that so far it looks like the tank is not the culprit of the leaks or the smell. The tabbing was partially peeling in places which I believe sometime over the last 40 years has allowed bilge water and probably spilled diesel and heaven only knows what else to leak down the sides of the tank and slowly fill the area, thereby dissolving the foam.
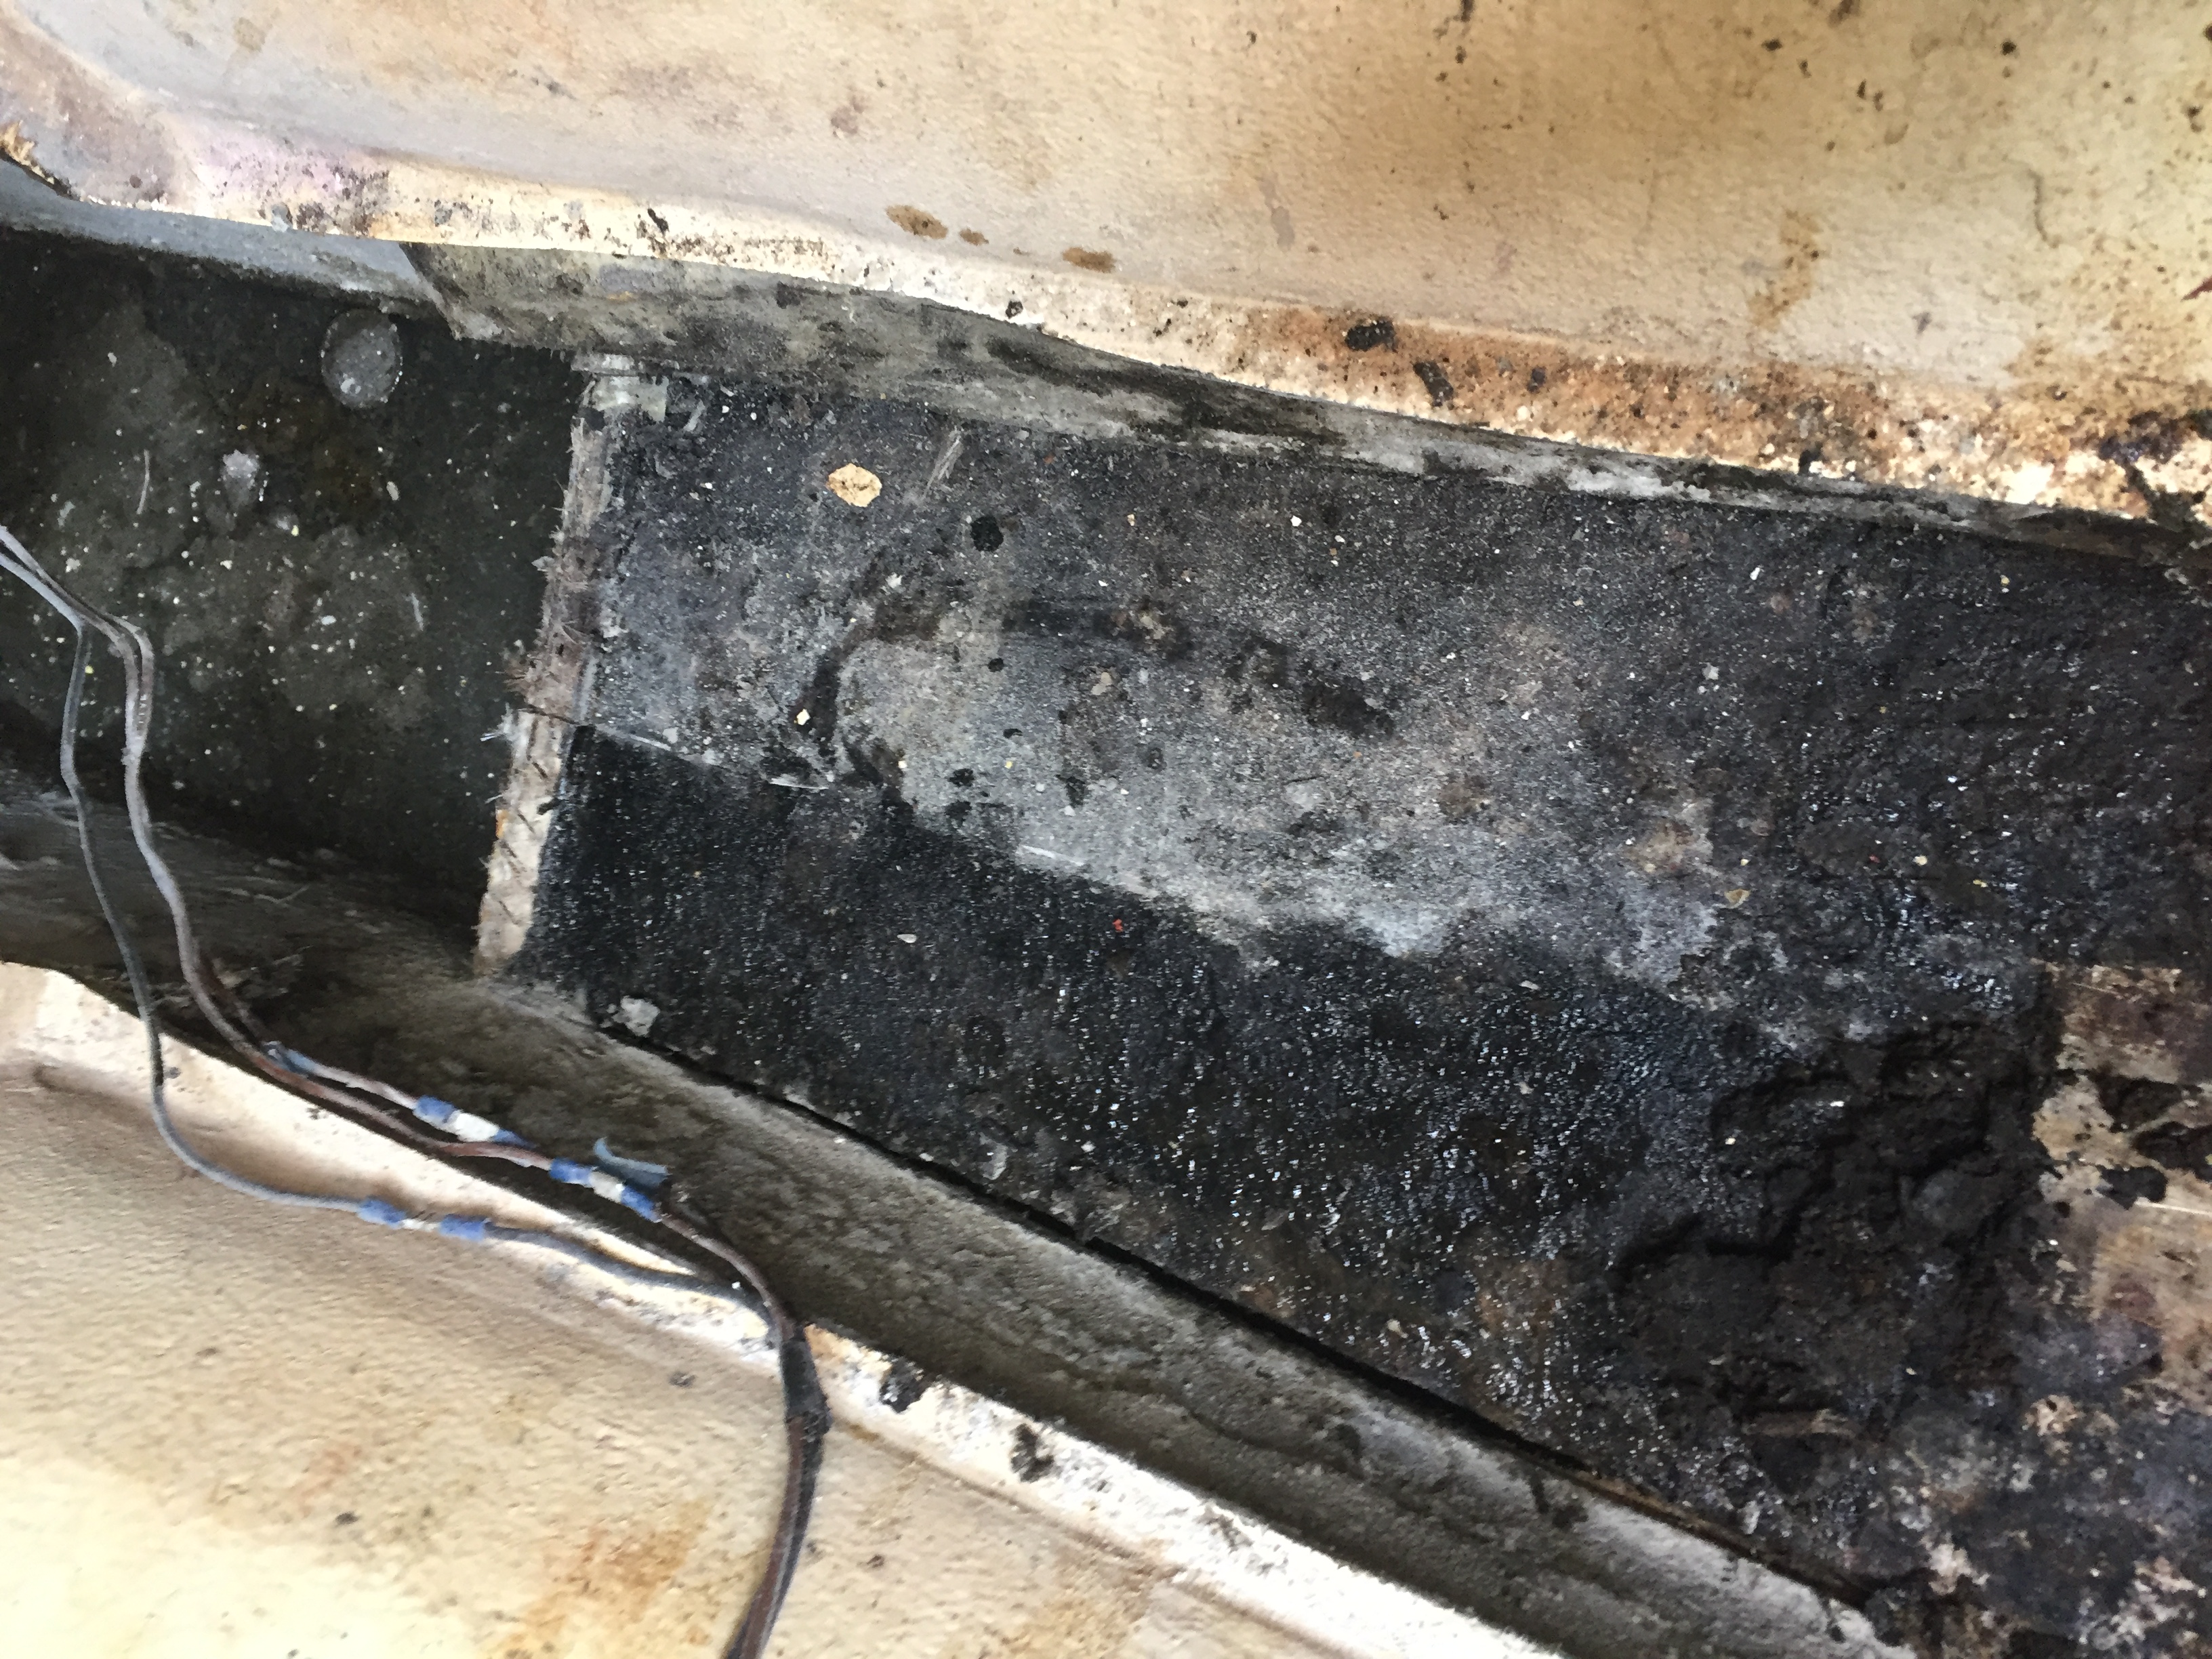
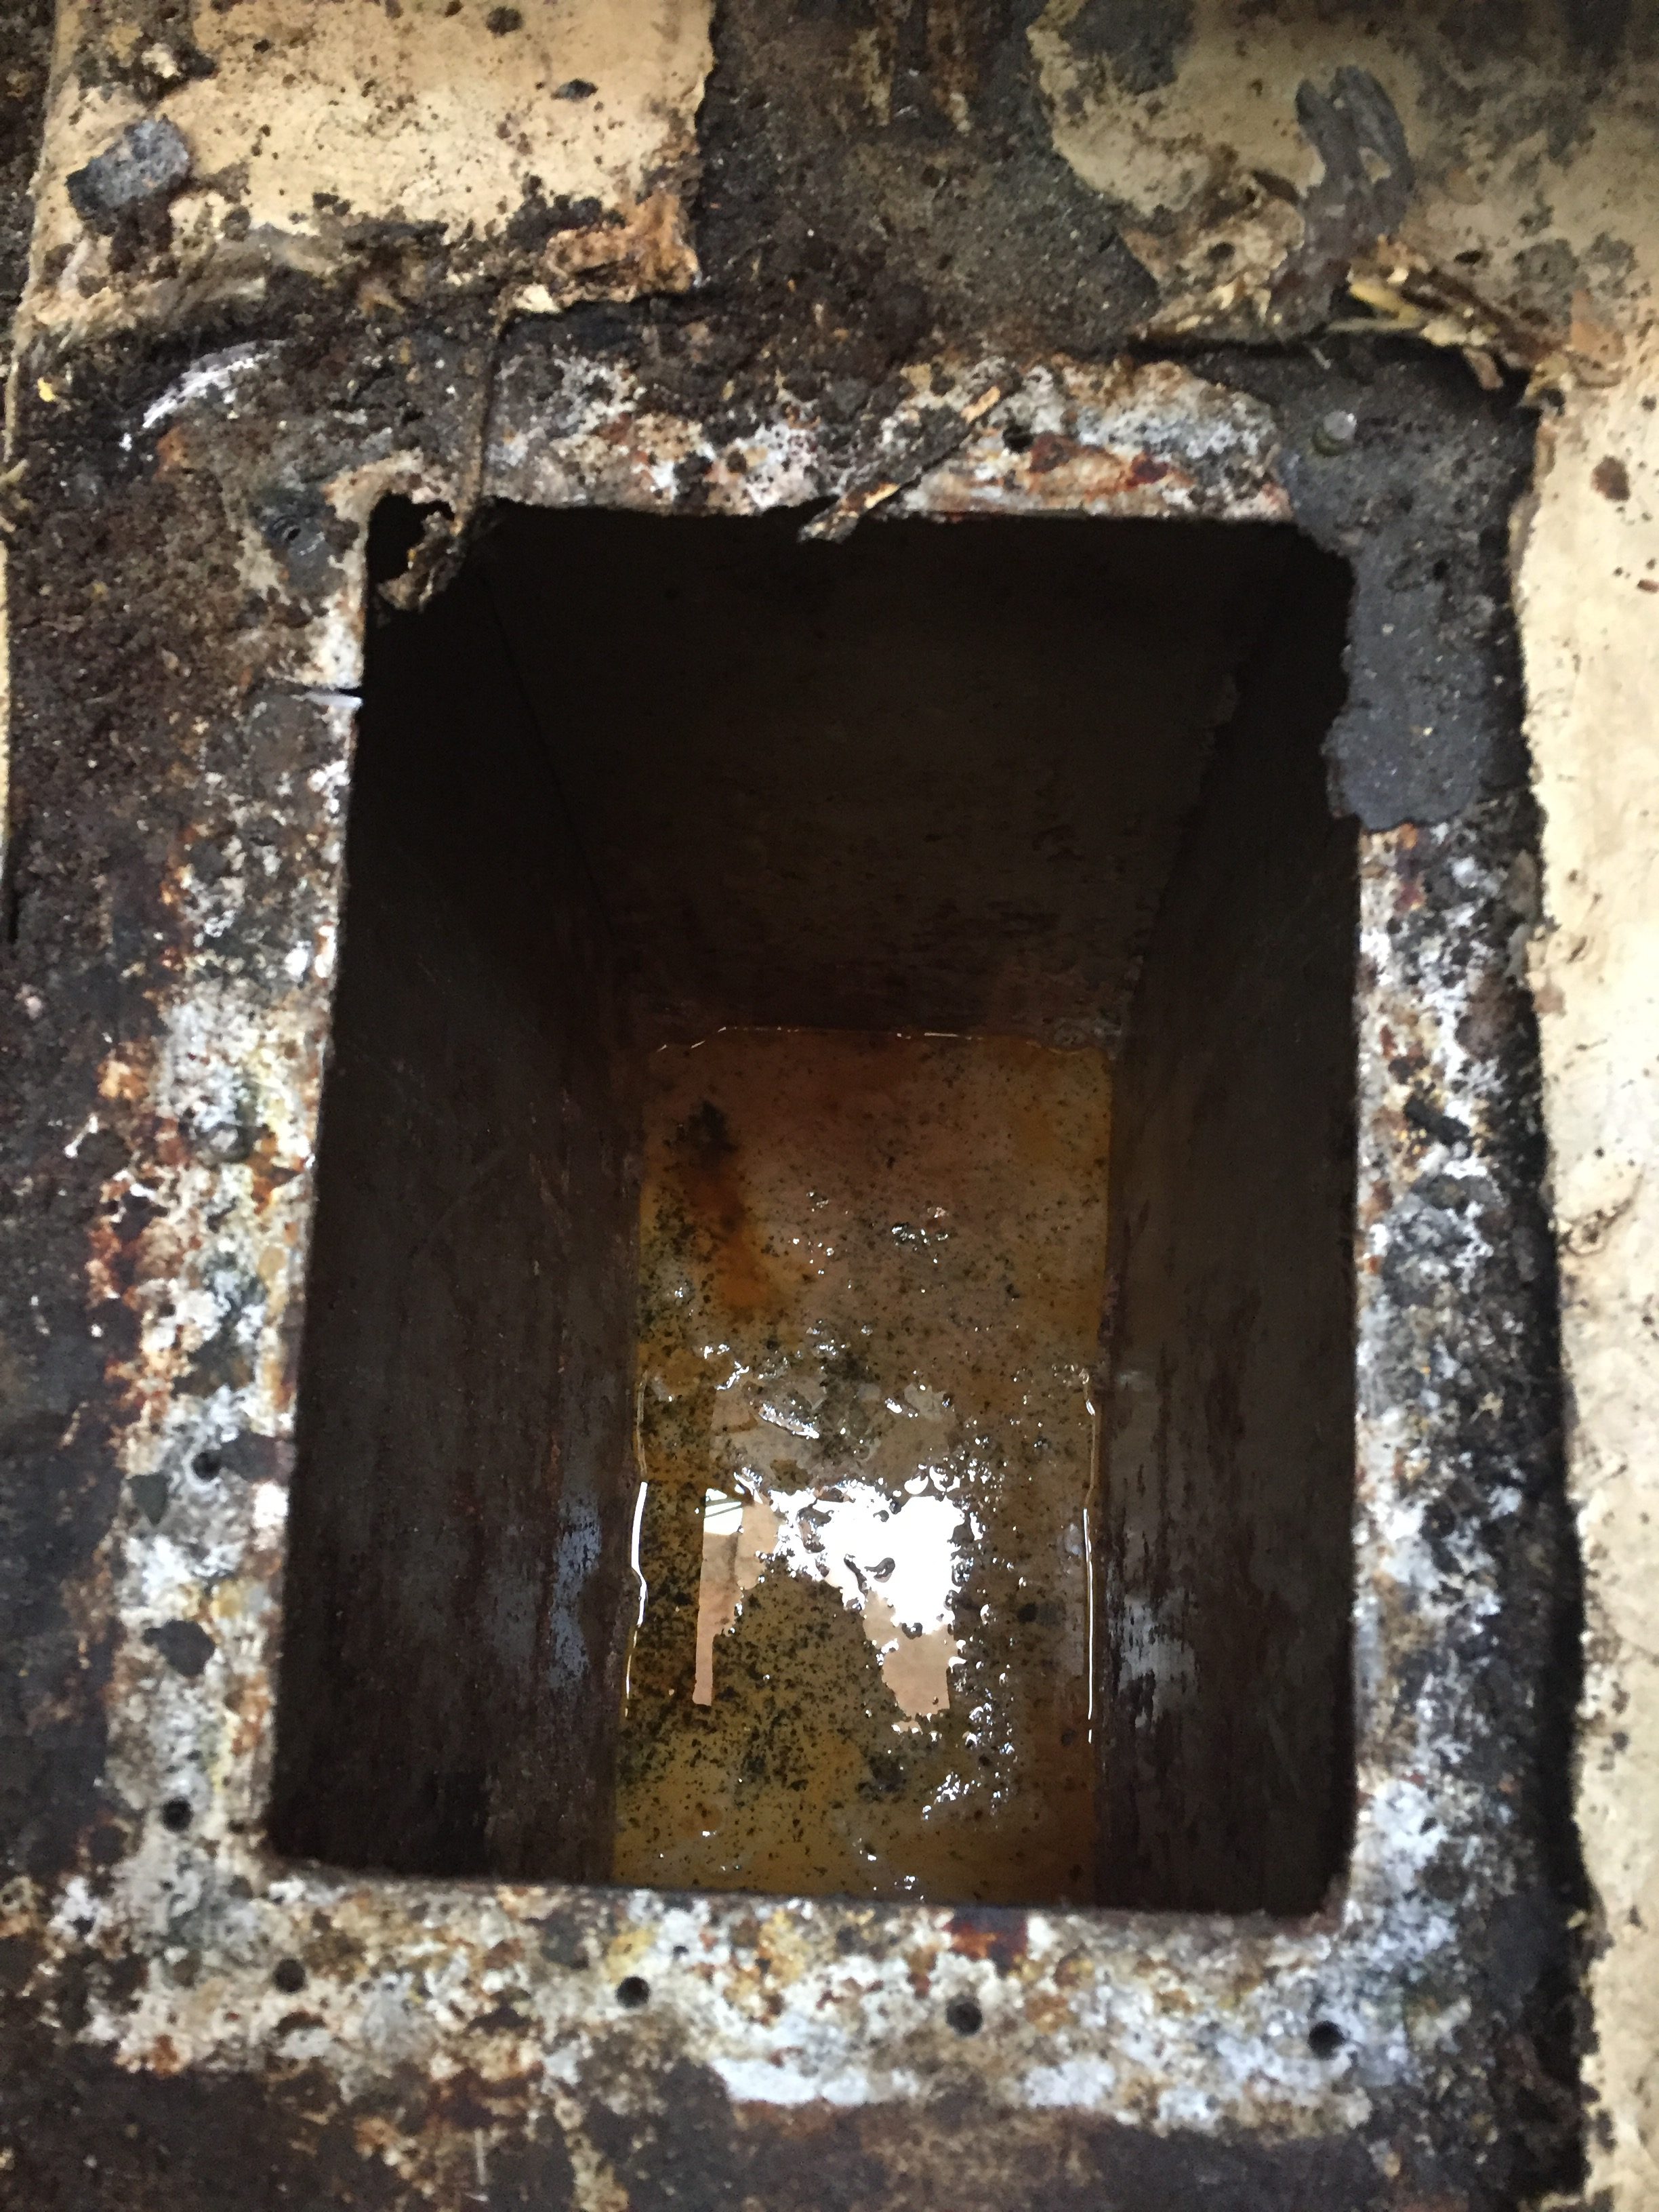
 If you look closely in the picture above, this is looking down from the top of the tank approximately where the front of the engine would be, you can see the water that has accumulated in there.
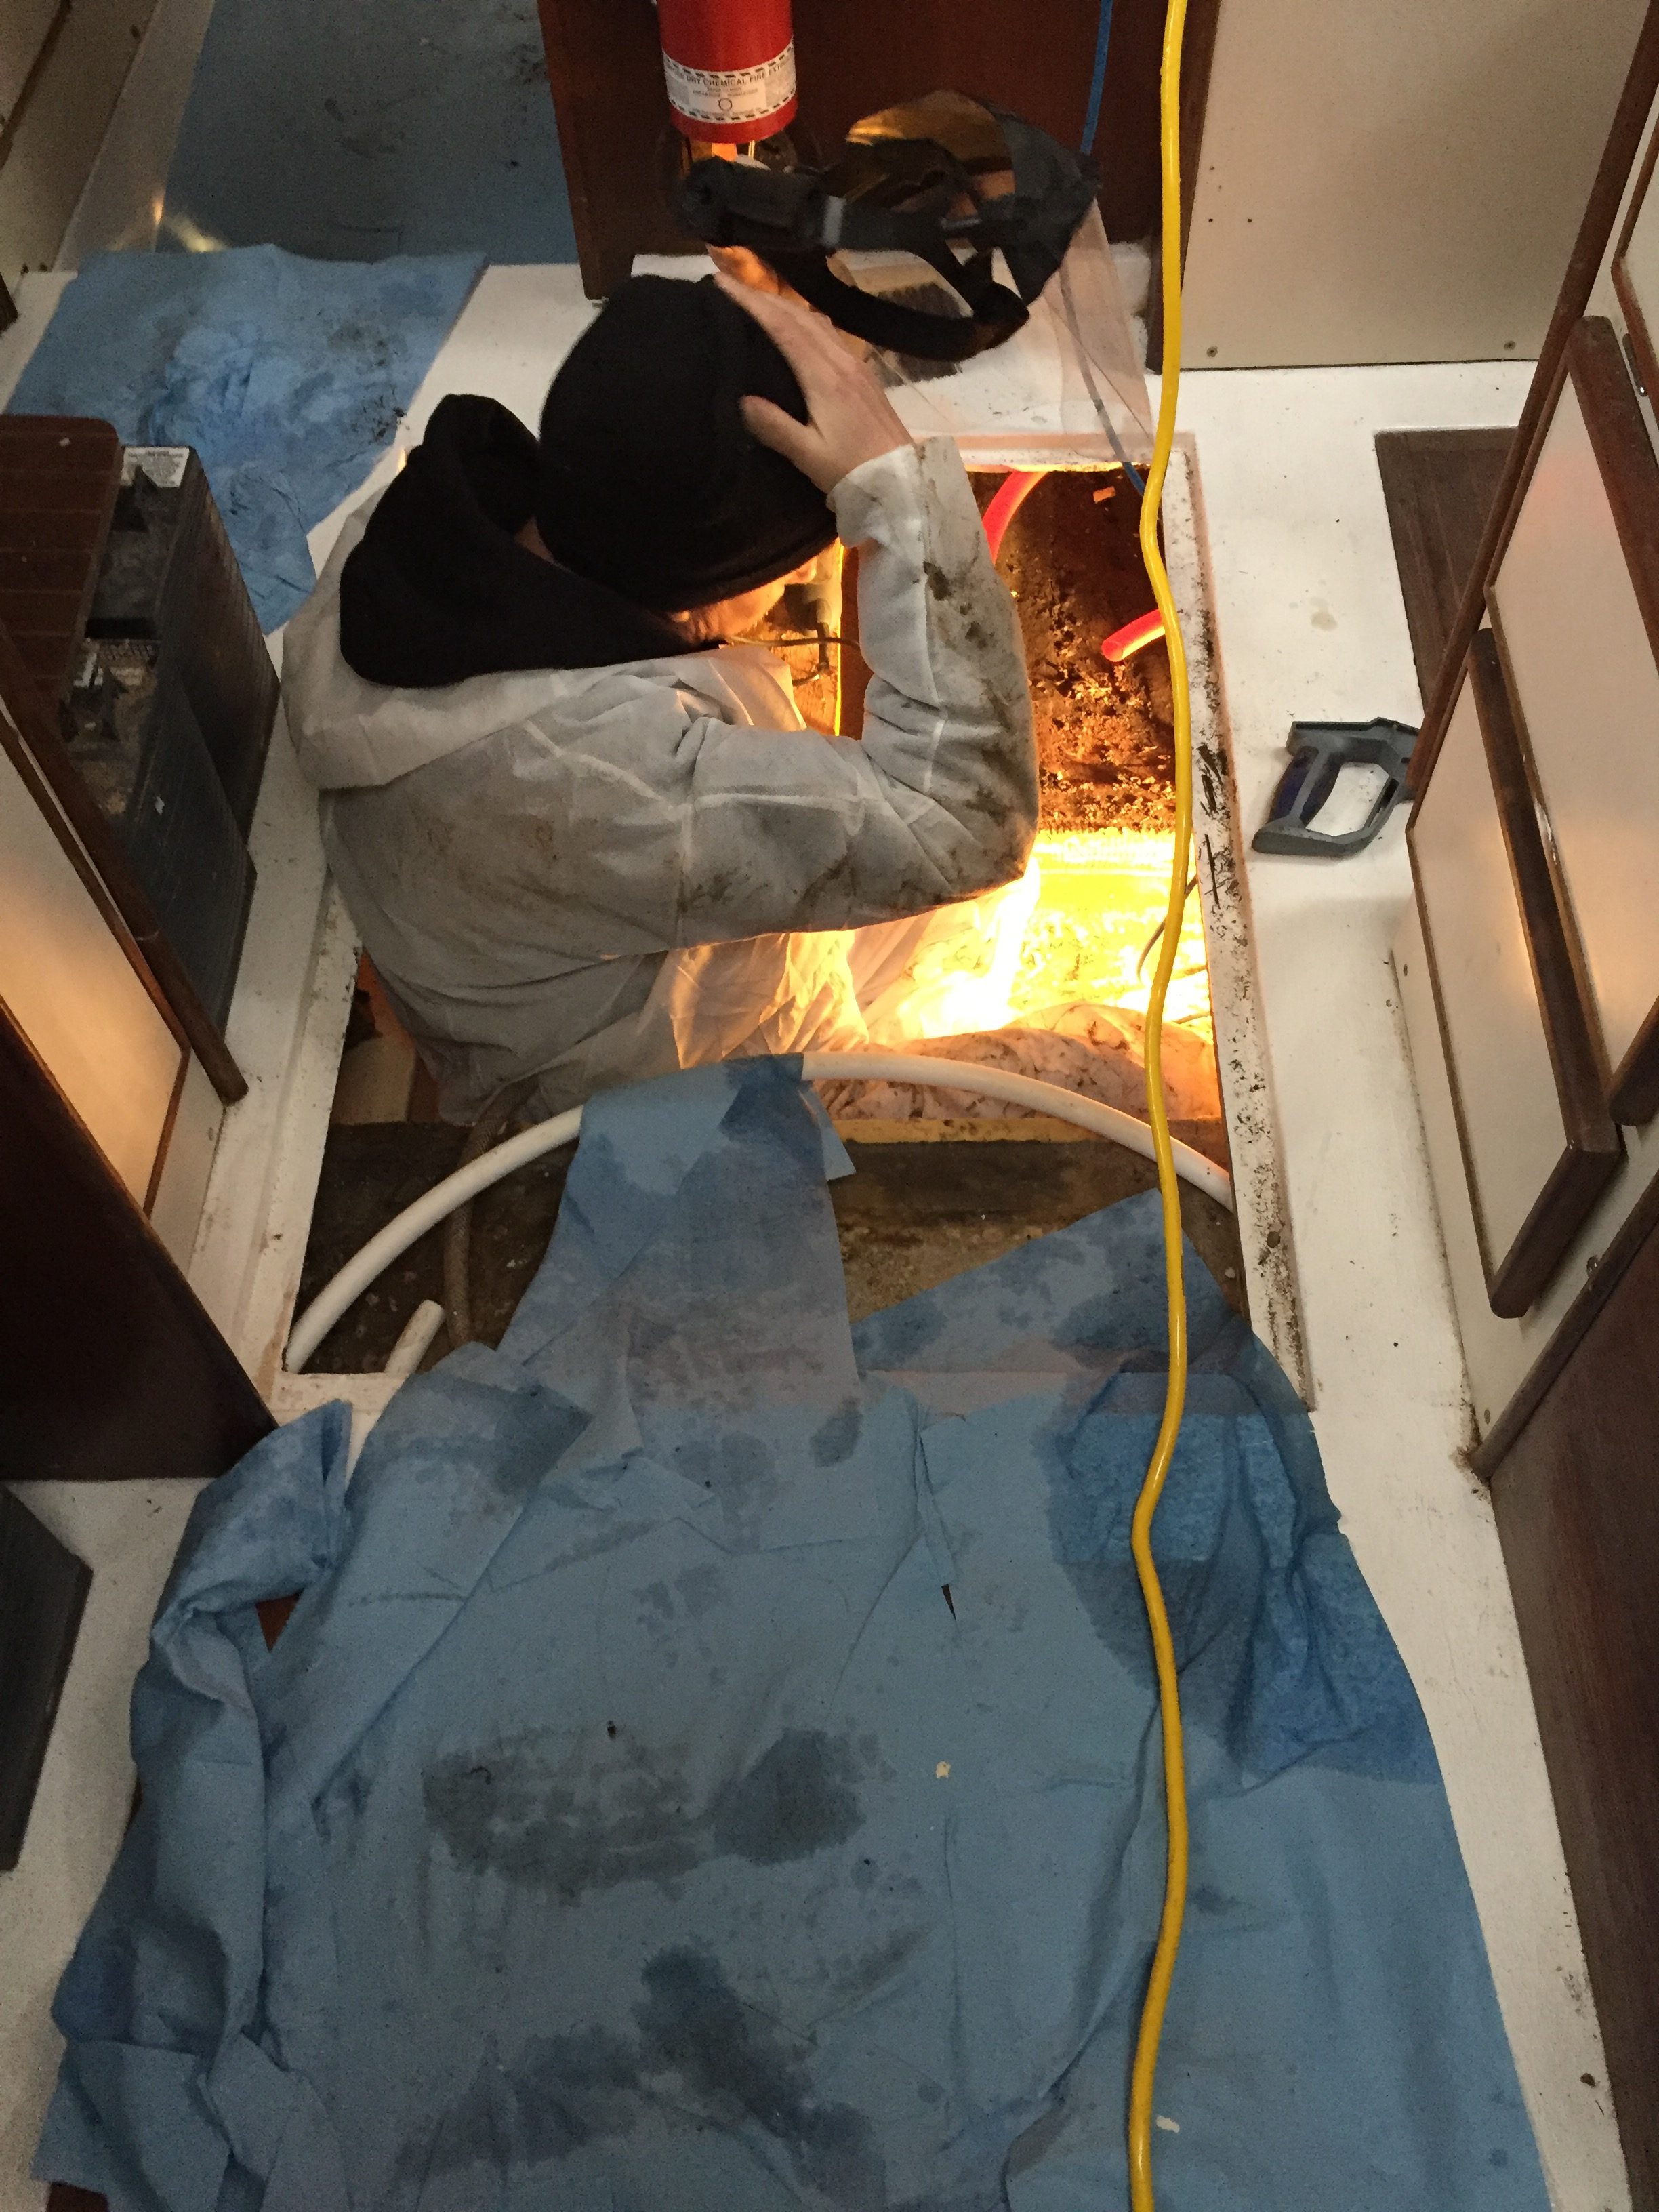
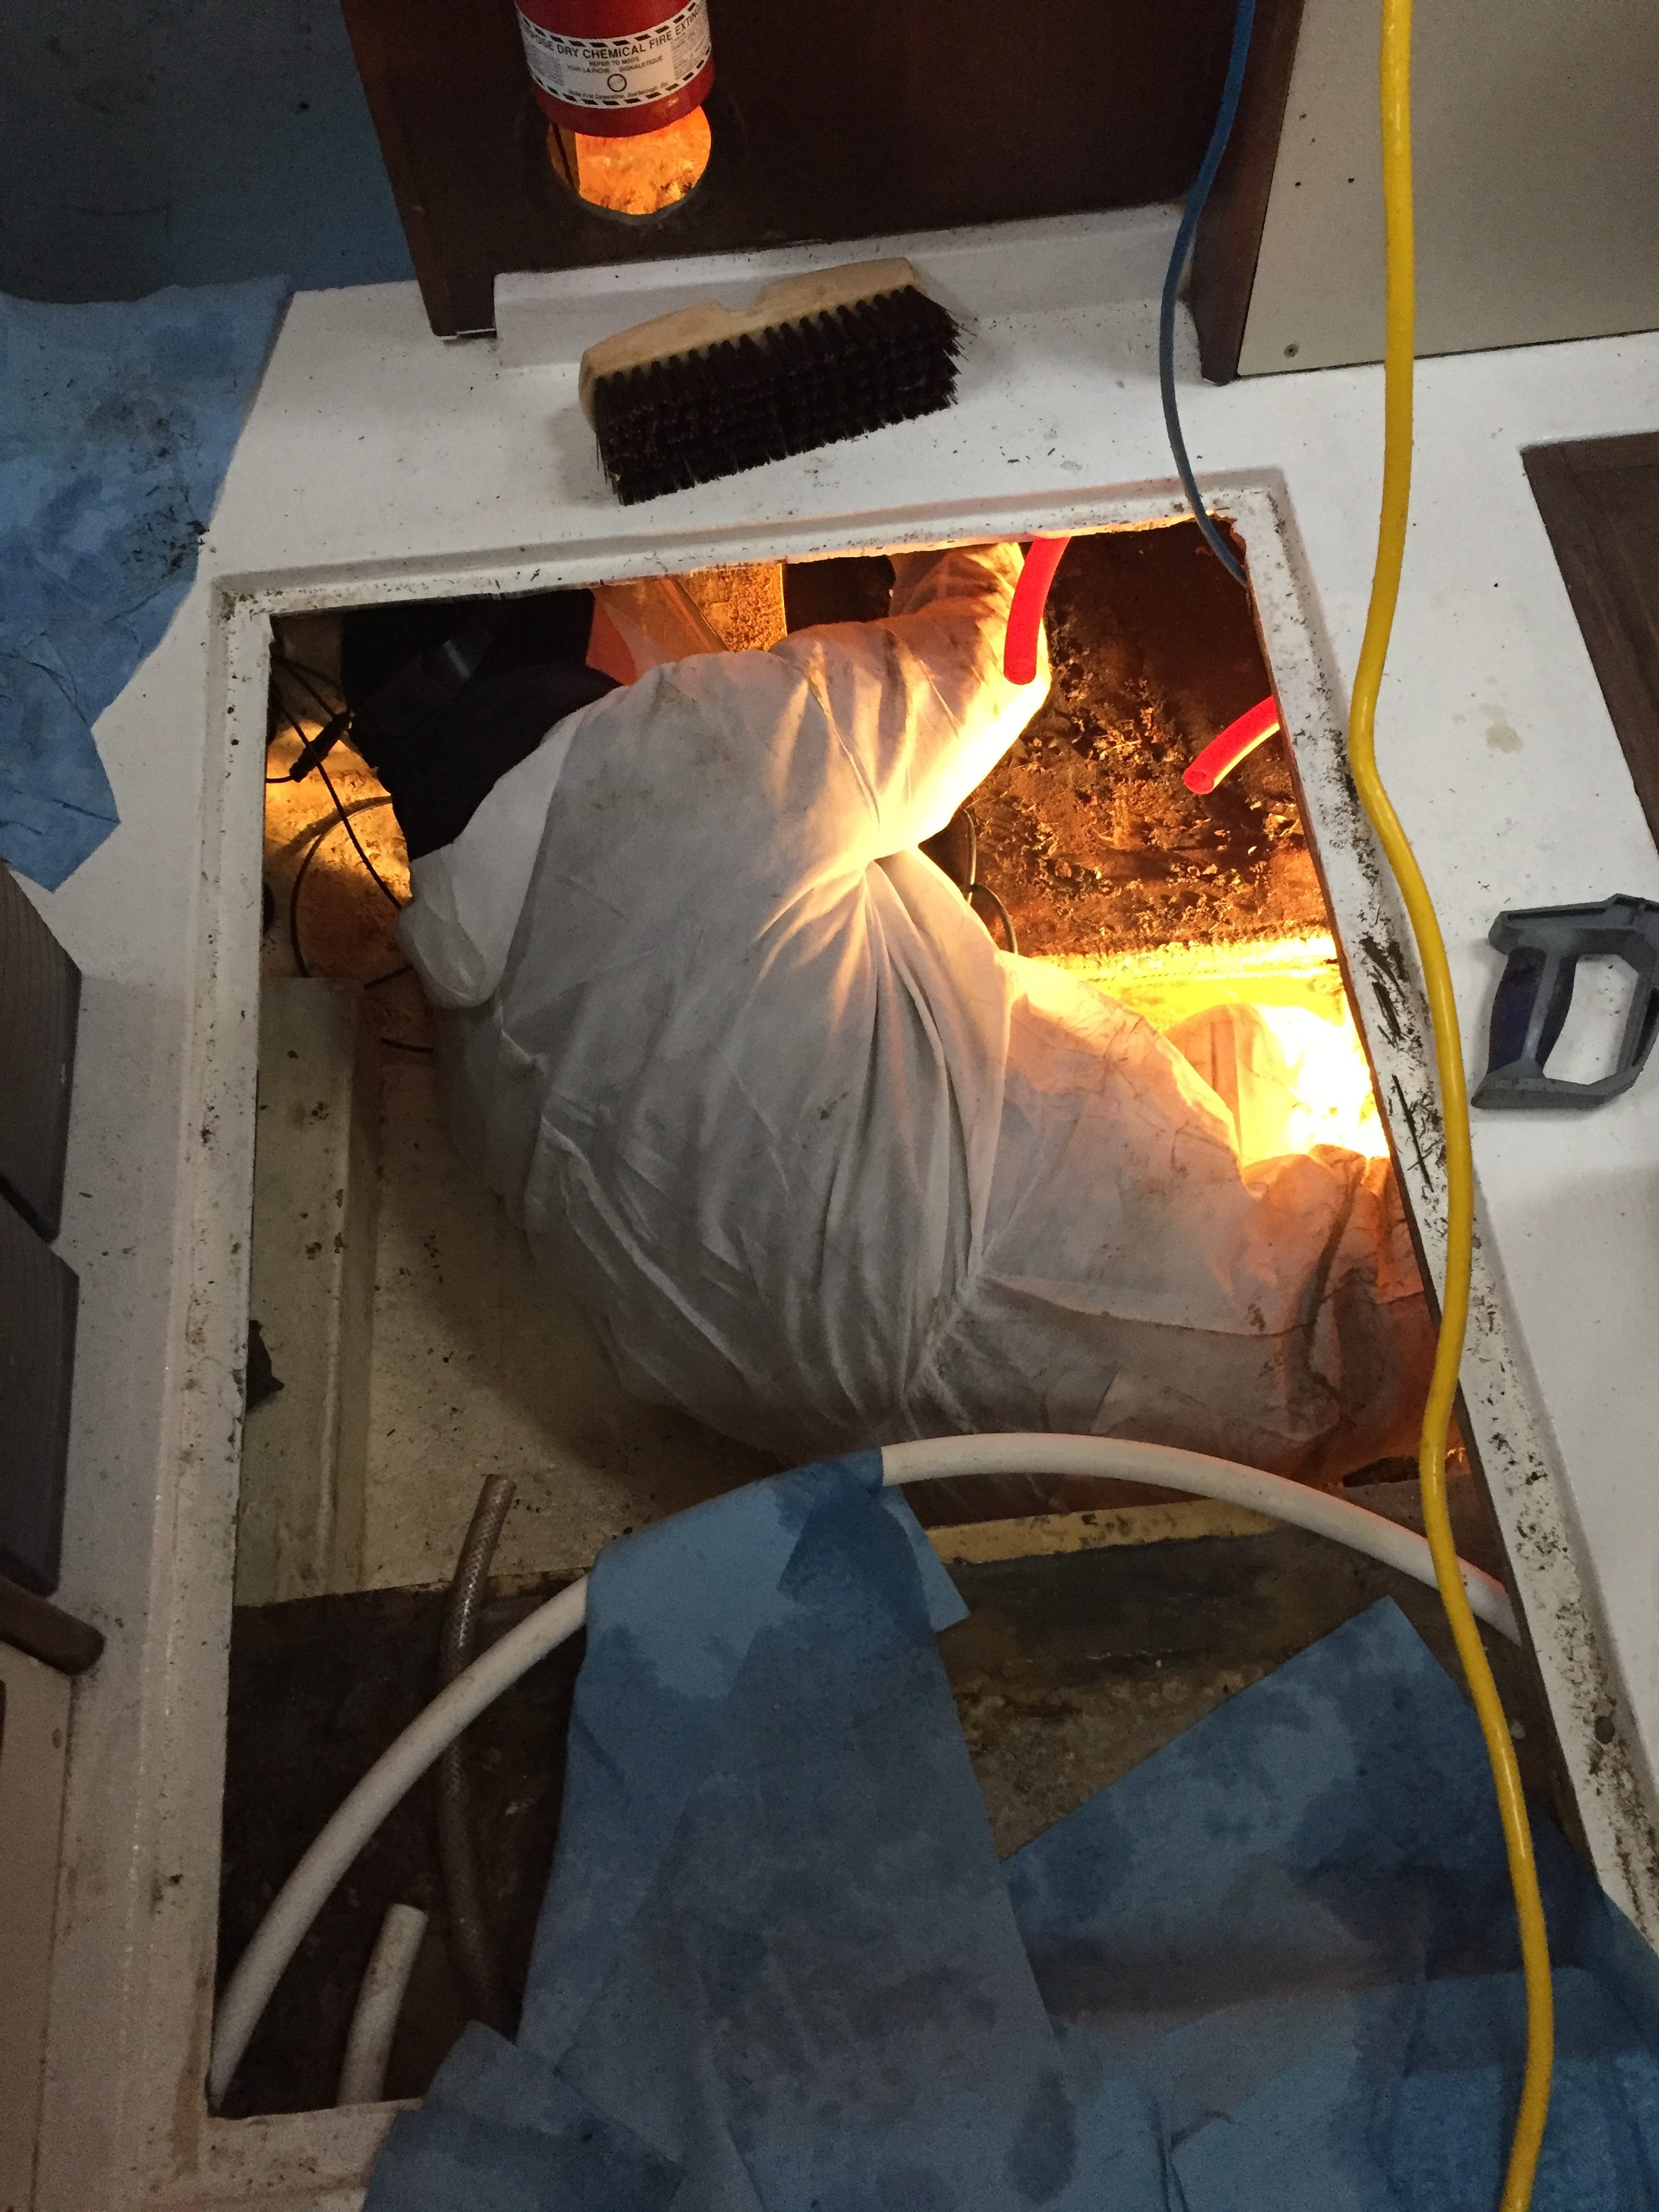
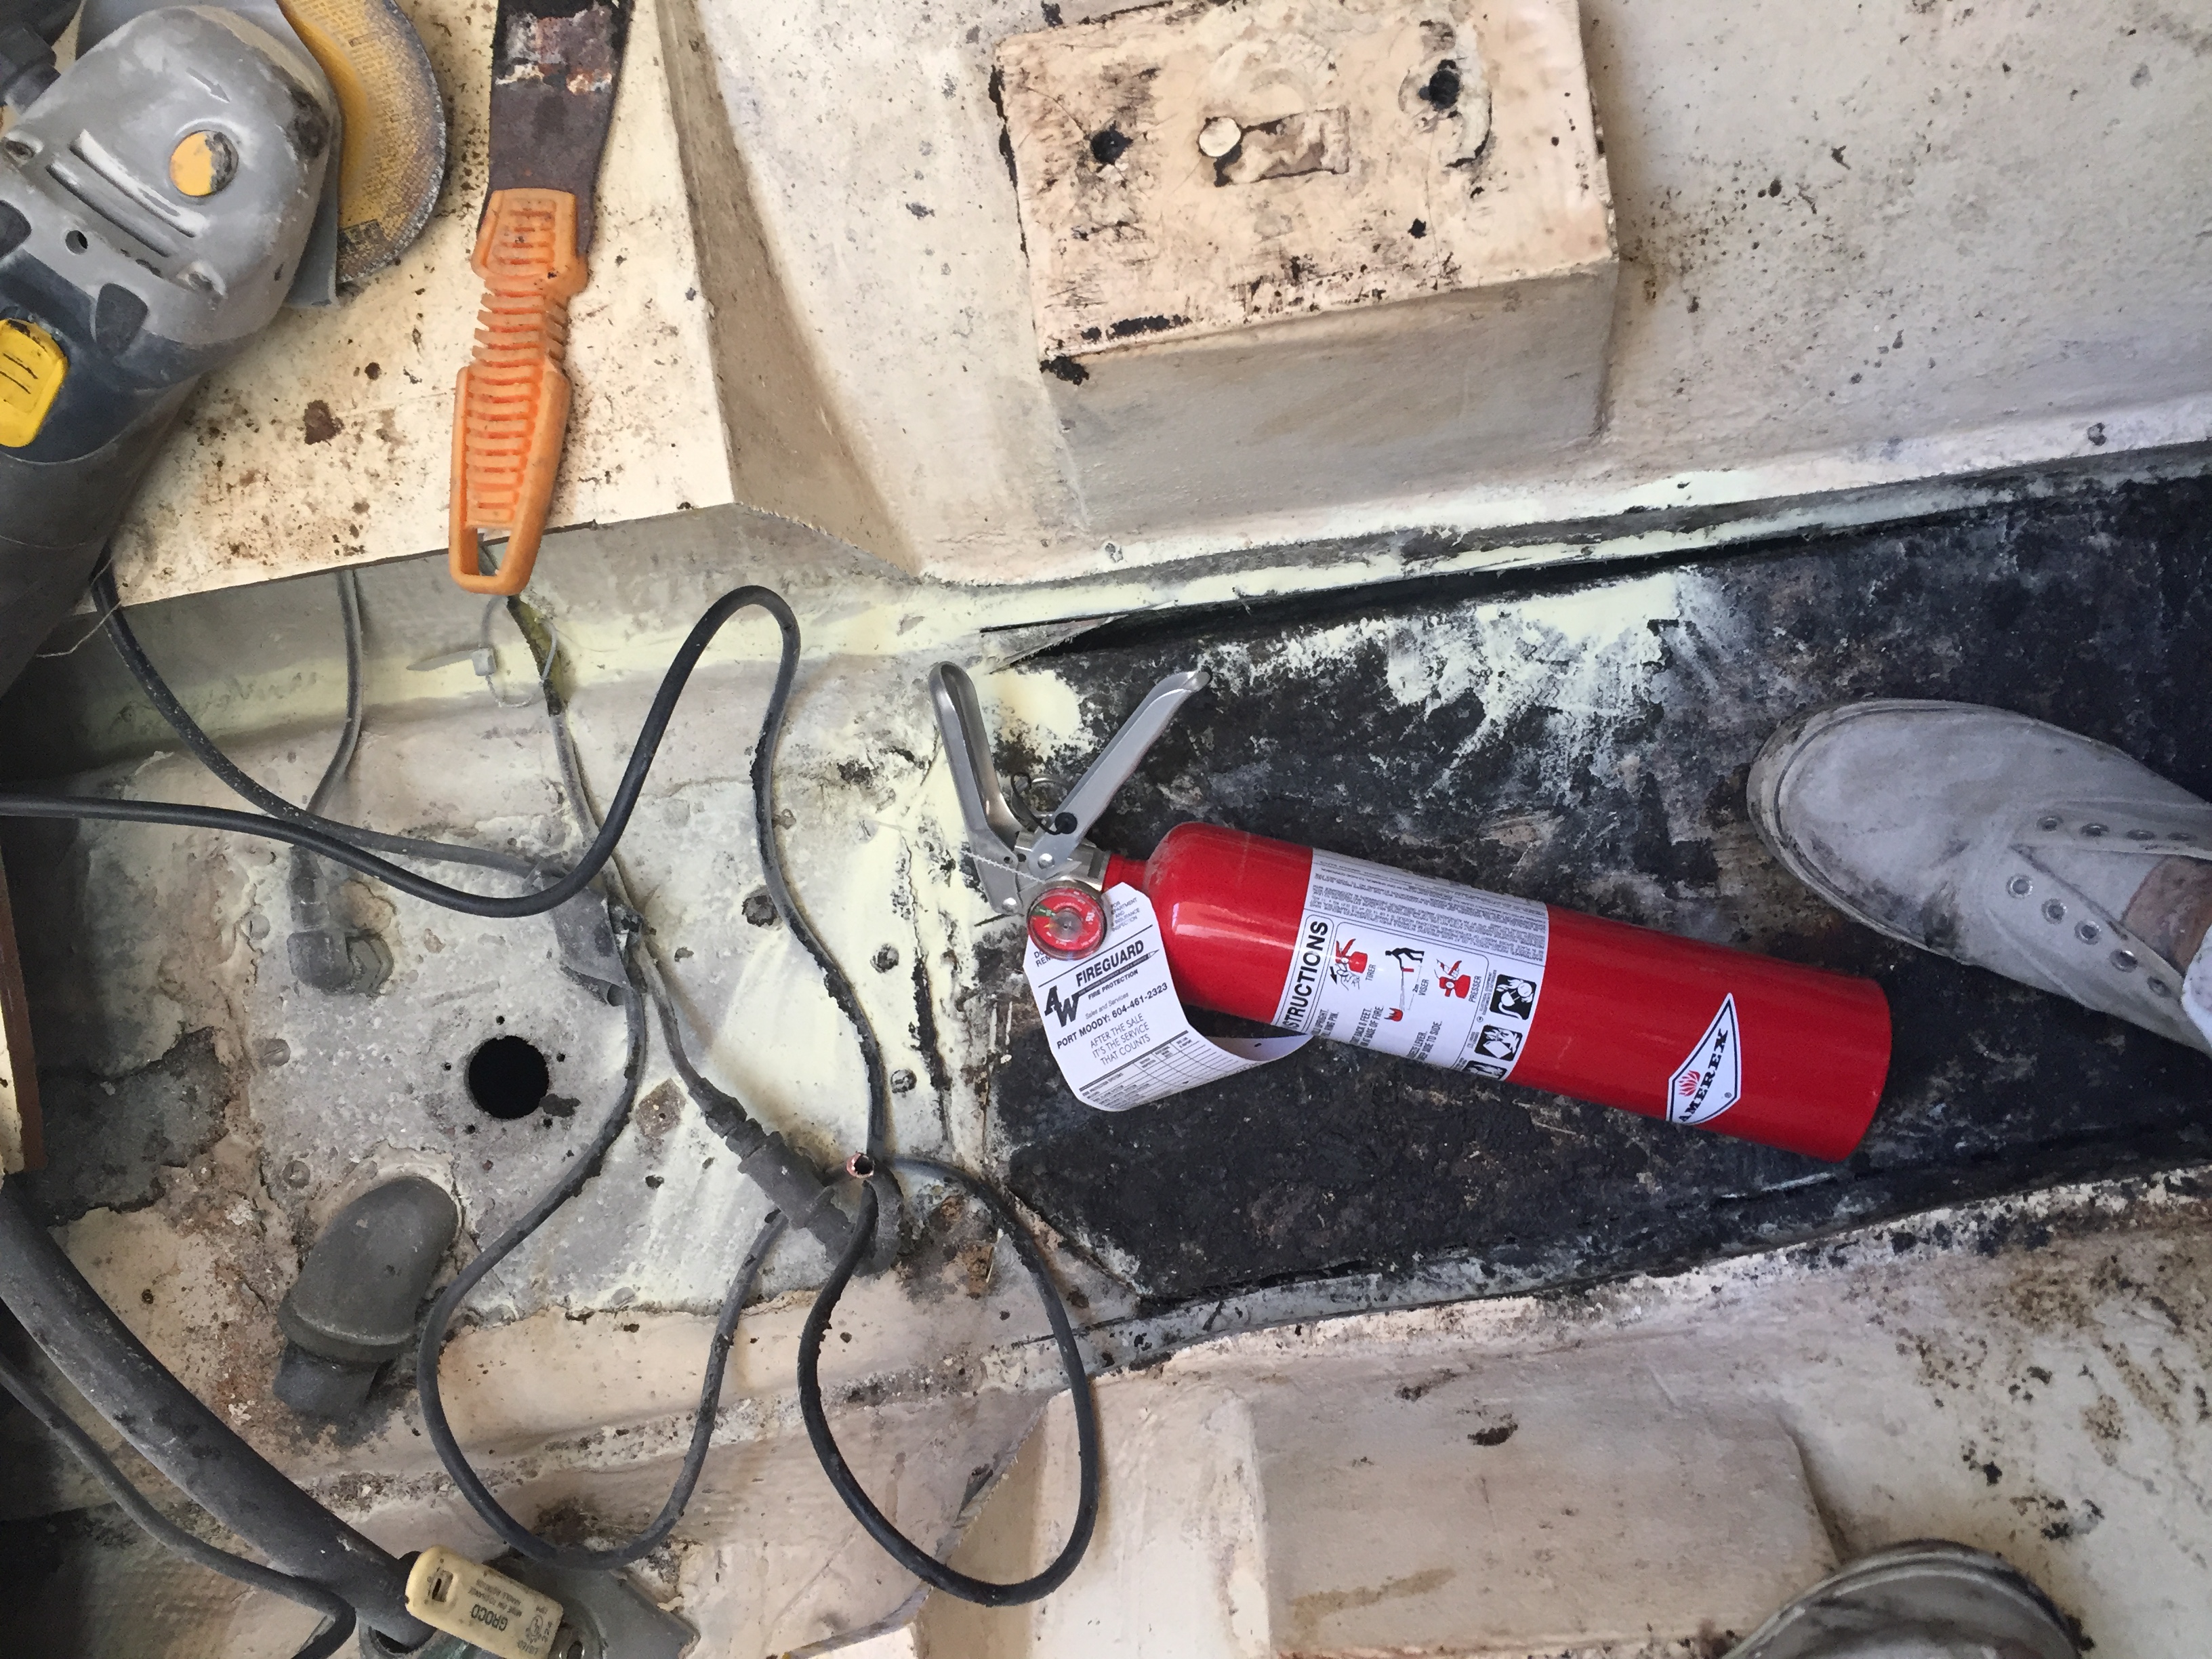 At one point I had a bit of smoke or steam that was rising up from the depths and I decided to play it safe, rather than have an even bigger issue on my hands. I have seen video of fiberglass boats burning and the thought has always been put it out before it gets started or abandon ship because then it would just be too late.
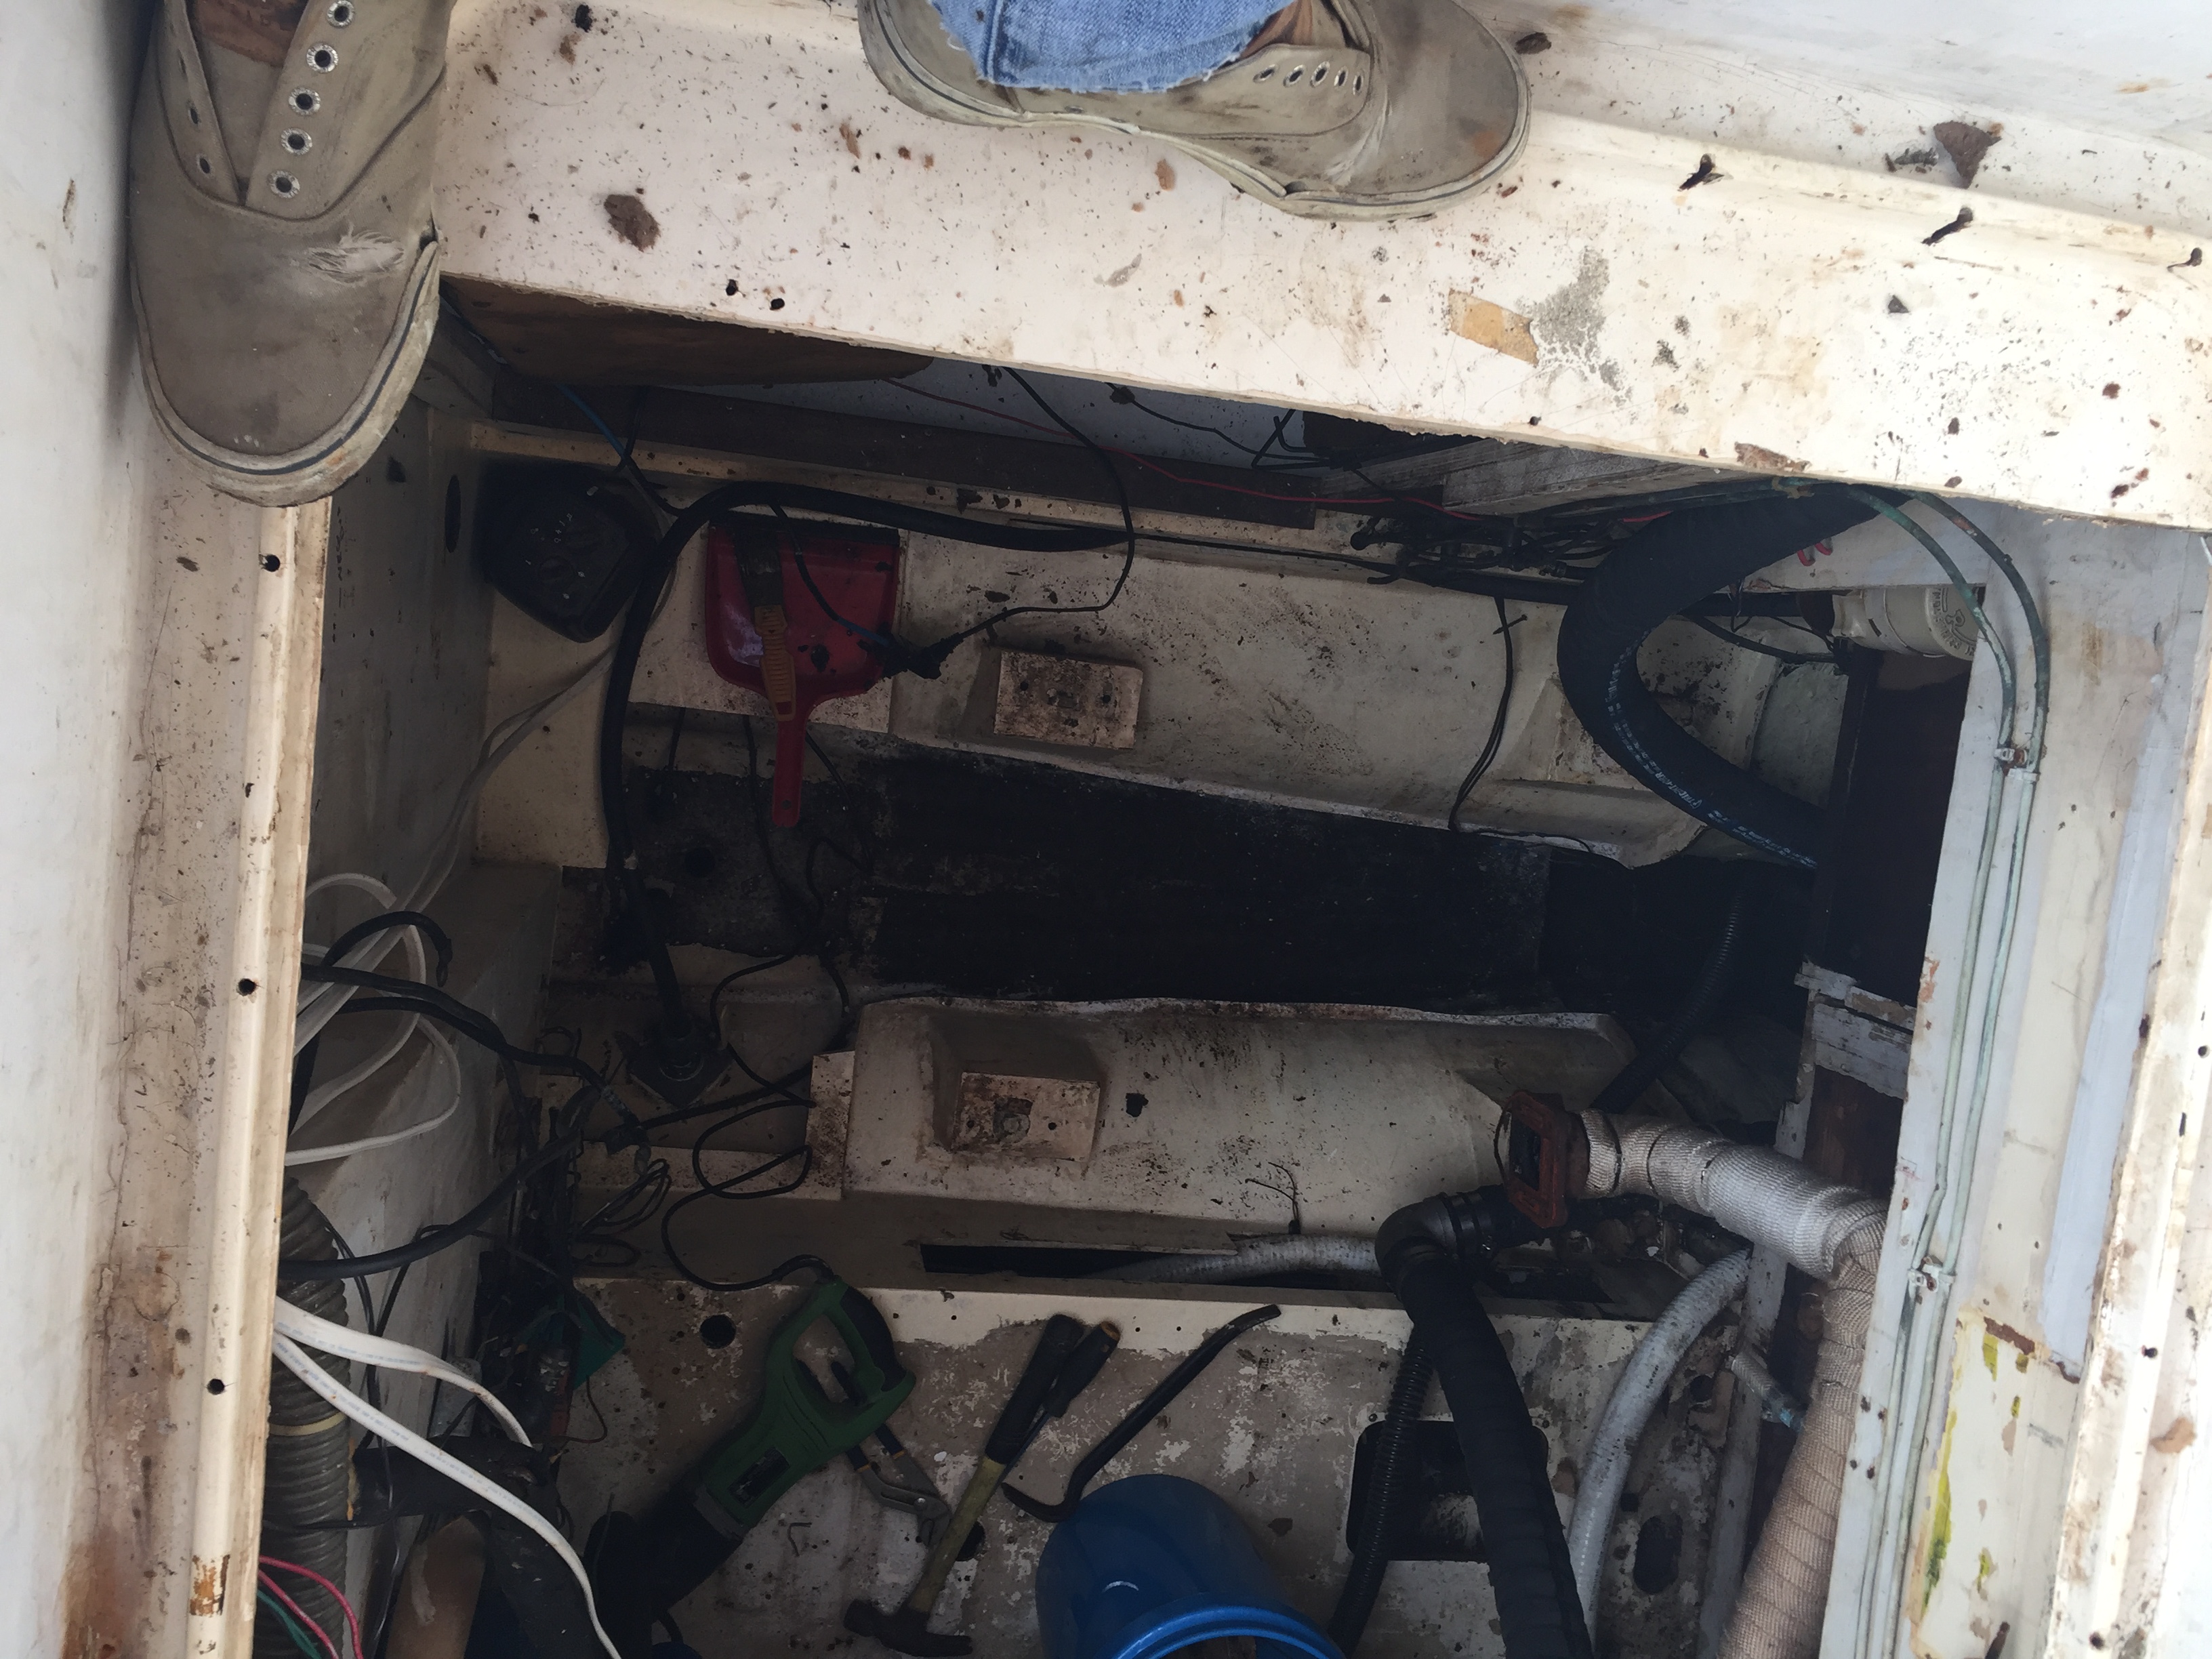
One of the longest battles I had in this entire process was removing the damn inspection plate. I could not get the grinder under the old fill tube in order to cut off one screw that was totally inaccessible. The fill itself had been cemented into place with something that was a lot stronger than I. At this point I also thought damn, I am almost done, I didn’t realize the tank ended right there. (See the aluminum at the top of the picture) ya it doesn’t, that is simply one of the baffles and the tank continues up all almost into the galley. I also lost a lot of time trying to pump that sludge out to no avail. Today will be the old bucket method if all else fails.
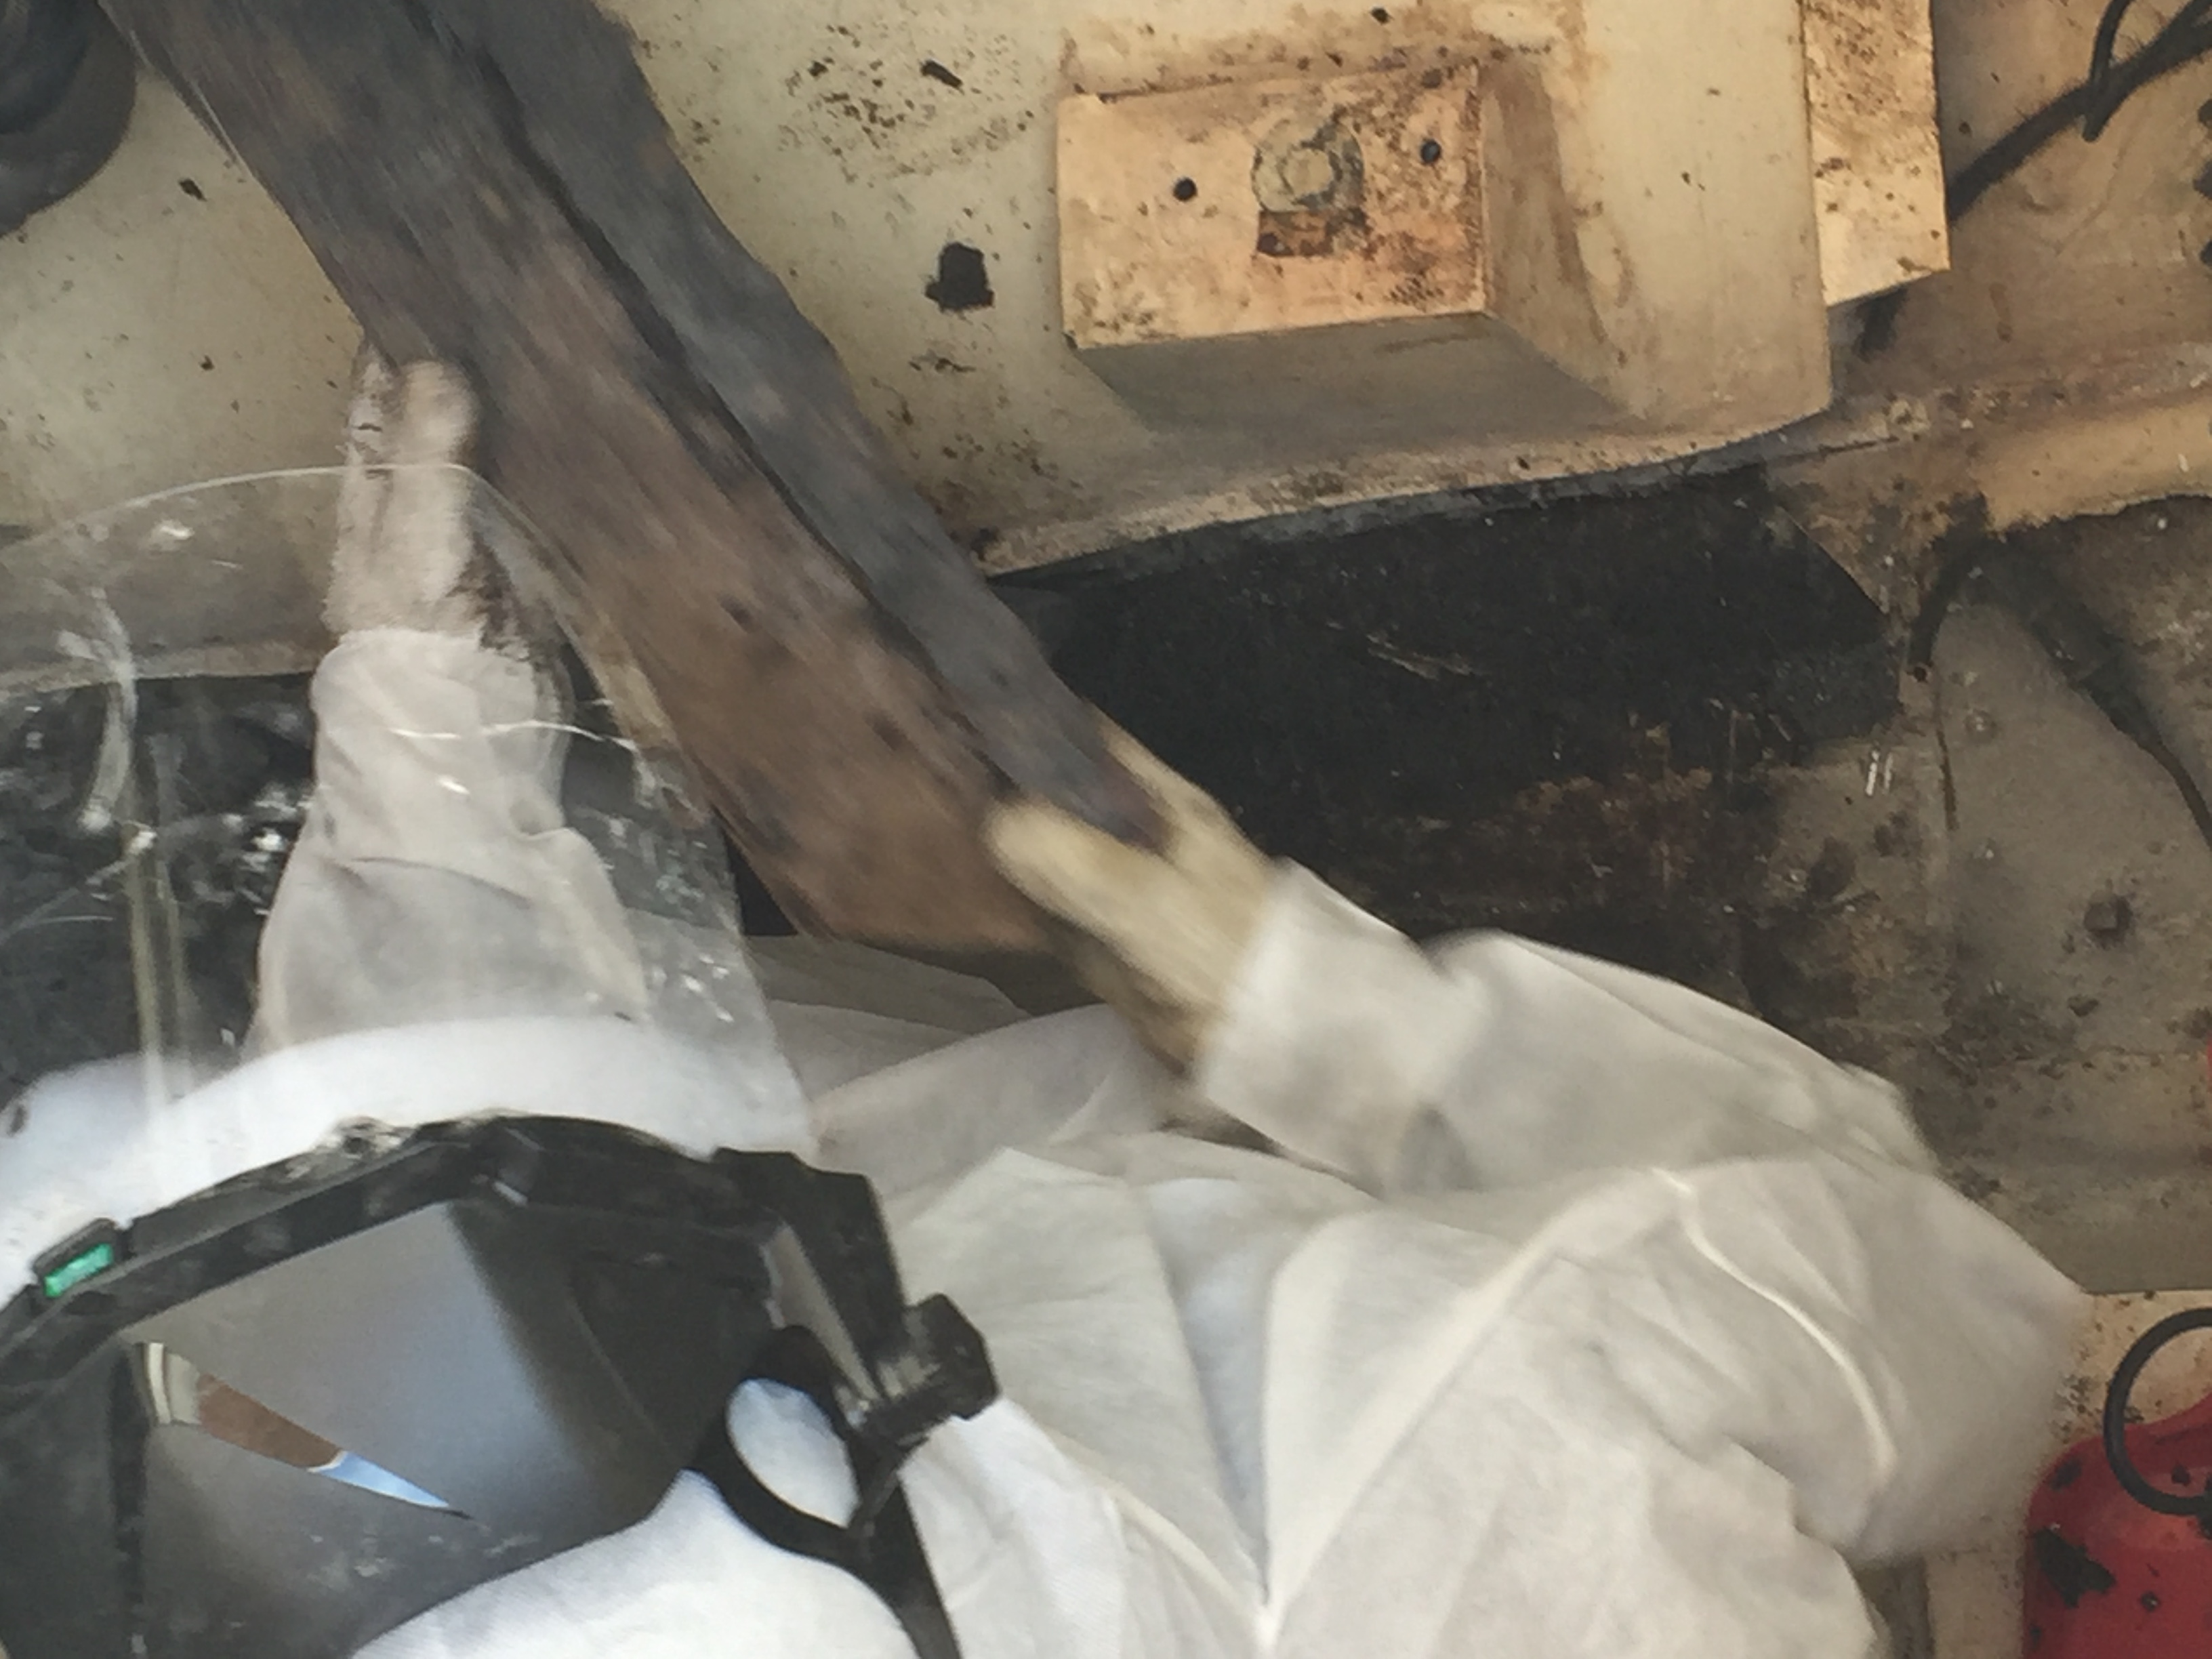
So in all honesty the actual time spent thus far has been 5 hours. Out of that 5 hours, I spent an hour disconnecting 8 batteries that have been hidden up under the hanging locker aft of the galley in what I can only assume is the old holding tank. I needed to remove all of that to gain access to the forward quarter of the tank. I will need to crawl under the floor today and cut the remaining portion of tabbing. I also lost a fair bit of time being really careful. Lots of cutting than stopping etc in order to ensure I wasn’t cutting into the hull itself.
All in all so far there have been the usual frustrating moments and I was pretty tired last night and fairly sore this morning, but other than the dirty aspect, it has not been TOO bad. Of course I am trying to be optimistic since I have to go back today 🙂
stay tuned, hopefully the tank comes out today and tomorrow is just cleaning and grinding! :fingers_crossed:
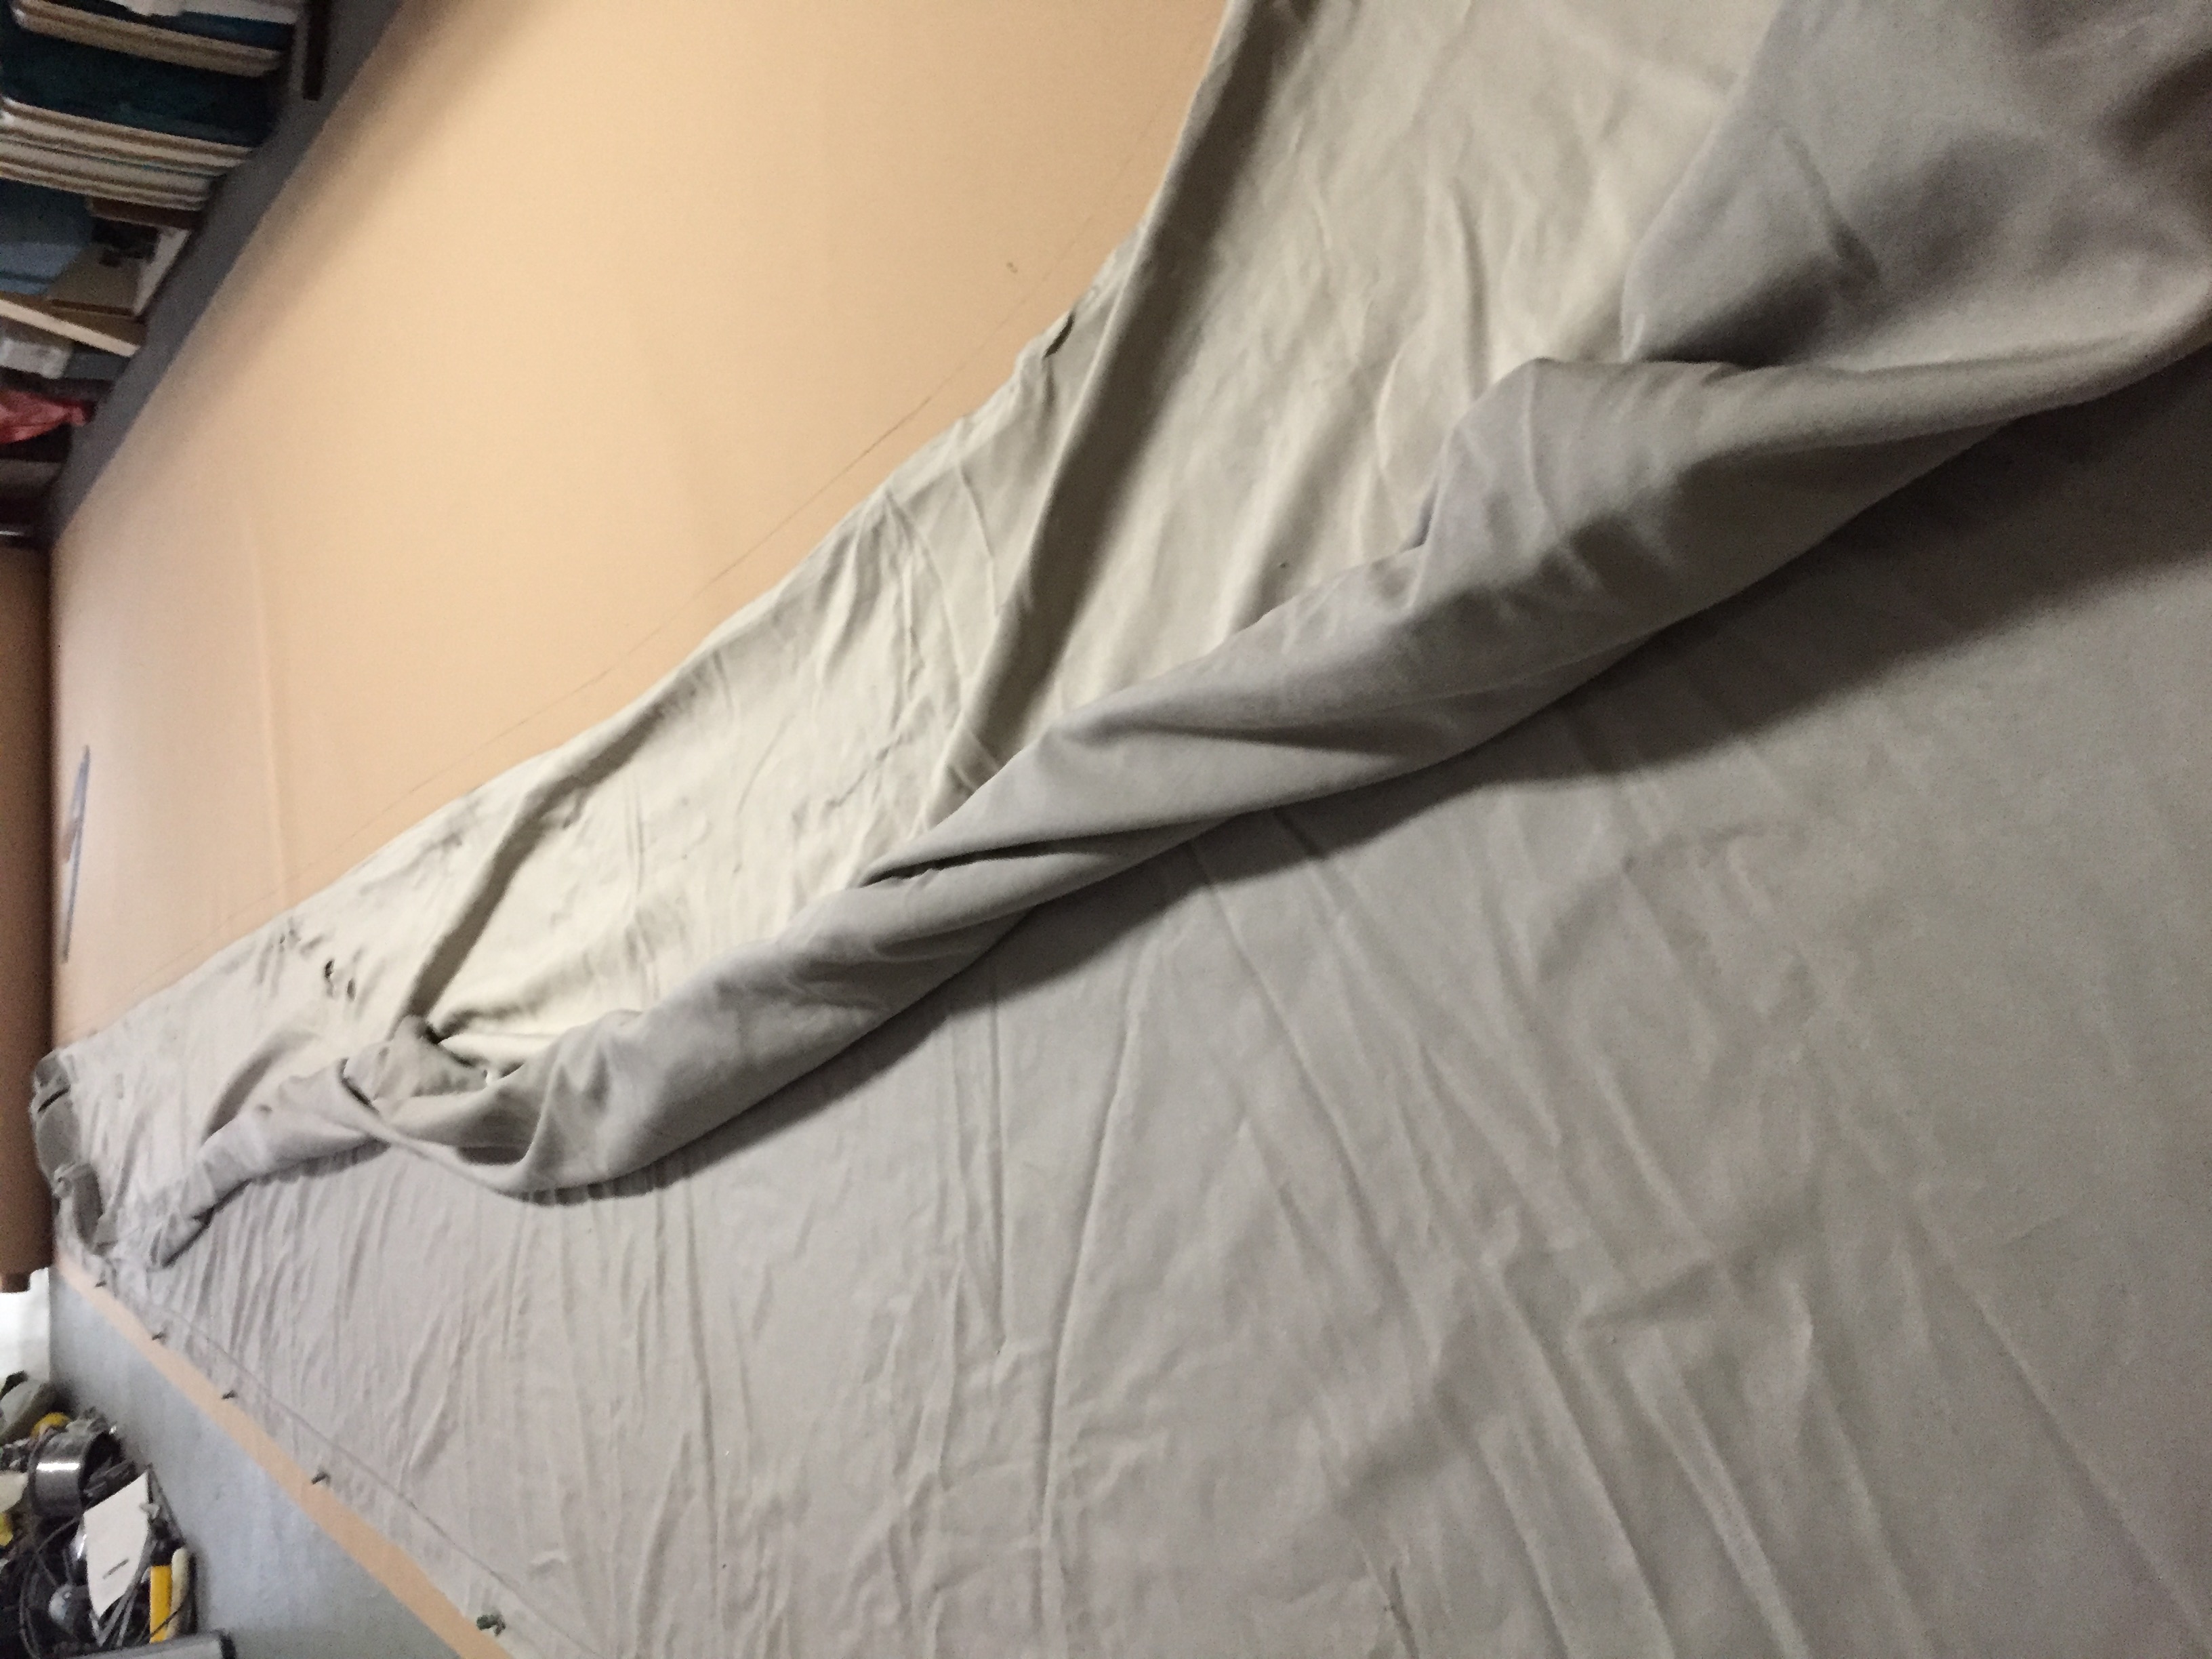
It has been a very busy time since the boat show with lots happening. We have ordered all new foam and material for the main salon, 5″ thick and the v-berth and aft cabin 8″ thick. We are going with an off white leather like material for the main salon and are still deciding on the material for the mattresses. We pick up the mattresses on Saturday! Then my evenings will be spent on sewing up the covering!
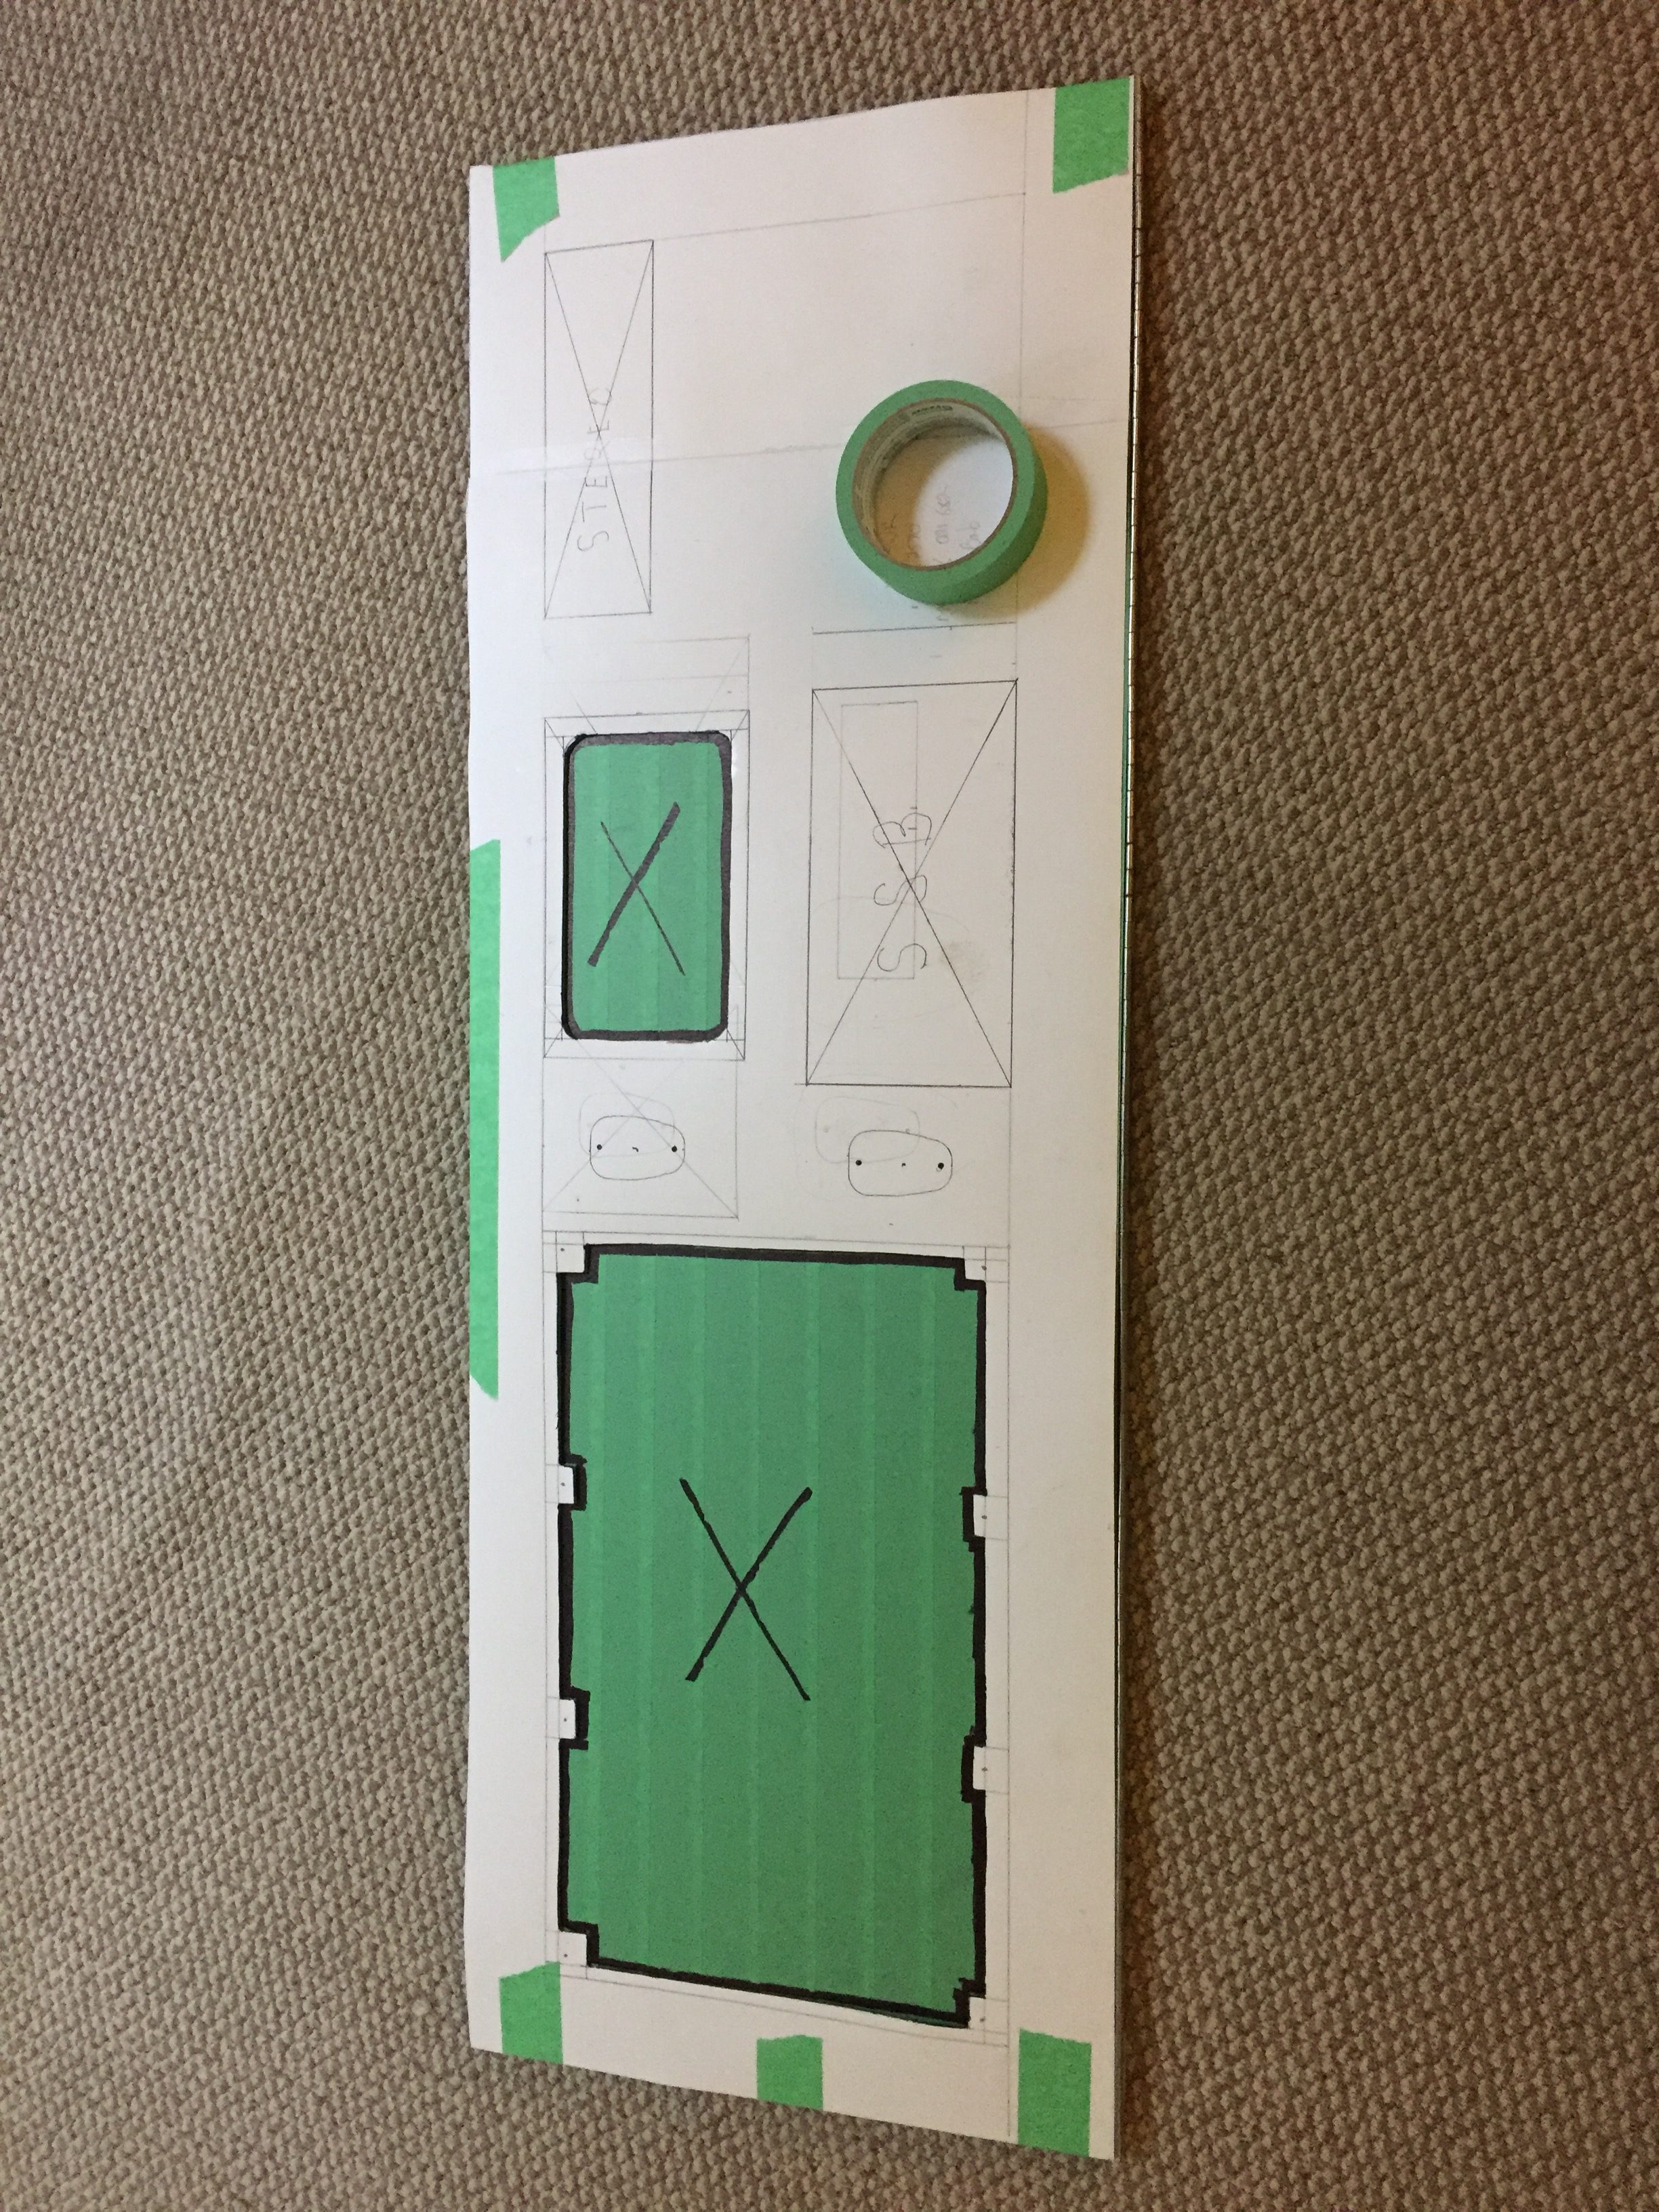
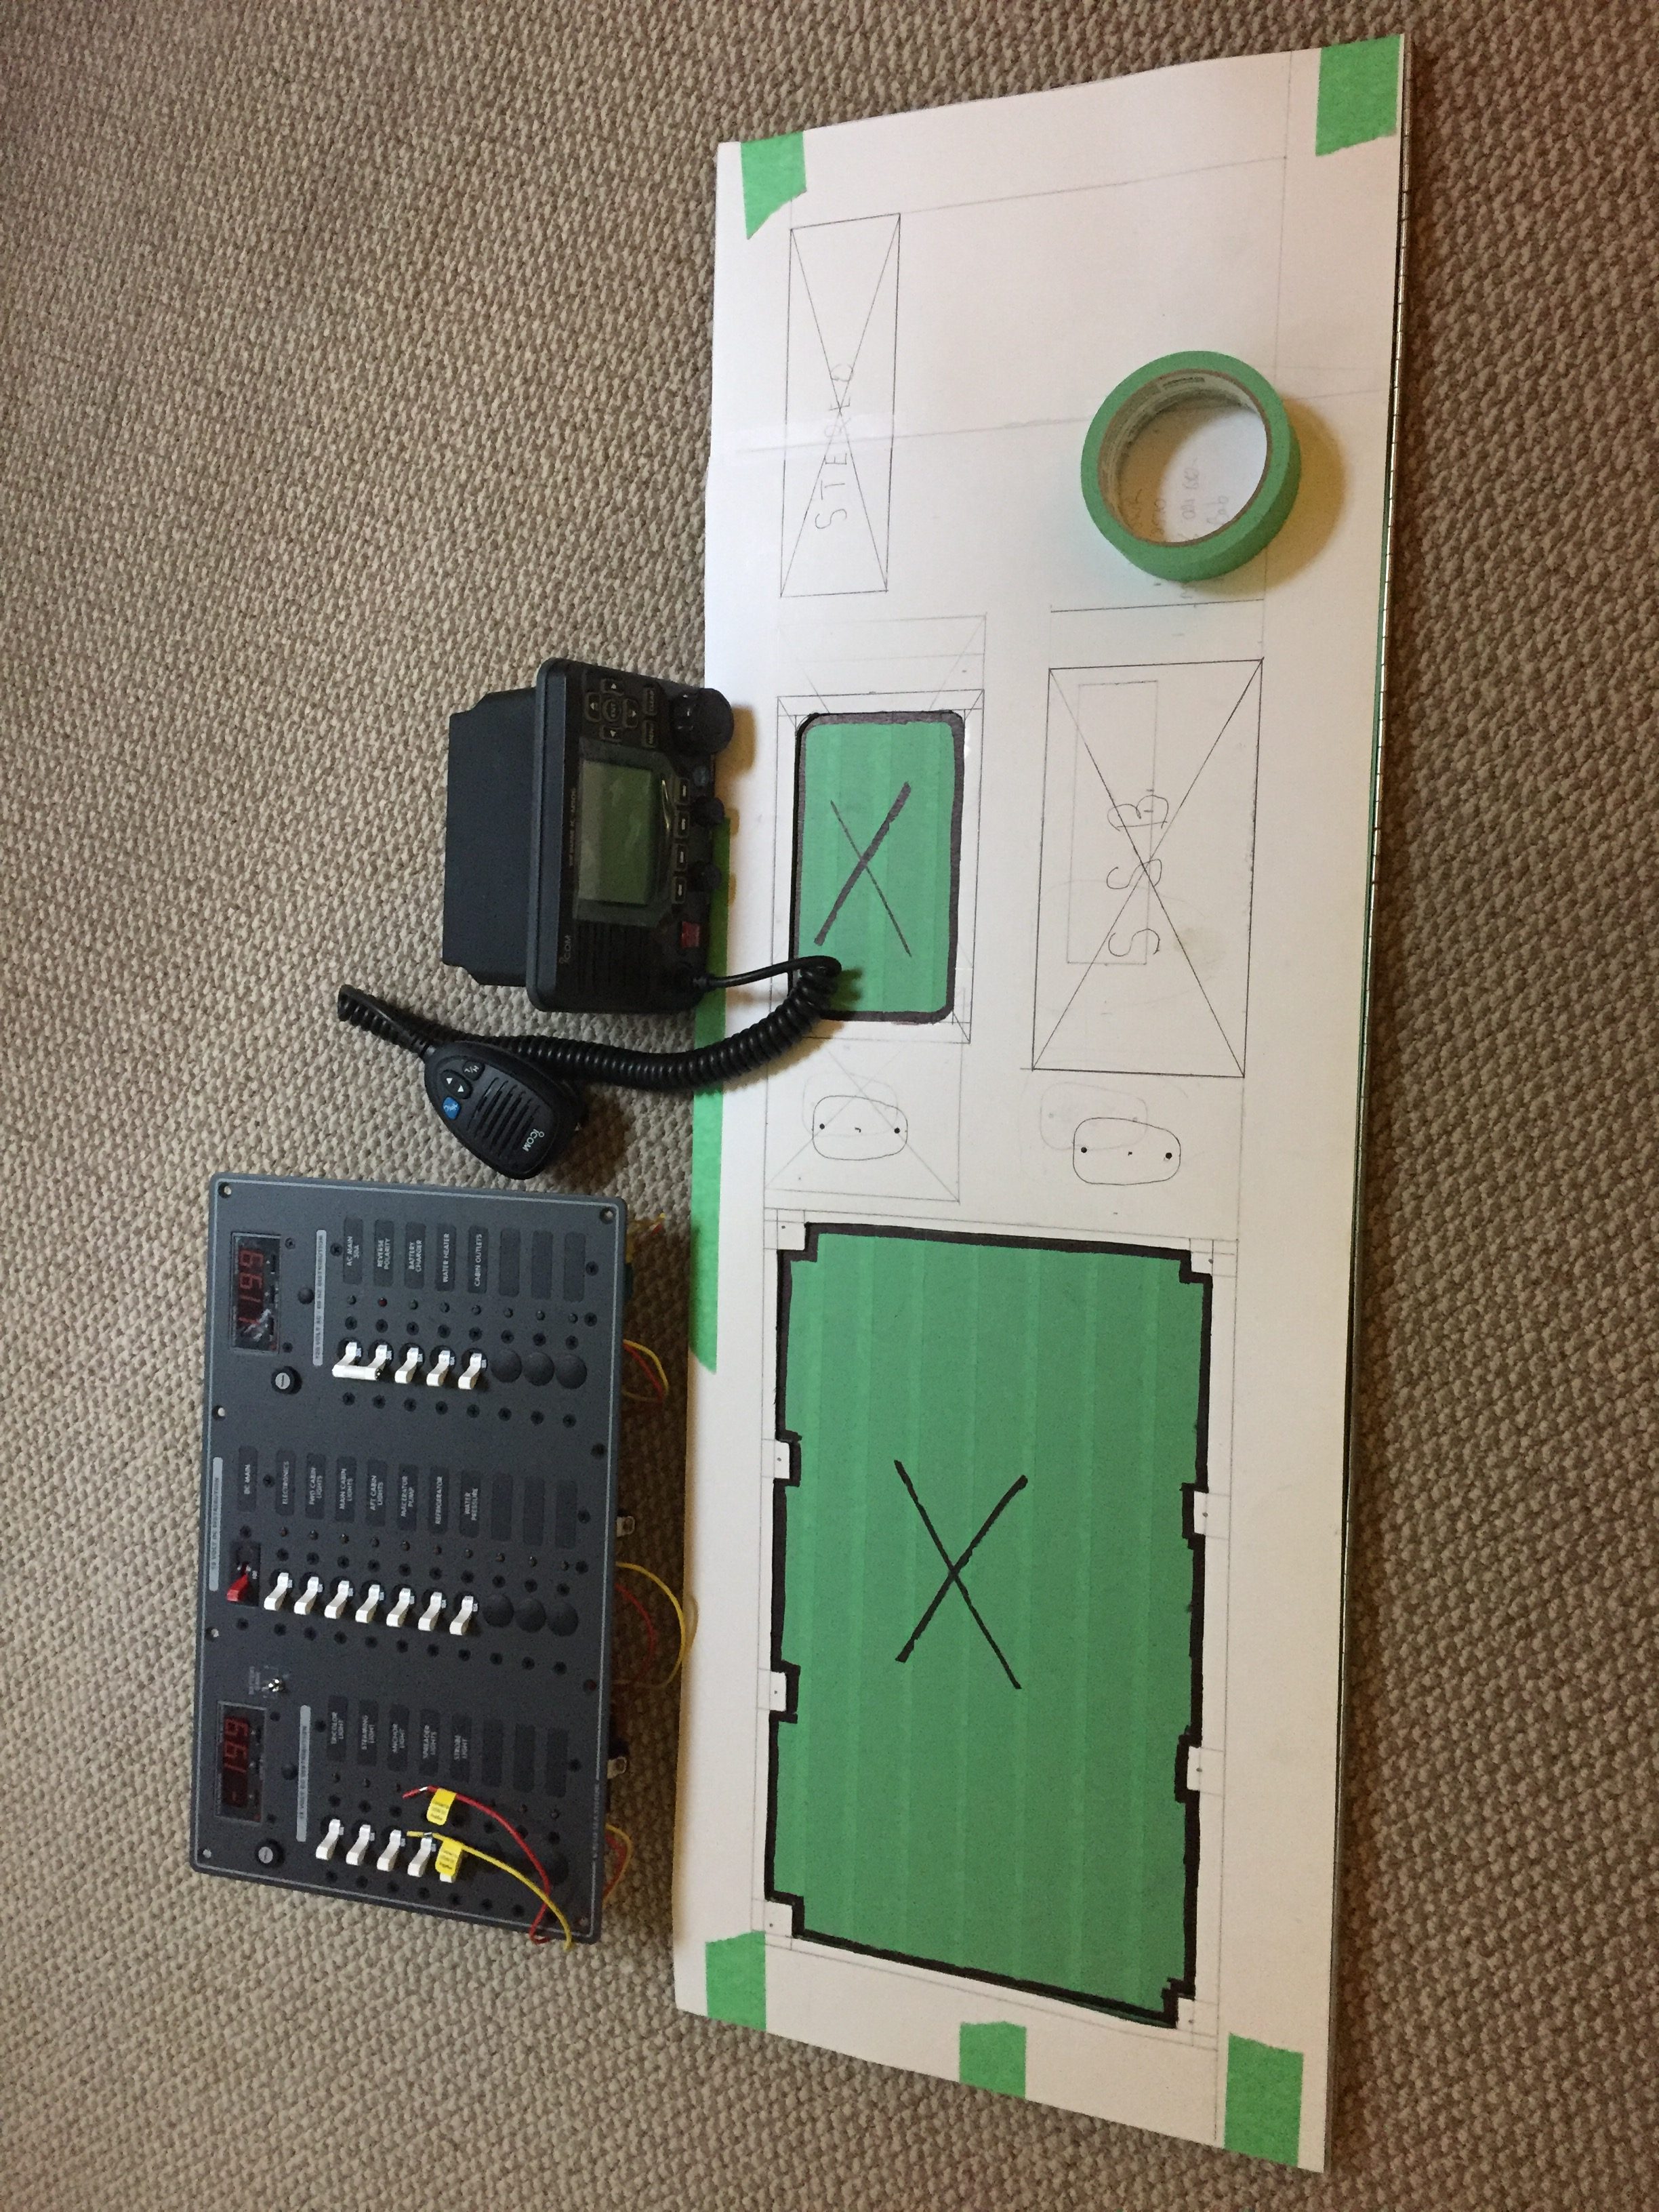
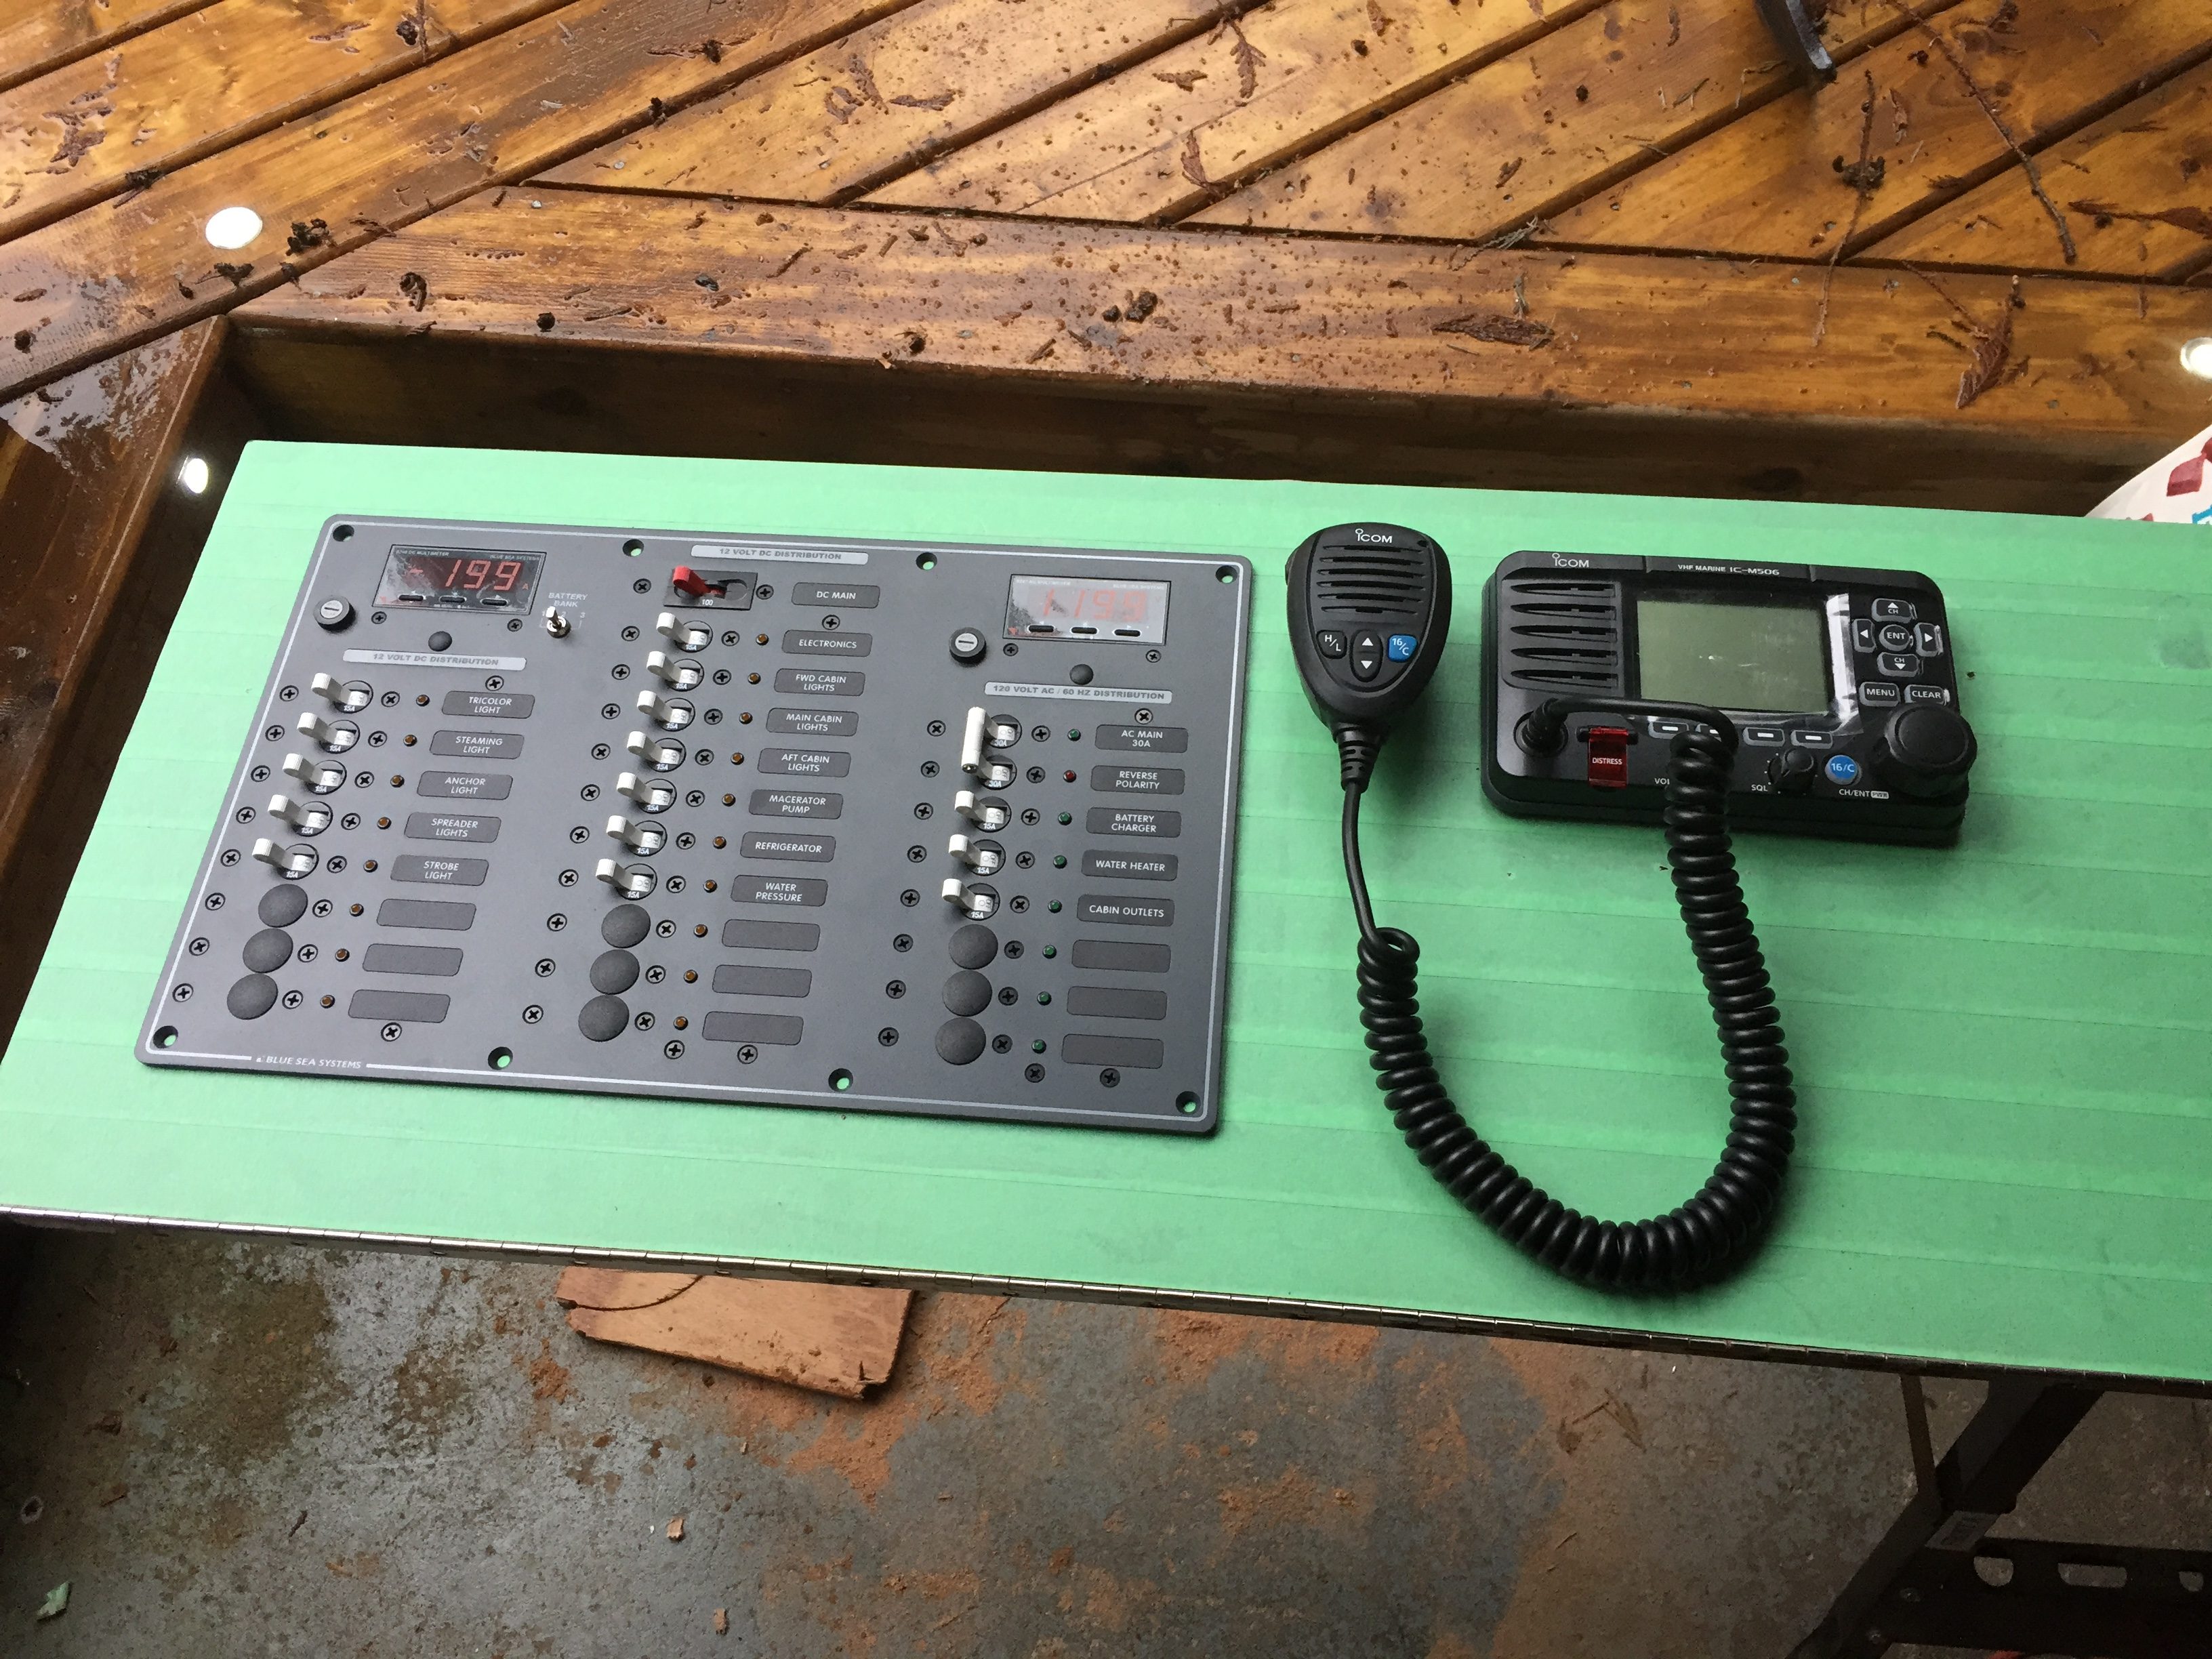
We have mounted the electrical panel and the new VHF into the electrical panel board which is designed to open in order to give full access to any of the electrical and or electronic connections. Still need to actually wire it up of course, but we are getting there. Have to go and buy a couple hundred connectors and some more wire.
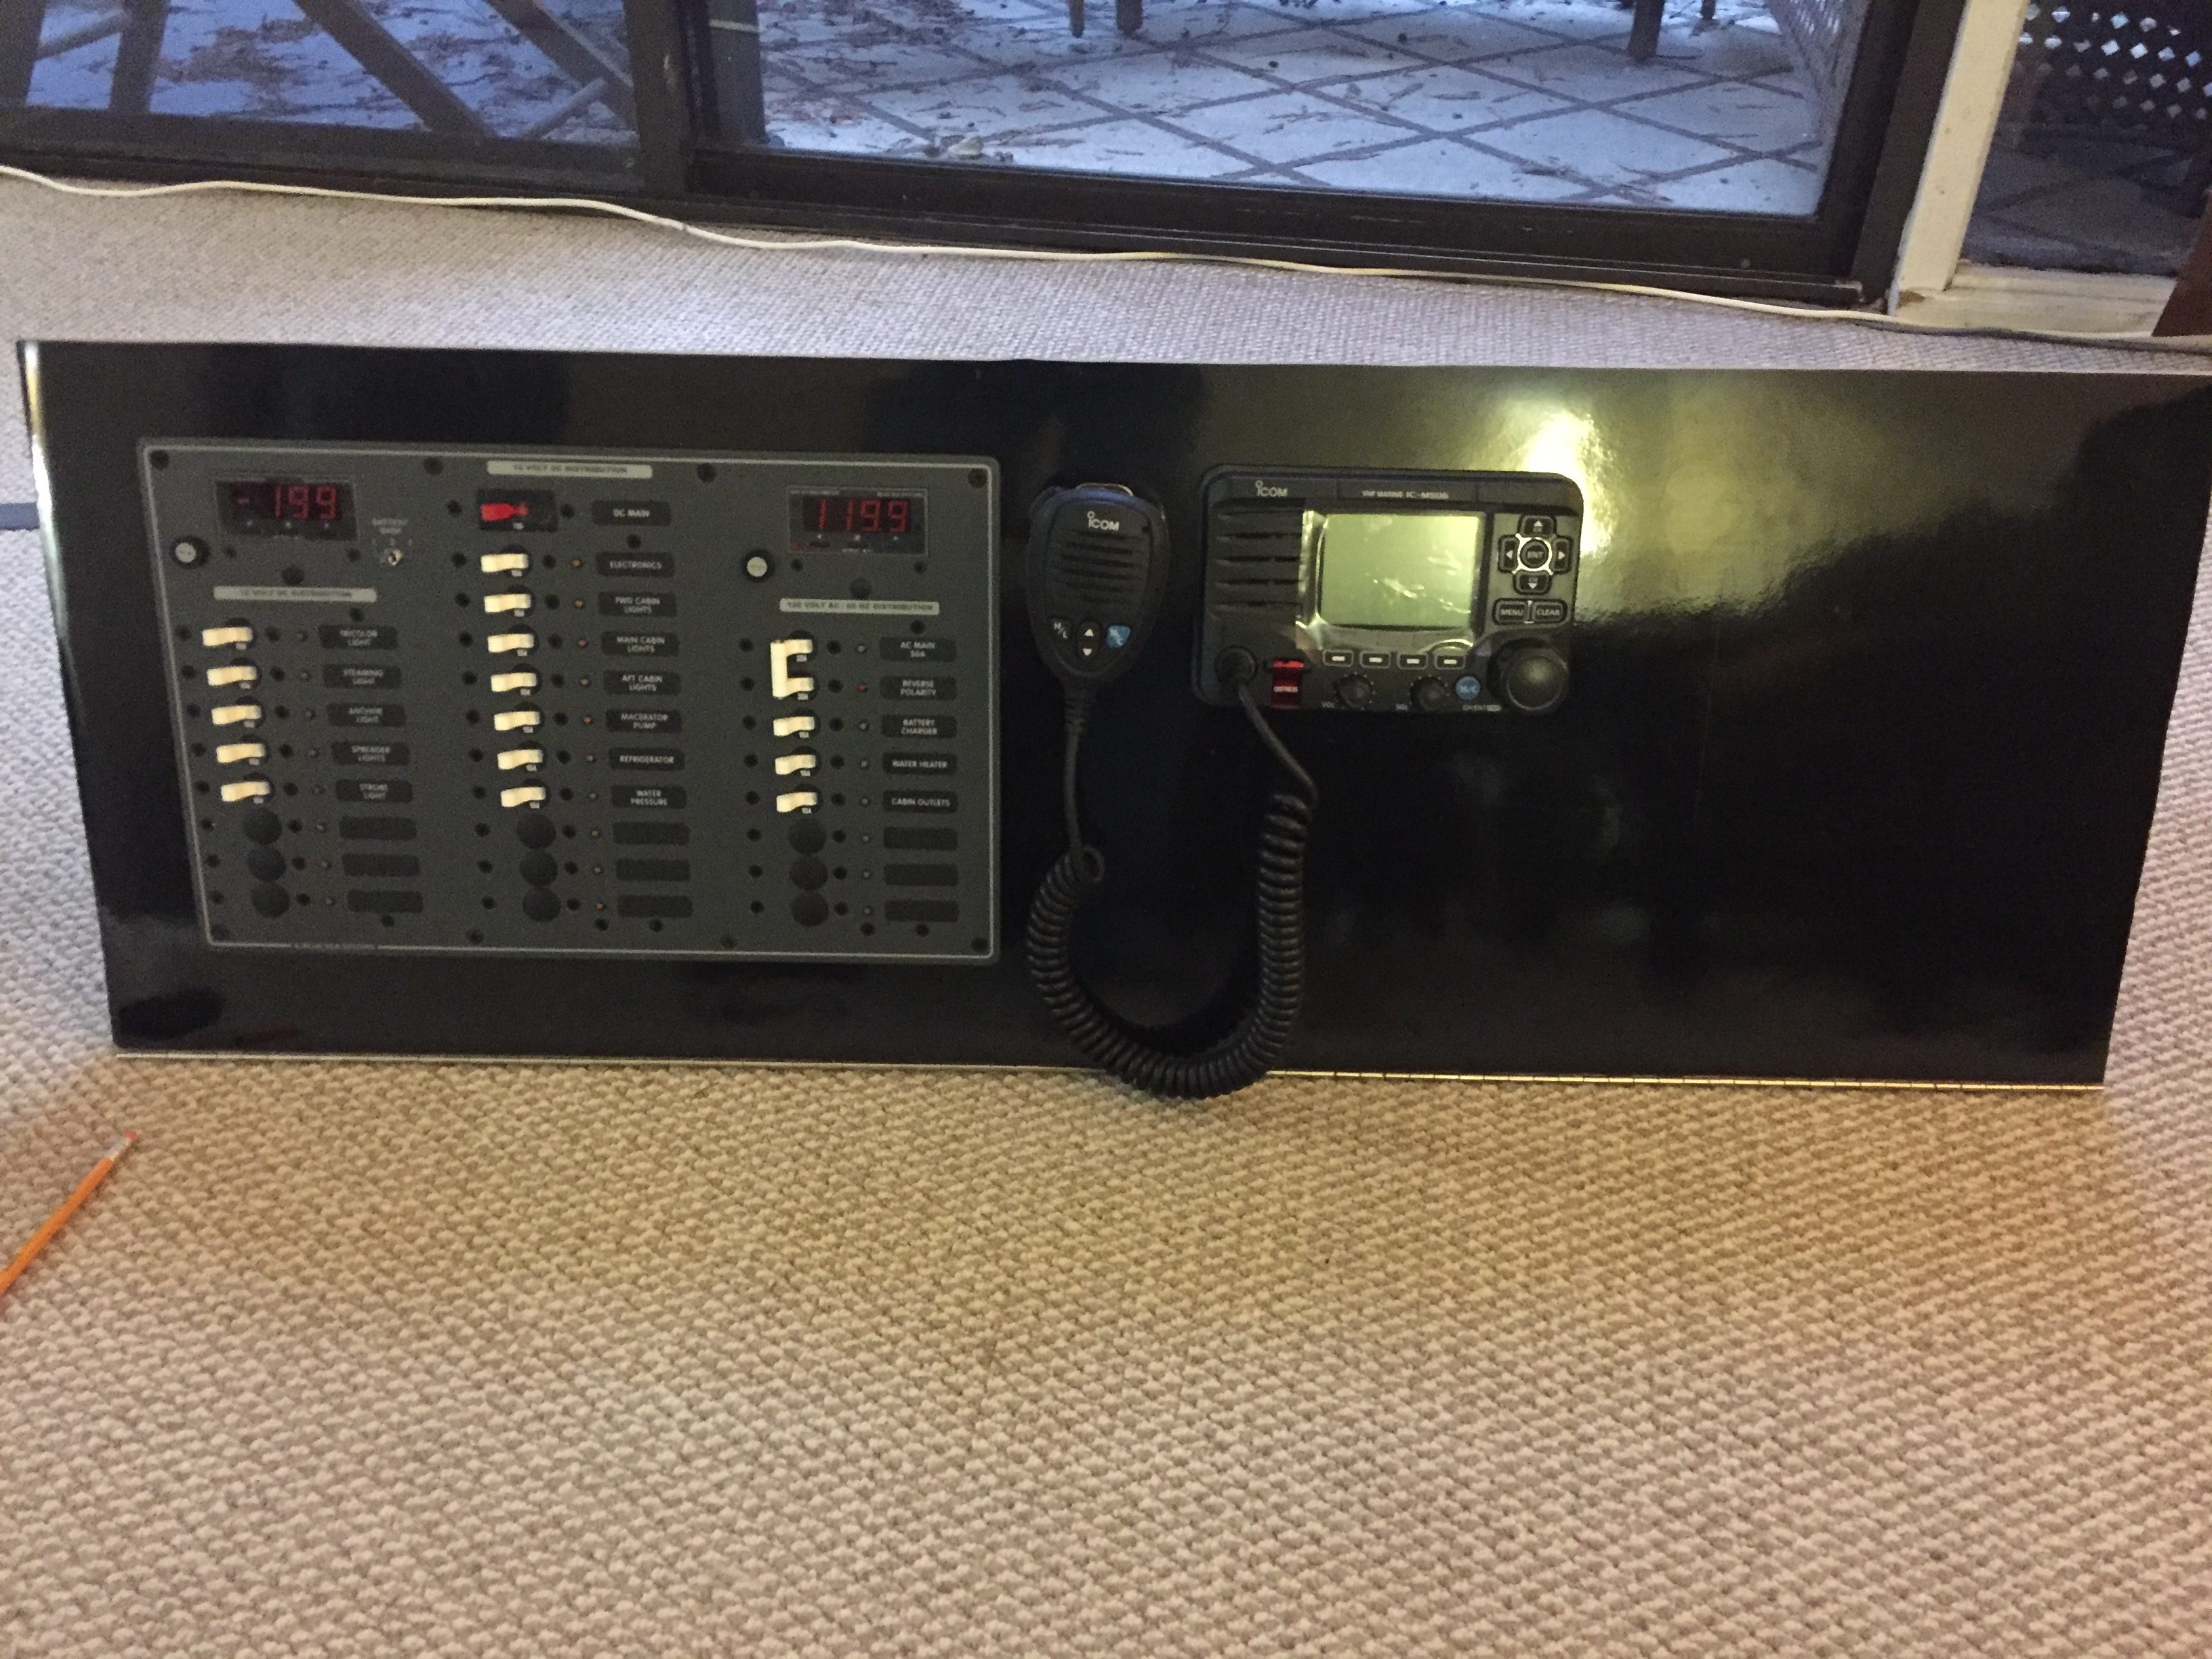
I really took my time with this project as I didn’t want to screw up the door. Everything needs to be perfectly square or it will just look bad.
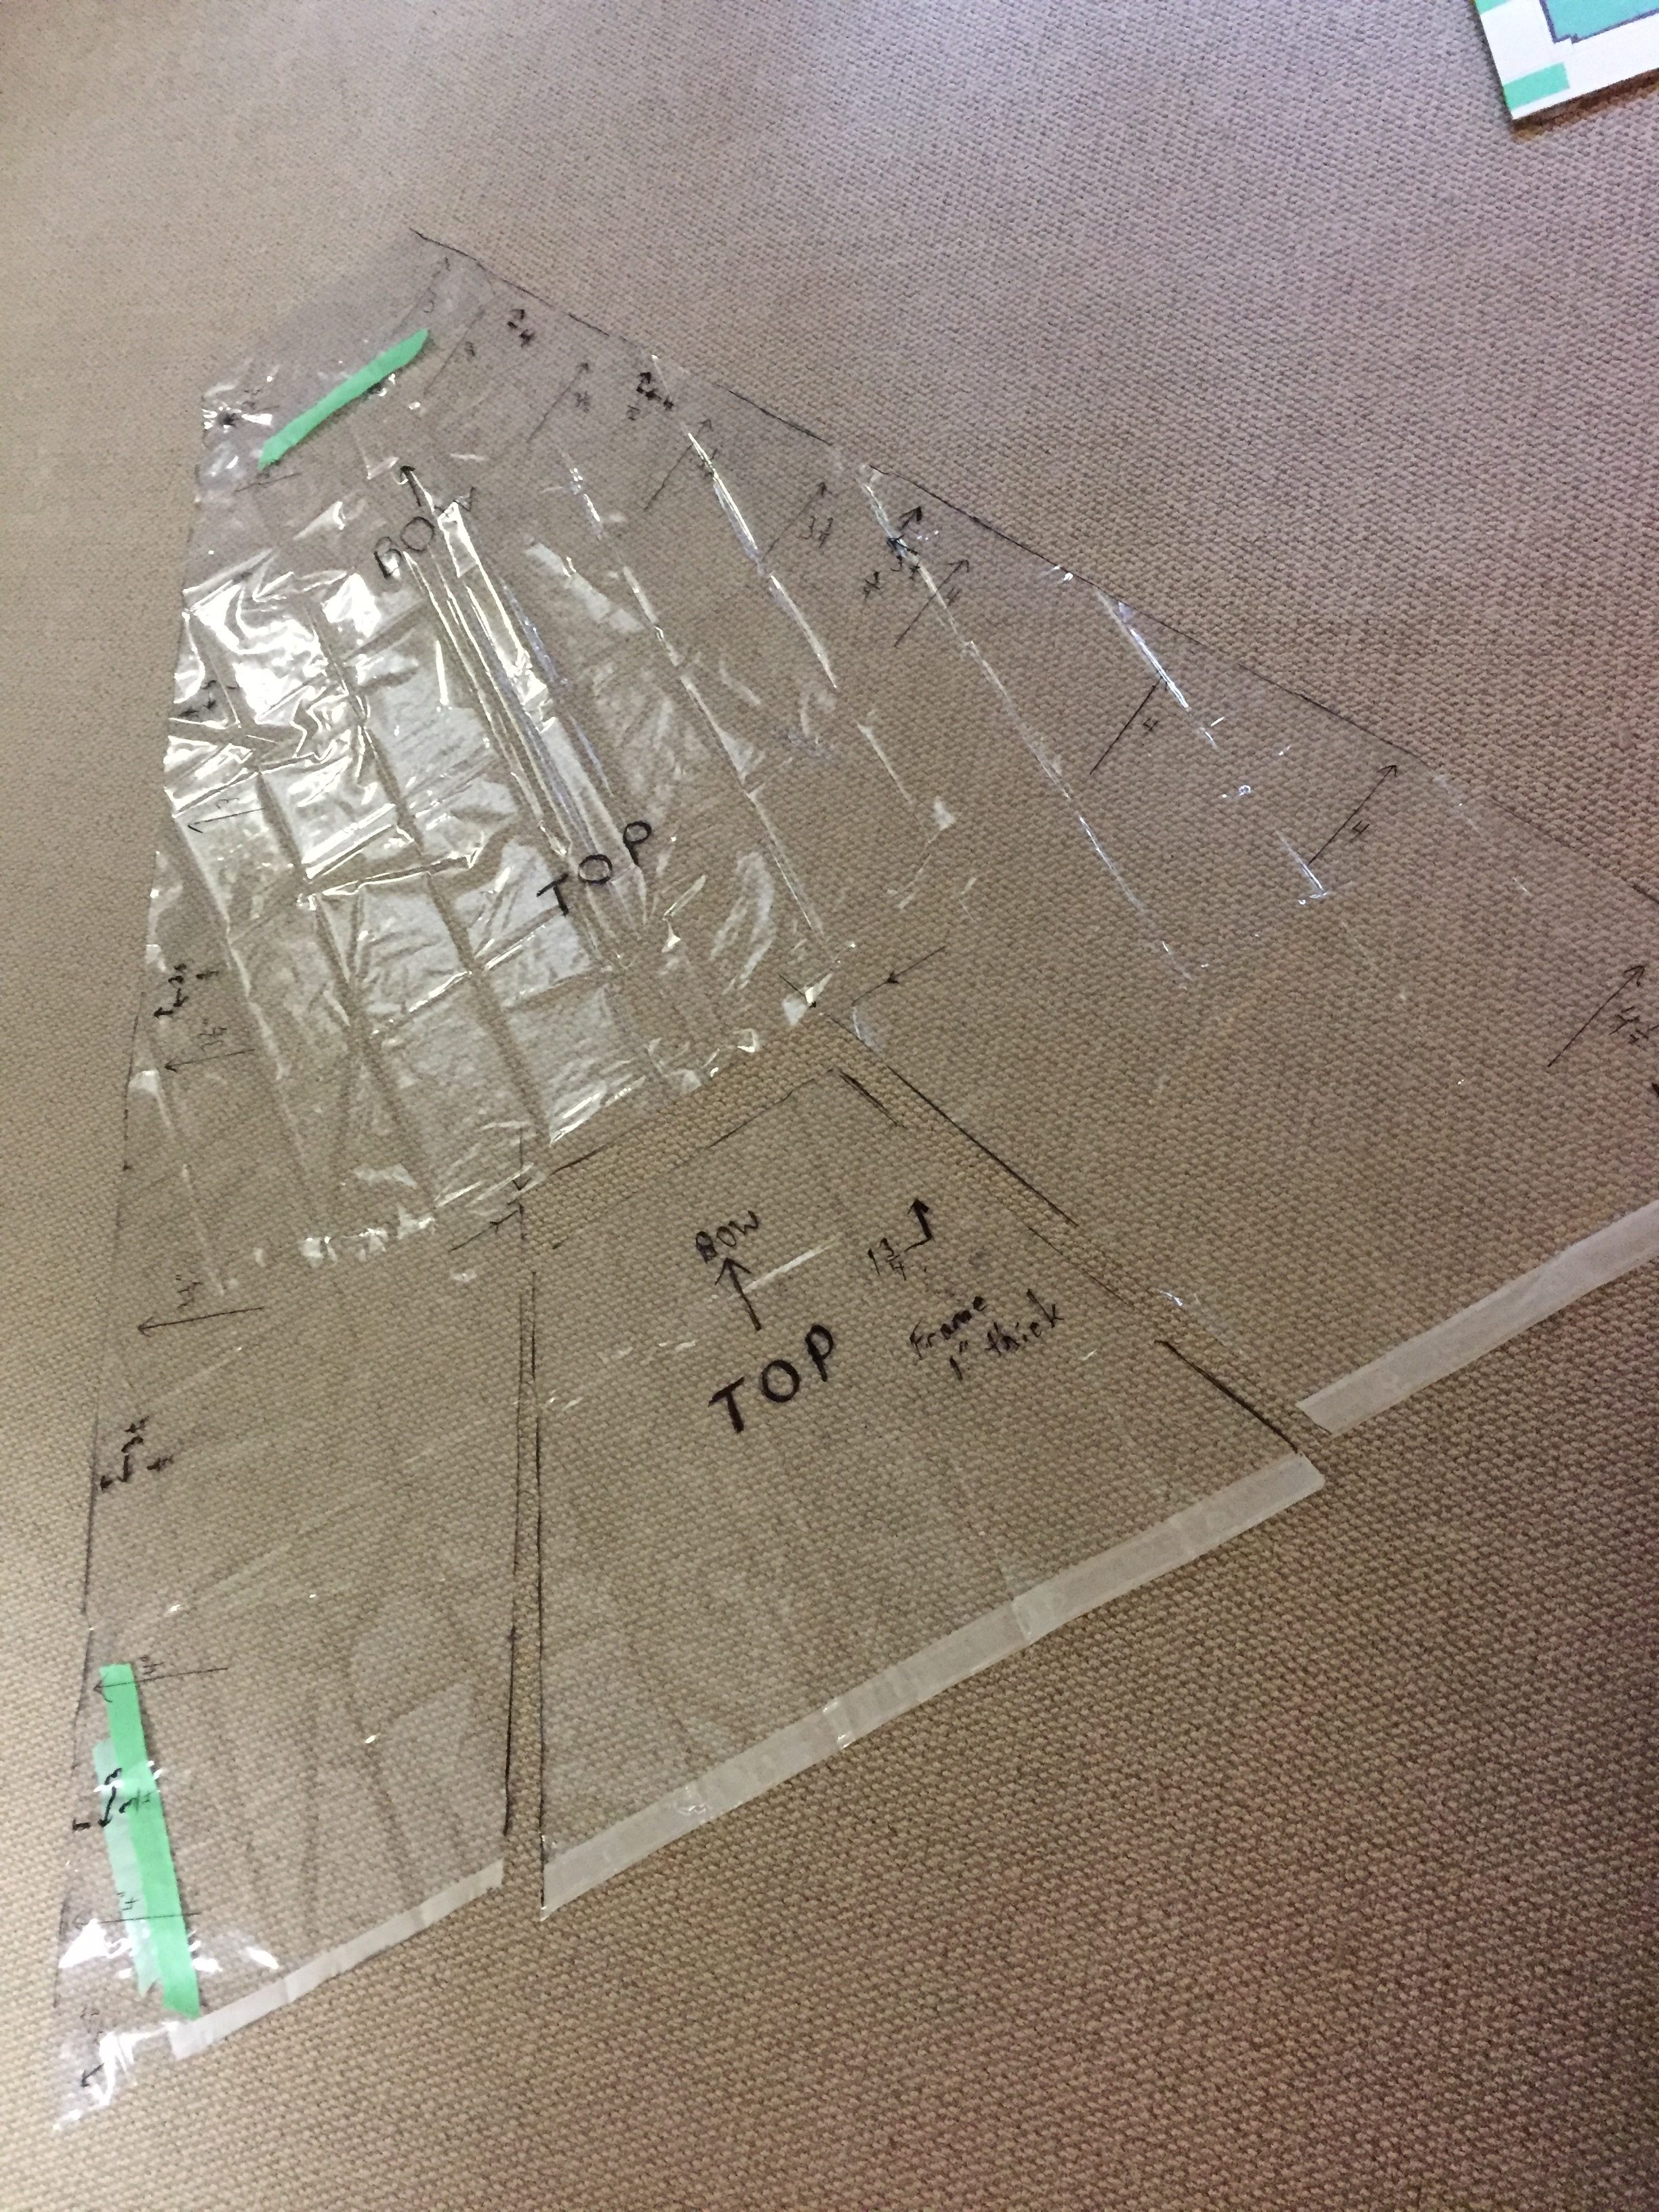
We made patterns for all of the cushions and mattresses, my god, the aft cabin is huge when you bring the pattern home and lay it on the carpet. The v-berth is pretty standard in my opinion. I used cheap $4 shower curtain liners from Walmart in order to make the patterns.
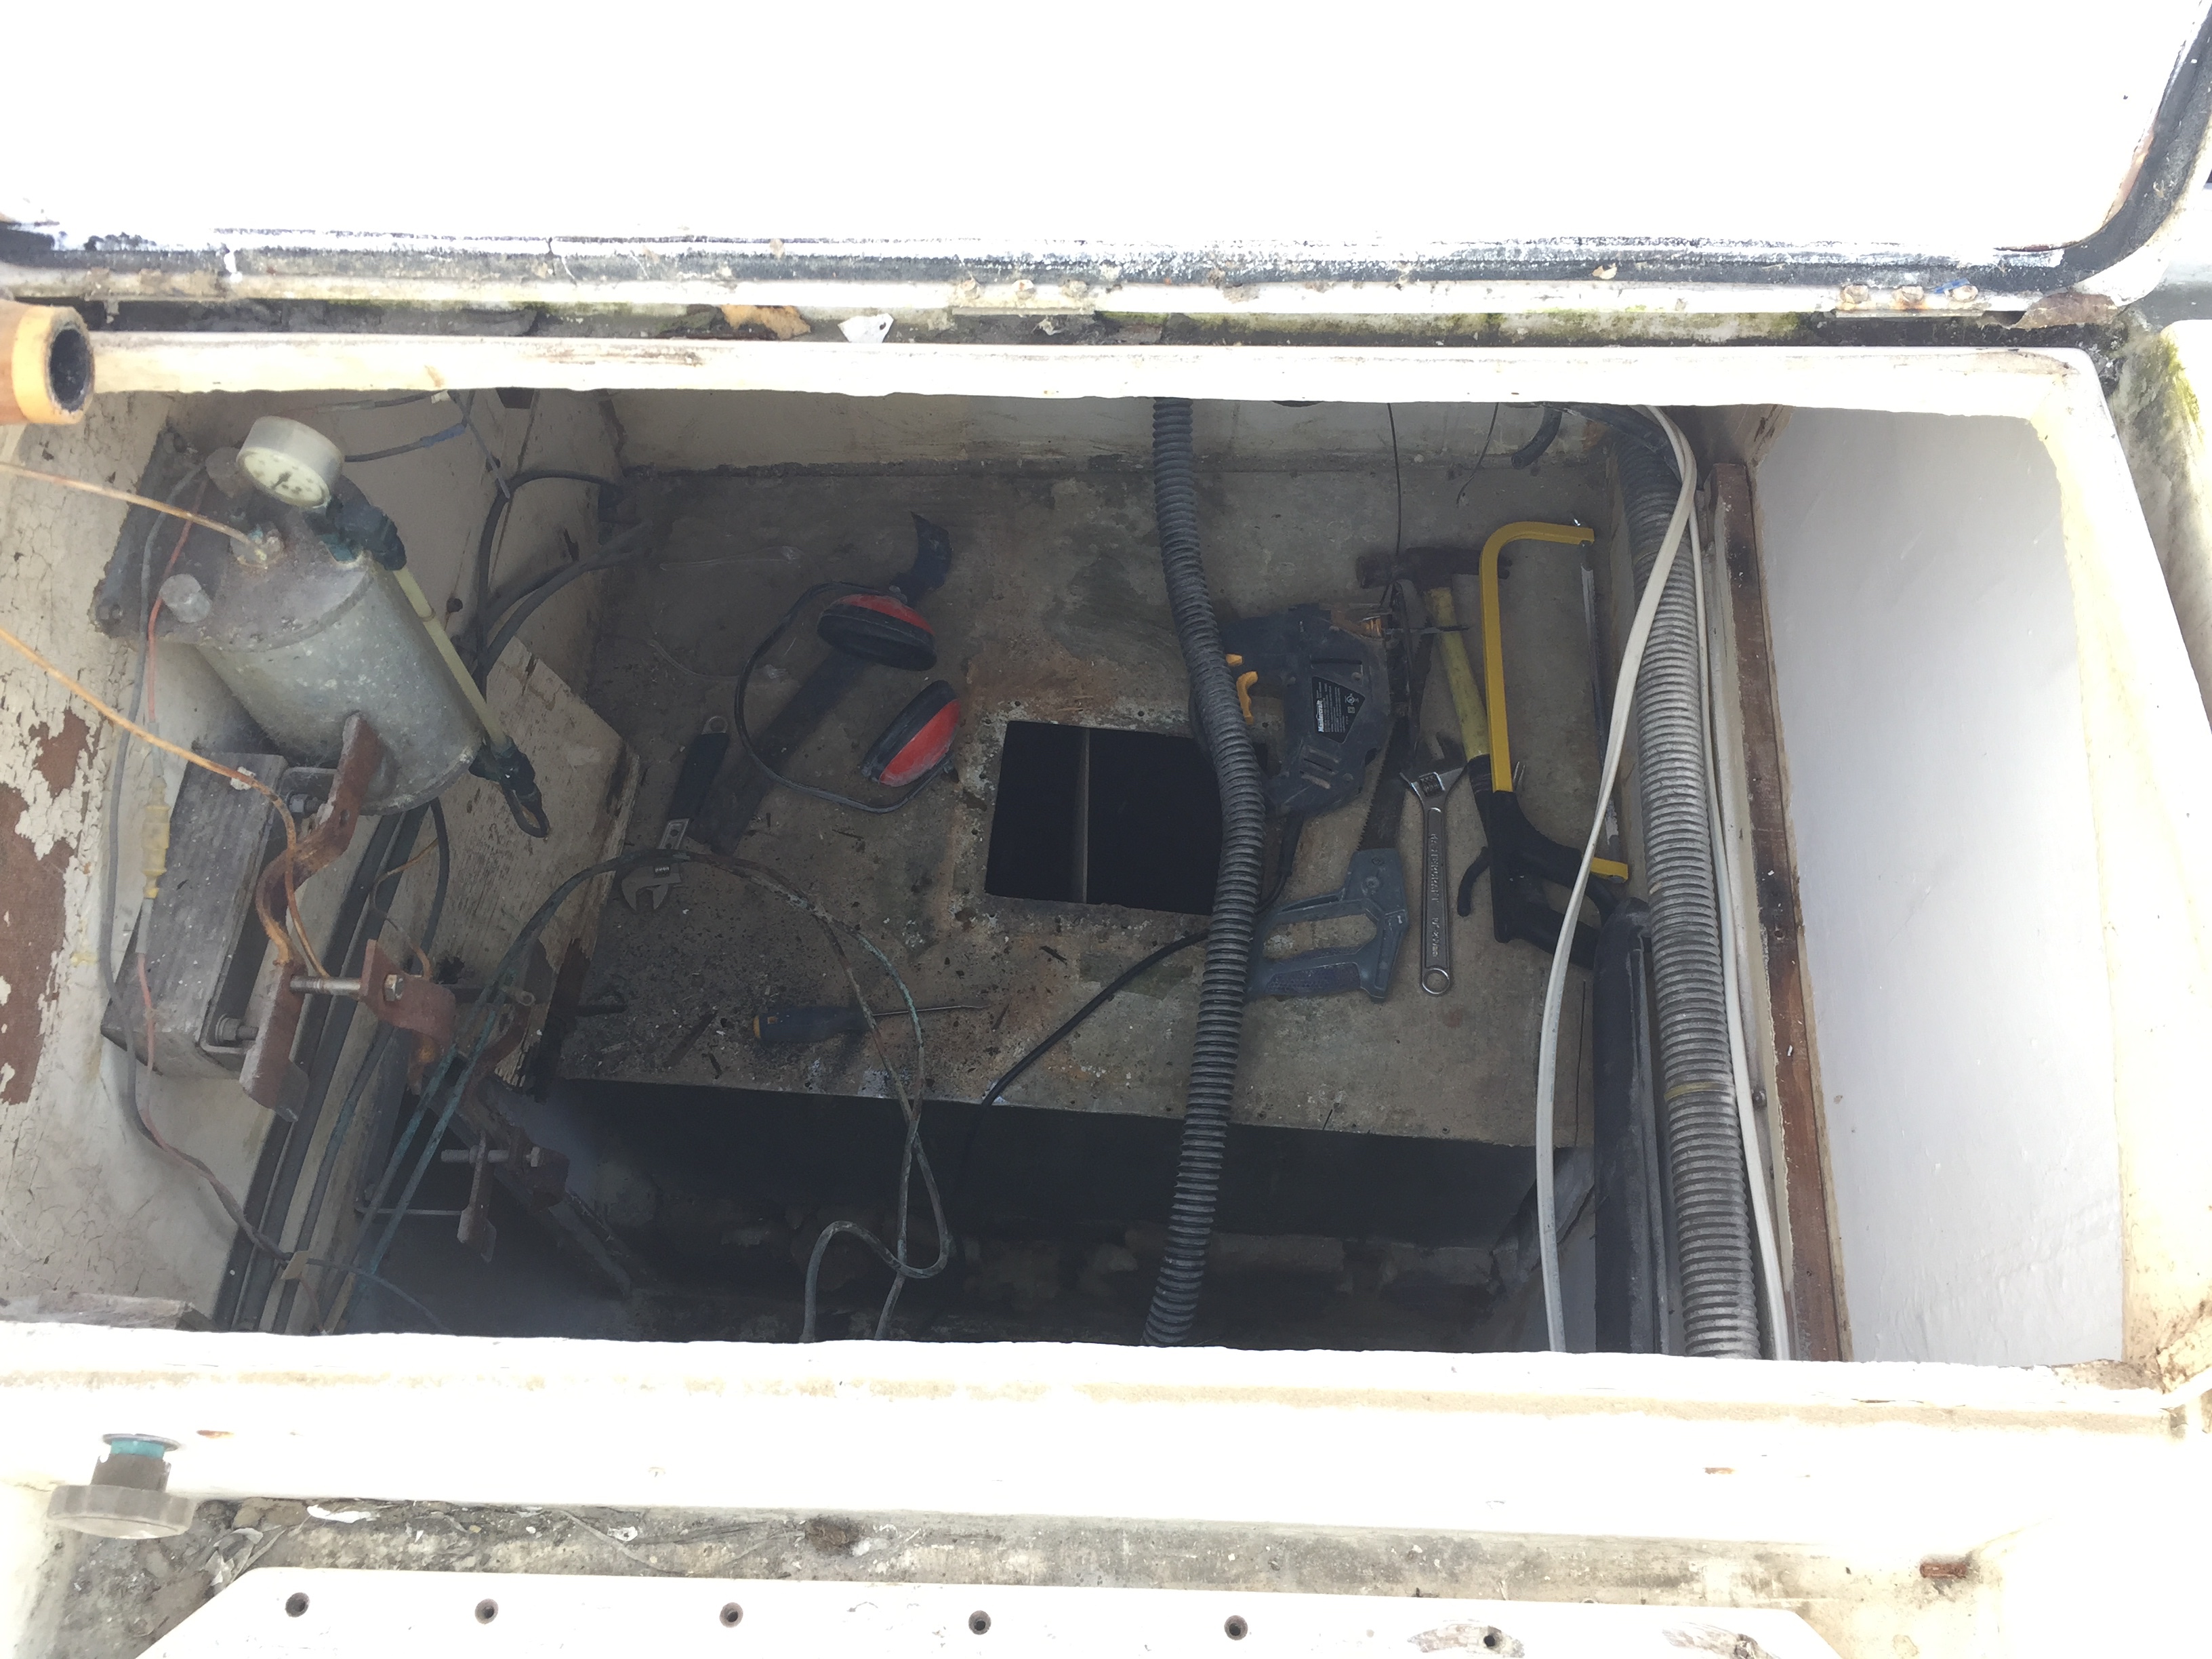
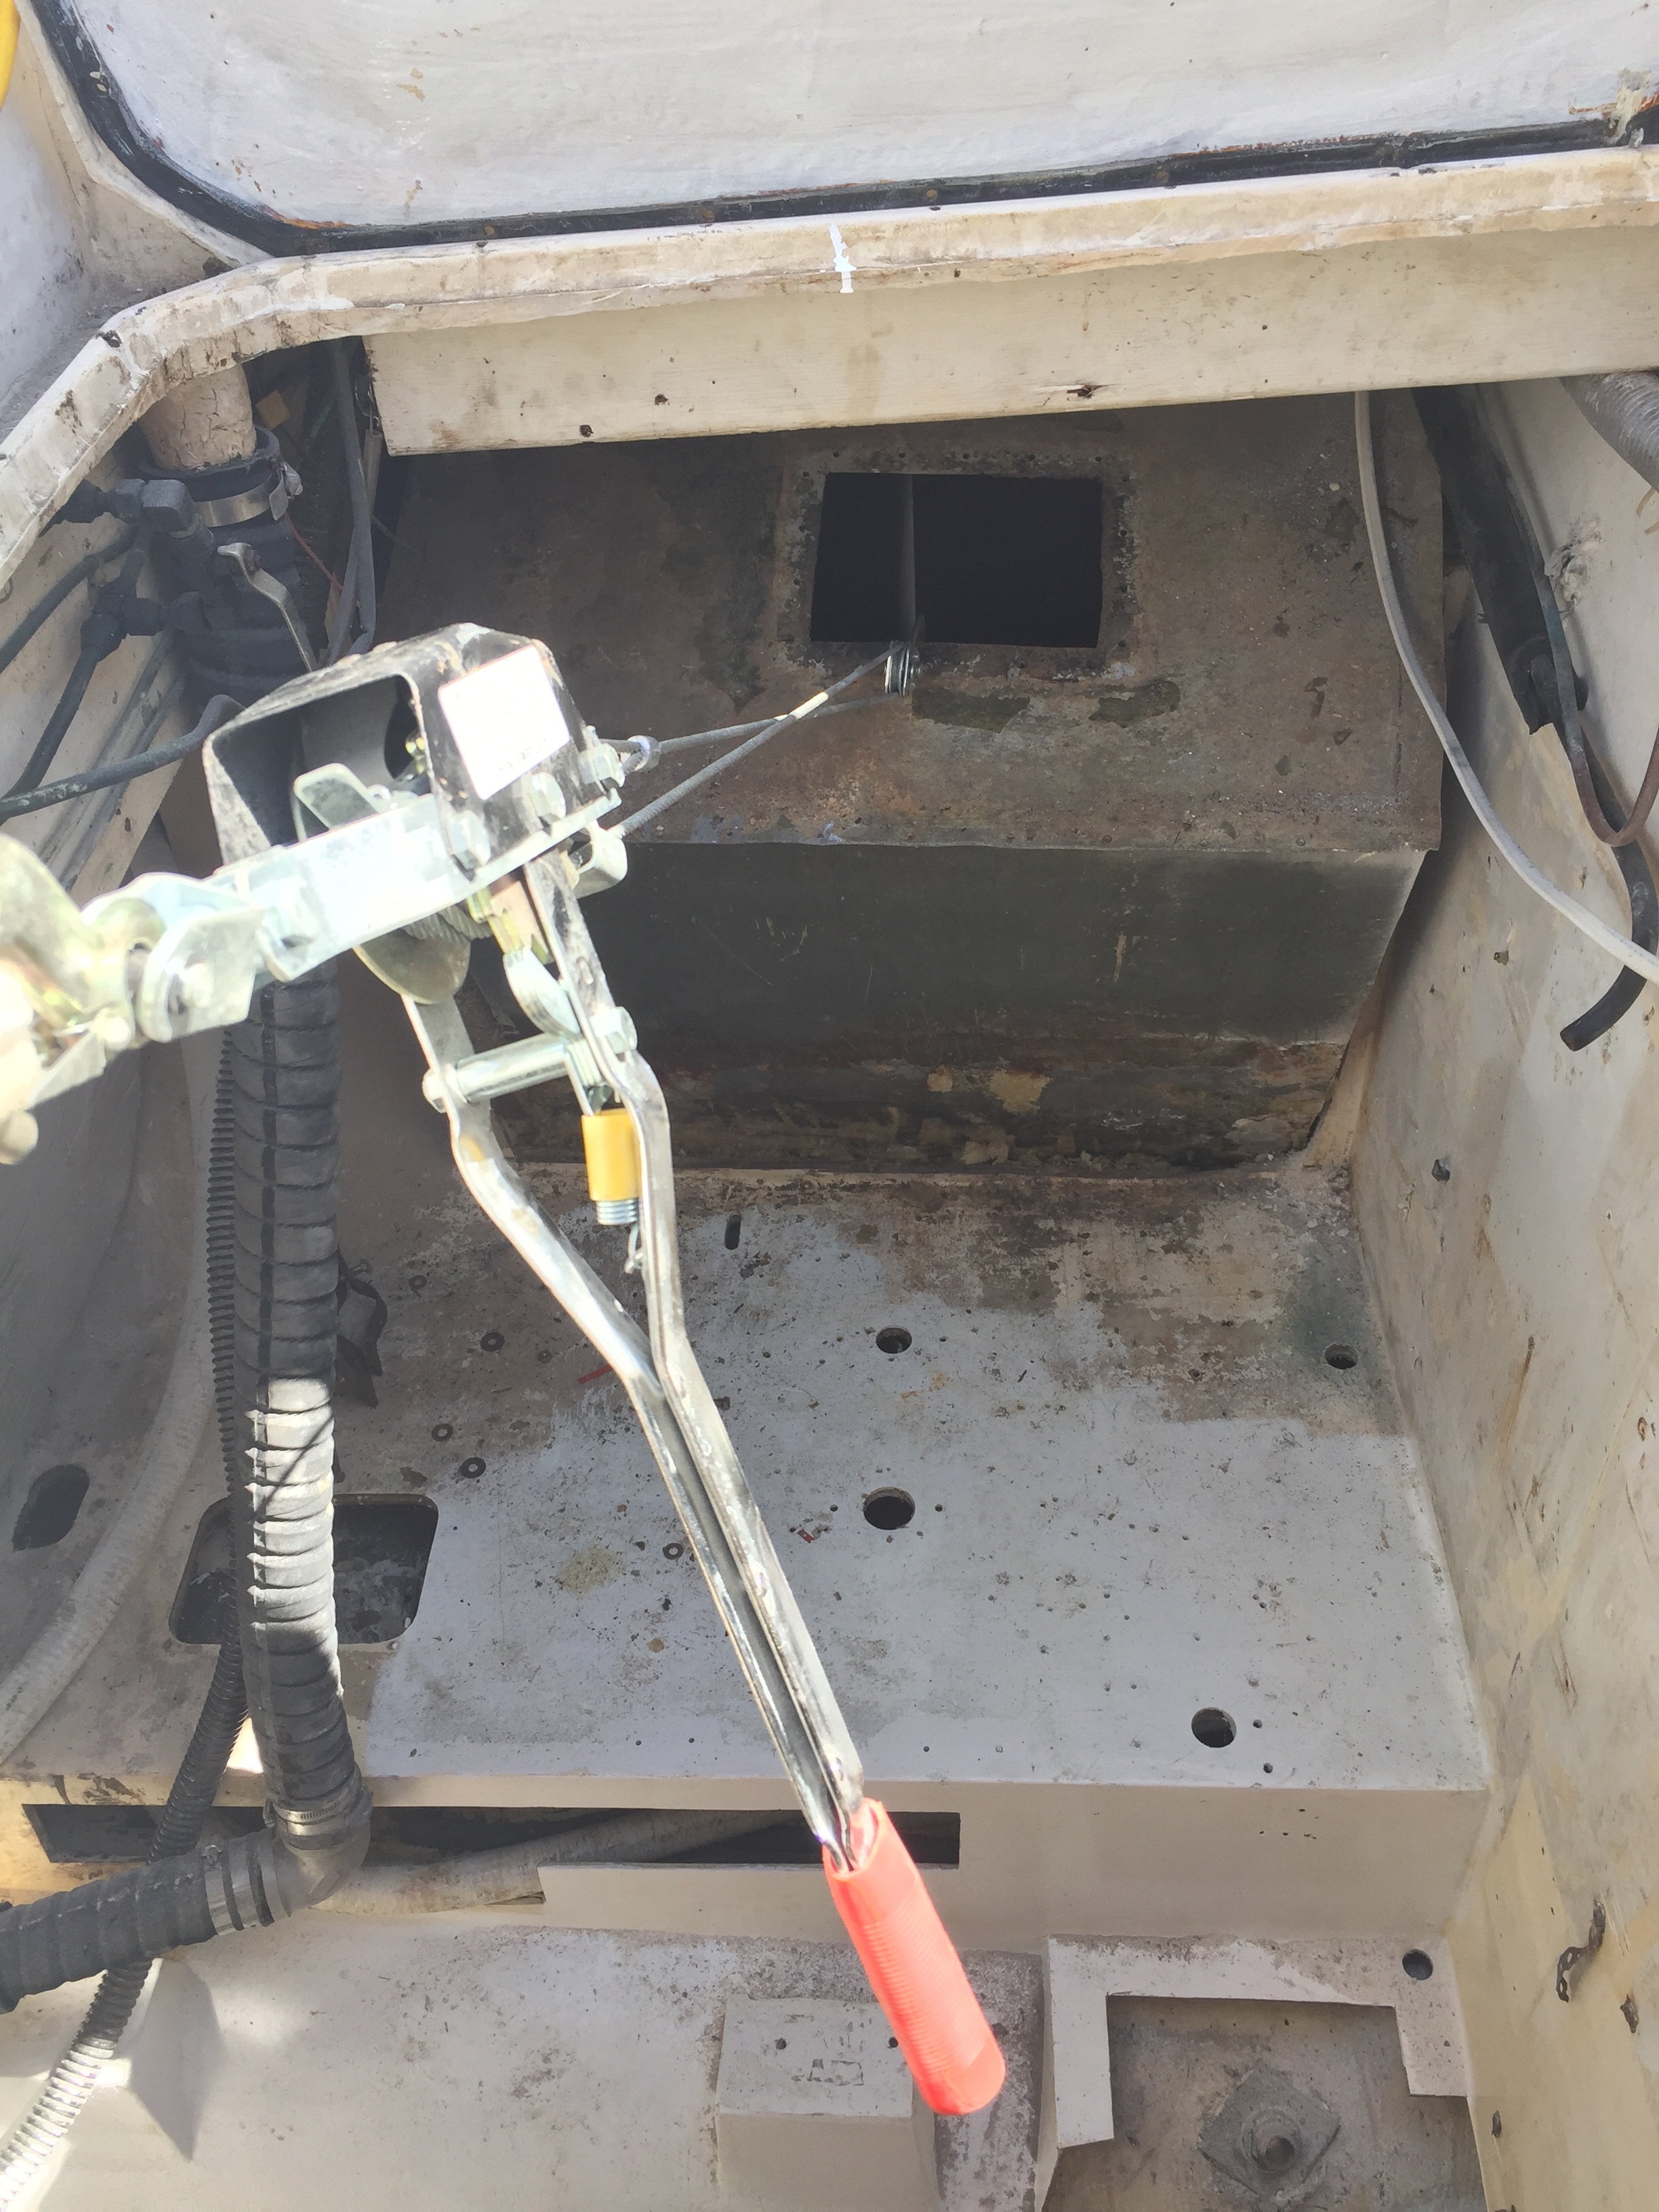
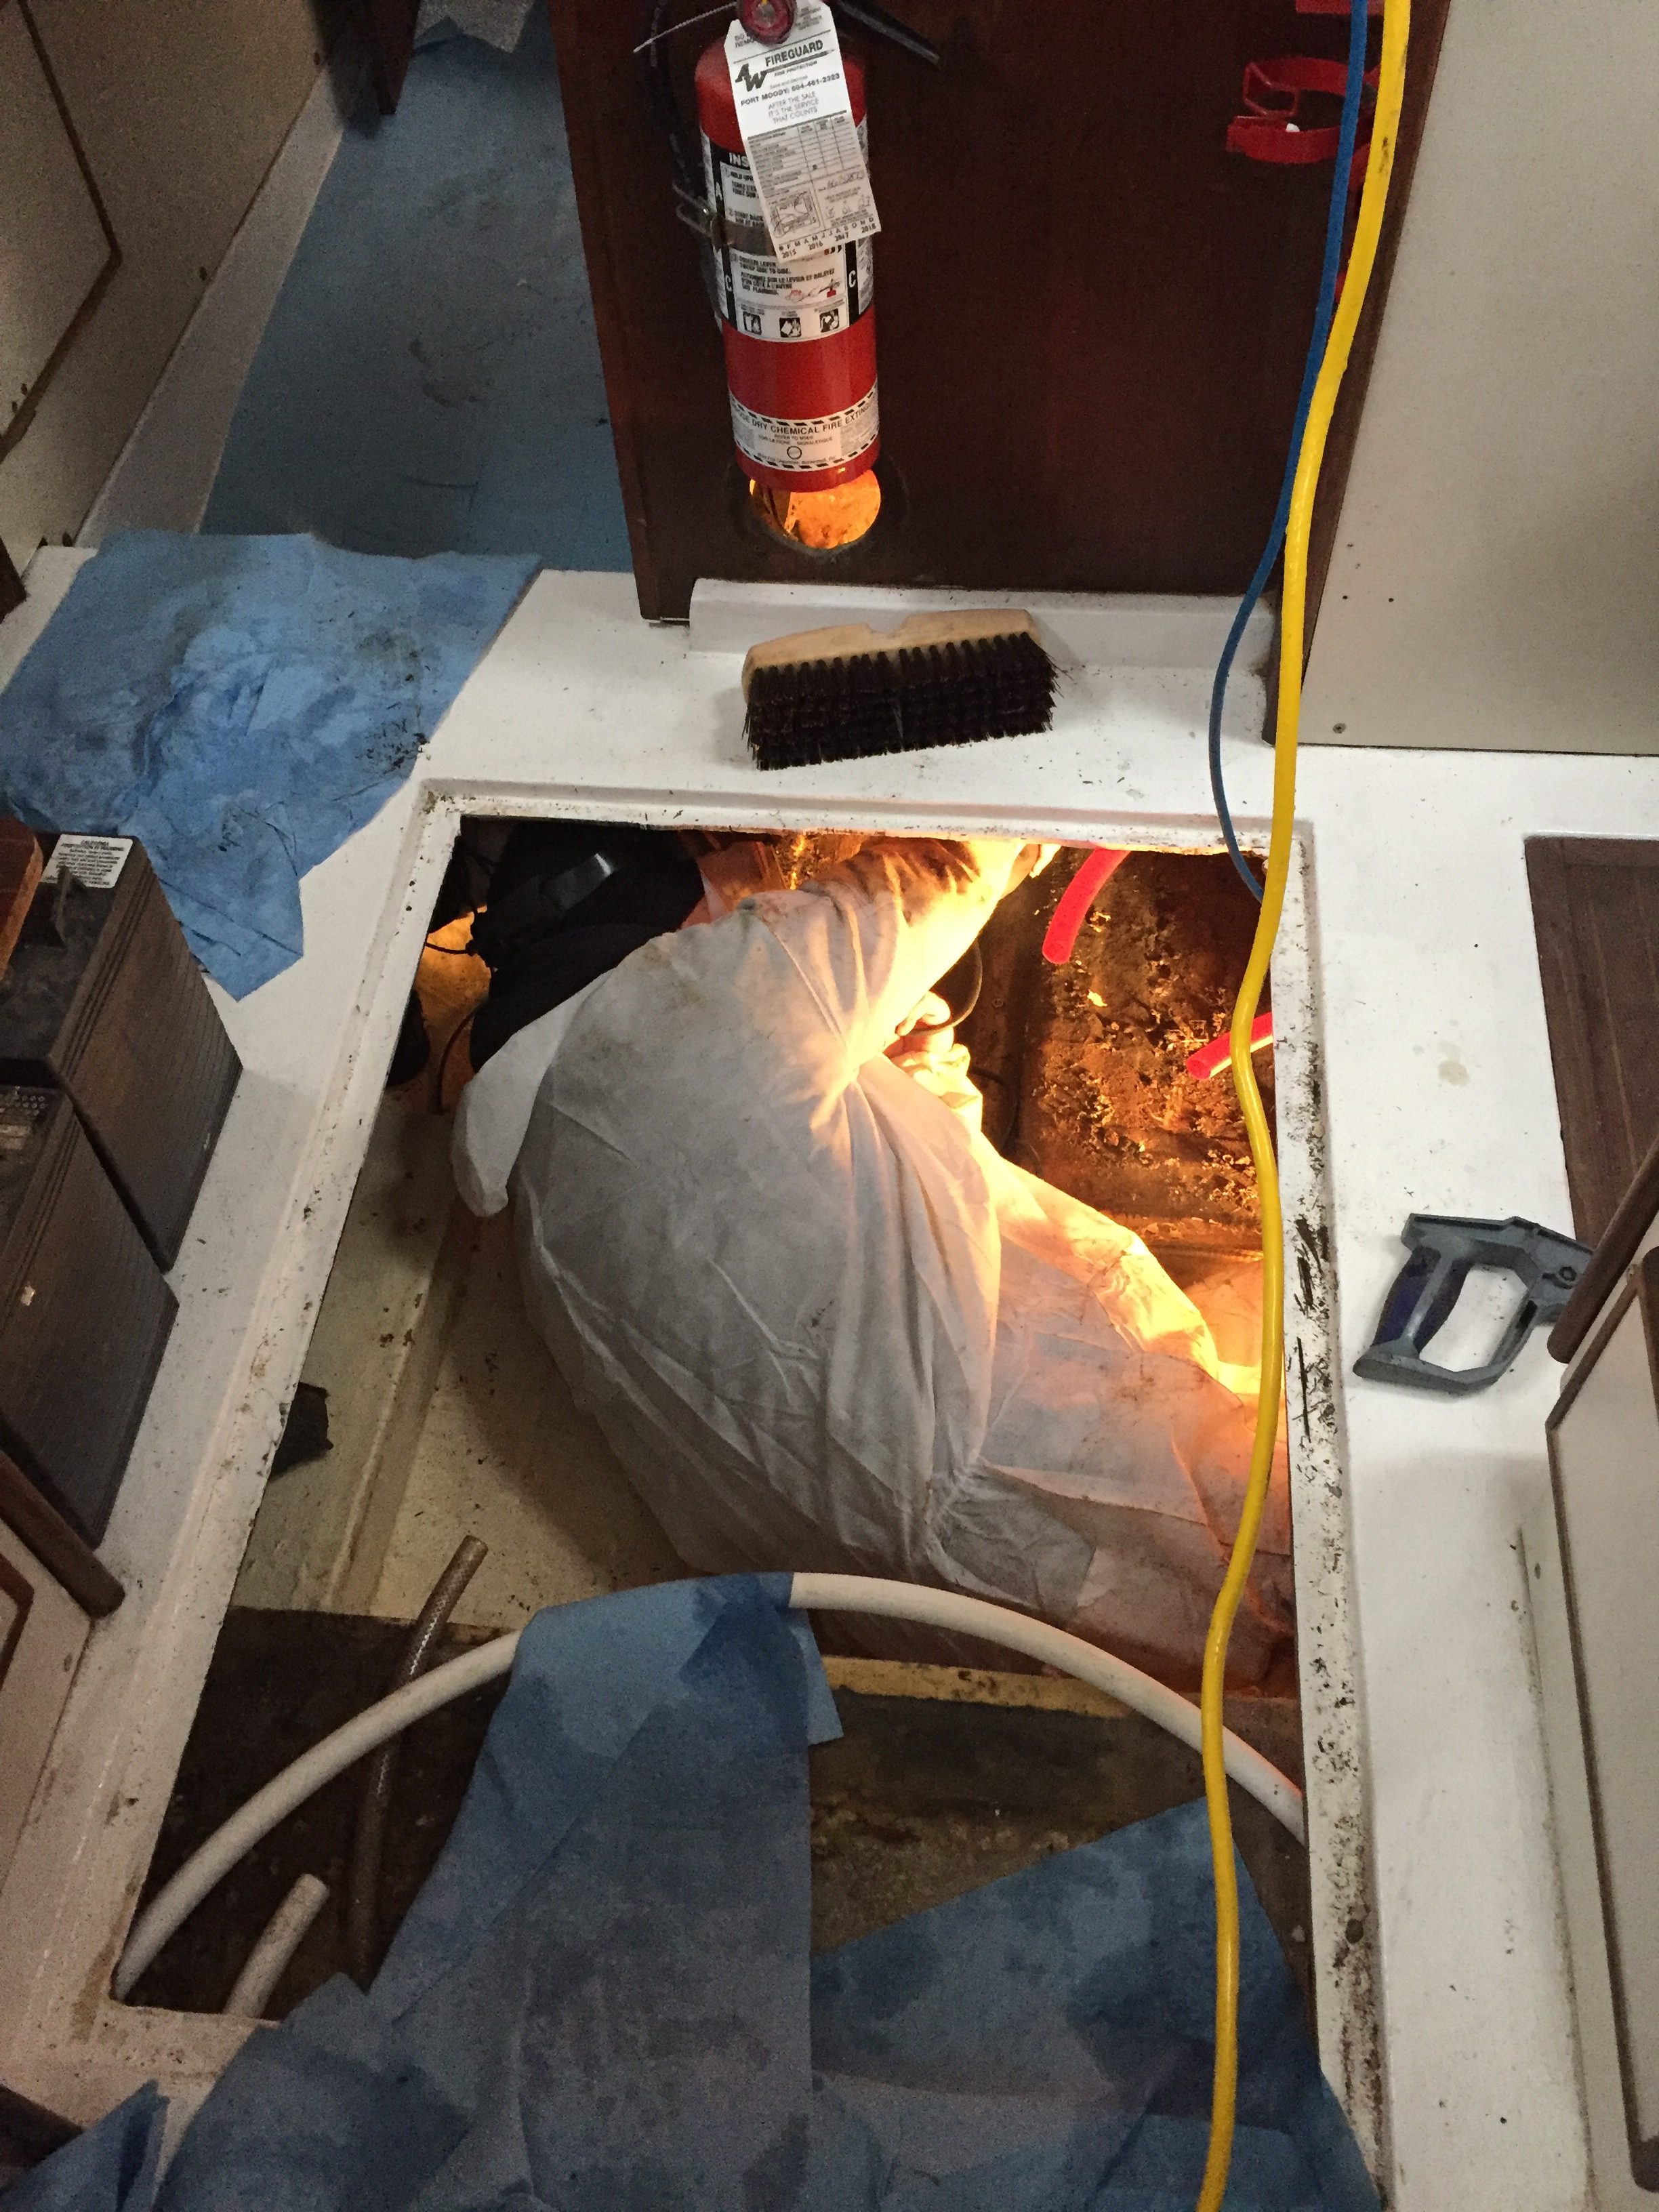
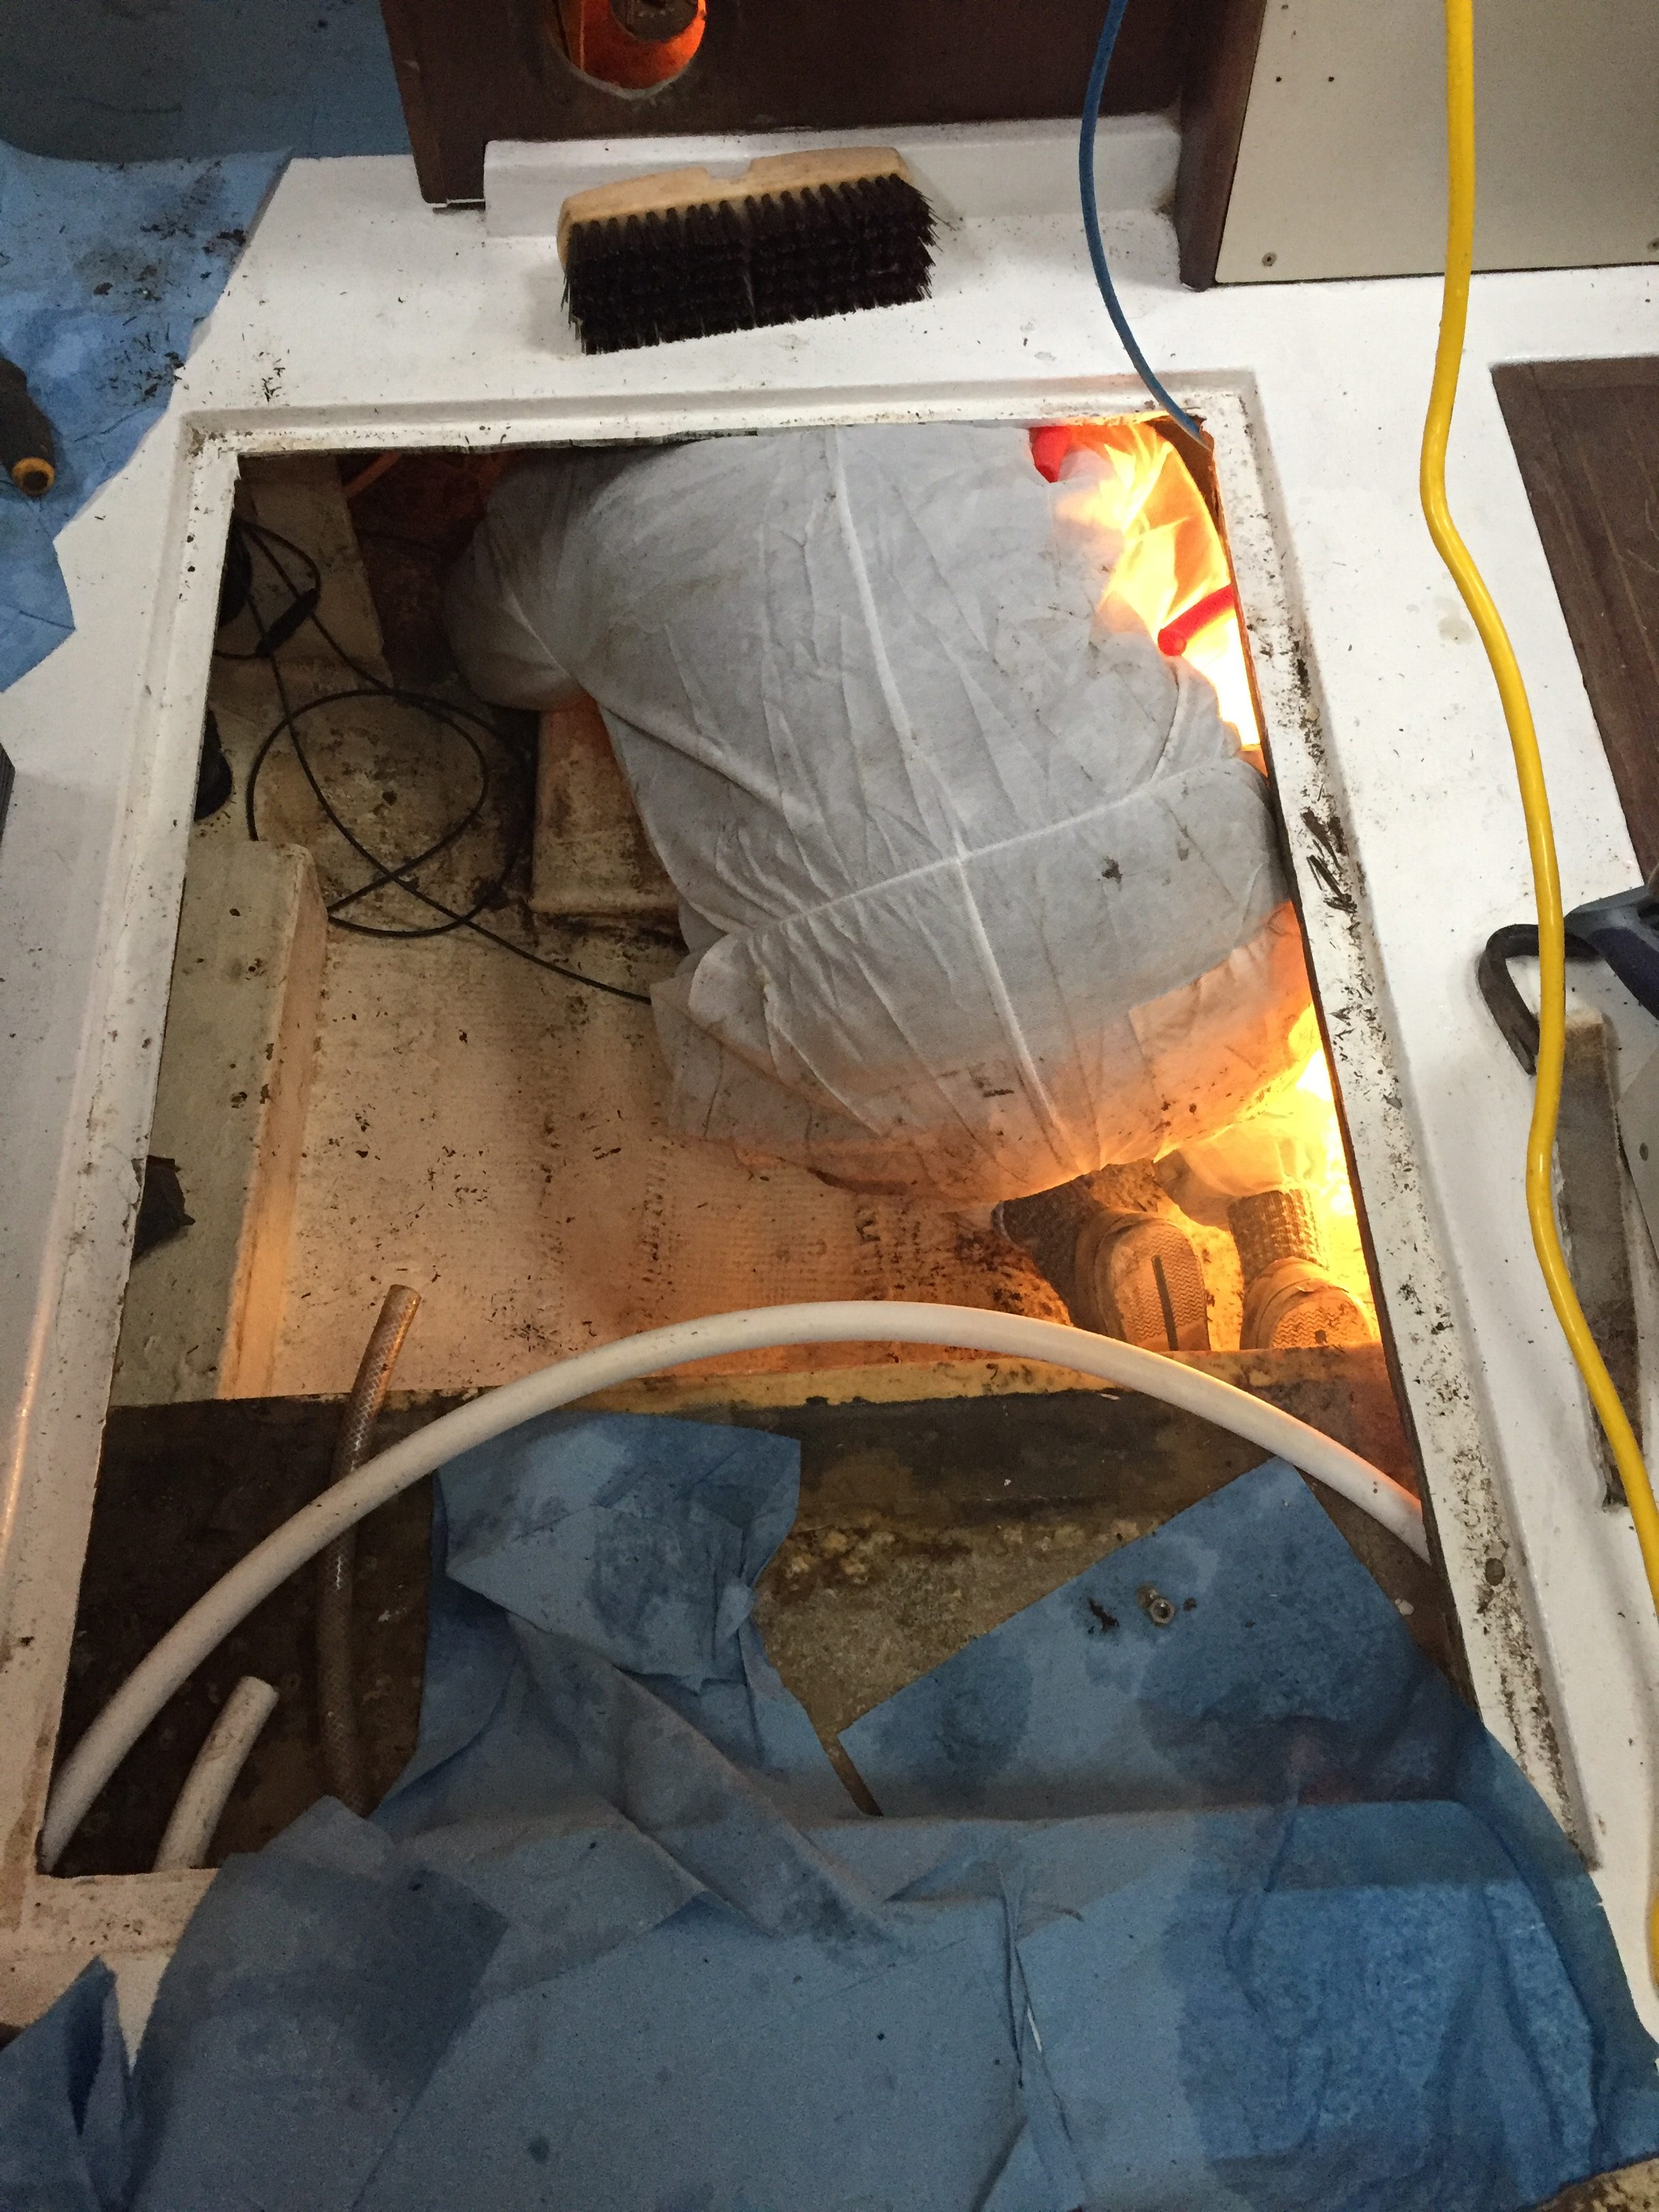
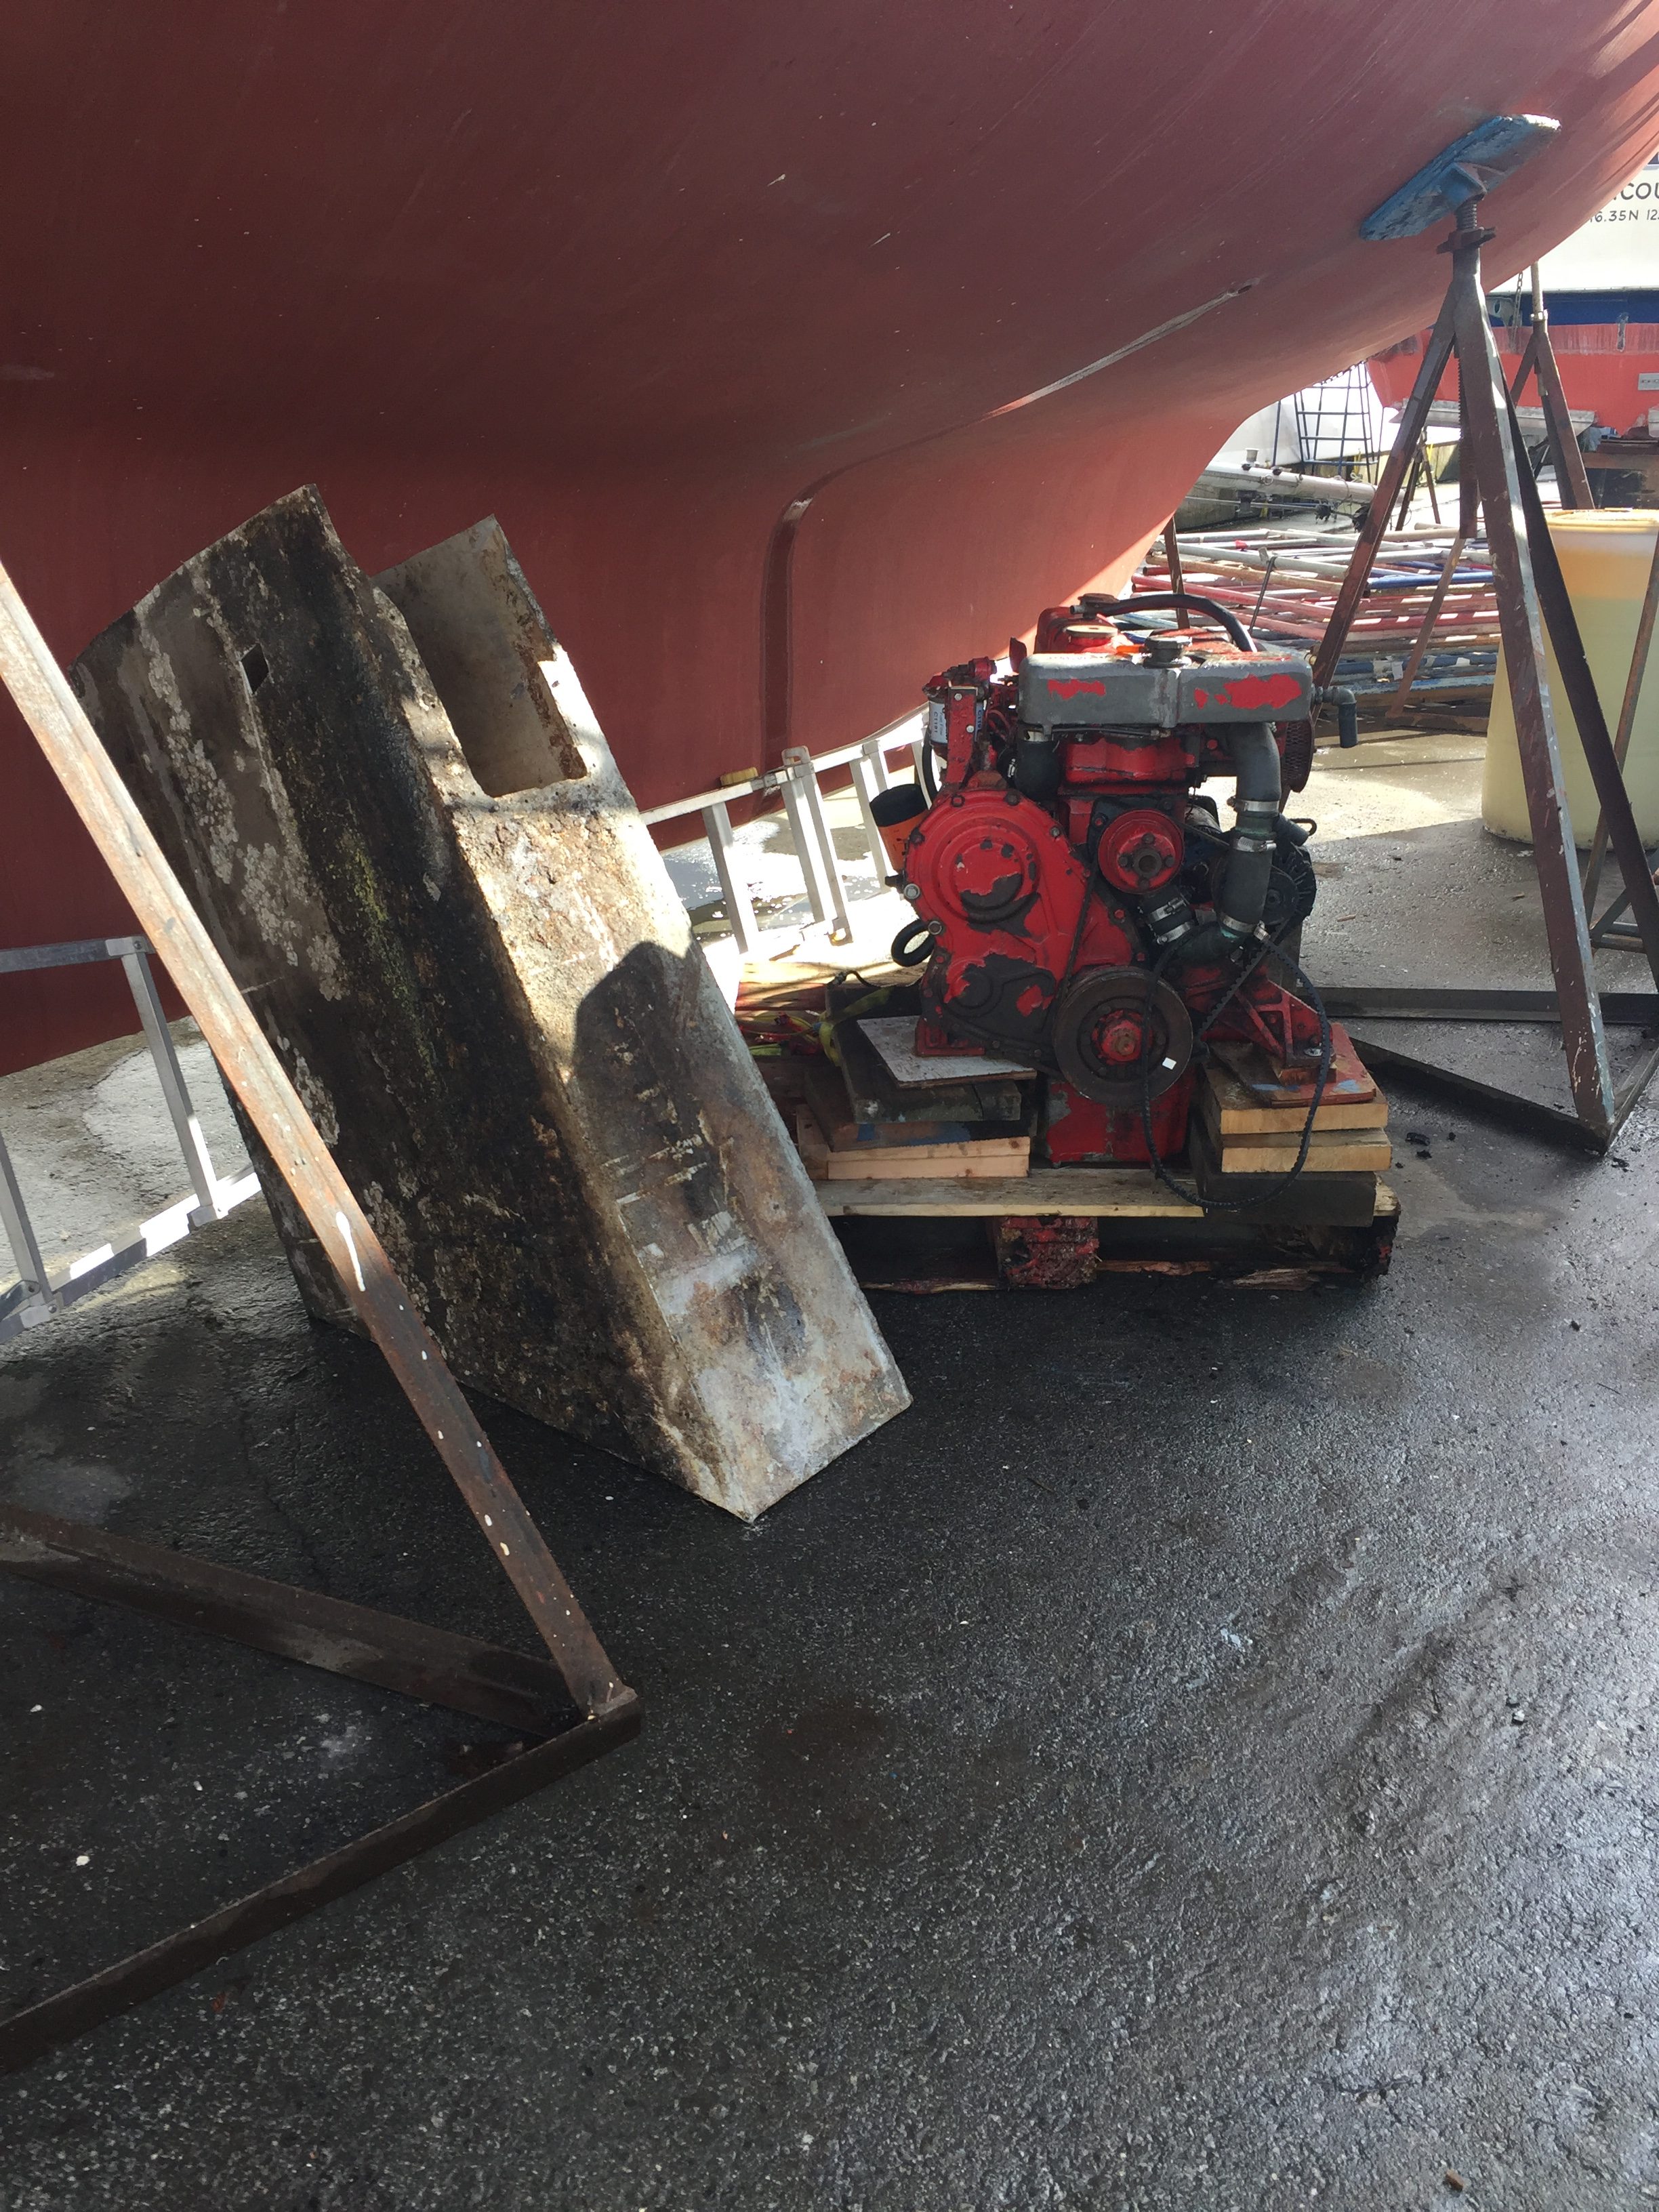
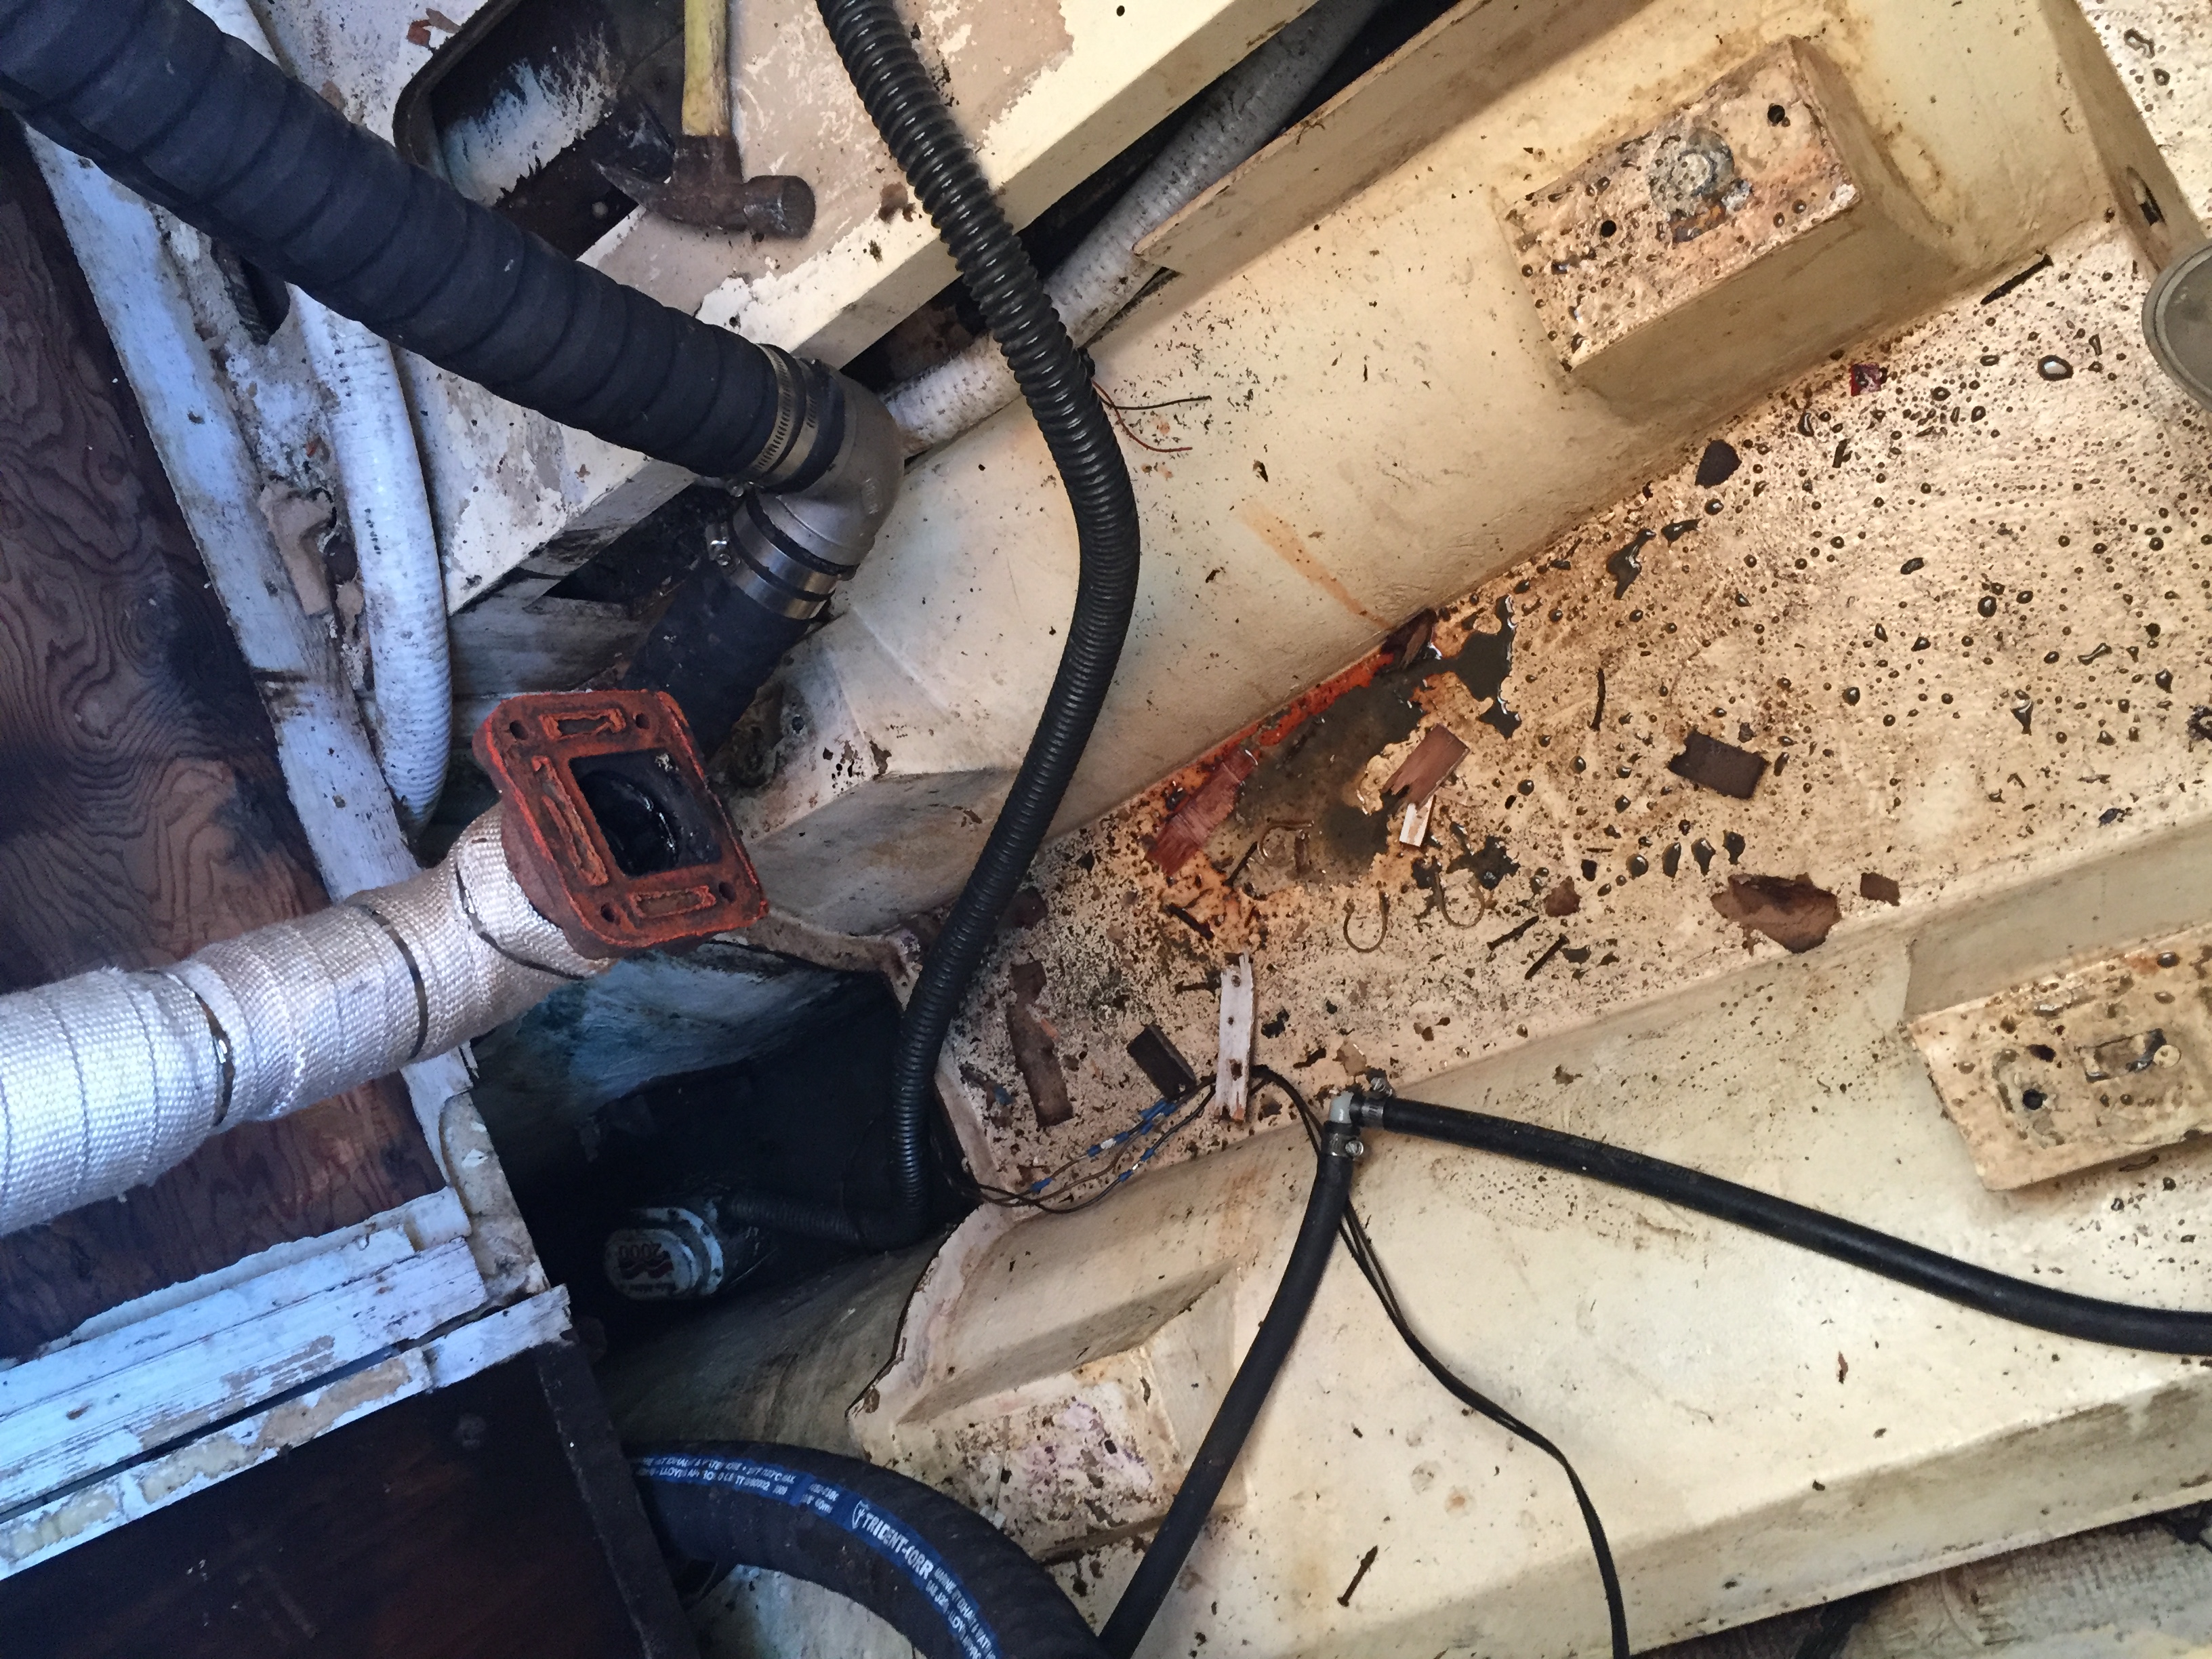
 And finally the big news! Yes it finally happened. Yes this is the last BIG, dirty, messy, smelly job! We have purposely left this to the last as it is also going to be the most expensive project on the boat! The old engine (read mooring anchor as it didn’t run) is gone! Out, vanished, disappeared, gonzo, how ever you want to word it, it is gone!
 Believe it or not, I am really excited about this huge mess!! Ya I know, I am nuts! I can not wait to get in there and degrease and clean and replace some of the old wood and paint and make this last room ready for the new engine! I still need to cut out the keel tank which I am sure is going to be a bitch, and I need to determine if the wing tanks are ok or if they need to be replaced but that is fine.
When I got the call today that the engine was coming out I actually started to get very nervous! We are committed now and things are going to happen fast! Of course it is easy when someone else does it while you are at work, makes it seem really fast! Anyway, hoping to get some good before and after shots for the blog!
Wow, February 1st already – so much to do before July!!
Well in the past I have to say that there have been lots of times that I have went to the boat show and maybe spent $20 on stuff just so I did not feel like I didn’t get anything, yesterday was a bit different.
I managed to get a couple of good deals!
I scored on a new Icom VHF with built in AIS for the nav station and the Commandmic remote for the helm! Got a great deal as well!


Of course the really BIG news is that we have ordered a new engine! Happy Dance!
I will add all of the details later and give the explanation as to how we arrived at this particular engine but we are pretty excited! Need to speak to the dealer this week to ensure we get the correct transmission gear ratio but other than that, it will be ordered and should be here in about a month!! Also spoke to our guy and Akupara will be moved back up to the front of the yard, the old engine should come out asap, which will give me time to reno the engine compartment prior to the new engine arriving. Plan is to have new cutlass bearing, new dripless packing gland, and a new shaft installed, and of course, if the old prop isn’t right, a new one as well!
So, we should be powered by the end of March, fingers crossed!
Almost forgot, we also reserved our slip for July 1st!
We ARE going back in the water! 159 days until Akupara is in her slip!
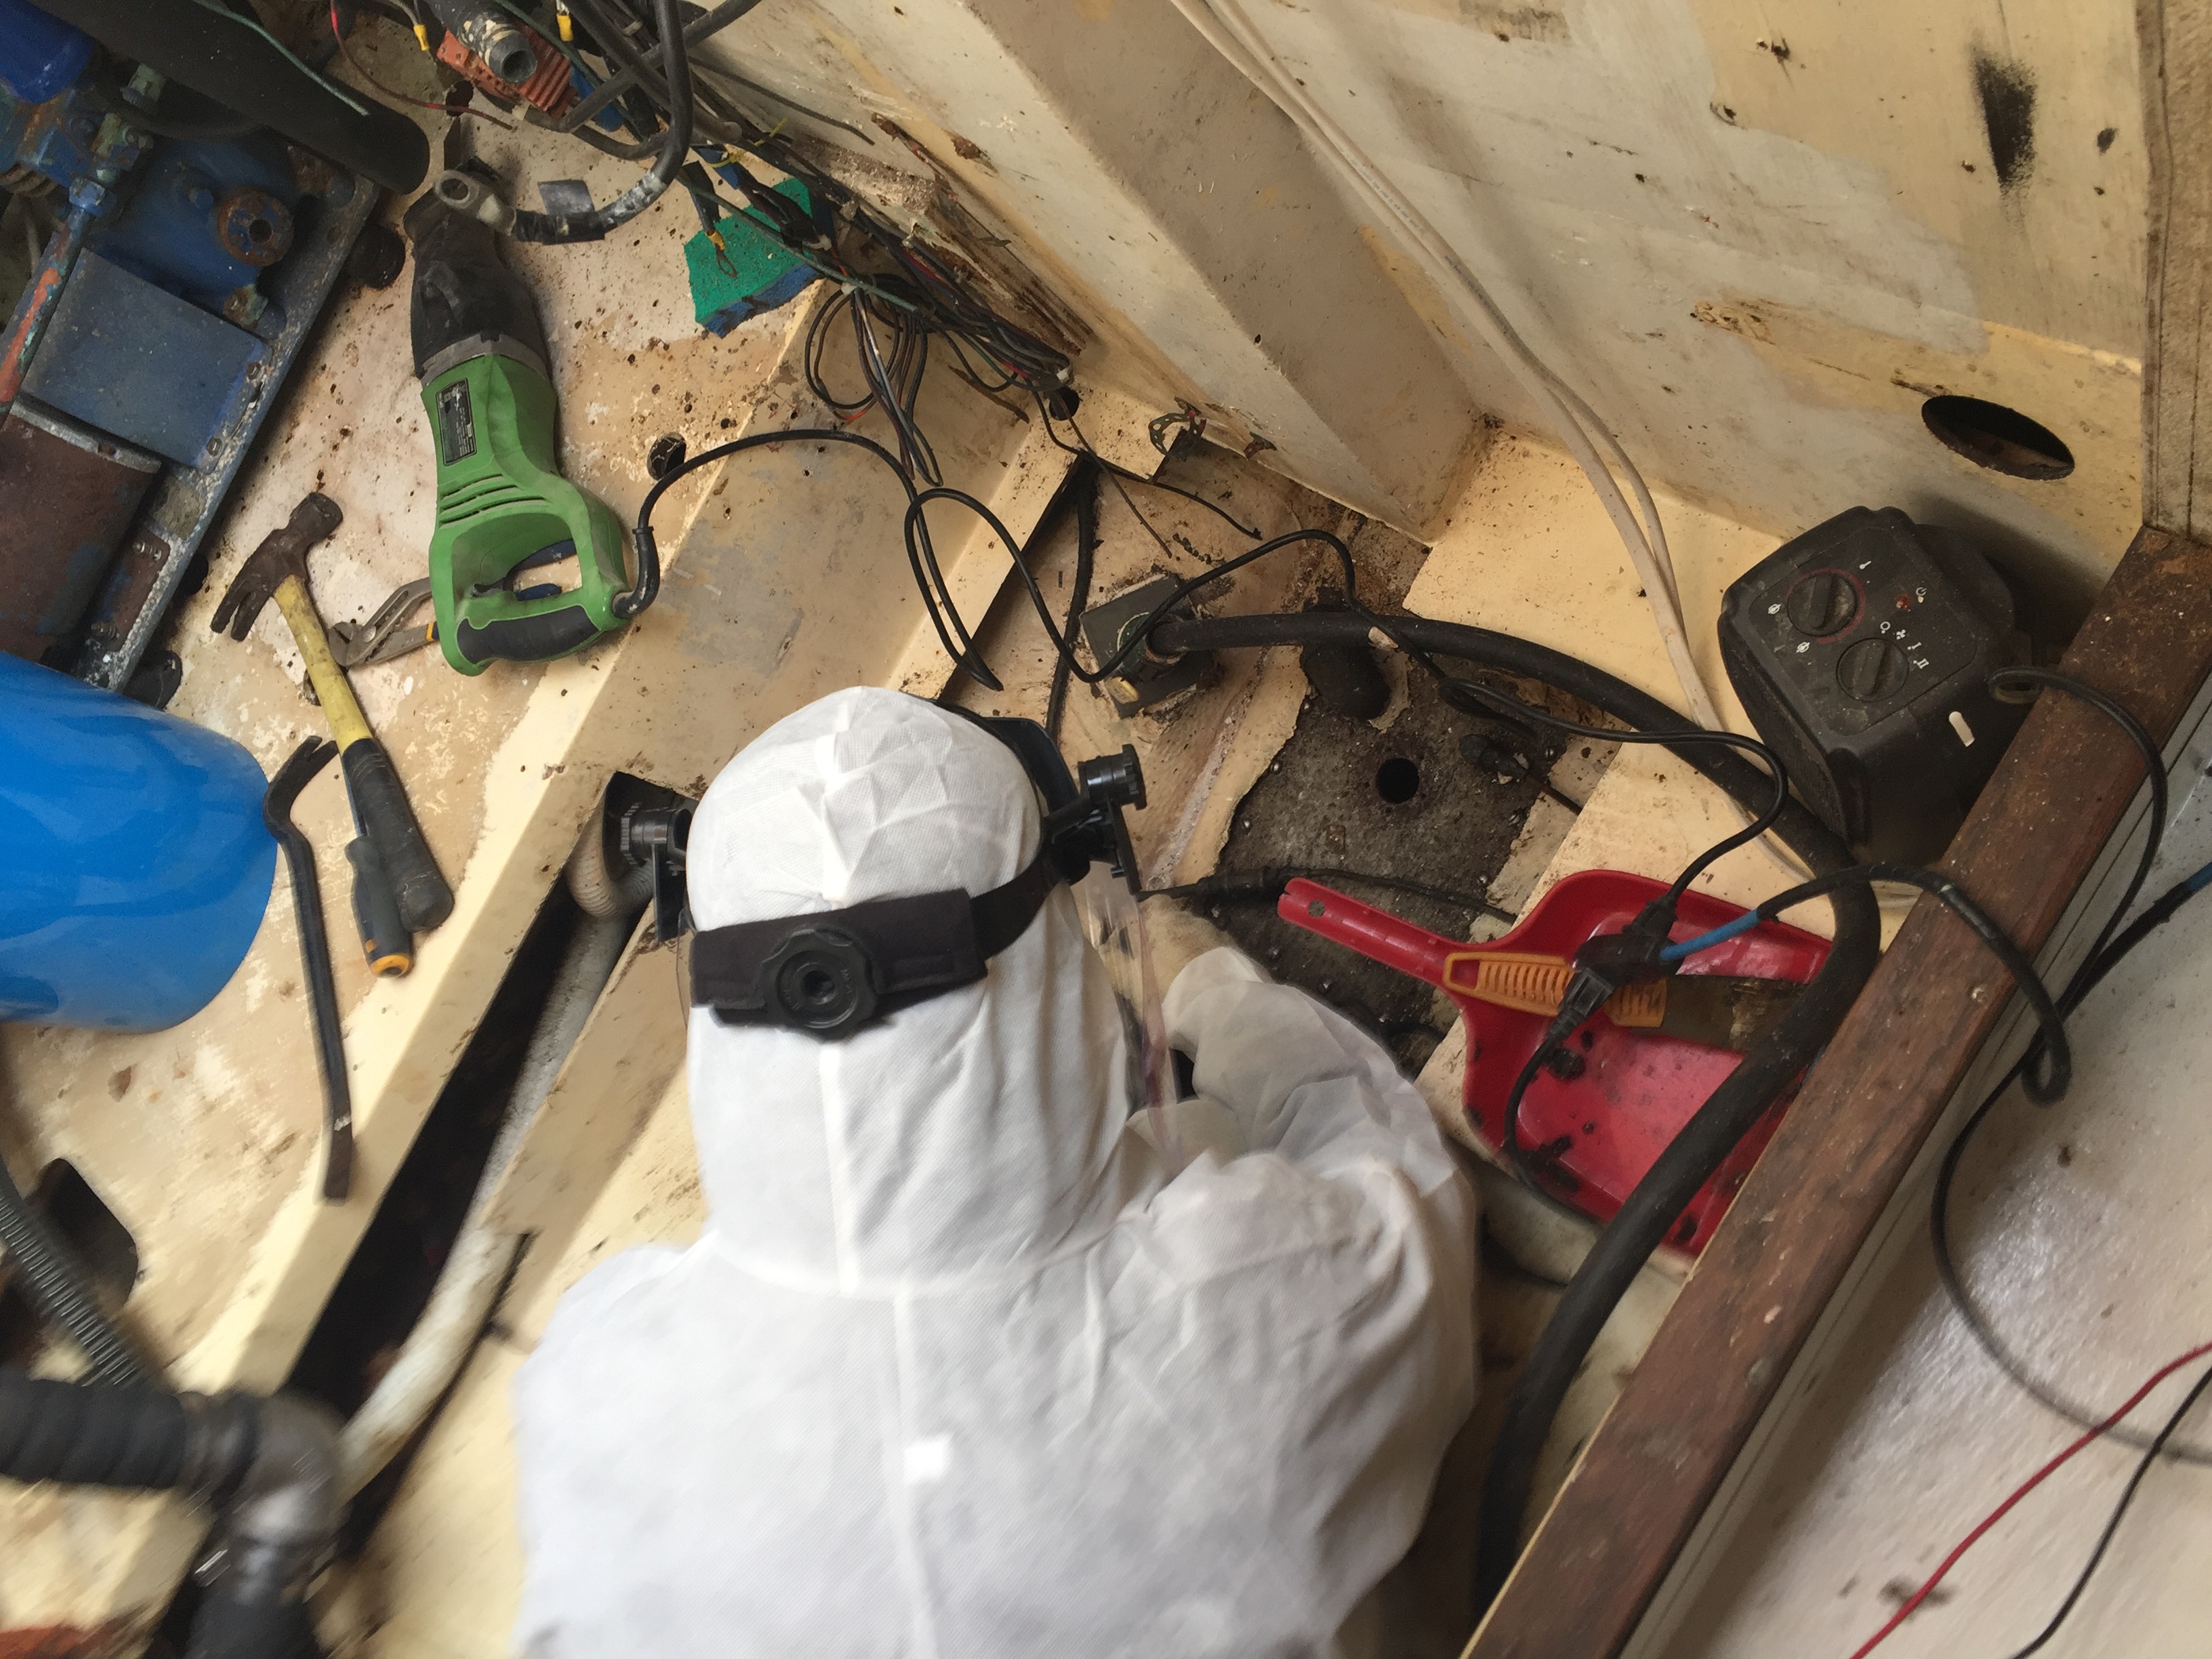
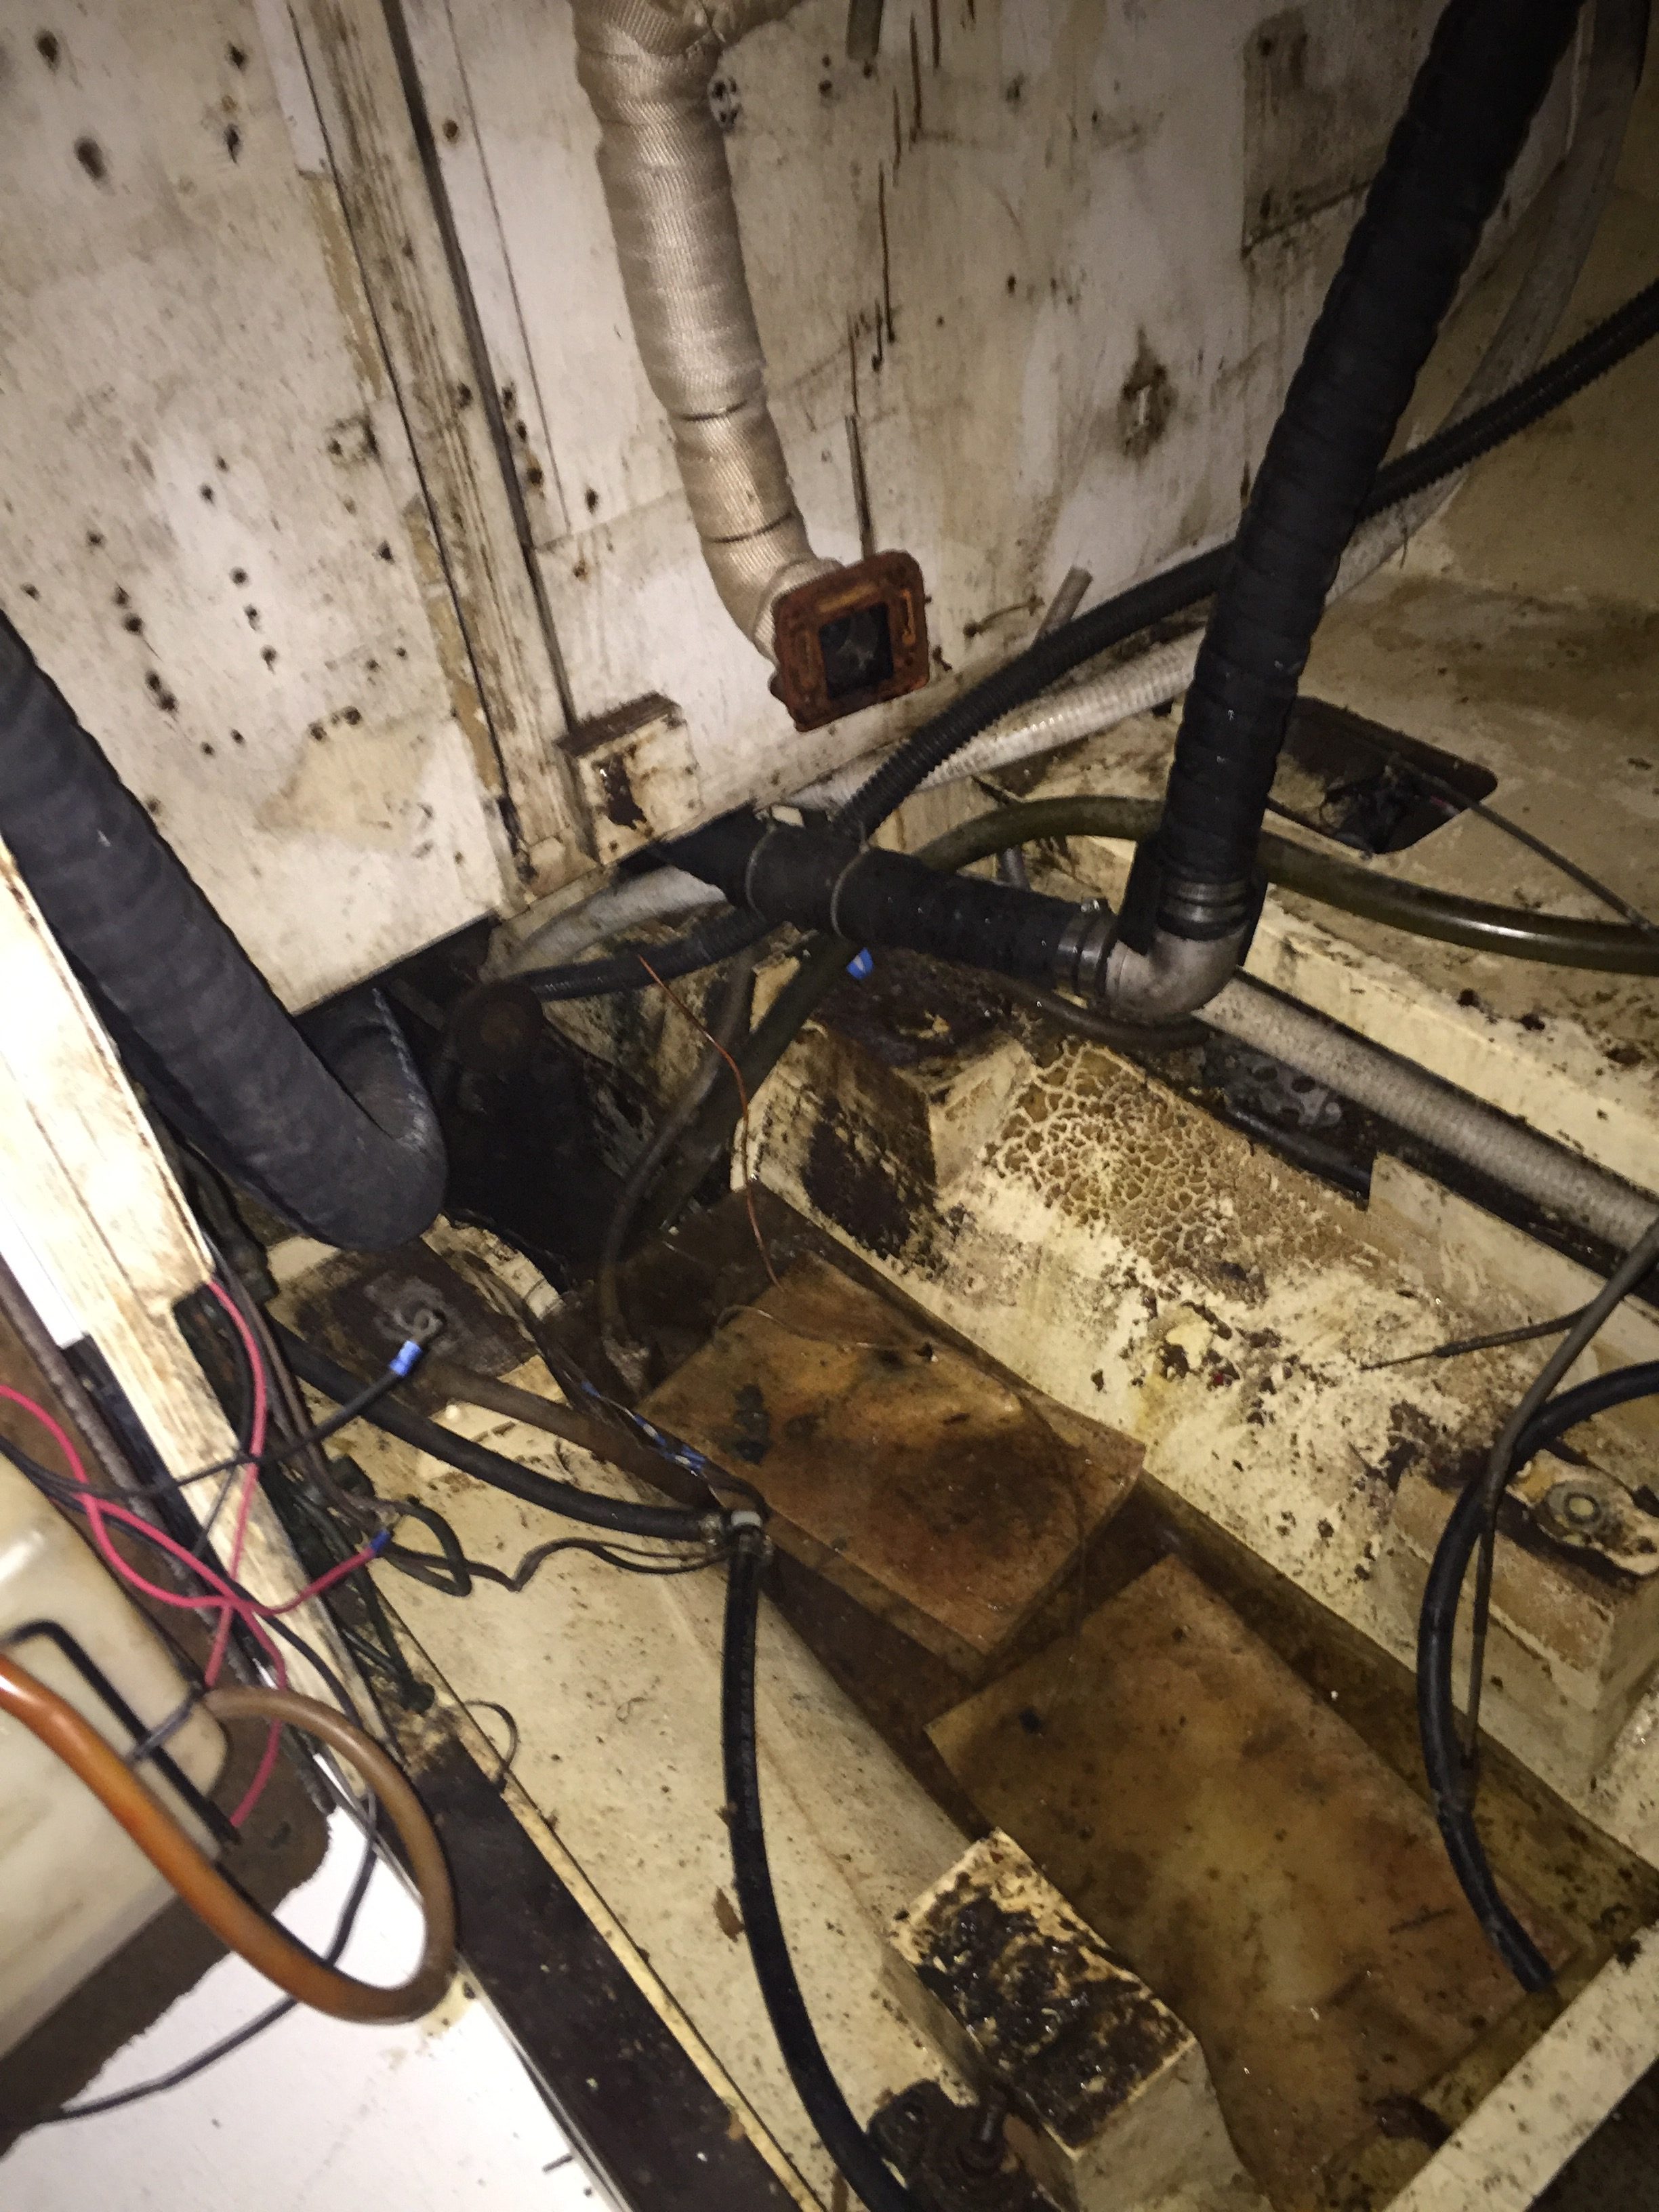
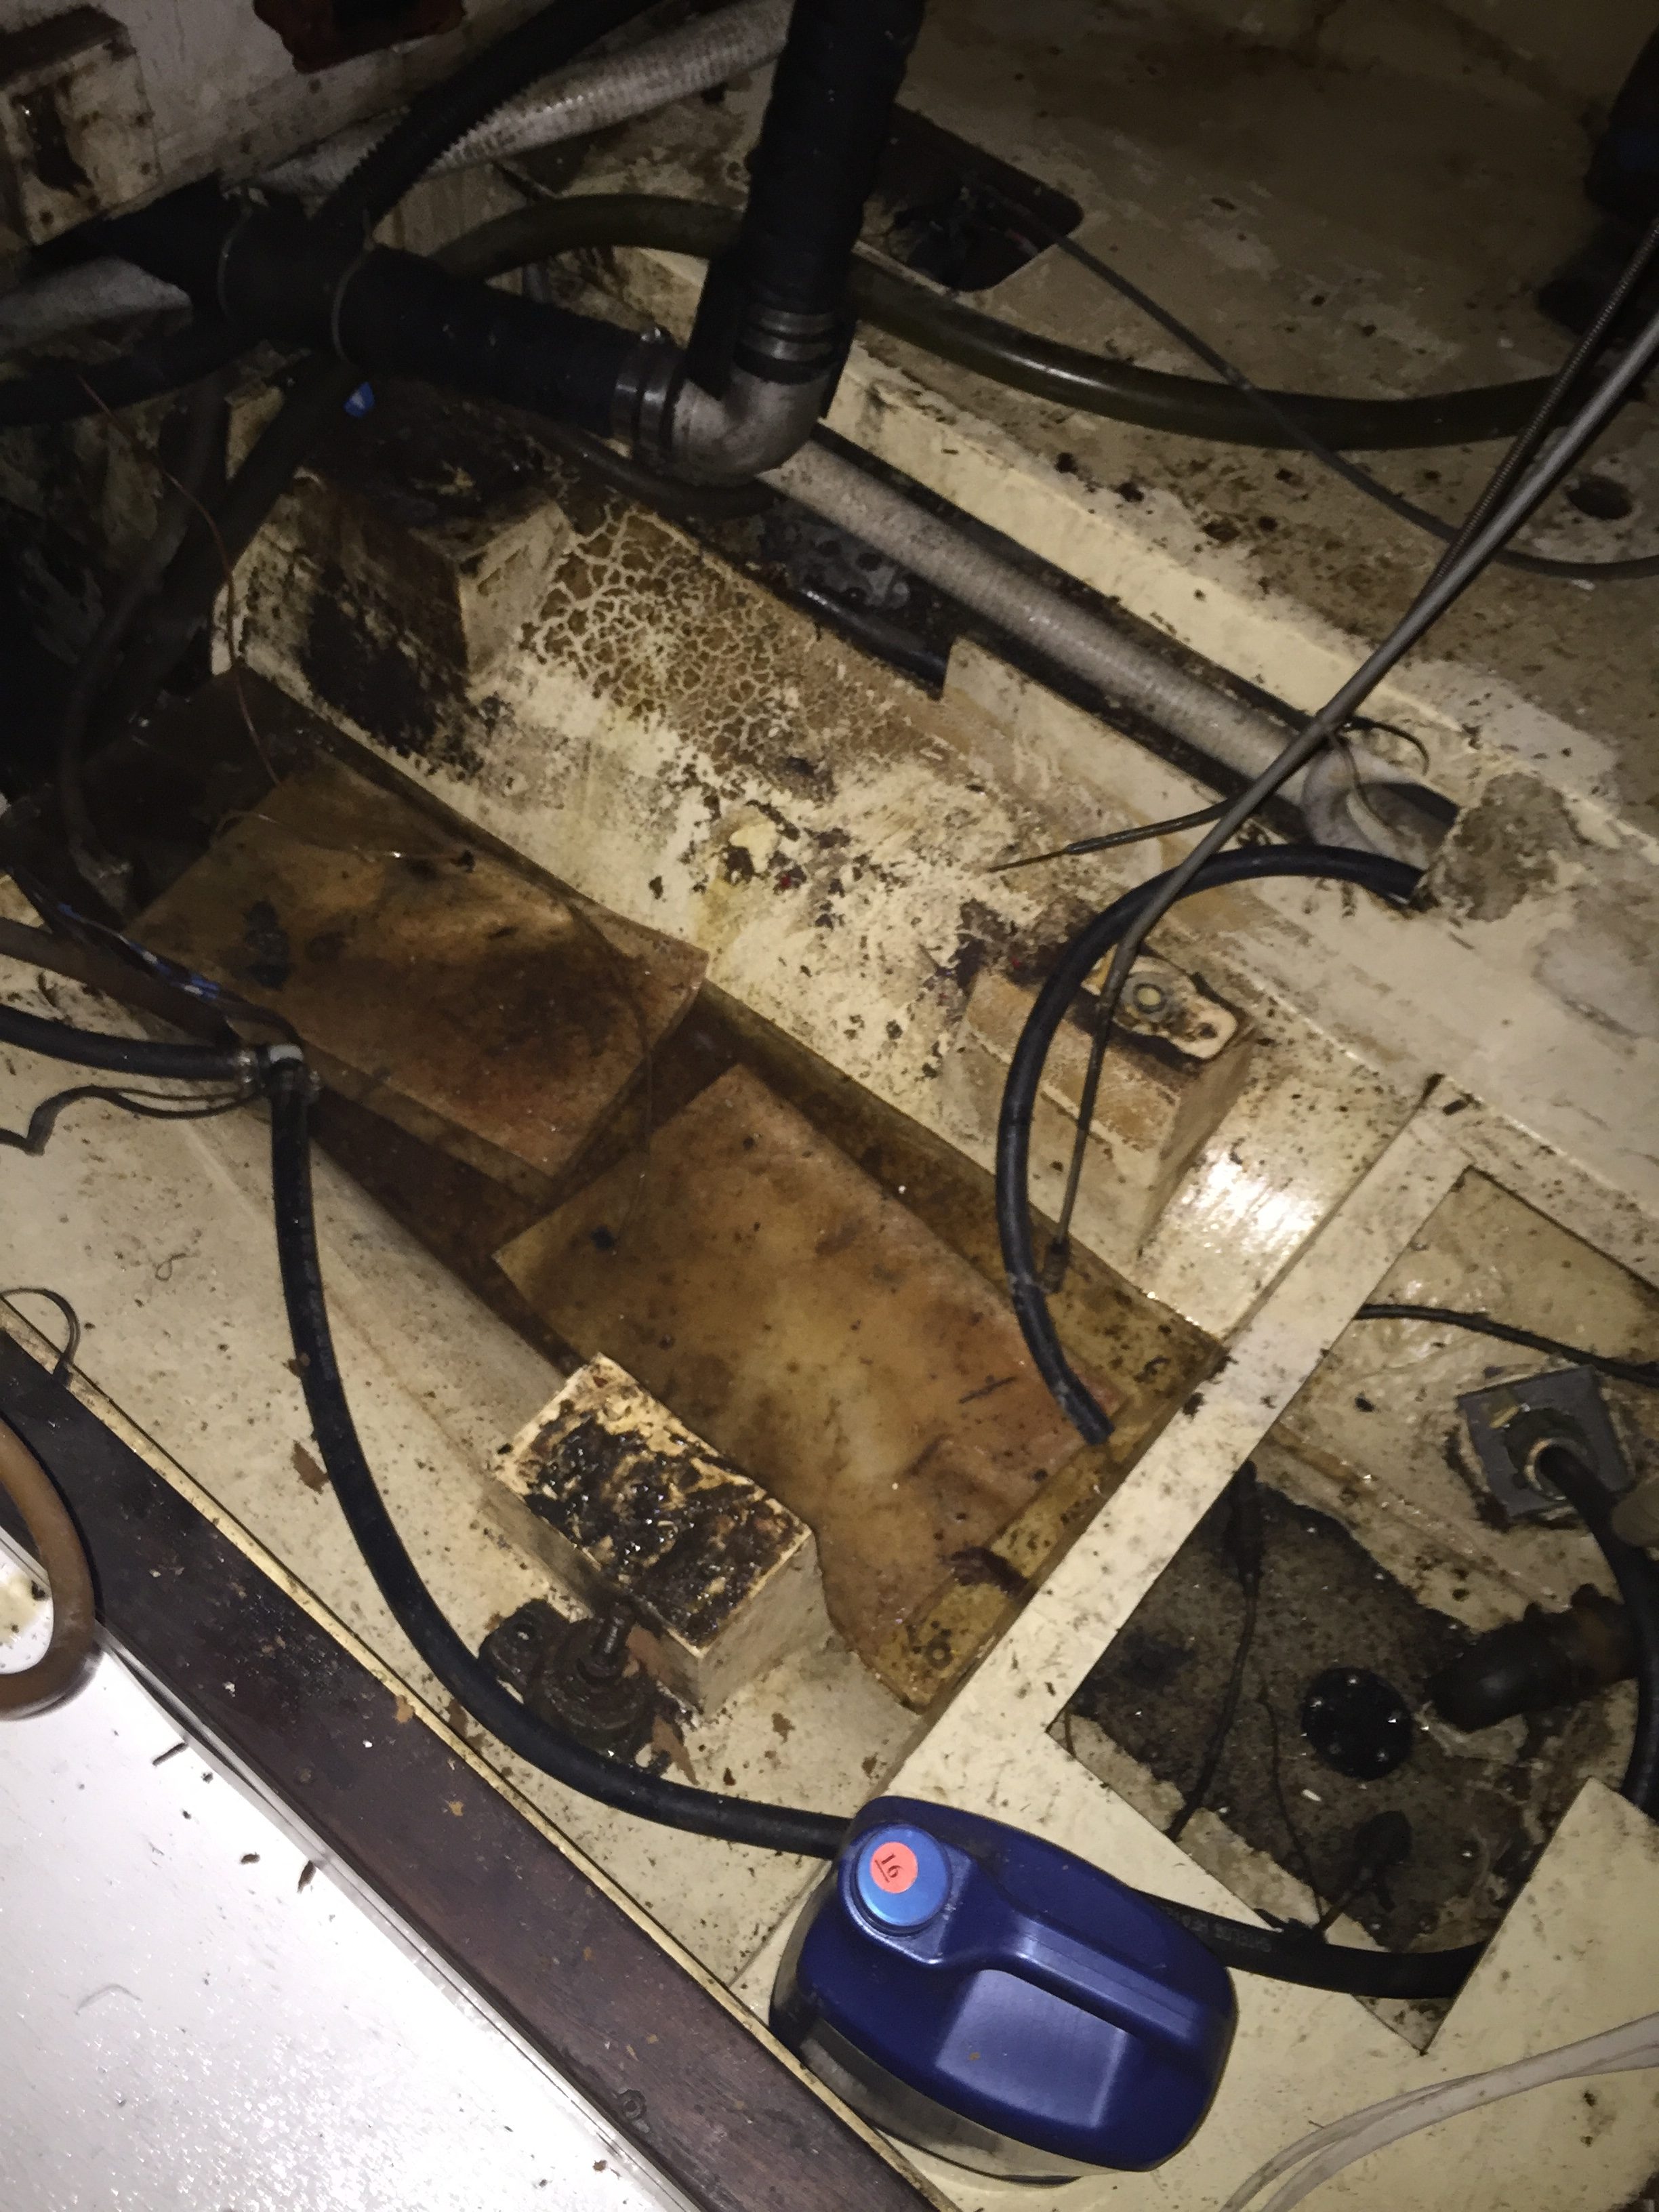
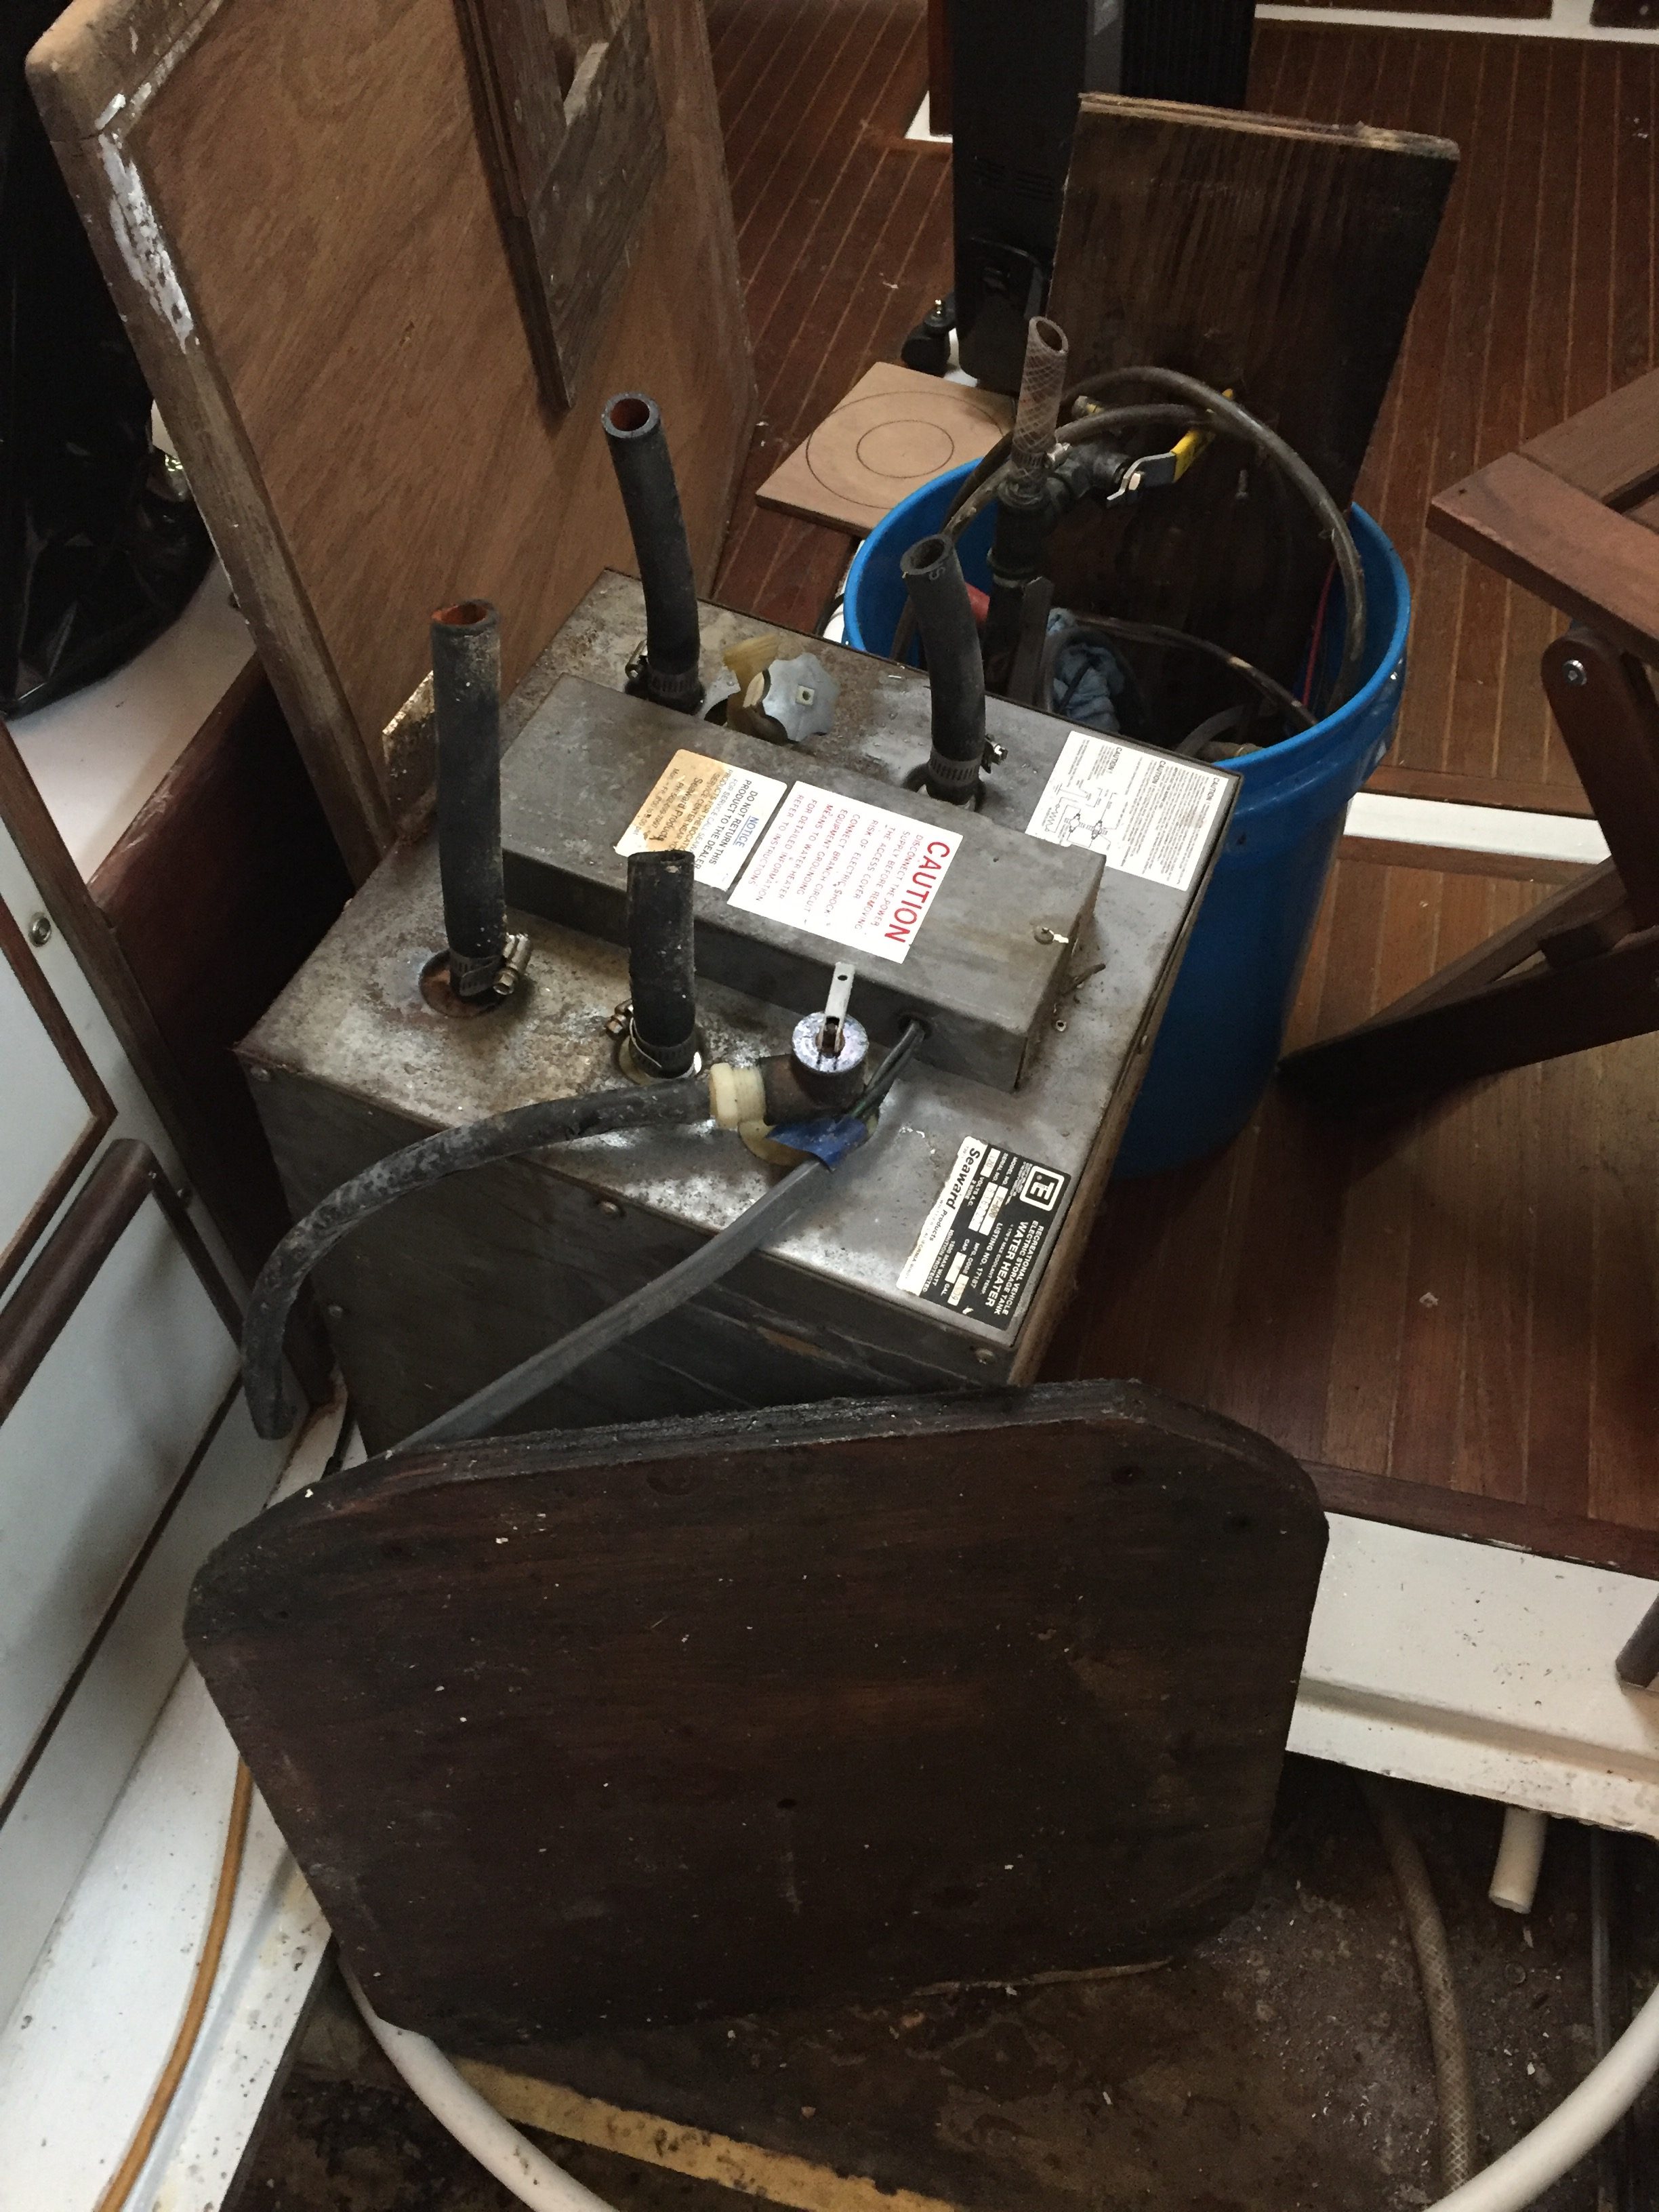
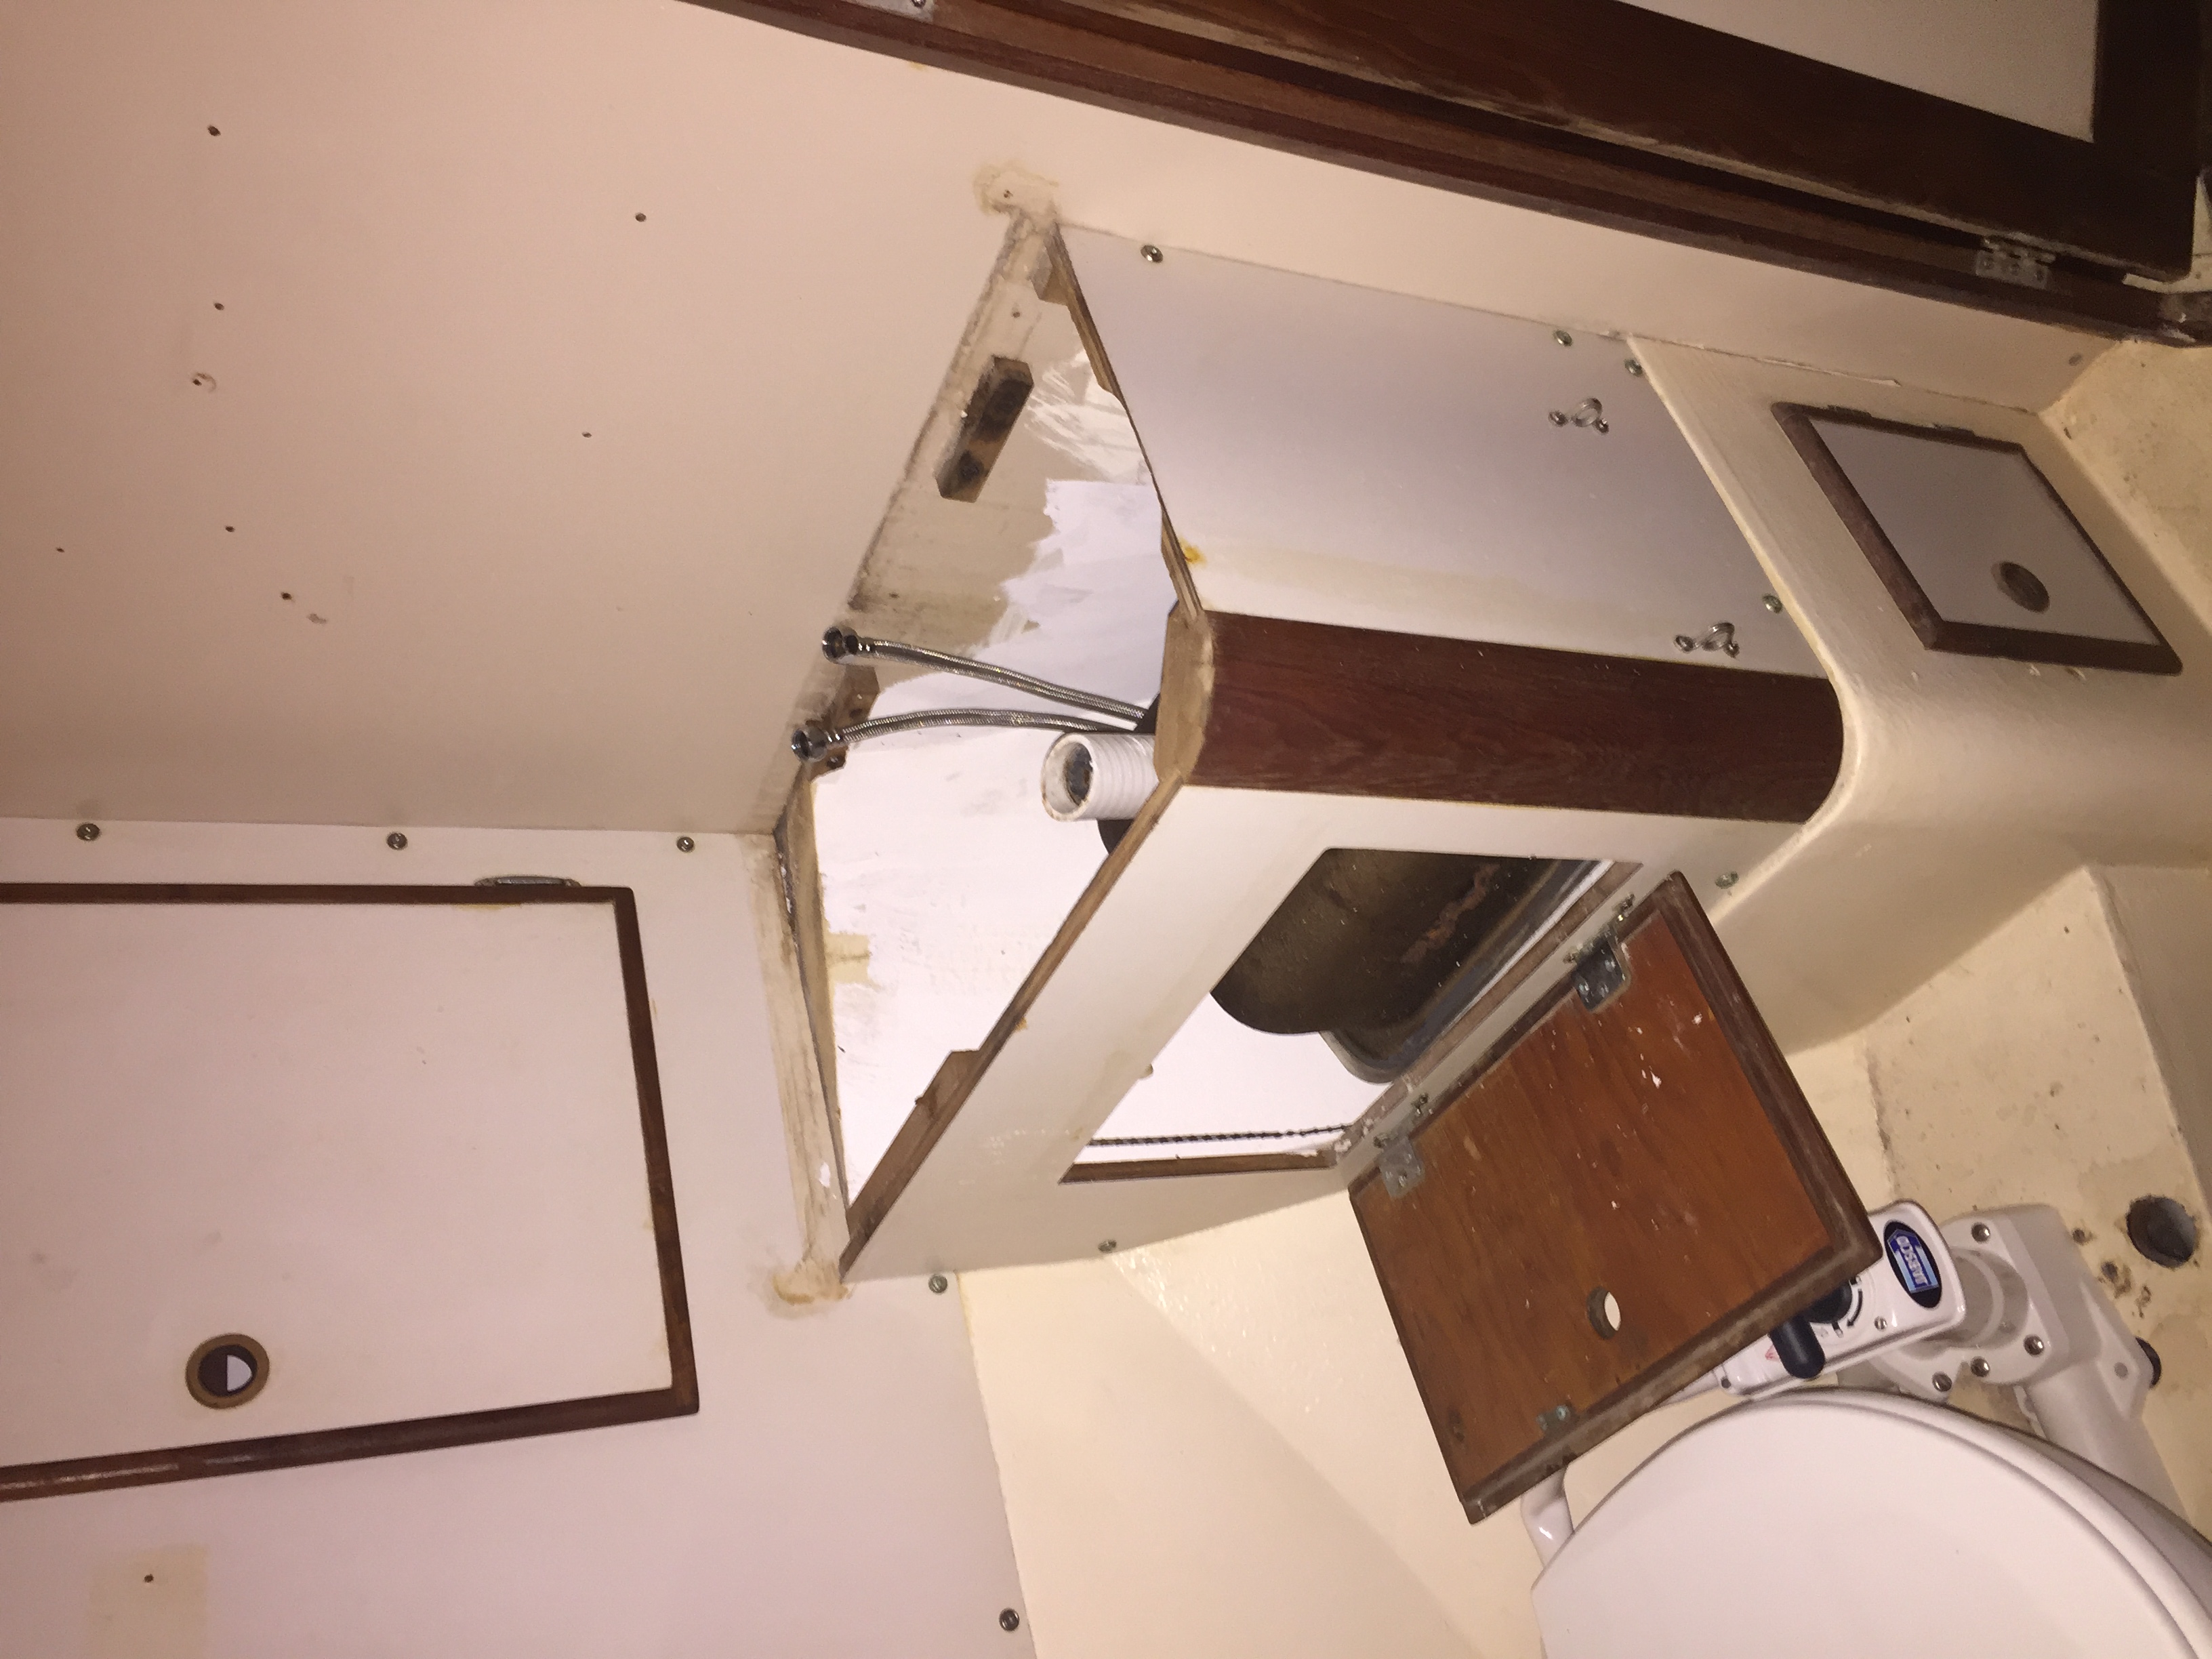
Made a bit of progress today on the water system. I was able to remove the old hot water tank which actually didn’t look too bad, of course when I tipped it up, it did indeed leak so out it goes!
Of course removing the tank, which was screwed to the half rotten board you see in the picture above, led to removing the board itself of course, as well as the system of valves for the water tanks. Underneath the lovely rotting board was another fantastic mess to clean up…
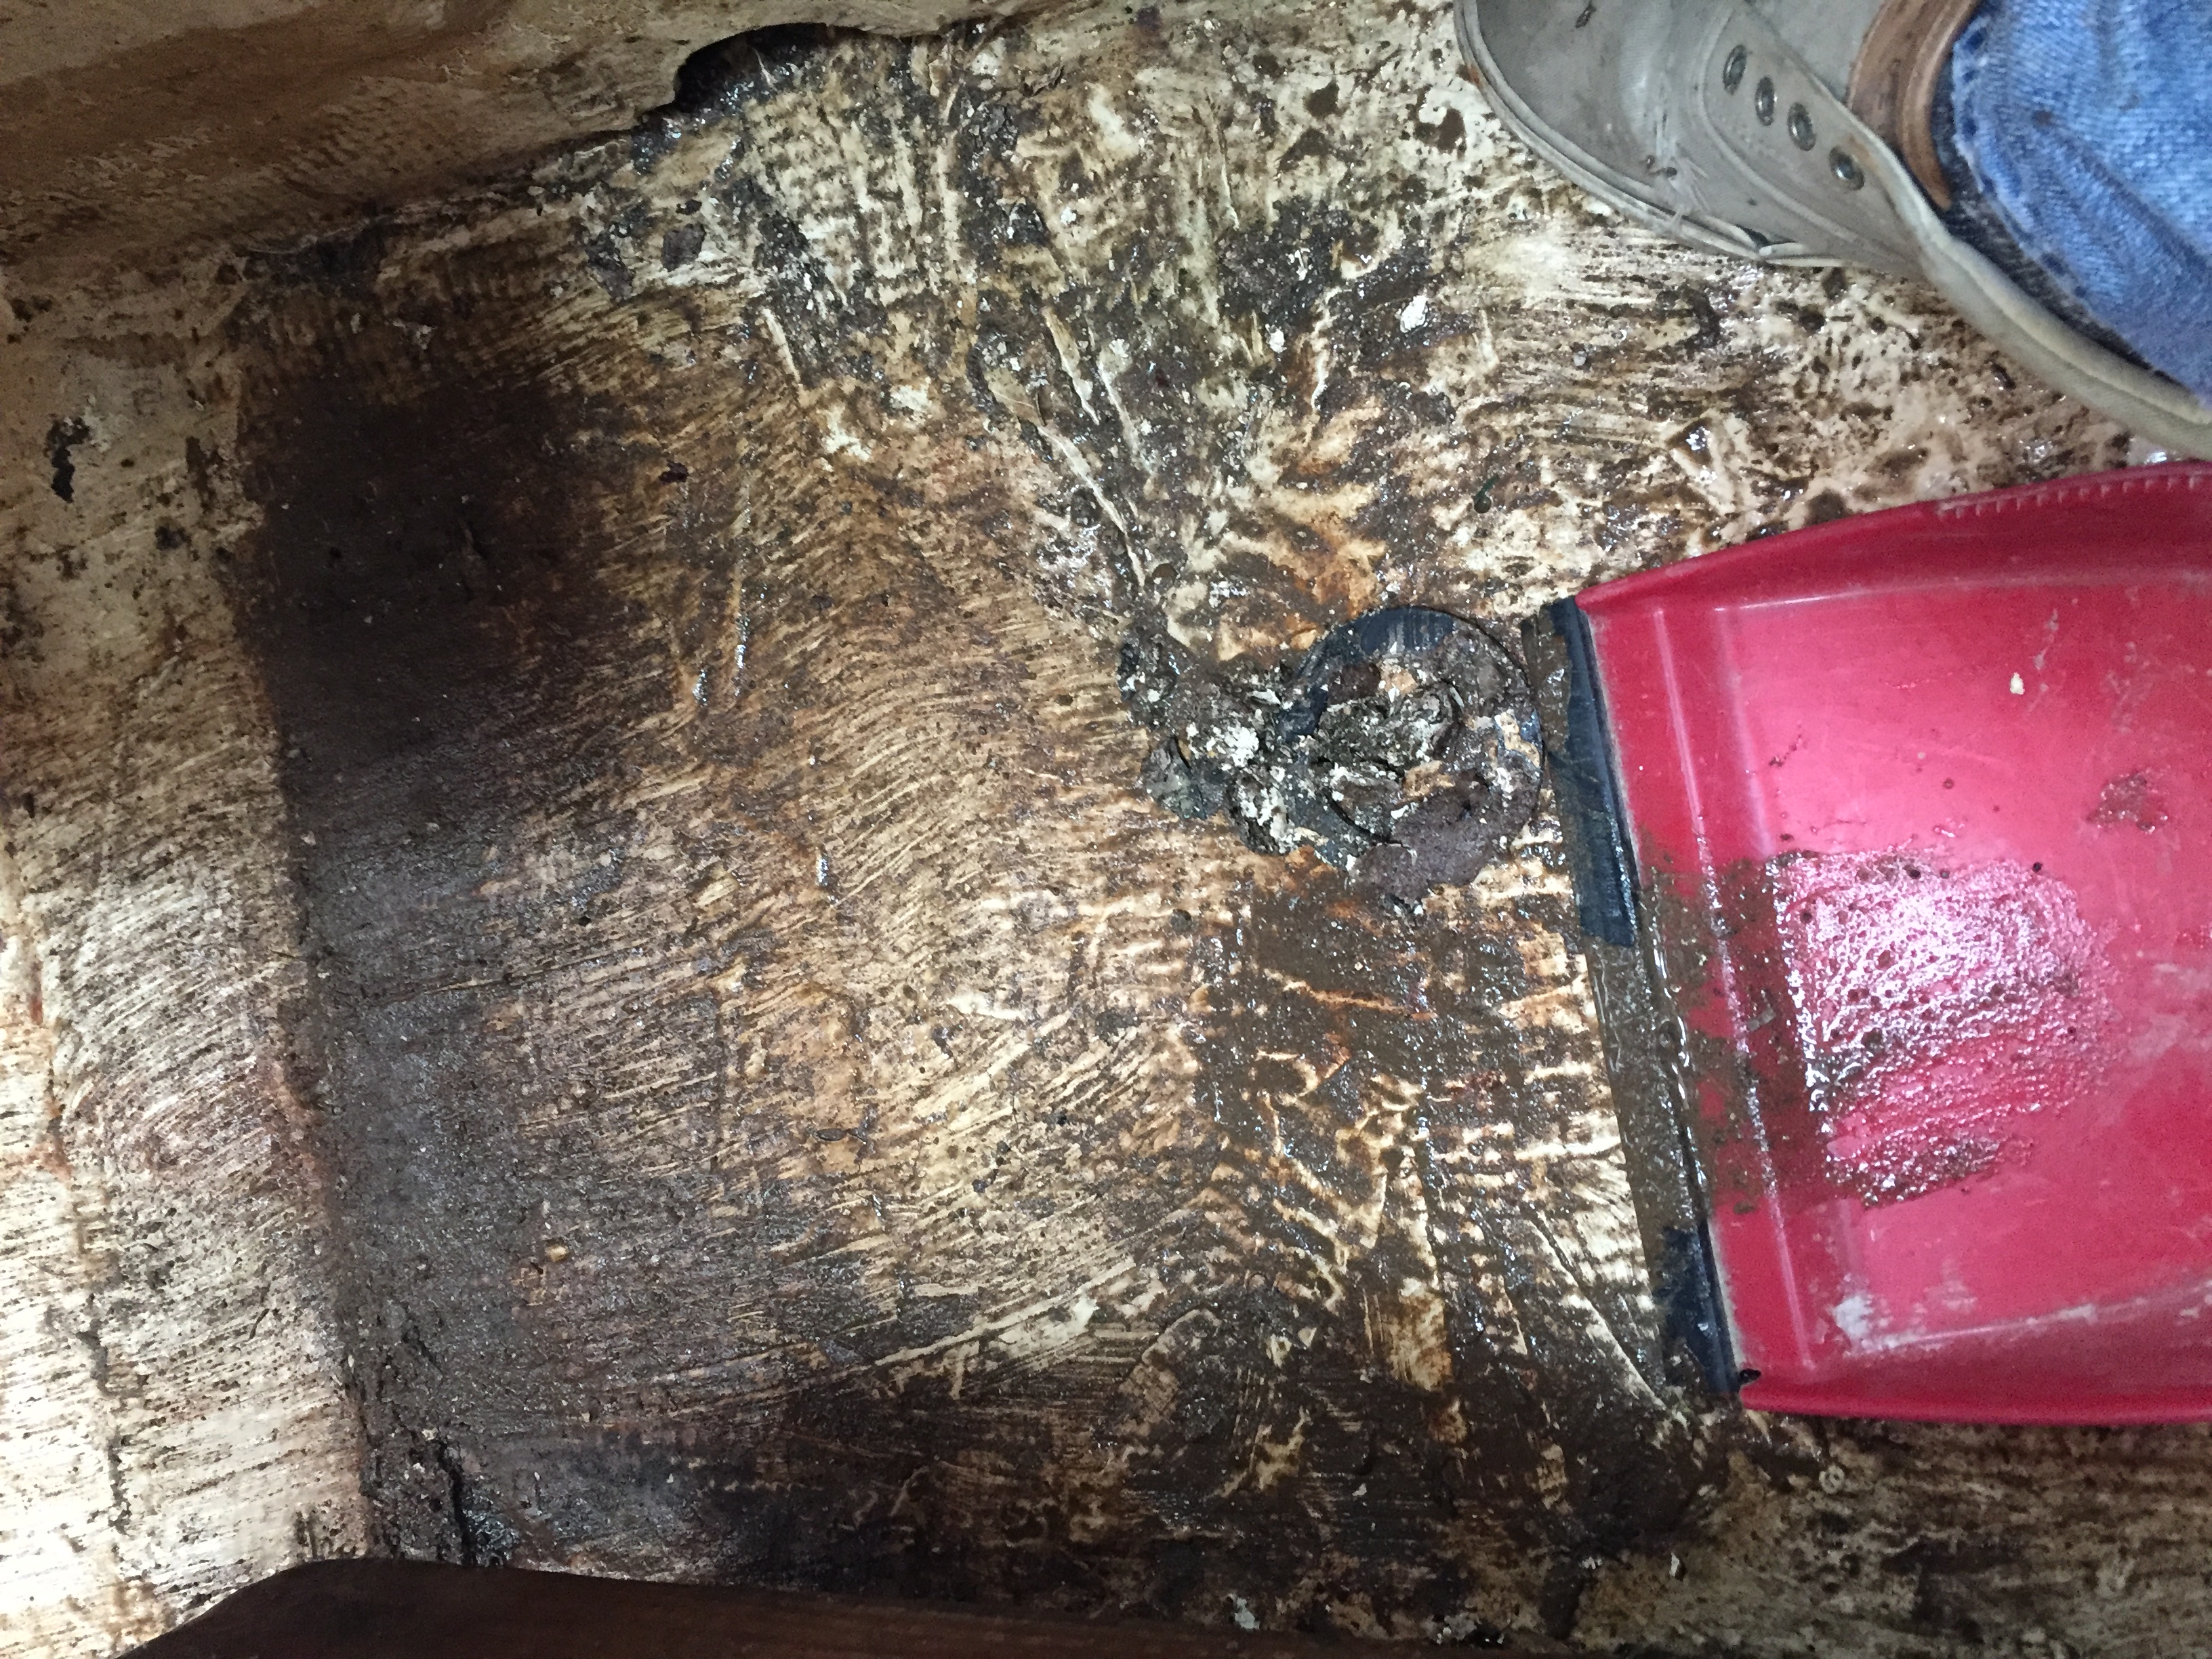
We did manage to get most of the dirt and grease and grime out and will paint it nice and white when it warms up a bit.
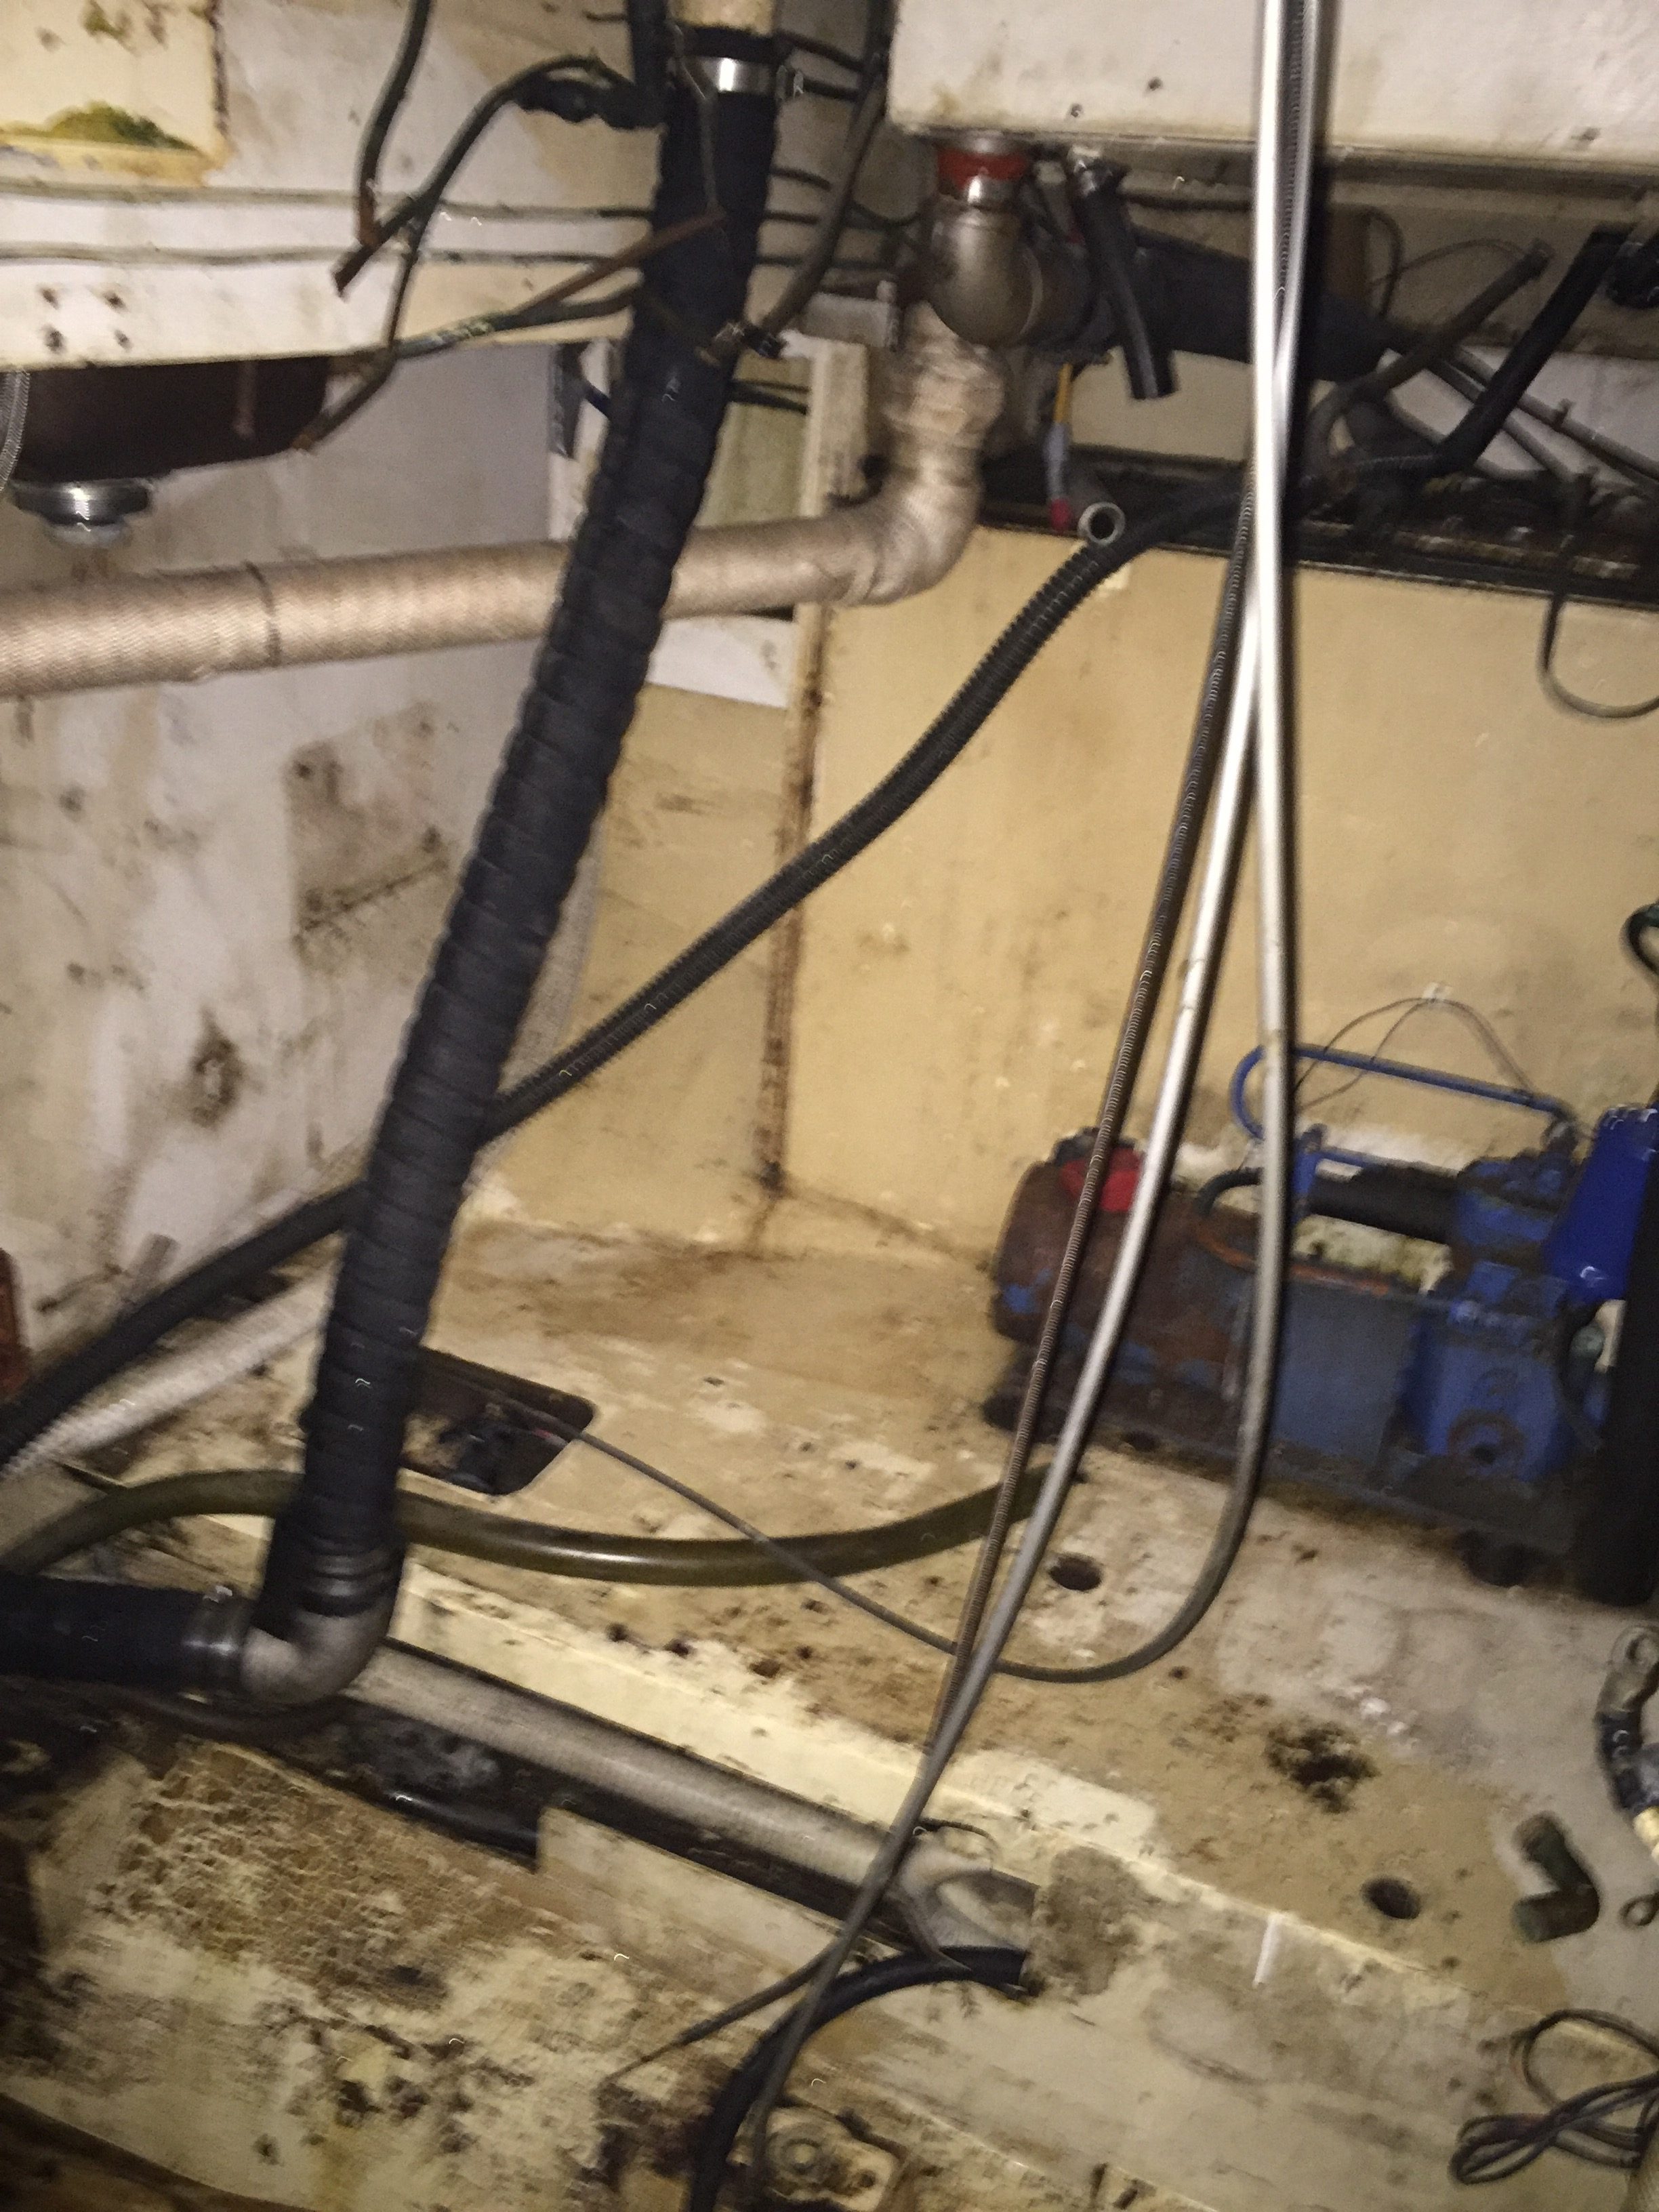
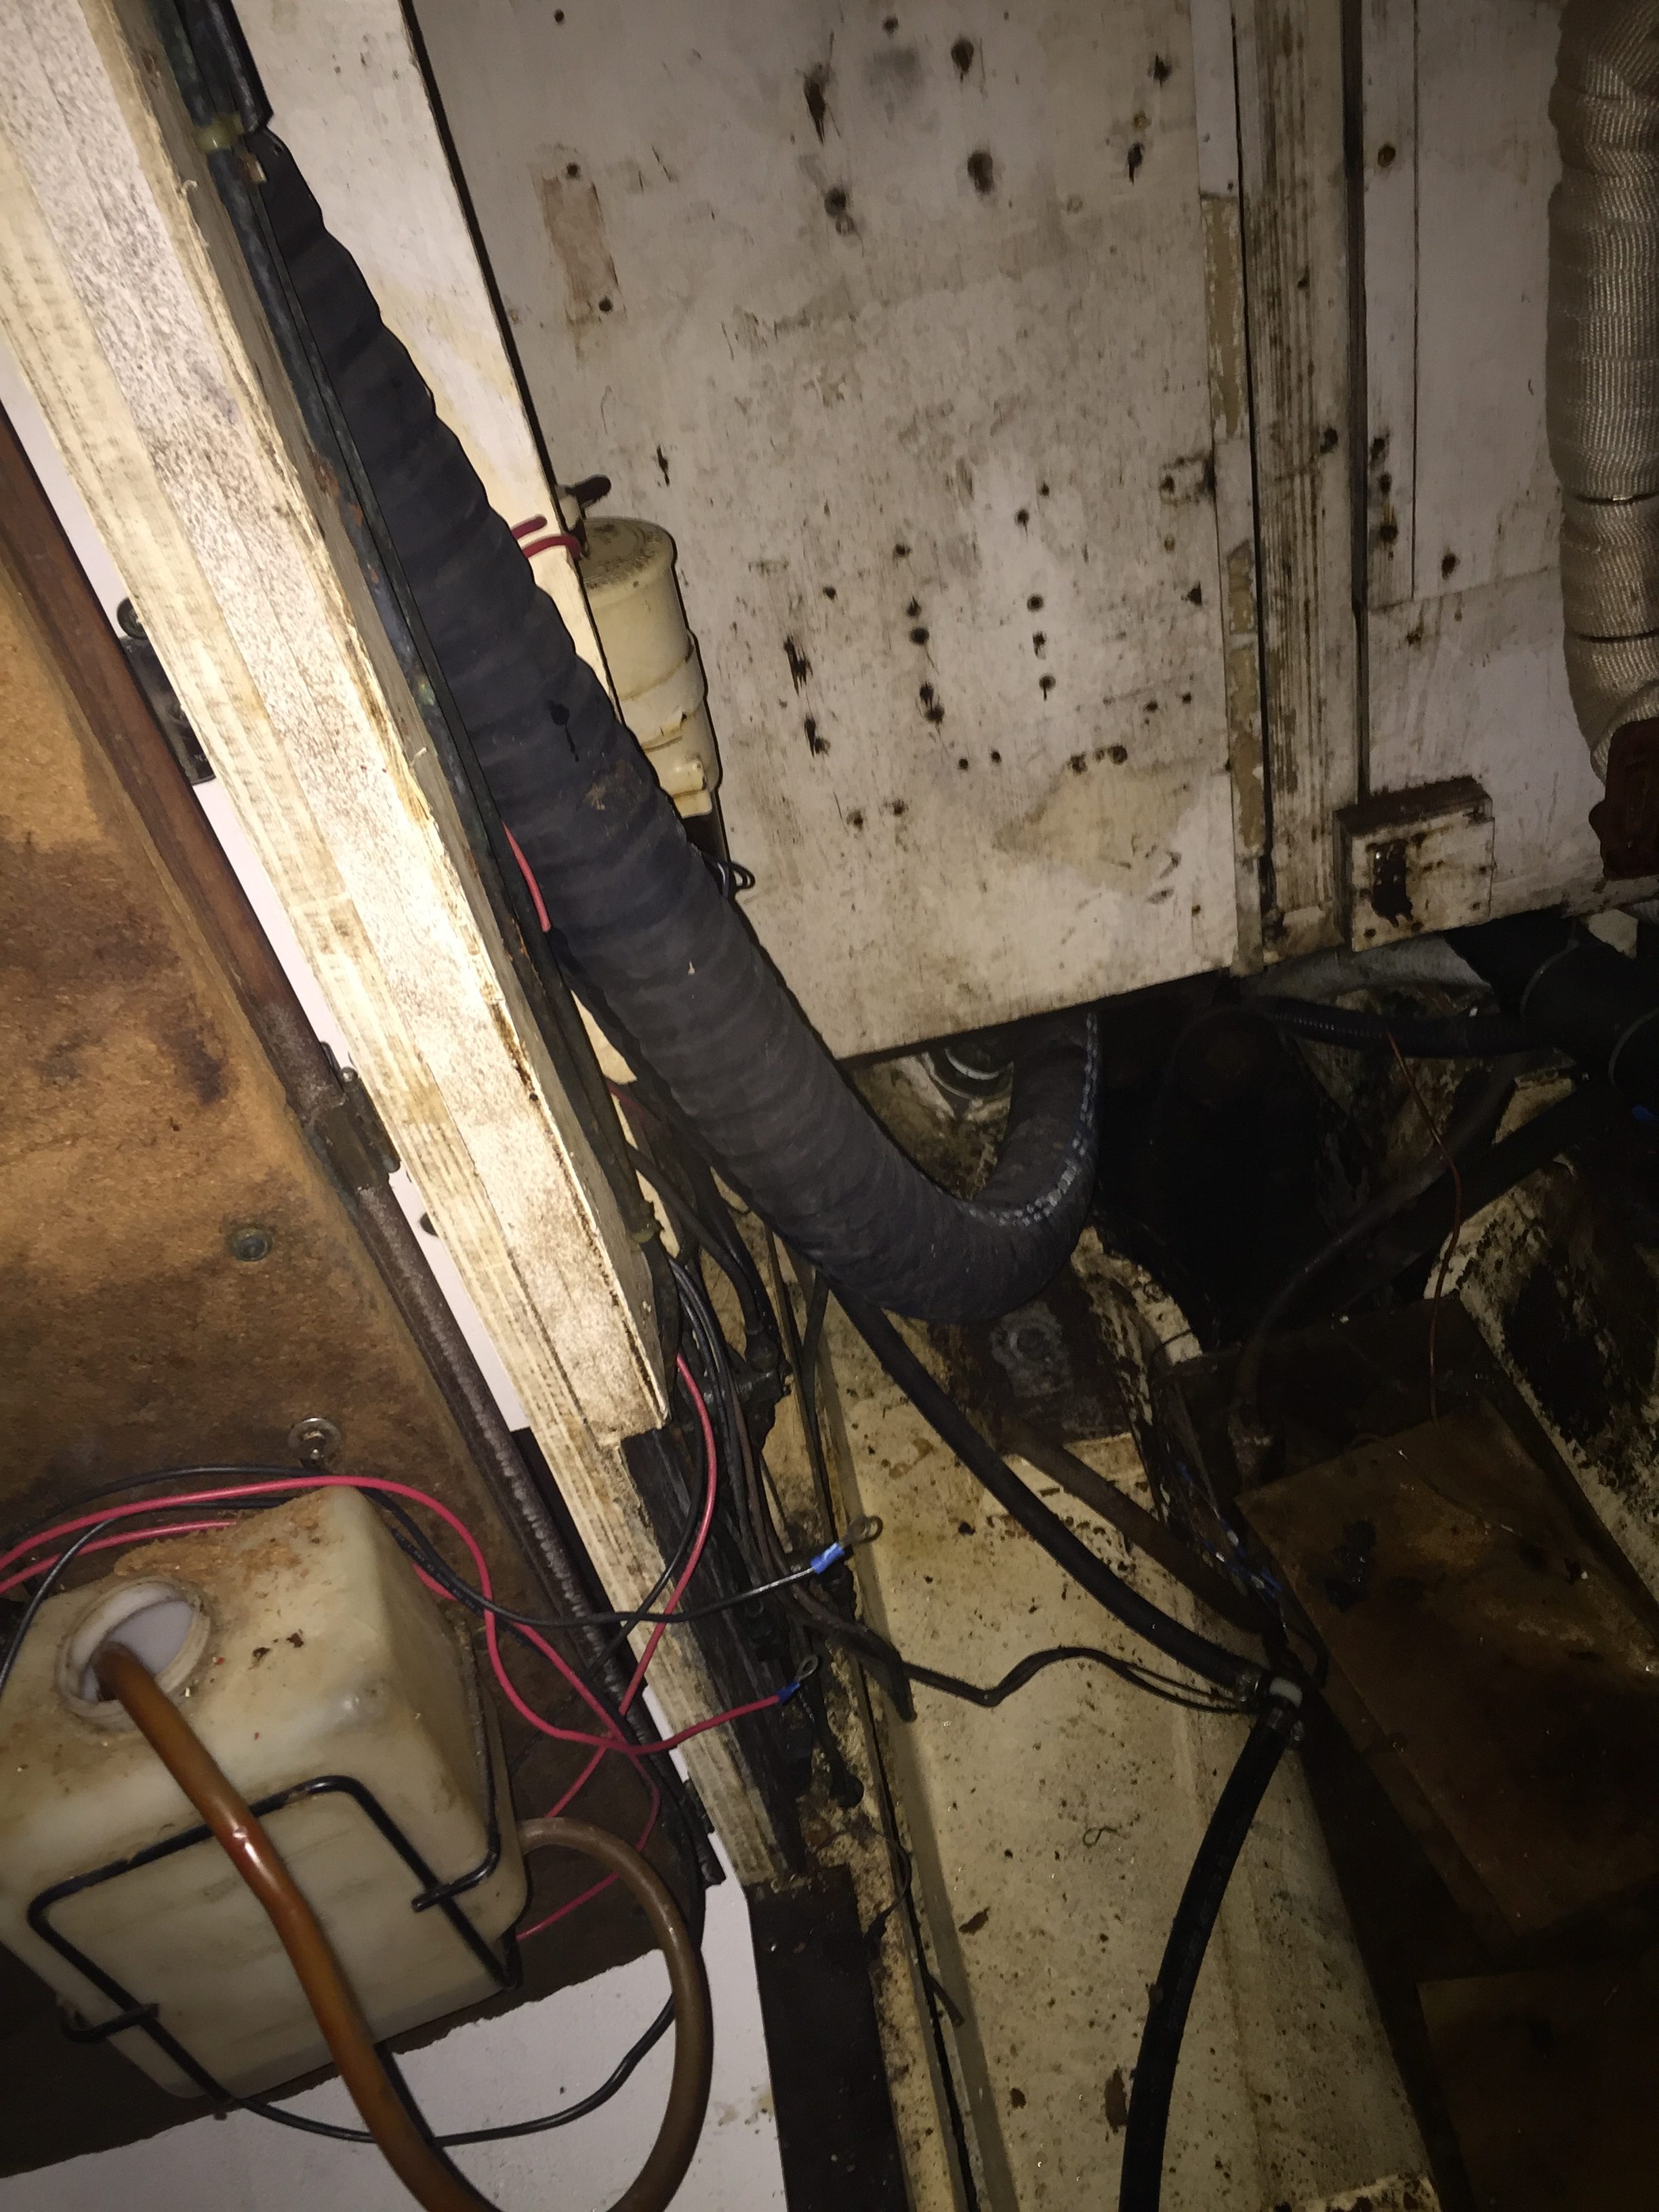
Hidden away under the galley sole, was a very nice Whale Shower sump,

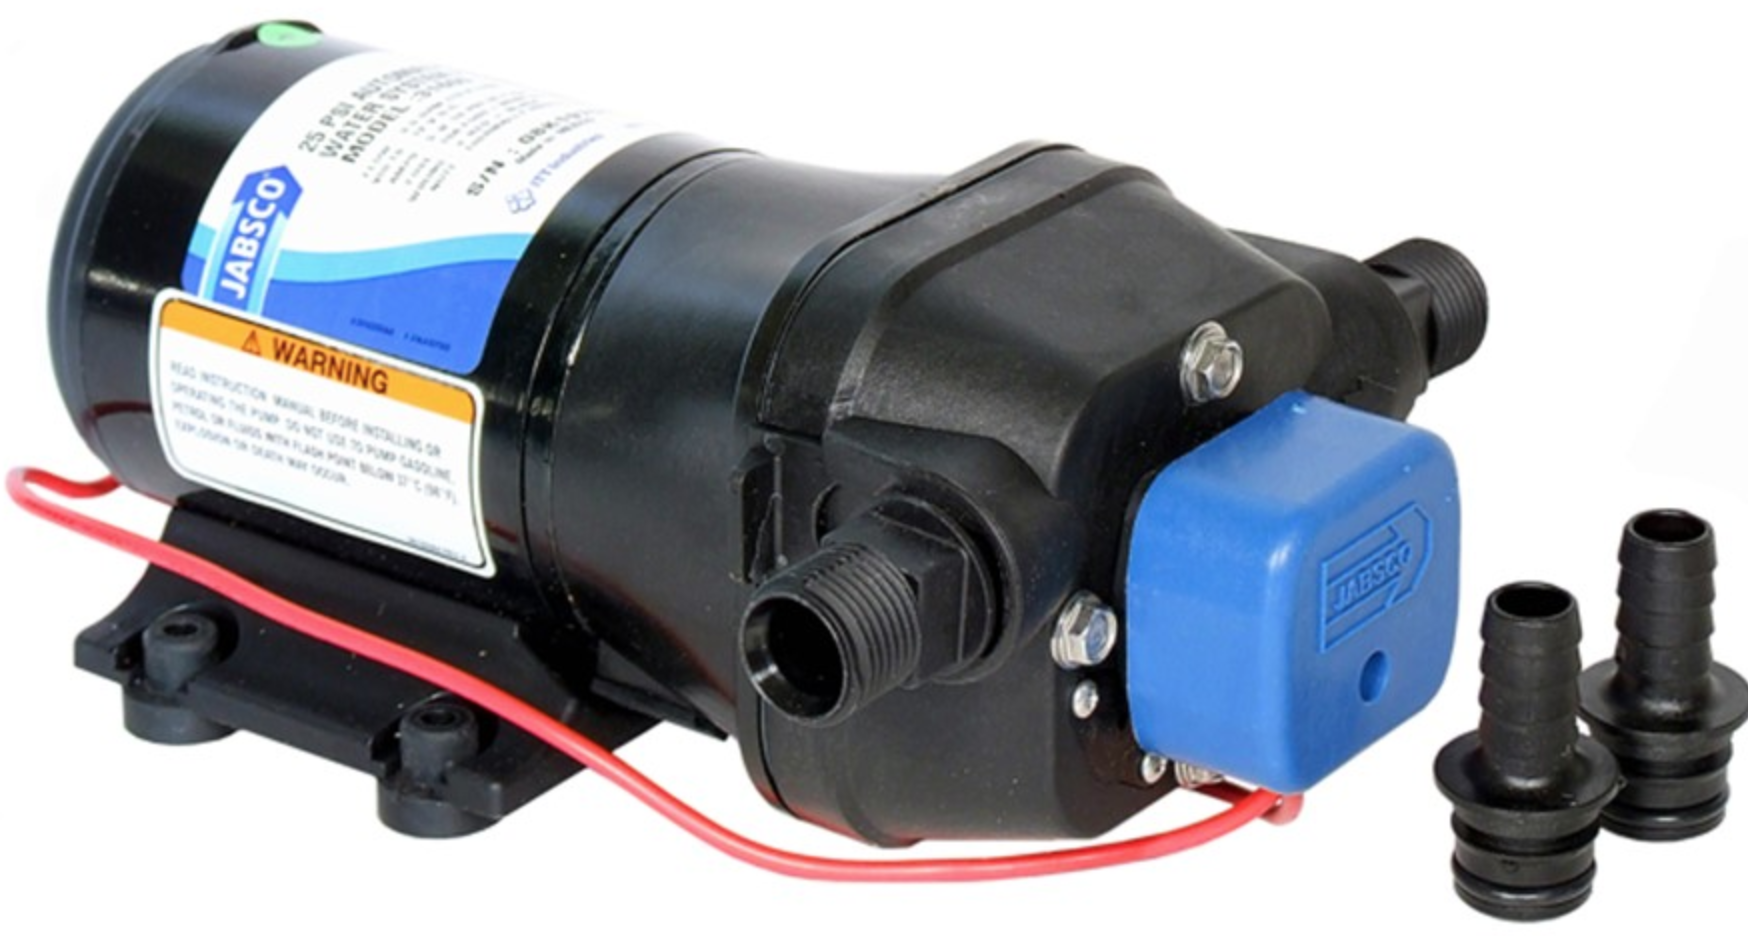
a newer Jabsco pressure water pump,
and a nice mini accumulator tank. Still LOTS of work to be done.
The list doesn’t really seem to be getting any smaller, but I did order the new electrical panel today, pretty pleased about that to be honest.

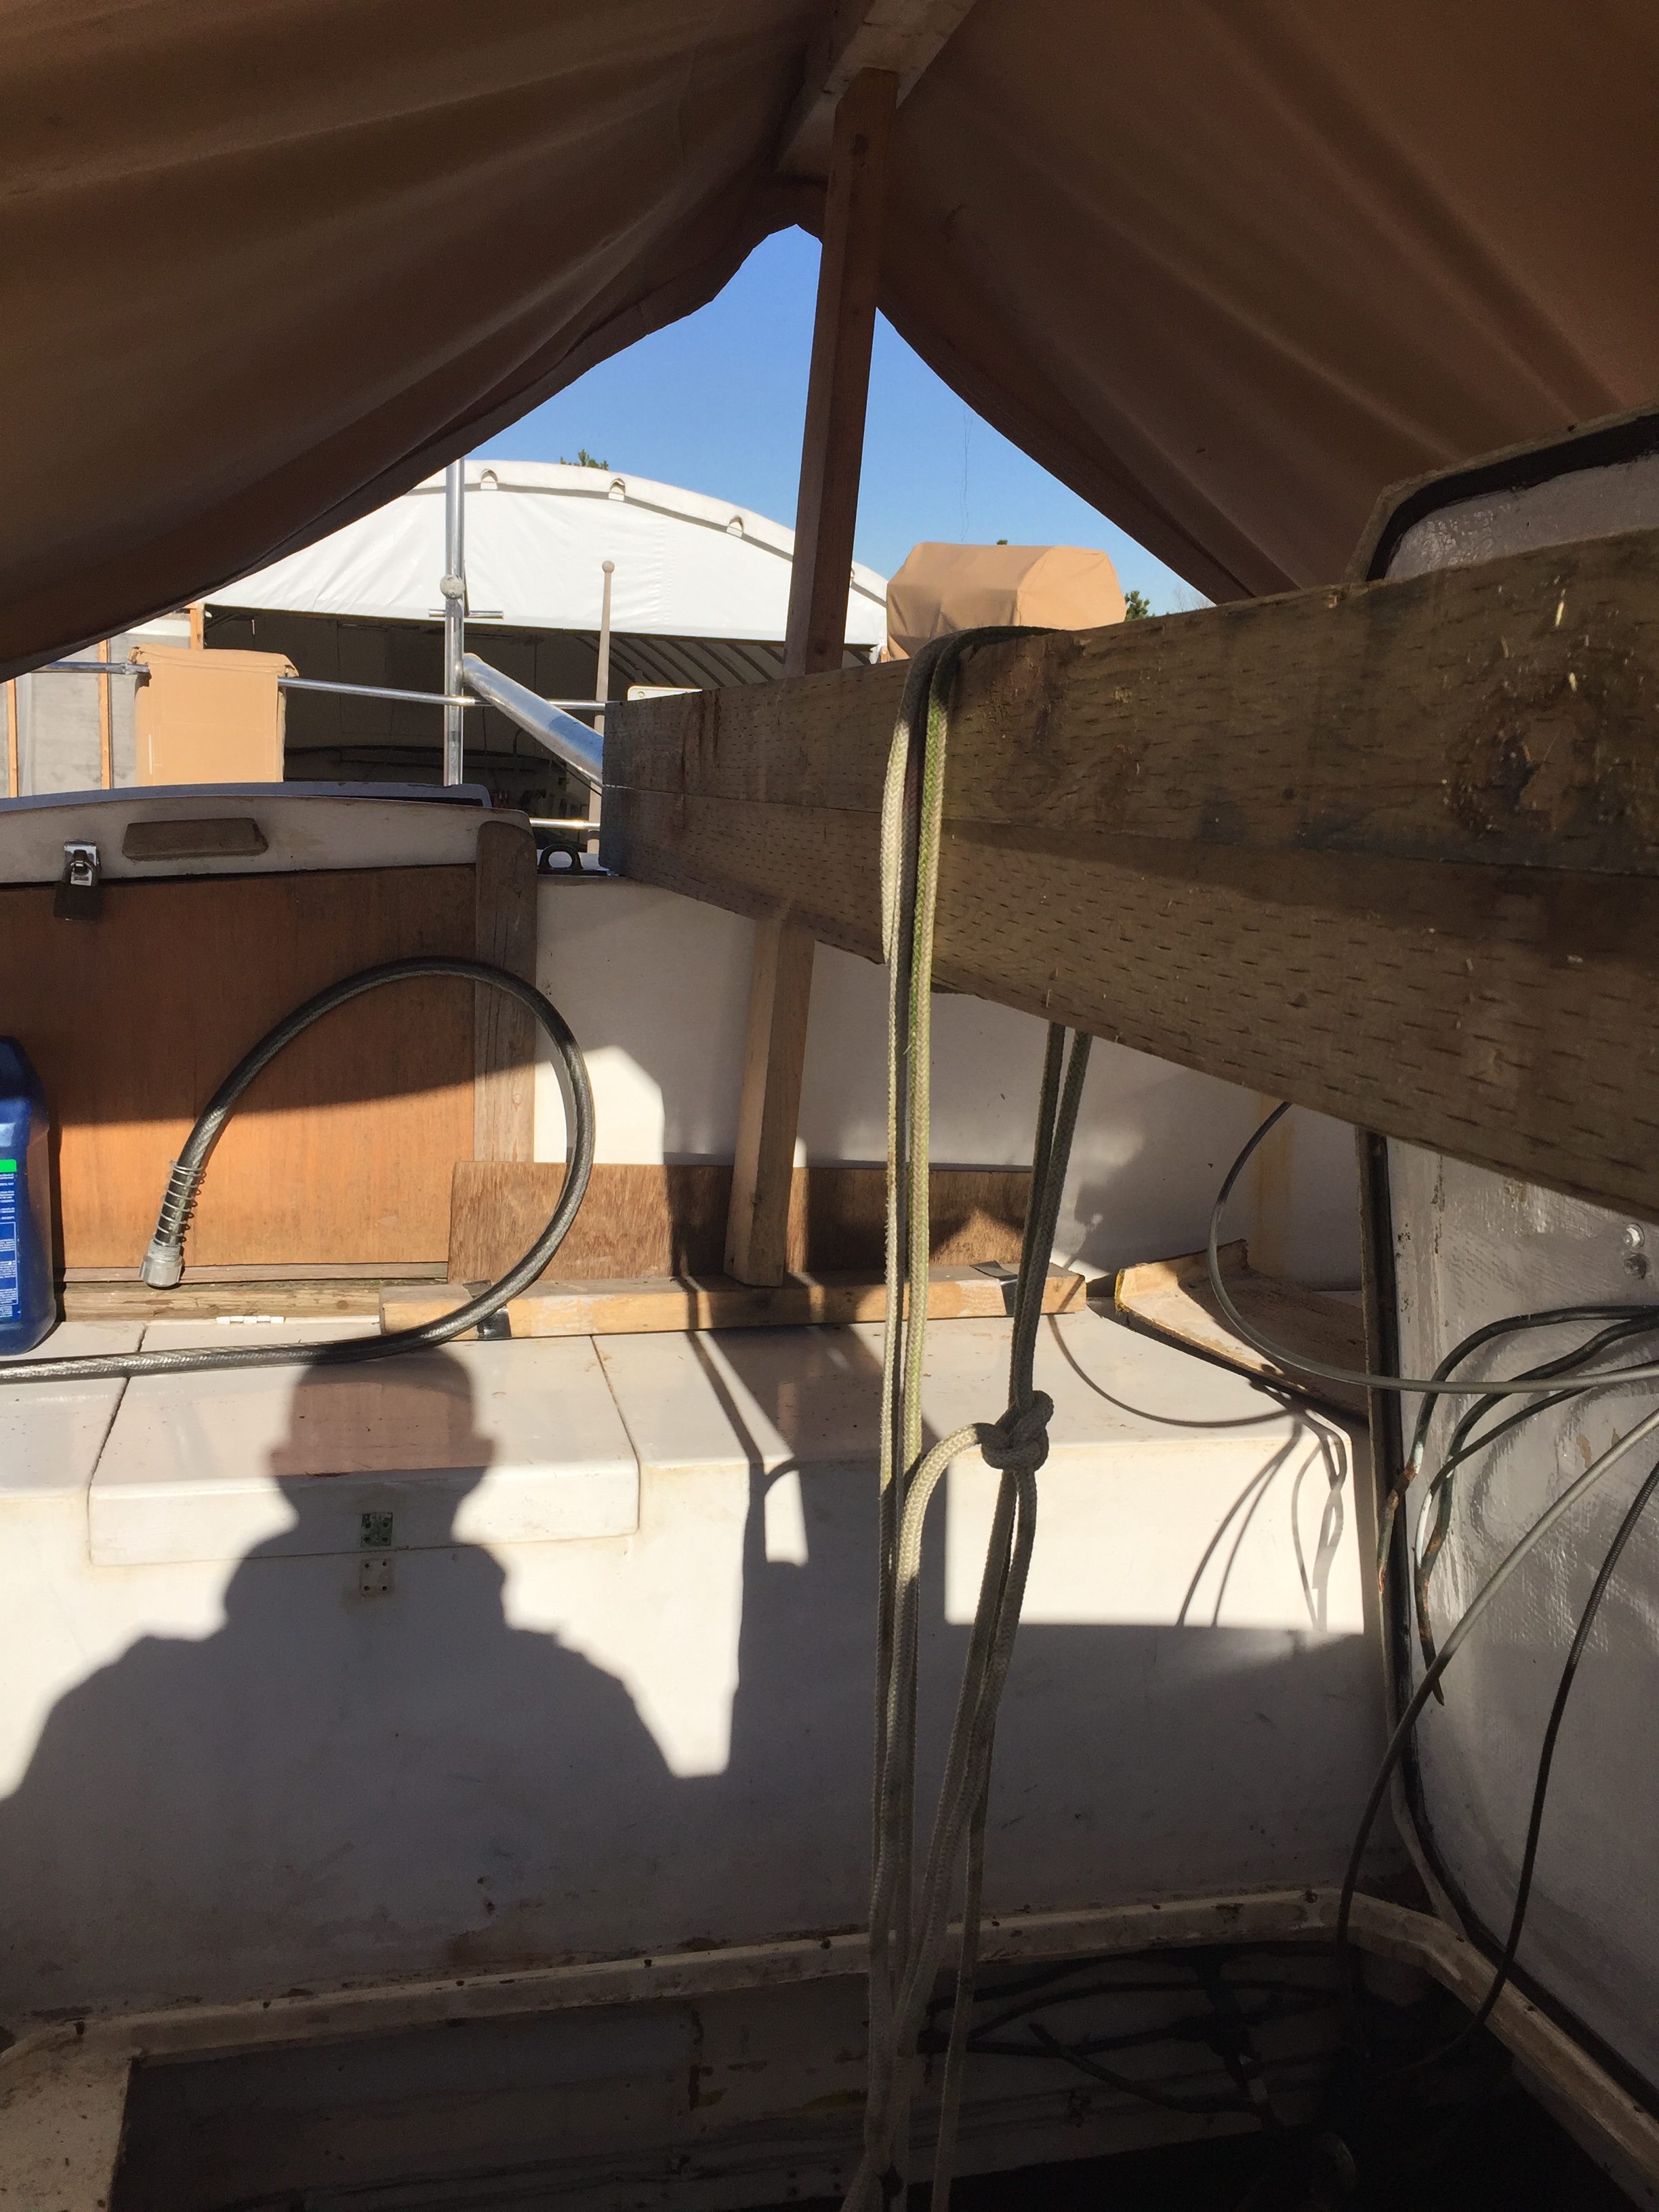
Back to Akupara tomorrow to re-bed a few deck fittings that have once again begun to leak, hopefully this will be the last time for a while.
Boat show next weekend so probably not a lot of work is going to get completed, but if we find any treasures I will be sure to post about them.
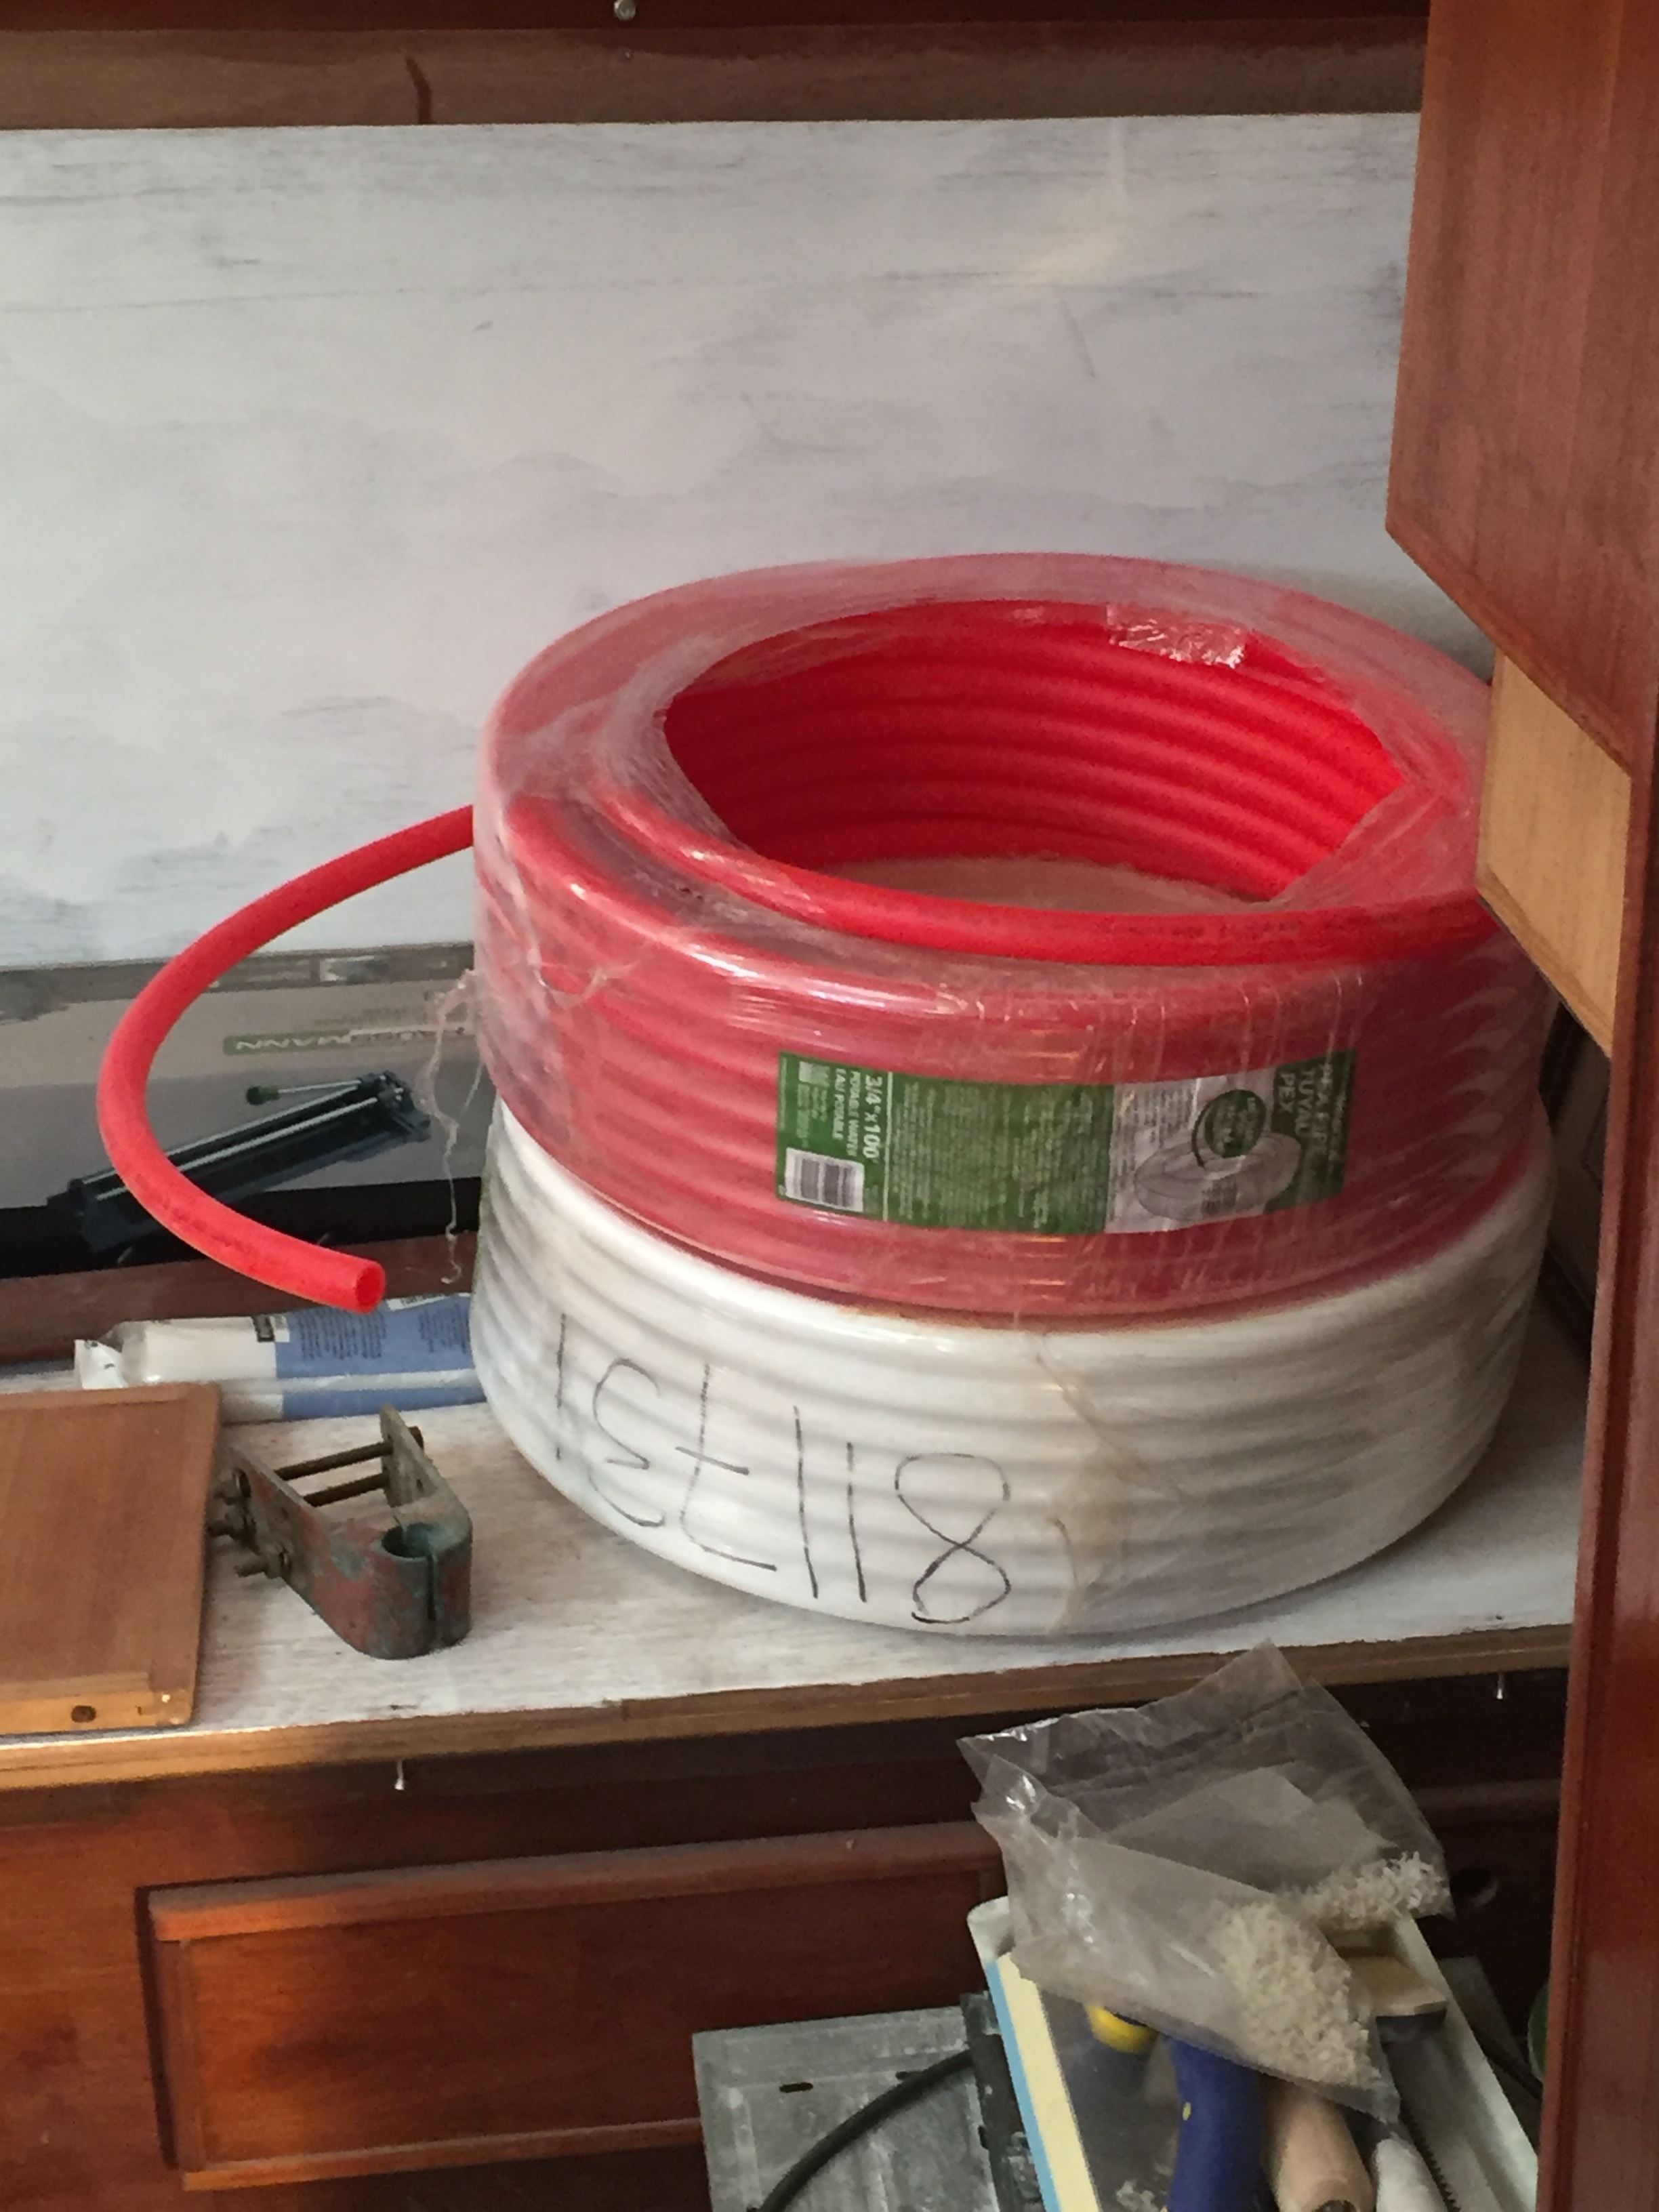 I had originally left all of the plumbing intact when we started this refit in order to be sure that I remembered where everything ran. Well that was a big waste of time. There was absolutely no point to that whatsoever. Lesson learned. The plumbing in Akupara was a mess to say the least. There were more tee’s and joins than a city water system. Managed to rip out the majority of it yesterday and began running the new Pex tubing. Because I bought the rolls of Pex as opposed to straight Pex tubing, it took a little longer than expected as I had to straighten and fight with it a bit but it is all in place now not including the aft head.
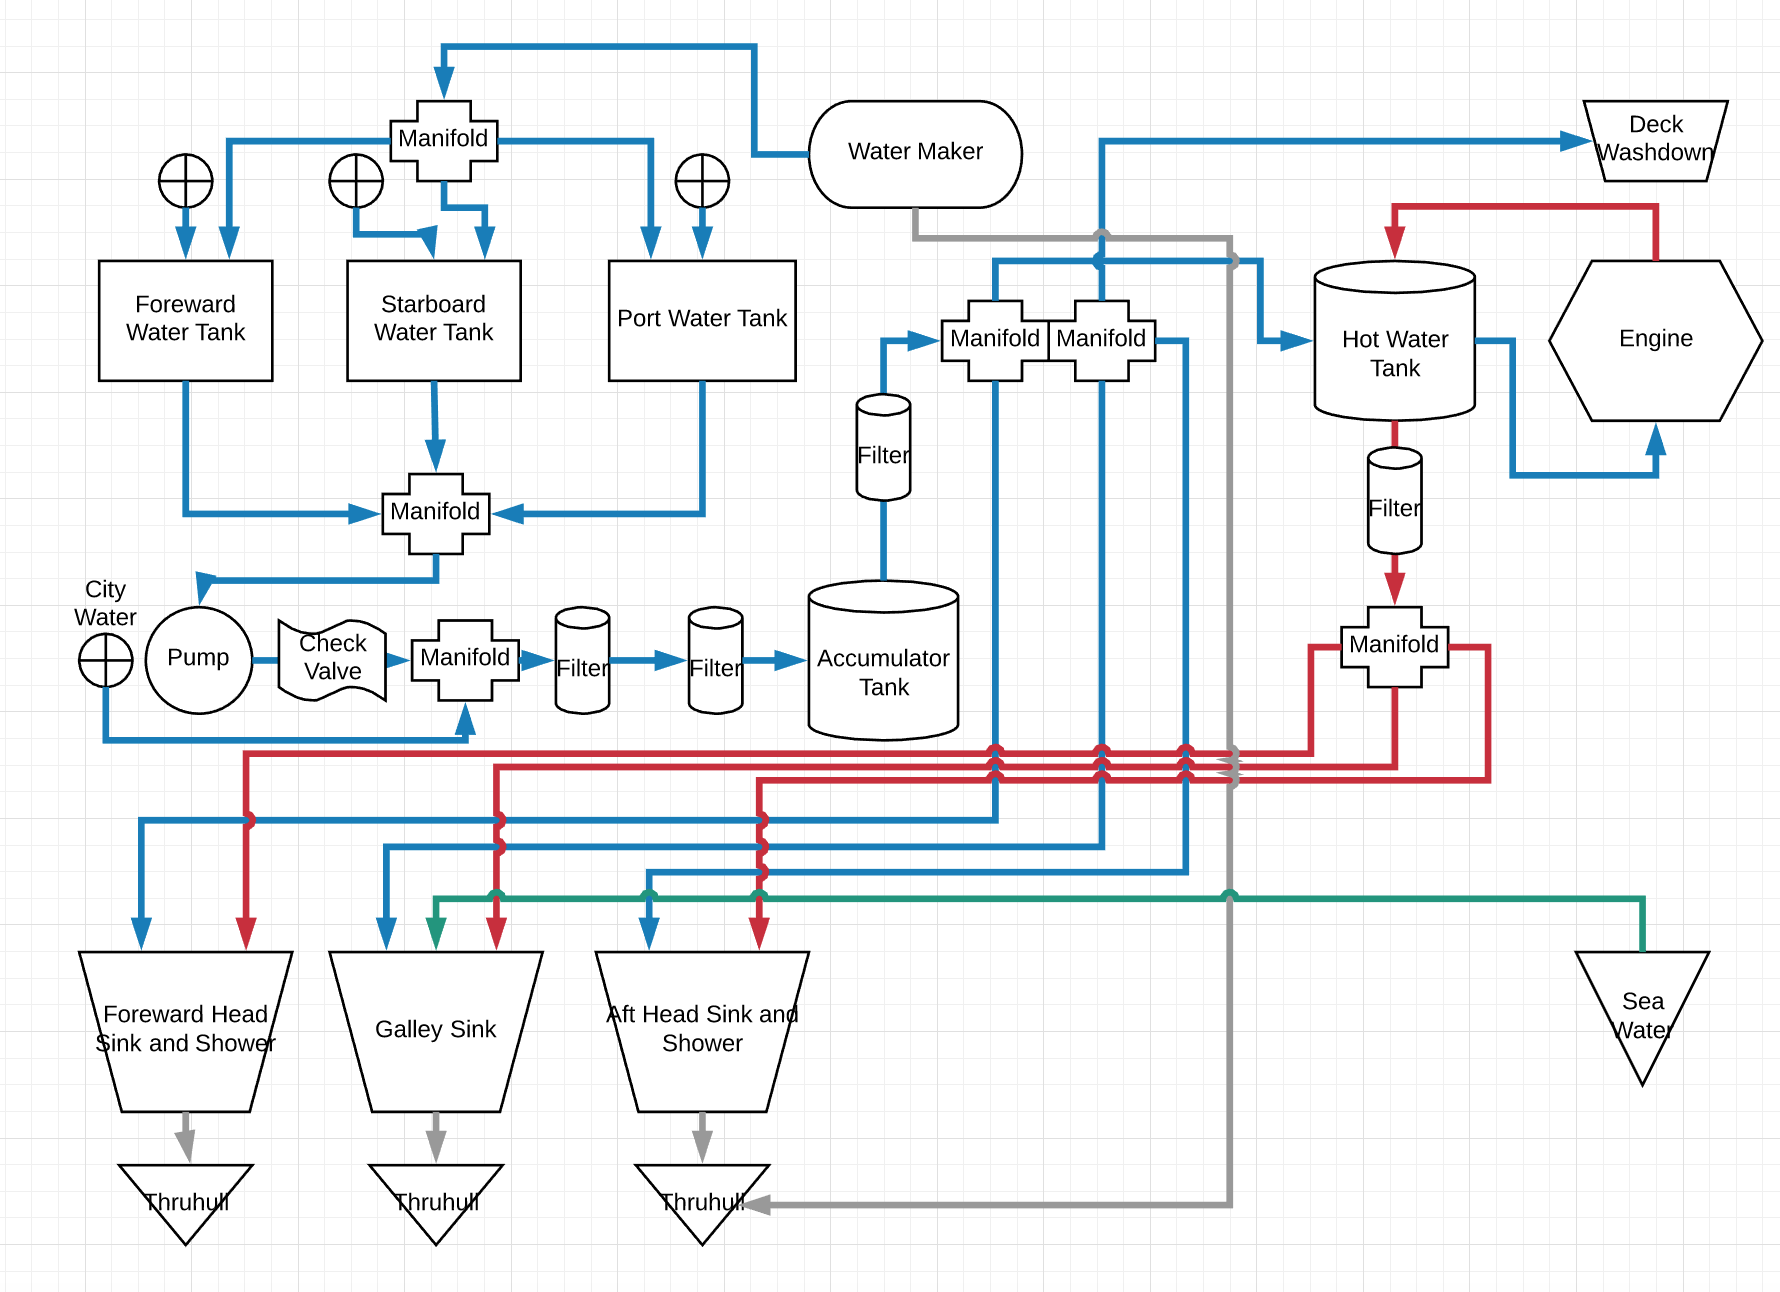
I think I have decided to locate the manifolds and pump underneath the galley as there is a fair amount of empty space there to work with.
Also managed to finish up some electrical work yesterday which is nice.
Engine is still in – damnit – I wish they would hurry up and get it out or perhaps I will start taking it out myself piece by piece.
The boat show is coming up fast, another 10 days, I wonder if the Admiral knows how much this show is going to cost us??? 😉
Also spent some time this morning planning out the new system.


 Almost impossible to add stories for everything that we have worked on for the last 4 months, so I will instead let the pictures tell the story!
A high level overview is, we had a very bad winter for Vancouver, we installed a Cubic Mini Woodstove, we purchased a Sailrite sewing machine and we continued work in the galley. That and 1000 other things!


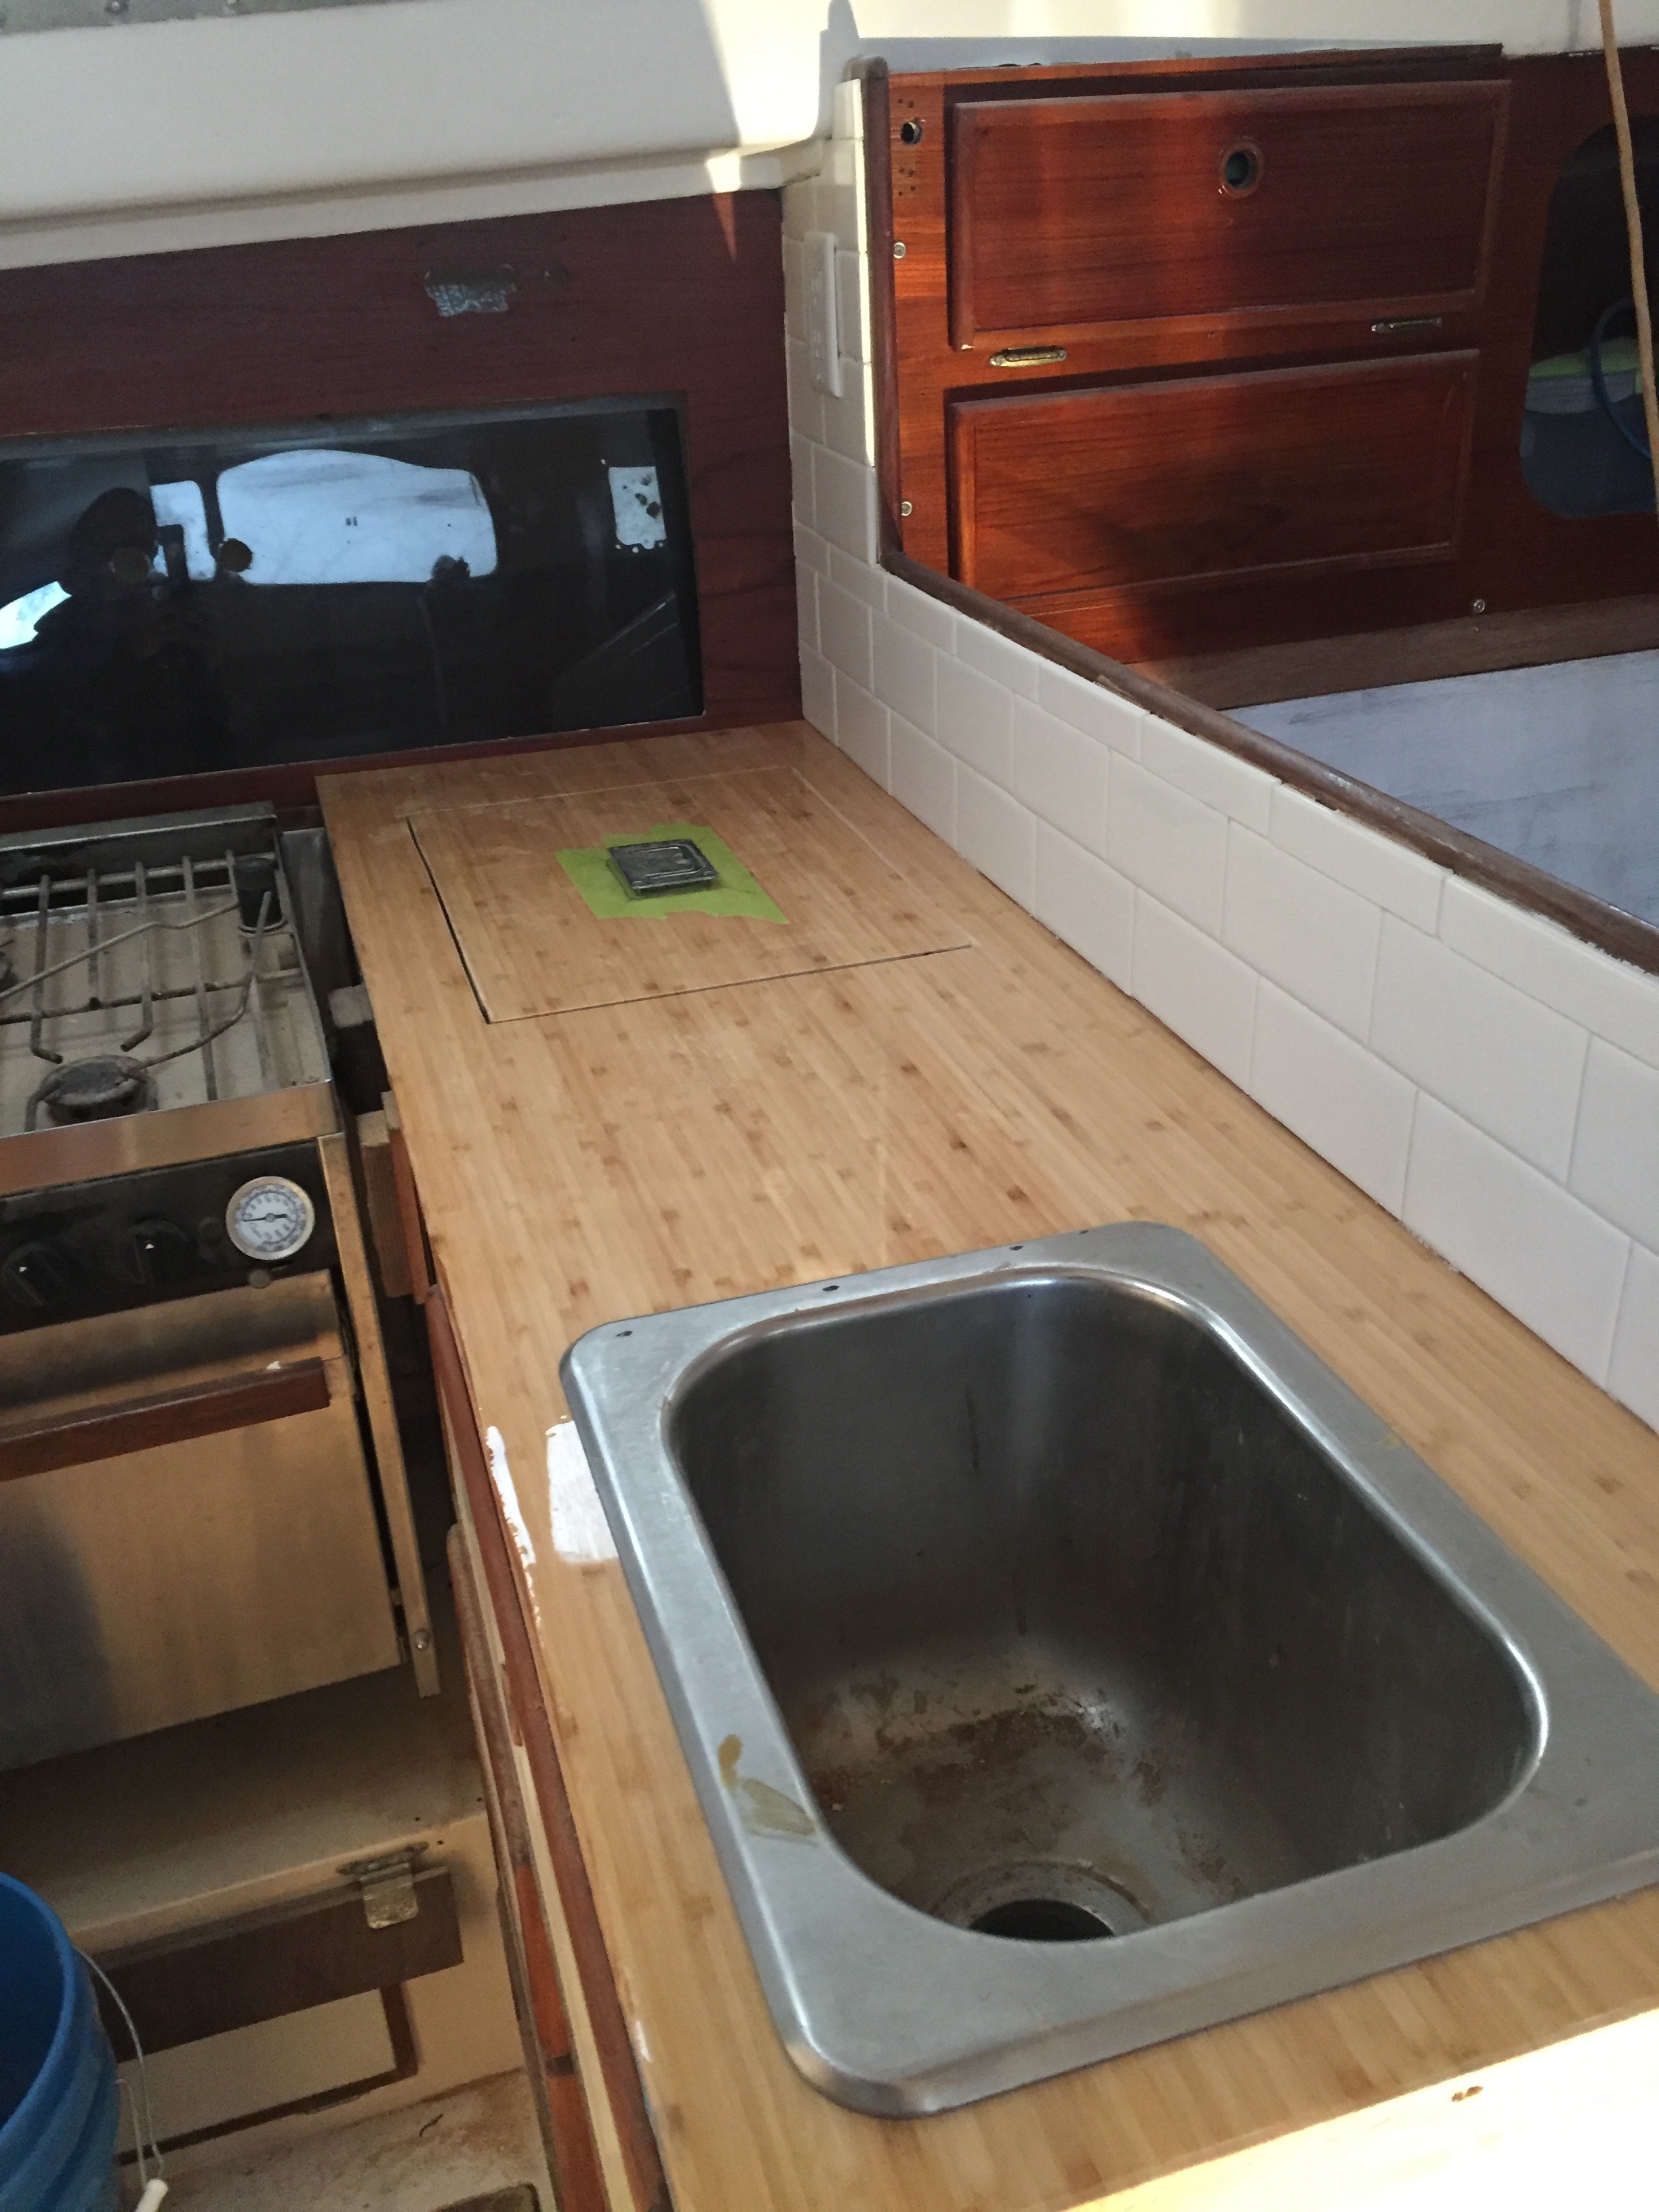
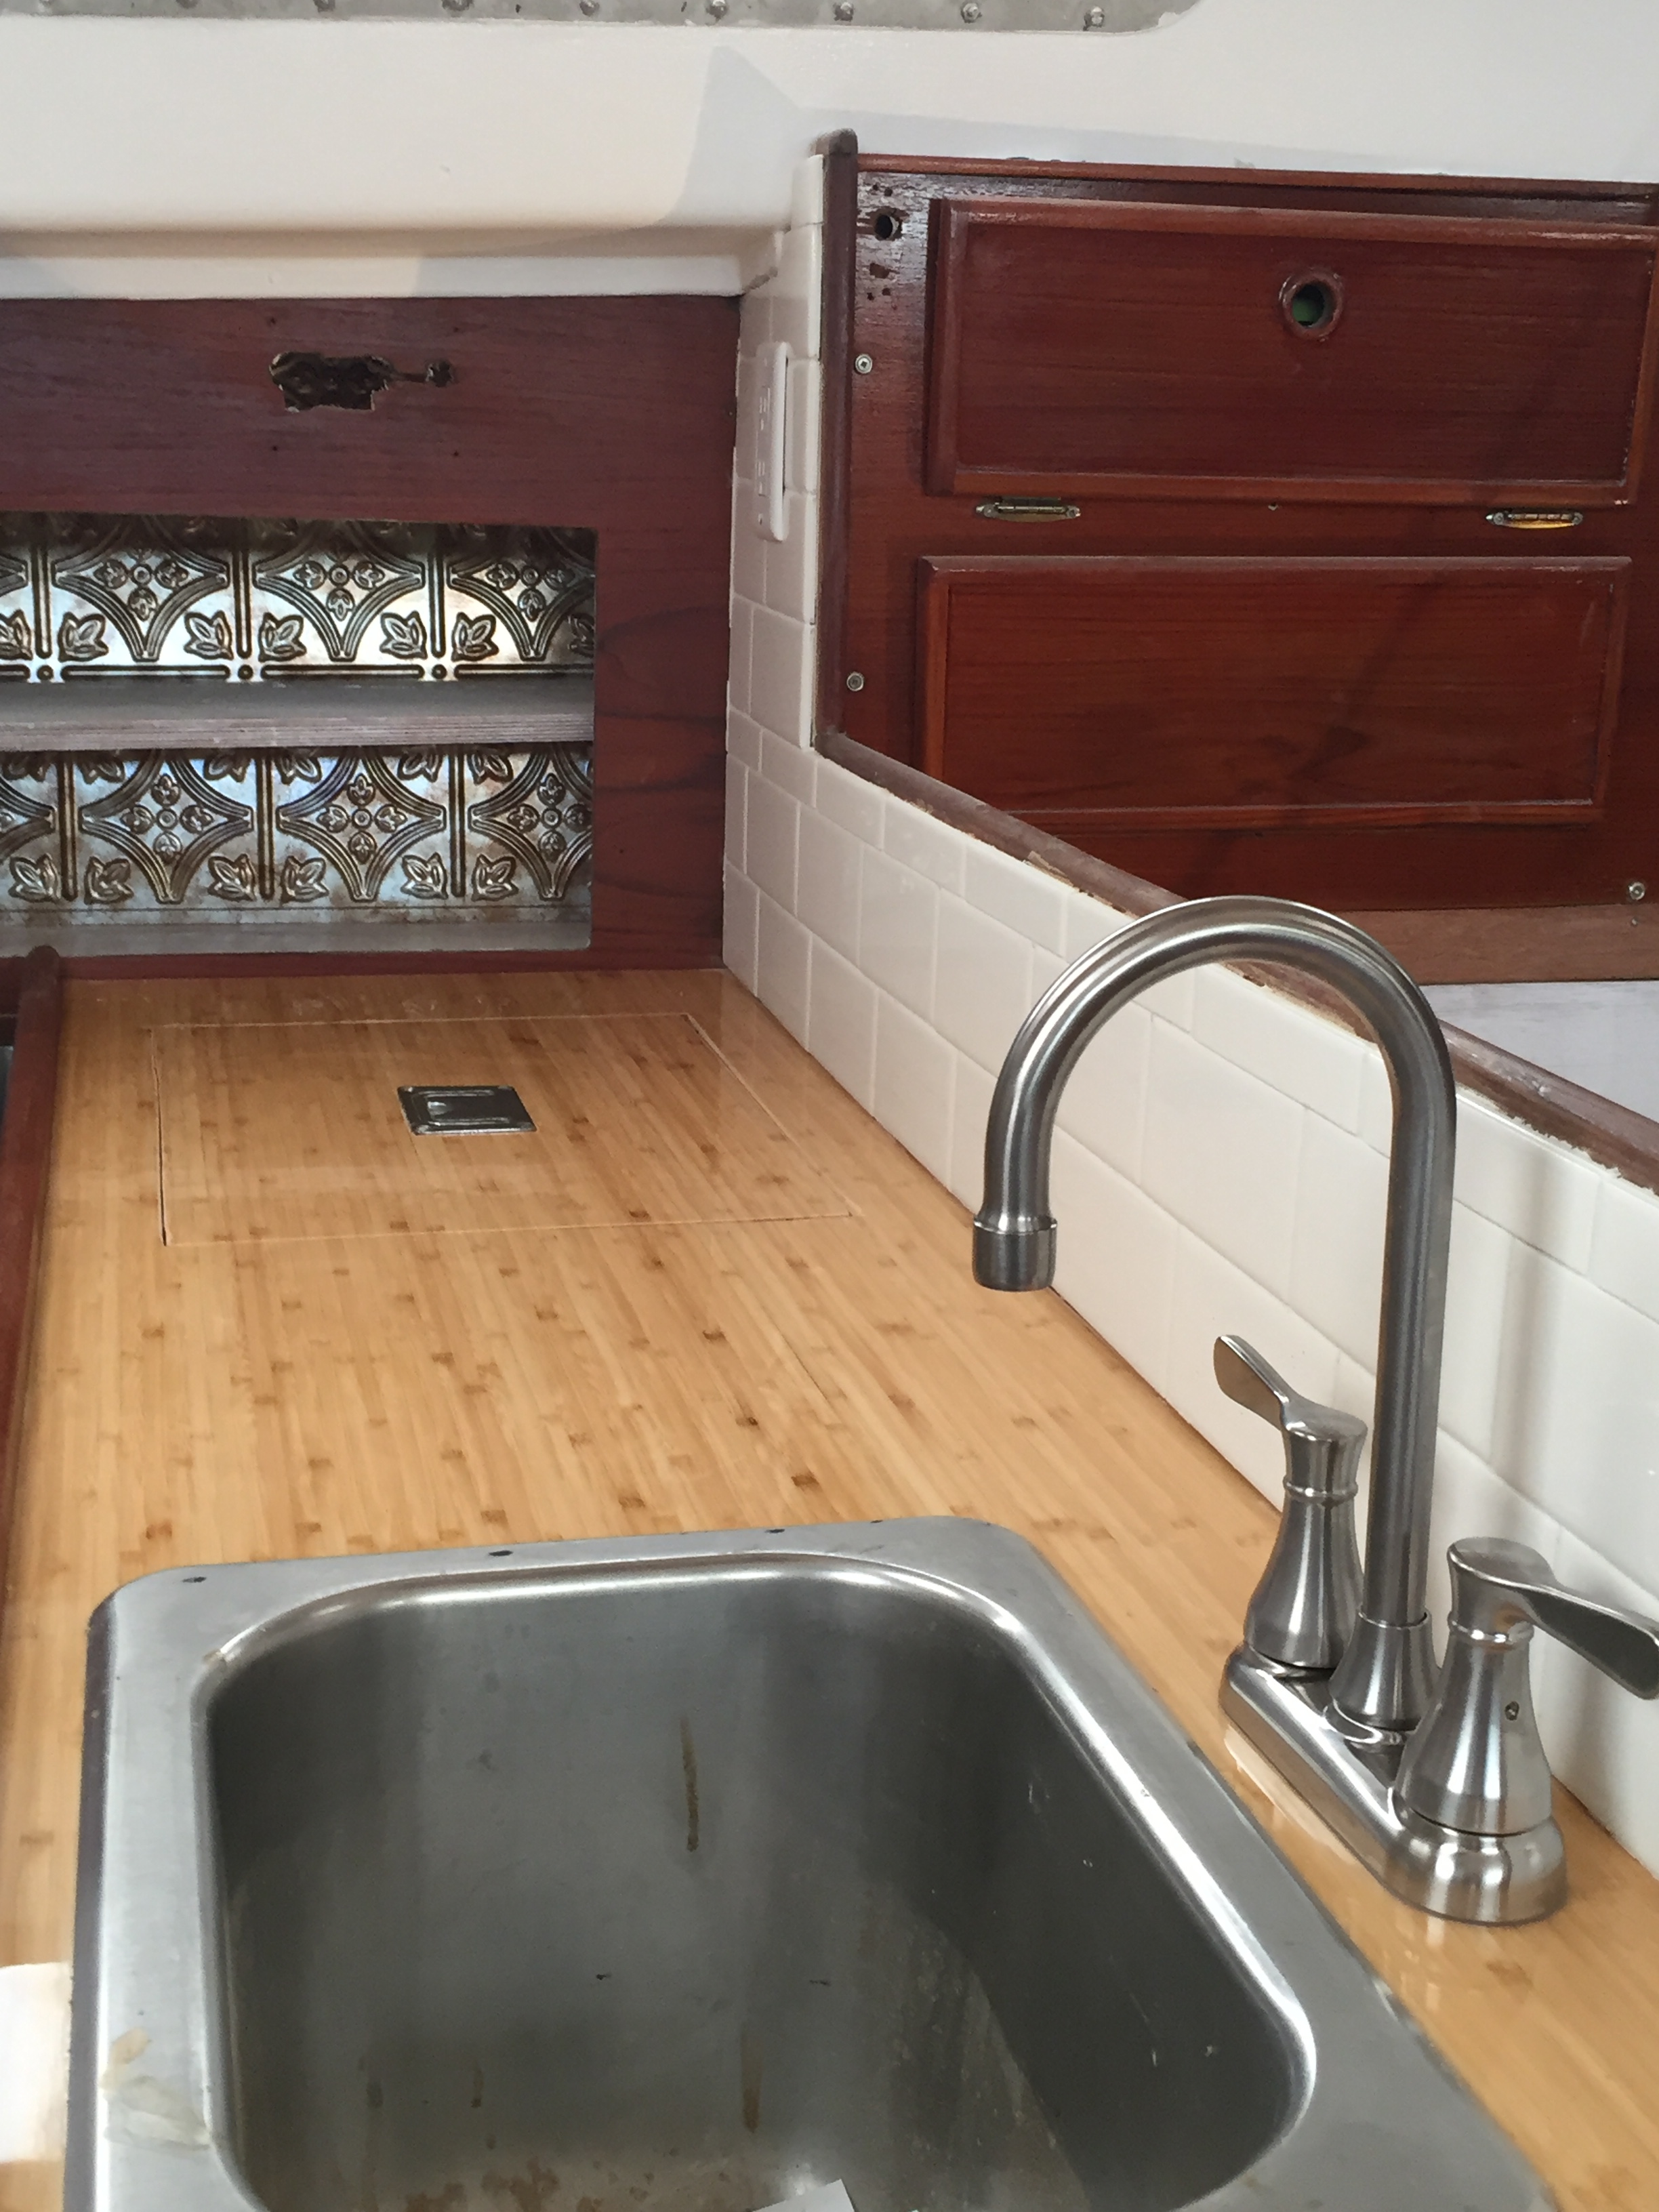

Holy crap there is a lot of work in renovating a kitchen! Now I understand why kitchen reno’s are so expensive! The galley on Akupara is gigantic compareds to a lot of boats, but miniscule as compared to a home kitchen, and yet the amount of work feels the same!
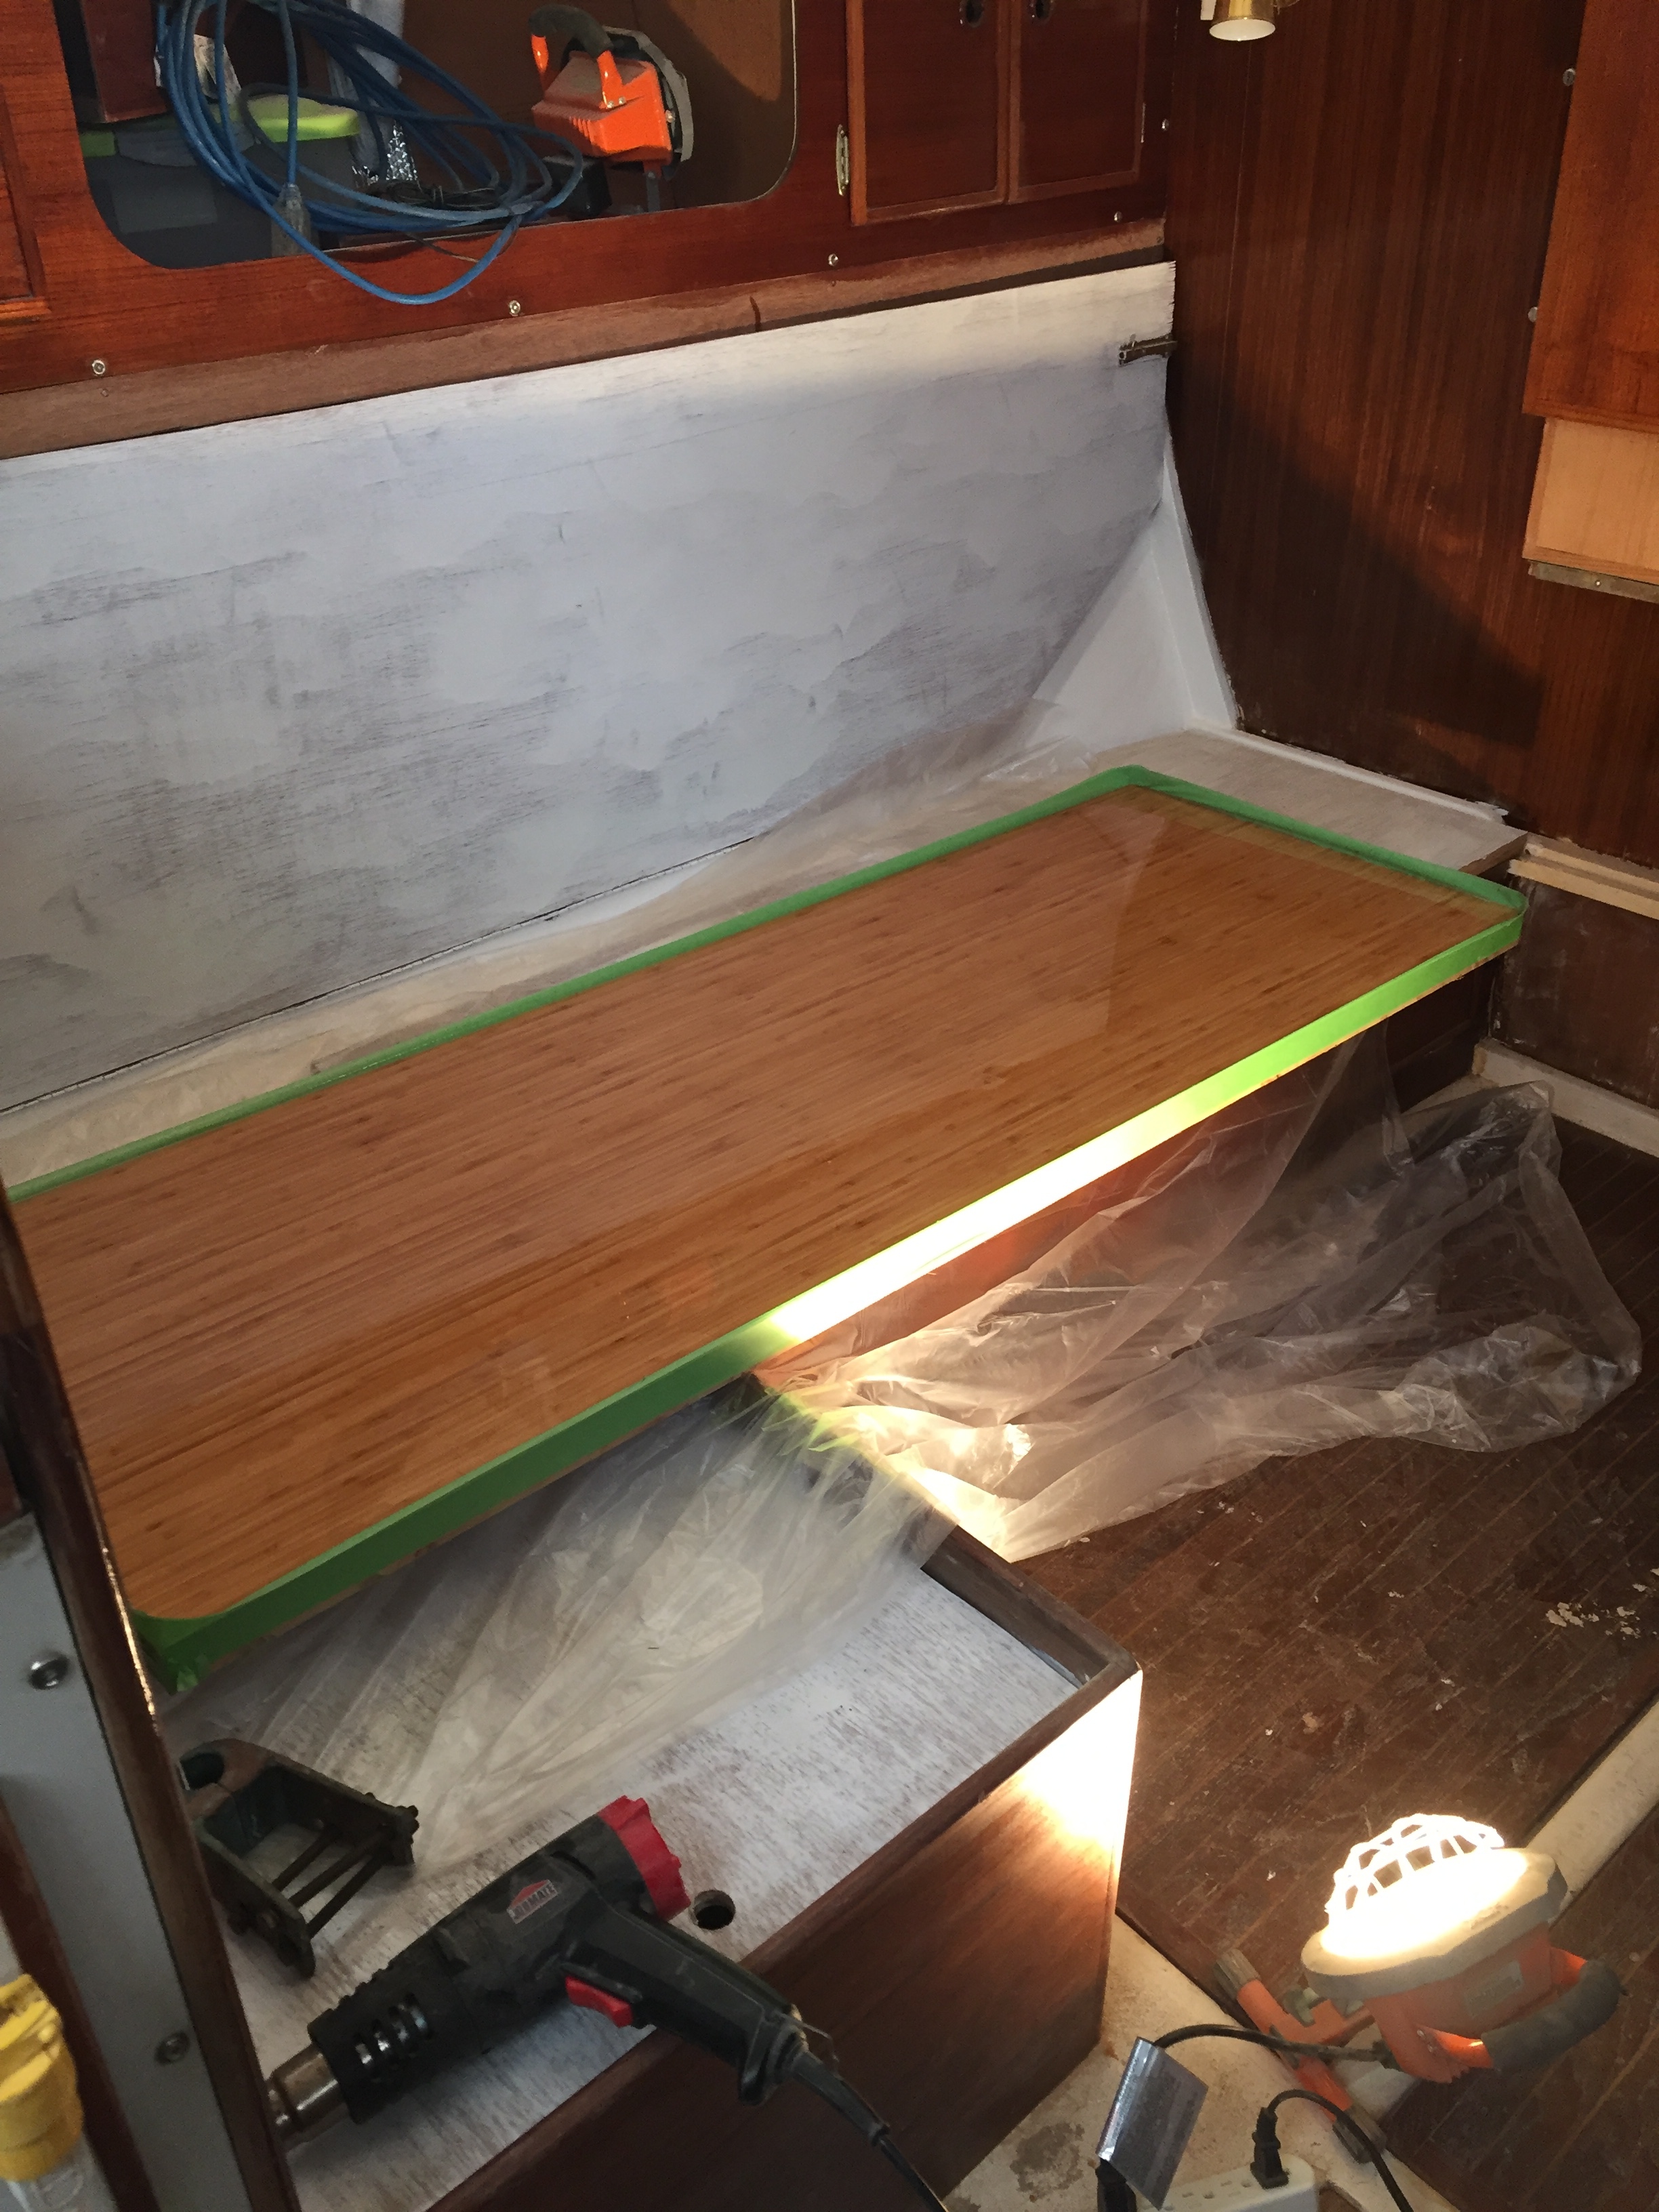
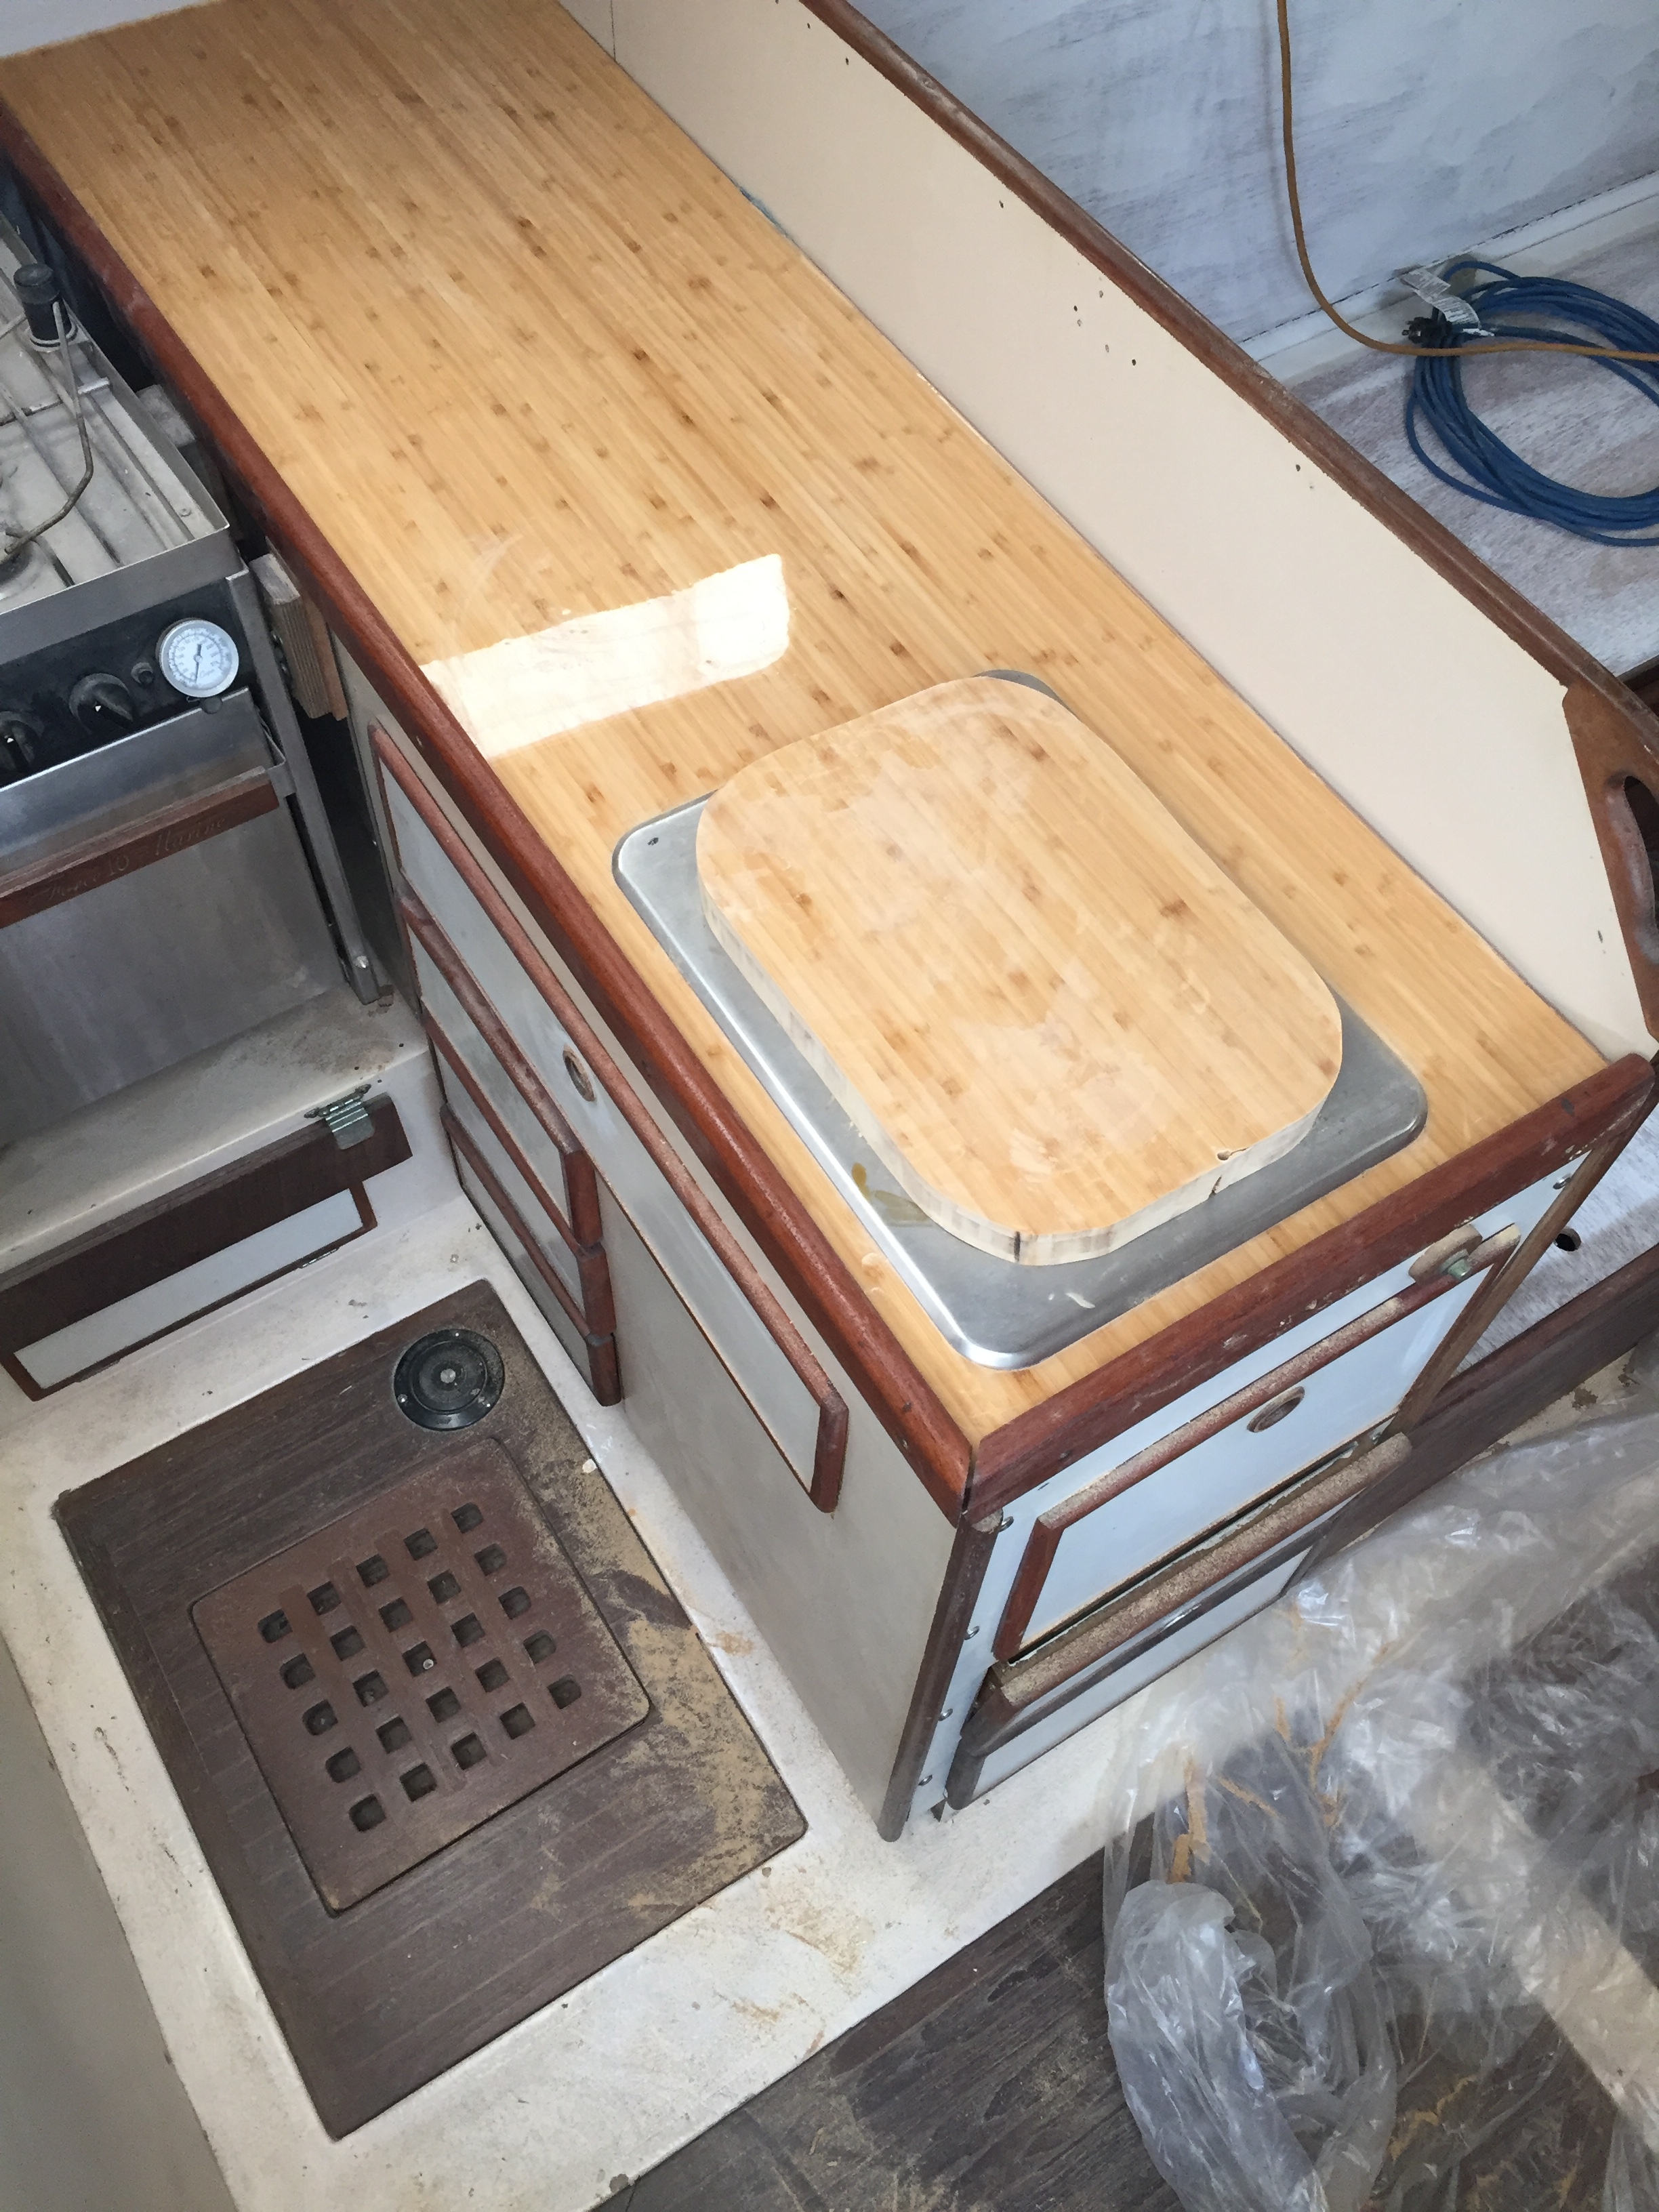
So far I have placed and removed the 2 countertops at least 10 times, I have placed and removed the cupboard panel at least 10 times. I have gutted the shelf, built a new one, sanded, ground, painted and epoxied, and we are still not complete!
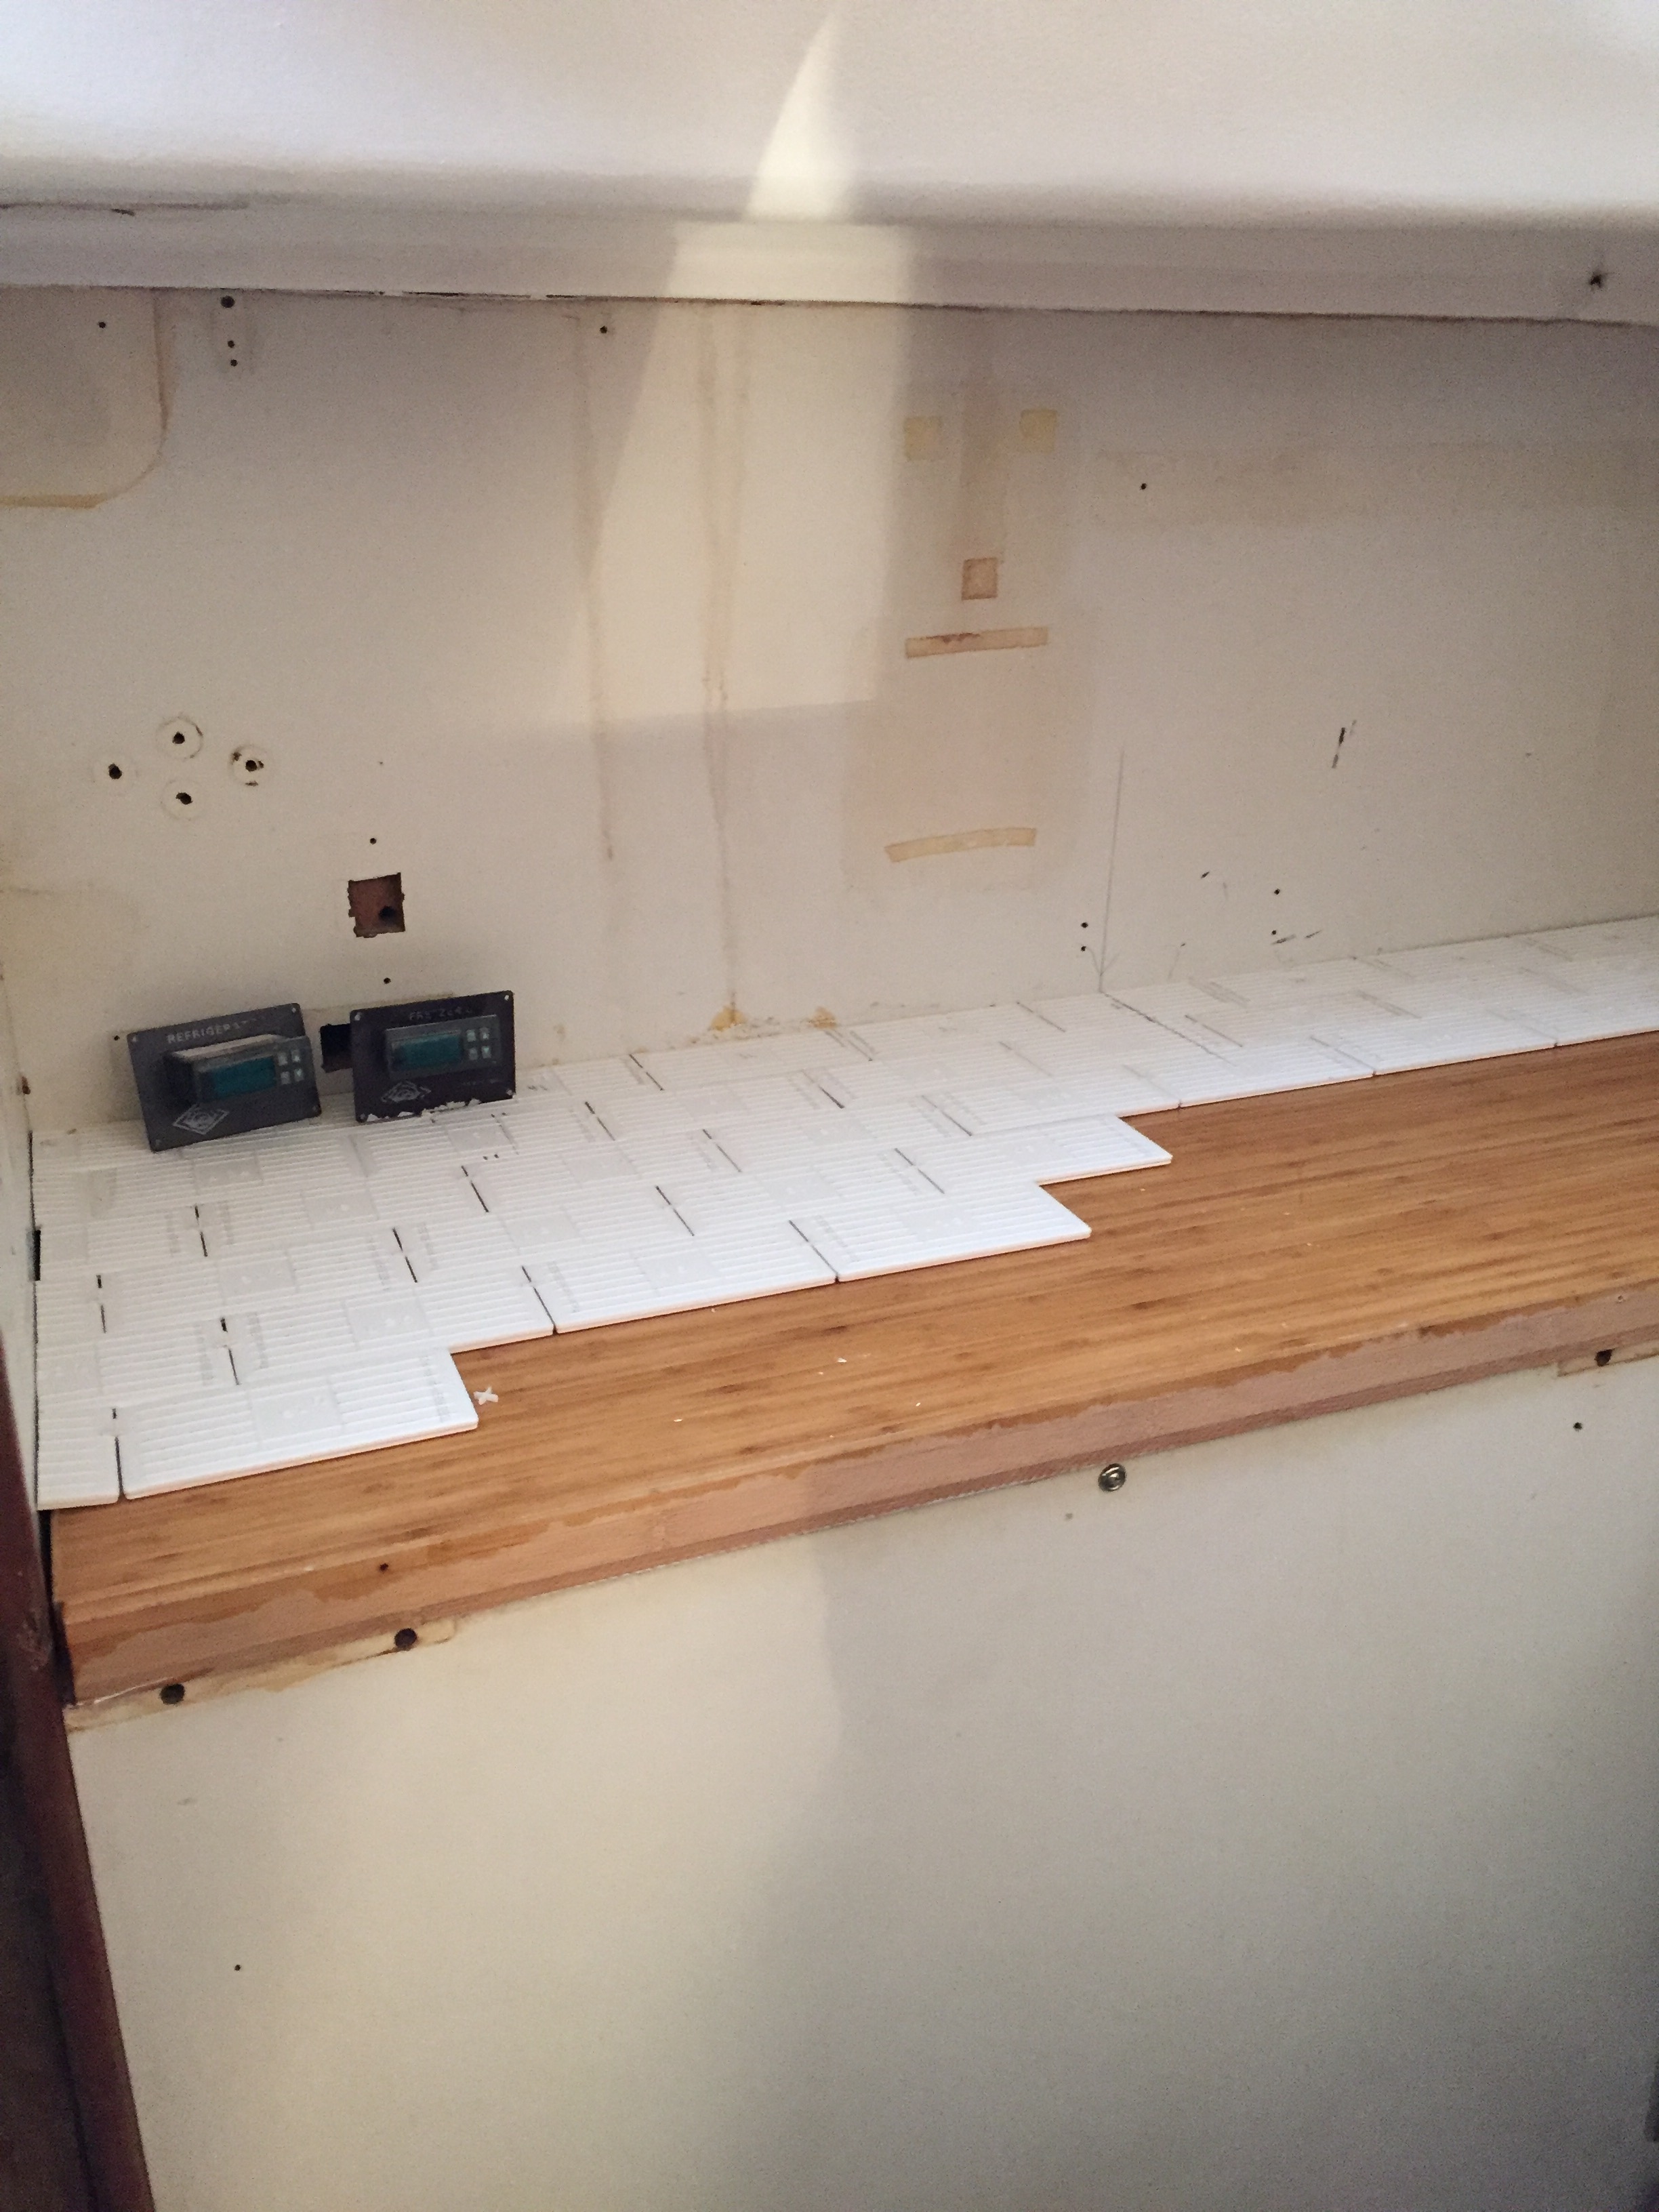
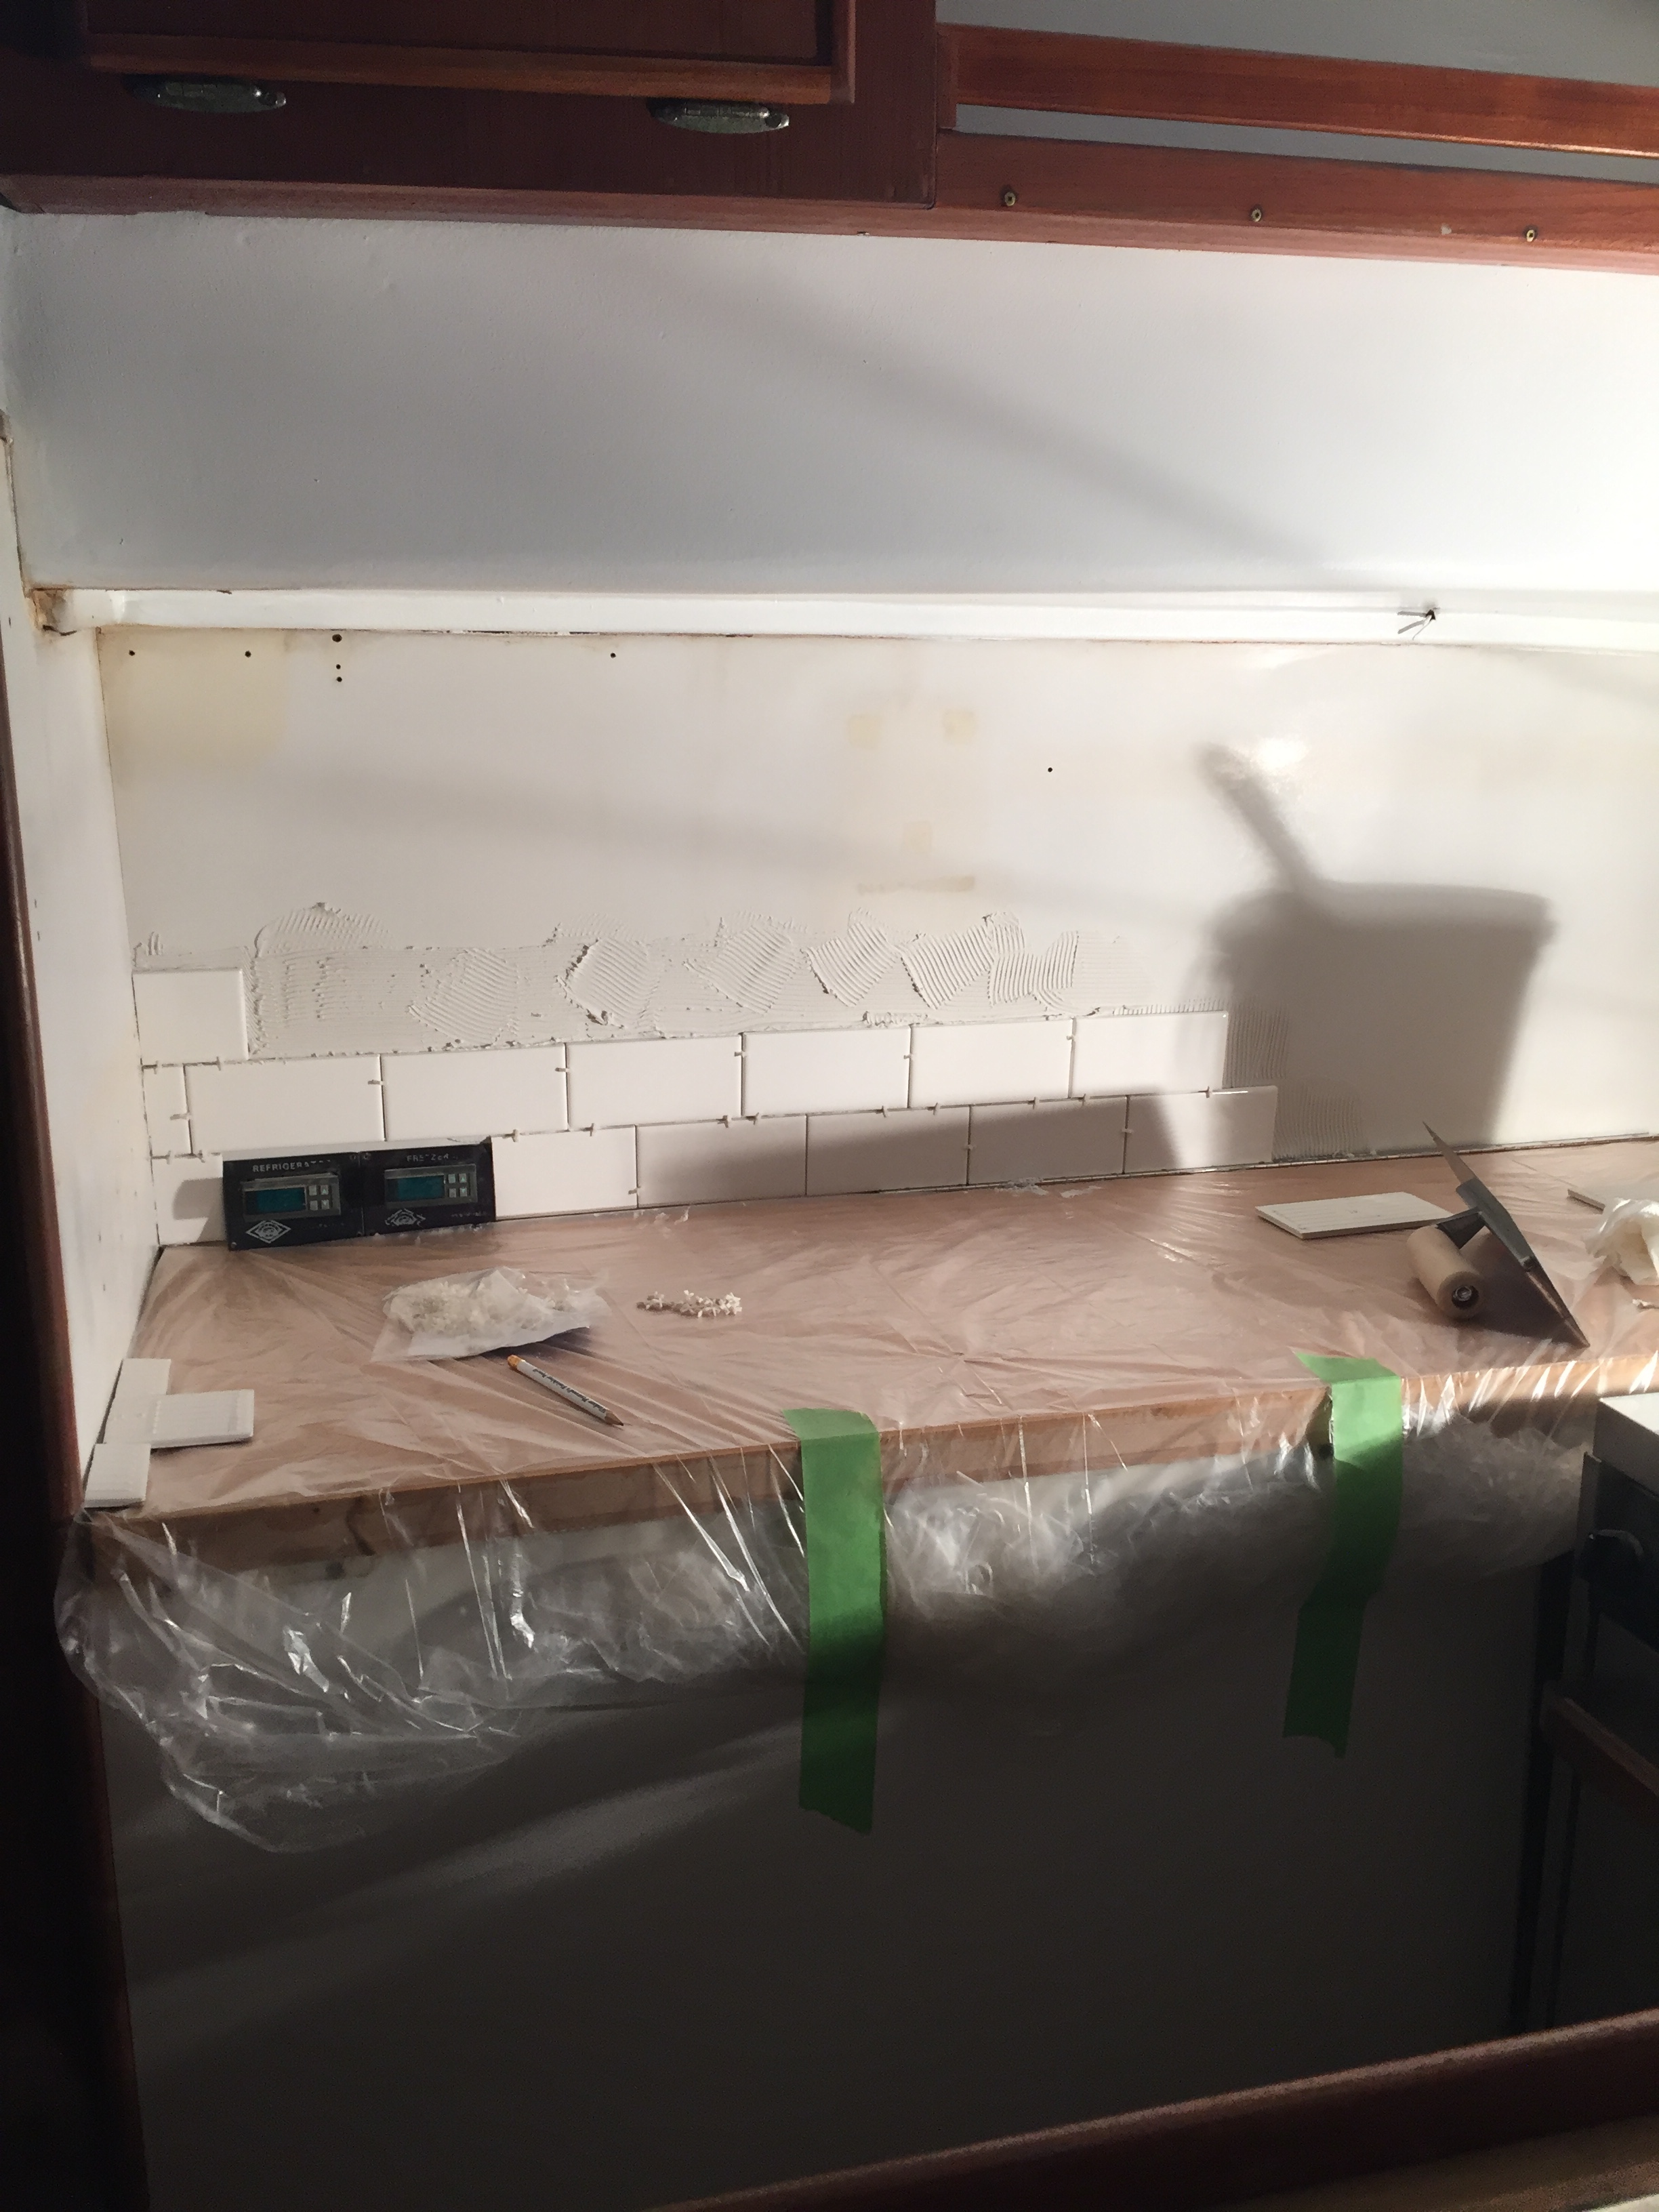

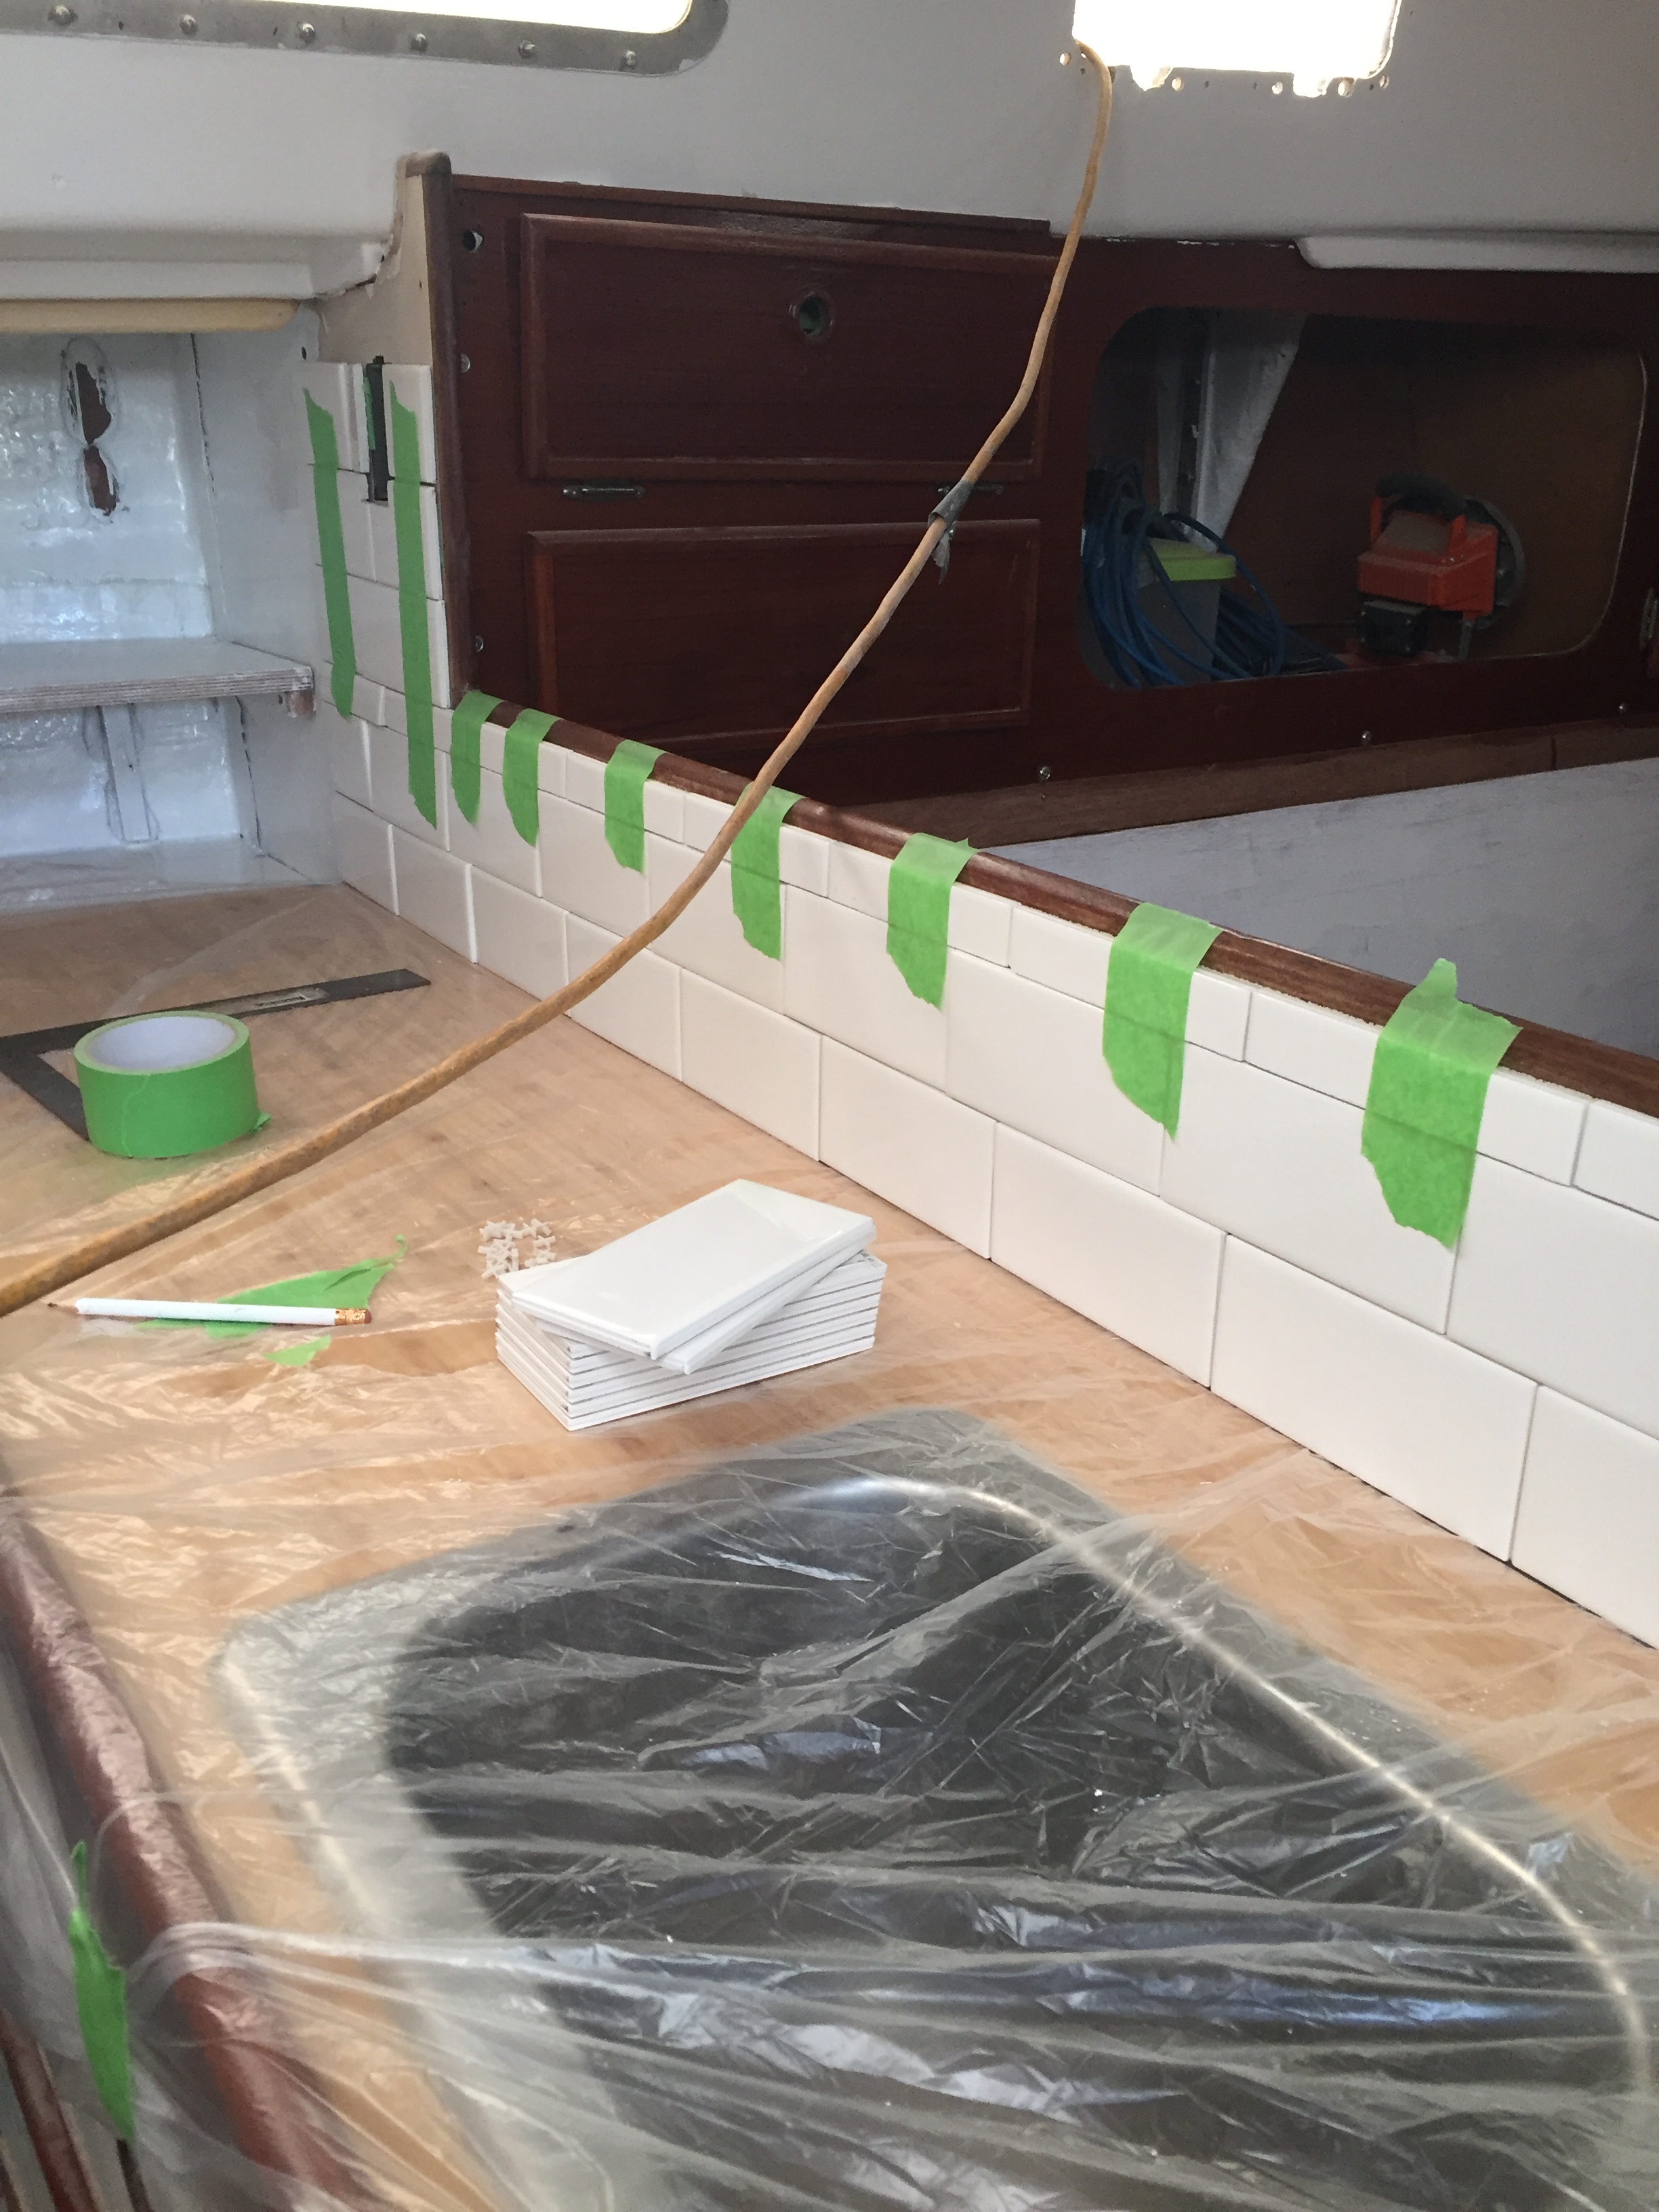
Last weekend we took the plunge and started installing white subway tile as a backsplash both behind the sink and behind the fridge/freezer. I have never done tiling in any way shape or form but thanks to the internet, home reno shows, and advice from my neighbour, who also loaned me his tile tools, I think I managed to do a decent job.
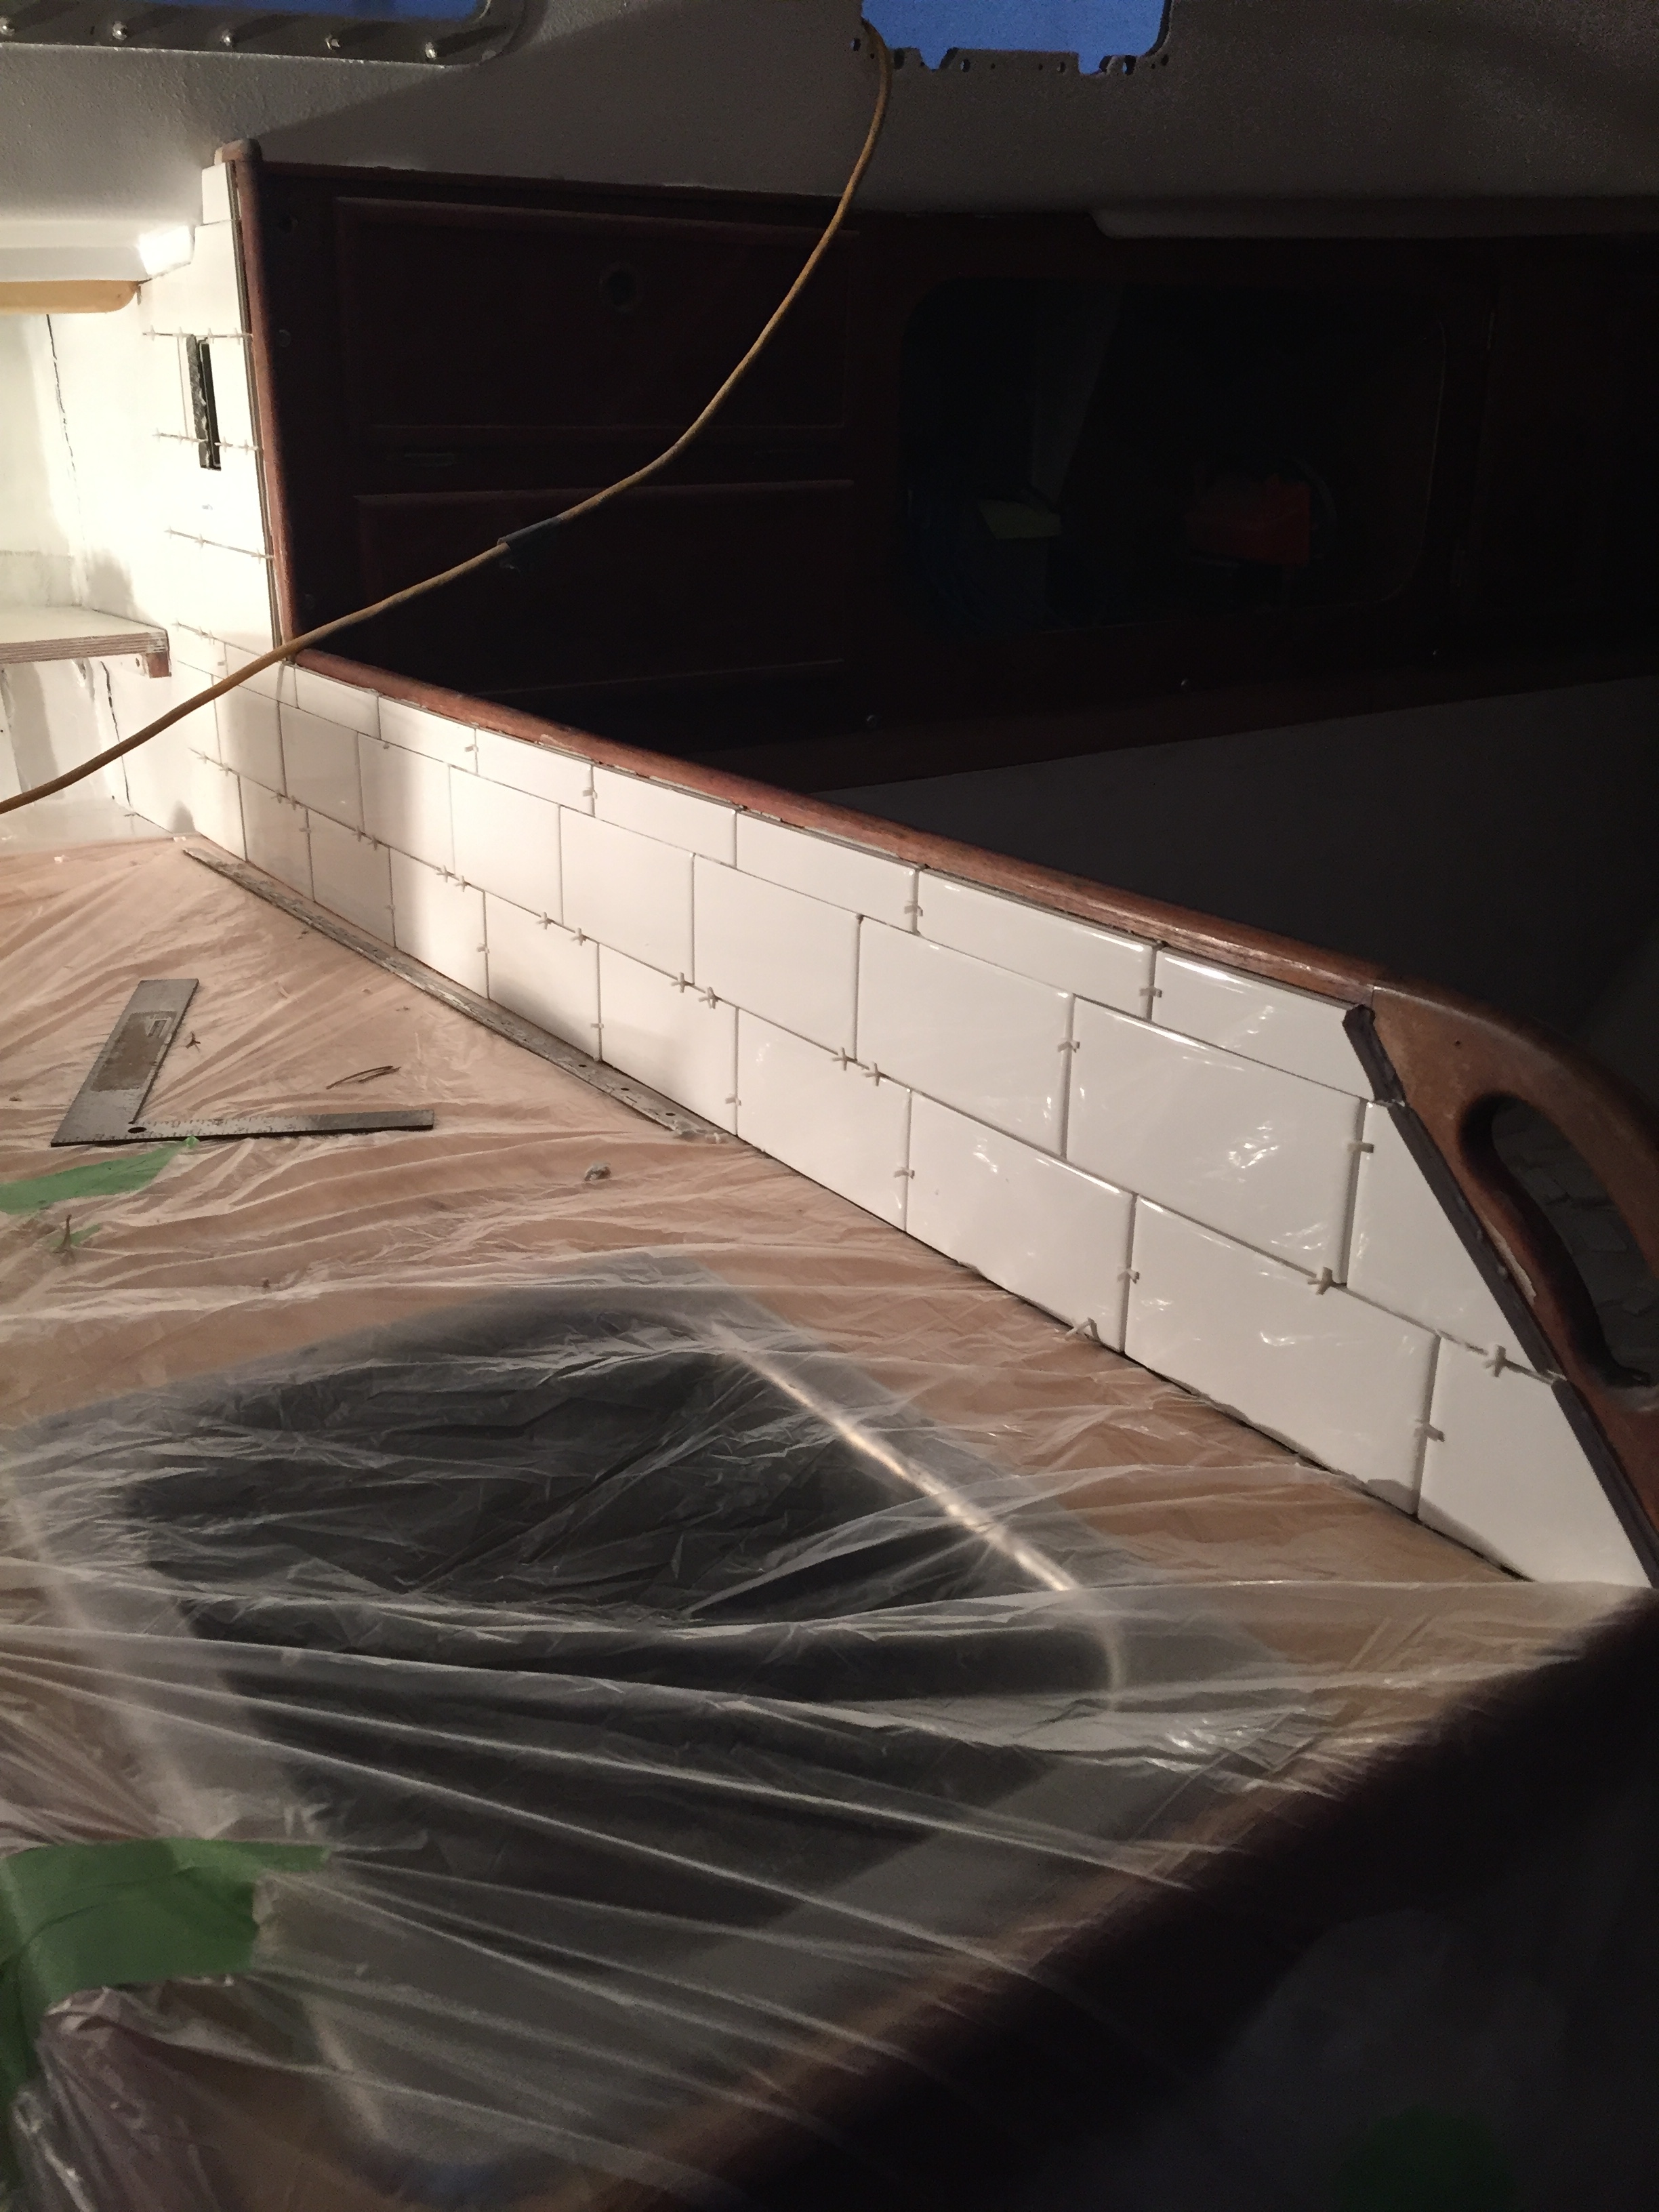
This weekend we are going to attack the grouting. Hopefully it will work out ok and hopefully I have watched enough youtube to do it properly.
I am spending a little extra time on the galley. I really want to make sure that it is “perfect” for the Admiral. I don’t mean that in any condescending or sexist way, I truly want her to be happy there. And to back up my claim of not trying to be ignorant, she has said the exact same thing to me. She wants it to be “perfect” for her as well. As she says, if it meets all of her needs, and she enjoys being in the space, she will use it. If it is a hole, she won’t. Makes perfect sense to me. I make her the best galley I possibly can, she enjoys it and spends lots of time in there, she does lots of cooking and baking, and I get fat! It’s a win win situation 🙂 ok I fell off the puritan wagon didn’t I 🙂
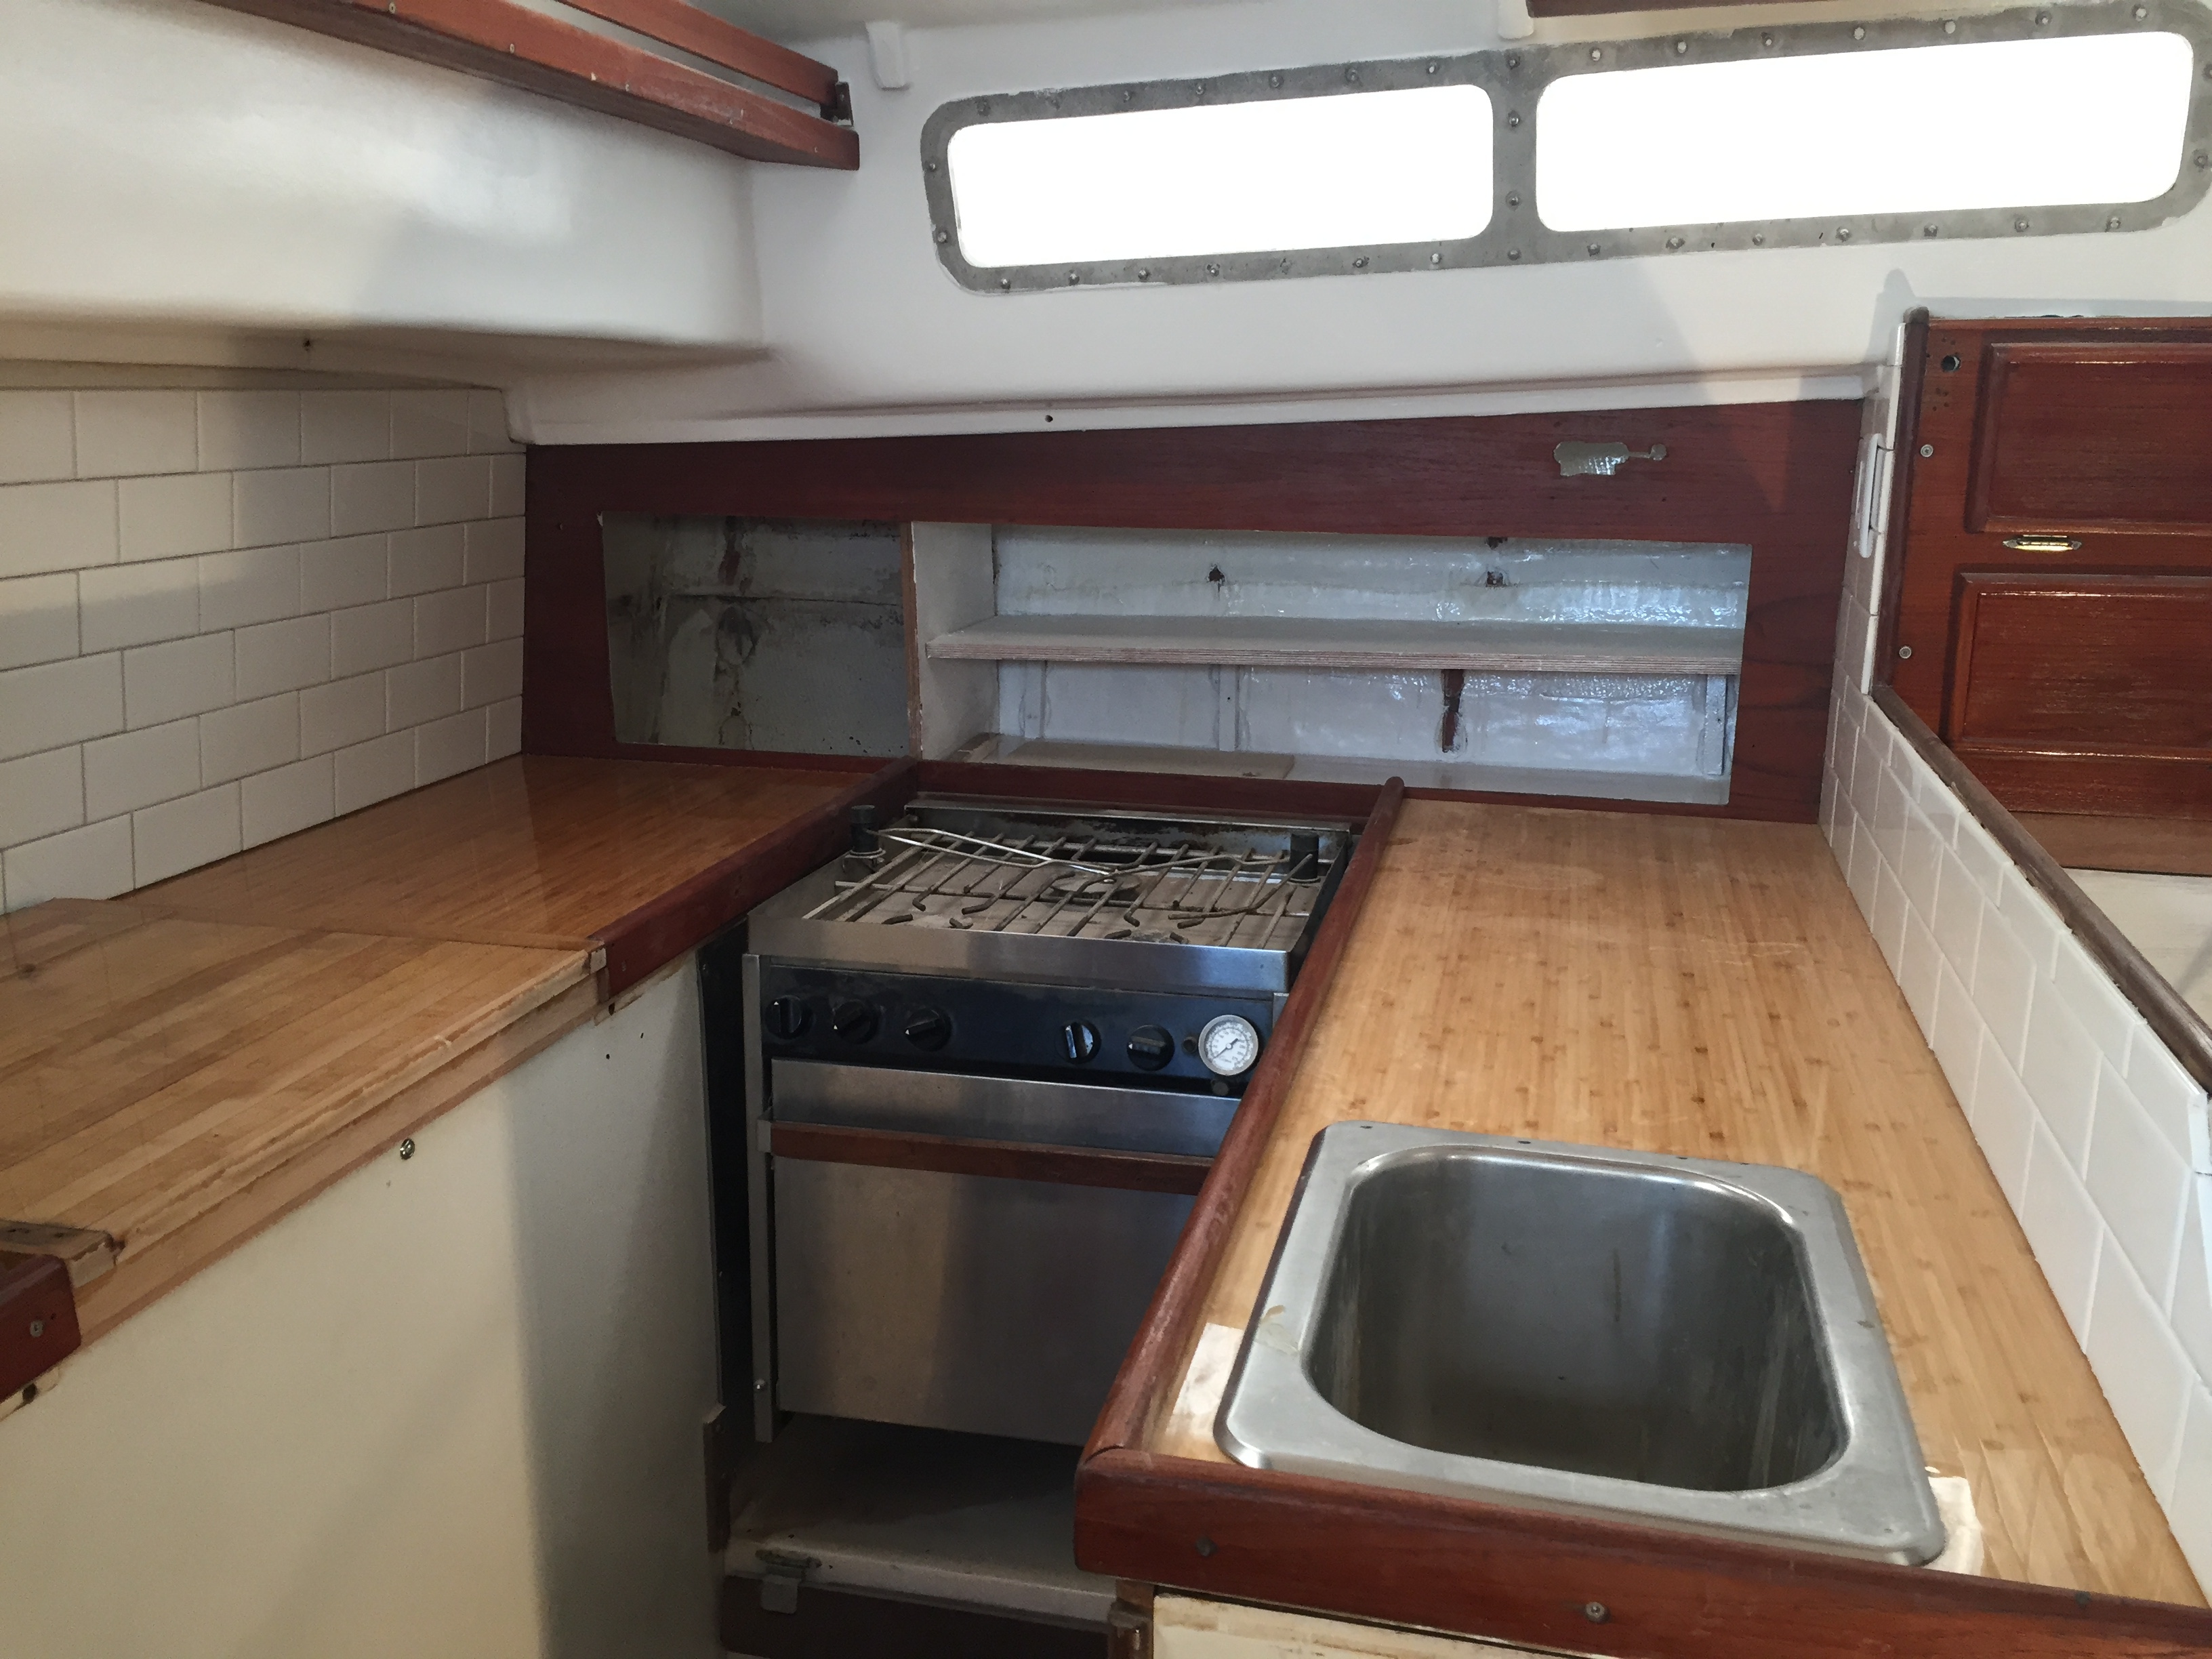
The galley in Akupara as I said above is a really big galley for a 42 foot boat in my opinion. It is located midships as close to the center of motion as possible. It is narrow for and aft which makes for a safe workspace while underway, the list goes on and on. But. It also has its drawbacks. You need to lean over the top of the stove to get into the cupboards. There is a gigantic bottomless pit underneath the counter beside the stove that again you have to twist and contort over half of the stove to access. It only has 3 small drawers, 1 drop down compartment which is half used by the sink, 2 slightly bigger drawers on the end and another drop down access. It can be improved. The issue is, I am not an interior designer or a master at re-architecting and re-defining useable space. I am also confined by the layout of the galley itself, which I do not want to change.
I have a dream for the galley but I will need to see if the budget allows for it. Last year at the boat show we visited a booth that blew our minds.
Shelf-genie! http://www.shelfgenie.com/british-columbia
These people seem to have a solution for everything! Oh the improvements that could be made, the happiness of the Admiral, and the fresh banana cream pies that could be had….. 🙂
Well, the Admiral gave the final nod, the credit card was whipped out, the laptop thrown open and in a rush the order was placed, before there could be a changing of one’s mind.
Super excited!!!!
Stay tuned….
 Well I am starting to wonder if we have somehow cursed ourselves. Every time we start back at it something happens that pulls us away. It is a struggle to find the time to get work done but if we have any hope in hell of hitting a launch date in June, we better figure it out quickly.
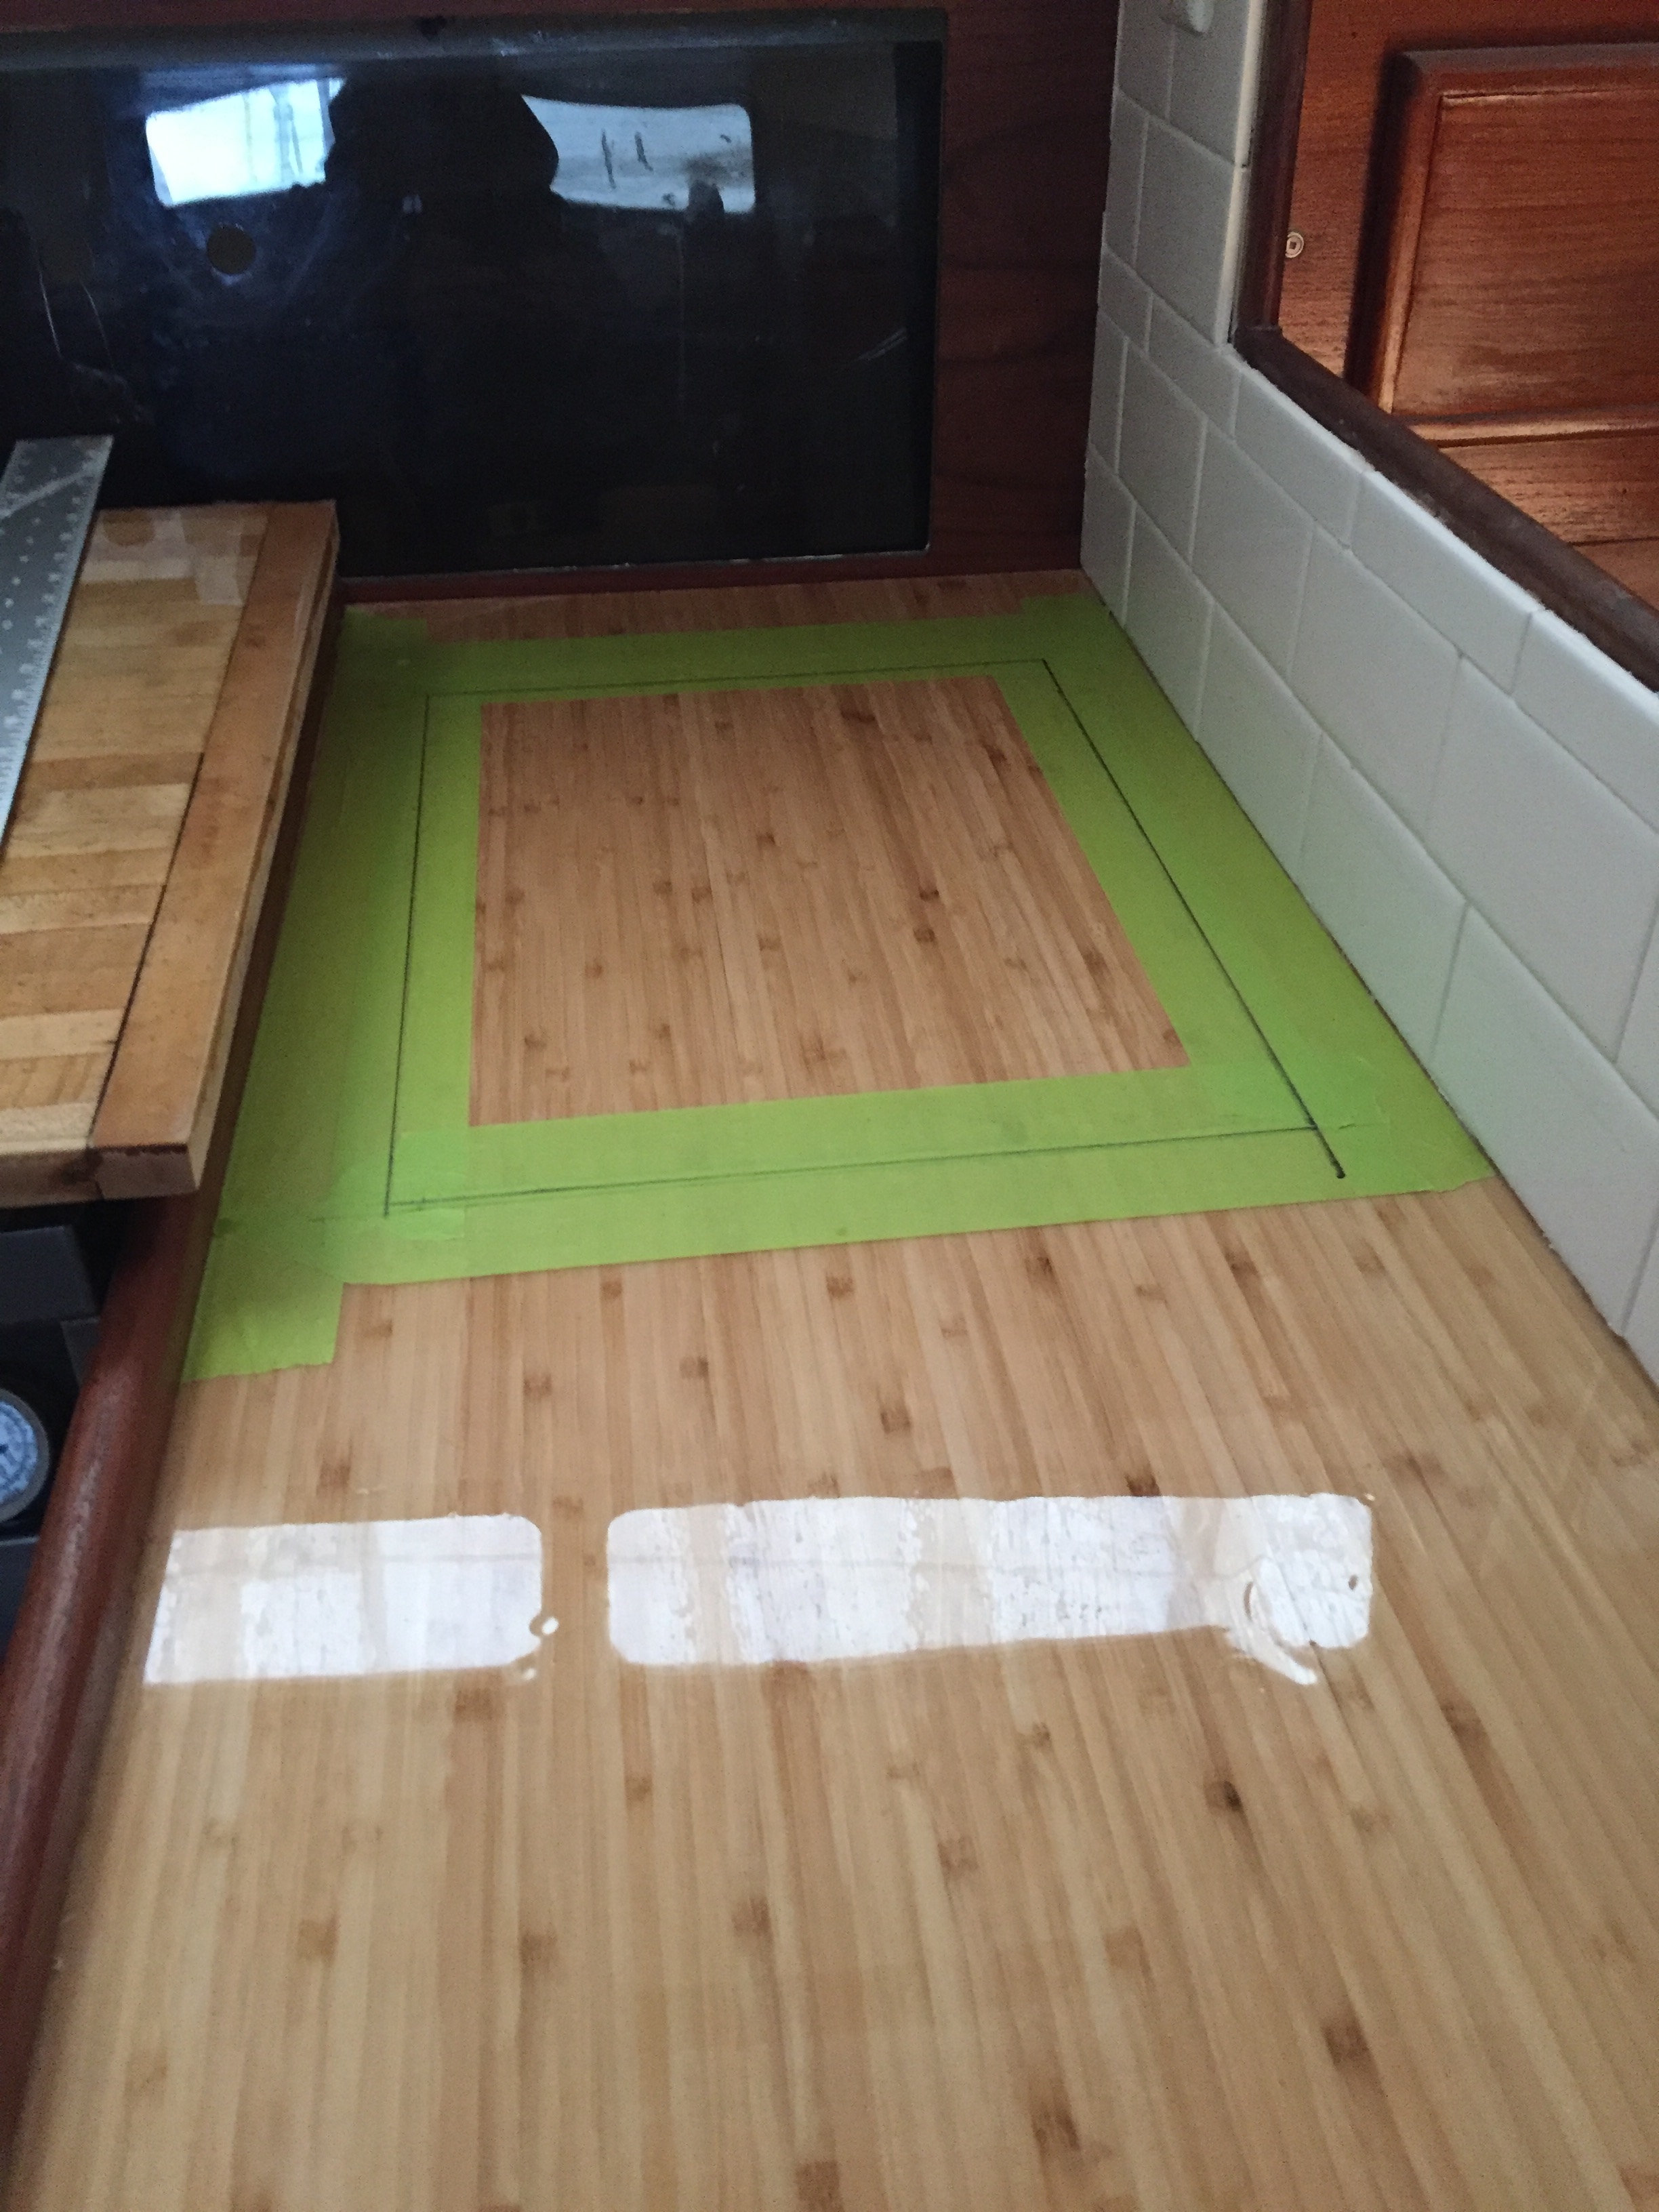
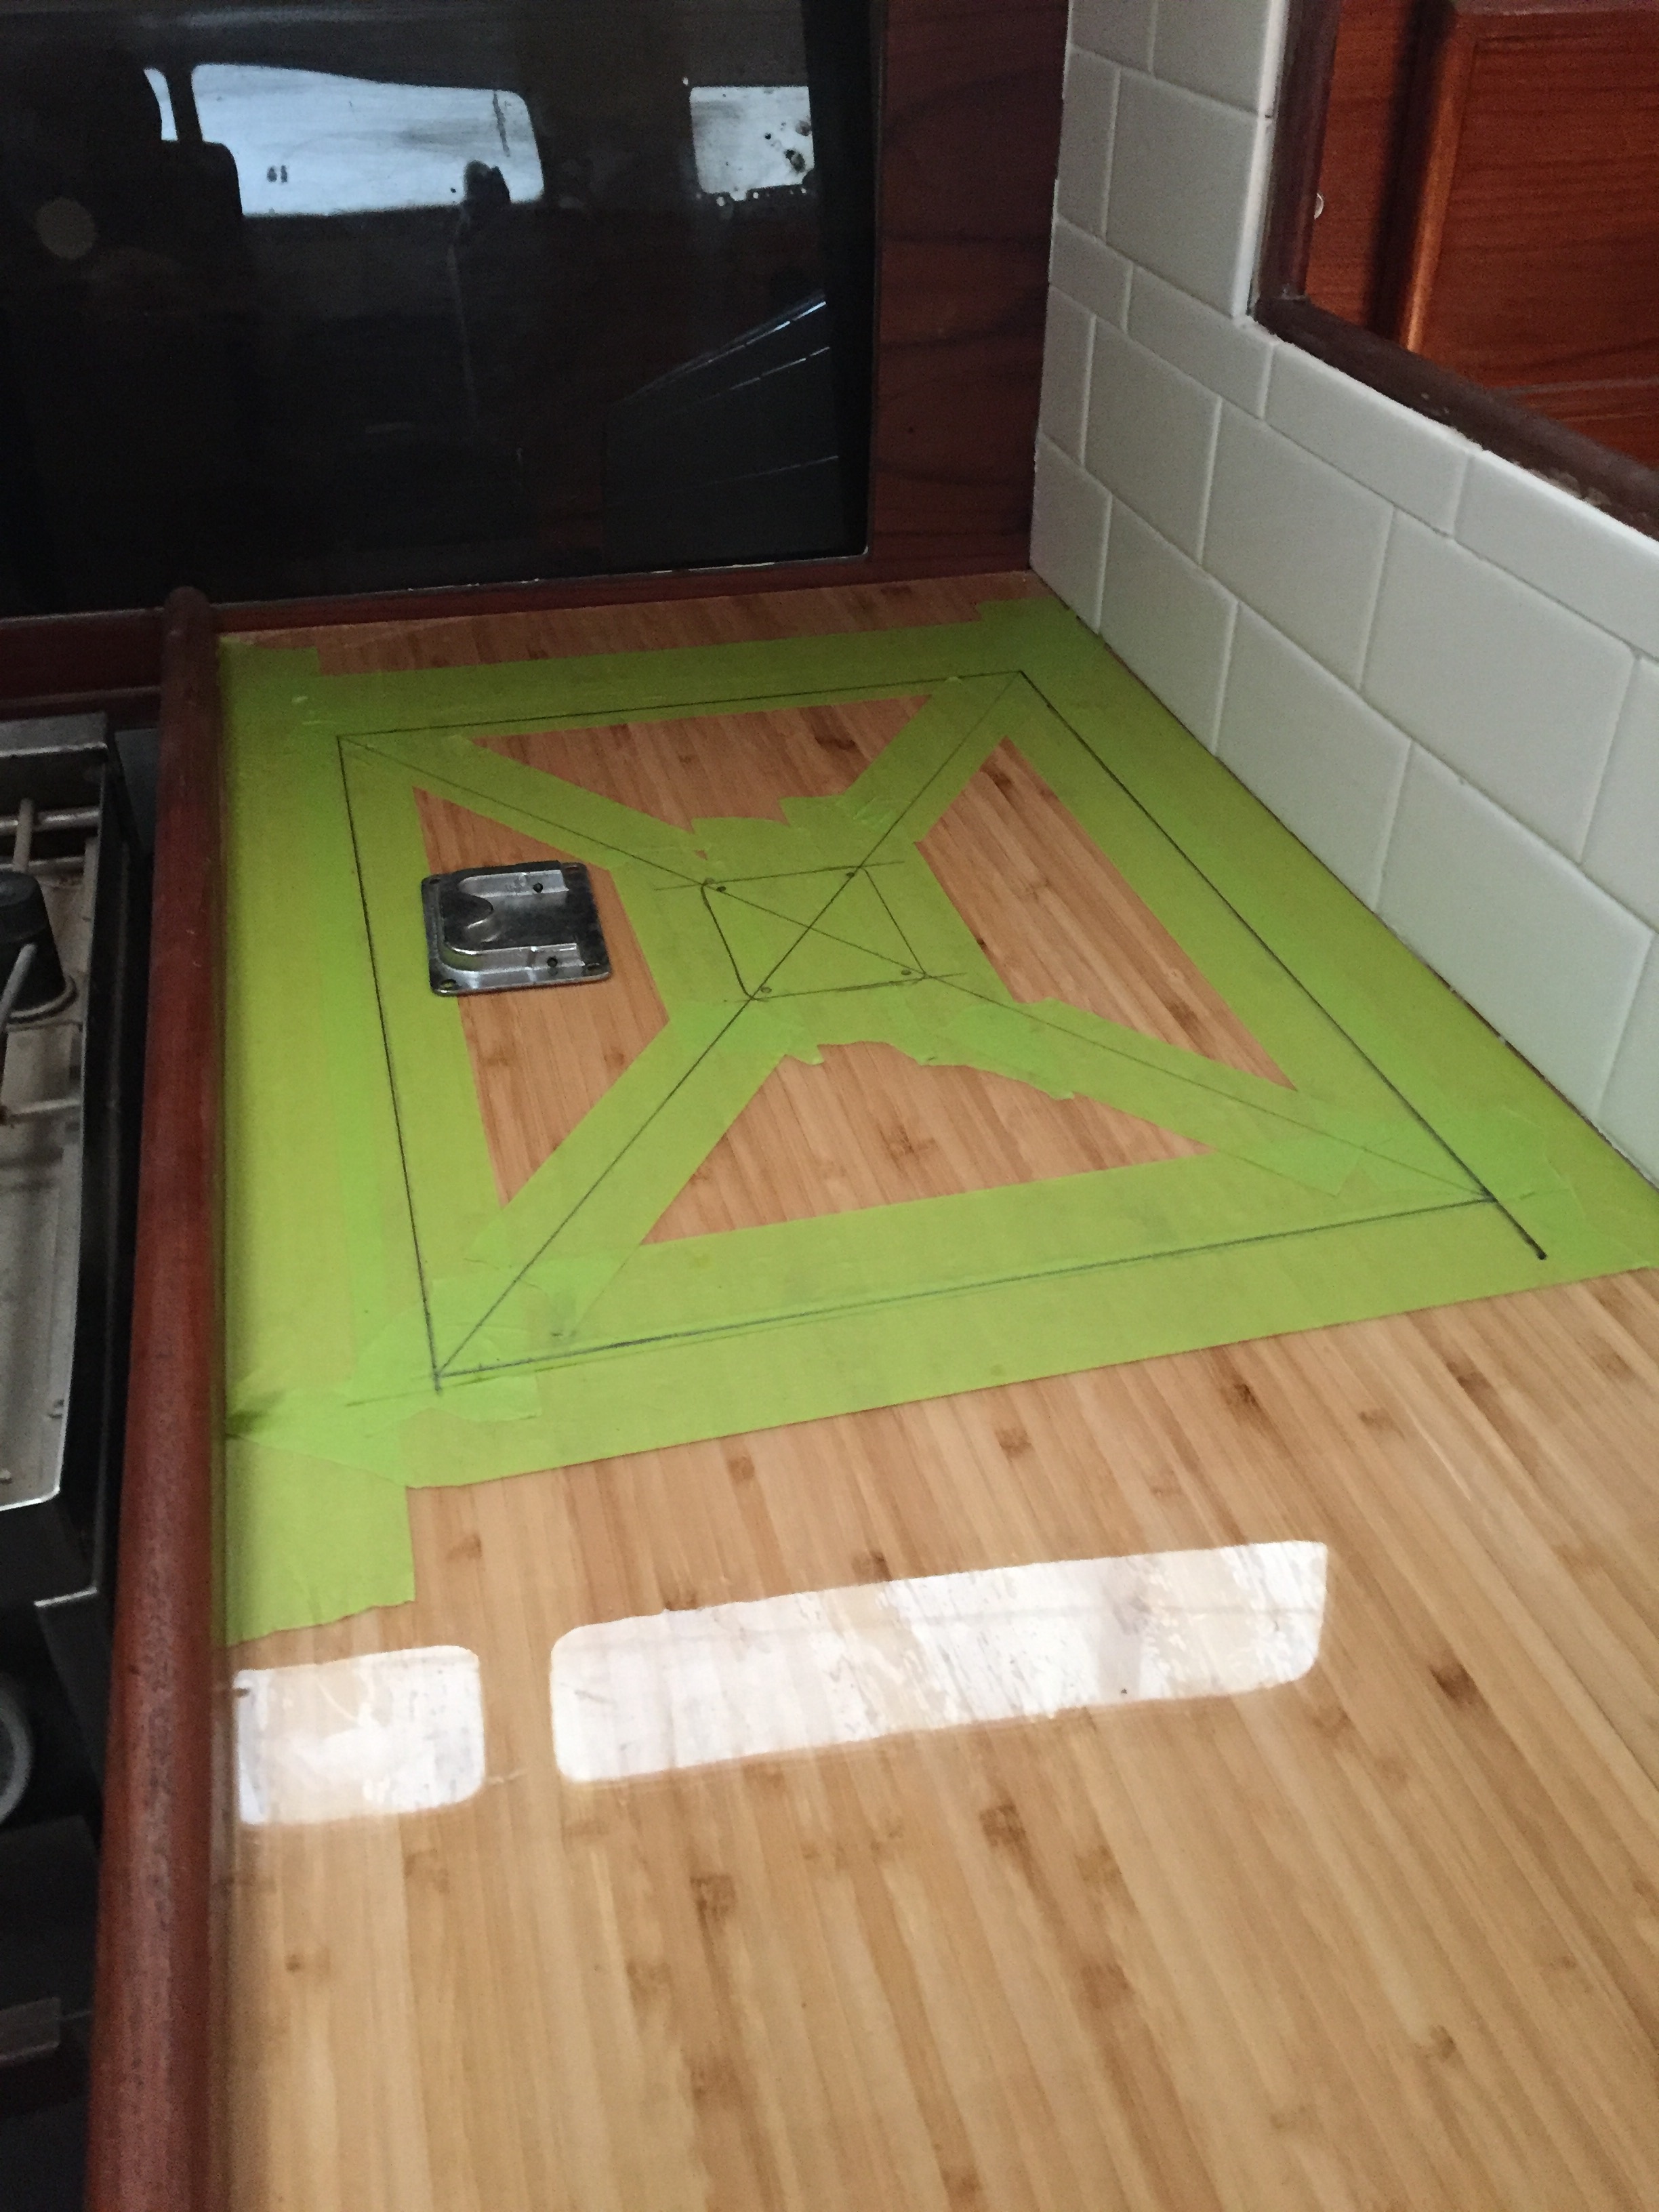
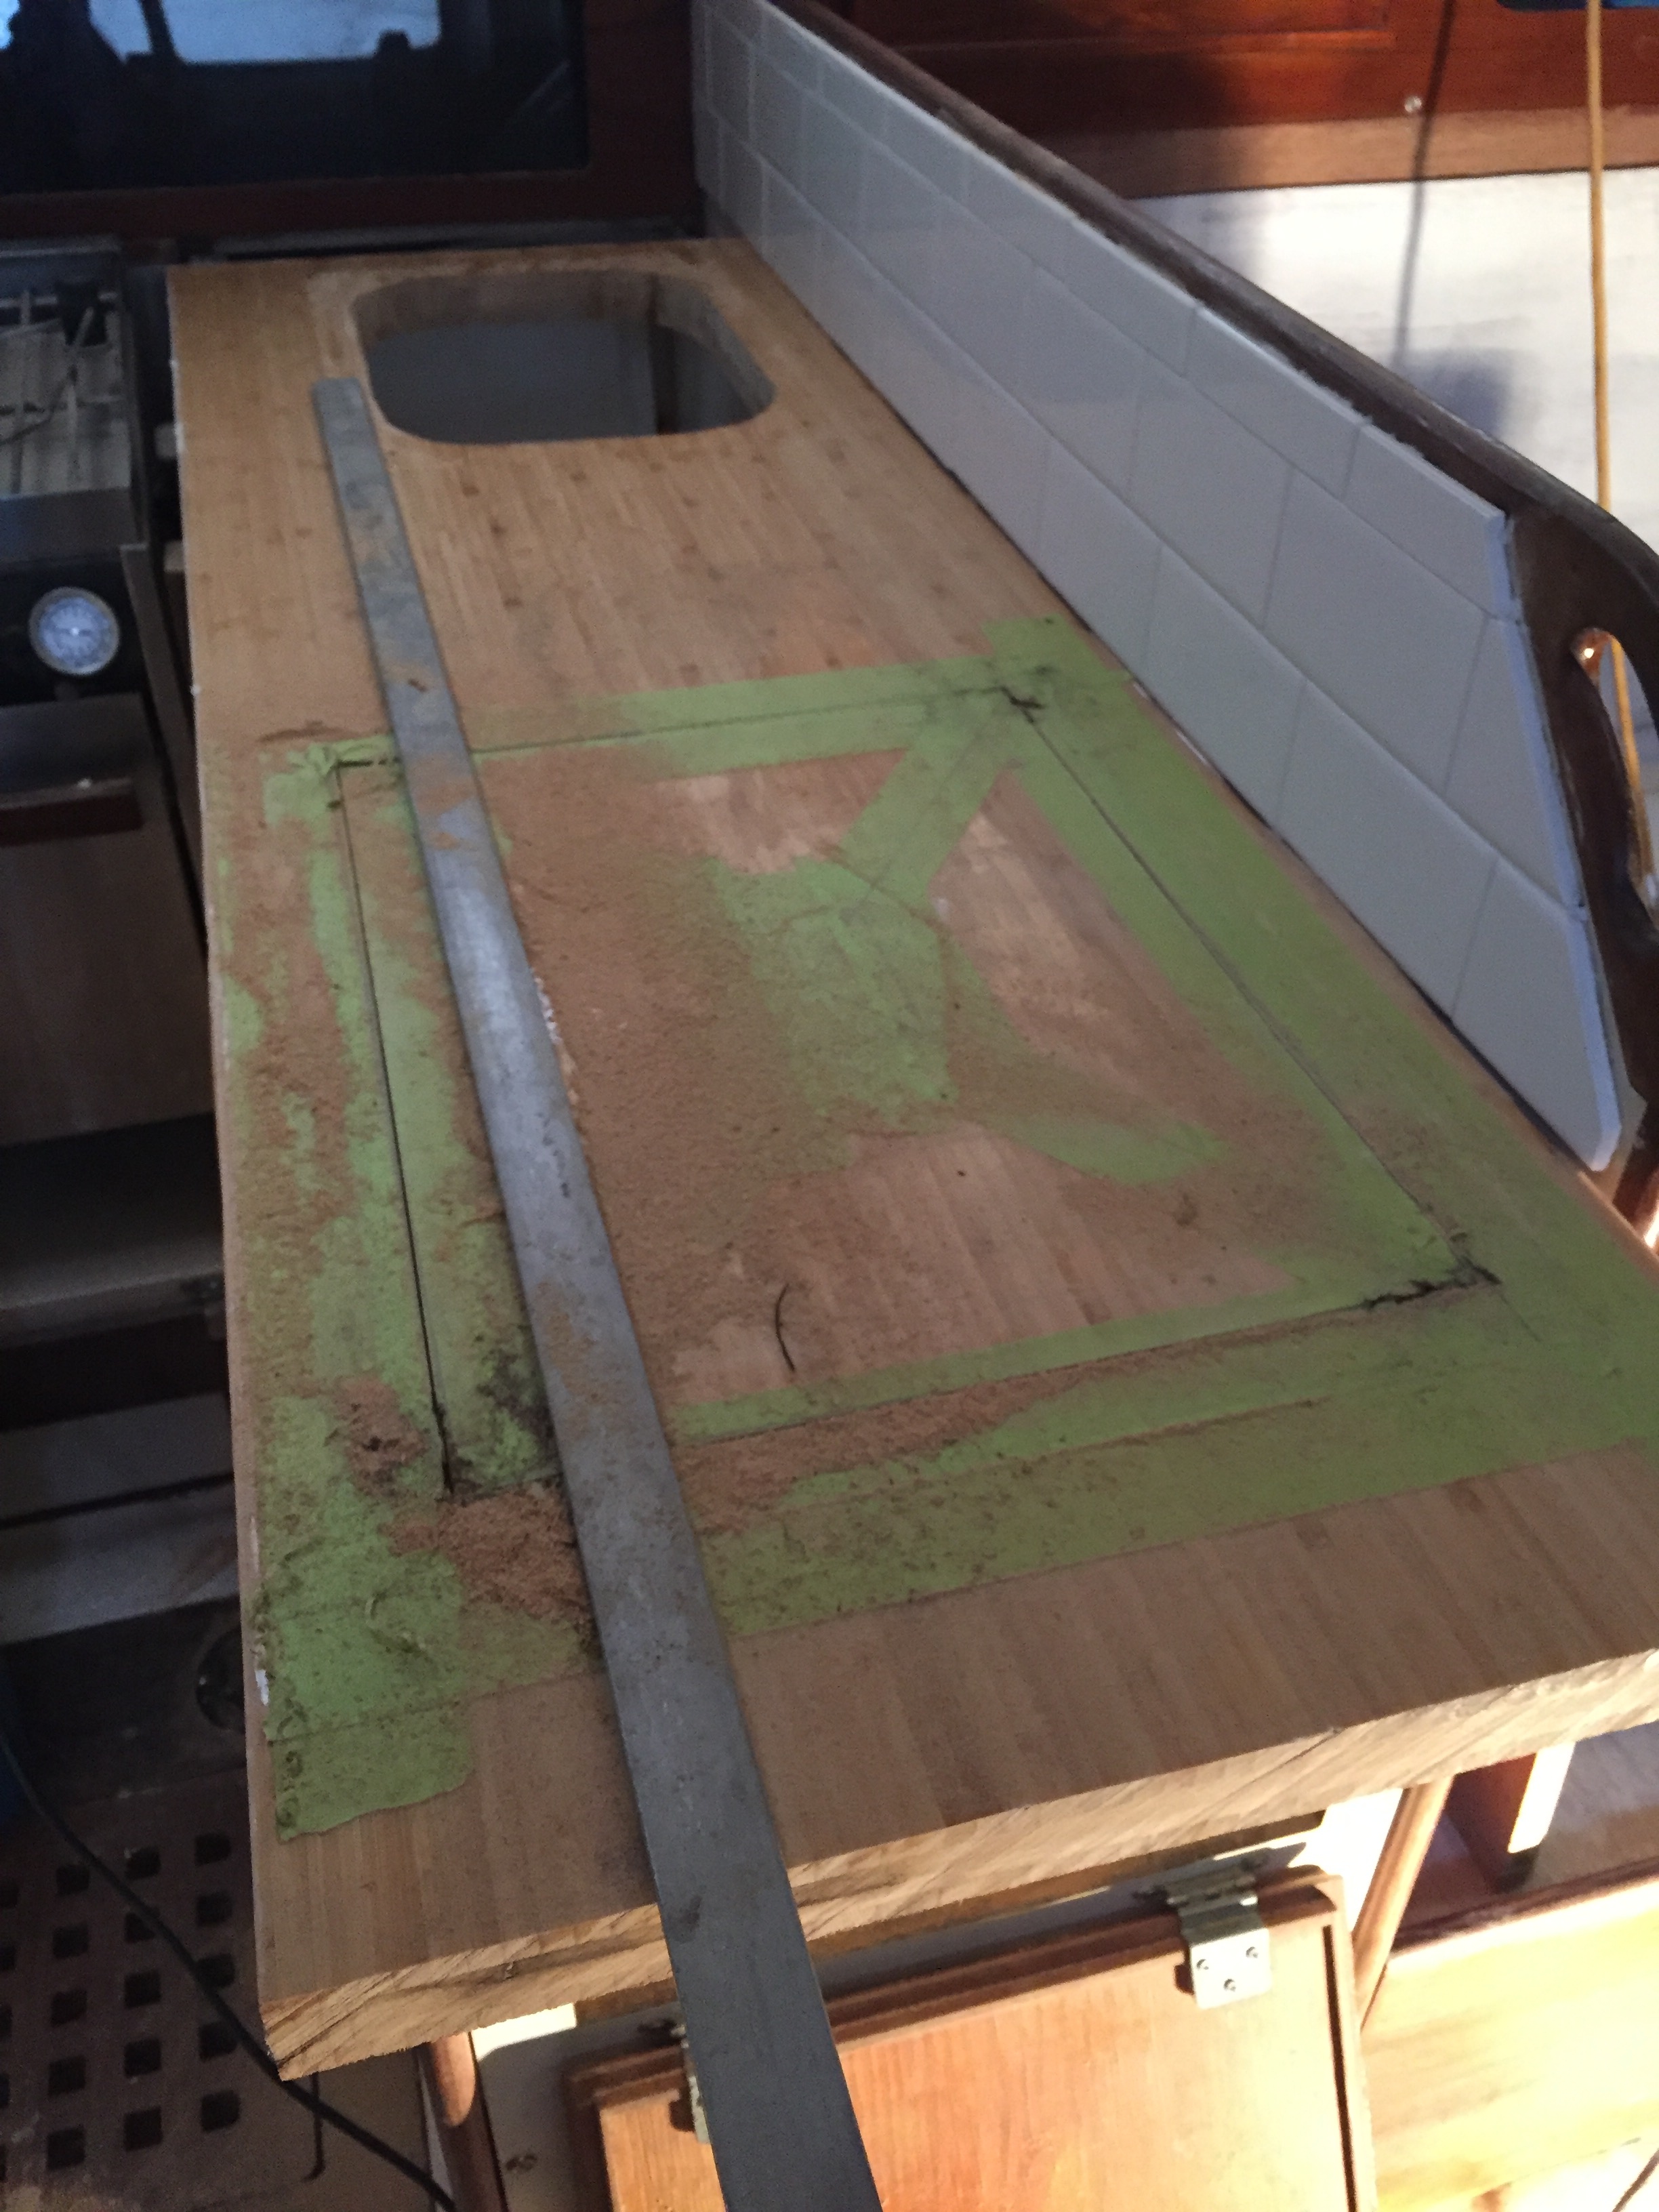
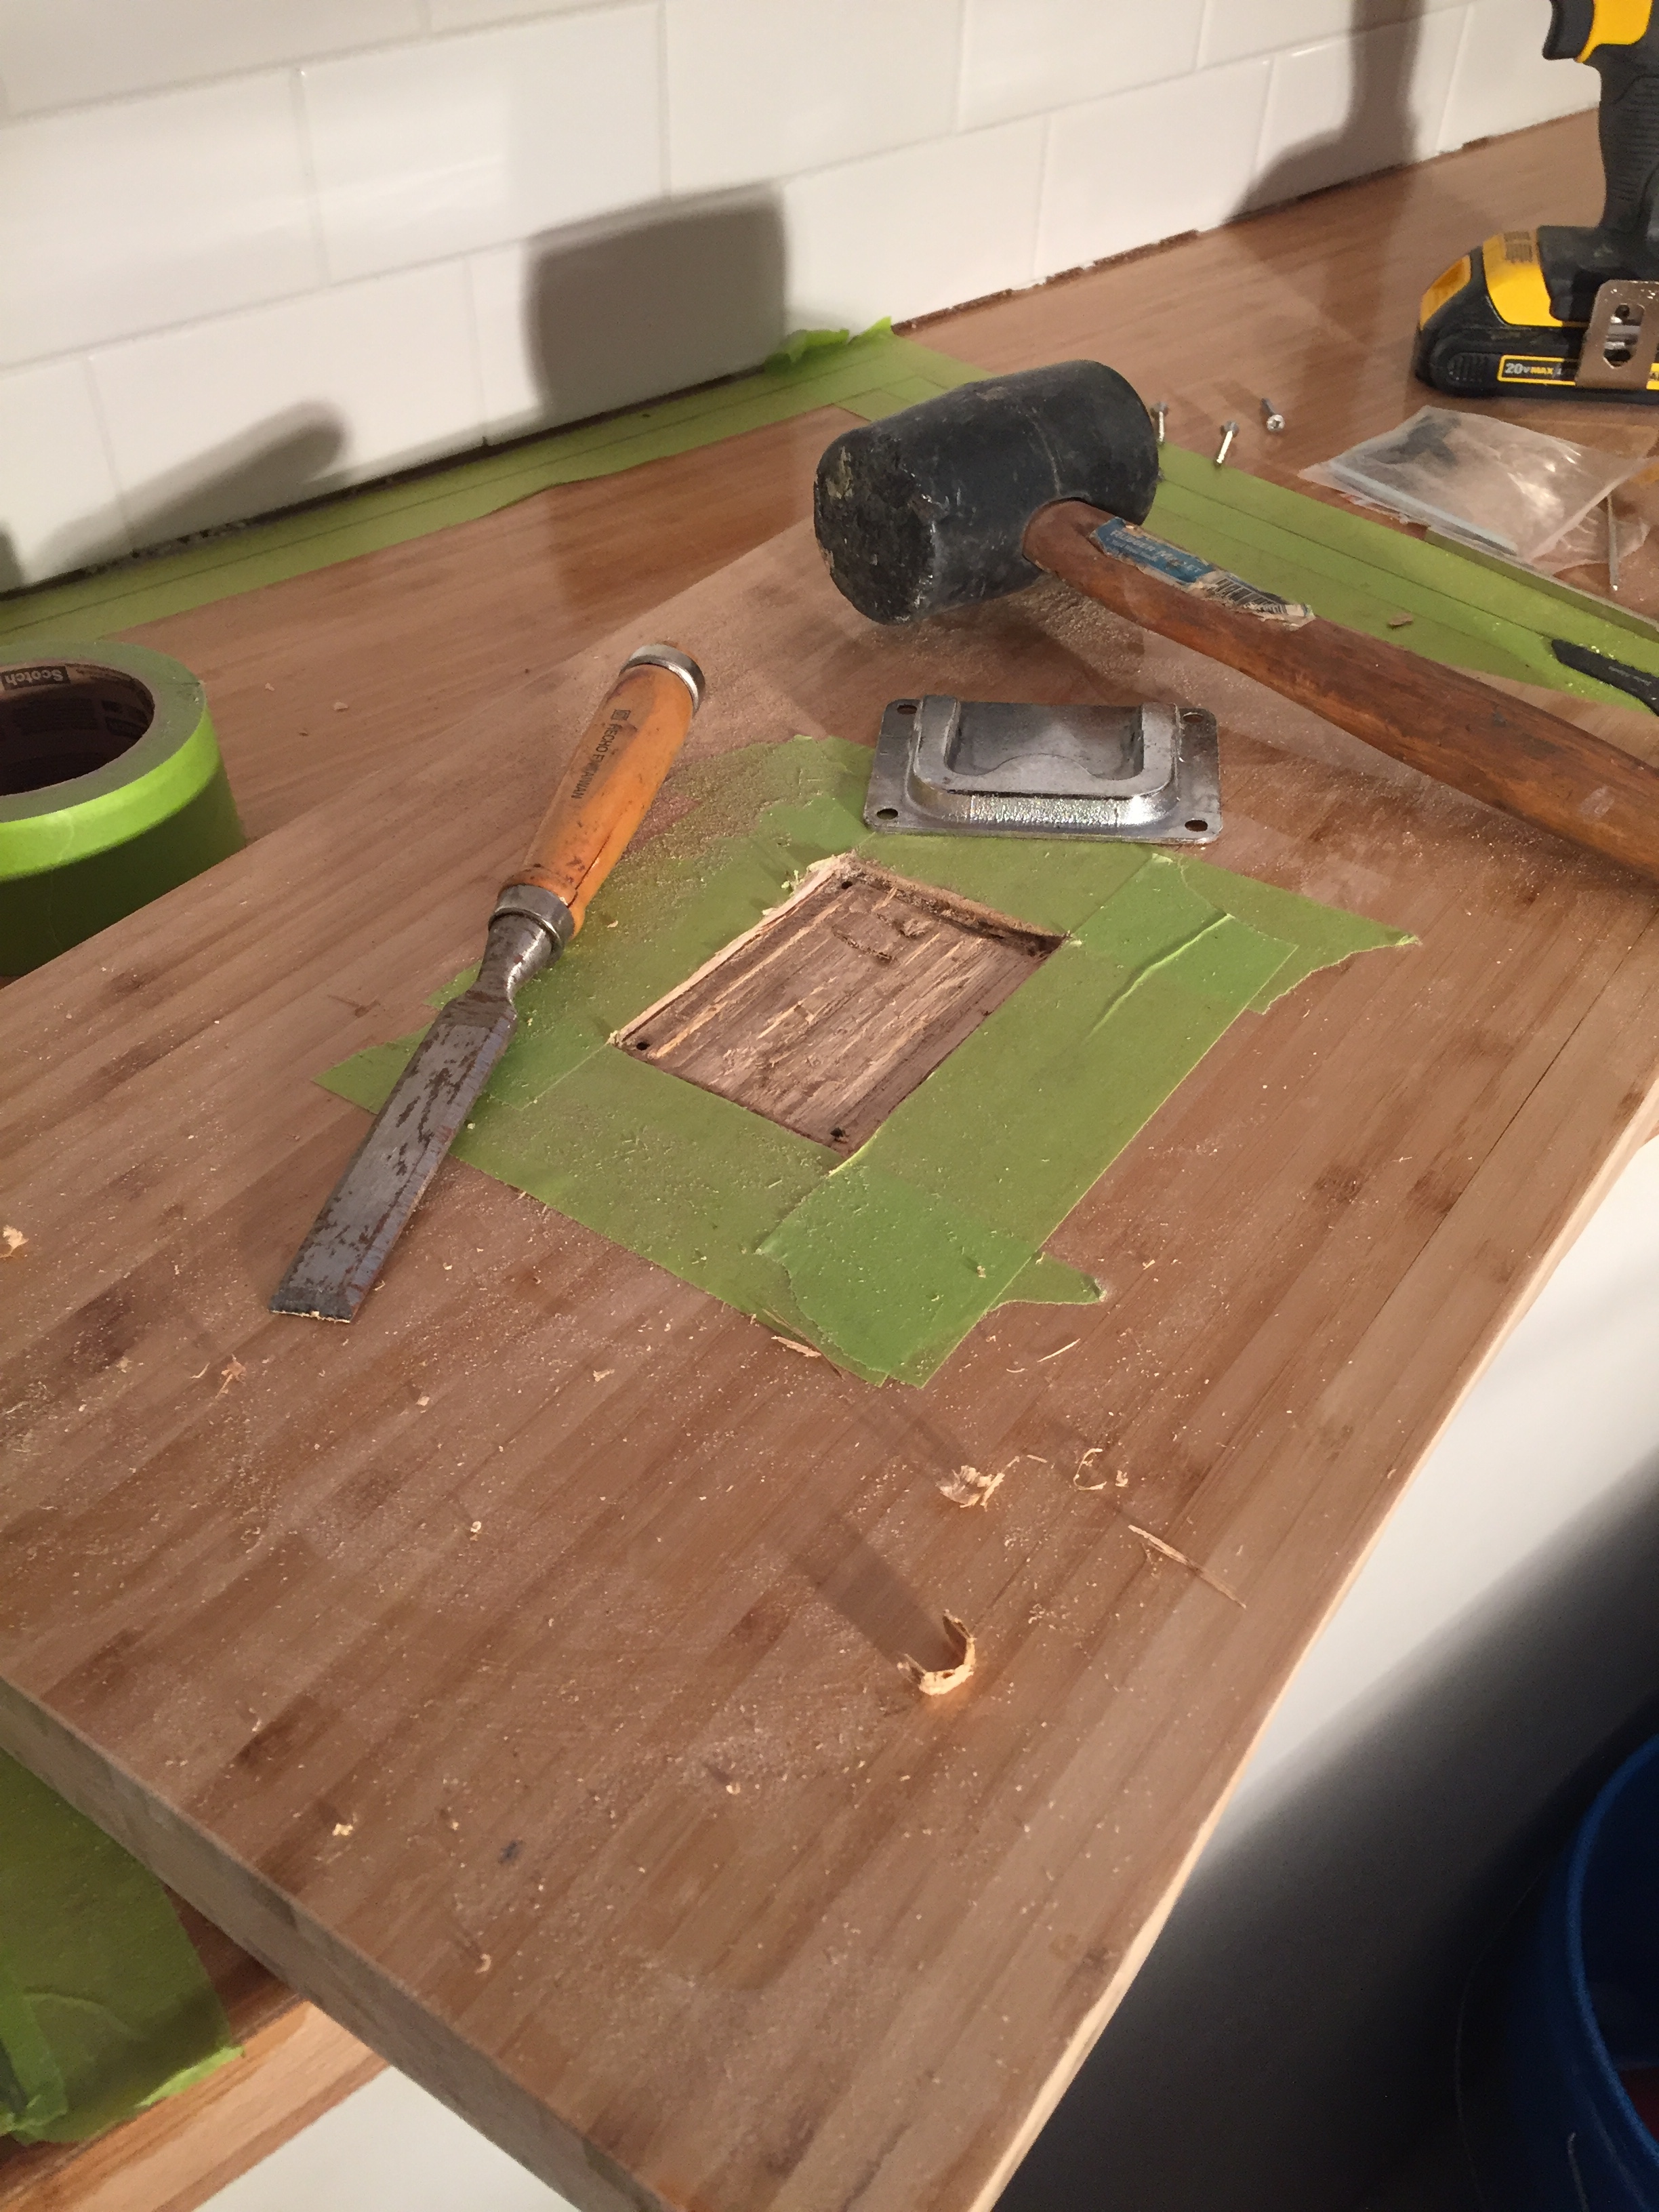
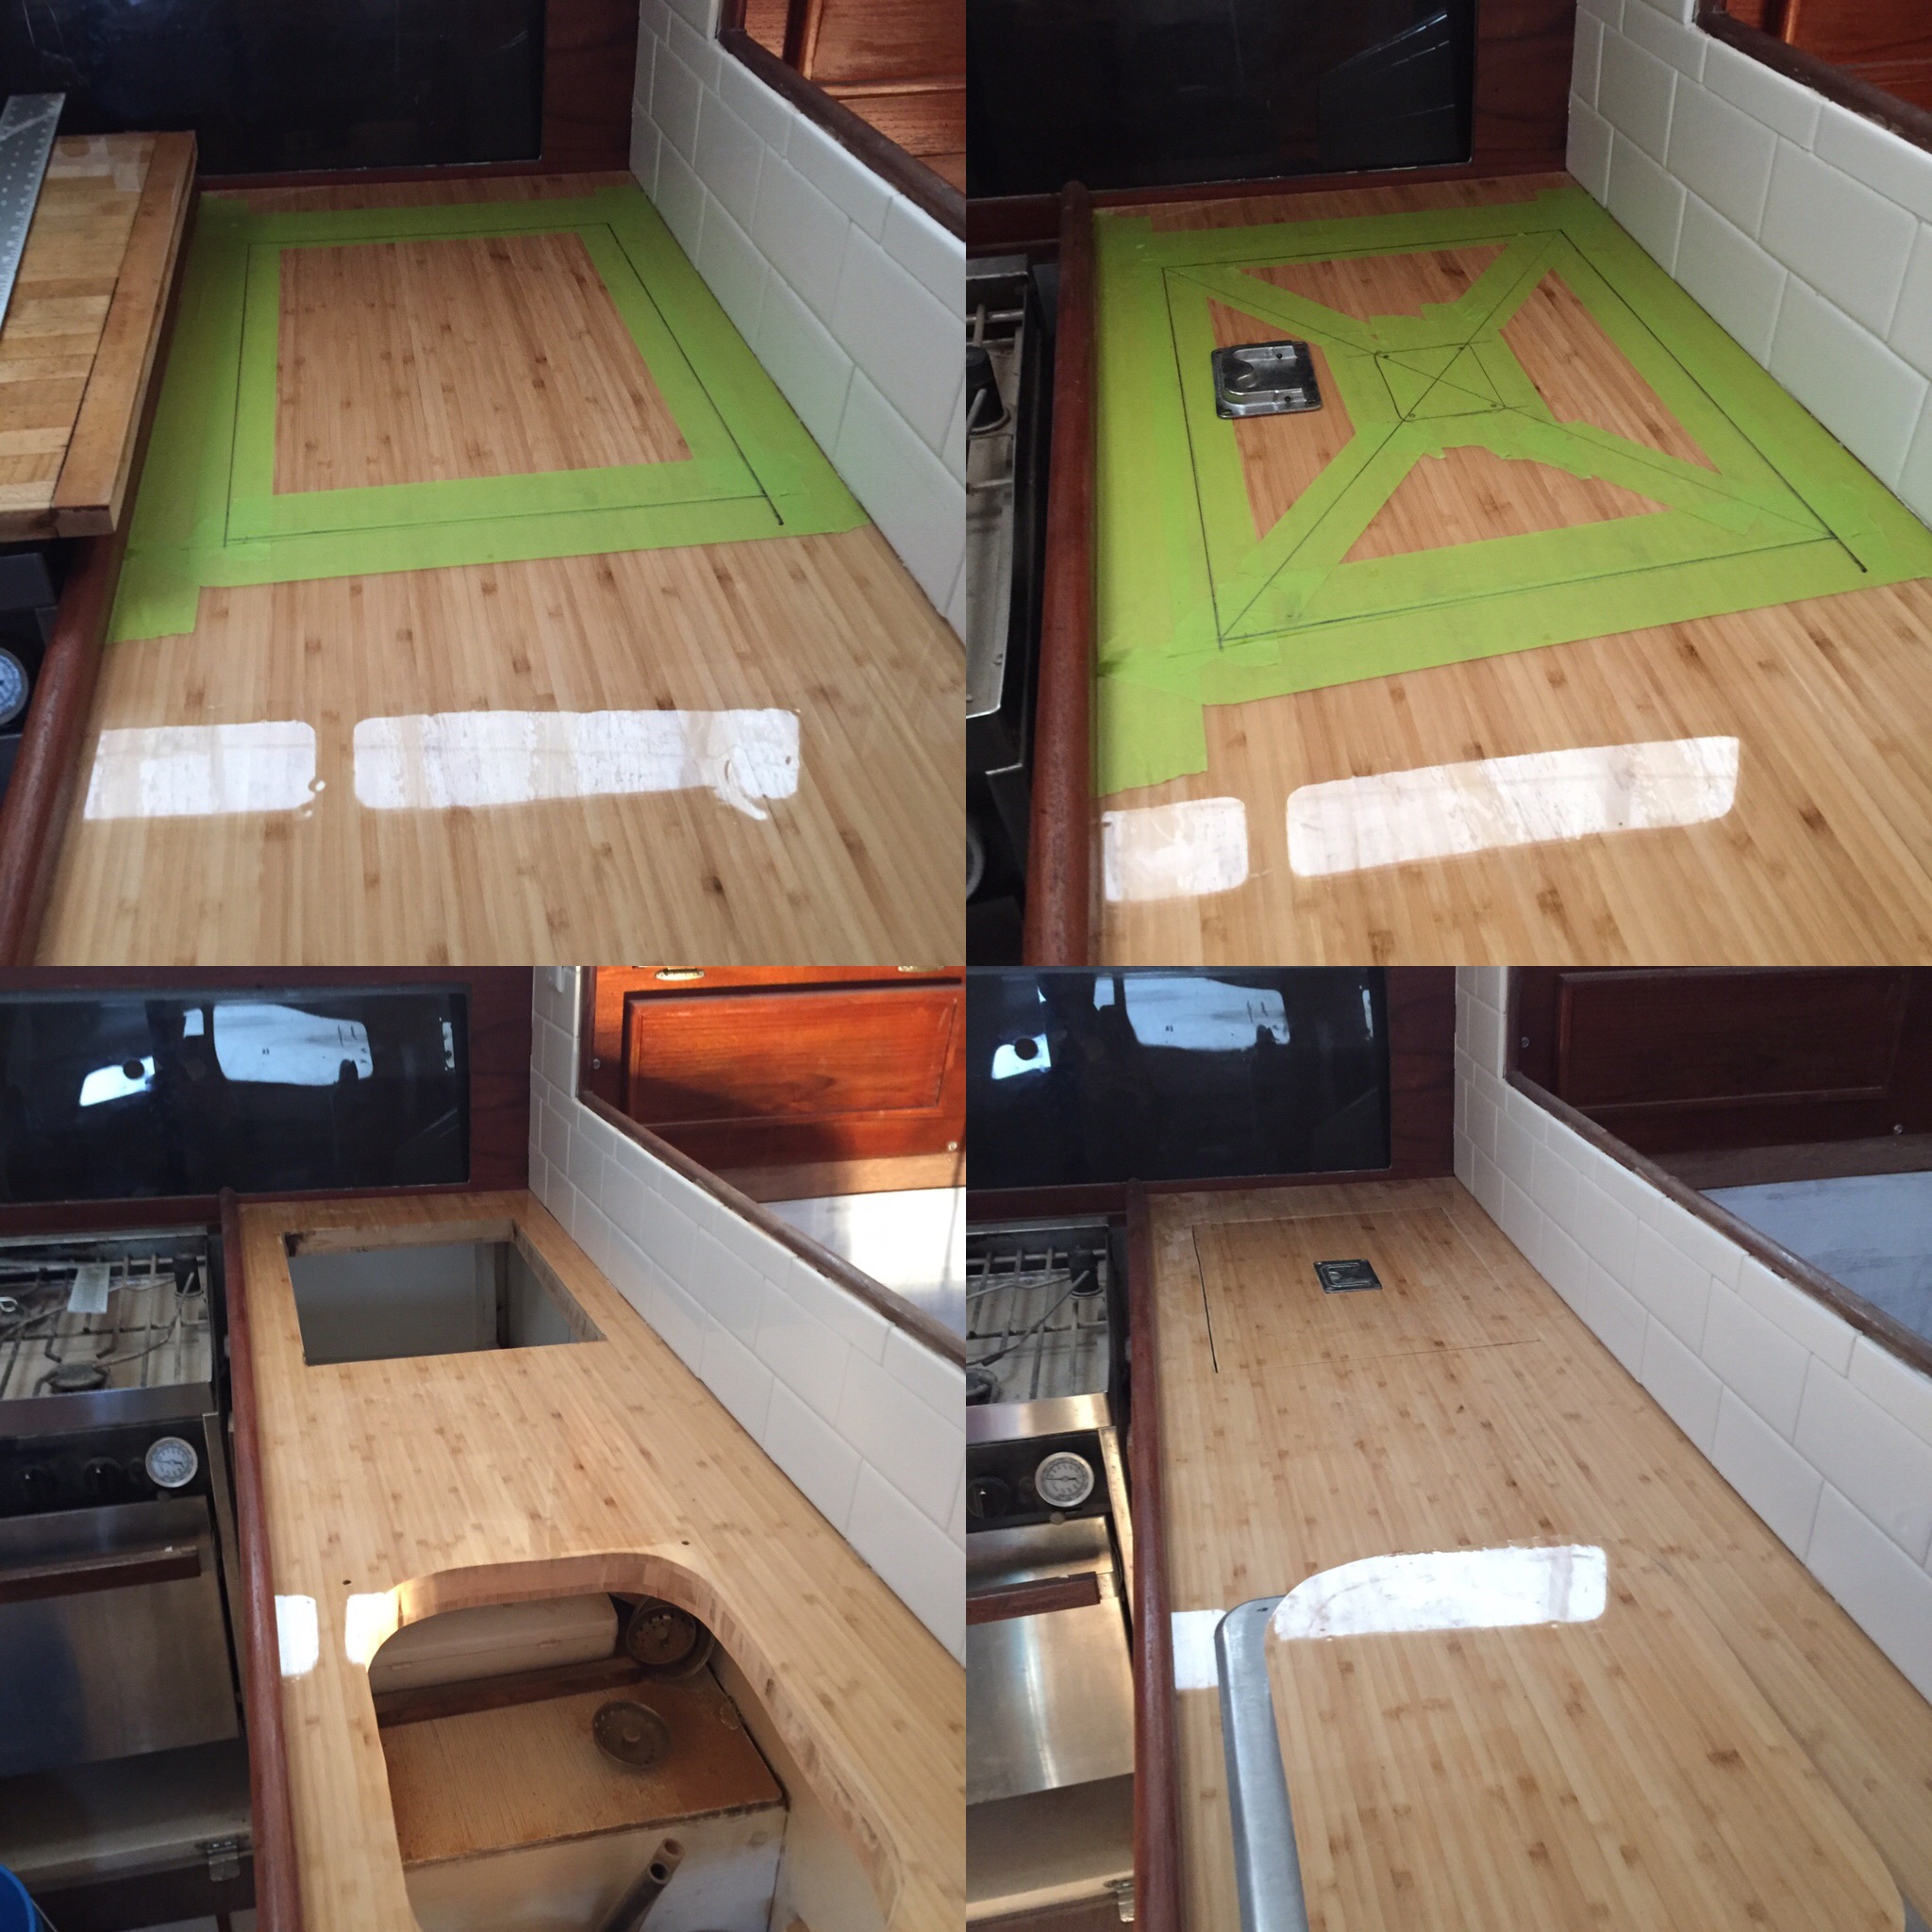
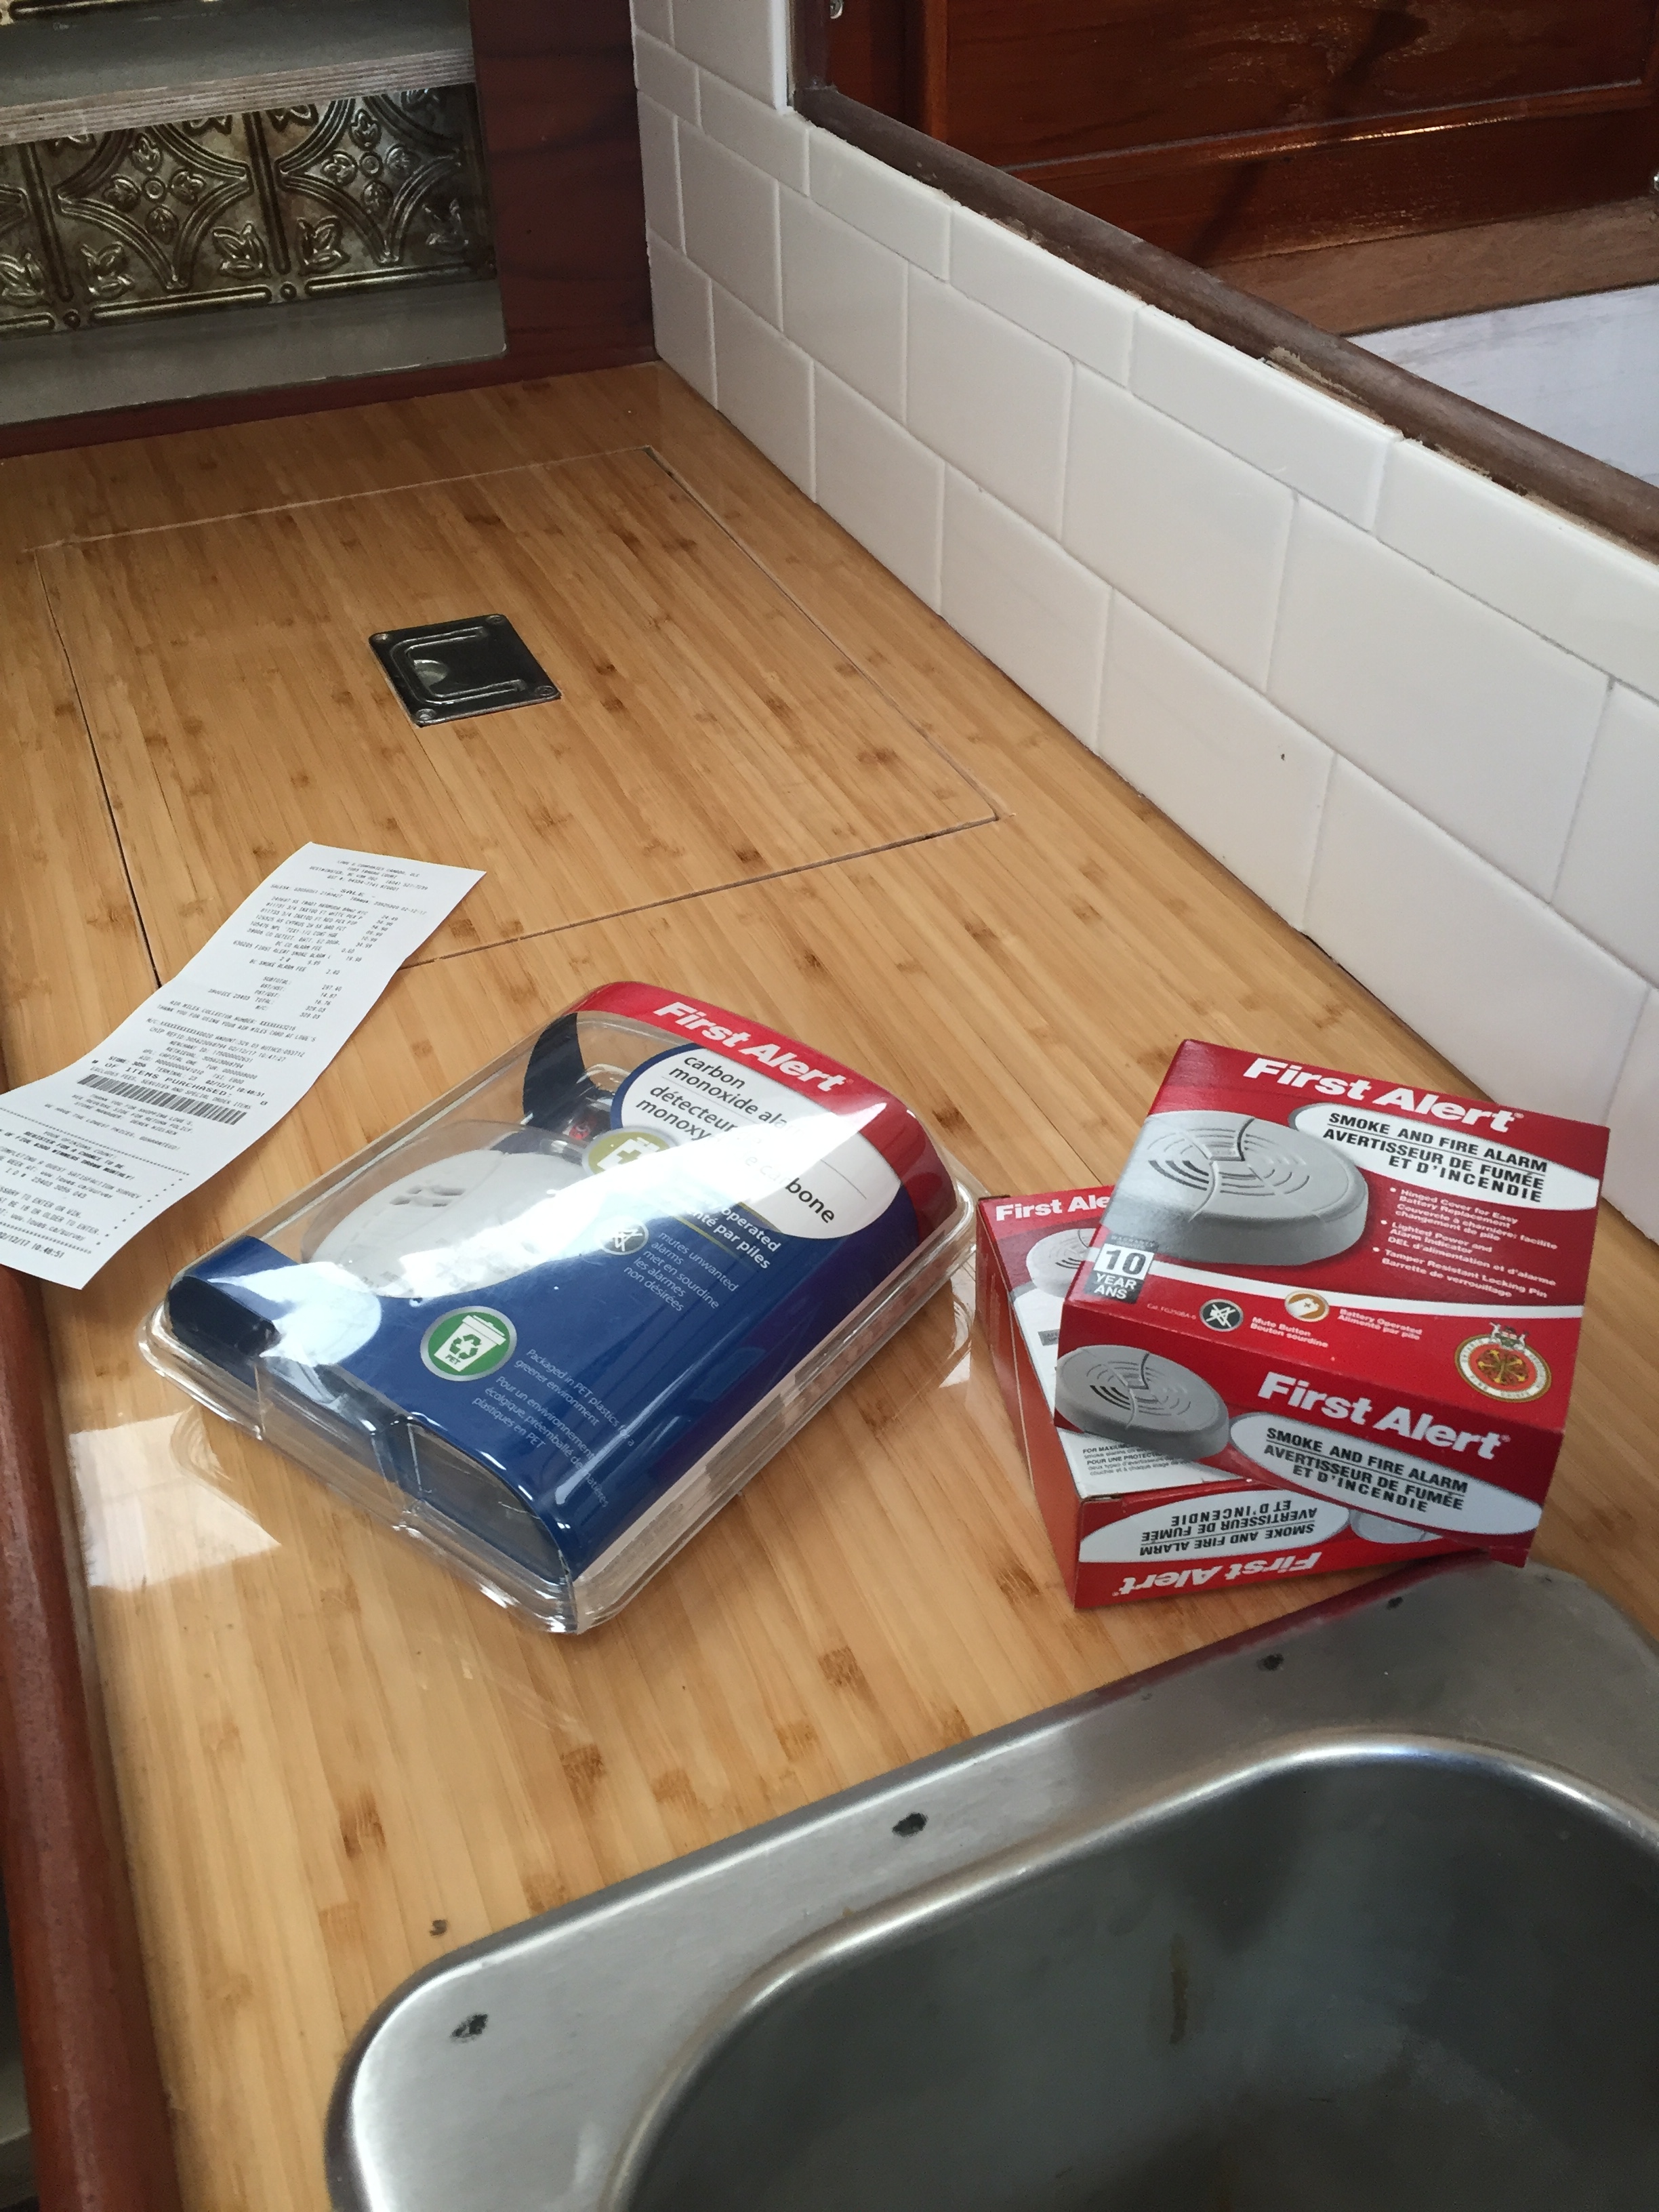
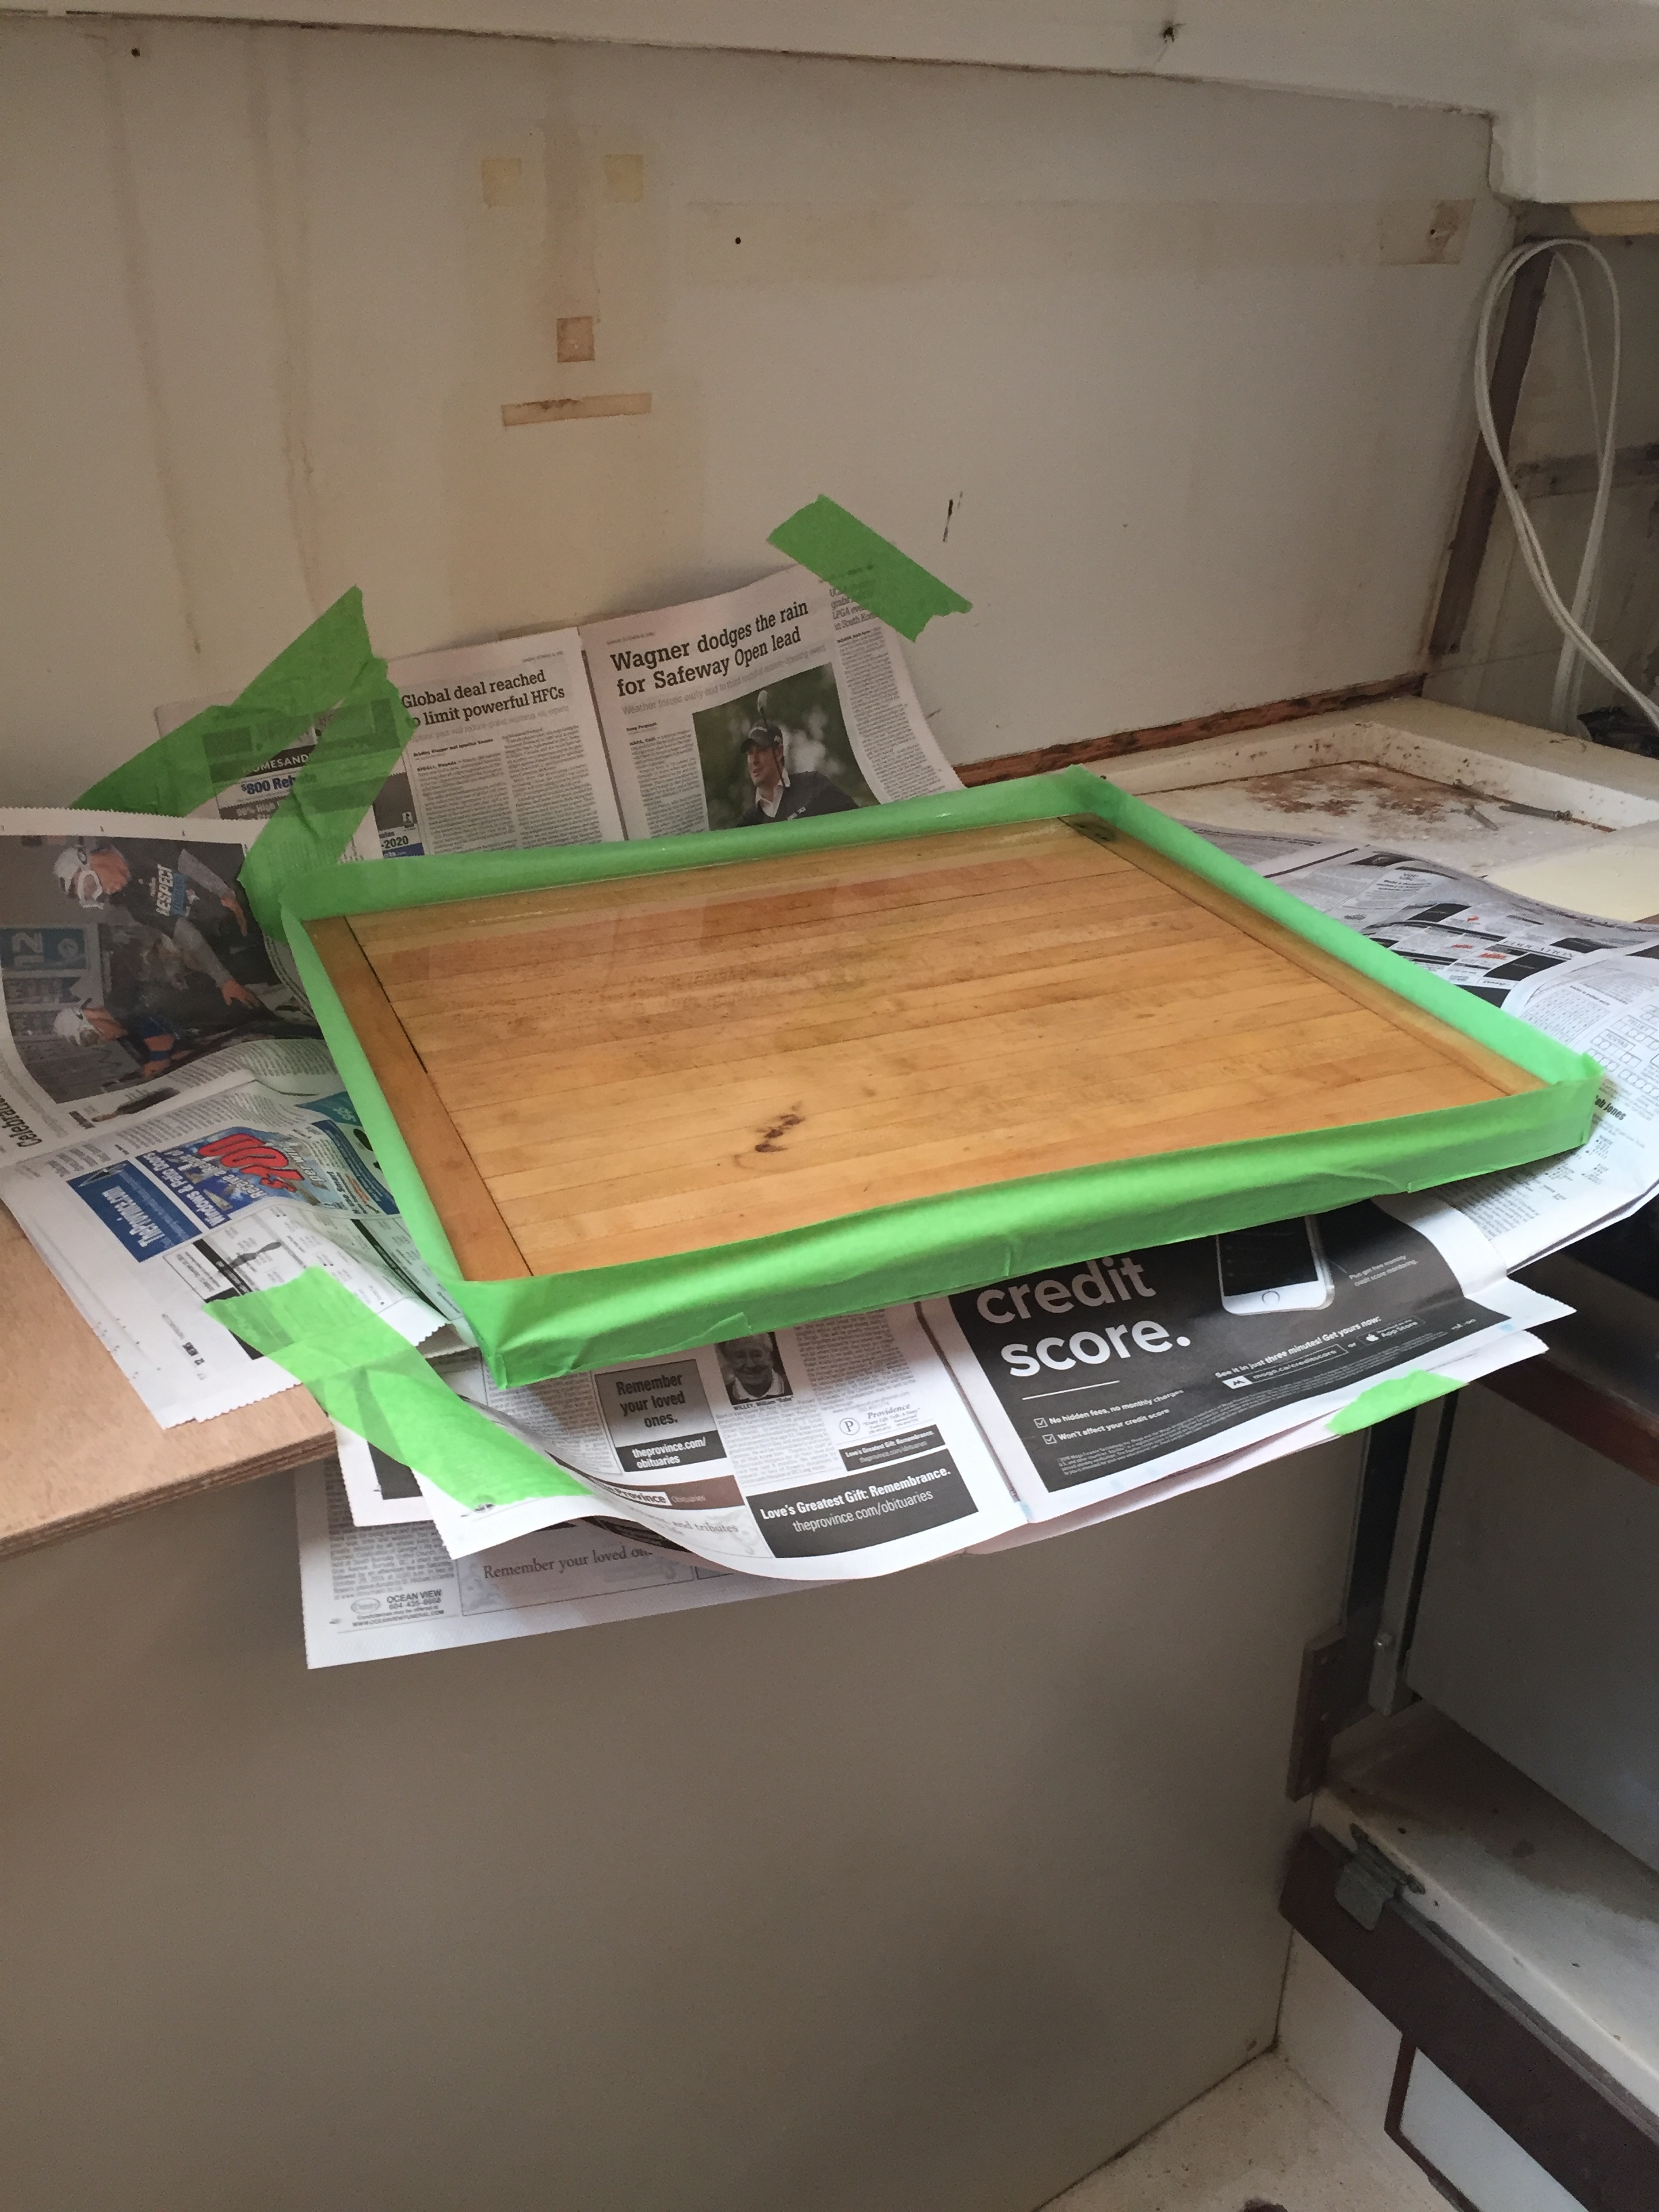
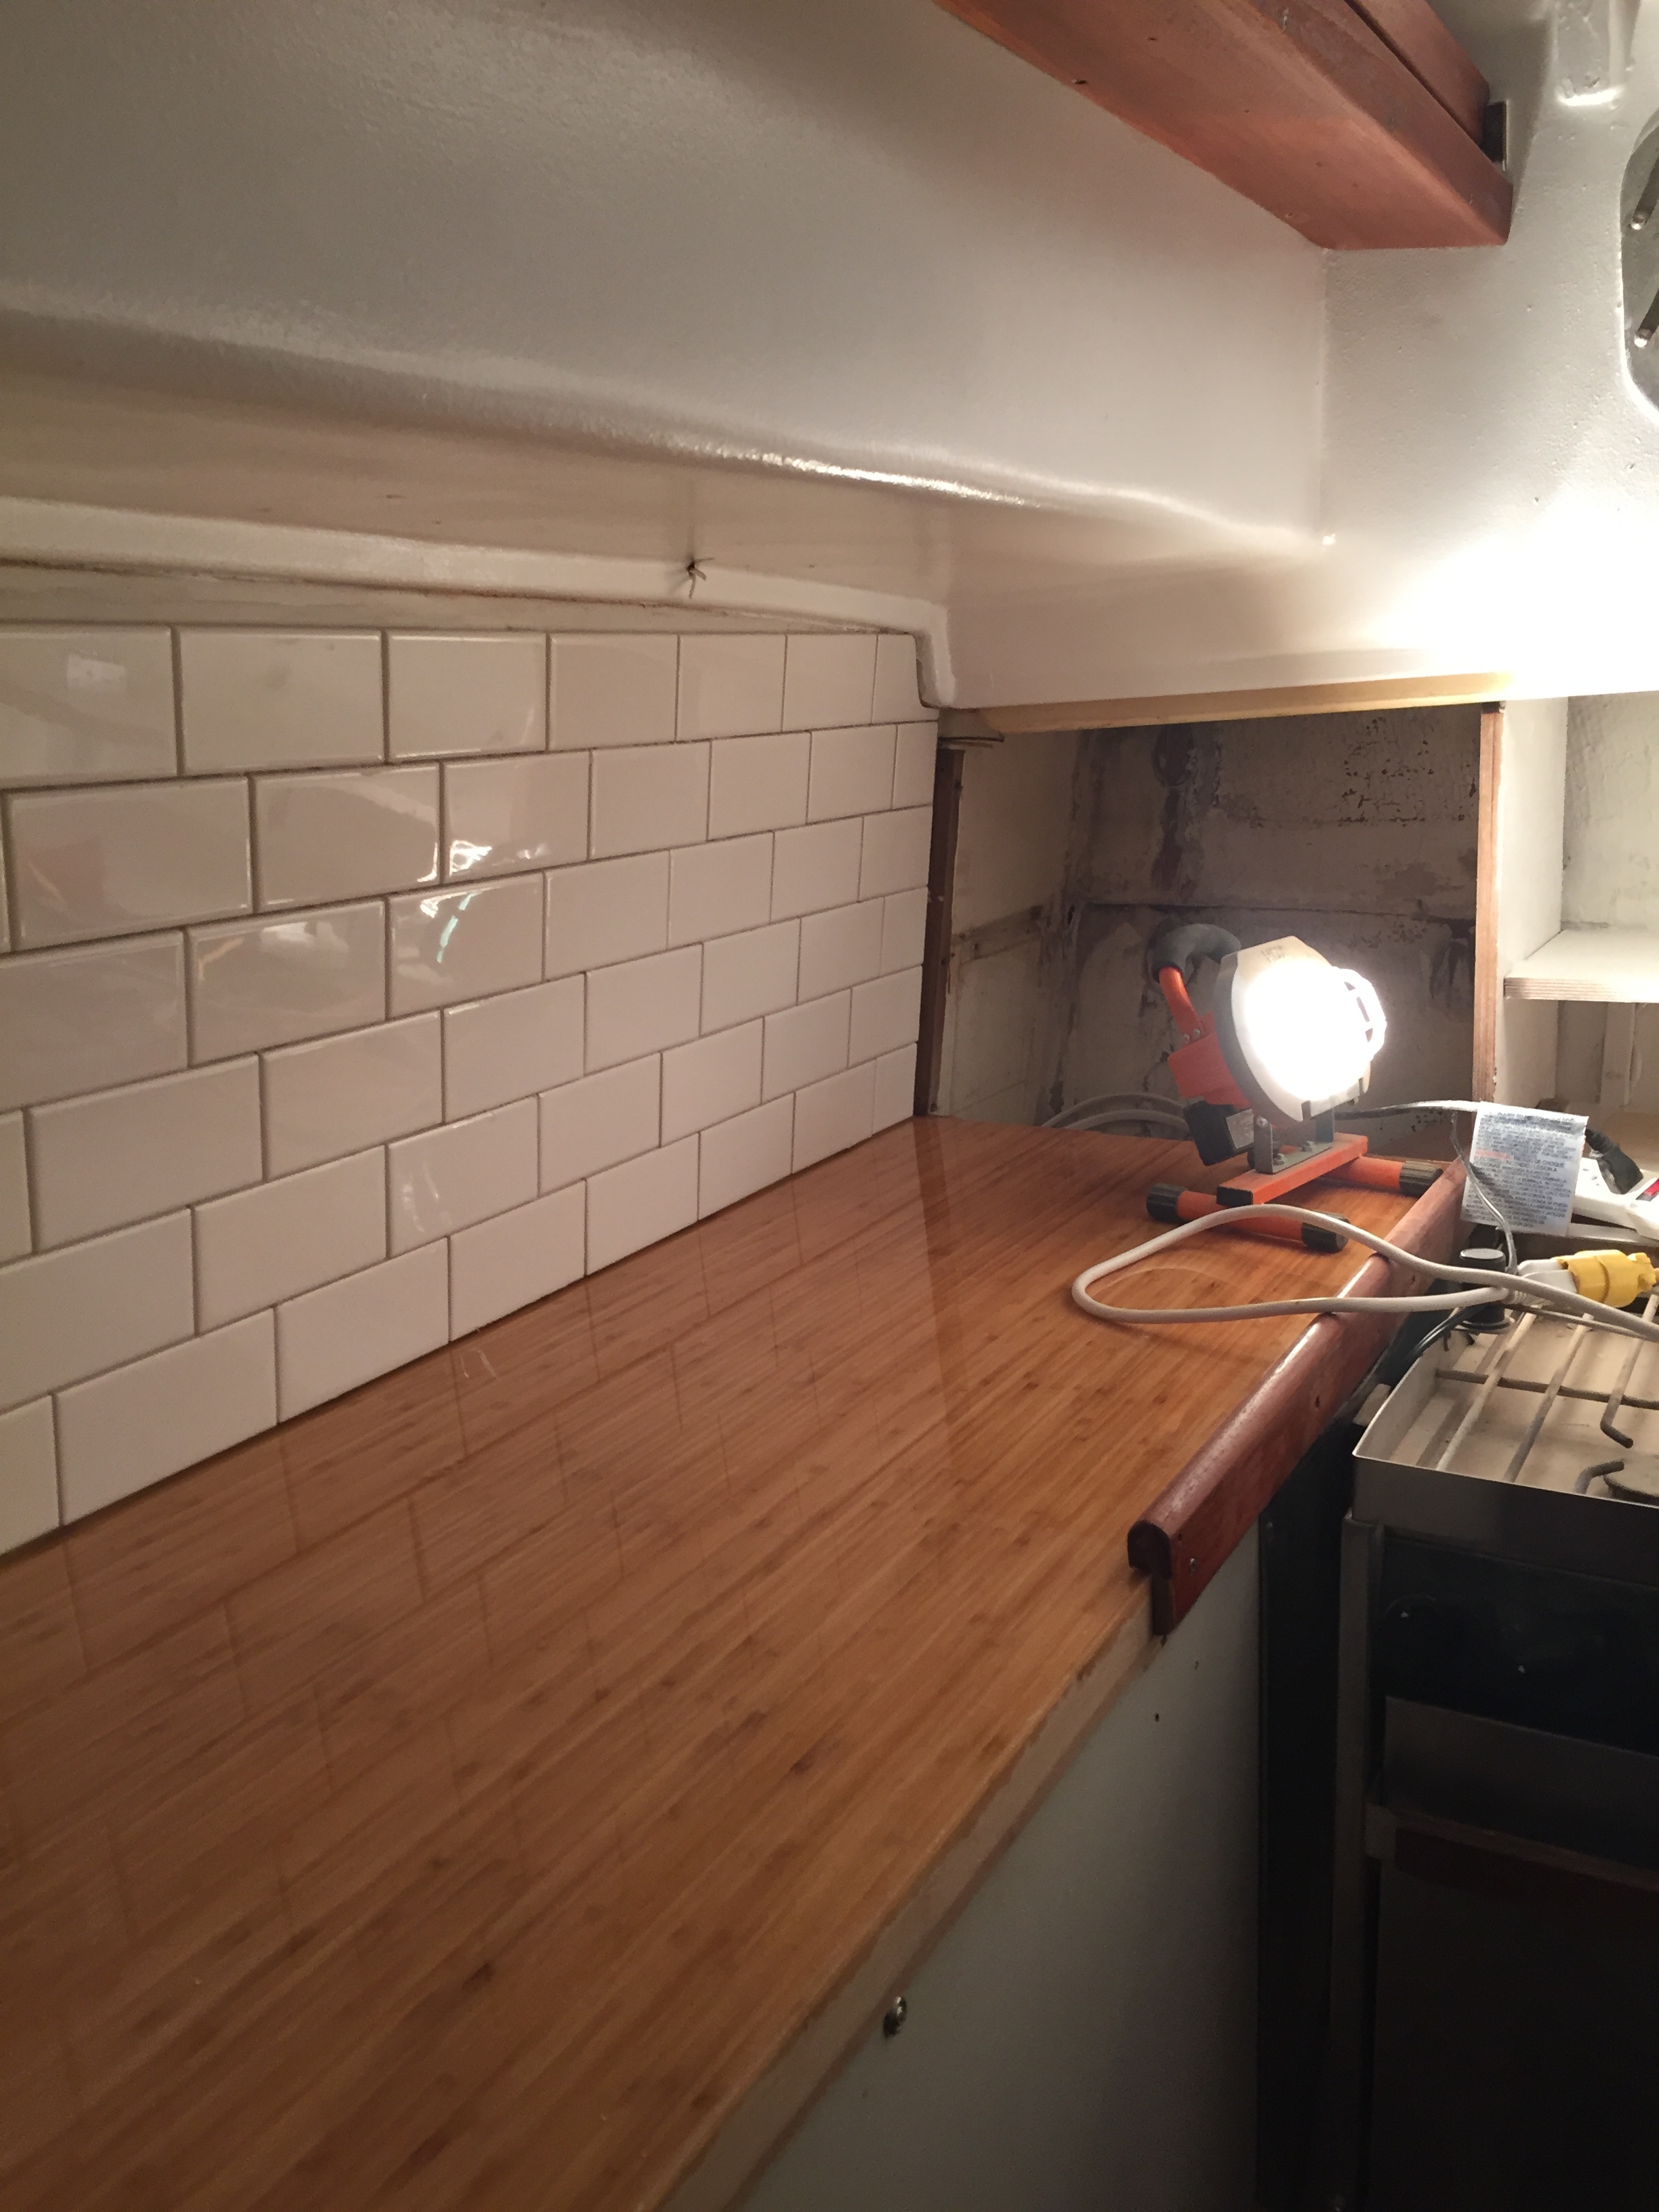
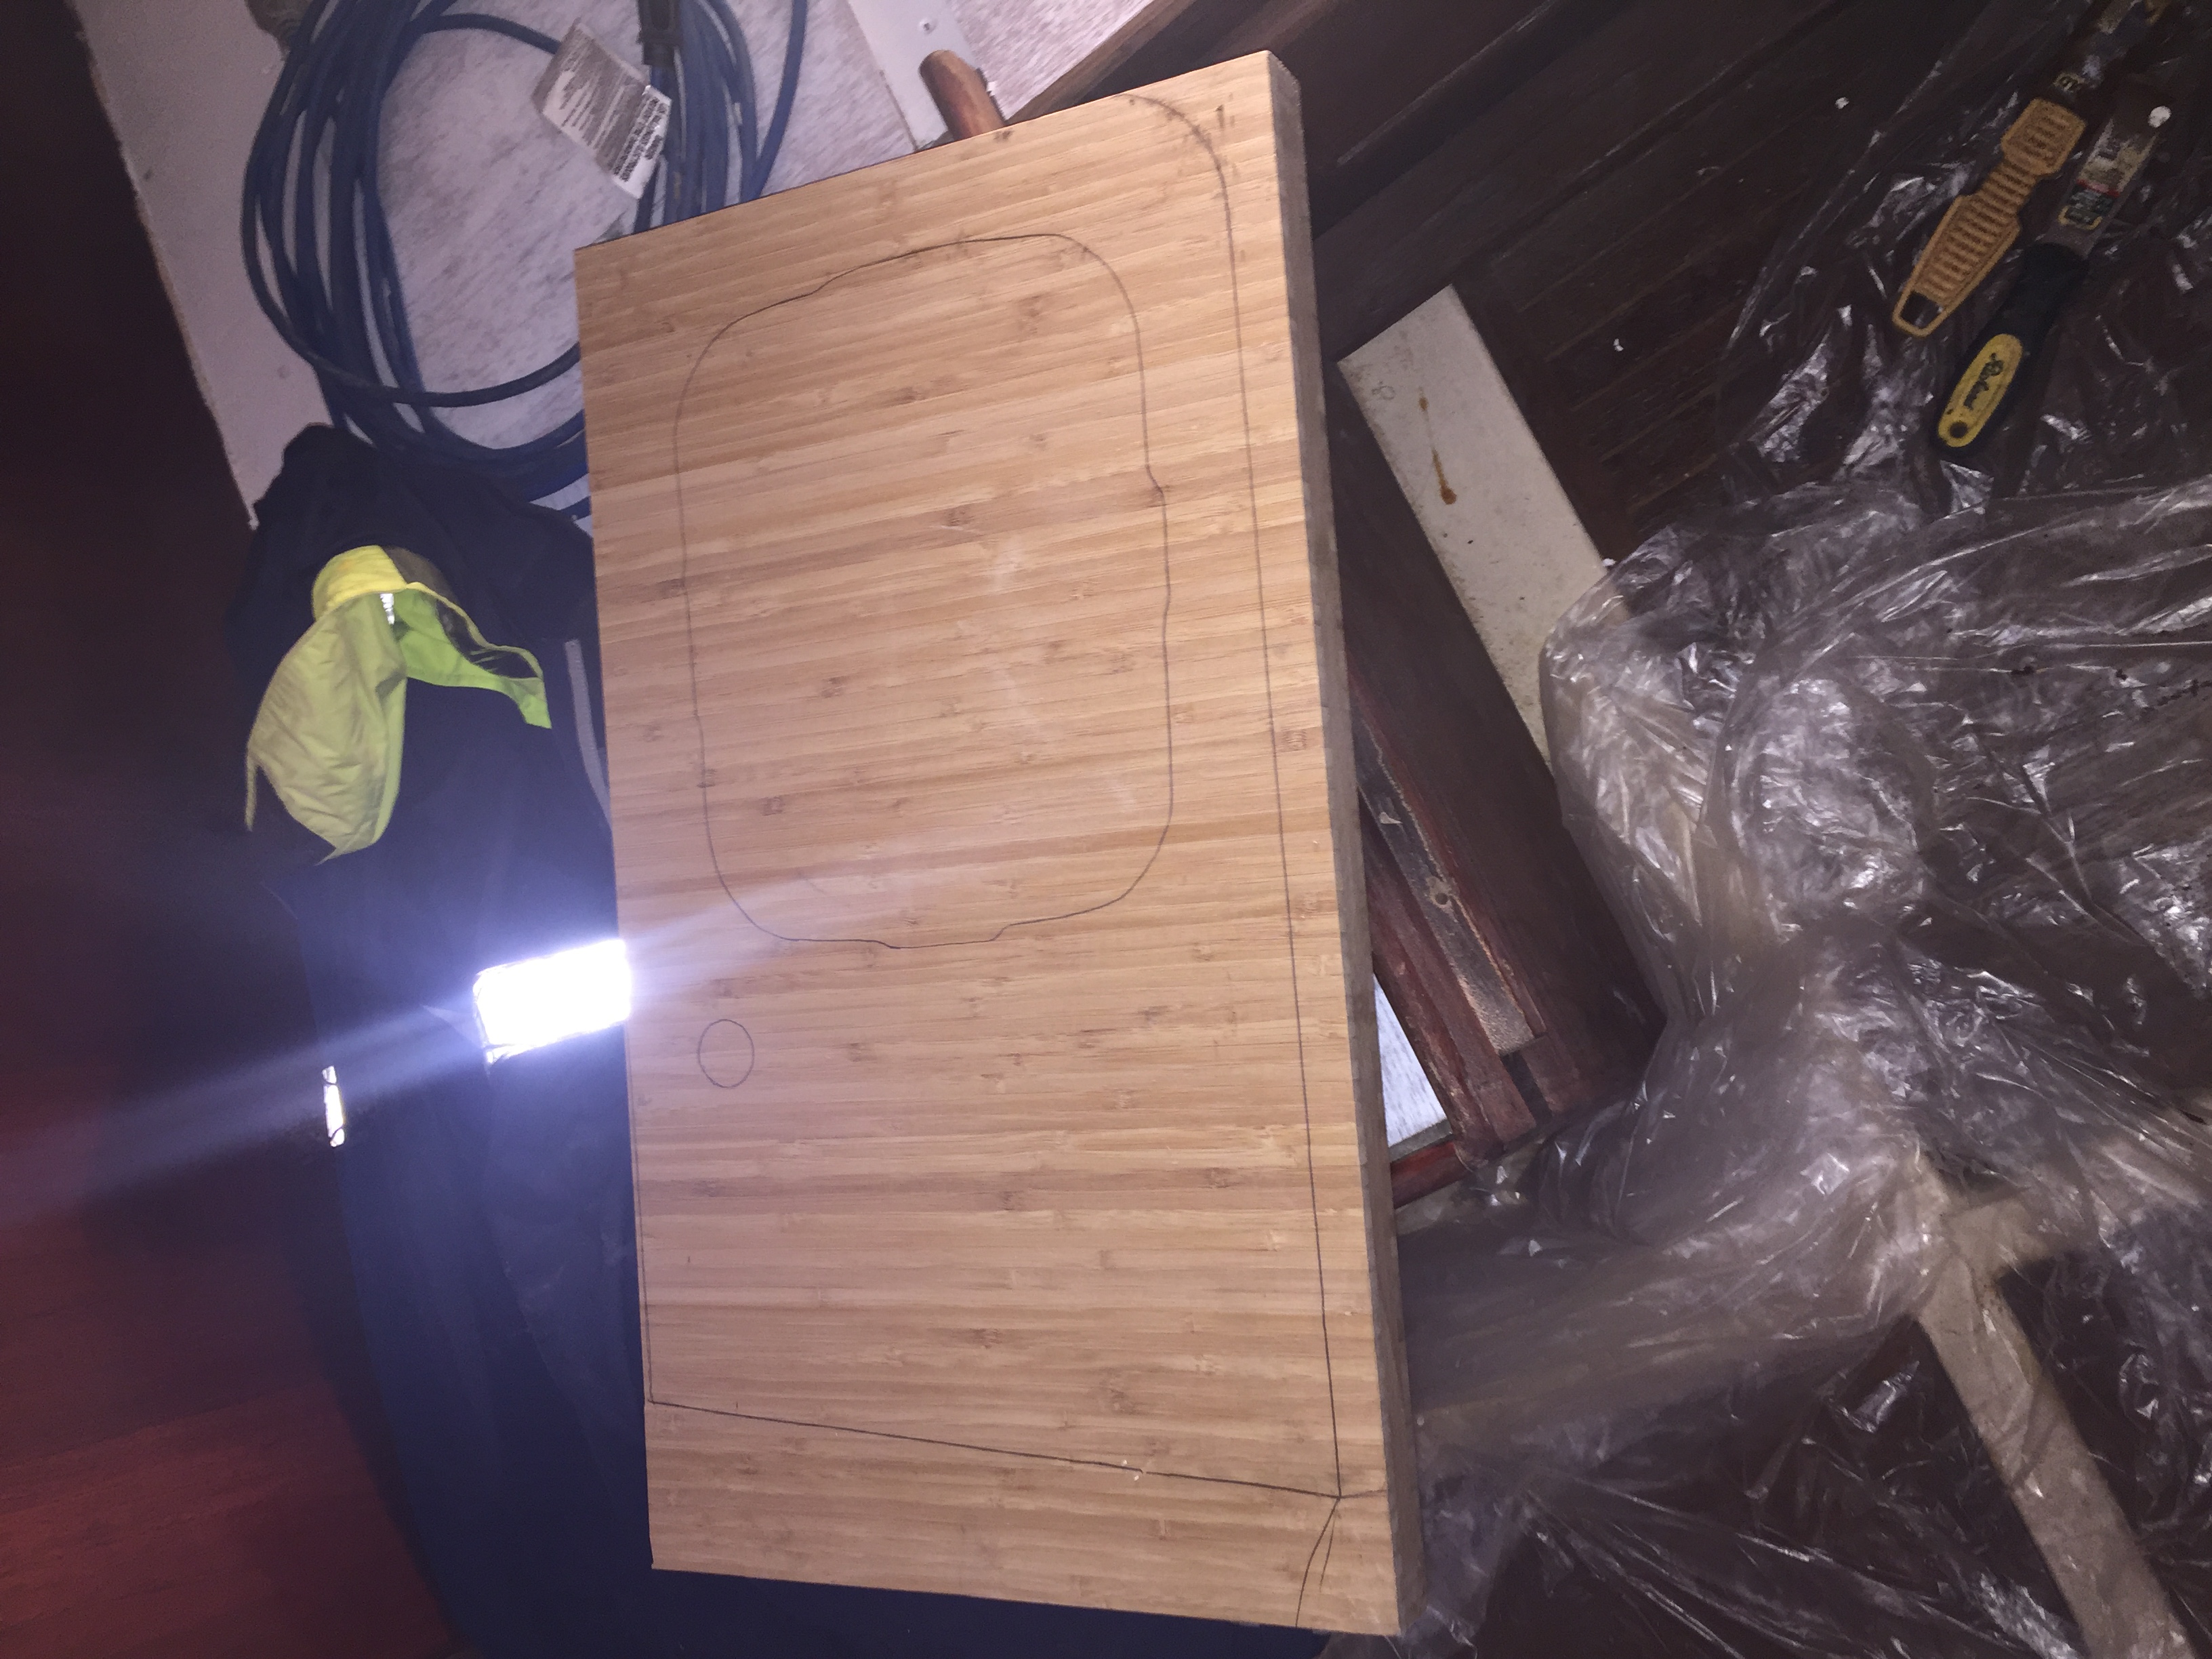
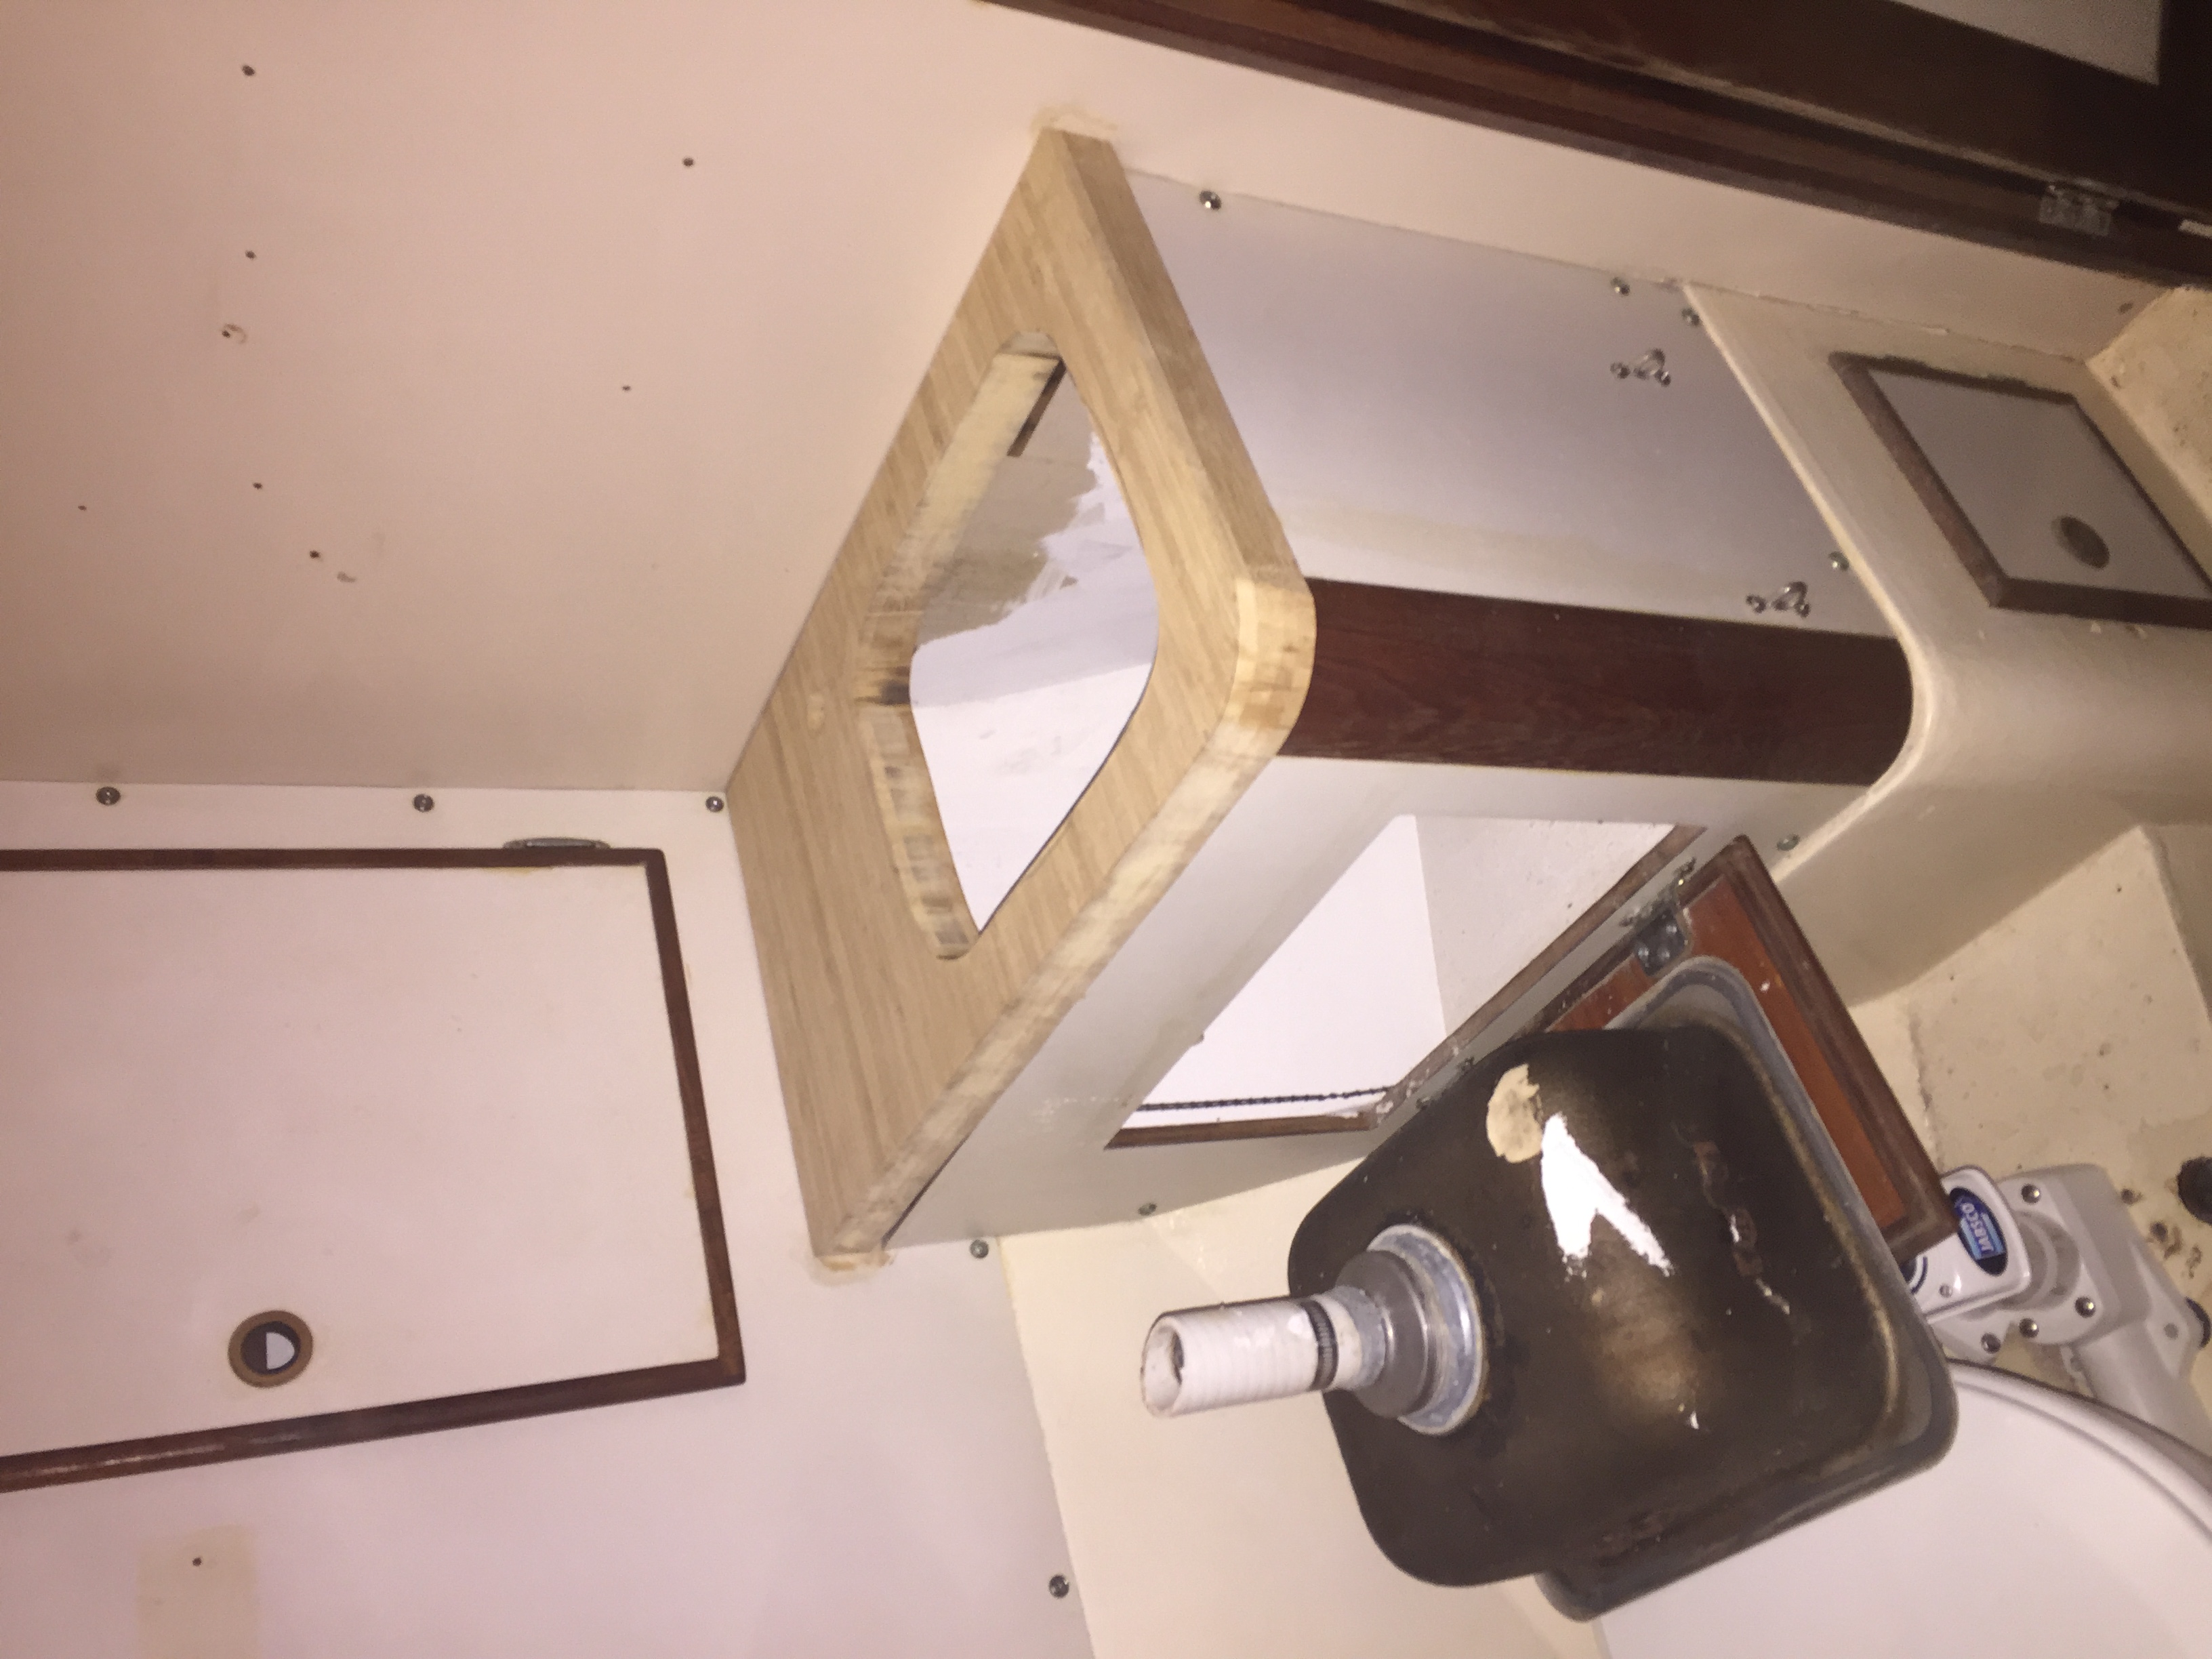
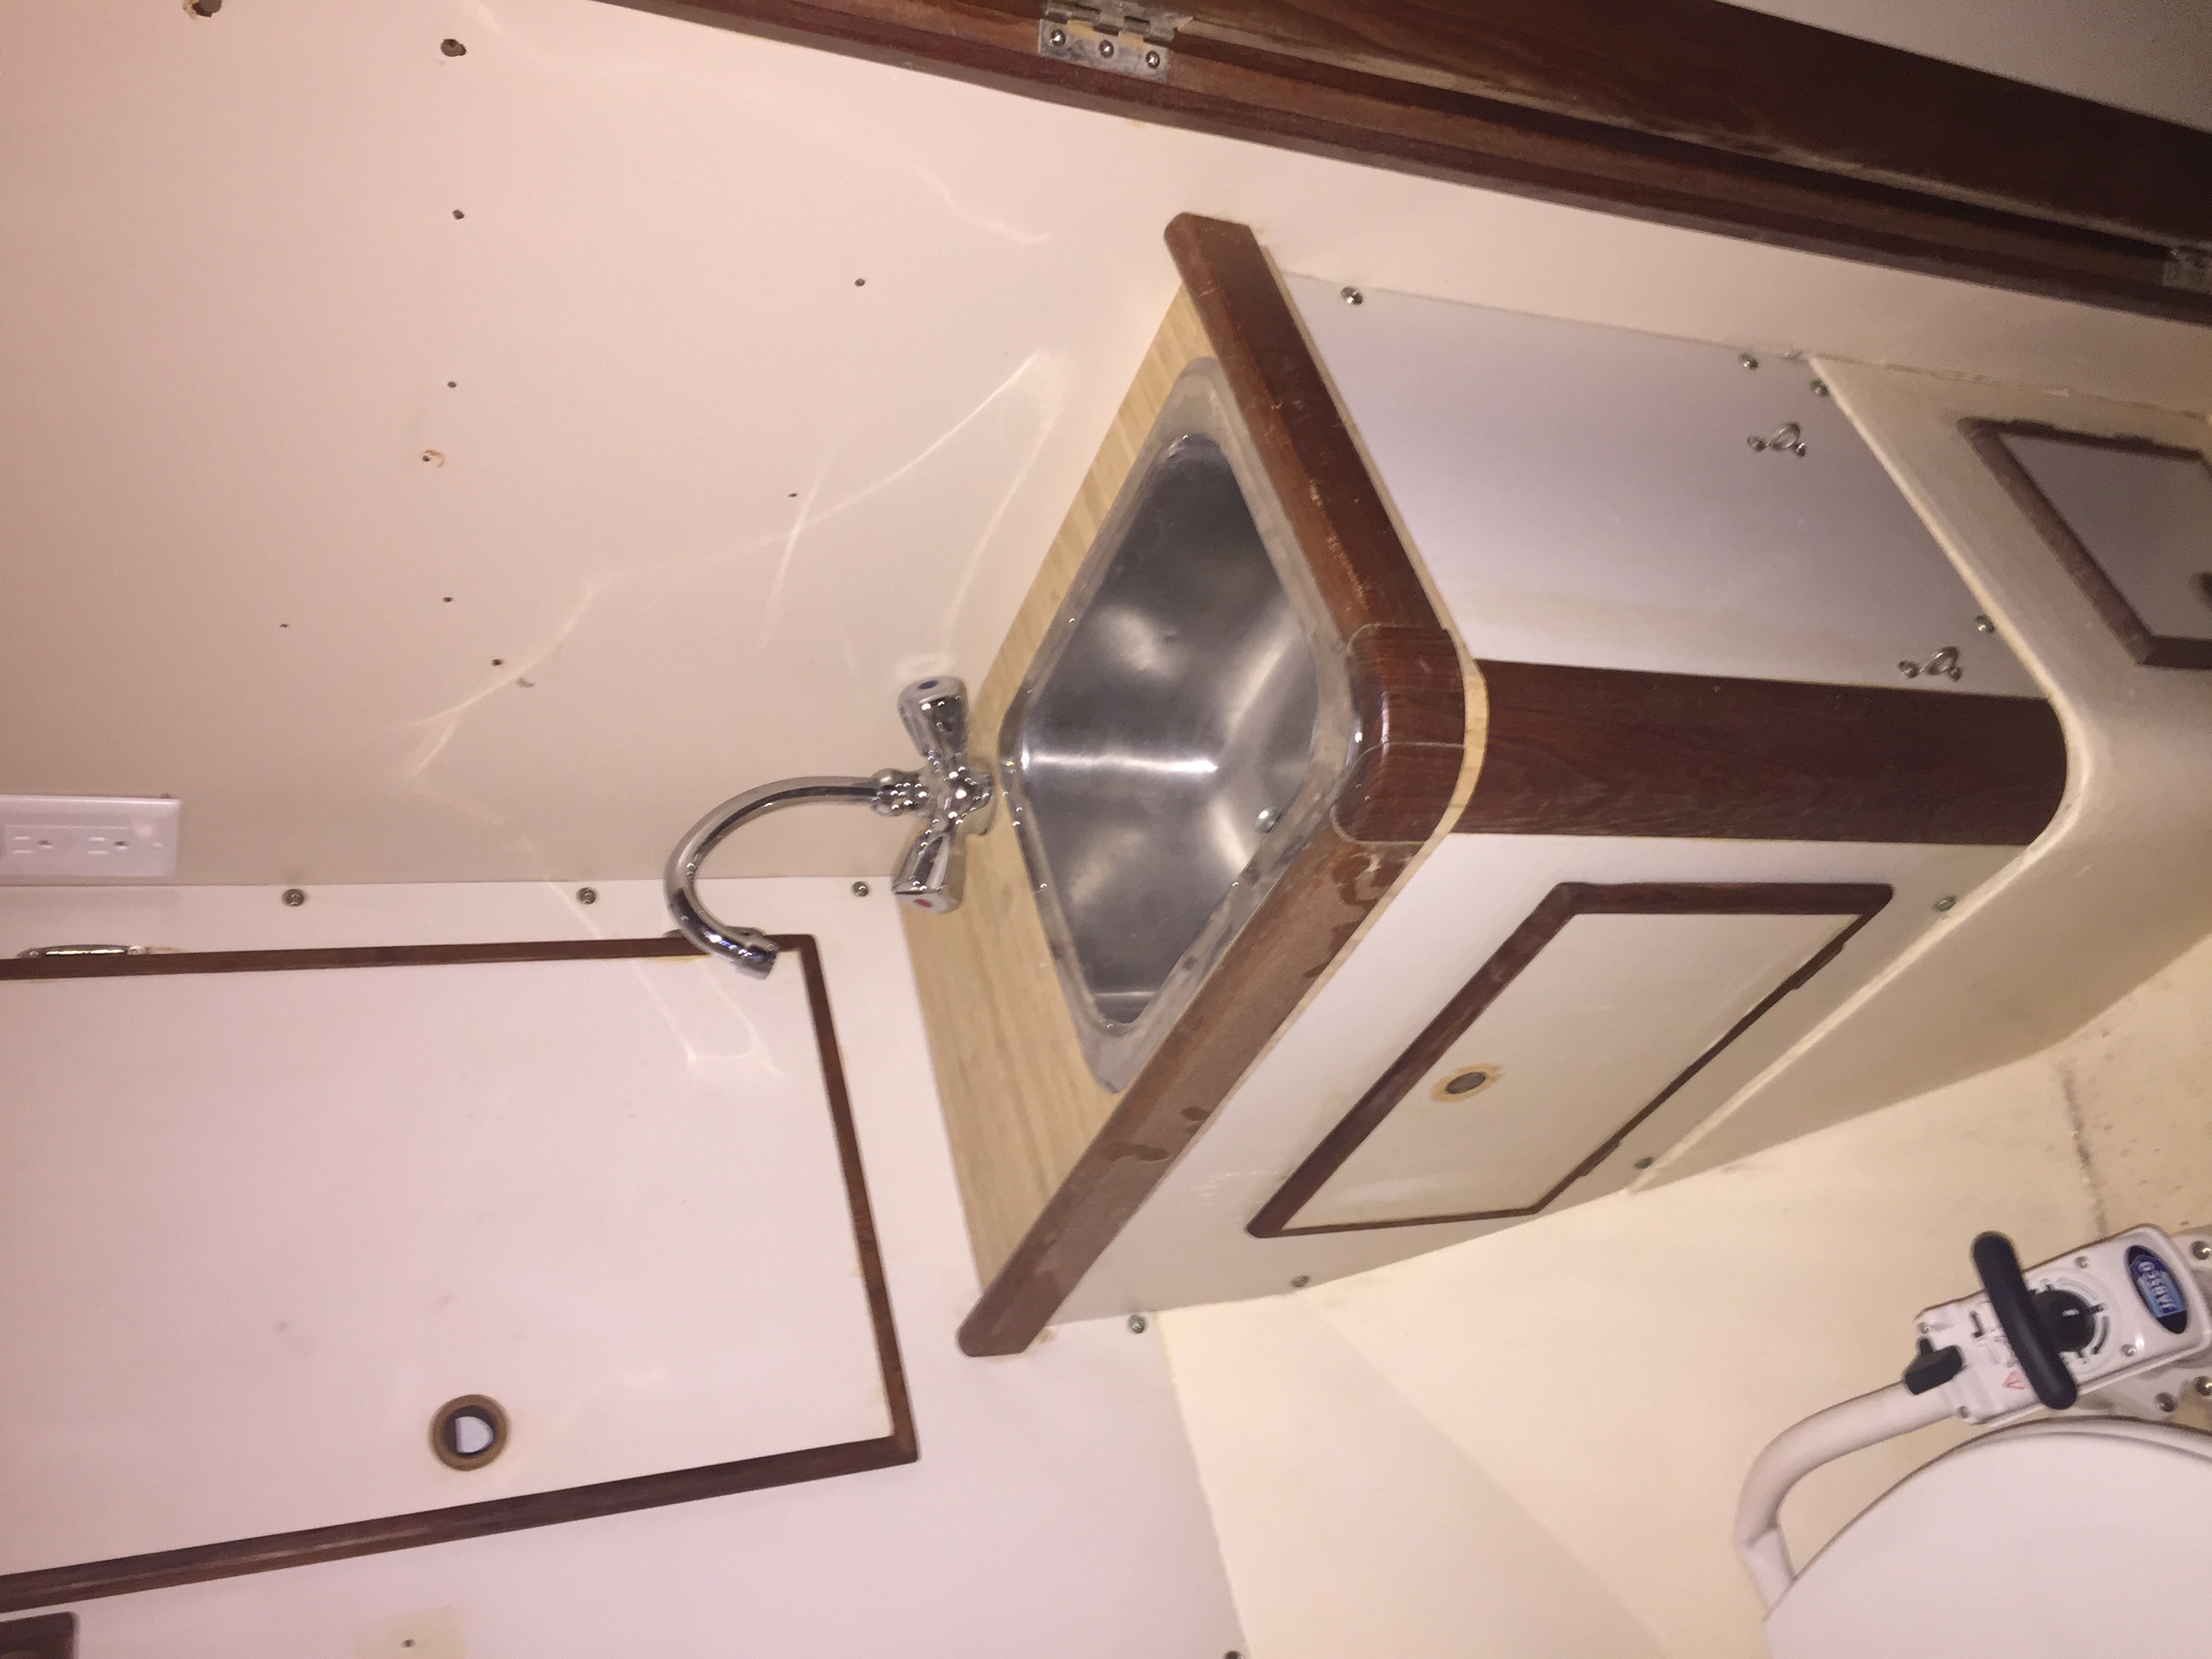
I have obviously watched one too many home renovation shows because it just didn’t seem right to not carry the bamboo countertops into the heads for continuity. Now I guess we will also have to carry the subway tile theme to match as well. Anyway, one more little job done, the forward head countertop is cut and dry fit. More next week I hope!