As of late…

Well, you may have noticed that we have been rather quiet for a while. Our apologies for that. We have been extremely busy in other areas of our life and the this site has suffered as a result. We have been working on Akupara whenever we can, and we have managed to make a fair bit of progress. So I will give a quick summary of where we are currently at.

90% of the electrical has been cut out. The anchor locker and vberth have been completely stripped and pressure washed, and are now ready for paint. The main cabin and the aft cabin are ready for pressure washing. We did pressure wash the complete deck as the dust and dirt were getting too much. All of the interior removable pieces are now in our basement. 90% of the deck fittings have been removed and the holes for all of the screws and bolts have been drying out in preparation for drilling them oversize and filling with epoxy. Half of all of the interior panels have had the backsides painted with 3 coats of paint to give them a fresh clean feel. We have a few more things to remove before the official rebuild starts, as in the rest of the plumbing and electrical need to come out still and the stanchions need to be removed (they are currently supporting the frame for the cover, so we need to figure out how to remove them without bringing down the top). And of course the dreaded job of sanding all of the decks still needs to be completed. This being Easter weekend and us having 3 days off will definitely help and fingers crossed, but we should make a fair bit of progress.

Possible chores for this weekend include: cutting out existing anchor locker bulkhead as it is rotten. Cutting out the foredeck to begin repairing the soft spot. Painting the v-berth and anchor locker. Painting the remainder of the interior panels. Sanding all of the interior wood.

Check back over the weekend as I will try to update our progress at the end of each day.

Bath time!

Akupara is the third boat we have owned that has had a wooden ceiling on the hullsides. I love the look of the wood and how it brings a feeling of warmth to the cabin. Akupara is also the third boat we have owned that it is obvious that none of the previous owners have ever removed the ceiling to clean behind it.

The ceiling in Akupara’s v-berth is like a lot of other boats in that it is comprised of approx. 4 inch wide strips of wood that are screwed to the side of the boat in one fashion or another. Of course there are tiny gaps between each of these slats where detritus from past years will accumulate. I realize we all like to think we are clean but in reality it is impossible to be spotless and eventually the empty space behind your lovely wood ceiling will begin to take on a life of its own. If you own a boat with nice wooden slats running down the interior of your cabin, take a Saturday morning and remove them just for fun. Typically there are only a few screws holding each slat so it isn’t a huge endeavour. You may be surprised at what you find.
https://youtu.be/Za2llAwM1oo


New versus old

We are leaning more and more towards replacing critical components with all new systems. Originally we considered keeping the engine and having it overhauled but as we get farther and farther down this path, we are leaning farther and farther towards a new one. This same thought process is happening with everything on Akupara.

Some would argue why spend all the extra money when you can save a bunch by fixing and reusing what is already there. I agree with this thought process completely but, the last thing I want to do is to be in a nice tropical anchorage and be worrying about my 45 year old engine, or the 45 year old wiring that is behind the walls and that I can’t see.

This is going to be our last big boat and we plan on keeping it for a very long time and we would like to have as many years as possible without having to worry about old systems.

The other side of this is that yes we could keep the existing engine and have it rebuilt, but how long will it take to spend $5000? I would guess that the starting price at rebuilding is close to that, and it wouldn’t take long to be creeping up to the $10000 price range. One or two major problems after that and we have just spent the cost of a new engine, on a 45 year old engine.

This of course opens up a whole other can of worms as now we are going to have to start thinking about fuel tanks as well. If the engine comes out, we might as well replace the 3 tanks while we have the access rather than discover a problem a year down the road.

We are still trying to feel our way through this decision process, but all of the indicator lights are currently pushing us towards going all new. And hey, in the end we will have a brand new 1976 Whitby 42, how many people can say that? 😉

Now, I need to start offsetting the cost of the new engine so who needs parts for a 60hp Ford Lehman ?? I will even consider selling the engine whole for $800, if you pay the costs associated with removing it!

The ugly side of painting.

IMG_0830Sometimes things just don’t turn out the way you planned.

This weekend was one of those things. We didn’t even make it to Akupara, somehow other things got in the way. That being said, we did manage to get 3 coats of paint on the back side of all of the panels from the interior. Why paint the backside you ask? Well, because they had never been painted and to be blunt, they were pretty gross. Our basement is getting smaller and smaller everytime we turn around. Behind all of the panels in the picture is some of our scuba gear, where in hell we are going to put all of this stuff on Akupara I have no idea. I think we need a bigger boat 😉

Two boats ago we had an Alberg 30, and for those of you who do not know, the Alberg 30 and the Whitby 42 were made at the same place, Whitby Boat Works. Having previously owned the Alberg 30, I am intimately familiar with the way these boats are assembled, and both are done the exact same way. All of the panels are screwed in and none of them are painted on the backside. Personally I like the fact that when we re-assemble Akupara, we will know beyond a shadow of a doubt that every square inch of surface area that we can not see, is clean, painted, and is somewhat protected from mould and mildew.

The paint I chose to cover the backs of the panels is a standard exterior mildew resistant paint. OMG you say, why are you not using Marine paint? Well, to be honest, considering we just used over half a gallon simply to paint the backs of the panels, we could eventually go bankrupt buying paint alone. When it comes time to paint the interior of the hull, we will spring for a higher quality paint, however nobody will ever see the areas that we painted with the cheap stuff, unless they start removing panels any way, and some paint is better than no paint! 😉

Captain’s Orders

The weather in Vancouver has been great the last two weeks and yesterday it was a true spring day. We made it to Akupara shortly after nine, with a full crew plus one and by midday we were working outside in the sun and the solar panels were actually putting a bit of juice into the battery bank.

Graeme,  August’s boyfriend, came along after graciously offering his help and my accepting. We have known Graeme for a couple of months now and he is a great kid! It was a very nice change having a young man aboard and I took the opportunity to use his strength to assist with a few things that I had been putting off. I made my way into the engine room and Graeme followed. We tried to trace the water maker plumbing and eventually gave up and just started cutting the hoses. After many contortions and maneuvers we successfully removed the entire system and one of the old starting batteries that was slowly self destructing.  Now with me being the farthest into the engine room and Graeme basically blocking the door, there was no way that I would be able to lend a hand to the ladies without having Graeme move, climbing out of the engine room and making my way to wherever the issue was, so Graeme took up the role and did a great job. As we were removing bits and pieces we could of course hear the goings on in the rest of Akupara and the feigned attempts at removing difficult screws and what have you. After what seemed like an eternity, I asked Graeme to go see if he could help and off he went. Within 30 seconds he was back and the issue was resolved. Hmmm, I might need to keep this guy around!! 🙂

I am teasing of course, a lot of times the issues do boil down to strength, however, normally speaking the Admiral and the crew manage to successfully perform any task they take up and perhaps at times they may try a little harder than I would just to make the point. Of course it does help to prod them along with “girl” comments 😉

So anyway back to my story.  August is a lot like myself and when she attacks something, she is either 100% or not at all. The last couple of weeks she has been extremely helpful and accomplished a lot of work. As we have been stripping the wiring, this is what the ladies did while Graeme and I were in the engine room.

Before we started yesterday I basically gave everyone a primer that went something to the effect of cut and remove any wire that is not grey (part of the auto pilot), or the larger white ones(GPS antenna wires) the rest are fair game including the AC wires as I specifically had not plugged in the shore power.

Occasionally there would be a call of “Dad, what about the green/blue/black/purple one that goes into/under/over this “thingy”?

Now, I have looked at every wire and every square inch of Akupara so far and I will say that I have a pretty good idea already of what is where, but when I am sitting inside the engine room beside the port fuel tank the only point of reference I have is to listen to where the voice is coming from, and based on that plot a line of position to where the individual is. From that estimated position, I then try to ascertain what said “thingy” is and thereby deduce which wire is currently confusing them. I am pretty good at it after 19 years of marriage and 16 years of having kids, so the majority of the time my answers were  a precise yes or no and this system worked very well, or so it seemed.  It also helps that there were only 3 different wires that I actually wanted to keep but there is no need to tell anyone that.

At the end of what I thought was a very fruitful day, I was making my rounds through Akupara prior to locking up and identified two little points of miscommunication. The port solar panel wire, which I do admit is black and red had been cleanly severed and to my amusement so had the main shore power cable from the back of the receptacle to the panel. The answer given when the question was asked was, “You said to cut all the black wires!” Damn.

I also recall the exact moment that the shore power line was cut and I also recall giving a firm yes when asked the question as it went something like this. Dad, what about the big black wire that goes through the cupboard. Based on my plotting I ascertained that August was at the starboard dressing table, which may have been a degree or two off. I also recall Graeme going to help with the big wire cutters. I also recall not clearly explaining that I wanted to keep the shore power available so that I could charge the batteries. 🙂

Oh well, it was going to come out sooner or later anyway.

Summary of yesterdays work:

Water maker removed (identified another area of rotten plywood between the engine room and the aft head)

IMG_4895IMG_0816


All electrical wiring from fore and aft of engine room removed. Rudder gudgeon removed and cleaned (appears to be okay to reuse, corrosion was isolated to the nuts and bolts)

IMG_0810IMG_0814


Navigation station dismantled.

IMG_0819


Shore power cut. 😉

Shocking…

We have been pretty busy as of late which has kept me away from updating the blog, so my apologies. The last two weekends have been spent continuing to remove the interior panels, bringing them home, and now the electrical stripping has begun. I figure we have one more trip to bring home the rest of the pieces.

IMG_0800IMG_0801


So far we have managed to remove all of the 12 volt wiring, as well as the 110 volt wiring on the starboard side,  from the nav station area forward. The port side is back to the main cabin bulkhead between the foreward head and the main cabin. It is amazing how long it takes to actually get this stuff out. The old electrical boxes are badly corroded and the majority of the screws are pretty rusty. The AC wiring is some of the thickest, most hard to cut stuff I have seen in a long time, but seeing as how it is 38 years old, it has to go. Which means that even with all of the interior panels out, we still need to twist and contort to odd angles and positions in order to remove it. It is fastened very well! We have also had to go a little bit deeper into the removal of panels than I was originally intending, but hey, in for a penny, in for a pound!

IMG_0803

Over the last couple of months the battery bank has slowly gone down more and more so on Sunday I decided to try to charge it a bit using a standard automotive charger seeing as how the electrical is 1/4 gone and I have loose wires hanging everywhere, I am unable to plug in the shore power of course. The little charger managed to put a bit of life back into the batteries, we will see just how much this weekend. However it gave me enough that I was able to pump the bilge out, and just for the hell of it, turn the ignition key.

The good news is that the engine turned over – barely. So at least we know that it is not seized and that the starting system is correct. if we decide to try to keep it, we have are a little farther ahead, but it will obviously require a lot of TLC before we try to start it for real.

Our basement is slowly becoming inhabitable. It is filled with more boat parts than I care to mention and at some point we are going to need to take a boat day, and use it to organize the basement so that we can start making some progress on rejuvenating all of the bits and pieces.

I am eagerly awaiting for the day when we have enough of the interior removed and stripped away, that it makes sense to pressure wash inside to remove the years of grime and filth. Almost there I think, not counting the engine room yet.


Water, water, everywhere…but not where it should be!

To all boat owners everywhere. If you have a deck leak, please take the time to address the situation properly to prevent unnecessary damage!

Akupara was built in 1976. That makes her 39 years old. We expect to find issues considering her age and that there have been several previous owners, which is why we are doing a complete rebuild which includes completely gutting the entire interior, electrical, plumbing, and mechanical. Had we just launched her as is, we would never have been aware of some of the more serious issues that we are slowly discovering. We knew we had a large foredeck repair coming and since then have discovered that the anchor locker bulkhead will need to be completely replaced, and yesterday as August disassembled the aft cabin, I had my first really good look at the mizzen main chainplates. The chainplates themselves have been replaced which is great, but they will need to be removed, and I will need to perform some surgery on the aft head bulkhead and aft dressing table bulkhead. It seems that whoever did the replacement, removed the old chainplates and discovered some wet plywood in the bulkheads. Rather than completely cut out the wet wood, and glass in a proper repair, they simply used a hole saw and drilled a bunch of holes enough to chisel out the immediate area of the chainplate, used some kind of a block of plastic and reattached the chainplate. I was stabbing it with a screwdriver to try to identify how big of an area will need to be fixed. Prior to that, it actually did not look that bad.

IMG_0775Thankfully, the actual knee that the chainplate is bolted to, which is on the other side of the bulkhead, seems to be solid and dry so the repair will be limited to replacing a portion of the bulkhead only. As well, the repair will be hidden inside the upper lockers in the aft cabin as since it is a rather tight area to get to, the repair may not turn out as visually pleasing as I would normally like. This does allow for a more robust repair though, which is good.

IMG_0776So, we have some more grinding and glassing to do but when we are finished, it will be as solid as it was originally. Did I mention that we will be using all marine grade plywood for repairs? Household plywood has absolutely no place on a boat.

Oh and there is also a very good look at some of the condition of the deck fitting bolts. You can actually see water dripping from one bolt. These are for one of the stanchions which we have not removed as of yet.

For those of you who have been following along, you may be wondering why we seemed to switch to dismantling the interior. We decided that we needed to gut the interior as soon as possible to allow Akupara to thoroughly dry out inside. All of the “pegboard” that lines the hull inside the lockers is simply trapping moisture, and hiding cockroaches 😉 and needs to be removed asap and given a chance to dry as well as quite a few pieces of wood.


Carlos the Cockroach

I was in the aft cabin helping August remove a few difficult screws and Paige and Andrea were in the main cabin and forward head working away when the scream finally came. It was the admiral who discovered our stowaway! I quickly made my way forward with visions of blood or some other trauma flashing through my mind. How do you hurt yourself with a screwdriver was all I could think. As I arrived on the scene I found the Admiral attempting to mount a courageous attack. There she stood in her finest combat attire, a screwdriver in one hand and the vacuum in the other. She was definitely shell shocked, and seemed unable to make the final offensive or lead her troops into battle. I hurriedly glanced at Paige to see if perhaps she was the victim, however a quick glance revealed no blood there either. I didn’t understand. What had happened? Where was the injury, who had suffered it? Very slowly the admiral pointed with the screwdriver. In almost a whisper she slowly mouthed the dreaded word. Cockroach!

Carlos the Cockroach RIP
RIP Carlos the Cockroach

Now to be honest I am not the greatest fan of creepy crawly’s either, but this is our home damnit, or will be eventually and as the Admiral, I would expect that upon finding a stowaway, she would immediately take charge and either arrest said stowaway, or make them walk the plank or something, but in this case, I assume she felt that it was time to delegate responsibility to those beneath her. Paige, was already at the top of the companionway preparing to abandon ship and refused to come below to meet Carlos. I quickly grabbed the vacuum and put an end to Carlos forever. Or at least until we have to empty the vacuum. Well, of course Carlos mounted a strong offensive and absolutely refused to go down the hose, and as soon as I shut the vacuum off, he fell out of the end of the nozzle onto the cabin sole. This inspired another round of “war cries” from the peanut gallery, brave souls they are. By this point now, The admiral, August and Paige were all gathered around the companionway and I could tell by the look in their eyes that it was each man for themselves and they would take no remorse in leaving their comrades behind, or trampling overtop of each other in order to make their escape.

IMG_0791

Eventually the screw that we had sucked up previously, fell out of the hose as well, and both screw and castaway were consumed by the trusty shop vac.

By the way, I forgot to mention that Carlos the Cockroach appears to have been dead for several years. Carlos, prior to his passing, found the only dry spot in the entire boat, tucked way in behind a piece of the pegboard that lines the inner hull, inside the head cupboard and was slowly mummified

It was only a matter of time before we found him. All of the indications were there, and the further we dug into the bowels of Akupara, reducing and eliminating places of cover and discovering new exciting secret locations, the higher the odds were that we would discover him!

We have found approximately 30 cockroach motels and at least 10 spots where there was cockroach paste, that brown sticky poisonous bug killer had been smeared in high traffic areas. So we knew at one point in time Akupara had a serious case of stowaways.

So the good news I guess is that the previous owners took the issue seriously, but the bad news is that with all of the hiding spots, we were still a little worried about finding them. Thankfully, when we finally did find Carlos the Cockroach yesterday, his days had ended peacefully a long time before.


Stain-Less steel, not Rust-less steel…

I firmly believe that there is a common misconception out there that stainless steel is a miracle material that will never stain, never rust, and never corrode.

After removing every screw, bolt, nut and washer from Akupara’s decks I can assure you that this is not true. Every single screw, bolt, nut and most washers was either rust stained, partially rusted, or completed corroded all the way through. We broke as many screws  as we managed to successfully remove, when trying to get them out.

Some of them we were able to remove after they broke, but some of them still need to be removed. Almost all of the corrosion starts approximately 1/16th of an inch below the deck. So it isn’t on any visible part, and if you could remove whatever fitting it is without removing the screw, you would not be able to see anything wrong. However, back the screw out 1/16th and the issues start to appear.

When we begin reinstalling things, we hope to avoid some of these issues with the way that we will countersink the deck and add  little rings of butyl tape around the bottom of each screw. When the time comes, we will document the process on the sight for everyone to see.

Take this as a warning to anyone who doesn’t re-bed their fittings on a regular basis, perhaps it is time to check all of that stuff?

No worries honey, it's stainless!
No worries honey, it’s stainless!

Switching things up.

Sometimes you just have to stop what you are doing and switch to something else and that is exactly what we did.

We had an errand to run prior to going to Akupara this morning, we dropped off the 2 scuba tanks that were on board when we bought her to see if they were still good. 1 was toast but one passed the internal visual and appears to be salvageable so we left it to be hydro tested and have new seals installed. Of course since we went in with 2 tanks there was no way I could leave without 2 tanks so I purchased a good used one that passed visual and hydro last month. We pick up the original one next weekend.

So when we arrived at Akupara we just weren’t in the mood to fight with nuts and bolts on deck fittings so we changed things up and began dismantling the interior starting in the v-berth.

Behind the ceiling in the v-berth |(ceiling refers to the wood slats that are on the sides of the v-berth) we found 40 years of dust dirt and grime. I don’t think anyone has ever tried to clean behind it before and it is so black that the only way I can think to clean it off is to pressure wash it, so as soon as we have all the rest of the interior out, that is exactly what we will do.

We also marked out the areas on deck that we will need to re-core and we did 2 test spots with the belt sander to see exactly how hard it is going to be to sand it down. Thankfully, it seemed to go fairly well and in 15 minutes I had about 3 square feet sanded down quite nicely with 80 grit.

Tomorrow we will try to resume the removal of the deck fittings.

We have also decided to take out stock in a stainless steel screw company as we have probably discarded  a full bucket of screws by now and will need to replace all of them.  😉


http://youtu.be/C0L7NeWkQlM

http://youtu.be/C0L7NeWkQlM

Down to the gelcoat you say? No problem!

So we had our first, of many I’m sure, contractors out to Akupara last weekend to take a close look at the decks and provide an estimate to having them media blasted.

He seemed like a thoughtful contractor. He discussed the project at length, he examined most of Akupara’s decks, he even took pictures of some spots. He discussed portioning off parts so as to minimize the dust etc. and we took a screwdriver and scratched off some of the non skid to attempt to determine how thick it was.

When he had gathered enough information, he thanked us and was on his way, but then about 2 minutes later there was a knock on the hull. He asked if there was a piece that he could bring back to his shop in order to run some tests. That way he would have a better idea as to how much material he would need to remove the non skid and paint. I reluctantly removed one of the aft locker lids and let him take that on his way.

The next day I received an email with a nice quote all typed up and professional, but to my horror it was $9300! How in hell can a rough estimate go from $1300 with one company to $9300 for another.

Well, the answer lies in one’s understanding of what gel coat actually is. In the email exchange that followed his quote, he kept talking about how much effort was required and how much media he needed to get the paint and non skid off. I know some of these products can be hard, but I was still in sticker shock so I didn’t really pick up on certain subtleties of his spoken word. In any event, I made it clear that I was not going to proceed at that price and we made an arrangement to meet so that I could get my locker lid back.

Imagine my surprise when I went and picked it up and saw this.

hatch
Ya I can take it down to the gelcoat no problem. So what is gelcoat exactly???

It seems that in all of his eagerness to obtain the job, he may have forgotten (if he ever knew) what gelcoat is, or perhaps he got confused and thought I had said, take off all of the gelcoat, but in any case, all of the non-skid and al of the paint and all of the gelcoat has now been removed from my locker lid.

Oh well, now we can practice our filling and fairing techniques as well as our painting and non skid applications. 🙂

All I can think is thank god I didn’t just give him the go ahead and come back to find half of Akupara’s decks down to raw glass…no wonder he had such a hard time getting the paint off!

UPDATE:

Turns out the marina where Akupara is stored only allows 1 company to do media blasting and they only use iron or glass. They are not able to remove only the paint and in fact would probably remove most of the first layer of glass. So much for media blasting. The only option would be to move the boat to a yard that does allow it, and that just makes the cost prohibitive. Back to sanding I guess.


Fiddly Bits and lots of dirt

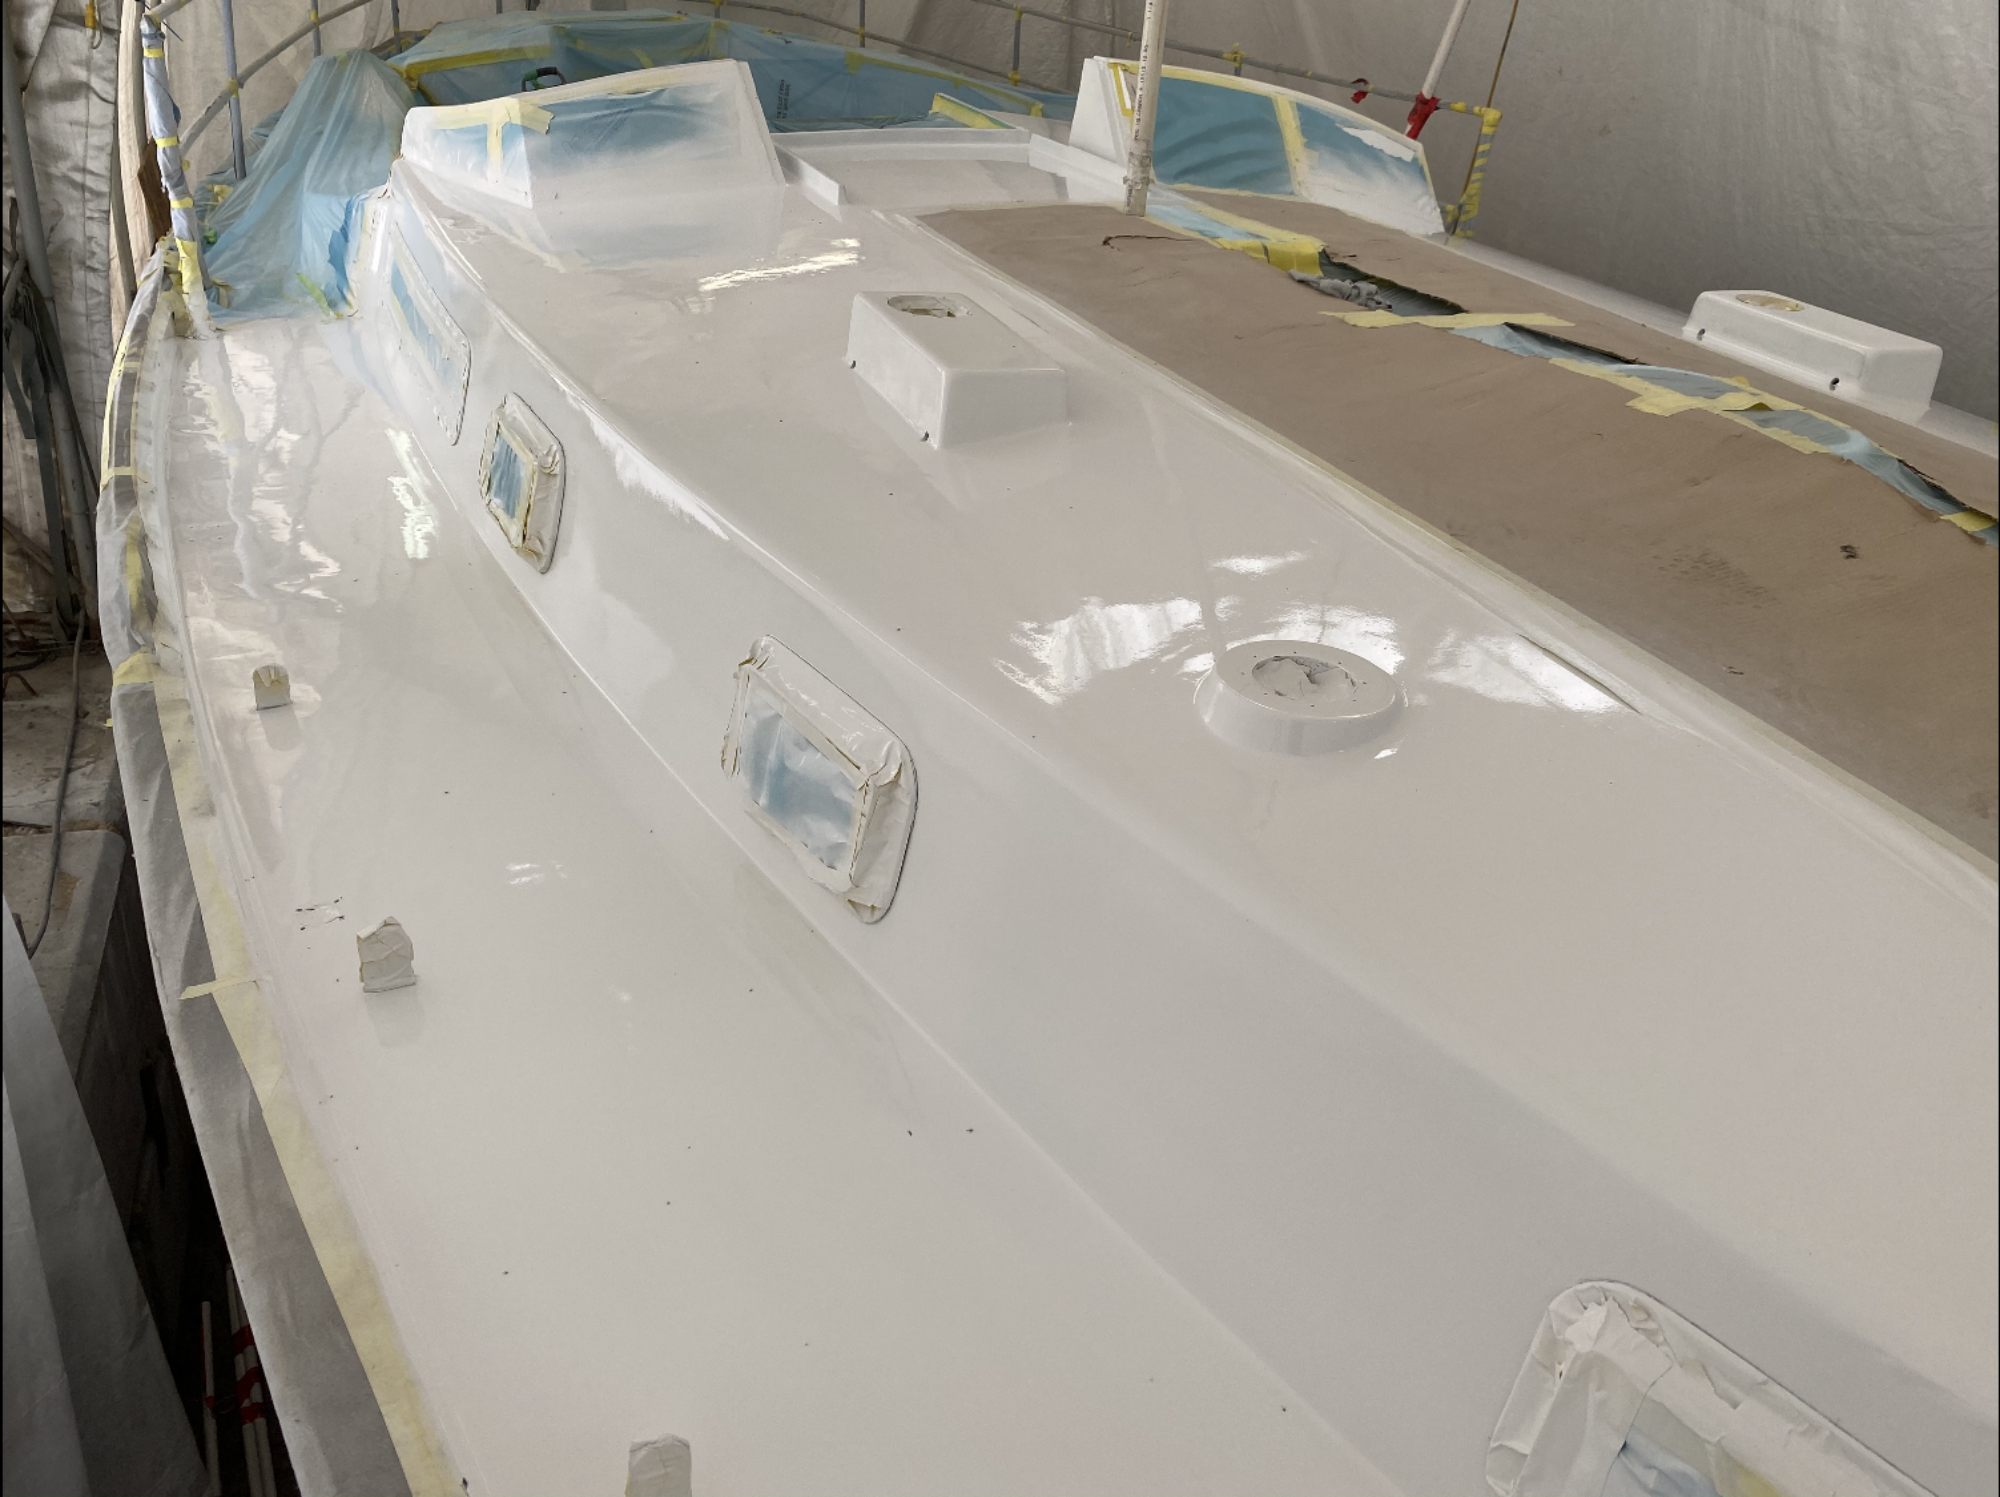
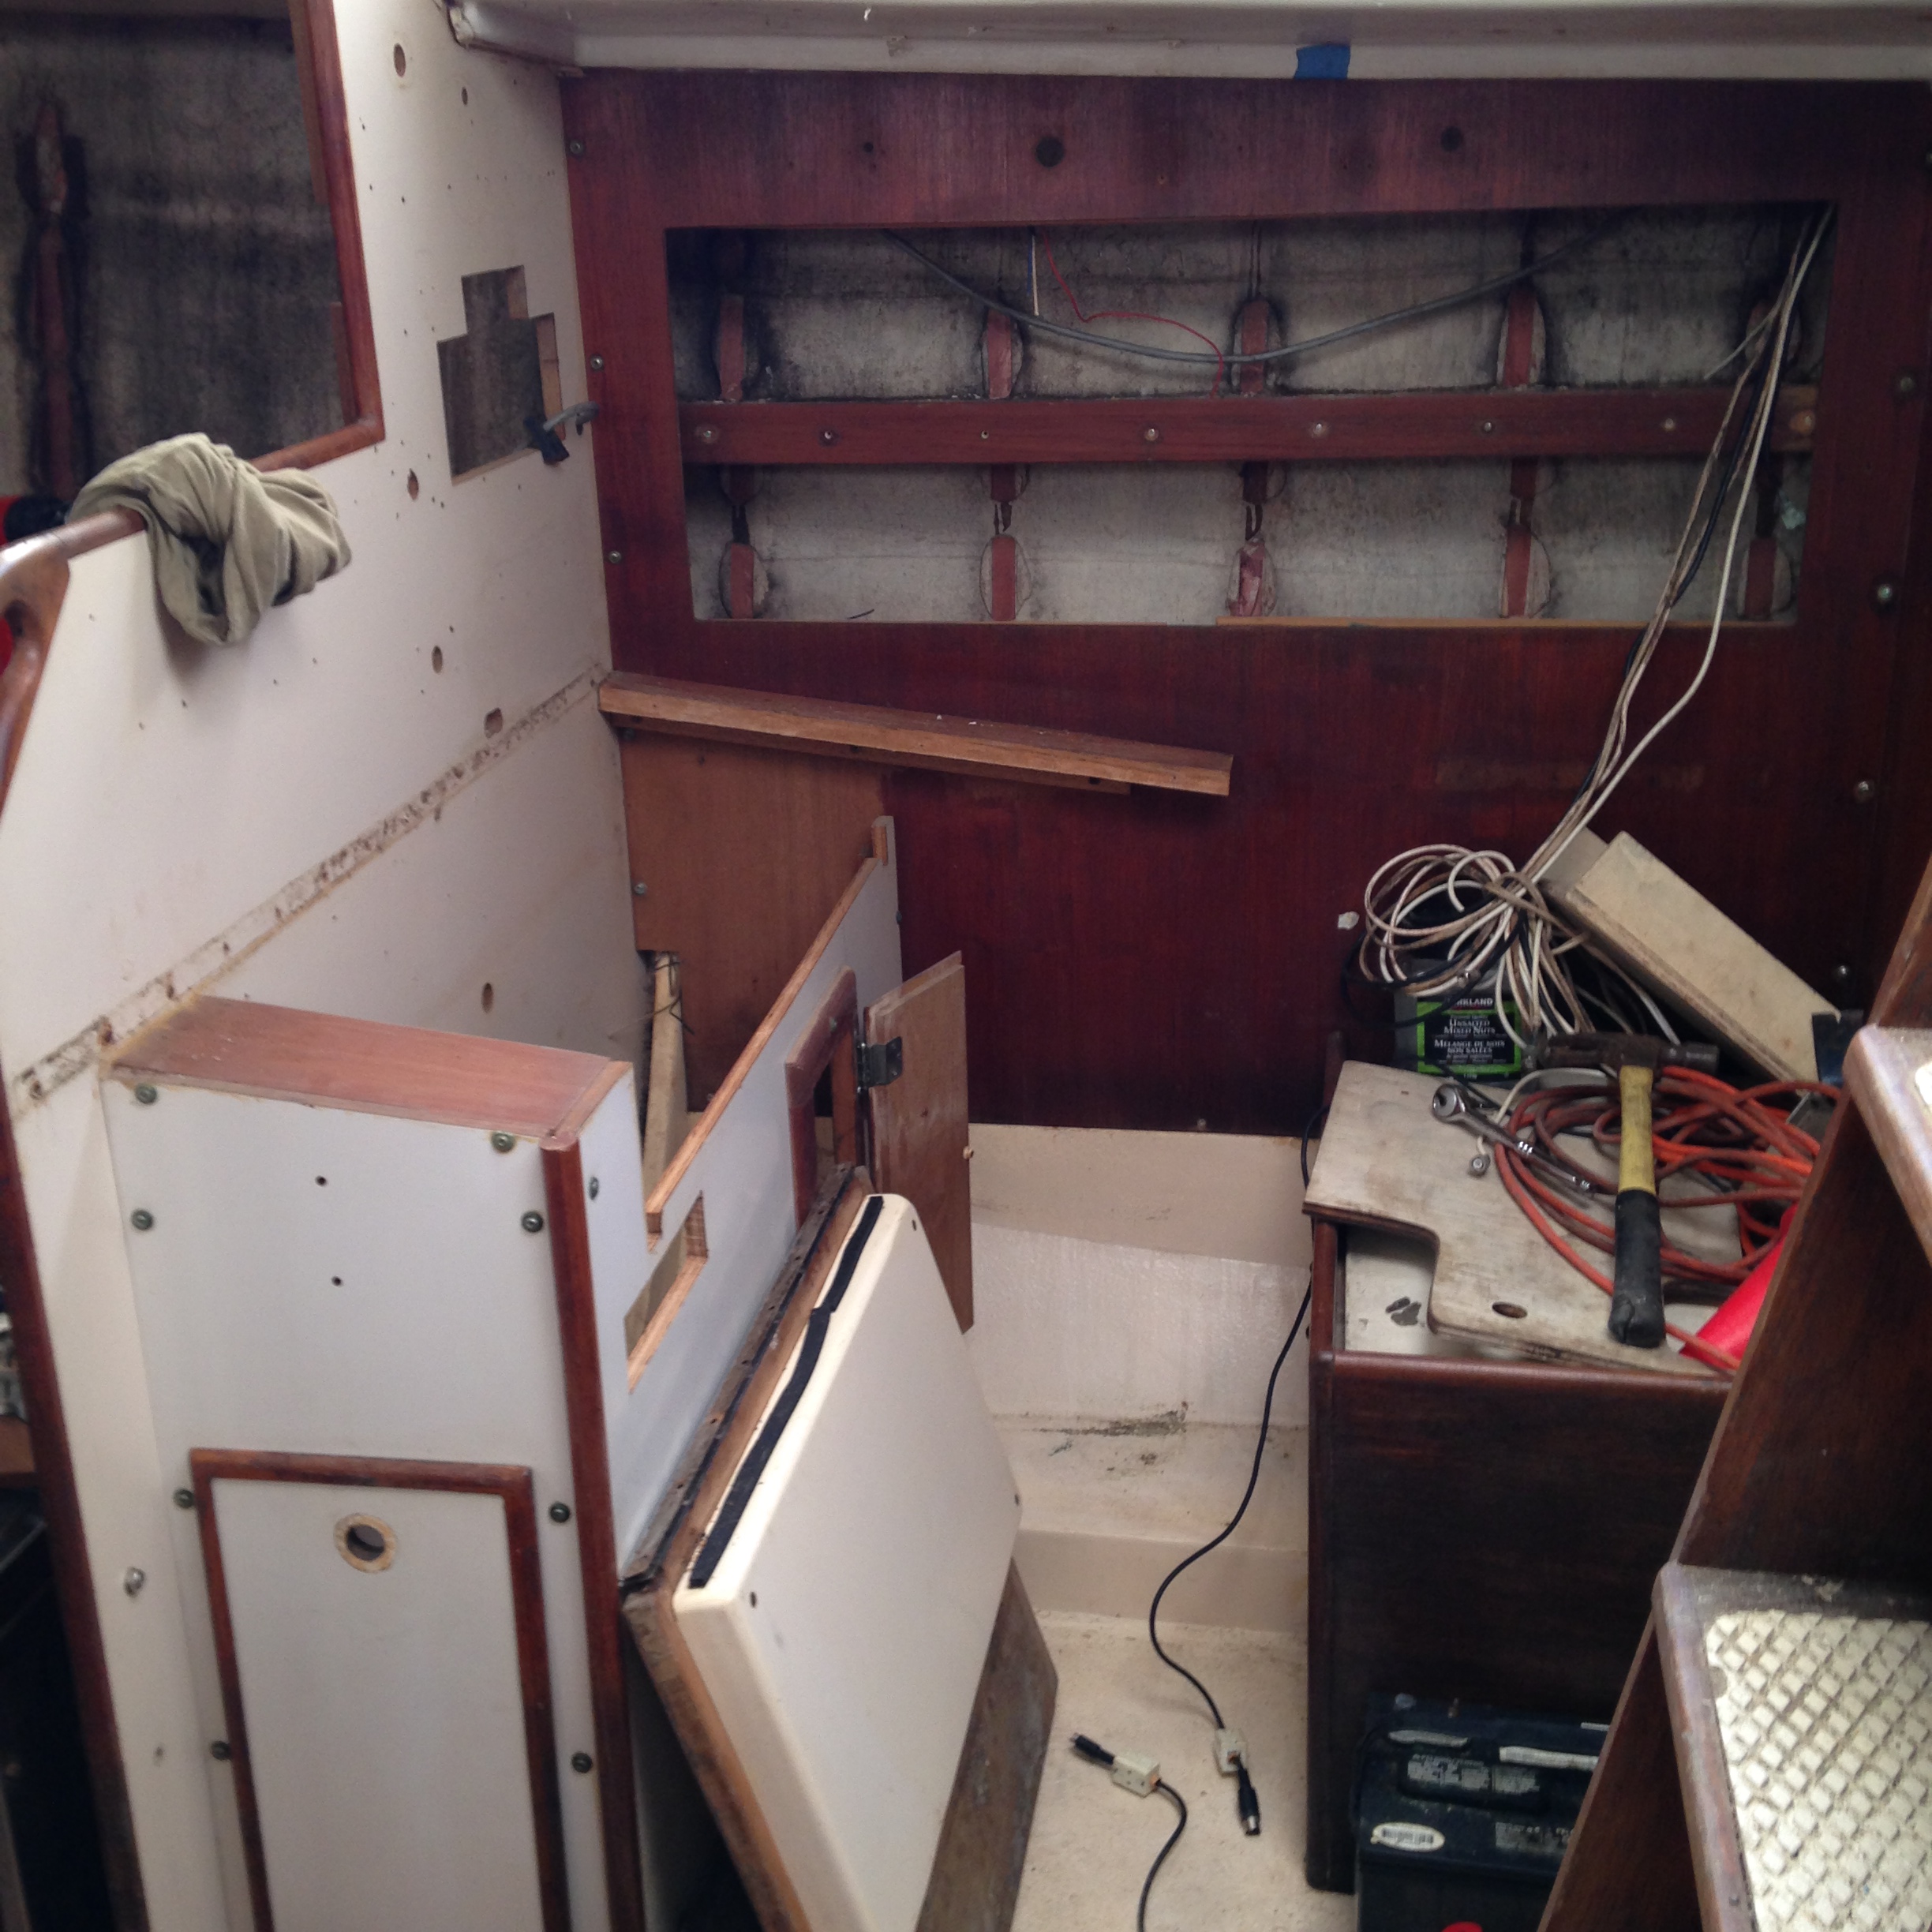
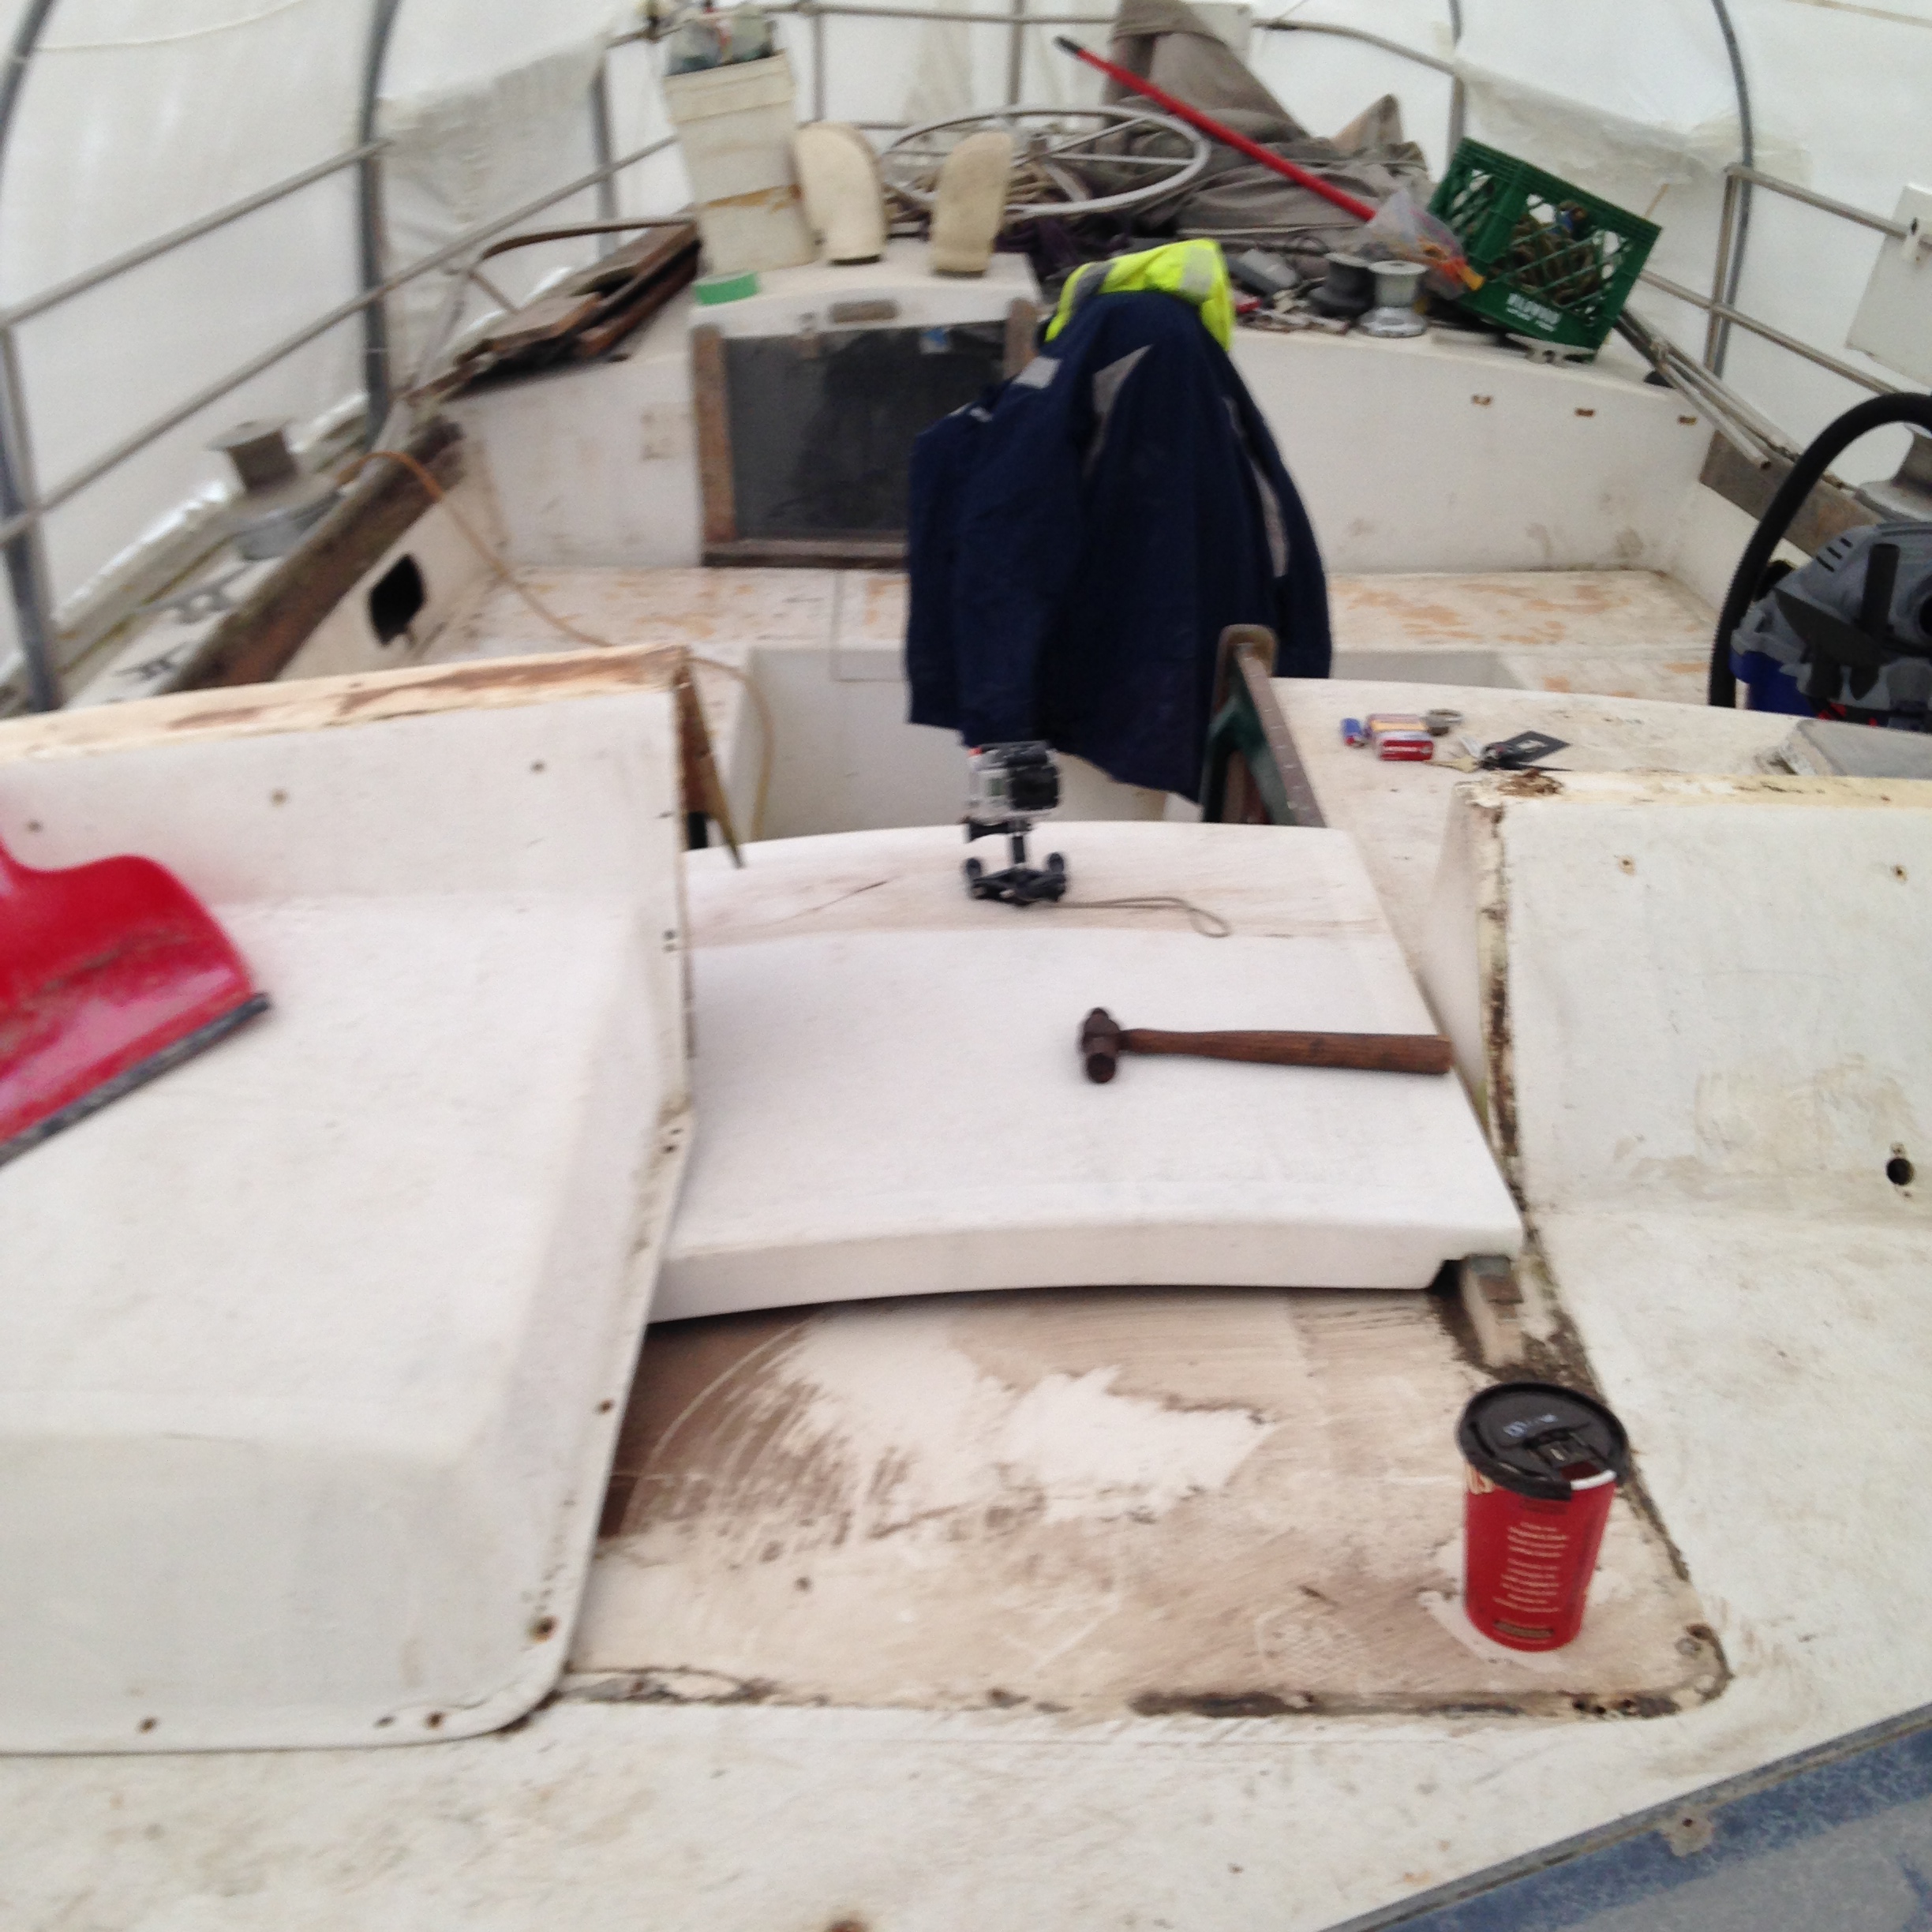
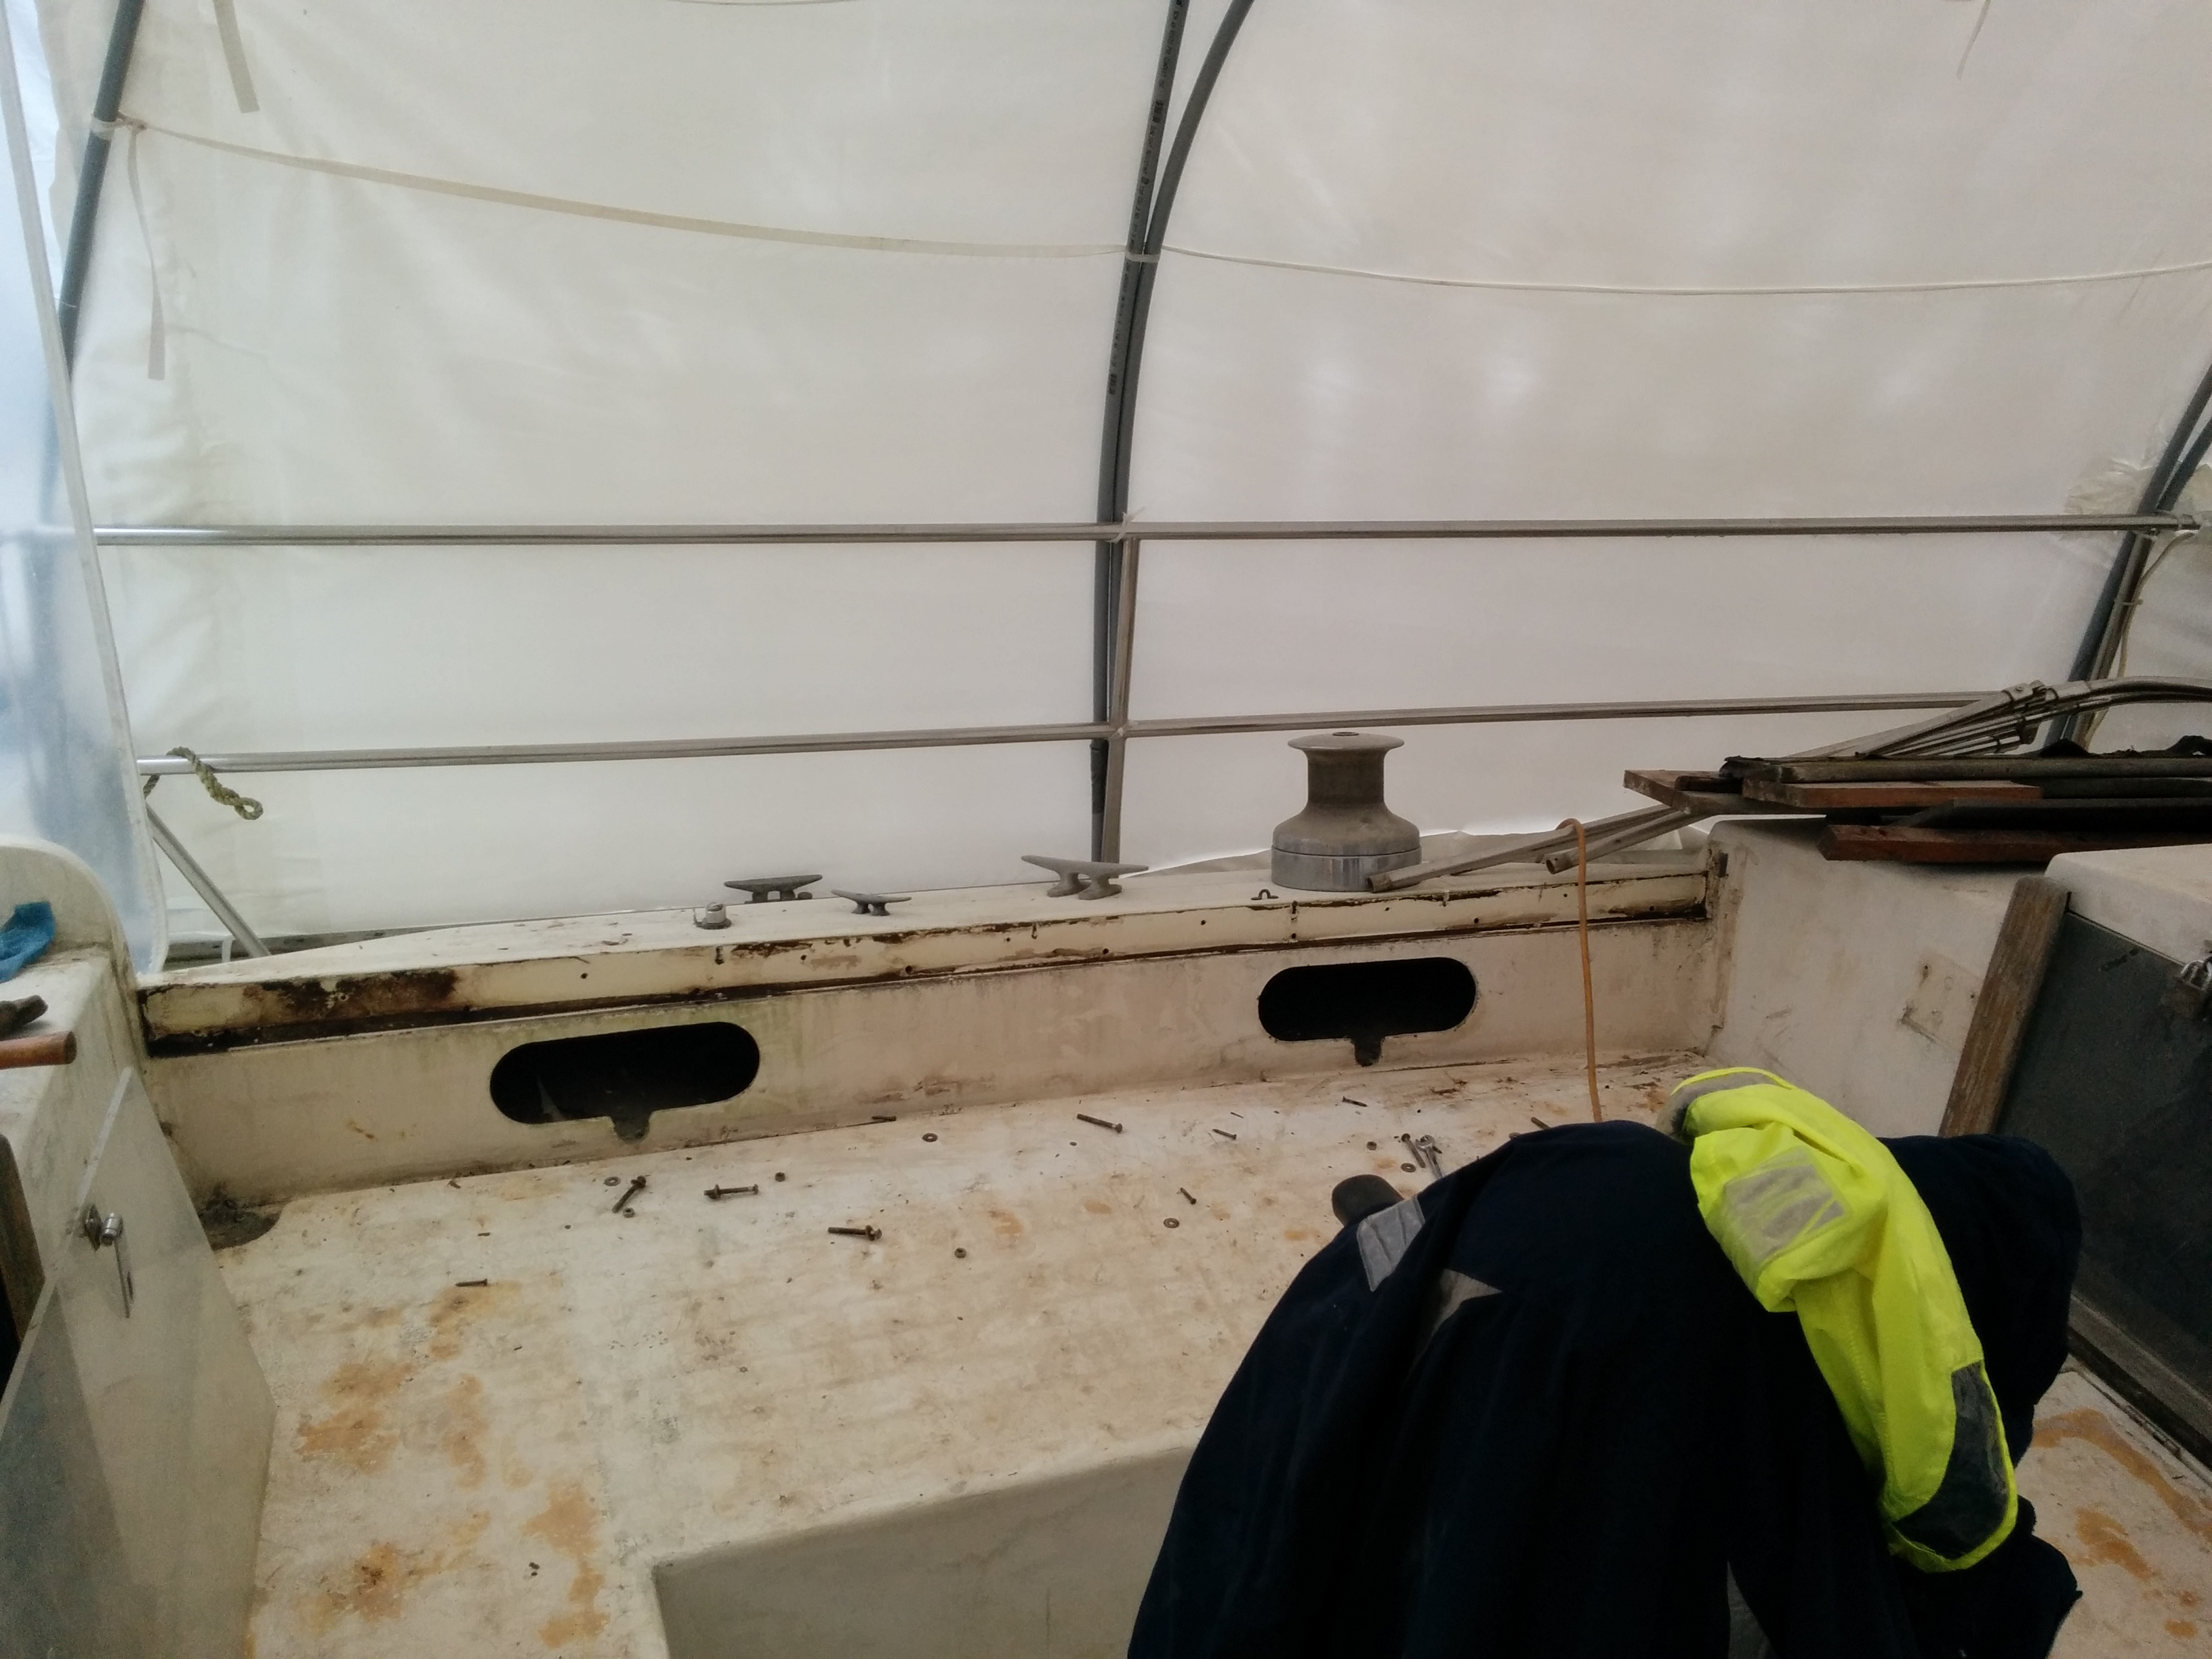
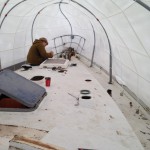
Well the last 2 weekends have been absorbed by slowly removing bits and pieces from Akupara’s decks.

IMG_0674IMG_0686


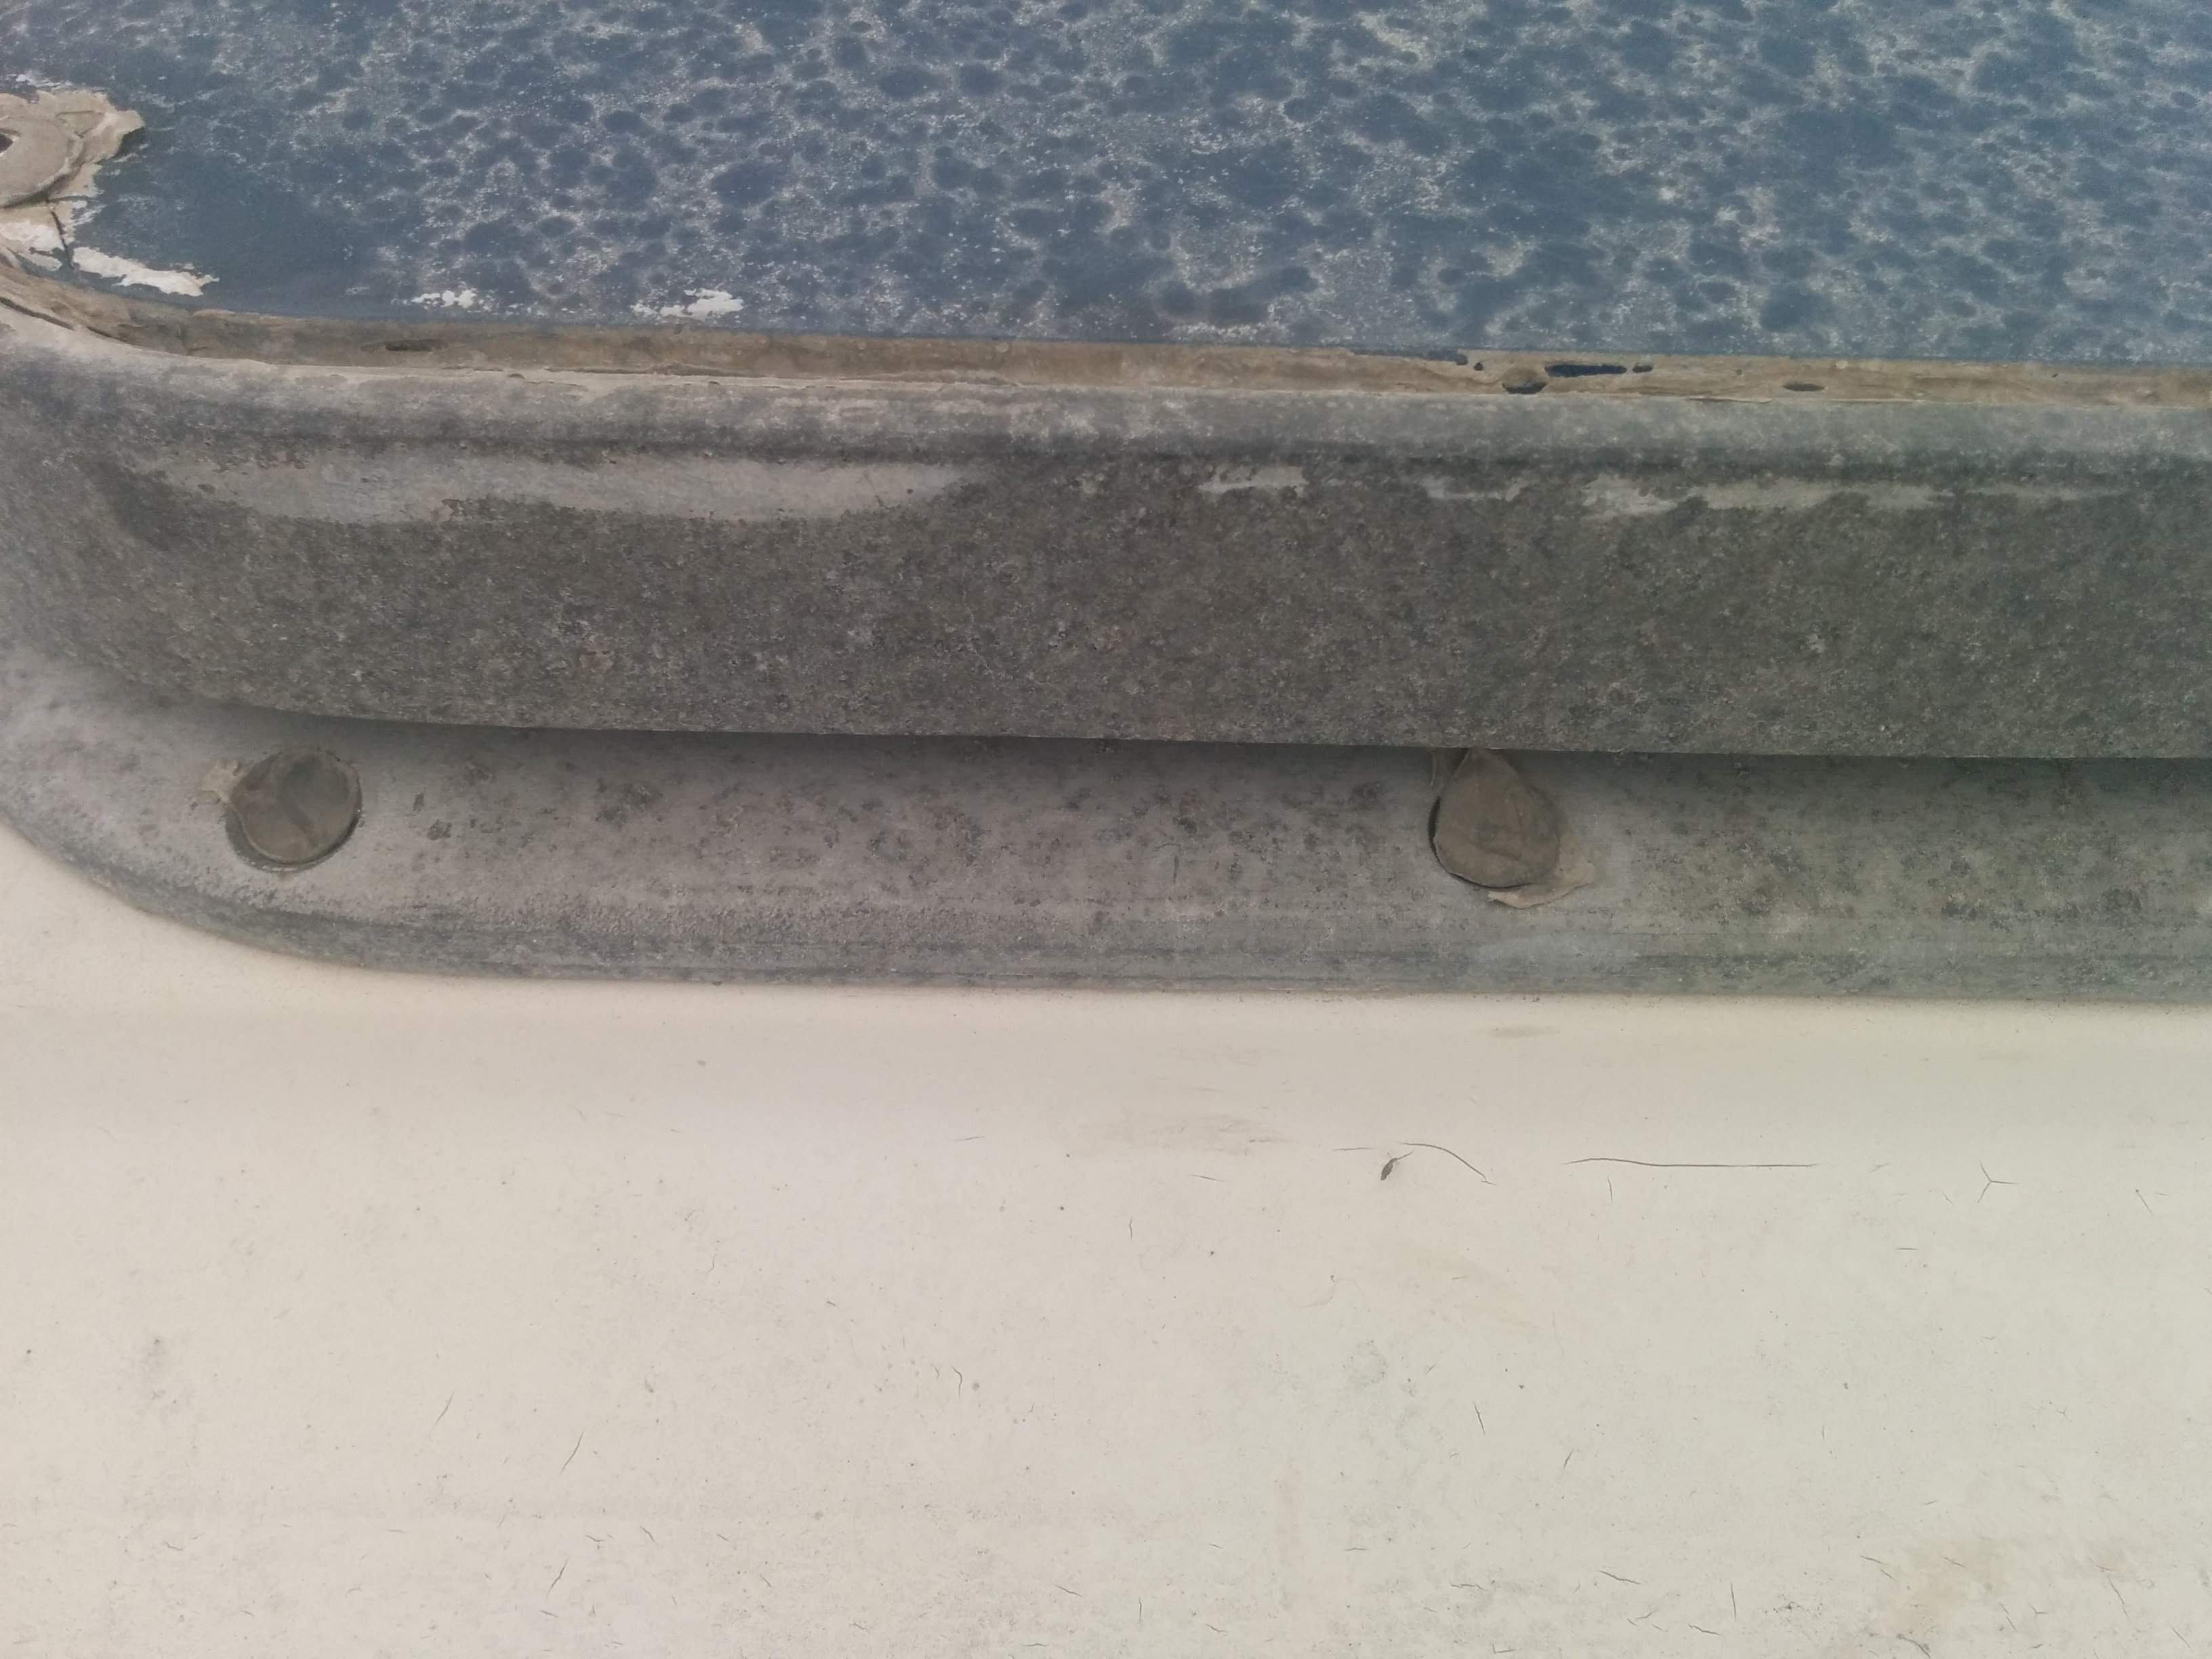
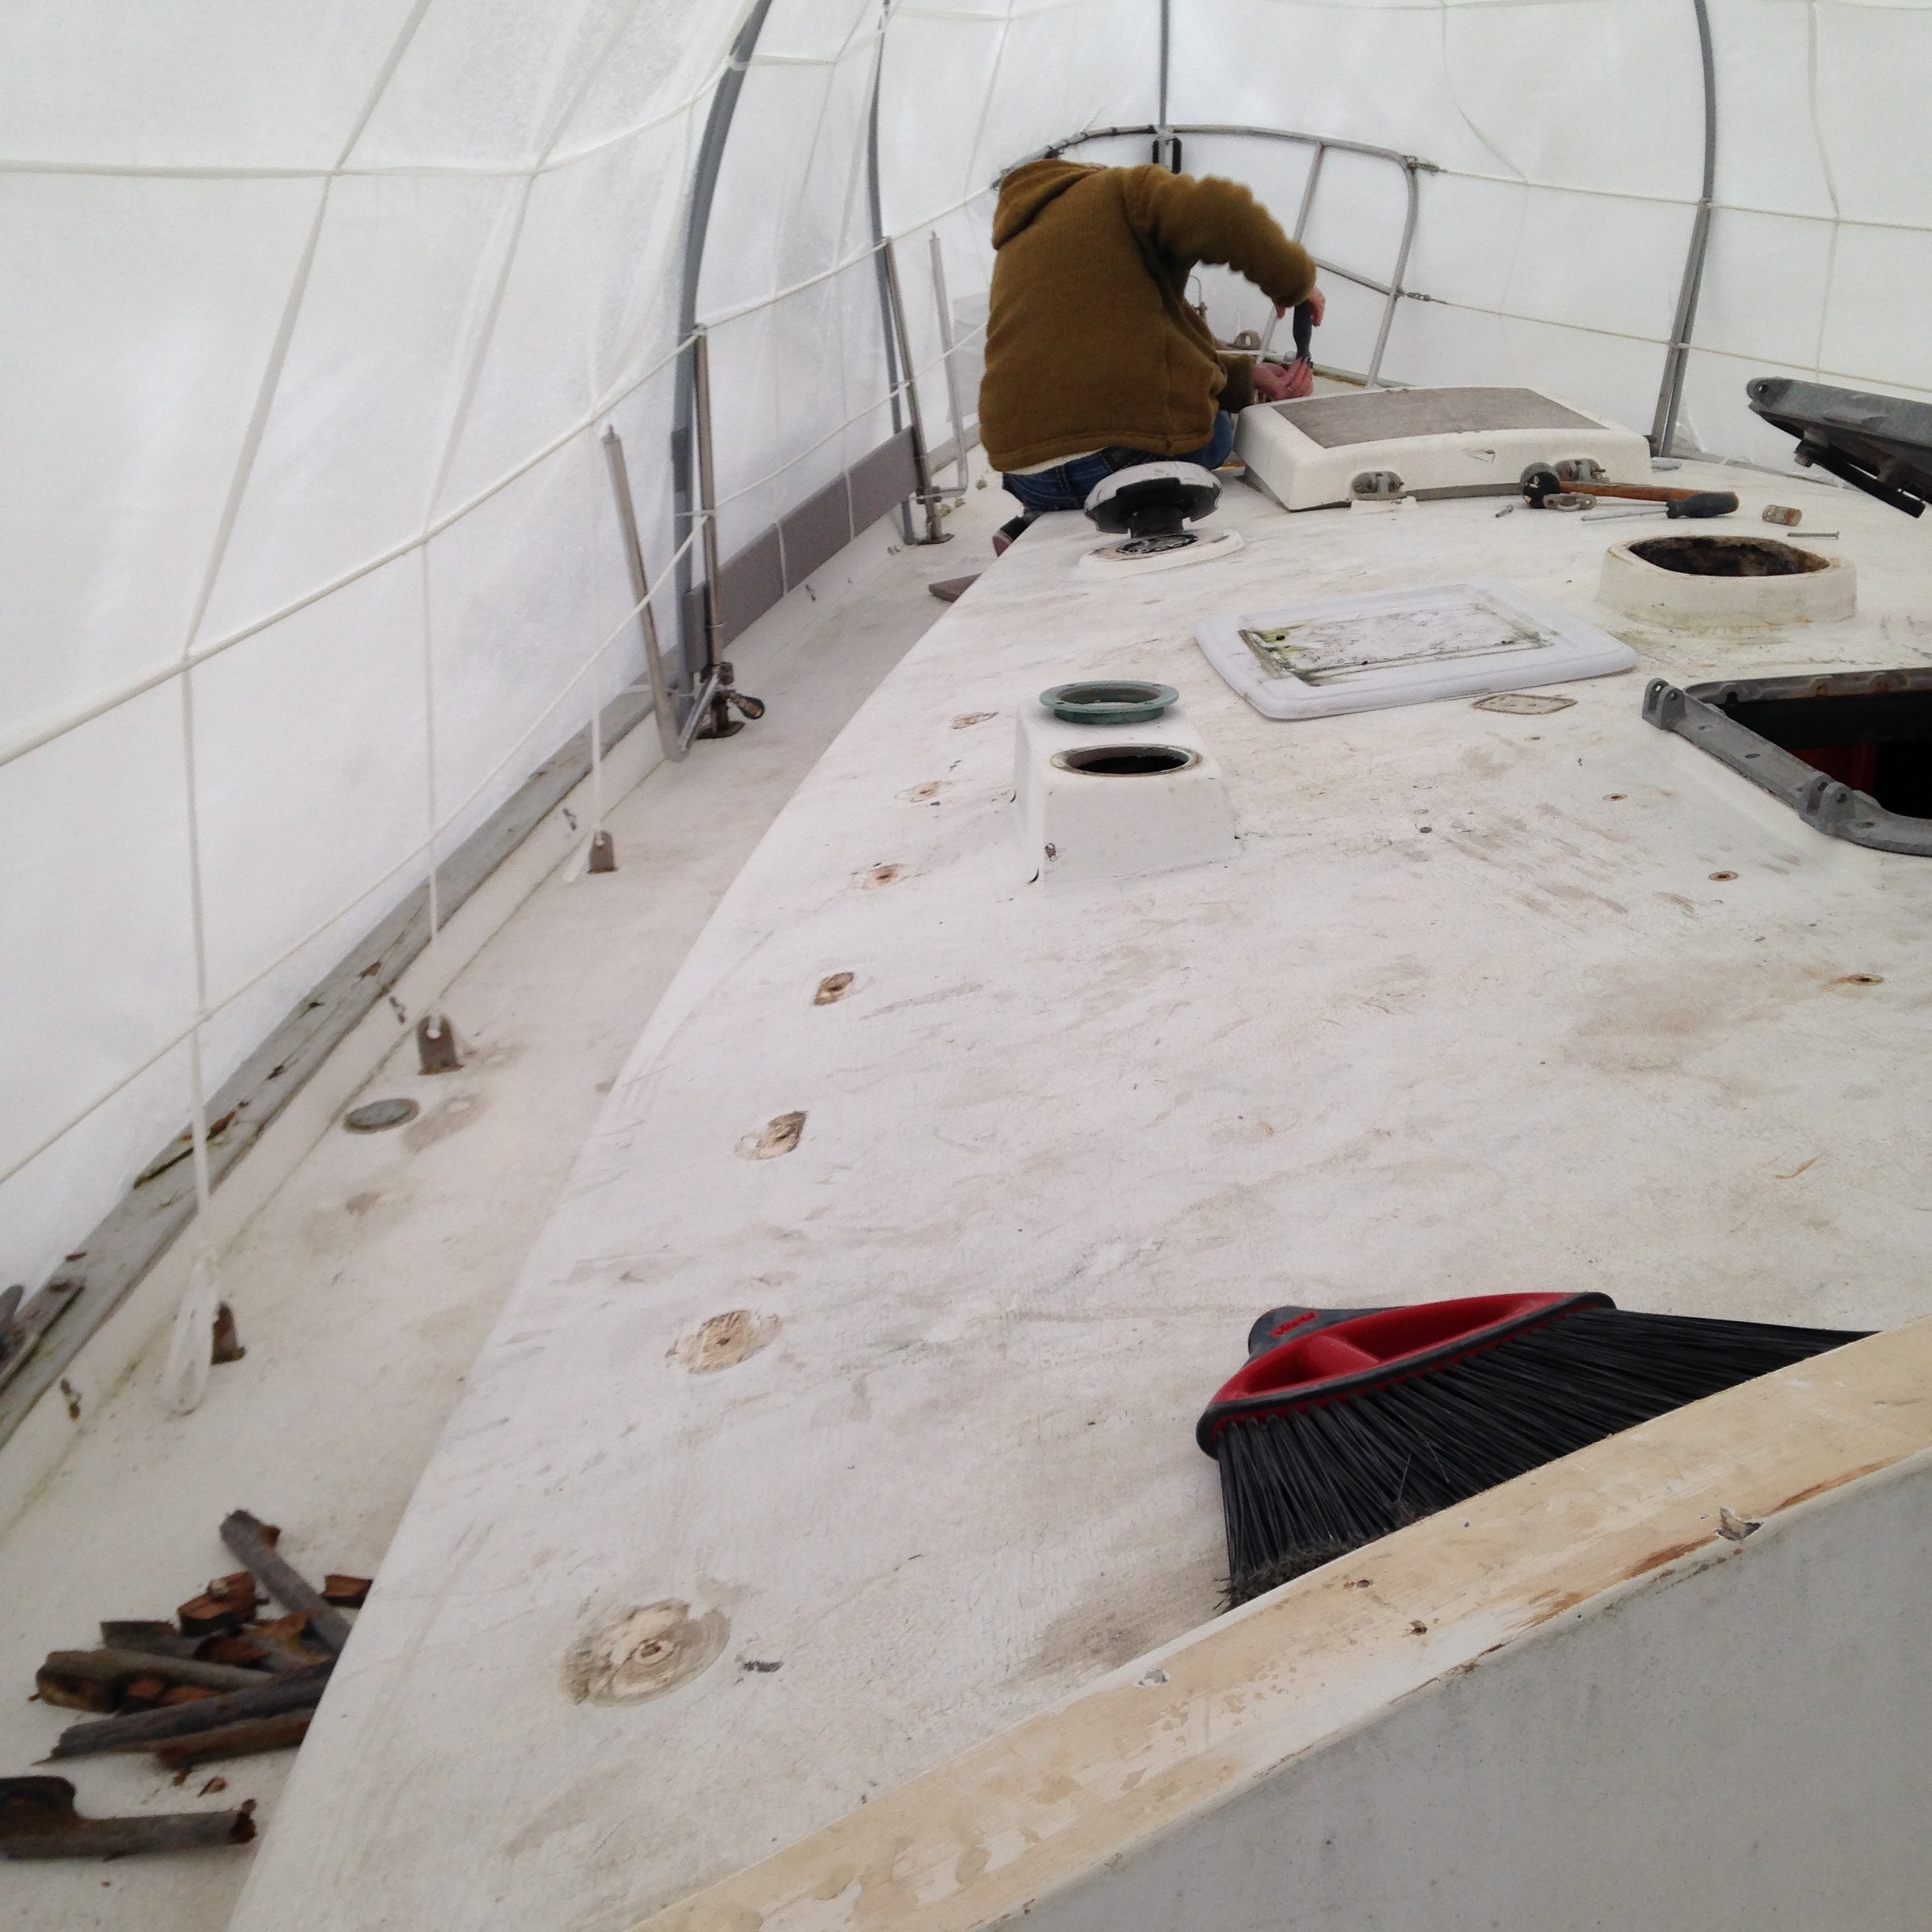
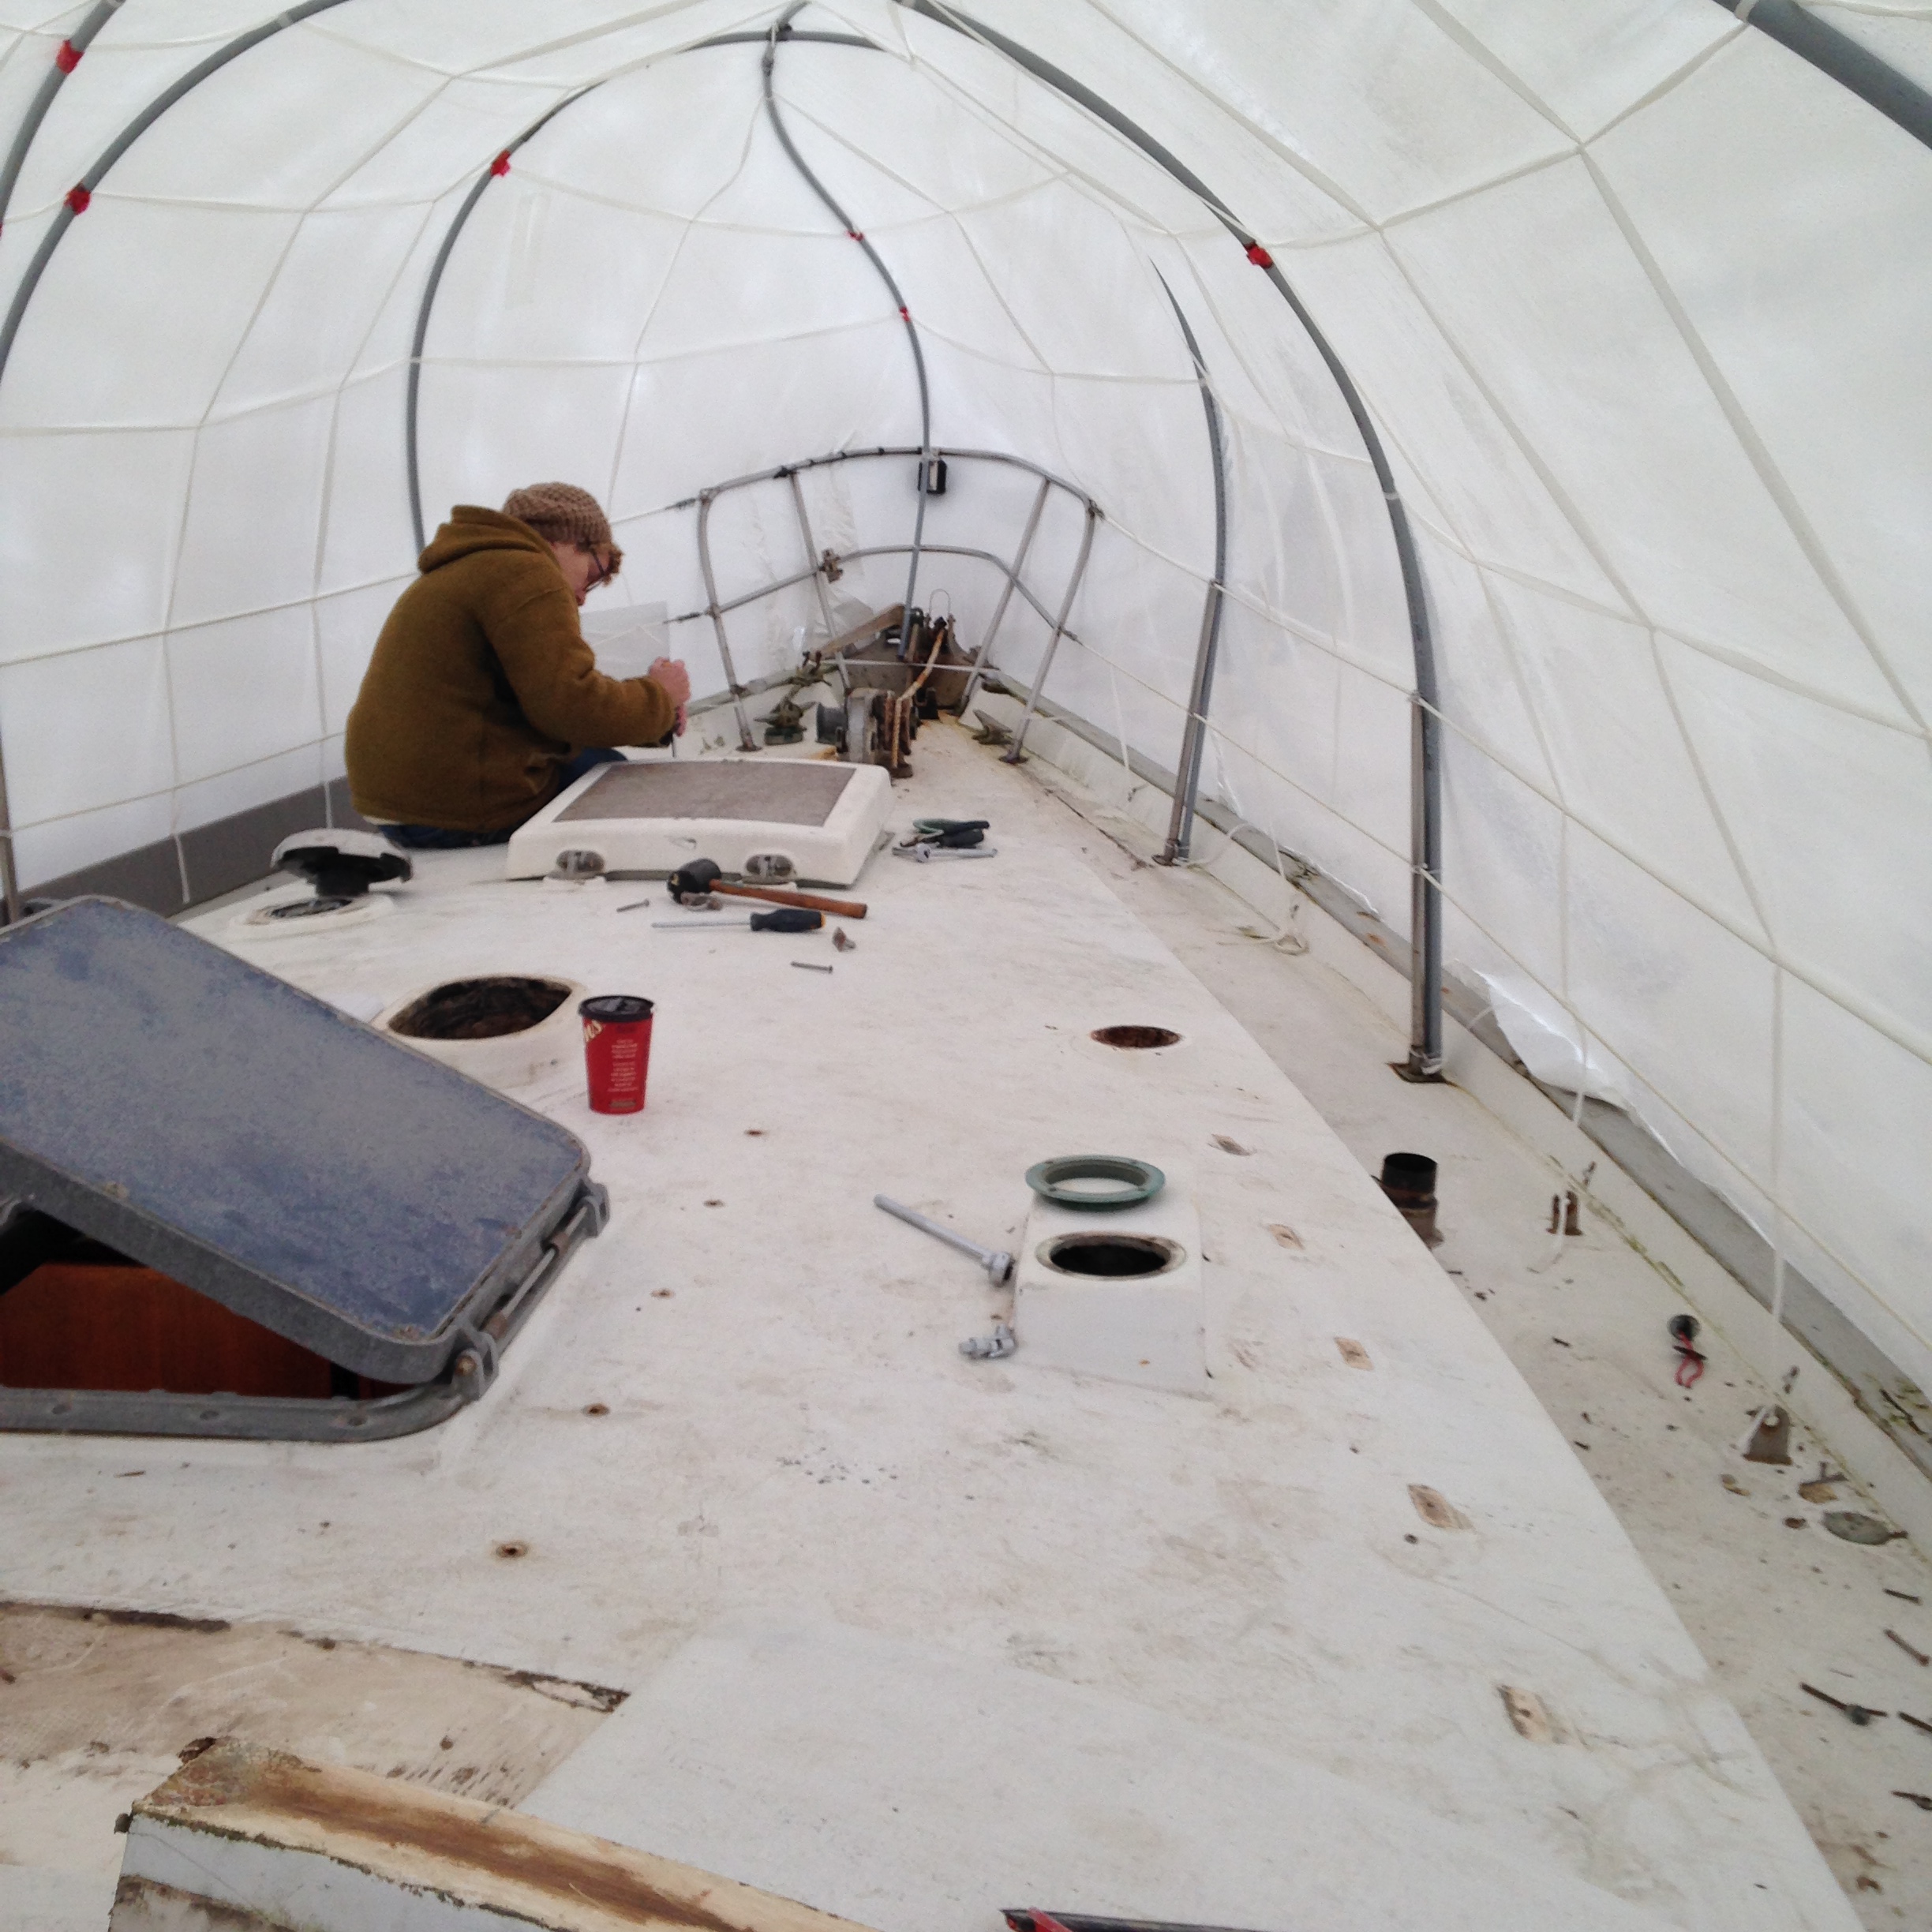
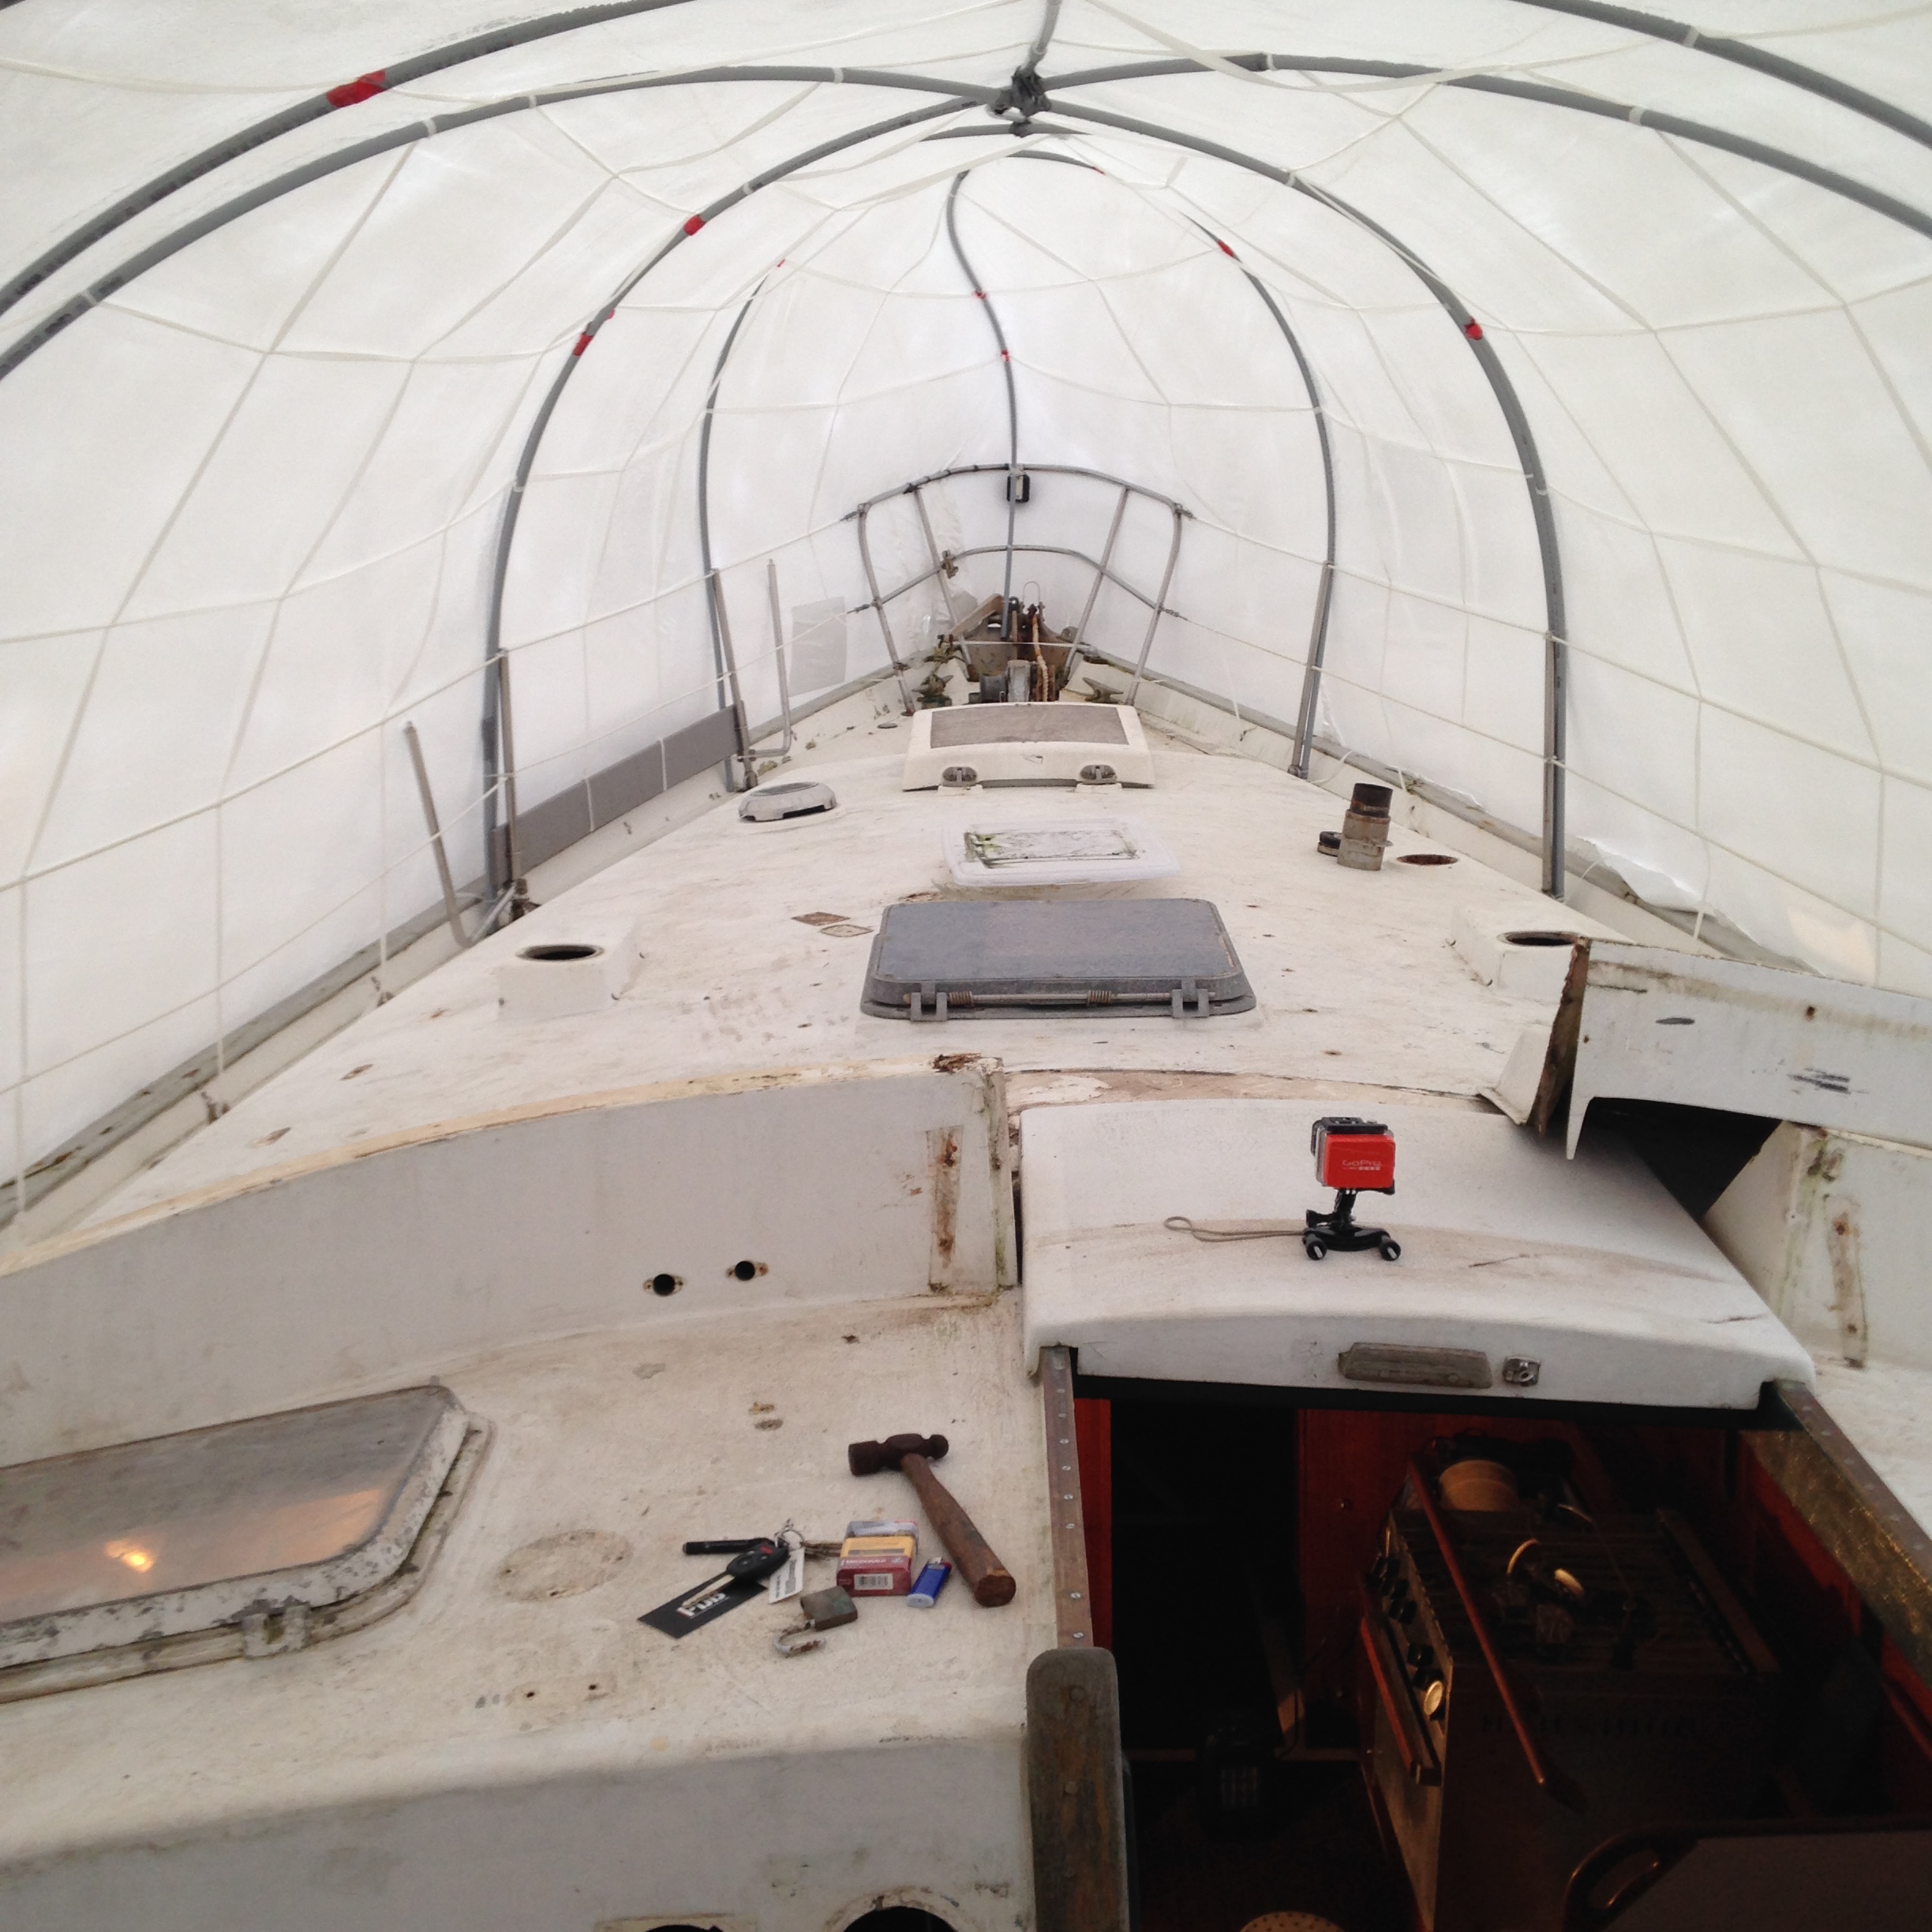
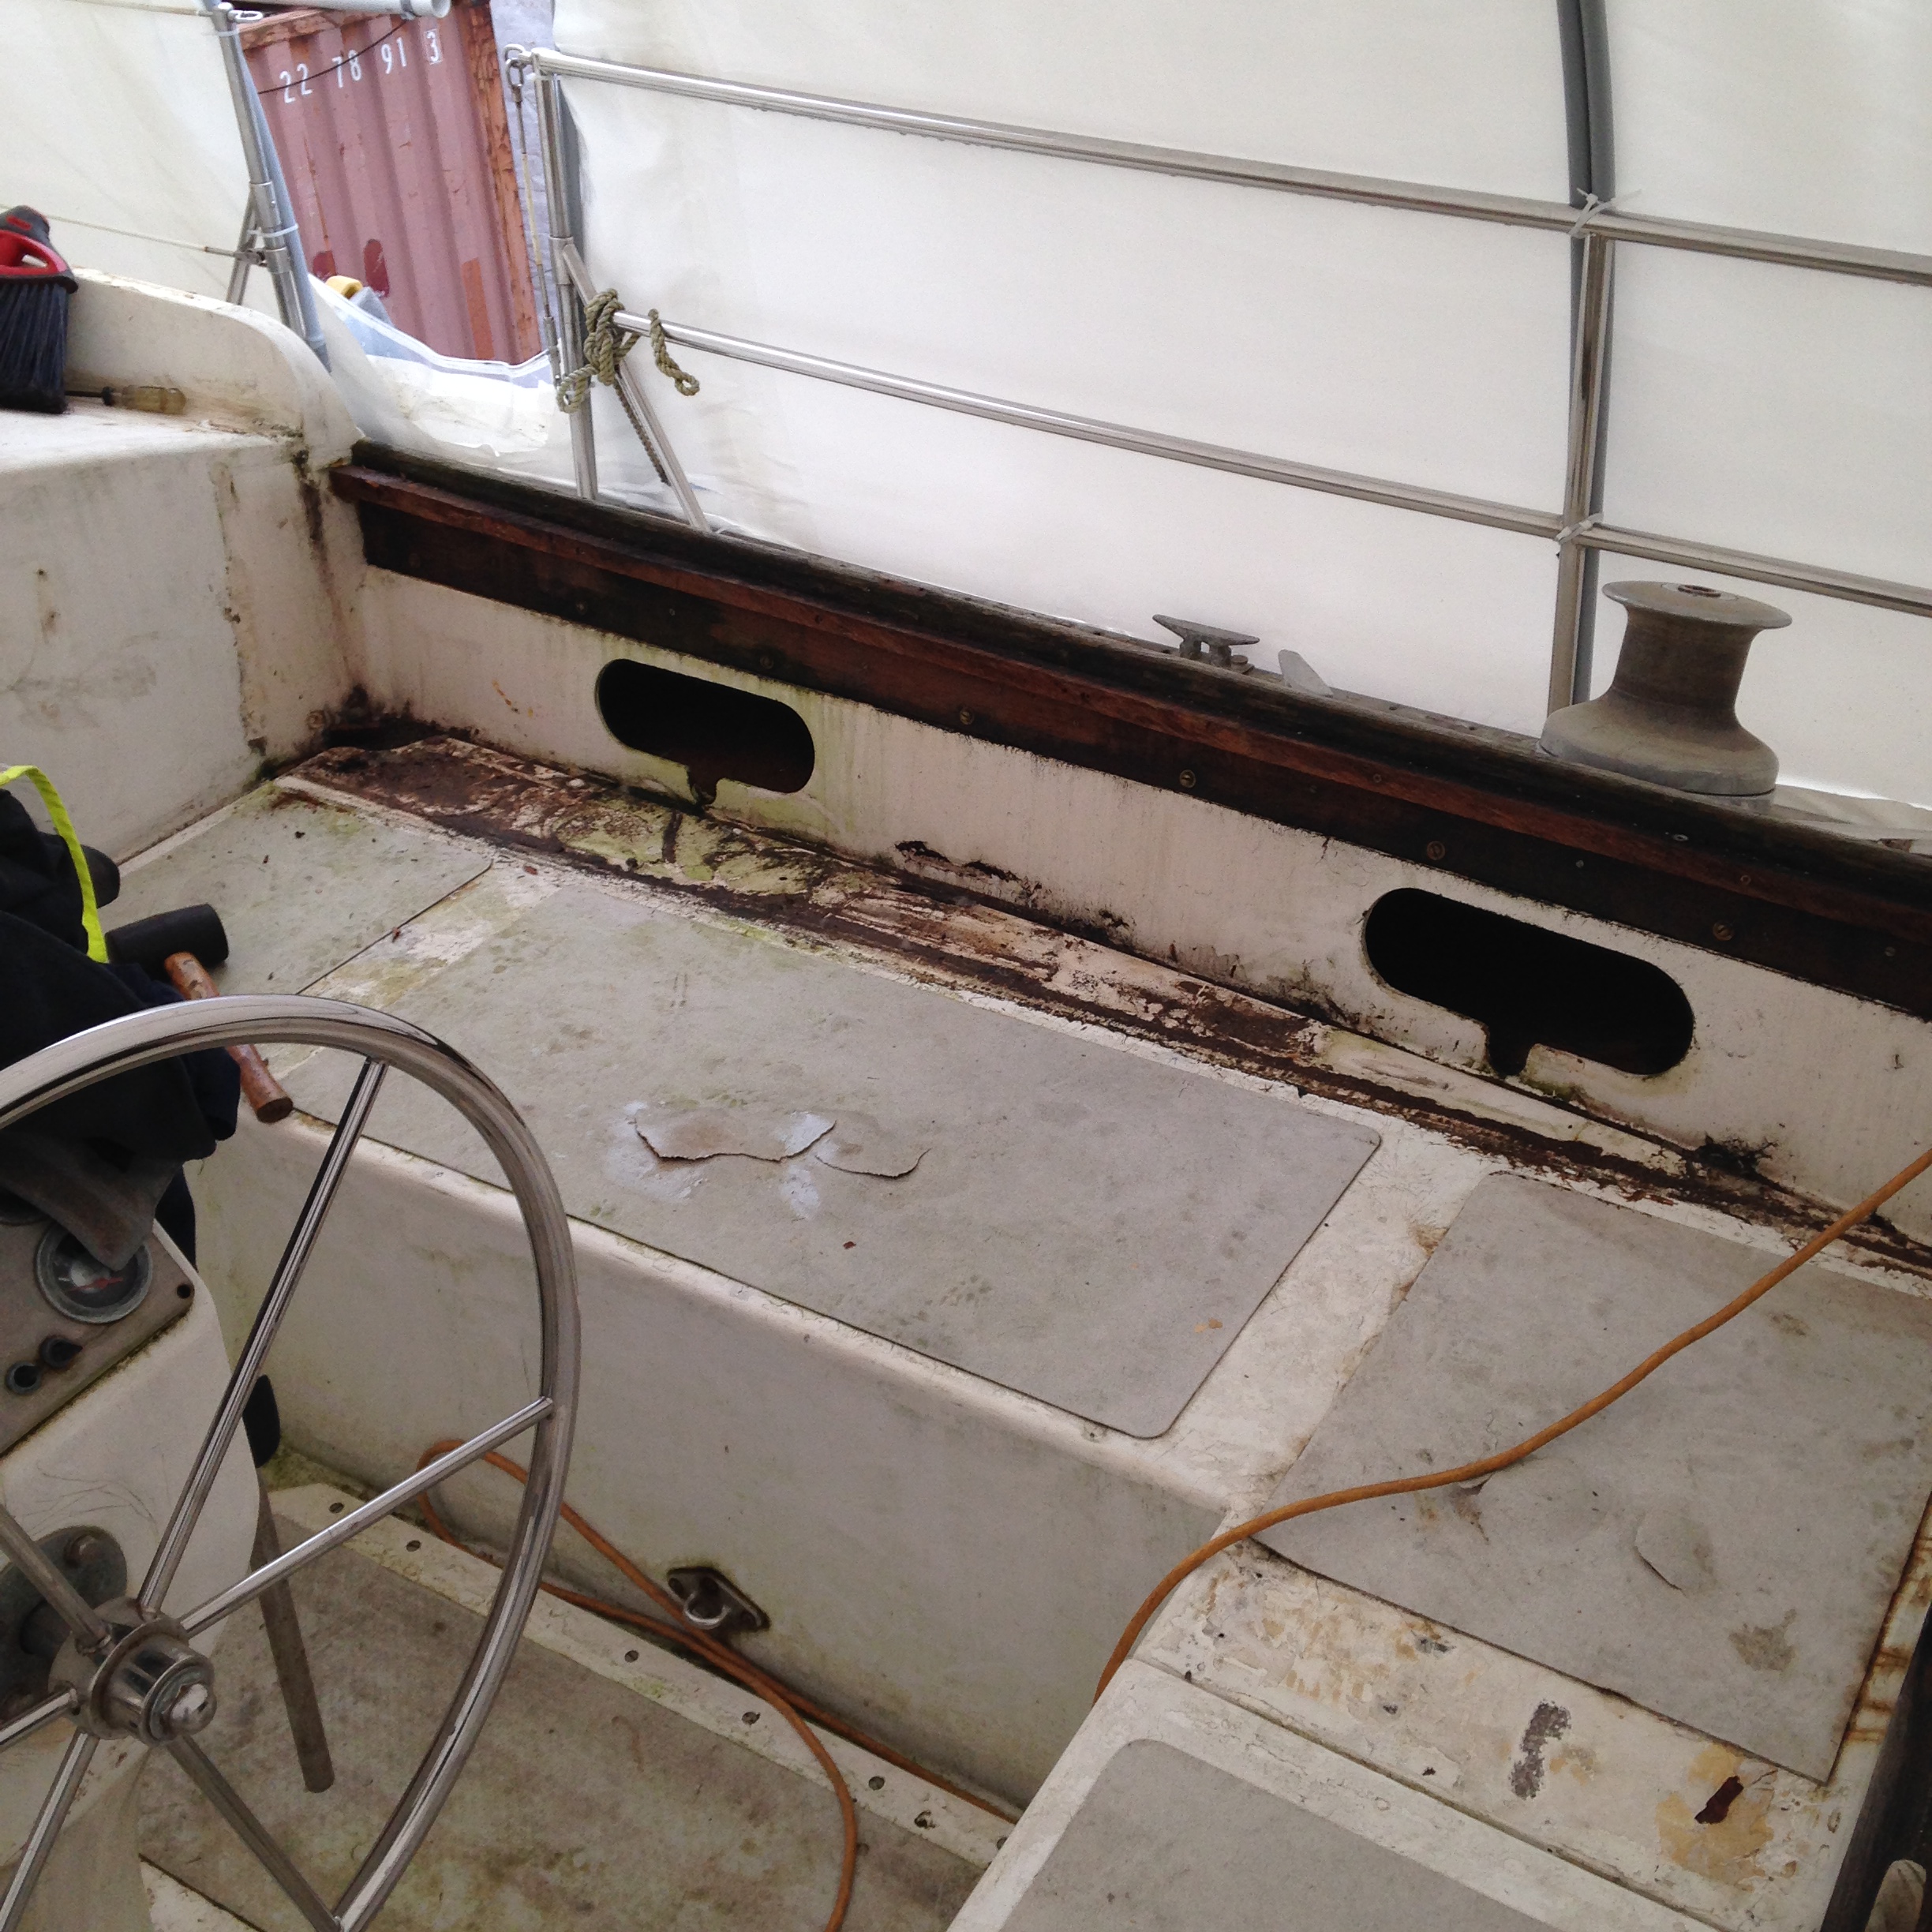
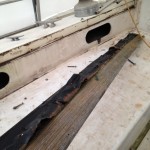
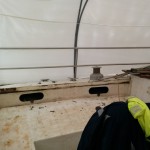
We are bound and determined to remove every nut, bolt, screw and every kind of adhesive and sealant known to man. So far we have managed to strip half of the cockpit and everything on the main cabin top.

IMG_0681IMG_0682


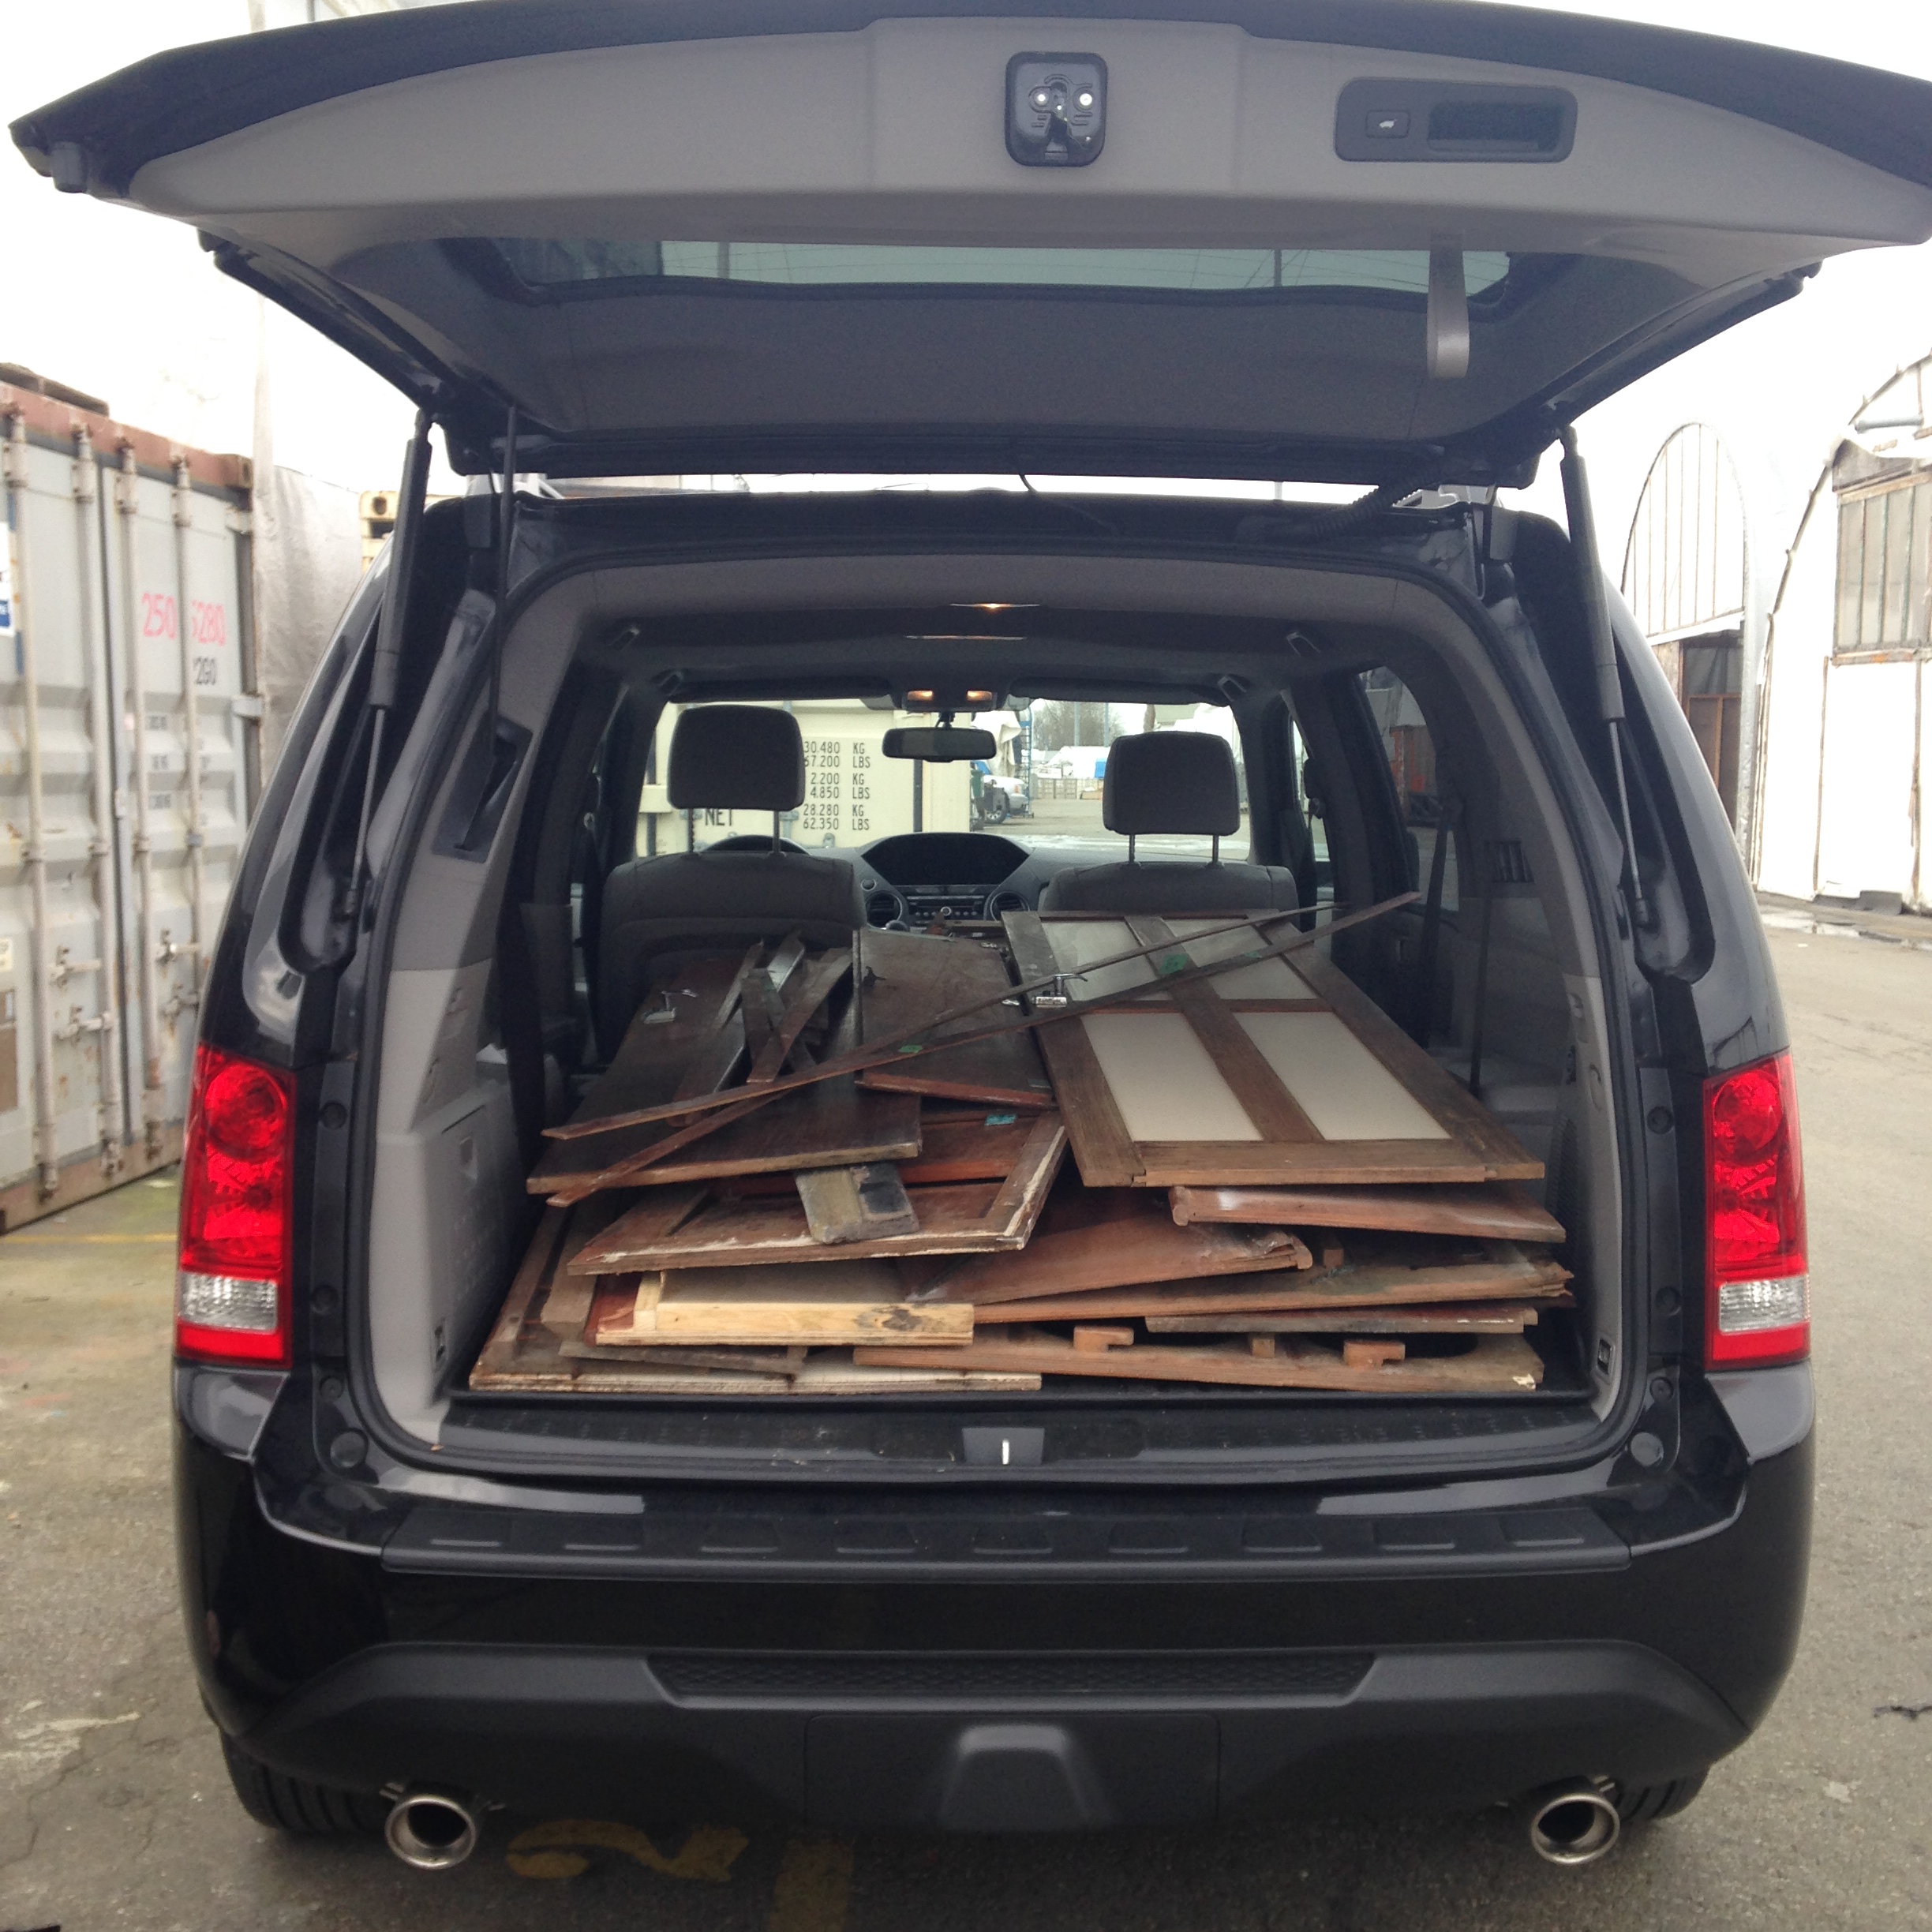
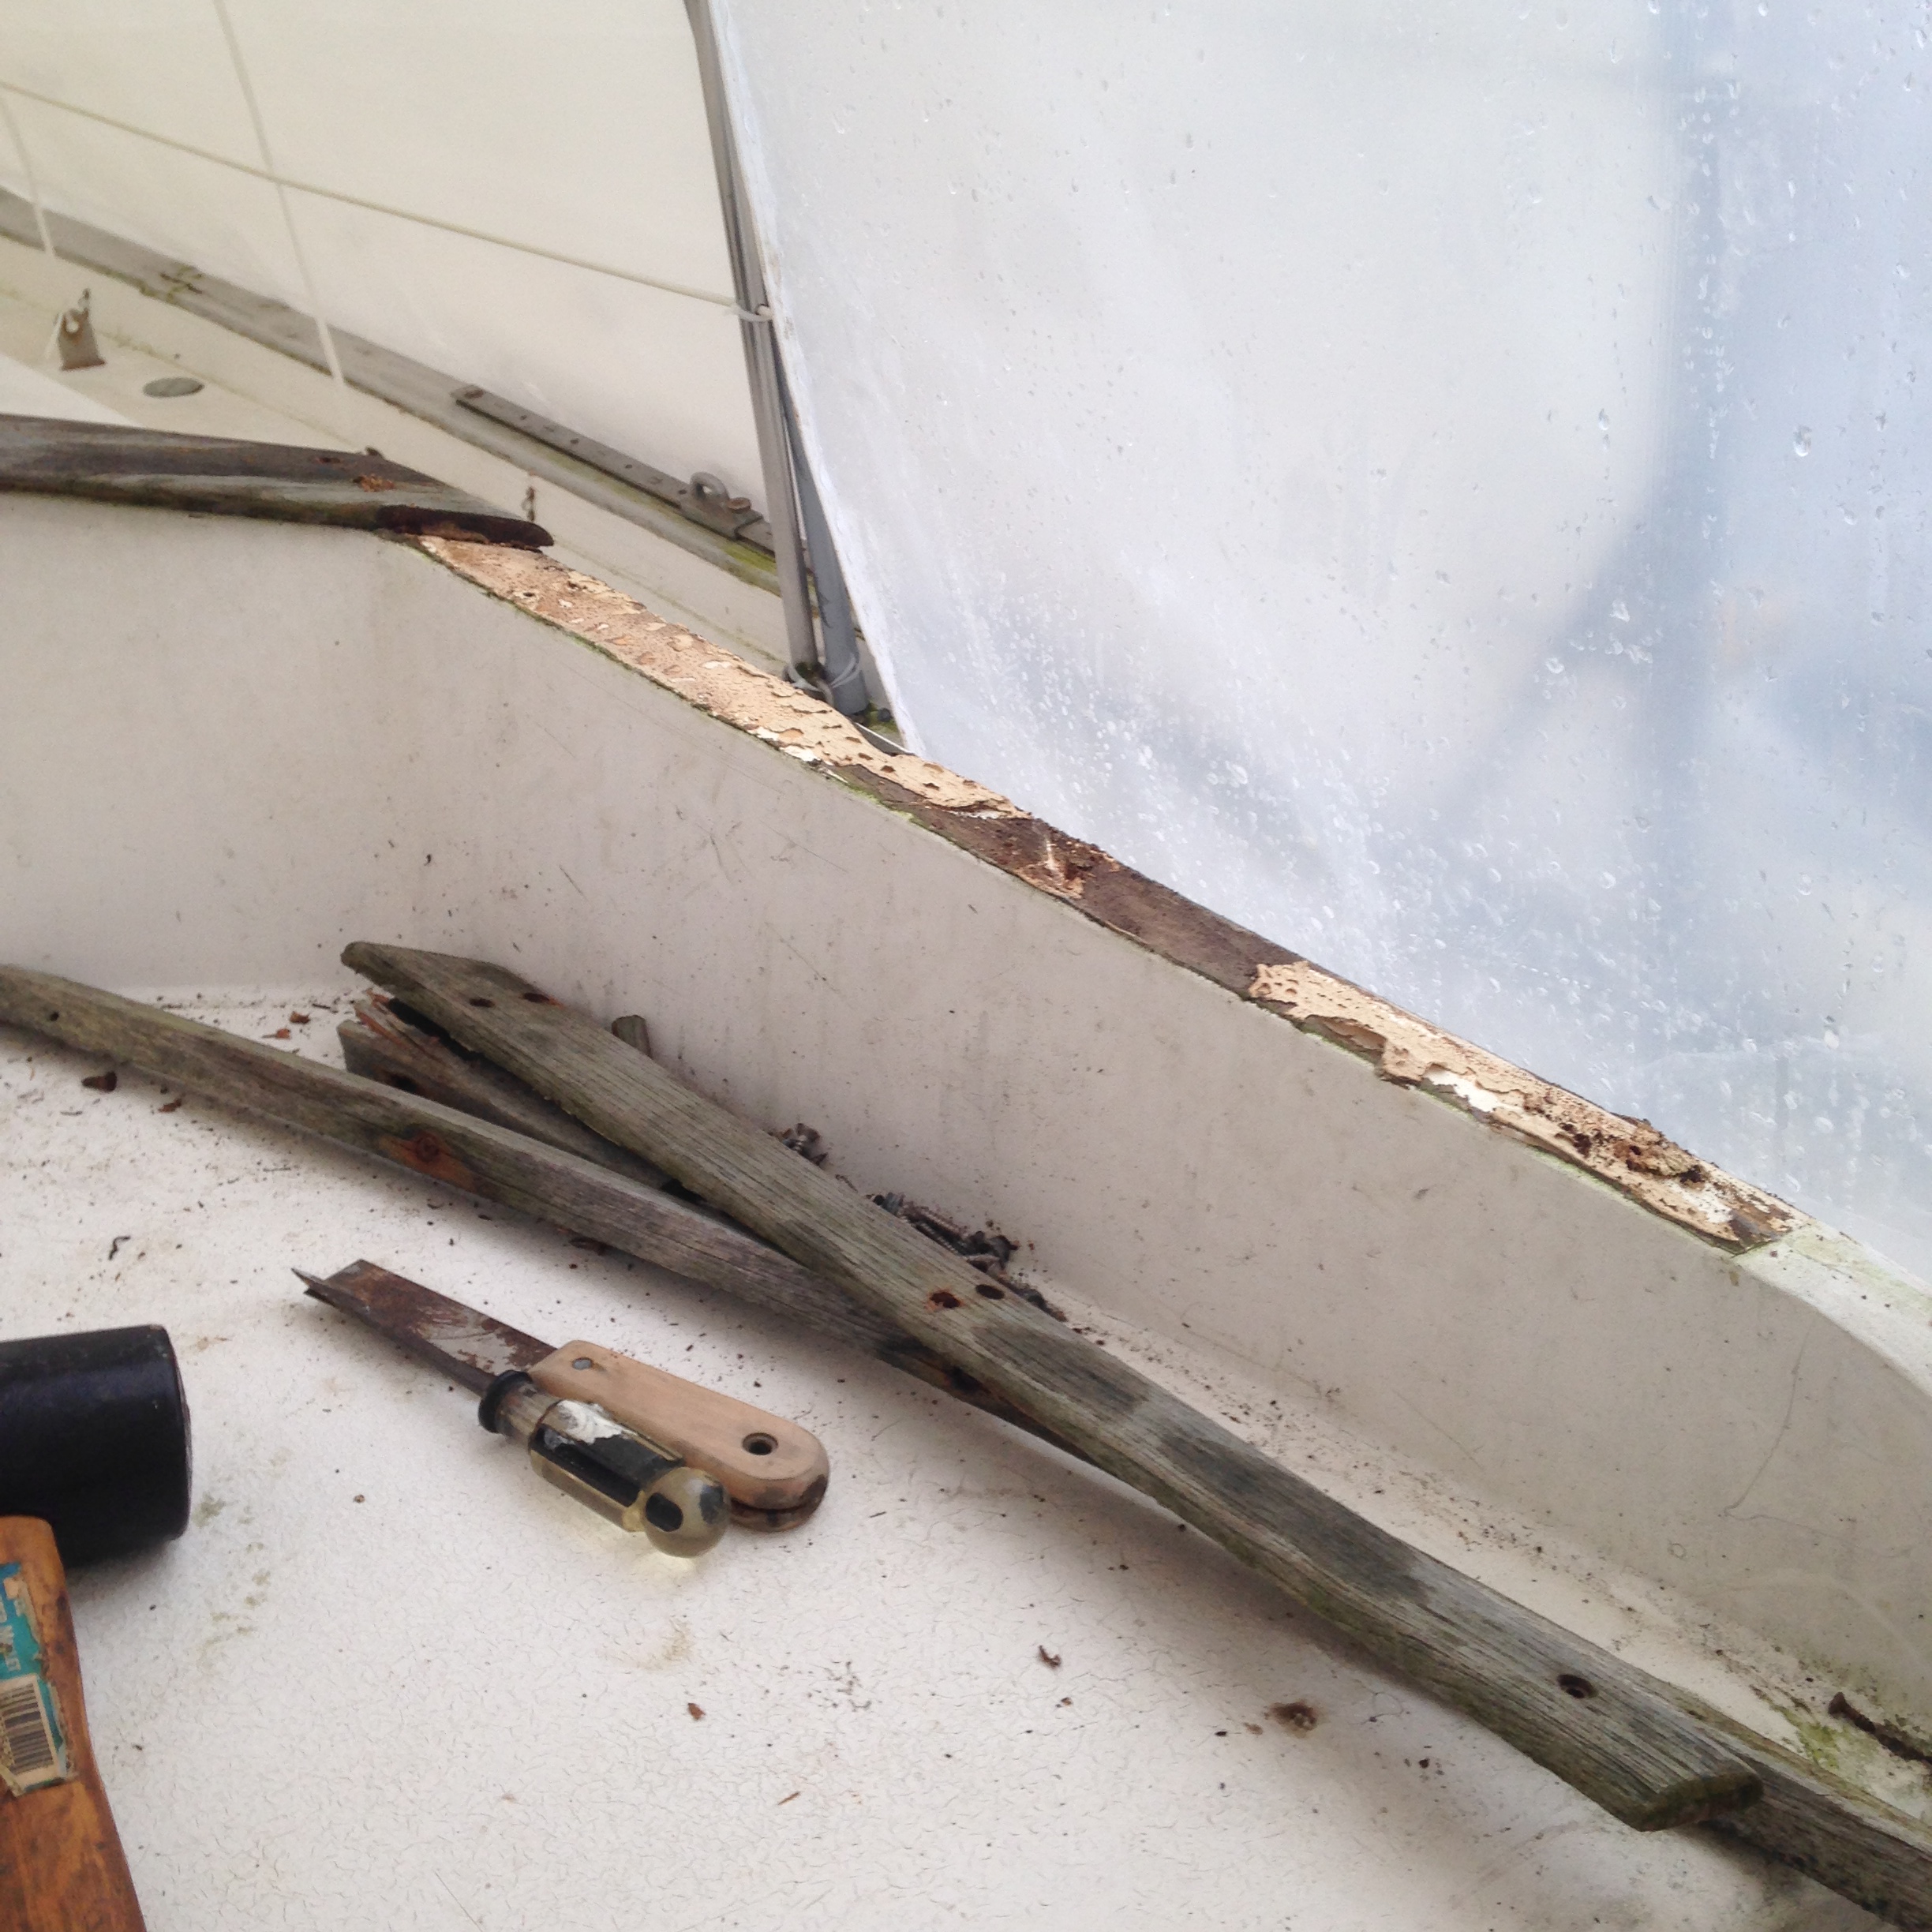
Including all of the wood trim, which will not be going back on.

IMG_0686IMG_0684


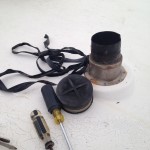
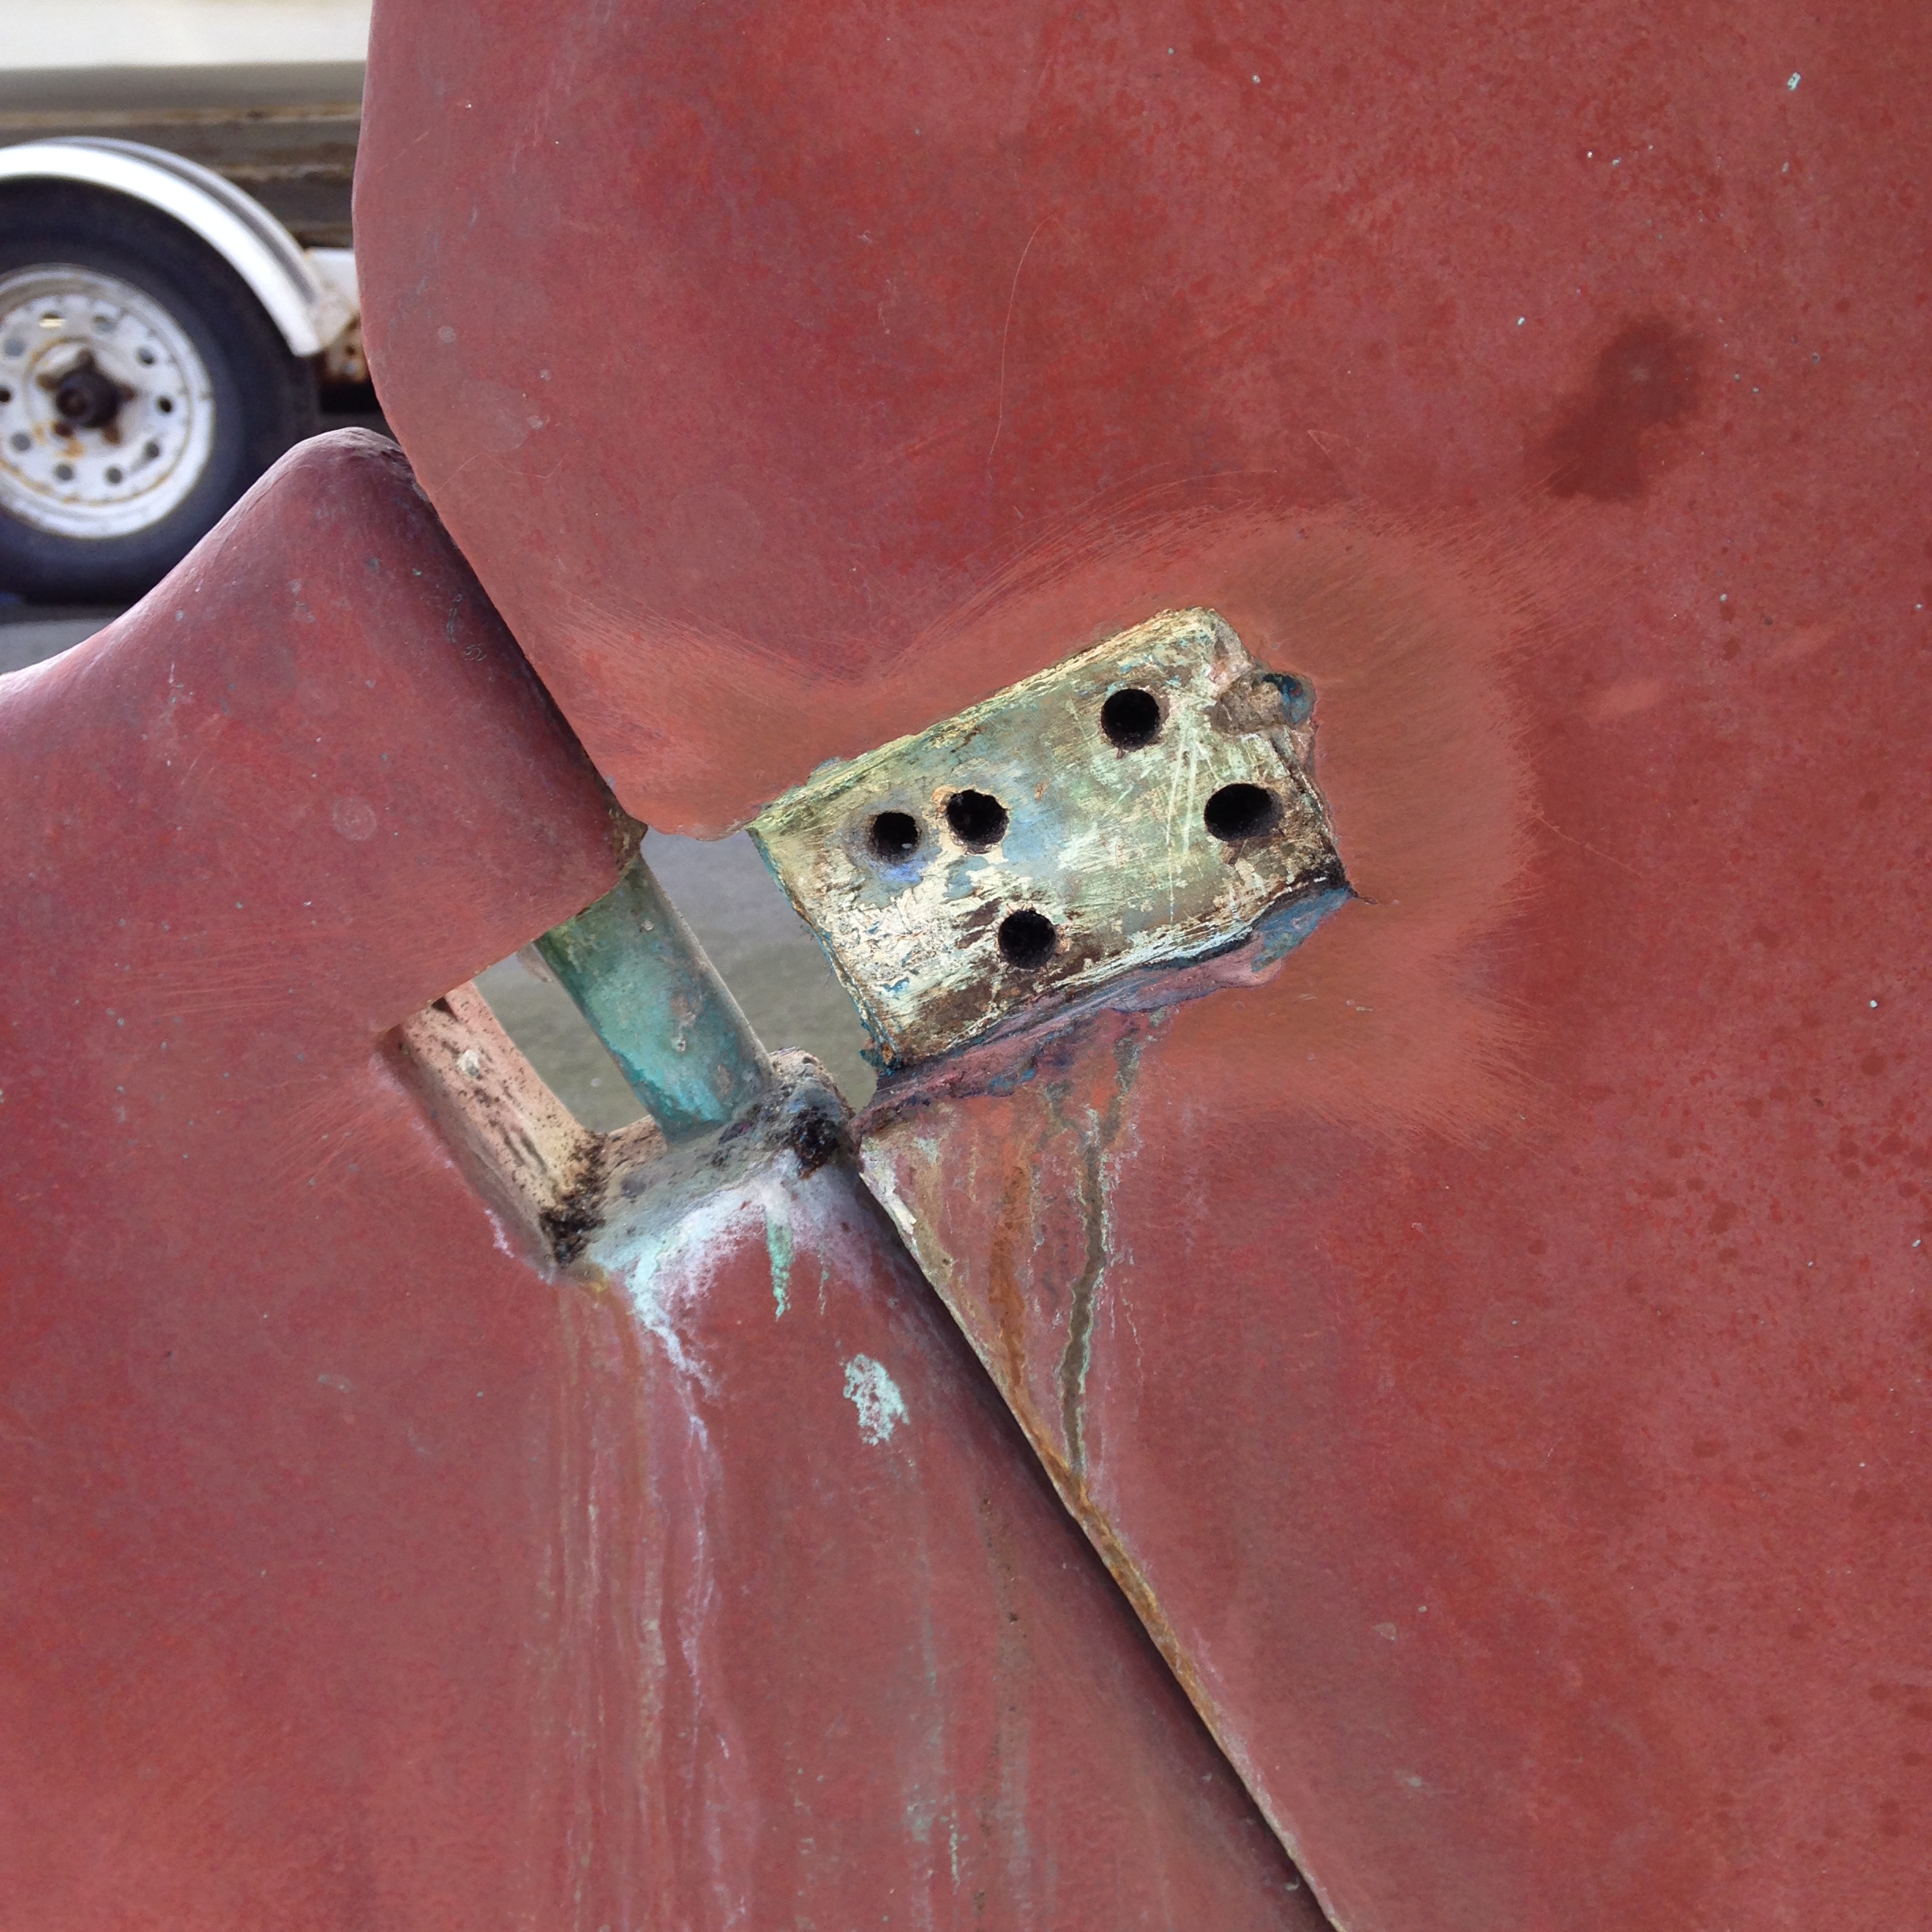
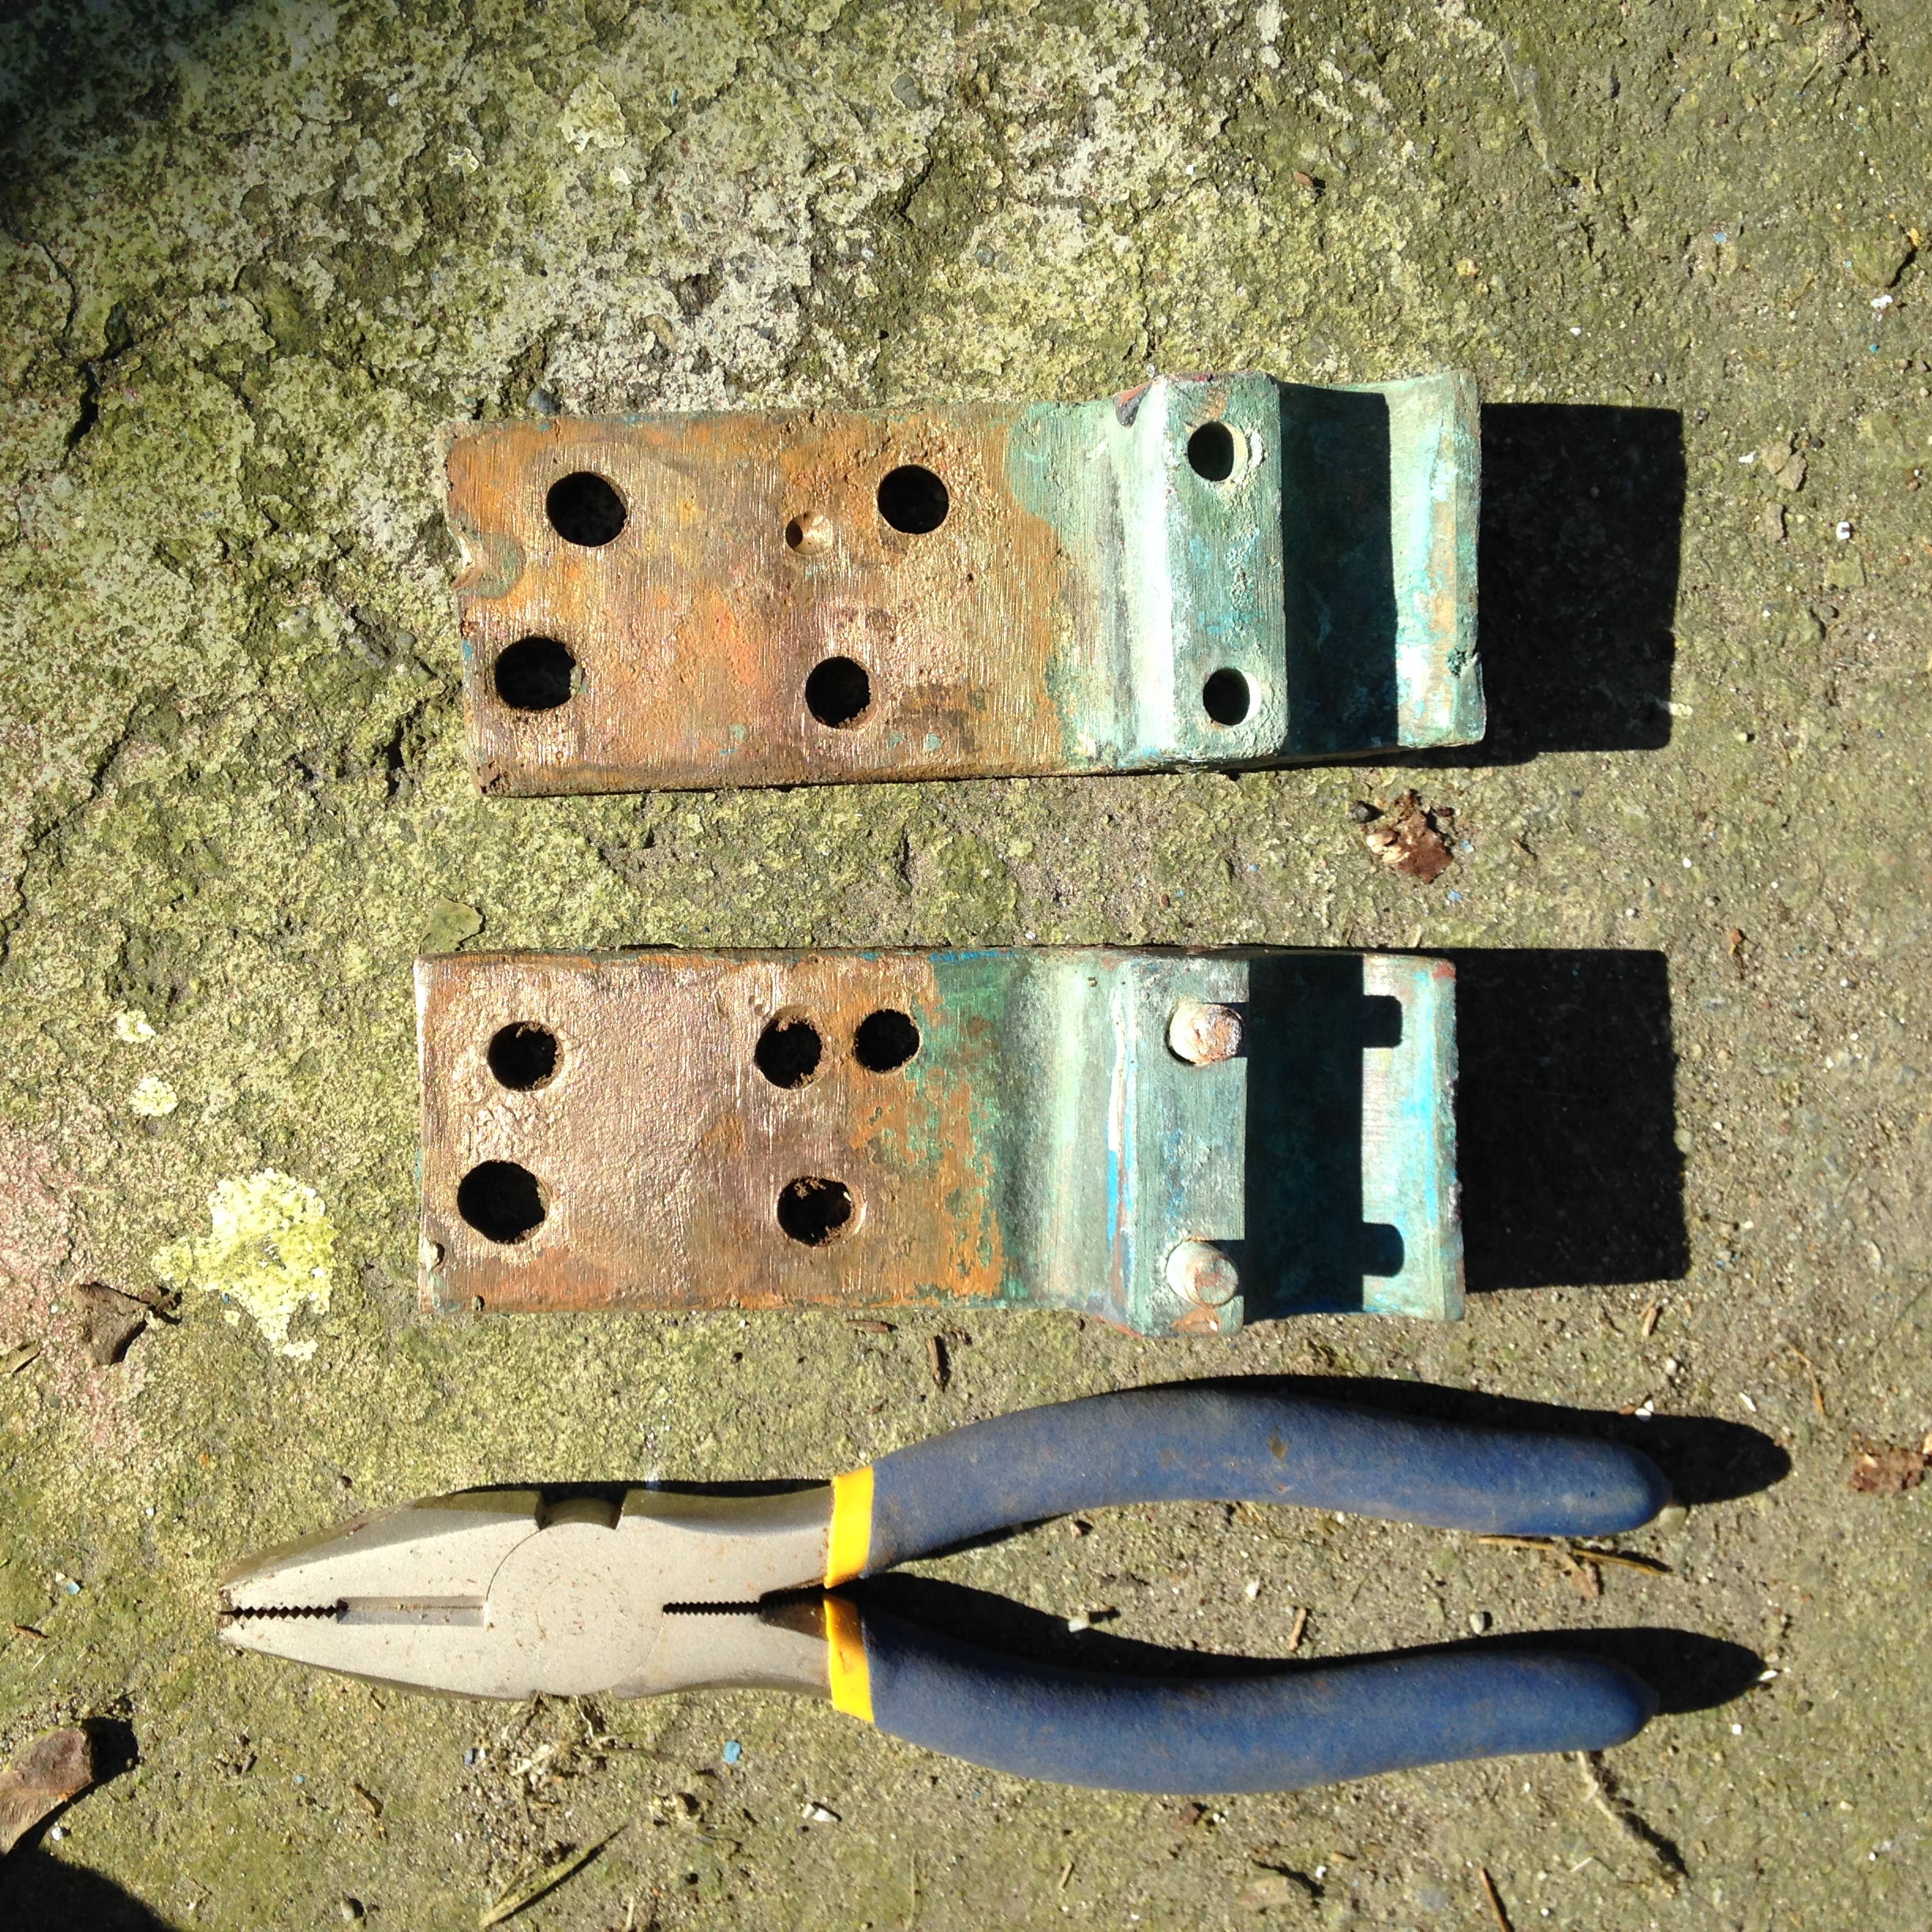
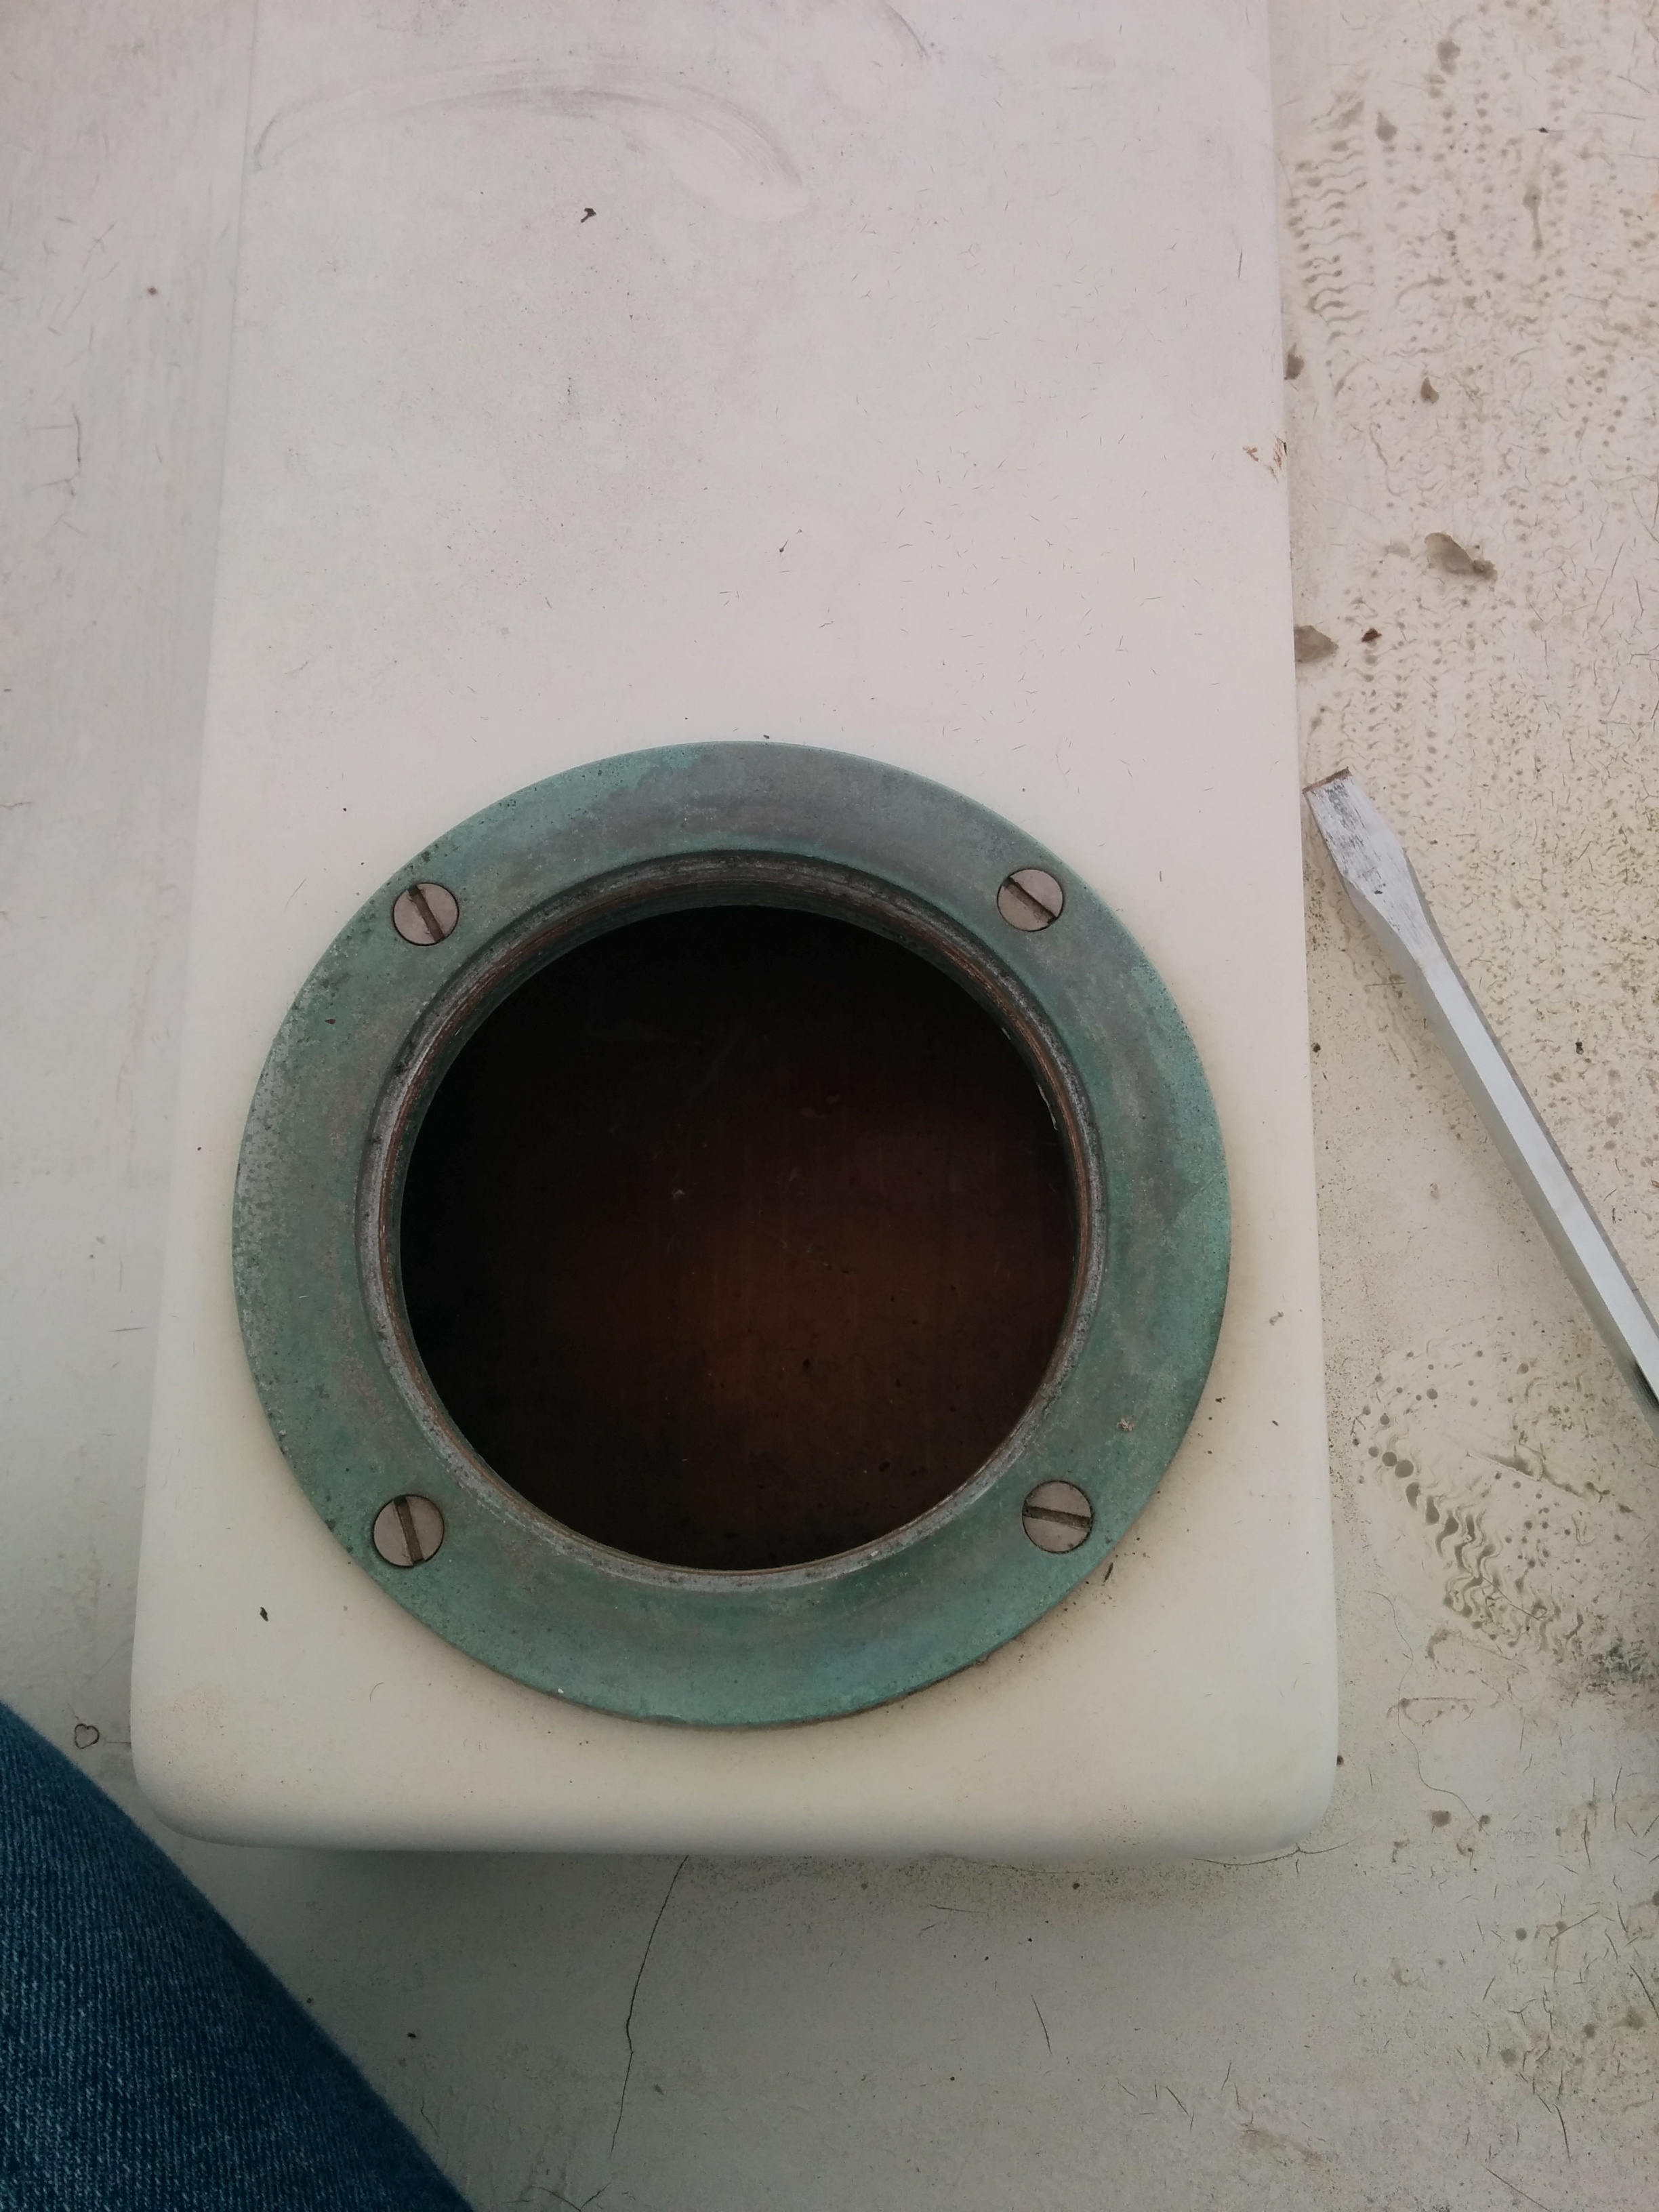
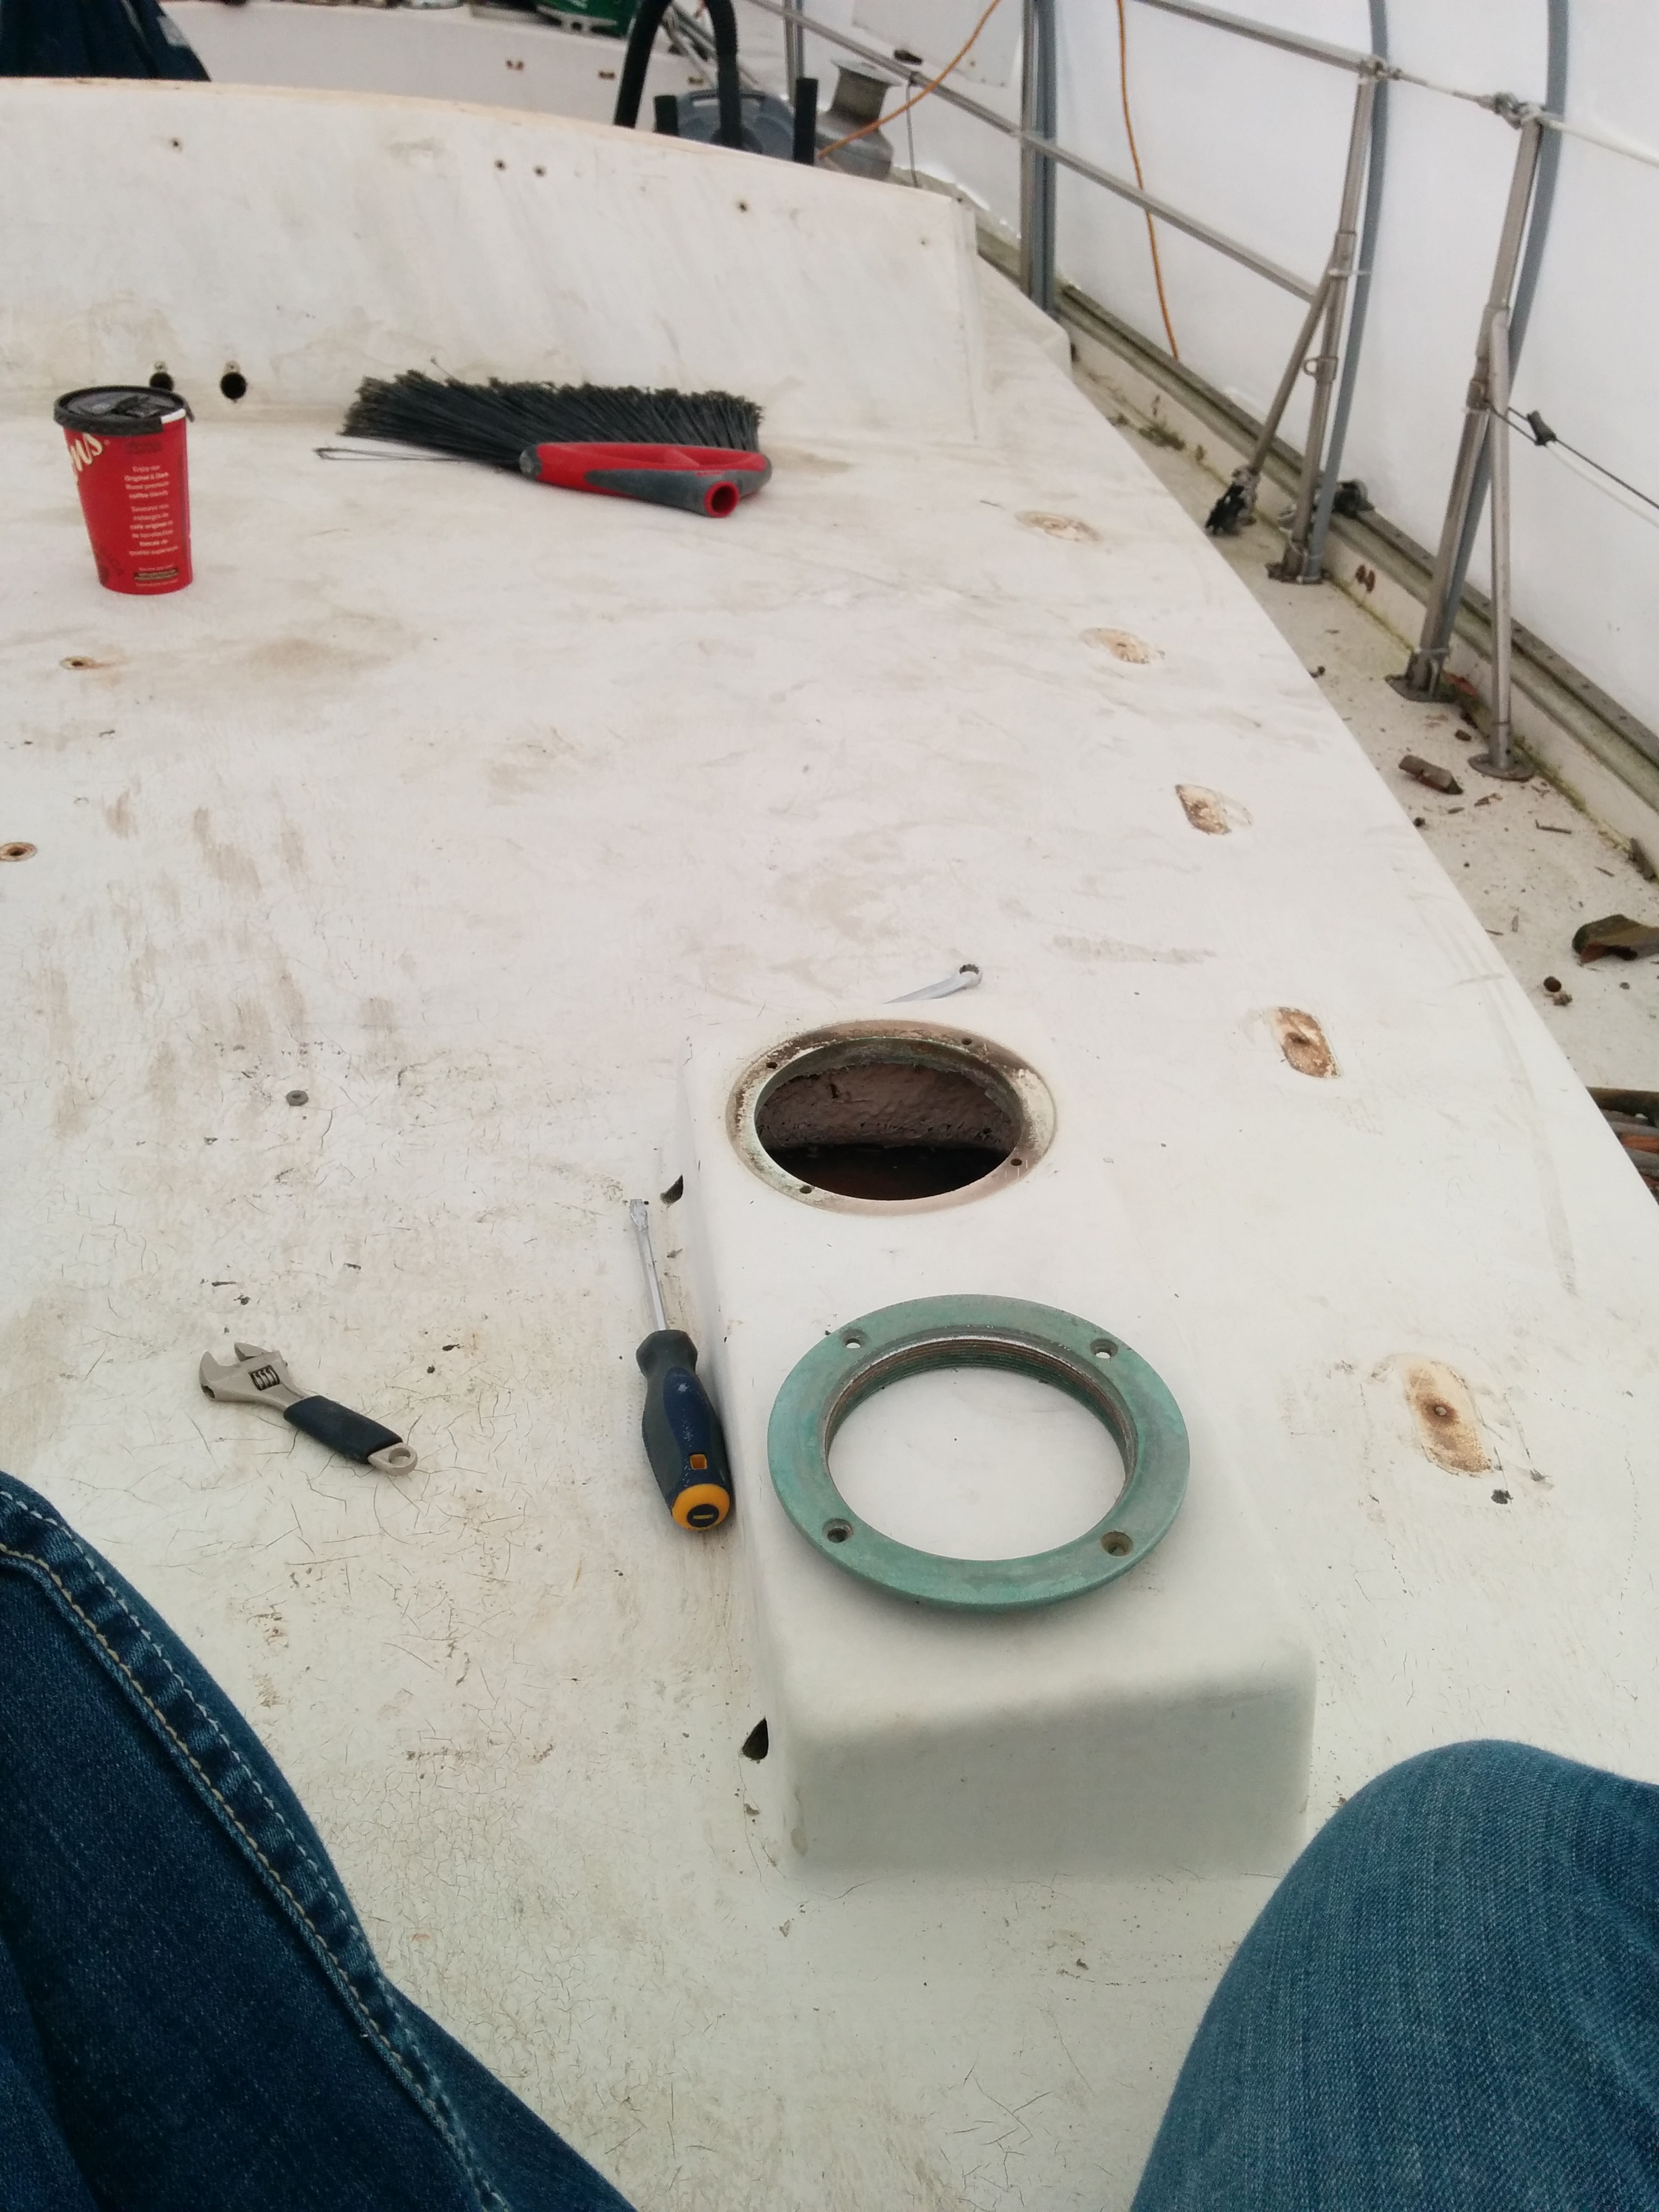
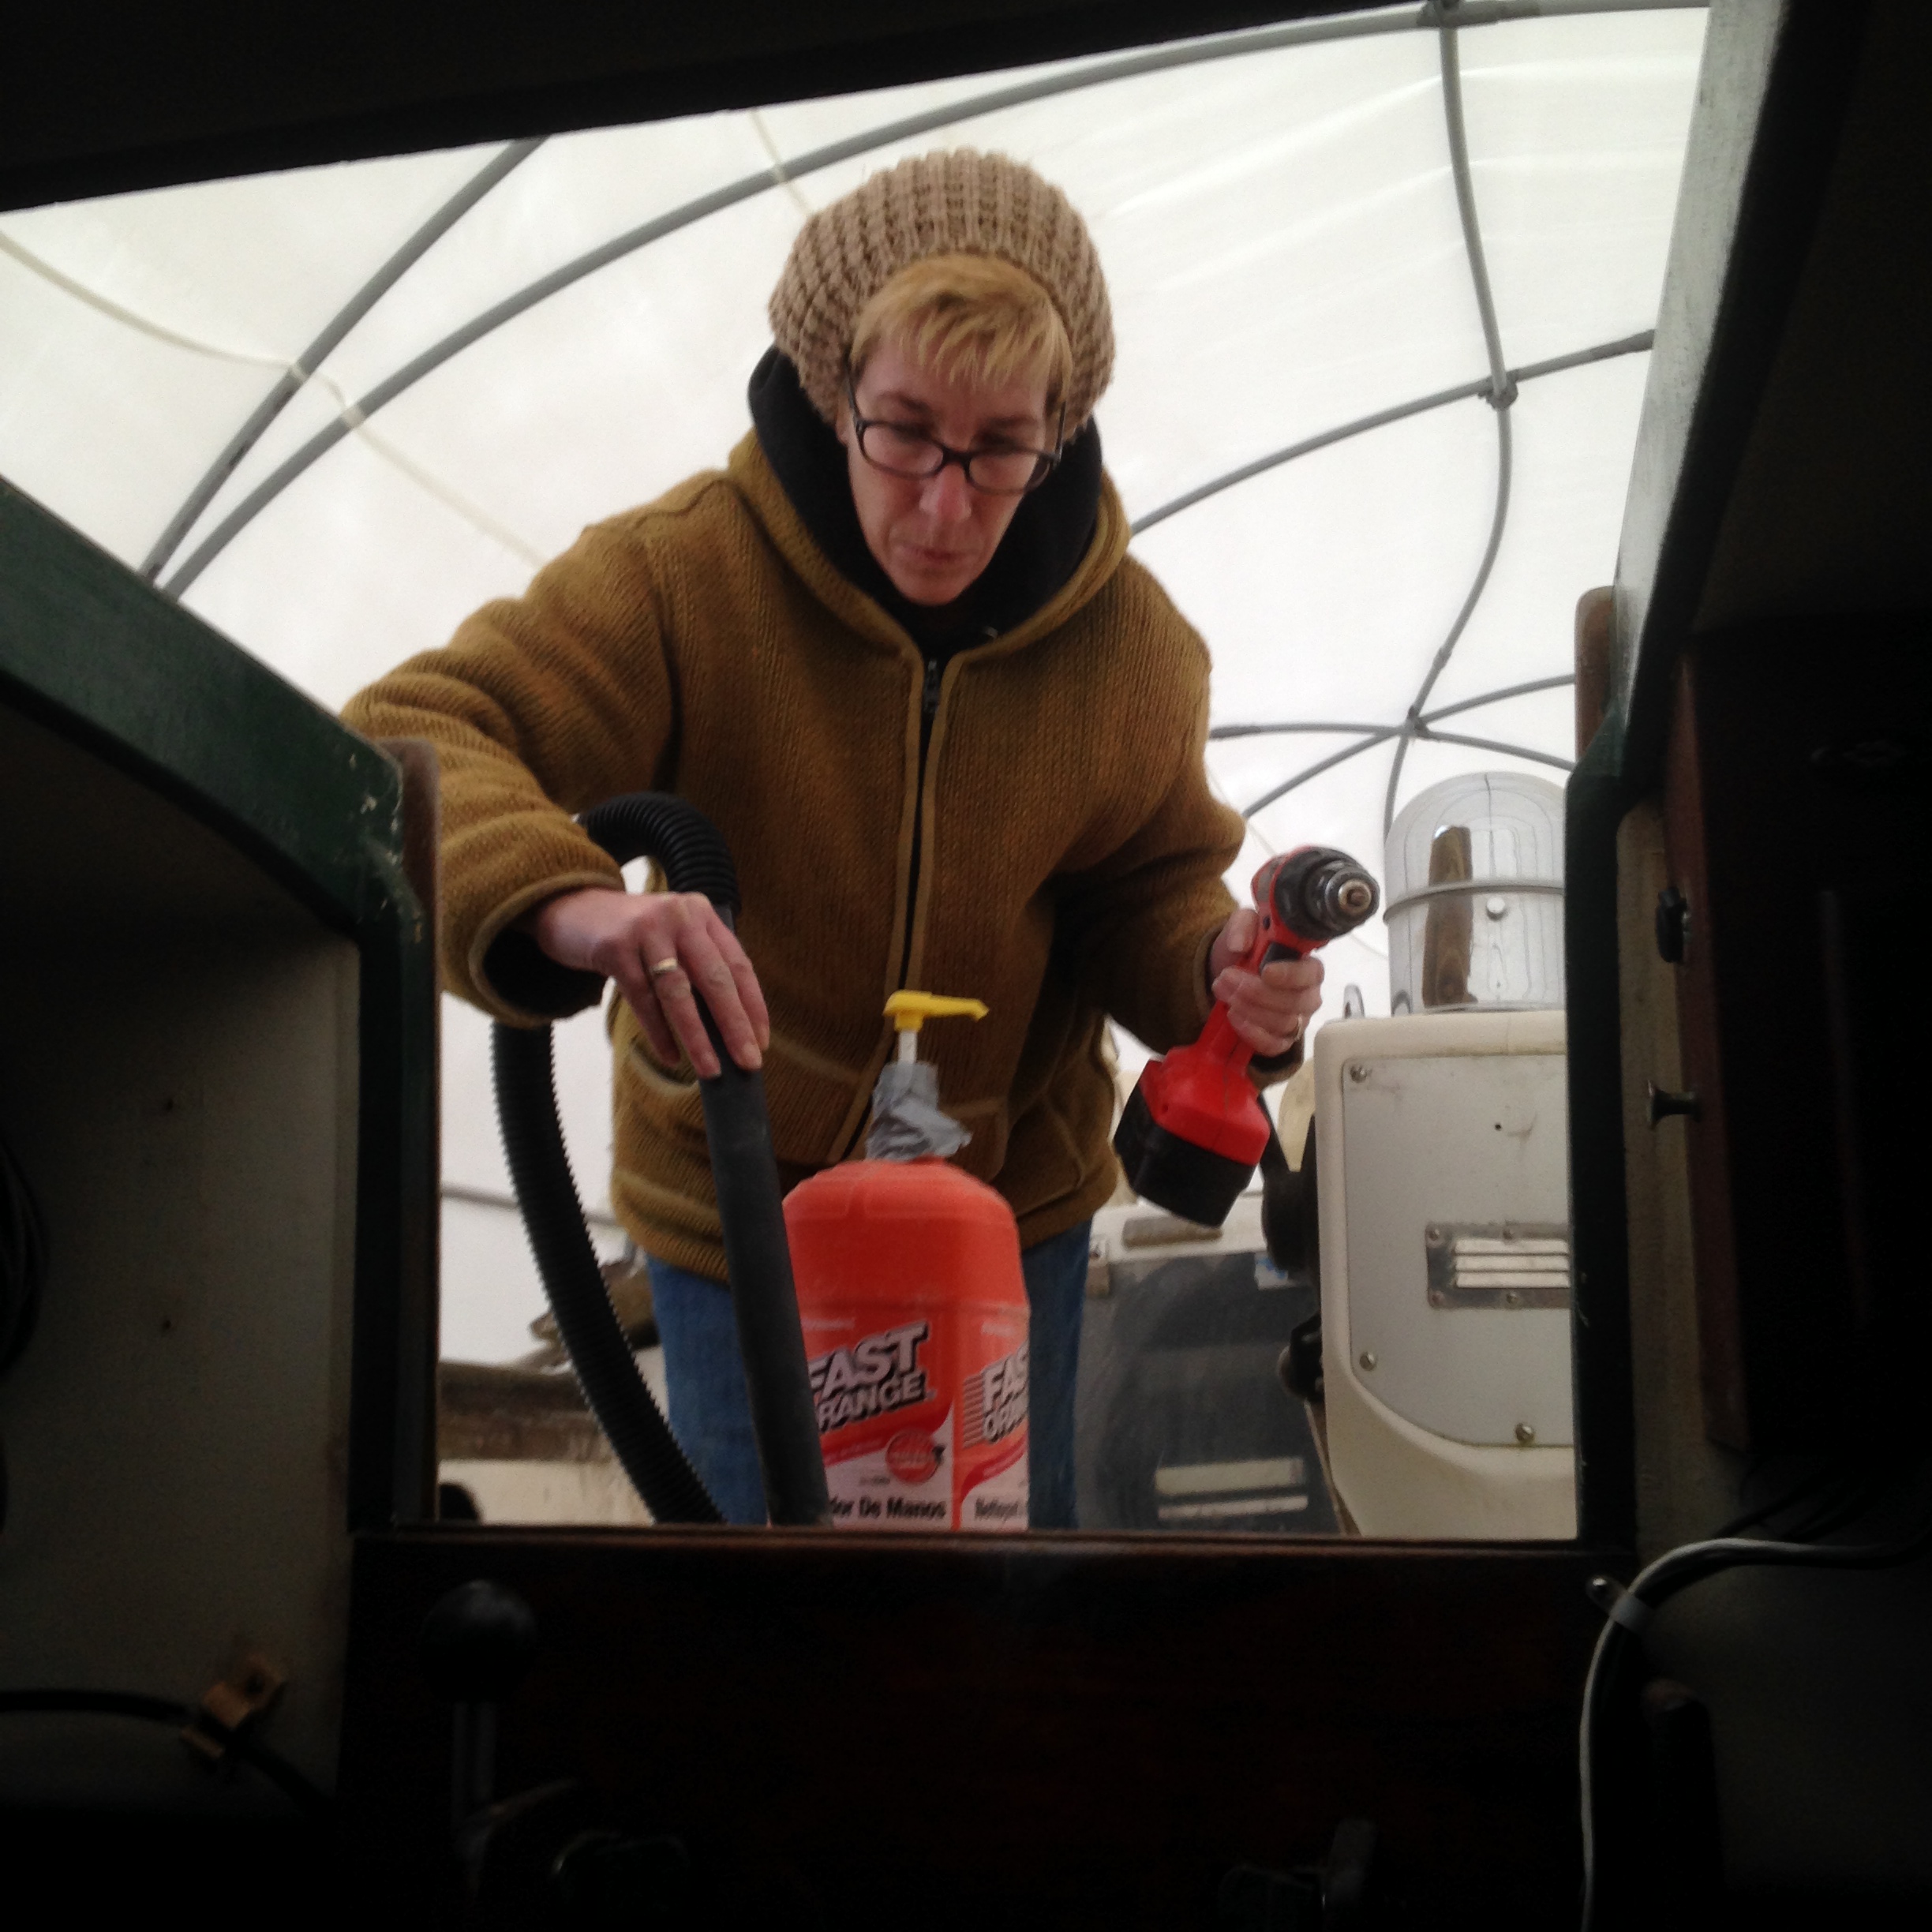
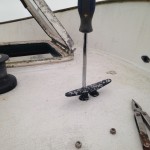
What should be an easy job, can sometimes turn out to be incredibly frustrating. For example the nice little brass rings that the dorade vents screw into.

IMG_20150117_115312
They are held with 4 little machine screws with nuts on the back. No combination of tool that I currently possess will do the job. The only way we finally managed to get the last screw out in each vent was by holding a socket with a pair of pliers and one hand inside the dorade box as the other person turned the screw. We messed with these for over an hour, but we finally got them all out without breaking anything.

IMG_20150117_140303
Speaking of screws, the only type of screw we have yet to find is a Robertson. You know, the only type of screw that actually makes sense in 2015. We have big slots and little slots, and medium Philips and tiny Philips but not one Robertson. Every screw that we have removed thus far has been destined for the trash bin and every screw that we put back in place will be a stainless Robertson screw!


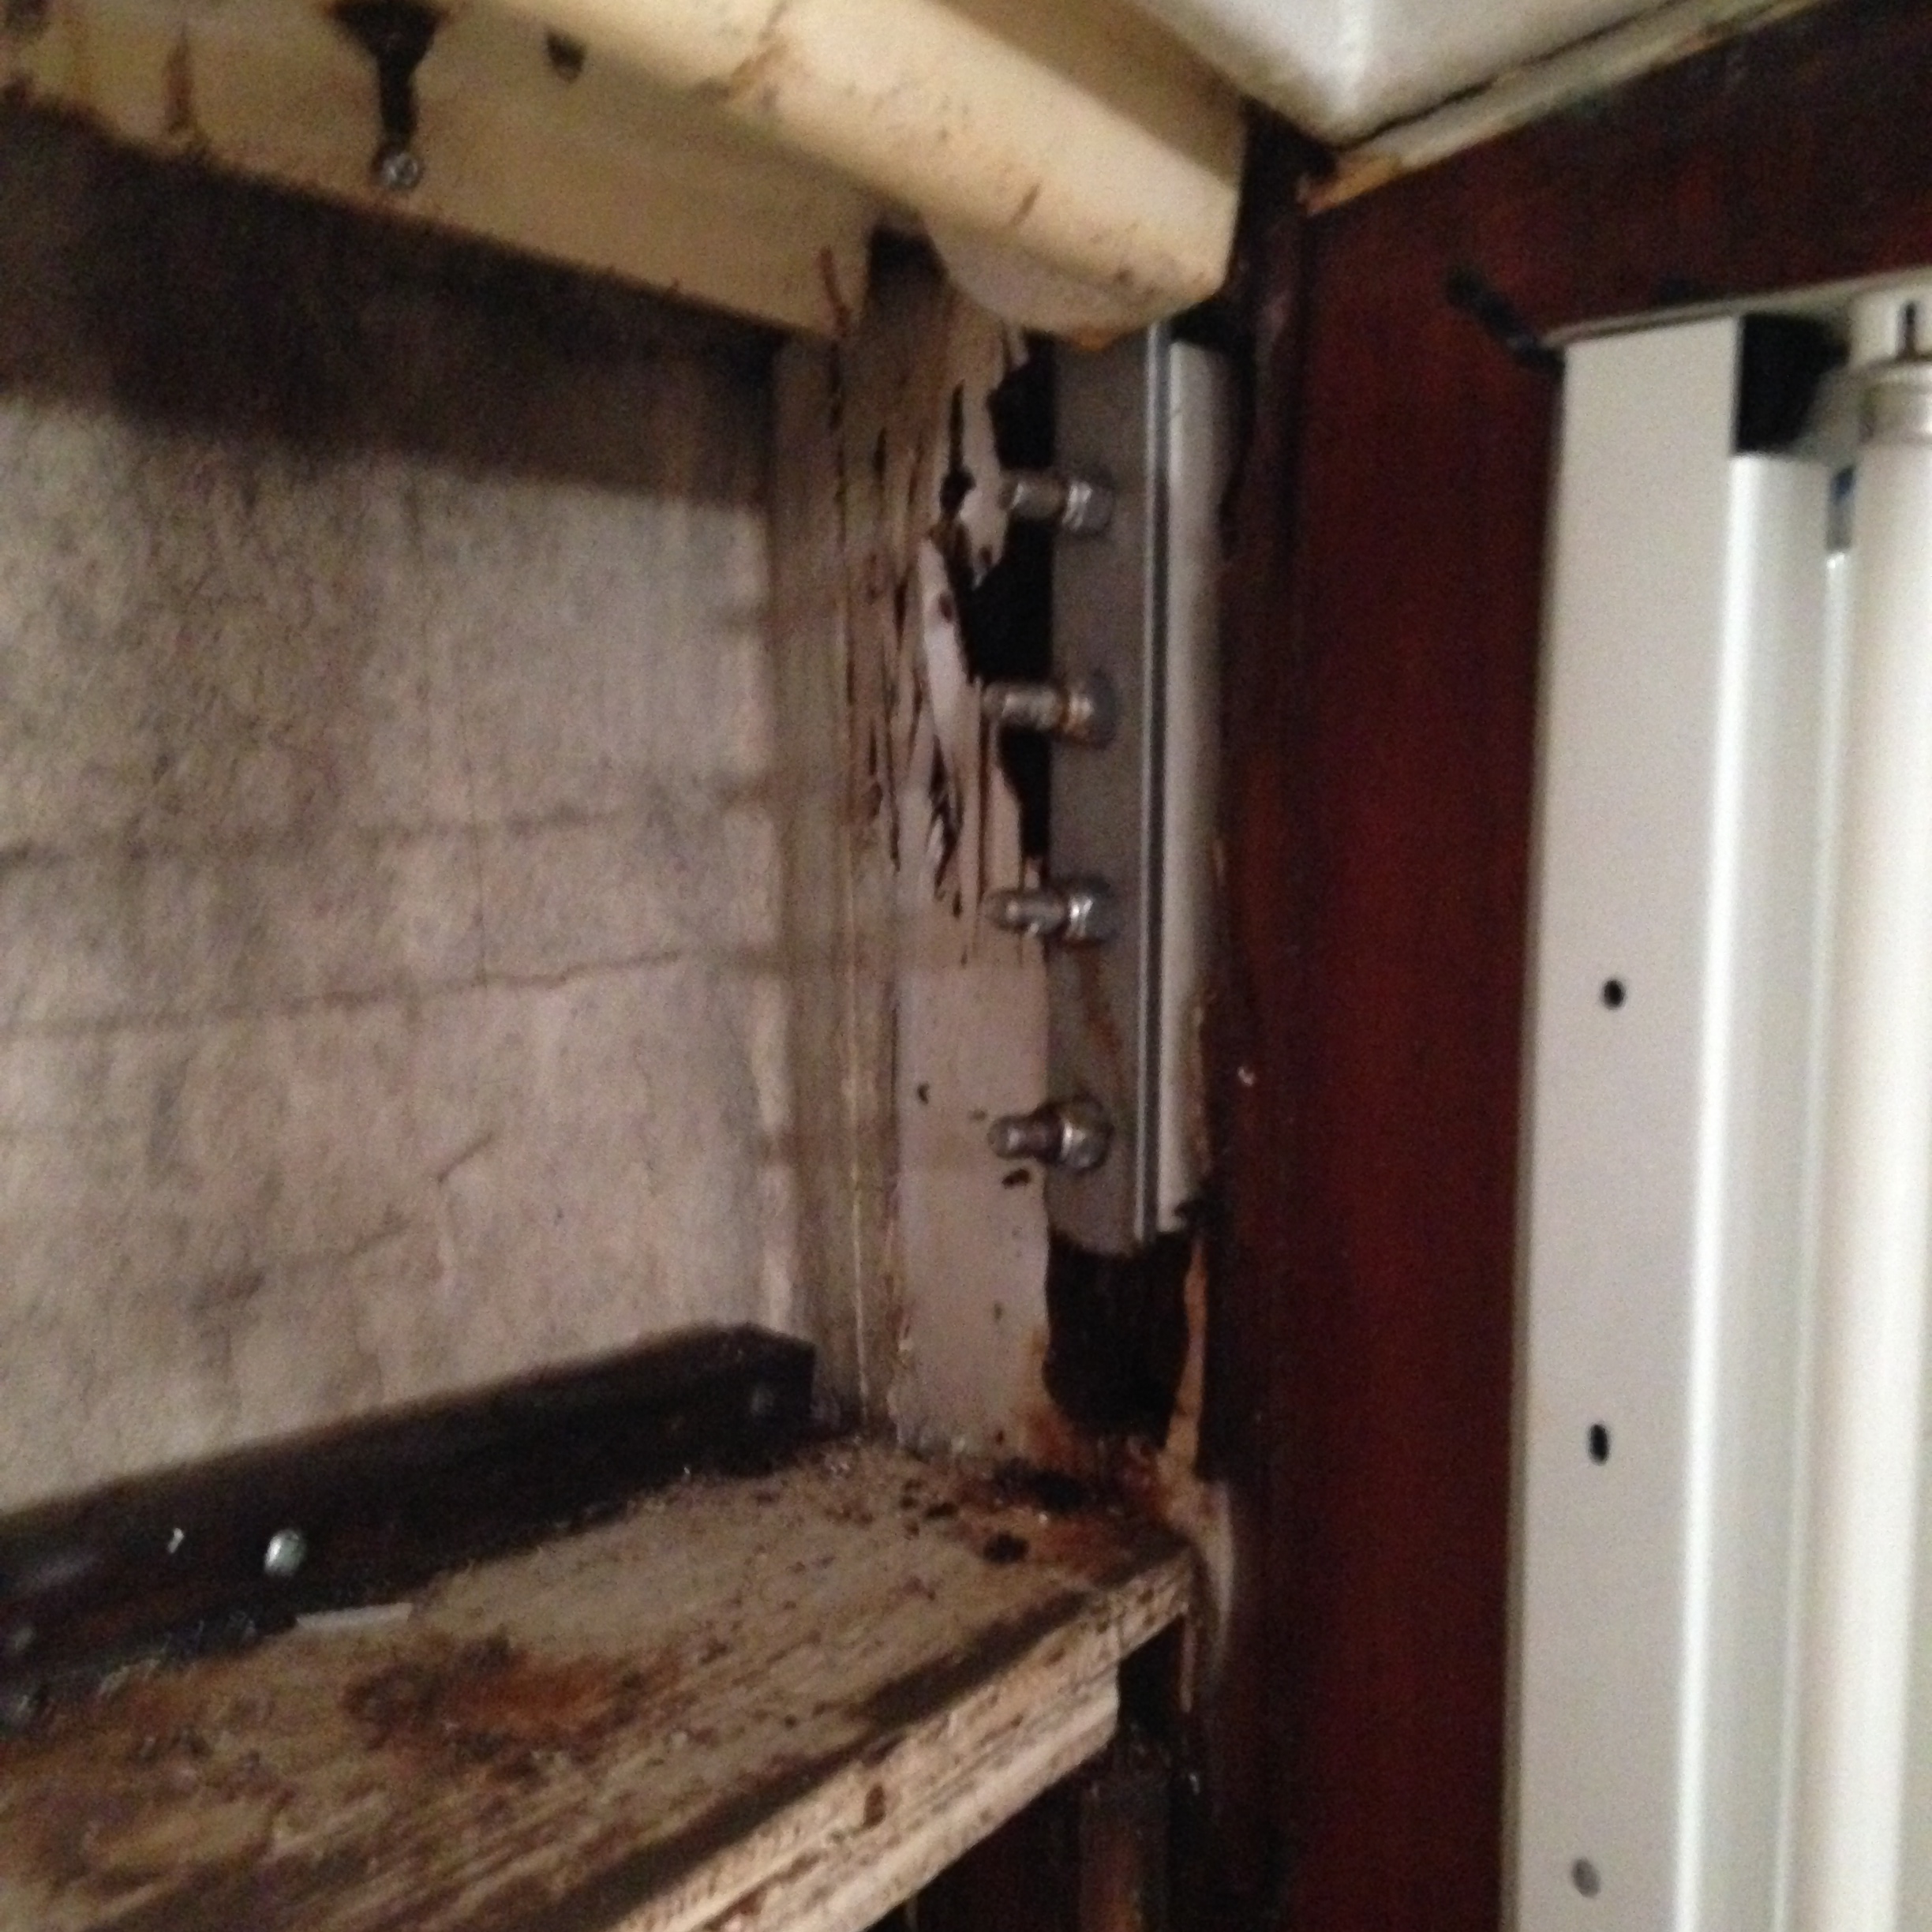
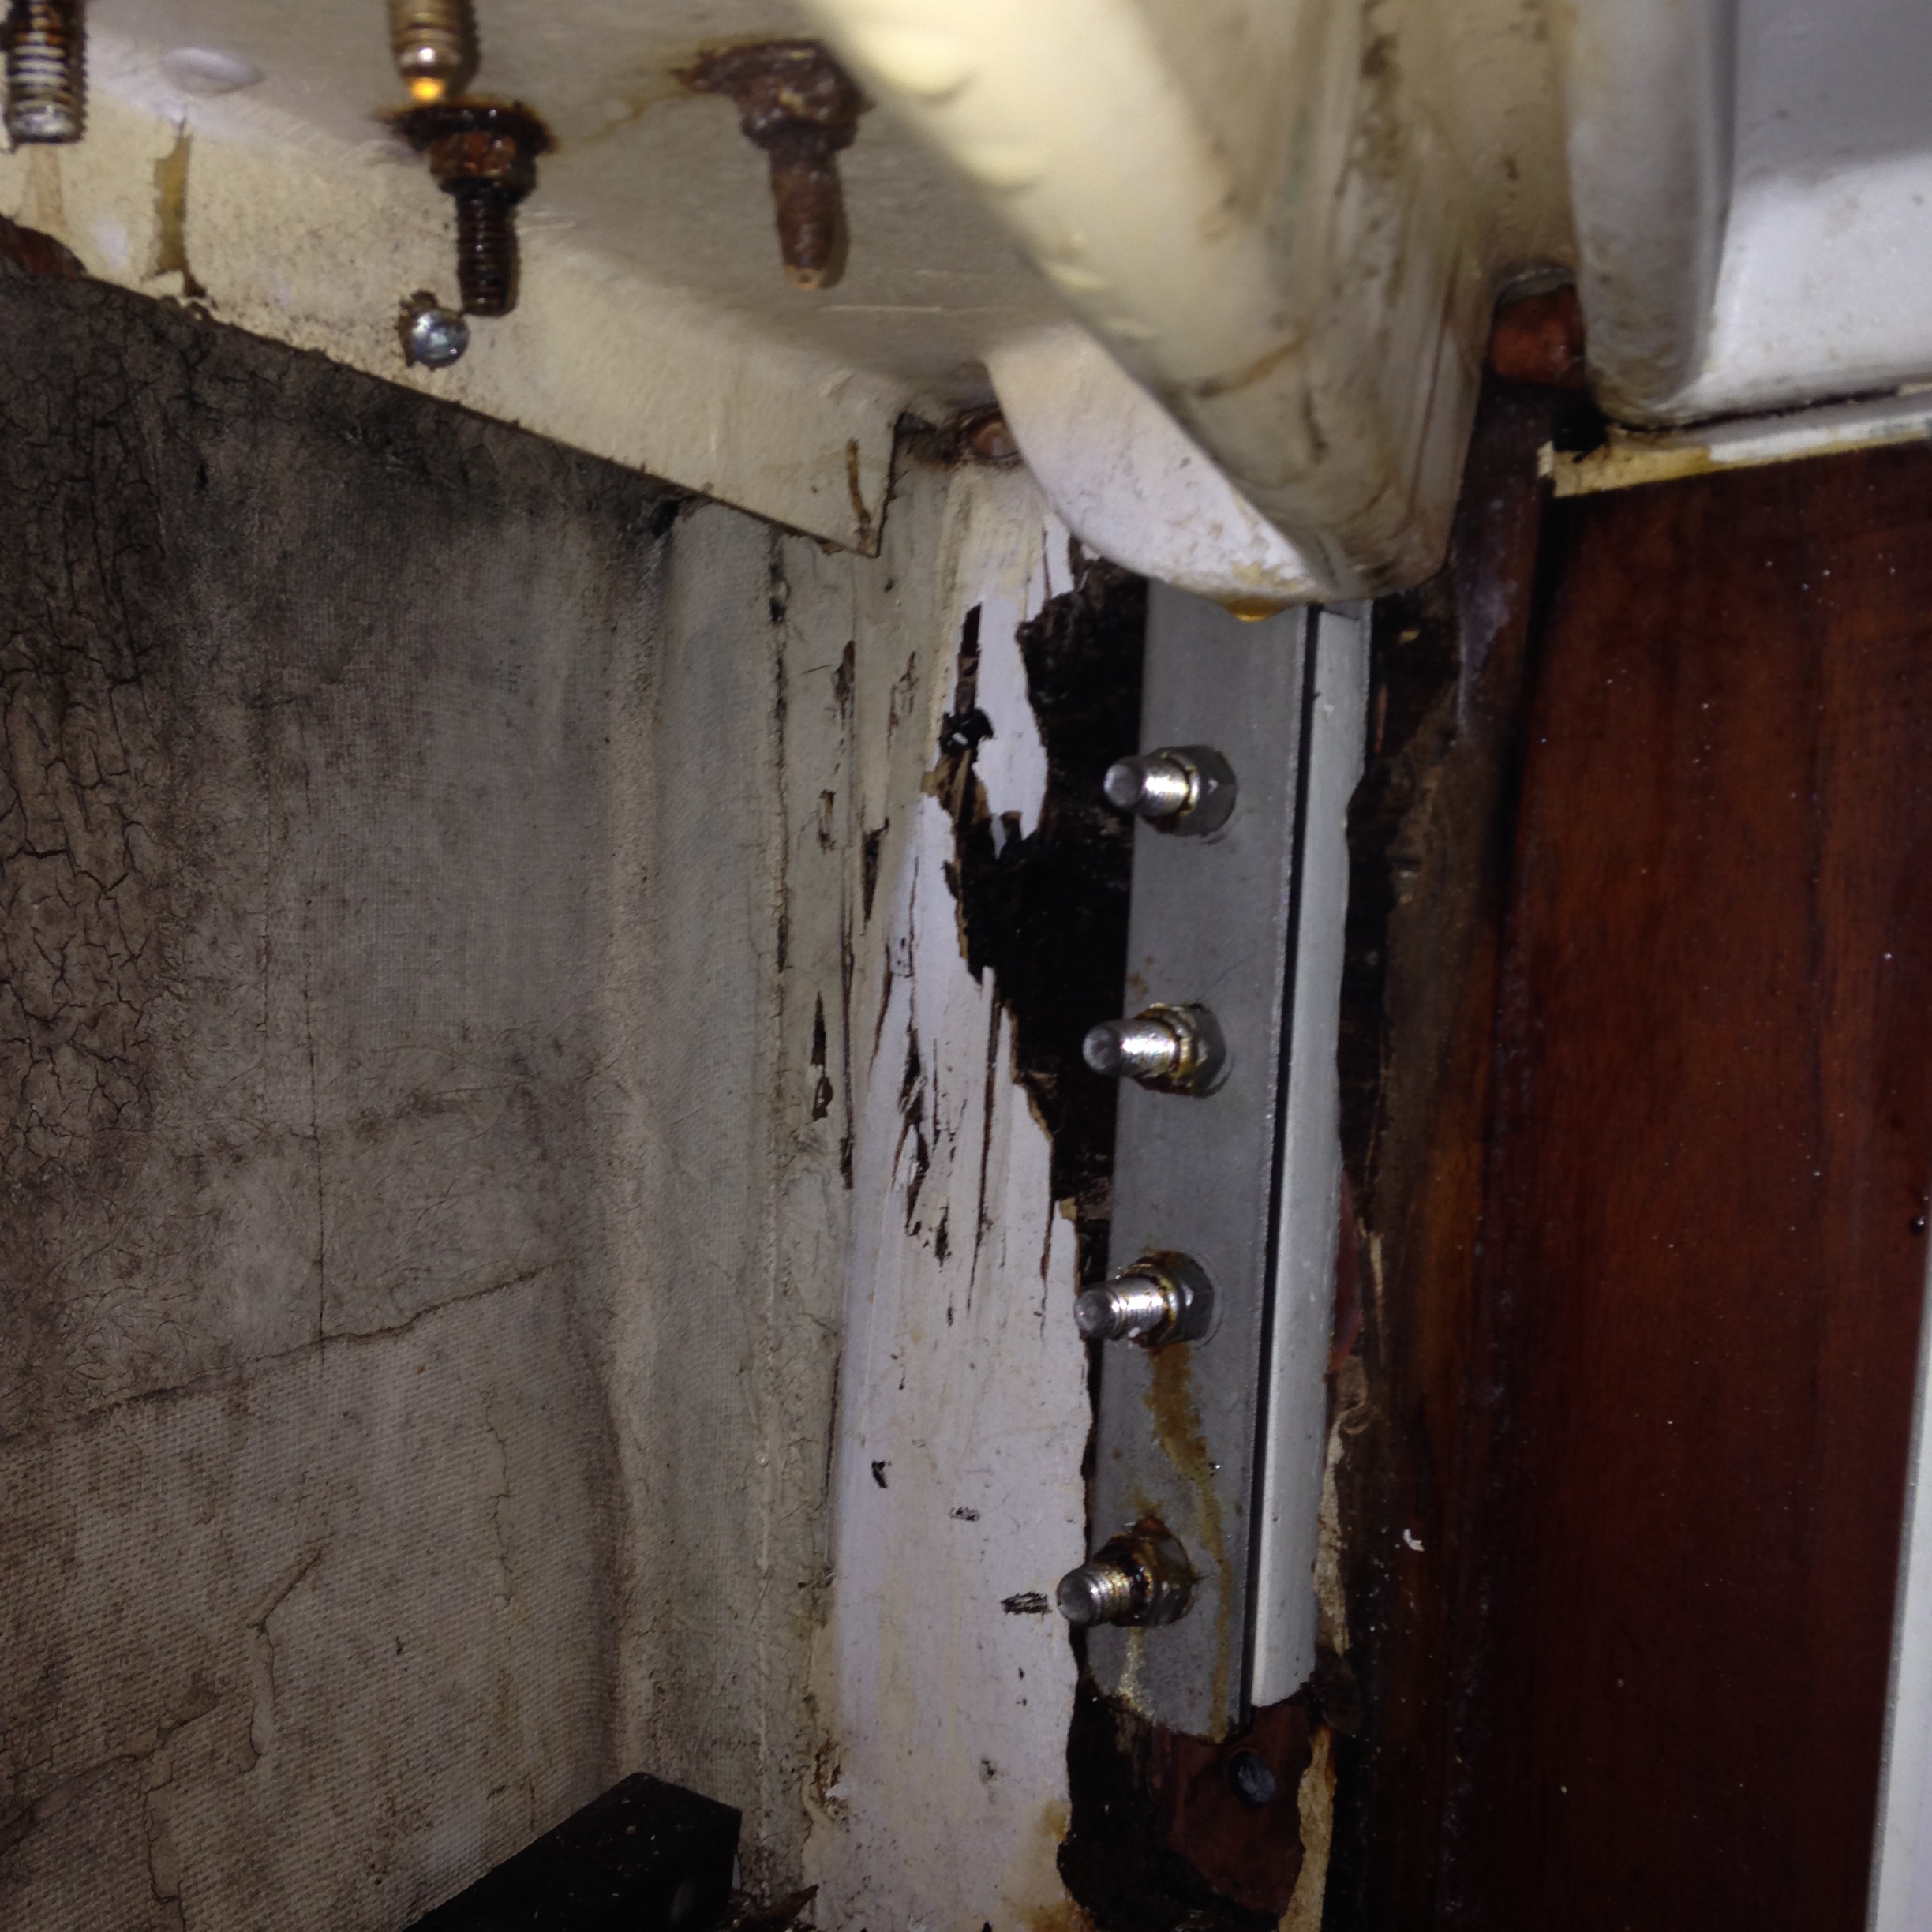
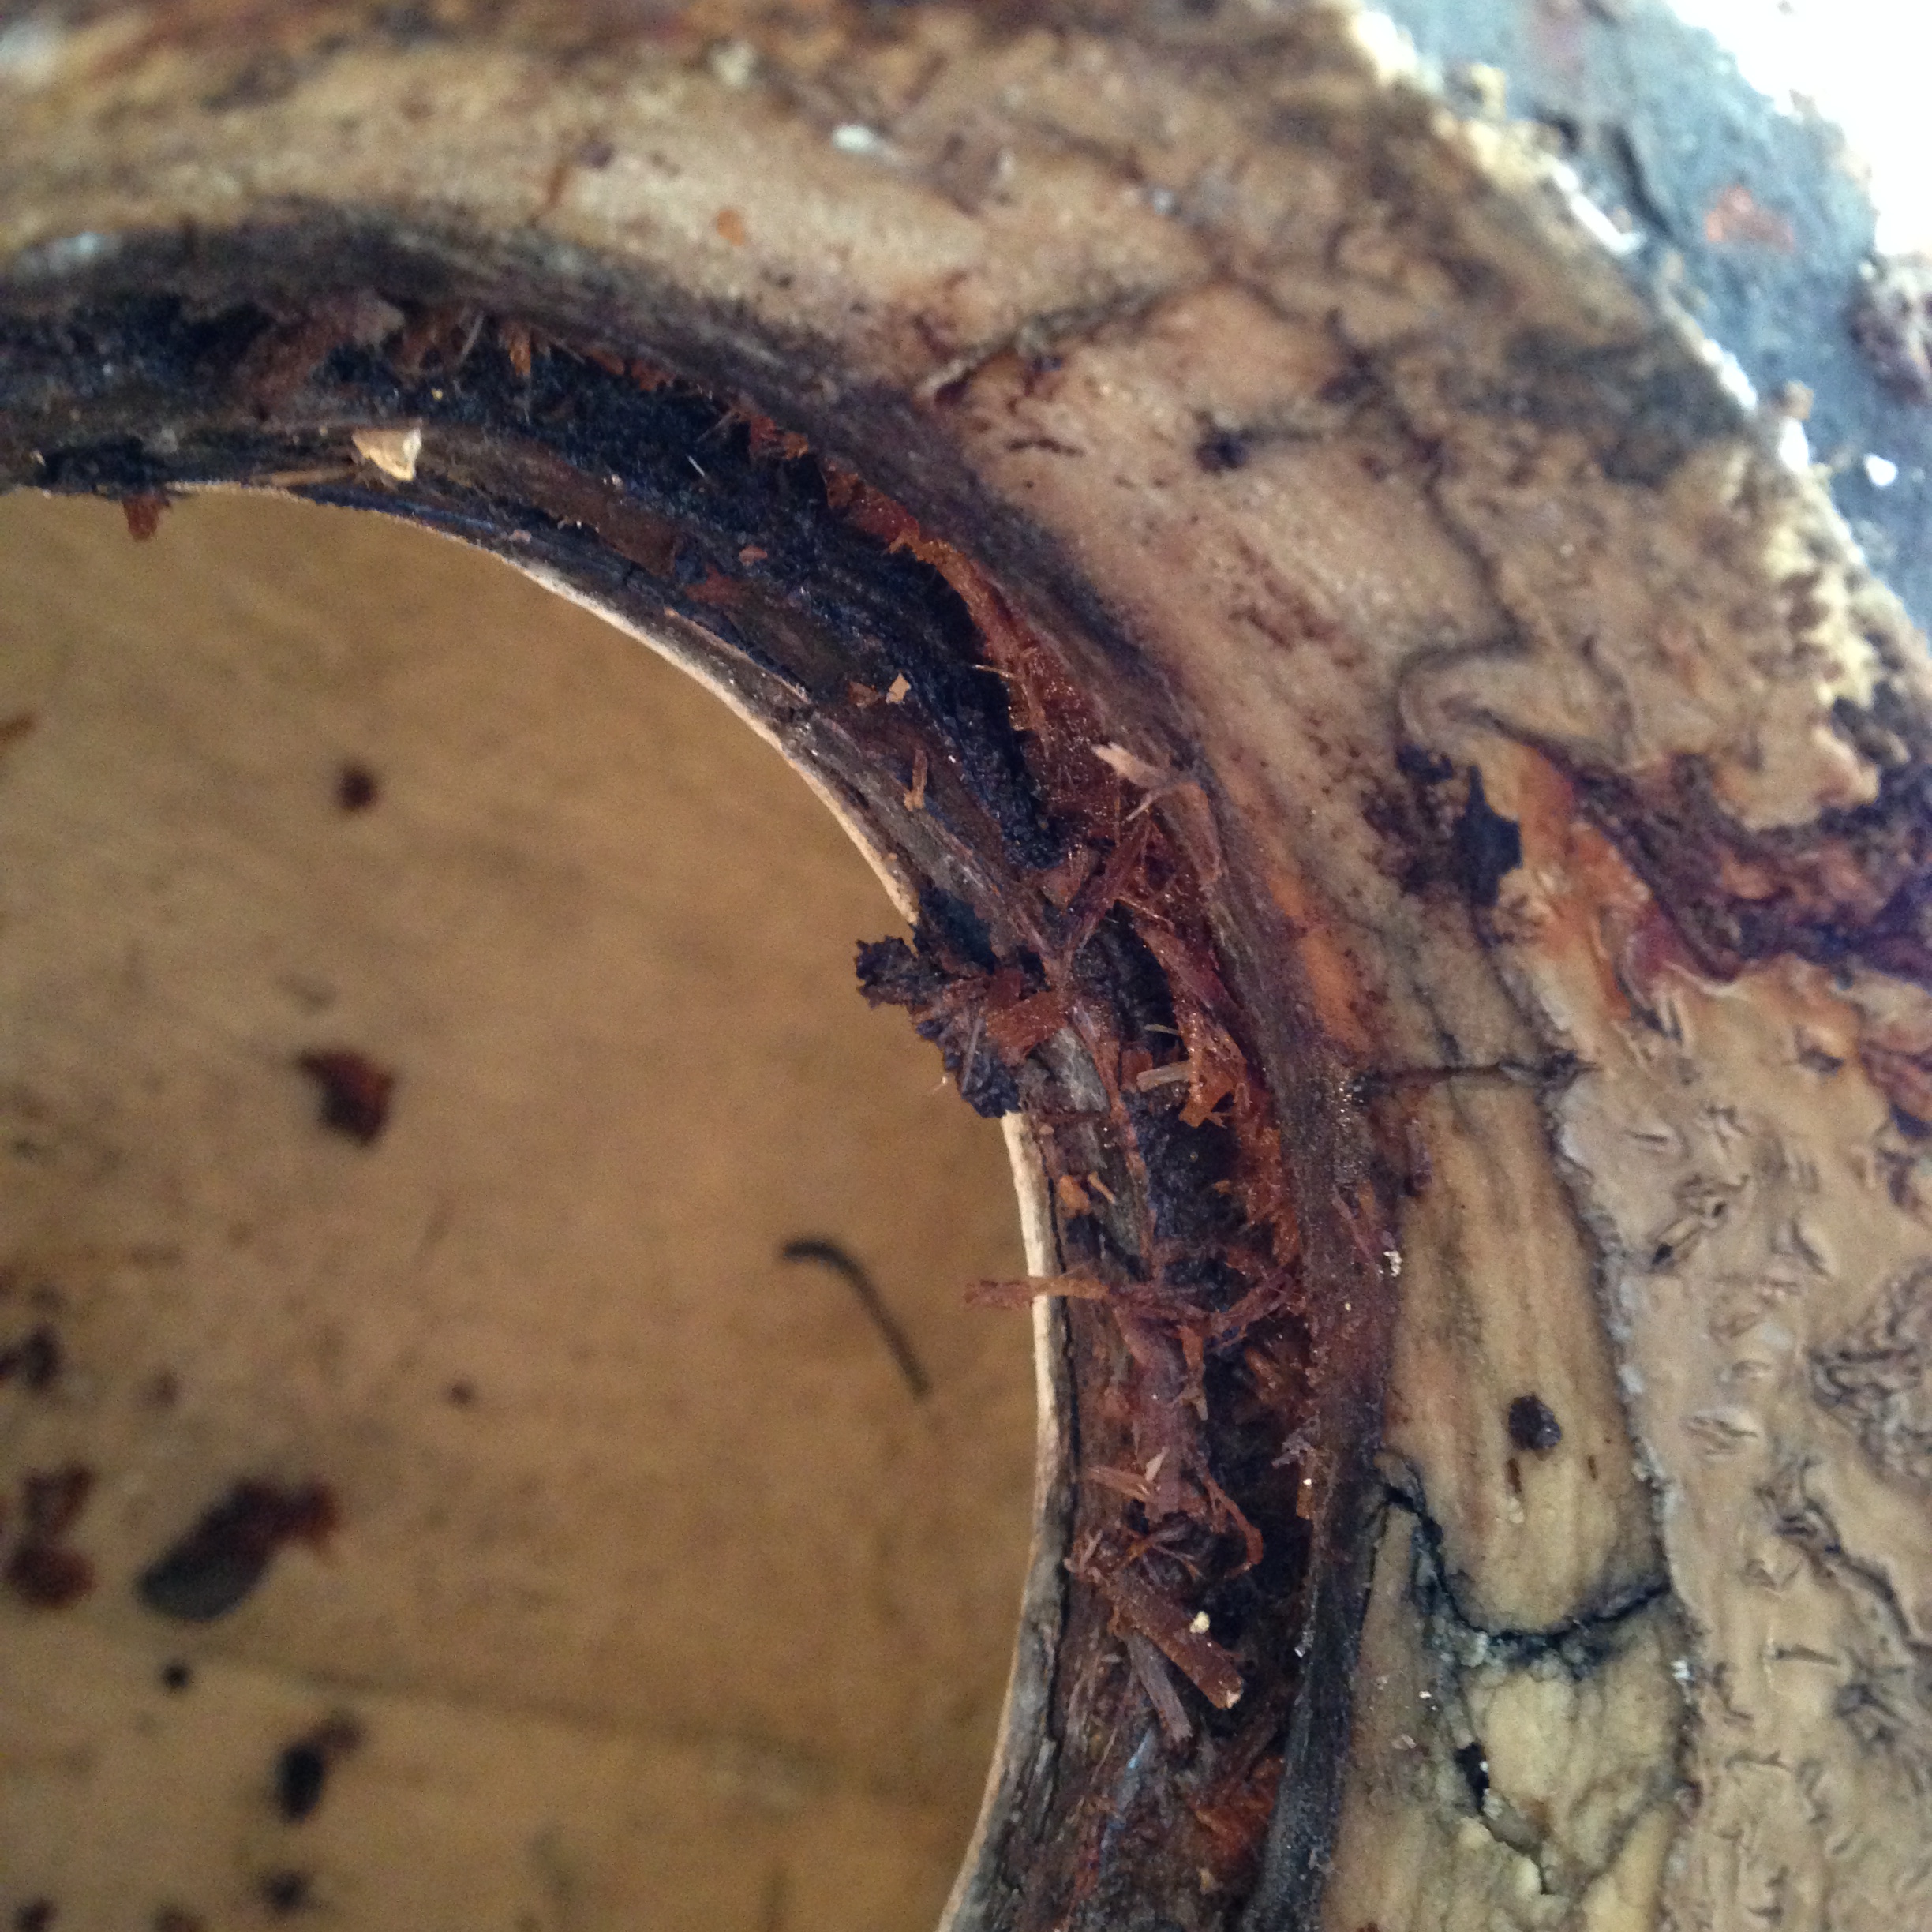
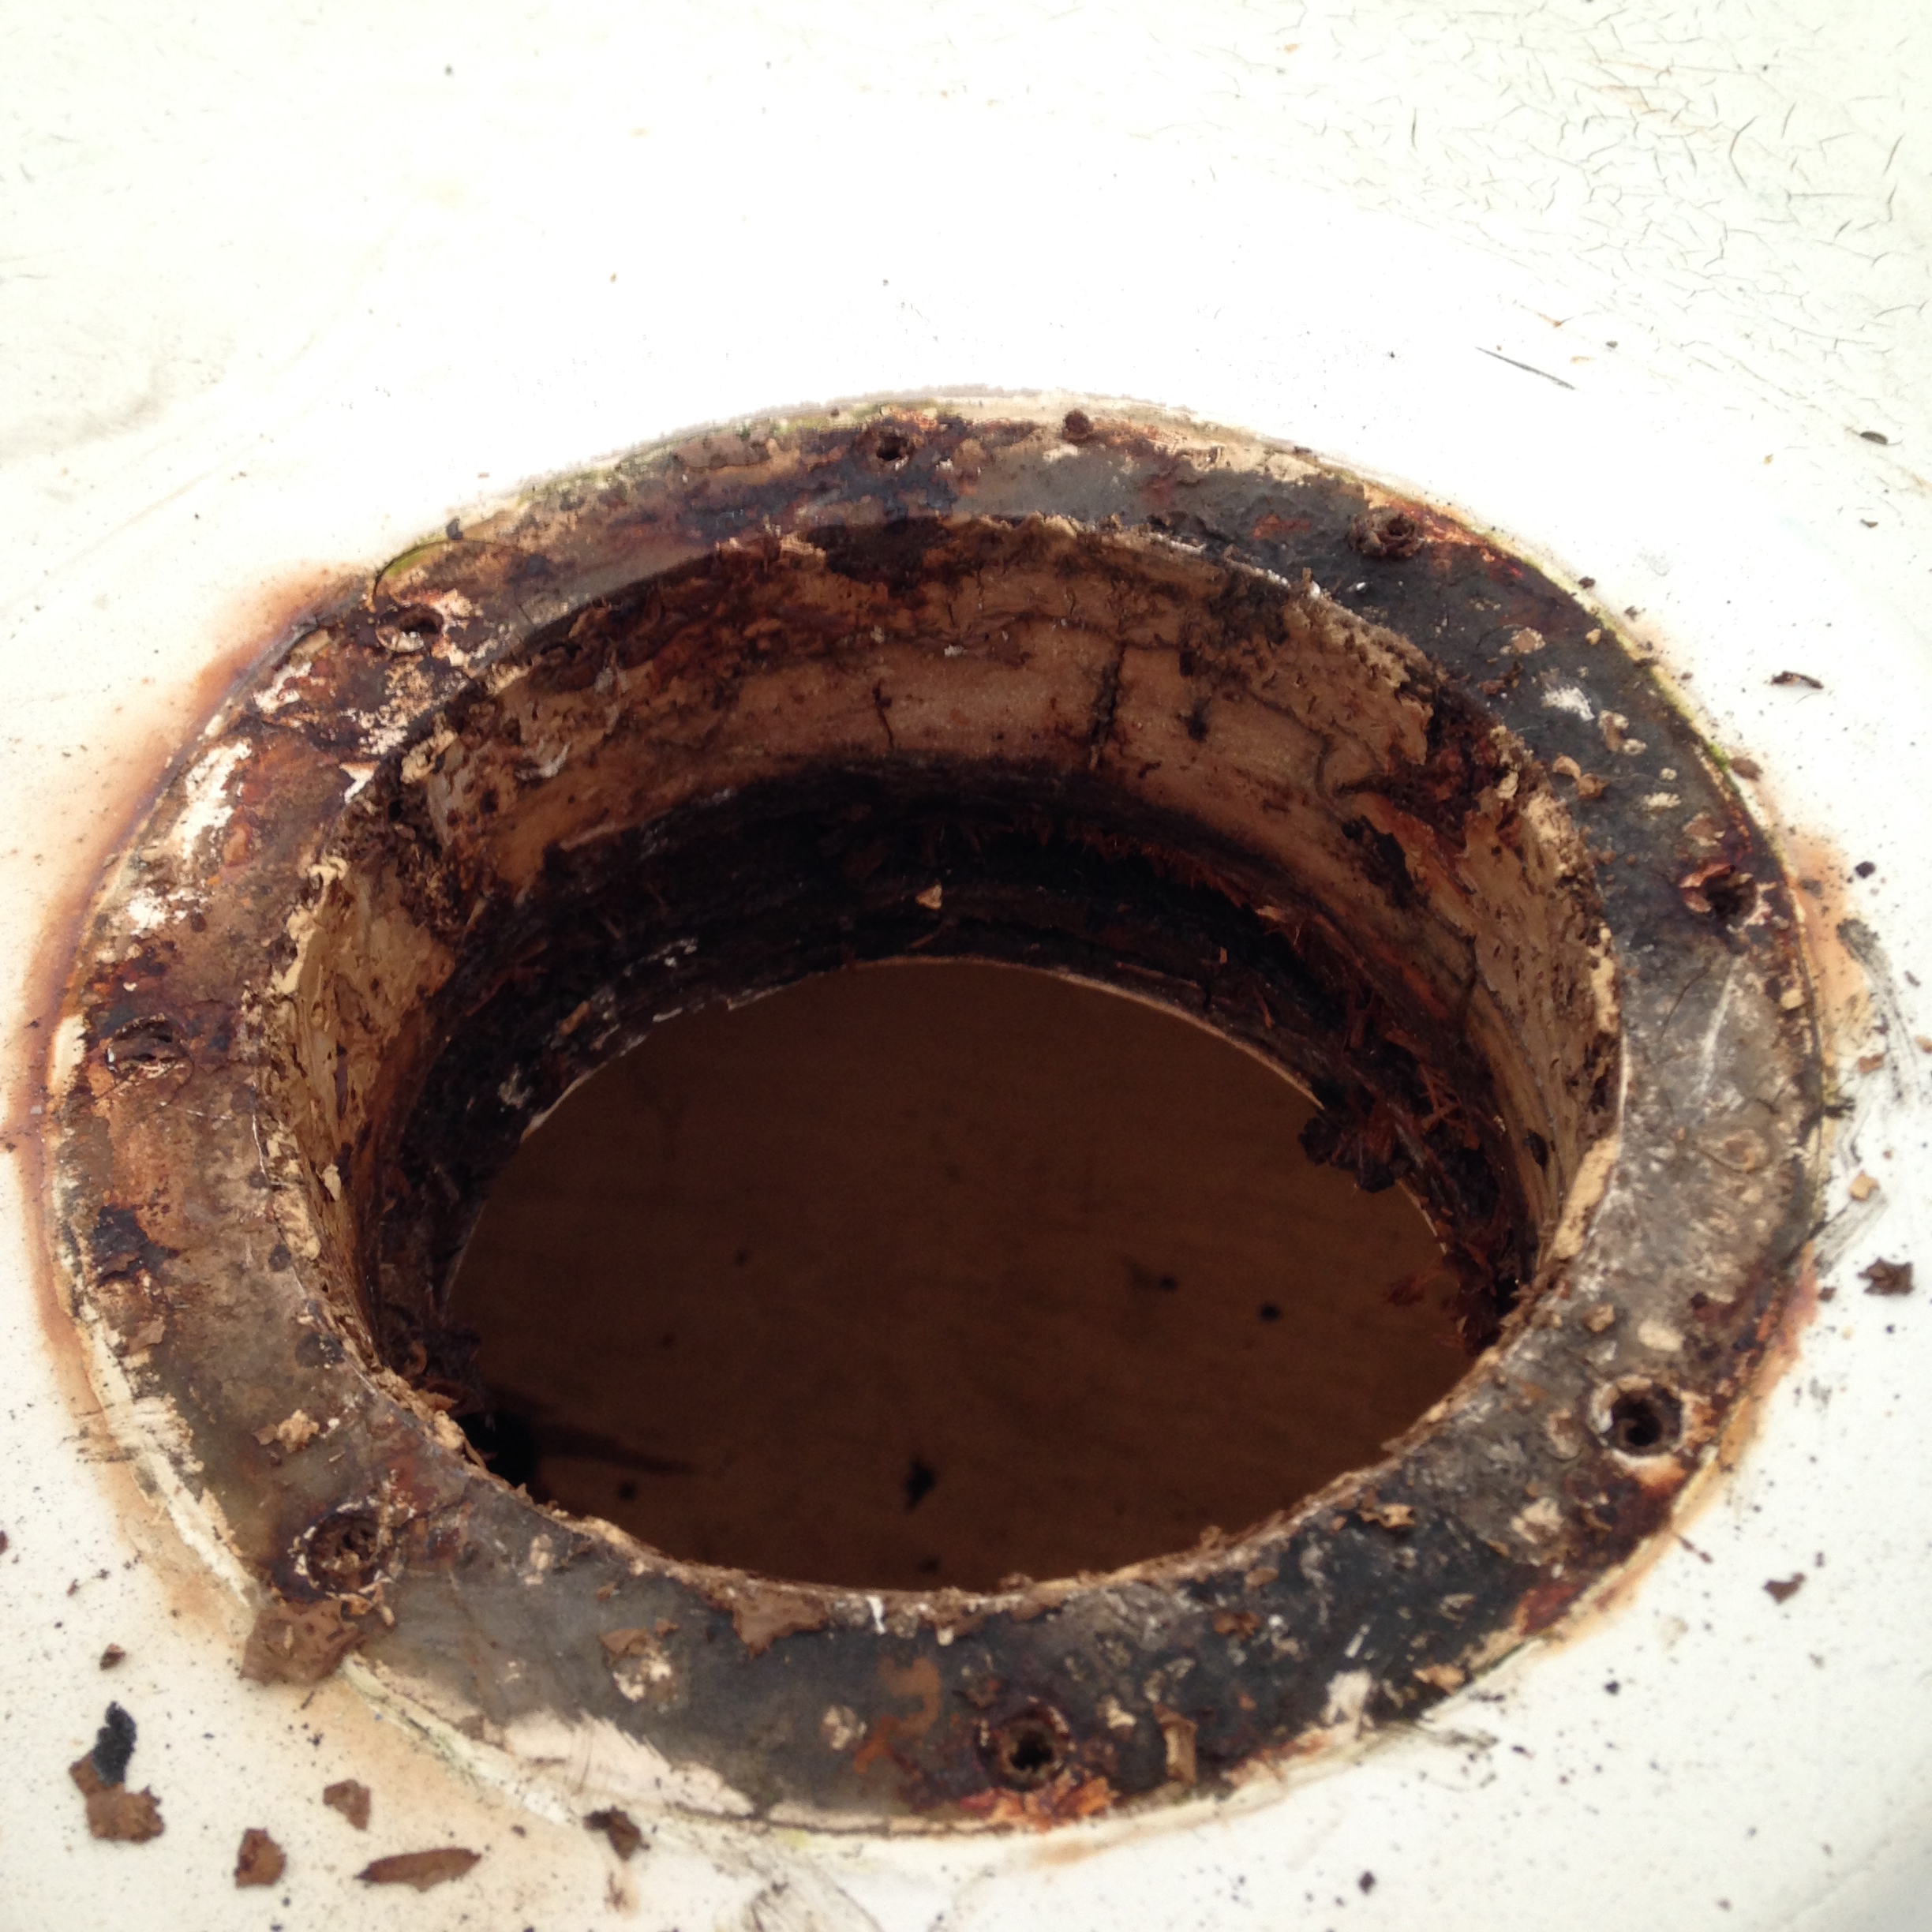
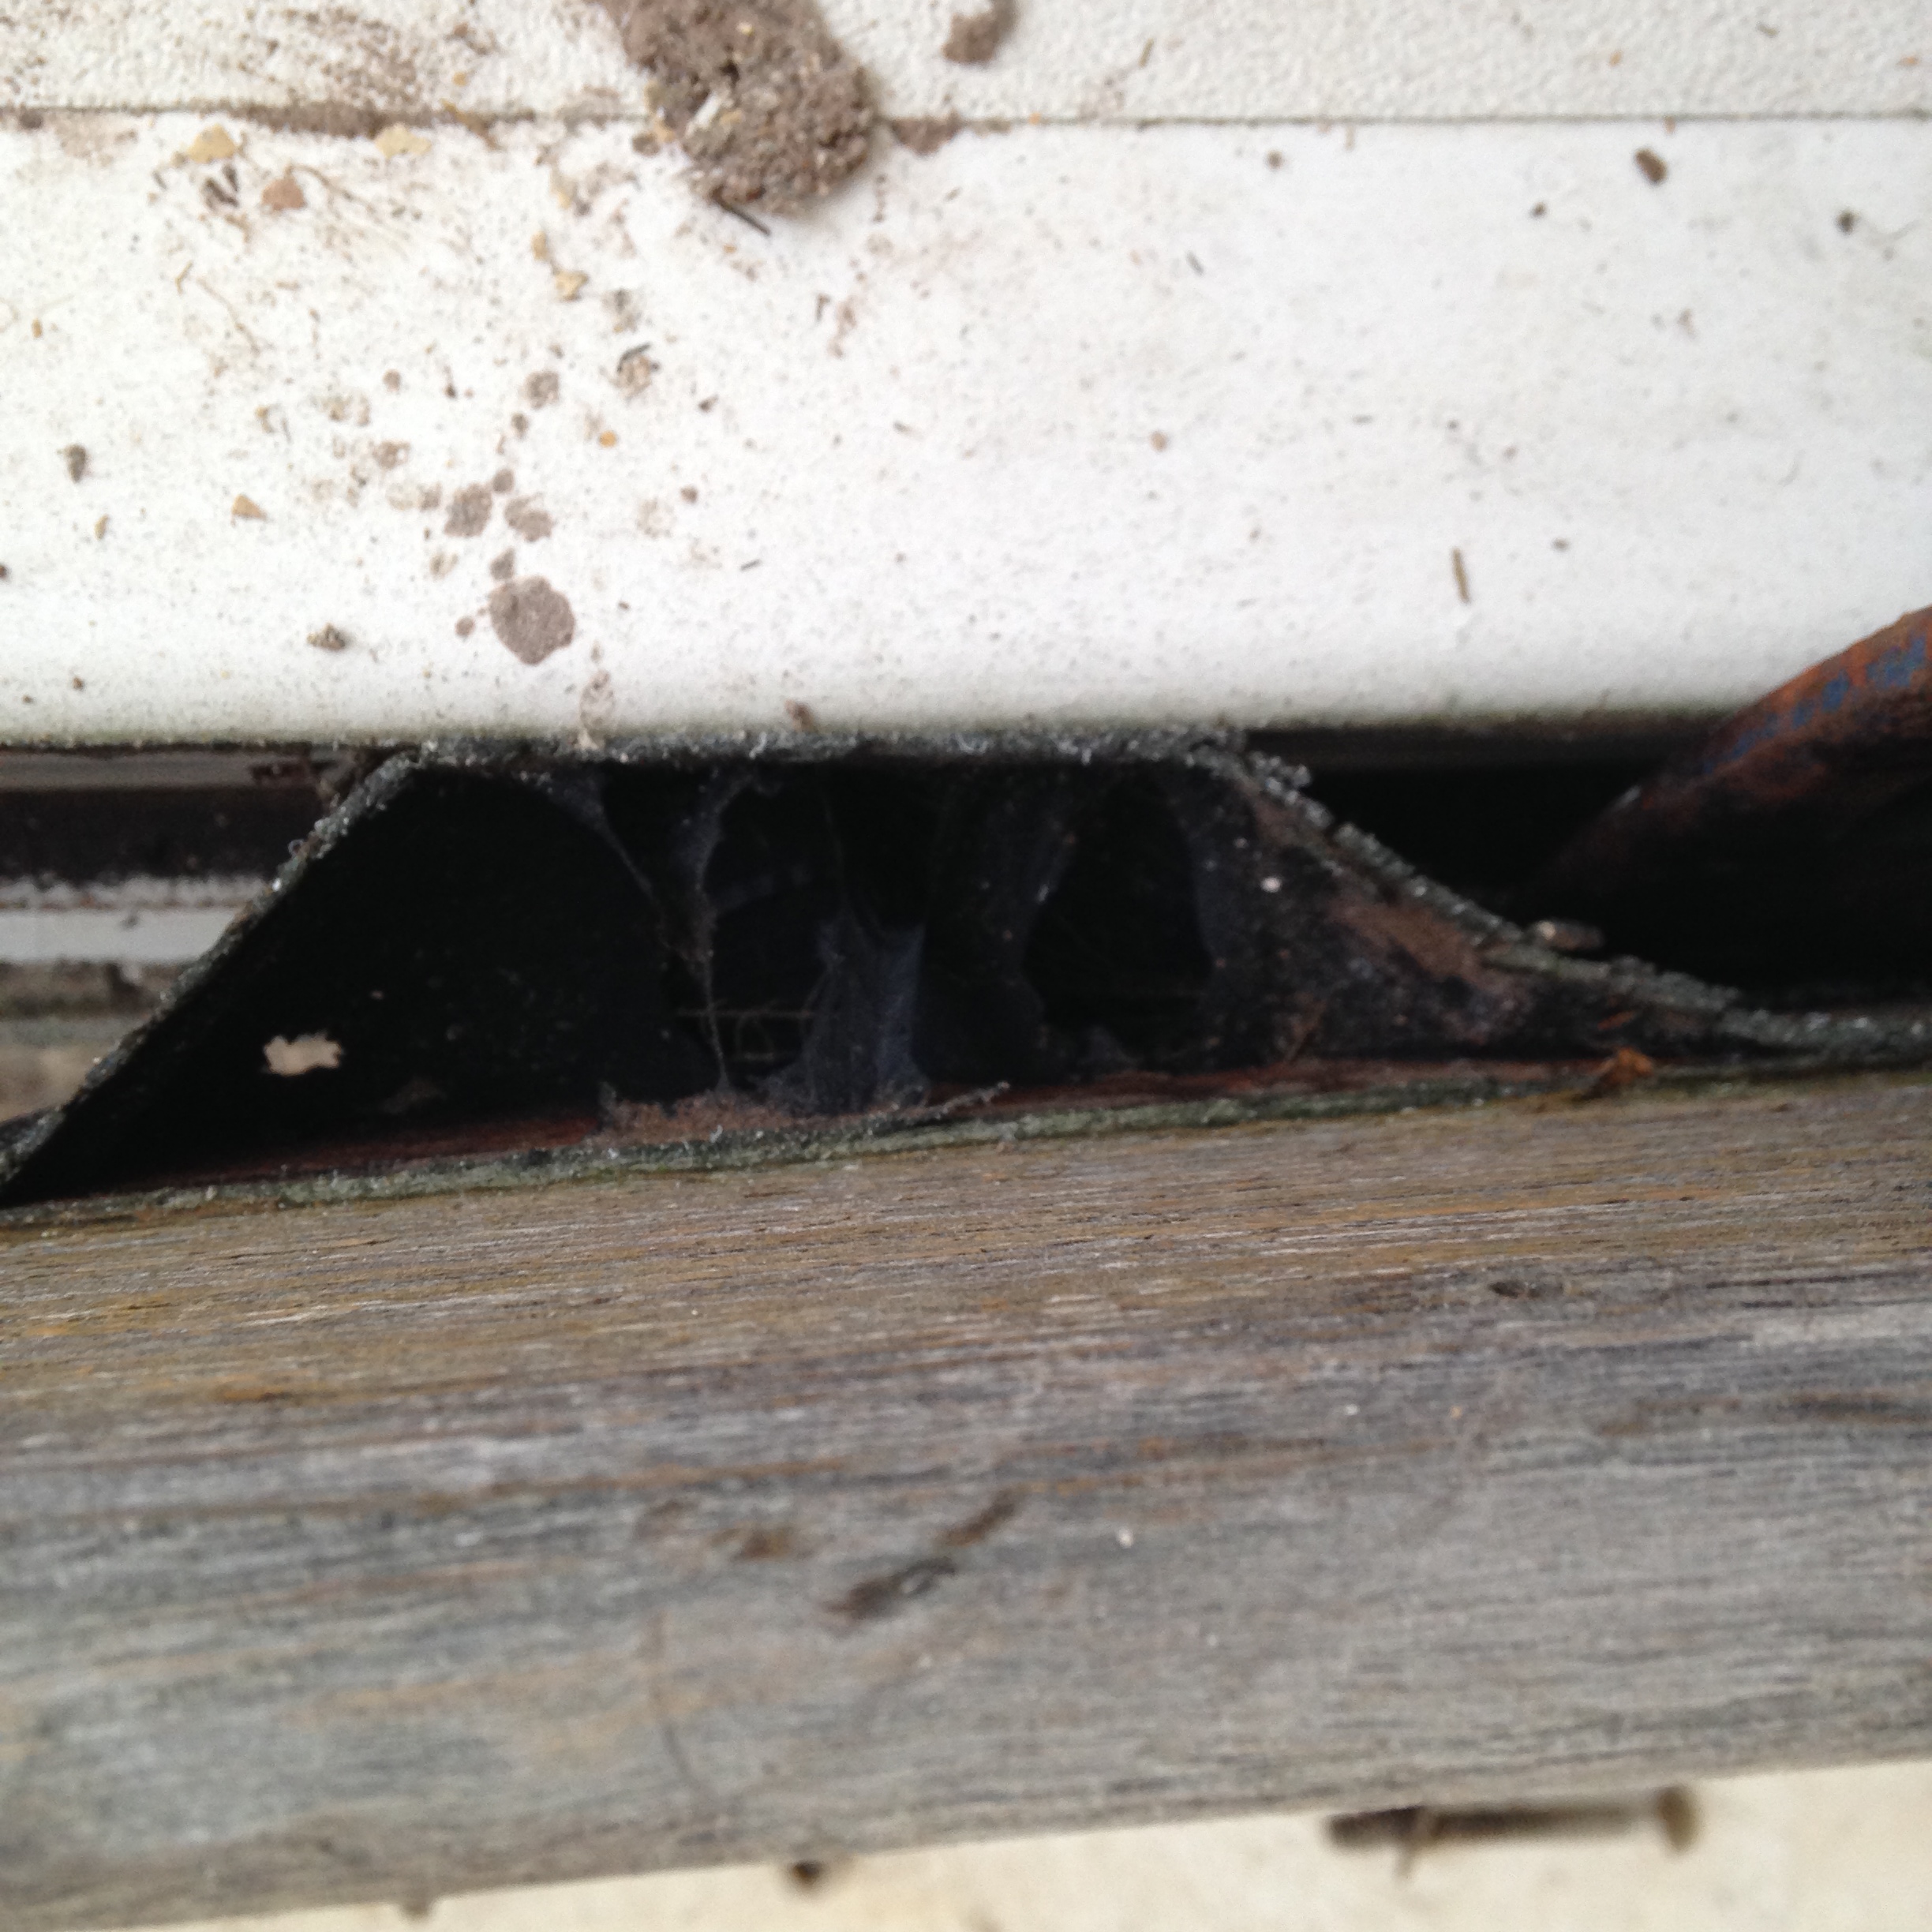
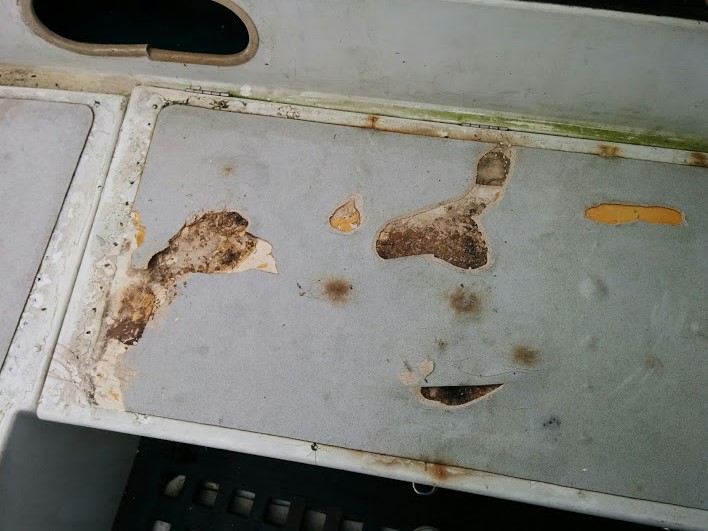
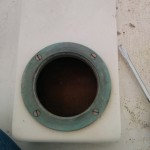
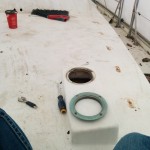
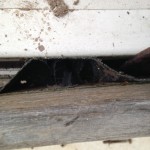
In our dismantling of everything we knew that we would discover more issues than what we originally planned for and yesterday we discovered some bad core around the chimney.

IMG_0727 IMG_0726


Thankfully based on sounding the deck, it does not seem to be very far spread, but the truth will only be discovered completely when we start the repair. We are not sure at this point if we will even put the molded chimney piece back.
IMG_0715IMG_0717


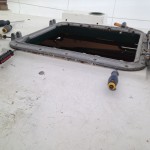
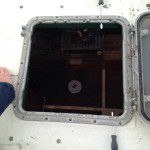
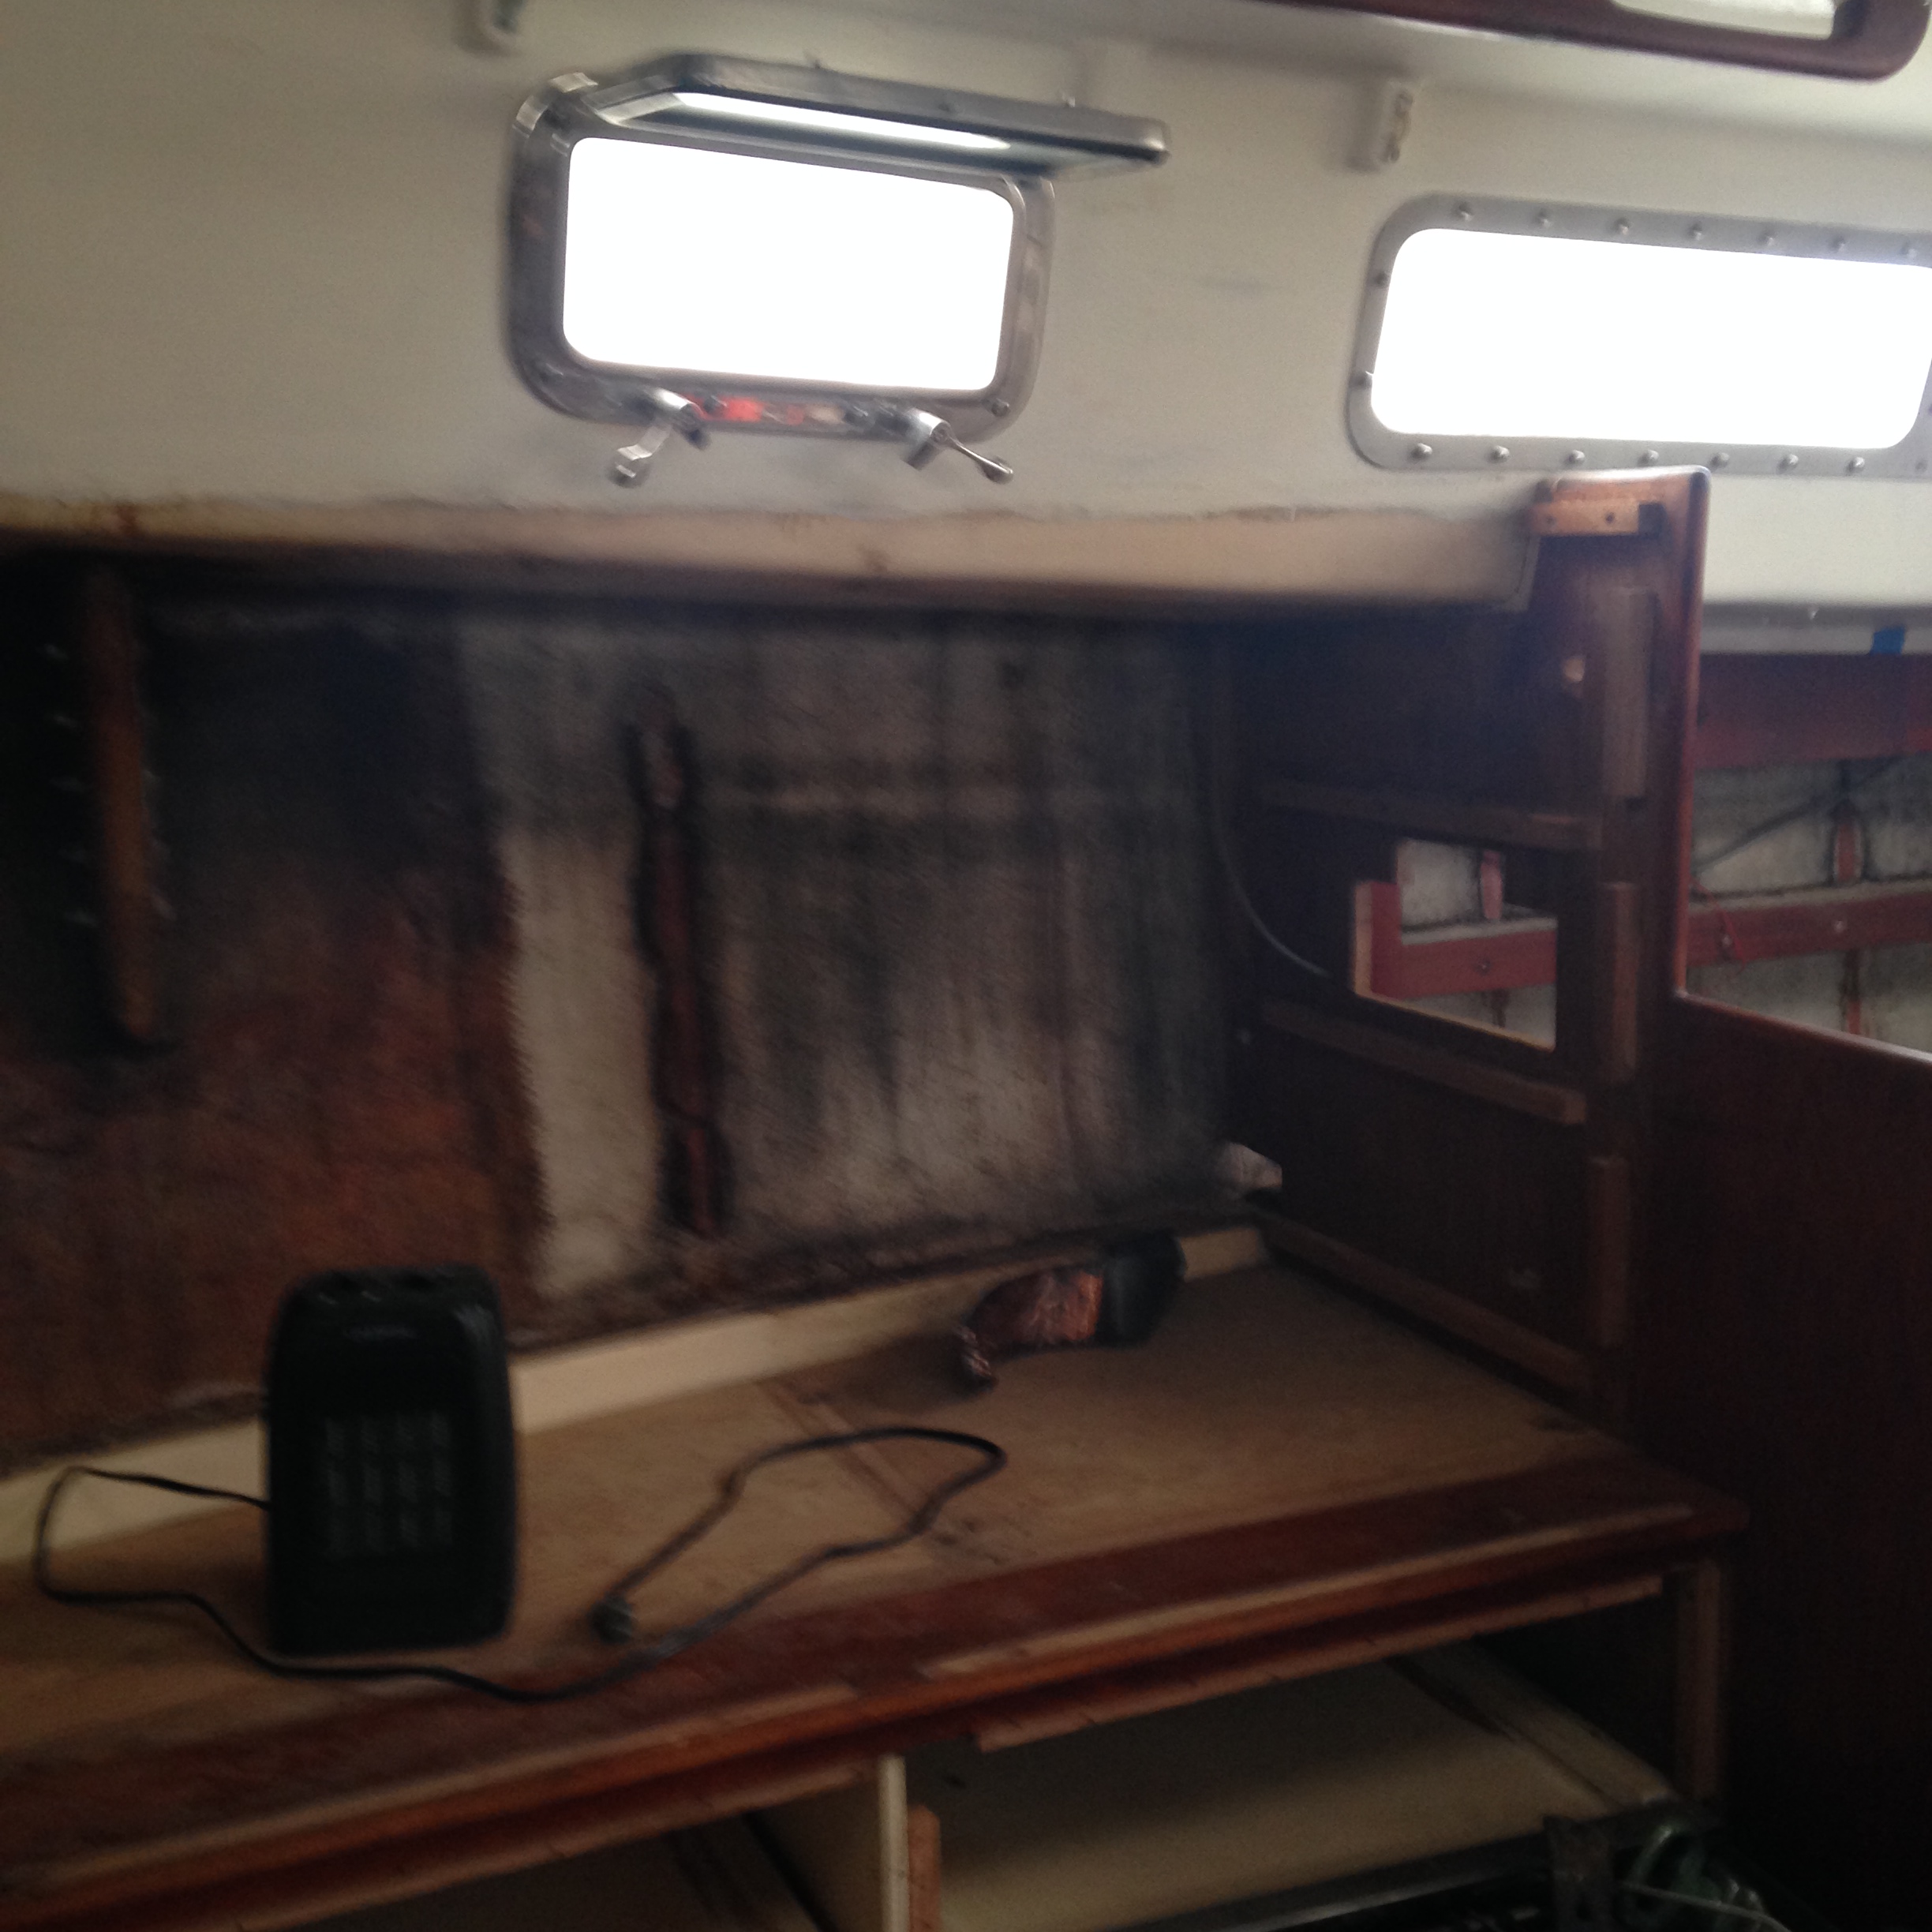
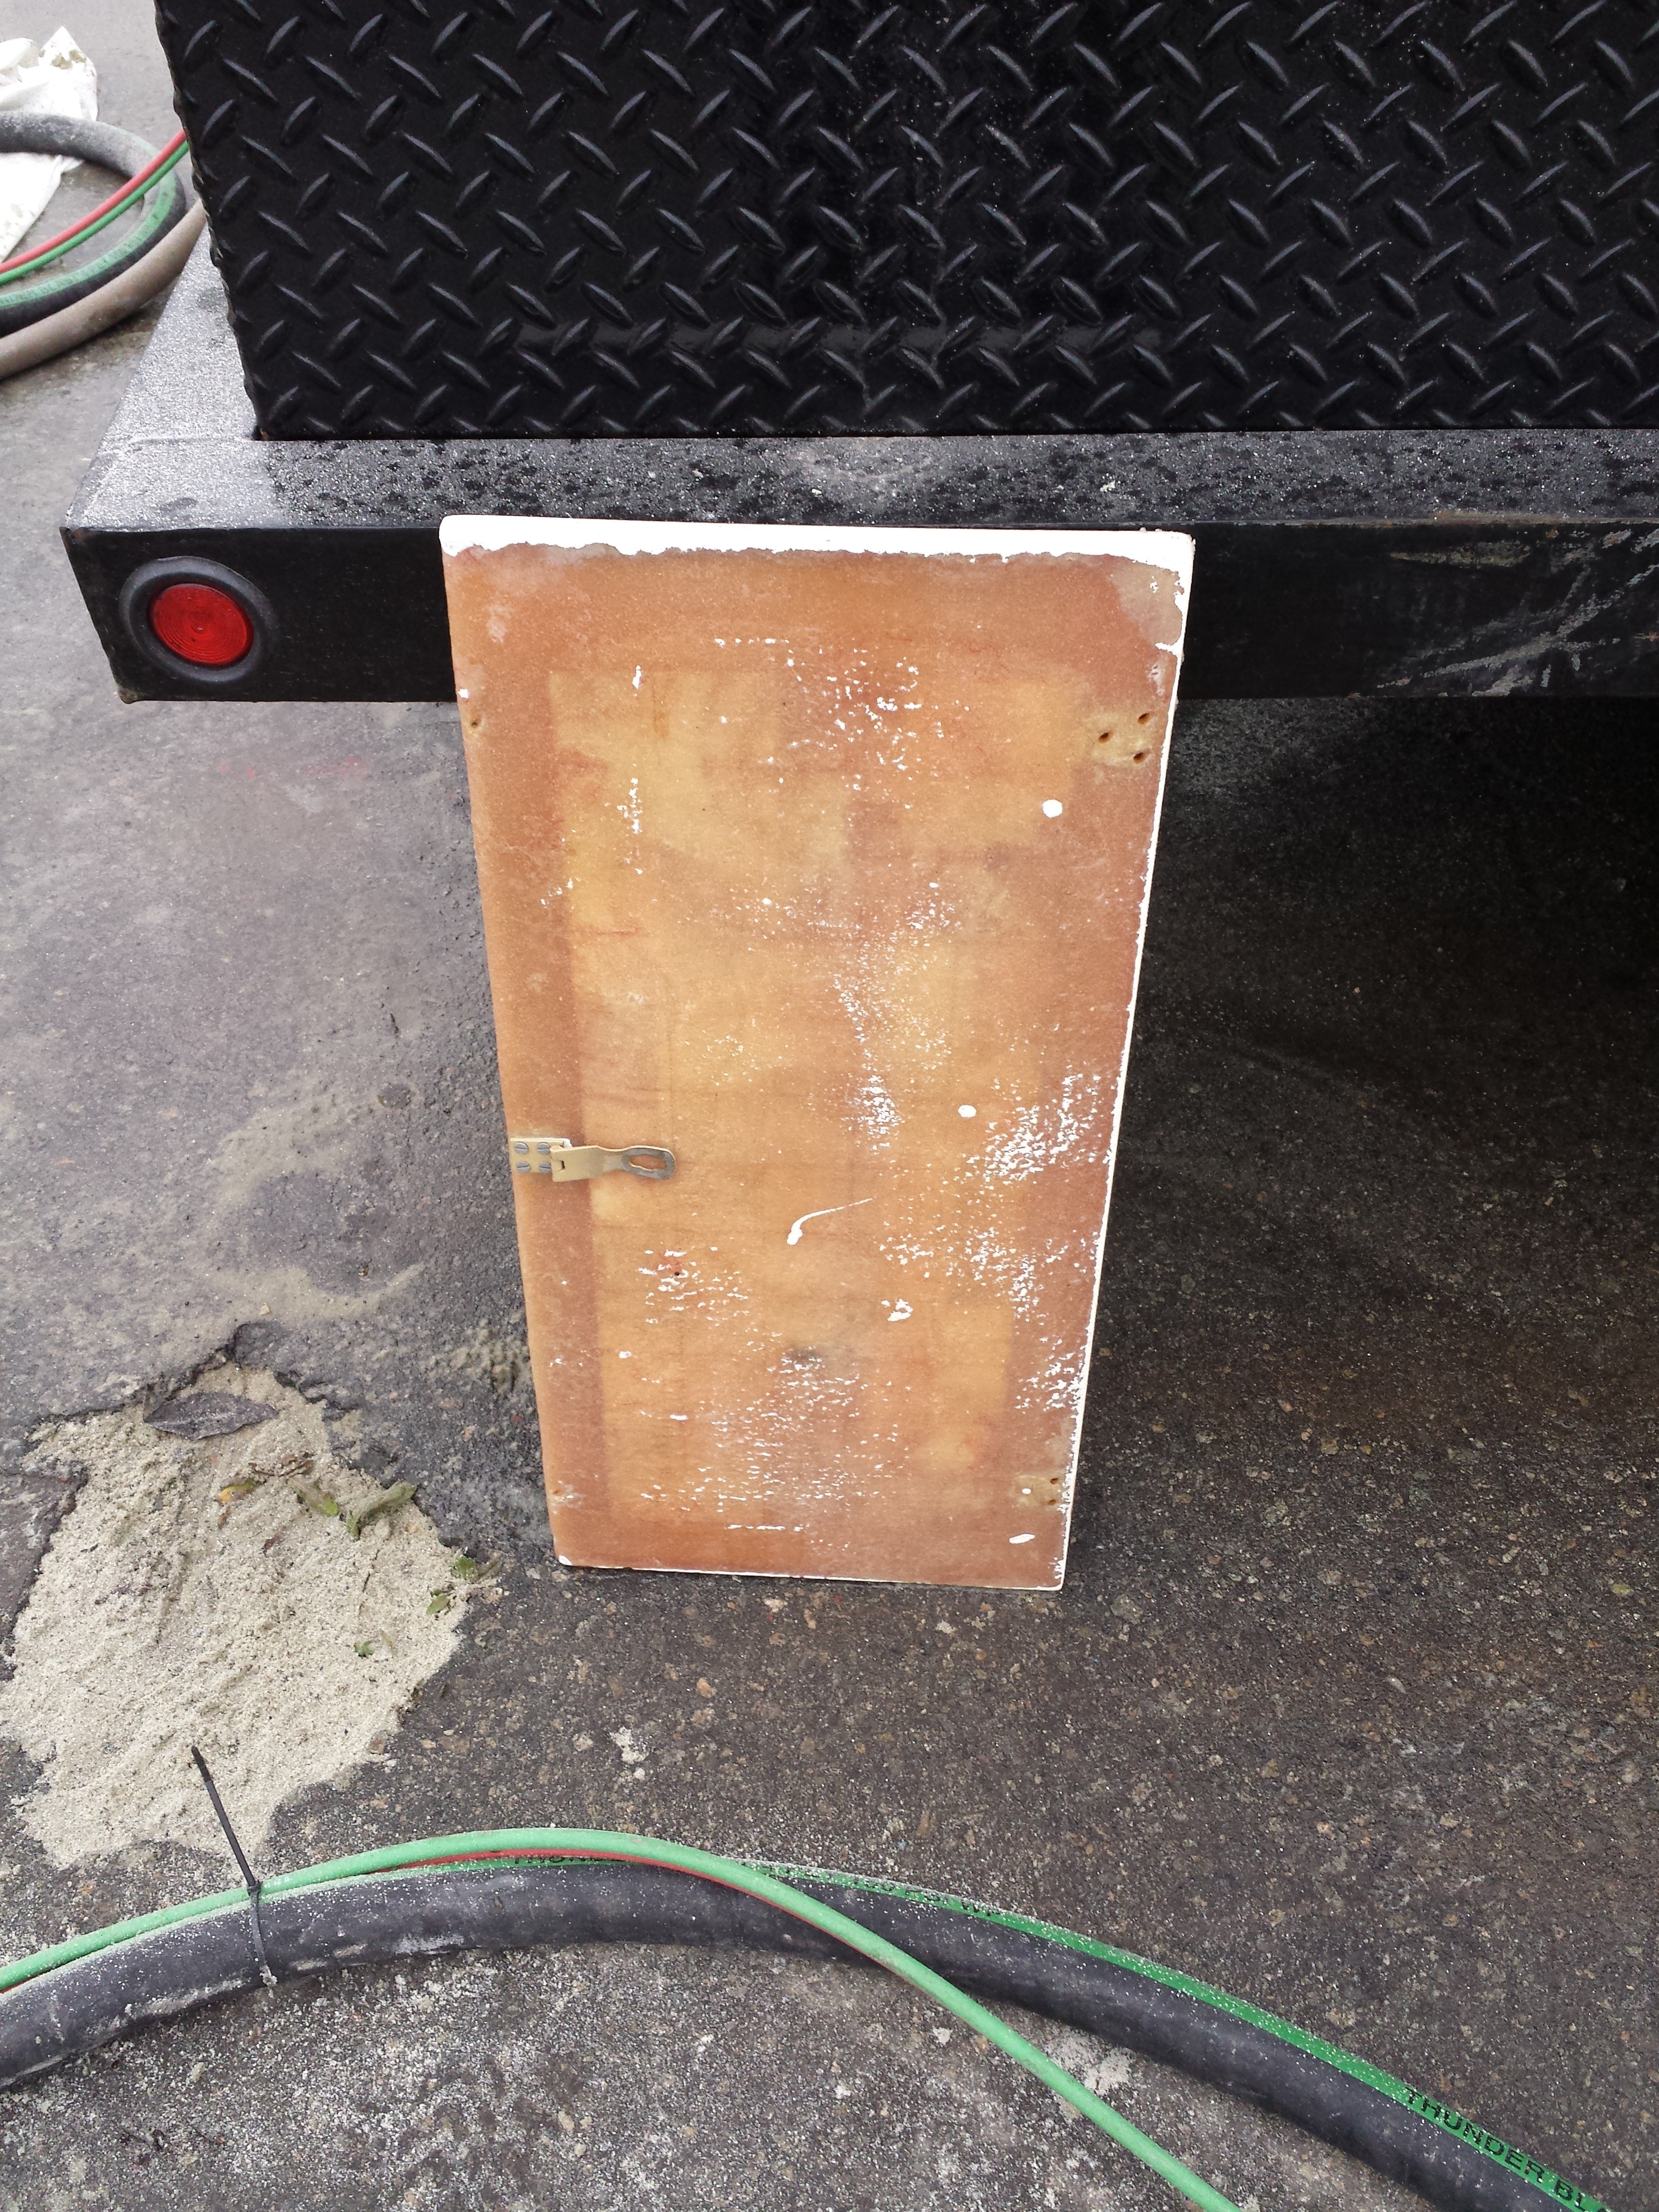
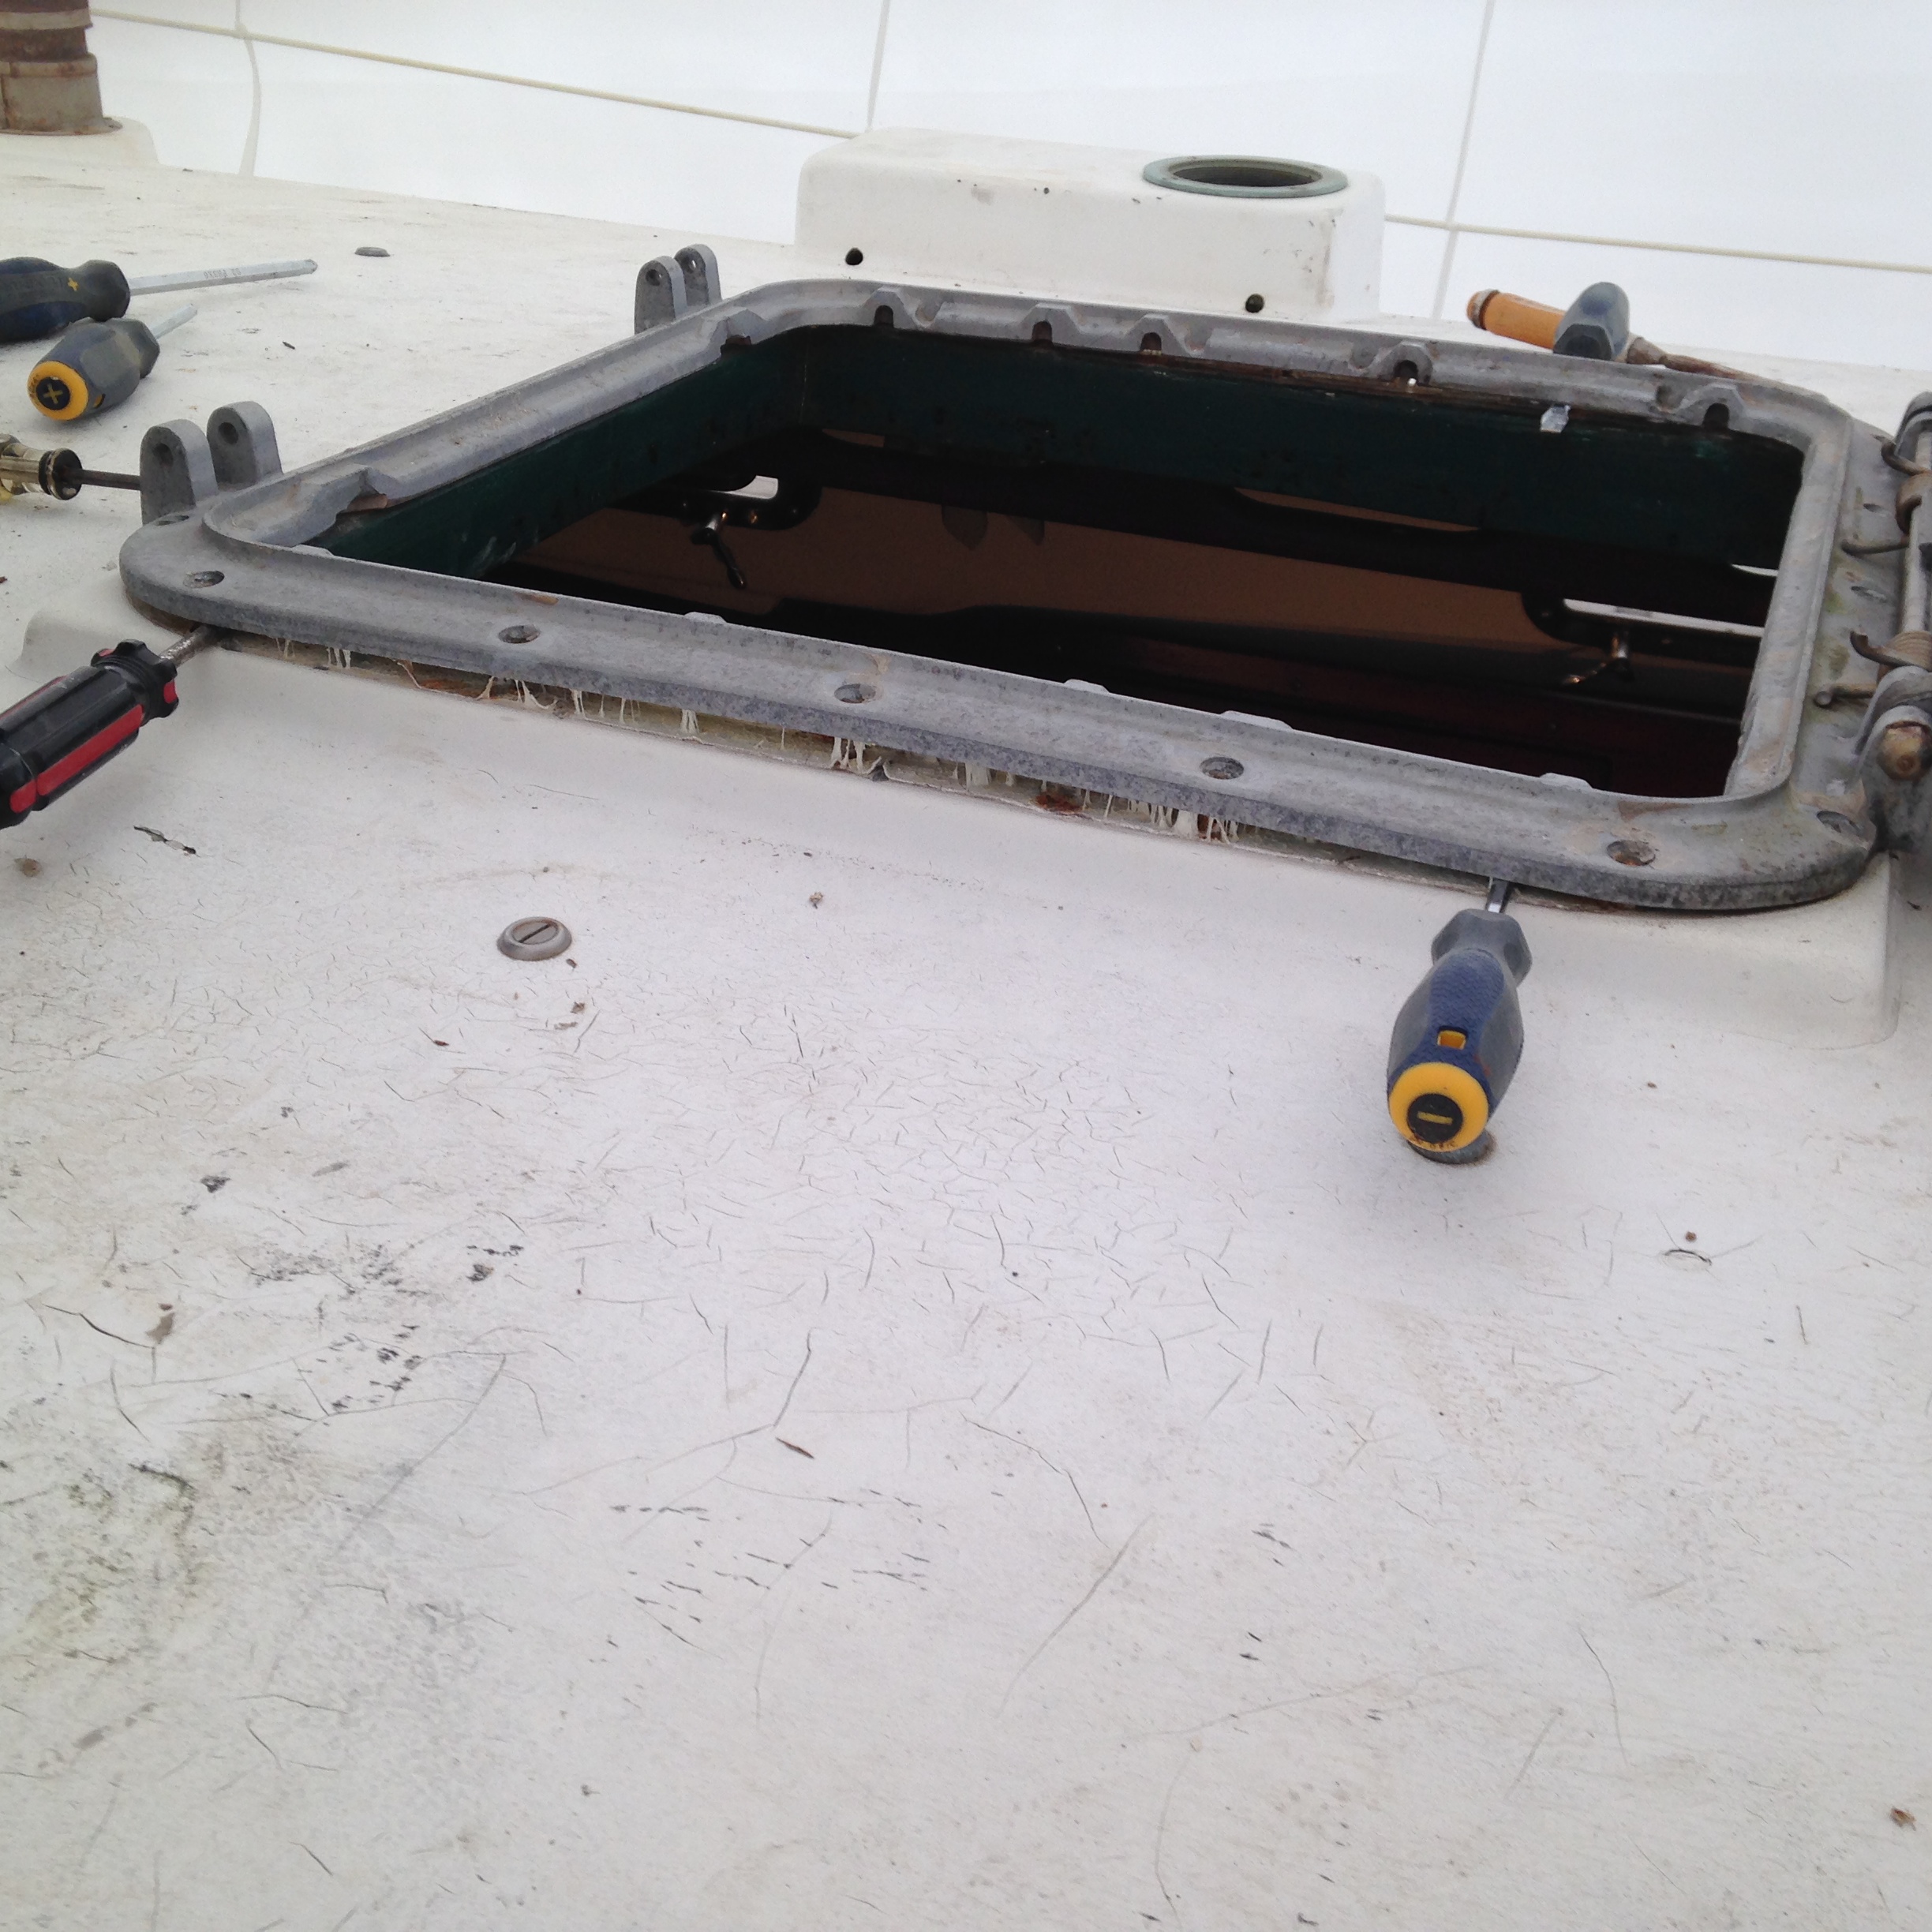
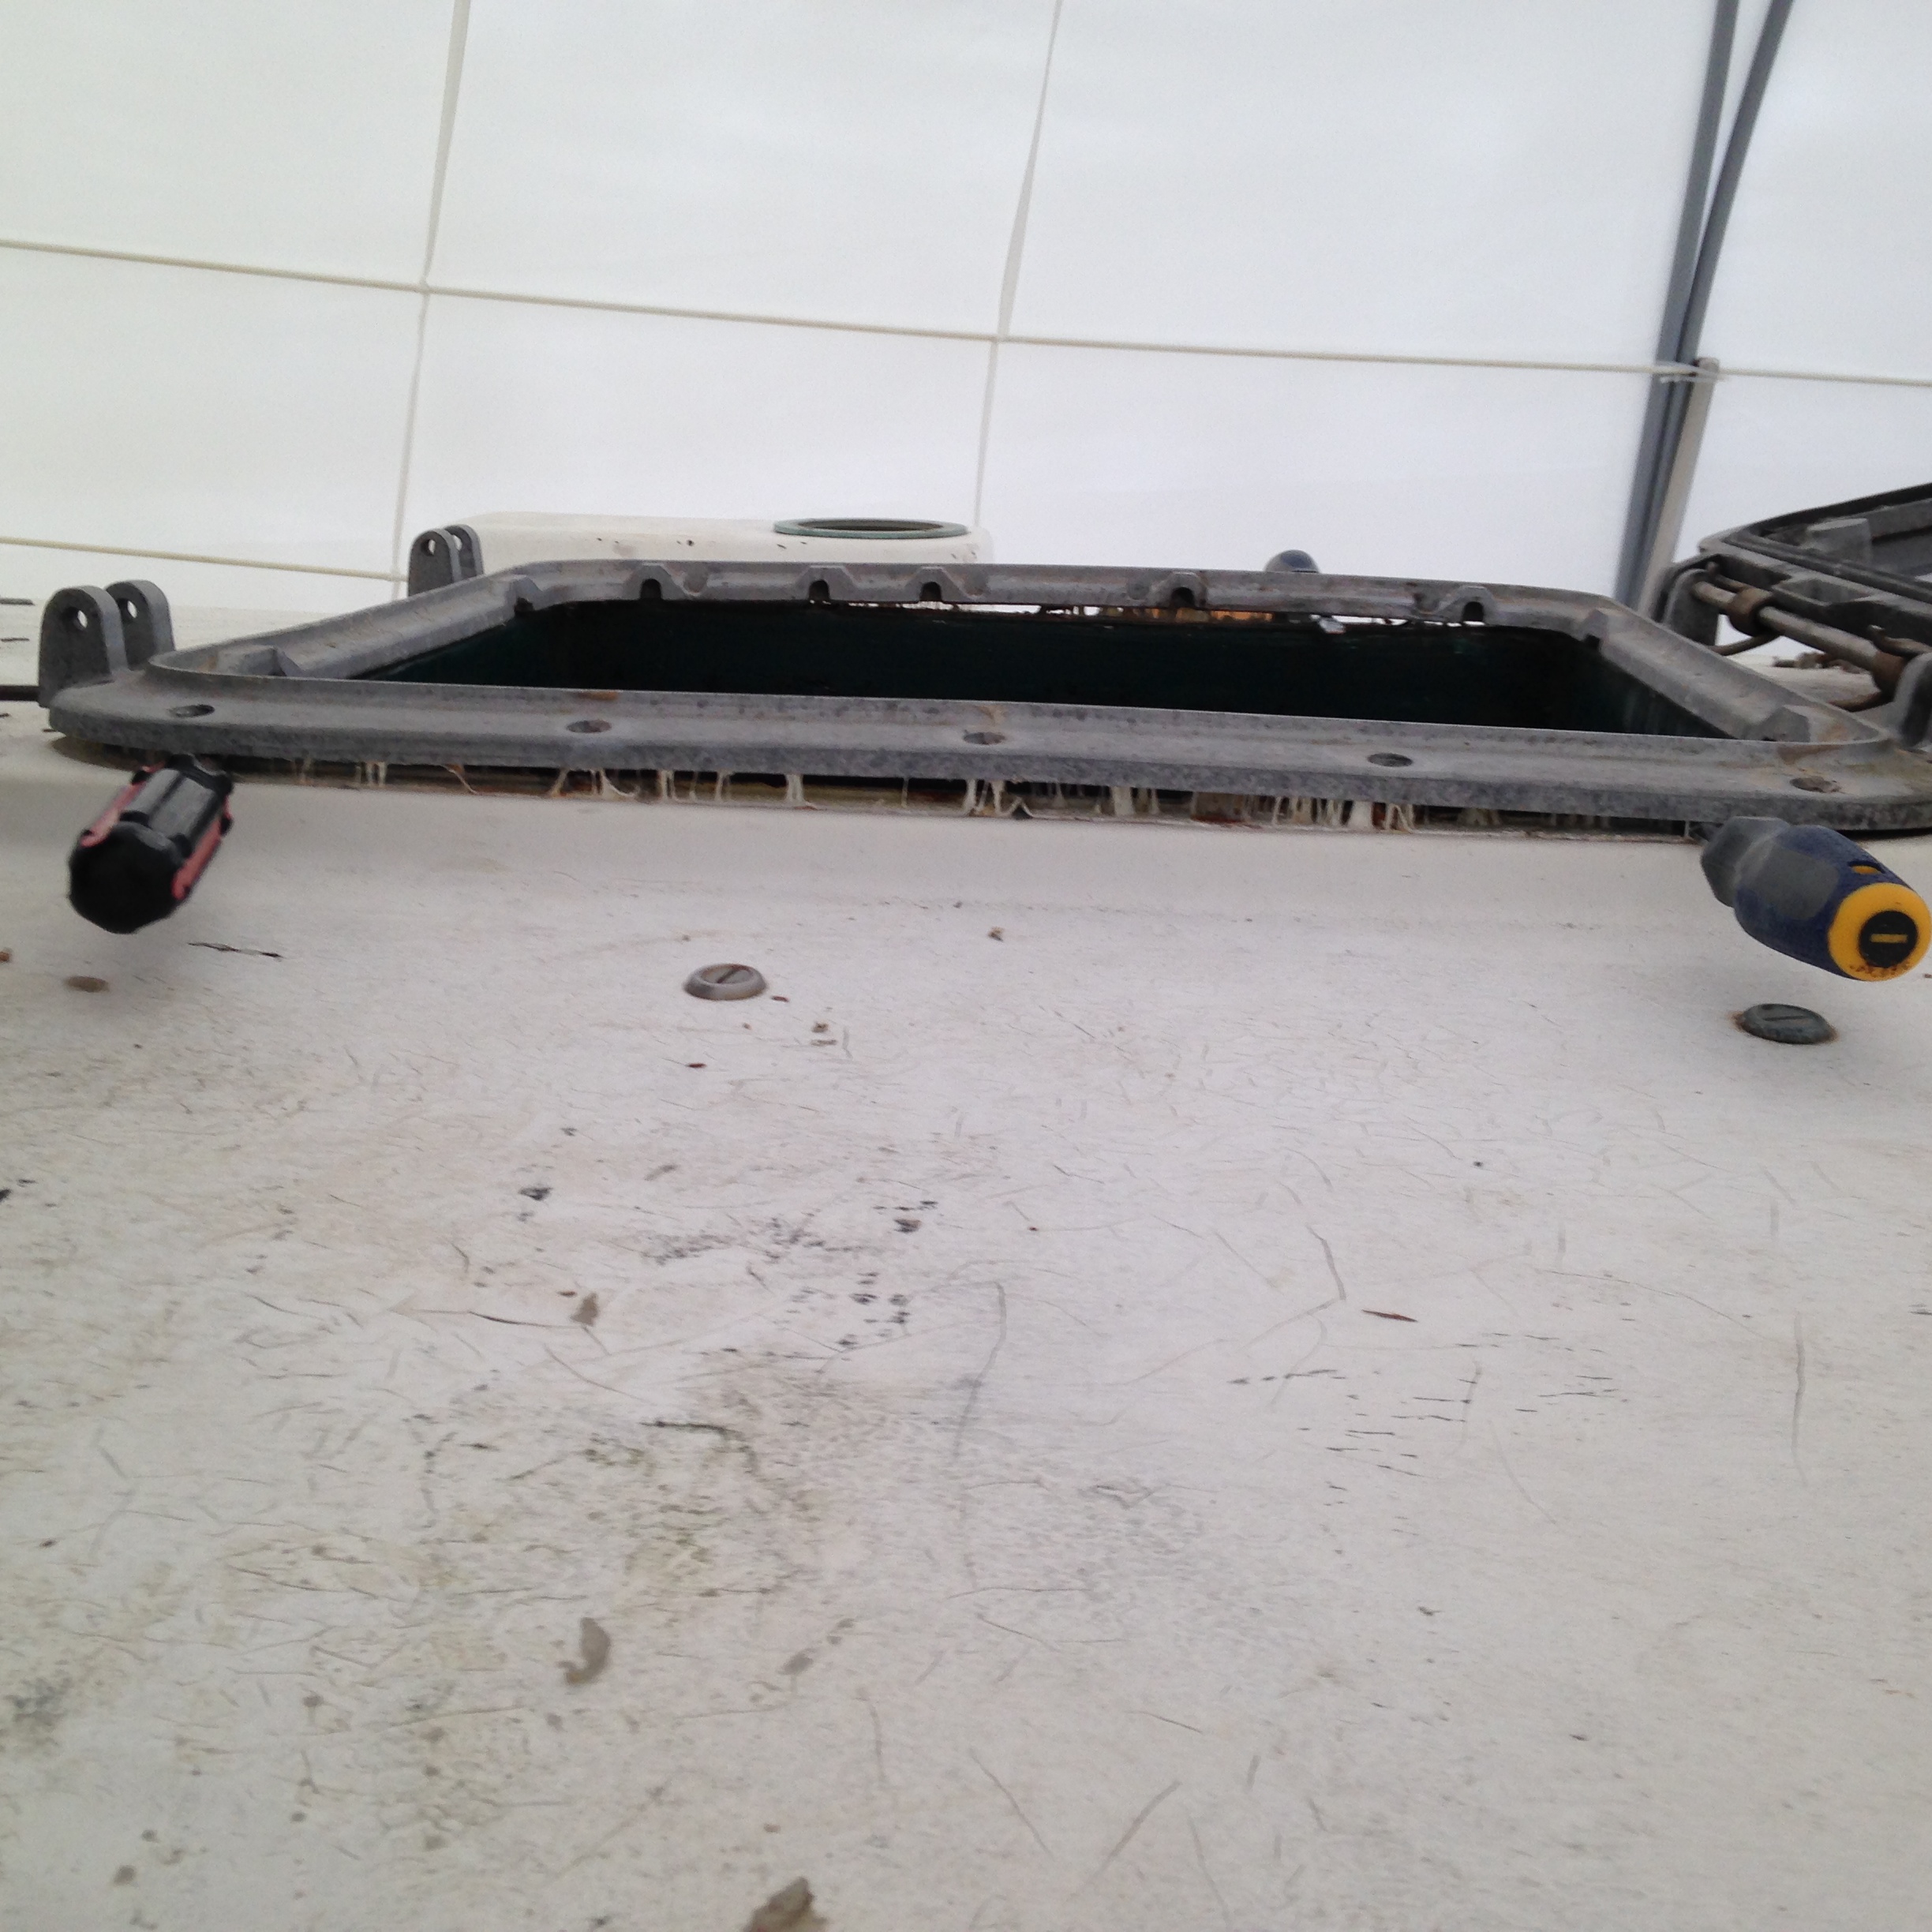
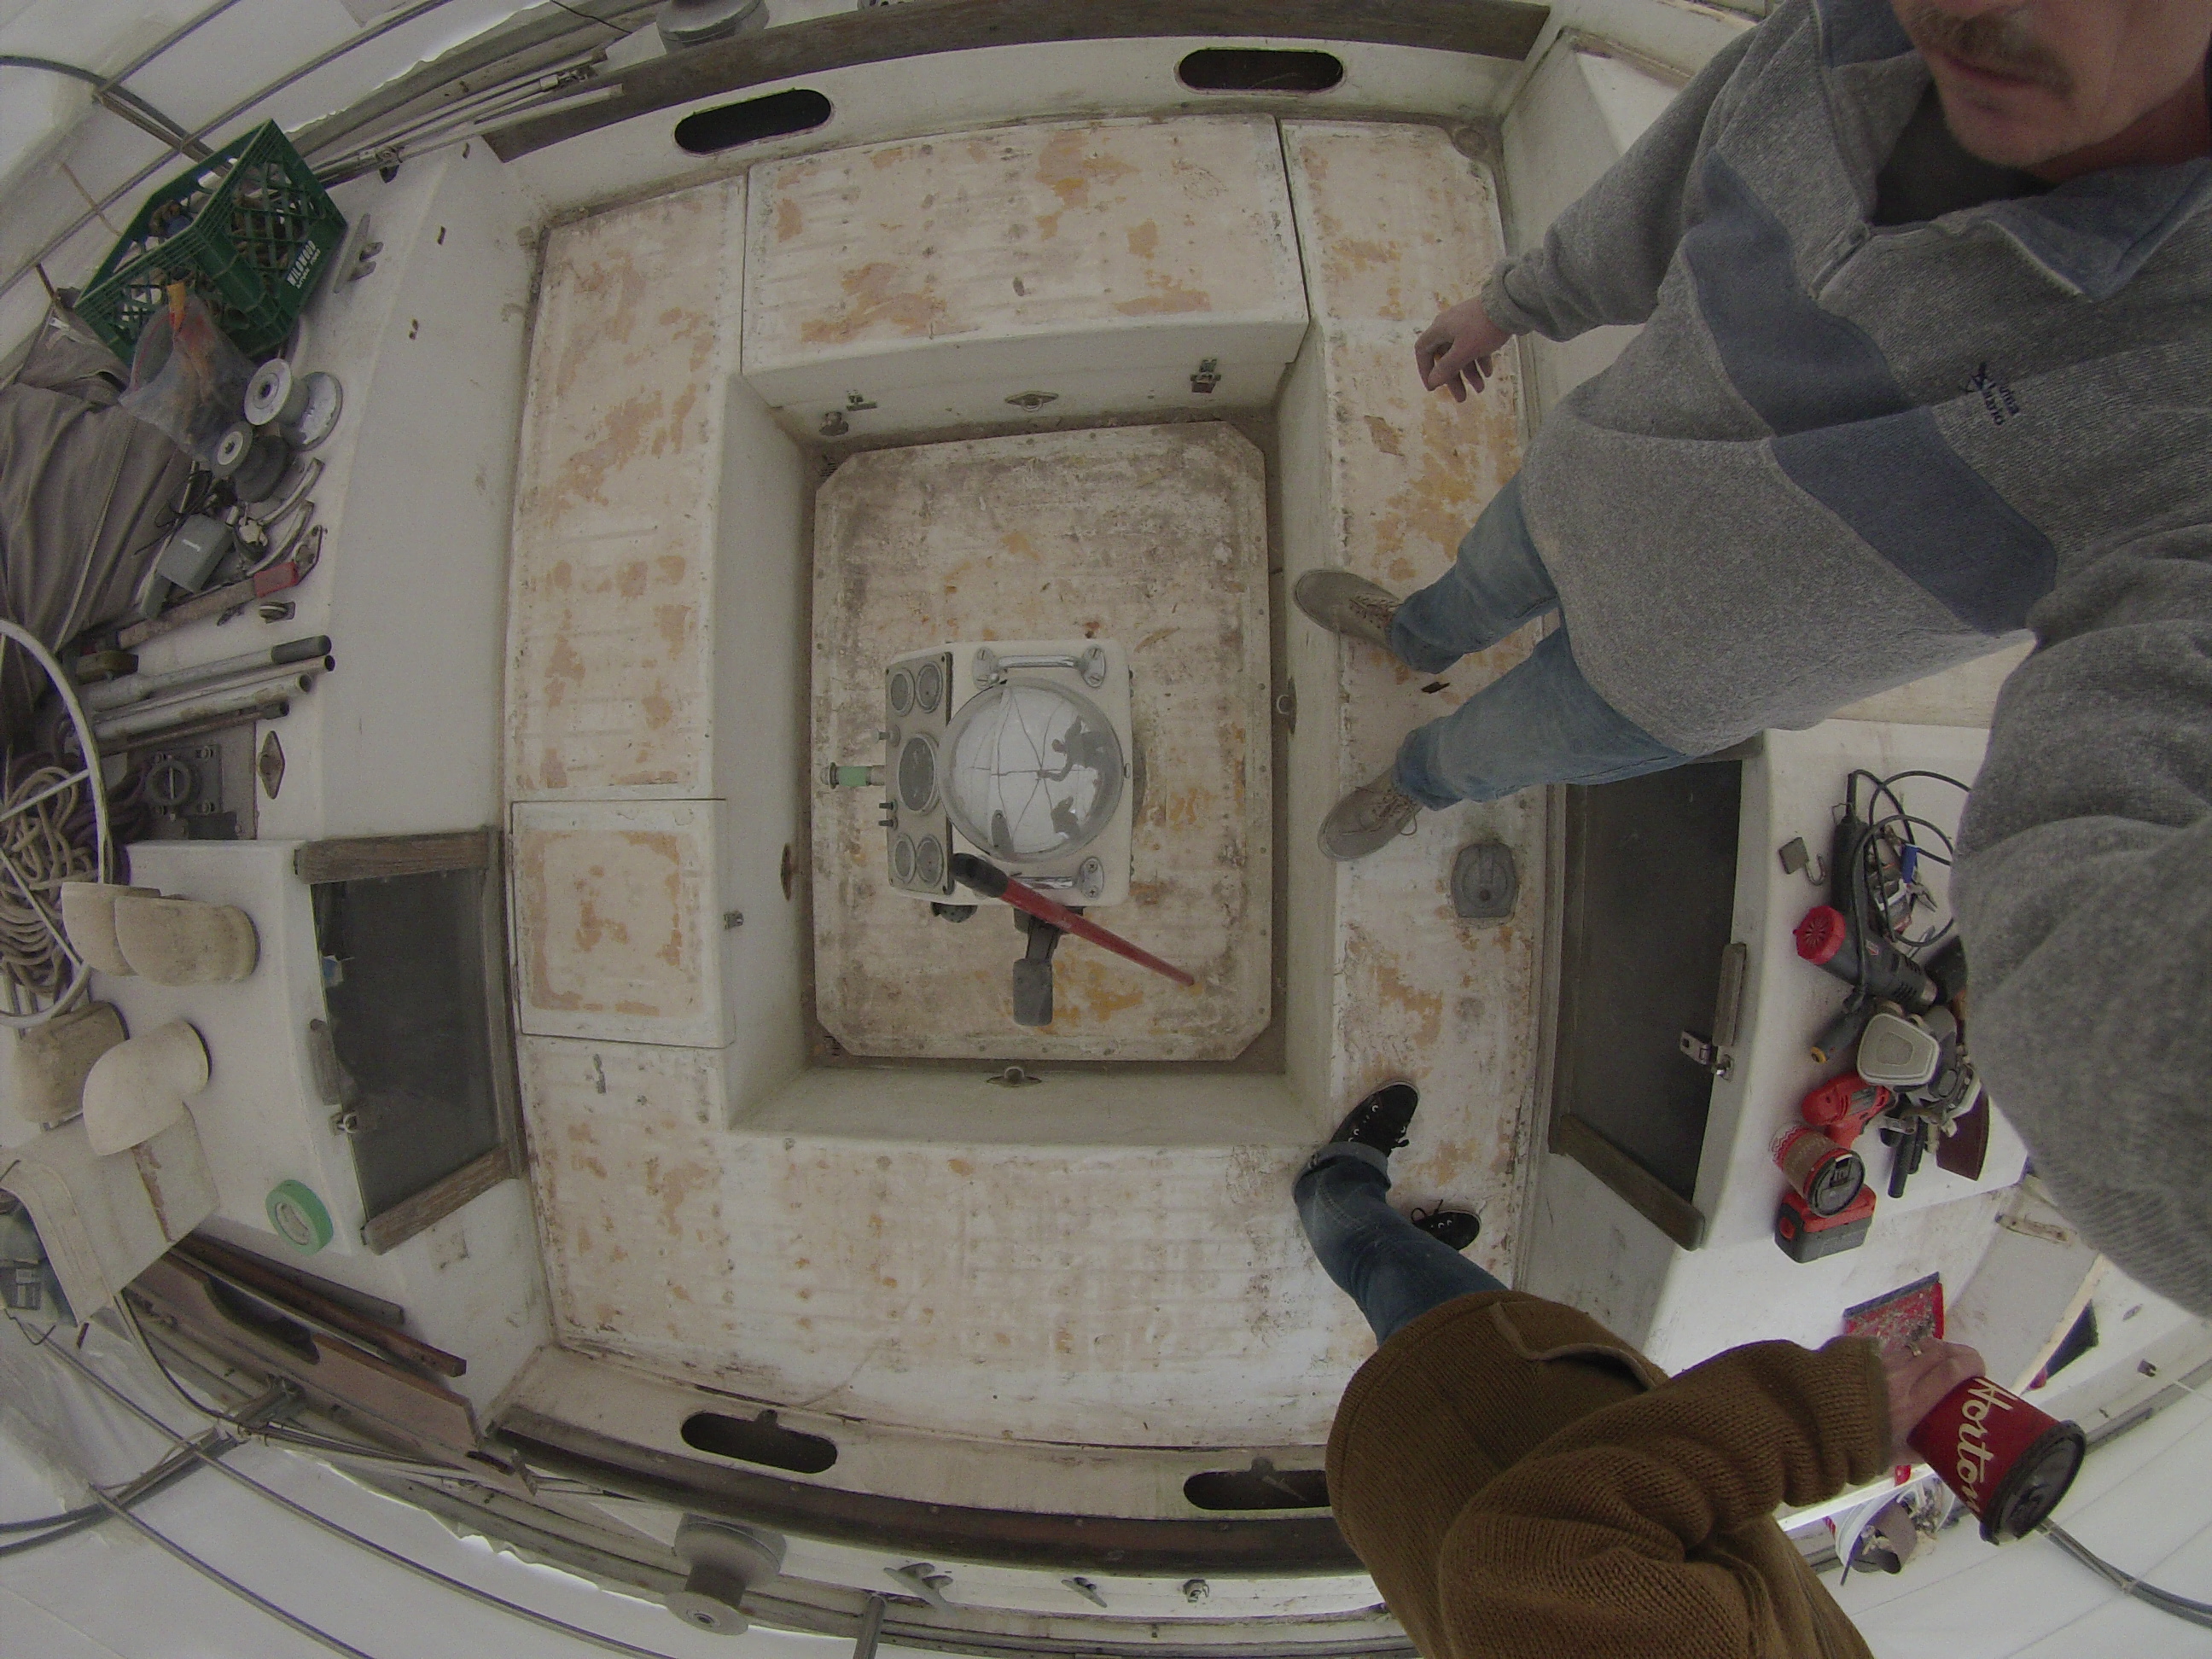
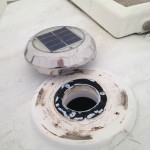
All of the opening hatches on the cabin top have been removed and are currently only held on by 2 screws each. Our plans are to replace all of them with new ones as the aluminum frames are very badly corroded. Each and every screw hole in the hatch frames had been filled with caulking on top of the screws, go figure.

IMG_20150117_103732
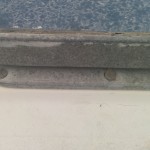
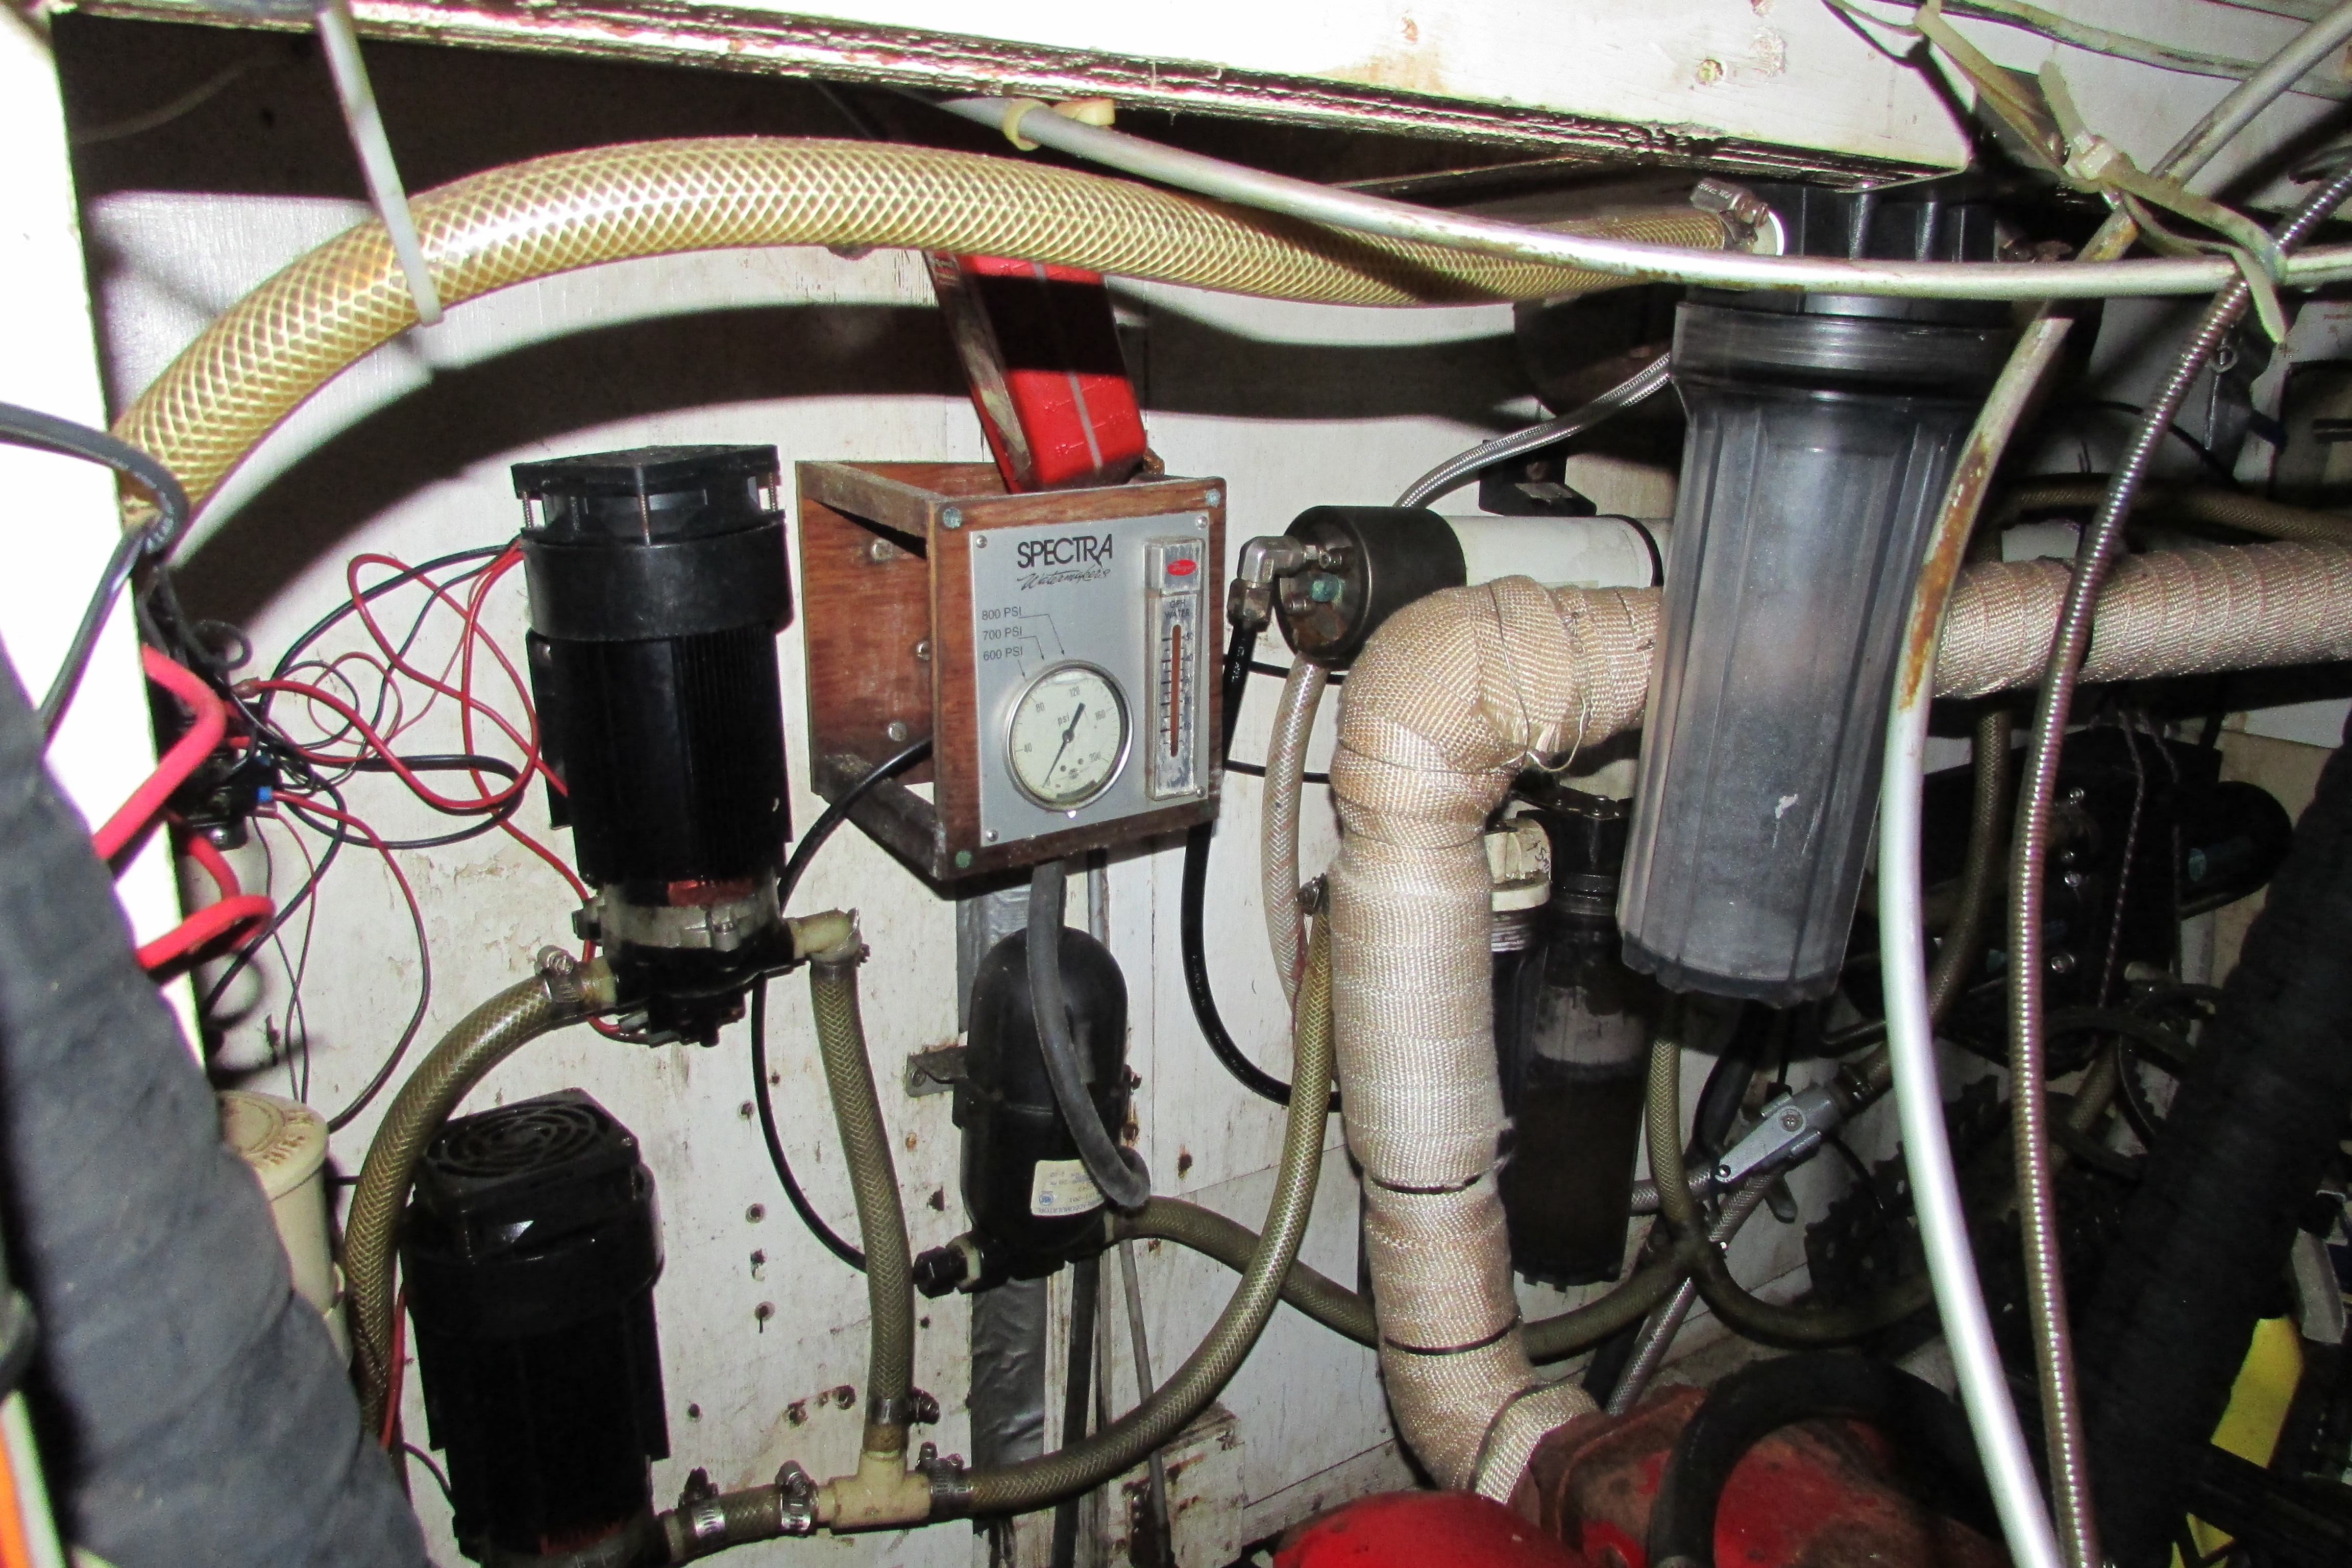
To this point we have identified several distinct types of goop. Some of it is clear silicone, some of it looks like bathroom silicone, then we have of course the 3m 4200/5200’s, and finally butyl tape.

IMG_0732 IMG_0716


The interesting part is that the butyl tape appears to be from the original build, and although it is 40 some years old, it is still as flexible and goopy as new stuff.

IMG_0733

It is also one of the most tenacious not counting 4200 and 5200 of course. A note to the wise. Any time you grab a tube of goop, and the first word is “Adhesive.” Stop and think if you, or any other person on the planet, will ever have to remove that part again. If the odds are greater than 1%, please, please, do not use 3m 5200.

We had our first contractor on Akupara to look at media blasting the decks, thanks to a very smart guy (Martin). We have received one guestimate already of $1300 to soda blast all of the paint and non skid, however this was based on pictures that I sent him. Let’s see, 500 sheets of sandpaper, 3 months of sanding morning to night, sore back, sore arms, burnt out sanders, lung contamination from breathing in all of the particles versus paying someone to do it in a day. I will let you decide which is the better course of action. I haven’t completely ruled out sanding yet, but that’s only because I am cheap and always think I can do it for less…;-)

As I was writing this we received the 2nd quote, $9300. Uhmm, something isn’t right here, $1300-$9300. So as I was saying 500 sheets of sandpaper isn’t really all that expensive…


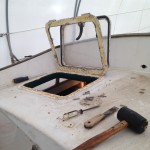
Another surprise yesterday was as I was removing the last of the screwed in snaps from the dodger, a nice stream of water started spurting out.

IMG_20150117_122030

I immediately grabbed my drill and made a bigger hole and added one on the other side as well. It seems that water has been getting in from badly bedded wood trim and over time filled up the moulded section. I am probably going to leave these holes, just to ensure this never happens again. Thankfully this area has no open coring to be concerned with.

IMG_0730All in all it has been a good couple of days, it seems slow and it seems like things are getting worse at times as we slowly disassemble Akupara, but soon enough we will be on to the restoration part.

What’s that saying? It is always darkest before the dawn?

IMG_0724IMG_0725


IMG_0734IMG_20150117_154004


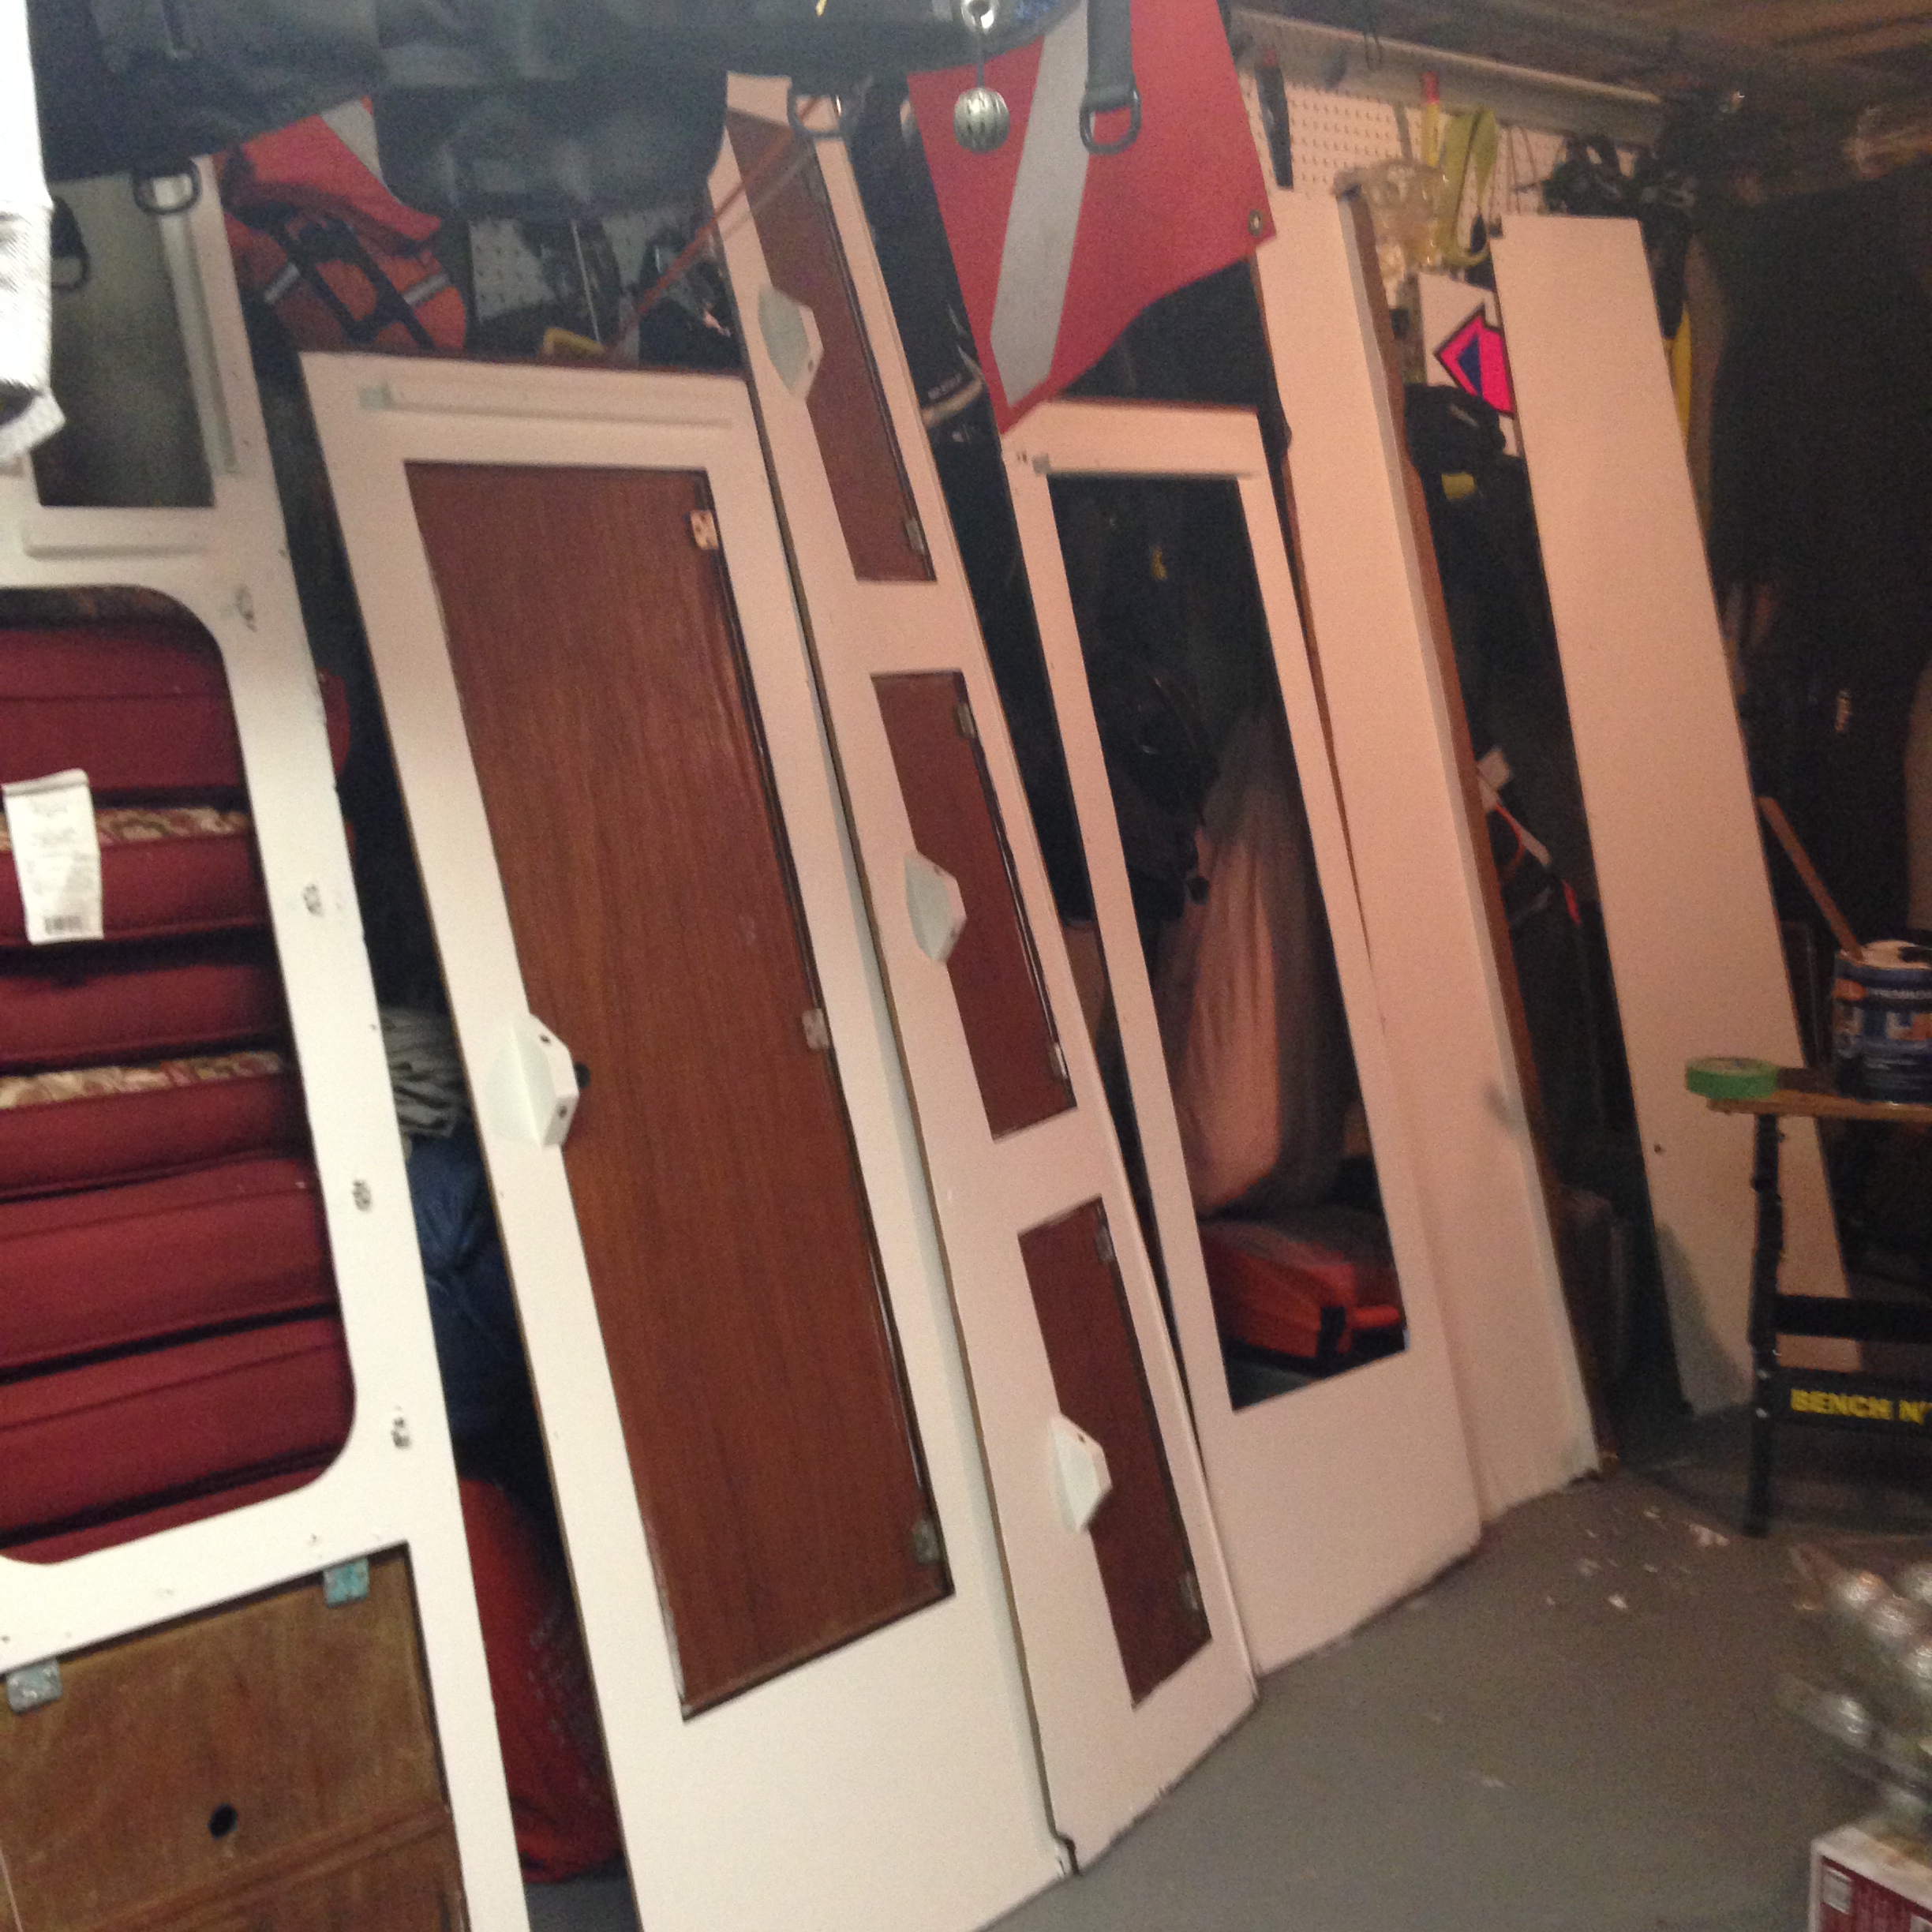
I almost forgot. I also brought the old dodger to the dumpster and committed it to the great beyond.  (Great beyond as in farther down the boatyard towards the back when someone pulls it out) This was a hard thing to do for me. It was a approximately a $3000 decision as that is a ballpark guess as to what a new one will cost us. Had I not pitched it, I would have been tempted to try to fix it and put off the cost etc etc. It would look like hell on Akupara once she is all fixed up. Decision made. Move on. 😉


A vacuum in one hand and a drill in the other…

What more can a guy ask for?

The Admiral
The Admiral

It is absolutely amazing how much difference 4 hands makes over 2. When we first purchased Akupara, the Admiral found a scraper and immediately began trying to take off the grey sticky plastic crap that was all over the cockpit seats. It was more of an exploratory effort than a real one and up until now it was a little hard to look at.

2014 - 1Well, since we have now started stripping the decks, we attacked it with a heat gun, 2 scrapers, the admiral broke the first one, and a belt sander to clean it all up. There is still a bit of extremely hard adhesive left, but all of the grey crap is off and the majority of the glue. Sadly enough, once the belt sander made it through the glue and into the top layer of paint, you could start to see where the old original teak strips were. We definitely will not be putting teak back on, the closest would be some type of fake teak.

DCIM103GOPRO

We are also seriously thinking about NOT putting the wood box back in on the starboard side of the cockpit. Once I removed it, I was amazed at the amount of extra space the starboard bench had. Our plans for now are to have some serious cockpit cushions made that will result in a luxurious starboard cockpit sofa, great for lounging and entertaining, maybe not so great offshore, but it is all about sacrifices. 😉

The outdoor soon to be sofa.
The outdoor soon to be sofa, before the removal of the grey stuff.