Keel Tank Removal-Part 2

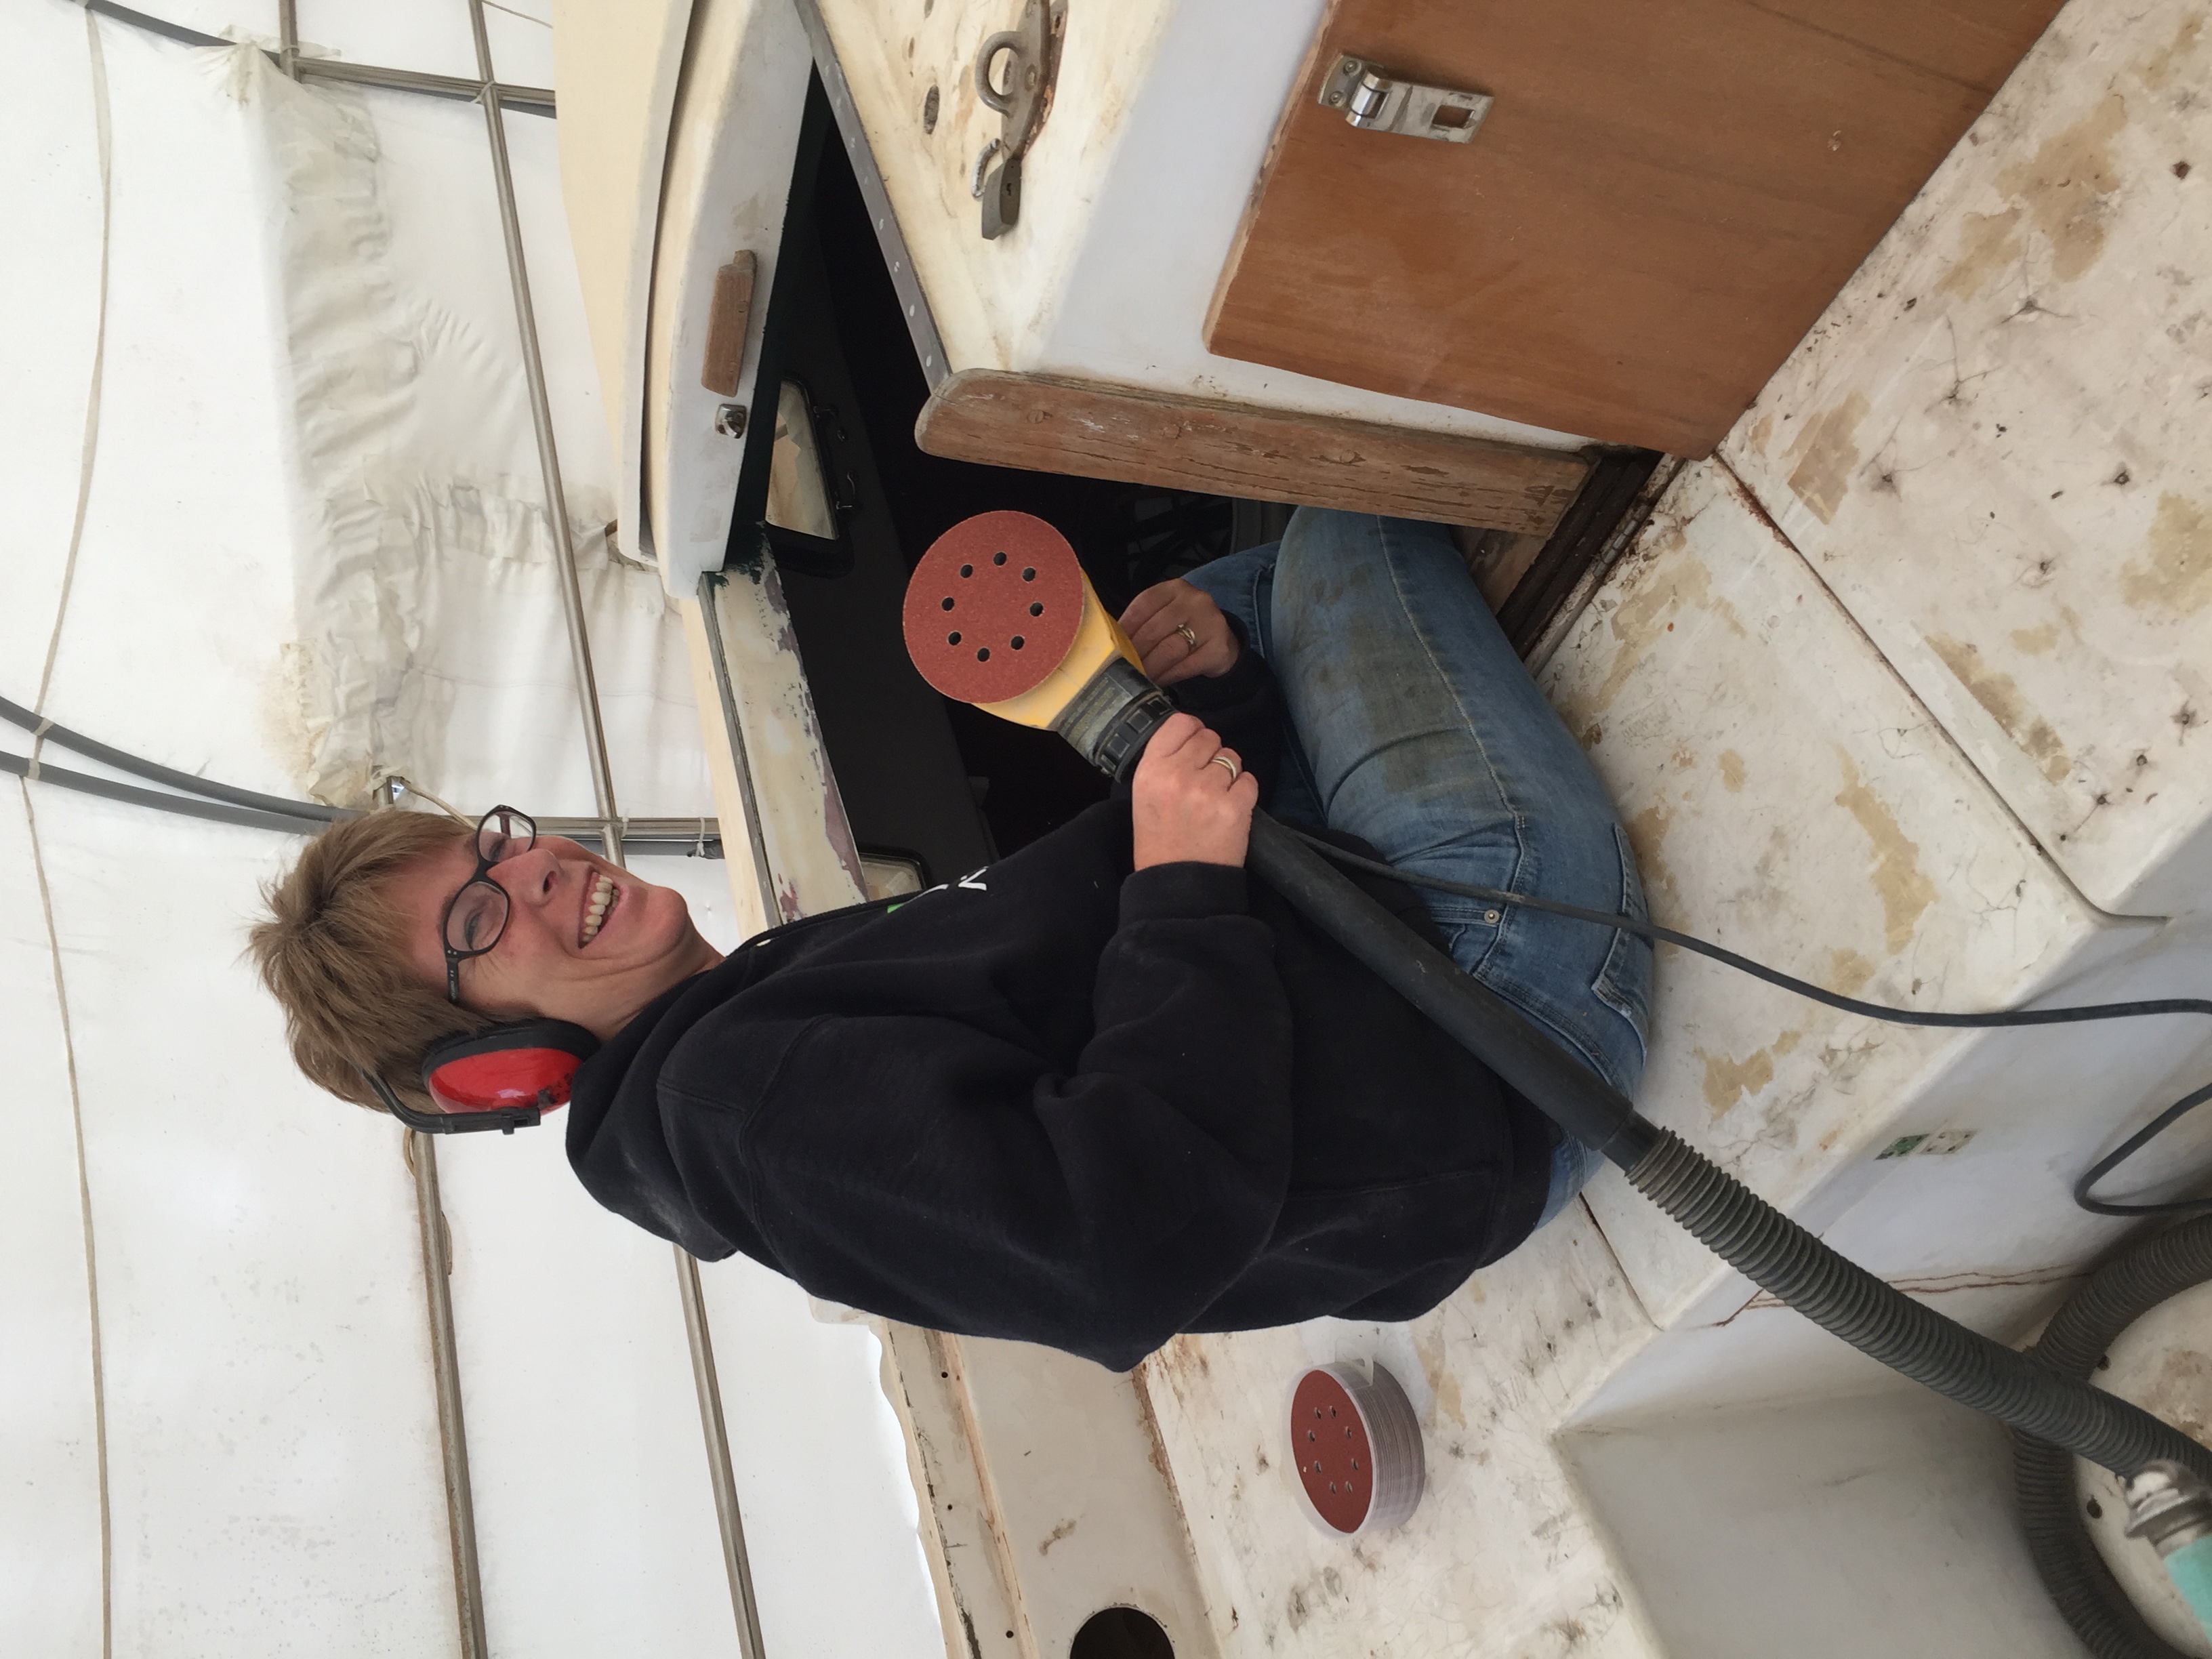
Okay so the tank won on the 2nd day as well. All in all I spent 7 hours working on this project today. Why so long? Let me explain.

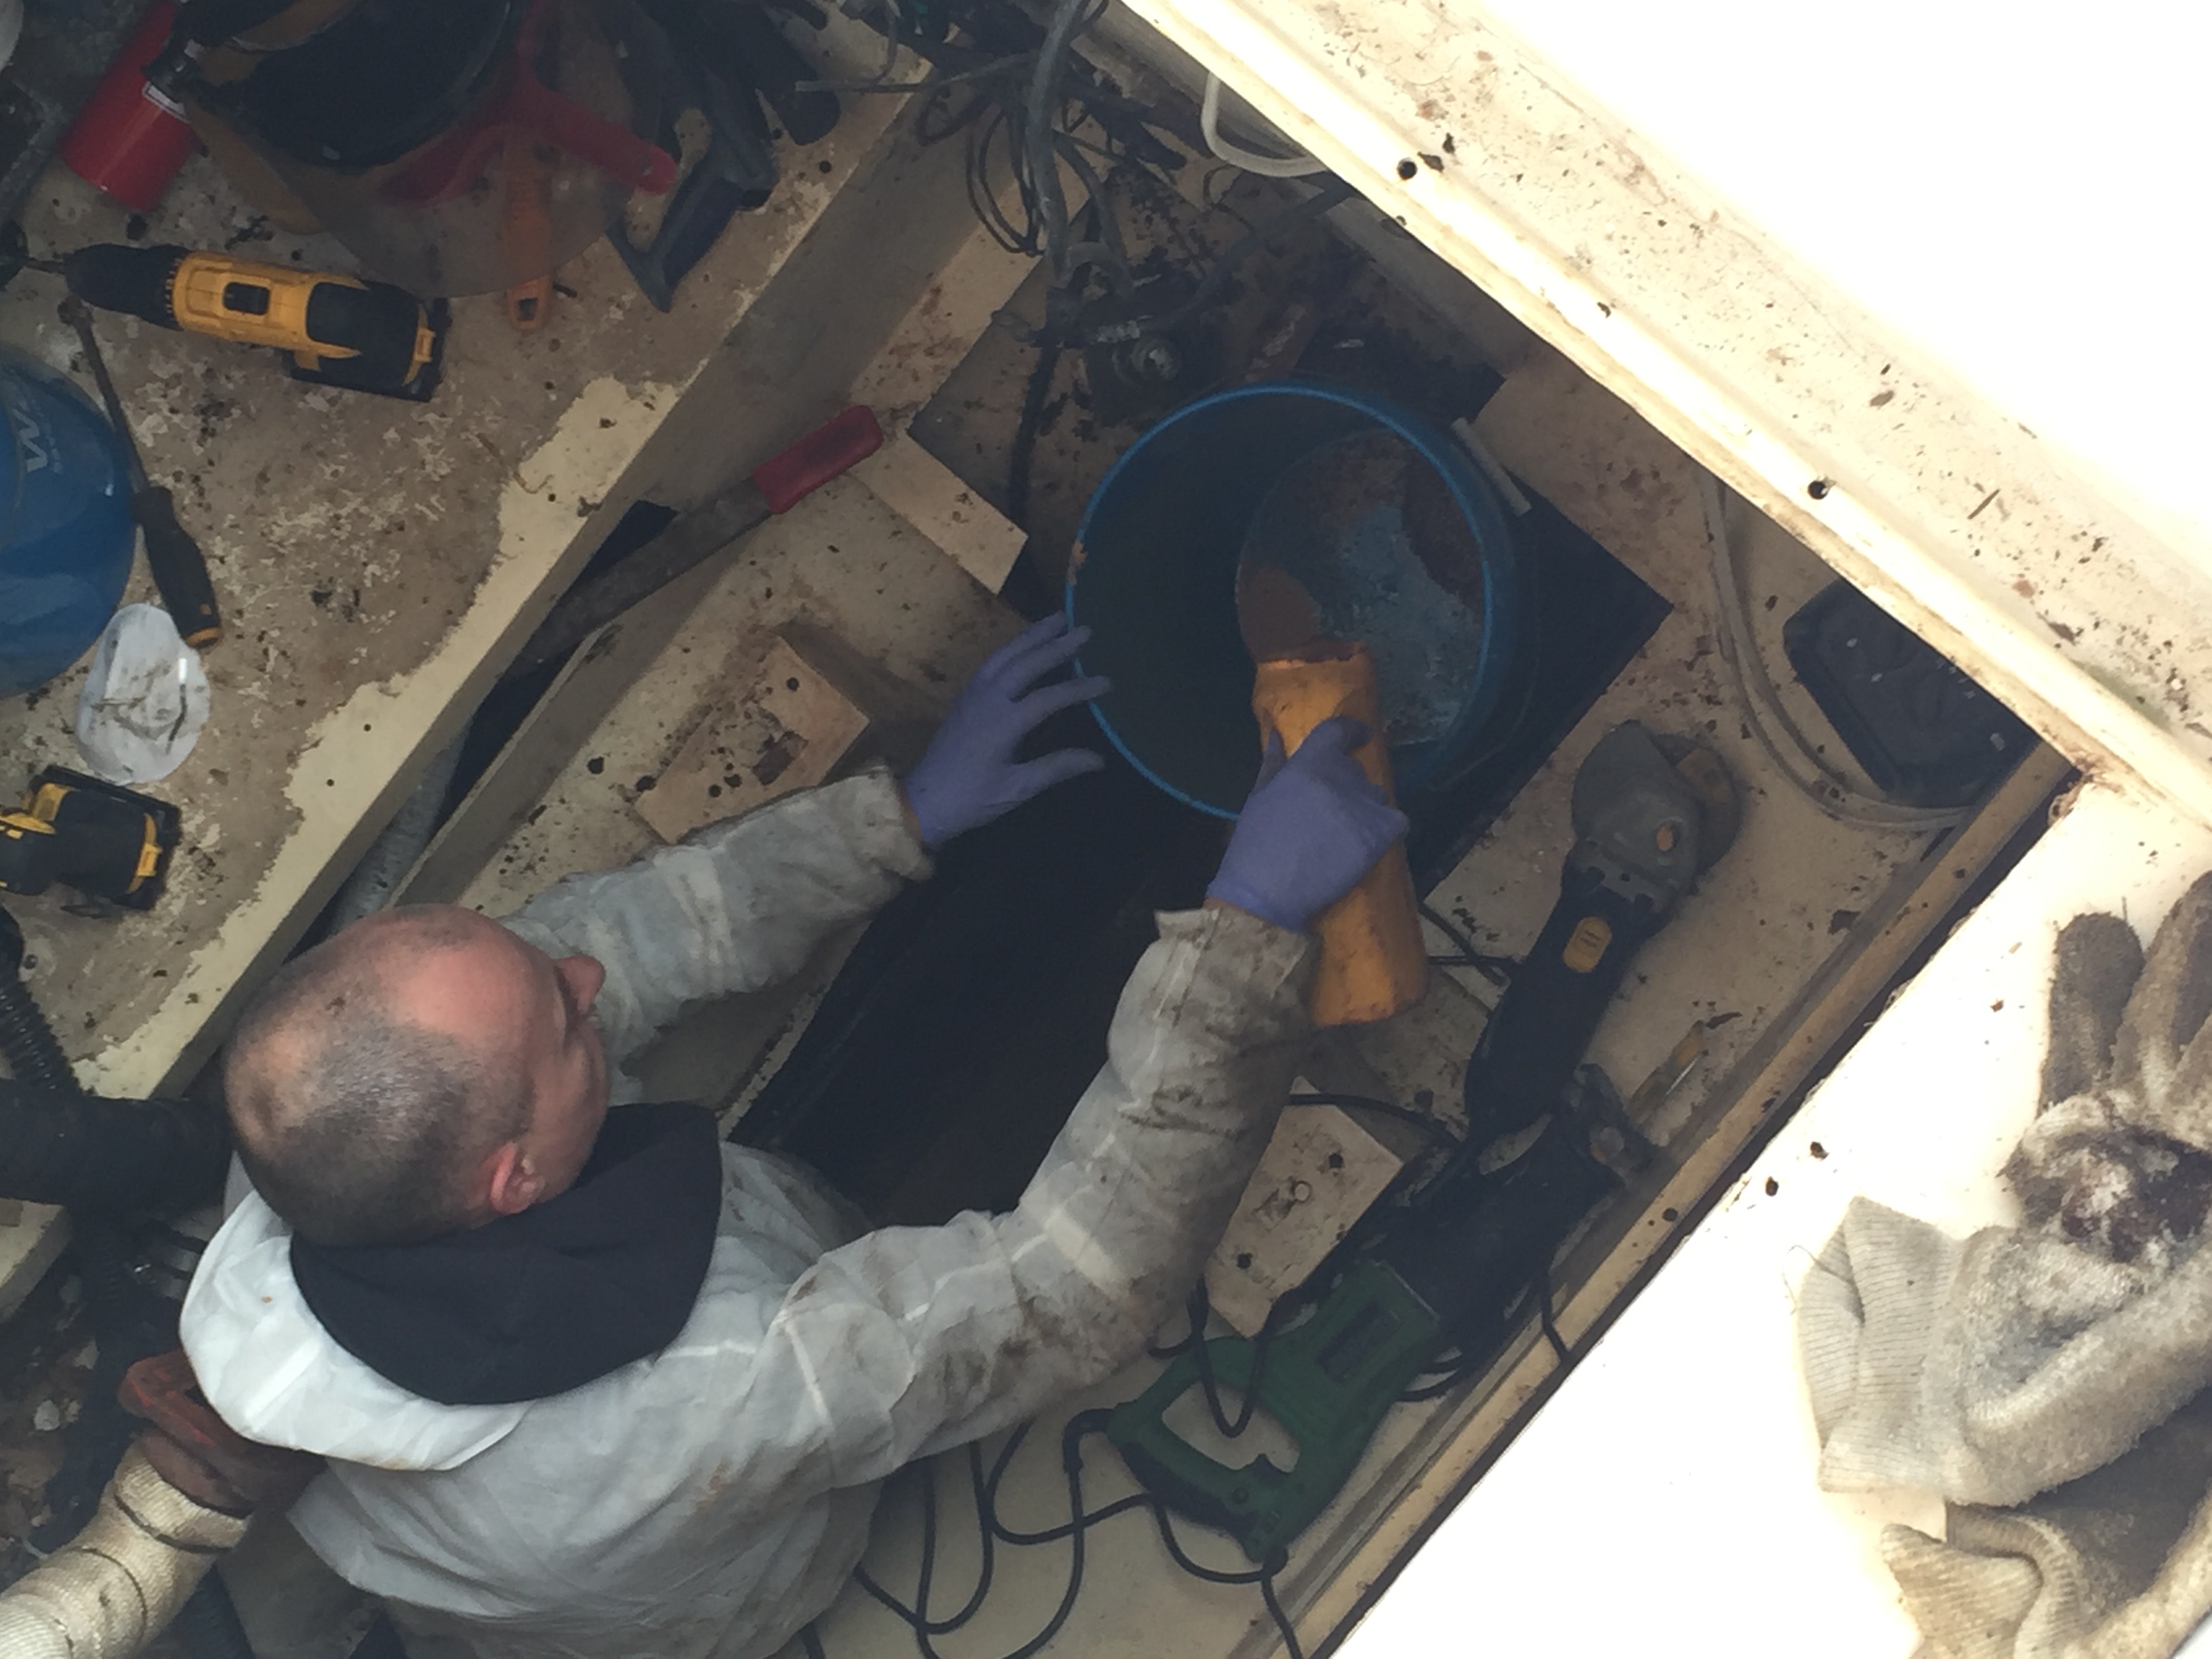
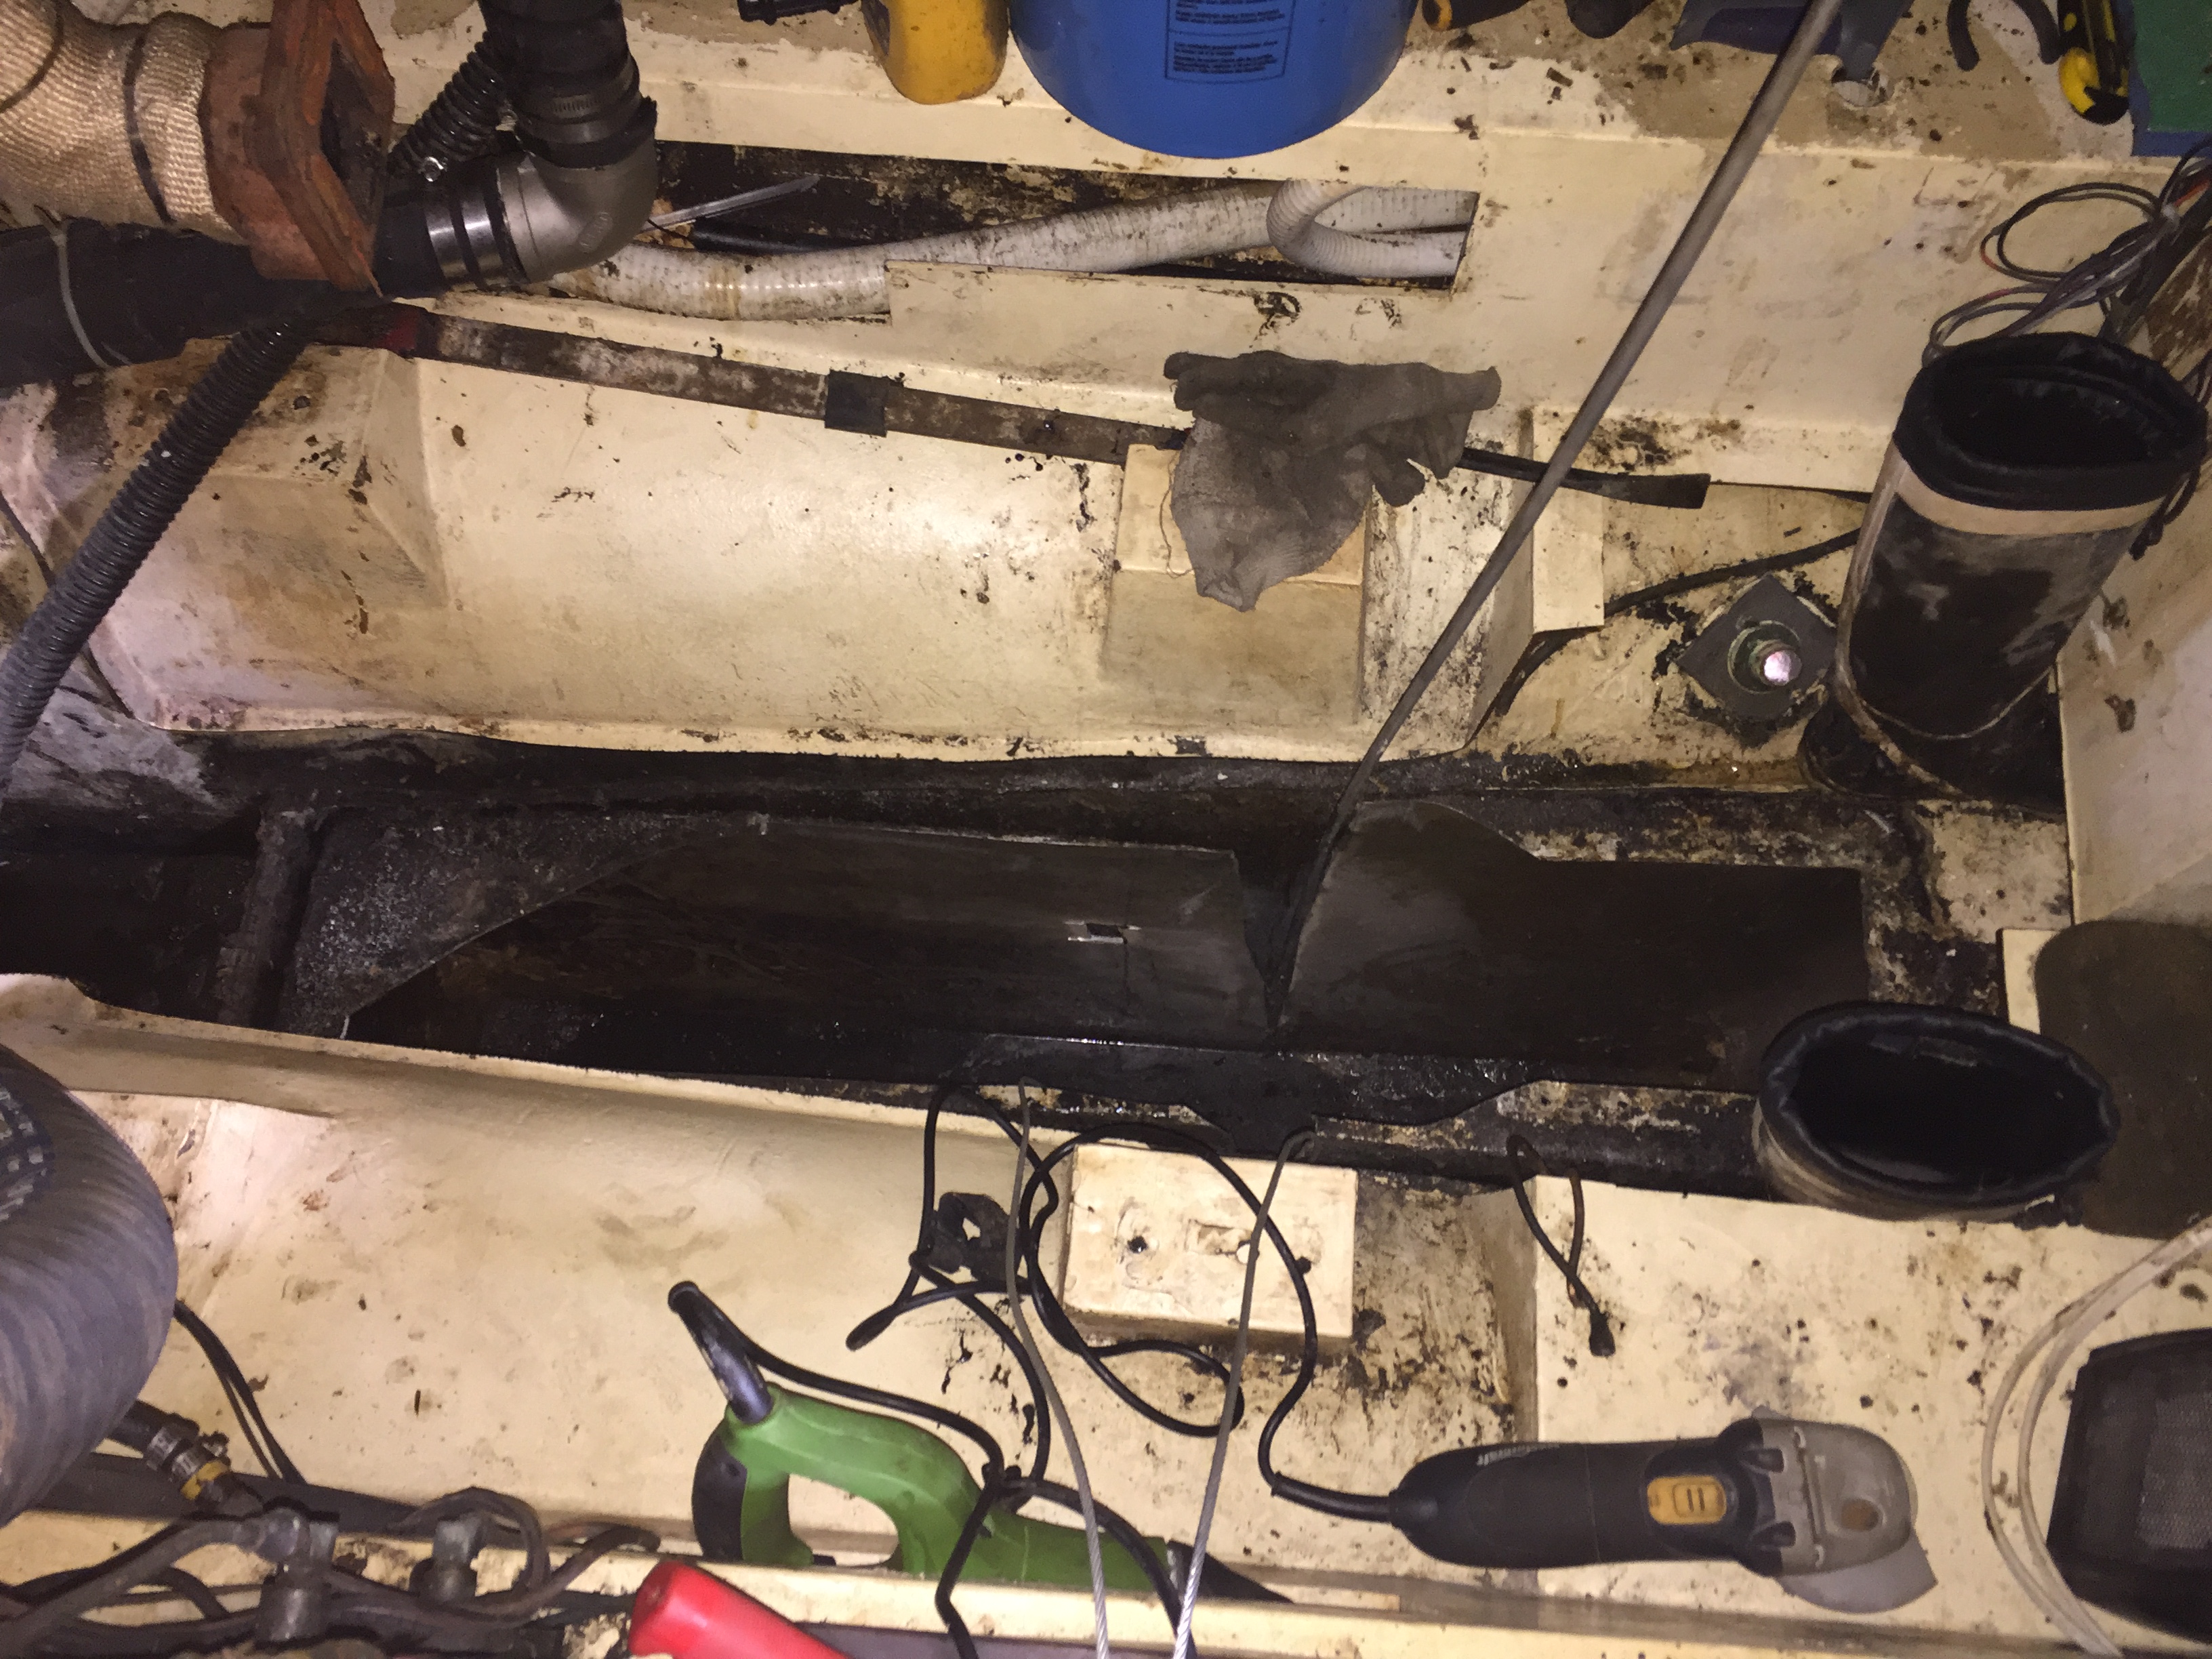
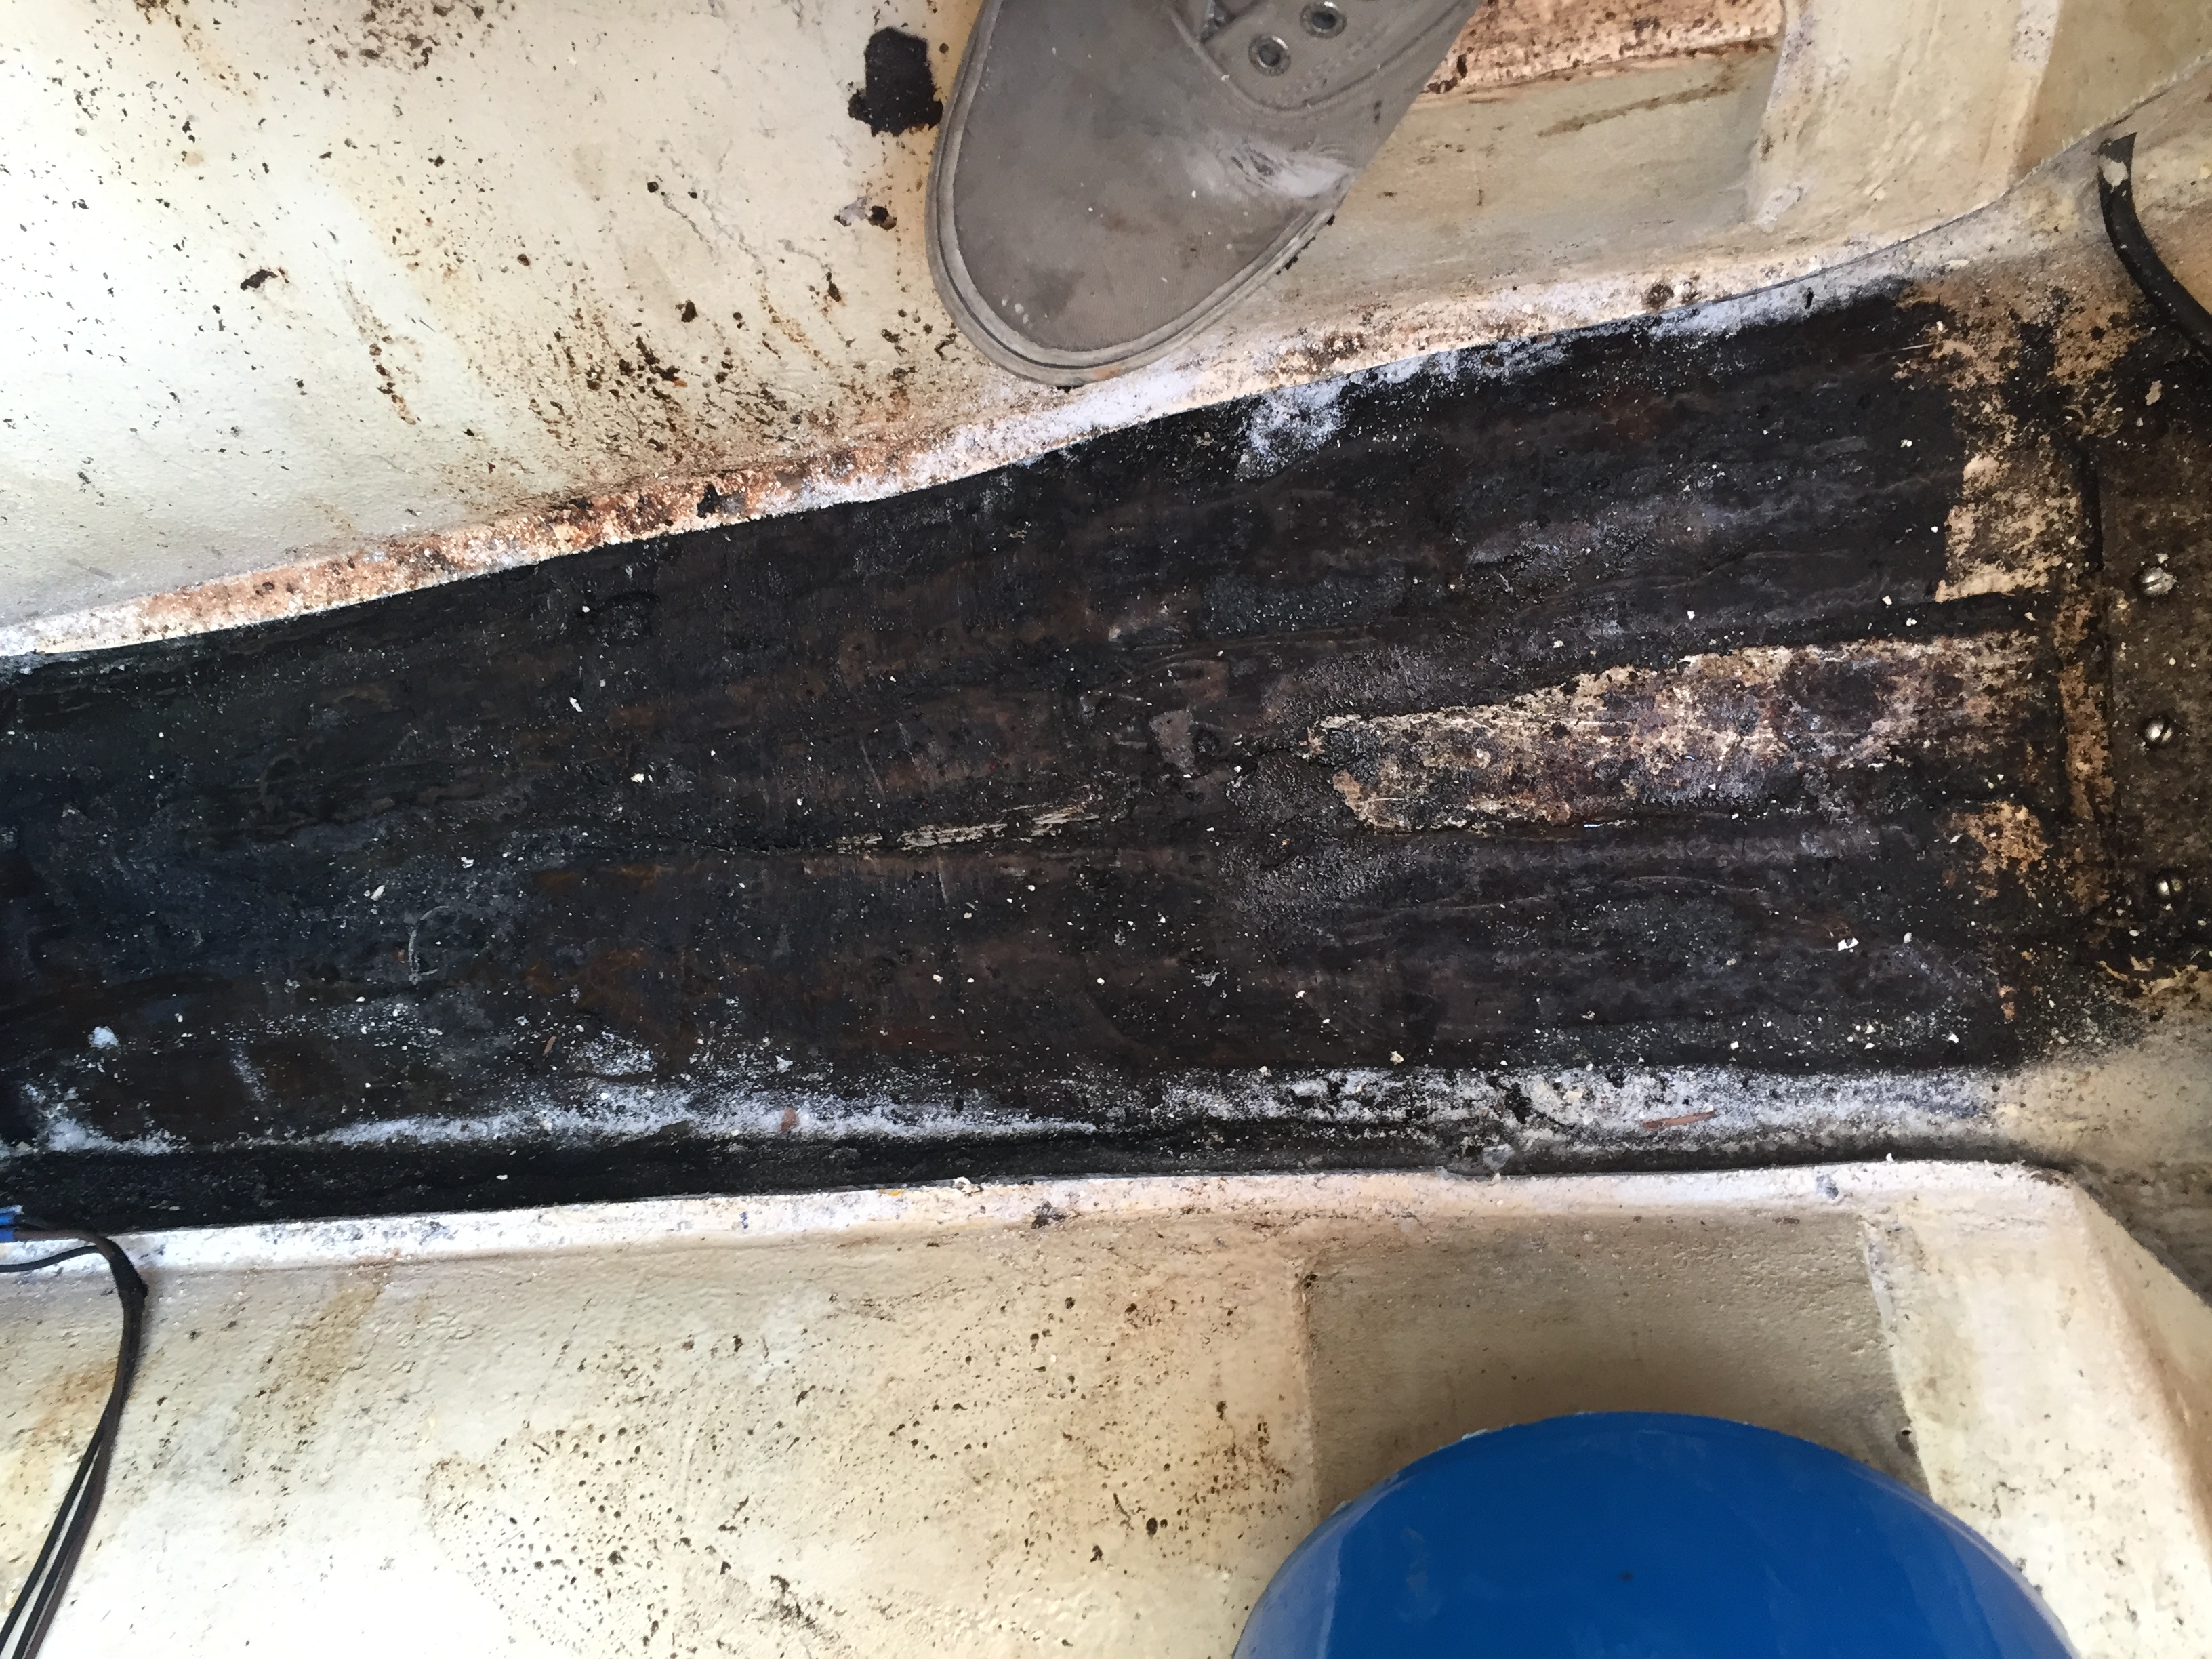
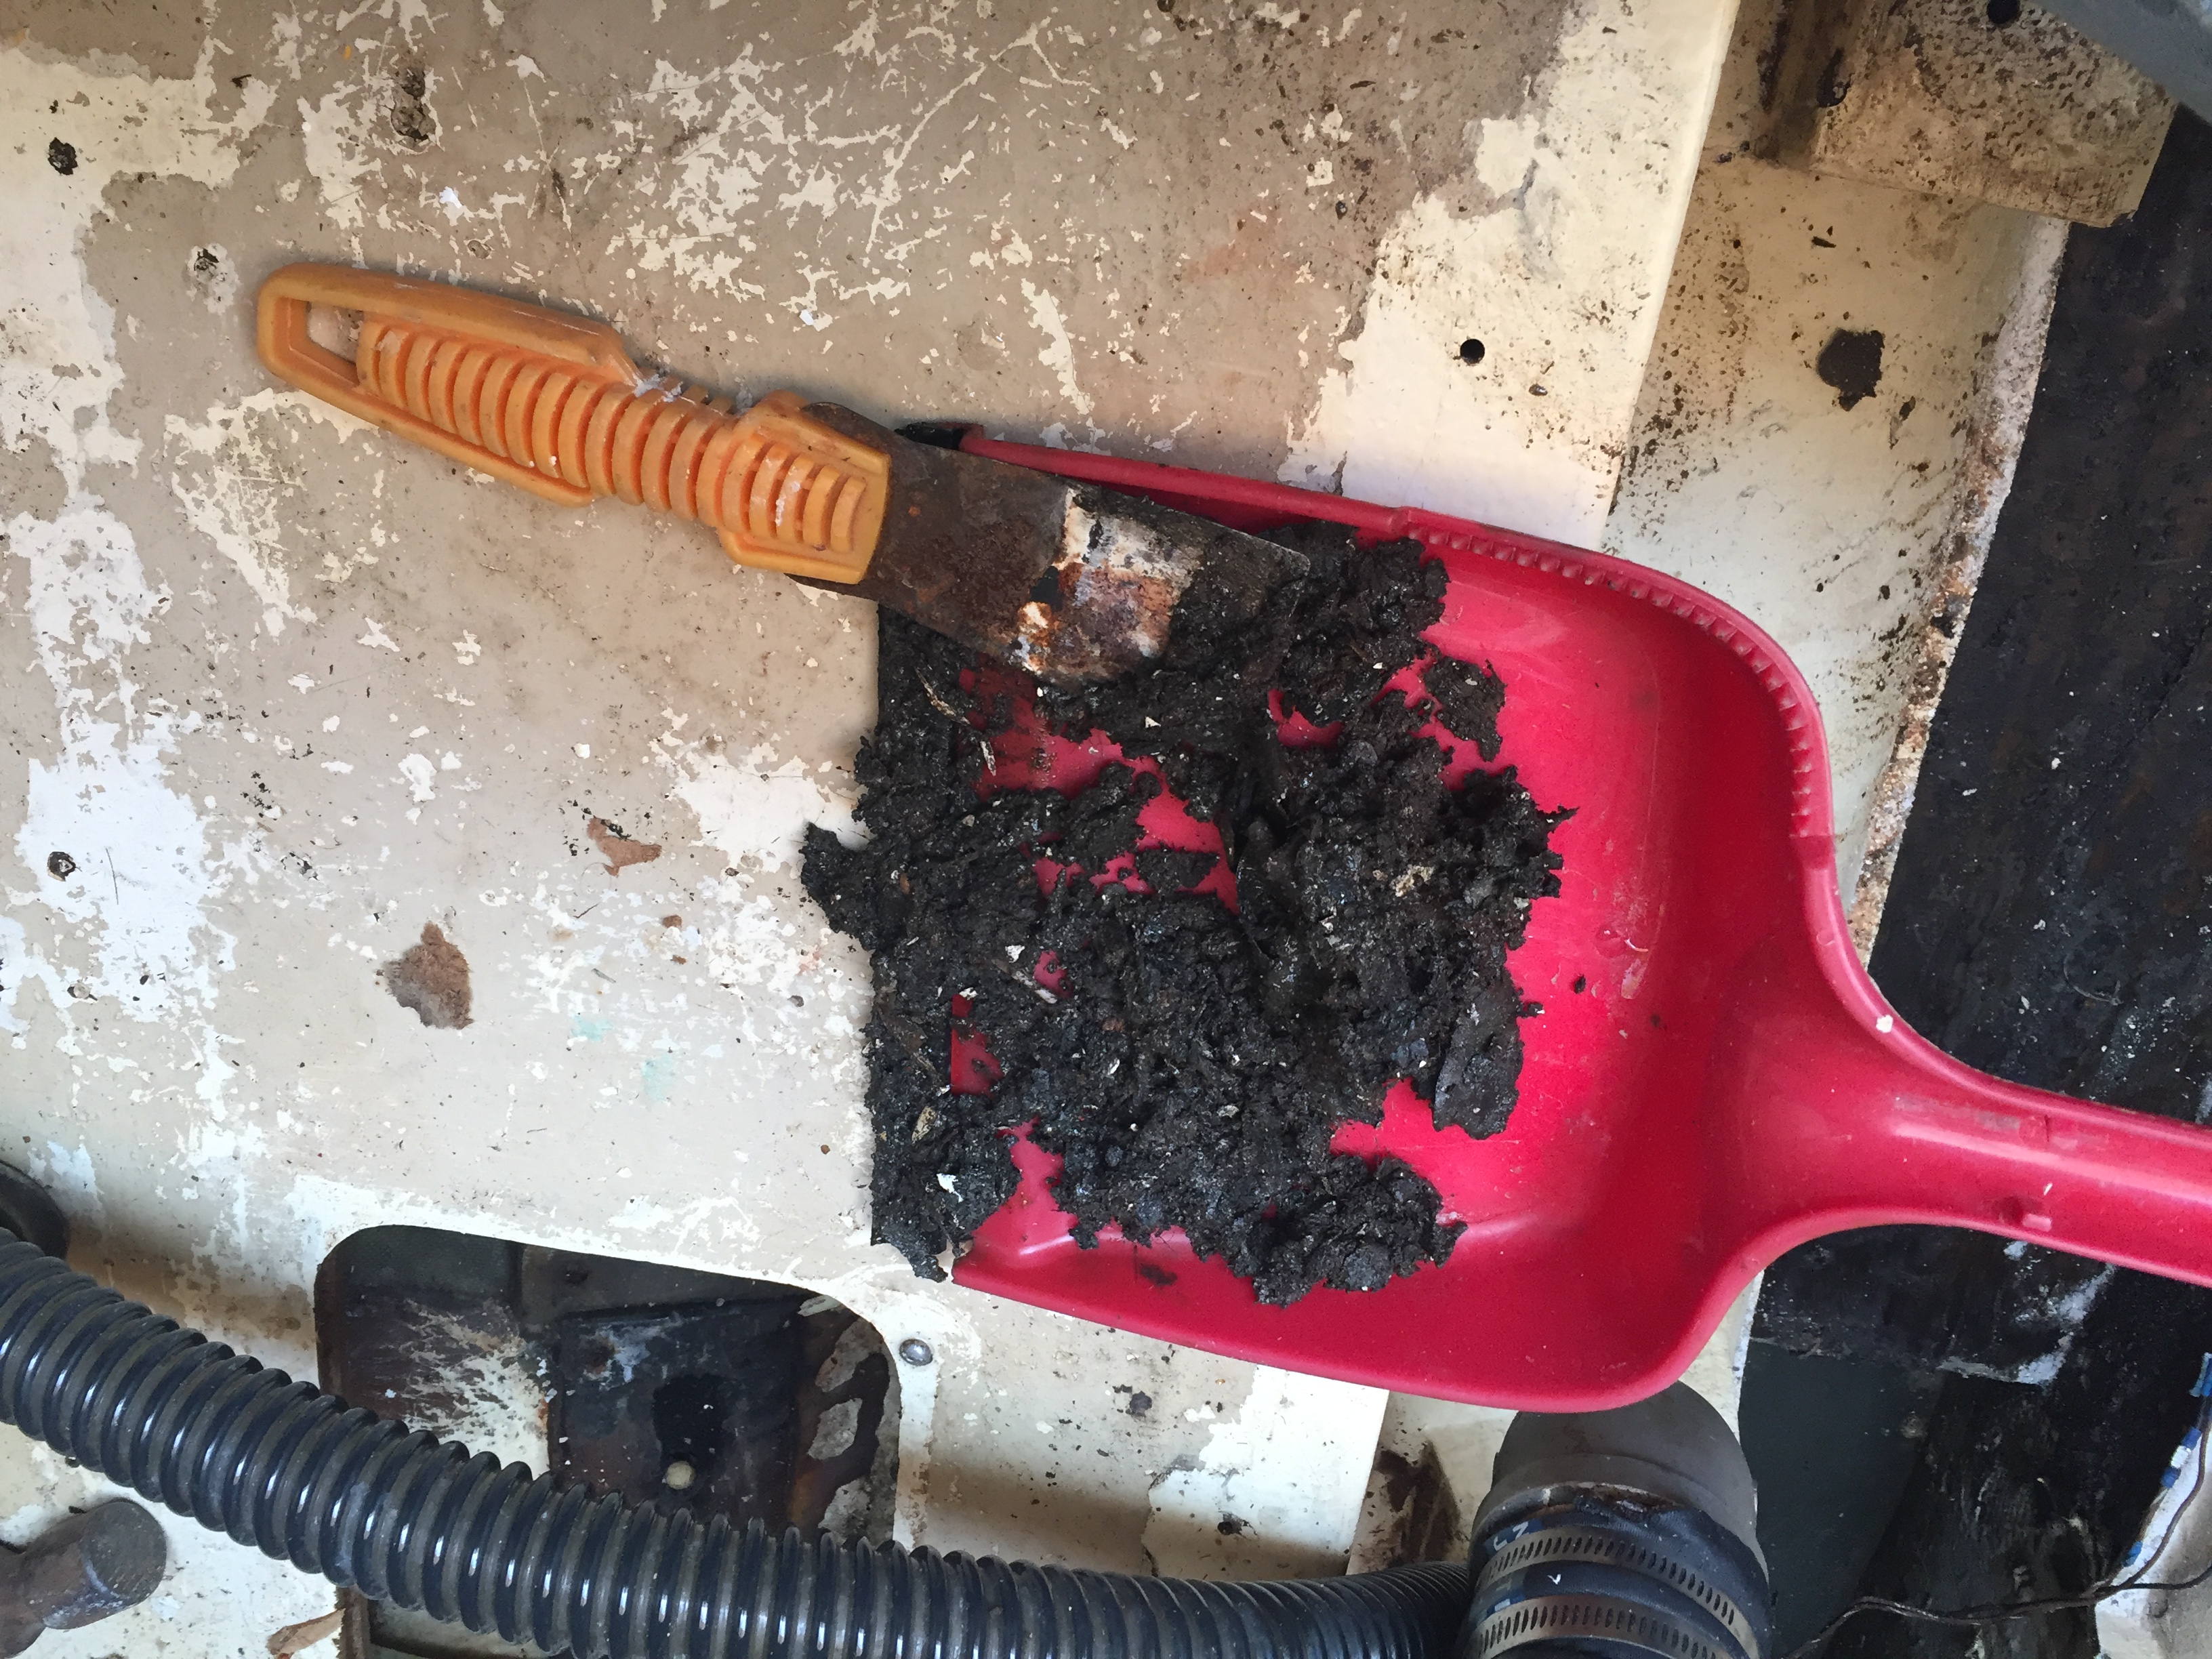
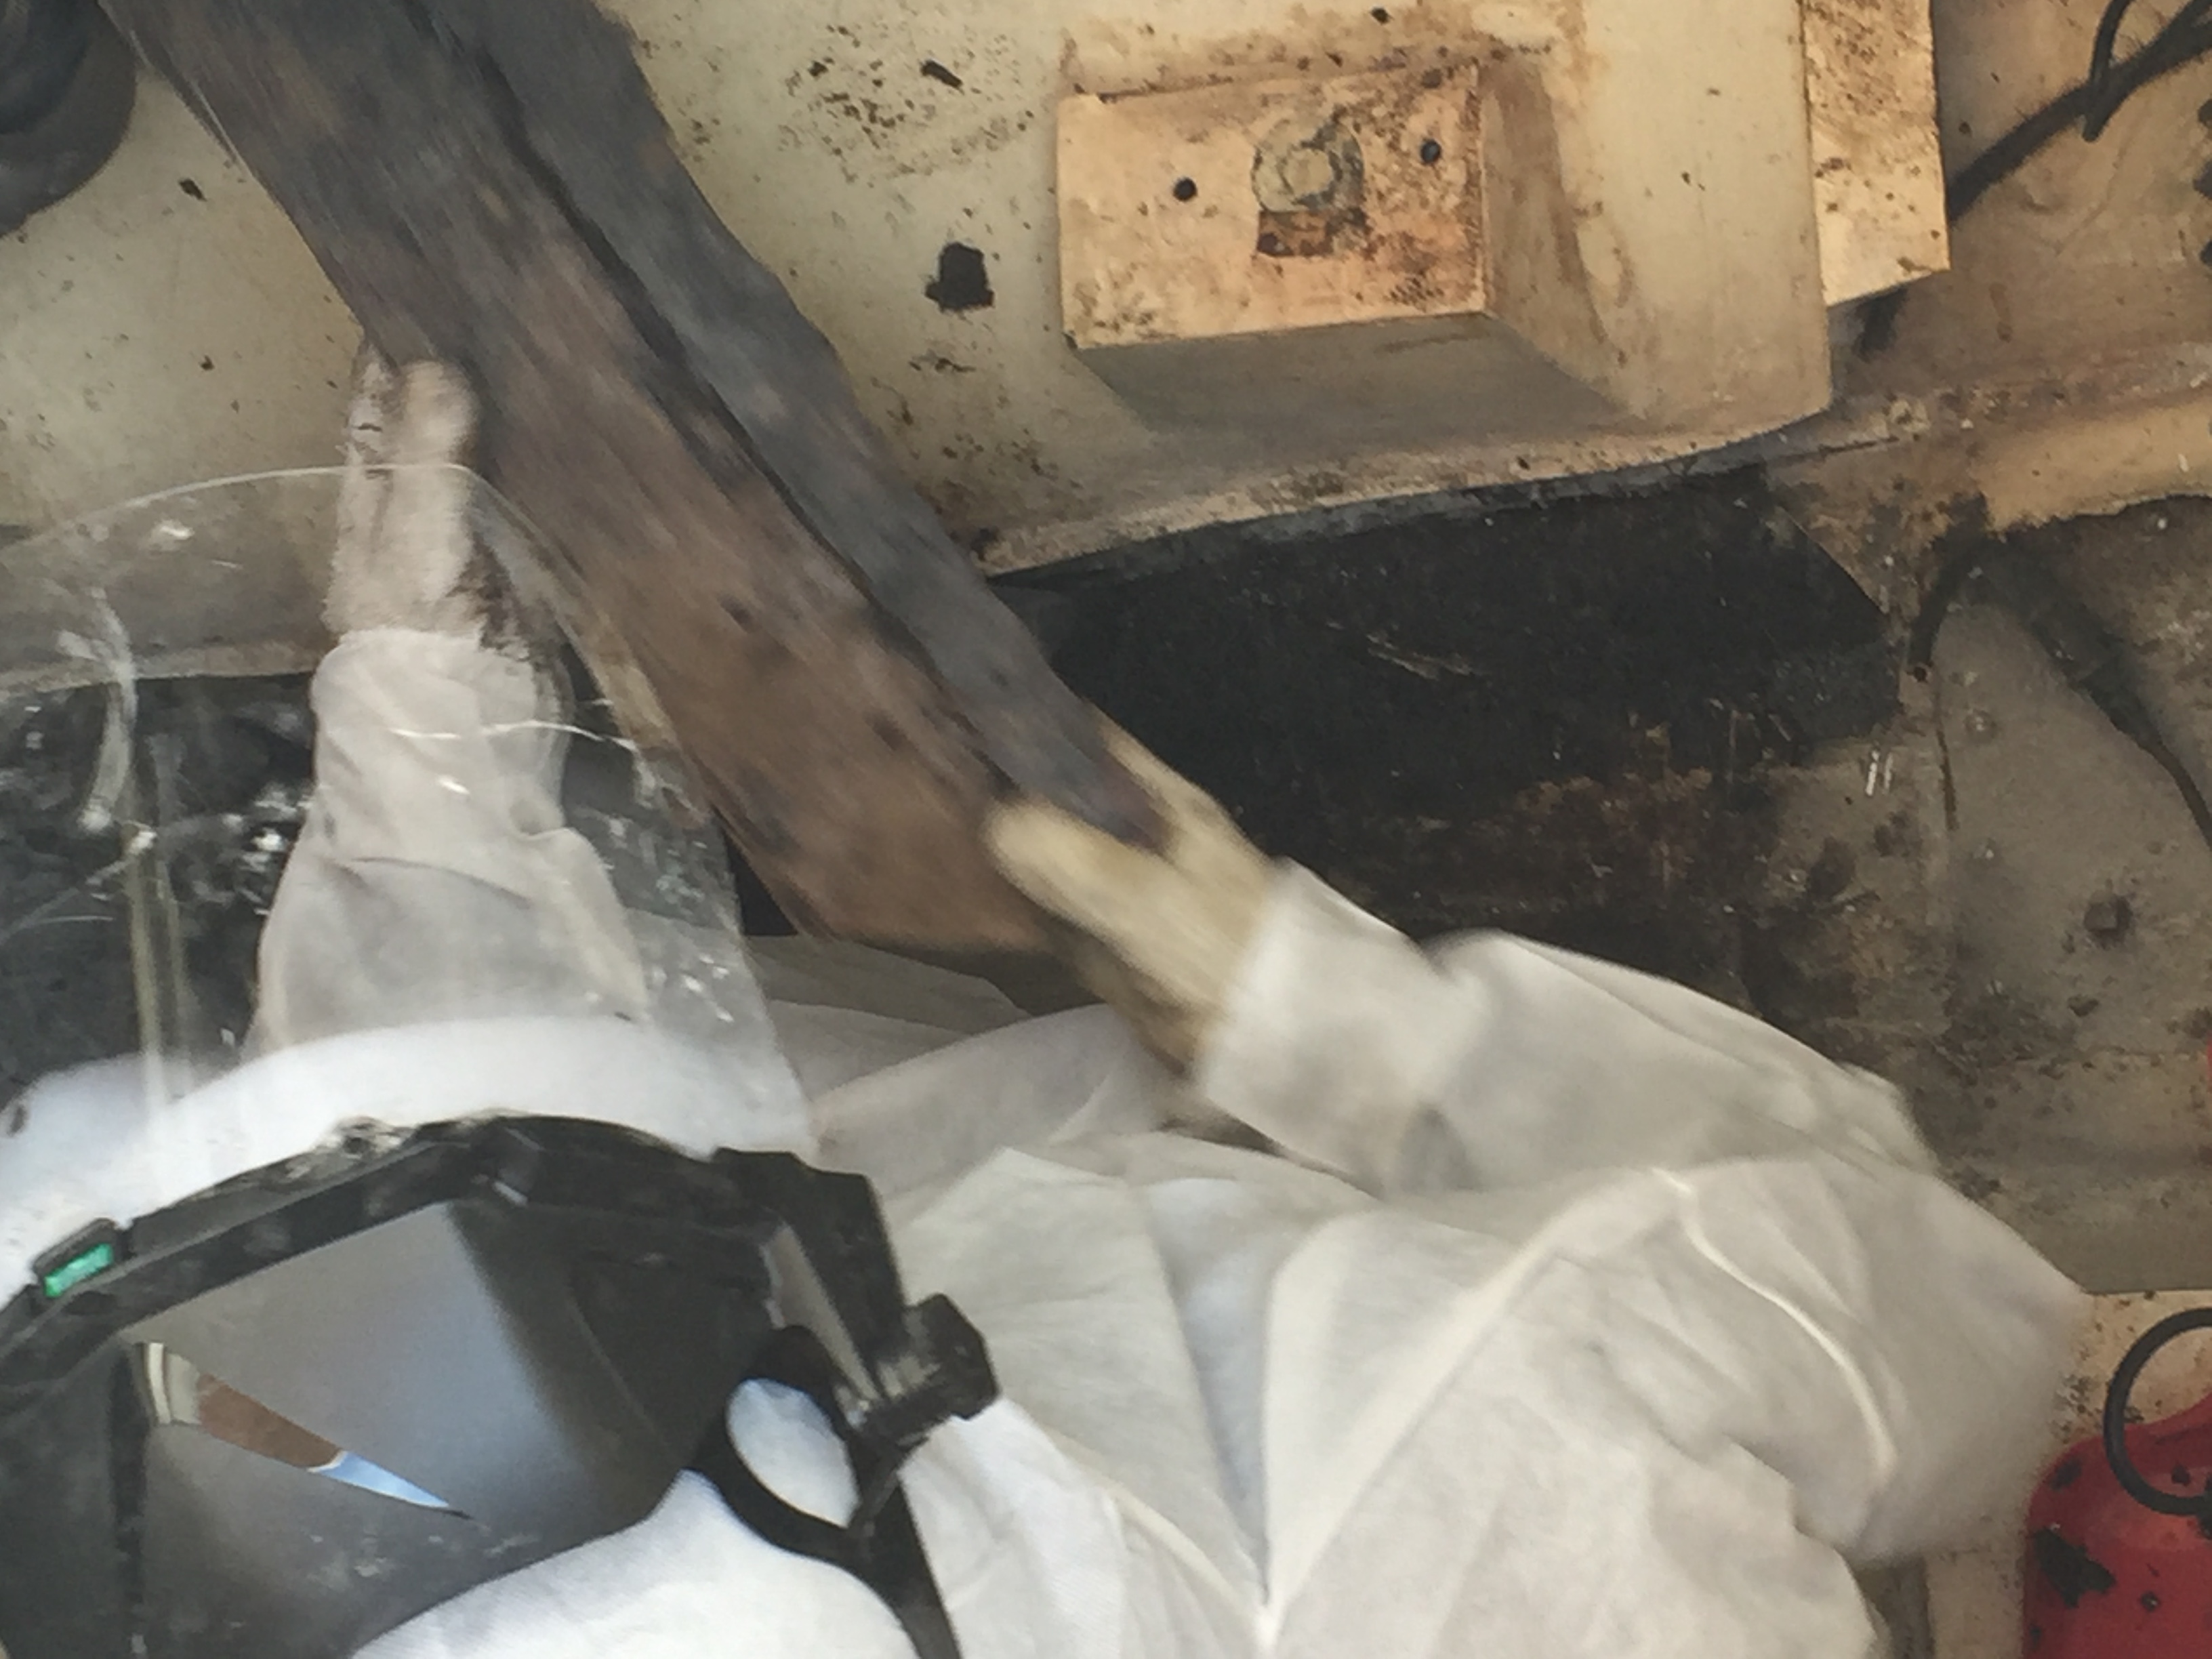
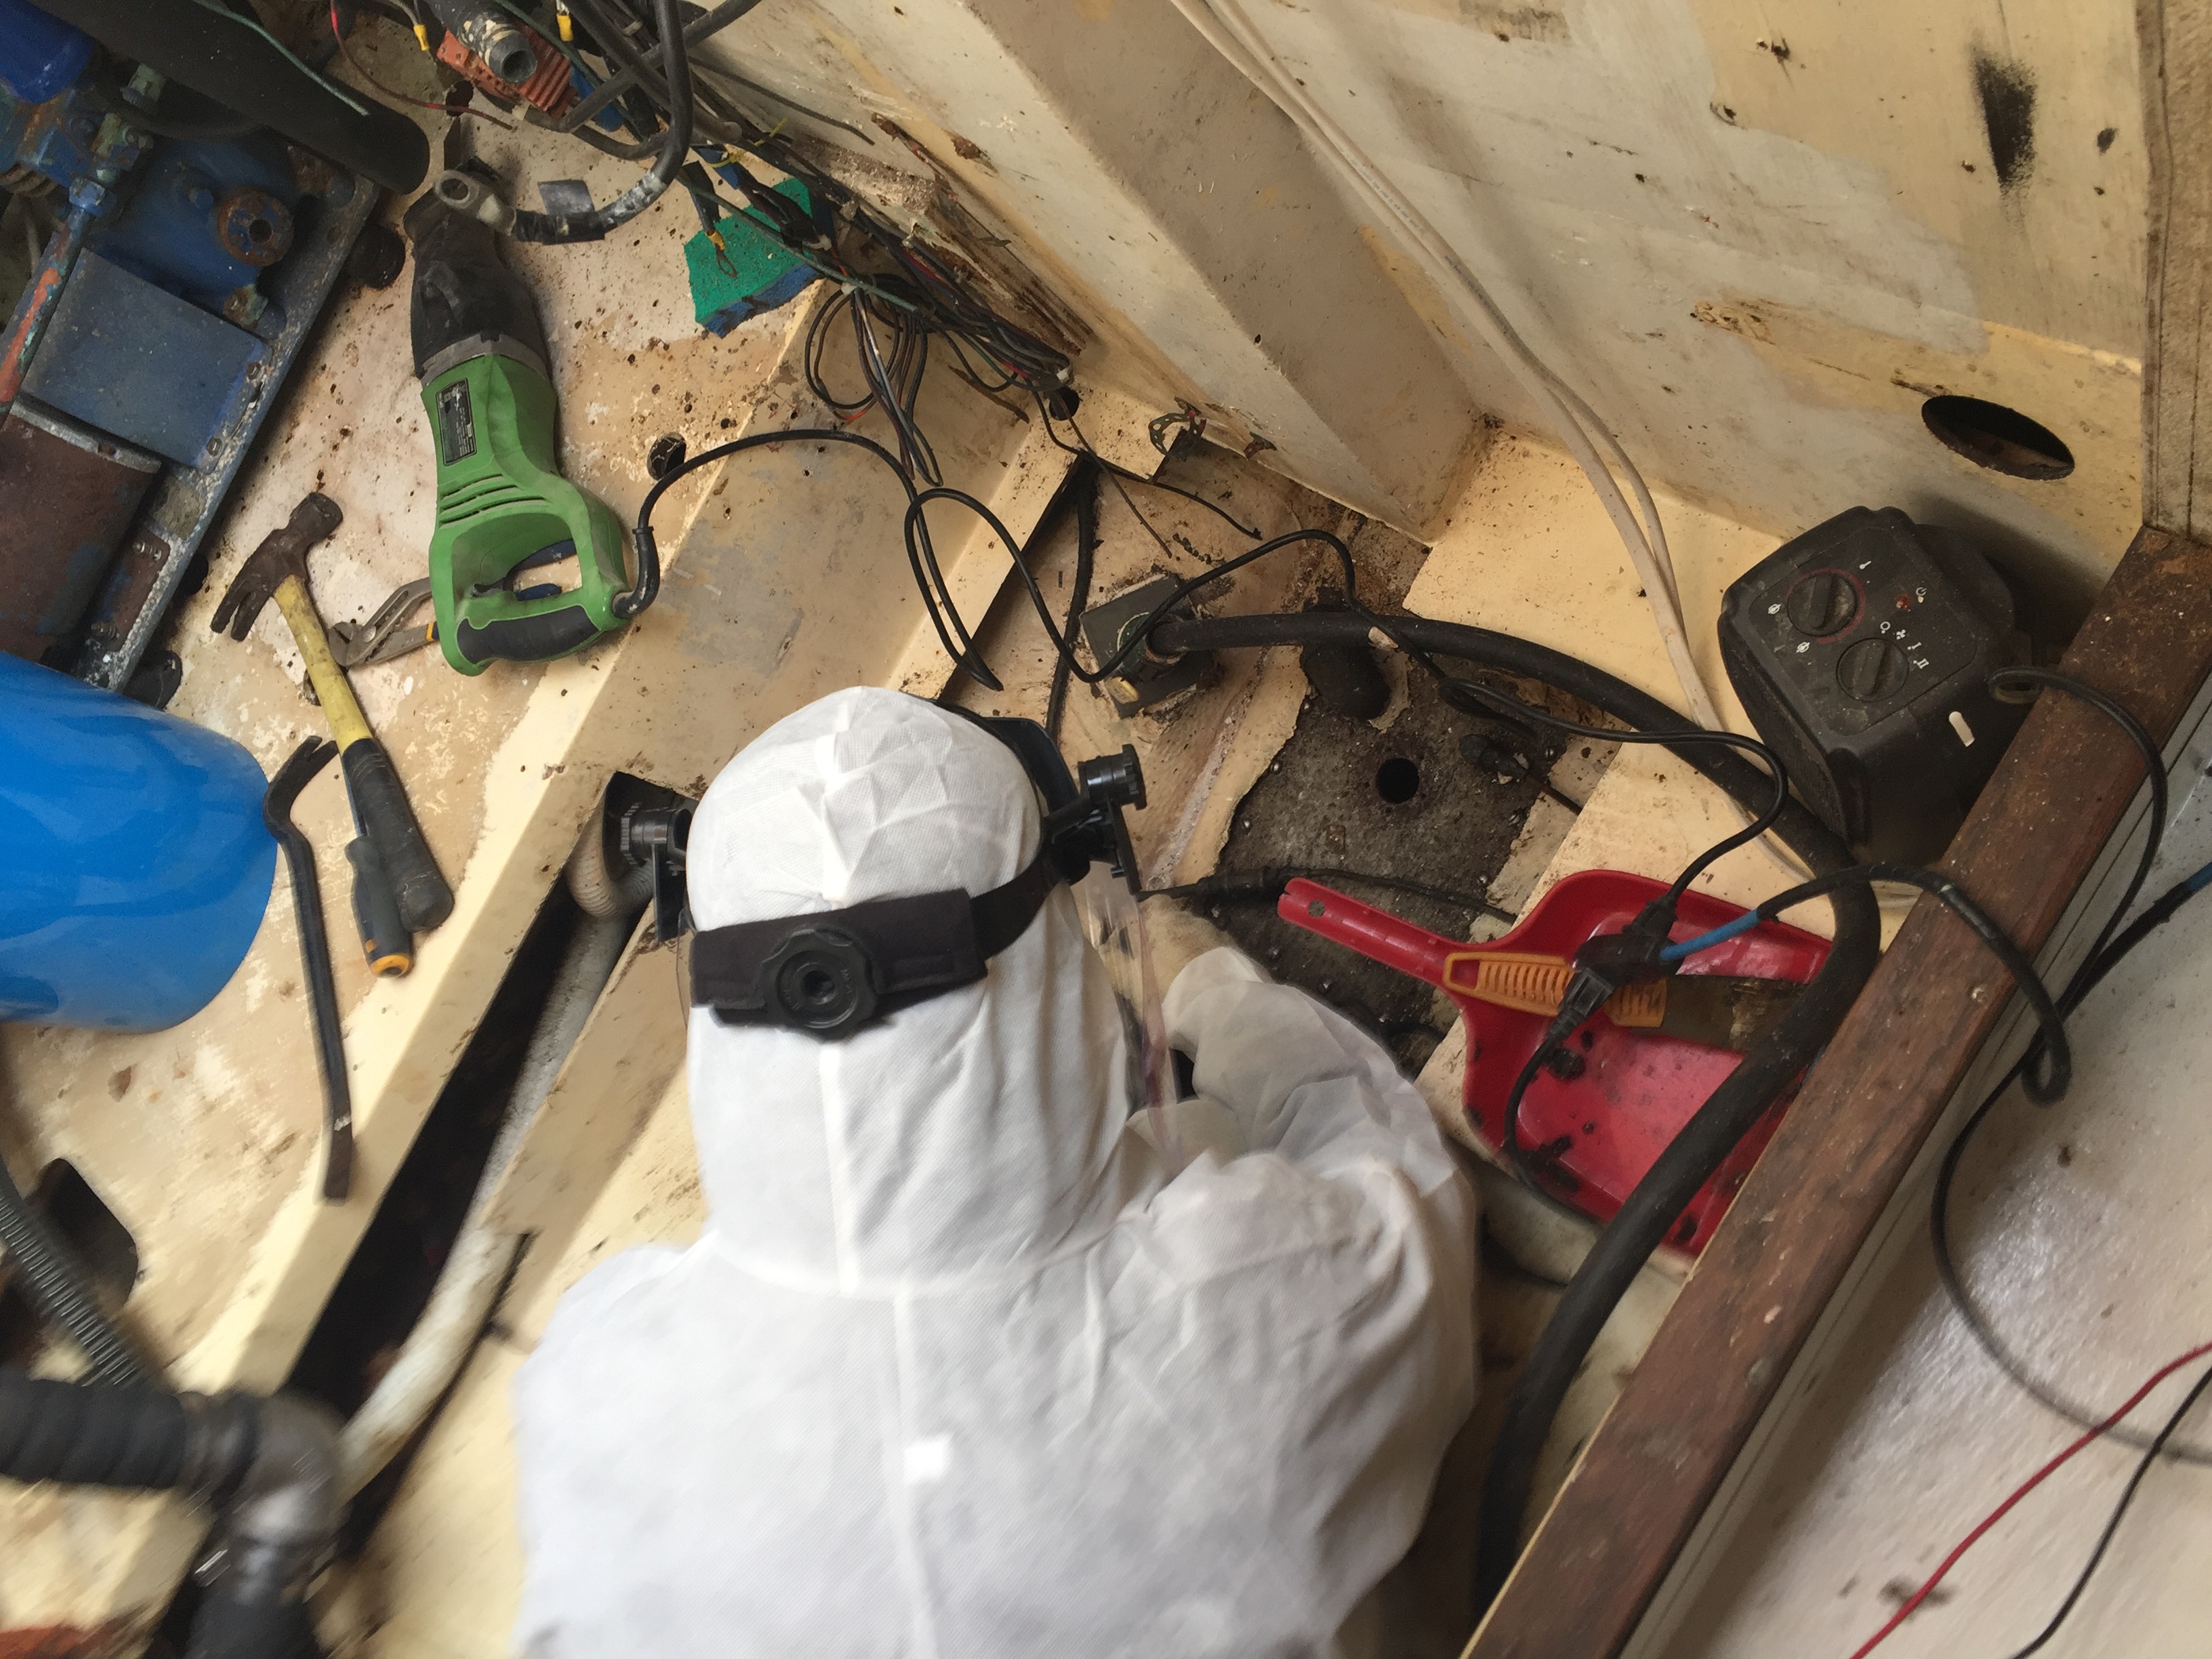
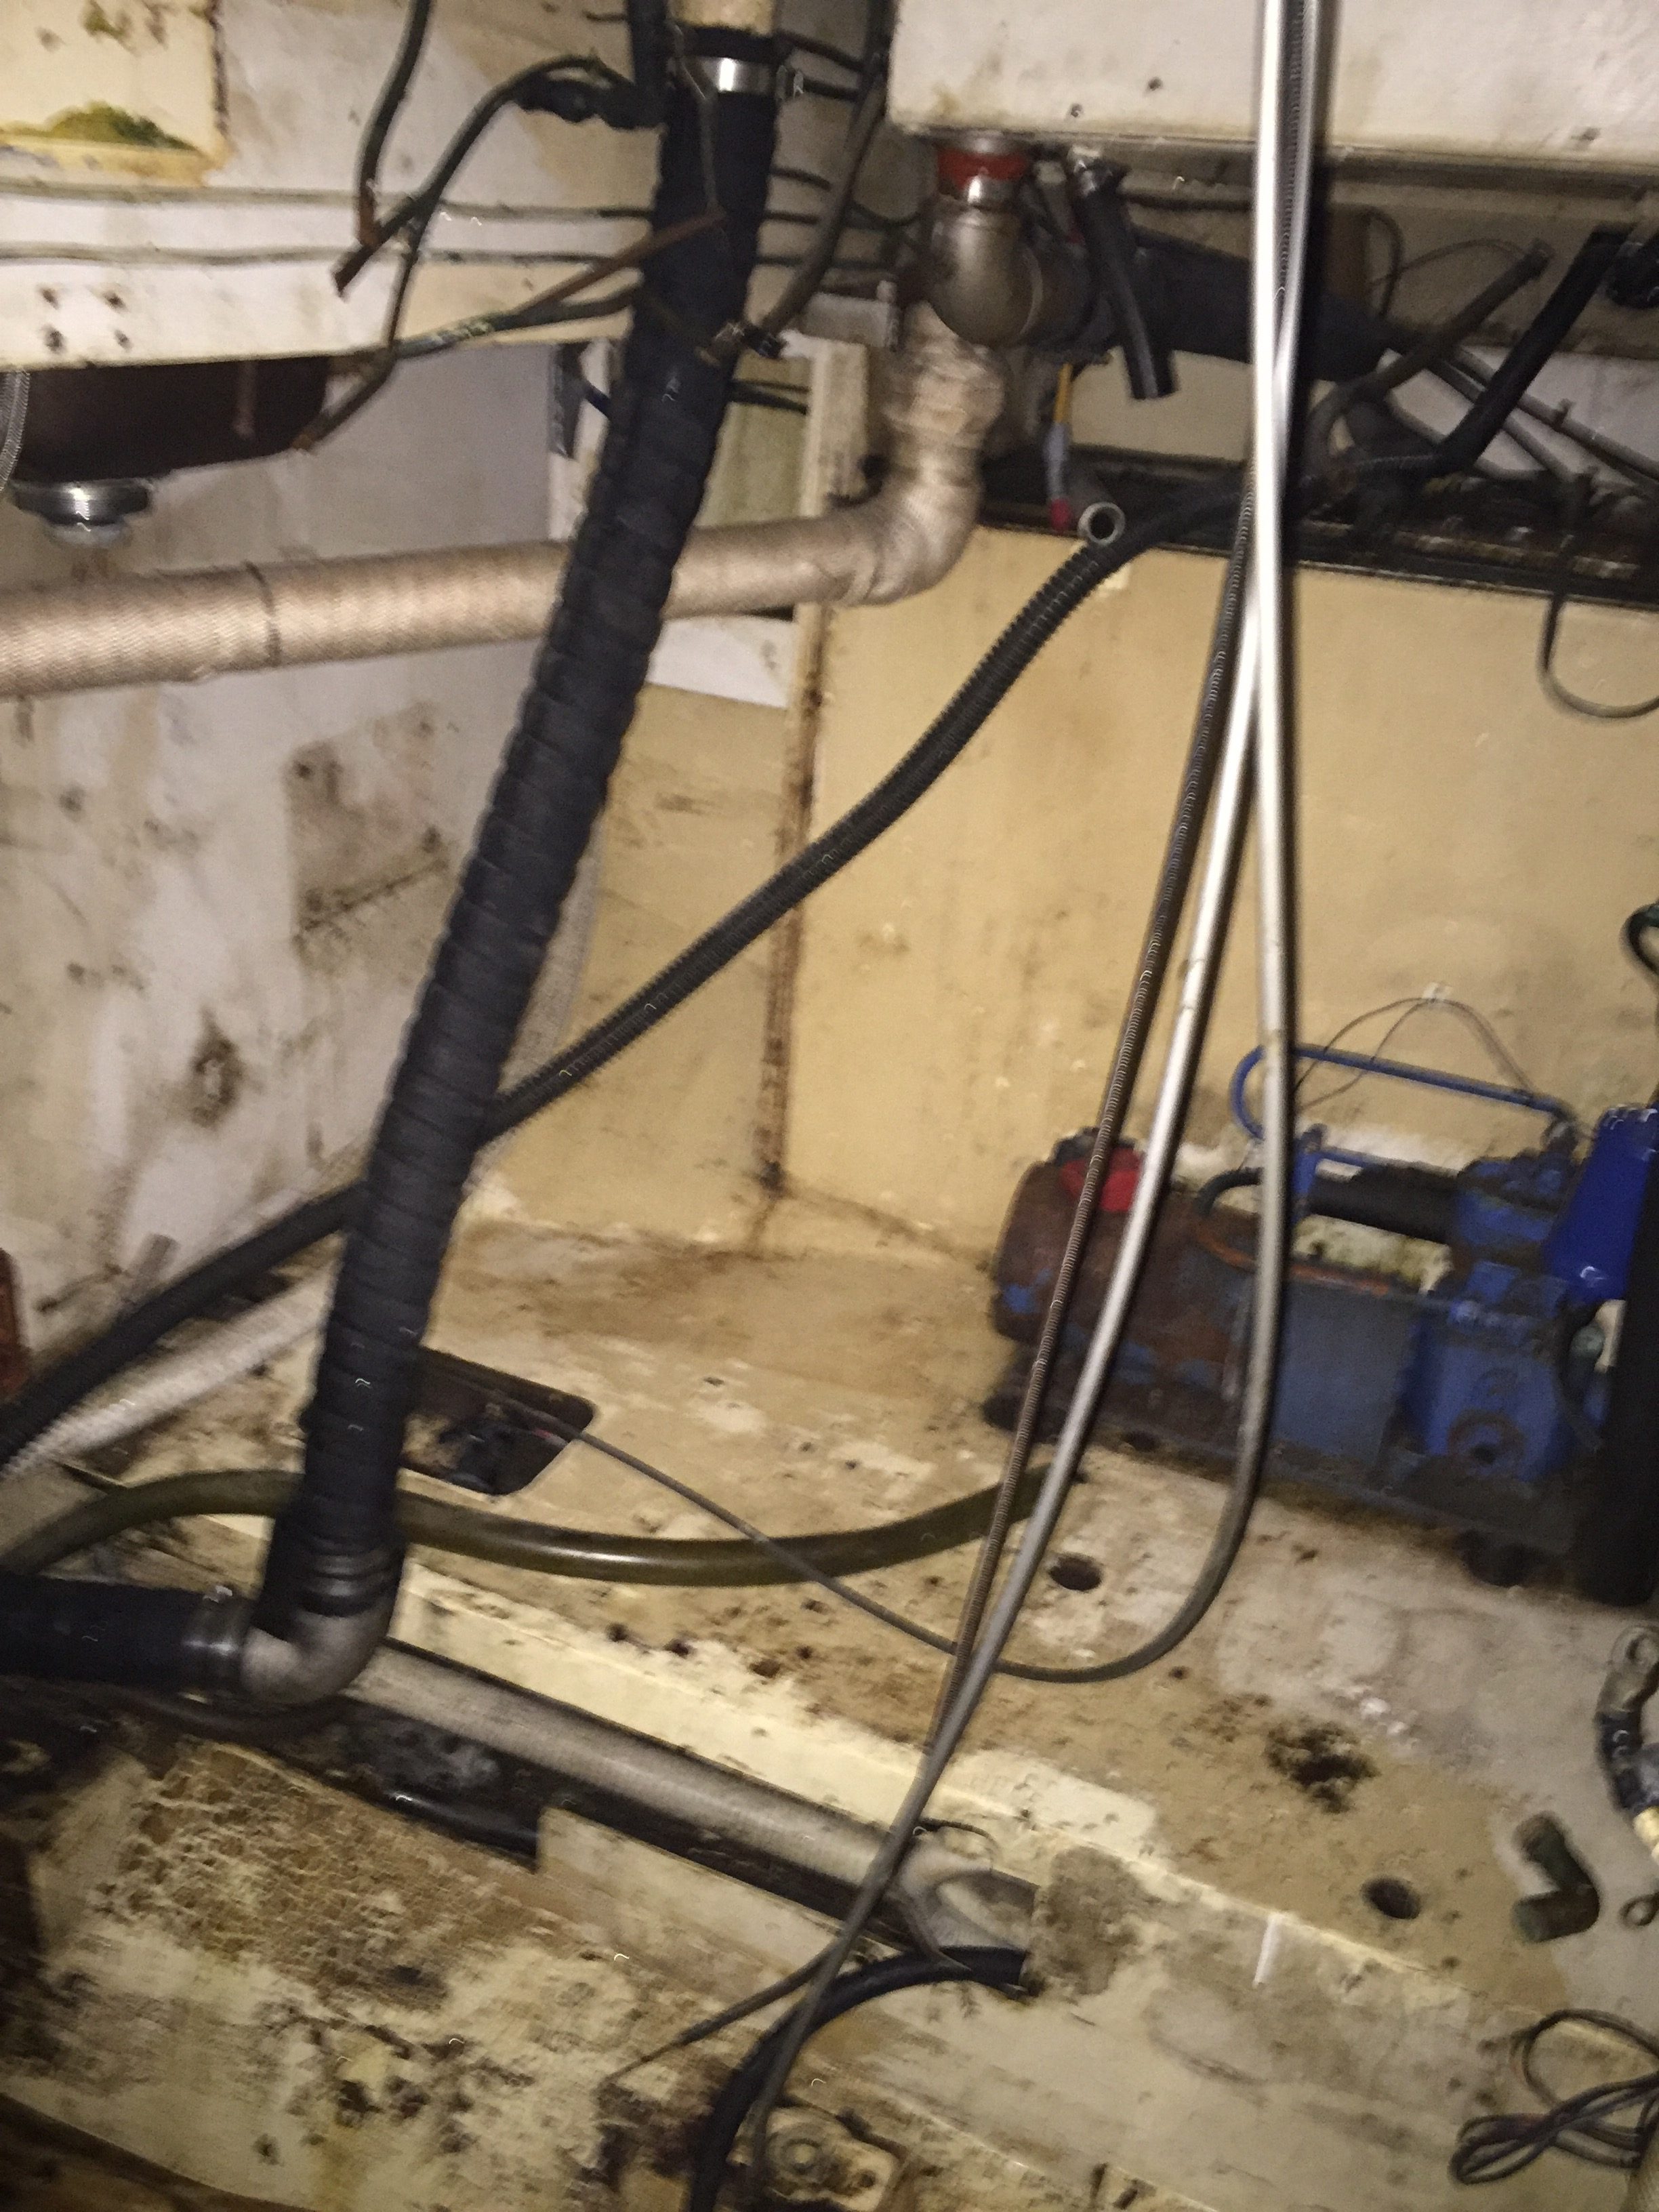
In order to cut the tank in half so that it can be removed I needed to get rid of the last of the sludge in the bottom of the tank. This process involved standing inside the tank and using a scoop to fill 5 gallon buckets. But before that I am missing the part about cutting the top off.

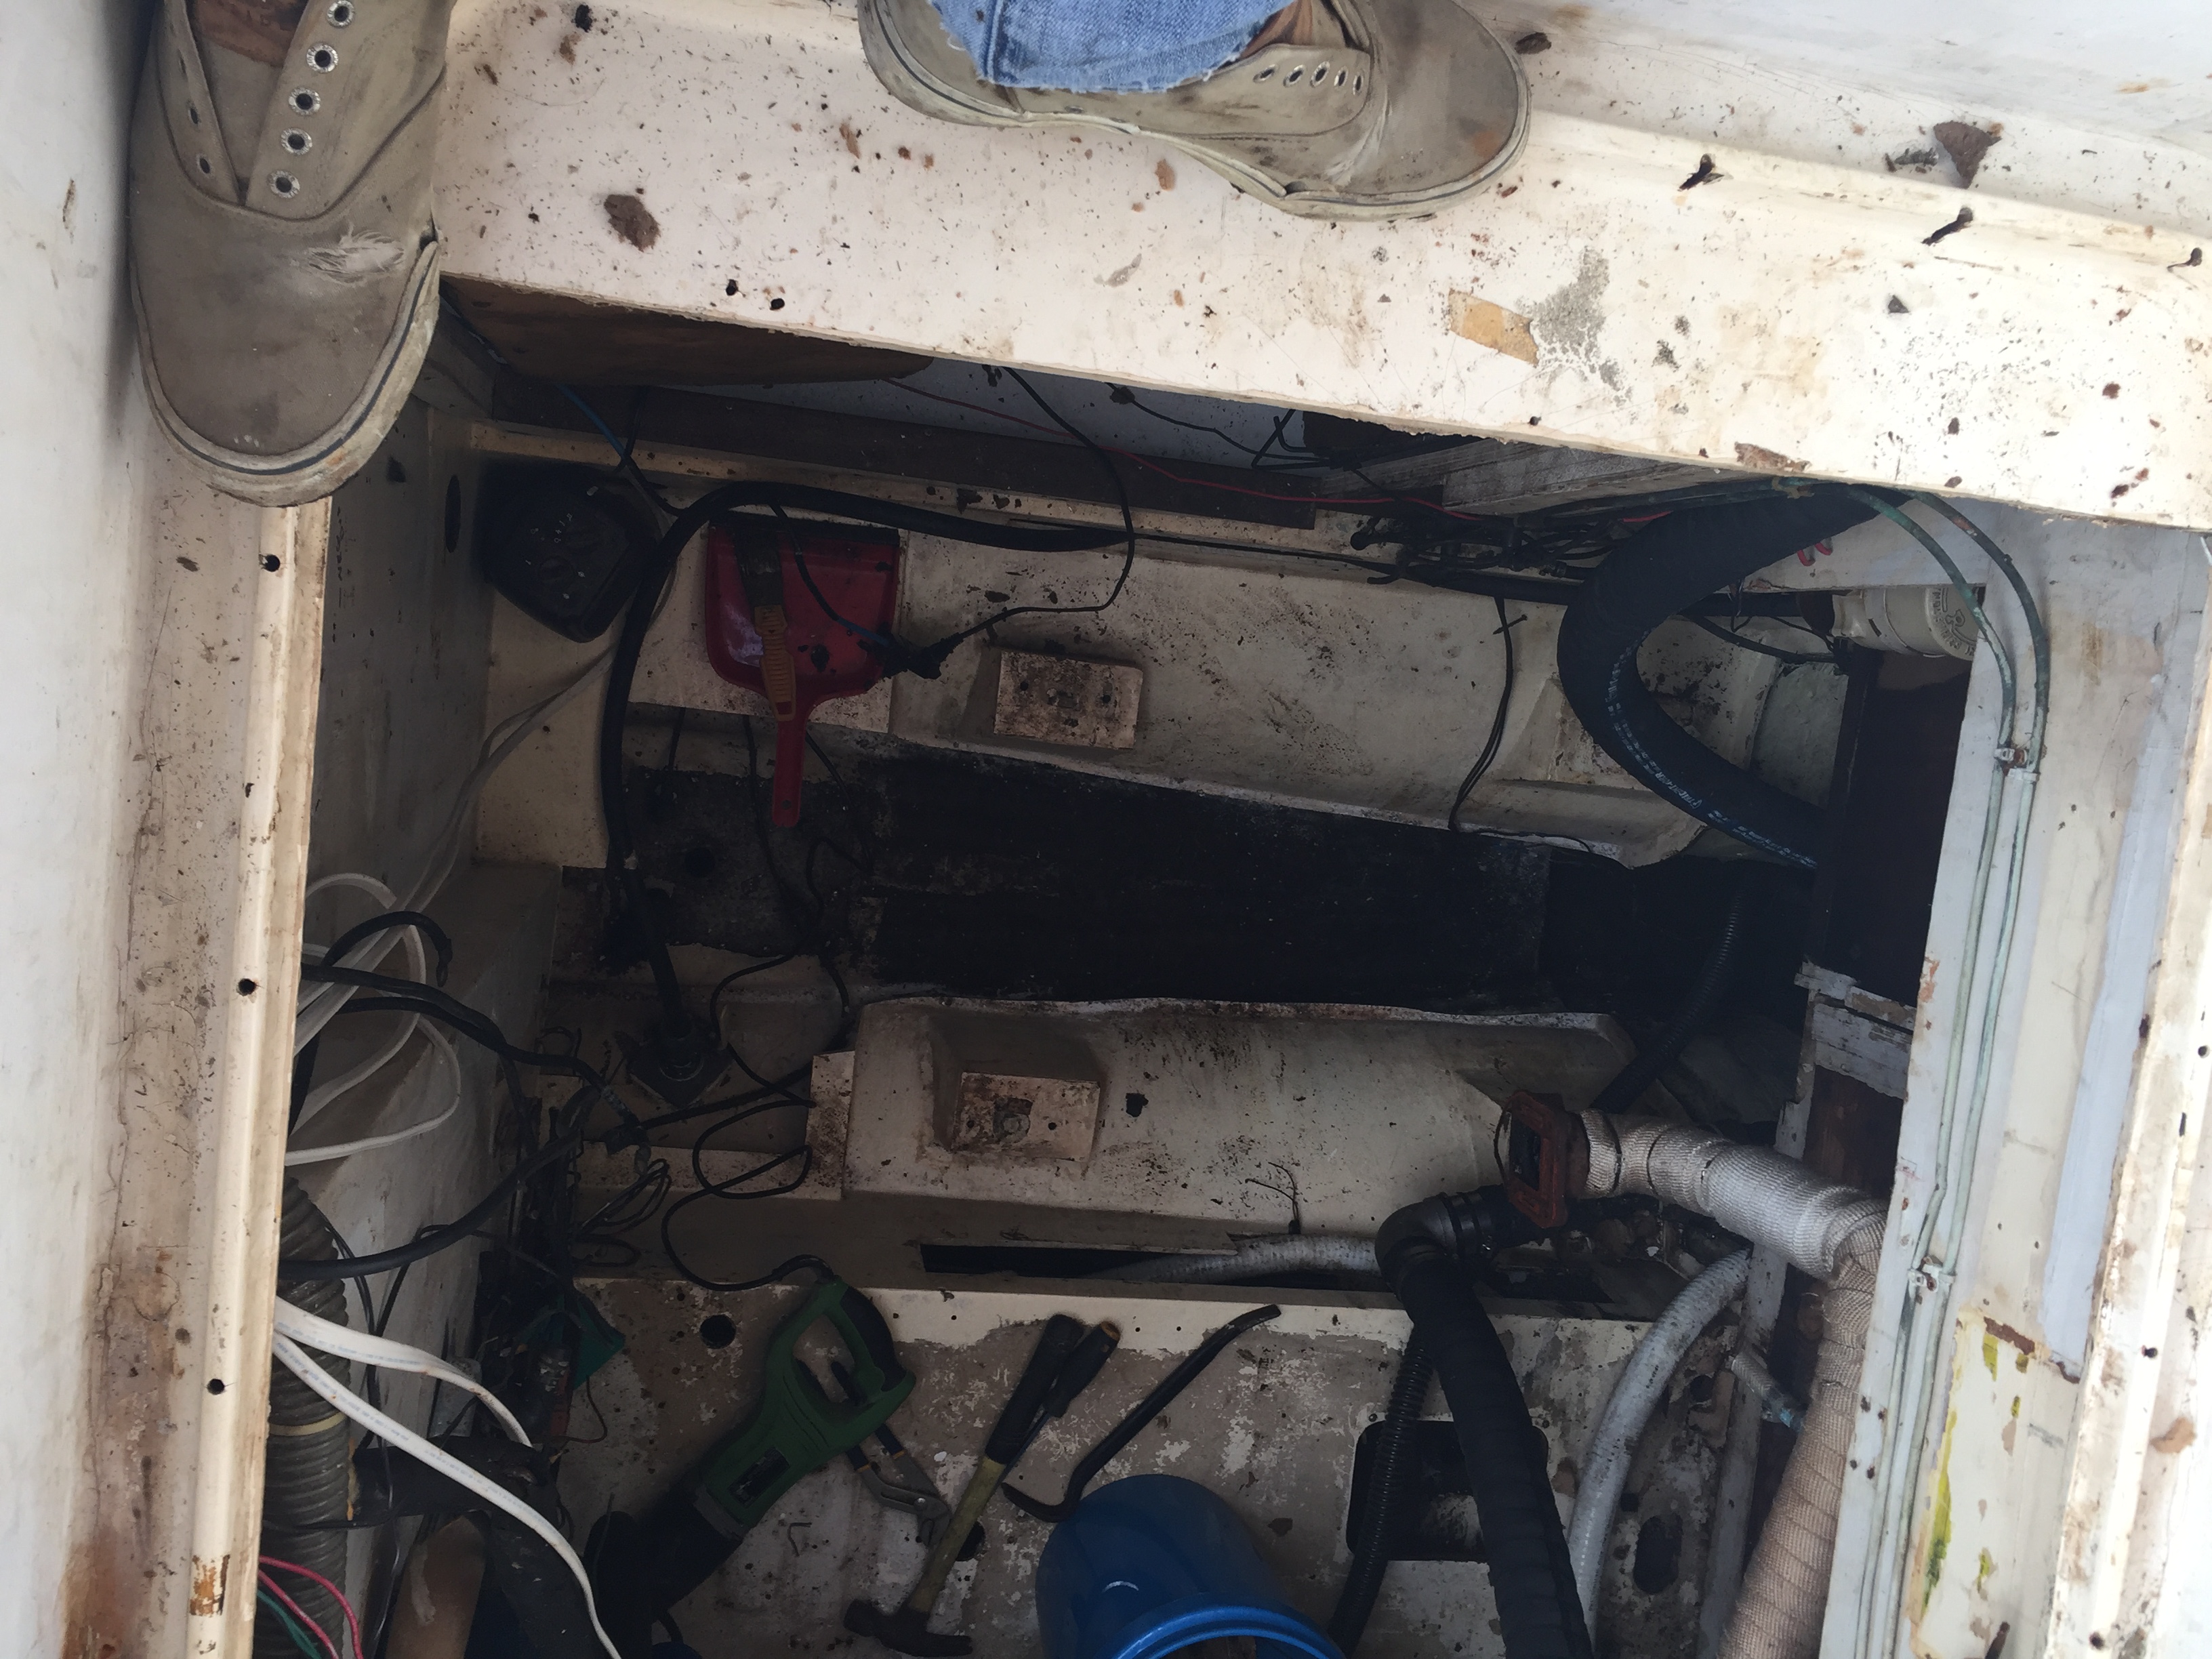
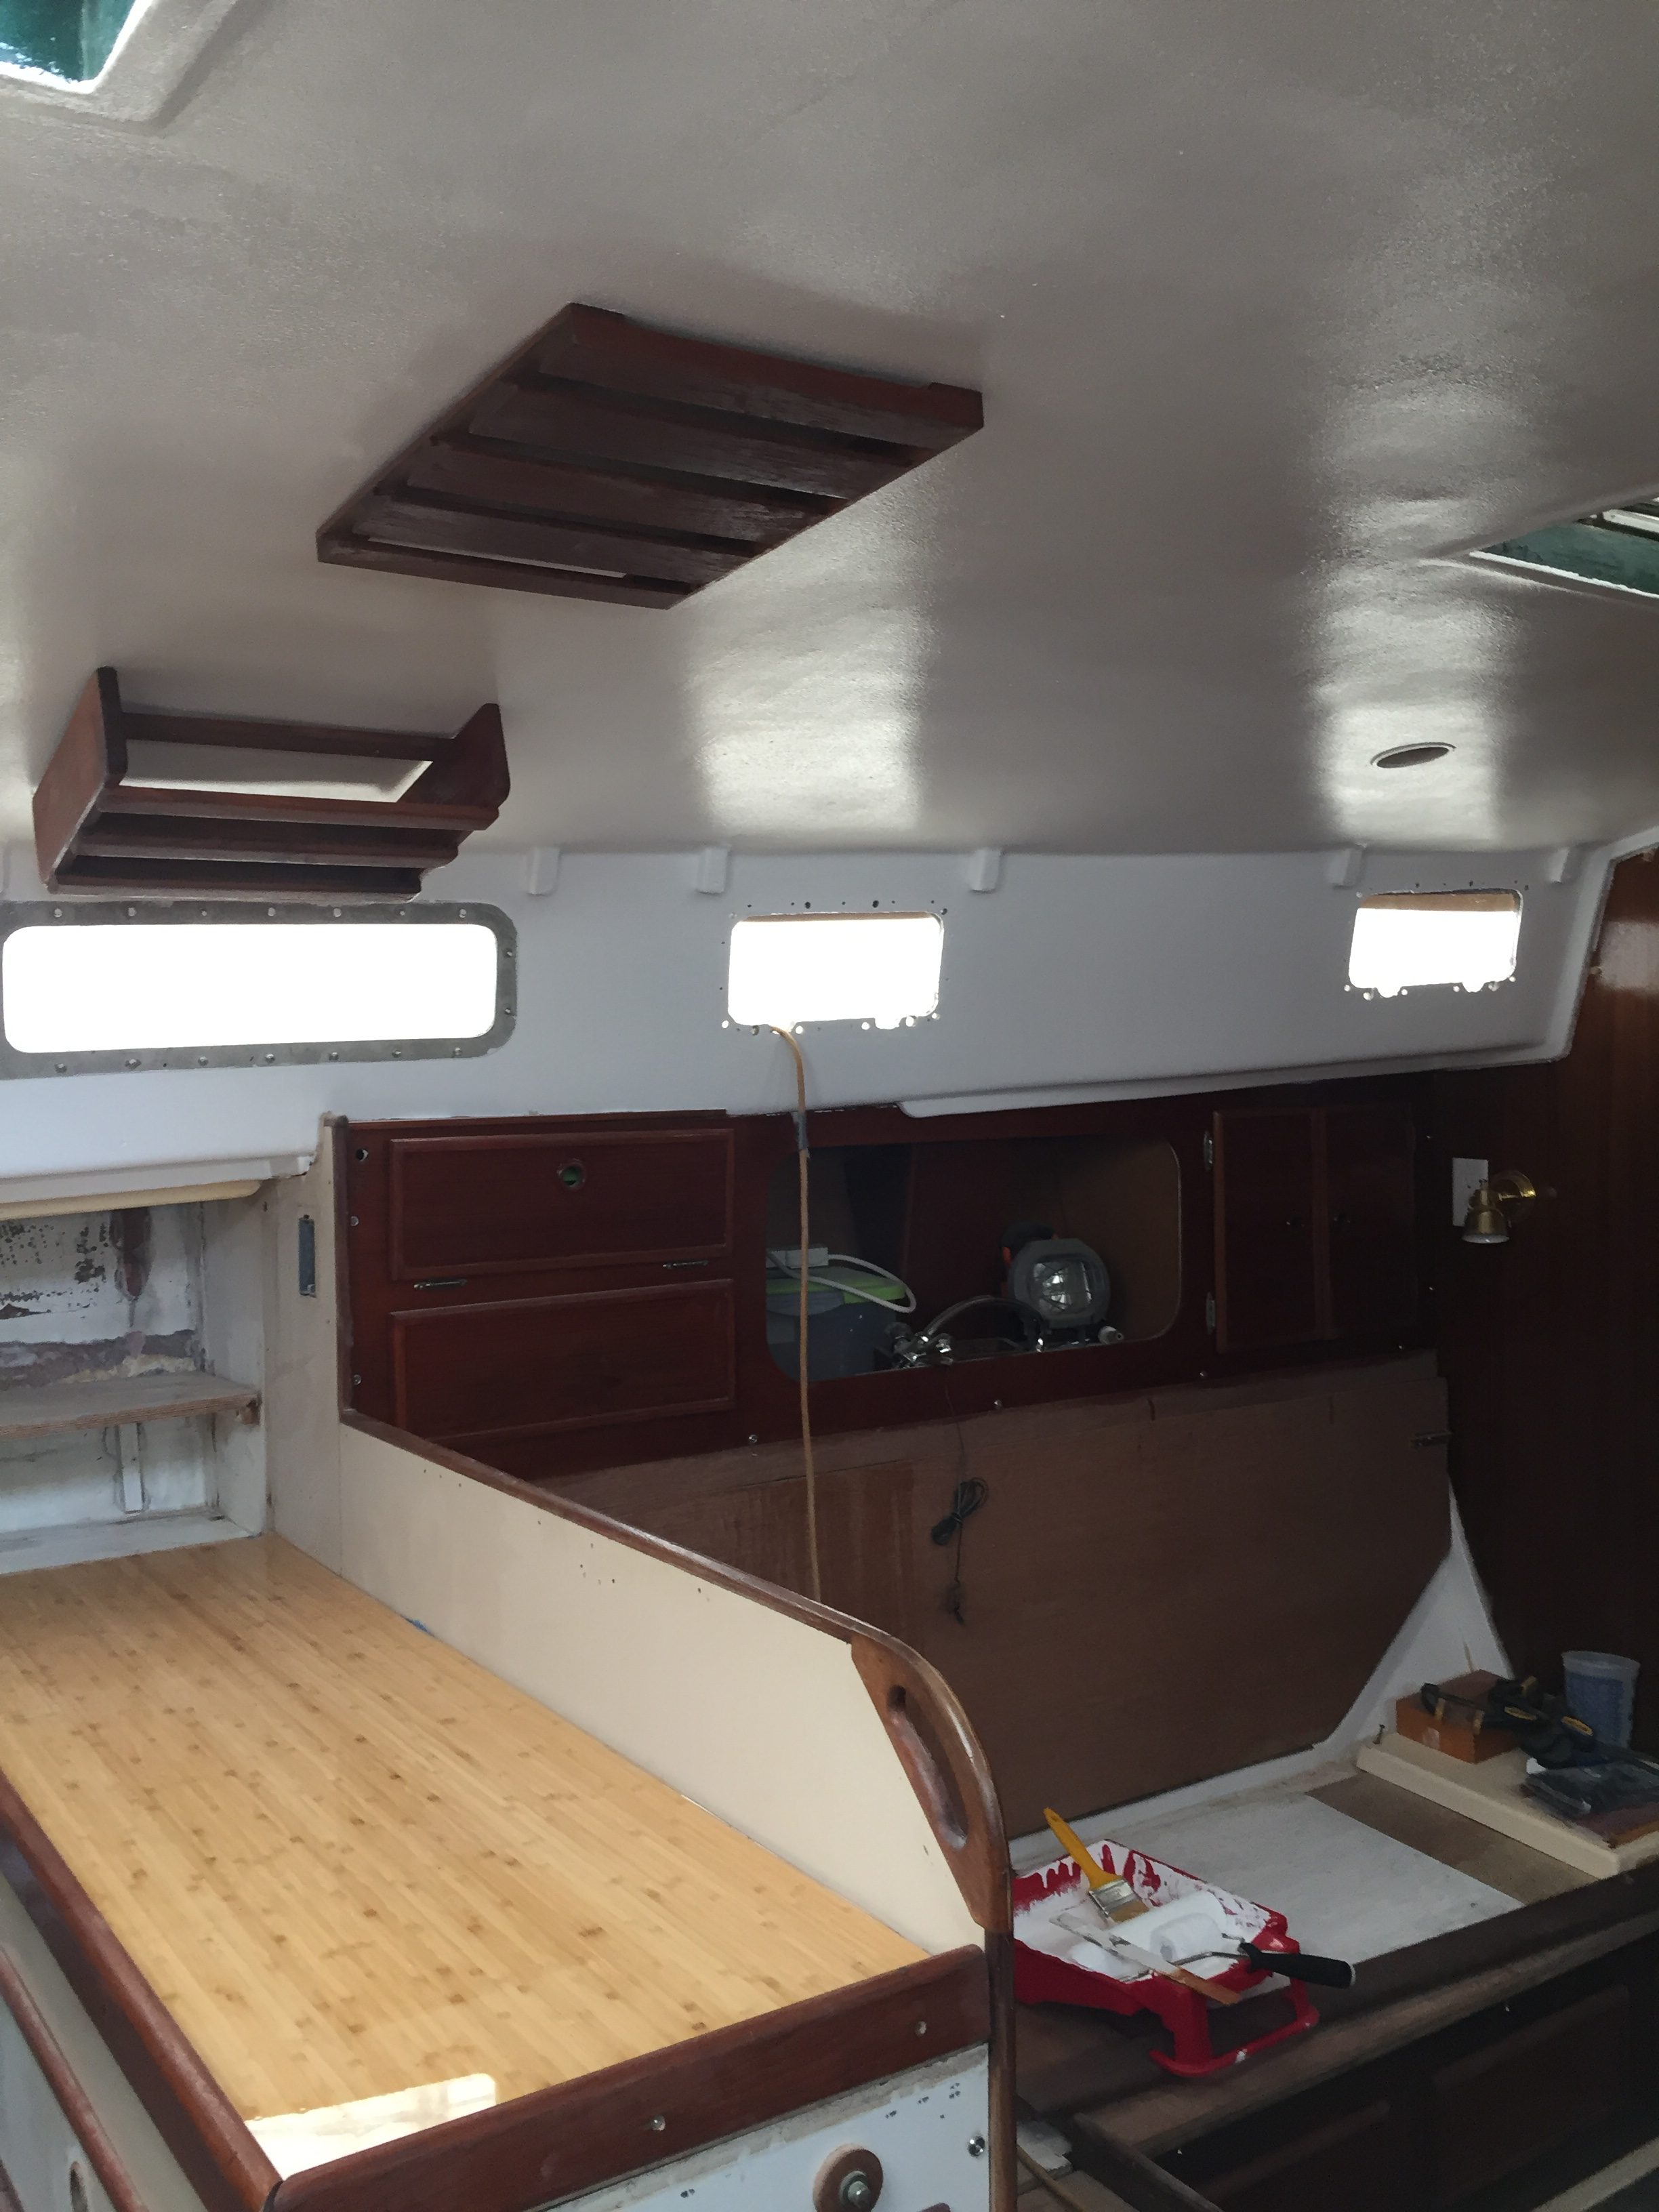
Cutting the top of the tank off, well at least the portion from the old inspection plate to the back was very simple and went really quick. Sawzall and good quality Dewalt metal cutting blades did the trick in minutes. Unfortunately there is not enough room between the tank and the keel to be able to cut it in half with the sawzall. That would have made things a lot easier. once the top was off, I could get down inside and clean it out a lot better.


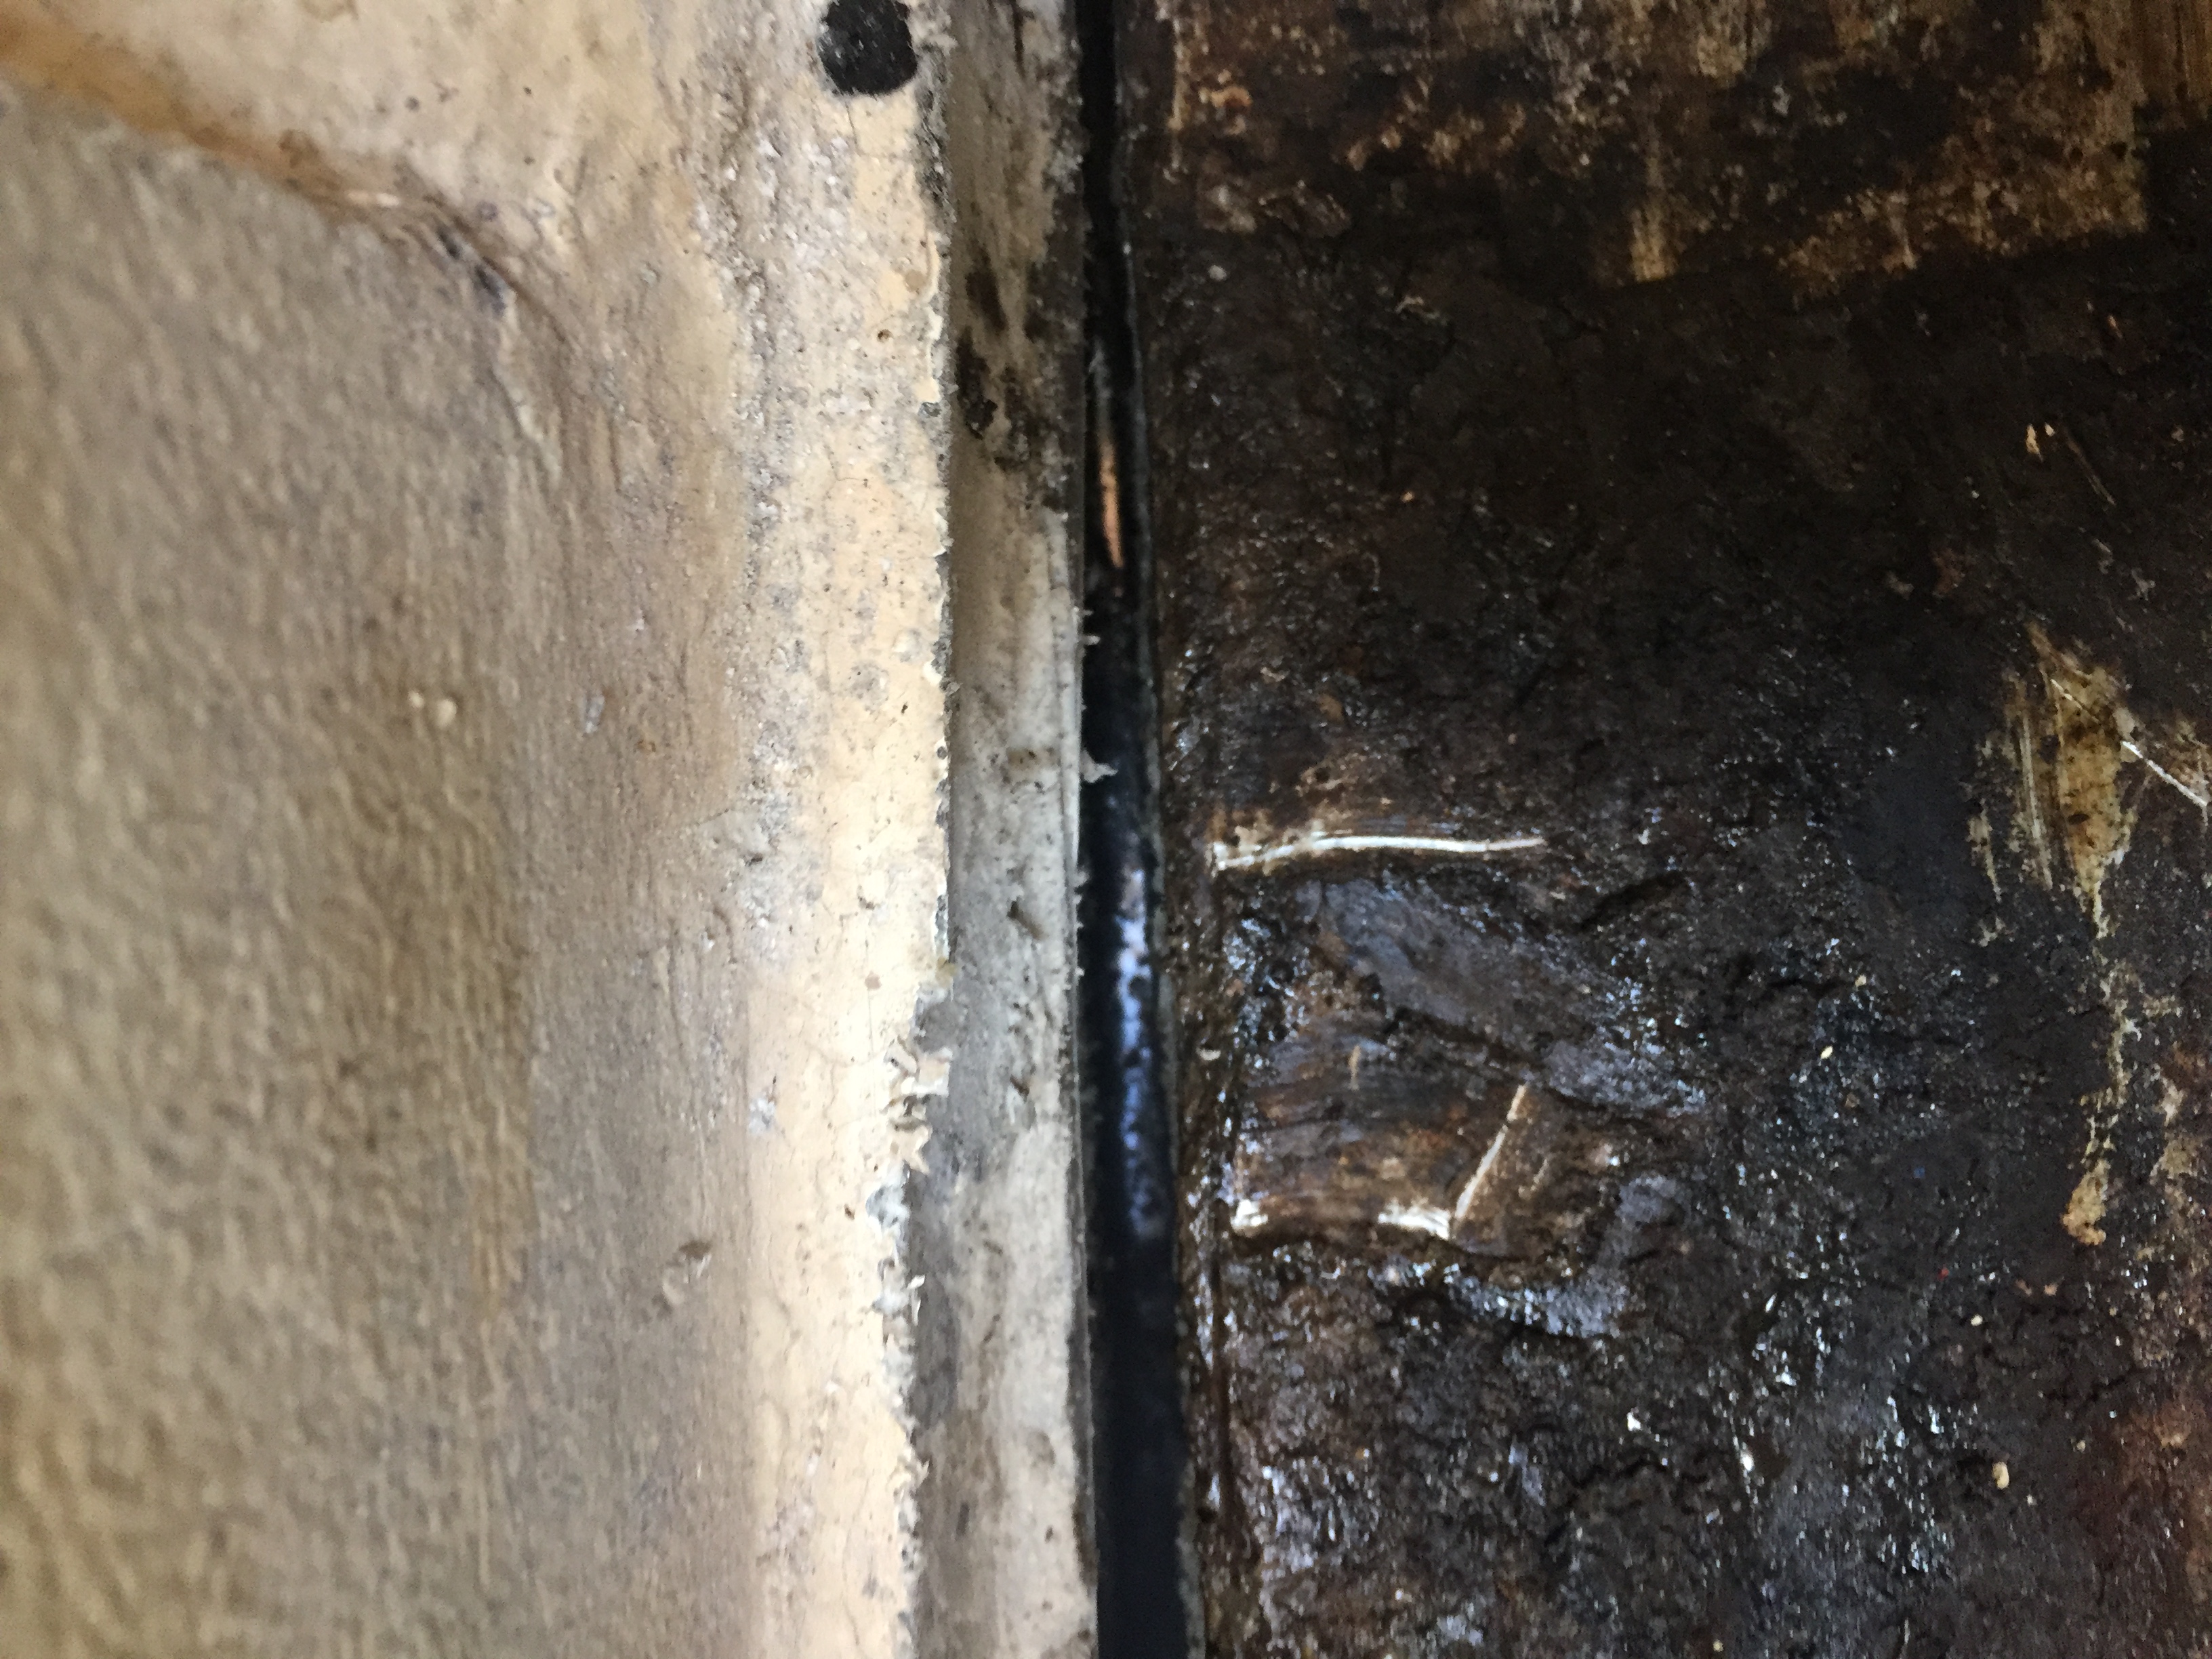
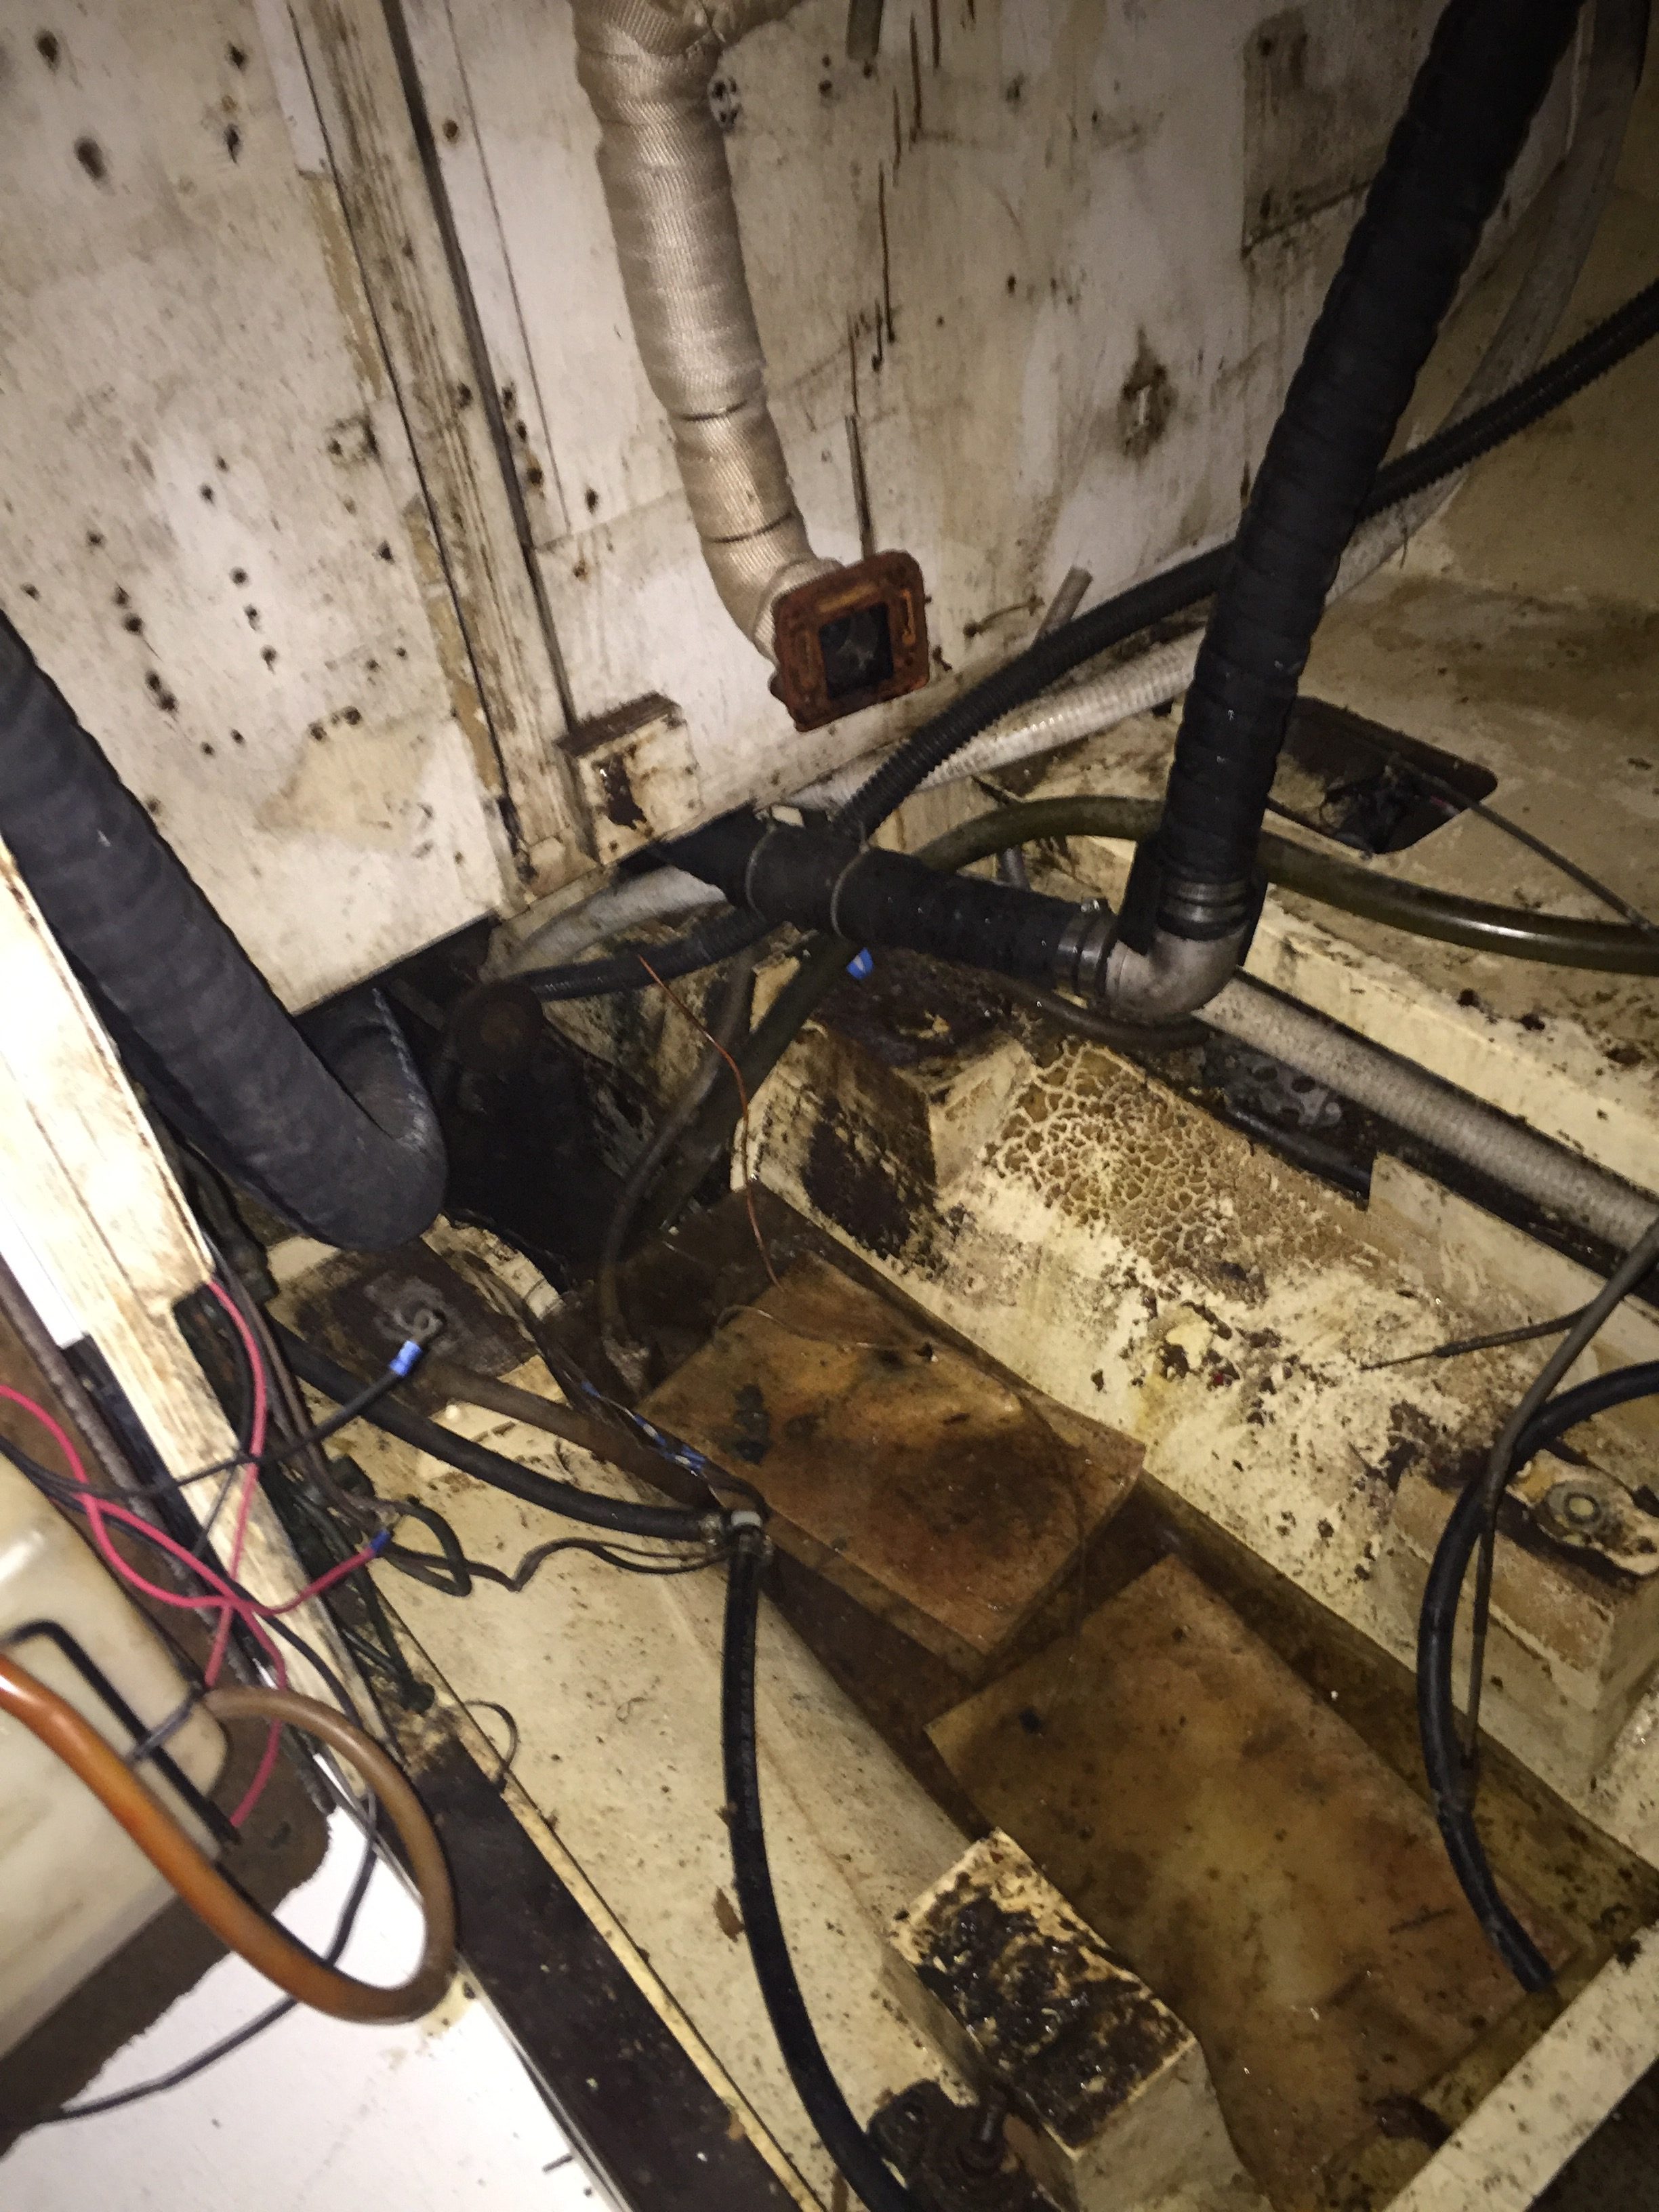
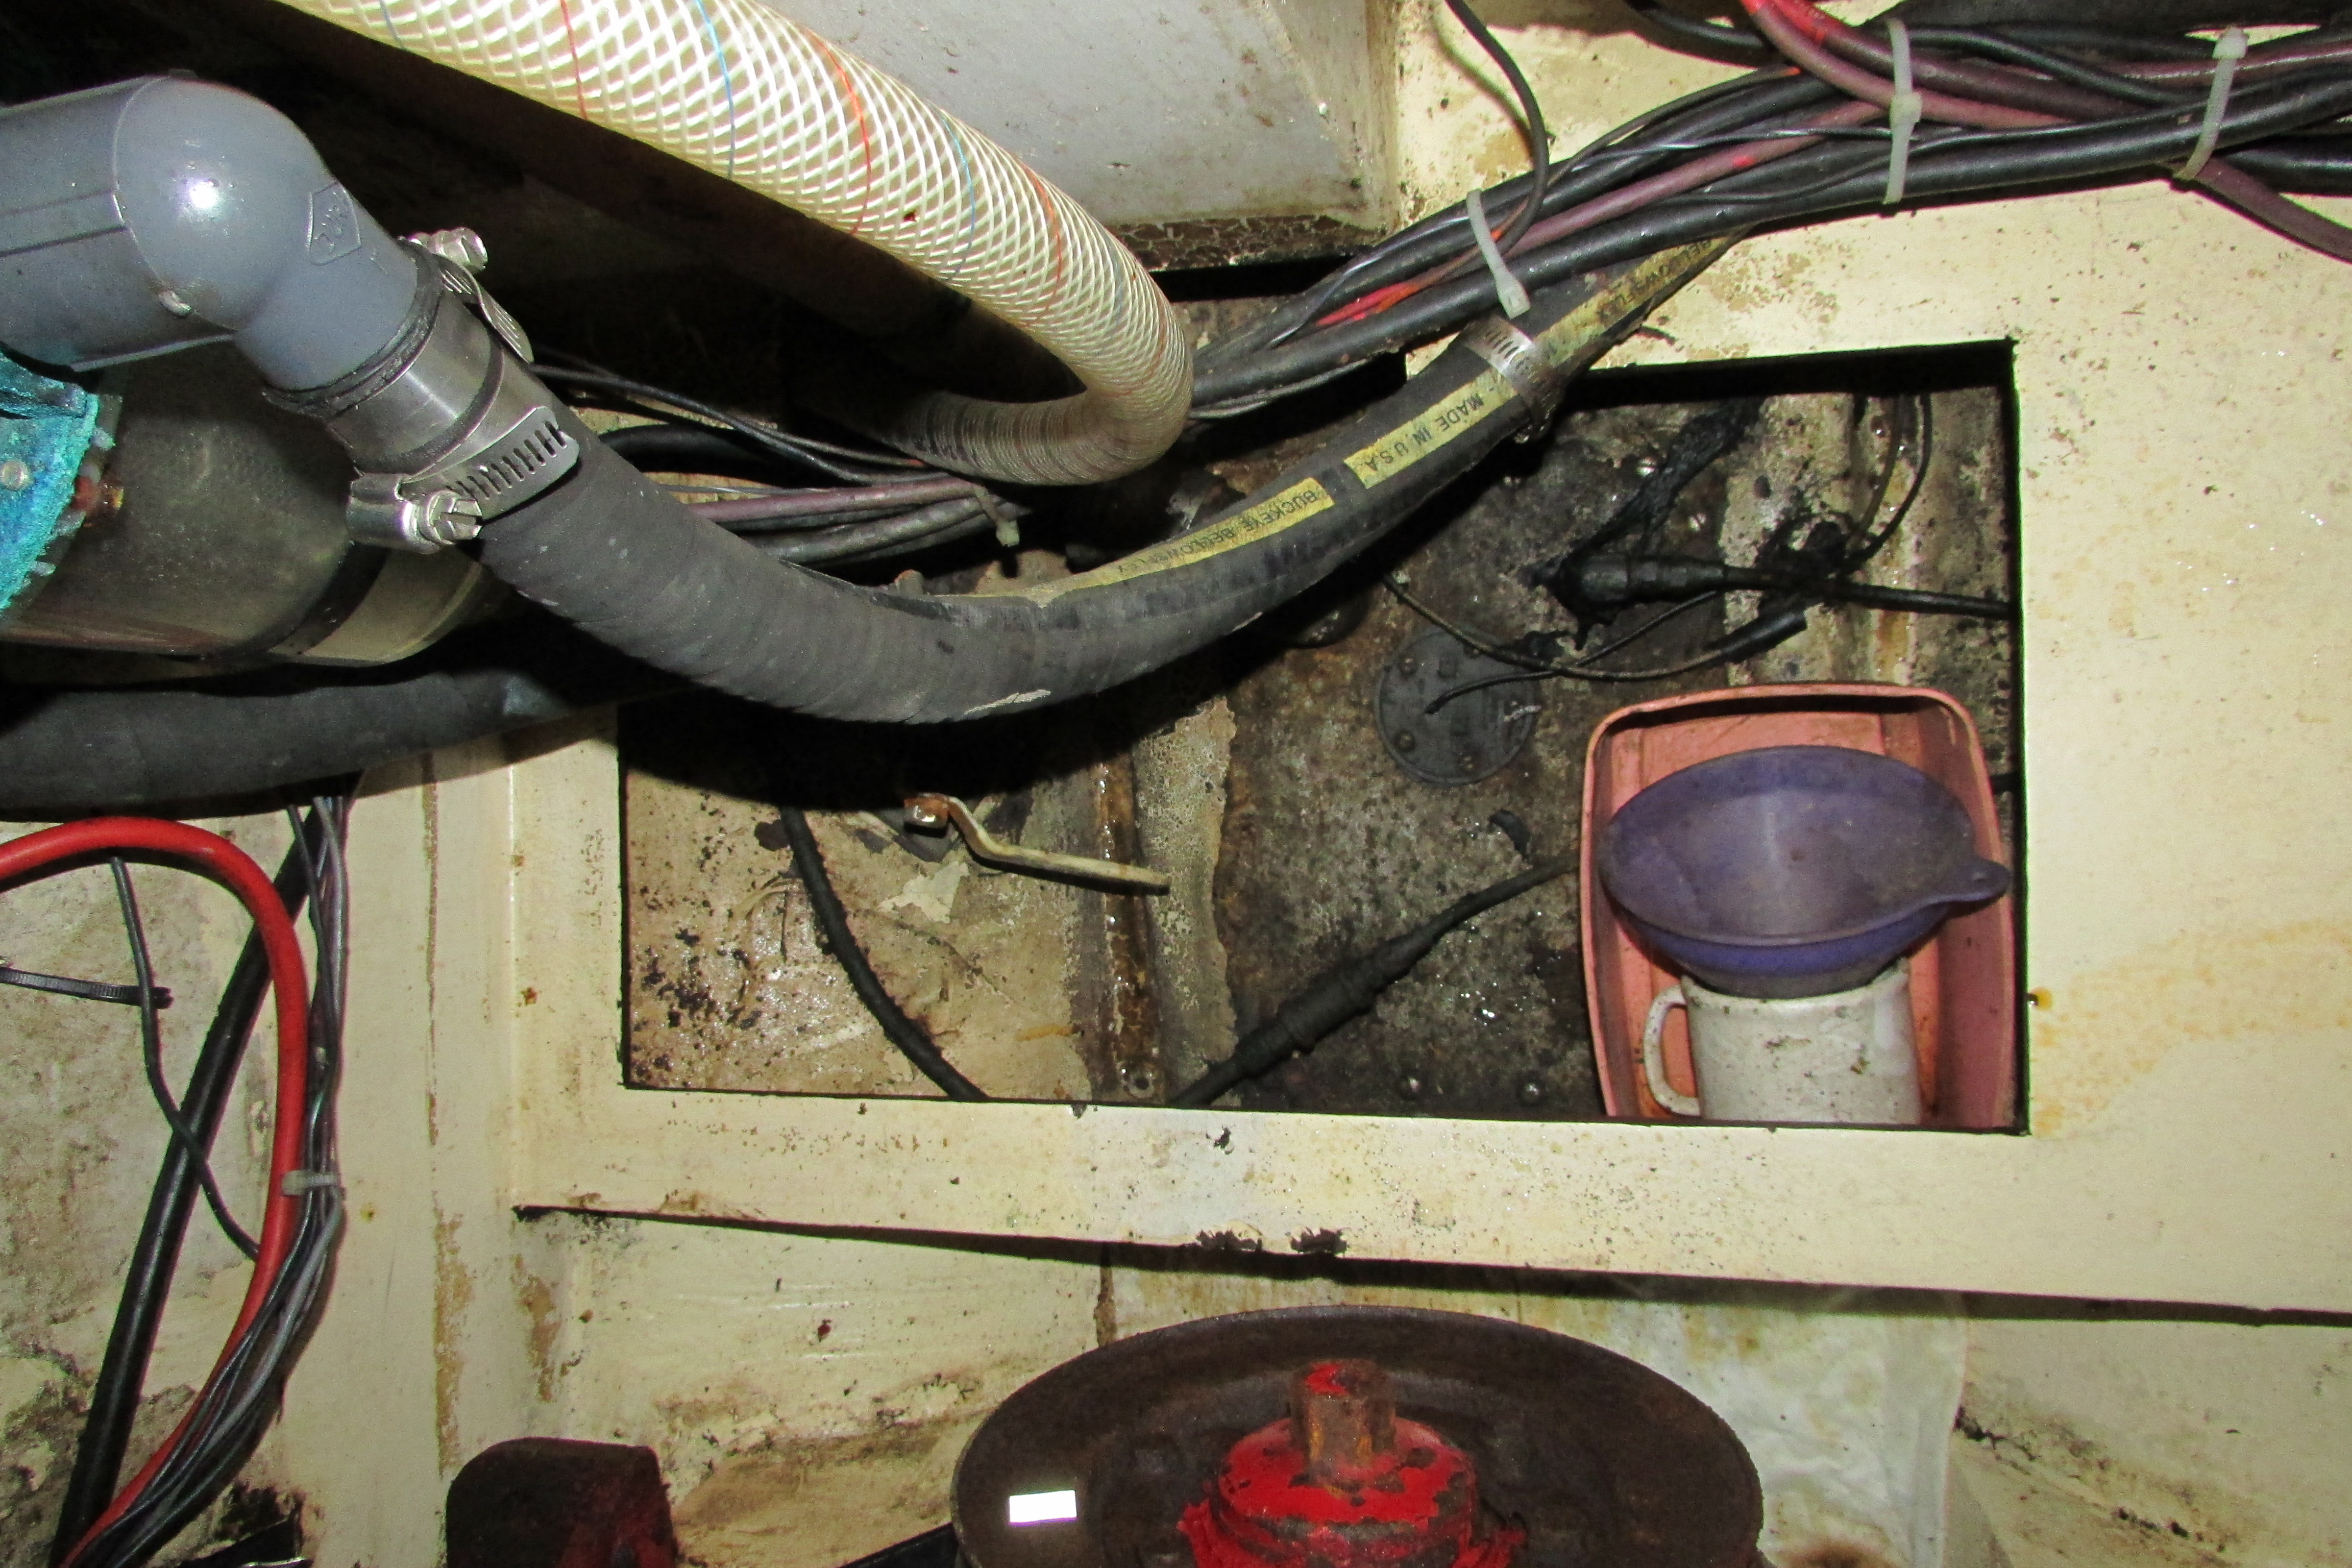
Unfortunately, as I mentioned yesterday, the entire tank is sitting in a puddle of water/diesel/grease and god only knows what else. The inside of the tank had a water mixture with what looks like beer fermentation foam on it. All of this had to be scooped out into 5 gallon pails, carried up on deck, down the ladder and dumped into a 40 gallon drum. And this process had to be repeated as I cut down the sides of the tank and all of the other goop poured in.

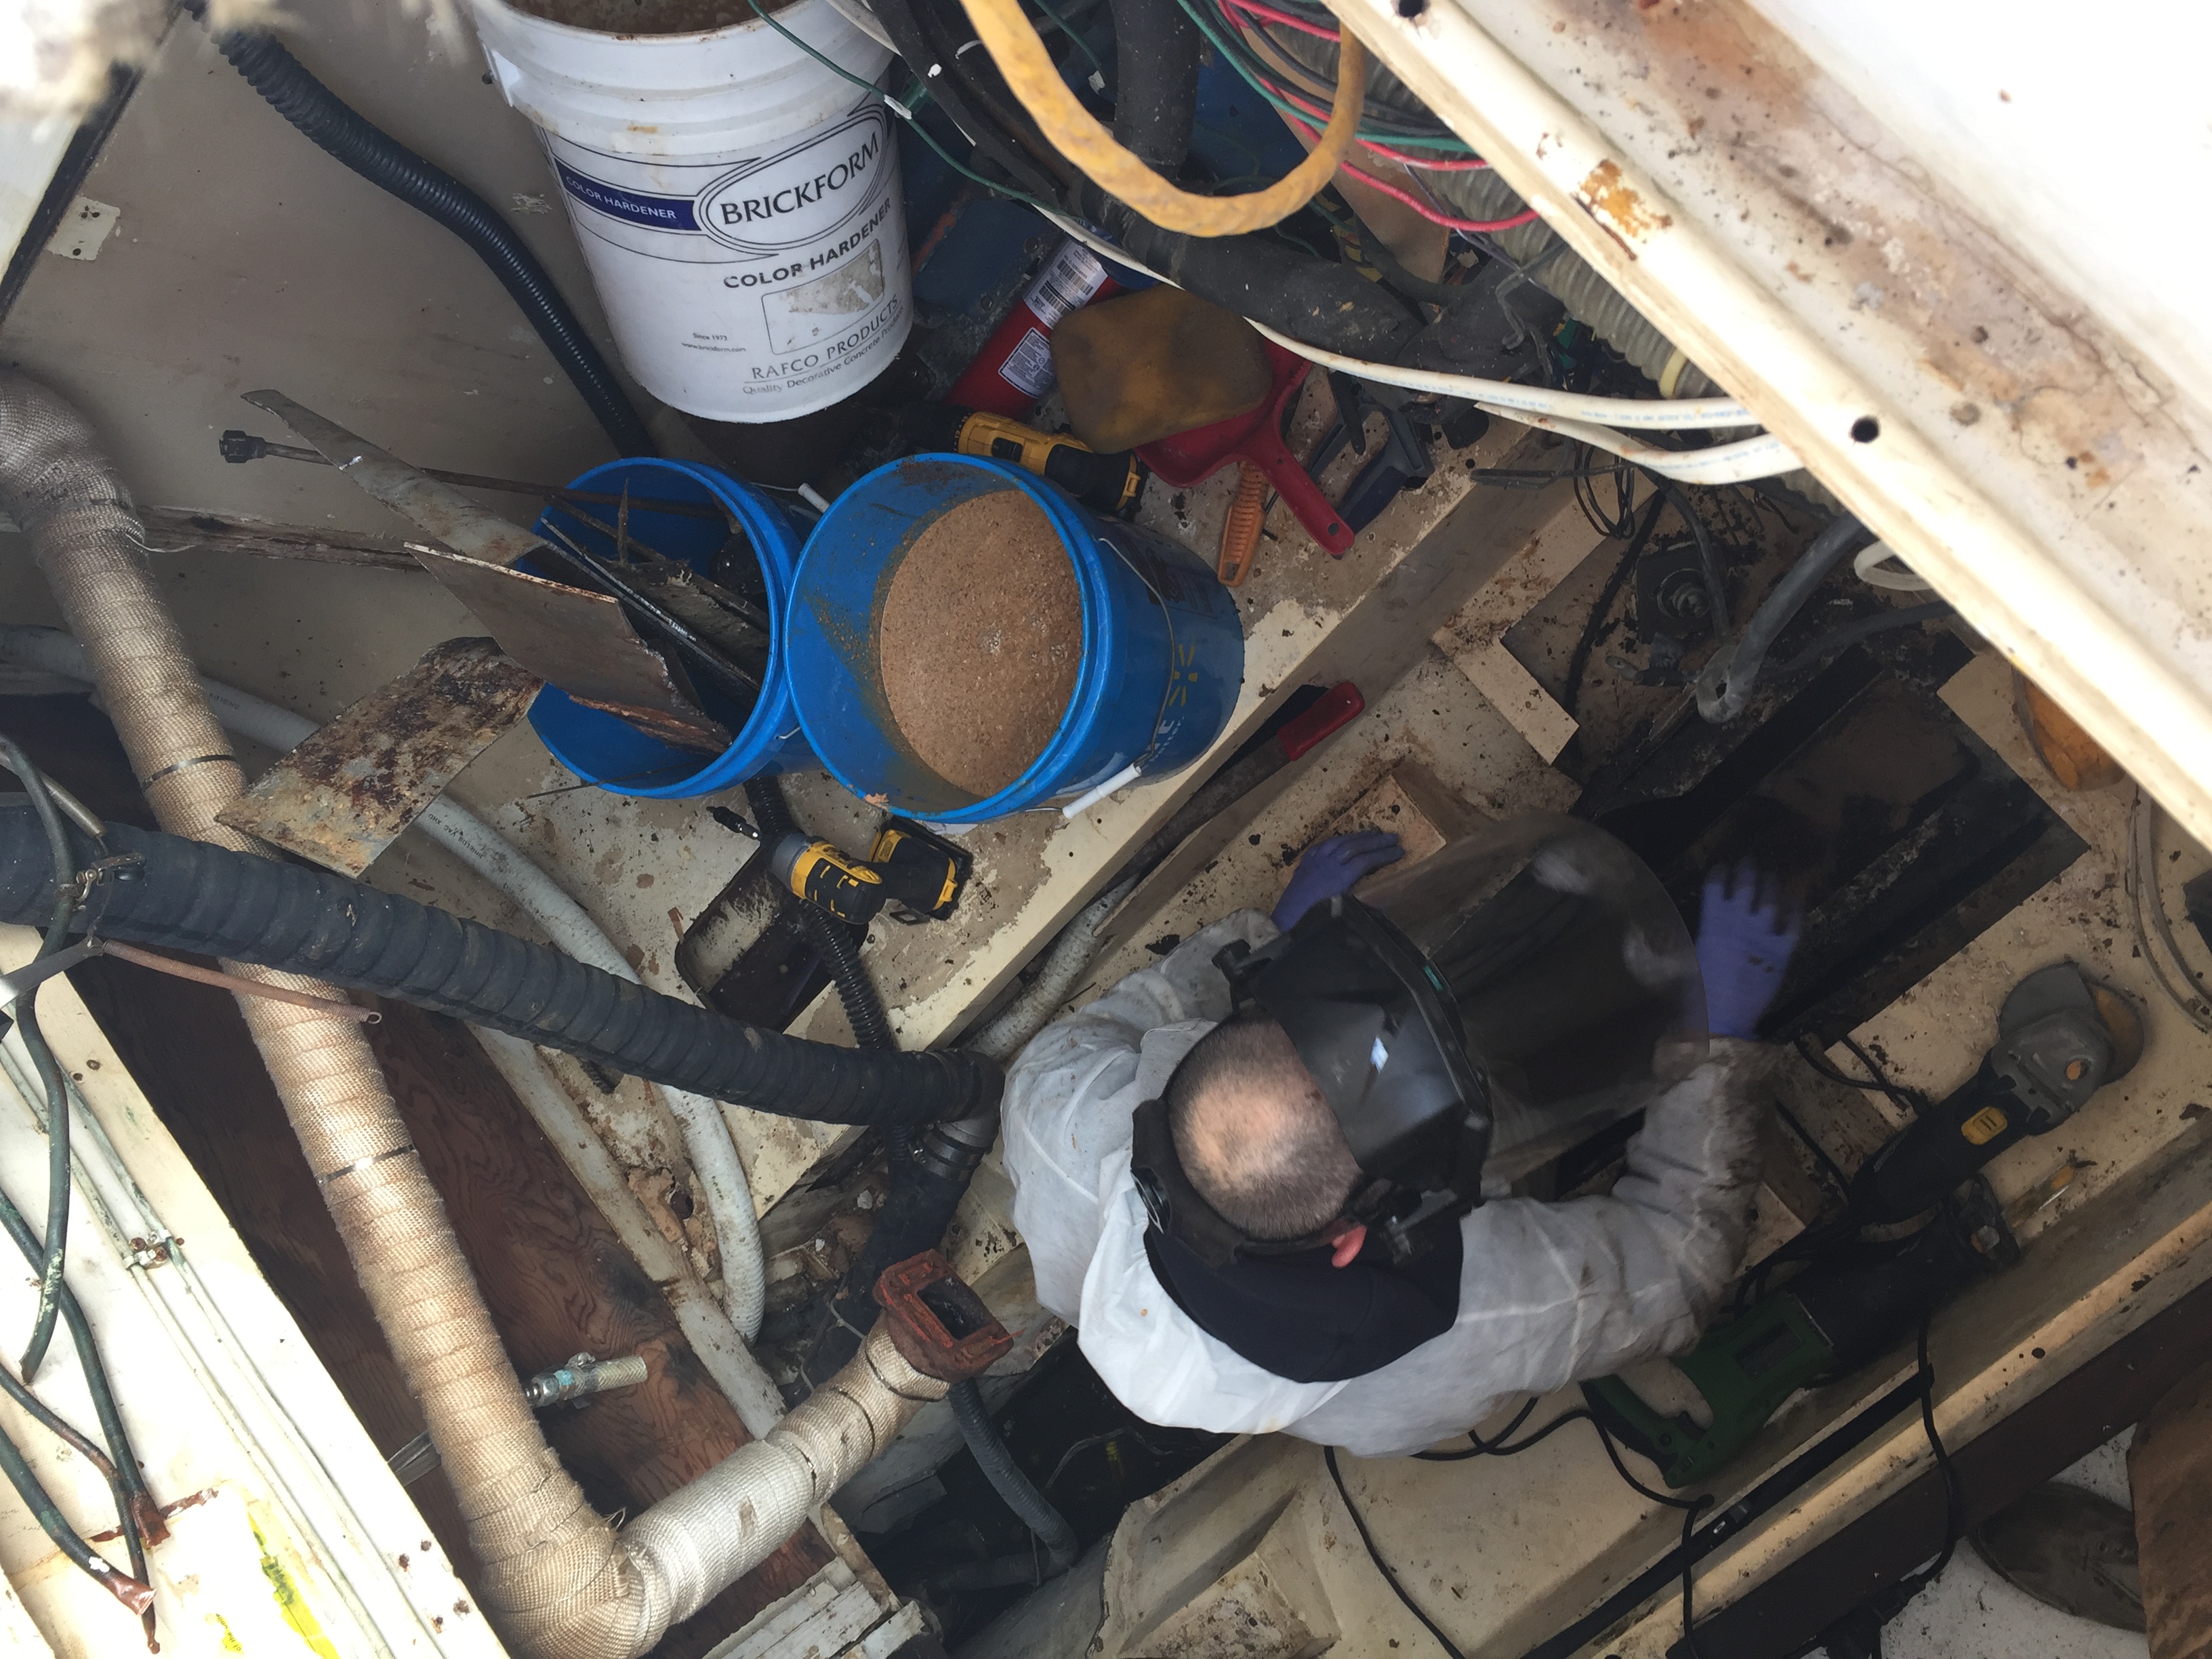
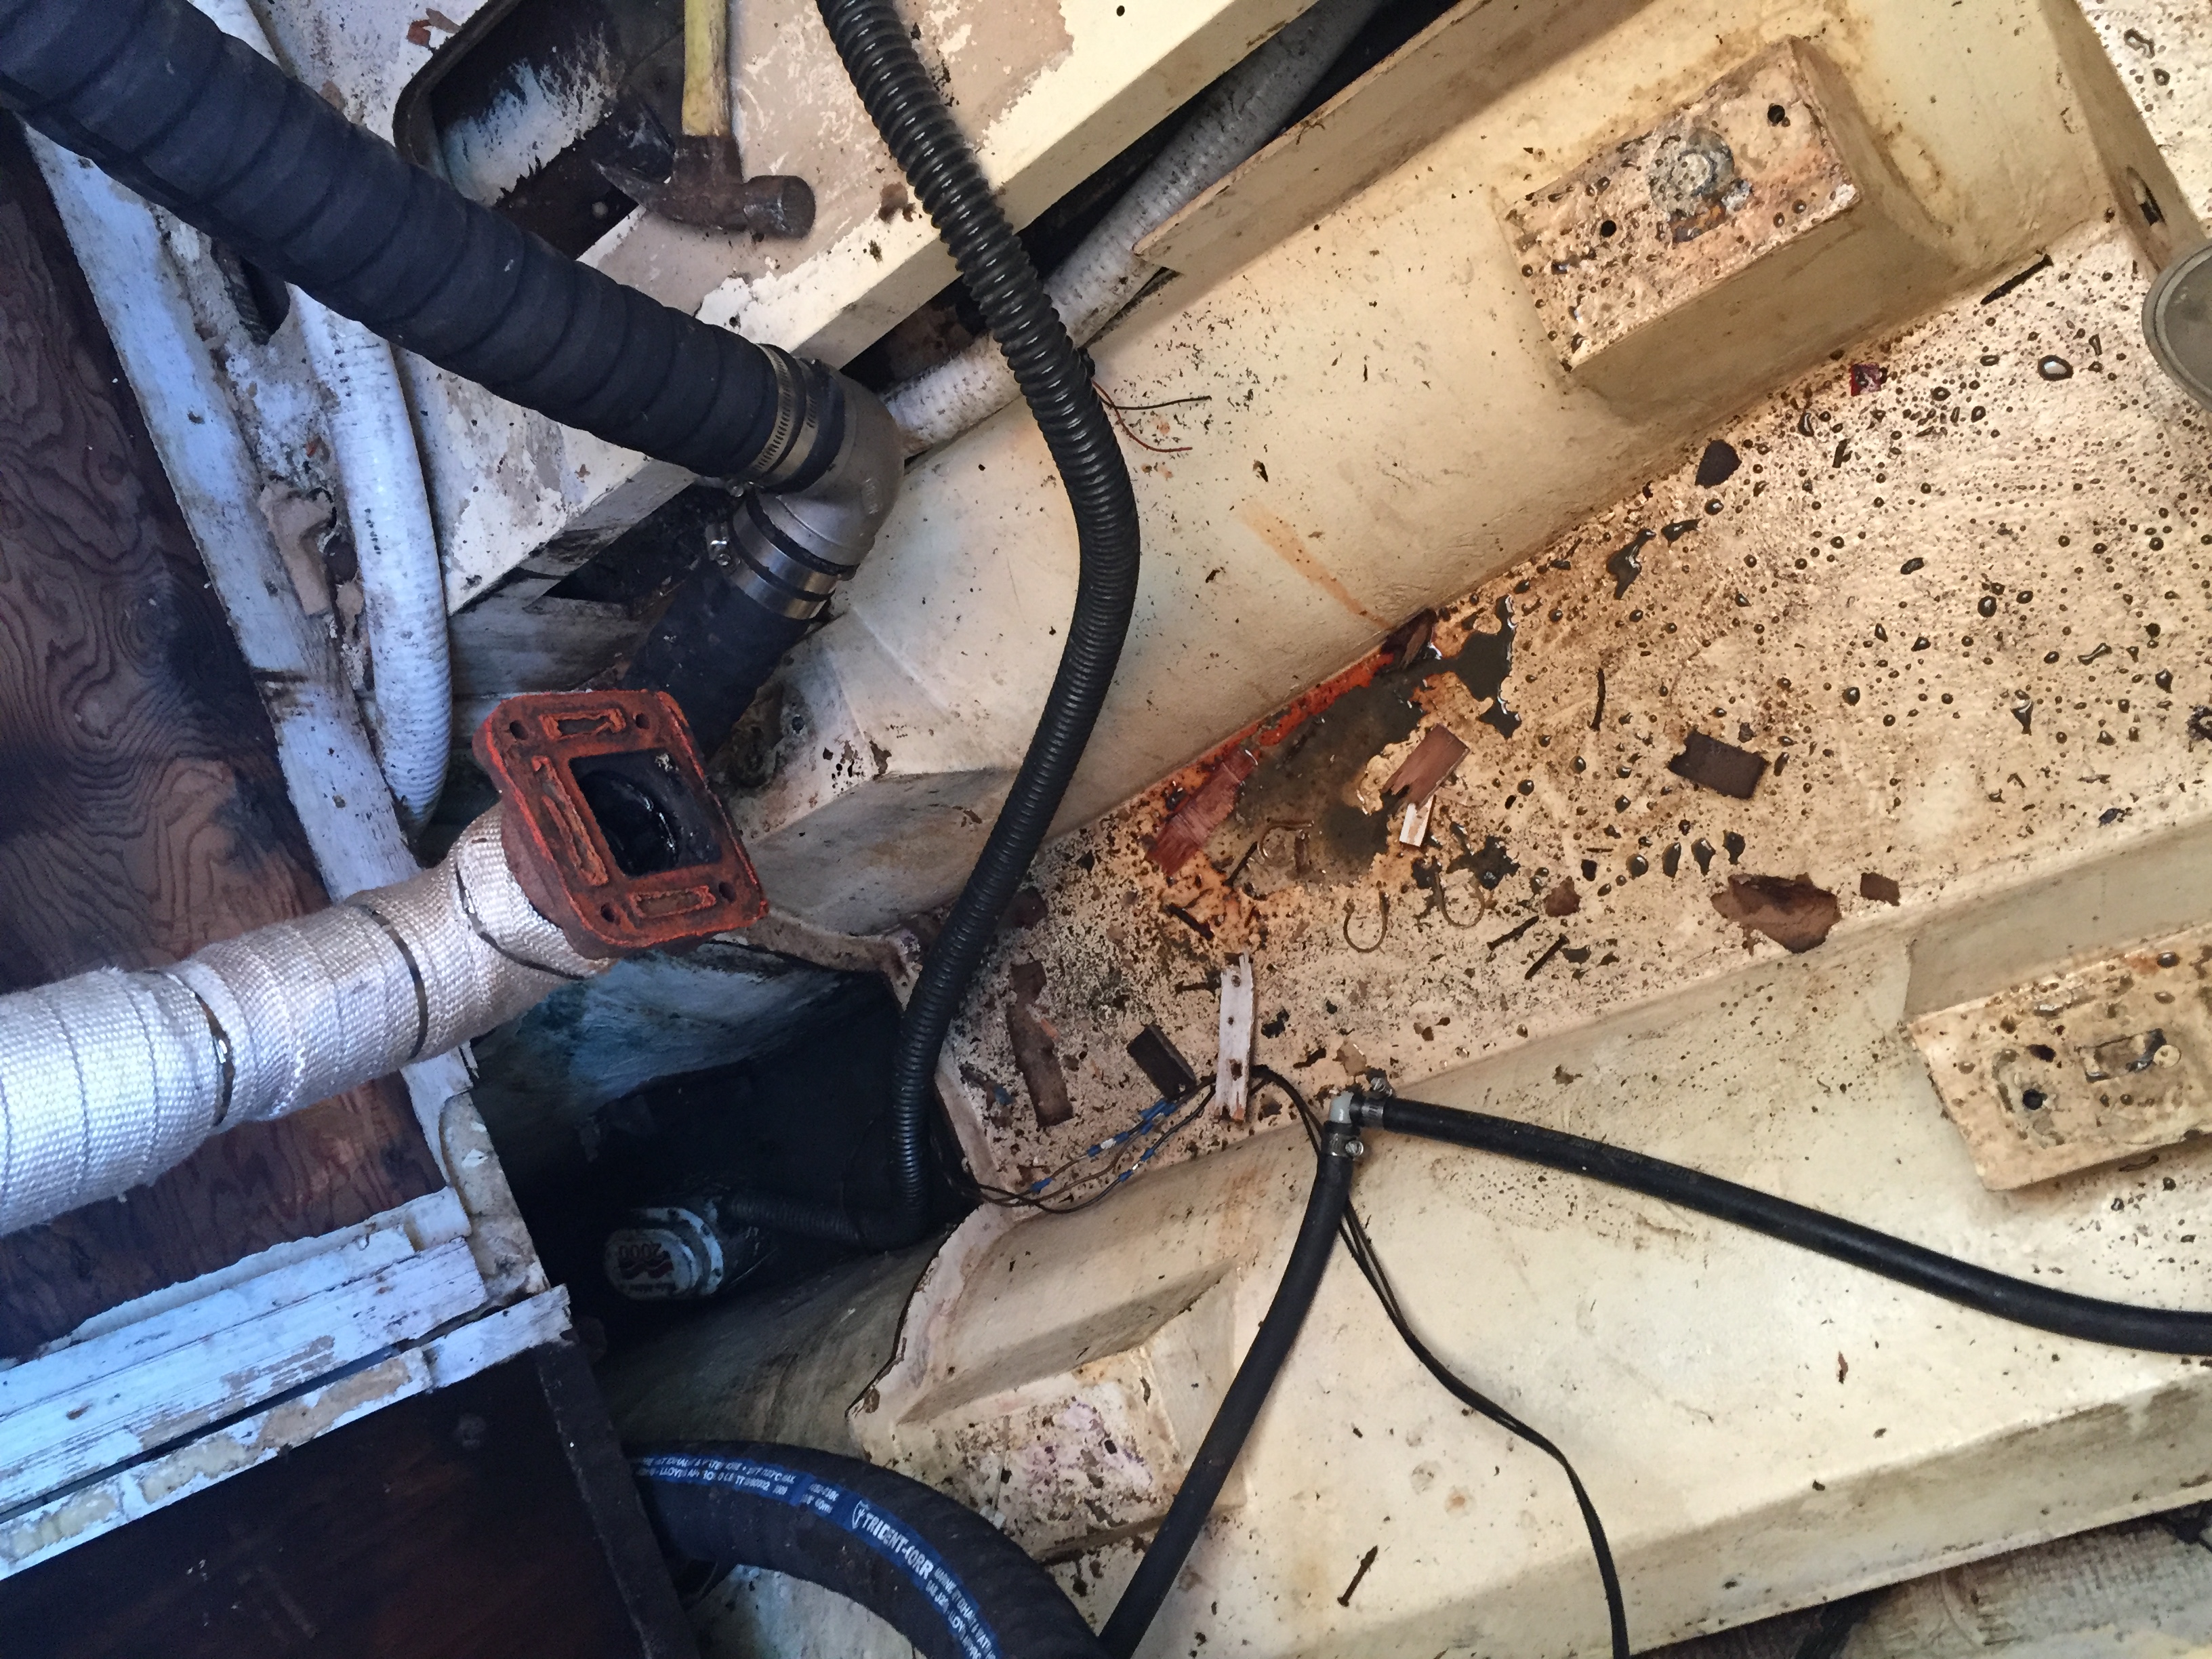
In order to cut the tank in two, I had to stand inside of it and cut it with the grinder and a good cutting blade. This process in itself isn’t really all that time consuming with the exception of all the liquid on the outside of the tank. Every time I cut the side down an inch, I had to wait until the liquid drained down to that level. This is what took so bloody long. I could not simply cut it in two as I was standing in the liquid using power tools. Not my idea of a fun day to electrocute myself removing a keel tank.


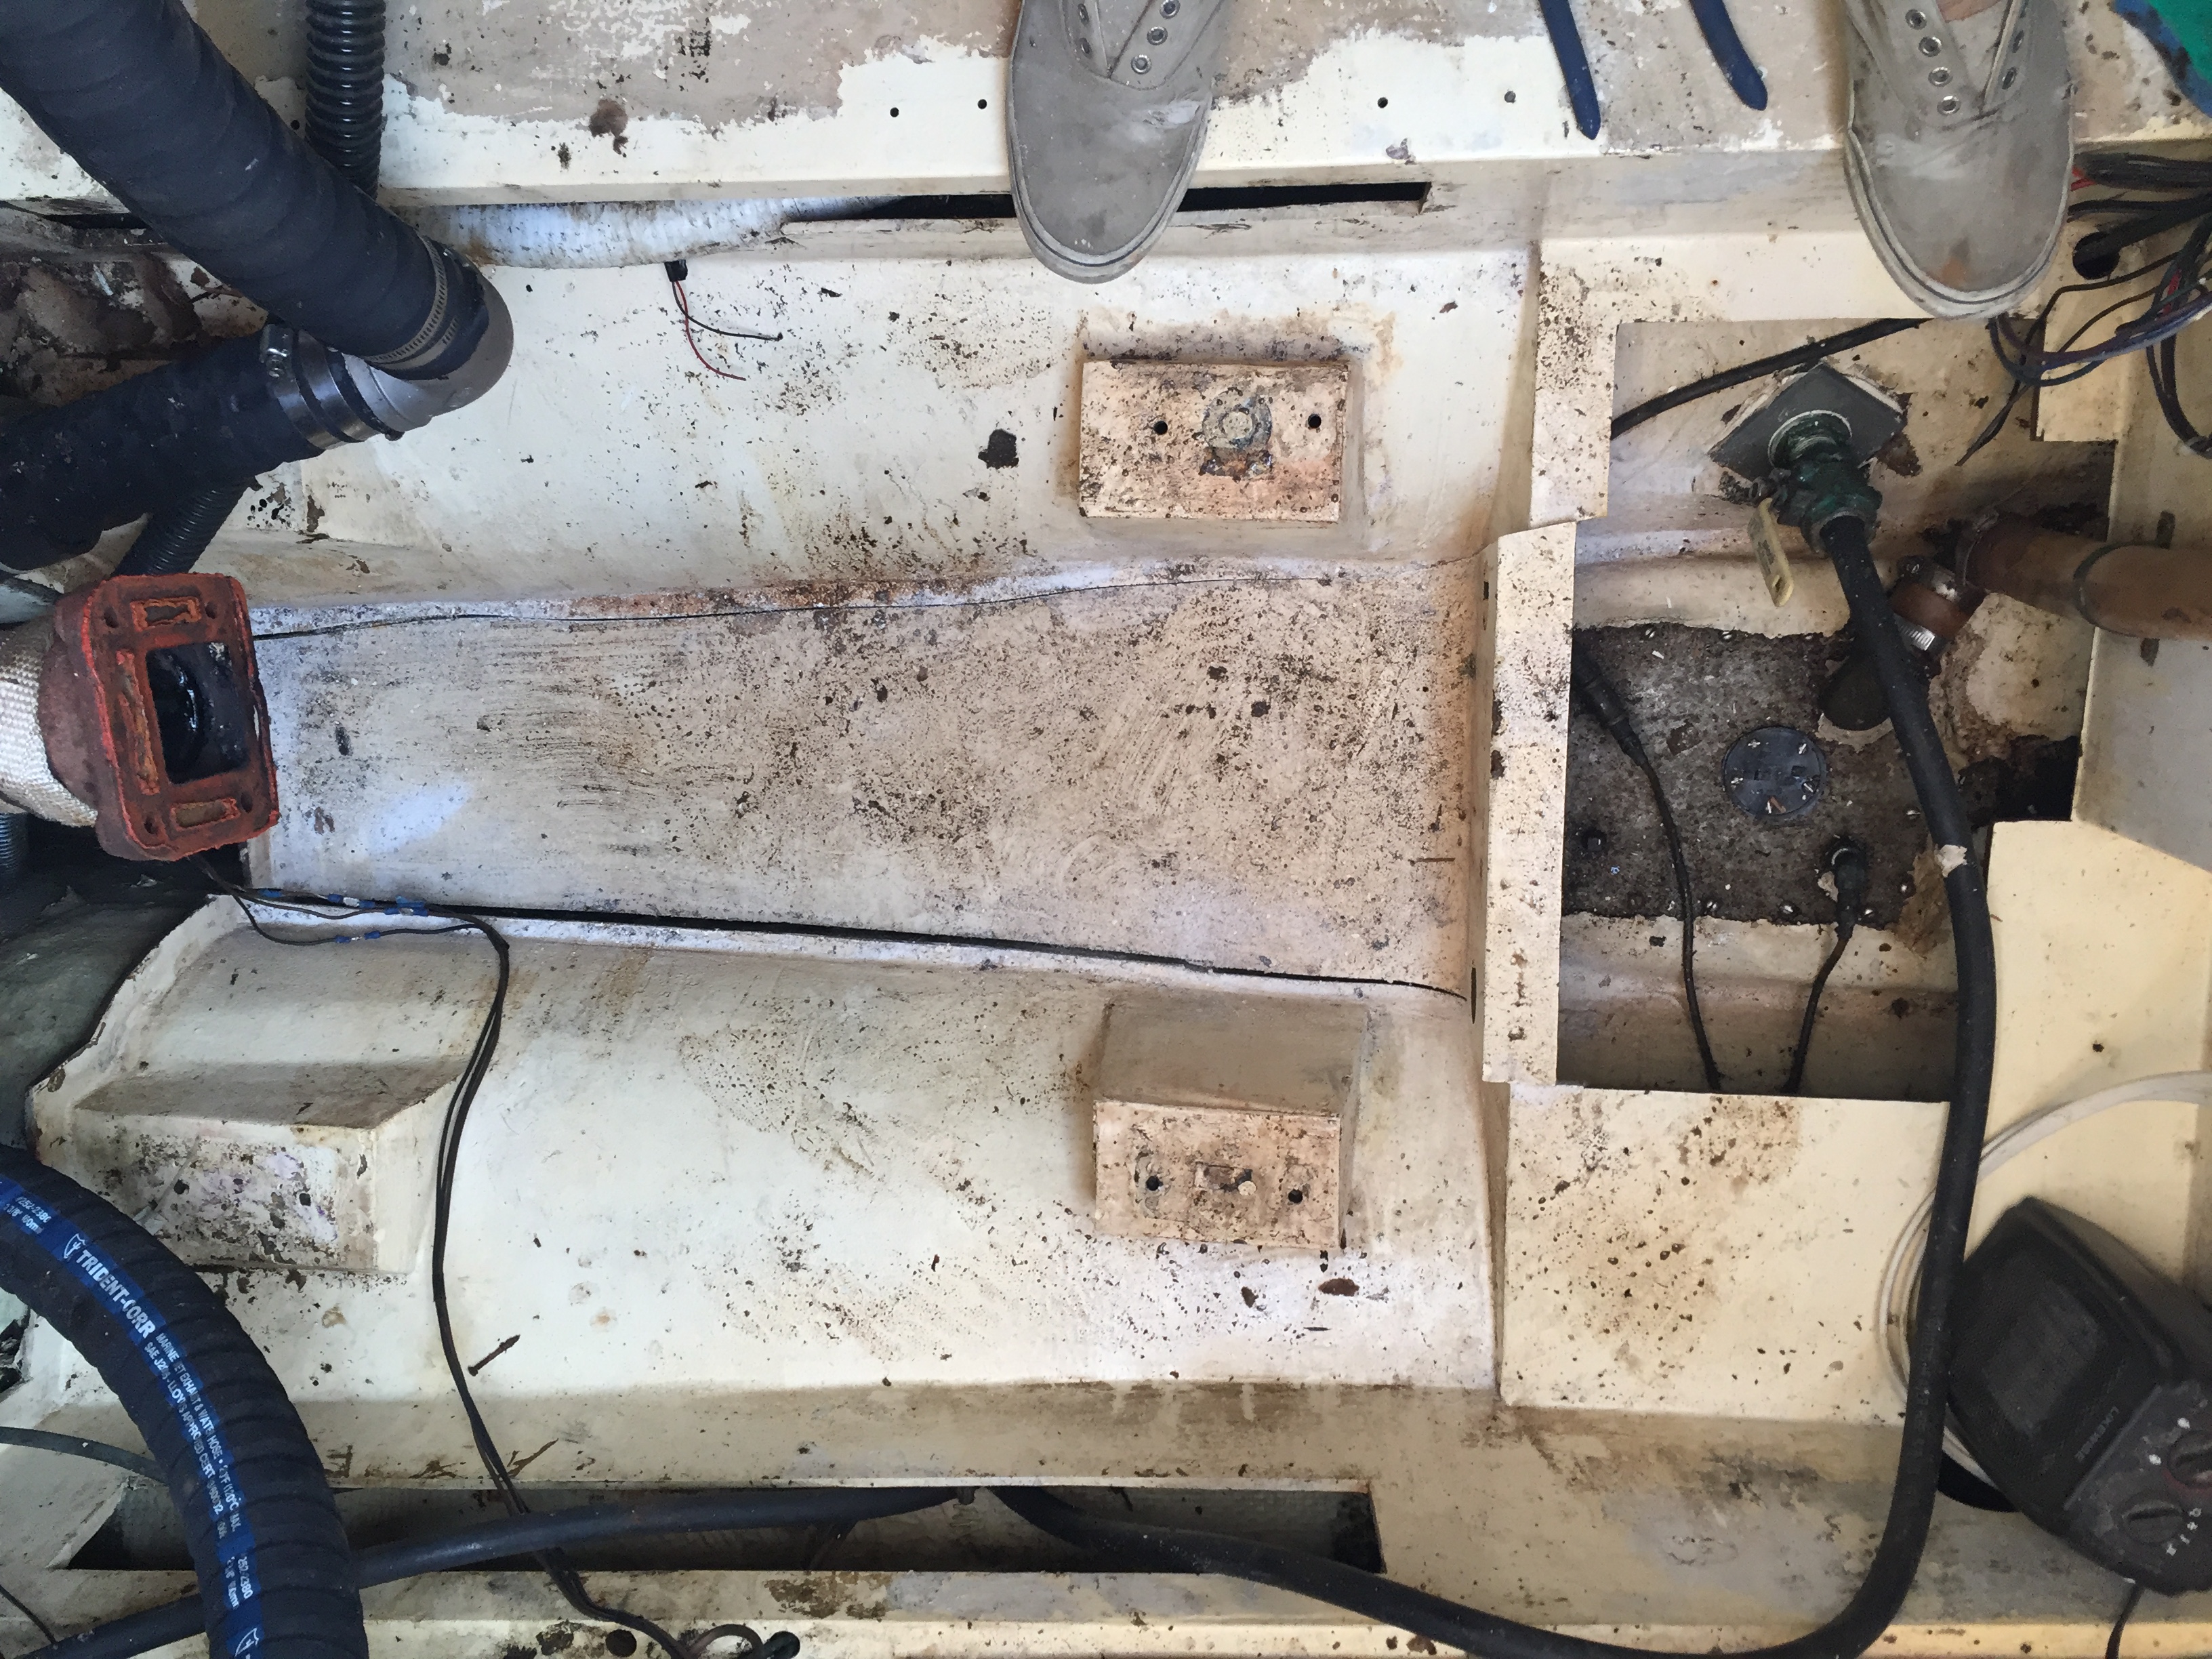
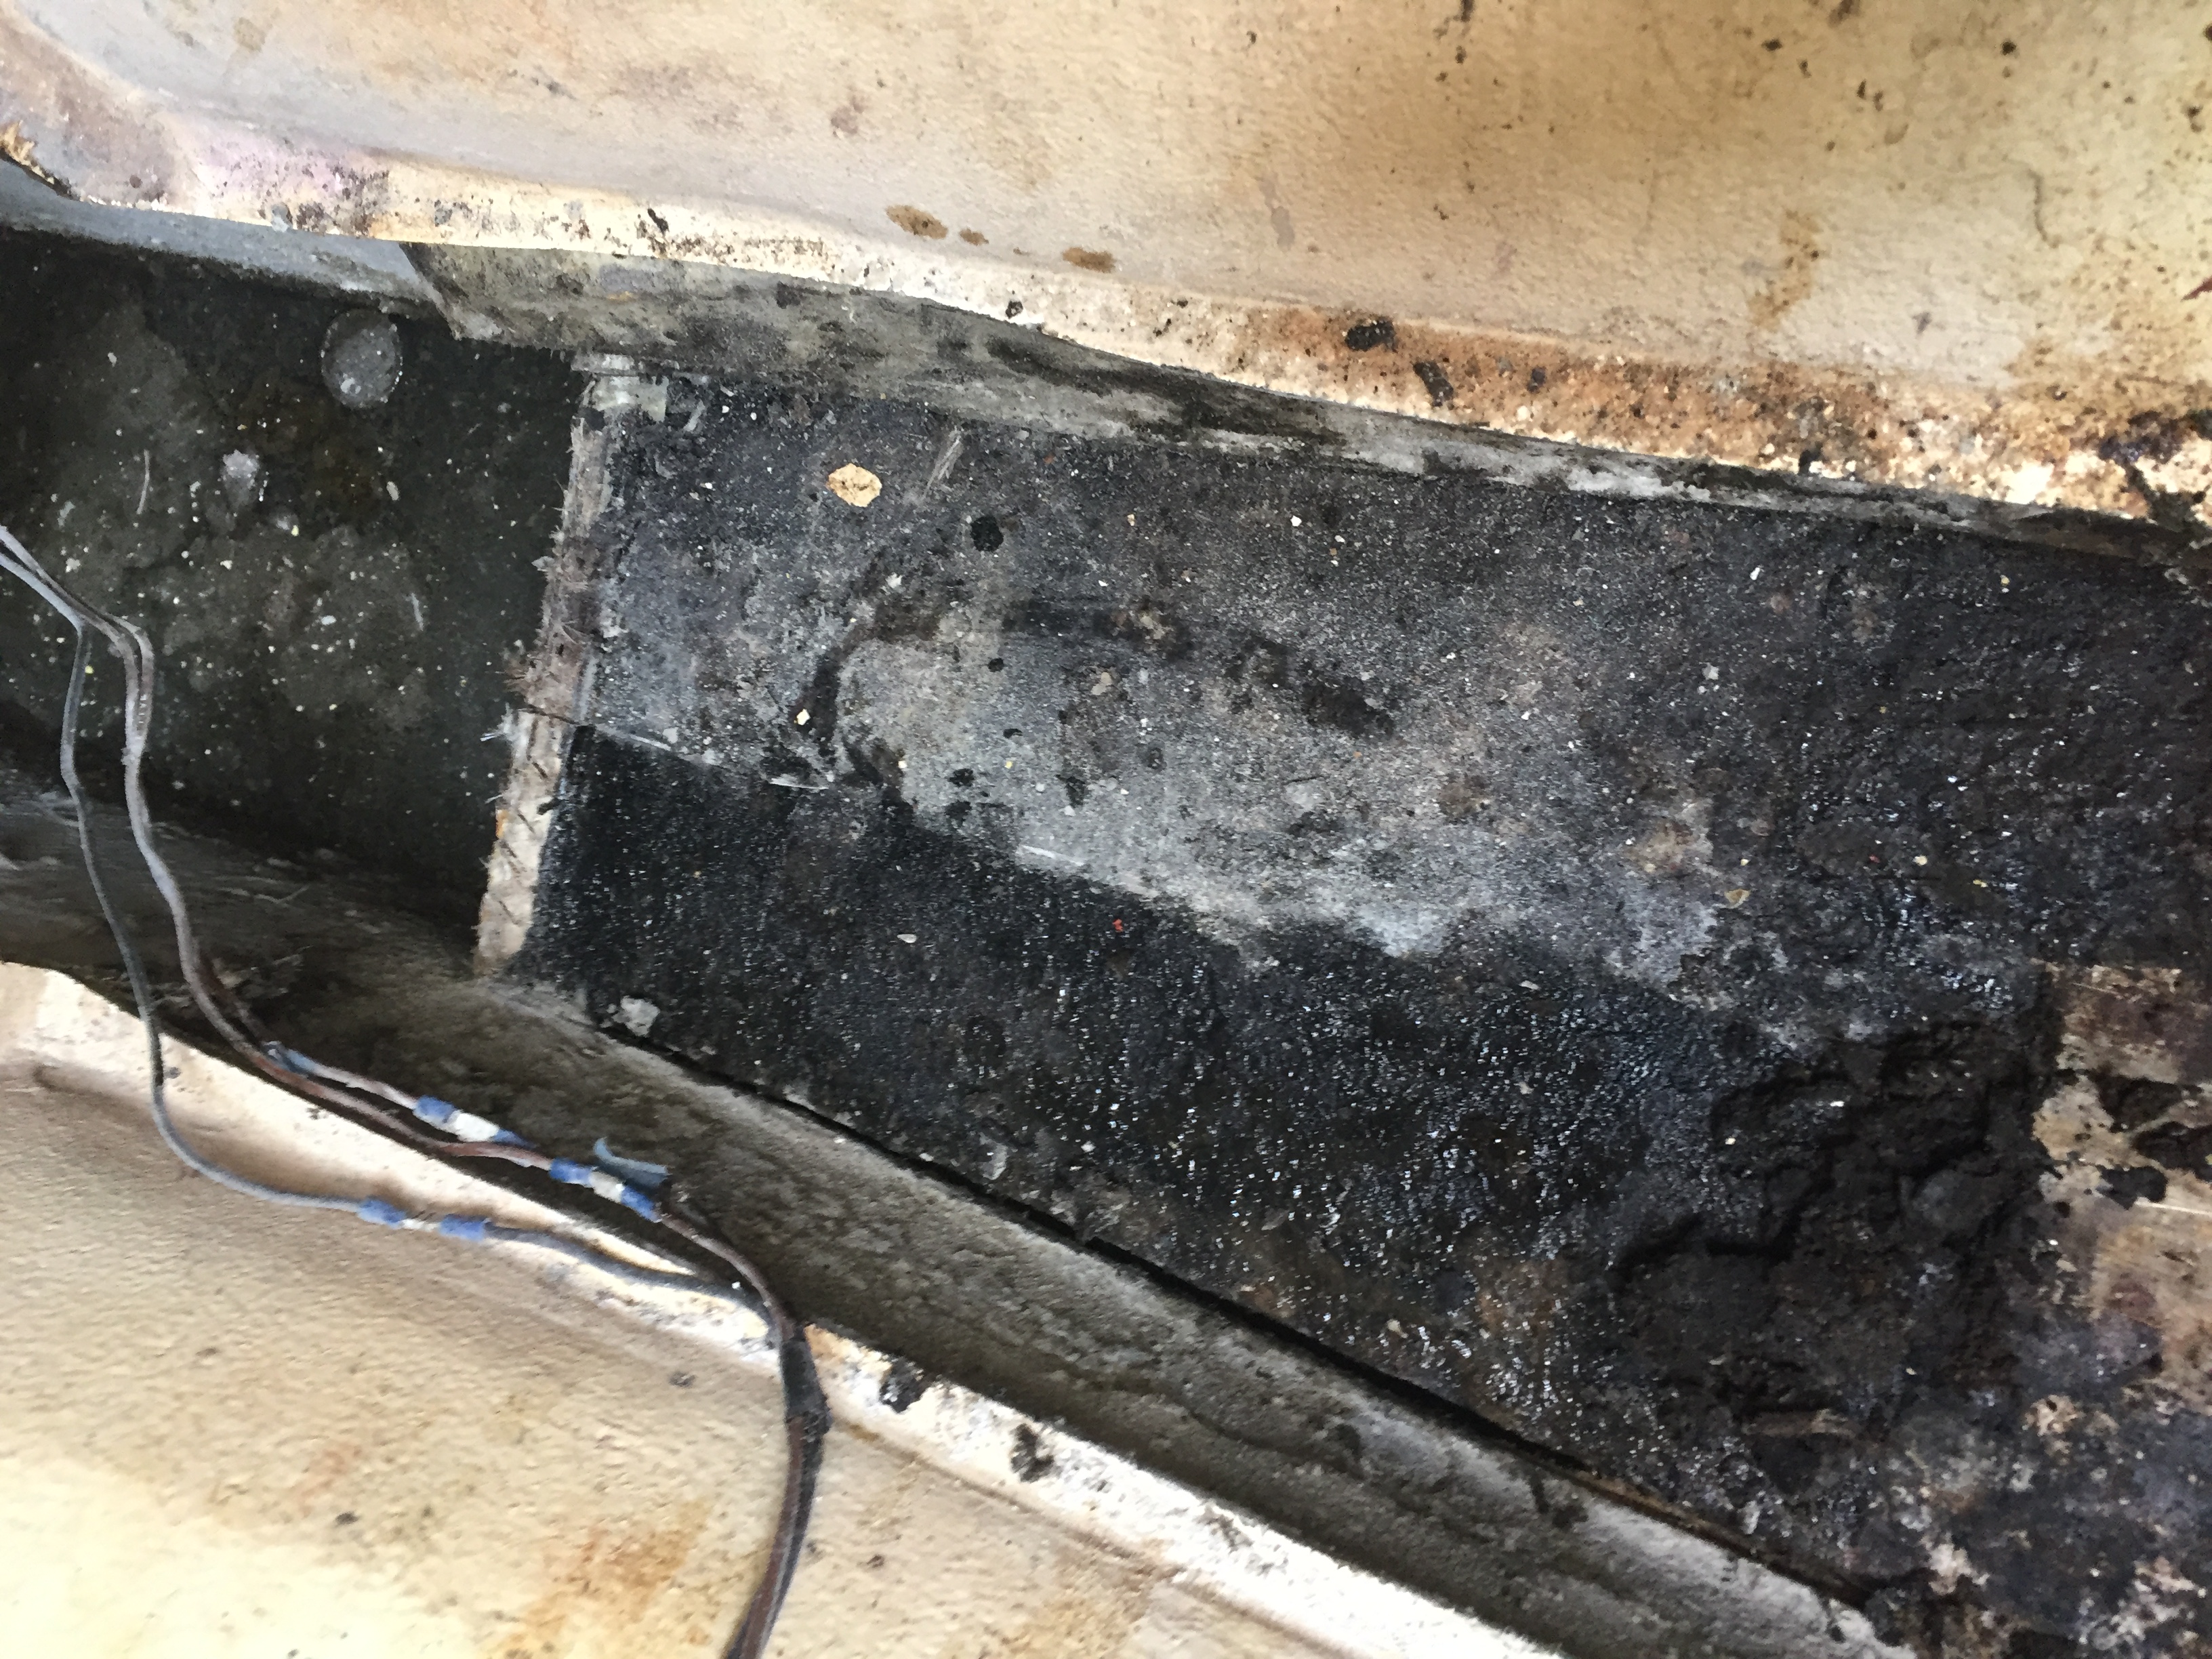
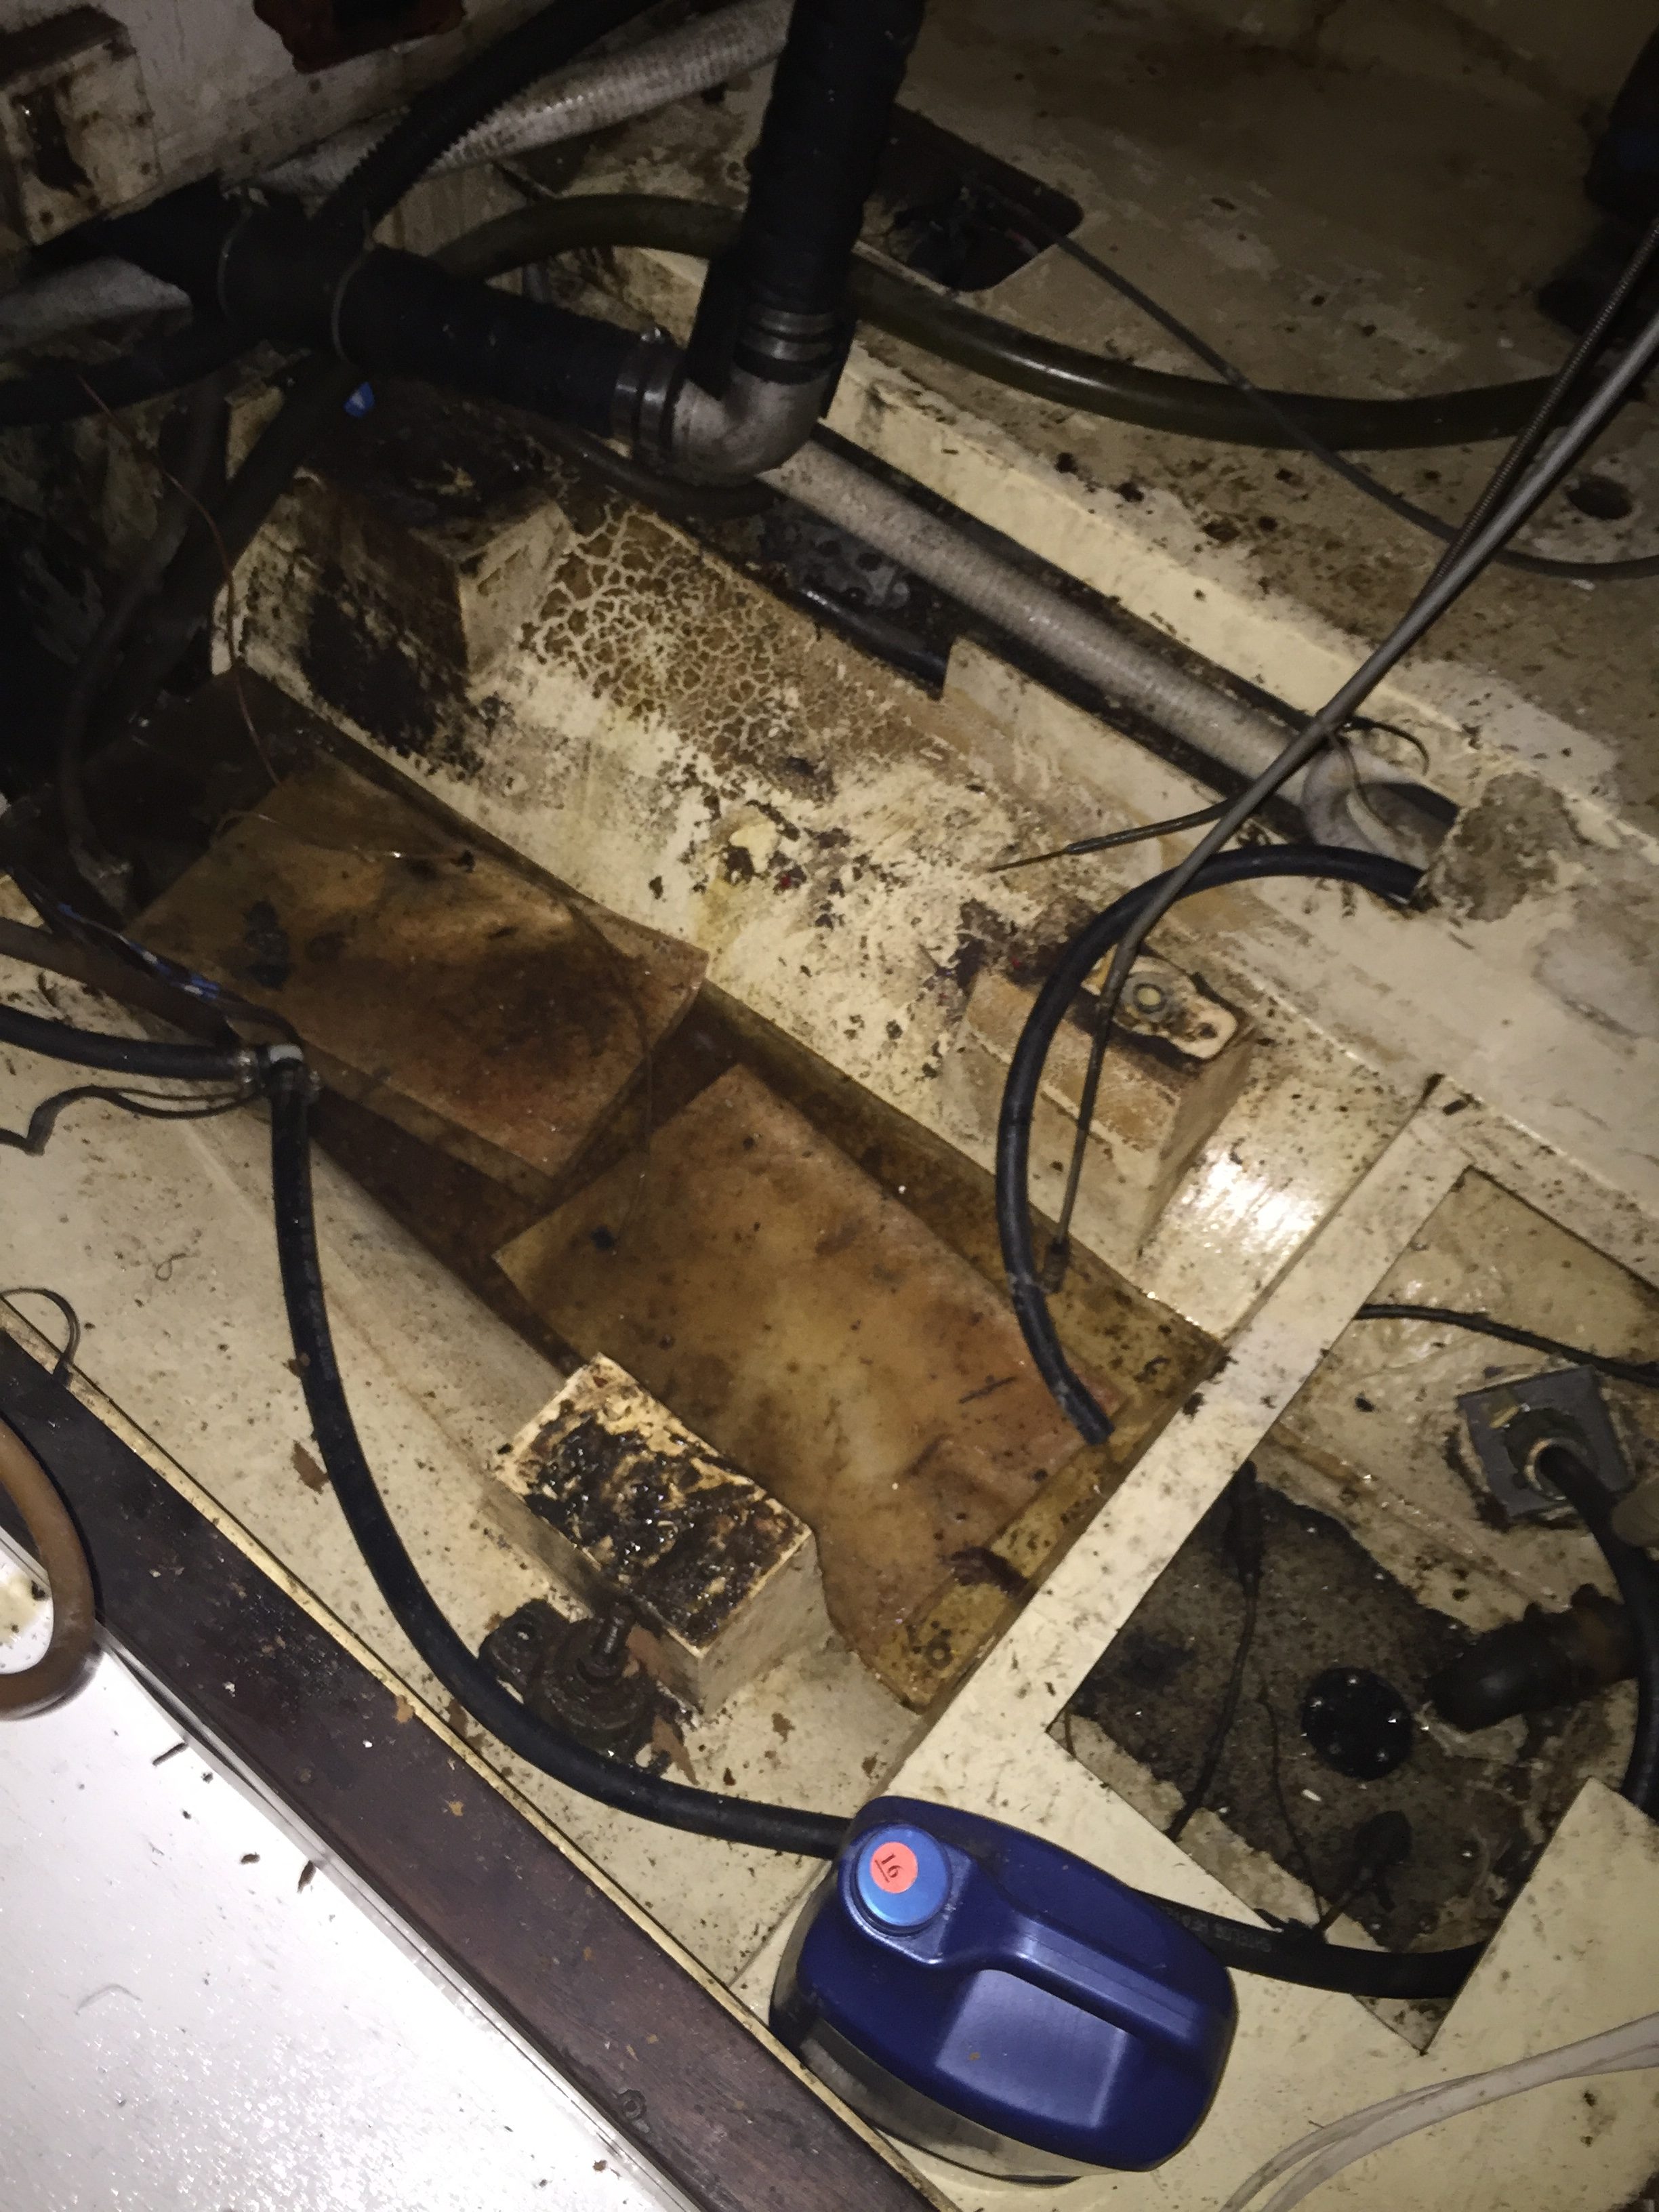
I am not sure how anyone can possibly do this job without standing inside the tank. It is a long way down to the bottom and would be impossible to cut the very bottom without standing inside, bent over and doing it with a grinder. To speed it up a little bit, I drilled a series of holes in a straight line across the bottom and finished it with the angle grinder. Of course, the grinder only fits so well into corners so I had to do a fair bit of screwing around right at the bottom.

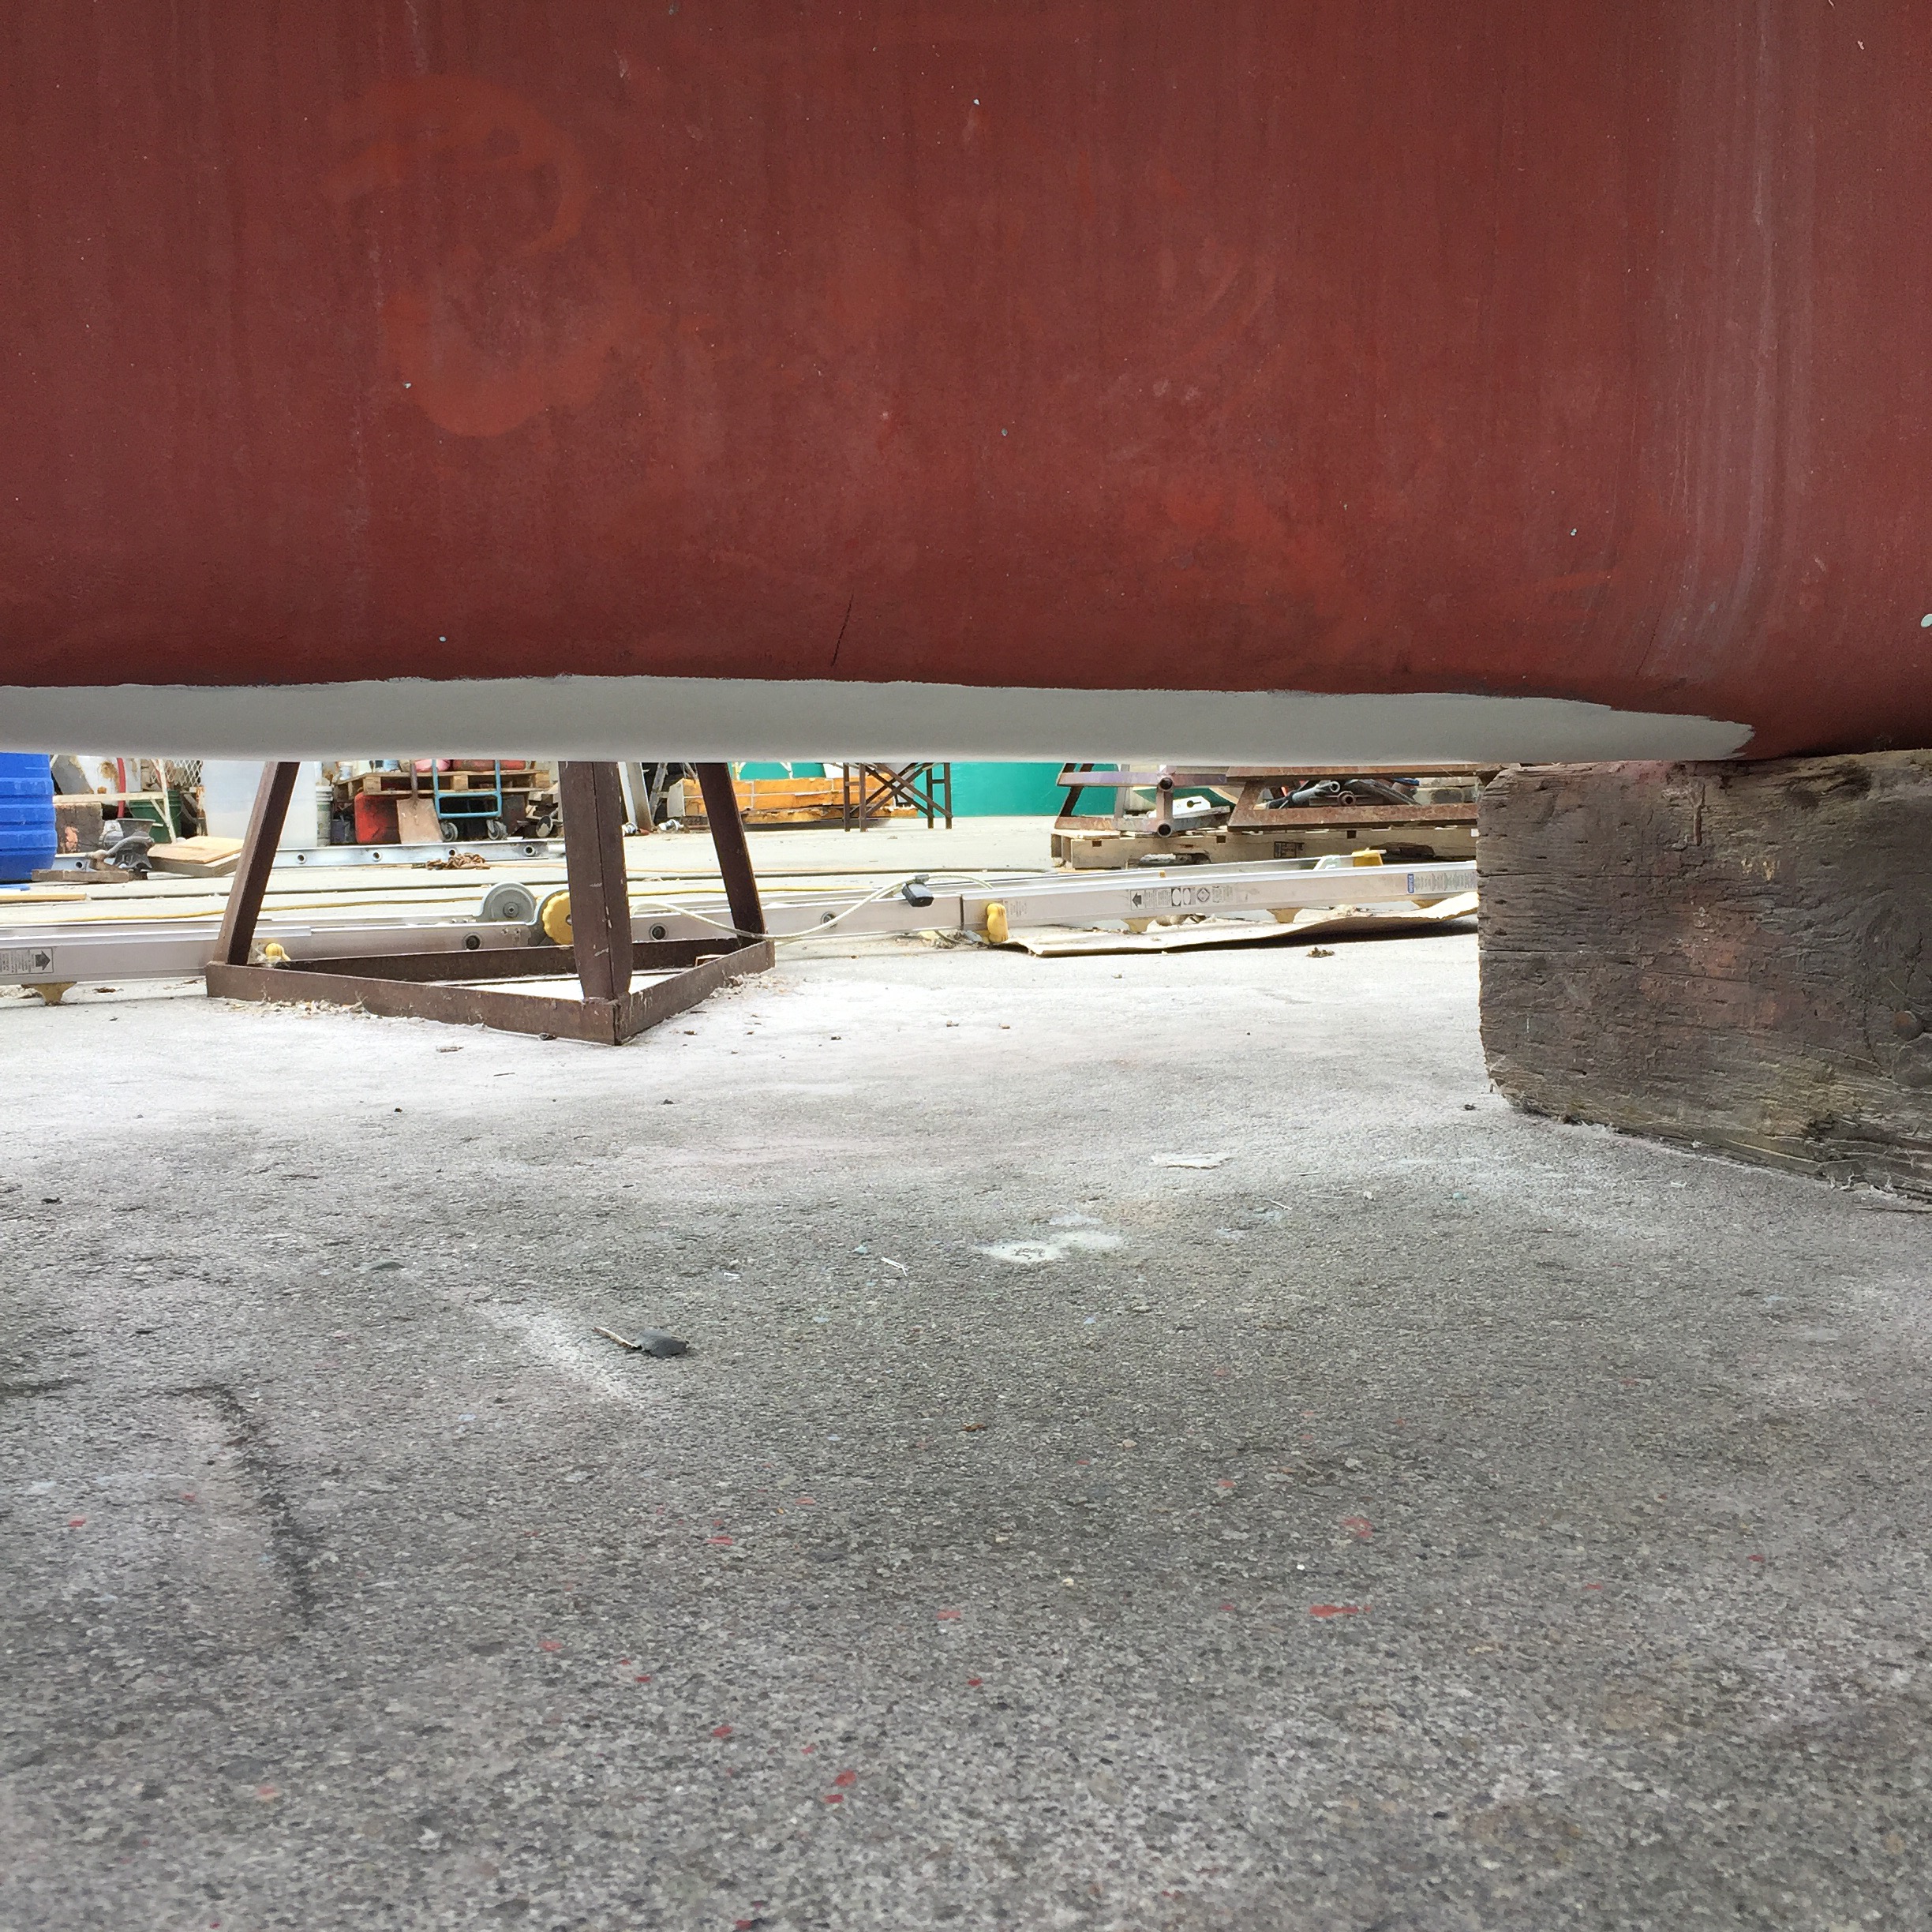
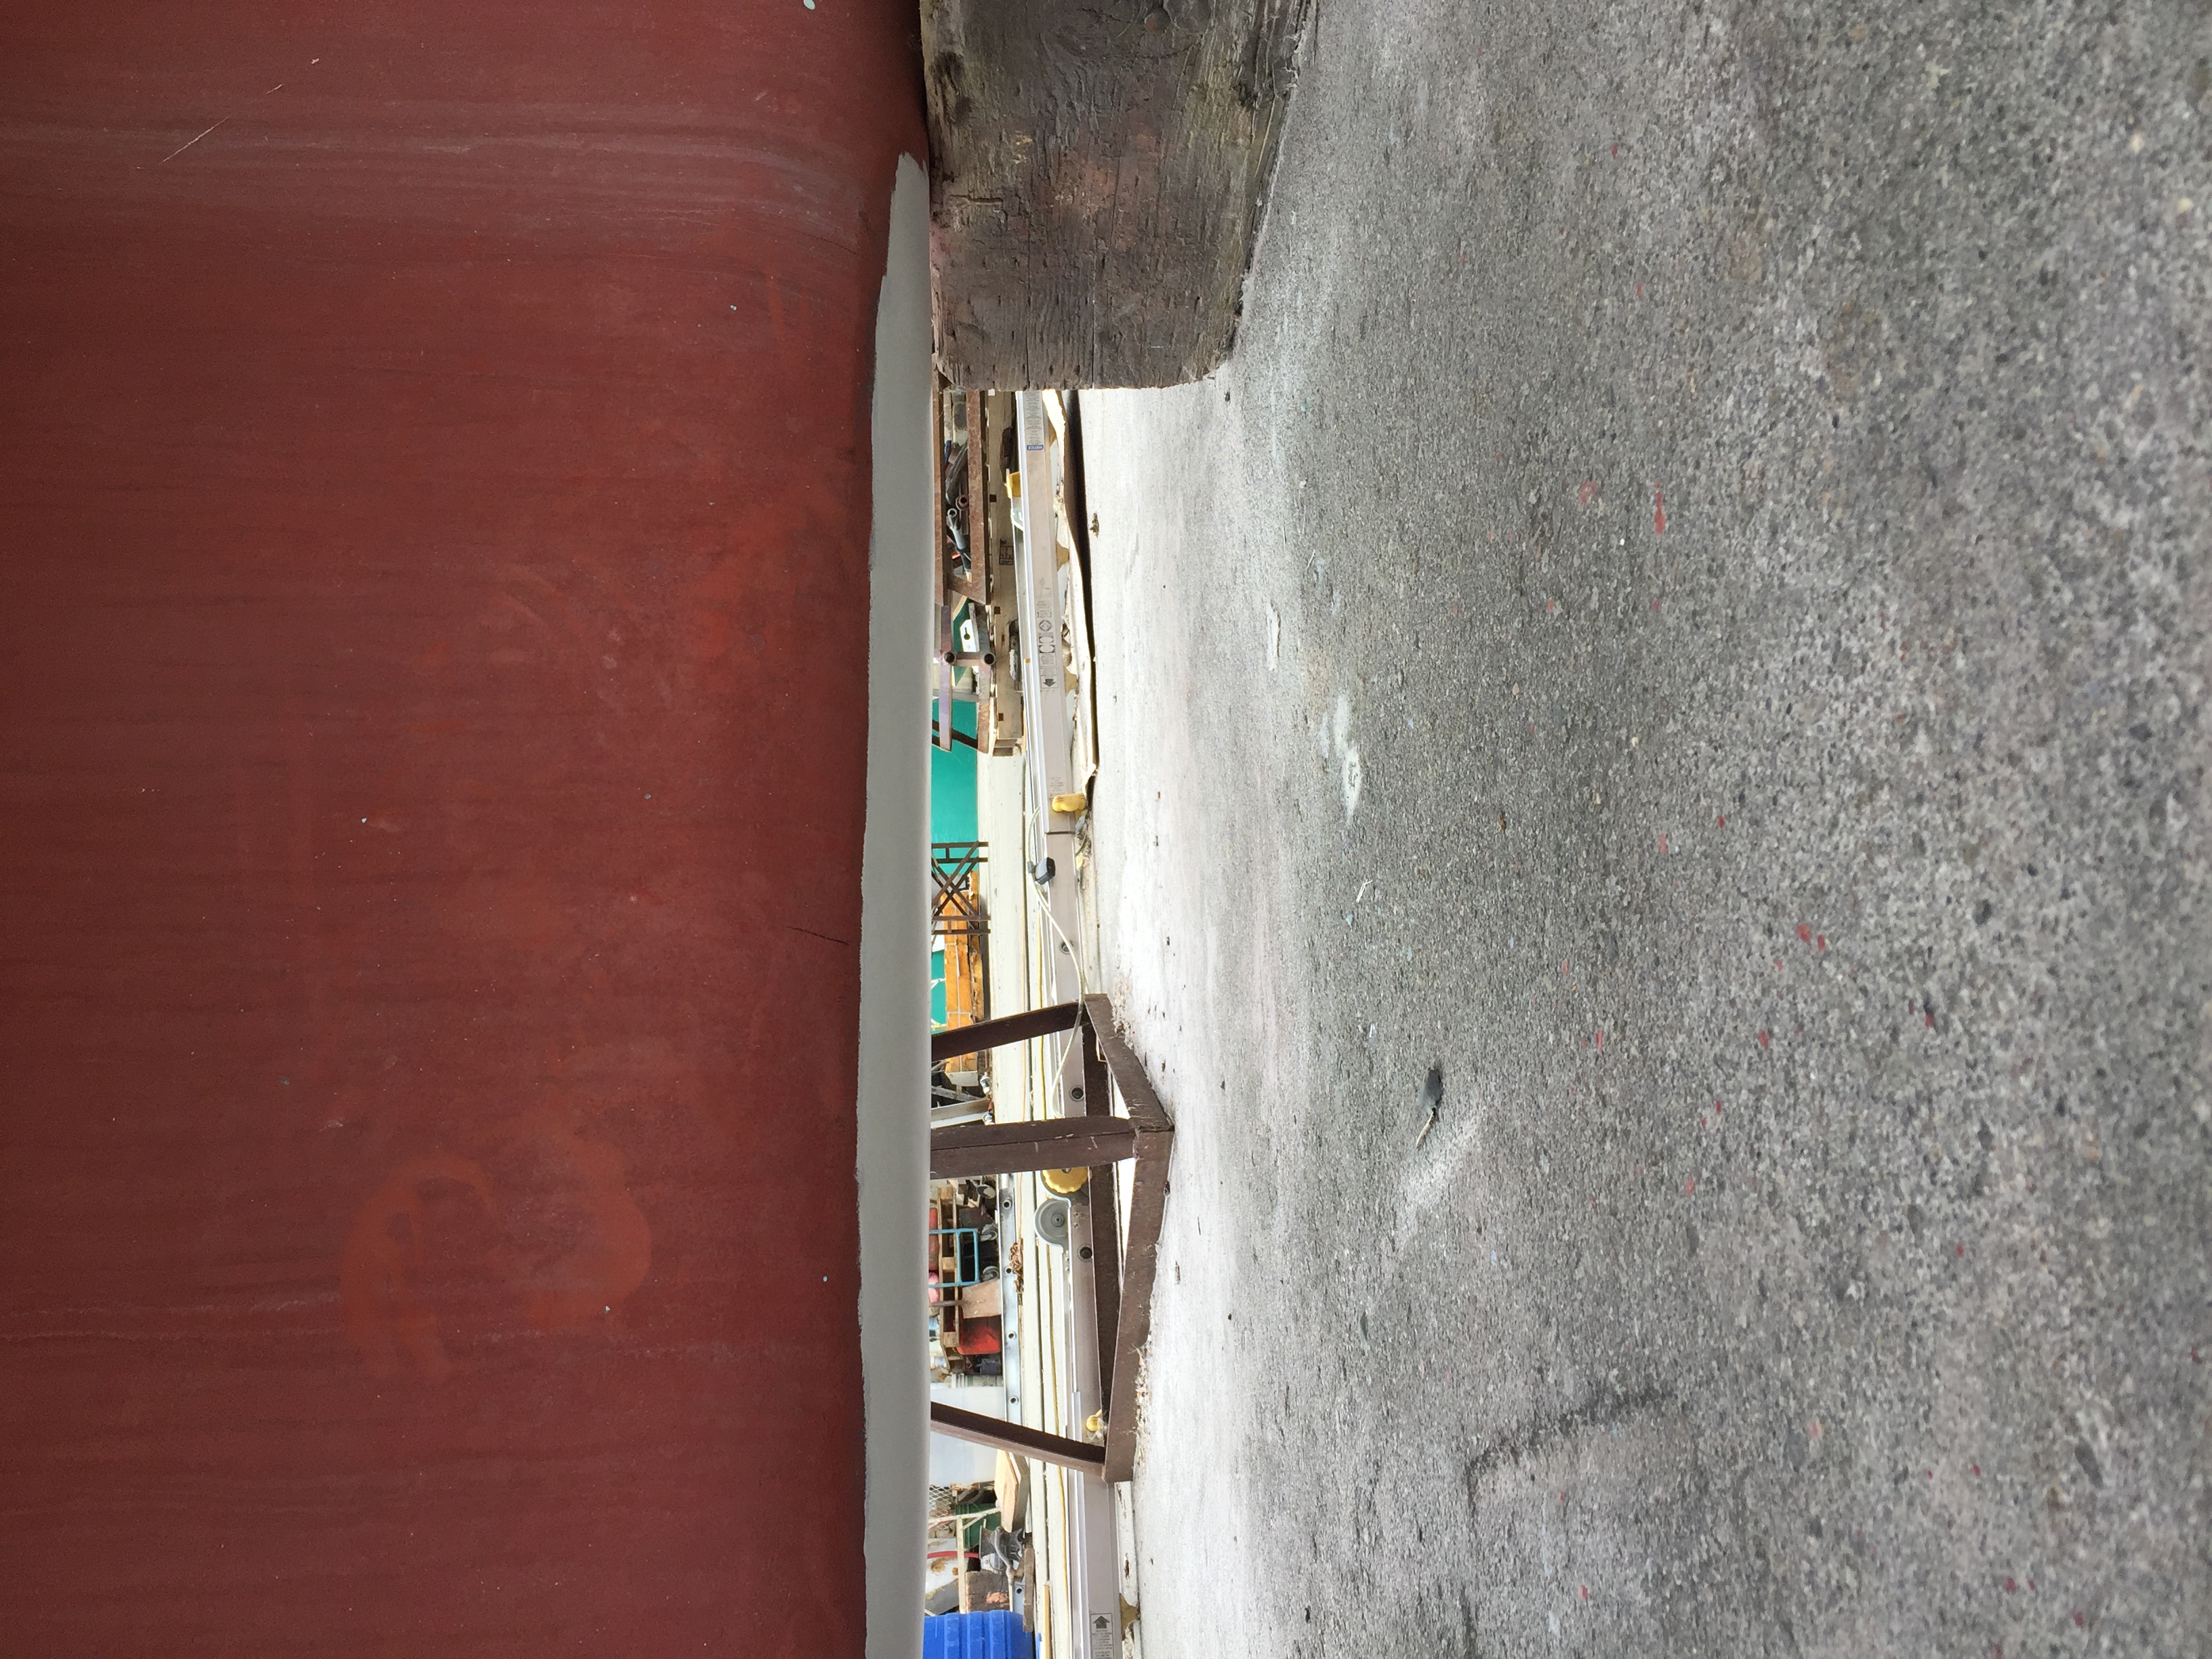
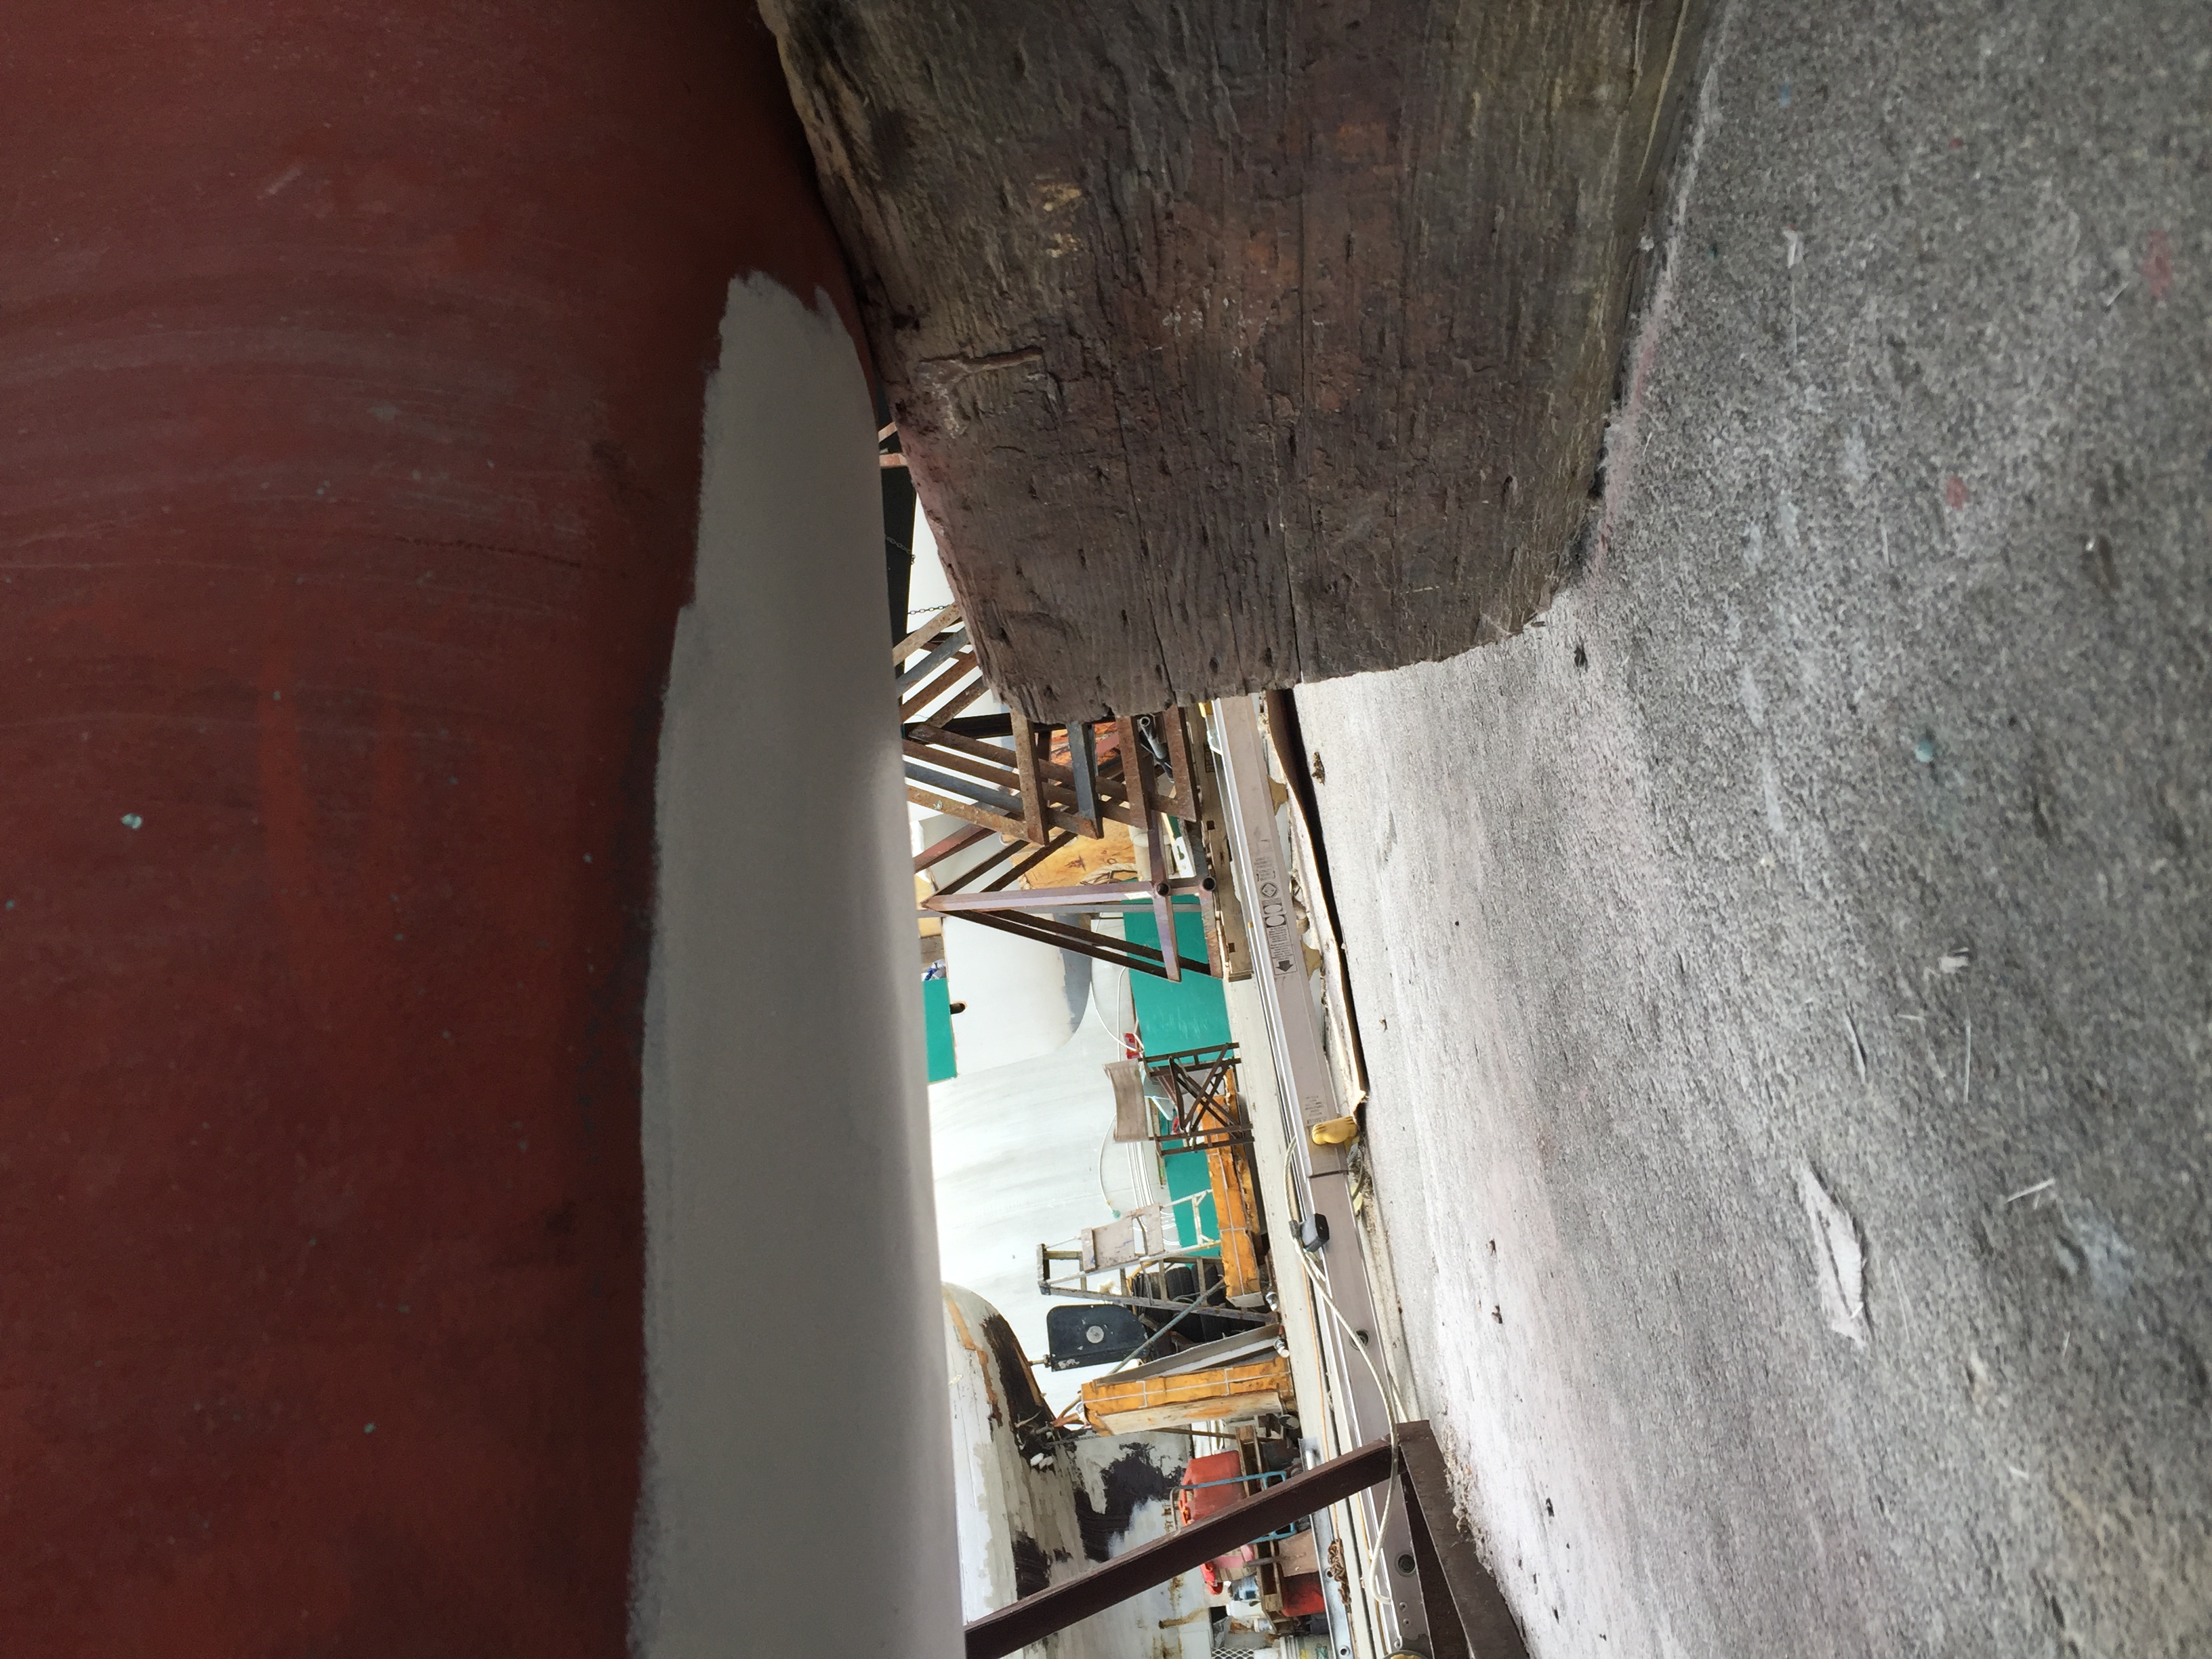
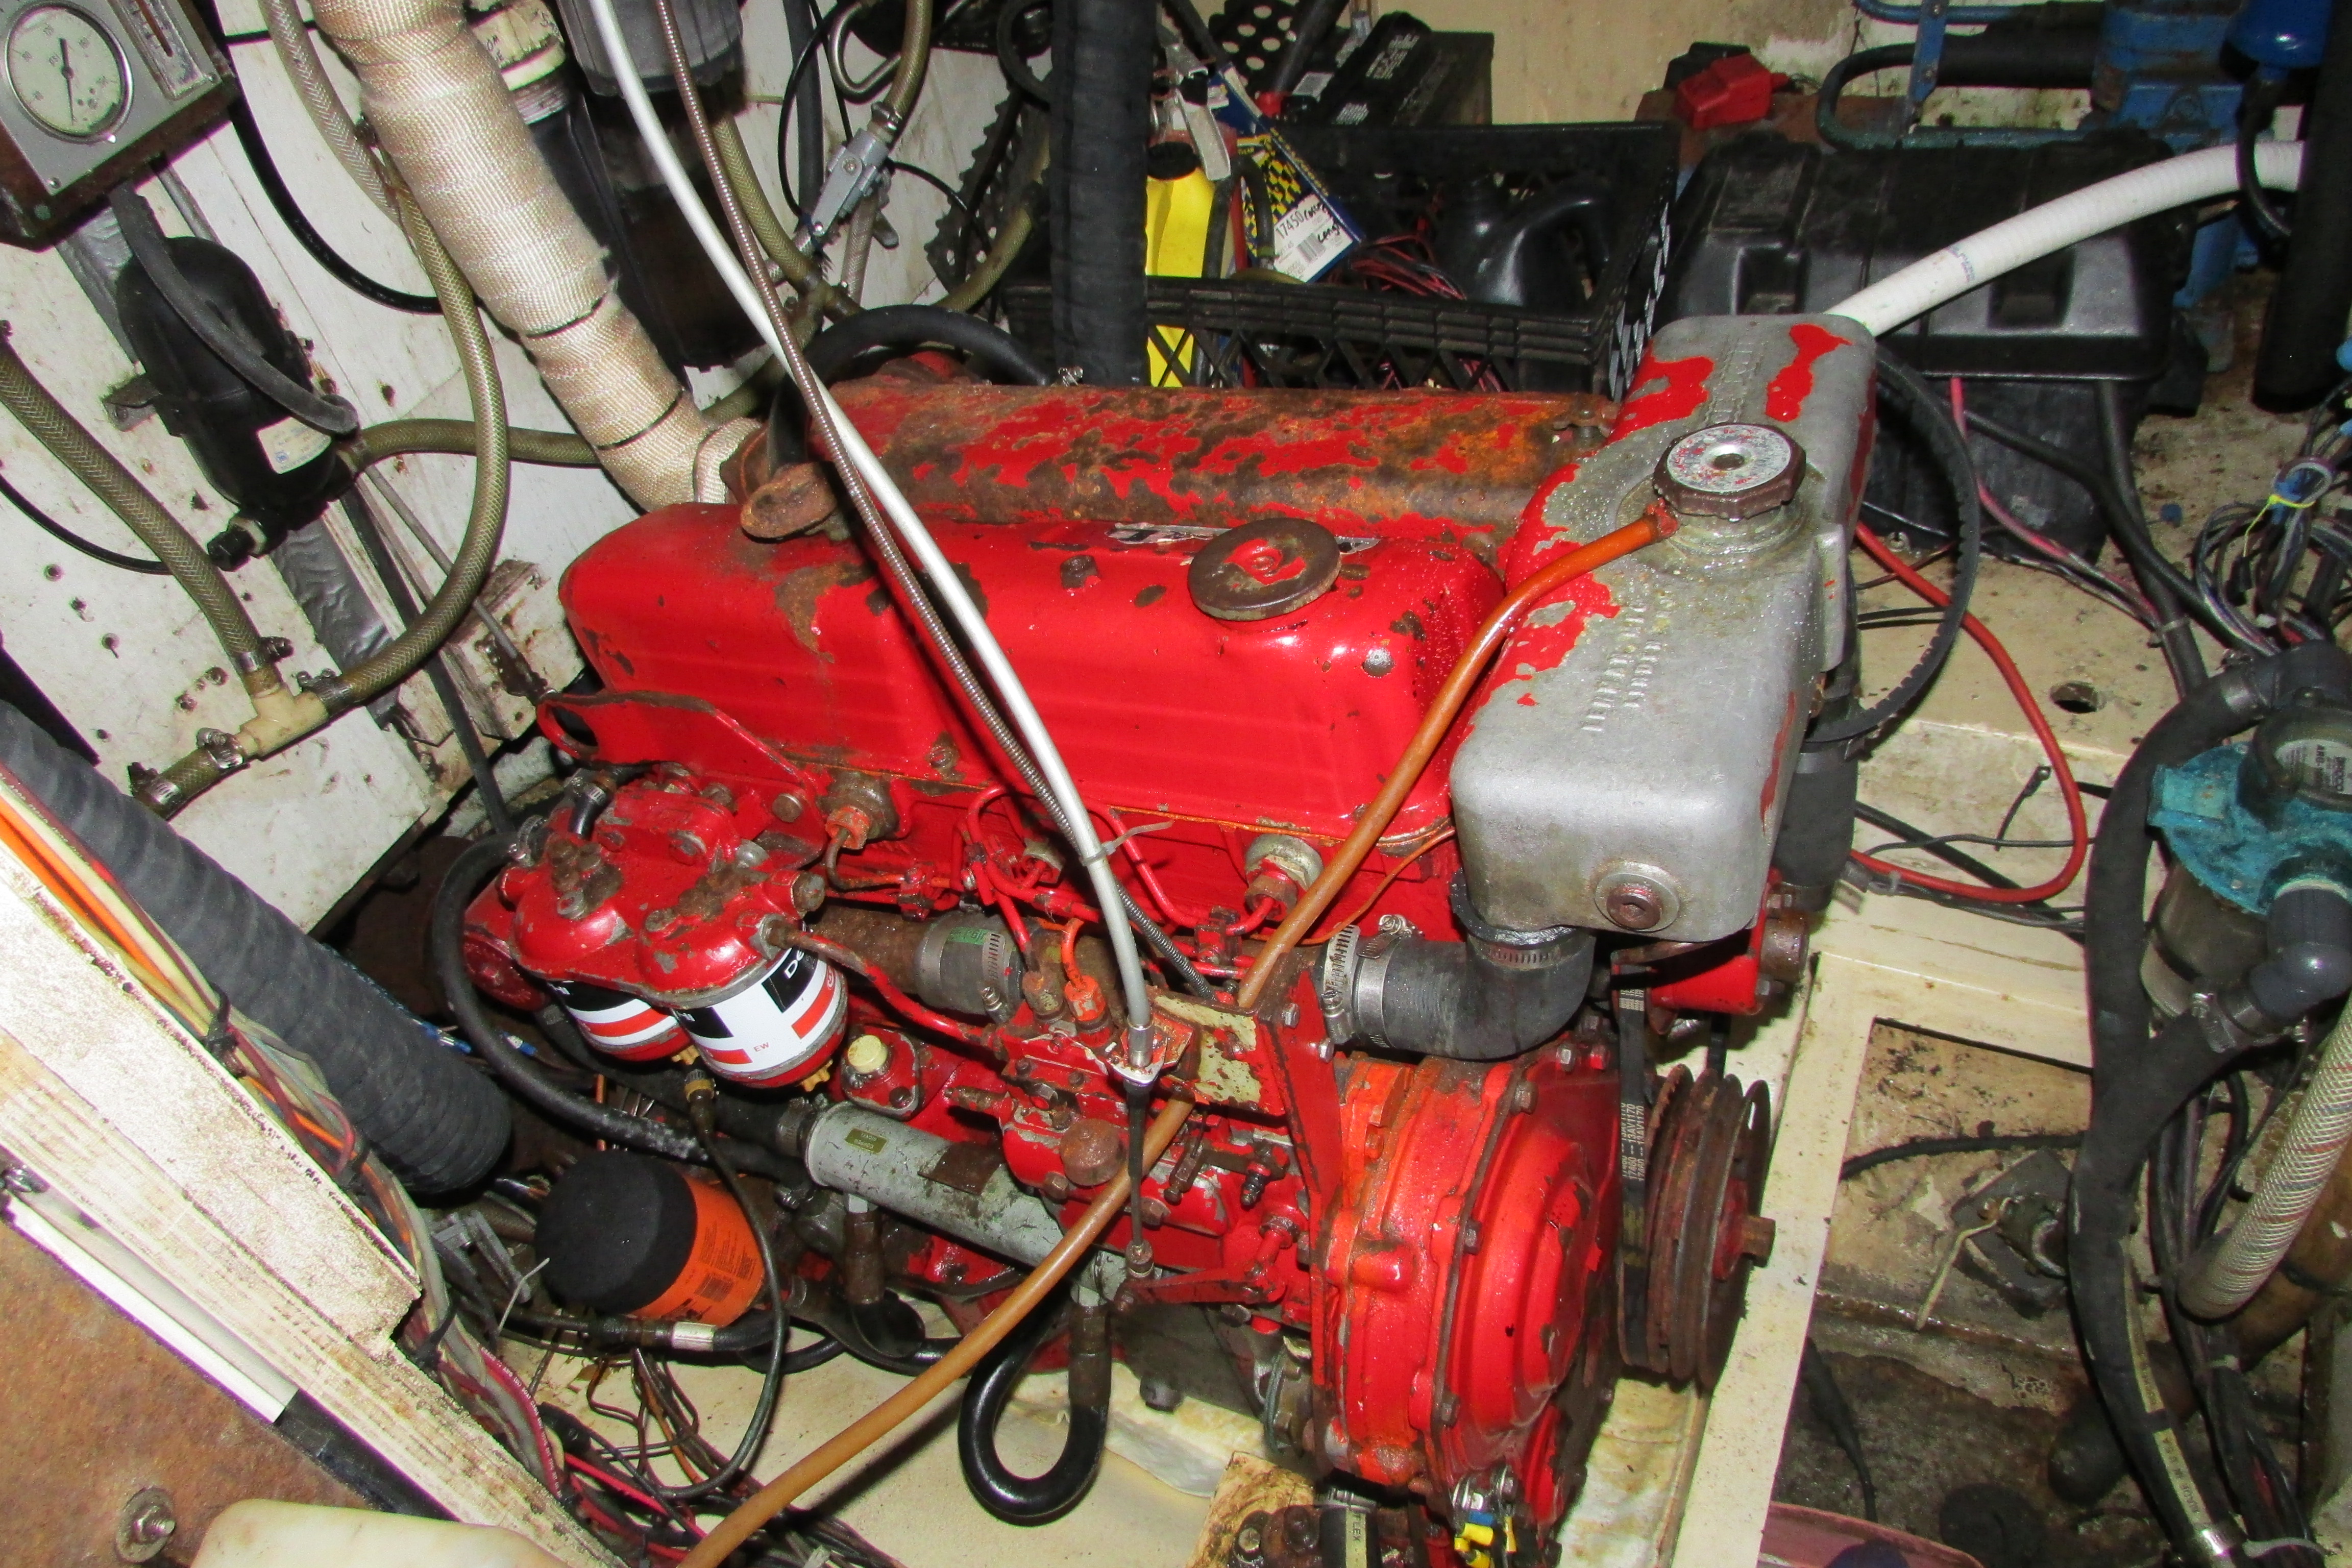
I am not sure of the exact depth yet, but there is a fair amount of space underneath the tank itself. I thought I might be drilling into the keel, but nope.

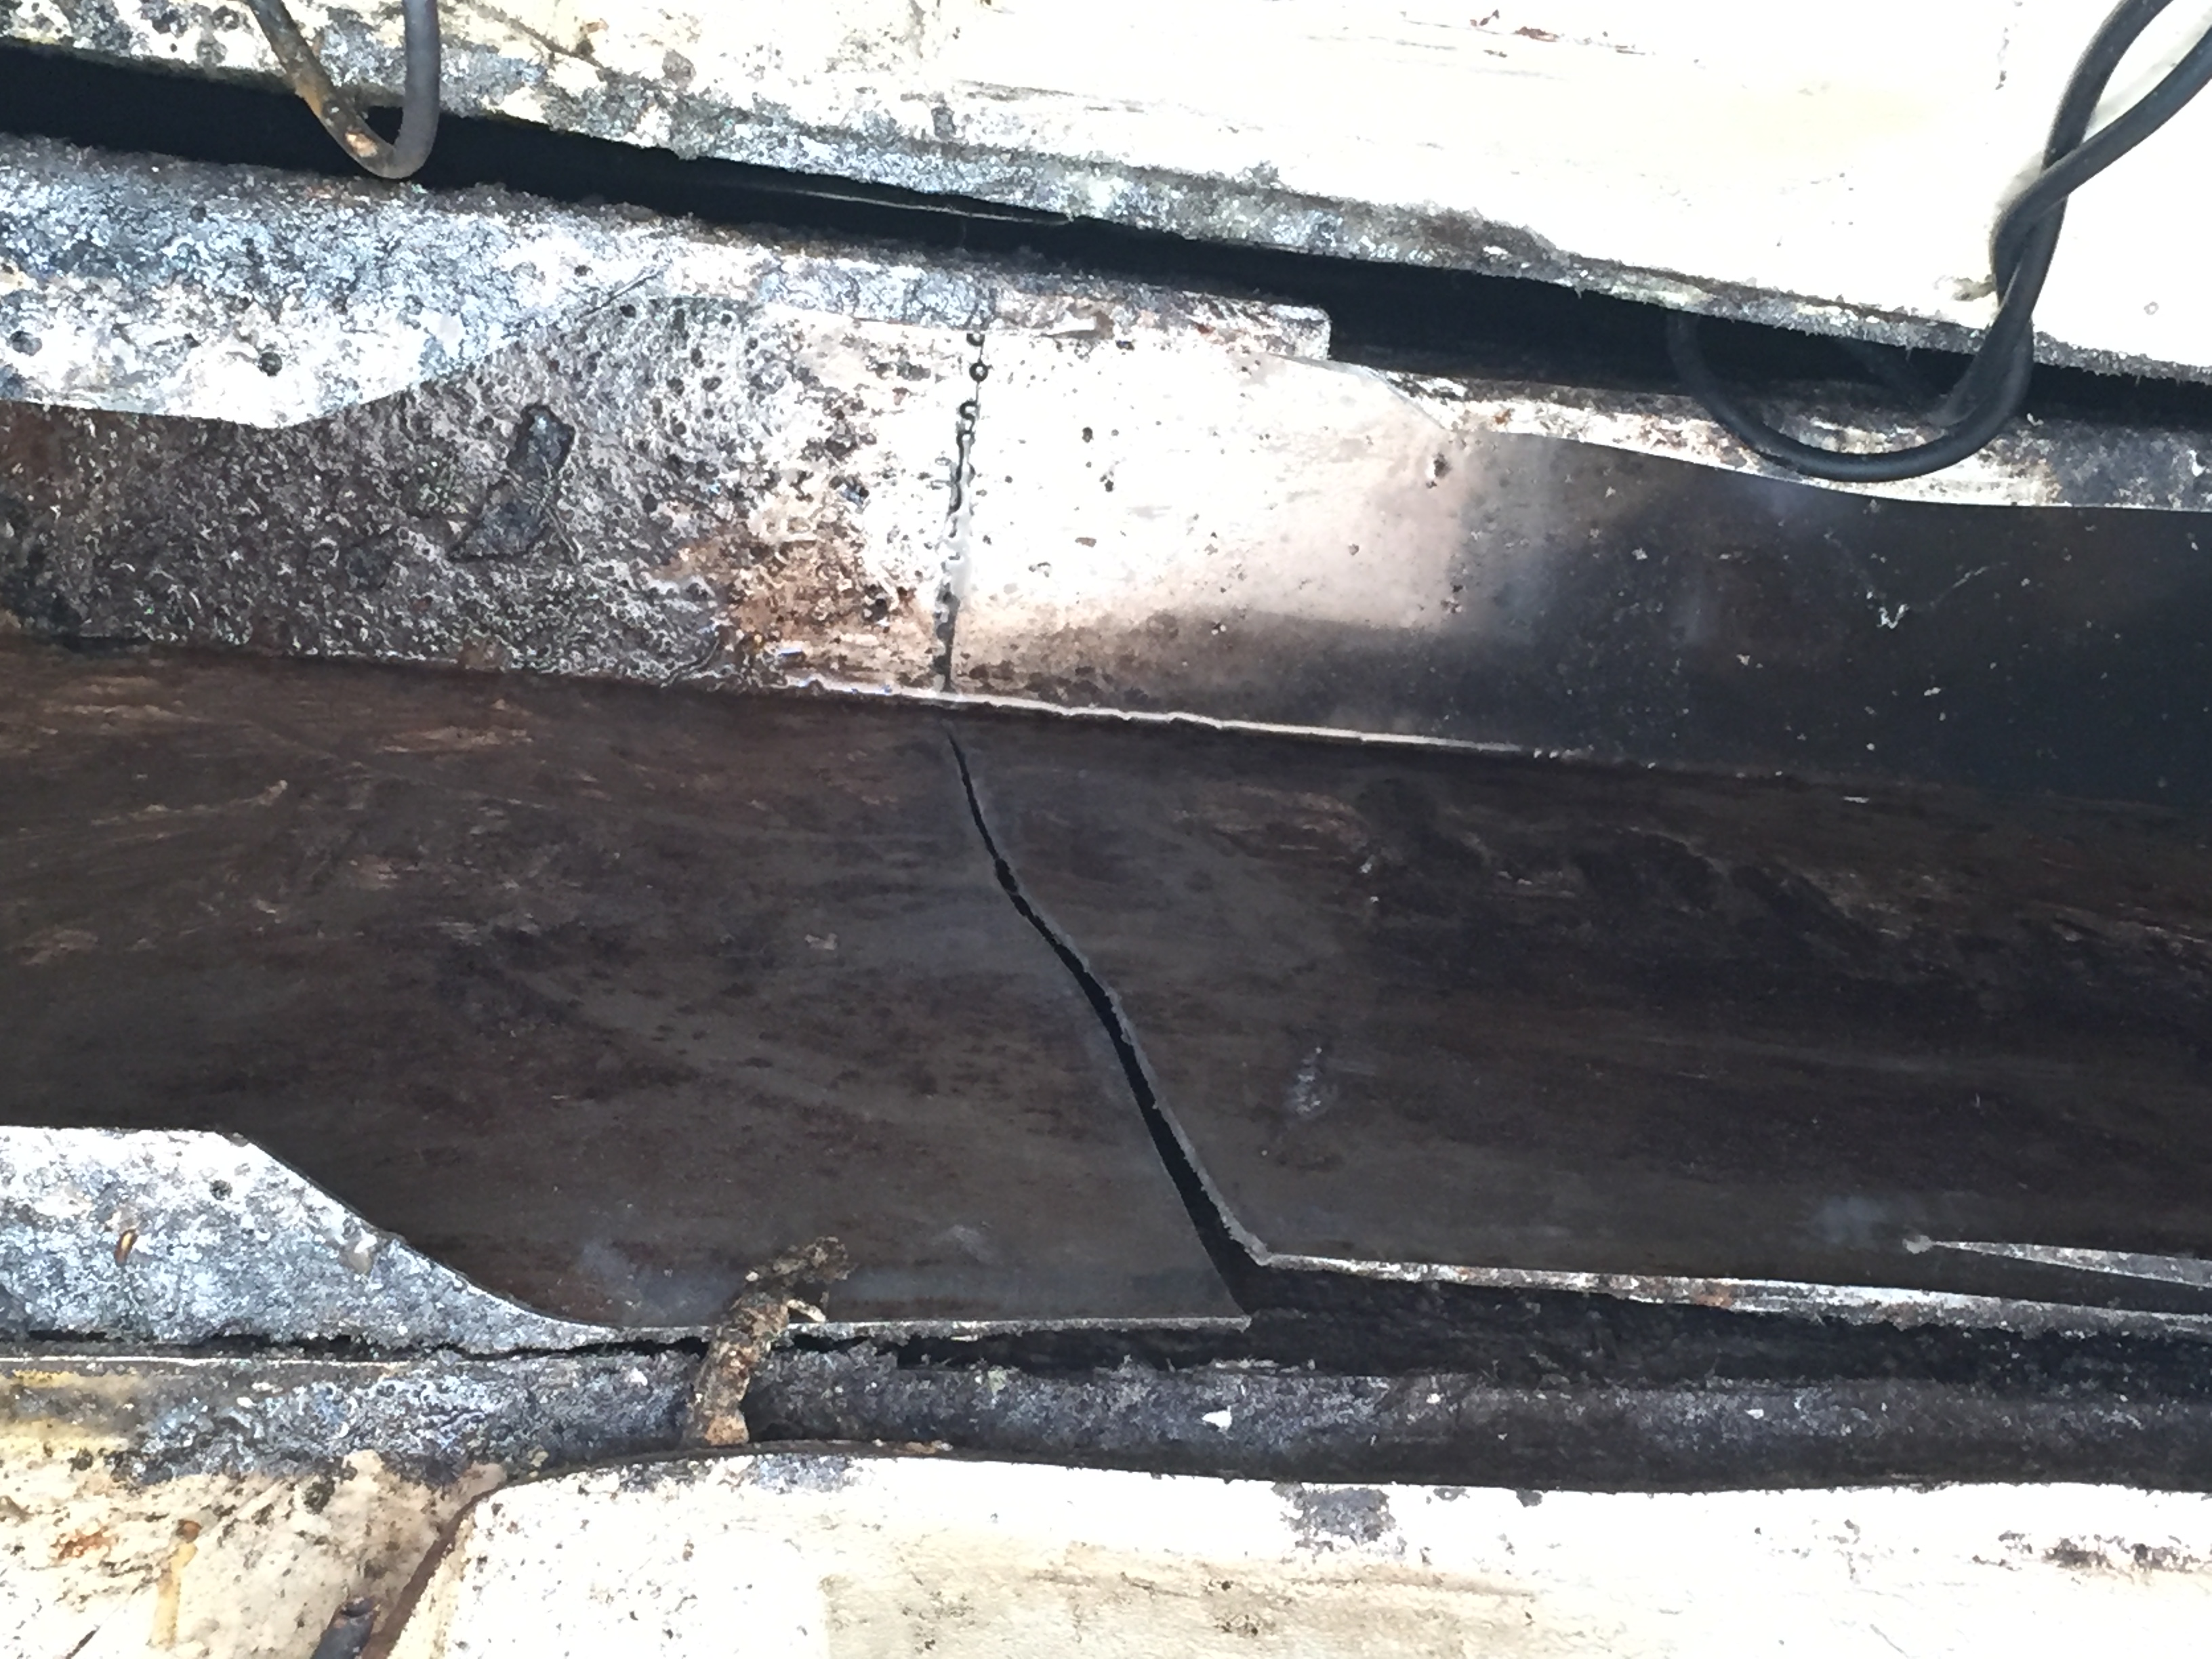
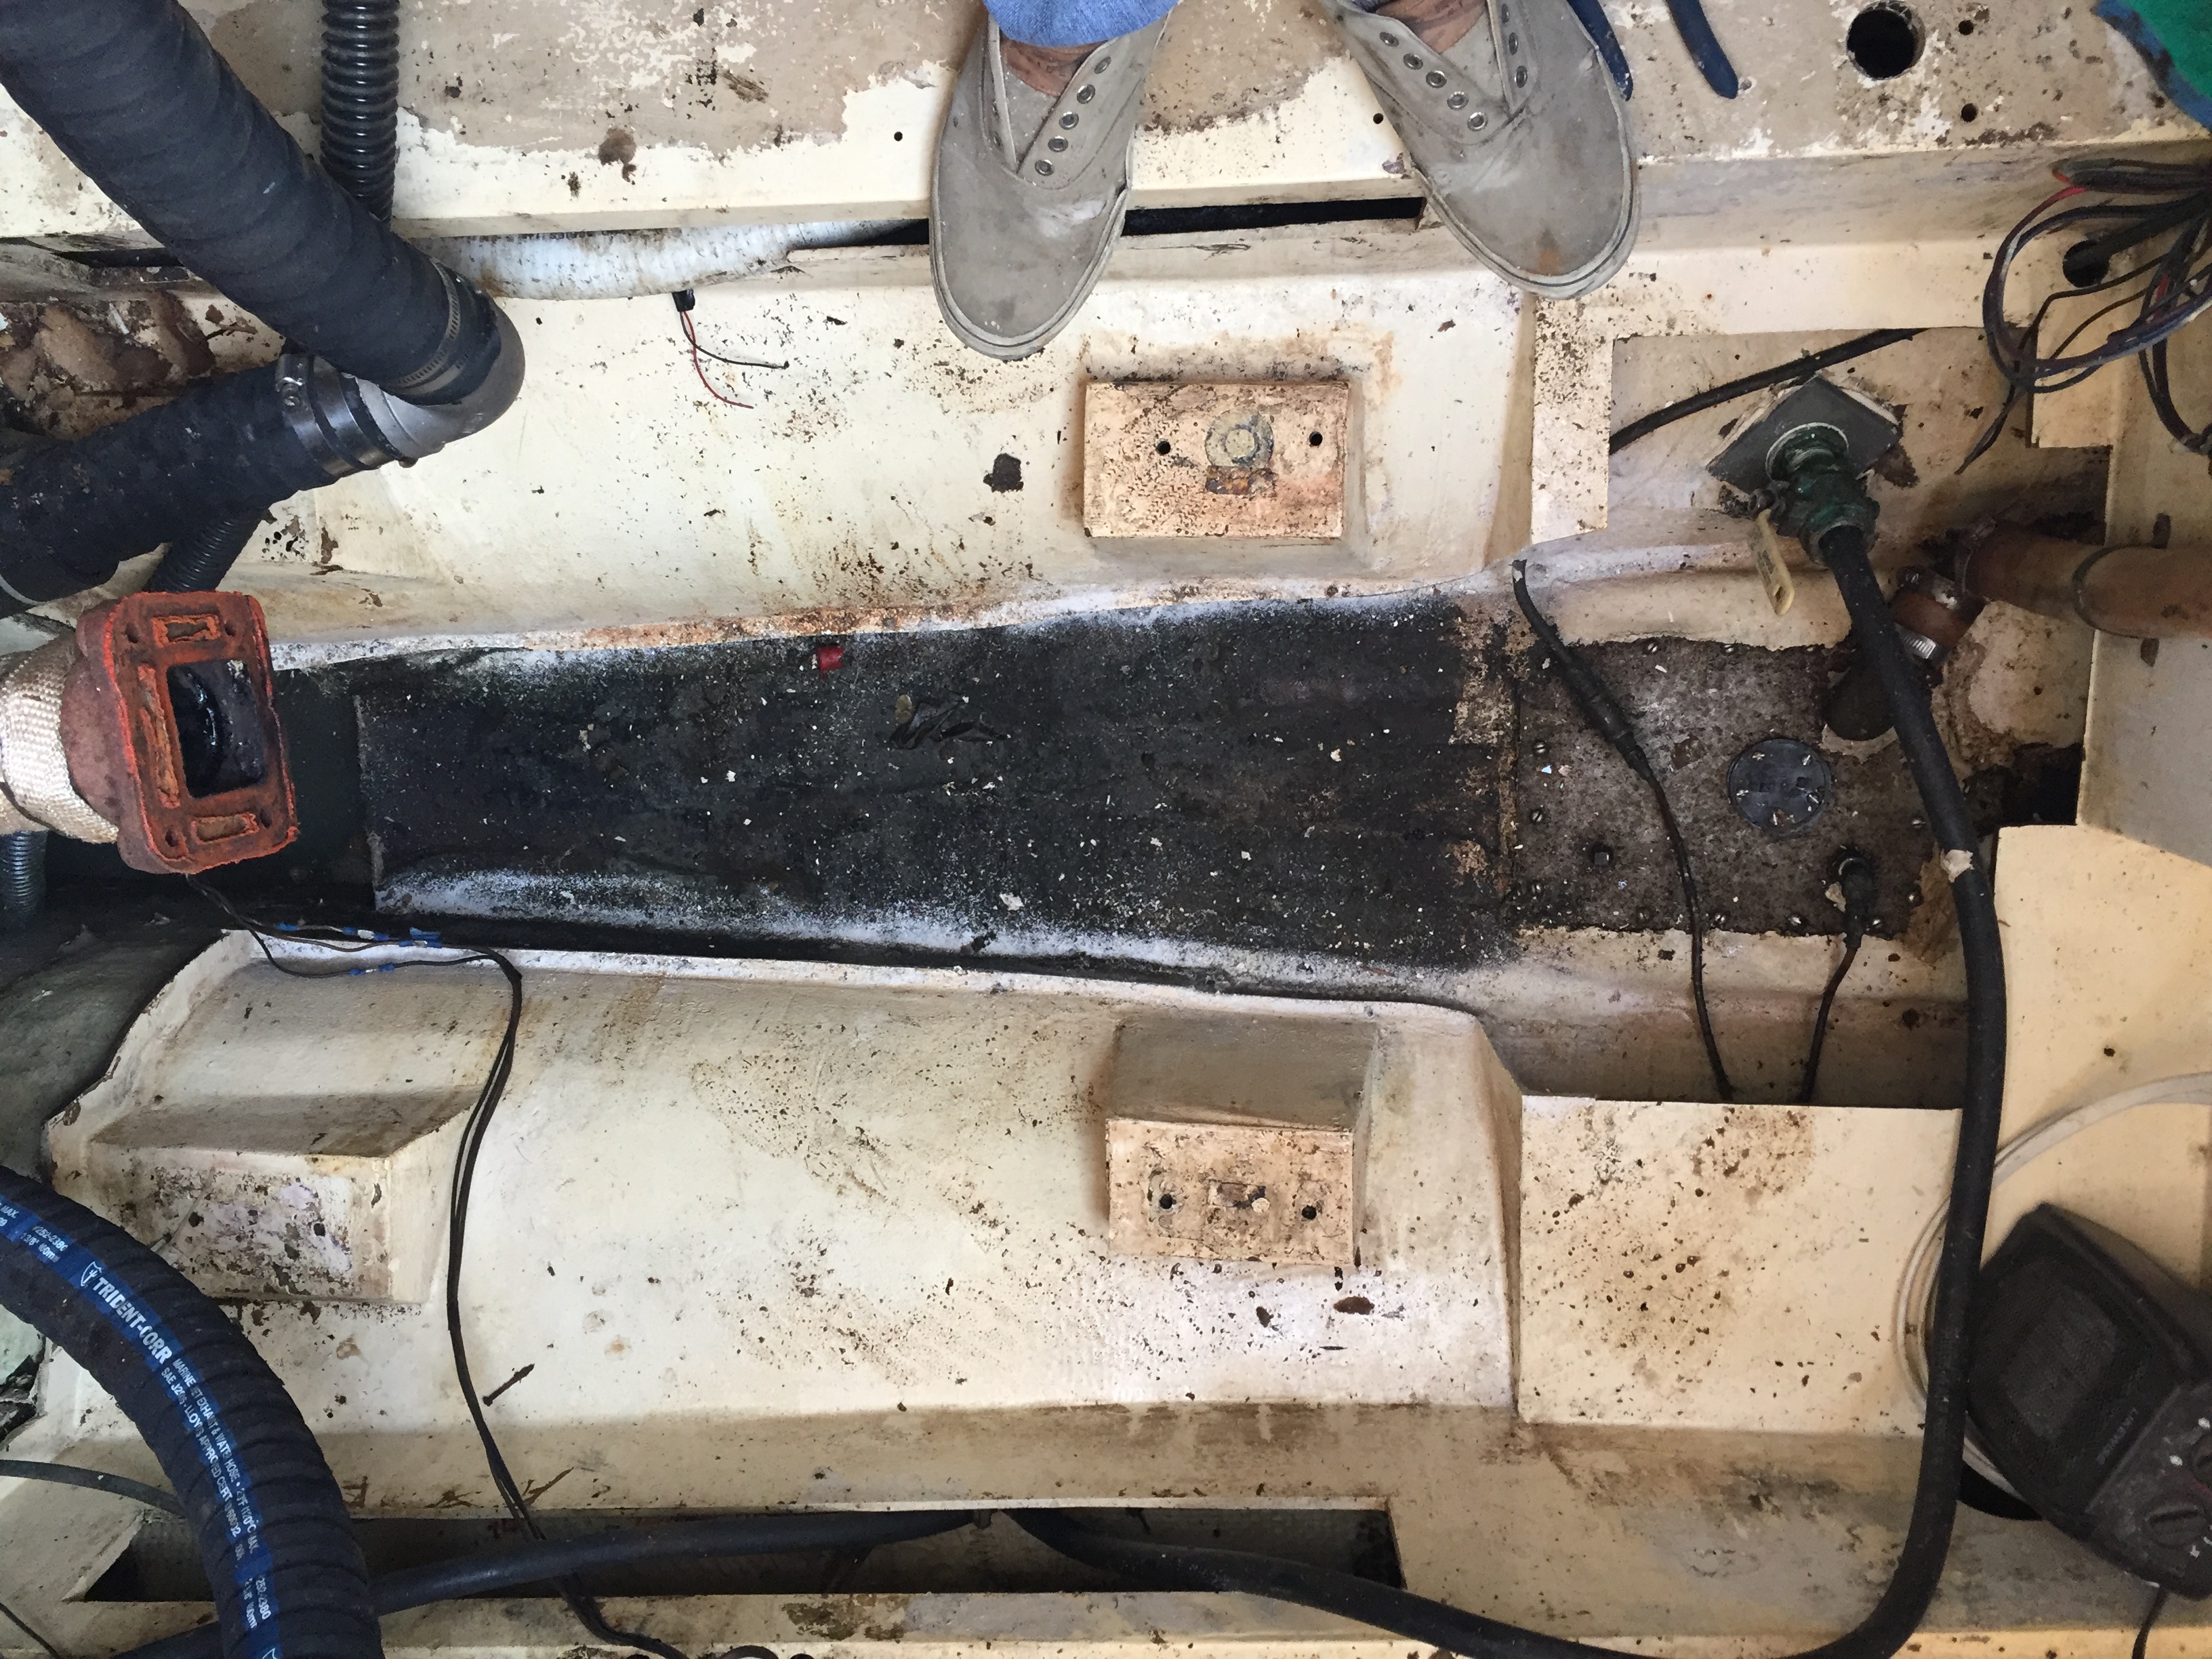
For anyone who reads this blog and is contemplating the same job here in a nutshell are things I learned today. Bending over cutting an aluminum tank while standing in it sounds like a lot of fun I know, but it is cramped, which means you are cramped, which means you are bent over for hours trying to do this. Also, make sure the angle of your cut is in the correct direction. Mine ended up being in the wrong direction needed to remove the back half of the tank first, which meant I had to go back in and cut v notches into the tank wall.

Buy good quality blades, Dewalt worked great for me.

Whatever this mess of liquid is stinks up to high hell and even after a 30 minute super hot shower with lots of soap, you can still smell it on yourself.

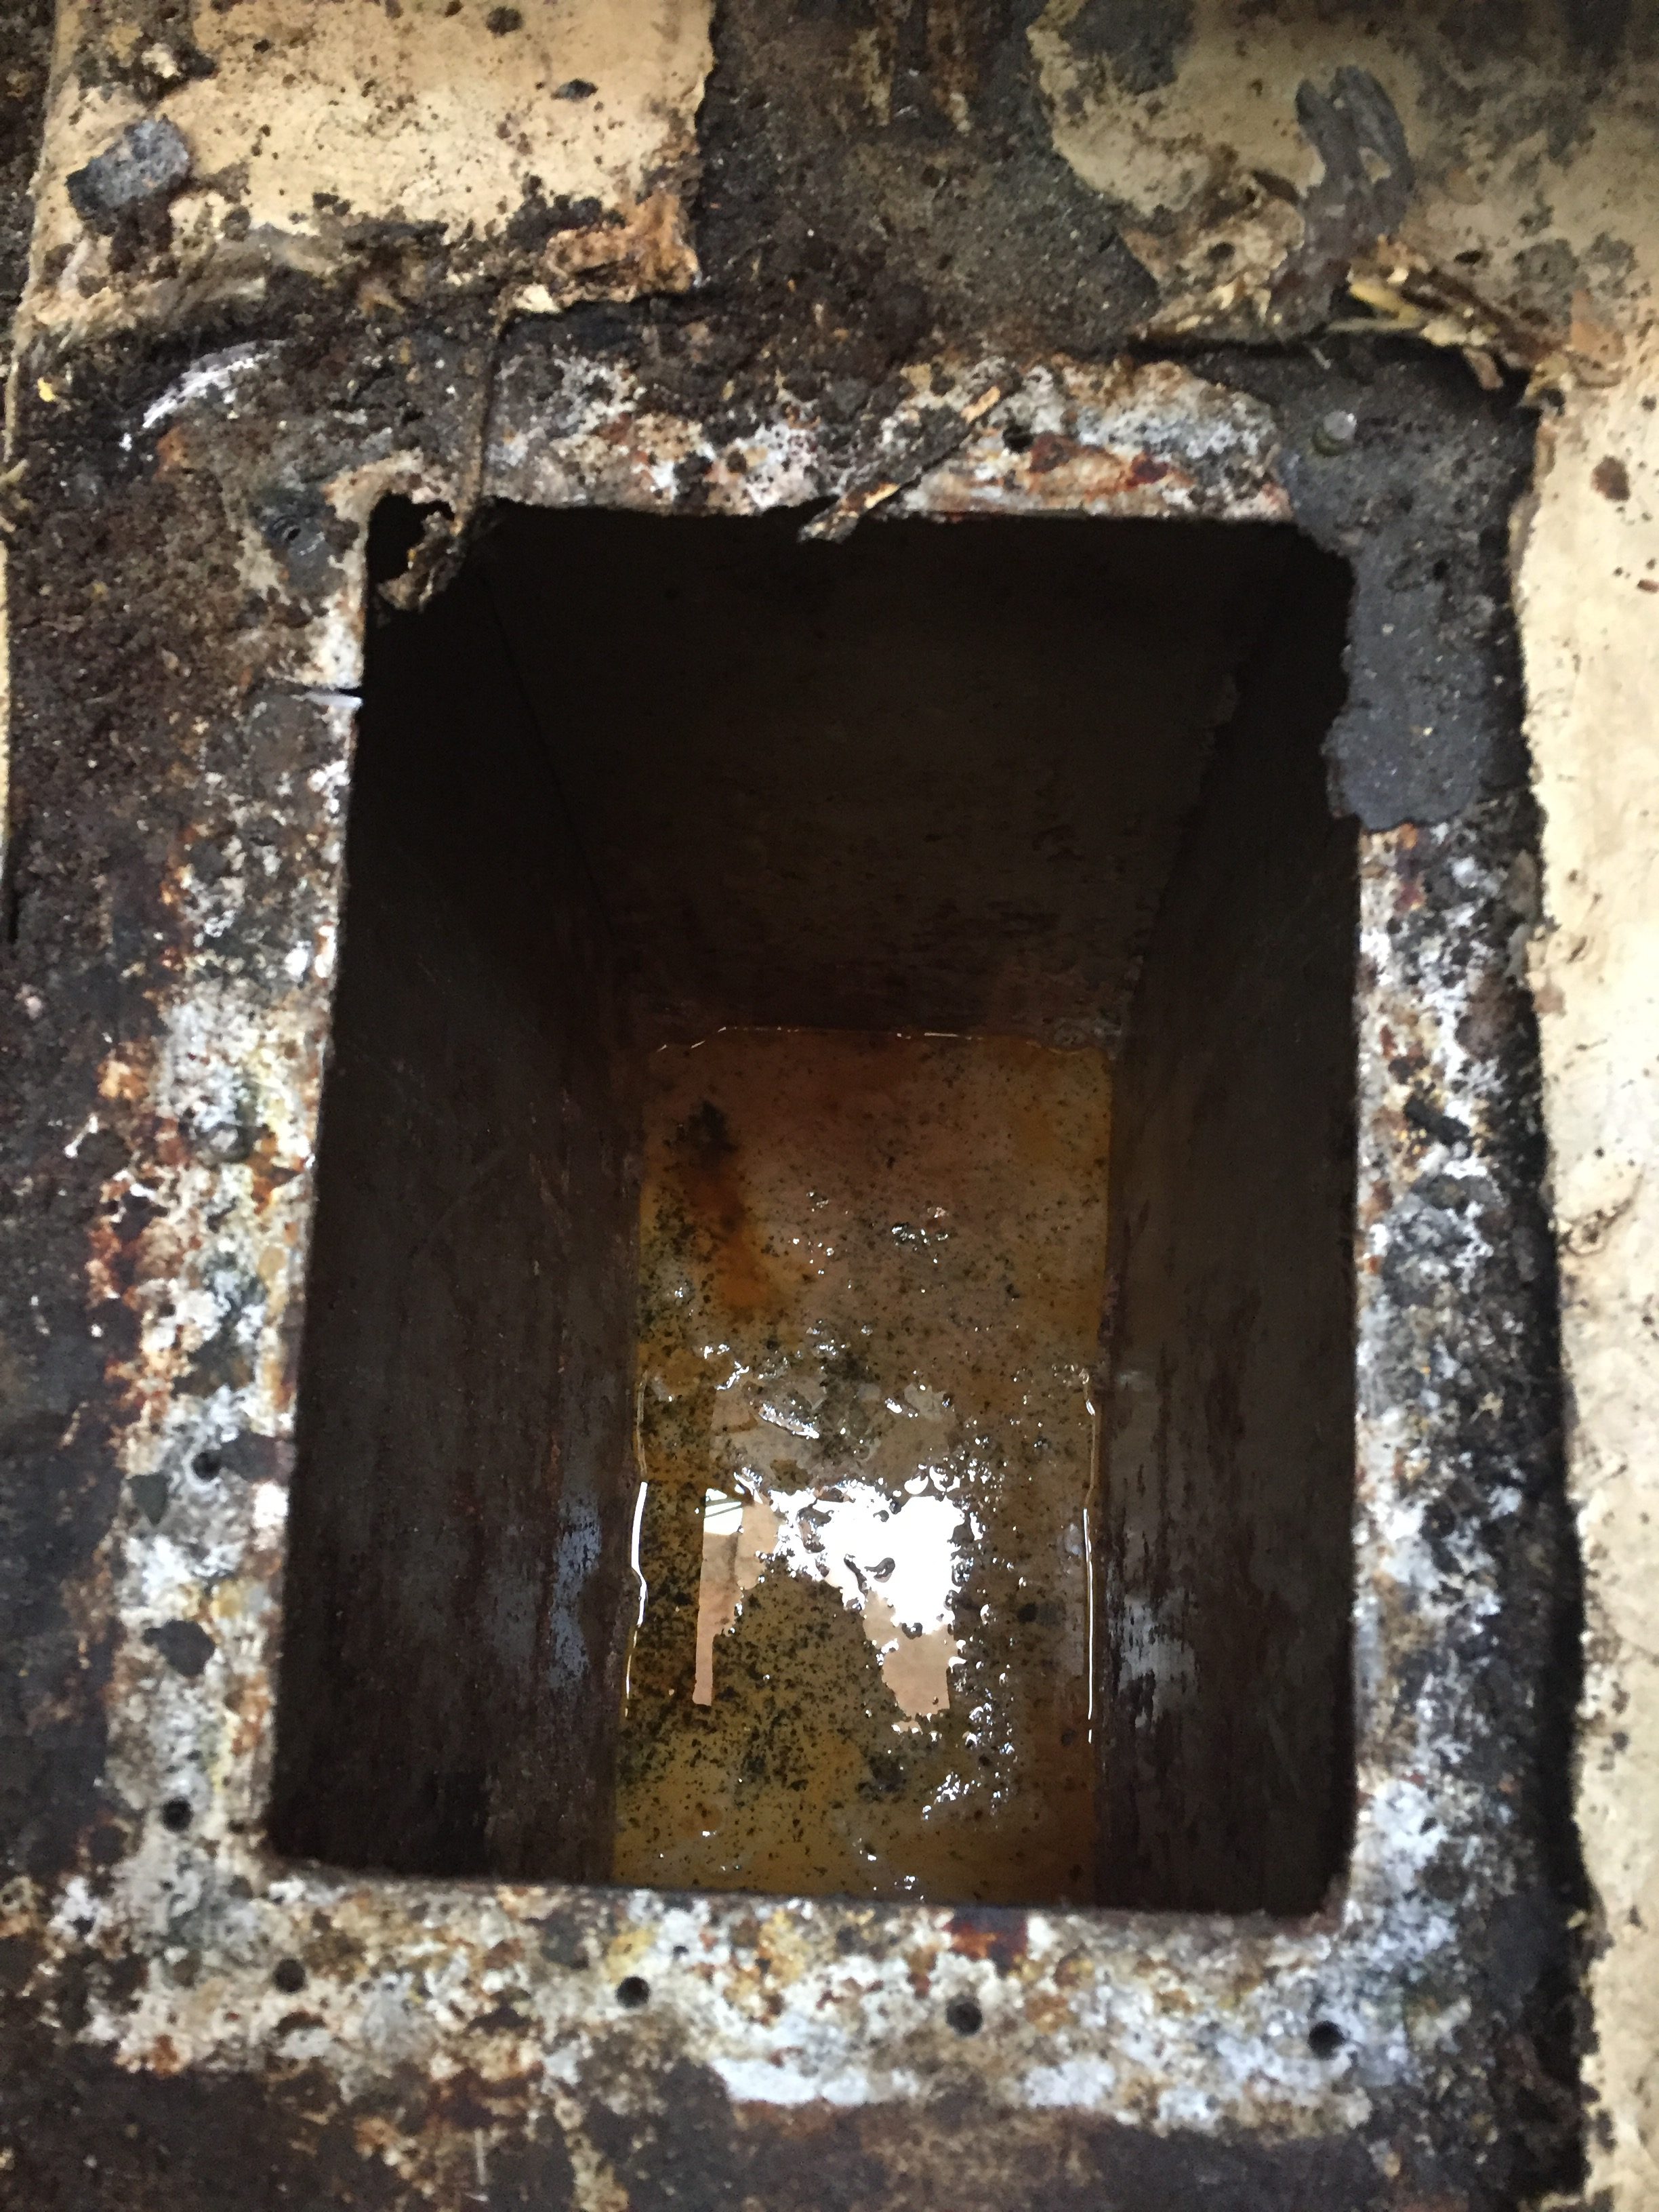
The success for the day is that the tank is officially in 2 pieces now and the back chunk should come out now.

This is definitely one of those jobs that make you ask yourself why. Why rebuild boats? I am so sore this morning it is nuts (I work in software, not physically demanding jobs) Sure we could pay someone to do this but it would be expensive and it would take all the “fun” away.

I am going to try to finish this job today, but I have to return to work tomorrow and I would like a little bit of relaxation this weekend so I am not sure how far I will get, and of course I feel like I was hit by a train.

Did I mention I am sore?

Total time to actually cut the tank, including a 1.5″ x 1.5″ hole to attach the winch to get it out – 2 hours


Keel Tank Removal -part 1

Well like any big job in life, the first step is always the hardest. Actually taking a sawzall to the drip pan was intimidating to say the least. I mean I could have just sealed off the tank and let someone else deal with it, but once I made that first cut I was committed to tanking it out.

So I have read everything I can find on the net about removing this beast right up to cutting a giant hole in the side of the keel to get it out. I decided to take the internal approach.

Now perhaps Akupara had been neglected more so than other boats but in all honesty, although the pictures look pretty disgusting, it is just grease, oil, diesel and dirt. It all cleans up with the right degreaser. I knew from when we bought Akupara that the keel tank was coming out as there was an old badly repaired spot on the bottom of the keel from a previous running aground episode that was leaking black ooze. We had the area repaired, see a previous post, but I knew that the tank was leaking. Interestingly enough now, I am not so sure. I will be once we get it out, if I find any holes but as of this moment I am not.

Step one is to cut out the drip pan. Approximate time, not including cleaning, 15 min.

Step 2 is to cut off the tabing on the top of the tank. Again with a sawzall where it would work, but primarily with a grinder using a cutting disk. Approximate time not including cleaning, 20 min.

Step 3 I used my new hand saw to poke around to see what this dreaded foam that is holding the tank in place was all about. On Akupara, that foam is either non existent or has deteriorated to the point of non existence. What I learnt at this stage is that so far it looks like the tank is not the culprit of the leaks or the smell. The tabbing was partially peeling in places which I believe sometime over the last 40 years has allowed bilge water and probably spilled diesel and heaven only knows what else to leak down the sides of the tank and slowly fill the area, thereby dissolving the foam.

If you look closely in the picture above, this is looking down from the top of the tank approximately where the front of the engine would be, you can see the water that has accumulated in there.

At one point I had a bit of smoke or steam that was rising up from the depths and I decided to play it safe, rather than have an even bigger issue on my hands. I have seen video of fiberglass boats burning and the thought has always been put it out before it gets started or abandon ship because then it would just be too late.

One of the longest battles I had in this entire process was removing the damn inspection plate. I could not get the grinder under the old fill tube in order to cut off one screw that was totally inaccessible. The fill itself had been cemented into place with something that was a lot stronger than I. At this point I also thought damn, I am almost done, I didn’t realize the tank ended right there. (See the aluminum at the top of the picture) ya it doesn’t, that is simply one of the baffles and the tank continues up all almost into the galley. I also lost a lot of time trying to pump that sludge out to no avail. Today will be the old bucket method if all else fails.

So in all honesty the actual time spent thus far has been 5 hours. Out of that 5 hours, I spent an hour disconnecting 8 batteries that have been hidden up under the hanging locker aft of the galley in what I can only assume is the old holding tank. I needed to remove all of that to gain access to the forward quarter of the tank. I will need to crawl under the floor today and cut the remaining portion of tabbing. I also lost a fair bit of time being really careful. Lots of cutting than stopping etc in order to ensure I wasn’t cutting into the hull itself.

All in all so far there have been the usual frustrating moments and I was pretty tired last night and fairly sore this morning, but other than the dirty aspect, it has not been TOO bad. Of course I am trying to be optimistic since I have to go back today ๐Ÿ™‚

stay tuned, hopefully the tank comes out today and tomorrow is just cleaning and grinding! :fingers_crossed:


The work begins – again.

It has been a very busy time since the boat show with lots happening. We have ordered all new foam and material for the main salon, 5″ thick and the v-berth and aft cabin 8″ thick. We are going with an off white leather like material for the main salon and are still deciding on the material for the mattresses. We pick up the mattresses on Saturday! Then my evenings will be spent on sewing up the covering!

We have mounted the electrical panel and the new VHF into the electrical panel board which is designed to open in order to give full access to any of the electrical and or electronic connections. Still need to actually wire it up of course, but we are getting there. Have to go and buy a couple hundred connectors and some more wire.

I really took my time with this project as I didn’t want to screw up the door. Everything needs to be perfectly square or it will just look bad.

We made patterns for all of the cushions and mattresses, my god, the aft cabin is huge when you bring the pattern home and lay it on the carpet. The v-berth is pretty standard in my opinion. I used cheap $4 shower curtain liners from Walmart in order to make the patterns.

And finally the big news! Yes it finally happened. Yes this is the last BIG, dirty, messy, smelly job! We have purposely left this to the last as it is also going to be the most expensive project on the boat! The old engine (read mooring anchor as it didn’t run) is gone! Out, vanished, disappeared, gonzo, how ever you want to word it, it is gone!

Believe it or not, I am really excited about this huge mess!! Ya I know, I am nuts! I can not wait to get in there and degrease and clean and replace some of the old wood and paint and make this last room ready for the new engine! I still need to cut out the keel tank which I am sure is going to be a bitch, and I need to determine if the wing tanks are ok or if they need to be replaced but that is fine.

When I got the call today that the engine was coming out I actually started to get very nervous! We are committed now and things are going to happen fast! Of course it is easy when someone else does it while you are at work, makes it seem really fast! Anyway, hoping to get some good before and after shots for the blog!

Wow, February 1st already – so much to do before July!!

The Boat Show

Well in the past I have to say that there have been lots of times that I have went to the boat show and maybe spent $20 on stuff just so I did not feel like I didn’t get anything, yesterday was a bit different.

I managed to get a couple of good deals!

I scored on a new Icom VHF with built in AIS for the nav station and the Commandmic remote for the helm! Got a great deal as well!

Of course the really BIG news is that we have ordered a new engine! Happy Dance!

I will add all of the details later and give the explanation as to how we arrived at this particular engine but we are pretty excited! Need to speak to the dealer this week to ensure we get the correct transmission gear ratio but other than that, it will be ordered and should be here in about a month!! Also spoke to our guy and Akupara will be moved back up to the front of the yard, the old engine should come out asap, which will give me time to reno the engine compartment prior to the new engine arriving. Plan is to have new cutlass bearing, new dripless packing gland, and a new shaft installed, and of course, if the old prop isn’t right, a new one as well!
So, we should be powered by the end of March, fingers crossed!

Almost forgot, we also reserved our slip for July 1st!

We ARE going back in the water! 159 days until Akupara is in her slip!

To paint or not to paint…

We have 3 options.

1) Launch without painting the hull. Saves money for now but we would need to live with the ugly worn white.

2) Pay to have the hull painted. Big big big dollars ?

3) Wrap the hull with vinyl. Still a fair bit of money but not as bad as painting!

ahhh decisions decisions

Has it really been 3 years?

I just checked the very first post on this blog, December 14, 2014??? Wow, time sure flies!

I do not want this project to become a 4 year project, so I am full steam ahead to launch by June of this year! I am sure somewhere in here I have said that before, but this time I am serious, no really. Come hell or high water, or incomplete electrical, or non plumbed heads or unfinished upholstery, we are launching in June. I hope. Fingers crossed. And please pray!


I have given the order…

Engine is all disconnected.

Order has been given to have it removed.

Waiting for confirmation that it is gone.

Anyone interested in a used non running Ford Lehman Diesel cheap?

๐Ÿ™‚

July

A lot has happened since my last post in May, unfortunately none of it involved Akupara. Let’s see, I took a last minute trip to France and Germany with our youngest daughter (3 weekends spent). Our youngest daughter graduated from high school (2 weekends spent). I built a new deck at our house (2 weekends spent) The Admiral and I took a quick roadtrip to Osoyoos (1 weekend spent). Yup that pretty much sums it up.

The hardest part about having a rebuild project that spans several years is keeping the drive going to finish it and finding the time to do so. Life has a way of getting in the way! There are household chores, and family commitments, and all other kinds of things that constantly distract you from completing it. I am not going to make anymore statements about when we are launching, or that I am back at it now. Seems every time I do, I end up getting swamped with “other” things.

If I make it down to Akupara this weekend, and if I have time to do anything, there are a few small projects I need to take care of like re-bedding some stanchions, and getting the engine ready for removal. I need to completely disconnect it so that the yard can simply pull it out and then I will have the room to renovate the engine room prior to the new engine going in.

Unfortunately as well, the Admiral is out of commission due to a bad back so I am working solo once again. Of course that means everything takes at least twice as long, but oh well, Rome wasn’t built in a day!

The cover is off, the cover is off!!!

On Saturday we decided to cut windows in the shrinkwrap.

On Sunday, by the time the Admiral arrived, I had half of the shrinkwrap off!

2.5 years! Akupara’s decks have not seen the sun (rain) in 2.5 years. Almost makes us feel like we are making progress!

My god it feels great to stand on deck and not have to bend over under the top. Almost like we have a real boat now. Of course there is still a hell of a lot of work to do but by the looks of it, this weekend will be spent addressing an issue I inadvertently created for us, which you can read about in the new section entitled “WTF was I thinking? And all my other screwups!” I will add the story soon so keep checking back!

Next weekend I hope to divide between finishing some deck repairs so my are ready for paint, and detaching the engine so it can be hauled out and we can put some much needed work into getting it ready for the new engine!

It certainly has been a while!

In case you think that we have abandoned our blog or our project, you are only partially correct. Truth be told, Akupara’s refit continues however I have been much more active on Instagram as opposed to here. I ran into a few computer issues and it is just easier to post on Instagram but i promise I will get the blog up to date!

Is anyone still here?

I know, I know. It has been a long time since I have written a blog post. If anyone reads this page anymore, you might be thinking that we have given up and sold Akupara, or that she has just become another statistic in the graveyard of dreams. Well, things have definitely been slow, but no, Akupara is not destined to rot in the back of the yard. We are still working on her. We are still thinking of her, and we are still determined to get her finished and in the water.

I try to keep my Instagram account up to date. It is easier and quicker to post there and at least I am keeping some of the work updated.

But the holidays are over, the snow is going away (better not be coming back) the temperature is slowly coming back to seasonal norms and hovers between 3-8 degrees now. Almost bearable to work with the heater on of course. So as the hours of daylight increase, and the numbers on the thermometer increase, so will the amount of work that is being completed. We are actually very close now. Ppppffft, keep telling yourself that buddy, ok closer than we have been before. There are still a thousand jobs that need to be completed.

If we tallied up all the time we have spent in the last 2 years, we would barely be at 4 months I would guess. So in all actuality, the refit is going quick ๐Ÿ™‚ Now if we could just get the next 4 months to be closer to 4 months, all would be good!! ๐Ÿ™‚

The view from here…

When a man takes that last step off of the dock, and onto his yacht, he changes.

Not only does he change on the inside, but he changes on the outside as well.

It doesn’t matter how big the yacht is, it only matters that he is Master and Commander of all he surveys. His chest swells, his muscles tense and his vocabulary changes with the introduction of long lost words like yardarm, and hawsepipe, and fathoms.

He gets the 1000 yard stare in his eyes. You know he has been there. He has survived horrors on the high seas, the kind of which fill the terrors of your dreams.

His quiet confidence strikes both fear and calm, all at the same time, and most women grow weak in the knee around such power.

If he happens to catch a glimpse of a reflection in perhaps the black death called a Great White’s eye, the picture he sees is very much like the one I now share below.

The way we see ourselves!


Of course, there are always 2 sides to every tail, and his greatest fan of all, his wife, has a much different perspective!


The way our wives see us!


Good night all,

Hee Haw….

Labour Day Weekend

At times it feels like we are making great progress and at other times it feels like we are making none or very little at least. I guess in reality any progress is good progress.

During our last surprise inspection I noticed that the eyes of one of the inspectors kept gazing towards the ceiling in the main salon. Hmmm not a good sign. I will admit that it looked pretty bad. So that decided it. We would tackle the ceiling. Now truth be told we had been putting this off as in order to paint it we needed to sand it. 4 hours of holding orbital sanders with 80 grit paper above our heads was not fun let me tell you but we powered through it and managed to get it done. We also had to cover all of the wood with drop cloths of course and created a scene right out of Dexter.

Another episode of Dexter?

2 coats of gloss white paint later and it feels like a new boat.

1st coat
1st coat

So. In order to complete the main cabin including the galley the major projects left are to finish the galley cupboards, countertop and tile. The main salon needs to have the pantry painted and we still need to make a firm decision on the starboard settee.

Whitby 42 Galley

fresh paint
fresh paint
All painted
All painted

The last and biggest job to complete will be the sole. It had been painted at some point with a lovely off white and of course with the refit now has a myriad of paint and stain drips and is very dirty. This will wait until all of the interior construction is complete.

We still have a lot of customizing to do inside lockers and what have you but those types of jobs will not prevent us from launching. Our goal as I said previously is to launch in June and at least Akupara will be back to original even is the custom jobs are yet to be completed.

This weekend I think we will work on completing the galley ย and maybe the electrical wire will be run it would be nice to have that job done as well.


Back to sanding

Whitby 42 refitAs we approach the 2 year mark the Admiral is still smiling. Hmmm maybe we should buy a bigger boat?

Sometimes I wonder if we had just saved all of our dimes and nickels for all this time, we probably could have a bought a working version of Akupara by now. But then again, we would have an unknown boat with all kinds of yet to be discovered issues. At least with Akupara we will be 100% intimate with every nut bolt screw wire fixture fitting piece of wood rope material and know for sure that if and when there is an issue exactly how to fix it.

Keel repair complete!

imageimageimage image image image image
This is the first time in 18 months of owning Akupara that we have hired out a job, with the exception of the shrinkwrap. Let me tell you is it ever nice to show up at Akupara and the job has been started, worked on, and completed and we didn’t even have to get dirty!!

I was also able to start on the internal wiring a little bit. Kind of a disorganized day but every little bit counts.


Engine Rooms…

Over the last 20 years of looking at boats and researching different makes and models and looking at for sale ads, I have always been shocked by how a lot of people treat their engine rooms. Many times I have seen ads where the introduction says something like “Immaculate condition” and as you continue on to through the pictures there is a dark, greasy, oily,ย dingy, rusty old piece of machinery crammed into some inaccessible hole that is called the engine room. You wouldn’t send your worst enemy in there as they may never come back out.

One of the things that drew us to the Whitby 42, okay me anyway, was the fact that she has a proper engine room. You can’t stand up in it but there is enough room to move around and you have pretty decent access to the engine as compared to a lot of other sailboats.

Whitby 42 Engine RoomAkupara’s engine room currently falls into this category!

Whitby 42 Engine Room 2Whitby 42 Engine Room bilgeIt is not up to standards. It isn’t up to anyone’s standards let alone mine.

On Sunday I had to venture in to the pit in order to remove the battery charger and the inverter, funny thing, it says right on them not to install in a hot machinery space, but that is another post, and I got to thinking that this was totally unacceptable and how exactly was I going to be able to make it acceptable. At the same time, I had been cleaning up a little and putting away tools etc. I have now commandeered almost every drawer, cupboard, and cavity with tools. This is also unacceptable! Especially when the admiral finds out!

And then it happened. I came across a bit of inspiration. It is possible to have an impressive engine room! It can be done. And no, grease, oil, grunge or any other detritus needs to be a part of it.

Now this is how an engine room should look!

Well, now I have my goal and my vision! Look at this! Not only is it immaculate but all of the tools are in an organized tool chest, not to mention clean, exactly where you need them. The cabinet becomes a work bench and all of the machinery is enclosed with protective screens so it would be impossible to get your sleeve caught in something if you had to go in there in a rolling sea! This is fantastic!

Okay so to be honest, I have pretty big doubts that Akupara’s engine room will ever look like this, but hey, if you don’t try, it definitely will never happen. If anyone knows where a guy can get one of those tool cabinets, let me know!

20th Anniversary

Well we celebrated our 20th Wedding Anniversary in June with a trip to Bucerias Mexico. At first it was only going to be the Admiral and I, but thenย as we wereย out for dinner about 2 weeks before our departure, talking about our lack of progress recently on Akupara, and the fact that we had been receiving reports of failed surprise inspections, a plan started to develop. See, it turns out that the inspectors had been attempting to make these inspections and each time, when we should have been working on Akupara, they discovered that we actually were not doing exactly that. As a matter of fact, each time they came down, we were not even there. It is one thing to fail an inspection while trying, but it is another to fail for lack of trying.

Our plan had the propensity of backfiring but it was worth the risk. If perhaps there was some remote possibility that they agreed to join us our trip, perhaps, just maybe, we could find a way to get them to forget about our lack of effort and maybe we would get a passing grade on the next inspection!

So with a text message and an ulterior motive, the invite was sent, and within minutes, the acceptance came through!

Holy shit now we are in trouble. Obviously the extra glass of wine at dinner had clouded our judgement, and we had made the decision a bit hastily. We had not considered the fact that we would now have 7 straight days of intense questioning, with no avenue for escape. Damn, what did we do? What do we do? We’re screwed now.

Like all good sailors when confronted with a bad situation, we turned to the only form of solace we know. Rum. And therein we found the answer!

Of course, we just needed to ply them with alcohol for 7 straight days and we might be able to escape the interrogations!

And there it was. The stage was set. And the game was on.

IMG_0882IMG_0883IMG_0901IMG_0899We had a fantastic week with the inspectors. From what we remember anyway! There was lots of food, lots of drink, lots of laughing, lots of evading questions, lots of lame excuses, and lots of more drinking.

We knew we had been successful in our mission when the inspectors turned into advisers and actually started to offer advice and assistance as opposed to bad reports and shakings of the finger.

The 5 hour flight home was rather quiet. I had completely destroyed any hope for my liver ever making a successful recovery, but in the end, it was worth it. We had won. We had evaded the interrogations, and plied the inspectors with drink, and the next time there is a surprise inspection, we may just come through it with a passing grade. ๐Ÿ˜‰

The Inspectors


The Gallery Is Back!!

All it took was 2.5 hours, 3 different plugins, and uploading all of the pictures 3 times.

Damn just like a boat project!!!!

It can be found under Random Photo Gallery. The old link is still there, should be gone soon.


Delayed again

Well it has been a rough couple of weeks. I had to fly to Sudbury Ontario on short notice 2 weekends ago and then promptly came back and got sick. Not sure if I caught it in the hospital in Sudbury, on the plane, or from the kids but it has certainly taken the wind out of my sails. 2 weekends missed now. Hopefully I will be better for this coming weekend.

๐Ÿ™